

Honeywell 7-Day Programmable Thermostat (RTH8500D) - 7-Day Programmable Thermostat Owner's Manual (English, French)
Honeywell 7-Day Programmable Thermostat (RTH8500D) - 7-Day Programmable Thermostat Owner's Manual (English, French)
Honeywell 7-Day Programmable Thermostat (RTH8500D) - 7-Day Programmable Thermostat Owner's Manual (English, French)

Create successful ePaper yourself
Turn your PDF publications into a flip-book with our unique Google optimized e-Paper software.
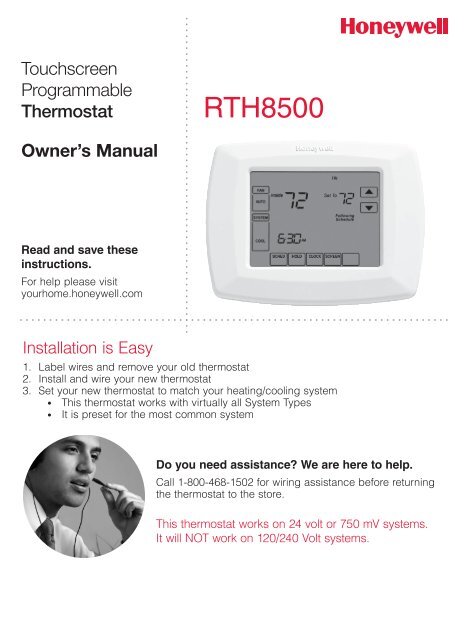
Touchscreen<br />
<strong>Programmable</strong><br />
<strong>Thermostat</strong><br />
RTH8500<br />
Owner’s <strong>Manual</strong><br />
Read and save these<br />
instructions.<br />
For help please visit<br />
yourhome.honeywell.com<br />
Installation is Easy<br />
1. Label wires and remove your old thermostat<br />
2. Install and wire your new thermostat<br />
3. Set your new thermostat to match your heating/cooling system<br />
• This thermostat works with virtually all System Types<br />
• It is preset for the most common system<br />
Do you need assistance? We are here to help.<br />
Call 1-800-468-1502 for wiring assistance before returning<br />
the thermostat to the store.<br />
This thermostat works on 24 volt or 750 mV systems.<br />
It will NOT work on 120/240 Volt systems.
Hg<br />
NO MERCURY<br />
NE PAS JETER<br />
LE MERCURE<br />
ATTENTION: MERCURY RECYCLING NOTICE<br />
This product does not contain mercury. However,<br />
this product may replace a product that contains<br />
mercury. Mercury and products containing<br />
mercury should not be discarded in household<br />
trash.<br />
For more information on how and where to<br />
properly recycle a thermostat containing<br />
mercury in the United States, please refer to the<br />
<strong>Thermostat</strong> Recycling Corporation at<br />
www.thermostat-recycle.org.<br />
For mercury thermostat recycling in Canada,<br />
please refer to Switch the Stat at<br />
www.switchthestat.ca<br />
This thermostat contains a Lithium battery which may contain<br />
Perchlorate material.<br />
Perchlorate Material—special handling may apply, See www.dtsc.<br />
ca.gov/hazardouswaste/perchlorate<br />
NOTICE: To avoid possible compressor damage, do not run air<br />
conditioner if the outside temperature drops below 50°F (10°C).<br />
Customer assistance<br />
For assistance with this product, please visit<br />
http://yourhome.honeywell.com.<br />
Or call <strong>Honeywell</strong> Customer Care toll-free at<br />
1-800-468-1502.<br />
® U.S. Registered Trademark. Patents pending.<br />
US Patent No. 6,595,430; 7,114,554; 7,274,972; 7,225,054; D520,386 and other patents pending<br />
2
Table of contents<br />
Installation<br />
Installation.............................................3<br />
Advanced Installation..........................10<br />
About your new thermostat<br />
Controls and Home screen<br />
quick reference....................................13<br />
Preset energy-saving schedules.........14<br />
Programming and operation<br />
Setting the clock..................................14<br />
Adjusting program schedules..............15<br />
Overriding schedules temporarily.......15<br />
Overriding schedules permanently.....16<br />
Filter reminder.....................................17<br />
Special features..................................18<br />
Replace batteries................................18<br />
Appendices<br />
Troubleshooting...................................19<br />
Limited warranty..................................20<br />
1 Turn Off Power to Heating/Cooling System<br />
or<br />
Circuit breaker<br />
box<br />
Heating/cooling<br />
M31535<br />
system<br />
power switch<br />
3
2 Remove Old <strong>Thermostat</strong><br />
Remove old thermostat but leave wallplate with wires attached.<br />
Do not remove wallplate yet<br />
If you have an older thermostat with a<br />
sealed mercury tube, turn to page 2<br />
for proper disposal instructions.<br />
Terminal<br />
designation<br />
C<br />
C<br />
3 Label Wires with Tags<br />
Label the wires using the supplied wire labels as you disconnect them, then<br />
remove the old wallplate. Wire color might not match labels.<br />
MCR33823<br />
Wire Labels<br />
C<br />
C<br />
M28100<br />
Terminal designation<br />
MCR31537<br />
4 Separate Wallplate from New <strong>Thermostat</strong><br />
Remove wallplate from the new thermostat<br />
and mount onto wall.<br />
+ +<br />
+<br />
Wallplate<br />
M28334<br />
4
Y<br />
W<br />
5 Mount Wallplate<br />
Mount the new wallplate using the included screws and anchors.<br />
M27514<br />
Drill 3/16-in. holes for drywall<br />
Drill 3/32-in. holes for plaster<br />
6 Connect Wires<br />
Simply match wire labels.<br />
If labels do not match letters on the thermostat, check “Alternate Wiring<br />
(Conventional Systems)” on page 6 and connect to terminal as shown here<br />
(see notes, below).<br />
We are here to help. Call 1-800-468-1502 for wiring assistance.<br />
SCREW<br />
INSERT WIRES<br />
THEN TIGHTEN SCREWS<br />
LABELED WIRES<br />
CONVENTIONAL<br />
WIRE HOLE<br />
CONVENTIONAL<br />
Y2<br />
R<br />
RC<br />
R<br />
W<br />
Remove metal jumper<br />
if you have both R<br />
and Rc wires.<br />
W2<br />
G<br />
Y<br />
G<br />
C<br />
M27515<br />
5
O<br />
Y<br />
Alternate Wiring (Conventional Systems)<br />
If labels do not match terminals, connect wires as shown here (see notes,<br />
below).<br />
RC<br />
Rc<br />
2<br />
R<br />
W<br />
Y<br />
G<br />
C<br />
Y2<br />
W2<br />
R<br />
W<br />
Y<br />
G<br />
C<br />
Y2<br />
W2<br />
2<br />
3<br />
MCR28076<br />
Remove metal jumper connecting R and Rc only if you must connect both<br />
R and Rc wires.<br />
If your old thermostat had both R and RH wires, remove metal jumper.<br />
Connect the R wire to the Rc terminal, and the RH wire to the R terminal.<br />
If your old thermostat had only 1 C or C1 wire, connect it to the C terminal.<br />
If your old thermostat had 2 C or C1 wires, wrap each separately with<br />
electrical tape and do not connect them.<br />
Wiring (Heat Pump)<br />
If labels do not match letters on thermostat, see page 7.<br />
SCREW<br />
INSERT WIRES<br />
THEN TIGHTEN SCREWS<br />
LABELED WIRES<br />
HEAT PUMP<br />
L<br />
WIRE HOLE<br />
R<br />
HEAT PUMP<br />
RC<br />
R<br />
NOTE: If E and Aux do not<br />
each have a wire connected,<br />
use a small piece of wire to<br />
connect them to each other.<br />
E<br />
AUX<br />
Aux<br />
O/B<br />
Y<br />
G<br />
G<br />
C<br />
M27516<br />
6
Alternate Wiring (For Heat Pumps Only)<br />
2<br />
3<br />
3<br />
5<br />
5<br />
6<br />
4<br />
6<br />
MCR28077<br />
5<br />
6<br />
Leave metal jumper in place, connecting R & Rc terminals.<br />
If your old thermostat had both V and VR wires, stop now and contact a<br />
qualified contractor for help.<br />
If your old thermostat had separate O and B wires, attach the B wire to<br />
the C terminal. If another wire is attached to the C terminal, stop now and<br />
contact a qualified contractor for help.<br />
If your old thermostat had Y1, W1 and W2 wires, stop now and contact a<br />
qualified contractor for help.<br />
If L terminal is used, C terminal wire must be connected (contact a<br />
contractor if there is no C wire).<br />
If E and Aux terminals do not each have a wire connected, use a small<br />
piece of wire to connect them to each other.<br />
7
7 Install Batteries<br />
Install three AAA alkaline batteries and remove tab.<br />
Remove tab<br />
M28336<br />
Back of thermostat<br />
M28335<br />
8 Install <strong>Thermostat</strong> onto Wallplate<br />
Install thermostat onto the wallplate on the wall.<br />
9 Turn Power Back On<br />
Turn the power back on to the heating/cooling system.<br />
M28337<br />
or<br />
Circuit breaker box<br />
Heating/cooling M31544 system<br />
power switch<br />
8
10 Set Time and Date<br />
1. Press s or t to set date.<br />
2. Press s or t to set month.<br />
3. Press s or t to set year, then press DONE.<br />
4. Press s or t to set time, then press DONE to save and exit.<br />
TUE<br />
TUE<br />
15<br />
2006<br />
6<br />
1:00PM<br />
6<br />
DONE<br />
DONE<br />
M28338<br />
M28339<br />
11 If your system type is...<br />
If your system type is:<br />
q Single Stage Heat and Cool<br />
Congratulations, you’re done!<br />
If your system type is:<br />
q Multistage Heat and Cool<br />
q Heat Pump* without Backup Heat<br />
q Heat Pump* with Backup Heat<br />
q Heat Only<br />
q Cool Only<br />
Continue with Advanced Installation on next page to match your thermostat to<br />
your system type.<br />
*Heat Pump—an air conditioner that provides cooling in the summer, and also<br />
runs in reverse in the winter to provide heating.<br />
If you are not sure of your system type or if you have other<br />
questions, call us toll-free at 1-800-468-1502.<br />
This thermostat works on 24 volt or 750 mV systems. It will NOT work on multistage<br />
conventional systems.<br />
9
Advanced Installation<br />
Enter System Setup<br />
1. Press SYSTEM.<br />
2. Press and hold blank center key until the screen changes (approximately<br />
5 seconds).<br />
TUE<br />
FAN<br />
Inside<br />
AUTO<br />
SYSTEM<br />
HEAT<br />
70<br />
6:01<br />
AM<br />
TUE<br />
Set<br />
FAN<br />
To70 Inside<br />
AUTO<br />
Following<br />
Schedule<br />
SYSTEM<br />
Outside<br />
HEAT<br />
43<br />
70<br />
6:01<br />
AM<br />
Set To70<br />
Changing Settings<br />
SCHED HOLD SCREEN MORE<br />
M28340<br />
DONE<br />
1. Press the s or t button to select<br />
function.<br />
2. Press the s or t button to change<br />
setting.<br />
3. Press DONE to save & exit.<br />
NOTE: Some functions in the following<br />
pages may not appear due to previous<br />
selections made.<br />
FAN<br />
AUTO<br />
DONE<br />
CANCEL<br />
M28341<br />
TUE<br />
Inside<br />
Function<br />
70<br />
0120<br />
Set To70<br />
Setting<br />
20<br />
M28341<br />
Function Description Setting<br />
Press the s or t button to change the setting.<br />
0120 Year Setting<br />
(first two digits)<br />
0130 Year Setting<br />
(second two digits)<br />
20 = Year 20xx<br />
21 = Year 21xx<br />
01 - 99 (i.e., 2001 - 2099<br />
0140 Month Setting 01 - 12 (i.e., January - December)<br />
0150 Date Setting 01 - 31<br />
10
Function Description Setting<br />
Press the s or t button to change the setting.<br />
0170 Select System Type 1 Heat/cool: Gas, oil or electric heating with central air<br />
conditioning.<br />
2 Heat pump: Heat pump without backup or auxiliary heat.<br />
3 Heat only: Gas, oil or electric heat without central air<br />
conditioning.<br />
4 Heat only with fan: Gas, oil or electric heat without central air<br />
conditioning.<br />
5 Hot water heat only (no fan): Gas, oil or hot water heat<br />
without central air conditioning.<br />
6 Cool only: Central air conditioning only.<br />
7 Heat pump: Heat pump with backup or auxiliary heating.<br />
8 Heat/Cool Multiple stages: 2 heat stages (wires on W and<br />
W2), 2 cooling stages (wires on Y and Y2).<br />
9 Heat/Cool Multiple stages: 2 heat stages (wires on W and<br />
W2), 1 cooling stage (wire on Y).<br />
10 Heat/Cool Multiple stages: 1 heat stage (wire on W), 2<br />
cooling stages (wires on Y and Y2).<br />
0180 Heating Fan Control 0 Gas or oil heat: Use this setting if you have a gas or oil<br />
heating system (system controls fan operation).<br />
1 Electric heat: Use this setting if you have an electric heating<br />
system (thermostat controls fan operation).<br />
0190 Heat Pump Changeover Valve<br />
(for heat pumps only)<br />
0 Cooling changeover valve: Use this setting if you connected<br />
a wire labeled “O” to the O/B terminal (see page 6).<br />
1 Heating changeover valve: Use this setting if you connected<br />
a wire labeled “B” to the O/B terminal (see page 7).<br />
0240 Heating Cycle Rate 5 Gas or oil furnace: Standard gas/oil furnace (less than 90%<br />
efficiency).<br />
9 Electric furnace: Electric heating systems.<br />
3 Heat pump, hot water or high-efficiency furnace: Hot water<br />
system or gas furnace (more than 90% efficiency).<br />
1 Gas/oil steam or gravity system: Steam or gravity heat<br />
systems.<br />
Settings 5, 9, 3, or 1 recommended. Other settings: 2, 4, 6, 7,<br />
8, 10, 11, 12. The number indicates how frequently the system<br />
cycles on and off to maintain the set temperature. A higher<br />
number means the system is on and off for shorter amounts<br />
of time, a lower number means longer on and off times. When<br />
these settings are set to match the system type, the thermostat<br />
controls temperature more accurately.<br />
0270 Emergency Heat Cycle Rate<br />
(heat pumps only)<br />
9 Electric furnace: Electric heating systems.<br />
0300 <strong>Manual</strong>/Auto Changeover 0 <strong>Manual</strong> changeover (Heat/Cool/Off).<br />
1 Automatic changeover (Heat/Cool/Auto/Off). Automatically<br />
turns on Heat or Cool based on room temperature. Note:<br />
System maintains minimum 3°F difference between heat and<br />
cool settings.<br />
0320 Temperature Format (°F/°C) 0 Fahrenheit<br />
1 Celsius<br />
0330 <strong>Day</strong>light Saving Time On/Off 0 Off: No adjustment for daylight saving time.<br />
1 On: Auto-change to daylight saving time (for areas that do<br />
not use the new 2007 DST calendar).<br />
2 On: Auto-change to daylight saving time (2007 and beyond,<br />
for areas that use the new 2007 DST calendar).<br />
11
Function Description Setting<br />
Press the s or t button to change the setting.<br />
0500 Furnace Filter Change Reminder 0 Off (no reminder)<br />
1 Reminder in about 1 month<br />
2 Reminder in about 3 months<br />
3 Reminder in about 6 months<br />
4 Reminder in about 9 months<br />
5 Reminder in about 1 year<br />
6 Reminder in about 3 years<br />
0530 Smart Response® Technology 1 On<br />
0 Off<br />
0640 Clock Format 1212-hour clock (i.e., “3:30 pm”)<br />
2424-hour clock (i.e., “15:30”)<br />
About your new thermostat<br />
Congratulations! You’ve just purchased the world’s most advanced, easy-to-use<br />
thermostat. It has been designed to give you many years of reliable service and<br />
touchscreen climate control.<br />
• 7-day program schedules maximize comfort and economy.<br />
• Armchair programming: Just pull thermostat from the wall to set schedules.<br />
• One-touch temp control overrides program schedule at any time.<br />
• Precise comfort control keeps temperature within 1°F of the level you set.<br />
• Change/check reminders let you know when to replace filters and batteries.<br />
• Large touchscreen display with backlight is easy to read—even in the dark.<br />
12
<strong>Thermostat</strong> controls<br />
Press day(s) to set program schedule (see page 14).<br />
Press FAN to select:<br />
Auto: Fan runs only<br />
when heating or cooling<br />
system is on.<br />
On: Fan runs<br />
continuously.<br />
Press DONE to exit<br />
and save settings.<br />
Press SYSTEM to select:<br />
Heat: Heating system control.<br />
Cool: Cooling system control.<br />
Auto: <strong>Thermostat</strong> automatically selects<br />
heating or cooling depending on the<br />
indoor temperature.<br />
Off: All systems off.<br />
Em Heat: Emergency & Auxiliary Heat<br />
control. Compressor is locked out.<br />
(Select models only.)<br />
Press DONE to exit and save settings.<br />
MON TUE WED THU FRI SAT SUN<br />
FAN<br />
AUTO<br />
SYSTEM<br />
HEAT<br />
Inside<br />
70<br />
OK TO PICK MULTIPLE DAYS<br />
6:01<br />
AM<br />
Set To<br />
70<br />
Following<br />
Schedule<br />
SCHED HOLD CLOCK SCREEN MORE<br />
M28373<br />
Hold<br />
Press to override<br />
program schedule.<br />
Sched<br />
Press to set program schedule.<br />
Arrow keys<br />
Press to adjust<br />
temperature or to make<br />
selections from screen<br />
menus.<br />
Clock<br />
Press to set clock.<br />
Screen<br />
Press to lock keypad<br />
for 30 seconds to clean<br />
screen.<br />
More<br />
Press for more options<br />
(select models only).<br />
Display screen<br />
Current inside temperature.<br />
Current day of week.<br />
Temperature setting.<br />
Current time.<br />
FAN<br />
Inside<br />
AUTO<br />
SYSTEM<br />
HEAT<br />
6:01<br />
WED<br />
70<br />
AM<br />
Set To<br />
70<br />
Following<br />
Schedule<br />
Recovery<br />
Program schedule on<br />
(does not display when off)<br />
SCHED HOLD CLOCK SCREEN MORE<br />
M28374<br />
Smart Response ®<br />
Technology in effect.<br />
Other display messages:<br />
Cool On: Cooling system is on.<br />
Heat On: Heating system is on.<br />
Aux Heat On: Auxiliary heating system is activated (heat pump systems only)<br />
13
Clock setting<br />
FAN<br />
AUTO<br />
Inside<br />
WED<br />
70<br />
Set To70<br />
1. To set the current time display,<br />
press CLOCK, then press s or t<br />
to adjust the time. Press and hold<br />
s or t to advance the time more<br />
quickly.<br />
2. Press DONE to save & exit (or press<br />
CANCEL to exit without changing the<br />
time).<br />
NOTE: The real-time clock should<br />
never require adjustment since it<br />
automatically updates for daylight<br />
savings time, and stores all date/time<br />
information.<br />
NOTE: To change the current week<br />
day display, see see System Setup in<br />
your Installation Guide.<br />
FAN<br />
AUTO<br />
DONE<br />
6:01<br />
AM<br />
WED<br />
Inside SCHED HOLD CLOCK Set SCREEN MORE<br />
70<br />
To70<br />
6:02<br />
AM<br />
M28375<br />
CANCEL<br />
M28376<br />
Program Schedule<br />
You can program four time periods each day, with different settings for<br />
weekdays and weekends. We recommend the pre-set settings (shown in the<br />
table below), since they can reduce your heating/cooling expenses.<br />
Wake - Set to the time you<br />
awaken and the temperature you<br />
want during the morning, until<br />
you leave for the day.<br />
Leave - Set to the time you leave<br />
home and the temperature you<br />
want while you are away (usually<br />
an energy-saving level).<br />
Return - Set to the time you<br />
return home and the temperature<br />
you want during the evening,<br />
until bedtime.<br />
Sleep - Set to the time you go to bed and the temperature you want overnight<br />
(usually an energy-saving level).<br />
Heat<br />
NOTE: Leave and Return periods can be canceled on weekends.<br />
Cool<br />
Wake<br />
(6:00 am) 70 ° 75 °<br />
Leave<br />
(8:00 am) 62 ° 83 °<br />
Return<br />
(6:00 pm) 70 ° 75 °<br />
Sleep<br />
(10:00 pm) 62 ° 78 °<br />
14
To adjust program schedules<br />
1. Press SCHED, then EDIT.<br />
2. Press day buttons (MON-SUN) to select<br />
day(s).<br />
3. Press s or t to set Wake time for<br />
selected day(s).<br />
4. Press s or t to set Heat and Cool<br />
temperature for this time period.<br />
5. Press other time periods (LEAVE, RETURN,<br />
SLEEP) to set time and temperatures for<br />
each.<br />
6. Press DONE to save & exit (or press<br />
CANCEL to exit without saving changes).<br />
NOTE: You can press CANCEL PERIOD to<br />
eliminate any unwanted time period.<br />
AUTO<br />
FAN<br />
AUTO<br />
Inside<br />
Set<br />
70<br />
To70<br />
WED<br />
Following<br />
Schedule<br />
Inside<br />
Set<br />
AM<br />
6:00 70<br />
To70<br />
Following<br />
Schedule<br />
SCHED HOLD CLOCK SCREEN MORE<br />
6:00<br />
AM<br />
DONE EDIT WAKE LEAVE RETURN SLEEP<br />
M28379<br />
CANCEL<br />
M28380<br />
MON TUE WED THU FRI SAT SUN<br />
OK TO PICK MULTIPLE DAYS<br />
CANCEL<br />
PERIOD<br />
70<br />
AM<br />
6:00 78<br />
HEAT<br />
COOL<br />
DONE WAKE LEAVE RETURN SLEEP CANCEL<br />
M28381<br />
Program schedule override (temporary)<br />
Press s or t to immediately adjust<br />
the temperature. This will temporarily<br />
override the temperature setting for<br />
the current time period.<br />
The new temperature will be<br />
maintained only until the time you<br />
set. When the timer expires, the<br />
program schedule will resume and<br />
set the temperature to the level<br />
you’ve programmed for the current<br />
time period.<br />
To cancel the temporary setting at<br />
any time, press CANCEL (or SCHED).<br />
The program schedule will resume.<br />
FAN<br />
AUTO<br />
SYSTEM<br />
HEAT<br />
Inside<br />
WED<br />
70<br />
Hold Temperature<br />
Until<br />
8:00<br />
AM<br />
Set To73<br />
Heat On<br />
SCHED HOLD CLOCK SCREEN MORE<br />
CANCEL<br />
M28382<br />
15
Program schedule override (permanent)<br />
Press HOLD to permanently adjust<br />
the temperature. This will turn off the<br />
program schedule.<br />
Whatever temperature you set will be<br />
maintained 24 hours a day until you<br />
manually change it or press CANCEL<br />
(or SCHED) to cancel “Hold” and<br />
resume the program schedule.<br />
FAN<br />
AUTO<br />
SYSTEM<br />
HEAT<br />
Inside<br />
WED<br />
70<br />
8:00<br />
Permanent<br />
Hold<br />
AM<br />
Set To<br />
73<br />
Heat On<br />
SCHED HOLD CLOCK SCREEN MORE<br />
CANCEL<br />
M28383<br />
Vacation hold<br />
This feature can suspend the program<br />
schedule for extended periods of time.<br />
Press s or t to set the temperature you<br />
want, then press s or t to set the time<br />
of day you want the schedule to resume<br />
when you return. Press HOLD twice, then<br />
press s or t to select the number of<br />
days.<br />
Whatever temperature you set will<br />
be maintained 24 hours a day for the<br />
number of days you select. After this<br />
number of days have elapsed, the<br />
previously programmed schedule will<br />
resume at the time you set.<br />
If you return earlier than expected, press<br />
CANCEL (or SCHED) to cancel “Hold” and<br />
resume the program schedule.<br />
FAN<br />
AUTO<br />
SYSTEM<br />
HEAT<br />
Inside<br />
WED<br />
70<br />
Hold Temperature<br />
Until<br />
6:00<br />
Set To55<br />
PM<br />
WED<br />
FAN<br />
SCHED HOLD CLOCK SCREEN MORE<br />
Inside<br />
Set<br />
AUTO<br />
70<br />
To55<br />
SYSTEM<br />
HEAT<br />
Hold Temperature<br />
Until<br />
14<br />
DAYS<br />
SCHED HOLD CLOCK SCREEN MORE<br />
CANCEL<br />
M28384<br />
CANCEL<br />
M28385<br />
16
Screen cleaning<br />
Press SCREEN to lock the screen for<br />
cleaning. The screen will remain locked<br />
for 30 seconds so you can clean the<br />
screen without changing any settings.<br />
After 30 seconds, press DONE to<br />
resume normal operation, or press<br />
SCREEN again if you require more time<br />
for cleaning.<br />
NOTE: Do not spray any liquid directly<br />
on the thermostat. Spray liquids onto a<br />
cloth, then use the damp cloth to clean<br />
the screen. Use water or household<br />
glass cleaner. Avoid abrasive<br />
cleansers.<br />
FAN<br />
AUTO<br />
Inside<br />
WED<br />
70<br />
6:00<br />
PM<br />
SCREEN LOCKED<br />
Set To<br />
70<br />
Following<br />
Schedule<br />
SCHED HOLD CLOCK SCREEN MORE<br />
30<br />
OK TO<br />
CLEAN<br />
SCREEN<br />
M28386<br />
M28387<br />
Filter reminder<br />
If activated during installation, the<br />
furnace filter reminder alerts you when<br />
it is time to replace your filter.<br />
Press RESET after changing the filter, to<br />
restart the timer.<br />
To change the reminder interval:<br />
1. Press MORE, then EDIT.<br />
2. Press s or t to select the desired<br />
interval, then press DONE.<br />
3. Press RESET.<br />
4. Press DONE to save and exit.<br />
WED<br />
CHANGE FILTER<br />
FAN<br />
Inside<br />
AUTO<br />
SYSTEM<br />
HEAT<br />
RESET<br />
70<br />
6:00<br />
PM<br />
Set To55<br />
SCHED HOLD CLOCK SCREEN MORE<br />
Filter<br />
60<br />
<strong>Day</strong>s<br />
M28388<br />
DONE<br />
M28389<br />
17
Special features<br />
Smart Response ® Technology: This feature allows the thermostat to<br />
“learn” how long the furnace and air conditioner take to reach programmed<br />
temperature settings, so the temperature is reached at the time you set. For<br />
example: Set the Wake time to 6 am, and the temperature to 70°. The heat will<br />
come on before 6 am, so the temperature is 70° by the time you wake at 6.<br />
The message “Recovery” is displayed when the system is activated before a<br />
scheduled time period.<br />
Compressor Protection: This feature forces the compressor to wait a few<br />
minutes before restarting, to prevent equipment damage. During the wait time,<br />
the message “Wait” is displayed on screen.<br />
Auto Changeover: This feature is used in climates where both air conditioning<br />
and heating are used on the same day. When the system is set to Auto,<br />
the thermostat automatically selects heating or cooling depending on the<br />
indoor temperature. Heat and cool settings must be at least 3 degrees apart.<br />
The thermostat will automatically adjust settings to maintain this 3-degree<br />
separation.<br />
CAUTION: To avoid possible compressor damage, do not use Auto<br />
Changeover if the outside temperature drops below 50°F (10°C).<br />
Battery replacement<br />
Batteries are optional (to provide<br />
backup power) if your thermostat<br />
was wired to run on AC power when<br />
installed.<br />
Install fresh batteries immediately when<br />
the LO BATT warning begins flashing.<br />
The warning flashes about 30 days<br />
before batteries are depleted.<br />
Even if the warning does not appear,<br />
you should replace batteries once a<br />
year, or before leaving home for more<br />
than a month.<br />
Grasp thermostat and pull to<br />
remove from wallplate<br />
M28337<br />
Turn thermostat over, insert<br />
fresh AAA alkaline batteries,<br />
then reinstall thermostat.<br />
18<br />
M28391
Troubleshooting<br />
If you have difficulty with your thermostat, please try the following suggestions.<br />
Most problems can be corrected quickly and easily.<br />
Display is blank • Check circuit breaker and reset if necessary.<br />
• Make sure power switch at heating & cooling system is on.<br />
• Make sure furnace door is closed securely.<br />
• Make sure fresh AAA alkaline batteries are correctly installed.<br />
Temperature<br />
settings do not<br />
change<br />
Make sure heating and cooling temperatures are set to acceptable<br />
ranges:<br />
• Heat: 40° to 90 °F (4.5° to 32 °C).<br />
• Cool: 50° to 99 °F (10° to 37 °C).<br />
Heating or<br />
cooling system<br />
does not respond<br />
• Press SYSTEM to set system to Heat. Make sure the temperature<br />
is set higher than the Inside temperature.<br />
• Press SYSTEM to set system to Cool. Make sure the temperature<br />
is set lower than the Inside temperature.<br />
• Check circuit breaker and reset if necessary.<br />
• Make sure power switch at heating & cooling system is on.<br />
• Make sure furnace door is closed securely.<br />
• Wait 5 minutes for the system to respond.<br />
Cannot change<br />
system setting<br />
to Cool<br />
Fan does not<br />
turn on when<br />
heat is required<br />
• Check Function 0170: System Type to make sure it is set to<br />
match your heating and cooling equipment.<br />
• Check Function 0180: Heating Fan Control to make sure it is set<br />
to match your heating equipment.<br />
Heating system<br />
is running in cool<br />
mode<br />
• Check Function 0170: System Type to make sure it is set to<br />
match your heating and cooling equipment.<br />
Red light is on • If thermostat is in Emergency Heat mode the red light is normal.<br />
It shows that the thermostat is in emergency heat mode.<br />
• If thermostat is not in Emergency Heat mode, contact a qualified<br />
service contractor for repair.<br />
“Wait” appears<br />
on the screen<br />
• Compressor protection feature is engaged. Wait 5 minutes for the<br />
system to restart safely, without damage to the compressor.<br />
Heat pump<br />
issues cool air<br />
in heat mode, or<br />
warm air in cool<br />
mode<br />
• Check Function 0190: Heat Pump Changeover Valve to make<br />
sure it is properly configured for your system.<br />
For assistance with this product, please visit http://yourhome.honeywell.com or<br />
call <strong>Honeywell</strong> Customer Care toll-free at 1-800-468-1502.<br />
19
1-year limited warranty<br />
<strong>Honeywell</strong> warrants this product, excluding battery, to be free from defects in the<br />
workmanship or materials, under normal use and service, for a period of one (1) year<br />
from the date of purchase by the consumer. If at any time during the warranty period the<br />
product is determined to be defective or malfunctions, <strong>Honeywell</strong> shall repair or replace it<br />
(at <strong>Honeywell</strong>’s option).<br />
If the product is defective,<br />
(i) return it, with a bill of sale or other dated proof of purchase, to the place from which<br />
you purchased it; or<br />
(ii) call <strong>Honeywell</strong> Customer Care at 1-800-468-1502. Customer Care will make the<br />
determination whether the product should be returned to the following address:<br />
<strong>Honeywell</strong> Return Goods, Dock 4 MN10-3860, 1885 Douglas Dr. N., Golden Valley, MN<br />
55422, or whether a replacement product can be sent to you.<br />
This warranty does not cover removal or reinstallation costs. This warranty shall not apply<br />
if it is shown by <strong>Honeywell</strong> that the defect or malfunction was caused by damage which<br />
occurred while the product was in the possession of a consumer.<br />
<strong>Honeywell</strong>’s sole responsibility shall be to repair or replace the product within the terms<br />
stated above. HONEYWELL SHALL NOT BE LIABLE FOR ANY LOSS OR DAMAGE<br />
OF ANY KIND, INCLUDING ANY INCIDENTAL OR CONSEQUENTIAL DAMAGES<br />
RESULTING, DIRECTLY OR INDIRECTLY, FROM ANY BREACH OF ANY WARRANTY,<br />
EXPRESS OR IMPLIED, OR ANY OTHER FAILURE OF THIS PRODUCT. Some states<br />
do not allow the exclusion or limitation of incidental or consequential damages, so this<br />
limitation may not apply to you.<br />
THIS WARRANTY IS THE ONLY EXPRESS WARRANTY HONEYWELL MAKES ON<br />
THIS PRODUCT. THE DURATION OF ANY IMPLIED WARRANTIES, INCLUDING THE<br />
WARRANTIES OF MERCHANTABILITY AND FITNESS FOR A PARTICULAR PURPOSE, IS<br />
HEREBY LIMITED TO THE ONE-YEAR DURATION OF THIS WARRANTY.<br />
Some states do not allow limitations on how long an implied warranty lasts, so the above<br />
limitation may not apply to you. This warranty gives you specific legal rights, and you may<br />
have other rights which vary from state to state.<br />
If you have any questions concerning this warranty, please write <strong>Honeywell</strong> Customer<br />
Relations, 1985 Douglas Dr, Golden Valley, MN 55422 or call 1-800-468-1502.<br />
Automation and Control Solutions<br />
<strong>Honeywell</strong> International Inc.<br />
1985 Douglas Drive North<br />
Golden Valley, MN 55422<br />
yourhome.honeywell.com<br />
® U.S. Registered Trademark.<br />
© 2016 <strong>Honeywell</strong> International Inc.<br />
33-00179EF—01 M.S. 01-16<br />
Printed in U.S.A.<br />
33-00179EF-01
<strong>Thermostat</strong><br />
<strong>Thermostat</strong><br />
programmable à<br />
écran tactile<br />
RTH8500<br />
Manuel du<br />
propriétaire<br />
Veuillez lire le mode<br />
d’emploi et le conserver en<br />
lieu sûr.<br />
Pour obtenir de l’aide veuillez<br />
visiter yourhome.honeywell.com<br />
L’installation est facile<br />
1. Étiquetage des fils et retrait de l’ancien thermostat<br />
2. Installation et raccordement du nouveau thermostat<br />
3. Configuration du nouveau thermostat pour correspondre à votre système de<br />
chauffage/climatisation<br />
• Ce thermostat fonctionne avec pratiquement tous les types de systèmes<br />
• Il est préréglé en prévision des systèmes les plus communs<br />
Besoin d’aide? Nous sommes à votre service<br />
Composer le 1-800-468-1502 pour obtenir de l’aide au<br />
raccordement avant de retourner le thermostat au magasin.<br />
Ce thermostat fonctionne sur systèmes de 24 V ou<br />
750 mV. Il NE fonctionnera PAS sur les systèmes<br />
120/240 V.
Hg<br />
NO MERCURY<br />
NE PAS JETER<br />
LE MERCURE<br />
ATTENTION : AVIS RELATIF AU RECYCLAGE<br />
DU MERCURE<br />
Ce produit ne contient aucun mercure.<br />
Cependant, ce produit peut remplacer un produit<br />
qui contient du mercure. Le mercure et les<br />
produits contenant du mercure ne doivent pas<br />
être jetés aux ordures ménagères.<br />
Pour obtenir plus d›informations pour savoir<br />
comment et où recycler adéquatement un<br />
thermostat contenant du mercure aux États-<br />
Unis, consultez l›organisme de recyclage des<br />
thermostats (<strong>Thermostat</strong> Recycling Corporation) à<br />
www.thermostat-recycle.org.<br />
Pour le recyclage de thermostats contenant<br />
du mercure au Canada, consultez l›organisme<br />
Switch the Stat à www.switchthestat.ca<br />
Ce thermostat contient une pile au lithium qui pourrait contenir du<br />
perchlorate.<br />
Matériau contenant du perchlorate — des consignes de manipulation<br />
spéciales pourraient s’appliquer, prière de consulter<br />
www.dtsc.ca.gov/hazardouswaste/perchlorate<br />
AVIS : Pour éviter d’endommager le compresseur, ne faites pas<br />
fonctionner le climatiseur si la température extérieure est inférieure à<br />
10 °C (50 °F).<br />
Services à la clientèle<br />
Pour obtenir de l’aide avec ce produit, veuillez<br />
consulter le site<br />
http://yourhome.honeywell.com.<br />
ou vous adresser aux Services à la clientèle de<br />
<strong>Honeywell</strong> en composant le 1-800-468-1502.<br />
® Marque de commence enregistrée aux États-Unis. Brevets en instance<br />
Brevets américains n os 6,595,430; 7,114,554; 7,274,972; 7,225,054; D520,386 et autres brevets en instance<br />
2
Table des matières<br />
Installation<br />
Installation.............................................3<br />
Guide d’installation avancé.................10<br />
À propos du thermostat<br />
Aide-mémoire sur les commandes<br />
et l’écran d’accueil..............................13<br />
Programmes d’économie<br />
d’énergie préconfigurés......................14<br />
Programmation et fonctionnement<br />
Réglage de l’horloge...........................14<br />
Réglage des programmes...................15<br />
Dérogation temporaire<br />
de la programmation...........................15<br />
Dérogation permanente<br />
de la programmation...........................16<br />
Changer le filtre...................................17<br />
Caractéristiques spéciales..................18<br />
Remplacement des piles.....................18<br />
Annexes<br />
Dépannage..........................................19<br />
Garantie limitée...................................20<br />
1 Couper le courant du système de chauffage/de<br />
climatisation<br />
ou<br />
Disjoncteur<br />
Interrupteur<br />
M31535<br />
d’alimentation du système<br />
de chauffage/refroidissement<br />
3
2 Retirer l’ancien thermostat<br />
Retirer l’ancien thermostat, mais laisser en place la plaque murale et les fils<br />
sans les détacher.<br />
Si vous possédez un thermostat plus ancien à tube<br />
Laisser la plaque de mercure scellé, allez à la page 2 pour les<br />
de montage en<br />
instructions de mise au rebut correctes.<br />
place<br />
Désignation de<br />
la borne<br />
C<br />
C<br />
3 Étiqueter les fils<br />
Étiqueter les fils au fur et à mesure qu’ils sont débranchés à l’aide des<br />
étiquettes fournies, puis retirer l’ancienne plaque murale. La couleur des fils ne<br />
correspondra peut-être pas avec les étiquettes.<br />
MCR33823<br />
Étiquettes de fils<br />
C<br />
C<br />
M28100<br />
Désignation de la borne<br />
MCR31537<br />
4 Séparer la plaque murale du nouveau thermostat<br />
Retirer la plaque murale du nouveau<br />
thermostat et l’installer au mur.<br />
+ +<br />
+<br />
Plaque de montage<br />
M28334<br />
4
Y<br />
W<br />
5 Installer la plaque<br />
Installer la nouvelle plaque murale à l’aide des vis et des chevilles d’ancrage<br />
fournies.<br />
Percer des trous de 3/16 po si le mur est en placoplâtre<br />
Percer des trous de 3/32 po si le mur est en plâtre<br />
M27514<br />
6 Raccorder les fils<br />
Il suffit ensuite de faire correspondre les fils avec les étiquettes.<br />
Si les étiquettes ne correspondent pas aux lettres du thermostat, consulter<br />
“Câblage alternatif (systèmes classiques)” au page 6 (voir les notes<br />
dessous).<br />
Composer le 1-800-468-1502 pour obtenir de l’aide au cours du raccordement.<br />
VIS<br />
INSÉRER LES FILS,<br />
PUIS SERRER LES VIS<br />
FILS ÉTIQUETÉS<br />
CLASSIQUE<br />
OUVERTURE<br />
POUR LES FILS<br />
CLASSIQUE<br />
Y2<br />
W2<br />
R<br />
G<br />
RC<br />
R<br />
W<br />
Y<br />
Retirer le cavalier<br />
en métal s’il y a<br />
à la fois les fils<br />
« R » et « Rc ».<br />
G<br />
C<br />
MF27515<br />
5
O<br />
Y<br />
Câblage alternatif (systèmes classiques)<br />
Si les étiquettes ne correspondent pas aux bornes, les raccorder comme<br />
l’indique l’explication ci-dessous (voir les notes ci-dessous).<br />
RC<br />
R<br />
W<br />
Y<br />
G<br />
C<br />
Y2<br />
W2<br />
Rc<br />
ou 2<br />
R<br />
ou ou ou<br />
W<br />
Y<br />
G<br />
C<br />
Y2<br />
W2<br />
ou<br />
ou<br />
ou<br />
ou<br />
ou<br />
ou<br />
ou ou<br />
2<br />
3<br />
MFCR28076<br />
Enlever le cavalier en métal en métal entre R et Rc seulement si les fils R<br />
et Rc doivent être raccordés.<br />
Si l’ancien thermostat avait les deux fils R et RH, retirer le cavalier de<br />
métal. Raccorder le fil R à la borne Rc et le fil RH à la borne R.<br />
Si l’ancien thermostat avait seulement un fil C ou C1, le raccorder à la<br />
borne C. Si l’ancien thermostat avait 2 fils C ou C1, enrubanner chacun<br />
des fils séparément avec du ruban isolant et ne pas les raccorder.<br />
Câblage (Thermopompe)<br />
Si les étiquettes ne correspondent pas aux lettres marquées sur le thermostat,<br />
se reporter à la page 7.<br />
VIS<br />
INSÉRER LES FILS,<br />
PUIS SERRER LES VIS<br />
THERMOPOMPE FILS ÉTIQUETÉS<br />
OUVERTURE<br />
POUR LES FILS<br />
L<br />
E<br />
AUX<br />
Aux<br />
R<br />
G<br />
THERMOPOMPE<br />
RC<br />
R<br />
O/B<br />
Y<br />
G<br />
REMARQUE : Si les<br />
bornes E et Aux ne sont<br />
raccordées à aucun fil,<br />
utiliser un bout de fil<br />
pour les raccorder l’une<br />
à l’autre.<br />
6<br />
C<br />
MF27516
Autre option de câblage (pour thermopompes seulement)<br />
ou<br />
2<br />
3<br />
ou<br />
ou<br />
ou<br />
ou<br />
ou<br />
ou<br />
3<br />
4<br />
5<br />
5<br />
6<br />
6<br />
ou<br />
ou ou<br />
ou<br />
ou ou<br />
ou ou ou<br />
MFCR28077<br />
5<br />
6<br />
Laisser le cavalier en place, en reliant les bornes R et Rc.<br />
Si l’ancien thermostat avait des fils de V et de VR, arrêter maintenant et<br />
communiquer avec un entrepreneur pour l’aide.<br />
Si l’ancien thermostat avait les fils O et B, raccorder le fil B à la borne C. Si<br />
un autre fil est raccordé à la borne C, arrêter maintenant et communiquer<br />
avec un entrepreneur.<br />
Si l’ancien thermostat avait les fils Y1, W1 et W2, arrêter maintenant et<br />
communiquer avec un entrepreneur.<br />
Si la borne L est utilisée, le fil de la borne C doit être raccordé<br />
(communiquer avec un entrepreneur s’il n’y a aucun fil C).<br />
Si chacune des bornes E et Aux n’est pas raccordée à un fil, utiliser un<br />
petit morceau de fil pour les raccorder entre elles.<br />
7
7 Installer les piles<br />
Installer 3 piles alcalines AAA à l’arrière du thermostat et retirer l’onglet.<br />
Retirer<br />
l’onglet.<br />
M28336<br />
Dos du thermostat<br />
M28335<br />
8 Fixer le thermostat à la plaque murale<br />
Installer le thermostat sur la plaque murale fixée au mur.<br />
9 Rétablir l’alimentation électrique<br />
M28337<br />
Rétablir l’alimentation électrique du système de chauffage-refroidissement.<br />
ou<br />
Disjoncteur<br />
Interrupteur M31544 d’alimentation<br />
du système de chauffage/<br />
refroidissement<br />
8
10 Régler l’heure et date<br />
1. Appuyer sur s ou t pour régler la date.<br />
2. Appuyer sur s ou t pour régler le mois.<br />
3. Appuyer sur s ou t pour régler l’année, puis appuyer sur DONE.<br />
4. Appuyer sur s ou t pour régler l’heure puis appuyer sur DONE pour<br />
sauvegarder et quitter.<br />
TUE<br />
TUE<br />
15<br />
2006<br />
6<br />
1:00PM<br />
6<br />
DONE<br />
DONE<br />
M28338<br />
M28339<br />
11 Si votre système est du type suivant...<br />
Si votre système est du type suivant:<br />
q Chauffage et refroidissement à un étage<br />
Félicitations, vous avez terminé<br />
Si votre système est du type suivant:<br />
q Chauffage et refroidissement, multiétages<br />
q Thermopompe* sans chauffage d’appoint<br />
q Thermopompe* avec chauffage d’appoint<br />
q Chauffage seulement<br />
q Refroidissement seulement<br />
Passer au mode d’installation avancé pour faire correspondre le thermostat à<br />
votre type de système.<br />
*Thermopompe—climatiseur qui procure de l’air froid en été et qui fonctionne à<br />
l’inverse en hiver pour assurer le chauffage.<br />
Si vous n’êtes pas certain de connaître votre type de système,<br />
composez sans frais le 1-800-468-1502.<br />
Ce thermostat convient aux systèmes alimentés par du courant 24 volts ou 750<br />
millivolts. Il ne fonctionnera pas sur les systèmes conventionnels à plusieurs<br />
étages ou les systèmes à 120/240 V.<br />
9
Guide d’installation avancé<br />
Entrer les réglages du système<br />
1. Appuyer sur SYSTEM.<br />
2. Appuyer sur la touche du centre blanche et continuer à le faire jusqu’à ce<br />
que l’affichage change (environ 5 secondes).<br />
TUE<br />
FAN<br />
Inside<br />
AUTO<br />
SYSTEM<br />
HEAT<br />
70<br />
6:01<br />
AM<br />
TUE<br />
Set<br />
FAN<br />
To70 Inside<br />
AUTO<br />
Following<br />
Schedule<br />
SYSTEM<br />
Outside<br />
HEAT<br />
43<br />
70<br />
6:01<br />
AM<br />
Set To70<br />
SCHED HOLD SCREEN MORE<br />
DONE<br />
CANCEL<br />
Modifier les réglages<br />
M28340<br />
1. Appuyer sur s ou t pour sélectionner<br />
la fonction.<br />
2. Appuyer sur s ou t pour modifier les<br />
paramètres.<br />
3. Appuyer sur DONE pour sauvegarder et<br />
quitter.<br />
REMARQUE : Certaines fonctions décrites<br />
dans les pages suivantes peuvent ne pas<br />
apparaître en raison des choix faits aux<br />
étapes précédentes.<br />
FAN<br />
AUTO<br />
DONE<br />
TUE<br />
Inside<br />
Fonction<br />
70<br />
0120<br />
M28341<br />
Set To70<br />
Paramètre<br />
20<br />
M28341<br />
Fonction Description Réglage<br />
Appuyer sur s t pour modifier les paramètres.<br />
0120 Programmation de l’année<br />
(deux premiers chiffres)<br />
0130 Programmation de l’année<br />
(deux derniers chiffres)<br />
20 = Année 20xx<br />
21 = Année 21xx<br />
01 - 99 (c.-à-d. 2001 - 2099)<br />
0140 Programmation du mois 01 - 12 (c.-à-d. janvier-décembre)<br />
0150 Programmation de la date 01 - 31<br />
10
Fonction Description Réglage<br />
Appuyer sur s t pour modifier les paramètres.<br />
0170 Type de système 1 Chauff./Clim. : Gaz, mazout ou chauffage électrique avec<br />
climatisation.<br />
2 Thermopompe : 1 chauffage (sans de chauffage aux.).<br />
3 Chauff. seulement : Gaz, mazout ou chauffage électrique<br />
sans climatisation.<br />
4 Chauffage seulement avec ventilateur (gaz, mazout ou<br />
chauffage électrique).<br />
5 Chauff. eau chaude sans ventilateur (gaz, mazout ou<br />
chauffage eau chaude).<br />
6 Climatisation centrale seulement.<br />
7 Thermopompe (avec chauffage aux.).<br />
8 Multi-étages : 2 étages de chauffage (fils W et W2), 2 étages<br />
de climatisation (fils Y et Y2).<br />
9 Multi-étages : 2 étages de chauffage (fils sur W et W2), 1<br />
étage de climatisation (fil Y).<br />
10 Multi-étages : 1 étage de chauffage (fil W), 2 étages de<br />
climatisation (fils Y et Y2).<br />
0180 Commande du ventilateur de<br />
chauffage<br />
0190 Vanne d’inversion (pour<br />
thermopompes seulement)<br />
0240 Longueur des cycles de<br />
chauffage<br />
0270 Longueur des cycles de<br />
chauffage de secours<br />
(thermopompes seulement)<br />
0300 L’inversion manuel ou<br />
automatique<br />
0320 Format de la température<br />
(°F/°C)<br />
0 Chauffage gaz/mazout : Système gaz/mazout (Le système<br />
commande le fonctionnement du ventilateur).<br />
1 Chauffage électrique : (Le thermostat commande le<br />
fonctionnement du ventilateur).<br />
0 Vanne de climatisation : Utiliser ce réglage si le fil étiqueté<br />
«O» a été raccordé à la borne O/B (voir la page 6).<br />
1 Vanne de chauffage : Utiliser ce réglage si le fil étiqueté «B» a<br />
été raccordé à la borne O/B (voir la page 7).<br />
5 Système de chauffage standard au gaz ou au mazout -<br />
efficacité à moins de 90 %<br />
9 Systèmes de chauffage électriques<br />
3 Thermopompe, système de chauffage à eau chaude ou au<br />
gaz - efficacité à plus de 90 %.<br />
1 Système de chauffage au gaz ou au mazout : Vapeur ou<br />
gravité<br />
Réglages recommandés 5, 9, 3 ou 1. Autres réglages : 2, 4,<br />
6, 7, 8, 10, 11, 12. Le nombre indique la fréquence à laquelle<br />
le système effectue un cycle marche et arrêt pour maintenir la<br />
température réglée. Un chiffre plus haut signifie que le système<br />
fonctionne et s’arrête pour de plus courtes périodes de<br />
temps, un chiffre plus bas signifie de plus longues périodes de<br />
fonctionnement et d’arrêts. Lorsque ces réglages sont adaptés<br />
au type de système, le thermostat contrôle la température de<br />
façon plus efficace.<br />
9 Systèmes de chauffage électriques<br />
0 L’inversion manuel (Heat/Cool/Off).<br />
1 L’inversion automatique (Heat/Cool/Auto/Off). Remarque : le<br />
système maintient un écart minimal de 3 ˚F entre les réglages<br />
du chauffage et du refroidissement.<br />
0 Fahrenheit<br />
1 Celsius<br />
11
Fonction Description Réglage<br />
Appuyer sur s t pour modifier les paramètres.<br />
0330 Changement horaire été 0 OFF : L’horaire d’été est désactivé.<br />
1 ON : Changement automatique à l’heure avancée (pour<br />
les zones qui n’utilisent pas le nouveau calendrier d’heure<br />
avancée de 2007)<br />
2 ON : Changement automatique à l’heure avancée (pour les<br />
zones qui utilisent le nouveau calendrier d’heure avancée de<br />
2007 et des années subséquentes)<br />
0500 Rappel de changement du filtre<br />
du système de chauffage<br />
0530 Technologie Smart Response ®<br />
(marche/arrêt)<br />
0 Arrêt (pas de rappel de changement de filtre du système de<br />
chauffage).<br />
1 Rappel après 1 mois.<br />
2 Rappel après 3 mois.<br />
3 Rappel après 6 mois.<br />
4 Rappel après 9 mois.<br />
5 Rappel après 1 an.<br />
6 Rappel après 3 ans.<br />
1 Marche<br />
0 Arrêt<br />
0640 Format de l’heure 12 Horloge 12 heures (3:30 pm)<br />
24 Horloge 24 heures (15:30)<br />
À propos du thermostat<br />
Félicitations! Vous venez d’acheter le thermostat le plus perfectionné et le plus<br />
facile à utiliser du monde. Il est conçu pour vous procurer de nombreuses<br />
années de service fiable et assurer la régulation de la température ambiante<br />
avec facilité par écran tactile.<br />
• Programmes de 7 jours maximisant confort et économie.<br />
• Programmation tout confort : il suffit de retirer le thermostat du mur pour<br />
établir les programmes.<br />
• Dérogations aux réglages de température prévus à tout moment à l’aide<br />
d’une seule touche.<br />
• Réglage précis de la température maintenant la température à 1 ˚F du point<br />
de consigne.<br />
• Rappels qui avisent l’utilisisateur de vérifier ou de changer les filtres et les<br />
piles.<br />
• Grand affichage à touches tactiles rétro-éclairé facile à lire, même dans<br />
l’obscurité.<br />
12
Commandes de thermostat<br />
Appuyer sur les jours pour programmer les réglages (voir page 14).<br />
Appuyer sur FAN pour<br />
sélectionner :<br />
Auto: Ventilateur<br />
fonctionne seulement quand<br />
le système de chauffage ou<br />
de refroidissement est en<br />
marche.<br />
On: Le ventilateur<br />
fonctionne sans interruption.<br />
Appuyer sur DONE pour<br />
enregistrer les modifications<br />
et quitter le mode de<br />
réglage.<br />
Écran d’affichage<br />
MON TUE WED THU FRI SAT SUN<br />
Appuyer sur SYSTEM pour sélectionner :<br />
Heat : Commande le système de chauffage.<br />
Cool : Commande le système de<br />
refroidissement.<br />
Auto : Le thermostat sélectionne<br />
automatiquement le chauffage ou la climatisation<br />
en fonction de la température intérieure.<br />
Off : Tous les systèmes sont à l’arrêt.<br />
FAN<br />
AUTO<br />
SYSTEM<br />
HEAT<br />
Hold<br />
Appuyer pour<br />
déroger au<br />
programme.<br />
Em Heat : Commande le fonctionnement du système de<br />
chauffage d’urgence et du système de chauffage d’appoint. Le<br />
compresseur est mis sous sécurité. (Certains modèles seulement.)<br />
Inside<br />
70<br />
OK TO PICK MULTIPLE DAYS<br />
6:01<br />
Boutons de flèches<br />
Appuyer sur ces<br />
touches pour régler la<br />
température, ou pour faire<br />
des choix à partir des<br />
menus affichés à l’écran.<br />
Clock<br />
Appuyer pour régler<br />
l’horloge.<br />
Screen<br />
Appuyer pour verrouiller<br />
le clavier numérique<br />
pendant 30 secondes afin<br />
de nettoyer l’écran.<br />
More<br />
Appuyer pour obtenir<br />
d’autres options (certains<br />
modèles seulement).<br />
Sched<br />
Appuyer pour programmer<br />
les réglages.<br />
Appuyer sur DONE pour enregistrer les modifications et quitter le mode de réglage.<br />
AM<br />
Set To<br />
70<br />
Following<br />
Schedule<br />
SCHED HOLD CLOCK SCREEN MORE<br />
M28373<br />
Température intérieure<br />
actuelle.<br />
Heure actuelle.<br />
FAN<br />
AUTO<br />
SYSTEM<br />
HEAT<br />
Jour de la semaine en cours.<br />
Inside<br />
6:01<br />
WED<br />
70<br />
AM<br />
Set To<br />
70<br />
Following<br />
Schedule<br />
Recovery<br />
Réglage du point de<br />
consigne.<br />
Programme en cours (ne<br />
s’affiche pas lorsqu’il n’est<br />
pas en fonctionnement).<br />
Autres messages affichés :<br />
SCHED HOLD CLOCK SCREEN MORE<br />
Cool On : Le système de refroidissement est en marche.<br />
Heat On : Le système de chauffage est en marche.<br />
13<br />
M28374<br />
Smart Response ®<br />
Technology en service.<br />
Aux Heat On : Le système de chauffage auxiliaire est en marche (thermopompes seulement)
Réglage de l’horloge<br />
FAN<br />
AUTO<br />
Inside<br />
WED<br />
70<br />
Set To70<br />
1. Pour régler l’affichage de l’heure<br />
actuelle, appuyer sur CLOCK, puis<br />
sur s ou t pour modifier l’heure.<br />
Appuyer sur les touches s ou t<br />
et maintenez-les enfoncées pour<br />
avancer l’heure plus rapidement.<br />
2. Appuyer sur DONE pour sauvegarder<br />
et quitter (ou appuyer sur CANCEL<br />
pour quitter sans modifier l’heure).<br />
REMARQUE : l’horloge temps réel ne<br />
devrait jamais nécessiter de réglage<br />
puisqu’elle est automatiquement mise<br />
à jour lors des changements entre<br />
DONE<br />
CANCEL<br />
l’heure avancée et l’heure normale et met en mémoire tous les renseignements<br />
concernant la date et l’heure.<br />
REMARQUE : Pour changer l’affichage courant de jour de semaine, consulter<br />
la section système de votre Guide d’installation.<br />
Dérogation au programme<br />
Vous pouvez programmer quatre périodes de temps par jour avec des<br />
réglages différents pour les jours de semaine et les fins de semaine. Nous<br />
recommandons ces préréglages (illustrés dans le tableau ci-dessous) puisqu’ils<br />
peuvent réduire les dépenses de chauffage et de refroidissement.<br />
Wake (Lever) - Réglez à l’heure du<br />
lever et à la température voulue le<br />
matin, jusqu’à votre départ.<br />
Leave (Départ) - Réglez à l’heure<br />
du départ de la maison et à la<br />
température voulue durant votre<br />
absence (en règle générale, un<br />
niveau d’économie d’énergie).<br />
Return (Retour) - Réglez à l’heure<br />
de votre retour à la maison et à<br />
la température que vous voulez<br />
durant la soirée, jusqu’au coucher.<br />
Sleep (Sommeil) - Réglez à<br />
l’heure du coucher et à la température voulue durant votre sommeil (en règle<br />
générale, un niveau d’économie d’énergie).<br />
REMARQUE : Les périodes de départ et de retour peuvent être annulées les<br />
fins de semaine.<br />
14<br />
6:01<br />
AM<br />
WED<br />
FAN<br />
Inside SCHED HOLD CLOCK Set SCREEN MORE<br />
AUTO<br />
70<br />
To70<br />
6:02<br />
Chauffage<br />
Climatisation<br />
Lever<br />
(06:00) 70 ° 78 °<br />
Départ<br />
(08:00) 62 ° 85 °<br />
Retour<br />
(18:00) 70 ° 78 °<br />
Sommeil<br />
(22:00) 62 ° 82 °<br />
AM<br />
M28375<br />
M28376
Pour modifier l’horaire programmé AUTO<br />
1. Appuyer sur SCHED, puis sur EDIT.<br />
2. Appuyer sur les touches des jours (MON-<br />
SUN) pour sélectionner les jours.<br />
3. Appuyer sur s ou t pour programmer<br />
l’heure du lever pour le ou les jours<br />
sélectionnés.<br />
4. Appuyer sur s ou t pour programmer<br />
les points de consigne de chauffage ou<br />
de climatisation pour cette plage horaire.<br />
5. Appuyer sur les autres plages<br />
horaires (LEAVE, RETURN, SLEEP) pour<br />
programmer l’heure et les points de<br />
consigne de chacune.<br />
6. Appuyer sur DONE pour sauvegarder<br />
et quitter (ou appuyer sur CANCEL<br />
pour quitter sans sauvegarder les<br />
modifications).<br />
REMARQUE : Vous pouvez appuyer sur CANCEL PERIOD pour<br />
éliminer toute plage horaire inutile.<br />
AUTO<br />
FAN<br />
Inside<br />
Set<br />
70<br />
To70<br />
WED<br />
Following<br />
Schedule<br />
Inside<br />
Set<br />
AM<br />
6:00 70<br />
To70<br />
Following<br />
Schedule<br />
SCHED HOLD CLOCK SCREEN MORE<br />
6:00<br />
AM<br />
DONE EDIT WAKE LEAVE RETURN SLEEP<br />
M28379<br />
CANCEL<br />
M28380<br />
MON TUE WED THU FRI SAT SUN<br />
OK TO PICK MULTIPLE DAYS<br />
CANCEL<br />
PERIOD<br />
70<br />
AM<br />
6:00 78<br />
HEAT<br />
COOL<br />
DONE WAKE LEAVE RETURN SLEEP CANCEL<br />
M28381<br />
Dérogation au programme (temporaire)<br />
Appuyer sur s ou t pour modifier<br />
immédiatement le point de consigne<br />
et déroger au programme en cours.<br />
Le nouveau point de consigne sera<br />
maintenu jusqu’à l’heure fixée. Une<br />
fois le temps affiché à la minuterie<br />
écoulé, le programme en cours<br />
reprend et revient au point de<br />
consigne prévu.<br />
Pour annuler le réglage temporaire<br />
à un moment quelconque, appuyer<br />
sur CANCEL (ou sur SCHED). Le<br />
programme reprendra.<br />
FAN<br />
AUTO<br />
SYSTEM<br />
HEAT<br />
Inside<br />
WED<br />
70<br />
Hold Temperature<br />
Until<br />
8:00<br />
AM<br />
Set To73<br />
Heat On<br />
SCHED HOLD CLOCK SCREEN MORE<br />
CANCEL<br />
M28382<br />
15
Dérogation au programme (permanente)<br />
Appuyer sur HOLD pour modifier<br />
le point de consigne de manière<br />
permanente et suspendre le<br />
programme en cours.<br />
Quelle que soit le point de consigne<br />
fixé, il sera maintenu 24 heures sur<br />
24 jusqu’à ce que vous le modifiez à<br />
la main, ou appuyer sur CANCEL (ou<br />
SCHED) pour annuler « HOLD » et<br />
reprendre le programme.<br />
FAN<br />
AUTO<br />
SYSTEM<br />
HEAT<br />
Inside<br />
WED<br />
70<br />
8:00<br />
Permanent<br />
Hold<br />
AM<br />
Set To<br />
73<br />
Heat On<br />
SCHED HOLD CLOCK SCREEN MORE<br />
CANCEL<br />
M28383<br />
Maintien pendant les vacances<br />
Cette fonction peut suspendre le<br />
programme pour une période prolongée.<br />
Appuyer sur s ou t pour régler au point<br />
de consigne désir et appuyer ensuite<br />
sur s ou t pour programmer l’heure du<br />
jour où vous voulez que le programme<br />
reprenne à votre retour. Appuyer deux<br />
fois sur HOLD, et appuyer ensuite sur s<br />
ou t pour sélectionner le nombre de<br />
jours.<br />
Le point de consigne programmé sera<br />
conservé 24 heures sur 24 pendant le<br />
nombre de jours choisis. Une fois ce<br />
nombre de jours écoulé, le programme<br />
précédemment établi reprendra à l’heure<br />
fixée.<br />
En cas de retour plus tôt que prévu,<br />
appuyer sur CANCEL (ou sur SCHED) pour<br />
annuler la période de maintien et revenir au programme en cours.<br />
FAN<br />
AUTO<br />
SYSTEM<br />
HEAT<br />
Inside<br />
WED<br />
70<br />
Hold Temperature<br />
Until<br />
6:00<br />
Set To55<br />
PM<br />
WED<br />
FAN<br />
SCHED HOLD CLOCK SCREEN MORE<br />
Inside<br />
Set<br />
AUTO<br />
70<br />
To55<br />
SYSTEM<br />
HEAT<br />
Hold Temperature<br />
Until<br />
14<br />
DAYS<br />
SCHED HOLD CLOCK SCREEN MORE<br />
CANCEL<br />
M28384<br />
CANCEL<br />
M28385<br />
16
Nettoyage de l’écran<br />
Appuyer sur SCREEN pour verrouiller<br />
l’écran afin de le nettoyer. L’écran<br />
restera verrouillé pendant 30 secondes<br />
pour permettre de le nettoyer sans<br />
modifier les réglages.<br />
Au bout de 30 secondes, appuyer sur<br />
DONE pour reprendre le fonctionnement<br />
normal ou appuyer sur SCREEN s’il faut<br />
davantage de temps pour nettoyer.<br />
REMARQUE : Ne jamais pulvériser de<br />
liquide directement sur le thermostat.<br />
Utiliser un chiffon humide pour nettoyer<br />
l’écran. Utiliser de l’eau ou un produit<br />
de nettoyage pour du verre. Ne pas<br />
utiliser de produits abrasifs.<br />
FAN<br />
AUTO<br />
Inside<br />
WED<br />
70<br />
6:00<br />
PM<br />
SCREEN LOCKED<br />
Set To<br />
70<br />
Following<br />
Schedule<br />
SCHED HOLD CLOCK SCREEN MORE<br />
30<br />
OK TO<br />
CLEAN<br />
SCREEN<br />
M28386<br />
M28387<br />
Rappel de remplacement du filtre<br />
Si elle est mise en marche à<br />
l’installation, la fonction de rappel de<br />
remplacement du filtre de l’appareil<br />
de chauffage sera activée lorsque le<br />
temps sera venu de remplacer le filtre.<br />
Appuyer sur RESET après avoir<br />
remplacé le filtre pour remettre la<br />
minuterie à zéro.<br />
Pour changer l’intervalle de rappel :<br />
1. Appuyer sur MORE, puis sur EDIT.<br />
2. Appuyer sur s ou t pour choisir<br />
l’intervalle désiré, appuyer sur DONE.<br />
3. Appuyer sur RESET.<br />
4. Appuyer sur DONE pour<br />
sauvegarder et quitter.<br />
WED<br />
CHANGE FILTER<br />
FAN<br />
Inside<br />
AUTO<br />
SYSTEM<br />
HEAT<br />
RESET<br />
70<br />
6:00<br />
PM<br />
Set To55<br />
SCHED HOLD CLOCK SCREEN MORE<br />
Filter<br />
60<br />
<strong>Day</strong>s<br />
DONE<br />
M28388<br />
M28389<br />
17
Caractéristiques spéciales<br />
Technologie Smart Response ® : Permet au thermostat «d’apprendre»<br />
combien de temps il faut à votre système de chauffage ou de refroidissement<br />
pour atteindre la température souhaitée pour que la température désirée<br />
soit atteinte à l’heure prévue. Par exemple : Régler le réveil à 6 h 00 et la<br />
température à 70°. Le système de chauffage se mettra en marche avant 6 h<br />
00 pour que la température de consigne de 70° soit atteinte à l’heure de votre<br />
réveil, à 6 h 00. Le mot «Recovery» (reprise) s’affiche à l’écran lorsque le<br />
système est mis en marche avant l’heure programmée pour la période.<br />
Protection du compresseur : Cette fonction oblige le compresseur à attendre<br />
quelques minutes avant de redémarrer afin d’éviter les bris matériels. Pendant<br />
cette attente, le message «Wait» (attendre) apparaît à l’écran.<br />
Commutation chaud-froid automatique : Cette caractéristique est employée<br />
dans les endroits où le chauffage et de refroidissement sont parfois en service<br />
le même jour. Lorsque le système fonctionne en mode Auto, le thermostat<br />
sélectionne automatiquement le chauffage ou le refroidissement en fonction<br />
de la température à l’intérieur. Il doit absolument y avoir au moins trois degrés<br />
d’écart entre les points de consigne de chauffage et de refroidissement. Le<br />
thermostat ajustera automatiquement les points de consigne pour conserver<br />
ces trois degrés d’écart.<br />
MISE EN GARDE : Pour éviter d’endommager le compresseur, ne pas<br />
employer la fonction de commutation chaud-froid automatique si la<br />
température extérieure est inférieure à 10 ºC (50 ºF).<br />
Remplacement des piles<br />
Les piles sont facultatives (et servent<br />
d’alimentation de secours en cas<br />
de panne de courant) lorsque le<br />
thermostat a été raccordé au courant<br />
alternatif à l’installation.<br />
Installer immédiatement des piles<br />
neuves lorsque l’avertissement de<br />
remplacement des piles LO BATT<br />
commence à clignoter. Ce message<br />
clignote pendant environ trente<br />
jours avant que les piles soient<br />
complètement épuisées.<br />
Même si le message d’avertissement<br />
n’apparaît pas, les piles devraient être<br />
remplacées une fois par année ou<br />
avant une absence prolongée (plus<br />
d’un mois).<br />
Saisir le thermostat et tirer pour le<br />
détacher de la plaque murale.<br />
M28337<br />
Retourner le thermostat et installer<br />
des piles alcalines AAA neuves,<br />
puis remettre le thermostat en place<br />
18<br />
M28391
Dépannage<br />
Si vous éprouvez des difficultés, nous vous proposons d’essayer les solutions<br />
suivantes. La plupart des problèmes peuvent être corrigés rapidement et<br />
facilement.<br />
Rien n’apparaît à<br />
l’écran<br />
Le thermostat<br />
ne réagit pas quand<br />
on appuie sur les<br />
touches (ou la<br />
température ne<br />
change pas).<br />
Le système de<br />
chauffage ou de<br />
refroidissement ne<br />
répond pas<br />
Impossible de<br />
changer le réglage<br />
du système à<br />
climatisation<br />
Ventilateur ne<br />
démarre pas lors de<br />
l’appel de chauffage<br />
Chauffage<br />
fonctionne en mode<br />
climatisation<br />
Le voyant rouge est<br />
allumé<br />
« Wait » apparaît sur<br />
l’écran<br />
Thermopompe<br />
émet de l’air froid<br />
en mode chauffage<br />
et de l’air chaud en<br />
mode climatisation<br />
• S’assurer que le coupe-circuit n’est pas déclenché et le remettre en position<br />
de marche au besoin.<br />
• S’assurer que le bouton de marche-arrêt du système de chauffage ou de<br />
refroidissement est à la position de marche.<br />
• S’assurer que la porte de l’appareil de chauffage est bien fermée.<br />
• S’assurer qu’il y a bien des piles alcalines AAA neuves en place.<br />
S’assurer que les températures de chauffage et de refroidissement sont réglées<br />
à l’intérieur des seuils de température permis :<br />
• Chauffage : 4,5 à 32 °C (40 à 90 °F).<br />
• Refroidissement : 10 à 37 °C (50 à 99 °F).<br />
• Appuyer sur SYSTEM pour régler le système en mode de chauffage. S’assurer<br />
que le point de consigne est plus élevé que la température ambiante.<br />
• Appuyer sur SYSTEM pour régler le système au mode de refroidissement.<br />
S’assurer que le point de consigne est moins élevé que la température<br />
ambiante.<br />
• S’assurer que le coupe-circuit n’est pas déclenché et le remettre en position<br />
de marche au besoin.<br />
• S’assurer que le bouton de marche-arrêt du système de chauffage ou de<br />
refroidissement est à la position de marche.<br />
• S’assurer que la porte de l’appareil de chauffage est bien fermée.<br />
• Le message «Wait» à l’afficheur indique que la minuterie de protection du<br />
compresseur est en marche. Attendre 5 minutes pour que le système se<br />
remette en marche en toute sécurité sans endommager le compresseur.<br />
• Vérifier la Fonction 170 : Type d’installation pour s’assurer que le réglage<br />
correspond aux systèmes de chauffage et de climatisation.<br />
• Vérifier la Fonction 180 : Commande du ventilateur de chauffage pour<br />
s’assurer que le réglage correspond au système de chauffage.<br />
• Vérifier la Fonction 170 : Type de système pour s’assurer que le réglage<br />
correspond aux systèmes de chauffage ou de climatisation.<br />
• Si le thermostat est en mode de la chaleur de secours la lumière rouge est<br />
normale. Elle prouve que le thermostat est en mode de la chaleur de secours.<br />
• Si le thermostat n’est pas en mode de la chaleur de secours, entrez en<br />
contact avec un entrepreneur qualifié de service pour la réparation.<br />
• La fonction de protection du compresseur est engagée. Attendre 5 minutes<br />
pour que le système redémarre sans risque d’endommager le compresseur.<br />
• Vérifier la Fonction 190 : Vanne d’inversion de la thermopompe pour<br />
s’assurer qu’elle est configurée pour convenir au système.<br />
Pour obtenir de l’aide avec ce produit, veuillez consulter le site<br />
http://yourhome.honeywell.com ou vous adresser aux Services à la clientèle de<br />
<strong>Honeywell</strong> en composant le 1-800-468-1502.<br />
19
Garantie limitée d’un an<br />
<strong>Honeywell</strong> garantit ce produit, à l’exception des piles, contre tout vice de fabrication ou<br />
de matière dans la mesure où il en est fait une utilisation et un entretien convenables,<br />
et ce, pour un (1) an à partir de la date d’achat par le consommateur. En cas de<br />
défectuosité ou de mauvais fonctionnement pendant la période de garantie, <strong>Honeywell</strong><br />
remplacera ou réparera le produit (au gré de <strong>Honeywell</strong>) dans un délai raisonnable.<br />
Si le produit est défectueux,<br />
(i) le retourner, accompagné d’une preuve d’achat indiquant la date d’achat, au<br />
détaillant auprès de qui il a été acheté, ou<br />
(ii) l’emballer avec soin, accompagné d’une preuve d’achat indiquant la date d’achat et<br />
d’une brève description du mauvais fonctionnement, et l’envoyer par la poste, port payé,<br />
à l’adresse suivante :<br />
<strong>Honeywell</strong> Return Goods<br />
Dock 4 MN10-3860<br />
1985 Douglas Dr N<br />
Golden Valley, MN 55422<br />
La présente garantie ne couvre pas les frais de retrait ou de réinstallation. La présente<br />
garantie ne s’appliquera pas s’il est démontré que la défectuosité ou le mauvais<br />
fonctionnement est dû à un endommagement du produit alors que le consommateur<br />
l’avait en sa possession.<br />
La responsabilité de <strong>Honeywell</strong> se limite à réparer ou à remplacer le produit<br />
conformément aux modalités susmentionnées. HONEYWELL N’EST EN AUCUN<br />
CAS RESPONSABLE DES PERTES OU DOMMAGES, Y COMPRIS LES DOMMAGES<br />
INDIRECTS OU ACCESSOIRES DÉCOULANT DIRECTEMENT OU INDIRECTEMENT<br />
D’UNE VIOLATION QUELCONQUE D’UNE GARANTIE, EXPRESSE OU TACITE,<br />
APPLICABLE AU PRÉSENT PRODUIT NI DE TOUTE AUTRE DÉFECTUOSITÉ DU<br />
PRÉSENT PRODUIT. Certaines provinces ne permettent pas l’exclusion ou la restriction<br />
des dommages indirects et, par conséquent, la présente restriction peut ne pas<br />
s’appliquer.<br />
LA PRÉSENTE GARANTIE TIENT LIEU DE TOUTES LES AUTRES GARANTIES,<br />
EXPRESSES OU TACITES, ET LES GARANTIES DE VALEUR MARCHANDE ET DE<br />
CONFORMITÉ À UNE FIN PARTICULIÈRE SONT PAR LES PRÉSENTES EXCLUES APRÈS<br />
LA PÉRIODE DE UN AN DE LA PRÉSENTE GARANTIE.<br />
Certaines provinces ne permettent pas de limiter la durée des garanties tacites et, par<br />
conséquent, la présente limitation peut ne pas s’appliquer. La présente garantie donne<br />
au consommateur des droits légaux spécifiques et peut-être certains autres droits qui<br />
peuvent varier d’une province à l’autre.<br />
Pour toute question concernant la présente garantie, prière d’écrire aux Services à<br />
la clientèle de <strong>Honeywell</strong> à l’adresse suivante : <strong>Honeywell</strong> Customer Relations, 1985<br />
Douglas Drive, Golden Valley, MN 55422, ou encore composer le 1-800-468-1502.<br />
Solutions de régulation et d’automatisation<br />
<strong>Honeywell</strong> International Inc.<br />
1985 Douglas Drive North<br />
Golden Valley, MN 55422<br />
yourhome.honeywell.com<br />
® Marque de commerce déposée aux É.-U.<br />
© 2016 <strong>Honeywell</strong> International Inc.<br />
33-00179EF—01 M.S. 01-16<br />
Imprimé aux États-Unis<br />
33-00179EF-01


