

Nokia 6210 Navigator - Nokia 6210 Navigator manual
Nokia 6210 Navigator - Nokia 6210 Navigator manual
Nokia 6210 Navigator - Nokia 6210 Navigator manual

Create successful ePaper yourself
Turn your PDF publications into a flip-book with our unique Google optimized e-Paper software.
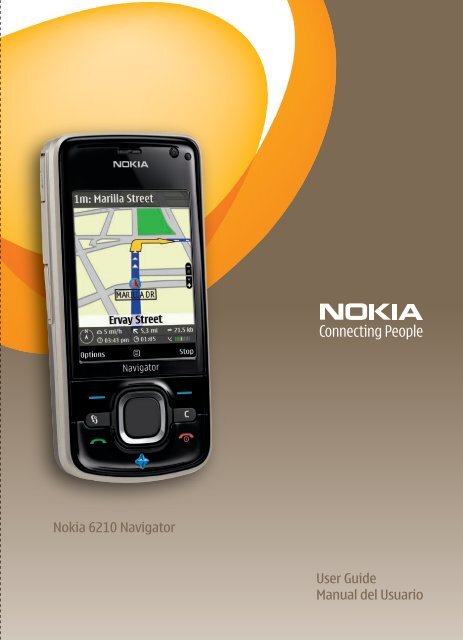
<strong>Nokia</strong> <strong>6210</strong> <strong>Navigator</strong><br />
User Guide<br />
Manual del Usuario
<strong>Nokia</strong> <strong>6210</strong> <strong>Navigator</strong> User Guide<br />
Nota: La traducción en español de este <strong>manual</strong> inicia en la página 79.<br />
9210189<br />
Issue 2<br />
1
0434<br />
DECLARATION OF CONFORMITY<br />
Hereby, NOKIA CORPORATION declares that this RM-419 product is in<br />
compliance with the essential requirements and other relevant provisions of<br />
Directive 1999/5/EC. A copy of the Declaration of Conformity can be found at<br />
http://www.nokia.com/phones/declaration_of_conformity/.<br />
© 2009 <strong>Nokia</strong>. All rights reserved.<br />
<strong>Nokia</strong>, <strong>Nokia</strong> Connecting People, Navi, Visual Radio and <strong>Nokia</strong> Care are trademarks or registered trademarks<br />
of <strong>Nokia</strong> Corporation. <strong>Nokia</strong> tune is a sound mark of <strong>Nokia</strong> Corporation. Other product and company names<br />
mentioned herein may be trademarks or tradenames of their respective owners.<br />
Reproduction, transfer, distribution, or storage of part or all of the contents in this document in any form<br />
without the prior written permission of <strong>Nokia</strong> is prohibited.<br />
This product includes software licensed from Symbian Software Ltd © 1998-2009.<br />
Symbian and Symbian OS are trademarks of Symbian Ltd.<br />
US Patent No 5818437 and other pending patents. T9 text input software Copyright (C) 1997-2009.<br />
Tegic Communications, Inc. All rights reserved.<br />
Java and all Java-based marks are trademarks or registered trademarks of<br />
Sun Microsystems, Inc.<br />
Portions of the <strong>Nokia</strong> Maps software are © 1996-2009 The FreeType Project. All rights reserved.<br />
This product is licensed under the MPEG-4 Visual Patent Portfolio License (i) for personal and noncommercial<br />
use in connection with information which has been encoded in compliance with the MPEG-4 Visual<br />
Standard by a consumer engaged in a personal and noncommercial activity and (ii) for use in connection<br />
with MPEG-4 video provided by a licensed video provider. No license is granted or shall be implied for any<br />
other use. Additional information, including that related to promotional, internal, and commercial uses,<br />
may be obtained from MPEG LA, LLC. See http://www.mpegla.com.<br />
<strong>Nokia</strong> operates a policy of ongoing development. <strong>Nokia</strong> reserves the right to make changes and<br />
improvements to any of the products described in this document without prior notice.<br />
TO THE MAXIMUM EXTENT PERMITTED BY APPLICABLE LAW, UNDER NO CIRCUMSTANCES SHALL NOKIA<br />
OR ANY OF ITS LICENSORS BE RESPONSIBLE FOR ANY LOSS OF DATA OR INCOME OR ANY SPECIAL,<br />
INCIDENTAL, CONSEQUENTIAL OR INDIRECT DAMAGES HOWSOEVER CAUSED.<br />
THE CONTENTS OF THIS DOCUMENT ARE PROVIDED "AS IS". EXCEPT AS REQUIRED BY APPLICABLE LAW,<br />
NO WARRANTIES OF ANY KIND, EITHER EXPRESS OR IMPLIED, INCLUDING, BUT NOT LIMITED TO, THE<br />
IMPLIED WARRANTIES OF MERCHANTABILITY AND FITNESS FOR A PARTICULAR PURPOSE, ARE MADE IN<br />
RELATION TO THE ACCURACY, RELIABILITY OR CONTENTS OF THIS DOCUMENT. NOKIA RESERVES THE<br />
RIGHT TO REVISE THIS DOCUMENT OR WITHDRAW IT AT ANY TIME WITHOUT PRIOR NOTICE.<br />
The availability of particular products and applications and services for these products may vary by region.<br />
Please check with your <strong>Nokia</strong> dealer for details, and availability of language options.<br />
2
Export controls<br />
This device may contain commodities, technology or software subject to export laws and regulations from<br />
the US and other countries. Diversion contrary to law is prohibited.<br />
The third-party applications provided with your device may have been created and may be owned by persons<br />
or entities not affiliated with or related to <strong>Nokia</strong>. <strong>Nokia</strong> does not own the copyrights or intellectual property<br />
rights to the third-party applications. As such, <strong>Nokia</strong> does not take any responsibility for end-user support,<br />
functionality of the applications, or the information in the applications or these materials. <strong>Nokia</strong> does not<br />
provide any warranty for the third-party applications.<br />
BY USING THE APPLICATIONS YOU ACKNOWLEDGE THAT THE APPLICATIONS ARE PROVIDED AS IS WITHOUT<br />
WARRANTY OF ANY KIND, EXPRESS OR IMPLIED, TO THE MAXIMUM EXTENT PERMITTED BY APPLICABLE LAW.<br />
YOU FURTHER ACKNOWLEDGE THAT NEITHER NOKIA NOR ITS AFFILIATES MAKE ANY REPRESENTATIONS<br />
OR WARRANTIES, EXPRESS OR IMPLIED, INCLUDING BUT NOT LIMITED TO WARRANTIES OF TITLE,<br />
MERCHANTABILITY OR FITNESS FOR A PARTICULAR PURPOSE, OR THAT THE APPLICATIONS WILL NOT<br />
INFRINGE ANY THIRD-PARTY PATENTS, COPYRIGHTS, TRADEMARKS, OR OTHER RIGHTS.<br />
FCC NOTICE<br />
Your device may cause TV or radio interference (for example, when using a telephone in close proximity to<br />
receiving equipment). The FCC can require you to stop using your telephone if such interference cannot be<br />
eliminated. If you require assistance, contact your local service facility. This device complies with part 15<br />
of the FCC rules. Operation is subject to the following two conditions: (1) This device may not cause<br />
harmful interference, and (2) this device must accept any interference received, including interference<br />
that may cause undesired operation. Any changes or modifications not expressly approved by <strong>Nokia</strong> could<br />
void the user's authority to operate this equipment.<br />
9210189/Issue 2<br />
3
Contents<br />
SAFETY.............................................. 6<br />
Support ............................................. 8<br />
Help ...................................................................... 8<br />
<strong>Nokia</strong> support and contact information .... 8<br />
1. Get started.................................... 9<br />
Insert a (U)SIM card and battery ................. 9<br />
Memory card...................................................... 9<br />
Charge the battery ........................................ 10<br />
Switch the device on and off..................... 11<br />
Antenna locations ......................................... 11<br />
Configuration settings ................................. 12<br />
Welcome application.................................... 12<br />
Settings wizard............................................... 12<br />
2. Your device ................................. 13<br />
Keys and parts ................................................ 13<br />
Standby mode................................................. 14<br />
Indicators ......................................................... 15<br />
Screen saver .................................................... 16<br />
Menu ................................................................. 16<br />
Mark items in an application..................... 16<br />
Switch between applications..................... 16<br />
Close an application ..................................... 17<br />
Volume control............................................... 17<br />
Display rotation.............................................. 17<br />
Turning control............................................... 17<br />
Keypad lock (keyguard)................................ 17<br />
Remote lock..................................................... 18<br />
Access codes ................................................... 18<br />
Download!........................................................ 19<br />
My own............................................................. 19<br />
Connect a compatible headset .................. 19<br />
Connect a USB data cable .......................... 20<br />
3. Call functions ............................. 20<br />
Make a voice call........................................... 20<br />
Answer or reject a call ................................. 22<br />
Video calls........................................................ 22<br />
Call settings..................................................... 23<br />
Video sharing .................................................. 24<br />
Log...................................................................... 26<br />
4. Write text................................... 26<br />
Traditional and predictive text input........ 26<br />
Copy and delete text..................................... 27<br />
5. Messaging .................................. 27<br />
Write and send messages ............................ 27<br />
Inbox.................................................................. 28<br />
Service messages............................................ 28<br />
E-mail................................................................ 29<br />
Mail for exchange.......................................... 29<br />
Outbox............................................................... 31<br />
Message reader............................................... 31<br />
View messages on the SIM card................ 31<br />
Cell broadcast ................................................. 31<br />
Service commands ......................................... 31<br />
Messaging settings........................................ 32<br />
6. Contacts ..................................... 32<br />
Save and manage contact information ... 32<br />
Contact groups ............................................... 33<br />
Add a ringing tone......................................... 33<br />
7. Positioning ................................. 33<br />
About GPS ........................................................ 33<br />
Assisted GPS .................................................... 34<br />
Set up GPS connection................................. 34<br />
Position requests............................................ 35<br />
Maps .................................................................. 35<br />
Landmarks ........................................................ 40<br />
GPS data ........................................................... 40<br />
8. Gallery ........................................ 41<br />
Main view......................................................... 41<br />
Download files ................................................ 42<br />
View images..................................................... 42<br />
Edit images ...................................................... 42<br />
Edit video clips................................................ 42<br />
Print images..................................................... 42<br />
Share online..................................................... 43<br />
9. Camera........................................ 44<br />
4
Capture images .............................................. 44<br />
Record video clips.......................................... 45<br />
Capture panoramic images......................... 45<br />
10.Media......................................... 45<br />
Music player.................................................... 45<br />
<strong>Nokia</strong> Podcasting........................................... 47<br />
Radio ................................................................. 49<br />
RealPlayer ........................................................ 50<br />
Recorder ........................................................... 50<br />
11.Internet...................................... 51<br />
Browse the web.............................................. 51<br />
Search ............................................................... 53<br />
12.Personalization.......................... 53<br />
Themes.............................................................. 53<br />
Profiles.............................................................. 54<br />
13.Time management .................... 54<br />
Clock.................................................................. 54<br />
Calendar ........................................................... 55<br />
14.Office applications ................... 55<br />
Active notes..................................................... 55<br />
Notes................................................................. 55<br />
Calculator......................................................... 55<br />
Converter.......................................................... 55<br />
Mobile dictionary........................................... 56<br />
Adobe Reader.................................................. 56<br />
Quickoffice ...................................................... 57<br />
15.Settings ..................................... 57<br />
Voice commands............................................ 57<br />
Phone settings................................................ 57<br />
Speech............................................................... 59<br />
16.Data management .................... 59<br />
Install or remove applications ................... 59<br />
File manager.................................................... 61<br />
Licenses ............................................................ 61<br />
Device manager.............................................. 62<br />
17.Connectivity.............................. 63<br />
Transfer or synchronize data...................... 63<br />
PC Suite............................................................ 64<br />
Bluetooth connectivity................................. 64<br />
USB connection .............................................. 65<br />
Remote synchronization .............................. 66<br />
Push to talk...................................................... 66<br />
Connection manager..................................... 67<br />
18.Enhancements .......................... 68<br />
19.Battery and charger information ..<br />
68<br />
<strong>Nokia</strong> battery authentication guidelines. 69<br />
Care and maintenance................... 70<br />
Additional safety information...... 71<br />
Index............................................... 75<br />
5
SAFETY<br />
Read these simple guidelines. Not following them may be dangerous or illegal. Read the<br />
complete user guide for further information.<br />
SWITCH ON SAFELY<br />
Do not switch the device on when wireless phone use is prohibited or when it<br />
may cause interference or danger.<br />
ROAD SAFETY COMES FIRST<br />
Obey all local laws. Always keep your hands free to operate the vehicle while<br />
driving. Your first consideration while driving should be road safety.<br />
INTERFERENCE<br />
All wireless devices may be susceptible to interference, which could<br />
affect performance.<br />
SWITCH OFF IN RESTRICTED AREAS<br />
Follow any restrictions. Switch the device off in aircraft, near medical<br />
equipment, fuel, chemicals, or blasting areas.<br />
QUALIFIED SERVICE<br />
Only qualified personnel may install or repair this product.<br />
ENHANCEMENTS AND BATTERIES<br />
Use only approved enhancements and batteries. Do not connect<br />
incompatible products.<br />
WATER-RESISTANCE<br />
Your device is not water-resistant. Keep it dry.<br />
About your device<br />
■<br />
The wireless device described in this guide is approved for use on the GSM/EGSM 850, 900,<br />
1800, and 1900 and WCDMA/HSDPA 1900/850 networks. Contact your service provider for<br />
more information about networks.<br />
When using the features in this device, obey all laws and respect local customs, privacy and<br />
legitimate rights of others, including copyrights.<br />
Copyright protection may prevent some images, music, and other content from being<br />
copied, modified, or transferred.<br />
Your device supports several methods of connectivity. Like computers, your device may be<br />
exposed to viruses and other harmful content. Exercise caution with messages, connectivity<br />
requests, browsing, and downloads. Only install and use services and other software from<br />
trustworthy sources that offer adequate security and protection against harmful software,<br />
6
such as applications that are Symbian Signed or have passed the Java Verifiedtesting. Consider<br />
installing antivirus and other security software on your device and any connected computer.<br />
Your device may have preinstalled bookmarks and links for third-party internet sites. You may<br />
also access other third-party sites through your device. Third-party sites are not affiliated<br />
with <strong>Nokia</strong>, and <strong>Nokia</strong> does not endorse or assume liability for them. If you choose to access<br />
such sites, you should take precautions for security or content.<br />
Warning: To use any features in this device, other than the alarm clock, the device<br />
must be switched on. Do not switch the device on when wireless device use may<br />
cause interference or danger.<br />
The office applications support common features of Microsoft Word, PowerPoint, and Excel<br />
(Microsoft Office 2000, XP, and 2003). Not all file formats can be viewed or modified.<br />
Remember to make back-up copies or keep a written record of all important information<br />
stored in your device.<br />
When connecting to any other device, read its user guide for detailed safety instructions.<br />
Do not connect incompatible products.<br />
Network services<br />
■<br />
To use the phone you must have service from a wireless service provider. Many of the features<br />
require special network features. These features are not available on all networks; other<br />
networks may require that you make specific arrangements with your service provider before<br />
you can use the network services. Your service provider can give you instructions and explain<br />
what charges will apply. Some networks may have limitations that affect how you can use<br />
network services. For instance, some networks may not support all language-dependent<br />
characters and services.<br />
Your service provider may have requested that certain features be disabled or not activated<br />
in your device. If so, these features will not appear on your device menu. Your device may<br />
also have a special configuration such as changes in menu names, menu order, and icons.<br />
Contact your service provider for more information.<br />
This device supports WAP 2.0 protocols (HTTP and SSL) that run on TCP/IP protocols. Some<br />
features of this device, such as multimedia messaging, web browsing, and e-mail require<br />
network support for these technologies.<br />
Battery removing<br />
■<br />
Always switch the device off and disconnect the charger before removing the battery.<br />
7
Support<br />
■<br />
Help<br />
Your device has context-sensitive help. To access help when an application is open, select<br />
Options > Help. To switch between help and the application that is open in the background,<br />
select and hold , and select from the list of open applications.<br />
To open help from the main menu, select > Help > Help. Select an application to view a list<br />
of help topics, and select the related help text. To open a keyword list, select Options > Search.<br />
■<br />
<strong>Nokia</strong> support and contact information<br />
Check www.nokia.com/support or your local <strong>Nokia</strong> website for the latest guides, additional<br />
information, downloads, and services related to your <strong>Nokia</strong> product.<br />
On the website, you can get information on the use of <strong>Nokia</strong> products and services. If you<br />
need to contact <strong>Nokia</strong> Care services, check the list of local <strong>Nokia</strong> Care contact centres at<br />
www.nokia.com/customerservice.<br />
For maintenance services, check your nearest <strong>Nokia</strong> Care point at www.nokia.com/repair.<br />
Software updates<br />
<strong>Nokia</strong> may produce software updates that may offer new features, enhanced functions, or<br />
improved performance. You may be able to request these updates through the <strong>Nokia</strong> Software<br />
Updater PC application. To update the device software, you need the <strong>Nokia</strong> Software Updater<br />
application and a compatible PC with Microsoft Windows 2000, XP, or Vista operating system,<br />
broadband internet access, and a compatible data cable to connect your device to the PC.<br />
To get more information and to download the <strong>Nokia</strong> Software Updater application, visit<br />
www.nokia.com/softwareupdate or your local <strong>Nokia</strong> web site.<br />
If software updates over the air are supported by your network, you may also be able to<br />
request updates through the device. See ”Update software,” p. 62.<br />
Downloading software updates may involve the transmission of large amounts of data through<br />
your service provider's network. Contact your service provider for information about data<br />
transmission charges.<br />
Make sure that the device battery has enough power, or connect the charger before starting<br />
the update.<br />
8
1. Get started<br />
■<br />
Insert a (U)SIM card and battery<br />
This device uses BL-5F batteries.<br />
1. To open the back cover of the device,<br />
press the back cover release button.<br />
2. Lift the back cover to remove it.<br />
3. To remove the battery, lift it from<br />
the end.<br />
4. Slide the (U)SIM card into the SIM card<br />
holder. Ensure that the gold-colored<br />
contact area on the card is facing downward<br />
on the device, and the beveled corner faces<br />
toward the card holder slot.<br />
5. Replace the battery.<br />
6. Replace the back cover.<br />
Memory card<br />
■<br />
Use only compatible microSD and microSDHC cards approved by <strong>Nokia</strong> for use<br />
with this device. <strong>Nokia</strong> uses approved industry standards for memory cards, but<br />
some brands may not be fully compatible with this device. Incompatible cards<br />
may damage the card and the device and corrupt data stored on the card.<br />
Insert a memory card<br />
Note that the memory card may be supplied with the device, and may already be inserted.<br />
9
1. Open the memory card slot door.<br />
2. Place the memory card in the slot<br />
with the gold-colored area facing<br />
down. Push the card gently to lock<br />
it into place.<br />
3. Close the slot door.<br />
Remove a memory card<br />
Important: Do not remove the memory card in the middle of an operation when the<br />
card is being accessed. Removing the card in the middle of an operation may<br />
damage the memory card as well as the device, and data stored on the card may<br />
be corrupted.<br />
1. In the standby mode, briefly press the power key.<br />
2. Scroll to Remove memory card, and select OK > Yes.<br />
3. Open the memory card slot door.<br />
4. Push the card gently to release it.<br />
5. Pull the card out, and select OK.<br />
6. Close the slot door.<br />
Charge the battery<br />
■<br />
Your battery has been precharged but the charging levels may vary.<br />
1. Connect the charger to the wall outlet.<br />
2. Connect the charger to the device. You<br />
can use your device while it is charging.<br />
3. When the battery is fully charged,<br />
disconnect the charger from the<br />
device, then from the wall outlet.<br />
If the battery is completely discharged,<br />
it may take a few minutes before the<br />
charging indicator appears on the<br />
display or before any calls can be made.<br />
The charging time depends on the charger<br />
and the battery used.<br />
10
■<br />
Switch the device on and off<br />
Press and hold the end key.<br />
If the device asks for a PIN code, enter the PIN code, and<br />
select OK.<br />
If the device asks for the lock code, enter the lock code, and<br />
select OK. The factory setting for the lock code is 12345.<br />
Set time and date<br />
To set the correct time zone, time, and date, select the<br />
country you are presently in, then enter the local time<br />
and date.<br />
My <strong>Nokia</strong><br />
My <strong>Nokia</strong> is a free service that sends you tips, tricks, and support for your <strong>Nokia</strong> device<br />
regularly as text messages. If My <strong>Nokia</strong> is available in your country and supported by your<br />
service provider, your device invites you to join the My <strong>Nokia</strong> service after you have set the<br />
time and date.<br />
Select the language for the service. If you change the language, the device restarts.<br />
To sign-up to My <strong>Nokia</strong>, select Accept and follow the instructions on the display.<br />
To sign-up to My <strong>Nokia</strong> later, select > Help > My <strong>Nokia</strong>.<br />
■<br />
Antenna locations<br />
Cellular antenna (1)<br />
Bluetooth antenna (2)<br />
GPS antenna (3)<br />
Your device may have internal and external antennas. As with any radio<br />
transmitting device, avoid touching the antenna area unnecessarily<br />
while the antenna is transmitting or receiving. Contact with such an<br />
antenna affects the communication quality and may cause the device to<br />
operate at a higher power level than otherwise needed and may reduce<br />
the battery life.<br />
11
■<br />
Configuration settings<br />
Before you can use multimedia messaging, push to talk, e-mail, synchronization, streaming,<br />
and the browser, you must have the proper configuration settings on your device. Your device<br />
may automatically configure browser, multimedia messaging, access point, and streaming<br />
settings based on the SIM card used. Otherwise, you can use the Sett. wizard application to<br />
configure the settings, or you may receive the settings directly as a configuration message,<br />
which you save to your device. For more information on availability, contact your service<br />
provider or nearest authorized <strong>Nokia</strong> dealer.<br />
When you receive a configuration message, and the settings are not automatically saved<br />
and activated, 1 new message is displayed. To save the settings, select Show > Options ><br />
Save. You may need to enter a PIN code provided by the service provider.<br />
■<br />
Welcome application<br />
The Welcome application starts when you switch on your device for the first time. With the<br />
Welcome application, you can access the following applications:<br />
Sett. wizard — Configure connection settings. See ”Settings wizard,” p. 12.<br />
E-mail settings — Configure e-mail settings. See ”E-mail settings,” p. 32.<br />
Switch — Copy or synchronize data from other compatible devices.<br />
Tutorial — Learn about the features of your device and how to use them. To start the tutorial<br />
later, select > Help > Tutorial and a tutorial item.<br />
To open Welcome later, select > Help > Welcome.<br />
■<br />
Settings wizard<br />
The setting wizard application configures your device for operator and e-mail settings based<br />
on your service provider. Configuring other settings may also be possible.<br />
To use these services, you may have to contact your service provider to activate a data<br />
connection or other services.<br />
Select > Settings > Sett. wizard.<br />
12
2. Your device<br />
■<br />
Keys and parts<br />
1 - Earpiece<br />
2 - Secondary camera lens<br />
3 - Light sensor<br />
4 - Display<br />
5 - Left and right selection keys<br />
6 - Navi TM scroll key, hereafter referred to as scroll key,<br />
and Navi key light around it<br />
7 - Menu key<br />
8 - Clear key<br />
9 - Call key<br />
10 - Power key / end key<br />
11 - <strong>Navigator</strong> key with GPS light<br />
12 - Number keys<br />
13 - Charger connector<br />
14 - Headset connector<br />
15 - Volume keys<br />
16 - Camera key<br />
17 - Camera flash<br />
18 - Main camera lens<br />
19 - Loudspeaker<br />
20 - Micro USB connector<br />
21 - Memory card slot<br />
22 - Back cover release button<br />
23 - Microphone<br />
During extended operation, the device may feel warm. In most cases, this condition is<br />
normal. If you suspect the device is not working properly, take it to the nearest authorized<br />
service facility.<br />
13
■<br />
Standby mode<br />
When you have switched on the device, and it is registered to a network, the device is in the<br />
standby mode and ready for use.<br />
To select the view for the standby mode, select > Settings > Phone sett. > General ><br />
Personalization > Standby mode > Standby theme.<br />
Keep your device away from magnets or magnetic fields as they may cause some<br />
applications to activate unexpectedly.<br />
Shortcuts in the standby mode<br />
To open a list of most recently dialed numbers, press the call key.<br />
To call your voice mailbox, press and hold the 1 key.<br />
To use the voice commands or voice dialling, press and hold the right selection key.<br />
To listen to new received messages, press and hold the left selection key until Msg. reader starts.<br />
To change the profile, briefly press the power key, and select a profile.<br />
To quickly change to silent profile from any other profile, press and hold #.<br />
To start a connection to the web, press and hold 0.<br />
Depending on the selected standby theme, you can select applications or events to add to a<br />
shortcut list in the standby mode or the scroll keys. To select the applications or events,<br />
select > Settings > Phone sett. > General > Personalization > Standby mode > Shortcuts.<br />
Offline profile<br />
To quickly activate the Offline profile, in the standby mode, briefly press the power key,<br />
and select Offline. To leave the Offline profile, briefly press the power key, and select<br />
another profile.<br />
When the Offline profile is active, all the connections to a cellular network are turned off.<br />
However, you can use your device without a SIM card, and listen to the radio or music using<br />
the Music Player. Remember to switch off your device when wireless phone use is prohibited.<br />
Important: In the offline profile you cannot make or receive any calls, or use other<br />
features that require cellular network coverage. Calls may still be possible to the<br />
official emergency number programmed into your device. To make calls, you must<br />
first activate the phone function by changing profiles. If the device has been locked,<br />
enter the lock code.<br />
14
■<br />
Icons<br />
Indicators<br />
or<br />
The device is connected to a WCDMA or GSM network.<br />
HSDPA (network service) in the WCDMA network is activated.<br />
The device is in the Offline profile and not connected to a cellular network.<br />
A memory card is inserted in the device.<br />
You have unread messages in the inbox in Messaging.<br />
You have new e-mail in your remote mailbox.<br />
You have messages waiting to be sent in outbox.<br />
You have missed calls.<br />
Ringing type is set to Silent and Message alert tone and E-mail alert tone are set<br />
to Off.<br />
The device keypad is locked.<br />
The loudspeaker is activated.<br />
An alarm is active.<br />
All calls to the device are diverted to another number.<br />
or<br />
A headset or a loopset is connected to the device.<br />
or or A GPRS packet data connection is active, or the connection is on hold, or a<br />
connection is available.<br />
or or A packet data connection is active in a part of the network that supports<br />
EGPRS, or the connection is on hold, or a connection is available. Your device<br />
may not use EGPRS in the data transfer.<br />
or or A WCDMA packet data connection is active, or the connection is on hold, or a<br />
connection is available.<br />
or<br />
Bluetooth connectivity is switched on, or data is being transmitted using<br />
Bluetooth technology.<br />
A USB connection is active.<br />
The GPS receiver is active<br />
Other indicators may also be shown.<br />
15
Light indication<br />
GPS light<br />
The GPS light blinks when your device is trying to establish a GPS connection, and remains on<br />
when the GPS connection is established. When you close an application using GPS connection,<br />
the light blinks quickly a few times.<br />
Navi key light<br />
You can set the Navi key light to blink slowly to indicate when the device is switched on.<br />
The light turns on for a few second at intervals of approximately 20 seconds. To activate<br />
the status light, select > Settings > Phone sett. > General > Personalization > Standby<br />
mode > Status light > On. The status light is not active in bright ambient light.<br />
Missed events<br />
The Navi key light blinks slowly for a few minutes after a missed event, such as a missed call.<br />
■<br />
Screen saver<br />
To set the screen saver settings, select > Settings > Phone sett. > General > Personalization ><br />
Display > Screen saver. To set the timeout period after which the screen saver is activated,<br />
select Screen saver time-out. To set for how long the screen saver is active, select Screen<br />
saver duration.<br />
■<br />
Menu<br />
In the menu, you can access the functions in your device. To access the main menu, select .<br />
To open an application or a folder, scroll to it, and press the scroll key.<br />
If you change the order of the functions in the menu, the order may differ from the default<br />
order described in this user guide.<br />
To change the menu view, select Options > Change Menu view and a view type.<br />
■<br />
Mark items in an application<br />
To mark or unmark an item in applications, such as an image or a video clip in Gallery, press<br />
#. To mark or unmark several consecutive items, press and hold #, and scroll.<br />
■<br />
Switch between applications<br />
To switch between open applications, do one of the following:<br />
• Select Options > Show open applicats. and the application.<br />
• Press and hold . Scroll to an application, and select it.<br />
16
■<br />
Close an application<br />
To close an application or a folder, select Back and Exit as many times as needed to return to<br />
the standby mode, or select Options > Exit.<br />
Leaving applications running in the background increases the demand on battery power and<br />
reduces the battery life.<br />
Volume control<br />
■<br />
To adjust the earpiece or loudspeaker volume during a call or when listening to an audio file,<br />
press the volume keys. To activate or deactivate the loudspeaker during a call, select Loudsp.<br />
or Handset.<br />
Warning: Do not hold the device near your ear when the loudspeaker is in use,<br />
because the volume may be extremely loud.<br />
Display rotation<br />
■<br />
Your device has an accelerometer that senses the movement of the device.<br />
To rotate the display content automatically when you turn the device on its left side or<br />
back to a vertical position, select > Settings > Phone sett. > General > Sensor settings ><br />
Sensors On. Some applications and features may not support rotating the display content.<br />
■<br />
Turning control<br />
To be able to silence calls and snooze alarms by turning the device so that the display<br />
faces down, select > Settings > Phone sett. > General > Sensor settings > Sensors > On.<br />
Select Turning control, and mark Silencing calls and Snoozing alarms.<br />
■<br />
Keypad lock (keyguard)<br />
To lock the keypad when you close the slide, select > Settings > Phone sett. > General ><br />
Slide handling > Keyguard activation > Change > On when closing slide.<br />
To set the device to automatically lock the keypad after a certain time, select > Settings ><br />
Phone sett. > General > Security > Phone and SIM card > Keypad autolock period > User<br />
defined and the desired time.<br />
Opening the slide unlocks the keypad. To unlock the keypad when the slide is closed, press<br />
the left selection key and select OK within 1.5 seconds.<br />
When the device or keypad is locked, calls may be possible to the official emergency number<br />
programmed into your device.<br />
17
Remote lock<br />
■<br />
To prevent unauthorized use of your device, you can lock your device and memory card<br />
remotely by using a text message. To lock your device, you must define the message text and<br />
then send that text message to your device. To unlock your device, you need the lock code.<br />
To enable remote locking and to define the text message content to be used, select ><br />
Settings > Phone sett. > General > Security > Phone and SIM card > Remote phone locking ><br />
Enabled. Enter the text message content (5 to 20 characters), verify it, and enter the lock<br />
code.<br />
Access codes<br />
■<br />
To set how your device uses the access codes, select > Settings > Phone sett. > General ><br />
Security > Phone and SIM card.<br />
Lock code<br />
The lock code (5 digits) helps to lock your device. The preset code is 12345. You can change<br />
the code. Keep the new code secret and in a safe place separate from your device.<br />
To change the lock code, select > Settings > Phone sett. > General > Security > Phone<br />
and SIM card > Lock code. To activate the automatic locking of your device, select Phone<br />
autolock period > User defined.<br />
If you forget the code and your device is locked, your device will require service and additional<br />
charges may apply. For more information, contact a <strong>Nokia</strong> Care point or your device dealer.<br />
When the device or keypad is locked, calls may be possible to the official emergency number<br />
programmed into your device.<br />
PIN codes<br />
The personal identification number (PIN) code or the universal personal identification number<br />
(UPIN) code (4 to 8 digits) help to protect your SIM card. The (U)PIN code is usually supplied<br />
with the SIM card. Set the device to request the code each time the device is switched on,<br />
select > Settings > Phone sett. > General > Security > Phone and SIM card > PIN code<br />
request > On.<br />
The PIN2 code may be supplied with the SIM card and is required for some functions.<br />
The module PIN is required to access the information in the security module. The signing PIN<br />
is required for the digital signature. The module PIN and the signing PIN are supplied with<br />
the SIM card if the SIM card has a security module in it.<br />
18
PUK codes<br />
The personal unblocking key (PUK) code or the universal personal unblocking key (UPUK)<br />
code (8 digits) are required to change a blocked PIN code and UPIN code, respectively.<br />
The PUK2 code is required to change a blocked PIN2 code.<br />
If needed, contact your local service provider for the codes.<br />
Restriction password<br />
The restriction password (4 digits) is required when using call restriction. You can obtain the<br />
password from your service provider. If the password is blocked, contact your service provider.<br />
Download!<br />
■<br />
Download! (network service) is a mobile content shop available on your device.<br />
With Download! you can discover, preview, buy, download, and upgrade content, services,<br />
and applications. The items are categorized under catalogs and folders provided by different<br />
service providers. The available content depends on your service provider.<br />
Select > Download! or > Internet > Download!, depending upon your device.<br />
Download! uses your network services to access the most up-to-date content. For information<br />
on additional items available through Download!, contact your service provider, or the<br />
supplier or manufacturer of the item.<br />
My own<br />
■<br />
You can install applications to your device. To access the applications, select ><br />
Applications > My own.<br />
Important: Only install and use applications and other software from trusted<br />
sources, such as applications that are Symbian Signed or have passed the Java<br />
Verified TM testing.<br />
Connect a compatible headset<br />
■<br />
Do not connect products that create an<br />
output signal as this may cause damage<br />
to the device. Do not connect any voltage<br />
source to the <strong>Nokia</strong> AV Connector.<br />
When connecting any external device or<br />
any headset, other than those approved<br />
by <strong>Nokia</strong> for use with this device, to the<br />
<strong>Nokia</strong> AV Connector, pay special attention<br />
to volume levels.<br />
19
Connect a USB data cable<br />
■<br />
Connect a compatible USB data cable to<br />
the USB connector.<br />
To select the default USB connection mode<br />
or change the active mode, select ><br />
Settings > Connectivity > USB > USB<br />
connection mode and the desired mode.<br />
To set whether the default mode is<br />
activated automatically, select Ask on<br />
connection > No.<br />
3. Call functions<br />
To adjust the volume during a call, press the volume keys.<br />
■<br />
Make a voice call<br />
1. In the standby mode, enter the phone number, including the area code. Press the clear key<br />
to remove a number.<br />
For international calls, press * twice for the international prefix (the + character replaces<br />
the international access code), and enter the country code, area code (omit the leading<br />
zero if necessary), and phone number.<br />
The character + as replacement for the international access code may not work in all<br />
regions. In this case, enter the international access code directly.<br />
2. To call the number, press the call key.<br />
3. To end the call, or to cancel the call attempt, press the end key.<br />
To select whether active calls are ended when closing the slide, select > Settings ><br />
Phone sett. > General > Slide handling > Closing the slide > Options > Change > End<br />
active call or Continue active call.<br />
To make a call from Contacts, select > Contacts. Scroll to the desired name; or enter the first<br />
letters of the name, and scroll to the desired name. To call the number, press the call key.<br />
To call a recently dialed number from the standby mode, press the call key.<br />
20
1-touch dialing<br />
The 1-touch dialing feature is a quick way to call frequently used numbers from the standby<br />
mode. You need to assign a phone number to the 1-touch dialing keys 2 to 9 (the 1 is reserved<br />
for the voice call mailbox), and set 1-touch dialing to On.<br />
To assign a phone number to a 1-touch dialing key, select > Settings > 1-touch. Scroll to<br />
a key icon, and select Assign and the contact to whom you want to assign the 1-touch dialing<br />
key. For information on adding a contact, see ”Save and manage contact information,” p. 32.<br />
To change the number, select Options > Change.<br />
To activate 1-touch dialing, select > Settings > Phone sett. > Phone > Call > 1-touch<br />
dialing > On.<br />
To call a 1-touch dialing number, press and hold the 1-touch dialing key until the call begins.<br />
Call mailbox<br />
To call your voice mailbox (network service), from the standby mode, press and hold 1.<br />
You can have call mailboxes for voice calls and multiple phone lines.<br />
To define the call mailbox number if no number is set, select > Settings > Call mailbox.<br />
Scroll to Voice mailbox, and enter the corresponding mailbox number. To change the call<br />
mailbox number, select Options > Change number. For the call mailbox number, contact<br />
your service provider.<br />
Voice dialing<br />
A voice tag is added automatically to all entries in Contacts. Use long names, and avoid<br />
similar names for different numbers.<br />
Make a voice dialing call<br />
Voice tags are sensitive to background noise. Use voice tags in a quiet environment.<br />
Note: Using voice tags may be difficult in a noisy environment or during an<br />
emergency, so you should not rely solely upon voice dialling in all circumstances.<br />
1. In the standby mode, press and hold the right selection key.<br />
If you are using a compatible headset with the headset key, press and hold the<br />
headset key.<br />
2. When Speak now is displayed, speak the voice command clearly. The device plays the<br />
voice command of the best match. After 1.5 seconds, the device dials the number; if the<br />
result is not the correct one, before dialling select another entry.<br />
Make a conference call<br />
Your device supports conference calls (network service) between a maximum of six<br />
participants, including yourself.<br />
21
1. Make a call to the first participant.<br />
2. To make a call to another participant, select Options > New call.<br />
3. To create the conference call when the new call is answered, select Options > Conference.<br />
To add another person to the conference call, repeat step 2, and select Options ><br />
Conference > Add to conference.<br />
4. To end the conference call, press the end key.<br />
■<br />
To answer a call, press the call key.<br />
To mute the ringing tone, select Silence.<br />
To reject the call, press the end key, or select Options > Decline. If you have activated<br />
Call forwarding > If busy, rejecting the call forwards the call.<br />
To send a text message as a reply to the caller instead of answering the call, select Options ><br />
Send message. To activate the text message reply and edit the message, select > Settings ><br />
Phone sett. > Phone > Call > Decline call with msg. and Message text.<br />
To determine whether calls are answered automatically when opening the slide, select ><br />
Settings > Phone sett. > General > Slide handling > Opening the slide > Change > Answer<br />
incoming call or Call not answered > OK.<br />
22<br />
Answer or reject a call<br />
Call waiting<br />
During a call, to answer the waiting call, press the call key. The first call is put on hold.<br />
To switch between the two calls, select Swap. To end the active call, press the end key.<br />
To activate the call waiting function (network service), select > Settings > Phone sett. ><br />
Phone > Call > Call waiting > Activate.<br />
■<br />
Video calls<br />
Make a video call<br />
To make a video call, you may need to have a USIM card and be within the coverage of a<br />
WDCMA network. For availability of and subscription to video call services, contact your<br />
service provider. A video call can only be made between two parties and when no other<br />
voice, video, or data calls are active. The video call can be made to a compatible mobile<br />
phone or an ISDN client.<br />
You have captured a still image to be sent instead of video sending.<br />
You have denied video sending from your device.<br />
1. Enter the phone number in the standby mode and select Video call. Or, select ><br />
Contacts, scroll to the desired contact, and select Options > Video call.
2. To change between showing video or only hearing sound during a video call, select from<br />
the toolbar Enable video sending or Disable video sending.<br />
If you have denied video sending during a video call, the call is still charged as a video call.<br />
Check the pricing with your network operator or service provider.<br />
3. To end the video call, press the end key.<br />
Answer a video call<br />
When a video call arrives, is displayed.<br />
To answer the video call, press the call key. Allow video image to be sent to caller? is shown.<br />
If you select Yes, the image captured by the camera in your device is shown to the caller.<br />
Otherwise, video sending is not activated.<br />
If you have denied video sending during a video call, the call is still charged as a video call.<br />
Check the pricing with your service provider.<br />
To end the video call, press the end key.<br />
Call settings<br />
■<br />
Call<br />
Select > Settings > Phone sett. > Phone > Call and from the following:<br />
Send my caller ID (network service) — to display or hide your phone number from the person<br />
to whom you are calling<br />
Call waiting (network service) — See ”Call waiting,” p. 22.<br />
Decline call with msg. and Message text — See ”Answer or reject a call,” p. 22.<br />
Own video in recvd. call— to set whether you allow to send your own video image when you<br />
receive a video call<br />
Image in video call — to select a still image to be shown when you deny a video call<br />
Automatic redial — to set your device to make a maximum of 10 attempts to connect the<br />
call after an unsuccessful call attempt<br />
Show call duration and Summary after call — to set the device to display the call duration<br />
during a call and the approximate duration of the last call<br />
1-touch dialing — See ”1-touch dialing,” p. 21.<br />
Anykey answer — to answer an incoming call by briefly pressing any key, except the left and<br />
right selection keys, volume keys, and end key<br />
Line in use (network service) — to select the phone lines for making calls and sending short<br />
messages. This is shown only if the SIM card supports two phone lines.<br />
Line change (network service) — to enable or disable the line selection<br />
23
Call forwarding<br />
1. Select > Settings > Phone sett. > Phone > Call forwarding (network service).<br />
2. Select which calls you want to forward, for example, Voice calls.<br />
3. Select the desired option. For example, to forward voice calls when your number is busy<br />
or when you reject an incoming call, select If busy.<br />
4. Select Options > Activate and the phone number to which you want to forward the calls.<br />
Several forwarding options can be active at the same time.<br />
Call restriction and call forwarding cannot be active at the same time.<br />
Call restriction<br />
1. Select > Settings > Phone sett. > Phone > Call restriction (network service) to restrict<br />
the calls that you make and receive with your device.<br />
2. Scroll to the desired restriction option, and select Options > Activate. To change the<br />
settings, you need the restriction password given by your service provider.<br />
Call restriction and call forwarding cannot be active at the same time.<br />
When calls are restricted, calls may be possible to certain official emergency numbers.<br />
Network<br />
Select > Settings > Phone sett. > Phone > Network and from the following:<br />
Network mode — to select which network to use (this is shown only if it is supported by<br />
the service provider). If you select Dual mode, the device uses the GSM or WDCMA<br />
network automatically.<br />
Operator selection — to set the device to search for and automatically select one of the<br />
available networks, select Automatic. To select the desired network <strong>manual</strong>ly from a list of<br />
networks, select Manual. The selected network must have a roaming agreement with your<br />
home network.<br />
Cell info display (network service) — to set the device to indicate when it is used in a cellular<br />
network based on microcellular network (MCN) technology, and to activate cell info reception<br />
■<br />
24<br />
Video sharing<br />
Use video sharing to send live video from your mobile device to another compatible mobile<br />
device during a voice call.<br />
Video sharing requirements<br />
Video sharing requires a 3G universal mobile telecommunications system (UMTS) connection.<br />
For information about network availability and the fees associated with this application,<br />
contact your service provider.
To use video sharing, you must do the following:<br />
• Ensure that your device is set up for person-to-person connections.<br />
• Ensure that both the sender and recipient are registered to the WDCMA network.<br />
• Ensure you have an active UMTS connection and you are within WDCMA network<br />
coverage. If you move away from a WDCMA network during the sharing session, the<br />
sharing session is discontinued, but your voice call continues.<br />
Video sharing settings<br />
A person-to-person connection is also known as a session initiation protocol (SIP)<br />
connection. Before you can use video sharing, ask your service provider for the configured<br />
SIP profile to be used in your device.<br />
Select > Settings > Phone sett. > Connection > Video sharing and from the following:<br />
Video sharing — to select whether the video sharing is enabled<br />
SIP profile — to select a SIP profile<br />
Video saving — to set whether the live videos are automatically saved<br />
Preferred saving memory — to select whether to save the videos to the device memory or to a<br />
memory card<br />
Capability alert tone — to set an alert tone to sound when video sharing is available during<br />
acall<br />
If you know a recipient’s SIP address, you can save it to Contacts. Select > Contacts, the<br />
contact, and Options > Edit > Options > Add detail > SIP or Share video. Enter the SIP<br />
address (username@domainname). You can use an IP address instead of a domain name.<br />
Share live video or video clip<br />
1. To share live video you are recording with the device camera, select Options > Share<br />
video > Live video during a voice call. To share a saved video clip, select Video clip and<br />
the clip you want to share.<br />
2. The device sends the invitation to the SIP address you saved to Contacts.<br />
If necessary, to send the invitation, select the SIP address of the recipient; or enter a SIP<br />
address, and select OK.<br />
3. Sharing begins automatically when the recipient accepts the invitation, and the<br />
loudspeaker is active. Use the toolbar buttons to control the video sharing.<br />
4. To end the sharing session, select Stop. To end the voice call, press the end key.<br />
Accept an invitation<br />
Your device rings when you receive an invitation. The invitation shows the sender’s name or<br />
SIP address. Select Yes to begin the sharing session. To decline the invitation and to return to<br />
the voice call, select No.<br />
25
■<br />
Log<br />
To view missed, received, or dialled calls; text messages; packet data connections; and fax<br />
and data calls registered by the device, select > Log.<br />
In the standby mode, you can use the call key as a shortcut to Dialed numbers in the Recent<br />
calls log (network service).<br />
Note: The actual invoice for calls and services from your service provider may vary,<br />
depending on network features, rounding off for billing, taxes, and so forth.<br />
Note: Some timers, including the life timer, may be reset during service or<br />
software upgrades.<br />
4. Write text<br />
■<br />
When you write text, on the display indicates predictive text input and traditional<br />
text input. To set the predictive text input on or off, press # repeatedly, or press *, and select<br />
Activate predictive text or Predictive text > Off.<br />
, , or next to the text input indicator indicates the character case or<br />
number mode. To change the character case, or to change between letter and number mode,<br />
press # repeatedly.<br />
To change the writing language of your device, select > Settings > Phone sett. > General ><br />
Personalization > Language > Writing language. The writing language affects the characters<br />
available when writing text and the predictive text dictionary used. Not all characters<br />
available under a number key are printed on the key.<br />
26<br />
Traditional and predictive text input<br />
Write with traditional text input<br />
Press a number key, 2 to 9, repeatedly until the desired character appears. Press the 1 key<br />
for the most common punctuation marks and special characters.<br />
If the next letter you want is on the same key as the present one, wait until the cursor<br />
appears (or scroll forward to end the time-out period), and enter the letter.<br />
Write with predictive text input<br />
1. Press a number key, 2–9, only once for one letter. The word changes after every keypress.<br />
For the most common punctuation marks, press 1.<br />
2. When you have finished the word and it is correct, to confirm it, scroll forward or insert<br />
aspace.<br />
If the word is not correct, to view the matching words the dictionary has found one by<br />
one, press * repeatedly.
If the ? character is shown after the word, the word you intended to write is not in the<br />
dictionary. To add a word to the dictionary, select Spell. Enter the word (up to 32 letters),<br />
and select OK. The word is added to the dictionary. When the dictionary becomes full, a<br />
new word replaces the oldest added word.<br />
Common functions in traditional and predictive text input<br />
To insert a number, press and hold the number key.<br />
To enter punctuation marks and special characters, press and hold *.<br />
To erase a character, press the clear key. To erase more characters, press and hold the<br />
clear key.<br />
To insert a space, press 0. To move the cursor to the next line, press 0 three times.<br />
■<br />
Copy and delete text<br />
1. To select letters and words, press and hold #, and at the same time scroll left or right.<br />
To select lines of text, press and hold #, and at the same time scroll up or down.<br />
2. To copy the text, press and hold #, and at the same time select Copy.<br />
To delete the selected text, press the clear key.<br />
3. To insert the text, scroll to the insertion point, press and hold #, and at the same time<br />
select Paste.<br />
5. Messaging<br />
Before you can receive or send messages or e-mail, you must have the necessary settings<br />
and access points defined. Contact your service provider for the settings.<br />
Write and send messages<br />
■<br />
Your device supports the sending of text messages beyond the character limit for a single<br />
message. Longer messages are sent as a series of two or more messages. Your service provider<br />
may charge accordingly. Characters that use accents or other marks, and characters from<br />
some language options, take up more space, limiting the number of characters that can be<br />
sent in a single message.<br />
The wireless network may limit the size of MMS messages. If the inserted picture exceeds<br />
this limit, the device may make it smaller so that it can be sent by MMS.<br />
Only devices that have compatible features can receive and display multimedia messages.<br />
The appearance of a message may vary depending on the receiving device.<br />
27
1. Select > Messaging > New message and the message type. To create a text message<br />
or multimedia message, select Message. The message type changes automatically based<br />
on the content.<br />
2. In the To field, enter the phone numbers or e-mail addresses of the recipients, or, to select<br />
recipients from Contacts, press the scroll key. Separate recipients with a semicolon (;).<br />
3. To enter the subject for a multimedia, or e-mail message, scroll down to the Subject<br />
field. If the subject field is not visible for a multimedia message, select Options ><br />
Message header fields, mark Subject, and select OK.<br />
4. Scroll down to the message field and enter the message content.<br />
When you write a text message, the message length indicator shows how many<br />
characters you can enter in the message. For example, 10 (2) means that you can still<br />
add 10 characters for the text to be sent as a series of two text messages.<br />
To insert an object, such as an image, video clip, note, or a business card, to a multimedia,<br />
or e-mail message, press the scroll key, and select Insert content.<br />
To record a new sound clip for an audio message, select Record. To use a previously<br />
recorded sound clip, select Options > Insert sound clip > From Gallery.<br />
5. To send the message, select Options > Send.<br />
■<br />
Inbox<br />
Inbox contains received messages except e-mail and cell broadcast messages. To read<br />
received messages, select > Messaging > Inbox and the message.<br />
To view the list of media objects that are included in the multimedia message, open the<br />
message, and select Options > Objects.<br />
Your device can receive many kinds of messages, such as operator logos, business cards,<br />
calendar entries, and ringing tones. You can save the special message content to your<br />
device. For example, to save a received calendar entry to the calendar, select Options ><br />
Save to Calendar.<br />
The appearance of a message may vary depending on the receiving device.<br />
■<br />
Service messages<br />
Service messages (network service) are notifications that may contain a text message or the<br />
address of a browser service.<br />
To define whether service messages are enabled and whether the messages are downloaded<br />
automatically, select > Messaging > Options > Settings > Service message.<br />
28
E-mail<br />
■<br />
Before you can use e-mail, you must have an e-mail account and the correct settings. To check<br />
the availability and the settings of your e-mail account, contact your e-mail service provider.<br />
You must also set up a mailbox in your device. When you create a new mailbox, the name<br />
you give to the mailbox replaces New mailbox. You can have up to six mailboxes.<br />
IMAP4 and POP3 mailboxes<br />
Select > Messaging and the mailbox. Connect to mailbox? is displayed. To connect to<br />
your mailbox (network service), select Yes, or to view previously retrieved e-mail messages<br />
offline, select No.<br />
To connect to the mailbox afterwards, select Options > Connect. When you are online, to<br />
end the data connection to the remote mailbox, select Options > Disconnect.<br />
Retrieve and read e-mail messages<br />
1. Select Options > Retrieve e-mail and whether you want to retrieve new, selected, or<br />
all messages.<br />
2. To open an e-mail message, select it.<br />
To view e-mail attachments, indicated with , select Options > Attachments. You can<br />
open, save or send attachments in supported formats.<br />
Delete e-mail messages<br />
To delete an e-mail message from the device and retain it in the remote mailbox, select<br />
Options > Delete > Phone only. To delete an e-mail from both the device and the remote<br />
mailbox, select Options > Delete > Phone and server.<br />
To cancel deletion of an e-mail from both the device and server, scroll to an e-mail that has<br />
been marked to be deleted during the next connection, and select Options > Restore.<br />
Sync mailboxes<br />
Select > Messaging and the sync mailbox.<br />
To synchronize your device with the remote mailbox, select Options > Synchronization > Start.<br />
To view received messages, select Inbox and the message.<br />
Mail for exchange<br />
■<br />
With Mail for Exchange, you can access the e-mail, calendar, contacts (address book), and<br />
tasks of your Microsoft® Exchange account on your mobile device. Keeping the entries on<br />
your mobile device updated with the entries on your Exchange account is possible through<br />
the process of synchronization.<br />
29
The availability of Mail for Exchange in your device depends on the software version of your<br />
device.<br />
You need an Exchange e-mail account and your Exchange administrator must have enabled<br />
your account for synchronization. Contact your administrator or e-mail account provider for<br />
details.<br />
Note: You can also install the standalone Company directory application instead<br />
of Mail for Exchange. With Company directory, you can search for contacts within<br />
the company directory. The same search function is included in Mail for Exchange<br />
as well. You cannot send Mail for Exchange e-mail with the standalone Company<br />
directory.<br />
Synchronization<br />
Synchronization updates the e-mail, calendar, contacts, and tasks content on your mobile<br />
device with the content of your Microsoft Exchange account. You can customize the way<br />
you synchronize by setting up a profile in which you can:<br />
• Select the content you want to synchronize - e-mail, calendar, contacts, tasks, or any<br />
combination of the four.<br />
• Set up a schedule by which Mail for Exchange automatically synchronizes. (You can also<br />
synchronize <strong>manual</strong>ly at any time.)<br />
• Resolve content conflicts during synchronization by specifying whether the content of<br />
your account on the Microsoft® Exchange server or your mobile device prevails when a<br />
conflict occurs.<br />
• Select Secure Sockets Layer (SSL) to increase the security between your mobile device<br />
and the Exchange server.<br />
• Select how you want to be alerted when you receive an e-mail.<br />
Activate Mail for Exchange<br />
1. To install and start Mail for Exchange on your mobile device, select > Settings > Sett.<br />
wizard.<br />
2. Create a synchronization profile that controls what and when you synchronize.<br />
3. Synchronize to get your e-mail, calendar, contact, and task entries on your mobile device<br />
from your account on the Exchange server.<br />
4. Start to use your e-mail, calendar, contacts, and tasks on your mobile device.<br />
Note: Mail for Exchange icons are visible in the Internet folder after you have<br />
configured your Mail for Exchange account with Settings Wizard.<br />
30
Note: A Mail for Exchange folder is visible in the Messaging folder of your device<br />
after you have configured your Mail for Exchange account.<br />
For more information on Mail for Exchange, see www.businesssoftware.nokia.com.<br />
■<br />
Outbox<br />
The outbox folder is a temporary storage place for messages that are waiting to be sent.<br />
To access the outbox folder, select > Messaging > Outbox.<br />
To retry sending a message, scroll to the message and select Options > Send.<br />
To postpone sending a message, scroll to a message, and select Options > Defer sending.<br />
■<br />
Message reader<br />
To listen to a message in Inbox or a mailbox, scroll to the message or mark the messages, and<br />
select Options > Listen.<br />
Tip: When you have received a new message, to listen to the received messages, in<br />
the standby mode, press and hold the left selection key until Msg. reader starts.<br />
To select the default language and voice used for reading messages, and adjust the voice<br />
properties, such as rate and volume, select > Settings > Speech.<br />
To select other settings for the message reader, in Speech, scroll right to Settings.<br />
■<br />
View messages on the SIM card<br />
Before you can view SIM messages, you need to copy them to a folder in your device. Select<br />
> Messaging > Options > SIM messages, mark the messages you want to copy, and select<br />
Options > Copy and the folder to which you want to copy the messages.<br />
■<br />
Cell broadcast<br />
Check with your service provider whether cell broadcast (network service) is available and<br />
what the available topics and related topic numbers are.<br />
Select > Messaging > Options > Cell broadcast. To activate the service, select Options ><br />
Settings > Reception > On.<br />
Service commands<br />
■<br />
To enter and send service commands (also known as USSD commands) such as activation<br />
commands for network services to your service provider, select > Messaging > Options ><br />
Service commands. To send the command, select Options > Send.<br />
31
■<br />
Messaging settings<br />
Text message settings<br />
To define text message settings, such as the message centre and character encoding used,<br />
select > Messaging > Options > Settings > Text message.<br />
Multimedia messaging settings<br />
To define multimedia message settings, such as which access point is used and whether<br />
multimedia messages are retrieved automatically, select > Messaging > Options ><br />
Settings > Multimedia message.<br />
E-mail settings<br />
Select > Messaging > Options > Settings > E-mail > Mailboxes, the mailbox and from<br />
the following:<br />
Connection settings — to define the connection settings, such as the servers and protocol used<br />
User settings — to define user settings, such as when messages are sent and whether to<br />
include a signature<br />
Retrieval settings — to define retrieval settings, such as which parts of the messages are<br />
retrieved and how many messages are retrieved<br />
Automatic retrieval — to define settings for retrieving messages automatically at set<br />
intervals or when an e-mail notification is received from the server<br />
Other settings<br />
To define whether a specified number of sent messages are saved to the Sent folder and<br />
whether to store the messages in the device memory or memory card, select > Messaging ><br />
Options > Settings > Other.<br />
6. Contacts<br />
■<br />
Save and manage contact information<br />
To save and manage contact information, such as names, phone numbers, and addresses,<br />
select > Contacts.<br />
To add a new contact, select Options > New contact. Fill in the fields you want, and<br />
select Done.<br />
32
To set your device to show contacts in the device memory and in the SIM card in the list of<br />
contacts, select Options > Settings > Contacts to display, and mark Phone memory and<br />
SIM memory.<br />
To copy names and numbers from a SIM card to your device or vice versa, scroll to the contact<br />
(or mark the desired contacts), and select Options > Copy > Phone memory or SIM memory.<br />
To view information about the memory consumption of contacts, select Options ><br />
Contacts info.<br />
To view the list of fixed dialling numbers, select Options > SIM numbers > Fixed dial contacts.<br />
This setting is only shown if supported by your SIM card.<br />
When fixed dialing is activated, calls may be possible to the official emergency number<br />
programmed into your device.<br />
To assign default numbers and addresses to a contact, select it, and select Options > Defaults.<br />
Scroll to the desired default option, and select Assign.<br />
■<br />
Contact groups<br />
To create a contact group so that you can send text or e-mail messages to several recipients<br />
at the same time, select > Contacts. Scroll right, and select Options > New group. Enter a<br />
name for the group, and open the group. Select Options > Add members. Mark the contacts<br />
you want to add to the group, and select OK.<br />
■<br />
Add a ringing tone<br />
You can set a ringing tone or a video ringing tone for each contact and group. To add a ringing<br />
tone to a contact, select > Contacts, and open the contact. Select Options > Ringing tone<br />
and the ringing tone. To add a ringing tone to a group, scroll right to the groups list, and<br />
scroll to a contact group. Select Options > Ringing tone and the ringing tone for the group.<br />
To remove the personal or group ringing tone, select Default tone as the ringing tone.<br />
7. Positioning<br />
You can use applications such as Maps and GPS data to find out your location, or measure<br />
distances and coordinates. These applications require a GPS connection.<br />
About GPS<br />
■<br />
The Global Positioning System (GPS) is a worldwide radio navigation system that includes<br />
24 satellites and their ground stations that monitor the operation of the satellites.<br />
Your device has an internal GPS receiver.<br />
33
The Global Positioning System (GPS) is operated by the government of the United States,<br />
which is solely responsible for its accuracy and maintenance. The accuracy of location data<br />
can be affected by adjustments to GPS satellites made by the United States government and<br />
is subject to change with the United States Department of Defense civil GPS policy and the<br />
Federal Radionavigation Plan. Accuracy can also be affected by poor satellite geometry.<br />
Availability and quality of GPS signals may be affected by your location, buildings, natural<br />
obstacles, and weather conditions. The GPS receiver should only be used outdoors to allow<br />
reception of GPS signals.<br />
Any GPS should not be used for precise location measurement, and you should never rely solely<br />
on location data from the GPS receiver and cellular radio networks for positioning or navigation.<br />
■<br />
34<br />
Assisted GPS<br />
Assisted GPS (A-GPS) is used to retrieve assistance data over a packet data connection,<br />
which assists in calculating the coordinates of your current location when your device is<br />
receiving signals from satellites.<br />
Your network operator may charge you for this connection according to your network<br />
subscription. Contact your service provider for the correct internet access point and<br />
charges related to the service.<br />
To enable or disable a positioning method, such as A-GPS, select > Settings > Phone sett. ><br />
General > Positioning > Positioning methods, the positioning method, and Enable or Disable.<br />
Your device is preconfigured to use the <strong>Nokia</strong> A-GPS service, if no service provider-specific<br />
A-GPS settings are available. The assistance data is retrieved from the <strong>Nokia</strong> A-GPS service<br />
server only when needed.<br />
To use A-GPS, you must have a packet data internet access point defined. Your device asks<br />
for the internet access point when A-GPS is used for the first time. To define the access point,<br />
see ”Positioning settings,” p. 34.<br />
Set up GPS connection<br />
■<br />
Positioning settings<br />
Select > Settings > Phone sett. > General > Positioning and from the following:<br />
Positioning methods — to enable or disable different positioning methods<br />
Positioning server — to edit positioning server settings. To select whether to allow automatic<br />
connections to the positioning server, to be asked every time, or to never connect to the<br />
positioning server, select Positioning server use. To define an access point for A-GPS, select<br />
Access point. Only a packet data internet access point can be used. Your device asks for the<br />
internet access point when A-GPS is used for the first time. To define the server used, select<br />
Server address.<br />
Notation preferences — to define the measurement system and coordinate format
Hold your device correctly<br />
When using the receiver, from an upright position, move the device to an angle of about<br />
45 degrees, with an unobstructed view of the sky.<br />
Establishing a GPS connection may take from a couple of seconds to several minutes, even<br />
longer in a vehicle. See ”GPS light,” p. 16.<br />
Using the GPS receiver may drain the device battery faster.<br />
If your device cannot find the satellite signal, consider the following:<br />
• If you are indoors, go outdoors to receive a better signal.<br />
• If you are outdoors, move to a more open space.<br />
• Check that your hand does not cover the GPS receiver of your device.<br />
• If the weather conditions are bad, the signal strength may be affected.<br />
• Some vehicles have tinted (athermic) windows, which may block the satellite signals.<br />
Satellite signal status<br />
To check how many satellites your device has found, and whether your device is receiving<br />
satellite signals, select > Applications > GPS data > Position > Options > Satellite status.<br />
If your device has found satellites, a bar for each satellite is shown in the satellite<br />
information view. When your device has received enough data from the satellite signal to<br />
calculate the coordinates of your location, the bars turn dark blue.<br />
■<br />
Position requests<br />
You may receive a request from a network service to receive your position information.<br />
Service providers may offer information about local topics, such as weather or traffic<br />
conditions, based upon the location of your device.<br />
When you receive a position request to allow your position information to be sent, select<br />
Accept, or to deny the request, select Reject.<br />
■<br />
Maps<br />
The map coverage varies by country or region. For example, maps may not be available due<br />
to legal restrictions of countries or regions. To the maximum extent permitted by applicable<br />
law, <strong>Nokia</strong> disclaims any and all warranty with respect to the availability, accuracy, correctness<br />
or update of maps.<br />
About Maps<br />
With Maps, you can see your current location on the map, browse maps for different cities<br />
and countries, navigate to a destination with voice guidance, search for addresses and<br />
35
different points of interest, plan routes from one location to another, and save locations as<br />
landmarks and send them to compatible devices. You can also purchase extra services, such<br />
as travel guides and traffic information. These services are not available in all countries or<br />
regions.<br />
Some maps may be pre-loaded on the memory card in your device. You can download more<br />
maps through the internet using <strong>Nokia</strong> Map Loader PC software. See ”Download maps,” p. 38.<br />
Maps uses GPS. You can define the positioning methods used with your device. See<br />
”Positioning settings,” p. 34. For the most accurate location information, use either the<br />
internal GPS or a compatible external GPS receiver.<br />
Browse maps<br />
To start Maps, press the <strong>Navigator</strong> key.<br />
When you use Maps for the first time, you may need to select a cellular access point for<br />
downloading map information for your current location. To change the default access point<br />
later, select Options > Tools > Settings > Internet > Network destination.<br />
To receive a note when your device registers to a network outside your home network, select<br />
Options > Tools > Settings > Internet > Roaming warning > On. For details and roaming<br />
costs, contact your network service provider.<br />
The data transfer indicator shows the internet connection used and the amount of data<br />
transferred since the application started.<br />
Almost all digital cartography is inaccurate and incomplete to some extent. Never rely solely<br />
on the cartography provided for use in this device.<br />
When you open Maps, it shows the location that was saved from your last session or the<br />
capital of the country you are in. The map of the location is also downloaded, if needed.<br />
To establish a GPS connection and zoom in to your last known location, press the <strong>Navigator</strong><br />
key, or select Options > My position.<br />
A GPS indicator (<br />
) shows the availability and strength of the satellite signal.<br />
One bar indicates one satellite. When the device receives enough data from the satellite to<br />
establish a GPS connection, the bar turns green. Your device must receive signals from at<br />
least four satellites to calculate the coordinates of your location. After the initial calculation,<br />
signals from three satellites may be enough.<br />
To zoom in or out, press * or #. To move on the map, use the scroll key. A new map is<br />
automatically downloaded if you scroll to an area which is not covered by maps already<br />
downloaded. See ”Download maps,” p. 38. The maps are free of charge, but downloading may<br />
involve the transmission of large amounts of data through your service provider's network.<br />
For more information on data transmission charges, contact your service provider. The maps<br />
are automatically saved in the device memory or on a compatible memory card (if inserted).<br />
36
Compass<br />
Your device has a magnetic compass.<br />
The compass should always be properly calibrated. Electromagnetic fields, large<br />
metal objects, other external circumstances, and opening or closing the slide may<br />
reduce the accuracy of the compass. Never rely solely on the device compass.<br />
To enable the compass and try to find your<br />
current position, press the <strong>Navigator</strong> key. If the<br />
circle around the compass is red, the compass<br />
is not calibrated. To calibrate the compass,<br />
rotate the device around all axes with your<br />
wrist in a continuous movement until the circle<br />
is green. When you rotate the device, make<br />
sure that the device display momentarily faces<br />
toward the ground.<br />
If the circle is yellow, the calibration accuracy is low, and you should continue rotating the<br />
device. When the compass is enabled and the circle around the compass is green, the map<br />
view turns automatically according to which direction the top of the device is pointing.<br />
To enable or disable the compass, select Options > Tools > Turn compass on or Turn compass<br />
off. When the compass is not in use, the circle around the compass is white and the map<br />
view does not turn automatically.<br />
Find locations<br />
To find a location in the city or area displayed on the map, enter the full or partial address of<br />
the location in the search field, and select Search. To find a location in another city, enter<br />
the city and the full or partial address, and select Search. If possible, write the name of city<br />
in the local language or English. If you are unsure of the address, enter the only first three<br />
characters of the address. To find a city in a different country, enter the full name of the<br />
country in English or the three-letter ISO country code and the city. For example, to find<br />
London using the country code, enter GBR London, and select Search.<br />
To find a specific address, select Options > Search > Addresses. Country/Region * and City or<br />
ZIP code are mandatory.<br />
To browse through or search for places and attractions in your area, select Options > Search ><br />
Places and a category. For example, to find a hotel, select Options > Search > Places ><br />
Accommodation. To find a hotel by its name, enter the name, and select Search, or to browse<br />
the hotels, select a category or Search all.<br />
To find an address saved in Contacts, select Options > Search > Addresses > Options ><br />
Select from Contacts.<br />
37
Save and send locations<br />
To save a location to your device, press the scroll key, and select Add to My places.<br />
To send a location to a compatible device, press the scroll key, and select Send. If you send<br />
the location in a text message, the information is converted to plain text.<br />
View your saved items<br />
To view the locations or routes you have saved to your device, select Options > Favorites ><br />
My places or Routes. Locations saved in Landmarks are displayed in My places.<br />
To check which locations you have searched for on the map, select Options ><br />
Favorites > History.<br />
To create a collection of your favorite places, select Options > Favorites > Collections ><br />
New collection. Enter the name for the collection. To add locations to your collection, open<br />
My places, scroll to a location, press the scroll key, and select Add to collection.<br />
Download maps<br />
When you browse a map in Maps, a new map is automatically downloaded if you scroll to an<br />
area which is not covered by maps already downloaded. The data counter (kB) shows the amount<br />
of network traffic when you browse maps, create routes, or search for locations online.<br />
Downloading maps may involve the transmission of large amounts of data through your<br />
service provider’s network. Contact your service provider for information about data<br />
transmission charges.<br />
To prevent automatic downloading of maps, for example, when outside your home network,<br />
select Options > Tools > Settings > Internet > Go online at start-up > No.<br />
To define the memory to be used and how much memory space you want to use for saving<br />
maps or voice guidance files, select Options > Tools > Settings > Map > Memory to be used<br />
and Maximum memory use. When the memory is full, the oldest map data is deleted. The<br />
saved maps data can be deleted using <strong>Nokia</strong> Map Loader PC software.<br />
<strong>Nokia</strong> Map Loader<br />
<strong>Nokia</strong> Map Loader is PC software that you can use to download and install maps and extra<br />
services from the internet to a compatible memory card. Use the Maps application and<br />
browse maps at least once before using <strong>Nokia</strong> Map Loader, as <strong>Nokia</strong> Map Loader uses the<br />
Maps history information.<br />
To install <strong>Nokia</strong> Map Loader to a compatible PC, see http://maps.nokia.com, and follow the<br />
instructions on the screen.<br />
38
Activate navigation license<br />
Before you can use the navigation feature, you have to activate the included limited-time<br />
license online using an internet access point (network service). Your service provider may<br />
charge you for the connection. To activate the license for both car and pedestrian navigation,<br />
select Options > Extras > Drive & Walk, and follow the instructions.<br />
After the included license expires, to purchase a new navigation license, select Options ><br />
Extras > Drive & Walk or Walk.<br />
To view your licenses, select Options > Extras > My licenses.<br />
Plan a route<br />
To plan a route, select a location on the map or search for a location, press the scroll key, and<br />
select Add to route.<br />
To add more locations for your route, select Options > Add route point, and search for<br />
the location.<br />
To edit the route, press the scroll key, and select Edit route.<br />
To define the settings for the route, select Options > Settings.<br />
To show the route on the map, select Options > Show route.<br />
To navigate to the destination by car or on foot, select Options > Start driving or Start walking.<br />
To save the route, select Options > Save route.<br />
Navigate to the destination<br />
To start navigating, select a location, press the scroll key, and select Drive to or Walk to.<br />
When you use car navigation for the first time, your device may ask you to select the<br />
language for the voice guidance. To change the language later, in the Maps main view,<br />
select Options > Tools > Settings > Navigation > Voice guidance. Voice guidance is not<br />
available for pedestrian navigation.<br />
To switch between different map views during the navigation, press the scroll key, and select<br />
Maneuver view, Bird's-eye view, or Arrow view.<br />
To discard the created route and use another route, select Options > Diff. route.<br />
To stop navigating, select Options > Stop navigation.<br />
Extra services for Maps<br />
Traffic and guide information and related services are generated by third parties independent<br />
of <strong>Nokia</strong>. The information may be inaccurate and incomplete to some extent and is subject<br />
to availability. Never rely solely on the aforementioned information and related services.<br />
39
Downloading extra services may involve the transmission of large amounts of data through<br />
your service provider’s network. Contact your service provider for information about data<br />
transmission charges.<br />
Traffic information<br />
The real-time traffic information service is an extra service that provides information about<br />
events that may affect your travel. You can purchase the service and download it to your<br />
device if available in your country or region.<br />
To purchase a license for the traffic information service, select Options > Extras > Traffic info.<br />
To view information about traffic events, select Options > Traffic info. The events are shown<br />
on the map as triangles and lines.<br />
To view details of an event, including possible rerouting options, select the event and<br />
Options > Open.<br />
To update the traffic information, select Update traffic info.<br />
Travel guides<br />
To purchase and download travel guides, or to view downloaded ones, select Options ><br />
Extras > Guides.<br />
To browse travel guide categories, select a category. If there are subcategories, select<br />
asubcategory.<br />
To download a new guide to your device, scroll to the desired guide, and select Yes. You can<br />
pay for the guides using a credit card or in your phone bill, if supported by your service provider.<br />
■<br />
40<br />
Landmarks<br />
Select > Landmarks. With Landmarks, you can save the position information of specific<br />
locations to your device. You can use your saved landmarks in compatible applications, such<br />
as GPS data and Maps. In Maps, saved landmarks are available in My places.<br />
To create a new landmark, select Options > New landmark. To make a positioning request<br />
for the coordinates of your location, select Current position. To enter the position information<br />
<strong>manual</strong>ly, select Enter <strong>manual</strong>ly.<br />
To add a landmark to preset categories, select the landmark and Options > Add to category.<br />
Select the categories to which you want to add the landmark.<br />
To send one or several landmarks to a compatible device, select Options > Send. Your received<br />
landmarks are placed in Inbox in Messaging.<br />
GPS data<br />
■<br />
GPS data is designed to provide route guidance information to a selected destination, position<br />
information about your location, and travelling information, such as the approximate distance<br />
and travel time to the destination.
Route guidance<br />
Start the route guidance outdoors. Select > Applications > GPS data > Navigation.<br />
Route guidance shows the straightest route and the shortest distance to the destination,<br />
measured in a straight line. Any obstacles on the route, such as buildings and natural<br />
obstacles, are ignored. Differences in altitude are not taken into account when calculating<br />
the distance. Route guidance is active only when you move.<br />
To set your trip destination, select Options > Set destination and a landmark as the destination,<br />
or enter the latitude and longitude coordinates. To clear the destination, select Stop navigation.<br />
Position<br />
To save your location as a landmark, select > Applications > GPS data > Position ><br />
Options > Save position.<br />
Trip meter<br />
To activate trip distance calculation, select > Applications > GPS data > Trip distance ><br />
Options > Start. To deactivate it, select Options > Stop. The calculated values remain on the<br />
display.<br />
To set the trip distance and time and average and maximum speeds to zero, and to start a<br />
new calculation, select Reset. To set the odometer and total time to zero, select Restart.<br />
The trip meter has limited accuracy, and rounding errors may occur. Accuracy can also be<br />
affected by availability and quality of GPS signals.<br />
8. Gallery<br />
Main view<br />
■<br />
To save and organize your images, video clips, music tracks, sound clips, playlists, streaming<br />
links, .ram files, and presentations, select > Gallery.<br />
To copy or move files to device memory or to the memory card, select a folder (such as<br />
Images), scroll to a file (or press # to mark several files), and select Options > Organize and<br />
the memory to where you want to copy or move the files.<br />
To create new image and video clips folders, select Images or Video clips > Options ><br />
Organize > New folder and the memory. Enter a name for the folder. To move images and<br />
video clips to a folder you created, mark the files, and select Options > Organize > Move to<br />
folder and the folder.<br />
41
To set an image as the wallpaper or to be shown during a call, select Images, and scroll to<br />
the image. Select Options > Use image > Set as wallpaper or Set as call image. To assign the<br />
image to a contact, select Assign to contact.<br />
To set a video clip as a video ringing tone, select Video clips and the video. Select Options ><br />
Use video > As ringing tone. To assign the video clip to a contact, select Assign to contact.<br />
■<br />
Download files<br />
To download images or video clips, select > Gallery > Images or Video clips and the image<br />
icon (Downl. graphics) or the video icon (Downld. videos). The browser opens. Choose a<br />
bookmark for the site to download from.<br />
View images<br />
■<br />
To view images in Gallery, scroll to the image, select Open.<br />
To open the toolbar when viewing an image, press the scroll key.<br />
To zoom in or out when viewing an image, press * or #.<br />
■<br />
Edit images<br />
To open the image editor in Gallery, scroll to the image, select Options > Edit.<br />
To view an image in the full screen, and to return to the normal view, press *.<br />
To rotate an image clockwise or counterclockwise, press 3 or 1.<br />
To zoom in or out, press 5 or 0.<br />
To move on a zoomed image, scroll up, down, left, or right.<br />
To crop or rotate the image; adjust the brightness, color, contrast, and resolution; and add<br />
effects, text, clip art, or a frame to the image, select Options > Apply effect.<br />
■<br />
Edit video clips<br />
To edit video clips in Gallery and create custom video clips, scroll to a video clip, and select<br />
Options > Video editor > Options > Edit video clip.<br />
In the video editor, you can see two timelines: video clip timeline and sound clip timeline.<br />
The images, text, and transitions added to a video clip are shown on the video clip timeline.<br />
To switch between the timelines, scroll up or down.<br />
Print images<br />
■<br />
You can use the device with a PictBridge-compatible printer using a USB cable.<br />
To print images in Gallery, scroll to the image, and select Options > Print.<br />
42
■<br />
Share online<br />
With the Share online application, you can share the images and video clips you have<br />
captured in compatible online albums, weblogs, or other compatible online sharing services<br />
on the web. You can upload content, save unfinished posts as drafts and continue later, and<br />
view the content of the albums. The supported content types may vary depending on the<br />
online sharing service provider.<br />
To share images and video clips online, you must have an account with an online image<br />
sharing service. You can usually subscribe to such a service on the web page of your service<br />
provider. For more information and applicable terms and costs, contact your service provider.<br />
Select > Internet > Share online. To update the list of service providers, select Options ><br />
Add new account > Update services. Some online sharing service providers may allow you to<br />
add an account using your device. See ”Share online settings,” p. 43.<br />
Upload files<br />
To upload files, select > Gallery > Images or Video clips. Mark the files to upload, and<br />
select Options > Send > Post to web and a sharing service.<br />
When you select the service, the selected images and video clips are shown in the edit state.<br />
You can open and view the files, reorganize them, add text to them, or add new files.<br />
To cancel the web upload process and save the created post as a draft, select Cancel ><br />
Save as draft.<br />
To connect to the service and upload the files to the web, select Options > Post to web.<br />
Open online service<br />
To view uploaded images and video clips in the online service, and draft and sent entries in<br />
your device, select > Internet > Share online. To update a service, scroll to it, and select<br />
Options > Update service.<br />
Select Options and from the following:<br />
Go to webs. — to connect to the service and view the uploaded and draft albums in the web<br />
browser. The view may vary depending on the service provider.<br />
Outbox — to view and edit the draft entries and upload them to the web<br />
New post — to create a new entry<br />
The available options may vary depending on the service provider.<br />
Share online settings<br />
To edit the share online settings, select > Internet > Share online > Options > Settings<br />
and from the following:<br />
Service providers — to view the list of service providers<br />
43
My accounts — to create a new account, select Options > Add new account. To edit an<br />
existing account, select an account and Options > Edit. You can enter the name for the<br />
account, and the user name and password for the account.<br />
Application settings — to select the size for the images shown on the display, and the font<br />
size used in drafts or text entries<br />
Advanced — to select the default access point and the way for polling new content from<br />
the server. You can also enable content to be downloaded while roaming or all image<br />
data to be published.<br />
9. Camera<br />
Your device has two cameras to capture still images and record video clips. A high resolution<br />
main camera is on the back of the device using the landscape mode, and a lower resolution<br />
secondary camera is on the front using the portrait mode.<br />
Your device supports an image capture resolution of 2048 x 1536 pixels. The image resolution<br />
in this guide may appear different.<br />
Keep a safe distance when using the flash. Do not use the flash on people or animals at close<br />
range. Do not cover the flash while taking a picture.<br />
You can send images and video clips in a multimedia message, as an e-mail attachment, or<br />
by using Bluetooth connectivity. You can also upload them to a compatible online album.<br />
See ”Share online,” p. 43.<br />
■<br />
44<br />
Capture images<br />
Main camera<br />
1. To activate the camera, press the camera key.<br />
2. To zoom in or out, press the volume keys.<br />
3. To lock the focus on an object, press<br />
the camera key halfway down.<br />
To capture an image, press the<br />
camera key down.<br />
Secondary camera<br />
1. To activate the secondary camera,<br />
press the camera key, scroll left or right to open the toolbar, and select .<br />
2. To zoom in or out, scroll up or down.<br />
3. To capture an image, select Capture.
Close the camera<br />
To close the camera, select Options > Exit.<br />
If you open the Gallery from the camera, the camera is closed.<br />
Record video clips<br />
■<br />
1. To activate the main camera, press the camera key. To activate the secondary camera,<br />
scroll left or right to open the toolbar, and select . If the camera is in the image mode<br />
( ), scroll left or right to open the toolbar, and select .<br />
2. To start recording with the main camera, press the camera key. To start recording with<br />
the secondary camera, select Record. A tone sounds, indicating that recording has started.<br />
To zoom in or out of the subject using the main camera, press the volume keys, or, using<br />
the secondary camera, scroll down or up.<br />
3. To stop recording with the main camera, press the camera key. To stop recording with<br />
the secondary camera, select Stop. The video clip is automatically saved to the Video<br />
clips folder in the Gallery. See ”Gallery,” p. 41. The maximum length of the video clip<br />
depends on the available memory.<br />
To pause recording at any time, select Pause. Video recording automatically stops if recording<br />
is paused and there are no keypresses within a minute. To resume recording, select Continue.<br />
■<br />
Capture panoramic images<br />
To activate the panorama mode with the main camera, scroll left or right to activate the<br />
toolbar, and select .<br />
To start capturing a panoramic image, press the camera key, and turn the camera slowly left<br />
or right. The camera captures the panoramic image and displays it as you turn. If the arrow<br />
on the viewfinder turns red, you are turning too fast and the image gets blurry. You cannot<br />
change the direction while turning. To stop capturing the image, press the camera key.<br />
10. Media<br />
■<br />
Music player<br />
Warning: Listen to music at a moderate level. Continuous exposure to high volume<br />
may damage your hearing. Do not hold the device near your ear when the loudspeaker<br />
is in use, because the volume may be extremely loud.<br />
You can listen to music and podcast episodes also when the Offline profile is activated.<br />
See ”Offline profile,” p. 14.<br />
For more information about copyright protection, see ”Licenses,” p. 61.<br />
45
Listen to music or a podcast episode<br />
1. Select > Applications > Music player.<br />
2. Select a category, such as All songs or Podcasts > All episodes, and a song or a<br />
podcast episode.<br />
3. To play the selected file, press the scroll key.<br />
To pause, press the scroll key. To resume the playback, press the scroll key again.<br />
4. To stop the playback, scroll down.<br />
To fast forward or rewind, press and hold the scroll key right or left.<br />
To skip forward, scroll right. To return to the beginning of the song or podcast, scroll left.<br />
To skip to the previous song or podcast, scroll left again within 2 seconds after a song or<br />
podcast has started.<br />
To adjust the volume, use the volume keys.<br />
To return to the standby mode and leave the player in the background, press the end key.<br />
Depending on the selected standby theme, the currently playing song is displayed. To return<br />
to the music player, select the currently playing song.<br />
Music menu<br />
Select > Applications > Music player. The music menu shows the available music. To view<br />
all songs, sorted songs, or playlists, select the desired list in the music menu.<br />
Playlists<br />
Select > Applications > Music player > Playlists. To view details of a playlist, scroll to the<br />
playlist, and select Options > Playlist details.<br />
Create a playlist<br />
1. Select Options > Create playlist.<br />
2. Enter a name for the playlist, and select OK.<br />
3. To add songs now, select Yes. To add songs later, select No.<br />
4. Select artists to find the songs you want to include in the playlist. To add a song, press<br />
the scroll key.<br />
5. When you have made your selections, select Done. If a compatible memory card is<br />
inserted, the playlist is saved to the memory card.<br />
To add more songs later, when viewing the playlist, select Options > Add songs.<br />
Podcasts<br />
To view all the podcast episodes available in your device, select > Applications ><br />
Music player > Podcasts > All episodes.<br />
46
The podcast episodes have three states: never played, partially played, and completely played.<br />
If an episode is partially played, it plays from the last playback position the next time it is<br />
played. Otherwise, it is played from the beginning.<br />
<strong>Nokia</strong> Music Store<br />
In the <strong>Nokia</strong> Music Store (network service) you can search, browse, and purchase music for<br />
downloading to your device. To purchase music, you first need to register for the service.<br />
For availability of <strong>Nokia</strong> Music Store in your country, visit www.music.nokia.com.<br />
To access the <strong>Nokia</strong> Music Store, you must have a valid internet access point in your<br />
device. To open <strong>Nokia</strong> Music Store, select > Applications > Music player > Options ><br />
Go to Music store.<br />
Transfer music<br />
You can buy music protected with WMDRM from online music shops and transfer the music<br />
to your device.<br />
To refresh the library after you have updated the song selection in your device, select ><br />
Applications > Music player > Options > Refresh library.<br />
Transfer music from PC<br />
To synchronize music with Windows Media Player, connect the compatible USB cable and<br />
select Media transfer as the connection mode. You can transfer WMDRM protected music<br />
files only using media transfer. A compatible memory card needs to be inserted in the device.<br />
To use <strong>Nokia</strong> Music Manager in <strong>Nokia</strong> PC Suite, see the <strong>Nokia</strong> PC Suite user guide.<br />
■<br />
<strong>Nokia</strong> Podcasting<br />
With the <strong>Nokia</strong> Podcasting application (network service), you can search, discover, subscribe<br />
to, and download podcasts over the air, and play, manage, and share audio podcasts with<br />
your device.<br />
Warning: Listen to music at a moderate level. Continuous exposure to high volume<br />
may damage your hearing. Do not hold the device near your ear when the loudspeaker<br />
is in use, because the volume may be extremely loud.<br />
Settings<br />
To use <strong>Nokia</strong> Podcasting, you must set your connection and download settings.<br />
Setting the application to retrieve podcasts automatically may involve the transmission of<br />
large amounts of data through your service provider's network. Contact your service provider<br />
for information about data transmission charges.<br />
Select > Applications > Podcasting > Options > Settings and from the following:<br />
47
Connection > Default access point — to select the access point to define your connection to<br />
the internet. To define the podcast search service for searches, select Search service URL.<br />
Download — to edit the download settings. You can select whether to save your podcasts to<br />
the device or the memory card; set how often podcasts are updated and set the time and<br />
date for the next automatic update; and set how much memory space to use for podcasts,<br />
and what to do if the downloads exceed the download limit.<br />
Search<br />
To set the search engine to use the podcast search service, select > Applications ><br />
Podcasting > Options > Settings > Connection > Search service URL.<br />
To search for podcasts, select > Applications > Podcasting > Search, and enter a keyword<br />
or a title.<br />
To subscribe to a channel and add it to your podcasts, select Options > Subscribe. You can<br />
also mark channels to add them all at the same time.<br />
Directories<br />
Directories help you to find new podcast episodes to which to subscribe. An episode is a<br />
particular media file of a podcast.<br />
Select > Applications > Podcasting > Directories. Select a directory folder to update it<br />
(network service). When the color of the folder icon changes, select to open it, and select a<br />
folder topic to view the list of podcasts.<br />
To subscribe to a podcast, select the title. After you have subscribed to episodes of a podcast,<br />
you can download, manage, and play them in the podcasts menu.<br />
To add a new directory or folder, select Options > New > Web directory or Folder. Select a<br />
title, URL of the .opml (outline processor markup language) file, and Done.<br />
To import an .opml file saved in your device, select Options > Import OPML file. Select the<br />
location of the file, and import it.<br />
When you receive a message with an .opml file using Bluetooth connectivity, open the file<br />
and save it to the Received folder in Directories. Open the folder to subscribe to any of the<br />
links to add to your podcasts.<br />
Downloads<br />
To view the podcasts you have subscribed to, select > Applications > Podcasting ><br />
Podcasts. To view individual episode titles, select the podcast title.<br />
To start a download, select the episode title. To download or to continue to download selected<br />
or marked episodes, select Options > Download or Continue download. You can download<br />
multiple episodes at the same time.<br />
To play a portion of a podcast during download or after partial downloading, select Podcasts<br />
and the podcast, scroll to the episode being downloaded, and select Options > Play preview.<br />
48
Fully downloaded podcasts are saved in the Podcasts folder in Music player when the music<br />
library is refreshed.<br />
Play and manage podcasts<br />
To display the episodes from a podcast, open the podcast. Under each episode, you can see<br />
the file information.<br />
To play a fully downloaded episode, select > Applications > Music player > Podcasts.<br />
To update the selected podcast or marked podcasts, for a new episode, select Options > Update.<br />
To add a new podcast by entering the URL of the podcast, select Options > New podcast.<br />
To edit the URL of a selected podcast, select Edit.<br />
To update, delete, and send a group of selected podcasts at once, select Options ><br />
Mark/Unmark, mark the podcasts, and select Options and the desired action.<br />
To open the website of the podcast (network service), select Options > Open web page.<br />
Some podcasts provide the opportunity to interact with the creators by commenting and<br />
voting. To connect to the internet to do this, select Options > View comments.<br />
Radio<br />
■<br />
To turn on the radio, select > Applications > Radio. To turn the radio off, select Exit.<br />
When you turn on the radio for the first time, a wizard helps you to save local radio stations<br />
(network service).<br />
For availability and costs of the visual service and station directory services, contact your<br />
service provider.<br />
The FM radio depends on an antenna other than the wireless device antenna. A compatible<br />
headset or enhancement needs to be attached to the device for the FM radio to function properly.<br />
Warning: Listen to music at a moderate level. Continuous exposure to high volume<br />
may damage your hearing. Do not hold the device near your ear when the loudspeaker<br />
is in use, because the volume may be extremely loud.<br />
The radio supports Radio Data System (RDS) functionality. Radio stations supporting RDS<br />
may display information, such as the name of the station. If activated in the settings, RDS<br />
also attempts to scan for an alternative frequency for the currently playing station, if the<br />
reception is weak. To set your device automatically search for alternative frequencies, select<br />
Options > Settings > Alternative frequencies > Auto scan on.<br />
Tune and save a radio station<br />
To start the station search when the radio is on, scroll up or down. To save the station when<br />
a station is found, select Options > Save station. Select a location for the station, enter the<br />
name for it, and select OK.<br />
49
To view the list of saved stations, select Options > Stations. To change the settings of a station,<br />
select the station and Edit.<br />
Radio functions<br />
To adjust the volume, press the volume keys.<br />
If there are any saved stations, scroll right or left to the next or previous stations.<br />
You can make or answer a call while listening to the radio. The radio is muted when there is<br />
an active call.<br />
To listen to the radio in the background and go to the standby mode, select Options ><br />
Play in background.<br />
View visual content<br />
For availability and costs, and to subscribe to the service, contact your service provider.<br />
To view visual content of the current station, select Options > Start visual service.<br />
Station needs to have visual service ID saved before service can be used.<br />
To end the visual content feed but continue listening to the radio, select Close.<br />
Station directory<br />
To access the station directory (network service), select Options > Station directory and your<br />
location. Radio stations that provide visual content are indicated with . To listen to or<br />
save a station, scroll to it, and select Options > Listen or Save.<br />
■<br />
RealPlayer<br />
With RealPlayer, you can play media files such as video clips saved in the device memory or<br />
memory card, or stream media files over the air by opening a streaming link. RealPlayer does<br />
not support all file formats or all the variations of file formats.<br />
Select > Applications > RealPlayer. To play, select Video clips, Streaming links, or<br />
Recently played and a media file or a streaming link.<br />
To stream live content, you must first configure your default access point. Select ><br />
Applications > RealPlayer > Options > Settings > Streaming > Network. For more<br />
information, contact your service provider.<br />
Warning: Do not hold the device near your ear when the loudspeaker is in use,<br />
because the volume may be extremely loud.<br />
Recorder<br />
■<br />
With voice recorder, you can record voice call conversations and voice memos. If you record<br />
a phone conversation, all parties hear a beeping sound during recording.<br />
50
Select > Applications > Recorder. To record a sound clip, select Options > Record sound<br />
clip, or select . To listen to the recording, select . Recorded files are saved in the Sound<br />
clips folder in Gallery.<br />
The recorder cannot be used when a data call or GPRS connection is active.<br />
11. Internet<br />
■<br />
Browse the web<br />
To browse web pages, select > Internet > Web, or press and hold 0 in the standby mode.<br />
For availability of services, pricing, and tariffs, contact your service provider.<br />
Important: Use only services that you trust and that offer adequate security and<br />
protection against harmful software.<br />
To access web pages, do one of the following:<br />
• Select a bookmark from the bookmarks view.<br />
• In the bookmarks view, enter the address of the web page, and select Go to.<br />
Bookmarks<br />
To add a bookmark <strong>manual</strong>ly, in the bookmarks view, select Options > Bookmark manager ><br />
Add bookmark, fill in the fields, and select Options > Save.<br />
Connection security<br />
If the security indicator is displayed during a connection, the data transmission between<br />
the device and the internet gateway or server is encrypted.<br />
The security icon does not indicate that the data transmission between the gateway and the<br />
content server (or place where the requested resource is stored) is secure. The service provider<br />
secures the data transmission between the gateway and the content server.<br />
To view details about the connection, encryption status, and information about server<br />
authentication, select Options > Settings > Page info.<br />
Keys and commands for browsing<br />
To open a link, make selections, or check boxes, press the scroll key.<br />
To go to the previous page while browsing, select Back. If Back is not available, to view a<br />
chronological list of the pages visited during a browsing session, select Options > Navigation<br />
51
options > History. Scroll left or right, and select the desired page. The history list is cleared<br />
each time a session is closed.<br />
To save a bookmark while browsing, select Options > Save as bookmark.<br />
To retrieve the latest content from the server, select Options > Navigation options > Reload.<br />
To open the browser toolbar, scroll to an empty part of the page, and press and hold the<br />
scroll key.<br />
To end the connection and view the browser page offline, select Options > Settings ><br />
Disconnect. To stop browsing, select Options > Exit.<br />
Keypad shortcuts while browsing<br />
1 — Open your bookmarks.<br />
2 — Search for keywords in the current page.<br />
3 — Return to the previous page.<br />
5 — List all open windows.<br />
8 — Show the page overview of the current page. Press 8 again to zoom in and view the<br />
desired section of the page.<br />
9 — Enter a new web address.<br />
0 — Go to the start page.<br />
* or # — Zoom the page in or out.<br />
Mini map<br />
Mini map helps you navigate web pages that contain large amount of information. When<br />
Mini map is on in the browser settings and you scroll through a large web page, Mini map<br />
opens and displays an overview of the web page you are browsing. To move in Mini map,<br />
scroll. When you stop scrolling, Mini map disappears and the area outlined in Mini map<br />
is displayed.<br />
Page overview<br />
With Page overview, you can move more quickly to the desired part of a web page.<br />
Page overview may not be available on all pages.<br />
To show the page overview of the current page, press 8. To find the desired spot on the page,<br />
scroll up or down. Press 8 again to zoom in and view the desired section of the page.<br />
Web feeds<br />
Web feeds are widely used to share the latest headlines or recent news.<br />
The browser automatically detects if a web page contains web feeds. To subscribe to a web<br />
feed, select Options > Subscribe to web feeds and a feed, or click on the link. To view the<br />
web feeds you have subscribed to, in the bookmarks view, select Web feeds.<br />
52
To update a web feed, select it, and Options > Refresh.<br />
To define how the web feeds are updated, select Options > Tools > Web feeds.<br />
Widgets<br />
Your device supports widgets. Widgets are small, downloadable web applications that deliver<br />
multimedia, news feeds, and other information, such as weather reports, to your device.<br />
Installed widgets appear as separate applications in the My own folder in Applications.<br />
You can download widgets using the Download! application or from the web.<br />
The default access point for widgets is the same as in the web browser. When active in the<br />
background, some widgets may update information automatically to your device. Using widgets<br />
may involve the transmission of large amounts of data through your service provider's network.<br />
Contact your service provider for information about data transmission charges.<br />
Saved pages<br />
To save a page while browsing to be able to view it offline, select Options > Settings ><br />
Save page.<br />
To view saved pages, in the bookmarks view, select Saved pages. To open a page, select it.<br />
Clear privacy data<br />
A cache is a memory location that is used to store data temporarily. If you have tried to<br />
access or have accessed confidential information requiring passwords, empty the cache<br />
after each use. The information or services you have accessed are stored in the cache.<br />
To empty the cache, select Options > Clear privacy data > Cache.<br />
To clear all privacy data, select Options > Clear privacy data > All.<br />
Search<br />
■<br />
Use Search to get access to search engines, and find and connect to local services, websites,<br />
images, and mobile content (network service). For example, you can use the application to find<br />
local restaurants and shops. You can also search for data in your device and memory card.<br />
Select > Internet > Search.<br />
12. Personalization<br />
■<br />
Themes<br />
To change the look of your device display, activate a theme.<br />
53
Select > Settings > Themes. To view the available themes, select General. The active<br />
theme is indicated by a check mark.<br />
To preview a theme, scroll to the theme, and select Options > Preview. To activate the<br />
previewed theme, select Set.<br />
In Themes, you can also set the menu view type, set a theme for the standby mode, set a<br />
custom wallpaper, personalize the look of the power saver, and select an image shown<br />
during a call.<br />
Profiles<br />
■<br />
In Profiles, you can adjust and personalize the device tones for different events,<br />
environments, or caller groups. You can see the selected profile at the top of the display in<br />
the standby mode. If the General profile is in use, only the current date is shown.<br />
Select > Settings > Profiles.<br />
To activate the profile, select the profile and Activate.<br />
Tip: To quickly change to silent profile from any other profile, in the standby mode,<br />
press and hold #.<br />
To personalize a profile, select the profile, Customize, and the desired settings.<br />
To set the profile to be active until a certain time within the next 24 hours, select Timed and<br />
the time.<br />
See also ”Offline profile,” p. 14.<br />
13. Time management<br />
■<br />
Select > Office > Clock. To change the clock settings, and to set the time and date, select<br />
Options > Settings.<br />
To set the device to show the time in other locations, scroll right to World clock. To add a<br />
location, select Options > Add location.<br />
To set your current location, scroll to a location, and select Options > Set as current location.<br />
The location is displayed in the clock main view, and the time in your device is changed<br />
according to the location selected. Check that the time is correct and matches your time zone.<br />
54<br />
Clock<br />
Alarm clock<br />
To set a new alarm, scroll right to Alarms, and select Options > New alarm. Enter the alarm<br />
time, select whether and when the alarm is repeated, and select Done.
■<br />
Calendar<br />
Select > Office > Calendar. Press # in month, week, or day views to automatically<br />
highlight the current date.<br />
To add a new calendar entry, select Options > New entry and an entry type. Anniversary<br />
entries are repeated every year. To-do entries help you to keep a list of tasks that you need<br />
to do. Fill in the fields, and select Done.<br />
14. Office applications<br />
■<br />
Active notes<br />
Active notes allows you to create, edit, and view different kinds of notes. You can insert<br />
images and videos or sound clips in the notes, link notes to other applications, such as<br />
Contacts, and send notes to others.<br />
Select > Office > Active notes.<br />
To create a note, start writing. To insert images, sound or video clips, business cards, web<br />
bookmarks, or files, select Options > Insert object and the type of item.<br />
To set the device to show a note when making or receiving a call from a contact, select<br />
Options > Settings. To link a note to a contact, open the note, and select Options > Link<br />
note to call > Add contacts and the contact.<br />
■<br />
Notes<br />
Select > Office > Notes.<br />
To write a new note, start writing. To save the note, select Done.<br />
You can save plain text files (.txt format) you receive to Notes.<br />
Calculator<br />
■<br />
Select > Office > Calculator. When entering numbers, to add a decimal point, press #.<br />
Note: This calculator has limited accuracy and is designed for simple calculations.<br />
■<br />
Converter<br />
Select > Office > Converter. You can convert measurements, such as length from one unit<br />
to another, for example, from yards to meters.<br />
The converter has limited accuracy and rounding errors may occur.<br />
55
Before you can convert currency, you need to choose a base currency (usually your domestic<br />
currency) and add exchange rates. The rate of the base currency is always 1. Select Currency<br />
as the measurement type, and select Options > Currency rates. To change the base currency,<br />
scroll to the currency, and select Options > Set as base currency. To add exchange rates,<br />
scroll to the currency, and enter a new rate.<br />
After you insert all the required exchange rates, you can convert currency. In the first amount<br />
field, enter the value to be converted. The other amount field changes automatically.<br />
Note: When you change base currency, you must enter new exchange rates because<br />
all previously set exchange rates are cleared.<br />
■<br />
56<br />
Mobile dictionary<br />
Use Dictionary to translate words from one language to another.<br />
Select > Office > Dictionary. English is available by default in your device. You can add<br />
two more languages. To add a language, select Options > Languages > Download languages.<br />
You can remove languages except English and add new ones. The languages are free of<br />
charge, but downloading may involve the transmission of large amounts of data through<br />
your service provider's network. Contact your service provider for information about data<br />
transmission charges.<br />
The display shows abbreviations for source and target languages. To change the source and<br />
target language, select Options > Languages > Source and Target.<br />
Enter the word to be translated, and select Translate. To hear the word spoken, select Listen.<br />
Adobe Reader<br />
■<br />
Use Adobe Reader to view portable document format (.pdf) documents. To open the application,<br />
select > Office > Adobe PDF.<br />
Open a .pdf file<br />
To open a recently viewed document, select it. To open a document that is not listed in the<br />
main view, select Options > Browse for file, the memory and folder where the file is stored<br />
and the file.<br />
View a document<br />
To move around within a page, scroll. To move to the next page, scroll down at the bottom of<br />
the page.<br />
To zoom in or out, select Options > Zoom > In or Out.<br />
To find text, select Options > Find > Text, and enter the text you want to find. To find the<br />
next occurrence, select Options > Find > Next.<br />
To save a copy of the document, select Options > Save.
■<br />
Quickoffice<br />
To use the Quickoffice applications, select > Office > Quickoffice.<br />
Not all variations or features of Word, Excel, and PowerPoint file formats are supported.<br />
If you experience problems with the Quickoffice applications, see www.quickoffice.com, or<br />
send an e-mail to sales@quickoffice.com.<br />
Quickmanager<br />
With Quickmanager, you can download software, including updates, upgrades, and other<br />
useful applications. You can pay for the downloads in your phone bill or using a credit card.<br />
15. Settings<br />
■<br />
Voice commands<br />
To select the functions to use by voice command, select > Settings > Voice comm..<br />
The voice commands for changing profiles are in the Profiles folder.<br />
To change the voice command for an application, scroll to the application, and select Edit, or<br />
Options > Change command. To play the activated voice command, select Options > Playback.<br />
To use voice commands, see ”Voice dialing,” p. 21.<br />
Phone settings<br />
■<br />
General<br />
Select > Settings > Phone sett. > General and from the following:<br />
Personalization — to adjust the display, standby mode, tones (such as ringing tone),<br />
language, themes, and voice command settings<br />
Date and time — to set the time and date and the display format<br />
Enhancement — to change the settings for an enhancement. Select an enhancement and the<br />
desired setting.<br />
Slide handling — to edit the slide settings. See ”Keypad lock (keyguard),” p. 17, ”Make a voice<br />
call,” p. 20, and ”Answer or reject a call,” p. 22.<br />
Sensor settings — to set which functions the accelerometer controls in your device and<br />
activate specific sensor interactions.<br />
Security — to change the device and SIM card settings, such as PIN and lock codes; view<br />
certificate details and check authenticity; and view and edit security modules<br />
57
When security features that restrict calls are in use (such as call restriction, closed user<br />
group, and fixed dialing), calls may be possible to the official emergency number<br />
programmed into your device.<br />
Factory settings — to reset some of the settings to their original values. You need the lock code.<br />
Positioning (network service) — to change positioning settings. See ”Positioning settings,” p. 34.<br />
Phone<br />
See ”Call settings,” p. 23.<br />
Connection<br />
Select > Settings > Phone sett. > Connection and from the following:<br />
Bluetooth — to switch Bluetooth technology on or off, and edit Bluetooth settings. See<br />
”Bluetooth connection settings,” p. 64.<br />
USB — to edit USB settings. See ”USB connection,” p. 65.<br />
Destinations — to define the connection methods used for reaching a particular destination<br />
Packet data — to select the packet data connection settings. The packet data settings affect<br />
all access points using a packet data connection.<br />
• To set the device to register to the packet data network when you are in a network<br />
that supports packet data, select Packet data connection > When available. If you<br />
select When needed, the device uses a packet data connection only if you start an<br />
application or function that needs it.<br />
• To set the access point name to use your device as a modem with your computer,<br />
select Access point.<br />
Data call — to set the online time for the data call connection. The data call settings affect<br />
all access points that use a GSM data call.<br />
Video sharing — to set your SIP profile settings <strong>manual</strong>ly. See ”Video sharing settings,” p. 25.<br />
Presence (network service) — to view and edit the presence settings. Connection applications,<br />
such as push to talk, use the presence settings. You may receive the settings from your<br />
service provider.<br />
SIP settings — to view and edit session initiation protocol (SIP) profiles. See ”Video sharing,”<br />
p. 24.<br />
XDM profile — to create or edit an XDM profile. Settings are for communication applications,<br />
such as presence and push to talk. These enable the service provider to access some user<br />
information that is saved in the network servers but managed by the user, for example push<br />
to talk groups. You may receive the settings from your service provider. See ”Configuration<br />
settings,” p. 12.<br />
58
Configurations — to view and delete configuration contexts. Certain functions, such as web<br />
browsing and multimedia messaging, may require configuration settings. You may receive<br />
the settings from your service provider. See ”Configuration settings,” p. 12.<br />
APN control — to restrict the use of packet data access points. This setting is only available if<br />
your SIM card supports the service. To change the settings, you need the PIN2 code.<br />
Applications<br />
To view and edit settings of applications installed to your device, select > Settings ><br />
Phone sett. > Applications.<br />
■<br />
Speech<br />
In Speech, you can select the default language and voice used for reading text messages and<br />
adjust the voice properties, such as rate and volume. Select > Settings > Speech.<br />
To view details of a voice, scroll right, scroll to the voice, and select Options > Voice details.<br />
To test a voice, scroll to the voice, and select Options > Play voice.<br />
16. Data management<br />
■<br />
Install or remove applications<br />
You can install two types of applications to your device:<br />
• J2ME TM applications based on Java TM technology with the extension .jad or .jar.<br />
PersonalJava TM applications cannot be installed to your device.<br />
• Other applications and software suitable for the Symbian operating system. The installation<br />
files have the .sis or .sisx extension. Only install software specifically designed for<br />
your device.<br />
Important: Only install and use applications and other software from trusted<br />
sources, such as applications that are Symbian Signed or have passed the Java<br />
Verified TM testing.<br />
Installation files may be transferred to your device from a compatible computer, downloaded<br />
during browsing, or sent to you in a multimedia message, as an e-mail attachment or by<br />
using Bluetooth technology. You can use <strong>Nokia</strong> Application Installer in <strong>Nokia</strong> PC Suite to<br />
install an application to your device or a memory card.<br />
To find installed applications, select<br />
To open Application manager, select<br />
> Applications > My own.<br />
> Settings > Data mgr. > App. mgr..<br />
59
Install an application<br />
The .jar file is required for installing Java applications. If it is missing, the device may ask you<br />
to download it.<br />
1. To install an application or software package, select Installation files, and scroll to an<br />
installation file. Applications on the memory card are indicated with .<br />
2. Select Options > Install.<br />
Alternatively, search the device memory or the memory card, select the application, and<br />
press the scroll key to start the installation.<br />
During the installation, the device shows information about the progress of the installation.<br />
If you are installing an application without a digital signature or certification, the device<br />
displays a warning. Continue installation only if you are sure of the origins and contents<br />
of the application.<br />
Important: Even if the use of certificates makes the risks involved in remote<br />
connections and software installation considerably smaller, they must be used<br />
correctly in order to benefit from increased security. The existence of a certificate<br />
does not offer any protection by itself; the certificate manager must contain<br />
correct, authentic, or trusted certificates for increased security to be available.<br />
Certificates have a restricted lifetime. If "Expired certificate" or "Certificate not<br />
valid yet" is shown, even if the certificate should be valid, check that the current<br />
date and time in your device are correct.<br />
Before changing any certificate settings, you must make sure that you really trust the<br />
owner of the certificate and that the certificate really belongs to the listed owner.<br />
Java applications may attempt to, for example, establish a data connection or send a message.<br />
To edit the permissions of an installed Java application and define which access point the<br />
application will use, select Installed apps., scroll to the application, and select Open.<br />
After you install applications to a compatible memory card, installation files (.sis) remain in<br />
the device memory. The files may use large amounts of memory and prevent you from storing<br />
other files. To maintain sufficient memory, use <strong>Nokia</strong> PC Suite to back up installation files to<br />
a compatible PC, then use the file manager to remove the installation files from the device<br />
memory. See ”File manager,” p. 61. If the .sis file is a message attachment, delete the message<br />
from the Messaging inbox.<br />
Remove an application<br />
In the Application manager main view, select Installed apps., scroll to the software package,<br />
and select Options > Uninstall.<br />
60
■<br />
File manager<br />
To browse, open, and manage files and folders in the device memory or on a memory card,<br />
select > Office > File mgr..<br />
Back up and restore device memory<br />
To back up information from device memory to the memory card or restore information from<br />
the memory card, in File manager, select Options > Back up phone memory or Restore from<br />
mem. card. You can only back up the device memory and restore it to the same device.<br />
Format a memory card<br />
When a memory card is formatted, all data on the card is permanently lost. Some memory<br />
cards are supplied preformatted and others require formatting.<br />
1. In the File manager view, select the memory card.<br />
2. Select Options > Memory card options > Format.<br />
3. When formatting is complete, enter a name for the memory card.<br />
Lock or unlock a memory card<br />
To set a password to help prevent unauthorized use, in the File manager view, select the<br />
memory card and Options > Memory card password > Set. Enter and confirm your password.<br />
The password can be up to eight characters long.<br />
If you insert another password-protected memory card into your device, you are prompted<br />
to enter the password of the card. To unlock the card, select Options > Unlock memory card.<br />
■<br />
Licenses<br />
Digital rights management<br />
Content owners may use different types of digital rights management (DRM) technologies<br />
to protect their intellectual property, including copyrights. This device uses various types of<br />
DRM software to access DRM-protected content. With this device you can access content<br />
protected with WMDRM, OMA DRM 1.0, and OMA DRM 2.0. If certain DRM software fails to<br />
protect the content, content owners may ask that such DRM software's ability to access new<br />
DRM-protected content be revoked. Revocation may also prevent renewal of such DRMprotected<br />
content already in your device. Revocation of such DRM software does not affect the<br />
use of content protected with other types of DRM or the use of non-DRM-protected content.<br />
Digital rights management (DRM) protected content comes with an associated license that<br />
defines your rights to use the content.<br />
If your device has OMA DRM-protected content, to back up both the licenses and the content,<br />
use the backup feature of <strong>Nokia</strong> PC Suite. Other transfer methods may not transfer the licenses<br />
61
which need to be restored with the content for you to be able to continue the use of OMA<br />
DRM protected content after the device memory is formatted. You may also need to restore<br />
the licenses in case the files on your device get corrupted.<br />
If your device has WMDRM protected content, both the licenses and the content will be lost<br />
if the device memory is formatted. You may also lose the licenses and the content if the files<br />
on your device get corrupted. Losing the licenses or the content may limit your ability to use<br />
the same content on your device again. For more information, contact your service provider.<br />
Some licenses may be connected to a specific SIM card, and the protected content can be<br />
accessed only if the SIM card is inserted in the device.<br />
To view the licenses saved in your device, select > Settings > Data mgr. > Licenses.<br />
To view valid licenses that are connected to one or more media files, select Valid licenses.<br />
Group licenses, which contain several licenses, are indicated with . To view the licenses<br />
contained in the group license, select the group license.<br />
To view invalid licenses for which the time period for using the file has exceeded, select<br />
Invalid licenses. To buy more usage time or extend the usage period for a media file, select<br />
an invalid license and Options > Get new license. It may not be possible to update licenses<br />
if service message reception is disabled.<br />
To view licenses that are not in use, select Not in use. Unused licenses have no media files<br />
connected to them.<br />
To view detailed information such as the validity status and the ability to send the file, scroll<br />
to a license, and select it.<br />
■<br />
With device manager you can connect to a server and receive configuration settings for your<br />
device, create new server profiles, or view and manage existing server profiles. You may<br />
receive configuration settings from your service provider or company information<br />
management department.<br />
To open the device manager, select > Settings > Data mgr. > Device mgr..<br />
62<br />
Device manager<br />
Update software<br />
Warning: If you install a software update, you cannot use the device, even to make<br />
emergency calls, until the installation is completed and the device is restarted. Be sure<br />
to back up data before accepting installation of an update.<br />
Downloading software updates may involve the transmission of large amounts of data<br />
through your service provider's network. Contact your service provider for information about<br />
data transmission charges.<br />
Make sure that the device battery has enough power, or connect the charger before starting<br />
the update.
1. Select Options > Check for updates. If an update is available, accept to download it.<br />
2. After a successful download, to install the update, select Now. To start the installation<br />
later, select Later.<br />
To start the installation process later, select Options > Install update.<br />
If no server profile has been defined, the device asks you to create one, or if there are several,<br />
to select from a list of servers. For server profile settings, contact your service provider.<br />
Configure your device<br />
You may receive configuration settings from your service provider or company information<br />
management department.<br />
To connect to a server and receive configuration settings for your device, select Options ><br />
Server profiles, scroll to the server profile, and select Options > Start configuration.<br />
To edit a server profile, scroll to the profile, and select Options > Edit.<br />
For the server profile settings, contact your service provider or company information<br />
management department.<br />
17. Connectivity<br />
Transfer or synchronize data<br />
■<br />
With Phone switch, you can copy or synchronize contacts, calendar entries, and possibly other<br />
data, such as video clips and images, from a compatible device using a Bluetooth connection.<br />
Depending on the other device, synchronization may not be possible and data can be copied<br />
only once.<br />
1. To transfer or synchronize data, select > Settings > Connectivity > Switch.<br />
If you have not used Phone switch before, information about the application is displayed.<br />
To start transferring data, select Continue.<br />
If you have used Phone switch, select the icon Start sync, Start retrieving or Start sending.<br />
2. When using Bluetooth technology, the devices need to be paired to transfer data.<br />
Depending on the type of the other device, an application may be sent and installed on<br />
the other device to enable the data transfer. Follow the instructions on the display.<br />
3. Select what content you want to transfer to your device.<br />
4. Content is transferred to your device. The transfer time depends on the amount of data.<br />
You can stop the transfer and continue later.<br />
63
■<br />
PC Suite<br />
With PC Suite you can synchronize contacts, calendar entries, and notes between your<br />
device and a compatible PC.<br />
You may find more information about PC Suite and the download link in the support area on<br />
the <strong>Nokia</strong> website, www.nokia.com/pcsuite.<br />
■<br />
Bluetooth connectivity<br />
Bluetooth wireless technology enables wireless connections between electronic devices<br />
within a maximum range of 10 meters (33 feet).<br />
This device is compliant with Bluetooth Specification 2.0 supporting the following profiles:<br />
Advanced Audio Distribution, Audio/Video Remote Control, Basic Imaging, Dial-Up Networking,<br />
File Transfer, Hands-free, Headset, Object Push, Serial Port, Phone Book Access, SIM Access,<br />
Generic Audio/Video Distribution, Generic Access, and Generic Object Exchange. To ensure<br />
interoperability between other devices supporting Bluetooth technology, use <strong>Nokia</strong> approved<br />
enhancements for this model. Check with the manufacturers of other devices to determine<br />
their compatibility with this device.<br />
Features using Bluetooth technology increase the demand on battery power and reduce the<br />
battery life.<br />
Do not accept Bluetooth connections from sources you do not trust.<br />
A Bluetooth connection is disconnected automatically after sending or receiving data.<br />
Bluetooth connection settings<br />
Select > Settings > Connectivity > Bluetooth.<br />
Bluetooth — to switch Bluetooth connectivity on or off<br />
My phone's visibility — to allow your device to be found by other devices with Bluetooth<br />
connectivity at all times, select Shown to all. To allow your device to be found for a defined<br />
time period, select Define period. For security reasons, it is advisable to use the Hidden setting<br />
whenever possible.<br />
My phone's name — to define a name for your device<br />
Remote SIM mode — to enable another device, for example, a car kit, to use the SIM card of<br />
your device using Bluetooth technology (SIM access profile)<br />
When the wireless device is in the remote SIM mode, you can only use a compatible connected<br />
enhancement, such as a car kit, to make or receive calls. Your wireless device will not make<br />
any calls, except to the emergency numbers programmed into your device, while in this mode.<br />
To make calls from your device, you must first leave the remote SIM mode. If the device has<br />
been locked, enter the lock code to unlock it first.<br />
64
Send data<br />
1. Open the application where the item you want to send is saved.<br />
2. Scroll to the item you want to send, and select Options > Send > Via Bluetooth.<br />
3. The device starts to search for devices within range. Paired devices are shown with .<br />
Some devices may show only the unique device addresses. To find out the unique address<br />
of your device, enter the code *#2820# in the standby mode.<br />
If you have searched for devices earlier, a list of devices found previously is shown.<br />
To start a new search, select More devices.<br />
4. Select the device with which you want to connect.<br />
5. If the other device requires pairing before data can be transmitted, a tone sounds and<br />
you are asked to enter a passcode. Create your own passcode and share the passcode<br />
with the owner of the other device. You do not have to memorize the passcode.<br />
Pair and block devices<br />
To open a list of paired devices, in the Bluetooth view, scroll right to Paired devices.<br />
To pair with a device, select Options > New paired device, select the device with which to<br />
pair, and exchange passcodes.<br />
To cancel pairing, scroll to the device whose pairing you want to cancel, and press the<br />
clear key. If you want to cancel all pairings, select Options > Delete all.<br />
To set a device to be authorized, scroll to the device, and select Options > Set as authorized.<br />
Connections between your device and an authorized device can be made without your<br />
knowledge. Use this status only for your own devices to which others do not have access, for<br />
example, your PC or devices that belong to someone you trust. is added next to<br />
authorized devices in the paired devices view.<br />
To block connections from a device, in the paired devices view, select the device and Block.<br />
To view a list of blocked devices, scroll right to Blocked devices. To unblock a device, scroll to<br />
the device, and select Delete.<br />
Receive data<br />
When you receive data using Bluetooth technology, you are asked if you want to accept the<br />
message. If you accept, the item is placed in inbox in Messaging.<br />
■<br />
USB connection<br />
Connect the USB data cable to establish a data connection between the device and a<br />
compatible PC.<br />
Select > Settings > Connectivity > USB and from the following:<br />
65
USB connection mode — to select the default USB connection mode or change the active<br />
mode. Select PC Suite to use the device with <strong>Nokia</strong> PC Suite; Mass storage to access files on<br />
the inserted memory card as a mass storage device; Image transfer to use the device with a<br />
PictBridge-compatible printer, or Media transfer to synchronize media files, such as music,<br />
with a compatible version of Windows Media Player.<br />
Ask on connection — to set the device to ask the purpose of the connection each time the cable<br />
is connected, select Yes. To set the default mode to be activated automatically, select No.<br />
After transferring data, ensure that it is safe to unplug the USB data cable from the PC.<br />
■<br />
66<br />
Remote synchronization<br />
Sync enables you to synchronize data such as your calendar entries, contacts, and notes<br />
with a compatible computer or a remote internet server.<br />
Select > Settings > Connectivity > Sync.<br />
To create a new profile, select Options > New sync profile and enter the required settings.<br />
To synchronize data, in the main view, mark the data to be synchronized, and select<br />
Options > Synchronize.<br />
■<br />
Push to talk<br />
Push to talk (PTT) (network service) is a real-time voice over IP service (network service). PTT<br />
provides direct voice communication connected with a single keypress. In PTT communication,<br />
one person talks while the others listen. The length of time of each turn is limited.<br />
For availability, costs and subscription to the service, contact your service provider. Note that<br />
roaming services may be more limited than home network services.<br />
Before you can use the PTT service, you must define the PTT connection settings. For PTT<br />
service settings, contact your service provider.<br />
Phone calls always take priority over PTT calls.<br />
Select > Applications > PTT.<br />
Log in to PTT<br />
To log in <strong>manual</strong>ly, select Options > Log in to PTT.<br />
indicates a PTT connection.<br />
indicates that PTT is set to do not disturb (DND).<br />
Exit PTT<br />
Select Options > Exit. Log out from PTT after exiting application? is displayed. To log out,<br />
select Yes. To keep PTT active in the background, select No.
Make a one-to-one call<br />
Warning: Do not hold the device near your ear when the loudspeaker is in use,<br />
because the volume may be extremely loud.<br />
1. Select Options > PTT contacts > Contacts, scroll to the contact you want to talk to, and<br />
press the call key.<br />
2. When the connection has been established, to talk to the other participant, press and<br />
hold the call key while you talk.<br />
3. To end the PTT call, select Disconnect, or, if there are several PTT calls, select<br />
Options > Disconnect.<br />
Make a PTT group call<br />
To call a group, select Options > PTT contacts > Contacts > Options > Talk to many, mark<br />
the contacts you want to call, and select OK.<br />
PTT sessions<br />
PTT sessions are displayed as call bubbles in the PTT display, giving information about the<br />
status of the PTT sessions:<br />
Wait — shown when you press and hold the call key and somebody else is still speaking in<br />
the PTT session<br />
Talk — shown when you press and hold the call key and get the permission to speak<br />
Send a callback request<br />
To send a callback request from Contacts, scroll to a contact, and select Options > Send<br />
callback request.<br />
■<br />
Connection manager<br />
In the Connection manager, you can identify the status of data connections, view details on<br />
the amount of data sent and received, and end unused connections.<br />
Note: The actual invoice for calls and services from your service provider may vary,<br />
depending on network features, rounding off for billing, taxes, and so forth.<br />
Select > Settings > Connectivity > Conn. mgr..<br />
To view connection details, scroll to a connection, and select Options > Details.<br />
To end a connection, scroll to the connection, and select Options > Disconnect. To end all<br />
connections, select Options > Disconnect all.<br />
67
18. Enhancements<br />
Warning: Use only batteries, chargers, and enhancements approved by <strong>Nokia</strong> for<br />
use with this particular model. The use of any other types may invalidate any<br />
approval or warranty, and may be dangerous.<br />
For availability of approved enhancements, please check with your dealer. When you<br />
disconnect the power cord of any enhancement, grasp and pull the plug, not the cord.<br />
19. Battery and charger information<br />
Your device is powered by a rechargeable battery. The battery intended for use with this<br />
device is BL-5F. This device is intended for use when supplied with power from the following<br />
chargers: AC-4, AC-5, AC-6, AC-8 or DC-4 chargers. The battery can be charged and discharged<br />
hundreds of times, but it will eventually wear out. When the talk and standby times are<br />
noticeably shorter than normal, replace the battery. Use only <strong>Nokia</strong> approved batteries, and<br />
recharge your battery only with <strong>Nokia</strong> approved chargers designated for this device. Use of an<br />
unapproved battery or charger may present a risk of fire, explosion, leakage, or other hazard.<br />
If a battery is being used for the first time or if the battery has not been used for a prolonged<br />
period, it may be necessary to connect the charger, then disconnect and reconnect it to<br />
begin charging the battery. If the battery is completely discharged, it may take several<br />
minutes before the charging indicator appears on the display or before any calls can be made.<br />
Always switch the device off and disconnect the charger before removing the battery.<br />
Unplug the charger from the electrical plug and the device when not in use. Do not leave a<br />
fully charged battery connected to a charger, since overcharging may shorten its lifetime.<br />
If left unused, a fully charged battery will lose its charge over time.<br />
Always try to keep the battery between 15°C and 25°C (59°F and 77°F). Extreme temperatures<br />
reduce the capacity and lifetime of the battery. A device with a hot or cold battery may not work<br />
temporarily. Battery performance is particularly limited in temperatures well below freezing.<br />
Do not short-circuit the battery. Accidental short-circuiting can occur when a metallic<br />
object such as a coin, clip, or pen causes direct connection of the positive (+) and negative<br />
(-) terminals of the battery. (These look like metal strips on the battery.) This might happen,<br />
for example, when you carry a spare battery in your pocket or purse. Short-circuiting the<br />
terminals may damage the battery or the connecting object.<br />
Do not dispose of batteries in a fire as they may explode. Batteries may also explode if<br />
damaged. Dispose of batteries according to local regulations. Please recycle when possible.<br />
Do not dispose as household waste.<br />
68
Do not dismantle, cut, open, crush, bend, deform, puncture, or shred cells or batteries. In the<br />
event of a battery leak, do not allow the liquid to come in contact with the skin or eyes. In the<br />
event of such a leak, flush your skin or eyes immediately with water, or seek medical help.<br />
Do not modify, remanufacture, attempt to insert foreign objects into the battery, or immerse<br />
or expose it to water or other liquids.<br />
Improper battery use may result in a fire, explosion, or other hazard. If the device or battery<br />
is dropped, especially on a hard surface, and you believe the battery has been damaged, take<br />
it to a service centre for inspection before continuing to use it.<br />
Use the battery only for its intended purpose. Never use any charger or battery that is<br />
damaged. Keep your battery out of the reach of small children.<br />
Important: Battery talk and standby times are estimates only and depend on signal<br />
strength, network conditions, features used, battery age and condition, temperatures<br />
to which battery is exposed, use in digital mode, and many other factors. The amount<br />
of time a device is used for calls will affect its standby time. Likewise, the amount of<br />
time that the device is turned on and in the standby mode will affect its talk time.<br />
■<br />
<strong>Nokia</strong> battery authentication guidelines<br />
Always use original <strong>Nokia</strong> batteries for your safety. To check that you are getting an original<br />
<strong>Nokia</strong> battery, purchase it from an authorized <strong>Nokia</strong> dealer, and inspect the hologram label<br />
using the following steps:<br />
Successful completion of the steps is not a total assurance of the authenticity of the battery.<br />
If you have any reason to believe that your battery is not an authentic, original <strong>Nokia</strong> battery,<br />
you should refrain from using it, and take it to the nearest authorized <strong>Nokia</strong> service point or<br />
dealer for assistance. Your authorized <strong>Nokia</strong> service point or dealer will inspect the battery<br />
for authenticity. If authenticity cannot be verified, return the battery to the place of purchase.<br />
Authenticate hologram<br />
1. When you look at the hologram on the label, you should see the<br />
<strong>Nokia</strong> connecting hands symbol from one angle and the <strong>Nokia</strong><br />
Original Enhancements logo when looking from another angle.<br />
69
2. When you angle the hologram left, right, down and up, you<br />
should see 1, 2, 3 and 4 dots on each side respectively.<br />
What if your battery is not authentic?<br />
If you cannot confirm that your <strong>Nokia</strong> battery with the hologram on the label is an authentic<br />
<strong>Nokia</strong> battery, please do not use the battery. Take it to the nearest authorized <strong>Nokia</strong> service<br />
point or dealer for assistance. The use of a battery that is not approved by the manufacturer<br />
may be dangerous and may result in poor performance and damage to your device and its<br />
enhancements. It may also invalidate any approval or warranty applying to the device.<br />
To find out more about original <strong>Nokia</strong> batteries, visit www.nokia.com/battery.<br />
Care and maintenance<br />
Your device is a product of superior design and craftsmanship and should be treated with<br />
care. The following suggestions will help you protect your warranty coverage.<br />
• Keep the device dry. Precipitation, humidity, and all types of liquids or moisture can<br />
contain minerals that will corrode electronic circuits. If your device does get wet,<br />
remove the battery, and allow the device to dry completely before replacing it.<br />
• Do not use or store the device in dusty, dirty areas. Its moving parts and electronic<br />
components can be damaged.<br />
• Do not store the device in hot areas. High temperatures can shorten the life of electronic<br />
devices, damage batteries, and warp or melt certain plastics.<br />
• Do not store the device in cold areas. When the device returns to its normal temperature,<br />
moisture can form inside the device and damage electronic circuit boards.<br />
• Do not attempt to open the device other than as instructed in this guide.<br />
• Do not drop, knock, or shake the device. Rough handling can break internal circuit boards<br />
and fine mechanics.<br />
• Do not use harsh chemicals, cleaning solvents, or strong detergents to clean the device.<br />
• Do not paint the device. Paint can clog the moving parts and prevent proper operation.<br />
• Use a soft, clean, dry cloth to clean any lenses, such as camera, proximity sensor, and<br />
light sensor lenses.<br />
70
• Use only the supplied or an approved replacement antenna. Unauthorized antennas,<br />
modifications, or attachments could damage the device and may violate regulations<br />
governing radio devices.<br />
• Use chargers indoors.<br />
• Always create a backup of data you want to keep, such as contacts and calendar notes.<br />
• To reset the device from time to time for optimum performance, power off the device<br />
and remove the battery.<br />
These suggestions apply equally to your device, battery, charger, or any enhancement. If any<br />
device is not working properly, take it to the nearest authorized service facility for service.<br />
Disposal<br />
The crossed-out wheeled-bin symbol on your product, literature, or packaging reminds<br />
you that all electrical and electronic products, batteries, and accumulators must be<br />
taken to separate collection at the end of their working life. This requirement applies to<br />
the European Union and other locations where separate collection systems are available.<br />
Do not dispose of these products as unsorted municipal waste.<br />
By returning the products to collection you help prevent uncontrolled waste disposal<br />
and promote the reuse of material resources. More detailed information is available<br />
from the product retailer, local waste authorities, national producer responsibility<br />
organizations, or your local <strong>Nokia</strong> representative. For the product Eco-Declaration or<br />
instructions for returning your obsolete product, go to country-specific information<br />
at www.nokia.com.<br />
Additional safety information<br />
■ Small children<br />
Your device and its enhancements may contain small parts. Keep them out of the reach of<br />
small children.<br />
■ Operating environment<br />
This device meets RF exposure guidelines when used either in the normal use position against<br />
the ear or when positioned at least 1.5 centimeters (5/8 inches) away from the body.<br />
When a carry case, belt clip, or holder is used for body-worn operation, it should not contain<br />
metal and should position the device the above-stated distance from your body.To transmit data<br />
files or messages, this device requires a quality connection to the network. In some cases,<br />
transmission of data files or messages may be delayed until such a connection is available.<br />
Ensure the above separation distance instructions are followed until the transmission<br />
is completed.<br />
71
Parts of the device are magnetic. Metallic materials may be attracted to the device. Do not<br />
place credit cards or other magnetic storage media near the device, because information<br />
stored on them may be erased.<br />
■ Medical devices<br />
Operation of any radio transmitting equipment, including wireless phones, may interfere<br />
with the functionality of inadequately protected medical devices. Consult a physician or the<br />
manufacturer of the medical device to determine if they are adequately shielded from external<br />
RF energy or if you have any questions. Switch off your device in health care facilities when<br />
any regulations posted in these areas instruct you to do so. Hospitals or health care facilities<br />
may be using equipment that could be sensitive to external RF energy.<br />
Implanted medical devices<br />
Manufacturers of medical devices recommend that a minimum separation of 15.3 centimeters<br />
(6 inches) should be maintained between a wireless device and an implanted medical device,<br />
such as a pacemaker or implanted cardioverter defibrillator, to avoid potential interference<br />
with the medical device. Persons who have such devices should:<br />
• Always keep the wireless device more than 15.3 centimeters (6 inches) from the medical<br />
device when the wireless device is turned on.<br />
• Not carry the wireless device in a breast pocket.<br />
• Hold the wireless device to the ear opposite the medical device to minimize the potential<br />
for interference.<br />
• Turn the wireless device off immediately if there is any reason to suspect that<br />
interference is taking place.<br />
• Read and follow the directions from the manufacturer of their implanted medical device.<br />
If you have any questions about using your wireless device with an implanted medical<br />
device, consult your health care provider.<br />
Hearing aids<br />
Some digital wireless devices may interfere with some hearing aids. If interference occurs,<br />
consult your service provider.<br />
■ Vehicles<br />
RF signals may affect improperly installed or inadequately shielded electronic systems in motor<br />
vehicles such as electronic fuel injection systems, electronic antiskid (antilock) braking systems,<br />
electronic speed control systems, and air bag systems. For more information, check with the<br />
manufacturer, or its representative, of your vehicle or any equipment that has been added.<br />
Only qualified personnel should service the device or install the device in a vehicle. Faulty<br />
installation or service may be dangerous and may invalidate any warranty that may apply to<br />
the device. Check regularly that all wireless device equipment in your vehicle is mounted<br />
and operating properly. Do not store or carry flammable liquids, gases, or explosive materials<br />
in the same compartment as the device, its parts, or enhancements. For vehicles equipped<br />
with an air bag, remember that air bags inflate with great force. Do not place objects, including<br />
72
installed or portable wireless equipment in the area over the air bag or in the air bag deployment<br />
area. If in-vehicle wireless equipment is improperly installed and the air bag inflates, serious<br />
injury could result.<br />
Using your device while flying in aircraft is prohibited. Switch off your device before boarding<br />
an aircraft. The use of wireless teledevices in an aircraft may be dangerous to the operation<br />
of the aircraft, disrupt the wireless telephone network, and may be illegal.<br />
■ Potentially explosive environments<br />
Switch off your device when in any area with a potentially explosive atmosphere, and obey<br />
all signs and instructions. Potentially explosive atmospheres include areas where you would<br />
normally be advised to turn off your vehicle engine. Sparks in such areas could cause an<br />
explosion or fire resulting in bodily injury or even death. Switch off the device at refuelling<br />
points such as near gas pumps at service stations. Observe restrictions on the use of radio<br />
equipment in fuel depots, storage, and distribution areas; chemical plants; or where blasting<br />
operations are in progress. Areas with a potentially explosive atmosphere are often, but not<br />
always, clearly marked. They include below deck on boats, chemical transfer or storage<br />
facilities and areas where the air contains chemicals or particles such as grain, dust, or metal<br />
powders. You should check with the manufacturers of vehicles using liquefied petroleum gas<br />
(such as propane or butane) to determine if this device can be safely used in their vicinity.<br />
■<br />
Emergency calls<br />
Important: This device operates using radio signals, wireless networks, landline<br />
networks, and user-programmed functions. If your device supports voice calls over<br />
the internet (internet calls), activate both the internet calls and the cellular phone.<br />
The device will attempt to make emergency calls over both the cellular networks<br />
and through your internet call provider if both are activated. Connections in all<br />
conditions cannot be guaranteed. You should never rely solely on any wireless<br />
device for essential communications like medical emergencies.<br />
To make an emergency call:<br />
1. If the device is not on, switch it on. Check for adequate signal strength. Depending on<br />
your device, you may also need to complete the following:<br />
• Insert a SIM card if your device uses one.<br />
• Remove certain call restrictions you have activated in your device.<br />
• Change your profile from offline or flight profile mode to an active profile.<br />
2. Press the end key as many times as needed to clear the display and ready the device<br />
for calls.<br />
3. Enter the official emergency number for your present location. Emergency numbers vary<br />
by location.<br />
4. Press the call key.<br />
73
When making an emergency call, give all the necessary information as accurately as possible.<br />
Your wireless device may be the only means of communication at the scene of an accident.<br />
Do not end the call until given permission to do so.<br />
■ Certification information (SAR)<br />
This mobile device meets guidelines for exposure to radio waves.<br />
Your mobile device is a radio transmitter and receiver. It is designed not to exceed the limits<br />
for exposure to radio waves recommended by international guidelines. These guidelines were<br />
developed by the independent scientific organization ICNIRP and include safety margins<br />
designed to assure the protection of all persons, regardless of age and health.<br />
The exposure guidelines for mobile devices employ a unit of measurement known as the<br />
Specific Absorption Rate or SAR. The SAR limit stated in the ICNIRP guidelines is 2.0 watts/<br />
kilogram (W/kg) averaged over 10 grams of tissue. Tests for SAR are conducted using<br />
standard operating positions with the device transmitting at its highest certified power level<br />
in all tested frequency bands. The actual SAR level of an operating device can be below the<br />
maximum value because the device is designed to use only the power required to reach the<br />
network. That amount changes depending on a number of factors such as how close you are<br />
to a network base station. The highest SAR value under the ICNIRP guidelines for use of the<br />
device at the ear is 0.76 W/kg.<br />
Use of device accessories and enhancements may result in different SAR values. SAR values<br />
may vary depending on national reporting and testing requirements and the network band.<br />
Additional SAR information may be provided under product information at www.nokia.com.<br />
Your mobile device is also designed to meet the requirements for exposure to radio waves<br />
established by the Federal Communications Commission (USA) and Industry Canada. These<br />
requirements set a SAR limit of 1.6 W/kg averaged over one gram of tissue. The highest SAR<br />
value reported under this standard during product certification for use at the ear is 0.83 W/kg<br />
and when properly worn on the body is 1.05 W/kg.<br />
74
Index<br />
NUMERICS<br />
11-touch dialing 21<br />
Å<br />
alarm clock. See clock.<br />
assisted GPS (A-GPS) 34<br />
B<br />
Bluetooth<br />
connection settings 64<br />
receiving data 65<br />
sending data 65<br />
bookmarks 51<br />
C<br />
cache 53<br />
calendar 55<br />
call log 26<br />
calls<br />
1-touch dialing 21<br />
answering 22<br />
ending 20<br />
forwarding 24<br />
international 20<br />
making 20<br />
rejecting 22<br />
restriction 24<br />
waiting 22<br />
camera<br />
capturing images 44<br />
recording video clips 45<br />
charging battery 10<br />
clock 54<br />
closing applications 17<br />
compass 37<br />
conference call 21<br />
connection manager 67<br />
connectivity 63<br />
contacts 32<br />
add ringing tone 33<br />
groups 33<br />
memory consumption 33<br />
save and manage 32<br />
converter 55<br />
D<br />
data cable. See USB.<br />
device manager 62<br />
dictionary. See mobile dictionary<br />
downloading maps 38<br />
E<br />
e-mail messages 29<br />
F<br />
file manager 61<br />
finding locations 37<br />
G<br />
gallery 41<br />
GPS<br />
assisted GPS 34<br />
GPS connection 33<br />
maps 35<br />
positioning 33<br />
satellites 35<br />
trip meter 41<br />
H<br />
help 8<br />
I<br />
indicators<br />
GPS light 16<br />
icons 15<br />
missed events 16<br />
Navi key light 16<br />
K<br />
keyguard. See keypad lock.<br />
keypad lock 17<br />
L<br />
landmarks 38, 40, 41<br />
listening to music 46<br />
locations 38, 40, 41<br />
lock code 11, 18<br />
75
M<br />
mail for exchange 29<br />
maps 36<br />
marking items 16<br />
media player. See RealPlayer.<br />
menu 16<br />
messages<br />
listening to 31<br />
service messages 28<br />
SIM messages 31<br />
missed events 16<br />
mobile dictionary 56<br />
music player<br />
downloading music 47<br />
music shop 47<br />
playlists 46<br />
transferring music 47<br />
N<br />
Navi key light 16<br />
navigating 39<br />
navigation license 39<br />
notes 55<br />
active notes 55<br />
Ö<br />
offline mode. See offline profile.<br />
offline profile 14<br />
operator selection 24<br />
P<br />
paired devices 65<br />
phonebook. See contacts.<br />
PIN 11, 18<br />
module PIN 18<br />
signing PIN 18<br />
position requests 35<br />
positioning 33<br />
profiles 54<br />
PTT. See push to talk.<br />
PUK 19<br />
push to talk 66<br />
R<br />
radio 49<br />
RealPlayer<br />
recorder 50<br />
restriction password 19<br />
ringing tones 33<br />
video ringing tones 42<br />
routes 39<br />
S<br />
saving locations 38<br />
screen saver 16<br />
service commands 31<br />
settings<br />
connection 58<br />
data call 58<br />
messaging 32<br />
packet data 58<br />
phone 57<br />
positioning 34<br />
Setting wizard 12<br />
speech 59<br />
writing language 26<br />
sharing online 43<br />
software updates 62<br />
standby theme 14<br />
status light. See Navi key light.<br />
switching between applications 16<br />
synchronization 66<br />
T<br />
text input 26<br />
themes 53<br />
transferring data 63<br />
transferring music 47<br />
trip meter 41<br />
U<br />
updating software 62<br />
UPIN 18<br />
USB 65<br />
using phone without a SIM card 14<br />
V<br />
video call 22, 23<br />
video sharing 24<br />
voice commands 57<br />
voice dialing 21<br />
voice mailbox 21<br />
voice recorder. See recorder.<br />
volume 17<br />
W<br />
web<br />
connection security 51<br />
76
feeds 52<br />
saving a page 53<br />
viewing a saved page 53<br />
viewing bookmarks 51<br />
world clock. See clock.<br />
writing text. See text input.<br />
77
78<br />
Notes
Manual del Usuario de <strong>Nokia</strong> <strong>6210</strong><br />
<strong>Navigator</strong><br />
9210189<br />
Edición 2<br />
79
0434<br />
DECLARACIÓN DE CONFORMIDAD<br />
Mediante la presente, NOKIA CORPORATION declara que el producto<br />
RM-419 cumple con los requisitos esenciales y otras disposiciones<br />
pertinentes de la Directiva 1999/5/EC. Se puede consultar<br />
una copia de la Declaración de Conformidad, en inglés, en<br />
http://www.nokia.com/phones/declaration_of_conformity/.<br />
© 2009 <strong>Nokia</strong>. Todos los derechos reservados.<br />
<strong>Nokia</strong>, <strong>Nokia</strong> Connecting People, Navi, Visual Radio y <strong>Nokia</strong> Care son marcas comerciales o marcas<br />
registradas de <strong>Nokia</strong> Corporation. <strong>Nokia</strong> tune es una marca de sonido de <strong>Nokia</strong> Corporation. Otros<br />
nombres de productos y compañías aquí mencionados pueden ser marcas comerciales o nombres<br />
comerciales de sus respectivos propietarios.<br />
Se prohíbe la duplicación, la transferencia, la distribución o el almacenamiento parcial o total del contenido<br />
de este documento, de cualquier manera, sin el consentimiento previo por escrito de <strong>Nokia</strong>.<br />
Este producto incluye software bajo licencia de Symbian Software Ltd. (c) 1998-2009.<br />
Symbian y Symbian OS son marcas registradas de Symbian Ltd.<br />
Número de patente de los EE. UU. 5818437 y otras patentes pendientes. Software de ingreso de texto T9.<br />
Copyright (C) 1997-2009. Tegic Communications, Inc. Todos los derechos reservados.<br />
Java y todas las marcas basadas en Java son marcas comerciales o marcas registradas de<br />
Sun Microsystems, Inc.<br />
Algunas partes del software <strong>Nokia</strong> Maps son © 1996-2009 The FreeType Project. Todos los<br />
derechos reservados.<br />
This product is licensed under the MPEG-4 Visual Patent Portfolio License (i) for personal and noncommercial<br />
use in connection with information which has been encoded in compliance with the MPEG-4 Visual<br />
Standard by a consumer engaged in a personal and noncommercial activity and (ii) for use in connection<br />
with MPEG-4 video provided by a licensed video provider. No license is granted or shall be implied for any<br />
other use. Additional information, including that related to promotional, internal, and commercial uses,<br />
may be obtained from MPEG LA, LLC. See http://www.mpegla.com.<br />
Este producto está autorizado en virtud de la Licencia en Cartera de Patentes Visual MPEG-4 I) para uso<br />
personal y no comercial en relación con la información codificada por un consumidor que se dedica a una<br />
actividad personal y no comercial, de acuerdo con el Estándar Visual MPEG-4 y II) para uso en relación<br />
con el video MPEG-4 provisto por un proveedor de videos autorizado. No se otorga ninguna licencia<br />
para otro tipo de uso ni se la considerará implícita. Se puede obtener información adicional de<br />
MPEG LA, LLC, incluida la información acerca de usos promocionales, internos y comerciales.<br />
Visite http://www.mpegla.com (en inglés).<br />
<strong>Nokia</strong> cuenta con una política de desarrollo continuo. <strong>Nokia</strong> se reserva el derecho de introducir cambios y<br />
mejoras en cualquiera de los productos descritos en este documento sin previo aviso.<br />
SEGÚN EL MÁXIMO ALCANCE PERMITIDO POR LA LEGISLACIÓN VIGENTE, EN NINGUNA CIRCUNSTANCIA,<br />
NOKIA O SUS LICENCIANTES SERÁN RESPONSABLES DE LAS PÉRDIDAS DE DATOS O DE GANANCIAS NI DE<br />
LOS DAÑOS ESPECIALES, INCIDENTALES, RESULTANTES O INDIRECTOS, INDEPENDIENTEMENTE DE CÓMO<br />
HAYAN SIDO CAUSADOS.<br />
80
EL CONTENIDO DE ESTE DOCUMENTO SE PROVEE “TAL COMO ESTÁ”. A MENOS QUE LO REQUIERA LA<br />
LEGISLACIÓN VIGENTE, NO SE OTORGARÁ NINGUNA GARANTÍA, SEA EXPRESA O IMPLÍCITA, EN RELACIÓN<br />
CON LA PRECISIÓN, LA CONFIABILIDAD O EL CONTENIDO DE ESTE DOCUMENTO, INCLUIDAS, CON MERO<br />
CARÁCTER ENUNCIATIVO, LAS GARANTÍAS IMPLÍCITAS DE COMERCIALIZACIÓN Y DE IDONEIDAD PARA<br />
UN FIN DETERMINADO. NOKIA SE RESERVA EL DERECHO DE MODIFICAR ESTE DOCUMENTO O DISCONTINUAR<br />
SU USO EN CUALQUIER MOMENTO SIN PREVIO AVISO.<br />
La disponibilidad de productos específicos y de aplicaciones y servicios para dichos productos puede<br />
variar de una región a otra. Comuníquese con su distribuidor <strong>Nokia</strong> para obtener información adicional y<br />
consultar la disponibilidad de opciones de idiomas.<br />
Controles de exportación<br />
Este dispositivo puede contener materias primas, tecnología o software sujetos a leyes y regulaciones de<br />
exportación de los Estados Unidos y otros países. Se prohíbe su desvío contraviniendo las leyes.<br />
Es posible que personas o entidades no afiliadas ni asociadas a <strong>Nokia</strong> hayan creado las aplicaciones de<br />
terceros proporcionadas con su dispositivo y que sean las propietarias de ellas. <strong>Nokia</strong> no es propietaria de<br />
los derechos de copyright ni de los derechos de propiedad intelectual de las aplicaciones de terceros. Por<br />
lo tanto, <strong>Nokia</strong> no asume ningún tipo de responsabilidad en relación con la asistencia al usuario final, la<br />
funcionalidad de tales aplicaciones y la información incluida en las aplicaciones o los materiales. <strong>Nokia</strong><br />
no provee ninguna garantía para las aplicaciones de terceros.<br />
AL USAR LAS APLICACIONES, USTED RECONOCE QUE LE SON PROVISTAS "TAL COMO ESTÁN", SIN<br />
GARANTÍA DE NINGÚN TIPO, SEA EXPRESA O IMPLÍCITA, SEGÚN EL MÁXIMO ALCANCE PERMITIDO POR<br />
LA LEGISLACIÓN VIGENTE. USTED RECONOCE TAMBIÉN QUE NOKIA O SUS AFILIADAS NO HACEN NINGÚN<br />
TIPO DE REPRESENTACIÓN NI GARANTÍA, SEA EXPRESA O IMPLÍCITA, INCLUIDAS, CON MERO CARÁCTER<br />
ENUNCIATIVO, LAS GARANTÍAS DE TÍTULOS, COMERCIALIZACIÓN O IDONEIDAD PARA UN FIN<br />
DETERMINADO O LAS QUE ESTABLECEN QUE EL SOFTWARE NO INFRINGE NINGUNA PATENTE,<br />
COPYRIGHT, MARCA REGISTRADA U OTRO DERECHO DE TERCEROS.<br />
AVISO DE LA FCC<br />
Su dispositivo puede causar interferencia radioeléctrica o televisiva (por ejemplo, cuando se utiliza un<br />
teléfono en las cercanías de equipos receptores). La FCC puede exigirle que deje de usar su teléfono si no<br />
se puede eliminar tal interferencia. Si necesita ayuda, comuníquese con el centro de servicio local. Este<br />
dispositivo cumple con lo establecido en la sección 15 de las normas de la FCC. El funcionamiento de este<br />
dispositivo está sujeto a las siguientes dos condiciones: I) este dispositivo no debe causar interferencia<br />
perjudicial, y II) este dispositivo debe aceptar cualquier interferencia recibida, incluso una interferencia<br />
que pueda causar un funcionamiento no deseado. Cualquier cambio o modificación que no haya sido<br />
expresamente aprobado por <strong>Nokia</strong> puede anular la legitimación del usuario de utilizar este equipo.<br />
9210189/ Edición 2<br />
81
Contenido<br />
Contenido ....................................... 82<br />
SEGURIDAD .................................... 84<br />
Asistencia técnica .......................... 86<br />
Ayuda ................................................................ 86<br />
Información de soporte y contacto<br />
de <strong>Nokia</strong> ........................................................... 86<br />
1. Inicio ........................................... 87<br />
Insertar una tarjeta (U)SIM y<br />
la batería.......................................................... 87<br />
Tarjeta de memoria ....................................... 87<br />
Cargar la batería............................................ 88<br />
Encender y apagar el dispositivo............... 89<br />
Ubicaciones de las antenas......................... 89<br />
Ajustes de configuración............................. 90<br />
Aplicación “Bienvenido” .............................. 90<br />
Asistente de configuración......................... 90<br />
2. Su dispositivo ............................. 91<br />
Teclas y partes ................................................ 91<br />
Modo en espera.............................................. 92<br />
Indicadores ...................................................... 93<br />
Protector de pantalla.................................... 94<br />
Menú ................................................................. 94<br />
Marcar elementos en una aplicación....... 94<br />
Alternar entre aplicaciones......................... 95<br />
Cerrar una aplicación ................................... 95<br />
Control de volumen....................................... 95<br />
Rotación de pantalla .................................... 95<br />
Control de activación ................................... 95<br />
Bloqueo del teclado<br />
(protección del teclado)............................... 95<br />
Bloqueo remoto.............................................. 96<br />
Códigos de acceso ......................................... 96<br />
Descargue ........................................................ 97<br />
Personal............................................................ 97<br />
Conectar un auricular compatible............ 98<br />
Conectar un cable de datos USB............... 98<br />
3. Funciones de llamada ................ 98<br />
Realizar una llamada de voz ...................... 98<br />
Contestar o rechazar una llamada......... 100<br />
Llamadas de video....................................... 101<br />
Configuraciones de llamadas................... 102<br />
Video compartido........................................ 103<br />
Registro.......................................................... 105<br />
4. Escribir texto............................ 105<br />
Ingreso de texto tradicional<br />
y predictivo ................................................... 105<br />
Copiar y eliminar texto.............................. 106<br />
5. Mensajes................................... 107<br />
Escribir y enviar mensajes......................... 107<br />
Buzón de entrada........................................ 108<br />
Mensajes de servicio .................................. 108<br />
E-mail............................................................. 108<br />
Buzones de correo IMAP4 y POP3.......... 108<br />
Sincronización de buzones de correo.... 109<br />
Mail for exchange....................................... 109<br />
Sincronización.............................................. 109<br />
Activar Mail for Exchange........................ 110<br />
Buzón de salida............................................ 110<br />
Lector de mensaje....................................... 111<br />
Ver mensajes en la tarjeta SIM ............... 111<br />
Difusión celular............................................ 111<br />
Comandos de servicio ................................ 111<br />
Configuraciones de mensajes .................. 111<br />
6. Contactos ................................. 112<br />
Guardar y administrar la información<br />
de contacto................................................... 112<br />
Grupos de contacto .................................... 113<br />
Agregar un tono de timbre....................... 113<br />
7. Posicionamiento....................... 113<br />
Acerca de GPS.............................................. 113<br />
A-GPS ............................................................. 114<br />
Configurar conexión a GPS ...................... 114<br />
Solicitudes de posición.............................. 115<br />
Maps ............................................................... 115<br />
Marcas............................................................ 121<br />
Datos GPS...................................................... 121<br />
82
8. Galería...................................... 122<br />
Vista principal............................................... 122<br />
Descarga de archivos.................................. 122<br />
Ver imágenes................................................. 122<br />
Editar imágenes............................................ 122<br />
Editar videoclips........................................... 123<br />
Imprimir imágenes ...................................... 123<br />
Compartir en línea....................................... 123<br />
9. Cámara..................................... 124<br />
Capturar imágenes...................................... 125<br />
Grabar videoclips ......................................... 125<br />
Capturar imágenes panorámicas............. 126<br />
10.Multimedia............................. 126<br />
Reproductor de música.............................. 126<br />
<strong>Nokia</strong> Podcasting......................................... 128<br />
Radio ............................................................... 130<br />
RealPlayer ...................................................... 132<br />
Grabadora ...................................................... 132<br />
11.Internet................................... 132<br />
Explorar la Web............................................ 132<br />
Buscar ............................................................. 135<br />
12.Personalización ...................... 136<br />
Temas .............................................................. 136<br />
Perfiles ............................................................ 136<br />
13.Administración del tiempo ... 136<br />
Reloj................................................................. 136<br />
Agenda............................................................ 137<br />
14.Aplicaciones de oficina ......... 137<br />
Notas activas ................................................ 137<br />
Notas............................................................... 137<br />
Calculadora.................................................... 138<br />
Convertidor.................................................... 138<br />
Diccionario móvil ........................................ 138<br />
Adobe Reader ............................................... 138<br />
Quickoffice.................................................... 139<br />
15.Configuraciones...................... 139<br />
Comandos de voz ........................................ 139<br />
Configuraciones del teléfono................... 140<br />
Voz................................................................... 141<br />
16.Administración de datos........ 142<br />
Instalar o eliminar aplicaciones.............. 142<br />
Administrador de archivos........................ 143<br />
Licencias ........................................................ 144<br />
Administrador de dispositivos ................. 145<br />
17.Conectividad........................... 146<br />
Transferir o sincronizar datos.................. 146<br />
PC Suite.......................................................... 147<br />
Conectividad Bluetooth............................. 147<br />
Conexión USB............................................... 149<br />
Sincronización remota............................... 149<br />
Comunicación instantánea....................... 150<br />
Administrador de conexiones .................. 151<br />
18.Accesorios............................... 151<br />
19.Información sobre baterías<br />
y cargadores................................. 151<br />
Normas de autenticación de<br />
baterías <strong>Nokia</strong>.............................................. 153<br />
Cuidado y mantenimiento........... 154<br />
Información adicional<br />
de seguridad................................. 155<br />
Índice............................................ 159<br />
83
SEGURIDAD<br />
Lea estas sencillas indicaciones. Su incumplimiento puede ser peligroso o ilegal. Lea todo el<br />
<strong>manual</strong> del usuario para obtener más información.<br />
ENCIENDA EL TELÉFONO EN FORMA SEGURA<br />
No encienda el dispositivo donde el uso de teléfonos móviles esté prohibido o<br />
pueda causar interferencia o peligro.<br />
LA SEGURIDAD VIAL ANTE TODO<br />
Obedezca las leyes locales. Mantenga siempre las manos libres para maniobrar el<br />
vehículo mientras conduce. La seguridad vial debe ser su prioridad cuando conduce.<br />
INTERFERENCIA<br />
Todos los dispositivos móviles pueden ser sensibles a interferencias que pueden<br />
afectar su rendimiento.<br />
APAGUE EL DISPOSITIVO EN ÁREAS RESTRINGIDAS<br />
Respete todas las restricciones existentes. Apague el dispositivo cuando se<br />
encuentre en una aeronave o cerca de equipos médicos, combustibles,<br />
productos químicos o áreas donde se realizan explosiones.<br />
SERVICIO TÉCNICO CALIFICADO<br />
Sólo personal calificado puede instalar o reparar este producto.<br />
ACCESORIOS Y BATERÍAS<br />
Utilice sólo baterías y accesorios aprobados. No conecte productos incompatibles.<br />
RESISTENCIA AL AGUA<br />
Su dispositivo no es resistente al agua. Manténgalo seco.<br />
■<br />
El dispositivo móvil descrito en este <strong>manual</strong> está aprobado para su uso en las redes GSM/<br />
EGSM 850, 900, 1800 y 1900, y WCDMA/HSDPA 1900/850. Comuníquese con su proveedor<br />
de servicios para obtener información sobre redes.<br />
Cuando use las funciones de este dispositivo, obedezca las leyes y respete las costumbres<br />
locales, la privacidad y los derechos legítimos de los demás, incluidos los derechos de<br />
propiedad intelectual.<br />
Es posible que la protección de los derechos de propiedad intelectual impida la copia, la<br />
modificación o la transferencia de determinadas imágenes, música y otros contenidos.<br />
Su dispositivo admite varios métodos de conectividad. Al igual que las computadoras, el<br />
dispositivo puede estar expuesto a virus y a otros contenidos peligrosos. Tenga precaución<br />
con los mensajes, las solicitudes de conectividad, la exploración y las descargas. Instale y<br />
utilice sólo los servicios y los software de fuentes confiables que ofrezcan seguridad y<br />
84<br />
Acerca de su dispositivo
protección adecuadas contra el software perjudicial, como las aplicaciones Symbian Signed<br />
o las aprobadas por Java Verified. Considere la instalación de software antivirus y de<br />
seguridad en su dispositivo y en cualquier computadora conectada.<br />
El dispositivo puede tener preinstalados favoritos y enlaces a sitios de Internet de terceros.<br />
Usted también podrá acceder a otros sitios de terceros mediante su dispositivo. Los sitios<br />
de terceros no están afiliados a <strong>Nokia</strong>, y <strong>Nokia</strong> no los patrocina ni asume responsabilidad<br />
alguna por ellos. Si opta por acceder a dichos sitios, deberá tomar precauciones de seguridad<br />
o contenido.<br />
Advertencia: Para usar cualquier función de este dispositivo, excepto la alarma, es<br />
necesario que el dispositivo esté encendido. No encienda el dispositivo cuando el<br />
uso de dispositivos móviles pueda causar interferencia o peligro.<br />
Las aplicaciones de oficina admiten las funciones comunes de Microsoft Word, PowerPoint<br />
y Excel (Microsoft Office 2000, XP y 2003). No todos los formatos de archivo se pueden ver<br />
o modificar.<br />
Recuerde hacer copias de seguridad o llevar un registro escrito de toda la información<br />
importante almacenada en su dispositivo.<br />
Antes de conectar el teléfono a otro dispositivo, lea el <strong>manual</strong> del usuario para ver las<br />
instrucciones de seguridad detalladas. No conecte productos incompatibles.<br />
Servicios de red<br />
■<br />
Para usar el teléfono, debe estar suscrito a un proveedor de servicios móviles. Muchas de las<br />
funciones requieren características de red especiales. Estas funciones no están disponibles<br />
en todas las redes; otras redes pueden requerirle acuerdos específicos con su proveedor de<br />
servicios antes de que pueda utilizar los servicios de red. Su proveedor de servicios puede<br />
darle instrucciones y explicarle los cargos que se aplicarán. Algunas redes pueden tener<br />
limitaciones que afectan el uso de los servicios de red. Por ejemplo, es posible que algunas<br />
redes no admitan todos los servicios y los caracteres que dependen del idioma.<br />
Su proveedor de servicios puede haber solicitado la desactivación o no activación de ciertas<br />
funciones de su dispositivo. De ser así, éstas no aparecerán en el menú del dispositivo. Es posible<br />
que el dispositivo también tenga una configuración especial, como cambios en los nombres<br />
de menús, en el orden de los menús y en los iconos. Comuníquese con su proveedor de servicios<br />
para obtener más información.<br />
Este dispositivo admite protocolos WAP 2.0 (HTTP y SSL) que se ejecutan en protocolos TCP/IP.<br />
Algunas funciones de este dispositivo, como exploración mensajería multimedia, navegación<br />
por la Web e e-mail, requieren soporte de la red para estas tecnologías.<br />
Retirar la batería<br />
■<br />
Apague siempre el dispositivo y desconecte el cargador antes de retirar la batería.<br />
85
Asistencia técnica<br />
■<br />
Ayuda<br />
Su dispositivo cuenta con ayuda contextual. Para acceder a la ayuda cuando hay una<br />
aplicación abierta, seleccione Opciones > Ayuda. Para alternar entre la ayuda y la aplicación<br />
abierta en segundo plano, seleccione y mantenga pulsada , y seleccione entre la lista de<br />
aplicaciones disponibles.<br />
Para abrir la ayuda desde el menú principal, seleccione > Ayuda > Ayuda. Seleccione una<br />
aplicación para ver una lista de temas de ayuda y seleccione el texto de ayuda relacionado.<br />
Para abrir una lista de palabras clave, seleccione Opciones > Buscar.<br />
■<br />
Información de soporte y contacto de <strong>Nokia</strong><br />
Consulte en www.nokia.com/support (en inglés) para obtener los <strong>manual</strong>es más recientes,<br />
información adicional, descargas y servicios relacionados con su producto <strong>Nokia</strong>.<br />
En el sitio Web, puede obtener más información sobre el uso de los productos y servicios<br />
<strong>Nokia</strong>. Si necesita comunicarse con <strong>Nokia</strong> Care services, consulte la lista de centros de<br />
contactos locales de <strong>Nokia</strong> Care en www.nokia.com/customerservice (en inglés).<br />
Para servicios de mantenimiento, consulte en su centro de atención <strong>Nokia</strong> Care en<br />
www.nokia.com/repair (en inglés).<br />
Actualizaciones de software<br />
<strong>Nokia</strong> puede producir actualizaciones de software que ofrezcan funcionalidades nuevas,<br />
funciones mejoradas o un mejor desempeño. Puede solicitar estas actualizaciones mediante<br />
la aplicación <strong>Nokia</strong> Software Updater PC. Para actualizar el software del dispositivo, necesita<br />
la aplicación <strong>Nokia</strong> Software Updater y una PC compatible con sistema operativo Microsoft<br />
Windows 2000, XP o Vista, acceso a Internet por banda ancha y un cable de datos compatible<br />
para conectar su dispositivo a la PC.<br />
Para obtener más información y para descargar la aplicación <strong>Nokia</strong> Software Updater, visite<br />
www.nokia.com/softwareupdate (en inglés).<br />
Si su red admite actualizaciones de software por aire, también podrá solicitar actualizaciones a<br />
través del dispositivo.<br />
La descarga de actualizaciones de software puede ocasionar la transmisión de grandes<br />
volúmenes de datos a través de la red de su proveedor de servicios. Comuníquese con su<br />
proveedor para obtener información acerca de los costos correspondientes a la transmisión<br />
de datos.<br />
86
Asegúrese de que la batería del dispositivo tenga energía suficiente o conecte el cargador<br />
antes de comenzar la actualización.<br />
1. Inicio<br />
■<br />
Insertar una tarjeta (U)SIM y la batería<br />
Este dispositivo usa baterías BL-5F.<br />
1. Para abrir la cubierta posterior del<br />
dispositivo, pulse el botón que libera<br />
la cubierta posterior.<br />
2. Retire la cubierta posterior<br />
hacia arriba.<br />
3. Para extraer la batería, levántela<br />
desde el extremo.<br />
4. Deslice la tarjeta (U)SIM en el soporte de<br />
tarjeta SIM. Asegúrese de que el área de<br />
contacto de color dorado de la tarjeta quede<br />
orientada hacia abajo del dispositivo, y de<br />
que la esquina biselada quede orientada<br />
hacia la ranura de soporte de la tarjeta.<br />
5. Vuelva a colocar la batería.<br />
6. Vuelva a colocar la cubierta posterior.<br />
Tarjeta de memoria<br />
■<br />
Utilice sólo tarjetas microSD y microSDHC compatibles aprobadas por <strong>Nokia</strong> con<br />
este dispositivo. <strong>Nokia</strong> utiliza estándares industriales aprobados para las tarjetas<br />
de memoria, pero algunas marcas podrían no ser totalmente compatibles con este<br />
dispositivo. Las tarjetas incompatibles pueden dañar la tarjeta y el dispositivo, además<br />
de los datos almacenados en la tarjeta.<br />
87
Insertar una tarjeta de memoria<br />
Tenga en cuenta que es posible que la tarjeta de memoria se entregue con el dispositivo y ya<br />
esté insertada.<br />
1. Abra la puerta de la ranura de la<br />
tarjeta de memoria.<br />
2. Coloque la tarjeta de memoria en la<br />
ranura con el área dorada hacia abajo.<br />
Presione suavemente la tarjeta para<br />
que se ajuste en su lugar.<br />
3. Cierre la puerta de la ranura.<br />
Retirar una tarjeta de memoria<br />
Importante: No retire la tarjeta de memoria en medio de una operación cuando se<br />
esté accediendo a la tarjeta. Si la retira durante una operación, se pueden dañar la<br />
tarjeta y el dispositivo, y se pueden alterar los datos almacenados.<br />
1. En el modo en espera, pulse brevemente la tecla Encender/Apagar.<br />
2. Desplácese hasta Retirar tarjeta memoria y seleccione Aceptar > Sí.<br />
3. Abra la puerta de la ranura de la tarjeta de memoria.<br />
4. Presione ligeramente la tarjeta para soltarla.<br />
5. Saque la tarjeta y seleccione Aceptar.<br />
6. Cierre la puerta de la ranura.<br />
Cargar la batería<br />
■<br />
La batería está cargada previamente, pero los niveles de carga pueden variar.<br />
1. Conecte el cargador al tomacorriente de pared.<br />
2. Conecte el cargador al dispositivo.<br />
Puede utilizar el dispositivo mientras<br />
se carga.<br />
3. Cuando la batería esté completamente<br />
cargada, desconecte el cargador del<br />
dispositivo y luego del tomacorriente.<br />
88
Si la batería está completamente descargada, es posible que pasen varios minutos antes de<br />
que el indicador de carga aparezca en la pantalla o antes de poder hacer alguna llamada.<br />
El tiempo de carga depende del cargador y de la batería utilizados.<br />
■<br />
Encender y apagar el dispositivo<br />
Mantenga pulsada la tecla Finalizar.<br />
Si el dispositivo pide un código PIN, ingréselo y<br />
seleccione Aceptar.<br />
Si el dispositivo pide el código de bloqueo, ingréselo y<br />
seleccione Aceptar. La configuración original de fábrica<br />
para el código de bloqueo es 12345.<br />
Configurar la hora y la fecha<br />
Para configurar la zona horaria, la fecha y la hora correctas,<br />
seleccione el país en el que se encuentra, y luego ingrese la<br />
fecha y hora locales.<br />
My <strong>Nokia</strong><br />
My <strong>Nokia</strong> es un servicio gratuito que le envía regularmente mensajes de texto con consejos,<br />
trucos y soporte para su dispositivo <strong>Nokia</strong>. Si My <strong>Nokia</strong> está disponible en su país y lo admite<br />
su proveedor de servicios, el dispositivo le invita a unirse al servicio My <strong>Nokia</strong> después de<br />
configurar la fecha y hora.<br />
Seleccione el idioma para el servicio. Si cambia el idioma, el dispositivo se reinicia. Para iniciar<br />
sesión en My <strong>Nokia</strong>, seleccione Aceptar y siga las instrucciones en pantalla.<br />
Para iniciar sesión en My <strong>Nokia</strong> en otro momento, seleccione > Ayuda > My <strong>Nokia</strong>.<br />
Ubicaciones de las antenas<br />
■<br />
Antena celular (1)<br />
Antena Bluetooth (2)<br />
Antena GPS (3)<br />
Su dispositivo puede tener una antena interna y una externa. Al igual<br />
que con otros dispositivos de radiotransmisión, evite el contacto<br />
innecesario con el área de la antena mientras la antena transmite o<br />
recibe señal. El contacto con la antena afecta la calidad de la comunicación<br />
y puede hacer que el dispositivo requiera más energía de la necesaria<br />
para funcionar, lo que reduce la vida útil de la batería.<br />
89
■<br />
Ajustes de configuración<br />
Antes de usar mensajería multimedia, push to talk, e-mail, sincronización, streaming y el<br />
explorador, el dispositivo debe tener los ajustes de configuración correctos. Es posible que el<br />
dispositivo configure automáticamente los ajustes de explorador, mensajería multimedia,<br />
puntos de acceso y streaming, dependiendo de la tarjeta SIM utilizada. De lo contrario,<br />
puede usar la aplicación Asist. config. para configurar los ajustes, o es posible que reciba los<br />
ajustes directamente como un mensaje de configuración, que puede guardar en el dispositivo.<br />
Para obtener más información de la disponibilidad, comuníquese con su proveedor de servicios<br />
o su distribuidor <strong>Nokia</strong> autorizado más cercano.<br />
Cuando reciba un mensaje de configuración, y las configuraciones no estén automáticamente<br />
guardadas ni activadas, aparece 1 mensaje nuevo. Para guardar las configuraciones, seleccione<br />
Mostrar > Opciones > Guardar. Es posible que deba ingresar el código PIN proporcionado<br />
por el proveedor de servicios.<br />
Aplicación “Bienvenido”<br />
■<br />
La aplicación Bienvenido se inicia cuando enciende el dispositivo por primera vez. Con la<br />
aplicación Bienvenido, puede acceder a las siguientes aplicaciones:<br />
Asist. config.: configurar los ajustes de conexión. Consulte ”Asistente de configuración”,<br />
pág. 90.<br />
E-mail: configurar los ajustes de e-mail. Consulte ”Configuraciones de e-mail”, pág. 112.<br />
Transfer.: copiar o sincronizar los datos desde otros dispositivos compatibles.<br />
Tutorial: obtener más información acerca de las funciones del dispositivo y cómo utilizarlas.<br />
Para iniciar el tutorial en otro momento, seleccione > Ayuda > Tutorial y un elemento<br />
del tutorial.<br />
Para abrir Bienvenido en otro momento, seleccione > Ayuda > Bienvenido.<br />
■<br />
Asistente de configuración<br />
La aplicación asistente de configuración ajusta el dispositivo para las configuraciones<br />
de operador y de e-mail, según el proveedor de servicios. También es posible configurar<br />
otros ajustes.<br />
Para usar estos servicios, es posible que deba ponerse en contacto con el proveedor de servicios<br />
para activar una conexión de datos u otros servicios.<br />
Seleccione > Config. > Asist. config.<br />
90
2. Su dispositivo<br />
■<br />
Teclas y partes<br />
1 - Audífono<br />
2 - Lente de la cámara secundaria<br />
3 - Sensor de luz<br />
4 - Pantalla<br />
5 - Teclas de selección izquierda y derecha<br />
6 - Tecla de desplazamiento Navi TM , de aquí en adelante<br />
denominada tecla de desplazamiento, y luz de la tecla<br />
Navi a su alrededor<br />
7 - Tecla Menú<br />
8 - Tecla Borrar<br />
9 - Tecla Llamar<br />
10 - Tecla Encender/Apagar/Finalizar<br />
11 - Tecla Navegador con luz GPS<br />
12 - Teclas numéricas<br />
13 - Conector para cargador<br />
14 - Conector del auricular<br />
15 - Teclas de volumen<br />
16 - Tecla Cámara<br />
17 - Flash de la cámara<br />
18 - Lente de la cámara principal<br />
19 - Altavoz<br />
20 - Conector micro USB<br />
21 - Ranura para la tarjeta de memoria<br />
22 - Botón de liberación de la<br />
cubierta posterior<br />
23 - Micrófono<br />
Durante un uso prolongado, es posible que el dispositivo adquiera temperatura y se entibie.<br />
En la mayoría de los casos, esto es normal. Si sospecha que el dispositivo no funciona en forma<br />
adecuada, llévelo a su centro de servicio autorizado más cercano.<br />
91
■<br />
92<br />
Modo en espera<br />
Después de encender el dispositivo y registrarlo en una red, el dispositivo queda en modo en<br />
espera y listo para su uso.<br />
Para seleccionar la vista en el modo en espera, seleccione > Config. > Config. teléf. ><br />
General > Personalización > Modo en espera > Tema de espera.<br />
Mantenga el dispositivo lejos de imanes o campos magnéticos, pues podrían hacer que<br />
ciertas aplicaciones se activen inesperadamente.<br />
Accesos directos en el modo en espera<br />
Para abrir una lista de los números marcados recientemente, pulse la tecla Llamar.<br />
Para llamar a su buzón de voz, mantenga pulsada la tecla 1.<br />
Para usar los comandos de voz o la marcación por voz, mantenga pulsada la tecla<br />
de selección derecha.<br />
Para escuchar los nuevos mensajes recibidos, mantenga pulsada la tecla de<br />
selección izquierda hasta que se inicie el Lector mens.<br />
Para cambiar el perfil, pulse brevemente la tecla Encender/Apagar y seleccione un perfil.<br />
Para cambiar rápidamente al perfil de silencio a partir de cualquier otro perfil, mantenga<br />
pulsada #.<br />
Para iniciar una conexión con la Web, mantenga pulsada la tecla 0.<br />
Según el tema de espera seleccionado, puede elegir aplicaciones o eventos para agregar a una<br />
lista de acceso directo en el modo en espera o las teclas de desplazamiento. Para elegir las<br />
aplicaciones o los eventos, seleccione > Config. > Config. teléf. > General > Personalización ><br />
Modo en espera > Accesos directos.<br />
Perfil Desconectado<br />
Para activar rápidamente el perfil Desconectado, en el modo en espera pulse brevemente la<br />
tecla Encender/Apagar y seleccione Desconectado. Para abandonar el perfil Desconectado,<br />
pulse brevemente la tecla Encender/Apagar y seleccione otro perfil.<br />
Cuando el perfil Desconectado está activo, todas las conexiones a una red celular se desactivan.<br />
Sin embargo, puede utilizar el dispositivo sin una tarjeta SIM y escuchar la radio o música<br />
con el reproductor de música. Recuerde apagar el dispositivo donde el uso de teléfonos<br />
móviles esté prohibido.<br />
Importante: En el perfil desconectado no es posible realizar ni recibir llamadas ni<br />
usar otras funciones que requieren cobertura de la red celular. Sin embargo, es posible<br />
llamar al número de emergencia oficial programado en su dispositivo. Para realizar<br />
llamadas, primero debe cambiar los perfiles para activar la función telefónica. Si el<br />
dispositivo está bloqueado, ingrese el código de bloqueo.
■<br />
Iconos<br />
Indicadores<br />
o El dispositivo está conectado a una red WCDMA o GSM.<br />
HSDPA (servicio de red) está activado en la red WCDMA.<br />
El dispositivo está en el perfil Desconectado, sin conexión a una red celular.<br />
Hay una tarjeta de memoria en el dispositivo.<br />
Tiene mensajes no leídos en el buzón entrada de Mensajes.<br />
Tiene un nuevo e-mail en el buzón de correo remoto.<br />
Hay mensajes para enviar en el buzón de salida.<br />
Tiene llamadas perdidas.<br />
Tipo de timbre está configurado en Silencio, y Tono aviso mensaje y Tono de alerta<br />
e-mail están configurados en Desactivado.<br />
El teclado del dispositivo está bloqueado.<br />
El altavoz está activado.<br />
Hay una alarma activa.<br />
Se desviarán todas las llamadas al dispositivo a otro número.<br />
o Hay un auricular o adaptador de audífono conectado al dispositivo.<br />
o o Hay una conexión de paquetes de datos GPRS activa, la conexión está<br />
retenida o hay una conexión disponible.<br />
o o Hay una conexión de paquete de datos activa en una parte de la red que<br />
admite EGPRS, la conexión está retenida o hay una conexión disponible. Es<br />
posible que el dispositivo no use EGPRS en la transferencia de datos.<br />
o o Hay una conexión de paquetes de datos WCDMA activa, la conexión está<br />
retenida o hay una conexión disponible.<br />
o La conectividad Bluetooth está activada o los datos se están transmitiendo<br />
mediante tecnología Bluetooth.<br />
Hay una conexión USB activa.<br />
El receptor GPS está activo.<br />
Es posible que también se exhiban otros indicadores.<br />
93
Indicador luminoso<br />
Luz GPS<br />
La luz GPS parpadea cuando el dispositivo intenta establecer una conexión GPS, y permanece<br />
encendida cuando la conexión GPS se establece. Cuando se cierra una aplicación que usa la<br />
conexión GPS, la luz parpadea rápidamente durante un momento.<br />
Luz de la tecla Navi<br />
Puede ajustar que la luz de la tecla Navi parpadee lentamente para indicar cuando se enciende<br />
el dispositivo. La luz se enciende durante algunos segundos a intervalos de aproximadamente<br />
20 segundos. Para activar la luz de estado, seleccione > Config. > Config. teléf. > General ><br />
Personalización > Modo en espera > Luz de estado > Activada. La luz de estado no está<br />
activa con luz ambiental intensa<br />
Eventos perdidos<br />
La luz de la tecla Navi parpadea lentamente durante algunos minutos después de un evento<br />
perdido, como una llamada perdida.<br />
Protector de pantalla<br />
■<br />
Para ajustar las configuraciones del protector de pantalla, seleccione > Config. > Config.<br />
teléf. > General > Personalización > Pantalla > Protector de pantalla. Para configurar el<br />
tiempo de espera para que se active el protector de pantalla, seleccione Límite tpo. protec.<br />
pant. Para configurar el tiempo que el protector de pantalla está activo, seleccione Duración<br />
protec. pantalla.<br />
Menú<br />
■<br />
En el menú, puede acceder a las funciones del dispositivo. Para acceder al menú principal,<br />
seleccione .<br />
Para abrir una aplicación o carpeta, desplácese hasta la opción que desea y pulse la tecla<br />
de desplazamiento.<br />
Si cambia el orden de las funciones del menú, es posible que no corresponda al orden<br />
descrito en este <strong>manual</strong> del usuario.<br />
Para cambiar la vista del menú, seleccione Opciones > Cambiar vista Menú y un tipo<br />
de visualización.<br />
Marcar elementos en una aplicación<br />
■<br />
Para marcar o desmarcar un elemento en las aplicaciones, como una imagen o un videoclip en<br />
Galería, pulse la tecla #. Para marcar o demarcar varios elementos consecutivos, mantenga<br />
pulsada # y desplácese.<br />
94
Alternar entre aplicaciones<br />
■<br />
Para alternar entre aplicaciones abiertas, realice uno de los siguientes procedimientos:<br />
• Seleccione Opciones > Mostrar aplic. abiertas y la aplicación.<br />
• Mantenga pulsada . Desplácese hasta una aplicación y selecciónela.<br />
■<br />
Cerrar una aplicación<br />
Para cerrar una aplicación o una carpeta, seleccione Atrás y Salir tantas veces como sea<br />
necesario para volver al modo en espera, o seleccione Opciones > Salir.<br />
Cuando se dejan aplicaciones ejecutándose en segundo plano, aumenta la demanda de<br />
energía de la batería y reduce su vida útil.<br />
Control de volumen<br />
■<br />
Para ajustar el volumen del auricular o altavoz durante una llamada o cuando escucha un<br />
archivo de audio, pulse las teclas de volumen. Para activar o desactivar el altavoz durante<br />
una llamada, seleccione Altavoz o Teléfono.<br />
Advertencia: Cuando use el altavoz, no sostenga el dispositivo cerca del oído, ya<br />
que el volumen puede resultar demasiado alto.<br />
Rotación de pantalla<br />
■<br />
El dispositivo cuenta con un acelerómetro que percibe el movimiento de éste.<br />
Para rotar el contenido de la pantalla automáticamente cuando se gira el dispositivo hacia la<br />
izquierda o se lo coloca en posición vertical, seleccione > Config. > Config. teléf. ><br />
General > Config. sensor > Sensores Activar. Es posible que algunas aplicaciones y<br />
funciones no permitan que el contenido de la pantalla gire.<br />
■<br />
Control de activación<br />
Para silenciar llamadas y poner en pausa alarmas volteando el dispositivo hacia abajo,<br />
seleccione > Config. > Config. teléf. > General > Config. sensor > Sensores > Activar.<br />
Seleccione Control de activación y marque Silenciar llamadas y Pausa alarmas.<br />
■<br />
Bloqueo del teclado (protección del teclado)<br />
Para bloquear el teclado cuando se cierra la tapa, seleccione > Config. > Config. teléf. ><br />
General > Manejo con tapa > Activación de bloqueo > Cambiar > Activ. si cierra tapa.<br />
Para que el dispositivo bloquee automáticamente el teclado después de un tiempo<br />
determinado, seleccione > Config. > Config. teléf. > General > Seguridad > Teléfono y<br />
tarjeta SIM > Per. bloq. auto. teclado > Definido usuario y seleccione el tiempo deseado.<br />
95
Al abrir la tapa se desbloquea el teclado. Para desbloquear el teclado cuando la tapa está<br />
cerrada, pulse la tecla de selección izquierda y seleccione Aceptar dentro de 1,5 segundos.<br />
Cuando el dispositivo o el teclado están bloqueados, es posible realizar llamadas al número<br />
de emergencia oficial programado en su dispositivo.<br />
Bloqueo remoto<br />
■<br />
Para evitar el uso no autorizado del dispositivo, puede bloquear el dispositivo y la tarjeta de<br />
memoria de manera remota mediante un mensaje de texto. Para bloquear el dispositivo, debe<br />
definir el mensaje de texto y debe enviarlo al dispositivo. Para desbloquear el dispositivo,<br />
necesita el código de bloqueo. Para activar el bloqueo remoto y definir el contenido del<br />
mensaje de texto, seleccione > Config. > Config. teléf. > General > Seguridad > Teléfono y<br />
tarjeta SIM > Bloqueo remoto teléfono > Activado. Escriba el contenido del mensaje de<br />
texto (5 a 20 caracteres), verifíquelo e ingrese el código de bloqueo.<br />
■<br />
Códigos de acceso<br />
Para configurar cómo el dispositivo usa los códigos de acceso, seleccione > Config. ><br />
Config. teléf. > General > Seguridad > Teléfono y tarjeta SIM.<br />
Código de bloqueo<br />
El código de bloqueo (cinco dígitos) le ayuda a bloquear el dispositivo. El código predeterminado<br />
es 12345 y es posible cambiarlo. Mantenga en secreto el nuevo código de bloqueo, en un<br />
lugar seguro y apartado del dispositivo.<br />
Para cambiar el código de bloqueo, seleccione > Config. > Config. teléf. > General ><br />
Seguridad > Teléfono y tarjeta SIM > Código de bloqueo. Para activar el bloqueo automático<br />
del dispositivo, seleccione Período bloq. auto. teléf. > Def. por usuario.<br />
Si olvida el código y el dispositivo se bloquea, el dispositivo necesitará servicio técnico y es<br />
posible que se apliquen cargos adicionales. Para obtener más información, comuníquese con<br />
el punto de servicio <strong>Nokia</strong> Care o con el distribuidor del dispositivo.<br />
Cuando el dispositivo o el teclado están bloqueados, es posible realizar llamadas al número<br />
de emergencia oficial programado en su dispositivo.<br />
Códigos PIN<br />
El código de número de identificación personal (PIN) o el código de número de identificación<br />
personal universal (UPIN) (de cuatro a ocho dígitos) ayudan a proteger su tarjeta SIM.<br />
Generalmente, el código (U)PIN se proporciona con la tarjeta SIM. Para configurar que el<br />
dispositivo solicite el código cada vez que se encienda, seleccione > Config. > Config.<br />
teléf. > General > Seguridad > Teléfono y tarjeta SIM > Solicitud código PIN > Activar.<br />
El código PIN2 se puede incluir con la tarjeta SIM y es necesario para algunas funciones.<br />
96
El PIN de módulo es necesario para acceder a la información en el módulo de seguridad.<br />
El PIN de firma es necesario para la firma digital. El PIN de módulo y el PIN de firma se<br />
proporcionan con la tarjeta SIM cuando el módulo de seguridad está incluido en la tarjeta SIM.<br />
Códigos PUK<br />
El código de clave de desbloqueo personal (PUK) o el código de clave de desbloqueo<br />
universal personal (UPUK) (de ocho dígitos) son necesarios para cambiar un código PIN<br />
y código UPIN bloqueados, respectivamente. El código PUK2 es necesario para cambiar<br />
un código PIN2 bloqueado.<br />
Si es necesario, comuníquese con el proveedor de servicios local para acceder a los códigos.<br />
Contraseña de restricción<br />
Cuando usa la restricción de llamadas necesitará la contraseña de restricción (4 dígitos). Su<br />
proveedor de servicios puede proporcionarle la contraseña. Si la contraseña está bloqueada,<br />
comuníquese con su proveedor de servicios.<br />
Descargue<br />
■<br />
Descargue (servicio de red) es una tienda móvil de contenidos disponible en su dispositivo.<br />
Con Descargue puede descubrir, ver previamente, comprar, descargar y actualizar contenido,<br />
servicios y aplicaciones. Los elementos se clasifican en catálogos y carpetas proporcionados<br />
por distintos proveedores de servicios. El contenido disponible depende del proveedor de servicios.<br />
Seleccione > Descargue o Internet > Descargue, dependiendo del dispositivo.<br />
Descargue usa los servicios de red para acceder al contenido más actualizado. Para obtener<br />
información sobre los elementos adicionales disponibles a través de Descargue, comuníquese<br />
con su proveedor de servicios, o el distribuidor o fabricante del elemento.<br />
■<br />
Personal<br />
Puede instalar aplicaciones en el dispositivo. Para acceder a las aplicaciones, seleccione ><br />
Aplicaciones > Personal.<br />
Importante: Instale y utilice sólo las aplicaciones y el software de fuentes<br />
confiables que ofrezcan seguridad, como las aplicaciones Symbian Signed o<br />
las aprobadas por Java Verified TM .<br />
97
Conectar un auricular compatible<br />
■<br />
No conecte productos que emitan una<br />
señal de salida, porque puede dañar el<br />
dispositivo. No conecte ninguna fuente<br />
de tensión al Conector <strong>Nokia</strong> AV.<br />
Cuando conecte al Conector <strong>Nokia</strong> AV<br />
algún dispositivo externo o auricular que<br />
no sean los aprobados por <strong>Nokia</strong> para este<br />
dispositivo, preste especial atención a los<br />
niveles de volumen.<br />
■<br />
Conectar un cable de datos USB<br />
Conecte un cable de datos USB compatible<br />
al conector USB.<br />
Para seleccionar el modo de conexión USB<br />
predeterminado o cambiar el modo activo,<br />
seleccione > Config. > Conect. > USB ><br />
Modo de conexión USB y el modo deseado.<br />
Para que el modo predeterminado se active<br />
automáticamente, seleccione Preguntar al<br />
conect. > No.<br />
3. Funciones de llamada<br />
Para ajustar el volumen durante una llamada, pulse las teclas de volumen.<br />
Realizar una llamada de voz<br />
■<br />
1. En modo en espera, ingrese el número telefónico, incluido el código de área. Pulse la<br />
tecla Borrar para eliminar un número.<br />
Para realizar llamadas internacionales, pulse * dos veces para indicar el prefijo internacional<br />
(el carácter + reemplaza el código de acceso internacional), e ingrese el código del país,<br />
el código de área (si fuese necesario, omita el cero inicial) y el número de teléfono.<br />
Puede que el carácter + como reemplazo del código de acceso internacional no funcione<br />
en todas las regiones. En este caso, ingrese directamente el código de acceso internacional.<br />
2. Para llamar al número, pulse la tecla Llamar.<br />
3. Para finalizar la llamada o para cancelar el intento de llamada, pulse la tecla Finalizar.<br />
98
Para seleccionar si las llamadas activas finalizan cuando se cierra la tapa, seleccione<br />
> Config. > Config. teléf. > General > Manejo con tapa > Cierre de tapa > Opciones<br />
> Cambiar > Finalizar llam. activa o Contin. llam. activa<br />
Para realizar una llamada desde Contactos, seleccione > Contactos. Desplácese al nombre<br />
que desea o ingrese las primeras letras del nombre y desplácese hasta el nombre. Para llamar<br />
al número, pulse la tecla Llamar.<br />
Para llamar a un número marcado recientemente desde el modo en espera, pulse la<br />
tecla Llamar.<br />
Marcación rápida<br />
La función de marcación rápida es una manera rápida de llamar a los números telefónicos<br />
utilizados con más frecuencia desde el modo en espera. Debe asignar un número de teléfono<br />
a las teclas de marcación rápida 2 a 9 (la 1 está definida para llamar al buzón) y configurar<br />
Marcación rápida en Activar.<br />
Para asignar un número de teléfono a una tecla de marcación rápida, seleccione > Config. ><br />
Marc. ráp. Desplácese hasta un icono de tecla y seleccione Asignar y el contacto al que<br />
desea asignar la tecla de marcación rápida. Para obtener información sobre cómo agregar un<br />
contacto, consulte ”Guardar y administrar la información de contacto”, pág. 112. Para<br />
cambiar el número, seleccione Opciones > Cambiar.<br />
Para activar la marcación rápida, seleccione > Config. > Config. teléf. > Teléfono ><br />
Llamada > Marcación rápida > Activar.<br />
Para llamar a un número de marcación rápida, mantenga pulsada la tecla de marcación<br />
rápida hasta que comience la llamada.<br />
Llamar al buzón<br />
Para llamar al buzón de voz (servicio de red), en el modo en espera mantenga pulsada 1.<br />
Puede tener buzones para llamadas de voz y múltiples líneas de teléfono.<br />
Para definir el número de buzón de llamada si no hay ningún número configurado, seleccione<br />
> Config. > Buzón llam. Desplácese hasta Buzón de voz e ingrese el número de buzón<br />
correspondiente. Para cambiar el número de buzón de llamada, seleccione Opciones ><br />
Cambiar número. Comuníquese con su proveedor de servicios para obtener el número de<br />
buzón de llamada.<br />
Marcación por voz<br />
Automáticamente, se agrega una etiqueta de voz a todas las entradas de Contactos. Utilice<br />
nombres largos y evite nombres parecidos para números distintos.<br />
Realizar una llamada de marcación por voz<br />
Las etiquetas de voz son sensibles al ruido de fondo. Úselas en un entorno sin ruidos.<br />
99
Nota: El uso de etiquetas de voz puede resultar difícil en un entorno ruidoso o<br />
durante una situación de emergencia, por lo que no se debe depender sólo de la<br />
marcación por voz en todas las circunstancias.<br />
1. En el modo en espera, mantenga pulsada la tecla de selección derecha.<br />
Si está usando un auricular compatible con la tecla del auricular, mantenga pulsada<br />
esta tecla.<br />
2. Cuando vea Hable ahora, diga claramente el comando de voz. El dispositivo reproduce el<br />
comando de voz de la mejor coincidencia. Después de aproximadamente 1,5 segundos, el<br />
dispositivo marca el número; si el resultado no es correcto, antes de marcar seleccione<br />
otra entrada.<br />
Realizar una llamada de multiconferencia<br />
Su dispositivo admite llamadas de multiconferencia (servicio de red) entre un máximo de<br />
seis participantes, incluyéndolo a usted.<br />
1. Llame al primer participante.<br />
2. Para llamar a otro participante, seleccione Opciones > Nueva llamada.<br />
3. Para crear la llamada de multiconferencia cuando se contesta la nueva llamada,<br />
seleccione Opciones > Multiconferencia.<br />
Para agregar otro participante a la llamada de multiconferencia, repita el paso 2 y<br />
seleccione Opciones > Multiconferencia > Incluir en multiconf.<br />
4. Para finalizar la llamada de multiconferencia, pulse la tecla Finalizar.<br />
■<br />
Contestar o rechazar una llamada<br />
Para contestar una llamada, pulse la tecla Llamar.<br />
Para silenciar el tono del timbre, seleccione Silenciar.<br />
Para rechazar la llamada, pulse la tecla Finalizar o seleccione Opciones > Rechazar. Si<br />
activó Desvío llamadas > Si está ocupado, la llamada se desvía cuando la rechaza.<br />
Para enviar mensajes de texto como respuesta a la persona que llama en lugar de contestar<br />
la llamada, seleccione Opciones > Enviar mensaje. Para activar la respuesta con mensaje de<br />
texto y editar el mensaje, seleccione > Config. > Config. teléf. > Teléfono > Llamada ><br />
Rechazar llam. con mens. y Texto de mensaje.<br />
Para determinar si las llamadas se contestan automáticamente cuando se abre la tapa,<br />
seleccione > Config. > Config. teléf. > General > Manejo con tapa > Apertura de tapa ><br />
Cambiar > Contestar llam. entr. o No se contestó llam. > Aceptar.<br />
100
Llamada en espera<br />
Durante una llamada, para responder la llamada en espera, pulse la tecla Llamar. La primera<br />
llamada queda retenida. Para alternar entre las dos llamadas, seleccione Cambiar. Para finalizar<br />
la llamada activa, pulse la tecla Finalizar.<br />
Para activar la función de llamada en espera (servicio de red), seleccione > Config. ><br />
Config. teléf. > Teléfono > Llamada > Llamada en espera > Activar.<br />
■<br />
Llamadas de video<br />
Realizar una llamada de video<br />
Para realizar una llamada de video, es posible que necesite una tarjeta USIM y que deba estar<br />
en el área de cobertura de una red WDCMA. Para obtener más información sobre disponibilidad<br />
y suscripción a los servicios de llamadas de video, comuníquese con su proveedor de<br />
servicios. Una llamada de video sólo puede realizarse entre dos participantes y cuando no<br />
estén activas otras llamadas de voz, video y datos. La llamada de video se puede realizar a<br />
teléfonos móviles compatibles o a clientes ISDN.<br />
Ha capturado una imagen fija que se enviará en lugar del video.<br />
Ha rechazado el envío de video desde su dispositivo.<br />
1. Ingrese el número de teléfono en el modo en espera y seleccione Llamada de video.<br />
También puede seleccionar > Contactos, desplazarse hasta el contacto deseado y<br />
seleccionar Opciones > Llamada de video.<br />
2. Para cambiar entre exhibir el video o sólo escuchar sonido durante una llamada de video,<br />
seleccione en la barra de herramientas Activar envío de video o Desactivar envío video.<br />
Si rechazó el envío de video durante una llamada de video, la llamada seguirá<br />
cobrándose como llamada de video. Verifique los precios con su operador de red o<br />
proveedor de servicios.<br />
3. Para finalizar una llamada, pulse la tecla Finalizar.<br />
Contestar una llamada de video<br />
Cuando recibe una llamada de video, aparece en pantalla .<br />
Para responder la llamada de video, pulse la tecla Llamar. ¿Permitir el envío de imágenes de<br />
video a la persona que llama? aparece en pantalla. Si selecciona Sí, la imagen capturada por<br />
la cámara del dispositivo puede ser vista por la persona que realiza la llamada. De lo<br />
contrario, la función de envío de video no estará activada.<br />
Si rechazó el envío de video durante una llamada de video, la llamada seguirá cobrándose<br />
como llamada de video. Consulte los precios con su proveedor de servicios.<br />
Para finalizar una llamada, pulse la tecla Finalizar.<br />
101
■<br />
Configuraciones de llamadas<br />
Llamada<br />
Seleccione > Config. > Config. teléf. > Teléfono > Llamada y alguna de las siguientes<br />
opciones:<br />
Envío de su número (servicio de red): para mostrar u ocultar el número de teléfono a la<br />
persona que está llamando.<br />
Llamada en espera (servicio de red): consulte ”Llamada en espera”, pág. 101.<br />
Rechazar llam. con mens. y Texto de mensaje: consulte ”Contestar o rechazar una llamada”,<br />
pág. 100.<br />
Propio video en llam. rec.: para permitir el envío de su propia imagen de video cuando recibe<br />
una llamada de video.<br />
Imagen en llam. video: para seleccionar una imagen fija cuando rechaza una llamada de<br />
video.<br />
Marcación automática: para configurar que el dispositivo haga un máximo de diez intentos<br />
para establecer la llamada después de un intento fallido.<br />
Mostrar duración llam. y Resumen tras llam.: para que el dispositivo muestre la duración de<br />
la llamada durante la llamada y la duración aproximada de la última llamada.<br />
Marcación rápida: consulte ”Marcación rápida”, pág. 99.<br />
Cualq. tecla contesta: para contestar una llamada entrante al pulsar brevemente cualquier<br />
tecla, excepto las teclas de selección izquierda y derecha, las teclas de volumen y la<br />
tecla Finalizar.<br />
Línea en uso (servicio de red): para seleccionar las líneas telefónicas para realizar llamadas<br />
y enviar mensajes cortos. Esta opción está disponible sólo si la tarjeta SIM admite dos<br />
líneas telefónicas.<br />
Cambio de línea (servicio de red): para activar o desactivar la selección de línea.<br />
Desvío de llamadas<br />
1. Seleccione > Config. > Config. teléf. > Teléfono > Desvío llamadas (servicio de red).<br />
2. Seleccione qué llamadas desea desviar, por ejemplo, Llamadas de voz.<br />
3. Seleccione la opción que desea. Por ejemplo, para desviar llamadas de voz cuando su<br />
número está ocupado o cuando rechaza una llamada entrante, seleccione Si está ocupado.<br />
4. Seleccione Opciones > Activar y el número de teléfono al que desea enviar las llamadas.<br />
Varias opciones de desvío pueden estar activadas a la vez.<br />
La restricción y el desvío de llamadas no pueden estar activos al mismo tiempo.<br />
102
Restricción de llamadas<br />
1. Seleccione > Config. > Config. teléf. > Teléfono > Restricción llam. (servicio de red)<br />
para restringir las llamadas que desea realizar y recibir con el dispositivo.<br />
2. Desplácese hasta la opción de restricción que desea y seleccione Opciones > Activar.<br />
Para cambiar las configuraciones, necesita la contraseña de restricción de su proveedor<br />
de servicios.<br />
La restricción y el desvío de llamadas no pueden estar activos al mismo tiempo.<br />
Cuando las llamadas están restringidas, se pueden realizar llamadas a determinados<br />
números de emergencia oficiales.<br />
Red<br />
Seleccione > Config. > Config. teléf. > Teléfono > Red y alguna de las siguientes opciones:<br />
Modo de red: para seleccionar la red deseada que utilizará (sólo aparece si lo admite el<br />
proveedor de servicios). Si selecciona Modo dual, el dispositivo utiliza automáticamente la<br />
red GSM o WCDMA.<br />
Selección operador: para que el dispositivo busque y seleccione automáticamente una de<br />
las redes disponibles, seleccione Automática. Para seleccionar <strong>manual</strong>mente la red de la<br />
lista de redes, seleccione Manual. La red seleccionada debe tener un acuerdo de roaming<br />
con su red doméstica.<br />
Mostrar info. célula (servicio de red): para que el dispositivo indique cuándo se usa en una<br />
red celular basada en tecnología de red microcelular (MCN, Micro Celular Network) y para<br />
activar la recepción de información celular.<br />
Video compartido<br />
■<br />
Use la función de video compartido para enviar videos en vivo desde su dispositivo móvil<br />
hasta otro dispositivo compatible durante una llamada de voz.<br />
Requisitos para video compartido<br />
La función de video compartido requiere una conexión de sistema de telecomunicación<br />
universal 3G (UMTS). Para obtener más información acerca de la disponibilidad de la red y<br />
los cargos asociados con esta aplicación, comuníquese con su proveedor de servicios.<br />
Para usar la función de video compartido, debe seguir estos pasos:<br />
• Asegurarse de que su dispositivo esté configurado para conexiones entre dos usuarios.<br />
• Asegurarse de que tanto el remitente como el destinatario estén registrados en la<br />
red WCDMA.<br />
103
• Asegurarse de que tiene una conexión UMTS activa y que está dentro de un área de<br />
cobertura de red WCDMA. Si se aleja de una red WCDMA durante la sesión para<br />
compartir, dicha sesión se termina, pero la llamada de voz continúa.<br />
Configuración de video compartido<br />
Una conexión entre dos usuarios también se conoce como conexión SIP (Protocolo de inicio<br />
de sesión). Antes de usar la función de video compartido, pida a su proveedor de servicios el<br />
perfil SIP configurado que utilizará en el dispositivo.<br />
Seleccione > Config. > Config. teléf. > Conexión > Video compart. y alguna de las<br />
siguientes opciones:<br />
Video compartido: para seleccionar la activación de video compartido.<br />
Perfil SIP: para seleccionar un perfil SIP.<br />
Guardar video: para que los videos en vivo se guarden automáticamente.<br />
Memoria guardar pref.: para seleccionar si los videos se guardan en la memoria del dispositivo<br />
o en la tarjeta de memoria.<br />
Tono alerta capacidad: para configurar un tono de alerta que suene cuando la función de<br />
video compartido esté disponible durante una llamada.<br />
Si conoce la dirección SIP de un destinatario, puede guardarla en Contactos. Seleccione ><br />
Contactos, el contacto y Opciones > Editar > Opciones > Agregar info. > SIP o Compartir<br />
video. Ingrese la dirección SIP (nombreusuario@nombredominio). Puede usar una dirección<br />
IP en lugar de un nombre de dominio.<br />
Compartir video en vivo o videoclip<br />
1. Para compartir el video en vivo que está grabando con la cámara del dispositivo,<br />
seleccione Opciones > Compartir video > Video en vivo durante una llamada de voz. Para<br />
compartir un videoclip guardado, seleccione Videoclip y el video que desea compartir.<br />
2. El dispositivo envía la invitación a la dirección SIP que guardó en Contactos.<br />
Si fuese necesario, para enviar la invitación, seleccione la dirección SIP del destinatario y<br />
seleccione Aceptar.<br />
3. Automáticamente se comienza a compartir cuando el destinatario acepta la invitación<br />
y el altavoz está activo. Use la barra de herramientas para controlar la función de<br />
video compartido.<br />
4. Para finalizar la sesión compartida, seleccione Detener. Para finalizar la llamada de voz,<br />
pulse la tecla Finalizar.<br />
104
Aceptar una invitación<br />
El dispositivo suena cuando recibe una invitación. La invitación muestra el nombre o la<br />
dirección SIP del remitente. Seleccione Sí para comenzar la sesión para compartir. Para<br />
rechazar la invitación y volver a la llamada de voz, seleccione No.<br />
■<br />
Registro<br />
Para ver llamadas perdidas, recibidas o marcadas, mensajes de texto, conexiones de paquetes<br />
de datos, y llamadas de fax y datos registradas en el dispositivo, seleccione > Registro.<br />
En el modo en espera, puede usar la tecla Llamar como un acceso directo a Llam. realizadas<br />
en el registro Últimas llam. (servicio de red).<br />
Nota: La facturación real de las llamadas y los servicios de parte de su proveedor<br />
puede variar según las funciones de red, el redondeo de la facturación, los<br />
impuestos, etc.<br />
Nota: Se pueden restablecer algunos temporizadores, incluido el temporizador<br />
general, durante las actualizaciones de servicios o de software.<br />
4. Escribir texto<br />
■<br />
Ingreso de texto tradicional y predictivo<br />
Cuando ingrese texto, en la pantalla indica ingreso de texto predictivo y ingreso<br />
de texto tradicional. Para activar o desactivar el ingreso de texto predictivo, pulse # varias<br />
veces o *, y seleccione Activar texto predictivo o Texto predictivo > Desactivar.<br />
, , o junto al indicador de ingreso de texto indica mayúscula/minúscula<br />
o el modo numérico. Para cambiar mayúscula/minúscula, o cambiar entre el modo alfabético<br />
y el numérico, pulse la tecla # varias veces.<br />
Para cambiar el idioma de escritura del dispositivo, seleccione > Config. > Config. teléf. ><br />
General > Personalización > Idioma > Idioma de escritura. El idioma de escritura afecta los<br />
caracteres disponibles cuando escribe texto y cuando usa el diccionario de texto predictivo.<br />
No todos los caracteres disponibles en una tecla numérica están impresos en la tecla.<br />
Escribir con el ingreso de texto tradicional<br />
Pulse una tecla numérica, del 2 al 9, varias veces hasta que aparezca el carácter deseado. Pulse<br />
la tecla 1 para acceder a los signos de puntuación más comunes y los caracteres especiales.<br />
Si la siguiente letra que desea ingresar está en la tecla que está usando, espere hasta que<br />
aparezca el cursor (o desplácese hacia adelante para finalizar el tiempo de espera) e ingrese<br />
la letra.<br />
105
Escribir con el ingreso de texto predictivo<br />
1. Pulse una tecla numérica, del 2 al 9, sólo una vez por cada letra. La palabra cambia<br />
después de cada pulsación de tecla. Para los signos de puntuación más comunes, pulse la<br />
tecla1.<br />
2. Cuando termine de escribir la palabra y esté correcta, para confirmarla, desplácese hacia<br />
adelante o inserte un espacio.<br />
Si la palabra no es correcta, para ver cada palabra coincidente que encontró el<br />
diccionario, pulse la tecla * varias veces.<br />
Si el signo ? aparece después de la palabra que trataba de escribir, la palabra no está en<br />
el diccionario. Para agregar una palabra al diccionario, seleccione Escribir. Ingrese la<br />
palabra (hasta 32 caracteres) y seleccione Aceptar. La palabra se agrega al diccionario.<br />
Cuando ya no hay más espacio en el diccionario, una nueva palabra reemplazará a la más<br />
antigua.<br />
Funciones comunes en el ingreso de texto tradicional y predictivo<br />
Para agregar un número, mantenga pulsada la tecla numérica.<br />
Para ingresar signos de puntuación y caracteres especiales, mantenga pulsada *.<br />
Para borrar un carácter, pulse la tecla Borrar. Para borrar más caracteres, mantenga pulsada<br />
la tecla Borrar.<br />
Para agregar un espacio, pulse la tecla 0. Para mover el cursor al siguiente renglón, pulse la<br />
tecla 0 tres veces.<br />
■<br />
Copiar y eliminar texto<br />
1. Para seleccionar letras y palabras, mantenga pulsada la tecla # y, al mismo tiempo,<br />
desplácese a la izquierda o a la derecha. Para seleccionar líneas de texto, mantenga<br />
pulsada la tecla # y, al mismo tiempo, desplácese hacia arriba o hacia abajo.<br />
2. Para copiar el texto, mantenga pulsada # y, al mismo tiempo, seleccione Copiar.<br />
Para eliminar el texto seleccionado, pulse la tecla Borrar.<br />
3. Para insertar el texto, desplácese hasta el punto de inserción, mantenga pulsada la tecla #<br />
y al mismo tiempo seleccione Pegar.<br />
106
5. Mensajes<br />
Antes de recibir o enviar mensajes o e-mail, debe tener las configuraciones necesarias y<br />
acceder a los puntos de acceso definidos. Comuníquese con su proveedor de servicios para<br />
obtener las configuraciones.<br />
Escribir y enviar mensajes<br />
■<br />
Su dispositivo puede enviar mensajes de texto que exceden el límite de caracteres para un<br />
solo mensaje. Los textos más largos son enviados como una serie de dos o más mensajes. Es<br />
posible que su proveedor de servicios le cobre los cargos correspondientes. Los caracteres<br />
que llevan tilde u otros signos y los caracteres de otros idiomas usan más espacio, de tal<br />
manera que se limita la cantidad de caracteres que se puede enviar en un solo mensaje.<br />
La red celular puede limitar el tamaño de los mensajes MMS. Si la imagen insertada excede<br />
ese límite, el dispositivo podrá reducir su tamaño para enviarla por MMS.<br />
Sólo los dispositivos con funciones compatibles pueden recibir y mostrar mensajes multimedia.<br />
La apariencia de un mensaje podrá variar dependiendo del dispositivo receptor.<br />
1. Seleccione > Mensajes > Crear mensaje y el tipo de mensaje. Para crear un mensaje<br />
de texto o un mensaje multimedia, seleccione Mensaje. El tipo de mensaje cambia<br />
automáticamente según el contenido.<br />
2. En el campo Para, ingrese los números de teléfono o las direcciones de e-mail de los<br />
destinatarios o, para seleccionar destinatarios desde Contactos, pulse la tecla de<br />
desplazamiento. Separe los destinatarios con un punto y coma (;).<br />
3. Para ingresar el asunto de un mensaje multimedia o de e-mail, desplácese hacia abajo<br />
hasta el campo Asunto. Si el campo Asunto no está visible para un mensaje multimedia,<br />
seleccione Opciones > Campos encab. mensaje, marque Asunto y seleccione Aceptar.<br />
4. Desplácese hacia abajo hasta el campo del mensaje e ingrese el contenido del mensaje.<br />
Cuando escriba un mensaje de texto, el indicador de extensión de mensaje exhibe cuántos<br />
caracteres puede ingresar. Por ejemplo, 10 (2) significa que aún puede agregar diez<br />
caracteres para enviarlos como una serie de dos mensajes de texto.<br />
Para insertar un objeto, como una imagen, un videoclip, una nota o una tarjeta de<br />
negocios a un mensaje multimedia o de e-mail, pulse la tecla de desplazamiento y<br />
seleccione Insertar contenido.<br />
Para grabar un nuevo clip de sonido para un mensaje de audio, seleccione Grabar.<br />
Para usar un clip de sonido grabado anteriormente, seleccione Opciones > Insertar clip<br />
sonido > Desde la Galería.<br />
5. Para enviar el mensaje, seleccione Opciones > Enviar.<br />
107
■<br />
Buzón de entrada<br />
Buzón entrada contiene mensajes recibidos, excepto e-mail y mensajes de difusión celular.<br />
Para leer los mensajes recibidos, seleccione > Mensajes > Buzón entrada y el mensaje.<br />
Para ver la lista de objetos multimedia incluidos en el mensaje multimedia, abra el mensaje y<br />
seleccione Opciones > Objetos.<br />
Su dispositivo puede recibir muchos tipos de mensajes, como logotipos del operador, tarjetas<br />
de negocios, entradas de agenda y tonos de timbre. Puede guardar el contenido de mensaje<br />
especial en el dispositivo. Por ejemplo, para guardar en la agenda una entrada de agenda<br />
recibida, seleccione Opciones > Guardar en Agenda.<br />
La apariencia de un mensaje podrá variar dependiendo del dispositivo receptor.<br />
Mensajes de servicio<br />
■<br />
Los mensajes de servicio (servicio de red) son notificaciones que pueden incluir un mensaje<br />
de texto o la dirección de un servicio de exploración.<br />
Para definir si los mensajes de servicio están activados y si se pueden descargar automáticamente,<br />
seleccione > Mensajes > Opciones > Configuraciones > Mensaje de servicio.<br />
■<br />
E-mail<br />
Antes de usar e-mail, debe tener una cuenta de e-mail y las configuraciones correctas. Para<br />
comprobar la disponibilidad y las configuraciones de su cuenta de e-mail, comuníquese con<br />
el proveedor de servicios de e-mail.<br />
También debe configurar un buzón de correo en el dispositivo. Al crear un nuevo buzón de<br />
correo, el nombre asignado al buzón de correo reemplaza a Nuevo buzón. Puede crear hasta<br />
seis buzones de correo.<br />
Buzones de correo IMAP4 y POP3<br />
Seleccione > Mensajes y el buzón de correo. ¿Conectar con buzón de correo? aparece en<br />
pantalla. Para conectarse con el buzón de correo (servicio de red), seleccione Sí, o para ver<br />
los e-mail recuperados anteriormente sin conexión, seleccione No.<br />
Para conectar el buzón de correo en otro momento, seleccione Opciones > Conectar.<br />
Cuando está conectado, para finalizar la conexión de datos al buzón de correo remoto,<br />
seleccione Opciones > Desconectar.<br />
Recuperar y leer mensaje de e-mail<br />
1. Seleccione Opciones > Recuperar e-mail y si desea recuperar los mensajes nuevos, los<br />
seleccionados o todos los mensajes.<br />
2. Para abrir un mensaje de e-mail, selecciónelo.<br />
108
Para ver archivos adjuntos de e-mail, indicados con , seleccione Opciones > Archivos<br />
adjuntos. Puede abrir, guardar o enviar archivos adjuntos en los formatos admitidos.<br />
Eliminar mensajes de e-mail<br />
Para eliminar un mensaje de e-mail del dispositivo y dejarlo en el buzón de correo remoto,<br />
seleccione Opciones > Eliminar > Sólo del teléfono. Para eliminar un e-mail tanto del<br />
dispositivo como del buzón de correo remoto, seleccione Opciones > Eliminar > Teléfono<br />
y servidor.<br />
Para cancelar la eliminación de un e-mail tanto del dispositivo como del servidor, desplácese<br />
a un e-mail que ha sido marcado para ser eliminado durante la próxima conexión y seleccione<br />
Opciones > Deshacer eliminar.<br />
■<br />
Sincronización de buzones de correo<br />
Seleccione > Mensajes y el buzón de correo de sincronización.<br />
Para sincronizar el dispositivo con el buzón de correo remoto, seleccione Opciones ><br />
Sincronización > Iniciar.<br />
Para ver los mensajes recibidos, seleccione Buzón entrada y el mensaje.<br />
■<br />
Mail for exchange<br />
Con Mail for Exchange, puede acceder al e-mail, agenda, contactos (libreta de direcciones) y<br />
tareas de la cuenta Microsoft® Exchange desde el dispositivo móvil. Con el proceso de<br />
sincronización es posible mantener actualizadas las entradas del dispositivo móvil con las<br />
entradas de la cuenta de Exchange.<br />
La disponibilidad de Mail for Exchange en el dispositivo depende de la versión del software<br />
del dispositivo.<br />
Necesita una cuenta de e-mail de Exchange y el administrador de Exchange debe habilitar la<br />
cuenta para sincronización. Comuníquese con el administrador o con el proveedor de la<br />
cuenta de e-mail para obtener más detalles.<br />
Nota:también puede instalar la aplicación autónoma Directorio de la compañía en<br />
lugar de Mail for Exchange. Con el Directorio de la compañía, puede buscar<br />
contactos que estén en el directorio de la compañía. Así mismo se incluye la<br />
misma función de búsqueda en Mail for Exchange. No puede enviar e-mail de Mail<br />
for Exchange con la aplicación autónoma Directorio de la compañía.<br />
Sincronización<br />
La sincronización actualiza el contenido de los e-mail, agenda, contactos y tareas del<br />
dispositivo móvil con el contenido de la cuenta Microsoft Exchange. Puede personalizar la<br />
forma en que sincroniza al configurar un perfil en el que puede:<br />
109
• Seleccionar el contenido que desea sincronizar: e-mail, agenda, contactos, tareas o<br />
cualquier combinación entre éstos cuatro.<br />
• Configurar un programa por medio del cual Mail for Exchange sincroniza<br />
automáticamente. (Además puede sincronizar <strong>manual</strong>mente en cualquier momento).<br />
• Resolver conflictos de contenido durante la sincronización al especificar si prevalece el<br />
contenido de la cuenta del servidor de Microsoft® Exchange o el contenido del<br />
dispositivo móvil cuando se produce un conflicto.<br />
• Seleccionar Capa de Sockets seguros (SSL) para aumentar la seguridad entre el<br />
dispositivo móvil y el servidor de Exchange.<br />
• Seleccionar cómo desea recibir alertas cuando reciba un e-mail.<br />
Activar Mail for Exchange<br />
■<br />
1. Para instalar e iniciar Mail for Exchange en el dispositivo móvil, seleccione > Config.<br />
> Asist. config..<br />
2. Cree un perfil de sincronización que controle qué y cuándo sincronizar.<br />
3. Sincronizar para obtener las entradas de e-mail, agenda, contactos y tareas en el<br />
dispositivo móvil desde la cuenta del servidor de Exchange.<br />
4. Comience a utilizar el e-mail, agenda, contactos y tareas en el dispositivo móvil.<br />
Nota: los iconos de Mail for Exchange están visibles en la carpeta de Internet<br />
después de configurar la cuenta de Mail for Exchange con el Asistente de<br />
configuración.<br />
Nota:una carpeta de Mail for Exchange está visible en la carpeta de Mensajería<br />
del dispositivo después de configurar la cuenta de Mail for Exchange.<br />
Para obtener más información acerca de Mail for Exchange, consulte<br />
www.businesssoftware.nokia.com.<br />
■<br />
Buzón de salida<br />
La carpeta de buzón de salida es un lugar de almacenamiento temporal para mensajes que<br />
esperan ser enviados. Para acceder a la carpeta de buzón de salida, seleccione ><br />
Mensajes > Buzón salida.<br />
Para intentar de nuevo el envío de un mensaje, desplácese hasta el mensaje y seleccione<br />
Opciones > Enviar.<br />
Para posponer el envío de un mensaje, desplácese hasta un mensaje y seleccione Opciones ><br />
Aplazar envío.<br />
110
■<br />
Lector de mensaje<br />
Para escuchar un mensaje en el Buzón entrada o en un buzón de correo, desplácese hasta el<br />
mensaje o marque los mensajes, y seleccione Opciones > Escuchar.<br />
Sugerencia: Cuando reciba un nuevo mensaje, para escuchar los mensajes recibidos,<br />
en el modo en espera, mantenga pulsada la tecla de selección izquierda hasta que se<br />
inicie el Lector mens.<br />
Para seleccionar el idioma predeterminado y la voz que se utilizará para leer los mensajes, y<br />
ajustar las propiedades de voz, como velocidad y volumen, seleccione > Config. > Voz.<br />
Para seleccionar otras configuraciones para el lector de mensajes, en Voz, desplácese a la<br />
derecha hasta Configuracion.<br />
■<br />
Ver mensajes en la tarjeta SIM<br />
Antes de ver los mensajes SIM, debe copiarlos en una carpeta en su dispositivo. Seleccione<br />
> Mensajes > Opciones > Mensajes SIM, marque los mensajes que desea copiar y<br />
seleccione Opciones > Copiar y la carpeta a la cual desea copiar los mensajes.<br />
Difusión celular<br />
■<br />
Verifique con su proveedor de servicios si la difusión celular (servicio de red) está disponible<br />
y cuáles son los temas disponibles y los números de temas relacionados.<br />
Seleccione > Mensajes > Opciones > Difusión celular. Para activar el servicio, seleccione<br />
Opciones > Configuraciones > Recepción > Activar.<br />
Comandos de servicio<br />
■<br />
Para ingresar y enviar a su proveedor de servicios comandos de servicio (también denominados<br />
comandos USSD) como comandos de activación para los servicios de red, seleccione ><br />
Mensajes > Opciones > Comandos de servicio. Para enviar el comando, seleccione<br />
Opciones > Enviar.<br />
■<br />
Configuraciones de mensajes<br />
Configuración de mensajes de texto<br />
Para definir las configuraciones de mensaje de texto, como el centro de mensajes y la<br />
codificación de caracteres utilizados, seleccione > Mensajes > Opciones > Configuraciones ><br />
Mensaje corto.<br />
111
Configuraciones de mensajes multimedia<br />
Para definir configuraciones de mensajes multimedia, como el punto de acceso que se utilizará<br />
y si los mensajes multimedia se recuperarán automáticamente, seleccione > Mensajes ><br />
Opciones > Configuraciones > Mensaje multimedia.<br />
Configuraciones de e-mail<br />
Seleccione > Mensajes > Opciones > Configuraciones > E-mail > Buzones de correo, el<br />
buzón de correo y una de las siguientes opciones:<br />
Config. conexión: para definir las configuraciones de conexión, como los servidores y<br />
protocolos utilizados.<br />
Config. de usuario: para definir las configuraciones de usuario, por ejemplo en qué momento<br />
se envían los mensajes y si se incluirá una firma.<br />
Config. recuperación: para definir las configuraciones de recuperación, por ejemplo qué<br />
partes del mensaje se recuperarán y cuántos mensajes se recuperarán<br />
Recuperación auto.: para definir las configuraciones para recuperar mensajes automáticamente<br />
a intervalos definidos o cuando se recibe una notificación de e-mail desde el servidor<br />
Otras configuraciones<br />
Para definir si un número especificado de mensajes enviados se guarda en la carpeta Enviados<br />
y si los mensajes se almacenarán en la memoria del dispositivo o en la tarjeta de memoria,<br />
seleccione > Mensajes > Opciones > Configuraciones > Otras.<br />
6. Contactos<br />
■<br />
112<br />
Guardar y administrar la información de contacto<br />
Para guardar y administrar información de contacto, como nombres, números de teléfono y<br />
direcciones, seleccione > Contactos.<br />
Para agregar un nuevo contacto, seleccione Opciones > Nuevo contacto. Complete los campos<br />
que desea y seleccione Listo.<br />
Para configurar su dispositivo para que exhiba los contactos de la memoria del dispositivo y<br />
de la tarjeta SIM en la lista de contactos, seleccione Opciones > Configuraciones > Contactos<br />
para mostrar y marque Memoria teléfono y Memoria SIM.<br />
Para copiar nombres y números desde una tarjeta SIM hasta el dispositivo y viceversa,<br />
desplácese hasta el contacto (o marque los contactos que desea), y seleccione Opciones ><br />
Copiar > Memoria teléfono o Memoria SIM.
Para ver información sobre el consumo de memoria de los contactos, seleccione Opciones ><br />
Información Contactos.<br />
Para ver la lista de números de marcación fija, seleccione Opciones > Números SIM ><br />
Contac. marcación fija. Esta configuración sólo aparece si la tarjeta SIM la admite.<br />
Cuando la marcación fija está activada, pueden efectuarse llamadas al número oficial de<br />
emergencias programado en su dispositivo.<br />
Para asignar números y direcciones predeterminados a un contacto, selecciónelo y<br />
seleccione Opciones > Predeterminados. Desplácese a la opción predeterminada que<br />
desea y seleccione Asignar.<br />
Grupos de contacto<br />
■<br />
Para crear un grupo de contactos para poder enviar mensajes de texto o e-mails a múltiples<br />
destinatarios al mismo tiempo, seleccione > Contactos. Desplácese a la derecha y seleccione<br />
Opciones > Nuevo grupo. Ingrese un nombre para el grupo y ábralo. Seleccione Opciones ><br />
Agregar miembros. Marque los contactos que desea agregar al grupo y seleccione Aceptar.<br />
■<br />
Agregar un tono de timbre<br />
Puede configurar un tono de timbre o un tono de timbre de video para cada contacto y grupo.<br />
Para agregar un tono de timbre a un contacto, seleccione > Contactos y abra el contacto.<br />
Seleccione Opciones > Tono de timbre y el tono de timbre. Para agregar un tono de timbre a<br />
un grupo, desplácese a la derecha de la lista de grupos y desplácese a un grupo de contactos.<br />
Seleccione Opciones > Tono de timbre y el tono de timbre para el grupo. Para eliminar el<br />
tono de timbre personal o de grupo, seleccione Tono predeter. como el tono de timbre.<br />
7. Posicionamiento<br />
Puede usar aplicaciones como Mapas y Datos GPS para buscar sus ubicaciones o medir<br />
distancias y coordenadas. Estas aplicaciones exigen una conexión GPS.<br />
Acerca de GPS<br />
■<br />
El sistema global de posicionamiento (GPS) es un sistema mundial de navegación por radio que<br />
utiliza 24 satélites y las estaciones en tierra que monitorean el funcionamiento de los satélites.<br />
Su dispositivo tiene un receptor interno de GPS.<br />
El Gobierno de los Estados Unidos es el operador del Sistema de Posicionamiento Global<br />
(GPS-Global Positioning System), y el único responsable de su precisión y mantenimiento.<br />
La precisión de localización de datos puede verse afectada por los ajustes en los satélites<br />
GPS que realice el Gobierno de los Estados Unidos y está sujeta a cambios en la política civil<br />
de GPS del Departamento de Defensa de los Estados Unidos y del Plan de Radionavegación<br />
113
Federal (Federal Radionavigation Plan). La precisión de los datos también puede verse afectada<br />
por una mala geometría satelital. La ubicación, la presencia de edificios y de obstáculos<br />
naturales, y las condiciones climáticas pueden afectar la disponibilidad y la calidad de las<br />
señales GPS. Sólo deberá usarse el receptor GPS en exteriores para permitir la recepción de<br />
señales GPS.<br />
No se debe usar ningún GPS como una medición de ubicación precisa y nunca debe depender<br />
solamente de los datos de ubicación del receptor GPS y de las redes celulares de radio para<br />
determinar el posicionamiento o la navegación.<br />
■<br />
114<br />
A-GPS<br />
Se usa el GPS asistido (A-GPS) para recuperar datos de asistencia mediante una conexión de<br />
paquetes de datos, que ayudan a calcular las coordenadas de su ubicación actual cuando su<br />
dispositivo recibe señales de los satélites.<br />
Su operador de red puede cobrarle por esta conexión según su suscripción de red. Comuníquese<br />
con su proveedor de servicios para conocer el punto de acceso a Internet y los cobros<br />
relacionados con el servicio.<br />
Para activar o desactivar un método de posicionamiento, como A-GPS, seleccione ><br />
Config. > Config. teléf. > General > Posicionam. > Métodos posicionam., el método de<br />
posicionamiento y Activar o Desactivar.<br />
Su dispositivo está preconfigurado para usar el servicio <strong>Nokia</strong> A-GPS si no hay configuraciones<br />
disponibles de A-GPS específicas del proveedor de servicios. Sólo se recuperan datos de<br />
asistencia del servidor del servicio <strong>Nokia</strong> A-GPS cuando es necesario.<br />
Para usar A-GPS, debe tener definido un punto de acceso a Internet para paquetes de datos.<br />
El dispositivo solicita un punto de acceso a Internet cuando se usa A-GPS por primera vez.<br />
Para definir el punto de acceso, consulte ”Configuraciones de posicionamiento”, pág. 114.<br />
■<br />
Configurar conexión a GPS<br />
Configuraciones de posicionamiento<br />
Seleccione > Config. > Config. teléf. > General > Posicionam. y alguna de las<br />
siguientes opciones:<br />
Métodos posicionam.: para activar o desactivar diferentes métodos de posicionamiento.<br />
Servidor posicionam.: para editar configuraciones de servidor de posicionamiento. Para<br />
seleccionar si permitir conexiones automáticas con el servidor de posicionamiento, para<br />
que siempre se le pregunte o para conectarse al servidor de posicionamiento, seleccione<br />
Uso servidor posic. Para definir un punto de acceso para A-GPS, seleccione Punto de acceso.<br />
Sólo se puede usar un punto de acceso a Internet para paquetes de datos. El dispositivo<br />
solicita un punto de acceso a Internet cuando se usa A-GPS por primera vez. Para definir el<br />
servidor usado, seleccione Dirección del servidor.<br />
Preferencias de notación: para definir el sistema de medida y el formato de coordenadas.
Sostenga el dispositivo en forma correcta.<br />
Cuando use un receptor, mueva el dispositivo desde la posición vertical hasta un ángulo de<br />
45 grados sin obstrucciones hacia el cielo.<br />
Establecer una conexión GPS puede demorar entre un par de segundos y varios minutos, o<br />
incluso más en un vehículo. Consulte ”Luz GPS”, pág. 94.<br />
El uso del receptor GPS puede descargar más rápidamente la batería del dispositivo.<br />
Si su dispositivo no puede encontrar las señales satelitales, considere lo siguiente:<br />
• Si está en interiores, salga para recibir una señal mejor.<br />
• Si está en exteriores, vaya a un lugar más despejado.<br />
• Asegúrese de que su mano no esté tapando el receptor GPS del dispositivo.<br />
• Si las condiciones climáticas son malas, la intensidad de señal se puede ver afectada.<br />
• Algunos automóviles tienen ventanas polarizadas (atérmicas), las cuales pueden<br />
bloquear las señales del satélite.<br />
Estado de la señal del satélite<br />
Para verificar cuántos satélites encontró su dispositivo, y si su dispositivo está recibiendo<br />
señales satelitales, seleccione > Aplicaciones > Datos GPS > Posición > Opciones ><br />
Estado del satélite.<br />
Si su dispositivo encontró satélites, se muestra una barra para cada satélite en la vista de<br />
información de satélites. Una vez que su dispositivo haya recibido datos suficientes de la señal<br />
satelital para calcular las coordenadas de su ubicación, las barras se vuelven azul oscuras.<br />
■<br />
Solicitudes de posición<br />
Puede recibir una solicitud de un servicio de red para recibir su información de posición. Los<br />
proveedores de servicios pueden ofrecer información sobre temas locales, como el tiempo y<br />
las condiciones de tránsito, según la ubicación de su dispositivo.<br />
Si recibe una solicitud de posición, para permitir el envío de la información de posición<br />
seleccione Aceptar, o Rechazar, para rechazar el pedido.<br />
Maps<br />
■<br />
La cobertura de mapas varía según el país o la región. Por ejemplo, puede que algunos mapas<br />
no estén disponibles debido a restricciones legales de países o regiones. Según el máximo<br />
alcance permitido por la legislación vigente, <strong>Nokia</strong> no ofrece ninguna garantía respecto de la<br />
disponibilidad, precisión, corrección o actualización de mapas.<br />
115
Acerca de Maps<br />
Con Maps, puede ver su ubicación actual en el mapa, navegar por mapas de distintas ciudades<br />
y países, navegar hacia el destino deseado usando guía de voz, buscar direcciones y puntos<br />
de interés diversos, planificar rutas de una ubicación a otra, guardar ubicaciones como marcas<br />
y enviarlas a dispositivos compatibles. También puede comprar servicios adicionales, como<br />
guías de viaje e información de tráfico. Estos servicios no están disponibles en todos los<br />
países o regiones.<br />
Algunos mapas pueden venir precargados en la tarjeta de memoria del dispositivo. Puede<br />
descargar más mapas desde Internet mediante el software para PC <strong>Nokia</strong> Maps Loader.<br />
Consulte ”Descarga de mapas”, pág. 118.<br />
Maps usa el GPS. Puede definir los métodos de posicionamiento que usa el dispositivo.<br />
Consulte ”Configuraciones de posicionamiento”, pág. 114. Para lograr la información de<br />
ubicación más exacta, use el receptor interno de GPS o el receptor externo compatible de GPS.<br />
Explorar mapas<br />
Para iniciar Mapas, oprima la tecla Navegador.<br />
Cuando use Maps por primera vez, puede que deba seleccionar un punto de acceso celular<br />
para descargar la información de los mapas de su ubicación actual. Para cambiar en otro<br />
momento el punto de acceso predeterminado, seleccione Opciones > Herramientas ><br />
Configuraciones > Internet > Destino de red.<br />
Para recibir una nota cuando su dispositivo registra una red fuera de su red doméstica,<br />
seleccione Opciones > Herramientas > Configuraciones > Internet > Advertencia de<br />
roaming > Activado. Para obtener detalles y conocer los costos de roaming, comuníquese<br />
con su proveedor de servicios.<br />
El indicador de transferencia de datos muestra la conexión de Internet utilizada y la cantidad<br />
de datos transferidos desde el inicio de la aplicación.<br />
En cierta medida, casi todos los sistemas de cartografía digital son imprecisos e incompletos.<br />
Nunca dependa únicamente de la cartografía que descarga para este dispositivo.<br />
Cuando abre Maps, éste muestra la ubicación que se guardó en la última sesión o la capital<br />
del país donde se encuentra. También se descarga el mapa de la ubicación, si es necesario.<br />
Para establecer una conexión GPS y acercarse a la última ubicación conocida, pulse la tecla<br />
Navegador o seleccione Opciones > Mi posición.<br />
El indicador GPS (<br />
) muestra la disponibilidad y la potencia de la señal satelital.<br />
Una barra corresponde a un satélite. Cuando el dispositivo recibe suficientes datos del satélite<br />
para establecer una conexión GPS, la barra cambia a verde. Su dispositivo debe recibir señales<br />
de al menos cuatro satélites para poder calcular las coordenadas de su ubicación. Después<br />
del cálculo inicial, pueden ser suficientes las señales de tres satélites.<br />
116
Para acercarse o alejarse, pulse la tecla * o #. Use la tecla de desplazamiento para moverse<br />
en el mapa. Automáticamente, se descargará un nuevo mapa cuando se desplace a un área<br />
que no esté cubierta por mapas previamente descargados. Consulte ”Descarga de mapas”,<br />
pág. 118. Los mapas no tienen ningún costo, pero la descarga de mapas puede ocasionar la<br />
transmisión de grandes volúmenes de datos a través de la red de su proveedor de servicios.<br />
Para obtener más información sobre los costos de transmisión de datos, comuníquese con su<br />
proveedor de servicios. Los mapas se guardan automáticamente en la memoria del dispositivo<br />
o en una tarjeta de memoria compatible (si está insertada).<br />
Brújula<br />
El dispositivo cuenta con una brújula magnética.<br />
La brújula siempre se debe calibrar correctamente. Los campos electromagnéticos,<br />
los objetos metálicos grandes, otras circunstancias externas y abrir y cerrar la tapa pueden<br />
reducir la precisión de la brújula. Nunca confíe únicamente en la brújula del dispositivo.<br />
Para activar la brújula e intentar buscar su<br />
ubicación actual, pulse la tecla Navegador.<br />
Si el círculo alrededor de la brújula está rojo,<br />
la brújula no está calibrada. Para calibrar la<br />
brújula, gire con la muñeca el dispositivo<br />
alrededor de todos sus ejes en un movimiento<br />
continuo hasta que el círculo se torne verde.<br />
Cuando gire el dispositivo, asegúrese de que la<br />
pantalla de éste apunte momentáneamente<br />
hacia el suelo.<br />
Si el círculo está amarillo, la precisión de la calibración es baja, y deberá seguir girando el<br />
dispositivo. Cuando la brújula está activada y el círculo a su alrededor está verde, la vista<br />
del mapa cambia automáticamente según la dirección a la que apunte la parte superior<br />
del dispositivo.<br />
Para activar o desactivar la brújula, seleccione Opciones > Herramientas > Activar brújula o<br />
Desactivar brújula. Cuando la brújula no se usa, el círculo a su alrededor está blanco y la<br />
vista del mapa no cambia automáticamente.<br />
Buscar ubicaciones<br />
Para buscar una ubicación en la ciudad o el área que aparece en el mapa, ingrese la dirección<br />
completa o parcial de la ubicación en el campo de búsqueda, y seleccione Buscar. Para buscar<br />
una ubicación en otra ciudad, ingrese la ciudad y la dirección total o parcial, y seleccione<br />
Buscar. Si es posible, escriba el nombre de la ciudad en el idioma local o en inglés. Si no está<br />
seguro de la dirección, ingrese los tres primeros caracteres de la dirección. Para buscar una<br />
ciudad en otro país, ingrese el nombre completo del país en inglés o el código de país de tres<br />
letras ISO y la ciudad. Por ejemplo, para buscar Londres mediante el código de país, ingrese<br />
GBR London y seleccione Buscar.<br />
117
Para buscar una dirección específica, seleccione Opciones > Buscar > Direcciones. País/<br />
Región * y Ciudad o cód. postal son obligatorios.<br />
Para explorar o buscar lugares y las atracciones en el área, seleccione Opciones > Buscar ><br />
Lugares y una categoría. Por ejemplo, para buscar un hotel, seleccione Opciones > Buscar ><br />
Lugares > Alojamiento. Para buscar un hotel por su nombre, ingrese el nombre y seleccione<br />
Buscar o, para explorar los hoteles, seleccione una categoría o Buscar todo.<br />
Para buscar una dirección guardada en Contactos, seleccione Opciones > Buscar ><br />
Direcciones > Opciones > Selec. de Contactos.<br />
Guardar y enviar ubicaciones<br />
Para guardar una ubicación en el dispositivo, pulse la tecla de desplazamiento y seleccione<br />
Agregar a Mis lugares.<br />
Para enviar una ubicación a un dispositivo compatible, pulse la tecla de desplazamiento y<br />
seleccione Enviar. Si envía la ubicación en un mensaje de texto, la información se convierte a<br />
texto simple.<br />
Ver los elementos guardados<br />
Para ver las ubicaciones o rutas que ha guardado en el dispositivo, seleccione Opciones ><br />
Favoritos > Mis lugares o Rutas. Las ubicaciones guardadas en Marcas se muestran en<br />
Mis lugares.<br />
Para consultar las ubicaciones que ha buscado en el mapa, seleccione Opciones ><br />
Favoritos > Historial.<br />
Para crear una colección de sus lugares favoritos, seleccione Opciones > Favoritos ><br />
Colecciones > Nueva colección. Ingrese el nombre de la colección. Para agregar ubicaciones a<br />
la colección, abra Mis lugares, desplácese hasta una ubicación, pulse la tecla de desplazamiento<br />
y seleccione Agregar a colección.<br />
Descarga de mapas<br />
Cuando explora un mapa en Maps, un nuevo mapa se descarga automáticamente cuando se<br />
desplaza hasta un área que no está cubierta por los mapas antes descargados. El contador de<br />
datos (kB) muestra la cantidad de tráfico de red cuando se buscan mapas, se crean rutas o se<br />
buscan ubicaciones en línea.<br />
La descarga de mapas puede ocasionar la transmisión de grandes volúmenes de datos a<br />
través de la red de su proveedor de servicios. Comuníquese con su proveedor para obtener<br />
información acerca de los costos de transmisión de datos.<br />
Para evitar la descarga automática de mapas, por ejemplo, cuando esté fuera de su red<br />
doméstica, seleccione Opciones > Herramientas > Configuraciones > Internet > Conectarse<br />
al inicio > No.<br />
118
Para definir la memoria que se va a usar y cuánto espacio de memoria desea usar para guardar<br />
mapas o archivos de guía de voz, seleccione Opciones > Herramientas > Configuraciones ><br />
Mapa > Memoria para usar y Uso máximo de memoria. Cuando la memoria se llena, se<br />
elimina el mapa más antiguo. Los datos de los mapas guardados se borran con el software<br />
<strong>Nokia</strong> Map Loader para PC.<br />
<strong>Nokia</strong> Map Loader<br />
<strong>Nokia</strong> Map Loader es un software para PC que puede usar para descargar e instalar mapas y<br />
servicios adicionales de Internet a una tarjeta de memoria compatible. Use la aplicación<br />
Maps y busque mapas al menos una vez antes de usar <strong>Nokia</strong> Map Loader, dado que <strong>Nokia</strong><br />
Map Loader usa la información del historial de Maps.<br />
Para instalar <strong>Nokia</strong> Map Loader en una PC compatible, visite http://maps.nokia.com<br />
(en inglés) y siga las instrucciones que aparecen en pantalla.<br />
Activar la licencia de navegación<br />
Antes de que pueda usar la función de navegación, debe activar en línea la licencia por tiempo<br />
limitado incluida mediante un punto de acceso a Internet (servicio de red). El proveedor de<br />
servicios puede cobrarle por la conexión. Para activar la licencia tanto para navegación en<br />
auto como a pie, seleccione Opciones > Extras > Conducir y A pie, y siga las instrucciones.<br />
Después del vencimiento de la licencia incluida, para comprar una nueva licencia de navegación<br />
seleccione Opciones > Extras > Conducir y A pie o A pie.<br />
Para ver las licencias, seleccione Opciones > Extras > Mis lic.<br />
Planificar una ruta<br />
Para planificar una ruta, seleccione una ubicación en el mapa o busque una ubicación, pulse<br />
la tecla de desplazamiento y seleccione Agregar a ruta.<br />
Para agregar más ubicaciones a la ruta, seleccione Opciones > Agregar punto de ruta y<br />
busque la ubicación.<br />
Para editar la ruta, pulse la tecla de desplazamiento y seleccione Editar ruta.<br />
Para definir las configuraciones para la ruta, seleccione Opciones > Configuraciones.<br />
Para ver la ruta en el mapa, seleccione Opciones > Mostrar ruta.<br />
Para navegar hacia el destino en auto o a pie, seleccione Opciones > Comenzar a conducir o<br />
Comenzar a caminar.<br />
Para guardar la ruta, seleccione Opciones > Guardar ruta.<br />
Navegar hacia un destino<br />
Para iniciar la navegación, seleccione una ubicación, pulse la tecla de desplazamiento y<br />
seleccione Conducir hasta allí o Caminar a.<br />
119
Cuando use la navegación para el auto por primera vez, el dispositivo puede pedirle que<br />
seleccione el idioma para la guía de voz. Para cambiar el idioma en otro momento, en la vista<br />
principal de Maps seleccione Opciones > Herramientas > Configuraciones > Navegación ><br />
Guía de voz. La guía de voz no está disponible para navegación a pie.<br />
Para cambiar entre las distintas vistas de mapa durante la navegación, pulse la tecla de<br />
desplazamiento y seleccione Vista de maniobra, Vista aérea o Vista de flecha.<br />
Para descartar la ruta creada y usar otra, seleccione Opciones > Ruta difer.<br />
Para detener la navegación, seleccione Opciones > Detener navegación.<br />
Servicios adicionales para Maps<br />
La información de tráfico y guía y los servicios relacionados son generados por terceros<br />
independientes de <strong>Nokia</strong>. Es posible que hasta cierto punto la información sea imprecisa e<br />
incompleta y que esté sujeta a disponibilidad. Nunca confíe exclusivamente en la información<br />
antes mencionada y los servicios relacionados.<br />
La descarga de servicios adicionales puede ocasionar la transmisión de grandes volúmenes<br />
de datos a través de la red de su proveedor de servicios. Comuníquese con su proveedor para<br />
obtener información acerca de los costos de transmisión de datos.<br />
Información de tráfico<br />
El servicio de información de tráfico en tiempo real es un servicio adicional que ofrece<br />
información acerca de los eventos que pueden afectar su viaje. Puede comprar el servicio y<br />
descargarlo al dispositivo si está disponible en su país o región.<br />
Para comprar una licencia para el servicio de información de tráfico, seleccione Opciones ><br />
Extras > Info. tráf.<br />
Para ver información acerca de los eventos de tráfico, seleccione Opciones > Info tráfico.<br />
Los eventos se muestran en el mapa como triángulos y líneas.<br />
Para ver detalles de un evento, incluidas las posibles opciones de redireccionamiento,<br />
seleccione el evento y Opciones > Abrir.<br />
Para actualizar la información de tráfico, seleccione Actualizar info tráfico.<br />
Guías de viaje<br />
Para comprar y descargar guías de viaje, o ver sus guías descargadas, seleccione Opciones ><br />
Extras > Guías.<br />
Para explorar categorías de guía de viaje, seleccione una categoría. Si existen subcategorías,<br />
seleccione una.<br />
Para descargar una guía nueva en su dispositivo, desplácese hasta la guía deseada y<br />
seleccione Sí. Puede pagar por las guías con tarjeta de crédito o en su cuenta telefónica,<br />
si lo admite su proveedor de servicios.<br />
120
■<br />
Marcas<br />
Seleccione > Marcas. Con Marcas, puede guardar la información de posición de ubicaciones<br />
específicas en su dispositivo. Puede usar las marcas guardadas en aplicaciones compatibles,<br />
tales como Datos GPS y Mapas. En Maps, las marcas guardadas están disponibles en Mis lugares.<br />
Para crear una nueva marca, seleccione Opciones > Nueva marca. Para marcar una solicitud<br />
de posición para las coordenadas de su ubicación actual, seleccione Posición actual. Para<br />
ingresar la información de posición <strong>manual</strong>mente, seleccione Ingresar <strong>manual</strong>.<br />
Para agregar una marca a categorías predeterminadas, seleccione la marca y Opciones ><br />
Agregar a categoría. Seleccione las categorías a las que desea agregar la marca.<br />
Para enviar una o varias marcas a un dispositivo compatible, seleccione Opciones > Enviar.<br />
Las marcas recibidas se colocan en Buzón entrada en Mensajes.<br />
■<br />
Datos GPS<br />
Datos GPS está diseñado para proporcionar información de guía de ruta a destinos<br />
seleccionados; información de posición sobre su ubicación e información de viaje, como<br />
la distancia aproximada y la duración aproximada del viaje al destino.<br />
Guía de ruta<br />
Inicie la guía de ruta en exteriores. Seleccione > Aplicaciones > Datos GPS > Navegación.<br />
La guía de ruta muestra la ruta más directa y la distancia más corta a su destino, medida en<br />
línea recta. Se ignoran todos los obstáculos en la ruta, como edificios y obstáculos naturales.<br />
Las diferencias de altitud no se tienen en cuenta para el cálculo de distancias. La guía de<br />
ruta está activa sólo cuando usted se desplaza.<br />
Para fijar el destino de su viaje, seleccione Opciones > Definir destino y una marca como el<br />
destino, o ingrese las coordenadas de latitud y longitud. Para borrar el destino, seleccione<br />
Detener navegación.<br />
Posición<br />
Para guardar su ubicación como una marca, seleccione > Aplicaciones > Datos GPS ><br />
Posición > Opciones > Guardar posición.<br />
Contador de viaje<br />
Para activar el cálculo de la distancia de viaje, seleccione > Aplicaciones > Datos GPS ><br />
Distancia viaje > Opciones > Iniciar. Para desactivarlo, seleccione Opciones > Parar. Los<br />
valores calculados permanecen en la pantalla.<br />
Para fijar en cero la distancia de viaje, el tiempo y las velocidades promedio y máxima, e<br />
iniciar un nuevo cálculo, seleccione Restablecer. Para fijar también el odómetro y el tiempo<br />
total en cero, seleccione Reiniciar.<br />
La precisión del contador es limitada y pueden producirse errores de redondeo. La disponibilidad<br />
y la calidad de las señales GPS también pueden afectar la precisión.<br />
121
8. Galería<br />
■<br />
122<br />
Vista principal<br />
Para guardar y organizar sus imágenes, videoclips, pistas de música, clips de sonido, listas de<br />
reproducción, enlaces de streaming, archivos .ram y presentaciones, seleccione > Galería.<br />
Para copiar y mover archivos a la memoria del dispositivo o a la tarjeta de memoria, seleccione<br />
la carpeta (como Imágenes), desplácese al archivo (o pulse la tecla # para marcar más archivos)<br />
y seleccione Opciones > Organizar y la memoria en la que desea copiar o mover los archivos.<br />
Para crear nuevas carpetas de imagen y videoclips, seleccione Imágenes o Videoclips ><br />
Opciones > Organizar > Nueva carpeta y la memoria. Ingrese un nombre para la carpeta.<br />
Para mover imágenes y videoclips a una carpeta creada, marque los archivos y seleccione<br />
Opciones > Organizar > Mover a carpeta y la carpeta.<br />
Para configurar una imagen como la imagen de fondo que se exhibirá durante una llamada,<br />
seleccione Imágenes y desplácese hasta la imagen. Seleccione Opciones > Usar imagen ><br />
Como imagen de fondo o Como imagen llamada. Para asignar la imagen a un contacto,<br />
seleccione Asignar a contacto.<br />
Para configurar un videoclip como tono de timbre de video, seleccione Videoclips y el video.<br />
Seleccione Opciones > Usar video > Como tono de timbre. Para asignar el videoclip a un<br />
contacto, seleccione Asignar a contacto.<br />
■<br />
Descarga de archivos<br />
Para descargar imágenes o videoclips, seleccione > Galería > Imágenes o Videoclips y el<br />
icono de imagen (Descargas gráf.) o el icono de video (Descargas vid.). Se abre el explorador.<br />
Elija un favorito desde donde descargará el sitio.<br />
Ver imágenes<br />
■<br />
Para ver imágenes en Galería, desplácese hasta la imagen y seleccione Abrir.<br />
Para abrir la barra de herramientas cuando vea una imagen, pulse la tecla de desplazamiento.<br />
Para acercar o alejar la imagen, pulse * o #.<br />
■<br />
Editar imágenes<br />
Para abrir el editor de imágenes en Galería, desplácese a la imagen y seleccione<br />
Opciones > Editar.<br />
Para ver una imagen en la pantalla completa y volver a la vista normal, pulse la tecla *.<br />
Para girar una imagen a la derecha o izquierda, pulse la tecla 3 ó 1.<br />
Para acercar o alejar, pulse la tecla 5 ó 0.
Para mover una imagen con zoom, desplácese hacia arriba, hacia abajo, a la izquierda o<br />
aladerecha.<br />
Para cortar o girar la imagen, ajustar el brillo, el color, el contraste y la resolución y agregar<br />
efectos, texto, una imagen prediseñada o un marco a la imagen, seleccione Opciones ><br />
Aplicar efecto.<br />
■<br />
Editar videoclips<br />
Para editar videoclips en Galería y crear videoclips personalizados, desplácese a un videoclip<br />
y seleccione Opciones > Editor de video > Opciones > Editar videoclip.<br />
En el editor de video puede ver dos cronologías: cronología de videoclip y cronología de clip<br />
de sonido. Las imágenes, el texto y las transiciones agregadas a un videoclip se exhiben en la<br />
cronología de videoclip. Para alternar entre las cronologías, desplácese hacia arriba y abajo.<br />
■<br />
Imprimir imágenes<br />
Puede usar el dispositivo con una impresora compatible con PictBridge mediante un cable USB.<br />
Para imprimir imágenes en Galería, desplácese a la imagen y seleccione Opciones > Imprimir.<br />
■<br />
Compartir en línea<br />
Con la aplicación Compartir en línea, puede compartir imágenes y videoclips que haya<br />
capturado en álbumes en línea compatibles, weblogs o en otros servicios compatibles para<br />
compartir en línea en la Web. Puede cargar contenido, guardar contenido sin terminar como<br />
borradores y continuar en otro momento, y ver el contenido de los álbumes. Los tipos de<br />
contenido admitidos pueden variar dependiendo del proveedor de servicios para compartir<br />
contenido en la Web.<br />
Para compartir imágenes y videoclips en línea, debe tener una cuenta con un servicio para<br />
compartir imágenes en línea. Por lo general, puede suscribirse a dicho servicio en la página<br />
Web de su proveedor de servicios. Comuníquese con su proveedor de servicios para obtener<br />
más información y los términos y costos que se aplicarán.<br />
Seleccione > Internet > Com. en lín. Para actualizar la lista de proveedores de servicios,<br />
seleccione Opciones > Agregar nueva cuenta > Actualizar servicios. Es posible que algunos<br />
proveedores de servicios para compartir en línea le permitan agregar una cuenta mediante<br />
su dispositivo. Consulte ”Configuraciones de Compartir en línea”, pág. 124.<br />
Cargar archivos<br />
Para cargar archivos, seleccione > Galería > Imágenes o Videoclips. Marque los archivos<br />
que cargará y seleccione Opciones > Enviar > Registrar en Web y un servicio para compartir.<br />
Cuando selecciona el servicio, las imágenes y los videoclips seleccionados aparecen en el<br />
estado de edición. Puede abrir y ver los archivos, volverlos a organizar, agregarles texto o<br />
agregar archivos nuevos.<br />
123
Para cancelar el proceso de carga Web y guardar la publicación creada como borrador,<br />
seleccione Cancelar > Guardar como borrador.<br />
Para conectarse al servicio y cargar los archivos a la Web, seleccione Opciones > Registrar<br />
en Web.<br />
Abrir servicio en línea<br />
Para ver imágenes y videoclips cargados en el servicio en línea y borradores y entradas<br />
enviadas en el dispositivo, seleccione > Internet > Com. en lín. Para actualizar un servicio,<br />
desplácese hasta dicho servicio y seleccione Opciones > Actualizar servicio.<br />
Seleccione Opciones y alguna de las siguientes opciones:<br />
Ir a Web de . : para conectarse al servicio y ver los álbumes cargados y de borrador en el<br />
explorador Web. La vista puede variar dependiendo del proveedor de servicios.<br />
Buzón de salida: para ver y editar las entradas de borrador y cargarlas en la Web.<br />
Nuevo registro: para crear una nueva entrada.<br />
Las opciones disponibles pueden variar dependiendo del proveedor de servicios.<br />
Configuraciones de Compartir en línea<br />
Para editar las configuraciones de compartir en línea, seleccione > Internet > Com. en lín. ><br />
Opciones > Configuraciones y una de las siguientes opciones:<br />
Proveed. servic.: para ver la lista de proveedores de servicio.<br />
Mis cuentas: para crear una nueva cuenta, seleccione Opciones > Agregar nueva cuenta.<br />
Para editar una cuenta existente, seleccione una cuenta y Opciones > Editar. Puede ingresar<br />
el nombre de la cuenta y el nombre de usuario y la contraseña para su cuenta.<br />
Config. aplic.: para seleccionar el tamaño de las imágenes que se ven en la pantalla y el<br />
tamaño de letra que se utiliza en los borradores o las entradas de texto.<br />
Avanzadas: para seleccionar el punto de acceso predeterminado y la forma de sondear el<br />
nuevo contenido del servidor. También puede activar que el contenido se descargue en<br />
roaming o que se publiquen todos los datos de imágenes.<br />
9. Cámara<br />
Su dispositivo tiene dos cámaras para capturar imágenes fijas y grabar videoclips. Hay una<br />
cámara principal de alta resolución que usa el modo horizontal en la parte posterior del<br />
dispositivo, y una cámara secundaria de menor resolución que usa el modo de retrato en la<br />
parte frontal.<br />
124
Su dispositivo admite una resolución de captura de imagen de 2048 x 1536 píxeles.<br />
La resolución de la imagen en este <strong>manual</strong> puede verse distinta.<br />
Mantenga una distancia segura cuando use el flash. No use el flash para tomar fotos de<br />
personas o animales a corta distancia. No cubra el flash mientras toma una foto.<br />
Puede enviar imágenes y videoclips en un mensaje multimedia, como un archivo adjunto de<br />
e-mail o mediante el uso de conectividad Bluetooth. También puede cargarlos en un álbum<br />
compatible en línea. Consulte ”Compartir en línea”, pág.123.<br />
■<br />
Capturar imágenes<br />
Cámara principal<br />
1. Pulse la tecla de cámara para activar la cámara.<br />
2. Para acercar o alejar la imagen, pulse las teclas de volumen.<br />
3. Para fijar el enfoque en un objeto,<br />
pulse la tecla de cámara hasta<br />
la mitad.<br />
Para capturar una imagen, pulse<br />
totalmente la tecla de la cámara.<br />
Cámara secundaria<br />
1. Para activar la cámara secundaria, pulse la tecla de la cámara, desplácese a la izquierda o<br />
la derecha para abrir la barra de herramientas y seleccione .<br />
2. Para acercar o alejar la imagen, desplácese hacia arriba o hacia abajo.<br />
3. Para capturar una imagen, seleccione Capturar.<br />
Cerrar la cámara<br />
Para cerrar la cámara, seleccione Opciones > Salir.<br />
Si abre Galería desde la cámara, la cámara se cierra.<br />
Grabar videoclips<br />
■<br />
1. Para activar la cámara principal, pulse la tecla de la cámara. Para activar la cámara<br />
secundaria, desplácese a la izquierda o la derecha para abrir la barra de herramientas y<br />
seleccione . Si la cámara está en el modo de imagen ( ), desplácese a la izquierda o<br />
la derecha para abrir la barra de herramientas y seleccione .<br />
2. Para iniciar la grabación con la cámara principal, pulse la tecla de cámara. Para iniciar la<br />
grabación con la cámara secundaria, seleccione Grabar. Escuchará un tono para indicar<br />
que se inició la grabación.<br />
Para acercar o alejar la imagen con la cámara principal, pulse las teclas de volumen; para<br />
la cámara secundaria, desplácese hacia arriba o abajo.<br />
125
3. Para detener la grabación con la cámara principal, pulse la tecla de cámara. Para detener<br />
la grabación con la cámara secundaria, seleccione Parar. El videoclip se guarda<br />
automáticamente en la carpeta Videoclips en Galería. Consulte ”Galería”, pág. 122.<br />
La duración máxima del videoclip depende de la memoria disponible.<br />
Para detener la grabación en cualquier momento, seleccione Pausa. La grabación de video<br />
se detiene automáticamente si se pone pausa a la grabación y no se pulsa ninguna tecla<br />
durante un minuto. Para reanudar la grabación, seleccione Continuar.<br />
■<br />
Capturar imágenes panorámicas<br />
Para activar el modo de panorama con la cámara principal, desplácese a la izquierda o la<br />
derecha para activar la barra de herramientas y seleccione .<br />
Para comenzar a tomar una imagen panorámica, pulse la tecla de cámara y gire la cámara<br />
lentamente hacia la izquierda o la derecha. La cámara toma la imagen panorámica y la<br />
muestra cuando gira. Si la flecha del visor cambia el color a rojo, significa que está girando<br />
demasiado rápido y la imagen se torna borrosa. Durante el giro no puede cambiar la<br />
dirección. Para detener la captura de la imagen, pulse la tecla de cámara.<br />
10. Multimedia<br />
■<br />
Reproductor de música<br />
Advertencia: Escuche música a un volumen moderado. La exposición prolongada a<br />
un nivel de volumen alto puede perjudicar su capacidad auditiva. Cuando use el<br />
altavoz, no sostenga el dispositivo cerca del oído, ya que el volumen puede resultar<br />
demasiado alto.<br />
También puede escuchar música y episodios de podcast cuando el perfil Desconectado está<br />
activado. Consulte ”Perfil Desconectado”, pág. 92.<br />
Para obtener más información sobre la protección de copyright, consulte ”Licencias”, pág. 144.<br />
Escuchar música o un episodio de podcast<br />
1. Seleccione > Aplicaciones > Repr. mús.<br />
2. Seleccione una categoría, como Todas las canciones o Podcasts > Todos los episodios y<br />
una canción o un episodio de podcast para escuchar.<br />
3. Para reproducir el archivo seleccionado, pulse la tecla de desplazamiento.<br />
Para poner pausa a la reproducción, pulse la tecla de desplazamiento. Para continuar la<br />
reproducción, pulse nuevamente la tecla de desplazamiento.<br />
126
4. Para detener la reproducción, desplácese hacia abajo.<br />
Para adelantar o rebobinar, mantenga pulsada la tecla de desplazamiento a la izquierda<br />
o derecha.<br />
Para ir a la siguiente pista, desplácese hacia la derecha. Para volver al inicio de la canción o<br />
podcast, desplácese hacia la izquierda.<br />
Para saltar a la canción o podcast anterior, desplácese hacia la izquierda nuevamente dentro<br />
de 2 segundos después del inicio de una canción o podcast.<br />
Para ajustar el volumen, utilice las teclas de volumen.<br />
Para volver al modo en espera y dejar el reproductor en segundo plano, pulse la tecla Finalizar.<br />
Según el tema en espera seleccionado, se muestra la canción actual en reproducción. Para<br />
volver al reproductor de música, seleccione la canción actual en reproducción.<br />
Menú de música<br />
Seleccione > Aplicaciones > Repr. mús. El menú de música muestra la música disponible.<br />
Para ver todas las canciones, canciones ordenadas o listas de reproducción, seleccione la<br />
lista que desea en el menú de música.<br />
Listas de reproducción<br />
Seleccione > Aplicaciones > Repr. mús. > Listas de reproducción. Para ver los detalles de<br />
una lista de reproducción, desplácese hasta la lista de reproducción y seleccione Opciones ><br />
Detalles lista reproduc.<br />
Crear una lista de reproducción<br />
1. Seleccione Opciones > Crear lista reproducción.<br />
2. Ingrese un nombre para la lista de reproducción y seleccione Aceptar.<br />
3. Para agregar canciones de inmediato, seleccione Sí. Para agregar canciones en otro<br />
momento, seleccione No.<br />
4. Seleccione artistas para buscar las canciones que desea incluir en la lista de reproducción.<br />
Para agregar una canción, pulse la tecla de desplazamiento.<br />
5. Una vez que haya hecho su elección, seleccione Listo. Si hay una tarjeta de memoria<br />
compatible insertada en el dispositivo, la lista de reproducción se graba en la tarjeta.<br />
Para agregar más canciones en otro momento, mientras ve la lista de reproducción,<br />
seleccione Opciones > Agregar canciones.<br />
Podcasts<br />
Para ver todos los episodios de podcast disponibles en el dispositivo, seleccione ><br />
Aplicaciones > Repr. mús. > Podcasts > Todos los episodios.<br />
Los episodios de podcast tienen tres estados: jamás reproducido, parcialmente reproducido y<br />
completamente reproducido. Si un episodio está parcialmente reproducido, la próxima vez<br />
127
se reproducirá desde la última posición de reproducción. De lo contrario, se reproducirá<br />
desde el comienzo.<br />
Tienda de música <strong>Nokia</strong><br />
En la Tienda de Música <strong>Nokia</strong> (servicio de red) puede buscar, explorar y comprar música para<br />
descargar al dispositivo. Para adquirir música, debe registrarse para el servicio. Para verificar la<br />
disponibilidad de la Tienda de Música <strong>Nokia</strong> en su país, visite www.music.nokia.com (en inglés).<br />
Para acceder a la Tienda de Música <strong>Nokia</strong>, debe tener un punto de acceso a Internet válido<br />
en el dispositivo. Para abrir la Tienda de Música <strong>Nokia</strong>, seleccione > Aplicaciones > Repr.<br />
mús. > Opciones > Ir a Tienda de música.<br />
Transferir música<br />
Puede comprar música protegida con WMDRM en las tiendas de música en línea y<br />
transferirla al dispositivo.<br />
Para actualizar la biblioteca después de actualizar la selección de canciones en su dispositivo,<br />
seleccione > Aplicaciones > Repr. mús. > Opciones > Actualizar biblioteca.<br />
Transferir música desde la PC<br />
Para sincronizar música con Windows Media Player, conecte el cable compatible USB y<br />
seleccione Transferencia de medios como el modo de conexión. Puede transferir archivos de<br />
música protegidos con WMDRM sólo mediante transferencia de medios. Es necesario que<br />
haya insertado una tarjeta de memoria compatible en el dispositivo.<br />
Para usar <strong>Nokia</strong> Music Manager en <strong>Nokia</strong> PC Suite, consulte la guía del usuario de<br />
<strong>Nokia</strong> PC Suite.<br />
■<br />
Con la aplicación <strong>Nokia</strong> Podcasting (servicio de red), puede buscar, descubrir, suscribirse a y<br />
descargar podcasts por aire, y reproducir, administrar y compartir podcasts de audio y de<br />
video con su dispositivo.<br />
Advertencia: Escuche música a un volumen moderado. La exposición prolongada a<br />
un nivel de volumen alto puede perjudicar su capacidad auditiva. Cuando use el<br />
altavoz, no sostenga el dispositivo cerca del oído, ya que el volumen puede resultar<br />
demasiado alto.<br />
128<br />
<strong>Nokia</strong> Podcasting<br />
Configuraciones<br />
Para usar <strong>Nokia</strong> Podcasting, debe definir las configuraciones de conexión y de descarga.<br />
La configuración de la aplicación para recuperar podcasts automáticamente puede<br />
ocasionar la transmisión de grandes volúmenes de datos a través de la red de su proveedor
de servicios. Comuníquese con su proveedor para obtener información acerca de los costos<br />
de transmisión de datos.<br />
Seleccione > Aplicaciones > Podcasting > Opciones > Configuraciones y una de las<br />
siguientes opciones:<br />
Conexión > Punto acceso predeter.: para seleccionar el punto de acceso para definir su<br />
conexión a Internet. Para definir el servicio de búsqueda de podcast para las búsquedas,<br />
seleccione Buscar URL de servicio.<br />
Descarga: para editar las configuraciones de descarga. Puede seleccionar si guardar los podcast<br />
en el dispositivo o en la tarjeta de memoria, configurar con qué frecuencia se actualizan los<br />
podcast y configurar la fecha y hora para la próxima actualización automática, y configurar<br />
cuánta memoria se utilizará para los podcast y qué hacer si la descarga supera el límite<br />
de descarga.<br />
Búsqueda<br />
Para que el buscador use el servicio de búsqueda de podcast, seleccione > Aplicaciones ><br />
Podcasting > Opciones > Configuraciones > Conexión > Buscar URL de servicio.<br />
Para buscar podcasts, seleccione > Aplicaciones > Podcasting > Buscar, e ingrese una<br />
palabra clave o un título.<br />
Para suscribirse a un canal y agregarlo a sus podcasts, seleccione Opciones > Suscribir.<br />
También puede marcar canales para agregarlos todos al mismo tiempo.<br />
Directorios<br />
Directorios lo ayuda a encontrar nuevos episodios de podcasts para suscribirse. Un episodio<br />
es un archivo de medios determinado de un podcast.<br />
Seleccione > Aplicaciones > Podcasting > Directorios. Seleccione una carpeta de directorio<br />
para actualizarla (servicio de red). Cuando el color del icono de carpeta cambie, seleccione<br />
para abrirla, y seleccione un tema de carpeta para ver la lista de podcasts.<br />
Para suscribirse a un podcast, seleccione el título. Después de suscribirse a episodios de un<br />
podcast, puede descargarlos, administrarlos y reproducirlos en el menú de podcasts.<br />
Para agregar un nuevo directorio o carpeta, seleccione Opciones > Nuevo > Directorio Web o<br />
Carpeta. Seleccione un título, la URL del archivo .opml (lenguaje de marcado para procesamiento<br />
de esquemas) y seleccione Listo.<br />
Para importar un archivo .opml almacenado en el dispositivo, seleccione Opciones ><br />
Importar archivo OPML. Seleccione la ubicación del archivo e impórtelo.<br />
Cuando reciba un mensaje con un archivo .opml mediante conectividad Bluetooth, abra el<br />
archivo y guárdelo en la carpeta Recibidos en Directorios. Abra la carpeta para suscribirse a<br />
cualquiera de los enlaces que agregará a los podcasts.<br />
129
Descargas<br />
Para ver los podcasts a los que se suscribió, seleccione > Aplicaciones > Podcasting ><br />
Podcasts. Para ver títulos de episodio individuales, seleccione el título de podcast.<br />
Seleccione el título del episodio para iniciar la descarga. Para descargar o continuar<br />
descargando los episodios elegidos o marcados, seleccione Opciones > Descargar o<br />
Continuar descarga. Puede descargar varios episodios al mismo tiempo.<br />
Para reproducir una parte de un podcast durante una descarga o descarga parcial, seleccione<br />
Podcasts, el podcast, desplácese hasta el episodio que se está descargando y seleccione<br />
Opciones > Reproducir vista previa.<br />
Los podcasts completamente descargados se guardan en la carpeta Podcasts en el Reproductor<br />
de música cuando se actualiza la biblioteca de música.<br />
Reproducir y administrar podcasts<br />
Para mostrar los episodios de un podcast, abra el podcast. En cada episodio, puede ver la<br />
información de archivo.<br />
Para reproducir un episodio completamente descargado, seleccione > Aplicaciones ><br />
Repr. mús. > Podcasts.<br />
Para actualizar los podcasts seleccionados o los podcasts marcados, para un nuevo episodio,<br />
seleccione Opciones > Actualizar.<br />
Para agregar un podcast nuevo mediante el ingreso de la URL del podcast, seleccione<br />
Opciones > Nuevo podcast. Para editar la URL de un podcast seleccionado, seleccione Editar.<br />
Para actualizar, eliminar o enviar un grupo de podcasts seleccionados de una sola vez,<br />
seleccione Opciones > Marcar/Desmarcar, marque los podcasts y seleccione Opciones y la<br />
acción deseada.<br />
Para abrir el sitio Web del podcast (servicio de red), seleccione Opciones > Abrir página Web.<br />
Algunos podcasts ofrecen la oportunidad de interactuar con los creadores a través de comentarios<br />
y votaciones. Para conectarse a Internet y comentar, seleccione Opciones > Ver comentarios.<br />
■<br />
Para encender la radio, seleccione > Aplicaciones > Radio. Para apagar la radio,<br />
seleccione Salir.<br />
Al abrir la radio por primera vez, un asistente le ayudará a guardar las estaciones de radio<br />
locales (servicio de red).<br />
Para comprobar la disponibilidad y los costos del servicio visual y los servicios de directorio<br />
de estaciones, comuníquese con su proveedor de servicios.<br />
La radio FM depende de una antena distinta a la antena del dispositivo móvil. Para que la radio<br />
FM funcione adecuadamente, conecte al dispositivo un auricular o un accesorio compatible.<br />
130<br />
Radio
Advertencia: Escuche música a un volumen moderado. La exposición prolongada a<br />
un nivel de volumen alto puede perjudicar su capacidad auditiva. Cuando use el<br />
altavoz, no sostenga el dispositivo cerca del oído, ya que el volumen puede resultar<br />
demasiado alto.<br />
La radio admite la funcionalidad de Sistema de datos de radio (RDS). Las estaciones de radio<br />
que admiten RDS pueden mostrar información, como el nombre de la estación. Si está activada<br />
en la configuración, RDS también intenta buscar frecuencias alternativas de la estación que<br />
se está escuchando, si la recepción es débil. Para que el dispositivo busque automáticamente<br />
frecuencias alternativas, seleccione Opciones > Configuraciones > Frecuencias alternativas ><br />
Explor. auto. activada.<br />
Sintonizar y guardar una estación<br />
Para iniciar la búsqueda de estación cuando la radio esté encendida, desplácese hacia arriba<br />
o hacia abajo. Para guardar la estación encontrada, seleccione Opciones > Guardar<br />
estación. Seleccione una ubicación para la estación, ingrese un número para la estación y<br />
seleccione Aceptar.<br />
Para ver la lista de estaciones guardadas, seleccione Opciones > Estaciones. Para cambiar<br />
las configuraciones de una estación, seleccione la estación y Editar.<br />
Funciones de la radio<br />
Para ajustar el volumen, pulse las teclas de volumen.<br />
Si hay estaciones guardadas, desplácese a la izquierda o derecha para ir a la estación<br />
siguiente o anterior.<br />
Puede realizar o responder una llamada mientras escucha la radio. Cuando hay una llamada<br />
activa se silencia el volumen de la radio.<br />
Para escuchar la radio en segundo plano e ir al modo en espera, seleccione Opciones ><br />
Reproducir en 2° plano.<br />
Ver contenido visual<br />
Para verificar la disponibilidad y los costos y para suscribirse al servicio, comuníquese con su<br />
proveedor de servicios.<br />
Para ver el contenido visual de la estación actual, seleccione Opciones > Iniciar servicio<br />
visual. La estación debe tener guardada la ID del servicio visual antes de utilizar el servicio.<br />
Para finalizar la comunicación de contenido visual, pero seguir escuchando la radio,<br />
seleccione Cerrar.<br />
131
Directorio de estaciones<br />
Para acceder al directorio de estaciones (servicio de red), seleccione Opciones > Directorio<br />
estaciones y su ubicación. Las estaciones de radio que ofrecen contenido visual se indican<br />
con . Para escuchar una estación guardada, desplácese a ésta y seleccione Opciones ><br />
Escuchar o Guardar.<br />
■<br />
RealPlayer<br />
Con RealPlayer, puede reproducir archivos multimedia como videoclips guardados en la memoria<br />
del dispositivo o la tarjeta de memoria, o abrir un enlace de streaming para reproducir archivos<br />
multimedia por aire. RealPlayer no admite todos los formatos de archivo ni todas las variaciones<br />
de formatos de archivo.<br />
Seleccione > Aplicaciones > RealPlayer. Para reproducir, seleccione Videoclips, Enl. streaming<br />
o Reprod. recien. y un archivo multimedia o un enlace de streaming.<br />
Para reproducir contenido en vivo, primero debe configurar el punto de acceso<br />
predeterminado. Seleccione > Aplicaciones > RealPlayer > Opciones ><br />
Configuraciones > Streaming > Red. Comuníquese con su proveedor de servicios para<br />
obtener más información.<br />
Advertencia: Cuando use el altavoz, no sostenga el dispositivo cerca del oído, ya<br />
que el volumen puede resultar demasiado alto.<br />
Grabadora<br />
■<br />
Con la grabadora de voz, puede grabar conversaciones de llamada de voz y recordatorios de<br />
voz. Si graba una conversación telefónica, todos los participantes escuchan un tono durante<br />
la grabación.<br />
Seleccione > Aplicaciones > Grabadora. Para grabar un nuevo clip de sonido, seleccione<br />
Opciones > Grabar clip sonido o seleccione . Para escuchar la grabación, seleccione .<br />
Los archivos grabados se guardan en la carpeta Clips de sonido en Galería.<br />
No se puede utilizar la grabadora cuando haya una llamada de datos o una conexión GPRS<br />
activa.<br />
11. Internet<br />
■<br />
Explorar la Web<br />
Para explorar páginas Web, seleccione<br />
modo en espera.<br />
> Internet > Web o mantenga pulsada 0 en el<br />
132
Comuníquese con el proveedor de servicios para conocer la disponibilidad de servicios, los<br />
precios y las tarifas.<br />
Importante: Use solamente servicios confiables y que ofrecen niveles adecuados de<br />
seguridad y protección contra software perjudicial.<br />
Para acceder a las páginas Web, siga una de estas indicaciones:<br />
• Seleccione un favorito de la vista de favoritos.<br />
• En la vista de favoritos, ingrese la dirección de la página Web y seleccione Ir a.<br />
Favoritos<br />
Para agregar <strong>manual</strong>mente un favorito, en la vista de favoritos, seleccione Opciones ><br />
Administrador favoritos > Agregar favorito, complete los campos y seleccione<br />
Opciones > Guardar.<br />
Seguridad de conexión<br />
Si aparece el indicador de seguridad durante una conexión, la transmisión de datos entre<br />
el dispositivo y el gateway o servidor de Internet está encriptada.<br />
El icono de seguridad no indica que la transmisión de datos establecida entre el gateway y<br />
el servidor de contenido (o el lugar donde se almacena el recurso solicitado) sea segura.<br />
El proveedor de servicios asegura la transmisión de datos entre el gateway y el servidor<br />
de contenido.<br />
Para ver detalles de la conexión, el estado de encriptación y la información sobre autenticación<br />
de servidor, seleccione Opciones > Configuraciones > Info. de página.<br />
Teclas y comandos para la exploración<br />
Para abrir un enlace, realizar selecciones o marcar cuadros, pulse la tecla de desplazamiento.<br />
Para retroceder a la página anterior durante la exploración, seleccione Atrás. Si Atrás no<br />
está disponible, seleccione Opciones > Opc. navegación > Historial para ver una lista<br />
cronológica de las páginas que visitó durante una sesión de exploración. Desplácese a la<br />
izquierda o derecha y seleccione la página deseada. La lista de historial se borra cada vez que<br />
la sesión se cierra.<br />
Para guardar un favorito durante la exploración, seleccione Opciones > Guardar como favorito.<br />
Para recuperar el contenido más reciente del servidor, seleccione Opciones > Opc. navegación ><br />
Cargar de nuevo.<br />
Para abrir la barra de herramientas del explotador, desplácese hasta un lugar vacío de la<br />
página, y mantenga pulsada la tecla de desplazamiento.<br />
133
Para finalizar la conexión y ver la página del explorador cuando está desconectado, seleccione<br />
Opciones > Configuraciones > Desconectar. Para detener la exploración, seleccione<br />
Opciones > Salir.<br />
Accesos directos del teclado durante la exploración<br />
1: abrir los favoritos.<br />
2: buscar palabras clave en la página actual.<br />
3: regresar a la página anterior.<br />
5: ver una lista de todas las ventanas abiertas.<br />
8: ver la descripción de la página actual. Pulse 8 nuevamente para acercar y ver la sección<br />
deseada de la página.<br />
9: ingresar una nueva dirección Web.<br />
0: ir a la página de inicio.<br />
* o #: acercar o alejar la página.<br />
Mini mapa<br />
Mini mapa le ayuda navegar en páginas Web que contienen una gran cantidad de información.<br />
Cuando Mini mapa está activado en las configuraciones del explorador y se desplaza a través<br />
de una página Web grande, Mini mapa se abre y exhibe una vista general de la página Web<br />
que está explorando. Para moverse en Mini mapa, desplácese. Cuando deja de desplazarse,<br />
Mini mapa desaparece y aparece el área que se marcó en Mini mapa.<br />
Descripción de página<br />
Con Descripción de página, puede moverse más rápido a la parte de la página Web que<br />
desea. Es posible que la descripción de la página no esté disponible en todas las páginas.<br />
Para exhibir la descripción de la página actual, pulse la tecla 8. Para buscar el lugar deseado<br />
en la página, desplácese hacia arriba o hacia abajo. Pulse 8 nuevamente para acercar y ver la<br />
sección deseada de la página.<br />
Vínculos Web<br />
Los vínculos Web son ampliamente utilizados para compartir los titulares y las noticias<br />
más recientes.<br />
El explorador detecta automáticamente si una página Web contiene vínculos Web. Para<br />
suscribirse a un vínculo Web, seleccione Opciones > Suscrib. vínculos Web y un vínculo, o<br />
haga clic en el enlace. Para ver los vínculos Web a los que se ha suscrito, en la vista de favoritos,<br />
seleccione Vínculos Web.<br />
Para actualizar un vínculo Web, selecciónelo y Opciones > Actualizar.<br />
134
Para definir cómo se actualizan los vínculos Web, seleccione Opciones > Herramientas ><br />
Vínculos Web.<br />
Widgets<br />
Su dispositivo admite widgets. Los widgets son pequeñas aplicaciones descargables de la<br />
Web que entregan a su dispositivo contenido multimedia, vínculos de noticias y otras<br />
informaciones, como informes meteorológicos. Los widgets instalados se ven como<br />
aplicaciones independientes en la carpeta Personal en Aplicaciones.<br />
Puede descargar widgets con la aplicación Descargue o desde la Web.<br />
El punto de acceso predeterminado para widgets es el mismo que en el explorador Web.<br />
Cuando están activos en segundo plano, algunos widgets pueden actualizar informaciones<br />
de manera automática en su dispositivo. El uso de widgets puede ocasionar la transmisión<br />
de grandes volúmenes de datos a través de la red de su proveedor de servicios. Comuníquese<br />
con su proveedor para obtener información acerca de los costos de transmisión de datos.<br />
Páginas guardadas<br />
Para guardar una página durante la exploración para verla cuando está desconectado,<br />
seleccione Opciones > Configuraciones > Guardar página.<br />
Para ver páginas guardadas, en la vista de favoritos, seleccione Páginas guardadas. Para abrir<br />
una página, selecciónela.<br />
Borrar datos de privacidad<br />
Una memoria caché es una parte de la memoria en la cual se almacenan datos en forma<br />
temporal. Si ha intentado acceder o ha accedido a información confidencial que exige<br />
contraseñas, vacíe la memoria caché después de cada uso. La información o los servicios a<br />
los que se ha accedido se almacenan en ella. Para vaciar la memoria caché, seleccione<br />
Opciones > Borrar datos privacidad > Caché.<br />
Para borrar todos los datos de privacidad, seleccione Opciones > Borrar datos privacidad > Todo.<br />
Buscar<br />
■<br />
Use Búsqueda para acceder a buscadores, y buscar y conectarse a servicios locales, sitios<br />
Web, imágenes y contenido móvil (servicios móviles). Por ejemplo, puede usar la aplicación<br />
para buscar restaurantes y tiendas locales. También puede buscar datos en el dispositivo y en<br />
la tarjeta de memoria.<br />
Seleccione > Internet > Búsqueda.<br />
135
12. Personalización<br />
Temas<br />
■<br />
Para cambiar la apariencia de la pantalla del dispositivo, active un tema.<br />
Seleccione > Config. > Temas. Para ver los temas disponibles, seleccione General. El tema<br />
activo se indica con una marca de verificación.<br />
Para acceder a una vista previa del tema, desplácese al tema y seleccione Opciones > Vista<br />
previa. Para activar el tema de la vista previa, seleccione Definir.<br />
En Temas, también puede configurar el tipo de la vista de menú, configurar un tema para el<br />
modo en espera, configurar una imagen de fondo personalizada, personalizar la apariencia<br />
del ahorro de energía y seleccionar una imagen para ver durante una llamada.<br />
■<br />
Perfiles<br />
En Perfiles, puede ajustar y personalizar los tonos de dispositivo para diferentes eventos,<br />
entornos o grupos de personas que llaman. Puede ver el perfil seleccionado en la parte<br />
superior de la pantalla cuando está en el modo en espera. Si el perfil General está en uso,<br />
sólo aparece la fecha actual.<br />
Seleccione > Config. > Modos.<br />
Para activar el perfil, selecciónelo y Activar.<br />
Sugerencia: Para cambiar rápidamente al perfil de silencio a partir de cualquier otro<br />
perfil, en el modo en espera, mantenga pulsada #.<br />
Para personalizar un perfil, seleccione el perfil, Personalizar y las configuraciones que desea.<br />
Para que el perfil esté activo hasta un tiempo determinado dentro de las próximas 24 horas,<br />
seleccione Programado y una hora.<br />
Consulte también ”Perfil Desconectado”, pág. 92.<br />
13. Administración del tiempo<br />
Reloj<br />
■<br />
Seleccione > Oficina > Reloj. Para cambiar las configuraciones de reloj y configurar la<br />
fecha y la hora, seleccione Opciones > Configuraciones.<br />
Para que el dispositivo exhiba la hora en otras ubicaciones, desplácese a la derecha hasta<br />
Reloj mundial. Para agregar una ubicación, seleccione Opciones > Agregar ubicación.<br />
Para configurar su ubicación actual, desplácese hasta una ubicación y seleccione<br />
Opciones > Como ubicación actual. La ubicación aparece en la vista principal del reloj y la<br />
136
hora en su dispositivo cambia de acuerdo con la ubicación seleccionada. Asegúrese de que la<br />
hora sea la correcta y que corresponda a su zona horaria.<br />
Alarma<br />
Para fijar una nueva alarma, desplácese a la derecha hasta Alarmas y seleccione Opciones ><br />
Nueva alarma. Ingrese la hora de la alarma, seleccione si se repetirá la alarma y en qué<br />
momento y seleccione Listo.<br />
■<br />
Agenda<br />
Seleccione > Oficina > Agenda. Pulse la tecla # en las vistas mensual, semanal o diaria<br />
para resaltar automáticamente la fecha actual.<br />
Para agregar una nueva entrada a la agenda, seleccione Opciones > Nueva entrada y un tipo<br />
de entrada. Las entradas de Aniversario se repiten cada año. Las entradas de Tarea le ayudan<br />
a mantener una lista de tareas que necesita realizar. Complete los campos y seleccione Listo.<br />
14. Aplicaciones de oficina<br />
Notas activas<br />
■<br />
Las notas activas le permiten crear, editar y ver diferentes tipos de notas. Puede insertar<br />
imágenes y videos o clips de sonido en las notas, vincular notas a otras aplicaciones, como<br />
Contactos, y enviar notas a terceros.<br />
Seleccione > Oficina > Notas activ.<br />
Para crear una nota, comience a escribir. Para insertar imágenes, clips de sonido o<br />
videoclips, tarjetas de negocio, favoritos Web o archivos, seleccione Opciones > Insertar<br />
y el tipo de elemento.<br />
Para configurar el dispositivo para que muestre una nota cuando realice o reciba una<br />
llamada desde un contacto, seleccione Opciones > Configuraciones. Para vincular una nota<br />
a un contacto, abra la nota y seleccione Opciones > Enlazar nota a llamada > Agregar<br />
contactos y el contacto.<br />
■<br />
Notas<br />
Seleccione > Oficina > Notas.<br />
Para escribir una nota nueva, comience a escribir. Para guardar la nota, seleccione Listo.<br />
Puede guardar los archivos de texto sencillo (formato .txt) que recibe en Notas.<br />
137
■<br />
138<br />
Calculadora<br />
Seleccione > Oficina > Calculad. Cuando ingrese números, para agregar un punto<br />
decimal, pulse la tecla #.<br />
Nota: La calculadora tiene una precisión limitada y está diseñada para<br />
cálculos sencillos.<br />
Convertidor<br />
■<br />
Seleccione > Oficina > Convertidor. Puede convertir medidas, como longitud, de una<br />
unidad a otra, por ejemplo, de yardas a metros.<br />
La precisión del convertidor es limitada y pueden producirse errores de redondeo.<br />
Antes de convertir monedas, debe elegir una moneda base (generalmente la moneda local) y<br />
agregar los tipos de cambio. El tipo de cambio de la moneda local siempre es 1. Seleccione<br />
Moneda como el tipo de medida y seleccione Opciones > Cambios monedas. Para cambiar la<br />
moneda base, desplácese hasta la moneda y seleccione Opciones > Fijar moneda base. Para<br />
agregar los tipos de cambio, desplácese a la moneda e ingrese un nuevo cambio.<br />
Después de insertar todos los tipos de cambio requeridos, puede convertir monedas. En el<br />
primer campo de cantidad, ingrese el valor que desea convertir. El otro campo de cantidad<br />
cambia automáticamente.<br />
Nota: Cuando cambie la moneda base, deberá ingresar las nuevas tasas de cambio<br />
ya que se borran todas las tasas de cambio ingresadas previamente.<br />
■<br />
Diccionario móvil<br />
Use Diccionario para traducir palabras de un idioma a otro.<br />
Seleccione > Oficina > Diccionario. Inglés es la configuración predeterminada de su<br />
dispositivo. Puede agregar dos idiomas adicionales. Para agregar un idioma, seleccione<br />
Opciones > Idiomas > Descargar idiomas. Puede eliminar idiomas excepto Inglés, además de<br />
agregar nuevos. Los idiomas no tienen ningún costo, pero la descarga puede ocasionar la<br />
transmisión de grandes volúmenes de datos a través de la red de su proveedor de servicios.<br />
Comuníquese con su proveedor para obtener información acerca de los costos de transmisión<br />
de datos.<br />
La pantalla muestra abreviaturas para los idiomas de origen y destino. Para cambiar el<br />
idioma de origen y destino, seleccione Opciones > Idiomas > Origen y Destino.<br />
Ingrese la palabra que va a traducir y seleccione Traducir. Para escuchar la palabra,<br />
seleccione Escuchar.<br />
Adobe Reader<br />
■<br />
Use Adobe Reader para ver documentos en formato de documento portátil (.pdf). Para abrir<br />
la aplicación, seleccione > Oficina > Adobe PDF.
Abrir un archivo .pdf<br />
Para abrir un documento visualizado recientemente, selecciónelo. Para abrir un documento<br />
que no está incluido en la vista principal, seleccione Opciones > Buscar archivo, la memoria<br />
y la carpeta donde éste se almacena y el archivo.<br />
Ver un documento<br />
Para moverse por una página, desplácese. Para moverse a la siguiente página, desplácese<br />
hacia abajo en la parte inferior de la página.<br />
Para acercarse o alejarse, seleccione Opciones > Zoom > Acercar o Alejar.<br />
Para buscar texto, seleccione Opciones > Buscar > Texto e ingrese el texto que desea buscar.<br />
Para buscar la siguiente repetición del texto, seleccione Opciones > Buscar > Siguiente.<br />
Para guardar una copia del documento, seleccione Opciones > Guardar.<br />
Quickoffice<br />
■<br />
Para usar las aplicaciones de Quickoffice, seleccione > Oficina > Quickoffice.<br />
No se admiten todas las variaciones ni características de los formatos de archivo Word, Excel<br />
y PowerPoint.<br />
Si tiene problemas con las aplicaciones Quickoffice, visite www.quickoffice.com (en inglés)<br />
o envíe un e-mail a sales@quickoffice.com.<br />
Quickmanager<br />
Con Quickmanager, puede descargar software, incluyendo actualizaciones, nuevas versiones, y<br />
otras aplicaciones útiles. Puede pagar por las descargas mediante su factura telefónica o con<br />
tarjeta de crédito.<br />
15. Configuraciones<br />
Comandos de voz<br />
■<br />
Para seleccionar las funciones que utilizará por comando de voz, seleccione > Config. ><br />
Coman. voz. Los comandos de voz para cambiar los perfiles están en la carpeta Perfiles.<br />
Para cambiar el comando de voz para una aplicación, desplácese hasta la aplicación y<br />
seleccione Editar u Opciones > Cambiar comando. Para reproducir el comando de voz<br />
activado, seleccione Opciones > Reproducir.<br />
Para utilizar comandos de voz, consulte ”Marcación por voz”, pág. 99.<br />
139
■<br />
Configuraciones del teléfono<br />
General<br />
Seleccione > Config. > Config. teléf. > General y una de las siguientes opciones:<br />
Personalización: para ajustar las configuraciones de pantalla, modo en espera, tonos (como<br />
el tono de timbre), idioma, temas y comando de voz.<br />
Fecha y hora: para configurar la hora y fecha y el formato de la pantalla.<br />
Accesorio: para cambiar las configuraciones para un accesorio. Seleccione un accesorio y la<br />
configuración que desea.<br />
Manejo con tapa: para editar las configuraciones de diapositiva. Consulte ”Bloqueo del<br />
teclado (protección del teclado)”, pág. 95, ”Realizar una llamada de voz”, pág. 98 y<br />
”Contestar o rechazar una llamada”, pág. 100.<br />
Config. sensor: para configurar las funciones que controla el acelerómetro en el dispositivo y<br />
activar interacciones de sensor específicas.<br />
Seguridad: para cambiar las configuraciones del dispositivo y de la tarjeta SIM, como los<br />
códigos PIN y de bloqueo; ver detalles del certificado y verificar la autenticidad; y ver y<br />
editar los módulos de seguridad.<br />
Cuando las funciones de seguridad que restringen las llamadas están en uso (como<br />
restricción de llamadas, grupo cerrado de usuarios y marcación fija) pueden realizarse<br />
llamadas al número de emergencia oficial programado en su teléfono.<br />
Config. fábrica: para restaurar algunas configuraciones a sus valores originales. Necesita el<br />
código de bloqueo.<br />
Posicionam. (servicio de red): para cambiar las configuraciones de posicionamiento.<br />
Consulte ”Configuraciones de posicionamiento”, pág. 114.<br />
Teléfono<br />
Consulte ”Configuraciones de llamadas”, pág. 102.<br />
Conexión<br />
Seleccione > Config. > Config. teléf. > Conexión y una de las siguientes opciones:<br />
Bluetooth: para activar o desactivar la tecnología Bluetooth y editar las configuraciones<br />
Bluetooth. Consulte ”Configuraciones de conexión Bluetooth”, pág. 147.<br />
USB: para editar las configuraciones USB. Consulte ”Conexión USB”, pág. 149.<br />
Destinos: para definir los métodos de conexión utilizados para buscar un destino específico.<br />
Paquete datos: para seleccionar las configuraciones de conexión del paquete de datos. Las<br />
configuraciones de paquete de datos afectan a todos los puntos de acceso usando una<br />
conexión de paquete de datos.<br />
140
• Para que el dispositivo se registre en la red de paquete de datos cuando esté en una<br />
red que admita paquetes de datos, seleccione Conex. paq. de datos > Si está<br />
disponible. Si selecciona Si es necesario, el dispositivo sólo usará una conexión de<br />
paquete de datos si inicia una aplicación o función que la necesita.<br />
• Para que el nombre de punto de acceso use su dispositivo como módem con la<br />
computadora, seleccione Punto de acceso.<br />
Llamada datos: para configurar el tiempo de conexión para las conexiones de llamada de<br />
datos. Las configuraciones de llamada de datos afectan todos los puntos de acceso que usan<br />
una llamada de datos GSM.<br />
Video compart.: para configurar <strong>manual</strong>mente las configuraciones de perfil SIP. Consulte<br />
”Configuración de video compartido”, pág. 104.<br />
Presencia (servicio de red): para ver y editar las configuraciones de presencia. Las aplicaciones<br />
de conexión, como push to talk, usan configuraciones de presencia. Puede obtener las<br />
configuraciones del proveedor de servicios.<br />
Configurac. SIP: para ver y editar los perfiles de protocolo de inicio de sesión (SIP). Consulte<br />
”Video compartido”, pág. 103.<br />
Perfil XDM: para crear o editar un perfil XDM. Las configuraciones son para aplicaciones de<br />
comunicación, como presencia y push to talk. Esto permite que el proveedor de servicios<br />
tenga acceso a cierta información del usuario guardada en los servidores de la red pero<br />
administrada por el usuario, por ejemplo, grupos push to talk groups. Puede obtener las<br />
configuraciones del proveedor de servicios. Consulte ”Ajustes de configuración”, pág. 90.<br />
Config.: para ver y eliminar contextos de configuración. Es posible que ciertas funciones,<br />
como la exploración Web y la mensajería multimedia, requieran ajustes de configuración.<br />
Puede obtener las configuraciones del proveedor de servicios. Consulte ”Ajustes de<br />
configuración”, pág. 90.<br />
Control APN: para restringir el uso de puntos de acceso de paquetes de datos. Esta<br />
configuración sólo está disponible si su tarjeta SIM admite el servicio. Para cambiar las<br />
configuraciones, necesita el código PIN2.<br />
Aplicaciones<br />
Para ver y editar las configuraciones de las aplicaciones instaladas en el dispositivo,<br />
seleccione > Config. > Config. teléf. > Aplicaciones.<br />
Voz<br />
■<br />
En Voz, puede seleccionar el idioma predeterminado y la voz que usará para leer mensajes de<br />
texto, y ajustar las propiedades de voz, como la velocidad y el volumen. Seleccione ><br />
Config. > Voz.<br />
141
Para ver detalles de una voz, desplácese a la derecha, desplácese hasta la voz y seleccione<br />
Opciones > Detalles de voz. Para probar una voz, desplácese hasta la voz y seleccione<br />
Opciones > Reproducir voz.<br />
16. Administración de datos<br />
■<br />
Instalar o eliminar aplicaciones<br />
Puede instalar dos tipos de aplicaciones en el dispositivo.<br />
• Las aplicaciones J2ME TM basadas en la tecnología Java TM con la extensión .jad o .jar.<br />
Las aplicaciones Personal Java TM no se pueden instalar en el dispositivo.<br />
• Otras aplicaciones y software apropiados para el sistema operativo Symbian. Los archivos<br />
de instalación tienen la extensión .sis o .sisx. Sólo instale software diseñado específicamente<br />
para su dispositivo.<br />
Importante: Instale y utilice sólo las aplicaciones y el software de fuentes confiables<br />
que ofrezcan seguridad, como las aplicaciones Symbian Signed o las aprobadas por<br />
Java Verified TM .<br />
Los archivos de instalación se pueden transferir a su dispositivo desde una computadora<br />
compatible, descargar durante la exploración o enviar en mensajes multimedia, como un<br />
archivo adjunto de e-mail o mediante tecnología Bluetooth. Puede usar <strong>Nokia</strong> Application<br />
Installer en <strong>Nokia</strong> Nseries PC Suite para instalar una aplicación en el dispositivo o en una<br />
tarjeta de memoria.<br />
Para buscar aplicaciones instaladas, seleccione > Aplicaciones > Personal.<br />
Para abrir el administrador de aplicaciones, seleccione > Config. > Adm. datos > Adm. aplic.<br />
Instalar una aplicación<br />
El archivo .jar es necesario para instalar las aplicaciones Java. Si no lo tiene, el dispositivo le<br />
puede solicitar descargarlo.<br />
1. Para instalar una aplicación o un paquete de software, seleccione Arch. instalación y<br />
desplácese hasta un archivo de instalación. Las aplicaciones de la tarjeta de memoria se<br />
indican con .<br />
2. Seleccione Opciones > Instalar.<br />
También puede buscar en la memoria del dispositivo o en la tarjeta de memoria,<br />
seleccionar la aplicación y pulsar la tecla de desplazamiento para iniciar la instalación.<br />
Durante la instalación, el dispositivo muestra información sobre el estado de la instalación.<br />
Si está instalando una aplicación sin firma digital o certificado, el dispositivo muestra<br />
142
una advertencia. Sólo continúe con la instalación si está seguro del origen y el contenido<br />
de la aplicación.<br />
Importante: Si bien el uso de certificados reduce considerablemente los riesgos<br />
implícitos relacionados con las conexiones remotas y la instalación de software, es<br />
necesario usarlos de manera correcta para obtener los beneficios derivados de la<br />
seguridad mejorada. La existencia de un certificado no proporciona ninguna<br />
protección por sí sola; el administrador de certificados debe contar con certificados<br />
correctos, auténticos y confiables como medida de seguridad adicional. Los certificados<br />
tienen una duración limitada. Si aparecen mensajes como ''Certificado caducado'' o<br />
''Certificado no válido aún'', incluso cuando el certificado debe ser válido, verifique<br />
que la fecha y la hora actuales de su dispositivo sean correctas.<br />
Antes de cambiar cualquier configuración del certificado, asegúrese de poder confiar<br />
totalmente en el propietario del certificado y de que éste realmente pertenezca al<br />
propietario indicado.<br />
Es posible que las aplicaciones Java intenten, por ejemplo, establecer una conexión de datos<br />
o enviar un mensaje. Para editar los permisos de una aplicación Java instalada y definir el<br />
punto de acceso que utilizará la aplicación, seleccione Aplic. instaladas, desplácese hasta la<br />
aplicación y seleccione Abrir.<br />
Después de instalar aplicaciones en una tarjeta de memoria compatible, los archivos de<br />
instalación (.sis) quedan en la memoria del dispositivo. Los archivos pueden usar grandes<br />
cantidades de memoria y limitar el almacenamiento de otros archivos. Para mantener una<br />
cantidad de memoria suficiente, use <strong>Nokia</strong> PC Suite para hacer copias de seguridad en una<br />
PC compatible, y después use el administrador de archivos para eliminar los archivos de<br />
instalación de la memoria del dispositivo. Consulte ”Administrador de archivos”, pág. 143.<br />
Si el archivo .sis es un archivo adjunto a un mensaje, elimine el mensaje del buzón de<br />
entrada de Mensajes.<br />
Eliminar una aplicación<br />
En la vista principal Admin. aplicaciones, seleccione Aplic. instaladas, desplácese al paquete<br />
de software y seleccione Opciones > Desinstalar.<br />
Administrador de archivos<br />
■<br />
Para explorar, abrir y administrar archivos y carpetas en la memoria del dispositivo o en una<br />
tarjeta de memoria, seleccione > Oficina > Adm. arch.<br />
Hacer copias de seguridad y restaurar la memoria del dispositivo<br />
Para hacer copias de seguridad de la información de la memoria del dispositivo a la tarjeta<br />
de memoria o restaurar información de la tarjeta de memoria, seleccione Opciones > Copia<br />
143
seg. mem. tel. o Restaurar de tarj. mem. Sólo puede hacer copias de seguridad de la memoria<br />
del dispositivo y restaurarla en el mismo dispositivo.<br />
Formatear una tarjeta de memoria<br />
Cuando se formatea la tarjeta de memoria, todos los datos en la tarjeta se borran<br />
permanentemente. Algunas tarjetas de memoria vienen preformateadas de fábrica y<br />
otras necesitan formateo.<br />
1. En la vista de Adm. archivos, seleccione la tarjeta de memoria.<br />
2. Seleccione Opciones > Opciones tarj. memoria > Formato.<br />
3. Cuando el formateo está completo, ingrese un nombre para la tarjeta de memoria.<br />
Bloquear y desbloquear una tarjeta de memoria<br />
Para configurar una contraseña que le ayude a evitar el uso no autorizado, seleccione la<br />
tarjeta de memoria y Opciones > Contraseña tarj. mem. > Fijar. Ingrese y confirme su<br />
contraseña. La contraseña puede ser hasta de ocho caracteres de longitud.<br />
Si inserta otra tarjeta de memoria protegida con contraseña en el dispositivo, se le solicitará<br />
que ingrese la contraseña para la tarjeta. Para desbloquear la tarjeta, seleccione Opciones ><br />
Desbloq. tarj. mem.<br />
Licencias<br />
■<br />
Administración de derechos digitales<br />
Los propietarios de contenido pueden emplear distintos tipos de tecnologías de administración<br />
de derechos digitales (DRM) para proteger su propiedad intelectual, incluidos los derechos<br />
de copyright. Este dispositivo usa variados tipos de software DRM para acceder a contenidos<br />
protegidos con DRM. Con este dispositivo puede acceder a contenido protegido con WMDRM,<br />
OMA DRM 1.0 y OMA DRM 2.0. Si cierto software DRM no brinda protección adecuada de<br />
contenido, los propietarios del contenido pueden solicitar la revocación de la capacidad de<br />
dicho software DRM de acceder a nuevos contenidos protegidos con DRM. Esa revocación<br />
también puede impedir la renovación de dicho contenido protegido con DRM que ya está en<br />
su dispositivo. La revocación de ese software DRM no afecta el uso del contenido protegido<br />
con otros tipos de DRM ni el uso de contenidos no protegidos con DRM.<br />
El contenido protegido con administración de derechos digitales (DRM) viene con una licencia<br />
asociada que define sus derechos de uso del contenido.<br />
Si su dispositivo tiene contenido protegido por OMA DRM, para hacer una copia de seguridad<br />
de las licencias y del contenido, use la función de copia de seguridad de <strong>Nokia</strong> PC Suite.<br />
Otros métodos de transferencia podrían no transferir las licencias, que se deben restaurar<br />
con el contenido para que pueda continuar usando el contenido protegido con OMA DRM,<br />
144
después de formatear la memoria del dispositivo. También podría ser necesario restaurar las<br />
licencias si se dañan los archivos de su dispositivo.<br />
Si su dispositivo tiene contenido protegido con WMDRM, al formatear la memoria del dispositivo<br />
se perderán tanto las licencias como el contenido. También se podrían perder las licencias y<br />
el contenido si se dañan los archivos de su dispositivo. La pérdida de las licencias o del<br />
contenido podría impedir que usted siga utilizando el mismo contenido de su dispositivo.<br />
Comuníquese con su proveedor de servicios para obtener más información.<br />
Algunas licencias pueden estar conectadas a una tarjeta SIM específica y sólo se podrá<br />
acceder al contenido protegido si se insertó la tarjeta SIM en el dispositivo.<br />
Para ver las licencias guardadas en el dispositivo, seleccione > Config. > Adm.<br />
datos > Licencias.<br />
Para ver licencias válidas conectadas a uno o más archivos multimedia, seleccione Licenc.<br />
válidas. Las licencias de grupo, que contienen varias licencias, se indican con . Para ver<br />
las licencias contenidas en la licencia de grupo, seleccione la licencia de grupo.<br />
Para ver licencias no válidas cuyo período de validez para usar el archivo ya expiró, seleccione<br />
Licenc. inválidas. Para comprar más tiempo de uso o prolongar la duración de uso para un<br />
archivo multimedia, seleccione una licencia no válida y Opciones > Obtener licencia nueva.<br />
Es posible que no pueda actualizar las licencias si el servicio de recepción de mensajes<br />
está desactivado.<br />
Para ver las licencias que no están en uso, seleccione Sin usar. Las licencias sin usar no<br />
tienen archivos multimedia conectados.<br />
Para ver información detallada, como el estado de validez y la capacidad para enviar el<br />
archivo, desplácese hasta una licencia y selecciónela.<br />
■<br />
Administrador de dispositivos<br />
Con el administrador de dispositivos puede conectarse a un servidor y recibir ajustes de<br />
configuración para el dispositivo, crear nuevos perfiles de servidor o ver y administrar<br />
perfiles de servidor existentes. Puede recibir ajustes de configuraciones de su proveedor<br />
de servicios o del departamento de administración de información de la compañía.<br />
Para abrir el administrador de dispositivos, seleccione > Config. > Adm. datos > Adm. disp.<br />
Actualizar software<br />
Advertencia: Cuando instale una actualización de software, no podrá usar el dispositivo,<br />
ni para realizar llamadas de emergencia, hasta que concluya la instalación y se<br />
reinicie el dispositivo. Asegúrese de hacer una copia de seguridad de sus datos antes<br />
de autorizar la instalación de una actualización.<br />
145
La descarga de actualizaciones de software puede ocasionar la transmisión de grandes<br />
volúmenes de datos a través de la red de su proveedor de servicios. Comuníquese con su<br />
proveedor para obtener información acerca de los costos de transmisión de datos.<br />
Asegúrese de que la batería del dispositivo tenga energía suficiente o conecte el cargador<br />
antes de comenzar la actualización.<br />
1. Seleccione Opciones > Buscar actualizaciones. Si hay una actualización disponible,<br />
acéptela para descargarla.<br />
2. Después de una descarga correcta, para instalar la actualización, seleccione Ahora.<br />
Para iniciar la instalación en otro momento, seleccione Más tarde.<br />
Para iniciar el proceso de instalación en otro momento, seleccione Opciones ><br />
Instalar actualización.<br />
Si no se ha definido un perfil de servidor, el dispositivo le pide que cree uno, o si hay varios, le<br />
pide que seleccione entre la lista de servidores. Comuníquese con su proveedor de servicios<br />
para obtener las configuraciones del perfil de servidor.<br />
Configurar su dispositivo<br />
Puede recibir ajustes de configuraciones de su proveedor de servicios o del departamento de<br />
administración de información de la compañía.<br />
Para conectarse a un servidor y recibir ajustes de configuración para su dispositivo, seleccione<br />
Opciones > Perfiles del servidor, desplácese al modo de servidor y seleccione Opciones ><br />
Iniciar config.<br />
Para editar un perfil de servidor, desplácese hasta el perfil y seleccione Opciones > Editar.<br />
Comuníquese con su proveedor de servicios o el departamento de administración de<br />
información de la compañía para obtener las configuraciones del perfil de servidor.<br />
17. Conectividad<br />
■<br />
Transferir o sincronizar datos<br />
Con la transferencia telefónica, puede copiar o sincronizar contactos, entradas de agenda y<br />
posiblemente otros datos, como videoclips e imágenes, desde un dispositivo compatible que<br />
utilice una conexión Bluetooth.<br />
Dependiendo del otro dispositivo, es posible que no pueda realizar la sincronización y que los<br />
datos sólo se copien una vez.<br />
1. Para transferir y sincronizar datos, seleccione > Config. > Conect. > Transfer.<br />
Si no había utilizado la transferencia telefónica anteriormente, aparecerá la información<br />
de la aplicación. Para comenzar a transferir datos, seleccione Continuar.<br />
146
Si ha utilizado la transferencia telefónica, seleccione el icono Comenzar sinc., Comenzar<br />
recup. o Comenzar envío.<br />
2. Cuando usa la tecnología Bluetooth, los dispositivos deben estar vinculados para que<br />
puedan transferir datos.<br />
Dependiendo del otro dispositivo, es posible que se envíe e instale una aplicación en el otro<br />
dispositivo para habilitar la transferencia de datos. Siga las instrucciones en pantalla.<br />
3. Seleccione el contenido que desea transferir a su dispositivo.<br />
4. El contenido se transfiere a su dispositivo. El tiempo de transferencia depende de la<br />
cantidad de datos. Puede detener la transferencia y continuarla en otro momento.<br />
PC Suite<br />
■<br />
Con PC Suite puede sincronizar contactos, entradas de agenda y notas entre el dispositivo y<br />
una PC compatible.<br />
Puede encontrar información adicional sobre PC Suite y el enlace de descarga en el área de<br />
soporte del sitio Web de <strong>Nokia</strong>, en www.nokia.com/pcsuite (en inglés).<br />
Conectividad Bluetooth<br />
■<br />
La tecnología inalámbrica Bluetooth permite conexiones inalámbricas entre dispositivos<br />
electrónicos dentro de un alcance máximo de 10 metros (33 pies).<br />
Este dispositivo cumple con la Especificación Bluetooth 2.0 que admite los siguientes<br />
perfiles: distribución avanzada de audio, control remoto de audio y video, imagen básica,<br />
acceso telefónico a redes, transferencia de archivos, manos libres, auricular, objeto push,<br />
puerto serial, acceso a directorio, acceso a SIM, distribución genérica de audio y video,<br />
acceso genérico e intercambio genérico de objetos. Para asegurar el funcionamiento con<br />
otros dispositivos que admiten tecnología Bluetooth, utilice los accesorios aprobados por<br />
<strong>Nokia</strong> para este modelo. Consulte a los fabricantes de otros dispositivos para determinar la<br />
compatibilidad entre esos dispositivos y el suyo.<br />
Las funciones que usan tecnología Bluetooth aumentan la demanda de energía de la batería<br />
y reducen su vida útil..<br />
No acepte conectividad Bluetooth de fuentes en las que no confía.<br />
Una conexión Bluetooth se desconecta automáticamente después de enviar o recibir datos.<br />
Configuraciones de conexión Bluetooth<br />
Seleccione > Config. > Conect. > Bluetooth.<br />
Bluetooth: para activar y desactivar la conectividad Bluetooth.<br />
Visibilidad mi tel.: para que su dispositivo siempre sea detectado por otros dispositivos con<br />
conectividad Bluetooth, seleccione Mostrado a todos. Para que su dispositivo se pueda<br />
147
detectar durante un período de tiempo definido, seleccione Definir período. Por razones de<br />
seguridad, se recomienda utilizar la configuración Oculto cuando sea posible.<br />
Mi nombre teléfono: para definir un nombre para su dispositivo.<br />
Modo remoto de SIM: para permitir que otro dispositivo, por ejemplo, un equipo para auto,<br />
use la tarjeta SIM de su dispositivo mediante tecnología Bluetooth (perfil de acceso SIM).<br />
Cuando el dispositivo móvil está en modo SIM, sólo se puede usar un accesorio de conexión<br />
compatible, como un equipo para auto, para hacer o recibir llamadas. Si este modo está activado,<br />
su dispositivo móvil no hará ninguna llamada, excepto a los números de emergencia programados<br />
en ese dispositivo. Primero desactive el modo remoto SIM para hacer llamadas desde su<br />
dispositivo. Si el dispositivo está bloqueado, ingrese el código de bloqueo para desbloquearlo.<br />
Enviar datos<br />
1. Abra la aplicación donde está guardado el elemento que desea enviar.<br />
2. Desplácese hasta el elemento que desea enviar y seleccione Opciones > Enviar ><br />
Vía Bluetooth.<br />
3. El dispositivo empieza a buscar los dispositivos dentro del alcance. Los dispositivos<br />
vinculados se muestran con . Es posible que algunos dispositivos sólo exhiban las<br />
direcciones únicas del dispositivo. Para conocer la dirección única de su dispositivo,<br />
ingrese el código *#2820# en el modo en espera.<br />
Si ya buscó dispositivos anteriormente, aparece una lista de los dispositivos que<br />
encontró antes. Para iniciar una nueva búsqueda, seleccione Más dispositivos.<br />
4. Seleccione el dispositivo con el cual desea establecer la conexión.<br />
5. Si el otro dispositivo requiere vinculación antes de poder transmitir datos, sonará un<br />
tono y se le pedirá que ingrese un código. Cree su propio código y compártalo con el<br />
propietario del otro dispositivo. No es necesario que memorice el código.<br />
Vincular y bloquear dispositivos<br />
Para abrir una lista de dispositivos vinculados, en la vista Bluetooth, desplácese a la derecha<br />
hasta Disposit. vinculados.<br />
Para vincular un dispositivo, seleccione Opciones > Vincular nuevo disp., seleccione el<br />
dispositivo con el que se vinculará e intercambie los códigos.<br />
Para cancelar la vinculación, desplácese hasta el dispositivo cuya vinculación desea cancelar<br />
y pulse la tecla Borrar. Si desea cancelar todas las vinculaciones, seleccione Opciones ><br />
Eliminar todos.<br />
Para autorizar un dispositivo, desplácese hasta el dispositivo y seleccione Opciones > Fijar<br />
como autoriz. Las conexiones entre su dispositivo y un dispositivo autorizado se pueden<br />
realizar sin su conocimiento. Use este estado sólo para sus dispositivos a los que el resto no<br />
148
tiene acceso, por ejemplo, su PC o los dispositivos que pertenecen a alguien en quien confía.<br />
se agrega junto a los dispositivos autorizados en la vista de dispositivos vinculados.<br />
Para bloquear las conexiones de un dispositivo, en la vista de dispositivos vinculados,<br />
seleccione el dispositivo y Bloquear.<br />
Para ver una lista de dispositivos bloqueados, desplácese a la derecha hasta Dispositiv.<br />
bloqueados. Para desbloquear un dispositivo, desplácese al dispositivo y seleccione Eliminar.<br />
Recibir datos<br />
Cuando recibe datos mediante tecnología Bluetooth, se le preguntará si desea aceptar el<br />
mensaje. Si acepta, el elemento se coloca en el buzón de entrada en Mensajes.<br />
Conexión USB<br />
■<br />
Conecte el cable de datos USB para establecer la conexión de datos entre el dispositivo y una<br />
PC compatible.<br />
Seleccione > Config. > Conect. > USB y una de las siguientes opciones:<br />
Modo de conexión USB: para seleccionar el modo de conexión USB predeterminado o cambiar<br />
el modo activo. Seleccione PC Suite para usar el dispositivo con <strong>Nokia</strong> PC Suite; Almacenam.<br />
masivo para acceder a los archivos en la tarjeta de memoria insertada como un dispositivo<br />
de almacenamiento masivo; Transferencia imág. para usar el dispositivo con una impresora<br />
compatible con PictBridge o Transferencia de medios para sincronizar archivos multimedia,<br />
como música, con una versión compatible de Windows Media Player.<br />
Preguntar al conect.: para que el dispositivo pregunte el propósito de la conexión cada vez<br />
que se conecta el cable, seleccione Sí. Para configurar que el modo predeterminado se active<br />
automáticamente, seleccione No.<br />
Después de transferir datos, asegúrese de que es seguro desconectar el cable de datos USB<br />
de la PC.<br />
Sincronización remota<br />
■<br />
Sinc. le permite sincronizar datos como entradas de agenda, contactos y notas con una<br />
computadora compatible o un servidor de Internet remoto.<br />
Seleccione > Config. > Conect. > Sinc.<br />
Para crear un nuevo perfil, seleccione Opciones > Nuevo perfil de sinc. e ingrese las<br />
configuraciones requeridas.<br />
Para sincronizar datos, en la vista principal, marque los datos que se sincronizarán y<br />
seleccione Opciones > Sincronizar.<br />
149
■<br />
Push to talk (PTT) (servicio de red) es un servicio en tiempo real de voz sobre IP. PTT ofrece<br />
comunicación de voz directa asociada a la pulsación de una sola tecla. En la comunicación<br />
PTT, una persona habla mientras las demás escuchan. El tiempo que le corresponde a cada<br />
participante es limitado.<br />
Para verificar la disponibilidad y costos y para suscribirse al servicio, comuníquese con su<br />
proveedor de servicios. Tenga en cuenta que los servicios de roaming pueden ser más<br />
limitados que los de la red doméstica.<br />
Antes de usar el servicio PTT, debe definir las configuraciones de conexión PTT. Póngase en<br />
contacto con su proveedor de servicios para obtener las configuraciones de servicio PTT correctas.<br />
Las llamadas de teléfono siempre tienen prioridad ante las de PTT.<br />
Seleccione > Aplicaciones > PTT.<br />
150<br />
Comunicación instantánea<br />
Iniciar sesión en PTT<br />
Para iniciar sesión <strong>manual</strong>mente, seleccione Opciones > Iniciar sesión en PTT.<br />
indica una conexión PTT.<br />
indica que PTT está configurado en No molestar (DND).<br />
Salir de PTT<br />
Seleccione Opciones > Salir. ¿Cerrar sesión en PTT después de salir de la aplicación? aparece<br />
en pantalla. Para desconectarse, seleccione Sí. Para mantener PTT activo en segundo plano,<br />
seleccione No.<br />
Realizar una llamada individual<br />
Advertencia: Cuando use el altavoz, no sostenga el dispositivo cerca del oído, ya<br />
que el volumen puede resultar demasiado alto.<br />
1. Seleccione Opciones > Contactos PTT > Contactos, desplácese hasta el contacto con el<br />
que desea hablar y oprima la tecla Llamar.<br />
2. Cuando se haya establecido la conexión, para hablar con el otro participante, mantenga<br />
pulsada la tecla Llamar mientras habla.<br />
3. Para finalizar la llamada PTT, seleccione Desconec. o, si existen varias llamadas PTT,<br />
seleccione Opciones > Desconectar.<br />
Realizar una llamada PTT<br />
Para llamar a un grupo, seleccione Opciones > Contactos PTT > Contactos > Opciones ><br />
Conversar con varios, marque los contactos a los que desea llamar y seleccione Aceptar.
Sesiones PTT<br />
Las sesiones PTT aparecen como indicaciones de llamadas en la pantalla PTT, que entregan<br />
información acerca del estado de las sesiones PTT:<br />
Espere: aparece cuando se mantiene pulsada la tecla Llamar y otra persona aún está<br />
hablando en la sesión PTT<br />
Hable: aparece cuando se mantiene pulsada la tecla Llamar y se obtiene permiso para hablar.<br />
Enviar una solicitud de devolución de llamada<br />
Para enviar una solicitud de devolución de llamada desde Contactos, desplácese hasta el<br />
contacto y seleccione Opciones > Env. solic. dev. llamada.<br />
■<br />
Administrador de conexiones<br />
En el administrador de conexiones, puede identificar el estado de las conexiones de datos, ver<br />
detalles acerca de la cantidad de datos enviados y recibidos, y las conexiones finales no utilizadas.<br />
Nota: La facturación real de las llamadas y los servicios de parte de su proveedor puede<br />
variar según las funciones de red, el redondeo de la facturación, los impuestos, etc.<br />
Seleccione > Config. > Conect. > Adm. con.<br />
Para ver detalles de conexión, desplácese hasta una conexión y seleccione Opciones > Detalles.<br />
Para terminar la conexión, desplácese hasta la conexión y seleccione Opciones > Desconectar.<br />
Para finalizar las conexiones, seleccione Opciones > Desconectar todas.<br />
18. Accesorios<br />
Advertencia: Utilice sólo baterías, cargadores y accesorios aprobados por <strong>Nokia</strong> para<br />
este modelo en particular. El uso de otros accesorios puede anular toda aprobación<br />
o garantía aplicables y puede resultar peligroso.<br />
Comuníquese con su distribuidor para obtener información acerca de la disponibilidad de<br />
accesorios aprobados. Cuando desconecte el cable de alimentación de cualquier accesorio,<br />
sujételo y tírelo del enchufe, no del cable.<br />
19. Información sobre baterías y cargadores<br />
Su dispositivo recibe alimentación eléctrica a través de una batería recargable. La batería<br />
diseñada para uso con este dispositivo es BL-5F. Este dispositivo está diseñado para su uso<br />
con los siguientes cargadores: AC-4, AC-5, AC-6, AC-8 o DC-4. La batería se puede cargar y<br />
151
descargar cientos de veces, pero con el tiempo se gastará. Cuando los tiempos de conversación<br />
y de standby sean notablemente más cortos que lo normal, reemplace la batería. Utilice<br />
únicamente baterías aprobadas por <strong>Nokia</strong>, y recárguelas sólo con los cargadores aprobados por<br />
<strong>Nokia</strong> y diseñados para este dispositivo. El uso de una batería o de un cargador no aprobados<br />
podría generar riesgo de incendio, explosión, pérdida u otro peligro.<br />
Si se usa una batería por primera vez, o si no se usó la batería durante un tiempo prolongado,<br />
tal vez sea necesario conectar el cargador, desconectarlo y reconectarlo para iniciar la carga<br />
de la batería. Si la batería está completamente descargada, es posible que pasen varios<br />
minutos antes de que el indicador de carga aparezca en la pantalla o antes de poder hacer<br />
alguna llamada.<br />
Apague siempre el dispositivo y desconecte el cargador antes de retirar la batería.<br />
Desconecte el cargador del enchufe eléctrico y del dispositivo cuando no esté en uso. No deje<br />
la batería conectada al cargador después de haberla cargado completamente, puesto que la<br />
sobrecarga puede acortar su vida útil. Si no se la utiliza, una batería completamente cargada<br />
se descargará paulatinamente.<br />
Intente mantener la batería siempre entre los 15 °C y 25 °C (59 °F y 77 °F). Las temperaturas<br />
extremas reducen la capacidad y la vida útil de la batería. Un dispositivo con una batería<br />
caliente o fría puede dejar de funcionar temporalmente. El rendimiento de la batería se ve<br />
particularmente limitado en temperaturas inferiores al punto de congelación.<br />
No provoque un cortocircuito en la batería. Puede producirse un cortocircuito accidental si<br />
un objeto metálico, como una moneda, un clip o un bolígrafo ocasionan la conexión directa<br />
de los terminales positivo (+) y negativo (-) de la batería (éstos parecen tiras metálicas en la<br />
batería). Puede ocurrir, por ejemplo, cuando lleva una batería de repuesto en su bolsillo o<br />
bolso. El cortocircuito de los terminales puede dañar la batería o el objeto que esté<br />
conectado a ella.<br />
No arroje las baterías al fuego, ya que pueden explotar. También pueden explotar si están<br />
dañadas. Elimine las baterías conforme a las normativas locales. Recíclelas siempre que sea<br />
posible. No las deseche junto con los desperdicios domésticos.<br />
No desmantele, corte, abra, aplaste, doble, deforme, perfore ni destruya las celdas o las<br />
baterías. En el caso de escape de líquido, evite su contacto con la piel o los ojos. Si esto<br />
ocurre, lave la piel o los ojos inmediatamente con agua o busque ayuda médica.<br />
No modifique ni reacondicione la batería; no intente insertar objetos extraños en ella ni la<br />
sumerja o exponga al agua o a otros líquidos.<br />
El uso inapropiado de la batería podría ocasionar un incendio, una explosión u otro peligro. Si<br />
el dispositivo o la batería se caen, especialmente en una superficie dura, y cree que la batería se<br />
dañó, llévela a un centro de servicios para su inspección antes de continuar usándola.<br />
Utilice la batería solamente para el propósito para el que fue diseñada. No utilice nunca el<br />
cargador o la batería si están dañados. Mantenga la batería fuera del alcance de los niños.<br />
152
Importante: Los tiempos de conversación y de standby de la batería son sólo<br />
estimaciones y dependen de la intensidad de la señal, las condiciones de la red, las<br />
funciones usadas, la antigüedad y las condiciones de la batería, la temperatura a la<br />
que se ha expuesto la batería, si se la usó en modo digital y muchos otros factores.<br />
El tiempo empleado en las llamadas afectará el tiempo de espera de la batería.<br />
Asimismo, el tiempo durante el cual el dispositivo permanece encendido y en modo<br />
standby afectará el tiempo de conversación.<br />
Normas de autenticación de baterías <strong>Nokia</strong><br />
■<br />
Siempre use baterías <strong>Nokia</strong> originales para su seguridad. Para asegurarse de haber adquirido<br />
una batería <strong>Nokia</strong> original, cómprela en un centro de distribución autorizado por <strong>Nokia</strong> e<br />
inspeccione el holograma siguiendo estos pasos:<br />
Completar con éxito los pasos no asegura totalmente la autenticidad de la batería. Si tiene<br />
alguna razón para creer que su batería no es una batería auténtica y original de <strong>Nokia</strong>, evite<br />
usarla y llévela al centro de servicio autorizado <strong>Nokia</strong> más cercano o a un distribuidor <strong>Nokia</strong><br />
para solicitar asistencia. Su distribuidor <strong>Nokia</strong> o centro de servicio <strong>Nokia</strong> autorizados<br />
inspeccionarán la batería para confirmar su autenticidad. Ante la imposibilidad de verificar<br />
la autenticidad de la batería, devuélvala al lugar de compra.<br />
Autenticación del holograma<br />
1. Al mirar el holograma en la etiqueta, deberá ver el símbolo de<br />
las manos conectadas <strong>Nokia</strong> desde un ángulo y el logo <strong>Nokia</strong><br />
Original Enhancements desde otro ángulo.<br />
2. Cuando mueva el holograma hacia la izquierda y la derecha,<br />
y hacia arriba y abajo, verá 1, 2, 3 y 4 puntitos en cada<br />
lado respectivamente.<br />
¿Qué ocurre si la batería no es auténtica?<br />
Si no puede confirmar que su batería <strong>Nokia</strong> con el holograma en la etiqueta es una batería<br />
auténtica de <strong>Nokia</strong>, no la use. Llévela al centro de servicio autorizado <strong>Nokia</strong> o al distribuidor<br />
más cercano para solicitar asistencia. El uso de una batería no aprobada por el fabricante<br />
podría ser peligroso y podría resultar en un rendimiento inferior y dañar su dispositivo y los<br />
accesorios. También podría invalidar cualquier aprobación o garantía aplicables al dispositivo.<br />
Para obtener información acerca de las baterías originales <strong>Nokia</strong>, visite<br />
www.nokia.com/battery (en inglés).<br />
153
Cuidado y mantenimiento<br />
Su dispositivo es un producto de diseño y fabricación superiores, y se lo debe tratar con<br />
cuidado. Las siguientes sugerencias lo ayudarán a mantener la cobertura de su garantía.<br />
• Mantenga el dispositivo seco. Las precipitaciones, la humedad y todos los tipos de<br />
líquidos o humedad contienen minerales que corroen los circuitos electrónicos. Si su<br />
dispositivo se moja, retire la batería y espere a que el dispositivo esté completamente<br />
seco para volver a colocarla.<br />
• No utilice ni guarde el dispositivo en lugares sucios o polvorientos. Las piezas movibles y<br />
los componentes electrónicos podrían dañarse.<br />
• No guarde el dispositivo en lugares calurosos. Las temperaturas altas pueden reducir la<br />
duración de los dispositivos electrónicos, dañar las baterías y deformar o derretir algunos<br />
tipos de plástico.<br />
• No guarde el dispositivo en lugares fríos. Cuando el dispositivo recupera su temperatura<br />
normal, puede formarse humedad en su interior, lo cual puede dañar las tarjetas de<br />
circuitos electrónicos.<br />
• Abra siempre el dispositivo de acuerdo con las instrucciones que figuran en este <strong>manual</strong>.<br />
• No deje caer, no golpee ni sacuda bruscamente el dispositivo. Los manejos bruscos<br />
pueden dañar las tarjetas de circuitos internos y los mecanismos delicados.<br />
• No utilice productos químicos abrasivos, solventes de limpieza ni detergentes fuertes<br />
para limpiarlo.<br />
• No pinte el dispositivo. La pintura puede obstruir las piezas movibles e impedir la<br />
operación apropiada.<br />
• Use un paño suave, limpio y seco para limpiar cualquier tipo de lente, como la lente de la<br />
cámara, de los sensores de proximidad y de los sensores de luz.<br />
• Utilice sólo la antena suministrada o una de repuesto aprobada. El uso de antenas,<br />
modificaciones o accesorios no aprobados podría dañar el dispositivo e infringir los<br />
reglamentos sobre el uso de dispositivos de radio.<br />
• Use los cargadores en interiores.<br />
• Haga siempre una copia de seguridad de los datos que desea guardar, como sus<br />
contactos y notas de agenda.<br />
• Para reiniciar el dispositivo periódicamente y optimizar su desempeño, apáguelo y quite<br />
la batería.<br />
Estas recomendaciones se aplican de igual manera a su dispositivo, la batería, al cargador o<br />
cualquier accesorio. Si algún dispositivo no funciona correctamente, llévelo a su centro de<br />
servicio autorizado más cercano.<br />
154
Eliminación<br />
El símbolo del contenedor con ruedas tachado en su producto, documentación o<br />
embalaje, le recuerda que todos los productos eléctricos y electrónicos, las baterías y<br />
los acumuladores deben ser entregados por separado para su eliminación luego de<br />
finalizada su vida útil. Este requisito se aplica a la Unión Europea y a otros sitios que<br />
disponen de sistemas de recolección separados. No deseche estos productos junto<br />
con los demás desperdicios domésticos.<br />
Debe devolver los productos para su recolección a fin de ayudar a evitar la eliminación<br />
de desechos no controlada y a promover la reutilización de recursos materiales.<br />
El vendedor minorista de los productos, las autoridades locales de eliminación de<br />
desechos, las organizaciones de responsabilidad de la producción nacional o su<br />
representante <strong>Nokia</strong> local cuentan con información más detallada. Para ver la<br />
Declaración ecológica del producto o las instrucciones para devolver un producto<br />
obsoleto, consulte la información específica de su país en www.nokia.com (en inglés).<br />
Información adicional de seguridad<br />
■ Niños pequeños<br />
Su dispositivo y los accesorios pueden contener partes pequeñas. Manténgalos fuera del<br />
alcance de los niños.<br />
■ Entorno operativo<br />
Este dispositivo cumple con lo establecido en las normas de exposición RF cuando se lo<br />
usa en su posición normal cerca del oído o cuando se lo coloca a una distancia mínima de<br />
1,5 centímetros (5/8 pulgadas) del cuerpo. Al portar el dispositivo en accesorios como<br />
un estuche, clip para cinturón o soporte, utilice sólo los que no contengan metal y que<br />
mantengan el dispositivo lejos del cuerpo a la distancia mínima del cuerpo, como se indica<br />
arriba. Para transmitir archivos de datos o mensajes, este dispositivo requiere una conexión<br />
de calidad a la red. En algunos casos, la transmisión de archivos de datos o mensajes puede<br />
demorarse hasta que la conexión adecuada esté disponible. Asegúrese de seguir las<br />
instrucciones anteriores sobre las distancias de separación hasta que la transmisión<br />
haya finalizado.<br />
Algunas piezas del dispositivo son magnéticas. Su dispositivo puede atraer materiales metálicos.<br />
No coloque tarjetas de crédito ni otros medios magnéticos de almacenamiento de datos<br />
cerca del dispositivo, pues la información que almacenen puede perderse.<br />
■ Dispositivos médicos<br />
Los aparatos de radiotransmisión, incluidos los teléfonos móviles, pueden interferir con<br />
el funcionamiento de dispositivos médicos que no estén protegidos adecuadamente.<br />
155
Consulte a un médico o al fabricante del dispositivo médico si tiene alguna pregunta o para<br />
determinar si está correctamente protegido contra las señales externas de RF. Apague su<br />
teléfono en los lugares de los centros de salud donde se indique hacerlo. Es probable que<br />
en los hospitales y los centros de salud se utilicen equipos sensibles a las señales externas<br />
de radiofrecuencia.<br />
Dispositivos médicos implantados<br />
Los fabricantes de dispositivos médicos recomiendan que se mantenga una separación<br />
mínima de 15,3 cm (6 pulgadas) entre un teléfono móvil y el dispositivo médico implantado,<br />
por ejemplo, marcapaso o desfibrilador cardioversor implantado, a fin de evitar interferencias<br />
potenciales con el dispositivo médico. Quienes tengan dichos dispositivos deben:<br />
• Mantener siempre una distancia de más de 15,3 cm (6 pulgadas) entre su dispositivo<br />
móvil y el dispositivo médico cuando el dispositivo móvil esté encendido.<br />
• No llevar el dispositivo móvil en el bolsillo superior de la ropa.<br />
• Utilizar el dispositivo en el oído contrario al dispositivo médico para minimizar las<br />
posibles interferencias.<br />
• Apagar el dispositivo móvil inmediatamente si existe alguna razón para sospechar que se<br />
están produciendo interferencias.<br />
• Leer y seguir las instrucciones del fabricante de los dispositivos médicos implantados.<br />
Si tiene alguna pregunta acerca del uso de su dispositivo móvil con un dispositivo médico<br />
implantado, consulte a su médico.<br />
Auxiliares auditivos<br />
Algunos dispositivos móviles digitales pueden interferir con determinados auxiliares auditivos.<br />
Si se produce alguna interferencia, consulte a su proveedor de servicios.<br />
■ Vehículos<br />
Las señales de RF pueden afectar los sistemas electrónicos instalados o protegidos en forma<br />
inadecuada en los automóviles, por ejemplo, sistemas electrónicos de inyección directa,<br />
sistemas electrónicos de frenos antideslizantes (antibloqueo), sistemas electrónicos de<br />
control de velocidad y sistemas de bolsas de aire. Para obtener más información, consulte<br />
al fabricante o al concesionario de su vehículo o de los equipos que haya incorporado<br />
posteriormente.<br />
Sólo personal especializado debe reparar el dispositivo o instalarlo en su vehículo. Una instalación<br />
o reparación defectuosa puede resultar peligrosa y anular cualquier garantía que se aplique<br />
al dispositivo. Compruebe con regularidad que el equipo completo del dispositivo móvil de su<br />
vehículo esté correctamente montado y funcionando debidamente. No almacene ni transporte<br />
líquidos inflamables, gases o materiales explosivos en el mismo compartimiento destinado al<br />
dispositivo, sus piezas o accesorios. Para los automóviles equipados con bolsas de aire, recuerde<br />
que se inflan con mucha fuerza. No coloque objetos, incluidos los equipos instalados o los<br />
156
celulares, encima del área de la bolsa de aire o en la zona donde ésta pueda desplegarse. Si el<br />
equipo de telefonía móvil para vehículos no está bien instalado y las bolsas de aire se despliegan,<br />
se pueden producir lesiones graves.<br />
Se prohíbe el uso de dispositivos celulares a bordo de las aeronaves. Apague su dispositivo<br />
antes de abordar el avión. Su uso puede resultar peligroso para el funcionamiento del avión,<br />
interrumpir la red del teléfono móvil y puede ser ilegal.<br />
■ Zonas potencialmente explosivas<br />
Apague el dispositivo en áreas donde puedan producirse explosiones y obedezca todas las<br />
señales e instrucciones. Las zonas potencialmente explosivas incluyen las zonas donde<br />
existen avisos reglamentarios que le exigen que apague el motor de su vehículo. Las chispas<br />
en dichas zonas pueden producir explosiones o incendios que causan lesiones físicas o<br />
incluso la muerte. Apague el dispositivo en los lugares de abastecimiento de combustible,<br />
como las áreas cercanas a las bombas de combustible en las estaciones de servicio. Respete<br />
las restricciones de uso de los equipos de radio en depósitos y áreas de almacenamiento y<br />
distribución de combustible, en plantas químicas o en lugares donde se realicen explosiones.<br />
Las zonas con atmósferas potencialmente explosivas suelen estar marcadas, pero no siempre<br />
de manera clara. Éstas incluyen las áreas bajo la cubierta de los barcos, las instalaciones de<br />
transferencia o almacenamiento de productos químicos y las áreas donde el aire contiene<br />
elementos químicos o partículas, como granos, polvo o partículas metálicas. Debe consultar<br />
a los fabricantes de vehículos que usan gas licuado de petróleo (como propano o butano)<br />
para determinar si se puede usar este dispositivo en forma segura en su cercanía.<br />
■<br />
Llamadas de emergencia<br />
Importante: Este dispositivo funciona con señales de radio, redes celulares, redes<br />
terrestres y funciones programadas por el usuario. Si su dispositivo admite llamadas<br />
de voz por Internet (llamadas por Internet), active las llamadas por Internet y el<br />
teléfono celular. El dispositivo intentará hacer llamadas de emergencia tanto a través<br />
de la red celular como de su proveedor de servicio de llamadas por Internet, si ambos<br />
están activados. No se pueden garantizar las conexiones en todas las condiciones.<br />
Nunca dependa únicamente de un dispositivo móvil para las comunicaciones<br />
importantes, como emergencias médicas.<br />
Para hacer una llamada de emergencia:<br />
1. Si el dispositivo está apagado, enciéndalo. Compruebe que la intensidad de la señal sea<br />
adecuada. Dependiendo de su dispositivo, también puede ser necesario hacer lo siguiente:<br />
• Insertar una tarjeta SIM si su dispositivo la usa.<br />
• Eliminar ciertas restricciones de llamadas que haya activado en su dispositivo.<br />
• Cambiar el perfil desconectado o de vuelo a un perfil activo.<br />
2. Pulsar la tecla Finalizar tantas veces como sea necesario para borrar la pantalla y<br />
preparar el dispositivo para las llamadas.<br />
157
3. Ingrese el número de emergencia oficial de la localidad en la que se encuentre.<br />
Los números de emergencia pueden variar de una localidad a otra.<br />
4. Pulse la tecla Llamar.<br />
Cuando haga una llamada de emergencia, recuerde dar toda la información necesaria de la<br />
forma más exacta posible. Su dispositivo móvil puede ser el único medio de comunicación en<br />
el lugar de un accidente. No finalice la llamada hasta que reciba instrucciones de hacerlo.<br />
■ Información de certificación (SAR)<br />
Este dispositivo móvil cumple las normas referentes a la exposición a ondas de radio.<br />
Su dispositivo móvil es radiotransmisor y receptor. Está diseñado para no exceder los límites<br />
de exposición a ondas de radio recomendados por las normas internacionales. La organización<br />
científica independiente ICNIRP ha desarrollado estas normas e incluido márgenes de seguridad<br />
diseñados para asegurar la protección de todas las personas, independientemente de su edad o<br />
estado de salud.<br />
Las normas de exposición para dispositivos móviles emplean una unidad de medida conocida<br />
como Tasa Específica de Absorción (SAR, Specific Absorption Rate). El límite de la SAR que las<br />
normas ICNIRP establecen es un promedio de 2 Vatios/kilogramo (W/kg) en 10 gramos de tejido<br />
corporal. Se realizan las pruebas de SAR mediante el uso en posiciones de manejo estándar, con<br />
el dispositivo transmitiendo al nivel más alto de potencia certificado en todas las bandas de<br />
frecuencia comprobadas. El nivel de SAR real de un dispositivo en funcionamiento puede<br />
estar debajo del valor máximo, ya que el dispositivo está diseñado para usar sólo la potencia<br />
requerida para alcanzar la red. La cantidad cambia según varios factores, por ejemplo, su<br />
proximidad a una estación base de red. El valor de SAR más alto que las normas ICNIRP<br />
establecen para la posición de este dispositivo cerca del oído es de 0,76 W/kg.<br />
El uso de los accesorios del dispositivo puede generar distintos valores de SAR. Es posible que<br />
los valores de SAR varíen, dependiendo de los requisitos nacionales de emisión de informes y<br />
de pruebas, además de la banda de la red. Se puede proporcionar información adicional<br />
sobre SAR junto con la información del producto en www.nokia.com (en inglés).<br />
Su dispositivo móvil también está diseñado para cumplir con los requisitos relacionados con<br />
la exposición a ondas de radio que establecen la FCC (los EE.UU.) e Industry Canada. Estos<br />
requisitos determinan un límite SAR de un promedio de 1,6 W/kg en un gramo de tejido<br />
corporal. El valor de SAR más elevado informado según este estándar durante la certificación<br />
del producto para su uso cerca del oído es de 0,83 W/kg; cuando se lleva adecuadamente<br />
cerca del cuerpo es de 1,05 W/kg.<br />
158
Índice<br />
A<br />
actualizaciones de software 145<br />
actualizar software 145<br />
administrador de archivos 143<br />
administrador de conexiones 151<br />
administrador de dispositivos 145<br />
agenda 137<br />
alarma. Consulte el reloj.<br />
alternar entre aplicaciones 95<br />
ayuda 86<br />
B<br />
bloqueo de teclado 95<br />
bloqueo de teclas. Consulte bloqueo de<br />
teclado.<br />
Bluetooth<br />
configuración de conexión 147<br />
enviar datos 148<br />
recibir datos 149<br />
brújula 117<br />
buscar ubicaciones 117<br />
buzón de correo de voz 99<br />
C<br />
cable de datos. Consulte USB.<br />
caché 135<br />
cámara<br />
capturar imágenes 125<br />
grabar videoclips 125<br />
cargar la batería 88<br />
cerrar aplicaciones 95<br />
código de bloqueo 89, 96<br />
comandos de servicios 111<br />
comandos de voz 139<br />
compartir en línea 123<br />
conectividad 146<br />
configuraciones<br />
asistente de configuración 90<br />
conexión 140<br />
idioma de escritura 105<br />
llamada de datos 141<br />
mensajes 111<br />
paquete de datos 140<br />
posicionamiento 114<br />
teléfono 140<br />
voz 141<br />
contactos 112<br />
agregar tono de timbre 113<br />
consumo de memoria 113<br />
grupos 113<br />
guardar y administrar 112<br />
contador de viaje 121<br />
contraseña de restricción 97<br />
convertidor 138<br />
D<br />
descargar mapas 118<br />
diccionario móvil 138<br />
diccionario. Consulte diccionario móvil.<br />
directorio. Consulte contactos.<br />
dispositivos vinculados 148<br />
E<br />
escribir texto. Consulte ingreso de texto.<br />
escuchar música 126<br />
eventos perdidos 94<br />
F<br />
favoritos 133<br />
G<br />
galería 122<br />
GPS<br />
conexión GPS 113<br />
contador de viaje 121<br />
GPS asistido 114<br />
mapas 115<br />
posicionamiento 113<br />
satélites 115<br />
GPS asistido (A-GPS) 114<br />
grabadora 132<br />
grabadora de voz. Consulte grabadora.<br />
guardar ubicaciones 118<br />
I<br />
indicadores<br />
eventos perdidos 94<br />
iconos 93<br />
luz de la tecla Navi 94<br />
Luz GPS 94<br />
ingreso de texto 105<br />
159
L<br />
licencia de navegación 119<br />
llamada de multiconferencia 100<br />
llamada de video 101<br />
llamadas<br />
contestar 100<br />
desvío 102<br />
en espera 101<br />
finalizar 98<br />
internacionales 98<br />
marcación rápida 99<br />
realizar 98<br />
rechazar 100<br />
restricción 103<br />
luz de estado. Consulte luz de la tecla Navi.<br />
luz de la tecla Navi 94<br />
M<br />
mail for exchange 109<br />
mapas 116<br />
marcación por voz 99<br />
marcación rápida 99<br />
marcar elementos 94<br />
marcas 118, 121<br />
mensajes<br />
escuchar 111<br />
mensajes de servicio 108<br />
mensajes SIM 111<br />
mensajes de e-mail 108<br />
menú 94<br />
modo desconectado. Consulte perfil<br />
desconectado.<br />
N<br />
navegación 119<br />
notas 137<br />
notas activas 137<br />
P<br />
perfil desconectado 92<br />
perfiles 136<br />
PIN 89, 96<br />
módulo PIN 97<br />
PIN de firma 97<br />
posicionamiento 113<br />
protector de pantalla 94<br />
PTT. Consulte push to talk.<br />
PUK 97<br />
push to talk 150<br />
R<br />
radio 130<br />
RealPlayer<br />
registro de llamadas 105<br />
reloj 136, 137<br />
reloj mundial. Usar el reloj.<br />
reproductor de medios. Consulte RealPlayer.<br />
reproductor de música<br />
descargar música 128<br />
listas de reproducción 127<br />
tienda de música 128<br />
transferencia de música 128<br />
rutas 119<br />
S<br />
selección de operador 103<br />
sincronización 149<br />
solicitudes de posición 115<br />
T<br />
tema de espera 92<br />
temas 136<br />
tonos de timbre 113<br />
tonos de timbre de video 122<br />
transferencia de música 128<br />
transferir datos 146<br />
U<br />
ubicaciones 118, 121<br />
UPIN 96<br />
usar el teléfono sin una tarjeta SIM 92<br />
USB 149<br />
V<br />
video compartido 103<br />
volumen 95<br />
W<br />
web<br />
guardar una página 135<br />
seguridad de conexión 133<br />
ver favoritos 133<br />
ver una página guardada 135<br />
vínculos 134<br />
160
Índice<br />
Notas<br />
161


