


You also want an ePaper? Increase the reach of your titles
YUMPU automatically turns print PDFs into web optimized ePapers that Google loves.
.4—_•• 7.,.<br />
,<br />
www.whitesewing.com<br />
Call Toll Free 800-331-3164<br />
INSTRUCTION BOOK<br />
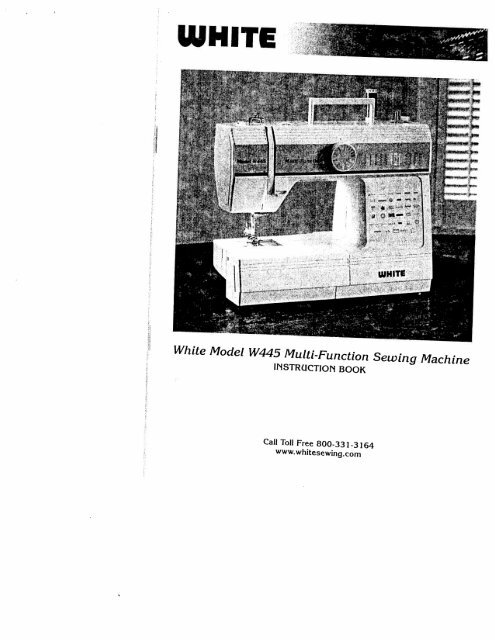
White Model <strong>W445</strong> Multi-Function Sewing Machine<br />
P....<br />
,.%••...o .1—<br />
,,,.,<br />
-‘*<br />
WHITE
current line plug (a plug having one blade wider than<br />
This product is equipped with a polarized alternating<br />
______________________<br />
________________________<br />
—1—<br />
Retain these numbers for future reference.<br />
Model No.<br />
Serial No.<br />
The Model No. is located on Rating Plate.<br />
The Serial No. is located on Bed plate.<br />
Model No. of this appliance.<br />
Record in space provided below the Serial No. and<br />
WHITE SEWING MACHINE COMPANY<br />
purpose of the polarized plug.<br />
If the plug should still fail to tit, contact an electrician to<br />
insert the plug fully into the outlet, try reversing the plug.<br />
replace the obsolete outlet. Do not defeat the safety<br />
one way. This is a safety feature. If you are unable to<br />
the other). This plug will fit into the power outlet, only<br />
POLARIZED PLUGS CAUTION
_______________________<br />
PRECAUCIONAL USAR<br />
ENCHUFE POLARIZADOS<br />
Este producto está equipado con un enchufe do corrient<br />
alterna polarizada (un enchufe con una aleta más ancha<br />
que Ia otra). Este enchufe entra en el tomacorrIente<br />
solamente de una manera. Es un diseño de seguridad.<br />
no puede insertar el enchufe en el enchufe por completo<br />
trate de insertarla de manera inversa. Si aun asi no<br />
entrara el enchufe, contacte a un electricista para quo<br />
cambie el tomacorrIente obsoleto. No use el enchufe<br />
polarizado de una manera para el quo no ha sido<br />
diseñado.<br />
WHITE SEWING MACHINE COMPANY<br />
Registre el nümero de serie y el nUmero del modelo<br />
de este aparato en el espacio proporcionado abajo.<br />
El nümero de serie se encuentra en Ia placa de Ia<br />
plataforma.<br />
El numero de modelo se encuentra en Ia placa de<br />
ci asificaciones.<br />
NUmero de serie<br />
NUmero de modelo<br />
Conserve estos nUmeros para referencia futura<br />
-2-
DANGER To reduce the risk of electric shock:<br />
Read all instructions before using this sewing machine.<br />
-3-<br />
SAVE THESE INSTRUCTIONS<br />
instruction manual.<br />
property, if it has been dropped or damaged, or dropped into water, Return the<br />
lubricating, or when making any other user servicing adjustments mentioned in the<br />
of the sewing machine and foot controller free from the accumulation of lint, dust, and<br />
10. Keep fingers away from all moving parts. Special care is required around the sewing<br />
11. Always use the proper needle plate. The wrong plate can cause the needle to break.<br />
12. Do not use bent needles.<br />
14. Unplug the sewing machine when making any adjustments in the needle area, such as<br />
15. Always unplug sewing machine from the electrical outlet when removing covers,<br />
loose cloth.<br />
machine needle.<br />
threading needle, changing needle, threading bobbin, or changing presser foot, etc.<br />
6. Do not use outdoors.<br />
13. Do not pull or push fabric while stitching. It may deflect the needle causing itto break.<br />
electrical or mechanical adjustment: -<br />
appliance to the nearest authorized dealer or service center for examination, repair,<br />
2. Use this appliance only for its intended use as described in this manual. Use only<br />
3. Never operate this appliance if it has a damaged cord or plug, if it is not working<br />
4. Never operate the appliance with any air openings blocked. Keep ventilation openings<br />
5. Never drop or insert any object into any opening.<br />
7. Do not operate where aerosol (spray) products are being used or where oxygen is<br />
8. To disconnect, turn all controls to the off (0) position, then remove plug from outlet.<br />
9. Do not unplug by pulling on cord. To unplug, grasp the plug, not the cord.<br />
being administered.<br />
1. Do not allow to be used as a toy. Close attention is necessary when this appliance is<br />
used by or near children.<br />
attachments recommended by the manufacturer as contained in this manual.<br />
Operate sewing machine only when mounted in sewing machine table, case, and the like.<br />
See the installation instructions.<br />
f<br />
WARNING To reduce the risk of burns, fire, electric shock, or<br />
injury to persons:<br />
Always unplug before relamping. Replace bulb with same type of 15 watt bulb.<br />
appliance from the electric outlet immediately after using and before cleaning.<br />
An appliance should never be left unattended when plugged in. Always unplug this<br />
followed, including the following:<br />
When using an electrical appliance, basic safety precautions should always be<br />
IMPORTANT SAFETY INSTRUCTIONS
INSTRUCCIONES IMPORTANTES DE SEGURIDAC<br />
Siempre deberá seguir as precauciones de seguridad básicas al usar este aparato<br />
eléctrico, incluyendo las siguientes precauciones:<br />
Lea todas las instrucciones antes de usar esta mãquina<br />
de coser<br />
PELIGRO Para reducir el riesgo de choques eléctricos:<br />
Se requiere supervision constante de este aparato cuando esté conectado. Siempre<br />
desconecte el aparato del tomacorriente inmediatamente después de usarto y antes de<br />
limpiarlo.Desconecte siempre antes de cambiar Ia bombilla.Cambie Ia bombilla con un<br />
repuesto del mismo tipode 15 vatios.<br />
ADVERTENCIA para reducir el riesgo de quemaduras,<br />
incendios,choques eléctricos a lesions a las personas:<br />
Haga funcionar Ia máquina de coser solamente cuando esté montada en Ia mesa para<br />
maquinas de coser, o en otros muebles parecidos. Véanse las instrucciones de<br />
instalaciOn.<br />
1. No permita que se use como juguete.Será necesaria Ia supervision constante Cuando<br />
este aparato sea usado donde haya ninoS 0 que éstos estén cerca.<br />
2. Use este aparato solamente para elfin para el que fue diseñado, como se describe<br />
en este manual. Use solamente los accesorios recomendados por el fabricante, como<br />
se indica en este manual.<br />
3. Nunca haga furicionar este aparato si el cable o el enchufe estuvieran dañados. Si no<br />
funcionara adecuadamente, si se hubiera caido 0 dañado, 0 Si Se hubiera caido at agua,<br />
devuelva el aparato a un distribuidor autorizado o at centro de servicio autorizado mOs<br />
cercano para que lo revisen, reparen o hagan los ajuStes eléctricos o mecánicos debido<br />
4. Nunca use este aparato con alguna de las rejillas de ventilaciOn bloqueadas. Mantenga<br />
las rejillas de ventilaciOn y el controlador del pedal limpios, sin acumulaciones de pelusa<br />
polvo y tela suelta.<br />
5. Nunca deje caer o inserte objetos en una abertura.<br />
6. No lo use a Ia intemperie.<br />
7. No lo use donde se estén usando productos de aerosol (rociador) o en donde so esté<br />
suministrando oxigeno.<br />
8. Para descoriectarlo,ponga todos los controles en Ia posiciOn de apagado (“0’) y,<br />
después, deconecte el enchufe del tomacorriente.<br />
9. No 10 desconecte jalando el cable. Para desconectarlo,sujete el enchufe,no el cable.<br />
10. Mantenga los dedos de las manos alejados de las piezas en movimiento. Se requerirán<br />
precauciones especiales cerca de Ia aguja de Ia máquina de coser.<br />
11. Siempre use Ia placa adecuada para Ia aguja. Usar Ia place errOnea podria causar que<br />
se rompa Ia aguja.<br />
12. No use agujas dobladas.<br />
13. No jale o empuje Ia tela mlentras cose. Podria mover Ia aguja y causar que se rompa.<br />
14. Desconecte Ia máquina de coser al hacer cualquier ajuste en el area de Ia aguja, como<br />
enhebrar Ia aguja, cambiar Ia aguja, enhebrar Ia bobina 0 al cambiar el prensatelas, etc.<br />
15. Siempre desconecte Ia máquina de coser del tomacorriente al quitar las cubiertas, al<br />
lubricar 0 al hacer cualquier otro ajuste de servicio mencionado en el manual de<br />
instrucciones.<br />
GUARDE ESTAS INSTRUCCIONES<br />
-4-
CONTENTS<br />
Name of parts 7-8<br />
Accessories 9<br />
Before sewing (Power supply and sewing lamp) 10<br />
t<br />
Removing extension table 11<br />
Free-arm sewing 11<br />
Winding the bobbin 12<br />
Removing bobbin case and bobbin 13<br />
Inserting bobbin into bobbin case 13<br />
Inserting bobbin case into shuttle race 14<br />
Threading upper thread & Twin needle threading 15<br />
Drawing up bobbin thread 16<br />
Changing sewing directions 16<br />
Levelling machine 17<br />
Adjusting thread tension 18<br />
Regulating the presser foot pressure 19<br />
Drop feed 19<br />
Changing needle 20<br />
Fabric-Thread-Needle-table 21<br />
Sewing (pattern selector) and operation table 23<br />
To start sewing 24<br />
How to finish stitches 25<br />
Straight stitch 26<br />
Zigzag sewing 26<br />
Overcasting 27<br />
Straight stretch stitches 27<br />
Blind stitch 28-29<br />
Button sewing 30<br />
Binding 30<br />
Zipper sewing 31<br />
Buttonhole sewing 32<br />
Hemming 33<br />
Twin needle 34<br />
Embroidery 34<br />
Quilter 35<br />
Seam guide 35<br />
Maintenance (Cleaning and oiling) 36<br />
Checking performance problems-Troubleshooting 37<br />
-5-
Bobinar 12<br />
Coser a brazo libre (freearm) 11<br />
Uso de Ia mesa ajustable para coser tejidos de gran superficie 11<br />
Antes de coser 10<br />
Accesorios 9<br />
Piezas principales. 7-8<br />
-6-<br />
Reemplazo de La aguja 20<br />
Costura recta elástica 27<br />
Costura oculta 28-29<br />
Ribeteado (de borde a borde) 30<br />
Costura de cremalleras 31<br />
Costura de ojales 32<br />
Posibles problemas de funcionamiento y soluciones 38<br />
Limpieza 36<br />
Ajustar las tensiones del hilo de rosca 18<br />
Gula de costura 35<br />
Regular Ia presiOn del pie prensatela 19<br />
Sobrehilar 27<br />
Ruedos, orlar 33<br />
Bordados 34<br />
Doble aguja 34<br />
Coser en zig-zag 26<br />
Puntada recta 26<br />
Enhebrar el hilo superior 15<br />
Remate de Ia costura 25<br />
Colocar Ia bobina en eI casquillo de Ia bobina 13<br />
Colocar el casquillo de Ia bobina en La guia del agarrador 14<br />
Cambiar La dirección de costura 16<br />
Avance en Ia posición hundida 19<br />
Comienzo de Ia costura 24<br />
Retirar el casquillo de Ia bobina y Ia bobina 13<br />
Subir el hilo de rosca inferior 16<br />
Estabilidad de La máquina 17<br />
Tabla de tejidos-hilo-aguja 22<br />
Tabla de costura, selector de diseno 23<br />
Cosido de botones 30<br />
Acolchado 35<br />
CONTENIDO
I<br />
I<br />
I<br />
-7-<br />
10. Presser foot<br />
11. resser foot pressure dial<br />
12. Thread take up lever<br />
3. Spool pins<br />
5. Stitch length dial<br />
7. Needle clamp screw<br />
8. Extension table<br />
9. Shuttle cover<br />
2. Pattern selector dial<br />
4. Bobbin winder spindle<br />
6. Reverse button<br />
1 Thread tension dial<br />
87<br />
PIEZAS PRINCIPALES (PARTE DELANTERA)<br />
NAME OF PARTS (FRONT VIEW)<br />
12. Palanca de compensaciOn<br />
10, Pie de costura<br />
5. Rueda de longitud de Oosido<br />
7. Abrazadera de Ia aguja<br />
4. Huso de Ia bobina<br />
11. Pie de control de Ia maquina<br />
2. BotOn de tipo de cosido<br />
3. Portador de bobina extraible<br />
6. Palanca de marcha atrás de cosido<br />
8. Base de cosido<br />
9. Cubierta del brazo de ajuste<br />
1. BotOn de Ia tension
REAR VIEW<br />
VISTA POSTERIORE<br />
I 2<br />
8<br />
3<br />
4<br />
5<br />
6<br />
1. Bobbin winder stopper<br />
2. Upper thread guide<br />
3. Face cover<br />
4. Thumb screw<br />
5. Needle plate<br />
6. Presser foot lever<br />
7. Hand wheel<br />
8. Stop clamp motion knob<br />
Stop de bobina<br />
2. Gula de hilo de rosca superior<br />
3. Cubier delantera<br />
4. Tornil que afianza Ia abrazadera<br />
5. Placa de Ia aguja<br />
6. Palanca del pie<br />
7. Manubrio<br />
8. BotOn del embrague<br />
-8-
ACCESSORIES<br />
ACCESORIOS<br />
Bobbin<br />
Bobinas<br />
Spool pin felt<br />
Discos del fieltro<br />
Zigzag foot<br />
(on machine)<br />
Pie de zig-zag<br />
(en Ia maquina)<br />
Buttonhole foot<br />
Pie para ojales<br />
Button foot<br />
Pie para botones<br />
Zipper foot<br />
Pie para cremalleras<br />
Pintuckfoot<br />
Contacto Imagen<br />
doble por Ia Iámina<br />
Screw driver<br />
Destomillador<br />
Buttonhole cutter<br />
Abridor de costuras<br />
y ojales<br />
Narrow hem foot<br />
Pie de dobladillo<br />
angosto<br />
Machine oil<br />
Tubo de aceite<br />
Needles<br />
Agujas<br />
-9-
eloj).<br />
indica.<br />
clockwise.<br />
distribuidor.<br />
mediante el pedal.<br />
control.<br />
2. Insert plug into the main socket.<br />
1. Fit plug into the machine.<br />
1. Enchufe el cable a Ia mãquina de cos<br />
Power supply / Power supply plug\<br />
,/‘Sewing lamp<br />
BEFORE SEWING I ANTES DE COSER<br />
CAUTION: When the machine is not being used, when cleaning it or changing its Ia<br />
Nota: Desconecte Ia maquina de Ia toma de corriente si nO Se está utilizando, si se<br />
tiene que sustituir Ia bombilla o durante su limpieza.<br />
Lampara de costura<br />
ConexiOn de a fuente de alimentaciOn<br />
disconnect it from the electric outlet.<br />
10 -<br />
with sewing machine.<br />
2. Remove bulb by unscrewing it<br />
Ues only FDM model KD-1902 loot contr<br />
Bulb replacement;<br />
deberla ser sustituido por otro idéntico.<br />
2. Conecte el enchufe a Ia toma de corn<br />
3. La velocidad de costura se ajusta<br />
3. Install a new bulb by screwing it in<br />
Esta maquina está equipada con un cat<br />
de conexiOn especial, que, si se dañara<br />
1. Open face cover in direction of arrow.<br />
Podrá adquirir un cable igual en su<br />
Solamente usa regulador de pie del Moc<br />
FDM KD-1 902 para maquina de coser.<br />
4. Use a 15 watt bulb (max).<br />
Reemplazar yb colocar Ia bombilla.<br />
2. Desenrosque Ia bombilla hacia Ia izqui<br />
4. Utilice solamente bombillas de 15 W d<br />
1. Para abrir el compartimiento de Ia borr<br />
3. Enrosque Ia bombilla hacia Ia derecha<br />
5. Después de cambiar Ia bombilla y de<br />
el compartimiento, atornillar el disposi<br />
3. Sewing speed can be varied by the fc<br />
counterclockwise.<br />
deberé destornillar los tornillos como s<br />
(en el sentido contrario a as agujas dE<br />
eI sentido de las agujas del reloj).<br />
rosca E12.<br />
de cierre como se indica.
REMOVING EXTENSION TABLE<br />
USO DE LA MESA AJUSTABLE PARA COSER TEJIDOS<br />
DE GRAN SUPERFICIE<br />
Hold th left end of the table and pull it<br />
out in direction of the arrow.<br />
La mesa ajustable se puede èölocàr o<br />
retirar tirando deella en el sentidoql.ie<br />
indica Ia flecha.<br />
FREE-ARM SEWING<br />
COSER A BRAZO LIBRE (FREEARM)<br />
1. This sewing machine can be used as<br />
a flat bed machine but easily converts<br />
to a free arm machine by removing<br />
the extension table.<br />
2. Especially useful for sewing sleeves,<br />
pant legs, tubular fabrics etc. more<br />
easily.<br />
3. To sew tubular items just slip the<br />
sleeve or leg of pants on the free arm<br />
as shown on the illustration.<br />
El brazo libre es indicado para coser<br />
mangas, costuras de pantalones, tejidos<br />
tubulares, etc.<br />
Para coser tales piezas desplácelas<br />
sobre el brazo libre, como se indica en<br />
Ia ilustraciOn.<br />
11—
WINDING THE BOBBIN<br />
BOBINAR<br />
1. Release stop motion knob.<br />
2. Thread as shown. -<br />
3. Place bobbin onto spindle and<br />
hand-wind thread onto bobbin ii<br />
anti-clockwise direction for 5 or<br />
turns.<br />
(When bobbin is filled re-tighten sti<br />
motion knob)<br />
1. Libere el boton de detencion.<br />
2. Enhebre como se muestra.<br />
3. Ponga Ia bobina en el eje y enb<br />
Ia bobina a mano en direccion<br />
contraria a las manecillas del re<br />
unas 5 a 6 vueltas.<br />
(Cuando Ia bobina estellena, vuelv<br />
ajustar el botOn de detenciOn.)<br />
Winder spindle<br />
Carrete<br />
2 inches thread<br />
5 centimetros de hilo<br />
(fl<br />
Push bobbin winder spindle in direction of<br />
arrow. When bobbin winding is completed,<br />
return spindle to its original position.<br />
A Ia izquierda, en Ia cubierta del brazo se<br />
encuentra Ia tensiOn de bobinado. Esta Se<br />
puede ajustar como se describe, si Ia<br />
mOquina no enrollara de manera uniforme<br />
Screw<br />
Tornillo<br />
I 1 I I I I<br />
r:to<br />
When bobbin winding is incorrect, rele<br />
the screw of the upper thread guide an<br />
adjust up or down until bobbin winding<br />
balanced.<br />
Si el bobinado no es uniforme, afloje el<br />
tornillo de Ia tensiOn de bobinado y<br />
colOquelo para arriba o para abajo has<br />
que bobine uniformemente.<br />
- 12<br />
-
______________<br />
___________Slot<br />
REMOVING BOBBIN CASE AND BOBBIN<br />
RETIRAR EL CASQUILLO DE LA BOBINA Y LA BOBINA<br />
Hedlaj<br />
1. Raise the needle to its highest<br />
position and open shuttle race cover.<br />
1. Coloque a aguja en Ia posiciOn más<br />
alta y abra a cubierta del ajuste.<br />
2. Open the hinged latch of the bobbin<br />
case and pull the bobbin case out of th<br />
machine.<br />
2. Abra Ia palanca del casquillo de Ia<br />
bobina y retirelo de Ia máquina.<br />
3. Release the latch and the bobbin will fall out<br />
easily.<br />
3. Si usted deja Ia palanca, Ia bobina caerá<br />
automáticamente del casquillo.<br />
INSERTING BOBBIN INTO BOBBIN CASE<br />
COLOCAR LA BOBINA EN EL CASQUILLO DE LA BOBINA<br />
Lm]<br />
1:<br />
1 Pull 5 cm of thread from bobbin and<br />
insert it into bobbin case as shown.<br />
1. Cuando coloque Ia bobina en el<br />
casquillo, deje 5 centimetros de<br />
hilo de rosca de mãs. (Véase<br />
ilustraciOn)<br />
Tension spring<br />
Resorte de tension<br />
2. Guide the end of thread into the slot.<br />
2, Conduzca el extremo del hilo de<br />
rosca por Ia ranura.<br />
E<br />
3. Pull the thread through the slot and under the tension<br />
spring and draw out about 10 cm of thread.<br />
3. Tire del hilo de rosca por Ia ranura y por debajo del<br />
muelle de tensiOn y tire aproximadamente 10<br />
centimetros de hilo.<br />
-13-
Dedo<br />
Fing”\<br />
14 -<br />
2. Fije el casquillo de Ia bobina, como se indica, en el perno medio, de modo que el<br />
dedo agarre al insertar en Ia hendidura.<br />
2. Holding the latch open, place bobbin case onto the center pin in the shuttle and<br />
release latch.<br />
1. Cerciórese de que Ia aguja esté en Ia posición más alta. Tire del hilo de rosca hacia<br />
delante. Abra Ia palanca y sostenga el casquillo.<br />
1. Raise the needle to its highest position. Pull the thread to the front, open the latch of<br />
the bobbin case and hold it.<br />
Palanca<br />
Hinged latch<br />
AGARRADOR<br />
COLOCAR EL CASQUILLO DE LA BOBINA EN LA GUIA DEL<br />
INSERTING BOBBIN CASE INTO SHUTTLE RACE
I<br />
I<br />
THREADING UPPER THREAD<br />
ENHEBRAR EL HILO SUPERIOR<br />
Pass the thread from A to I as shown.<br />
Enhebre el hit segón se indica de A-I<br />
ED<br />
Twin needle threading.<br />
La aguja melliza enhebrando,<br />
4<br />
7<br />
- 15-
lower thread will be brought up in a loop.<br />
Lightly draw up the upper thread, by which the<br />
position.<br />
wheel when the take up lever is at its highest<br />
goes down and comes up. Then stop the hand<br />
1. Hold the upper thread with left hand, turn the<br />
________________________<br />
hand wheel slowly towards you until the needle<br />
16-<br />
pie de costura. Dé Ia vuelta al tejido.<br />
1. Pinche Ia aguja en el tejido y eleve el<br />
as desired. cosiendo.<br />
around the needle to change direction 2. Saje el pie de costura y continue<br />
raise presser foot, pivot the fabric<br />
1. Lower needle down into fabric and 2. Lower the presser foot and start to sew<br />
CAMBIAR LA DIRECCION DE COSTURA<br />
CHANGING SEWING DIRECTIONS<br />
debajo del pie de costura hacia atrás.<br />
2. Tire de los dos hilos y guielos juntos por<br />
4. Start to sew.<br />
lower presser foot.<br />
3. Place fabric under presser foot from the front,<br />
under presser foot to the rear of the machine.<br />
2. Pull out both threads and place them together<br />
inferior se recogerá en forma de lazo.<br />
Tire suavemente del hilo superior y el hilo<br />
cuando el donador de hilo esté situado arriba.<br />
hacia usted hasta que Ia aguja se desplace<br />
hacia abajo y nuevamente hacia arriba. Pare<br />
izquierda, gire Ia rueda volante lentamente<br />
1. Sostenga el hilo superior con Ia mano<br />
SUBIR EL HILO DE ROSCA INFERIOR<br />
DRAWING UP THE BOBBIN THREAD
LEVELLING MACHINE<br />
ESTABILIDAD DE LA MAQUINA<br />
J<br />
Down<br />
Hacia abajo<br />
Up<br />
Hacia arriba<br />
- 17-
tensiOn.<br />
Tejido<br />
superior<br />
F<br />
Upper thread<br />
Correcto<br />
Correct<br />
by turning the thread tension dial.<br />
Upper thread tension may be adjusted<br />
AJUSTAR LAS TENSIONES DEL HILO DE ROSCA<br />
ADJUSTING THREAD TENSION<br />
regulada girando el botOn de tensiOn.<br />
La tensiOn maxima puede ser<br />
- 18-<br />
agujas del reloj) para clisminuir Ia<br />
izquierda (en el sentido contrario a las<br />
para aumentar Ia tensiOn y hacia Ia<br />
La tensiOn del hilo inferior puede ser<br />
decreases tension.<br />
to the left (counter-clockwise)<br />
() by turning the screw of the bobbin case<br />
Lower thread tension can be increased<br />
Lado interior del<br />
Upper thread<br />
Incorrecto Inside of fabric<br />
Incorrect<br />
Normal upper thread tension: 4 —<br />
6<br />
Tension normal del hilo superior: entre 4—6<br />
derecha (en sentido a las agujas del reloj)<br />
slightly to the right (clockwise). Turning it<br />
0 Hilo inferior<br />
tejido, hilo superior<br />
regulada girando el tornillo del casquillo<br />
de Ia bobina ligeramente hacia Ia<br />
Bobbin threac
1. Push down the lever for the desired pressure; for light weight fabrics set lever at 3, set at 2 for<br />
A. Empuje Ia palanca del avance para bajar el avance por debajo de Ia placa do Ia aguja<br />
- 19<br />
-<br />
para zurcir, bordar y coser botones.<br />
para coser do manera normal.<br />
B. Empuje Ia palanca del avance hacia arriba para elevar el avance pox encima dela aguja<br />
B. Push feed lever up to raise feed above needle plate for normal sewing.<br />
button sewing.<br />
A. Push feed lever down to drop feed below needle plate for darning, embroidery, and<br />
B<br />
t II<br />
EEl:<br />
DROP FEED I AVANCE EN LA POSICION HUNDIDA<br />
vuelva a colocar el tornillo. La palanca normalmente está en Ia posiciôn 2.<br />
Cuando haya modificado a posición de Ia palanca, cierre el compartimiento do Ia bombilla y<br />
posicián “0”, para que no se ejerza ninguna presion.<br />
3. Cuando se zurce 0 en costura a mano libre, Ia presiOn de Ia palanca tendrá que estar en Ia<br />
bombilla. Abra el compartimiento. -<br />
tejido.<br />
2. Una presiOn demasiado baja provoca que se omitan puntos 0 haya dificultades para zurcir el<br />
del compartimiento de Ia bombilla. Afloje él tornillo de fijaciOn de el compartimiento de Ia<br />
(2)0 tejidos pesados (1).<br />
1. Coloque Ia palanca en Ia posiciOn adecuada, segün si son tejidos igeros (3), tejidos medios<br />
El ajuste de Ia presion del pie prensatela Se consigue con Ia palanca que so encuentra detrás<br />
After adjusting the presser foot pressure and closing the lamp cover, tighten up the stop screw.<br />
3. When darning or sewing freehand embroidery, release the pressure by setting the lever to 0.<br />
stop screw of the lamp cover to open it.<br />
To adjust the presser foot pressure, use the lever behind the cover of the lamp. Loosen the<br />
2. Insufficient pressure may cause poor feeding, skipped stitches or difficulty in guiding the fabric.<br />
medium fabrics and at 1 for heavy fabrics.<br />
The lever is usually adjusted at 2.<br />
REGULAR LA PRESION DEL PIE PRENSATELA<br />
REGULATING THE PRESSER FOOT PRESSURE
4<br />
de Ia aguja<br />
Tornillo de abrazadera<br />
Needle clamp screw<br />
REEMPLAZO DE LA AGUJA<br />
CHANGING NEEDLE<br />
20<br />
arriba como sea posible.<br />
3. Con el lado piano de Ia aguja hacia Ia parte posterior, coloque Ia aguja tan<br />
4. Apriete muy bien el tornillo de Ia abrazadera.<br />
2. Afloje el tornillo de a abrazadera y quite Ia aguja vieja.<br />
1. Ponga Ia aguja en Ia posiciOn más alta.<br />
4. Tighten the needle clamp screw securely.<br />
up as it will go.<br />
2. Loosen needle clamp screw and remove the old needle.<br />
3. With the flat side of the needle facing away from you, insert the needle as far<br />
1 Raise the needle bar to its highest position.<br />
posterior<br />
Lado piano hacia Ia parte<br />
Face flat side away from you
- 21<br />
80-90<br />
80-90<br />
80-90<br />
Fiber<br />
Tricot 60S 70(10)<br />
0<br />
-<br />
Dial<br />
See page 19 Straight<br />
Tension<br />
Presser Foot Stitches<br />
Fabric Thread 1<br />
Needle<br />
regulation Stitch Length<br />
of Upper<br />
Pressure of Length of<br />
Pressure stitch<br />
22<br />
Indication<br />
Light Cotton<br />
FABRIC-THREAD-NEEDLE-TABLE<br />
Medium Cotton<br />
Please pay attention to the following list as a guide for sewing different types of fabric.<br />
Heavy Cotton<br />
j weight Fiber 2 0.5 - 3 0.5 - 4<br />
1 Jersey 80(12)<br />
Nylon 80<br />
Silk 50 Silk<br />
Wool silk 50 S 80 (12)<br />
Cotton 60-80<br />
Light 60 S<br />
Gabardine 50 Silk<br />
Tweed 50 Silk (12-14)<br />
Jersey 50 S (12-14)<br />
(14-16)<br />
Denim 50<br />
90-100<br />
(12-14)<br />
Fiber silk<br />
Fibersilk 3 1-3 1-4<br />
\i____<br />
-<br />
1 0.5 - 3 0.5 - 4<br />
CIH’1
- 22<br />
Lana<br />
Fino<br />
ioi/<br />
[i—Il<br />
ø% puntada<br />
ElecciOn de<br />
prensatela<br />
Tejido Hilo Aguja del pie<br />
puntadas<br />
Tension<br />
Largo de<br />
1 PresiOn<br />
N<br />
TABLA DE TEJIDOS-HILO-AGUJA<br />
Tenga en cuenta el tipo de tejido que va a usar.<br />
Tricot Fibra<br />
Nylon Algodón 80<br />
Seda Seda 50<br />
Jersey fino Fibra 2 0.5 - 3 0.5 - 4<br />
Mediano AlgodOn (12-14)<br />
lana sintOtica.<br />
Popelin 60-80<br />
Seda de Fibra<br />
Gabardina Seda 50<br />
-<br />
(1214<br />
sintética 50<br />
Tweed SedaSO<br />
80-90<br />
80-90<br />
Grueso vaqueros<br />
Denim, Algodón 50 (14-16)<br />
90-100<br />
80 (12)<br />
sintética 60<br />
80-90<br />
seda 50<br />
80 (12)<br />
sintOtica 60<br />
70 (10)<br />
pagina 19<br />
VOase Recto ZZ<br />
—--- C<br />
Jersey Fibra (12-14) 1 0.5 - 3 0.5 - 4<br />
1 - 3 1 - 4
- 23<br />
I<br />
E1<br />
Ill<br />
.<br />
ciego<br />
3<br />
Ojal<br />
Straight stitch<br />
Puntada recta<br />
puntada<br />
Costura, diseño Largo de Pie Avance<br />
Stitch patterns Stitch length Presser foot Drop feed<br />
—V<br />
I<br />
TABLA DE COSTURA, SELECTOR DE DISEf4O<br />
SEWING (PATTERN SELECTOR) AND OPERATION TABLE<br />
5 stitch —5: .<br />
Zigzag<br />
-<br />
Bordado freehand<br />
g Free-hand embroidery<br />
para ojales<br />
Aguja doble Excepto<br />
8 Twin needle Buttonhole<br />
Except<br />
Costura estirada recta III<br />
Straight stretch stitch III<br />
Slant over edge<br />
6 Sobrehllo inclinado<br />
Zig-zag con 3 pasos<br />
Three step zigzag<br />
Costura oculta borde •<br />
Blind stitch<br />
Buttonhole<br />
—<br />
IEJlII L4J<br />
2 Zig-zag<br />
•<br />
Without<br />
No necesario
- 24<br />
for the length of the stitch and tension suitable to your fabric.<br />
stitches.<br />
sewing.<br />
important hints:<br />
2. Guide the fabric gently with your hand.<br />
3. To prevent breaking needles, always raise the needle out of the fabric when you stop<br />
Attention:<br />
COMIENZO DE LA COSTURA<br />
TO START SEWING<br />
1. When turning the hand wheel manually, always turn it toward you.<br />
1 Lower the take-up lever to its lowest position before starting, and raise it after stopping<br />
2. Conduzca el tejido suavemente con Ia mano.<br />
3. Para evitar quo so rompa a aguja, deje do coser desplazando Ia aguja hacia arriba y<br />
2. Retenga ambos hilos aproximadamente 10 centimetros hacia atrás do Ia máquina<br />
Notas importantes:<br />
2. Hold both threads about 10 cms to the rear of the machine for the first two or three<br />
4. Presione el pedal y comience a coser.<br />
3. Sufficient fabric should be placed under needle before lowering the presser foot.<br />
3. AsegUrese de que el tejido estã debajo do Ia aguja antes de empezar a coser y pisar<br />
el pedal.<br />
1. Al empezar o terminar una costura levantar el tirahilos a Ia posiciôn mãs alta.<br />
4. Depress foot/speed control and start to sew.<br />
5. Test the machine stitches on a scrap of fabric you plan to use, adjusting the machine<br />
1. Gire el volante siempre en su direcciOn.<br />
5 Pruebe las puntadas en un trozo do tejido do muestra, para asi poder ajustar Ia<br />
Notas:<br />
sewing.<br />
durante las primeras dos o tres puntadas.<br />
longitud de puntada y Ia tension<br />
no dejándola en a tela.<br />
-
I<br />
25-<br />
2. Presione el botOn de marcha atrás (reserva) y cosa de 8 a 10 centimetros hacia atrás.<br />
3. Eleve Ia aguja a Ia posición mãs alta.<br />
1. Cosa hasta el extremo de a costura.<br />
4. Lift the presser foot and pull the fabric out of the back of the machine.<br />
3. Raise needle to its highest position.<br />
2. Push the reverse button and sew in reverse for about 3-4 inches.<br />
1. Sew to the edge of seam.<br />
REMATE DE LA COSTURA<br />
HOW TO FINISH STITCHES<br />
4. Levante el pie prensatela y desplace Ia tela hacia Ia parte posterior de Ia máquina.<br />
5. Cut threads as shown on the thread cutter.<br />
5. Corte los hilos con eI cortahilos.
STRAIGHT STITCH<br />
PUNTADA RECTA<br />
1 This type of stitching is used most frequently.<br />
2. The zigzag presser foot can be used for both straight and zigzag sewing.<br />
3. For sewing light weight fabric, use a smaller stitch size. (Refer to page 21 for dial<br />
setting).<br />
1. This type of stitching is used most frequently.<br />
2. The zigzag presser foot can be used for both straight and zigzag sewing.<br />
3. For sewing light fabric, use a smaller stitch size. (Refer to page 21 for dial setting).<br />
1. Es el tipo de cosido más frecuente y utilizado.<br />
2. El pie zig-zag puede usarse tanto para Ia puntada recta como para el cosido en zig<br />
3. Para coser telas finas utilice tamaños más pequenos de puntada.<br />
(Ia elecciOn apropiada está ilustrada en Ia pãgina 22).<br />
ZIGZAG SEWING<br />
ZIG-ZAG<br />
COSER<br />
EN<br />
Pattern selector position<br />
Posición del selector<br />
4<br />
Satin stitching can be used for sewing initi<br />
patterns, appliqué, etc.<br />
La puntada en zig-zag es una puntada<br />
universal.<br />
Para coser satén, los puntos de Ia costura<br />
están muy juntos y Ia longitud de puntada E<br />
muy corta. Normalmente se utiliza para<br />
coser iniciales, siglas, dibujos o similares.<br />
- 26<br />
-
OVERCASTING<br />
SOBREHILAR<br />
t<br />
Use these stitches for oversewing rough<br />
edges.<br />
Con estas puntadas se evita que Se<br />
deshilen de los bordes.<br />
STRAIGHT STRETCH STITCHES<br />
COSTURA RECTA ELASTICA<br />
‘U<br />
‘U<br />
‘H<br />
Use this stitch with knitted, tricot or other<br />
stretchy fabrics.<br />
The stitch enables your seam to stretch<br />
without breaking the thread.<br />
Use esta puntada para telas tejidas, de<br />
tricot y otras telas elásticas.<br />
Este tipo de costura permite ser estirada<br />
sin que el hilo se rompa.<br />
La puntada recta elãstica también es muy<br />
resistente en una costura recta.<br />
- 27 -
BLIND STITCH<br />
COSTURA OCULTA<br />
H H<br />
1 Fold fabric as shown.<br />
1. Doble el tejido como se muestra.<br />
L__<br />
2. Finish the seam as shown.<br />
2. Ejecute Ia puntada ocutta como se muestra.<br />
1<br />
28 -
I<br />
(A)<br />
(B)<br />
4<br />
dobladillo.<br />
to fold at all.<br />
costura correcta.<br />
posiciOn de Ia aguja mientras cosa para obtener una<br />
Utilice el pie oculto de costura. Ajuste el ancho y Ia<br />
Adjust the width to obtain the correct seam.<br />
dobladillo.<br />
Incorrecto: La aguja no cose el<br />
Ii<br />
Wrong: Needle is not piercing edge<br />
Correct seam.<br />
Costura correcta.<br />
Aquf Ia aguja entra demasiado en el<br />
Needle pierces the edge of fold too much.
Utilice el pie para botones.<br />
Utilize the button presser foot.<br />
- 30<br />
-<br />
Ia puntada multi zig-zag o Ia puntada smok.<br />
Para coser tetas de borde a borde, seleccione<br />
stitch.<br />
To sew fabric edge select the multi-zigzag<br />
RIBETEADO (DE BORDE A BORDE)<br />
BINDING<br />
6. Tire de ambos hilos y ãtelos.<br />
(Use el avance en Ia posiciOn hundida; véase a pagina 19)<br />
5. Sew about 7 stitches.<br />
3. Coloque el botOn entre el pie y Ia tela y baje el pie prensatela.<br />
5. Cosa aproximadamente 7 puntadas.<br />
Ia anchura de zig-zag.<br />
penetre en ambos agujeros del botOn sin ninguna obstrucciOn. Si es necesario, ajuste<br />
of button without obstruction. (Increase or decrease width setting).<br />
3. Place the button between presser foot and fabric and lower the presser foot.<br />
2. Place button presser foot in position and attach it firmly.<br />
4. <strong>Manual</strong>ly turn hand wheel towards you, ensuring that the needle enters into both holes<br />
6. Pull both threads to the underside and tie them together.<br />
2. Coloque el pie para botones<br />
4. Gire manualmente Ia rueda volante hacia usted, asegurándose de que Ia aguja<br />
1. Lower feed teeth.<br />
1. Cover alimentar con zurcir plato.<br />
Drop feed teeth (see page 19)<br />
COSIDO DE BOTONES<br />
BUTTON SEWING
7<br />
underfoot.<br />
*<br />
2. Place zipper foot in position and attach firmly.<br />
Select straight stitch.<br />
thus preventing sewing on zipper.<br />
Utilice pie para cremalleras.<br />
Utilize the zipper foot.<br />
ZIPPER SEWING<br />
4 Sew as illustrated.<br />
COSTURA DE CREMALLERAS<br />
2. El pie para cremalleras está diseñado para coser<br />
1. Doble Ia tela aproximadamente 2 centfmetros y<br />
1. Zipper foot is designed to sew close to a raised edge,<br />
2. To sew the right side of the zipper, set it on the left<br />
1. To sew the left side of the zipper, set the zipper on<br />
2. Para coser el lado derecho, of pie de cremallera<br />
3. Fold the fabric about 5/8 inch and place the fabric<br />
1. Para coser el ado izquierdo de Ia cre,iiallera, flje el<br />
Cosa de acuerdo con Ia ilustraciOn.<br />
coloquela debajo del pie.<br />
Seleccione Ia puntada recta.<br />
cerca del borde levantädo, evitando quo so cosa<br />
sobre Ja cremallera.<br />
the right side of the needle.<br />
side of the needle.<br />
debé estar a Ia derecha de Ia aguja.<br />
pie de Ia cremallera en el lado izquierdo do Ia aguja.<br />
-31-
- 32<br />
6.<br />
3. Raise the needle<br />
2.<br />
Sew eftside<br />
Modelo del selector Pasos Posición<br />
shown.<br />
Utilice el pie para ojales<br />
Set the stitch length dial.<br />
Before sewing, fit buttonhole foot as<br />
Antes de empezar a coser ajuste el pie para<br />
Ajuste el selector de longitud de puntada en el area deseada.<br />
BUTTONHOLE SEWING I COSTURA DE OJALES<br />
ojal del botOn como muestra Ia figura.<br />
Pattern selector dial Steps Settings<br />
-<br />
as shown.<br />
t<br />
n<br />
ii<br />
L<br />
4 6. Levante Ia aguja<br />
L<br />
5. Sew 5-6 stitches<br />
3. Levante_Ia_aguja<br />
1. Set dial to “1” position<br />
12._Levante_(a_aguja<br />
11. Cosa deS a 6 puntadas<br />
12. Raise the needle<br />
10. Coloque el selector en Ia posicion 4<br />
10. Set dial to “4” position<br />
11. Sew 5-6 stitches<br />
E l<br />
8. Sew right side<br />
5. Cosa de 5 a 6 puntadas<br />
4. Coloque el selector en (a posiciOn 2<br />
1. Coloque el selector en Ia posicic5r’i 1<br />
7. Set dial to “3” position<br />
7. Coloque el selector en Ia posición 3<br />
8. Cosa eI (ado derecho<br />
2. Cosa el lado izquierdo<br />
Cut buttonhole along centre with cutter<br />
LH1<br />
9._Levante_Ia_aguja<br />
9. Raise the needle<br />
Raise the needle<br />
4. Set dial to “2” position<br />
Corte el agujero del botOn con el<br />
cortador, como muestra Ia figura.
uedos.<br />
1 mmTJ<br />
3mm<br />
RUEDOS, ORLAR<br />
HEMMING<br />
2. Doble Ia tela aproximadamente 3 milimetros y colóquela debajo del pie.<br />
1. Levante el pie y Ia aguja en su posiciOn más alta. Cambie el pie por el pie especial para<br />
4. While sewing fold the fabric to the left a little and guide it into the hemmer foot.<br />
3. Lower the foot and sew the hem.<br />
2. Fold over the fabric edge by about 1/4 inch and place it under the foot. Secure the<br />
1. Raise the foot and the needle to its highest position. Replace the foot with the picot foot.<br />
5. Make sure that the fabric does not move under the right half of the foot. The fabric must<br />
4. Durante el cosido, doble un poco Ia tela hacia Ia izquierda para que corra bien por el<br />
3. Baje el pie y cosa el ruedo.<br />
5. Asegirese de que el tejido no se deslice debajo de Ia mitad derecha del pie.<br />
folded edge with a few stitches. Slide the hem of your project into the picot foot by<br />
pulling the threads.<br />
Dé unas cuantas puntadas. Seguidamente levante Ia aguja y el pie de cosido.<br />
lntroduzca el ruedo en el pie de ruedos.<br />
Only suitable materials can be used and some practice may be necessary to achieve<br />
through the groove under the foot.<br />
be fed into the scroll of the hemmer sufficiently so that the project edge runs freely<br />
the best results.<br />
SOlo Se pueden utilizar tejidos adecuados y será necesarlo un poco de práctica para<br />
La tela debe ser guiada por debajo de Ia curva del pie de tal forma que eI dobladillo de<br />
pie de ruedos.<br />
Ia tela pueda correr libremente.<br />
lograr resultados Optimos.<br />
- 33
- 34<br />
[t<br />
their ends separately through its eye.<br />
Sewing width should not exceed the third widest stitch width, as this will break the<br />
EMBROIDERY<br />
Put in the twin needle with the flat side backwards.<br />
Coloque Ia aguja doble con el lado pIano hacia atrás.<br />
DOBLE AGUJA (Opcional)<br />
TWIN NEEDLE (Optional)<br />
BORDADOS<br />
Thread the machine for normal sewing, leading both threads to needle and passing<br />
needles.<br />
gulas hasta Ia aguja donde se enhebran por separado.<br />
fabric has been embroidered.<br />
Use drop feed (see page 19)<br />
aguja podrIa romperse. -<br />
Enhebre Ia aguja como si fuera a coser normal, para ello pase ambos hilos por las<br />
Lower feed dog and move the hooped fabric slowly in the desired direction until the<br />
Remove the presser foot and lower feed dog.<br />
El ancho de costura no debe exceder dos tercios de Ia anchura maxima, puesto que Ia<br />
(Use el avance en Ia posiciOn hundida; véase Ia página 19)<br />
Baje el avance y mueva Ia tela en el aro lentamente para formar el efecto deseado.<br />
-
- 35<br />
QUILTER (Optional)<br />
SEAM GUIDE (Optional)<br />
ACOLCHADO (Opcional)<br />
2. Screw the guide on the right side of the needle plate and adjust the desired distance.<br />
3. While sewing, the edge of the fabric must touch the guide. -<br />
GUIA DE COSTURA (Opcional)<br />
1. Use the seam guide to sew long seams of an equal distance from the edge of the fabric.<br />
2. Fije a gula en et agujero de Ia base, a Ia derecha del plato de Ia aguja, y ajuste Ia<br />
1 Use el gula de costura cuando tenga que coser una costura larga en el borde de Ia tela.<br />
3. Asegürese de que el borde de Ia tela toca Ia gufa. Coloque Ia guia de costura en angulo<br />
distancia deseada.<br />
para hacer costuras en curva.<br />
2. Move the quilter to the required stitch distance.<br />
1. Slide the arm through the hole on top of the presser foot holder.<br />
2. Mueva Ia regla a Ia derecha o a a izquierda para ajustar Ia distancia deseada.<br />
1. Coloque Ia regla de acolchado en a gufa sobre a palanca del pie de cosido.<br />
-
- 36<br />
N<br />
direcciOn de Ia flecha.<br />
2. Take out the bobbin case.<br />
1. Raise needle to its highest position.<br />
LIMPIEZA<br />
MAINTENANCE<br />
Abra Ia cubierta de Ia lanzadera y engrase<br />
Open face cover and oil the parts indicated.<br />
los puntos indicados.<br />
Cleaning shuttle race<br />
(A) Latch knob<br />
(C) Shuttle hook<br />
(B) Shuttle race cover<br />
Limpie Ia lanzadera<br />
(C) Gancho de Ia lanzadera<br />
(A) BotOn picaporte<br />
(B) Tapa de Ia lanzadera<br />
5. Saque el gancho de Ia lanzadera.<br />
6. Limpie y engrase el gancho de Ia lanzadera<br />
4. Aleje Ia tapa de Ia lanzadera.<br />
3. Turn the latch knob A as illustrated.<br />
-<br />
thereafter replace all parts in reverse order<br />
6. Clean and oil shuttle race and hook,<br />
5. Take out shuttle hook.<br />
4, Take off shuttle race cover.<br />
luego vuelva a colocarla en su lugar.<br />
Limpie los dientes alimentadores<br />
Cleaning feed dog.<br />
1. Levante Ia aguja a su posiciOn más alta.<br />
con un cepillo.<br />
3. Gire el picaporte (a) como se muestra en Ia<br />
2. Saque Ia caja de Ia bobina.
move<br />
Fabric does not<br />
Machine<br />
thread<br />
strong<br />
too tight -<br />
Breaking needle - Fabric is being pulled - Do not pull fabric<br />
Breaking bobbin -<br />
adjustment of zigzag<br />
fabric<br />
jamming<br />
tension -<br />
tension<br />
or nicks on bobbin<br />
width<br />
not match<br />
teeth down - Raise feed teeth<br />
- Feed<br />
- Stitch<br />
- Incorrect insertion of needle -<br />
- Bent needle - Replace needle<br />
- Faulty<br />
needle<br />
needle<br />
case<br />
Re-insert<br />
Problem Probable cause What to do<br />
CHECKING PERFORMANCE PROBLEMS — TROUBLESHOOTING<br />
Breaking upper<br />
37 -<br />
and thread and thread<br />
Puckering strong<br />
fabric, needle, -<br />
correct fabric, needle<br />
foot pressure too - Reduce sewing foot pressure<br />
not match thread according to type of<br />
thread and fabric do - Reduce proper needle and<br />
foot pressure too -<br />
pressure accordingly<br />
thread - Improper threading - Rethread machine<br />
insertion of needle -<br />
- Light<br />
presser foot pressure - Increase pressure<br />
- Needle, thread and fabric do -<br />
correct needle and thread<br />
Use<br />
- Re-adjust zigzag width<br />
Improper threading<br />
-<br />
Tight upper thread tension<br />
-<br />
Bent needle<br />
-<br />
- Scratches<br />
Re-thread machine<br />
-<br />
Reduce upper thread tension<br />
-<br />
- Replace needle<br />
- Polish or replace bobbin case<br />
- Tight bobbin thread tension - Reduce bobbin thread tension<br />
Incorrect<br />
Re-insert<br />
- Lint<br />
or thread in bobbin case - Clean bobbin case<br />
Excessive -<br />
Presser -<br />
Needle, -<br />
- No<br />
oil - Oil moving parts<br />
Re-adjust<br />
Reduce<br />
Tension Reset<br />
-<br />
Sewing -<br />
- Incorrect<br />
Use<br />
length dial position - Set dial between 1 and 4
prensateta<br />
Disturbio Probable causa Solución<br />
presiOn en Ia tela - Aumente Ia presiOn del pie<br />
La tela no se -<br />
El<br />
- Poca<br />
mueve está en Ia posicion<br />
selector de largo de puntada - Mueva el selector de 1-4<br />
volante rueda<br />
La maquina no cose, sOlo el -<br />
Tire<br />
del botOn de embragu<br />
POSIBLES PROBLEMAS DE FUNCONAMIENTO V SOLUC<br />
- 38<br />
-<br />
enhebra.<br />
tela<br />
- La<br />
- La<br />
- Uso<br />
incorrecto de aguja, hilo y<br />
costura<br />
tensiOn es demasiado alta<br />
presiOn del pie de costura es<br />
tela incorrecta, aguja y - La tela correcta, aguja y enflebra.<br />
excesiva<br />
- Regule<br />
- Uso correcto de a aguja, hilo y<br />
tela<br />
Ia presiOn del pie de<br />
- Vuelva a ajustar a tensiOn<br />
hilo de Ia -<br />
Rotura del bobina bobina<br />
- Demasiada tensiOn del hilo e Ia -<br />
ColocaciOn<br />
- La<br />
- Coser<br />
- La<br />
Puckering fuerte.<br />
el pie presiona demasiado -<br />
bobina -<br />
Enhebrado<br />
- Polvo<br />
incorrecta de Ia aguja -<br />
Coloque<br />
Reset<br />
que cose presión de pie.<br />
La tela se<br />
tensiOn demasiado ajustada. -<br />
Reset.<br />
ondula<br />
e hilo en Ia lanzadera -<br />
Afloje<br />
Enhebre<br />
Limpie<br />
Ia lanzadera<br />
inconrecto -<br />
correctamente<br />
Ia aguja de nuevo<br />
Ia tensiOn del hilo de<br />
lanzadera raspaduras<br />
doblada - Cambie Ia aguja<br />
- Aguja<br />
hilo superior superior<br />
Rotura del - Demasiada tensiOn del hilo - Afloje Ia tensiOn del hilo super<br />
- Enhebrado incorrecto - Vuelva a enhebrar correctam€<br />
de ancho de zig-zag correcta<br />
- PosiciOn<br />
- Hendiduras<br />
y raspadunas en a -<br />
Cambie<br />
a lanzadera o lime las<br />
incorrecta del selector -<br />
Mueva<br />
el selector a Ia posici<br />
- Uso<br />
incorrecto de aguja, hilo y<br />
aguja<br />
Rotura de a<br />
- La aguja estã doblada<br />
tela<br />
- ColocaciOn incorrecta de a aguja<br />
- Hala<br />
- No hale de Ia tela<br />
de Ia tela<br />
- Coloque Ia aguja de nuevo<br />
- Cambie Ia aguja<br />
- Uso<br />
correcto de aguja, hilo y


