


You also want an ePaper? Increase the reach of your titles
YUMPU automatically turns print PDFs into web optimized ePapers that Google loves.
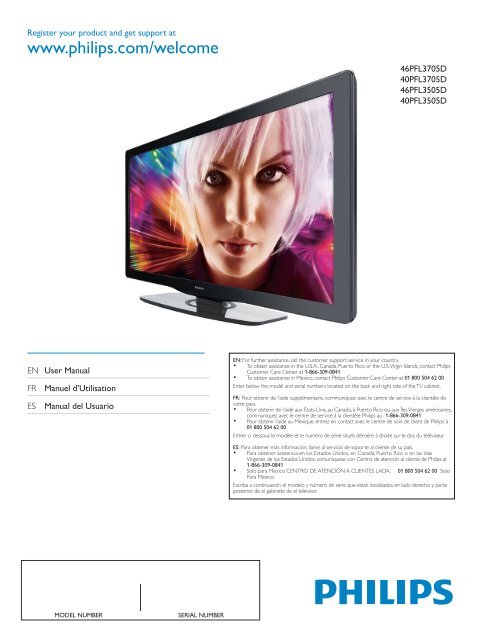
Register your product and get support at<br />
www.philips.com/welcome<br />
46PFL3705D<br />
40PFL3705D<br />
46PFL3505D<br />
40PFL3505D<br />
EN <strong>User</strong> Manual<br />
FR Manuel d’Utilisation<br />
ES Manual del Usuario<br />
EN: For further assistance, call the customer support service in your country.<br />
• To obtain assistance in the U.S.A., Canada, Puerto Rico, or the U.S. Virgin Islands, contact <strong>Philips</strong><br />
Customer Care Center at 1-866-309-0841<br />
• To obtain assistance in Mexico, contact <strong>Philips</strong> Customer Care Center at 01 800 504 62 00<br />
Enter below the model and serial numbers located on the back and right side of the <strong>TV</strong> cabinet.<br />
FR: Pour obtenir de l’aide supplémentaire, communiquez avec le centre de service à la clientèle de<br />
votre pays.<br />
• Pour obtenir de l’aide aux États-Unis, au Canada, à Puerto Rico ou aux Îles Vierges américaines,<br />
communiquez avec le centre de service à la clientèle <strong>Philips</strong> au : 1-866-309-0841<br />
• Pour obtenir l’aide au Mexique, entrez en contact avec le centre de soin de client de <strong>Philips</strong> à<br />
01 800 504 62 00<br />
Entrer ci dessous le modèle et le numéro de série situés dérrière à droite sur le dos du téléviseur.<br />
ES: Para obtener más información, llame al servicio de soporte al cliente de su país.<br />
• Para obtener asistencia en los Estados Unidos, en Canadá, Puerto Rico o en las Islas<br />
Vírgenes de los Estados Unidos, comuníquese con Centro de atención al cliente de <strong>Philips</strong> al<br />
•<br />
1-866-309-0841<br />
Solo para Mexico CENTRO DE ATENCIÓN A CLIENTES LADA. 01 800 504 62 00 Solo<br />
Para México.<br />
Escriba a continuación el modelo y número de serie que estan localizados en lado derecho y parte<br />
posterior de el gabinete de el televisor.<br />
MODEL NUMBER<br />
SERIAL NUMBER
Contents<br />
1 Notice 4<br />
2 Important 5<br />
Product information 5<br />
Screen care 5<br />
Environmental care 5<br />
Regulatory notices 5<br />
3 Your <strong>TV</strong> 6<br />
Side controls and indicators 6<br />
Remote control 6<br />
4 Get started 8<br />
Supplied accessories 8<br />
Mounting stand onto <strong>TV</strong> 8<br />
Positioning the <strong>TV</strong> 8<br />
Installing the remote control batteries 8<br />
Connecting the antenna or cable 9<br />
Managing cables 10<br />
Connecting the AC power cord 10<br />
Switching on and initial setup 11<br />
9 Connect devices 27<br />
Connection overview 27<br />
Selecting your connection quality 28<br />
Connecting your devices 29<br />
10 Troubleshooting 31<br />
Downloading an electronic copy 31<br />
Contact us 31<br />
11 Notes for the use of USB devices 32<br />
12 Specifi cations 33<br />
13 Warranty 34<br />
14 Index 35<br />
English<br />
5 Use your <strong>TV</strong> 12<br />
Switching on your <strong>TV</strong> and putting it in standby mode 12<br />
Switching channels 12<br />
Adjusting volume 13<br />
Still mode 13<br />
Watching channels from a set-top box 13<br />
Watching connected devices 13<br />
Watching a Blu-ray disc 14<br />
Switching audio mode 14<br />
6 Use more of your <strong>TV</strong> 15<br />
Changing picture and sound settings 15<br />
Sleeptimer 18<br />
Child and rating locks 18<br />
Closed caption 20<br />
EasyLink 21<br />
Energy saving mode 21<br />
Set your location to home 21<br />
View photos and play music on a USB device 22<br />
7 Install channels 24<br />
Selecting your menu language 24<br />
Autoprogram 24<br />
Channel list 25<br />
Add channels 25<br />
Optimizing the signal quality from your antenna 25<br />
8 Upgrade your <strong>TV</strong> software 26<br />
Checking your current software version 26<br />
Preparing for the software upgrade 26<br />
Upgrading software 26<br />
EN<br />
1
Return your Product Registration Card or register online at<br />
www.philips.com/welcome today to get the very most from your purchase.<br />
Registering your model with PHILIPS makes you eligible for all of the valuable benefits listed below, so don't miss out.<br />
Complete and return your Product Registration Card at once, or register online at www.philips.com/welcome<br />
to ensure:<br />
*Proof of Purchase<br />
Returning the enclosed card guarantees<br />
that your date of purchase will be on file,<br />
so no additional paperwork will be<br />
required from you to obtain warranty<br />
service.<br />
*Product Safety<br />
Notification<br />
By registering your product, you'll receive<br />
notification - directly from the manufacturer<br />
- in the rare case of a product<br />
recall or safety defect.<br />
*Additional Benefits<br />
Registering your product guarantees that<br />
you'll receive all of the privileges to<br />
which you're entitled, including special<br />
money-saving offers.<br />
Know these<br />
safety symbols<br />
Congratulations on your purchase,<br />
and welcome to the “family!”<br />
Dear PHILIPS product owner:<br />
Thank you for your confidence in PHILIPS.You’ve selected one of<br />
the best-built, best-backed products available today.We’ll do everything<br />
in our power to keep you happy with your purchase for many<br />
years to come.<br />
As a member of the PHILIPS “family,” you’re entitled to protection<br />
by one of the most comprehensive warranties and outstanding<br />
service networks in the industry.What’s more, your purchase guarantees<br />
you’ll receive all the information and special offers for which<br />
you qualify, plus easy access to accessories from our convenient<br />
home shopping network.<br />
Most importantly, you can count on our uncompromising commitment<br />
to your total satisfaction.<br />
All of this is our way of saying welcome - and thanks for investing<br />
in a PHILIPS product.<br />
P.S. To get the most from your PHILIPS purchase, be<br />
sure to complete and return your Product Registration<br />
Card at once, or register online at:<br />
www.philips.com/welcome<br />
CAUTION<br />
RISK OF ELECTRIC SHOCK<br />
DO NOT OPEN<br />
CAUTION: TO REDUCE THE RISK OF ELECTRIC SHOCK, DO NOT<br />
REMOVE COVER (OR BACK). NO USER-SERVICEABLE PARTS<br />
INSIDE. REFER SERVICING TO QUALIFIED SERVICE PERSONNEL.<br />
This “bolt of lightning” indicates uninsulated<br />
material within your unit may<br />
cause an electrical shock. For the safety of<br />
everyone in your household, please do not<br />
remove product covering.<br />
The “exclamation point” calls attention<br />
to features for which you should read<br />
the enclosed literature closely to prevent<br />
operating and maintenance problems.<br />
WARNING: To reduce the risk of fire or<br />
electric shock, this apparatus should not be<br />
exposed to rain or moisture and objects<br />
filled with liquids, such as vases, should not<br />
be placed on this apparatus.<br />
CAUTION: To prevent electric shock,<br />
match wide blade of plug to wide slot, fully<br />
insert.<br />
ATTENTION: Pour éviter les choc<br />
électriques, introduire la lame la plus large<br />
de la fiche dans la borne correspondante de<br />
la prise et pousser jusqu’au fond.<br />
For Customer Use<br />
Enter below the model and serial numbers located<br />
on the back and right side of the <strong>TV</strong> cabinet. Retain<br />
this information for future reference.<br />
Model No.________________________<br />
Serial No. ________________________<br />
Visit our World Wide Web Site at http://www.philips.com/welcome<br />
2<br />
EN
IMPORTANT SAFETY INSTRUCTIONS<br />
Read before operating equipment<br />
English<br />
1. Read these instructions.<br />
2. Keep these instructions.<br />
3. Heed all warnings.<br />
4. Follow all instructions.<br />
5. Do not use this apparatus near water.<br />
6. Clean only with a dry cloth.<br />
7. Do not block any of the ventilation openings. Install in accordance with<br />
the manufacturer’s instructions.<br />
8. Do not install near any heat sources such as radiators, heat registers,<br />
stoves, or other apparatus (including amplifiers) that produce heat.<br />
9. Do not defeat the safety purpose of the polarized or grounding-type plug.<br />
A polarized plug has two blades with one wider than the other. A<br />
grounding type plug has two blades and third grounding prong. The wide<br />
blade or third prong are provided for your safety. When the provided<br />
plug does not fit into your outlet, consult an electrician for replacement<br />
of the obsolete outlet.<br />
10. Protect the power cord from being walked on or pinched particularly at<br />
plugs, convenience receptacles, and the point where they exit from the<br />
apparatus.<br />
11. Only use attachments/accessories specified by the manufacturer.<br />
12. Use only with a cart, stand, tripod, bracket, or table specified by<br />
the manufacturer, or sold with the apparatus. When a cart is<br />
used, use caution when moving the cart/apparatus combination<br />
to avoid injury from tip-over.<br />
13. Unplug this apparatus during lightning storms or when unused for long<br />
periods of time.<br />
14. Refer all servicing to qualified service personnel. Servicing is required<br />
when the apparatus has been damaged in any way, such as power-supply<br />
cord or plug is damaged, liquid has been spilled or objects have fallen<br />
into apparatus, the apparatus has been exposed to rain or moisture,<br />
does not operate normally, or has been dropped.<br />
15. This product may contain lead or mercury. Disposal of these materials<br />
may be regulated due to environmental considerations. For disposal or<br />
recycling information, please contact your local authorities or the<br />
Electronic Industries Alliance: www.eiae.org.<br />
16. Damage Requiring Service - The appliance should be serviced by<br />
qualified service personnel when:<br />
A. The power supply cord or the plug has been damaged; or<br />
B. Objects have fallen, or liquid has been spilled into the appliance; or<br />
C. The appliance has been exposed to rain; or<br />
D. The appliance does not appear to operate normally or exhibits a<br />
marked change in performance; or<br />
E. The appliance has been dropped, or the enclosure damaged.<br />
17. Tilt/Stability - All televisions must comply with recommended<br />
international global safety standards for tilt and stability properties of its<br />
cabinets design.<br />
• Do not compromise these design standards by applying excessive pull<br />
force to the front, or top, of the cabinet which could ultimately<br />
overturn the product.<br />
• Also,do not endanger yourself, or children, by placing electronic<br />
equipment/toys on the top of the cabinet. Such items could<br />
unsuspectingly fall from the top of the set and cause product damage<br />
and/or personal injury.<br />
18. Wall or Ceiling Mounting - The appliance should be mounted to a<br />
wall or ceiling only as recommended by the manufacturer.<br />
19. Power Lines - An outdoor antenna should be located away from<br />
power lines.<br />
20. Outdoor Antenna Grounding - If an outside antenna is connected to<br />
the receiver, be sure the antenna system is grounded so as to provide<br />
some protection against voltage surges and built up static charges.<br />
Section 810 of the National Electric Code, ANSI/NFPA No. 70-1984,<br />
provides information with respect to proper grounding of the mats and<br />
supporting structure grounding of the lead-in wire to an antennadischarge<br />
unit, size of grounding connectors, location of antennadischarge<br />
unit, connection to grounding electrodes and requirements for<br />
the grounding electrode. See Figure below.<br />
21. Objects and Liquid Entry - Care should be taken so that objects do<br />
not fall and liquids are not spilled into the enclosure through openings.<br />
a) Warning: To reduce the risk of fire or electric shock, this apparatus<br />
should not be exposed to rain or moisture and objects filled with<br />
liquids, such as vases should not be placed on this apparatus.<br />
22. Battery Usage CAUTION - To prevent battery leakage that may<br />
result in bodily injury, property damage, or damage to the unit:<br />
• Install all batteries correctly, with + and - alignment as marked on the<br />
unit.<br />
• Do not mix batteries (old and new or carbon and alkaline, etc.)<br />
• Remove batteries when the unit is not used for a long time.<br />
EXAMPLE OF ANTENNA GROUNDING AS PER<br />
NATIONAL ELECTRICAL CODE (NEC)<br />
GROUND CLAMP<br />
ANTENNA LEAD IN WIRE<br />
ANTENNA DISCHARGE UNIT<br />
(NEC SECTION 810-20)<br />
GROUNDING CONDUCTORS<br />
(NEC SECTION 810-21)<br />
GROUND CLAMPS<br />
ELECTRIC SERVICE EQUIPMENT<br />
POWER SERVICE GROUNDING<br />
ELECTRODE SYSTEM<br />
(NEC ART 250, PART H)<br />
Note to the CA<strong>TV</strong> system installer: this reminder is provided to call the CA<strong>TV</strong> system installer’s attention to Article 820-40 of<br />
the NEC that provides guidelines for proper grounding and, in particular, specifies that the cable ground shall be connected to the<br />
grounding system of the building, as close to the point of cable entry as practical.<br />
EN<br />
3
1 Notice<br />
2010 © Koninklijke <strong>Philips</strong> Electronics N.V. All rights reserved.<br />
Specifi cations are subject to change without notice. Trademarks are<br />
the property of Koninklijke <strong>Philips</strong> Electronics N.V. or their respective<br />
owners. <strong>Philips</strong> reserves the right to change products at any time<br />
without being obliged to adjust earlier supplies accordingly.<br />
The material in this <strong>manual</strong> is believed adequate for the intended use<br />
of the system. If the product, or its individual modules or procedures,<br />
are used for purposes other than those specifi ed herein, confi rmation<br />
of their validity and suitability must be obtained. <strong>Philips</strong> warrants that<br />
the material itself does not infringe any United States patents. No<br />
further warranty is expressed or implied.<br />
<strong>Philips</strong> cannot be held responsible neither for any errors in the content<br />
of this document nor for any problems as a result of the content in this<br />
document. Errors reported to <strong>Philips</strong> will be adapted and published on<br />
the <strong>Philips</strong> support website as soon as possible.<br />
Pixel characteristics<br />
This <strong>LCD</strong> product has a high number of color pixels. Although it has<br />
effective pixels of 99.999% or more, black dots or bright points of light<br />
(red, green or blue) may appear constantly on the screen. This is a<br />
structural property of the display (within common industry standards)<br />
and is not a malfunction.<br />
Warranty<br />
No components are user serviceable. Do not open or remove covers<br />
to the inside of the product. Repairs may only be done by <strong>Philips</strong><br />
Service Centers and offi cial repair shops. Failure to do so shall void any<br />
warranty, stated or implied.<br />
Any operation expressly prohibited in this <strong>manual</strong>, any adjustments, or<br />
assembly procedures not recommended or authorized in this <strong>manual</strong><br />
shall void the warranty.<br />
Federal Communications Commission Notice<br />
This equipment has been tested and found to comply with the limits<br />
for a Class B digital device, pursuant to part 15 of the FCC Rules. These<br />
limits are designed to provide reasonable protection against harmful<br />
interference in a residential installation. This equipment generates, uses,<br />
and can radiate radio frequency energy and, if not installed and used<br />
in accordance with the instructions, may cause harmful interference<br />
to radio communications. However, there is no guarantee that<br />
interference will not occur in a particular installation. If this equipment<br />
does cause harmful interference to radio or television reception, which<br />
can be determined by turning the equipment off and on, the user is<br />
encouraged to try to correct the interference by one or more of the<br />
following measures:<br />
• Reorient or relocate the receiving antenna.<br />
• Increase the separation between the equipment and the receiver.<br />
• Connect the equipment into an outlet on a circuit different from<br />
that to which the receiver is connected.<br />
• Consult the dealer or an experienced radio or television<br />
technician for help.<br />
Declaration of Conformity<br />
Trade Name: PHILIPS<br />
Responsible Party: P&F USA, Inc.<br />
Model:<br />
46PFL3705D, 40PFL3705D,<br />
46PFL3505D, 40PFL3505D<br />
Address: PO Box 430 Daleville, IN 47334-0430 U.S.A.<br />
Telephone Number: 1-866-309-0841<br />
Modifi cations<br />
The FCC requires the user to be notifi ed that any changes or modifi cations<br />
made to this device that are not expressly approved by <strong>Philips</strong> Consumer<br />
Electronics may void the user’s authority to operate the equipment.<br />
Cables<br />
Connections to this device must be made with shielded cables with<br />
metallic RFI / EMI connector hoods to maintain compliance with FCC<br />
Rules and Regulations.<br />
Canadian notice<br />
Standard Television Receiving Apparatus, Canada BETS-7 / NTMR-7.<br />
This Class B digital apparatus meets all requirements of the Canadian<br />
Interference-Causing Equipment Regulations.<br />
Copyright<br />
All other registered and unregistered trademarks are the property of<br />
their respective owners.<br />
ENERGY STAR ® is a joint program of the U.S.<br />
Environmental Protection Agency and the U.S.<br />
Department of Energy helping us all save money<br />
and protect the environment through energy<br />
effi cient products and practices.<br />
Consumer Notice:<br />
This <strong>TV</strong> has been set to maximize energy effi ciency while delivering the<br />
best possible picture using the factory installed home mode settings.<br />
Changing or enabling other features in this <strong>TV</strong> (e.g. brightened backlighting)<br />
will possibly increase energy consumption beyond the original<br />
ENERGY STAR ® qualifi ed limits.<br />
Manufactured under license from Dolby Laboratories. Dolby and the<br />
double-D symbol are trademarks of Dolby Laboratories.<br />
VESA, FDMI and the VESA Mounting Compliant logo are trademarks of<br />
the Video Electronics Standards Association.<br />
® Kensington and Micro Saver are registered US trademarks of ACCO<br />
World corporation with issued registrations and pending applications in<br />
other countries throughout the world.<br />
Portions of this software are copyright © The FreeType Project<br />
(www.freetype.org).<br />
The American Academy of Pediatrics discourages television viewing for<br />
children younger than two years of age.<br />
4<br />
EN
2 Important<br />
Registering your model with <strong>Philips</strong> makes you eligible for all of the<br />
valuable benefi ts listed below, so don’t miss out.<br />
Complete and return your Product Registration Card at once, or<br />
register online at www.philips.com/welcome to ensure:<br />
• Proof of Purchase<br />
Returning the enclosed card guarantees that your date of purchase<br />
is on fi le, so no additional paperwork is required from you to<br />
obtain warranty service.<br />
• Product Safety Notifi cation<br />
By registering your product you receive notifi cation - directly from<br />
the manufacturer - in the rare case of a product recall or safety<br />
defect.<br />
• Additional Benefi ts of Product Ownership<br />
Registering your product guarantees that you receive all of the<br />
privileges to which you’re entitled, including special money-saving<br />
offers.<br />
Environmental care<br />
The packaging of this product is intended to be recycled. Contact your<br />
local authorities for information about how to recycle the packaging.<br />
End of life directives<br />
English<br />
For further assistance<br />
For further assistance, call the customer support service in your country.<br />
• To obtain assistance in the U.S.A., Canada, Puerto Rico, or the U.S. Virgin<br />
Islands, contact <strong>Philips</strong> Customer Care Center at 1-866-309-0841<br />
Product information<br />
This <strong>TV</strong> consumes minimal energy in standby mode to minimize<br />
environmental impact. The active power consumption is given on the<br />
type plate at the back of the <strong>TV</strong>. The model and serial numbers of your<br />
<strong>TV</strong> can be found on the back and right side of the <strong>TV</strong> as well as on the<br />
packaging.<br />
Like all <strong>LCD</strong> products, this set contains a lamp with mercury; please<br />
dispose of according to all local, state and federal laws.<br />
<strong>Philips</strong> pays a lot of attention to produce environment-friendly products<br />
in green focal areas. Your new <strong>TV</strong> contains materials which can be<br />
recycled and reused. At the end of its life, specialized companies can<br />
dismantle the discarded <strong>TV</strong> to concentrate the reusable materials and to<br />
minimize the amount of materials to be disposed of. Please ensure you<br />
dispose of your old <strong>TV</strong> according to local regulations.<br />
Screen care<br />
• Avoid stationary images as much as possible. Stationary images<br />
are images that remain on-screen for extended periods of time.<br />
Examples include: on-screen menus, black bars and time displays.<br />
If you must use stationary images, reduce screen contrast and<br />
brightness to avoid screen damage.<br />
• Unplug the <strong>TV</strong> before cleaning.<br />
• Clean the <strong>TV</strong> screen and frame with a soft cloth. Never use<br />
substances such as alcohol, chemicals or household cleaners on the<br />
<strong>TV</strong> screen.<br />
• Risk of damage to the <strong>TV</strong> screen! Never touch, push, rub or strike<br />
the screen with any object.<br />
• To avoid deformations and color fading, wipe off water drops as<br />
soon as possible.<br />
Disposal of used batteries<br />
The batteries supplied do not contain the heavy metals mercury and<br />
cadmium. Nevertheless, in many areas batteries may not be disposed<br />
of with your household waste. Please ensure you dispose of batteries<br />
according to local regulations.<br />
Regulatory notices<br />
Warning<br />
To reduce the risk of fi re or electric shock, this apparatus should not be exposed to<br />
rain or moisture. Objects fi lled with liquids, such as vases, should not be placed on this<br />
apparatus.<br />
Caution<br />
To prevent electric shock, match the wide blade of the plug to the wide slot, fully inserted.<br />
Do not place the unit on the furniture that is capable of being tilted by a<br />
child and an adult leaning, pulling, standing or climbing on it.<br />
A falling unit can cause serious injury or even death.<br />
This apparatus should not be placed in a built-in installation such as a<br />
bookcase or rack unless proper ventilation is provided.<br />
Make sure to leave a space of 4 inches (10 cm) or more around this<br />
apparatus.<br />
EN<br />
5
3 Your <strong>TV</strong><br />
Remote control<br />
Congratulations on your purchase, and welcome to <strong>Philips</strong>! To fully<br />
benefi t from the support that <strong>Philips</strong> offers, register your product at<br />
www.philips.com/welcome<br />
a<br />
Side controls and indicators<br />
f<br />
s<br />
r<br />
q<br />
p<br />
*<br />
b<br />
c<br />
d<br />
e<br />
e<br />
f<br />
g<br />
d<br />
o<br />
h<br />
b<br />
a<br />
c<br />
n<br />
i<br />
a Standby indicator / remote control sensor<br />
b Ambient light sensor<br />
When in [Home] mode, this <strong>TV</strong> will automatically adjust the<br />
brightness based on the ambient light. If there is a sudden change<br />
in <strong>TV</strong> brightness, it may be due to changes in the room lighting<br />
conditions (sunshine / lamps), or an object blocking the light sensor<br />
on the front of the <strong>TV</strong>. Please ensure the room lighting is stable and<br />
the light sensor is not blocked.<br />
c . POWER<br />
Switches the <strong>TV</strong> on or puts it in standby mode. The <strong>TV</strong> is not<br />
powered off completely unless it is physically unplugged.<br />
d CHANNEL + /-<br />
Switches to the next or previous channel.<br />
e MENU<br />
Toggles the main menu on or off.<br />
f VOLUME + /-<br />
Increases or decreases volume.<br />
m<br />
j<br />
k<br />
l<br />
*This button does not function on this unit.<br />
a . (standby-On)<br />
Switches the <strong>TV</strong> on or puts it in standby mode. The <strong>TV</strong> is not<br />
powered off completely unless it is physically unplugged.<br />
b SOURCE<br />
Selects connected devices.<br />
6<br />
EN
c FORMAT<br />
Selects a picture format (see ‘Changing picture format’ on page 16).<br />
d SAP<br />
Digital Mode (D<strong>TV</strong>)<br />
• Press to select the audio language.<br />
Analog Mode (<strong>TV</strong>)<br />
• Press to select the audio mode.<br />
e FREEZE<br />
Press to pause screen image.<br />
f OK<br />
Activates a selection or accesses the menu.<br />
g Î ï Í Æ (Navigation buttons)<br />
Navigates through the menus.<br />
h INFO<br />
Displays information about the <strong>TV</strong> channel or accessory device.<br />
The quality and accuracy of the information depends on the<br />
broadcaster. You might see a difference in broadcast time if the<br />
broadcast is from a different time zone.<br />
i CH + /-<br />
Switches to the next or previous channel.<br />
j MUTE<br />
Mutes or unmutes audio.<br />
k Number buttons<br />
Select a channel, page or setting.<br />
l • (Dot)<br />
Press the dot (•) for digital channels.<br />
m PREV CH<br />
Returns to the previously viewed channel.<br />
n VOL + /-<br />
Increases or decreases volume.<br />
o MENU / EXIT<br />
Turns the menu on or off.<br />
p BACK<br />
Returns to a previous screen.<br />
q AUTO SOUND<br />
Cycles through preset sound setting<br />
(see ‘Changing auto sound mode’ on page 17).<br />
r AUTO PIC<br />
Cycles through preset picture setting<br />
(see ‘Changing auto picture mode’ on page 15).<br />
s SLEEP<br />
Sets a delay after which the <strong>TV</strong> switches to standby.<br />
English<br />
EN<br />
7
AC IN<br />
4 Get started<br />
Supplied accessories<br />
• Remote Control<br />
• 2 x AAA, 1.5V Batteries<br />
• M5 x 20 double sems screw x 4<br />
• AC Power cord<br />
• Cable management tie<br />
• <strong>User</strong> Manual<br />
• Quick Start Guide<br />
Mounting stand onto <strong>TV</strong><br />
Applicable to <strong>TV</strong>s without mounted stands.<br />
1<br />
Positioning the <strong>TV</strong><br />
Warning<br />
• Do not insert the AC power cord into the power socket outlet before all the<br />
connections are made.<br />
• Large screen <strong>TV</strong>s are heavy. 2 people are required to carry and handle a large screen <strong>TV</strong>.<br />
• Before you move the <strong>TV</strong>, disconnect attached cables to prevent damage to connectors.<br />
In addition to reading and understanding the safety instructions,<br />
consider the following before positioning your <strong>TV</strong>:<br />
• Ensure that you always have easy access to the AC power cord or<br />
plug to disconnect the <strong>TV</strong> from the power.<br />
• If the <strong>TV</strong> is mounted on a swivel base, ensure that no strain is<br />
placed on the AC power cord when the <strong>TV</strong> is swiveled. Strain on<br />
the AC power cord can loosen connections.<br />
• The ideal viewing distance for watching <strong>TV</strong> is three times its screen<br />
size.<br />
• Position the <strong>TV</strong> where light does not fall on the screen.<br />
• Connect your devices before you position the <strong>TV</strong>.<br />
Using a Kensington lock<br />
There is a Kensington security slot on the back of the <strong>TV</strong>. Prevent theft<br />
by looping a Kensington lock between the slot and a permanent object,<br />
such as a heavy table.<br />
2<br />
Installing the remote control batteries<br />
x 4<br />
Note<br />
• To wall mount the <strong>TV</strong>, refer to the addendum.<br />
• If you lose the stand mounting screws, please purchase 4 <strong>Philips</strong> head screws (M5×20)<br />
at your local store.<br />
1 Slide the battery cover off the back of the remote control.<br />
2 Insert the 2 supplied batteries (AAA, 1.5V). Be sure the + and −<br />
ends of the batteries line up with the markings inside the case.<br />
3 Slide the cover back into position.<br />
Note<br />
• Remove the batteries if not using the remote control for an extended period of time.<br />
8<br />
EN
Connecting the antenna or cable<br />
If you connect a set-top box through RF IN / OUT<br />
If the <strong>TV</strong> is connected to a cable box or satellite set-top box via a<br />
coaxial connection, set the <strong>TV</strong> to channel 3 or 4, or to the channel<br />
specifi ed by the service provider.<br />
English<br />
Cable<br />
If you connect to an antenna<br />
Any D<strong>TV</strong> programs that are broadcast in your area can be received for<br />
free through an antenna connection.<br />
Contact your local content provider or your local electronics retailer if<br />
you are unsure about what HD<strong>TV</strong> programs are available in your area.<br />
Broadcasters are transitioning from analog to digital <strong>TV</strong>. This means that<br />
a given broadcaster can have channels available either in analog or in<br />
digital, or both analog and digital at the same time.<br />
The <strong>TV</strong> produces stereo sound only if a stereo signal is broadcast.<br />
If you connect a set-top box through HDMI<br />
If the <strong>TV</strong> is connected to a cable box or satellite set-top box via HDMI,<br />
make sure you select the correct HDMI source by using SOURCE on this<br />
unit’s remote control.<br />
If you connect to a cable<br />
When your <strong>TV</strong> is connected to the cable socket, you might receive free<br />
digital and high defi nition programs (depending on your cable provider).<br />
The channel number for digital and high defi nition channels includes a<br />
dot “•”. For example, 11.1, 46.30, 108.201. Contact your cable provider<br />
for more information.<br />
If you connect to a DBS (Direct Broadcast Satellite)<br />
There are two main DBS systems: Direc<strong>TV</strong> and DishNetwork. These<br />
systems require a separate, proprietary set-top box to decode signals<br />
and send them to the <strong>TV</strong>. The set-top box contains a digital <strong>TV</strong> tuner for<br />
receiving off-air digital broadcasts.<br />
Contact your local DBS provider for more information about the<br />
connections and the <strong>TV</strong> channels.<br />
If you connect to a set-top box<br />
A cable box or satellite set-top box can be connected to the <strong>TV</strong><br />
through the following connections:<br />
• ANT<br />
• A/V (Composite Video and Audio)<br />
• S-Video<br />
• YPbPr (Component Video Input)<br />
• HDMI<br />
For information about how to connect a set-top box, see the Quick<br />
Start Guide provided.<br />
If you connect a set-top box through component video input<br />
If the <strong>TV</strong> is connected to a cable box or satellite set-top box via<br />
component video input, make sure you select the correct component<br />
video source by using SOURCE on this unit’s remote control.<br />
EN<br />
9
AC IN<br />
ANT. IN<br />
Managing cables<br />
Route your antenna cable and all other cables through the cable<br />
management tie at the back of the <strong>TV</strong>. The holder helps keep your<br />
cables tidy and easily manageable.<br />
1 Attach the cable management tie as illustrated below.<br />
Connecting the AC power cord<br />
Warning<br />
• Verify that your power voltage corresponds with the voltage printed at the back of the<br />
<strong>TV</strong>. Do not insert the AC power cord if the voltage is different.<br />
1 Locate the power connector at the back of the <strong>TV</strong>. The location of<br />
the power connector varies according to <strong>TV</strong> model.<br />
2 Insert the AC power cord fully into the power connector.<br />
3 Connect the AC power cord plug to the power outlet. Ensure that<br />
the cord is tightly secured at both ends.<br />
2 Pass cables through the cable management tie to avoid tangles.<br />
a<br />
b<br />
Disconnect the <strong>TV</strong> from the power outlet<br />
Caution<br />
• Pull the AC power cord by the plug; do not pull on the AC power cord.<br />
1 Unplug the AC power cord from the power outlet.<br />
2 Unplug the AC power cord from the power connector at the back<br />
of the <strong>TV</strong>.<br />
10<br />
EN
Switching on and initial setup<br />
Before you switch on the <strong>TV</strong>, check that the AC power cord is properly<br />
connected. Press . POWER at the right side of the <strong>TV</strong>, or press . on<br />
the remote control. The <strong>TV</strong> normally takes 25-30 seconds to start up<br />
and the following screen appears the fi rst time you turn on the <strong>TV</strong>.<br />
Press Í or Æ 5 times to select the side of the pictures that is the most<br />
pleasing to you. then press OK.<br />
Left side<br />
Right side<br />
English<br />
Initial Setup<br />
Select your menu language.<br />
Seleccione el idioma para el menú.<br />
English<br />
Español<br />
1/5 Select the picture setting that you prefer.<br />
Sélectionnez la langue du menu.<br />
Français<br />
Select<br />
OK<br />
Next<br />
BACK<br />
Back<br />
MENU<br />
Exit<br />
Press OK to fi nish [Settings assistant].<br />
Select<br />
OK<br />
OK<br />
MENU<br />
Skip<br />
Settings assistant<br />
Follow the on-screen instructions to select your language and complete<br />
your <strong>TV</strong> setup. Installation takes approximately 10 minutes.<br />
You have set up your viewing preferences.<br />
Press Í or Æ to select the desired mode for energy saving, then press<br />
OK.<br />
OK<br />
Finish the Setup.<br />
Store<br />
BACK<br />
Back<br />
MENU<br />
Exit<br />
Initial Setup<br />
Select “Retail” or “Home” for your location.<br />
Retail<br />
Home<br />
Note<br />
• If you are not receiving a signal from your cable service, contact the CA<strong>TV</strong> provider.<br />
• If you press . or MENU during autoprogram, this setting will be canceled.<br />
• The initial autoprogram function can be executed for either [Antenna] or [Cable]<br />
only once. When you change the connection (Antenna / Cable), set autoprogram again.<br />
(Refer to page 24.)<br />
• If there is no signal input from the antenna terminal and no operation for several<br />
seconds after you turn on the <strong>TV</strong>, [Helpful Hints] appears. Follow the instructions<br />
listed on the <strong>TV</strong> screen.<br />
Select<br />
OK<br />
OK<br />
SETUP<br />
Exit<br />
Select [Retail] if you want backlight to be brighter.<br />
Select [Home] to reduce power consumption.<br />
You must set [Home]. Otherwise, personalized picture and sound<br />
settings will not be memorized after the unit goes to standby mode.<br />
• Select [Retail], the unit will be set up with predefi ned setting<br />
for retail displays. In this setting, the power consumption may<br />
possibly exceed the limited requirement of the ENERGY STAR ®<br />
qualifi cation.<br />
• Select [Home], the unit will be set to maximize energy effi ciency.<br />
Picture and sound settings can be adjusted and saved as per your<br />
personal preferences.<br />
Press OK to begin [Settings assistant].<br />
Settings assistant<br />
Settings assistant helps you customize picture settings. You will<br />
see a series of test pictures where the right side and left side<br />
differ. Select the side that is most pleasing to you with the Left/<br />
Right keys.<br />
OK<br />
Next<br />
BACK<br />
Back<br />
MENU<br />
Exit<br />
EN<br />
11
5 Use your <strong>TV</strong><br />
Switching channels<br />
This section helps you perform basic <strong>TV</strong> operations.<br />
Switching on your <strong>TV</strong> and putting it in<br />
standby mode<br />
Press CHANNEL + / − on the side of the <strong>TV</strong>. For digital channels, press<br />
a number (1 to 135) followed by a dot “•” and then the corresponding<br />
sub channel number (1 to 135). e.g. 108.30.<br />
• Press CH + / − or enter a number on the remote control.<br />
• Press PREV CH to return to the previously viewed channel.<br />
To switch on<br />
• Press . POWER at the side of the <strong>TV</strong> or press . (standby-On)<br />
on the remote control.<br />
To switch to standby<br />
• Press . POWER at the side of the <strong>TV</strong> or press . (standby-On)<br />
on the remote control again.<br />
Note<br />
• Energy consumption contributes to air and water pollution. When the AC power<br />
cord is plugged in, your <strong>TV</strong> consumes energy. Your <strong>TV</strong> has very low standby power<br />
consumption.<br />
12<br />
EN
Adjusting volume<br />
Still mode<br />
You can pause the image shown on the <strong>TV</strong> screen.<br />
Press FREEZE to pause the image shown on the <strong>TV</strong> screen.<br />
English<br />
FREEZE<br />
• The sound output will not be paused.<br />
• If no signal is detected or protected signal is received during still<br />
mode, the image remains paused and the sound output will be<br />
muted.<br />
• The still function will be released after 5 minutes.<br />
To cancel still mode, press any button except . (standby-On).<br />
Watching channels from a set-top box<br />
To watch channels from a set-top box<br />
1 Switch on the set-top box.<br />
» The picture from your set-top box might appear automatically<br />
on the <strong>TV</strong> screen.<br />
2 Use the remote control of your set-top box to select channels.<br />
If the picture does not appear<br />
To increase or decrease volume<br />
• Press VOL + / − on the remote control or press VOLUME + / − on<br />
the side of the <strong>TV</strong>.<br />
To mute or unmute sound<br />
• Press MUTE on the remote control to mute the sound.<br />
• Press MUTE again or VOL + / − to recover the original sound.<br />
1 Press SOURCE repeatedly to select the set-top box and wait a<br />
few seconds for the picture to appear.<br />
2 Use the remote control of your set-top box to select channels.<br />
Watching connected devices<br />
To watch connected devices<br />
1 Switch on the connected device.<br />
» The picture from your connected device might appear<br />
automatically on the <strong>TV</strong> screen.<br />
2 Use the remote control of the device to select channels.<br />
If the picture does not appear<br />
1 Press SOURCE repeatedly to select the connected device and wait<br />
a few seconds for the picture to appear.<br />
2 Use the remote control of the device to select channels.<br />
EN<br />
13
Watching a Blu-ray disc<br />
To watch a Blu-ray Disc<br />
1 Insert a Blu-ray Disc into your player.<br />
2 Press ► (play) on the remote control of the Blu-ray Disc player.<br />
» The Blu-ray Disc might automatically play on the <strong>TV</strong>.<br />
If the picture does not appear<br />
Switching audio mode<br />
This section describes how to switch audio language in digital mode and<br />
how to switch audio in analog mode.<br />
D<strong>TV</strong><br />
1 Press SAP to display the currently selected language and the<br />
number of available languages.<br />
11.1<br />
English 1/3<br />
1 Press SOURCE repeatedly to select the Blu-ray Disc player and<br />
wait a few seconds for the picture to appear.<br />
2 Use the remote control of the Blu-ray Disc player to play the disc.<br />
2 Press SAP repeatedly to cycle through the available audio<br />
languages.<br />
• Available languages differ depending on the broadcast. [Other]<br />
is displayed when the audio language cannot be acquired, or the<br />
acquired languages are other than English, Spanish or French.<br />
Note<br />
• SAP does not control external audio devices.<br />
• The information display will automatically disappear in a few seconds.<br />
• The default setting for audio mode can be fi xed, see [Audio Setting] in ‘Changing sound<br />
settings’ on page 17.<br />
<strong>TV</strong><br />
Press SAP to display the currently selected audio mode. While<br />
receiving an MTS broadcast, press repeatedly to cycle through the<br />
available audio channel.<br />
11.1<br />
SAP English / STEREO 1/3<br />
When all audio are available<br />
SAP / STEREO<br />
SAP / MONO<br />
SAP / STEREO<br />
When stereo and monaural audio are available<br />
MONO / STEREO<br />
MONO / STEREO<br />
When SAP and monaural audio are available<br />
MONO SAP / MONO STEREO<br />
When only monaural audio is available<br />
MONO<br />
(Cannot be switched)<br />
MONO SAP / MONO STEREO<br />
STEREO<br />
SAP<br />
MONO<br />
: Outputs stereo-audio<br />
: Outputs second audio program<br />
: Outputs mono-audio<br />
14<br />
EN
*<br />
6 Use more of your <strong>TV</strong><br />
Changing picture and sound settings<br />
You must set [Home] in [Location] (refer to page 21).<br />
Otherwise, personalized picture and sound settings will not be memorized<br />
after the unit goes to standby mode.<br />
Changing picture settings<br />
1 Press MENU on the remote control.<br />
2 Press OK to enter the [Picture].<br />
Picture<br />
Sound<br />
Setup<br />
Features<br />
Language<br />
USB<br />
Settings assistant<br />
Auto Picture<br />
Brightness<br />
Contrast<br />
Color<br />
Tint<br />
Sharpness<br />
Color Temperature<br />
120Hz<br />
Personal<br />
Normal<br />
Off<br />
*[120Hz], [Off] does NOT appear on 46PFL3505D / 40PFL3505D.<br />
3 Press Î or ï to select one of the picture settings, and press OK<br />
to enter the setting.<br />
4 Adjust the picture quality.<br />
[Auto Picture]<br />
Press Î or ï to select the desired setting, then press OK.<br />
([Personal], [Standard], [Sports], [Movie] and [Game])<br />
30<br />
60<br />
36<br />
0<br />
0<br />
Summary of picture settings<br />
The following picture settings can be confi gured. Depending on the<br />
format of the picture source, some picture settings are not available.<br />
• [Auto Picture]: Sets all picture settings to the factory default.<br />
• [Brightness]: Adjusts the intensity and details of dark areas.<br />
When in [Home] mode, this <strong>TV</strong> will automatically adjust the<br />
brightness based on the ambient light. If there is a sudden change<br />
in <strong>TV</strong> brightness, it may be due to changes in the room lighting<br />
conditions (sunshine / lamps), or an object blocking the light sensor<br />
on the front of the <strong>TV</strong>. Please ensure the room lighting is stable and<br />
the light sensor is not blocked.<br />
• [Contrast]: Adjusts the intensity of bright areas, keeping dark areas<br />
unchanged.<br />
• [Color]: Adjusts color saturation.<br />
• [Tint]: Adjusts the color balance in an image.<br />
• [Sharpness]: Adjusts the level of sharpness in image details.<br />
• [Color Temperature]: To set the color temperature to [Normal],<br />
[Warm] or [Cool].<br />
Changing auto picture mode<br />
1 Press AUTO PIC to set your <strong>TV</strong> to a predefi ned picture setting.<br />
2 Press Î or ï to select one of the following settings:<br />
• [Personal]: The customized settings you defi ned by using the<br />
[Picture] menu.<br />
• [Standard]: For normal <strong>TV</strong> viewing.<br />
• [Sports]: Vivid picture settings for high action.<br />
• [Movie]: Brilliant picture settings for a cinematic experience.<br />
• [Game]: Optimized for PCs, games consoles and playstations.<br />
English<br />
[Brightness], [Contrast], [Color], [Tint], [Sharpness],<br />
[Color Temperature]<br />
Press Î or ï to select the desired setting, then Press Í or Æ to<br />
adjust.<br />
[120Hz]<br />
(Available for 46PFL3705D / 40PFL3705D only)<br />
When the picture is blurred while viewing fast moving scenes may<br />
be corrected using the 120Hz (120 frames per second) resolution<br />
feature.<br />
Press Î or ï to select the desired option, then press OK.<br />
On<br />
Off<br />
Display changes from 60Hz to 120Hz (120 frames/<br />
sec.) for fast moving pictures. If a picture slows down<br />
while viewing fast moving scenes when you play video<br />
games, set [Auto Picture] to [Game].<br />
Disables the 120Hz.<br />
5 Press MENU to exit.<br />
Note<br />
• To cancel picture adjustment, press MENU.<br />
EN<br />
15
Changing picture format<br />
1 Press FORMAT on the remote control.<br />
For 4:3 video signal<br />
[Normal] [16:9]<br />
2 Press Î or ï to select a picture format and press OK to confi rm<br />
your choice.<br />
Summary of picture formats<br />
5 types of display modes can be selected when the broadcasting station<br />
is sending 16:9 or 4:3 video signal. And 3 types of display modes can be<br />
selected for PC input signal.<br />
For 16:9 video signal<br />
[Normal] [4:3]<br />
[Wide]<br />
[Movie Expand]<br />
[Zoom]<br />
Normal<br />
Display a 16:9 picture at its original size.<br />
4:3<br />
Display a 16:9 picture at a 4:3 size; the picture is shortened<br />
horizontally. Sidebars appear on both edges of the screen.<br />
Movie Expand<br />
Display a 16:9 picture that is vertically stretched to fi ll the screen.<br />
This only crops out the top of the picture.<br />
Zoom<br />
Display a 16:9 picture at its maximum size without changing its<br />
horizontal and vertical ratio.<br />
Wide<br />
Display a horizontally stretched picture. This crops out the left and<br />
right sides of the picture.<br />
[Wide]<br />
[Movie Expand]<br />
[Zoom]<br />
Normal<br />
Display a 4:3 picture at its original size. Sidebars appear on both<br />
edges of the screen.<br />
16:9<br />
Display a 4:3 picture at a 16:9 size; the picture is stretched<br />
horizontally to fi ll the screen.<br />
Movie Expand<br />
Display a 4:3 picture at a 16:9 size; the picture is stretched more<br />
vertically at the top of the screen. This crops out the top of the<br />
picture.<br />
Zoom<br />
Display a 4:3 picture at a 16:9 size; at its maximum size that is more<br />
vertically stretched to fi ll the screen. This crops out the top and<br />
bottom of the picture.<br />
Wide<br />
Display the picture with its center at the original size and the edges<br />
stretched horizontally to fi ll the screen.<br />
For PC input signal through HDMI1 input mode<br />
[Normal]<br />
[Dot By Dot]<br />
[Full]<br />
Normal<br />
Display a proportionately stretched picture. Sidebars appear on<br />
both edges of the screen.<br />
Full<br />
Display a picture that is stretched out of proportion to fi ll the<br />
screen.<br />
Dot By Dot<br />
Display a picture in its original size<br />
.<br />
16<br />
EN
Using your <strong>TV</strong> as a PC monitor<br />
Use an HDMI-DVI cable or an HDMI-DVI adaptor to connect a PC to<br />
your <strong>TV</strong>. For sound, add an audio cable with a stereo mini jack.<br />
Caution<br />
• Before you connect your PC, set the PC monitor refresh rate to 60Hz.<br />
Supported screen resolutions<br />
The following screen resolutions are supported in PC mode:<br />
[<strong>TV</strong> Speakers]<br />
This option will allow you to select the audio output from the<br />
unit’s speakers. If you connect this <strong>TV</strong> to an external amplifi er<br />
which is compatible with HDMI CEC, you can use volume controls<br />
on this <strong>TV</strong> to control volume on the external amplifi er.<br />
Press Î or ï to select the desired option, then press OK.<br />
On<br />
Off<br />
Speakers<br />
EasyLink<br />
The sound will be output from the unit’s speakers.<br />
The sound will not be output from the unit’s speakers.<br />
You can control audio output from your connected<br />
EasyLink Compliant Devices with VOL + / − by using<br />
this unit’s remote control.<br />
English<br />
Resolution Refresh rate<br />
640 x 480 60Hz<br />
800 x 600 60Hz<br />
1024 x 768 60Hz<br />
1280 x 768 60Hz<br />
1360 x 768 60Hz<br />
1920x 1080 60Hz<br />
Changing sound settings<br />
1 Press MENU on the remote control and select [Sound].<br />
Picture<br />
Sound<br />
Setup<br />
Features<br />
Language<br />
USB<br />
Auto Sound<br />
Equalizer<br />
Virtual Surround Sound<br />
Auto Volume Leveling<br />
<strong>TV</strong> Speakers<br />
Audio Setting<br />
Standard<br />
On<br />
Off<br />
Speakers EasyLink<br />
Stereo<br />
2 Press Î or ï to highlight a sound setting and press OK to select<br />
the setting.<br />
3 Adjust the following items.<br />
[Auto Sound]<br />
Press Î or ï to select the desired setting, then press OK.<br />
([Personal], [Standard], [Movie], [Music] and [News])<br />
[Equalizer]<br />
Adjust tone quality for each frequency.<br />
Press Í or Æ to select the specifi c frequency, then press Î or ï to<br />
adjust the level.<br />
[Virtual Surround Sound]<br />
This selects sound modes for more spatial or surround sound<br />
reproduction.<br />
Press Î or ï to select the desired option, then press OK.<br />
On<br />
Off<br />
The Virtual Surround Sound will be effective.<br />
The original sound will be output.<br />
[Auto Volume Leveling]<br />
Reduces sudden changes in volume, for example, during commercials<br />
or when switching channels.<br />
Press Î or ï to select the desired option, then press OK.<br />
[Audio Setting]<br />
You can set the output mode as a default for the sound mode<br />
(NTSC only).<br />
This setting is not interlocked when you change the output mode<br />
by pressing SAP. (see ‘Switching audio mode’ on page 14).<br />
Press Î or ï to select the desired option, then press OK.<br />
Stereo<br />
Mono<br />
SAP<br />
4 Press MENU to exit.<br />
Outputs stereo-audio<br />
Outputs mono-audio<br />
Summary of sound settings<br />
Outputs second audio program<br />
The following sound settings can be confi gured. Depending on the<br />
sound source, some sound settings are not available.<br />
• [Auto Sound]: Sets all sound settings to the factory default.<br />
• [Equalizer]: Adjusts individual sound frequencies.<br />
• [Virtual Surround Sound]: This selects sound modes for more<br />
spatial or surround sound reproduction.<br />
• [Auto Volume Leveling]: Reduces sudden changes in volume, for<br />
example, during commercials or when switching channels. Select<br />
[On] or [Off].<br />
• [<strong>TV</strong> Speakers]: Select [On] or [Off], or output sound to an<br />
EasyLink compliant device. When [Speakers EasyLink] is selected,<br />
the <strong>TV</strong> speakers are disabled and <strong>TV</strong> sound outputs to the speakers<br />
of the compatible EasyLink compliant device. Adjust the volume<br />
using the unit’s remote control.<br />
Note<br />
• If the <strong>TV</strong> is connected to a non-EasyLink compliant device and [Speakers EasyLink] is<br />
selected, the <strong>TV</strong> speakers will not be disabled and continue to output sound.<br />
Changing auto sound mode<br />
1 Press AUTO SOUND to set your <strong>TV</strong> to a predefi ned sound setting.<br />
2 Press Î or ï to select one of the following settings:<br />
• [Personal]: The customized settings you defi ned by using the<br />
[Sound] menu.<br />
• [Standard]: For normal <strong>TV</strong> viewing.<br />
• [Movie]: Realistic sound settings for a cinematic experience.<br />
• [Music]: Emphasize high and low freq. for instrument sound.<br />
• [News]: Clear sound settings for human voice.<br />
On<br />
Off<br />
Select if you want to reduce volume differences<br />
between the <strong>TV</strong> commercials and the programs.<br />
Select if you want to turn off the Auto Volume Leveling.<br />
EN<br />
17
Sleeptimer<br />
You can always put your <strong>TV</strong> in standby mode earlier or reset the<br />
sleeptimer during the countdown.<br />
Press SLEEP to set the sleep timer.<br />
Sleep<br />
Off<br />
Sleep timer display appears on the <strong>TV</strong> screen.<br />
Press SLEEP repeatedly to change the amount of time (in increments of<br />
30 minutes up to 120 minutes).<br />
Sleep<br />
120min.<br />
Picture<br />
Sound<br />
Setup<br />
Features<br />
Language<br />
USB<br />
Select<br />
Video 1<br />
Video 2<br />
Component<br />
HDMI 1<br />
HDMI 2<br />
HDMI 3<br />
OK<br />
View / Block<br />
BACK<br />
Back<br />
• Each press of SLEEP will increase the time by 30 minutes.<br />
• After setup, the sleep timer display can be called up for<br />
checking by pressing SLEEP.<br />
Tip<br />
To Cancel the Sleep Timer<br />
• Press SLEEP repeatedly until “Sleep Off” is displayed on the <strong>TV</strong> screen.<br />
3 Press Î or ï and then press OK repeatedly to switch between<br />
blocked and not blocked.<br />
• A box with indicates that the channel or input source is<br />
blocked.<br />
• An empty box indicates that the channel or input source is<br />
not blocked.<br />
4 Press MENU to exit.<br />
Using the <strong>TV</strong> ratings lock<br />
Child and rating locks<br />
You can prevent your children from watching certain programs or<br />
certain channels by locking the <strong>TV</strong> controls and by using ratings.<br />
Setting your PIN<br />
1 Press MENU on the remote control and select [Features] ><br />
[Child Lock].<br />
2 Enter a 4-digit PIN on the Number buttons, of the remote control.<br />
• If you have not set up your PIN, enter 0000.<br />
Changing your PIN<br />
1 Press MENU on the remote control and select [Features] ><br />
[Child Lock] > [Change PIN].<br />
2 Enter a 4-digit PIN on the Number buttons of the remote control.<br />
• If you have a PIN, enter your current PIN.<br />
• If you do not have a PIN, enter 0000.<br />
• If you have forgotten your PIN, unplug the AC power cord for<br />
10 seconds to restore the PIN to 0000.<br />
3 Enter your PIN again to confi rm.<br />
4 Press MENU to exit.<br />
Locking a channel or input source<br />
This section describes how to lock input sources or specifi ed channels.<br />
The channels can be selected but the screen is blanked out and the<br />
audio is muted.<br />
1 Press MENU on the remote control and select [Features] ><br />
[Child Lock] > [Channel Lock].<br />
2 Enter your PIN (see ‘Setting your PIN’ on page 18).<br />
Your <strong>TV</strong> is equipped with a V-chip that allows you to control access to<br />
individual programs based on their age rating and content rating. The<br />
program content advisory data are sent by the broadcaster or by the<br />
program provider.<br />
If you receive channels through a set-top box or cable box connected<br />
by HDMI, you cannot use the <strong>TV</strong> ratings lock. Your set-top box or cable<br />
box must be connected through RF or AV connectors.<br />
1 Press MENU on the remote control and select [Features] ><br />
[Child Lock] > [US <strong>TV</strong> ratings lock].<br />
2 Press Î or ï or Í or Æ and then press OK repeatedly to switch<br />
between blocked and not blocked.<br />
Each rating has a box-graphic in front of it to indicate whether<br />
programs carrying that rating are locked:<br />
• A box with indicates that all items in the content ratings list<br />
are blocked.<br />
• An empty box indicates that no items in the content ratings<br />
list are blocked.<br />
• An empty box indicates that some content ratings are<br />
deselected. For example, for rating <strong>TV</strong>-14, you can deselect<br />
one or more of the following content ratings: [D] (Dialog),<br />
[L] (Language), [S] (Sex), or [V] (Violence).<br />
Picture<br />
Sound<br />
Setup<br />
Features<br />
Language<br />
USB<br />
<strong>TV</strong>-MA<br />
<strong>TV</strong>-14<br />
<strong>TV</strong>-PG<br />
<strong>TV</strong>-G<br />
<strong>TV</strong>-Y7<br />
<strong>TV</strong>-Y<br />
Select<br />
FV V S L D<br />
OK<br />
View / Block<br />
BACK<br />
Back<br />
• When you block a rating, all ratings in the younger age<br />
categories are automatically blocked.<br />
3 Press MENU to exit.<br />
18<br />
EN
Summary of <strong>TV</strong> ratings<br />
Age rating Content rating<br />
<strong>TV</strong>-Y : Appropriate for children of all ages None<br />
with themes and elements suitable for<br />
children aged 2-6.<br />
<strong>TV</strong>-Y7 : Programs designed for children age 7 [FV] (Fantasy Violence)<br />
and older.<br />
<strong>TV</strong>-G : Programs suitable for all ages. These None<br />
programs contain little or no violence,<br />
no strong language and little or no<br />
sexual dialog or situations.<br />
<strong>TV</strong>-PG : Programs contain elements that some [D] (Dialog)<br />
parents may fi nd unsuitable for younger [L] (Language)<br />
children and which may need parental [S] (Sex)<br />
guidance. The program may contain [V] (Violence)<br />
moderate violence, sexual dialog and / or<br />
situations and some strong language.<br />
<strong>TV</strong>-14 : Programs contain elements that may<br />
not be suitable for children under 14<br />
years of age. These programs include<br />
one or more of the following: intense<br />
violence, intense sexual situations,<br />
suggestive dialog and strong language.<br />
<strong>TV</strong>-MA : Programs are designed to be viewed<br />
by adults and may be unsuitable for<br />
children under the age of 17. These<br />
programs may contain graphical<br />
violence, explicit sexual activity and / or<br />
crude or indecent language.<br />
Using the movie ratings lock<br />
[D] (Dialog)<br />
[L] (Language)<br />
[S] (Sex)<br />
[V] (Violence)<br />
[L] (Language)<br />
[S] (Sex)<br />
[V] (Violence)<br />
You can control viewing of movies based on their MPAA (Motion<br />
Picture Association of America) rating.<br />
1 Press MENU on the remote control and select [Features] ><br />
[Child Lock].<br />
2 Select one of the menus for movie ratings lock.<br />
• In the USA, select [US Movie ratings lock].<br />
• In Canada, select [Canadian English Rating] or<br />
[Canadian French Rating].<br />
3 Enter your PIN (see ‘Setting your PIN’ on page 18).<br />
» The following screen shows the ratings in<br />
[US Movie ratings lock].<br />
Picture<br />
Sound<br />
Setup<br />
Features<br />
Language<br />
USB<br />
Select<br />
X<br />
NC-17<br />
R<br />
PG-13<br />
PG<br />
G<br />
NR<br />
View / Block<br />
BACK<br />
Back<br />
4 Press Î or ï and then press OK repeatedly to switch between<br />
blocked and not blocked.<br />
• A box with indicates that all items in the rating are blocked.<br />
• An empty box indicates that no items in the rating are not<br />
blocked.<br />
5 Press MENU to exit.<br />
OK<br />
Summary of US movie ratings<br />
Rating Description<br />
NR Not rated.<br />
G Movies with a mild content, suitable for all ages.<br />
PG Movies for which parental guidance is recommended.<br />
They may contain a few racy or violent scenes or<br />
maybe some bad language.<br />
PG-13 Movies for which parental guidance may be<br />
recommended if under age 13.<br />
R Restricted. The movies usually contain offensive sex<br />
or bad language and may be unsuitable for children<br />
under the age of 17. Parental guidance or permission<br />
needed.<br />
NC-17 Even with parental permission, forbidden under age<br />
17. More offensive sex, violence or bad language.<br />
X Movies which generally focus on sex, violence and /<br />
or bad language. Also known as pornography.<br />
Summary of Canadian English rating<br />
Rating Description<br />
E Exempt program.<br />
C Programming suitable for children under the age of<br />
8 years. No profanity or sexual content of any level<br />
allowed. Minimal comedic violence.<br />
C8+ Suitable for children ages 8 and over. Low intensity<br />
violence and fantasy horror allowed.<br />
G Movies with a mild content, suitable for all ages.<br />
PG Movies for which parental guidance is recommended.<br />
They may contain a few racy or violent scenes or<br />
maybe some bad language.<br />
14+ Programming intended for children ages 14 and<br />
over. May contain intense scenes of violence, strong<br />
profanity, and depictions of sexual activity within the<br />
context of a story.<br />
18+ Programming intended for viewers ages 18 and over.<br />
May contain strong violence, language, and sexual<br />
activity.<br />
Summary of Canadian French rating<br />
Rating Description<br />
E Exempt program.<br />
G Appropriate for all ages with little or no violence and<br />
little to no sexual content.<br />
8ans+ Appropriate for children 8 and up which may<br />
contain little violence, some foul language and / or<br />
little to no sexual content.<br />
13ans+ Appropriate for children 13 and up, with moderate<br />
violence, language, and some sexual situations.<br />
Persons under 13 should be accompanied by an<br />
adult.<br />
16ans+ Appropriate for children 16 and up, with strong<br />
violence, strong language, and strong sexual content.<br />
18ans+ Only to be viewed by adults and contains extreme<br />
violence and graphic sexual content / pornography.<br />
English<br />
EN<br />
19
Closed caption<br />
Closed captioning is an assistive technology that allows persons with<br />
hearing disabilities to access television programming. Closed captioning<br />
displays the audio portion of programming as text superimposed over<br />
the video.<br />
Note<br />
• Closed captioning service may not be controlled by this unit’s menu options if you are<br />
watching television through an external cable or satellite set top box. In which case you will<br />
need to use the menu options on the external set top box to control Closed Captioning.<br />
• The captions do not always use correct spelling and grammar.<br />
Not all <strong>TV</strong> programs and product commercials include closed caption information.<br />
Refer to your area <strong>TV</strong> program listings for the <strong>TV</strong> channels and times of closed caption<br />
shows. The captioned programs are usually noted in the <strong>TV</strong> listings with service marks<br />
such as [CC].<br />
<strong>TV</strong><br />
Selecting caption services<br />
1 Select a caption service for analog channels:<br />
• Press MENU on the remote control and select<br />
[Features] > [Closed Caption] > [Caption Service].<br />
• Press Î or ï to select one of the listed caption services, and<br />
press OK to confi rm your choice.<br />
2 Press MENU to exit.<br />
Note<br />
• Not all caption services are used by a <strong>TV</strong> channel during the transmission of a closed<br />
caption program.<br />
D<strong>TV</strong><br />
Selecting D<strong>TV</strong> caption services<br />
1 Select a caption service for digital channels:<br />
• Press MENU on the remote control and select<br />
[Features] > [Closed Caption] ><br />
[Digital Caption Service].<br />
• Press Î or ï to select one of the listed caption services, and<br />
press OK to confi rm your choice.<br />
Off<br />
CS-1 to CS-6<br />
2 Press MENU to exit.<br />
Select if you do not want Digital Caption Service. This<br />
is the default.<br />
Select one of these before changing any other item<br />
in [Closed Caption] menu. Choose [CS-1] under<br />
normal circumstances.<br />
Selecting how captions are displayed<br />
You can choose the size, font, color, background and other<br />
characteristics of the caption text.<br />
1 Press MENU on the remote control and select [Features] ><br />
[Closed Caption] > [Caption Style] > [<strong>User</strong> Setting].<br />
Press Î or ï to select [On], then press OK.<br />
2 Press Î or ï to highlight an option for digital captions, and press<br />
OK to select the option.<br />
3 Press Î or ï to highlight a setting for the option, and press OK to<br />
confi rm your choice.<br />
4 Press MENU to exit.<br />
Summary of caption services<br />
Service Description<br />
CC-1 and T-1; are the primary caption and text services.<br />
The captioning or text is displayed in the same<br />
language as the program’s dialogue<br />
(up to 4 lines of script on the <strong>TV</strong> screen, where it<br />
does not obstruct relevant parts of the picture).<br />
CC-3 and T-3; serve as the preferred data channels.<br />
The captioning or text is often a secondary language.<br />
CC-2, CC-4, T-2 are rarely available and broadcasters use them only<br />
and T-4; in special conditions, such as when [CC-1] and<br />
[CC-3] or [T-1] and [T-3] are not available.<br />
• There are 3 display modes according to programs:<br />
Paint-on mode:<br />
Displays input characters on the <strong>TV</strong> screen<br />
immediately.<br />
Pop-on mode:<br />
Once characters are stored in memory, they are<br />
displayed all at once.<br />
Roll-up mode:<br />
Displays the characters continuously by scrolling<br />
(max. 4 lines).<br />
Diffi culties viewing closed captions on D<strong>TV</strong> programming<br />
If you have difficulties viewing closed captions on D<strong>TV</strong> programming, including<br />
HD<strong>TV</strong>, received from your subscription television provider, you should:<br />
• consult any consumer information and <strong>manual</strong>s / guides on closed<br />
captions for D<strong>TV</strong> programming provided by your subscription<br />
television provider;<br />
• ensure that the captioning function on your set-top box, if<br />
applicable, is turned on; and,<br />
• ensure that the captioning function on your D<strong>TV</strong> is turned on.<br />
If you are still unable to view closed captions on D<strong>TV</strong> programming, you<br />
should contact your subscription television provider for assistance.<br />
20<br />
EN
EasyLink<br />
Energy saving mode<br />
This function allows you to operate the linked functions between our<br />
brand devices with EasyLink capabilities and this unit connected via a<br />
HDMI cable.<br />
1 Press MENU on the remote control and select [Features] ><br />
[EasyLink].<br />
You can set whether the power consumption is saved or not.<br />
1 Press MENU on the remote control and select [Features] ><br />
[Energy Saving Mode].<br />
English<br />
Picture<br />
Sound<br />
Setup<br />
Features<br />
Language<br />
USB<br />
Master EasyLink<br />
Auto Device Off<br />
Auto <strong>TV</strong> On<br />
Device List<br />
On<br />
On<br />
On<br />
Picture<br />
Sound<br />
Setup<br />
Features<br />
Language<br />
USB<br />
Closed Caption<br />
Child Lock<br />
EasyLink<br />
Energy Saving Mode<br />
Location<br />
Current Software Info<br />
Off<br />
Home<br />
2 Press Î or ï to highlight the desired setting and press OK to<br />
select the setting.<br />
3 Adjust the following items.<br />
[Master EasyLink]<br />
Set the EasyLink [On] or [Off].<br />
The following additional settings will be grayed out when you set<br />
to [Off].<br />
Press Î or ï to select the desired option, then press OK.<br />
On<br />
Off<br />
Select if you have connected an external device that<br />
is compatible with the EasyLink function.<br />
Disable all EasyLink function.<br />
[Auto Device Off]<br />
Press Î or ï to select the desired option, then press OK.<br />
On<br />
Off<br />
Your connected EasyLink device goes into standby mode<br />
automatically when you put this unit into standby mode.<br />
Your connected EasyLink device stays on even if unit<br />
goes into standby mode.<br />
[Auto <strong>TV</strong> On]<br />
Press Î or ï to select the desired option, then press OK.<br />
On<br />
Off<br />
This unit turns on automatically when you turn on<br />
your connected EasyLink device.<br />
This unit remains in standby mode even if you turn on<br />
your connected EasyLink device.<br />
2 Press Î or ï to select the desired mode, then press OK.<br />
On<br />
Off<br />
3 Press MENU to exit.<br />
Set your location to home<br />
Select if you want to reduce power consumption.<br />
Power consumption may possibly exceed the limited<br />
requirement of ENERGY STAR ® qualification.<br />
You can set the location of your <strong>TV</strong> to [Home] or [Retail].<br />
Choosing [Home] gives you full fl exibility to change predefi ned settings for<br />
picture and sound.<br />
1 Press MENU on the remote control and select [Features] ><br />
[Location].<br />
2 Select [Home] and press OK to confi rm your choice.<br />
3 Press MENU to exit.<br />
Note<br />
• You must set [Home]. Otherwise, personalized picture and sound settings will not be<br />
memorized after the unit goes to standby mode.<br />
[Device List]<br />
This function lets you see the product name of connected devices.<br />
Press Î or ï to select the desired HDMI device listed on the <strong>TV</strong><br />
screen, then press OK.<br />
4 Press MENU to exit.<br />
EN<br />
21
View photos and play music on a USB device<br />
Your <strong>TV</strong> is fi tted with a USB connection that enables you to view<br />
photos or listen to music stored on a USB device.<br />
Supported formats Not-supported formats<br />
JPEG Progressive JPEG fi les<br />
MP3 File name exceeding 128 characters<br />
FAT / DOS-formatted memory File names containing a dot character<br />
devices<br />
It is recommended that fi les to be played back in this unit are<br />
recorded under the following specifi cations:<br />
<br />
• Sampling frequency<br />
: 32 kHz or 44.1 kHz or 48 kHz<br />
• Constant bit rate<br />
: 32 kbps - 320 kbps<br />
<br />
• Upper limit<br />
: 24 Mpixel<br />
Note<br />
• <strong>Philips</strong> can not be held responsible if your USB device is not supported, nor will <strong>Philips</strong><br />
accept any liability for damage or loss of stored data.<br />
• The USB device is not supplied with the <strong>TV</strong>.<br />
View your pictures on a USB device<br />
1 After connecting your USB device to the <strong>TV</strong>, press OK to enter the<br />
[USB] menu.<br />
» [Picture] is highlighted.<br />
Picture<br />
Music<br />
USB0<br />
Picture<br />
Image1.JPG<br />
Image2.JPG<br />
Folder 1<br />
Folder 2<br />
1 2 Thumbnails 3 4<br />
Press the OK button to play/pause<br />
2 Press OK to enter the [Picture] folder.<br />
3 Press Î or ï to select a picture or an album on the USB device.<br />
» The pictures appear in a list or as thumbnails.<br />
4 Press a number 2 (Number buttons) to toggle between [List] and<br />
[Thumbnails].<br />
Connect a USB storage device<br />
1 Turn on the <strong>TV</strong>.<br />
2 Connect the USB device to the USB port on the side of your <strong>TV</strong>.<br />
» The main menu appears automatically.<br />
3 Press Î or ï select [USB].<br />
USB0<br />
Image1.JPG<br />
Image2.JPG<br />
Image2.JPG<br />
Image1.JPG<br />
Image1.JPG<br />
Picture<br />
Sound<br />
Setup<br />
Features<br />
Language<br />
USB<br />
This menu allows you to enjoy your photos and<br />
music via your USB device.<br />
USB0<br />
1 2 Thumbnails 3 4<br />
Press the OK button to play/pause<br />
USB0<br />
Image1.JPG<br />
Image1.JPG<br />
Disconnect a USB storage device<br />
Caution<br />
• To avoid damaging the USB device always exit the on-screen menu and wait fi ve<br />
seconds before you remove the USB device.<br />
1 Press MENU to exit the on-screen menu.<br />
2 Wait fi ve seconds then remove the USB device.<br />
1 2 List<br />
3 4<br />
Press the OK button to play/pause<br />
5 Press OK to view the picture or to start a slideshow of pictures in<br />
the album.<br />
• Press the Number buttons on the remote control to perform<br />
the function shown at the bottom of the screen.<br />
• If the function bar at the bottom disappears, press any<br />
Number buttons to make it reappear.<br />
6 Press Í and select another picture or another album.<br />
22<br />
EN
Confi gure how the slideshow is played<br />
You can confi gure the following features of your slideshow.<br />
Feature Description<br />
[More details] Displays the picture name, date, size and<br />
next picture in the slide show.<br />
[Transitions] Displays a list of available transition styles of<br />
the pictures.<br />
[Slide time] Sets the amount of time that a picture is<br />
shown.<br />
[Rotate] Rotates a picture.<br />
[Zoom] Displays a list of available magnifi cations.<br />
[Start show] / Starts or stops a slide show.<br />
[Stop show]<br />
English<br />
Listen to music on a USB device<br />
1 Connect your USB device to the <strong>TV</strong>.<br />
2 Press OK to enter the [USB] menu.<br />
3 Select [Music].<br />
4 Press OK to enter the music folder.<br />
Music<br />
Music<br />
..<br />
folder<br />
Track1.MP3<br />
Track1.MP3<br />
Title: Track1<br />
Artist:<br />
Album: Sentiment...<br />
Duration: 00:02:53<br />
Year:<br />
1 2 3 4<br />
Press the OK button to play/pause<br />
5 Press Î or ï to select a song.<br />
• Press the Number buttons on the remote control to repeat,<br />
shuffl e, or change settings.<br />
• Press OK to pause, press OK again to restart.<br />
• If the Number buttons disappear from the screen, press OK<br />
to make them reappear.<br />
6 Press Í to select another song.<br />
EN<br />
23
7 Install channels<br />
The fi rst time you set up your <strong>TV</strong>, you are prompted to select a menu<br />
language and to install <strong>TV</strong> and digital radio channels (if available). This<br />
chapter provides instructions on how to reinstall and fi ne-tune channels.<br />
Autoprogram<br />
Before you install channels, ensure that you are registered with your<br />
cable <strong>TV</strong> provider and that your equipment is correctly connected.<br />
1 Press MENU on the remote control and select [Setup] ><br />
[Autoprogram].<br />
Selecting your menu language<br />
1 Press MENU on the remote control and select [Language].<br />
Picture<br />
Sound<br />
Setup<br />
Features<br />
Language<br />
USB<br />
Select your menu language.<br />
Seleccione el idioma para el menú.<br />
Sélectionnez la langue du menu.<br />
English<br />
2 Select a language and press OK to confi rm your choice.<br />
3 Press MENU to exit.<br />
Español<br />
Français<br />
Picture<br />
Sound<br />
Setup<br />
Features<br />
Language<br />
USB<br />
Autoprogram<br />
Channel List<br />
Add Channels<br />
Antenna<br />
2 Press OK to start the installation.<br />
If you run [Autoprogram] when you have locked channels, a<br />
message appears asking to enter your PIN . Enter your PIN in<br />
order to complete the installation.<br />
If you have forgotten your PIN, reset it as described in ‘Changing<br />
your PIN’ on page 18.<br />
3 Select [Antenna] or [Cable] and press OK.<br />
• When [Antenna] is selected, the <strong>TV</strong> detects antenna signals. It<br />
searches for NTSC and ATSC channels available in your area.<br />
• When [Cable] is selected, the <strong>TV</strong> detects signals supplied<br />
by cable. It searches for NTSC, ATSC, and QAM modulated<br />
channels available in your area.<br />
Picture<br />
Sound<br />
Setup<br />
Features<br />
Language<br />
USB<br />
Autoprogram will rescan all channels.<br />
Auto programming may take more than 20<br />
minutes to complete.<br />
Select your signal source.<br />
Antenna<br />
Back<br />
Antenna<br />
Cable<br />
Cable<br />
Or<br />
ANT.IN<br />
• When autoprogramming is complete, the lowest memorized<br />
channel will be displayed.<br />
4 Follow the on-screen instructions to complete the installation.<br />
24<br />
EN
Channel list<br />
Add channels<br />
The channels selected here can be skipped when selecting the channels<br />
using CH + / −.<br />
Those channels can still be selected with the Number buttons.<br />
1 Press MENU on the remote control and select [Setup] ><br />
[Channel List].<br />
Picture<br />
Sound<br />
Setup<br />
Features<br />
Language<br />
USB<br />
Autoprogram<br />
Channel List<br />
Add Channels<br />
Antenna<br />
This function lets you add the channels that were not added by the<br />
autoprogram due to the receptible condition at the initial setup.<br />
1 Press MENU on the remote control and [Setup] > [Add Channels].<br />
Picture<br />
Sound<br />
Setup<br />
Features<br />
Language<br />
USB<br />
Autoprogram<br />
Channel List<br />
Add Channels<br />
Antenna<br />
English<br />
2 Press Î or ï to select the channel you want to remove, then press OK.<br />
2 Press a number (1 to 135) to enter the number of the channel you<br />
want to add, then press OK.<br />
11<br />
Picture<br />
Sound<br />
Setup<br />
Features<br />
Language<br />
USB<br />
Highlight channels for Ch Up/Down key<br />
selection.<br />
D<strong>TV</strong> 40.1<br />
D<strong>TV</strong> 40.2<br />
D<strong>TV</strong> 40.3<br />
Picture<br />
Sound<br />
Setup<br />
Features<br />
Language<br />
USB<br />
For analog channels,<br />
select a channel to be<br />
added using number keys.<br />
For digital channels,<br />
you must perform<br />
Autoprogram function.<br />
Add channels<br />
BACK<br />
Ch Select<br />
OK<br />
Watch/Skip Back<br />
Ch Change<br />
BACK<br />
Back<br />
• The channel display for the removed channel darkens. You will not<br />
be able to select the channel again using CH + / −.<br />
• To reactivate a removed channel, press Î or ï and press OK. The<br />
registered channels are highlighted.<br />
• When you remove a major channel, its minor channels are<br />
removed as well.<br />
Note<br />
• The channel with the [D<strong>TV</strong>] indicated on the display is ATSC. Otherwise the channel is NTSC.<br />
3 Press MENU to exit.<br />
3 Press MENU to exit.<br />
Note<br />
• If setup completes successfully, [Added to the channel list] is displayed.<br />
• If external input is used, it is not possible to register the channel and [Unavailable] will<br />
be displayed on the <strong>TV</strong> screen.<br />
• By pressing Î or ï you can select the memorized channels only.<br />
• In most cases, digital channels are not broadcast on the RF channel on which they<br />
appear on your <strong>TV</strong>. To add digital channels you need to know the RF channel on which<br />
the digital channel is being broadcast. E.g. If there is a digital channel 9.1 which is being<br />
broadcast on RF channel 25, you need to enter 25 while performing a weak channel<br />
installation. To fi nd out the RF channel on which a particular digital channel is being<br />
broadcast, please contact your local service provider.<br />
Installing digital channels using [Add channels] might not work for direct cable<br />
connections and if the digital signal is too weak for the <strong>TV</strong> to process.<br />
Optimizing the signal quality from your<br />
antenna<br />
You can optimize your signal quality by tuning in ATSC channels with<br />
weak signals, and adjusting the antenna.<br />
1 Press MENU on the remote control and select [Setup] > [Antenna].<br />
2 Press OK to confi rm your choice.<br />
3 Press a number (1 to 135) or press CH + or CH − to select the<br />
channel for which you want to check the digital signal strength.<br />
4 Press MENU to exit.<br />
EN<br />
25
8 Upgrade your <strong>TV</strong> software<br />
<strong>Philips</strong> continuously tries to improve its products and we strongly<br />
recommend that you upgrade the <strong>TV</strong> software when upgrades are available.<br />
New software can be downloaded from our website at www.philips.com<br />
using the model number of your <strong>TV</strong> (e.g. 46PFL3705D) to fi nd information.<br />
Upgrading software<br />
1 Prepare the software upgrade (see ‘Preparing for the software<br />
upgrade’ on page 26).<br />
2 If the <strong>TV</strong> is on, press . POWER at the side of the <strong>TV</strong>.<br />
3 Connect your USB device to the service terminal on the side of<br />
your <strong>TV</strong>.<br />
Checking your current software version<br />
1 Press MENU on the remote control and select [Features] ><br />
[Current Software Info].<br />
» The version and a description of the current software is<br />
displayed, then press OK.<br />
Picture<br />
Sound<br />
Setup<br />
Features<br />
Language<br />
Release Version:<br />
XXXXXXX_XXX_X_XXXX<br />
Back<br />
4 Switch on the <strong>TV</strong>.<br />
» The <strong>TV</strong> scans the USB device for the upgraded software and<br />
automatically enters upgrade mode.<br />
5 Read the on-screen instructions and confi rm that you want to<br />
continue with the installation.<br />
Software Upgrade<br />
USB<br />
Software upgrade in progress. Please wait.<br />
2 Press MENU to exit.<br />
Preparing for the software upgrade<br />
You require the following equipment:<br />
• A PC with web browsing capability.<br />
• An archive utility that supports the ZIP-format (e.g. WinZip for<br />
Windows or StuffIt for Mac OS).<br />
• An empty clean formatted USB stick.<br />
Note<br />
• Only FAT / DOS-formatted portable memory is supported.<br />
• New software can be downloaded from www.philips.com<br />
• Use only software upgrades that can be found on the <strong>Philips</strong> web site.<br />
Do not remove the USB storage device or turn the <strong>TV</strong> off<br />
while upgrade is in progress.<br />
Downloading...<br />
60%<br />
6 When the software upgrade is complete, remove the USB device.<br />
7 Press . POWER at the side of the <strong>TV</strong> to make sure the unit goes<br />
to standby mode.<br />
8 Switch on the <strong>TV</strong>.<br />
» The <strong>TV</strong> starts up with the new software.<br />
• The following messages are displayed without starting software<br />
upgrade when it doesn’t fulfi ll the upgrade conditions.<br />
Software Upgrade<br />
Warning<br />
• When the software upgrade is running, don’t press any buttons.<br />
• Do not remove the USB device during the software upgrade.<br />
• If there is a power drop during the upgrade, do not remove the USB device from the<br />
<strong>TV</strong>. The <strong>TV</strong> continues the upgrade as soon as the power comes back.<br />
• If an error occurs during the upgrade, retry the procedure or contact your dealer.<br />
Downloading the software<br />
The version of this update file is the same or older<br />
than the current version.<br />
Please check the file and try again.<br />
1 On your PC, open a web browser and go to www.philips.com<br />
2 Find information and software related to your <strong>TV</strong> and download<br />
the latest software upgrade fi le to your PC.<br />
3 Decompress the ZIP-fi le.<br />
4 Copy the upgrade fi le to the root directory of the USB device.<br />
26<br />
EN
AC IN<br />
ANT. IN<br />
9 Connect devices<br />
This section describes how to connect various devices with different<br />
connectors and supplements examples provided in the Quick Start Guide.<br />
English<br />
Connection overview<br />
a<br />
b<br />
j<br />
k<br />
c<br />
d<br />
e<br />
f<br />
ANT. IN<br />
S-VIDEO<br />
VIDEO<br />
L<br />
AUDIO<br />
R<br />
l<br />
m<br />
g<br />
h<br />
i<br />
a HDMI 2 input jack<br />
Digital audio and video input from high defi nition digital devices<br />
such as Blu-ray players.<br />
b HDMI 1 input jack<br />
First HDMI in connector.<br />
c antenna input jack<br />
Signal input from an antenna, cable or satellite.<br />
d VIDEO 1 S-Video input jack (back)<br />
S-Video (back) input connector to be used with Audio L/R<br />
connectors for camcorder, game console, etc. When you use the<br />
S-Video (back) for video signals, do not use Composite video<br />
(back) for video signals.<br />
e VIDEO 1 composite video and audio input jack (back)<br />
Video input for analog devices such as DVD, camcorder, game<br />
console, etc. To be used with audio input.<br />
f component video and audio input jack<br />
Video input from analog devices such as DVD, receiver, game<br />
console, etc. This connector is used with audio input.<br />
g audio input jack for HDMI 1<br />
h analog audio output jack<br />
Audio cable connection for an external device.<br />
i digital audio output jack<br />
Digital audio output to home theaters and other digital audio systems.<br />
j HDMI 3 input jack<br />
Third HDMI in connector.<br />
k USB terminal<br />
Data input from USB storage devices only. Do not connect any<br />
device to this terminal such as; digital camera, keyboard, mouse, etc.<br />
l VIDEO 2 S-Video input jack (side)<br />
S-Video (side) input connector to be used with Audio L/R<br />
connectors for camcorder, game console, etc. When you use the<br />
S-Video (side) for video signals, do not use Composite video (side)<br />
for video signals.<br />
m VIDEO 2 composite video and audio input jack (side)<br />
Video input for analog devices such as DVD, camcorder, game<br />
console, etc. To be used with audio input.<br />
Caution<br />
• Disconnect the AC power cord before connecting devices.<br />
Note<br />
• Do not use an extension cord between the USB fl ash memory and the unit. Always<br />
insert the USB fl ash memory to this unit directly.<br />
• Different types of connectors may be used to connect a device to your <strong>TV</strong>, depending<br />
on availability and your needs.<br />
EN<br />
27
Selecting your connection quality<br />
S-Video - Good quality<br />
HDMI - Highest quality<br />
Supports high-defi nition signals and gives highest picture and sound<br />
quality. Video and audio signals are combined in one cable. You must use<br />
HDMI for full high-defi nition video and to enable <strong>Philips</strong> EasyLink.<br />
S-Video cable and audio L/R cable (red / white)<br />
For analog connections. Use an S-Video cable together with an audio<br />
L / R cable.<br />
Composite - Basic quality<br />
Tip<br />
• To connect to a PC without an HDMI connector, use a HDMI-DVI adaptor and a<br />
separate audio cable.<br />
Note<br />
• <strong>Philips</strong> HDMI supports HDCP (High-bandwidth Digital Contents Protection). HDCP is<br />
a form of Digital Rights Management that protects high defi nition content in DVD or<br />
Blu-ray Discs.<br />
Composite video / audio cable (yellow / red / white)<br />
For analog connections. Composite cables usually combine a yellow<br />
video cable with a red / white audio L/R cable. Match the cable colors<br />
when you connect to the <strong>TV</strong>.<br />
Component (Y Pb Pr) - High quality<br />
Component video cable (red / green / blue) and audio L/R cable<br />
(red / white)<br />
Supports high-defi nition signals but gives lower picture quality than<br />
HDMI. Component cables combine a red / green / blue video cable with<br />
a red / white audio L/R cable. Match the cable colors when you connect<br />
to the <strong>TV</strong>.<br />
28<br />
EN
Connecting your devices<br />
This section describes how to connect a selection of devices with<br />
different connectors. Different types of connectors can be used to<br />
connect a device to your <strong>TV</strong>. The following sections describe examples<br />
only, other confi gurations are possible.<br />
Connecting a set-top box, DVD player / recorder via<br />
component video output connectors (YPbPr) and analog<br />
audio<br />
English<br />
Connecting a set-top box, Blu-ray Disc player and<br />
HD game console via HDMI<br />
OUT<br />
IN<br />
IN<br />
HDMI<br />
IN<br />
HDMI<br />
OUT<br />
OUT<br />
Set-top box<br />
Blu-ray Disc player<br />
IN<br />
IN<br />
YPbPr<br />
OUT<br />
Set-top box<br />
or<br />
DVD player<br />
AUDIO L/R<br />
HDMI<br />
OUT<br />
Note<br />
• When you connect cables, match the cable colors to the connectors on the <strong>TV</strong>.<br />
HD game console<br />
Connecting a DVD player via HDMI-DVI and analog audio<br />
Connecting a set-top box, DVD player / recorder via<br />
composite connectors<br />
AUDIO L/R<br />
+ VIDEO<br />
OUT<br />
IN<br />
IN<br />
RF IN<br />
RECORDER<br />
IN<br />
HDMI 1 IN only<br />
DVI OUT<br />
DVD player<br />
OUT<br />
IN<br />
AUDIO<br />
OUT<br />
Cable<br />
RF OUT<br />
Set-top box<br />
RF IN<br />
AUDIO L/R<br />
Do not place your recorder too close to the screen because some<br />
recorders can be susceptible to signals.<br />
If your recorder has an S-Video jack for improved picture quality,<br />
connect an S-Video cable with the S-Video input. Connect the audio<br />
cables to the audio L and R input jacks.<br />
Note<br />
• When you use an S-Video connector, do not connect any device to the Composite<br />
video jack.<br />
• Only the left loudspeaker reproduces sound for mono equipment. Use a mono to<br />
stereo adapter (not supplied) for sound reproduction via all internal loudspeakers.<br />
• When you connect cables, match the cable colors to the connectors on the <strong>TV</strong>.<br />
EN<br />
29
Connecting a set-top box via an S-Video connector<br />
Connecting a PC<br />
If you connect a PC with an S-Video connector at the side<br />
S-VIDEO<br />
RF IN<br />
IN<br />
AUDIO L/R<br />
OUT<br />
OUT<br />
Cable<br />
IN<br />
S-VIDEO<br />
AUDIO L/R<br />
OUT<br />
IN<br />
RF OUT<br />
Set-top box<br />
RF IN<br />
IN<br />
OUT<br />
PC<br />
Note<br />
If you connect a PC with a HDMI-DVI connector<br />
• When you use an S-Video connector, do not connect any device to the Composite<br />
video jack.<br />
• Only the left loudspeaker reproduces sound for mono equipment. Use a mono to<br />
stereo adapter (not supplied) for sound reproduction via all internal loudspeakers.<br />
• When you connect cables, match the cable colors to the connectors on the <strong>TV</strong>.<br />
Connecting a digital home theater amplifi er<br />
IN<br />
HDMI 1 IN only<br />
DVI OUT<br />
AUDIO L/R<br />
OUT<br />
PC<br />
IN<br />
If you connect a PC with an HDMI connector<br />
OUT<br />
DIGITAL AUDIO<br />
IN<br />
digital home theater amplifier<br />
IN<br />
Note<br />
OUT<br />
• Due to Copyright restrictions, the broadcaster may choose to mute PCM audio over<br />
Digital Audio Output for certain channels, shows or segments during the broadcast.<br />
HDMI<br />
PC<br />
30<br />
EN
10 Troubleshooting<br />
Problem Possible cause and solution<br />
No power or The <strong>TV</strong> is not connected to the power.<br />
indicator light. Press . POWER at the side of the <strong>TV</strong> or on the<br />
remote control.<br />
Ensure that the AC power cord is connected tightly<br />
to the <strong>TV</strong> power connector and to the power socket<br />
outlet.<br />
Remove the AC power cord from the power socket<br />
outlet, wait 60 seconds and reconnect the AC power<br />
cord.<br />
Connect the <strong>TV</strong> to a different power socket outlet.<br />
Error message<br />
on the screen<br />
with HDMI<br />
connection.<br />
No picture<br />
or sound is<br />
detected from<br />
the PC.<br />
<strong>TV</strong> does not<br />
respond to the<br />
remote control.<br />
The picture<br />
is distorted,<br />
stretched out, or<br />
has black bars on<br />
the side or top.<br />
HDCP authentication fail.<br />
Ensure that your HDMI cable is certifi ed.<br />
Press SOURCE on the remote control to switch to<br />
another source and then switch back to the HDMI<br />
source.<br />
Reset the accessory device and the <strong>TV</strong>.<br />
Turn on the <strong>TV</strong>.<br />
Select the HDMI channel.<br />
Turn on the accessory device.<br />
While the <strong>TV</strong> and the accessory device are powered<br />
on, unplug either end of the HDMI cable and then<br />
reinsert the cable.<br />
An incorrect HDMI input jack is connected or an<br />
audio cable is not connected.<br />
Connect a HDMI-DVI cable to the HDMI 1 input<br />
jack on the <strong>TV</strong>.<br />
Connect an audio cable to the HDMI 1 AUDIO IN<br />
on the <strong>TV</strong>.<br />
Press SOURCE on the remote control, and select<br />
the HDMI 1 source.<br />
Batteries are installed incorrectly, or low battery power.<br />
Ensure the indicator light on the <strong>TV</strong> blinks when you<br />
press the remote control buttons.<br />
Ensure that you are using the <strong>TV</strong> remote control.<br />
Ensure that the batteries are inserted correctly and<br />
do not need to be replaced.<br />
Remove the AC power cord from the power socket<br />
outlet, wait 60 seconds and reconnect the AC power<br />
cord.<br />
Broadcast video format.<br />
Press FORMAT on the remote control to select the<br />
best picture format.<br />
For some accessory devices, the picture format must<br />
be set in the accessory device.<br />
The picture is Insecure/incorrect connection.<br />
mostly red and Ensure all the connections are made according to<br />
green, or the the color code.<br />
picture misses<br />
Push the component cables all the way into the<br />
red when<br />
YPbPr sockets on the <strong>TV</strong>.<br />
connected to an<br />
accessory device<br />
via component<br />
cables.<br />
No picture or<br />
sound.<br />
No picture or sound - ensure you have selected the<br />
correct channel.<br />
Incomplete channel installation.<br />
If the <strong>TV</strong> receives channels via an AV connection, set<br />
the <strong>TV</strong> to the correct source input.<br />
If the <strong>TV</strong> is connected directly to the wall via a coaxial<br />
connection, perform the auto-installation again.<br />
No sound<br />
on the <strong>TV</strong><br />
loudspeaker.<br />
Bad picture<br />
quality with<br />
a coaxial<br />
connection.<br />
Volume level is set to zero - increase the volume.<br />
Sound is muted - press MUTE on the remote control.<br />
Audio cable is not connected - for AV connection,<br />
ensure that the Audio L/R cable is connected<br />
as described in Connecting your devices (see<br />
‘Connecting your devices’ on page 29 ). If you use a<br />
component cable, ensure that you have not crossed<br />
the red audio cable with the red video cable.<br />
Audio output setting for the accessory device is<br />
incorrect. For HDMI connections, some accessory<br />
devices have an HDMI audio output setting that<br />
must be turned on for HDMI to HDMI connections.<br />
Check if [Sound] > [<strong>TV</strong> Speakers] > [Off] is set to<br />
[On]. No sound will be output when<br />
[<strong>TV</strong> Speakers] is set to [Off].<br />
Standard defi nition channels are not as clear as<br />
high defi nition channels - connect the devices via<br />
component or HDMI cables.<br />
Cannot control Confi rm that the connected devices are EasyLink<br />
your <strong>TV</strong> and compliant and are connected to your <strong>TV</strong> via an<br />
connected HDMI cable. Not all brands of devices such as Blu-ray<br />
devices with one Disc players use the same system as <strong>Philips</strong> EasyLink.<br />
remote control. Other brands might not work with <strong>Philips</strong> EasyLink.<br />
The brightness<br />
of the <strong>TV</strong><br />
fl uctuates<br />
automatically.<br />
When in [Home] mode, this <strong>TV</strong> will automatically<br />
adjust the brightness based on the ambient light.<br />
If there is a sudden change in <strong>TV</strong> brightness, it may<br />
be due to changes in the room lighting conditions<br />
(sunshine / lamps), or an object blocking the light<br />
sensor on the front of the <strong>TV</strong>. Please ensure the<br />
room lighting is stable and the light sensor is not<br />
blocked.<br />
Downloading an electronic copy<br />
To obtain an electronic copy of this <strong>manual</strong>:<br />
1 Point your browser to www.philips.com/support<br />
2 Choose your country of location.<br />
3 Enter the model number or a keyword in the “Find your product”<br />
fi eld. Alternatively, you can browse the catalog.<br />
4 Click the description or model.<br />
5 Under Product support, click “<strong>User</strong> <strong>manual</strong>s”.<br />
Contact us<br />
If you cannot resolve your problem, refer to the FAQ for this <strong>TV</strong> at<br />
www.philips.com/support<br />
If the problem remains unresolved, contact the Customer Support<br />
Center in your country.<br />
Warning<br />
• Do not attempt to repair the <strong>TV</strong> yourself. This may cause severe injury, irreparable<br />
damage to your <strong>TV</strong> or void your warranty.<br />
Note<br />
• Please have available your <strong>TV</strong> model and serial number before contacting us. These<br />
numbers are available on the back and side of your <strong>TV</strong>, as well as on the packaging.<br />
English<br />
EN<br />
31
11 Notes for the use of USB<br />
devices<br />
Digital Content Issues<br />
• Only FAT (DOS) formatted (initialized) portable memory is<br />
supported. Errors in this formatting can result in unreadable<br />
content. If such problems appear try to re-format the card. Be<br />
aware that formatting the card will also delete all the content on it<br />
(pictures, music, …).<br />
• Only linear JPEG picture formats are supported. Progressive JPEG<br />
and JPEG2000 encodings are not supported.<br />
• The length of a fi lename or directory name is limited to the length<br />
specifi ed by the FAT16/32 fi le systems.<br />
• Max. levels of nested directories is 19.<br />
• Never use the supported fi le type extensions (.jpg, .jpeg, .mp3) as<br />
extensions for directories as these directories will be treated as<br />
corrupted fi les.<br />
• The MP3 decoder does not support MPEG1 Layer 1 or Layer 2<br />
playback.<br />
• MP3 Pro fi les can be played with normal MP3 quality.<br />
• The access and response time of the content on a device can differ<br />
depending on the type or brand of the device.<br />
• The access and response time of the content on a device will<br />
increase the more unsupported or corrupted fi les are on the<br />
device.<br />
Digital Camera Issues<br />
• If a USB connection between your digital camera and the <strong>TV</strong> isn’t<br />
working, you can try the solutions below to resolve your problem.<br />
• Make sure your digital camera is switched on and verify if the<br />
confi guration of your digital camera is correct (see the <strong>manual</strong> of<br />
your digital camera for more information).<br />
• Some digital cameras allow you to switch off the USB interface.<br />
Make sure that the USB interface is switched on before connecting<br />
to the <strong>TV</strong>.<br />
• If you have a digital camera with only internal memory (no<br />
removable memory) you can try to copy the content <strong>manual</strong>ly to<br />
a USB memory device (e.g. <strong>Philips</strong> KEY product) using a personal<br />
computer.<br />
• Some digital cameras allow you to switch between PTP (Picture<br />
Transfer Protocol) or “PC Link” and USB Mass Storage or “PC<br />
Drive”. Make sure that you select USB Mass Storage or “PC Drive”<br />
on your digital camera.<br />
• If your camera supports different interface settings be sure to try<br />
them one by one or contact the reseller of your camera to fi nd<br />
out the correct setting.<br />
USB Memory Device Issues<br />
• Devices connected to the USB port of your <strong>TV</strong> must be “Mass<br />
Storage Class” compliant. If your device (digital camera. MP3 player,<br />
portable hard disk, …) is not “Mass Storage Class” compliant it will<br />
not be detected by the content browser of the <strong>TV</strong>.<br />
• The following subsets of the Mass Storage Class specifi cation are<br />
supported.<br />
• The implementation of the <strong>TV</strong> is based on the “Universal Serial<br />
Bus Mass Storage Class Specifi cation Overview” (v1.2, June 23,<br />
2003) including all documents referenced by the document. The<br />
document can be found on the USB standardization website<br />
(www.usb.org).<br />
• Full support of the USB Mass Storage Class Bulk-Only Transport<br />
(bInterfaceProtocol = 50h).<br />
• Full support of SubClass Code = 05h; SFF-8070i spec.<br />
• Full support of SubClass Code = 06h; SCSI transparent command<br />
set.<br />
• For large USB memory devices, when you are in the Content<br />
Browser, it may take a long time before you can access your fi les.<br />
• When using a USB portable hard disk, and due to the high power<br />
consumption of the hard disk, it is advised to use the external<br />
power supply of the portable hard disk to guarantee proper<br />
working under all conditions.<br />
32<br />
EN
12 Specifications<br />
Note<br />
• Specifi cations are subject to change without prior notice.<br />
Picture enhancement<br />
Type:<br />
46PFL3705D / 40PFL3705D:<br />
Full HD (1920 x 1080 pixels 120Hz)<br />
46PFL3505D / 40PFL3505D:<br />
Full HD (1920 x 1080 pixels 60Hz)<br />
Aspect ratio: 16:9<br />
Viewing angles: 176° (V) by 176° (H)<br />
Built-in digital tuner: ATSC/QAM<br />
Connections<br />
Component video<br />
input with audio L/R:<br />
1, supporting video signals / 480i/p, 720p, 1080i,<br />
1080p 60Hz<br />
Composite video input 2<br />
with audio L/R and<br />
S-Video:<br />
HDMI: 3<br />
HDMI supporting video signals / 480i/p, 720p,<br />
1080i, 1080p 24HZ-60Hz<br />
For HDMI 1 / PC-input signal up to Full HD<br />
Audio L/R integrated 1<br />
with HDMI 1:<br />
Digital audio output : 1, supporting Dolby Digital<br />
Analog audio output : 1<br />
USB:<br />
1 (on the side of <strong>TV</strong>)<br />
English<br />
Sound enhancement<br />
Mono/Stereo: Mono, Stereo, Virtual Surround Sound<br />
Power output 20 W<br />
(RMS watts):<br />
Equalizer: 5 band<br />
Power<br />
Power requirements: 120V~ AC +/− 10%, 60Hz +/− 0.5%<br />
Ease of use<br />
Video modes: For 16:9 video signal / Normal, 4:3, Movie<br />
Expand, Zoom, Wide<br />
For 4:3 video signal / Normal, 16:9, Movie<br />
Expand, Zoom, Wide<br />
For PC input signal / Normal, Full, Dot By Dot<br />
PC input: via HDMI<br />
Photo slide show: Yes (jpeg fi les only)<br />
MP3 playback: Yes (mp3 fi les only)<br />
EN<br />
33
13 Warranty<br />
LIMITED WARRANTY<br />
ONE (1) YEAR<br />
WARRANTY COVERAGE:<br />
This warranty obligation is limited to the terms as set forth<br />
below.<br />
WHO IS COVERED:<br />
This product warranty is issued to the original purchaser or the<br />
person receiving the product as a gift against defects in materials<br />
and workmanship as based on the date of original purchase<br />
(“Warranty Period”) from an Authorized Dealer. The original<br />
sales receipt showing the product name and the purchase date<br />
from an authorized retailer is considered such proof.<br />
WHAT IS COVERED:<br />
This warranty covers new products if a defect in material or<br />
workmanship occurs and a valid claim is received within the<br />
Warranty Period. At its option, the company will either (1)<br />
repair the product at no charge, using new or refurbished<br />
replacement parts, or (2) exchange the product with a product<br />
that is new or which has been manufactured from new, or serviceable<br />
used parts and is at least functionally equivalent or most<br />
comparable to the original product in current inventory, or (3)<br />
refund the original purchase price of the product.<br />
Replacement products or parts provided under this warranty are<br />
covered against defects in materials and workmanship from the<br />
date of the replacement or repair for ninety (90) days or for the<br />
remaining portion of the original product’s warranty, whichever<br />
provides longer coverage for you. When a product or part is<br />
exchanged, any replacement item becomes your property and the<br />
replaced item becomes company property. When a refund is<br />
given, your product becomes company property.<br />
Note: Any product sold and identified as refurbished or<br />
renewed carries a ninety (90) day limited warranty.<br />
Replacement product can only be sent if all warranty<br />
requirements are met. Failure to follow all requirements<br />
can result in delay.<br />
WHAT IS NOT COVERED - EXCLUSIONS AND LIMI-<br />
TATIONS:<br />
This Limited Warranty applies only to new company manufactured<br />
products that can be identified by the trademark, trade<br />
name, or logo affixed to it. This Limited Warranty does not apply<br />
to any hardware product or any software, even if packaged or<br />
sold with the product, as manufacturers, suppliers, or publishers<br />
may provide a separate warranty for their own products packaged<br />
with the bundled product.<br />
The company is not liable for any damage to or loss of any programs,<br />
data, or other information stored on any media contained<br />
within the product, or other additional product or part not covered<br />
by this warranty. Recovery or reinstallation of programs,<br />
data or other information is not covered under this Limited<br />
Warranty.<br />
or a part that has been modified without written company permission,<br />
or (d) if any serial number has been removed or defaced,<br />
or (e) product, accessories or consumables sold “AS IS” without<br />
warranty of any kind by including refurbished product sold “AS<br />
IS” by some retailers.<br />
This Limited Warranty does not cover:<br />
• Shipping charges to return defective product.<br />
• Labor charges for installation or setup of the product, adjustment<br />
of customer controls on the product, and installation or<br />
repair of antenna/signal source systems outside of the product.<br />
• Product repair and/or part replacement because of improper<br />
installation or maintenance, connections to improper voltage<br />
supply, power line surge, lightning damage, retained images or<br />
screen markings resulting from viewing fixed stationary content<br />
for extended periods, product cosmetic appearance items<br />
due to normal wear and tear, unauthorized repair or other<br />
cause not within the control of the company.<br />
• Damage or claims for products not being available for use, or<br />
for lost data or lost software.<br />
• Damage from mishandled shipments or transit accidents when<br />
returning product.<br />
• A product that requires modification or adaptation to enable<br />
it to operate in any country other than the country for which<br />
it was designed, manufactured, approved and/or authorized, or<br />
repair of products damaged by these modifications.<br />
• A product used for commercial or institutional purposes<br />
(including but not limited to rental purposes).<br />
• Product lost in shipment and no signature verification receipt<br />
can be provided.<br />
• Failure to operate per Owner’s Manual.<br />
TO OBTAIN ASSISTANCE…<br />
Contact the Customer Care Center at:<br />
1-866-309-0841<br />
REPAIR OR REPLACEMENT AS PROVIDED UNDER THIS<br />
WARRANTY IS THE EXCLUSIVE REMEDY FOR THE CON-<br />
SUMER, WITH THE ISSUING COMPANY NOT LIABLE FOR<br />
ANY INCIDENTAL OR CONSEQUENTIAL DAMAGES FOR<br />
BREACH OF ANY EXPRESS OR IMPLIED WARRANTY ON<br />
THIS PRODUCT. EXCEPT TO THE EXTENT PROHIBITED BY<br />
APPLICABLE LAW, ANY IMPLIED WARRANTY OF MER-<br />
CHANTABILITY OR FITNESS FOR A PARTICULAR PURPOSE<br />
ON THIS PRODUCT IS LIMITED IN DURATION TO THE<br />
DURATION OF THIS WARRANTY.<br />
Some states do not allow the exclusions or limitation of incidental<br />
or consequential damages, or allow limitations on how long an<br />
implied warranty lasts, so the above limitations or exclusions may<br />
not apply to you.<br />
This warranty does not apply (a) to damage caused by accident,<br />
abuse, misuse, neglect, misapplication, or non-supplied product,<br />
(b) to damage caused by service performed by anyone other than<br />
company approved Authorized Service Location, (c) to a product<br />
This warranty gives you specific legal rights. You may have other rights which vary from state/province to state/province.<br />
P&F USA, Inc. PO Box 430 Daleville, IN 47334-0430<br />
061708<br />
34 EN
14 Index<br />
A<br />
Antenna, connect 9<br />
Audio 17<br />
Audio setting 17<br />
Auto device off 21<br />
Auto picture mode 15<br />
Auto sound mode 17<br />
Auto <strong>TV</strong> on 21<br />
Auto volume leveling 17<br />
C<br />
Cables<br />
component 28<br />
composite 28<br />
connection quality 28<br />
HDMI 28<br />
manage cables 10<br />
S-Video 28<br />
YPbPr 28<br />
Channels<br />
install 24<br />
list 25<br />
lock 18<br />
Child lock<br />
channel lock 18<br />
PIN 18<br />
ratings lock 18, 19<br />
Closed caption 20<br />
Connections 9, 27, 29<br />
Controls 6<br />
Customer support service 5<br />
D<br />
Device List 21<br />
E<br />
EasyLink 21<br />
Energy saving mode 21<br />
ENERGY STAR ® 4, 11<br />
Environmental care 5<br />
Equalizer 17<br />
H<br />
Home mode 11, 21<br />
P<br />
Picture format 16, 17<br />
Picture settings 15<br />
R<br />
Ratings 18, 19<br />
Remote control<br />
insert batteries 8<br />
overview 6, 7<br />
Retail mode 11, 21<br />
S<br />
Settings assistant 11<br />
Signal quality 25<br />
Sleeptimer 18<br />
Software<br />
upgrade 26<br />
version 26<br />
Sound settings 17<br />
Speakers EasyLink 17<br />
Specifi cations 33<br />
Standby 6, 12<br />
Subtitles 20<br />
T<br />
Troubleshooting 31<br />
<strong>TV</strong><br />
as PC monitor 16, 17, 30<br />
connections 9, 27, 29<br />
controls 6<br />
menu 15<br />
position 8<br />
remote control 6, 7, 8<br />
screen care 5<br />
software 26<br />
switch channels 12<br />
switch on 11, 12<br />
<strong>TV</strong> Speakers 17<br />
U<br />
USB 22, 32<br />
V<br />
Volume<br />
adjust 13<br />
auto volume leveling 17<br />
mute 13<br />
English<br />
I<br />
Initial setup 11<br />
L<br />
Location (retail or home) 11, 21<br />
W<br />
Warranty 34<br />
Y<br />
YPbPr 28<br />
M<br />
Master EasyLink 21<br />
Mounting stand onto <strong>TV</strong> 8<br />
EN<br />
35
P&F USA, Inc.<br />
PO Box 430 Daleville, IN 47334-0430<br />
P&F Mexicana, S.A. de C.V.<br />
Av. La Palma No. 6, Col. San Fernando La Herradura,<br />
Huixquilucan Edo. de México C.P. 52787<br />
TELEVISOR A COLOR DE CRISTAL LIQUIDO (<strong>LCD</strong>)<br />
MODELO <strong>LCD</strong> IMAGEN VISIBLE ENERGIA<br />
46PFL3705D / F7 46”(116,84cm) 116,81cm 120V ~ 60Hz 228W<br />
40PFL3705D / F7 40”(101,60cm) 101,60cm 120V ~ 60Hz 205W<br />
46PFL3505D / F7 46”(116,84cm) 116,81cm 120V ~ 60Hz 228W<br />
40PFL3505D / F7 40”(101,60cm) 101,60cm 120V ~ 60Hz 205W<br />
Comercializado por :<br />
IMPORTADOR :<br />
P&F MEXICANA, S.A. DE C.V.<br />
SOJITZ MEXICANA, S.A. DE C.V.<br />
Av. Paseo de las Palmas No. 239-302<br />
Col. Lomas de Chapultepec, C.P. 11000<br />
México, D.F. Tel. 52 (55) 5202 - 7222<br />
EXPORTADOR :<br />
FUNAI ELECTRIC CO. LTD.<br />
ENSAMBLADO EN : MEXICO<br />
GARANTIA INCLUIDA EN EL INSTRUCTIVO DE USO<br />
LEA CUIDADOSAMENTE ESTE INSTRUCTIVO<br />
ANTES DE USAR SU APARATO.<br />
<strong>Philips</strong> and <strong>Philips</strong> Shield are used under license of<br />
Koninklijke <strong>Philips</strong> Electronics N.V.<br />
Printed in USA<br />
A01Q2UF / A01P2UF / A01PCUF / A01QEUF<br />
1EMN26039A ★★★★


