

Samsung HD Upconversion DVD/VCR Combo Player - DVD-V9800/XAA - User Manual ver. 2.0 (ENGLISH,12.32 MB)
Samsung HD Upconversion DVD/VCR Combo Player - DVD-V9800/XAA - User Manual ver. 2.0 (ENGLISH,12.32 MB)
Samsung HD Upconversion DVD/VCR Combo Player - DVD-V9800/XAA - User Manual ver. 2.0 (ENGLISH,12.32 MB)

Create successful ePaper yourself
Turn your PDF publications into a flip-book with our unique Google optimized e-Paper software.
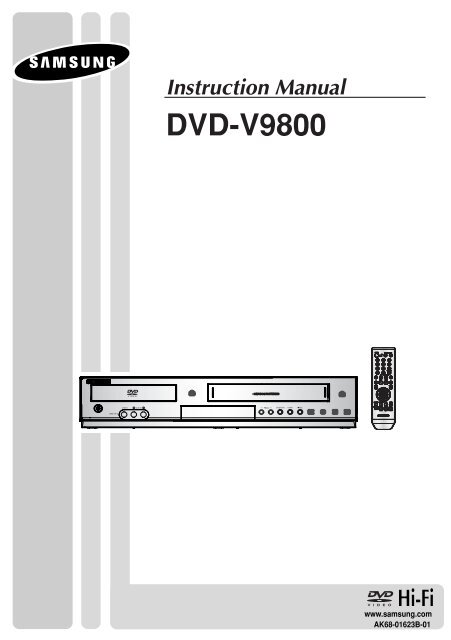
Instruction <strong>Manual</strong><br />
<strong>DVD</strong>-<strong>V9800</strong><br />
www.samsung.com<br />
AK68-01623B-01
S AFETY I NSTRUCTIONS<br />
Important Safety Instructions<br />
1) Read these instructions.<br />
2) Keep these instructions.<br />
3) Heed all warnings.<br />
4) Follow all instructions.<br />
5) Do not use this apparatus near water.<br />
6) Clean only with a dry cloth.<br />
7) Do not block any ventilation openings, Install in accordance with the manufacturer's instructions.<br />
8) Do not install near any heat sources such as radiators, heaters, or other apparatus (including<br />
amplifiers) that produce heat.<br />
9) Do not defeat the safety purpose of the polarized or grounding- type plug. A polarized plug has two blades<br />
with one wider than the other. A grounding type plug has two blades and a third grounding prong.<br />
The wide blade and the third prong are provided for your safety. If the provided plug does not fit into your<br />
outlet, consult an electrician for replacement of the outlet.<br />
10) Protect the power cord from being walked on or pinched particularly at plugs, convenience receptacles,<br />
and the point where they exit from the apparatus.<br />
11) Only use attachments/accessories specified by the manufacturer.<br />
12) Use only with a cart, stand, tripod, bracket, or table specified by the<br />
manufacturer, or sold with the apparatus.<br />
13) When a cart is used, unplug this apparatus and use caution when moving the<br />
cart/apparatus combination to avoid injury from tip-o<strong>ver</strong>.<br />
14) Refer all servicing to qualified service personnel. Servicing is required when<br />
the apparatus has been damaged in any way, such as the power-supply cord or plug is damaged, liquid has<br />
been spilled or objects have fallen into the apparatus. Service is also required if the apparatus has been<br />
exposed to rain or moisture, does not operate normally, or has been dropped.<br />
ENG-2
S AFETY I NSTRUCTIONS<br />
Precautions<br />
TO REDUCE THE RISK OF ELECTRIC SHOCK, DO NOT<br />
REMOVE THE COVER (OR BACK).<br />
NO USER-SERVICEABLE PARTS ARE INSIDE. REFER<br />
SERVICING TO QUALIFIED SERVICE PERSONNEL.<br />
This symbol indicates “dangerous voltage”<br />
inside the product that presents a risk of<br />
electric shock or personal injury.<br />
This symbol indicates important<br />
instructions accompanying the<br />
product.<br />
Do not install this equipment in a confined space such as a bookcase or similar unit.<br />
WARNING : To prevent damage which may result in fire or electric shock hazard, do not expose<br />
this appliance to rain or moisture.<br />
Note to CATV system installer: This reminder is provided to call CATV system installer’s attention to Article<br />
820-40 of the National Electrical Code (Section 54 of Canadian Electrical Code, Part I) that provides guidelines<br />
for proper grounding and, in particular, specifies that the cable ground shall be connected to the grounding<br />
system of the building as close to the point of cable entry as practical.<br />
Caution: FCC regulations state that any unauthorized changes or modifications to this equipment may void the<br />
user’s authority to operate it.<br />
• Apparatus shall not be exposed to dripping or splashing and no objects filled with liquids, such as vases, shall<br />
be placed on the apparatus.<br />
• If this power supply is used at 240V ac, a suitable plug adapter should be used.<br />
FCC NOTE (for U.S.A):<br />
This equipment has been tested and found to comply with the limits for a Class B digital device, pursuant to Part<br />
15 of the FCC rules. These limits are designed to provide reasonable protection against harmful interference in a<br />
residential installation. This equipment generates, uses and can radiate radio frequency energy and, if not<br />
installed and used in accordance with the instructions, may cause harmful interference to radio or television<br />
reception, which can be determined by turning the equipment off and on.<br />
The user is encouraged to try to correct the interference by one or more of the following measures.<br />
• Reposition or relocate the receiving antenna.<br />
• Increase the separation between the equipment and recei<strong>ver</strong>.<br />
• Connect this equipment into an outlet on a circuit different from that to which the recei<strong>ver</strong> is connected.<br />
• Consult the dealer or an experienced radio/TV technician for help.<br />
This class B digital apparatus meets all requirements of the Canadian Interference --<br />
Causing Equipment Regulations.<br />
CLASS 1<br />
LASER PRODUCT<br />
KLASSE 1 LASER PRODUKT<br />
LUOKAN 1 LASER LAITE<br />
KLASS 1 LASER APPARAT<br />
PRODUCTO LÁSER CLASE 1<br />
ENG-3
S AFETY I NSTRUCTIONS<br />
CAUTION<br />
THIS PRODUCT UTILIZES A LASER. USE OF CONTROLS OR ADJUSTMENTS OR<br />
PERFORMANCE OF PROCEDURES OTHER THAN THOSE SPECIFIED HEREIN MAY RESULT IN<br />
HAZARDOUS RADIATION EXPOSURE. DO NOT OPEN COVER AND DO NOT REPAIR YOURSELF.<br />
REFER SERVICING TO QUALIFIED PERSONNEL.<br />
Note:<br />
• This unit can be used only where the power supply is AC 120V, 60Hz. It cannot be used elsewhere.<br />
• This <strong>DVD</strong> player is designed and manufactured to respond to the Region Management Information.<br />
If the Region number of a <strong>DVD</strong> disc does not correspond to the Region number of this <strong>DVD</strong> player,<br />
the <strong>DVD</strong> player cannot play the disc.<br />
Handling Cautions<br />
• Before connecting other components to this player, be sure to turn them all off.<br />
• Do not move the player while a disc is being played, or the disc may be scratched or broken, and the player’s<br />
internal parts may be damaged.<br />
• Do not put a flower vase filled with water or any small metal objects on the player.<br />
• Be careful not to put your hand into the disc tray.<br />
• Do not place anything other than the disc in the disc tray.<br />
• Exterior interference such as lightning and static electricity can affect normal operation of this player.<br />
If this occurs, turn the player off and on again with the POWER button, or disconnect and then reconnect the<br />
AC power cord to the AC power outlet. The player will operate normally.<br />
• Be sure to remove the disc and turn off the player after use.<br />
• Disconnect the AC power cord from the AC outlet when you don’t intend to use the player for long<br />
periods of time.<br />
• Clean the disc by wiping in a straight line from the inside to the outside of the disc.<br />
• The Mains plug is used as a disconnect device and shall stay readily operable at anytime.<br />
Disc Storage<br />
Be careful not to harm the disc because the data on these discs is highly vulnerable to the environment.<br />
• Do not keep under direct sunlight.<br />
• Keep in a cool ventilated area.<br />
• Store <strong>ver</strong>tically.<br />
• Keep in a clean protection jacket.<br />
Maintenance of Cabinet<br />
For safety reasons, be sure to disconnect the AC power cord from the AC outlet.<br />
• Do not use benzene, thinner, or other solvents for cleaning.<br />
• Wipe the cabinet with a soft cloth.<br />
ENG-4
B EFORE YOU START<br />
Before you start<br />
Accessories<br />
Remote Control<br />
AK59-00061J<br />
Batteries-2EA<br />
1.5V(AAA)<br />
AC43-12002H<br />
Video/Audio Cable<br />
AC39-00073A<br />
<strong>User</strong>’s Guide<br />
AK68-01623B<br />
Install Batteries in the Remote Control<br />
1<br />
Open the battery co<strong>ver</strong> on<br />
the back of the remote<br />
control.<br />
2<br />
Insert two AAA batteries.<br />
Make sure that the<br />
polarities (+ and -) are<br />
aligned correctly.<br />
3<br />
Replace the battery<br />
co<strong>ver</strong>.<br />
If the remote control doesn’t operate properly:<br />
■<br />
■<br />
■<br />
■<br />
Check the polarity +, - of the batteries.<br />
Check if the batteries are drained.<br />
Check if the remote control sensor is blocked by obstacles.<br />
Check if there is any fluorescent lighting nearby.<br />
ENG-5
TABLE OF C ONTENTS<br />
Table of Contents<br />
Safety Instructions ........................................................................................................................................2<br />
Important Safety Instructions ................................................................................................................2<br />
Precautions ..........................................................................................................................................3<br />
Before you start ............................................................................................................................................5<br />
Accessories............................................................................................................................................5<br />
Install Batteries in the Remote Control ..................................................................................................5<br />
Chapter 1: Setup<br />
General Features............................................................................................................................................8<br />
Disc Type and Characteristics ........................................................................................................................9<br />
Description....................................................................................................................................................10<br />
Tour of the Remote Control..................................................................................................................12<br />
Chapter 2: Connections<br />
Before Connecting the <strong>DVD</strong>-<strong>VCR</strong> ..............................................................................................................13<br />
Connecting a Set-top/Cable/Satellite Box to the <strong>DVD</strong>-<strong>VCR</strong> ........................................................................13<br />
Connection to a TV ......................................................................................................................................14<br />
Connecting to a TV with an <strong>HD</strong>MI Jack ..............................................................................................14<br />
Connecting to a TV (Progressive)........................................................................................................16<br />
Connecting to a TV (Interlace) ............................................................................................................17<br />
Connecting to a TV (Video)..................................................................................................................18<br />
Connection to an Audio System ..................................................................................................................19<br />
Connecting to an Audio System (2 Channel Amplifier, Analog) ..........................................................19<br />
Connecting to an Audio System (Dolby digital, MPEG2 or DTS Amplifier)..........................................20<br />
Connecting the Power Cord ........................................................................................................................21<br />
Chapter 3: Initial Setup<br />
Selecting a Menu Language ........................................................................................................................22<br />
Setting the Clock ........................................................................................................................................23<br />
Setting the Clock <strong>Manual</strong>ly ................................................................................................................23<br />
Setting the Front Panel Display ..................................................................................................................24<br />
Setting the Auto Power Off ..........................................................................................................................25<br />
Chapter 4: <strong>DVD</strong> Operations<br />
Playing a Disc ..............................................................................................................................................26<br />
Using the Search and Skip Functions ........................................................................................................28<br />
Using the Display Function ..........................................................................................................................29<br />
Using the Disc and Title Menu (<strong>DVD</strong>) ..........................................................................................................31<br />
Using the Function Menu (<strong>DVD</strong>) ..................................................................................................................32<br />
Repeat Play ................................................................................................................................................33<br />
Slow Play ....................................................................................................................................................34<br />
Adjusting the Aspect Ratio (EZ View) ..........................................................................................................35<br />
Selecting the Audio Language ....................................................................................................................37<br />
ENG-6
TABLE OF C ONTENTS<br />
Selecting the Subtitle Language ................................................................................................................38<br />
Changing the Camera Angle ......................................................................................................................39<br />
Using the Bookmark Function (<strong>DVD</strong>) ..........................................................................................................39<br />
Using the Zoom Function (<strong>DVD</strong>) ..................................................................................................................41<br />
Clips Menu for CD Audio/MP3/WMA/JPEG/MPEG4 files ............................................................................42<br />
Folder Selection ..........................................................................................................................................42<br />
CD Audio/MP3/WMA Playback ....................................................................................................................43<br />
MPEG4 Playback ........................................................................................................................................45<br />
Picture CD Playback ....................................................................................................................................47<br />
Using the Setup Menu ................................................................................................................................49<br />
Setting Up the Language Features ..............................................................................................................50<br />
Setting Up the Audio Options ......................................................................................................................52<br />
Setting Up the Display Options ....................................................................................................................54<br />
Setting Up the Parental Control ..................................................................................................................58<br />
DivX(R) Registration ....................................................................................................................................61<br />
Chapter 5: <strong>VCR</strong> Operations<br />
Inserting and Ejecting a Video Cassette Tape ............................................................................................62<br />
Playing a Pre-Recorded Video Cassette Tape ............................................................................................63<br />
Special <strong>VCR</strong> Playback Features ................................................................................................................64<br />
Using Automatic Tracking ............................................................................................................................65<br />
Selecting the Cassette Type ........................................................................................................................66<br />
Setting the Auto Play ..................................................................................................................................67<br />
Setting the Auto Repeat ..............................................................................................................................68<br />
Using the Tape Counter ..............................................................................................................................69<br />
Using the Assemble Edit Function ..............................................................................................................70<br />
Selecting the Audio Output Mode ................................................................................................................71<br />
Searching for a Specific Sequence ............................................................................................................72<br />
Basic Recording ..........................................................................................................................................74<br />
Special Recording Features ........................................................................................................................75<br />
Using One-Touch Recording ......................................................................................................................76<br />
Selecting the Recording Speed ..................................................................................................................77<br />
Making a Timer Recording ..........................................................................................................................78<br />
Chapter 6: Reference<br />
Using the TV Buttons on the Remote Control ............................................................................................80<br />
Troubleshooting ..........................................................................................................................................81<br />
Technical Specifications ..............................................................................................................................83<br />
ENG-7
Chapter 1<br />
S ETUP<br />
General Features<br />
<strong>DVD</strong>-<strong>VCR</strong> Features<br />
■<br />
■<br />
■<br />
Perfect compatibility to play back <strong>DVD</strong>s, audio<br />
CDs or VHS Tapes.<br />
Composite, Component Video and <strong>HD</strong>MI<br />
outputs.<br />
On-Screen Program (English/French/Spanish).<br />
<strong>DVD</strong> Features<br />
■<br />
■<br />
■<br />
■<br />
■<br />
10-bit video digital to analog con<strong>ver</strong>ter and<br />
54MHz advanced digital filter.<br />
Playback of 96KHz/24-bit sources.<br />
DTS digital output for DTS-enhanced <strong>DVD</strong>s.<br />
This unit can play MPEG4 formats within an avi<br />
file.<br />
Playback MP3-CDs.<br />
<strong>VCR</strong> Features<br />
■<br />
Hi-Fi Stereo <strong>VCR</strong>.<br />
■ Superior slow motion and stop action (with 4<br />
heads).<br />
■ Playback of S-VHS tapes with a better than<br />
standard resolution.<br />
■ INTRO Scan, Zero Return, and END Search.<br />
■ Time remaining counter, real time counter.<br />
Note<br />
■<br />
■<br />
■<br />
Discs which cannot be played with this player.<br />
- <strong>DVD</strong>-ROM/<strong>DVD</strong>-RAM/VCD<br />
- CDI/CDV<br />
- Super Audio CD (CD, <strong>HD</strong> layer)<br />
- CDGs play audio only, not graphics.<br />
- <strong>DVD</strong>-RW (VR mode)<br />
- Non finalized <strong>DVD</strong>-RW, -R, <strong>DVD</strong>+RW, and +R<br />
discs.<br />
Ability to play back may depend on recording<br />
conditions.<br />
- <strong>DVD</strong>-RW, -R/CD-RW/<strong>DVD</strong>+RW, +R/CD-ROM<br />
This <strong>DVD</strong>-<strong>VCR</strong> unit does not have a TV tuner.<br />
Recording TV broadcasts is possible via<br />
Connection to Cable/Satellite boxes and Multi<br />
Channel Video Services.<br />
Note<br />
This product incorporates copyright protection<br />
technology that is protected by U.S. patents and other<br />
intellectual property rights. Use of this copyright<br />
protection technology must be authorized by<br />
Macrovision, and is intended for home and other<br />
limited viewing uses only unless otherwise authorized<br />
by Macrovision. Re<strong>ver</strong>se engineering or disassembly<br />
is prohibited.<br />
COPY PROTECTION<br />
Many <strong>DVD</strong> discs are encoded with copy protection.<br />
Because of this, you should only connect your <strong>DVD</strong>-<br />
<strong>VCR</strong> directly to your TV, not to a <strong>VCR</strong>. Connecting to<br />
a <strong>VCR</strong> results in a distorted picture from copyprotected<br />
<strong>DVD</strong> discs.<br />
This product incorporates copyright protection<br />
technology that is protected by methods claims of<br />
certain U.S. patents and other intellectual property<br />
rights owned by Macrovision Corporation and other<br />
rights owners. Use of this copyright protection<br />
technology must be authorized by Macrovision<br />
Corporation, and is intended for home and other<br />
limited viewing uses only unless otherwise authorized<br />
by Macrovision Corporation. Re<strong>ver</strong>se engineering or<br />
disassembly is prohibited.<br />
PROGRESSIVE SCAN<br />
OUTPUT SETTING<br />
PLEASE NOTE THAT NOT ALL<br />
HIGH DEFINITION TELEVISION SETS ARE FULLY<br />
COMPATIBLE WITH THIS PRODUCT AND MAY<br />
CAUSE ARTIFACTS TO BE DISPLAYED IN THE<br />
PICTURE. IF PROGRESSIVE SCAN PICTURE<br />
PROBLEMS OCCUR, WE RECOMMEND<br />
SWITCHING THE CONNECTION TO THE<br />
‘STANDARD DEFINITION’ OUTPUT. IF THERE ARE<br />
QUESTIONS REGARDING YOUR TV SET<br />
COMPATIBILITY WITH THIS <strong>DVD</strong>-<strong>VCR</strong>, PLEASE<br />
CONTACT SAMSUNG'S CUSTOMER SERVICE<br />
CENTER.<br />
ENG-8
S ETUP<br />
Disc Type and Characteristics<br />
This <strong>DVD</strong>-<strong>VCR</strong> is capable of playing the following types of discs with the corresponding logos:<br />
Disc Types (Logos) Recording Types Disc Size Max. Playing Time Characteristics<br />
<strong>DVD</strong><br />
Audio<br />
+<br />
Video<br />
5”<br />
3 1/2”<br />
Single-sided 240 min.<br />
Double-sided 480 min.<br />
Single-sided 80 min.<br />
Double-sided 160 min.<br />
- <strong>DVD</strong> contains excellent sound<br />
and video due to Dolby Digital<br />
and MPEG-2 system.<br />
- Various screen and audio<br />
functions can be easily selected<br />
through the on-screen menu.<br />
AUDIO-CD<br />
Audio<br />
5”<br />
3 1/2”<br />
74 min.<br />
20 min.<br />
- CD is recorded as a Digital<br />
Signal with better audio quality,<br />
less distortion and less<br />
deterioration of audio quality<br />
o<strong>ver</strong> time.<br />
■<br />
■<br />
CD-R,CD-RW and <strong>DVD</strong>-RW, -R, <strong>DVD</strong>+RW, +R discs may not be playable in all cases due to the disc<br />
type or condition of the recording.<br />
Do not run the player with two discs loaded at the same time.<br />
Disc Markings<br />
Region Number<br />
~<br />
NTSC<br />
STEREO<br />
DIGITAL<br />
SOUND<br />
Play Region Number<br />
NTSC broadcast system in U.S.A, Canada, Korea,<br />
Japan, etc.<br />
Dolby Digital disc<br />
Stereo disc<br />
Digital Audio disc<br />
DTS disc<br />
MP3 disc<br />
Both the <strong>DVD</strong>-<strong>VCR</strong> and the discs are<br />
coded by region. These regional codes<br />
must match in order for the disc to play.<br />
If the codes do not match, the disc will<br />
not play.<br />
The Region Number for this player is<br />
described on the rear panel of the player.<br />
DivX Certification<br />
You must only insert one <strong>DVD</strong> disc at a time. Inserting two<br />
or more discs will not allow playback and may cause<br />
damage to the <strong>DVD</strong>-<strong>VCR</strong>.<br />
DivX, DivX Certified, and<br />
associated logos are<br />
trademarks of DivXNetworks, Inc and are<br />
used under license.<br />
ENG-9
S ETUP<br />
Description<br />
Front Panel Controls<br />
1 2 3 4<br />
5 6 7 8 9 10 11 12 13 14 15<br />
1 DISC TRAY<br />
Place the disc here.<br />
2 OPEN/CLOSE<br />
Press to open and close the disc tray.<br />
3 <strong>VCR</strong> Deck<br />
Insert a standard VHS video tape.<br />
4 EJECT<br />
Press to eject a video tape if the tape is stopped.<br />
5 (POWER)<br />
Press to turn the <strong>DVD</strong>-<strong>VCR</strong> on and off.<br />
6 LINE IN 2<br />
Connects to the Video/Audio output jack of your<br />
external device.<br />
7 Front Panel Display<br />
Operation indicators are displayed here.<br />
8 LINE IN SELECT<br />
Press to select Line Input 1 or 2. These buttons<br />
are also used as Tracking buttons for the <strong>VCR</strong>.<br />
9 <strong>DVD</strong>/<strong>VCR</strong><br />
Press to select <strong>DVD</strong> or <strong>VCR</strong> mode.<br />
10 <strong>HD</strong>MI<br />
<strong>HD</strong>MI Output resolution setup.<br />
11 REC (<strong>VCR</strong>)<br />
Press to begin recording.<br />
12 (Re<strong>ver</strong>se/Rewind)<br />
Press to re<strong>ver</strong>se/rewind a disc/video tape.<br />
13 (STOP)<br />
Press to stop a disc/video tape during playback or<br />
record (<strong>VCR</strong>).<br />
14 (Play/Pause)<br />
Press to play or pause the disc/video tape.<br />
15 (Forward/Fast Forward)<br />
Press to forward/fast forward a disc/videotape.<br />
Front Panel Display<br />
❶ ❷ ❸<br />
❹<br />
➎<br />
1 <strong>DVD</strong> is activated.<br />
2 The time, counter position, time remaining or<br />
current deck status is indicated.<br />
3 <strong>VCR</strong> is activated.<br />
4 <strong>DVD</strong> or CD media is loaded.<br />
5 VHS videotape is loaded.<br />
ENG-10
S ETUP<br />
Rear Panel<br />
Œ ´ ˇ<br />
¨ ˆ Ø ¨<br />
1 AUDIO OUT<br />
Connect to the Audio input jacks of your television.<br />
2 COMPONENT VIDEO OUT<br />
- Use these jacks if you have a TV with<br />
Component Video in jacks.<br />
These jacks provide PR, PB and Y video.<br />
3. <strong>HD</strong>MI OUT JACK<br />
- Use an <strong>HD</strong>MI cable to connect this jack to the<br />
<strong>HD</strong>MI jack on your television for the best<br />
quality picture.<br />
- If an <strong>HD</strong>MI cable is connected to an <strong>HD</strong>MIcompatible<br />
TV, <strong>HD</strong>MI will be output<br />
automatically within 10 seconds.<br />
- If you want to use the Video or Component<br />
Output, unplug the <strong>HD</strong>MI cable.<br />
4 DIGITAL AUDIO OUT (OPTICAL/COAXIAL)<br />
- Use either an optical or coaxial digital audio<br />
cable to connect to a compatible Dolby Digital<br />
recei<strong>ver</strong>.<br />
- Use either an optical or coaxial digital audio<br />
cable to connect to an A/V Amplifier that<br />
contains a Dolby Digital, MPEG2 or DTS<br />
decoder.<br />
5 LINE IN 1 (VIDEO/AUDIO)<br />
Connect to the Video/Audio output jack of your<br />
external device.<br />
6 LINE OUT (VIDEO/AUDIO)<br />
Use a Video/Audio cable to connect to the<br />
Video/Audio input jacks on your television.<br />
You must have these jacks connected to see<br />
video playback from the <strong>VCR</strong> on your TV.<br />
<strong>DVD</strong>/<strong>VCR</strong> Output Chart<br />
Type of Connection<br />
COMPONENT VIDEO OUT<br />
AUDIO OUT (L,R)<br />
DIGITAL AUDIO OUT (OPTICAL, COAXIAL)<br />
LINE OUT (A/V)<br />
<strong>HD</strong>MI OUT<br />
<strong>DVD</strong> Output Jacks <strong>VCR</strong> Output Jacks<br />
O<br />
X<br />
O<br />
X<br />
O<br />
X<br />
O<br />
O<br />
O<br />
X<br />
▼<br />
O : Active.<br />
X : Inactive.<br />
Notes<br />
■ Consult your TV <strong>User</strong>’s <strong>Manual</strong> to find out if your TV supports Progressive Scan. If Progressive Scan is<br />
supported, follow the TV <strong>User</strong>’s <strong>Manual</strong> regarding Progressive Scan settings in the TV’s menu system.<br />
ENG-11
S ETUP<br />
Tour of the Remote Control<br />
1 TV button<br />
Use to operate the TV.<br />
2 <strong>DVD</strong> button<br />
Use to operate the <strong>DVD</strong> player.<br />
3 POWER button<br />
Press to turn the <strong>DVD</strong>-<strong>VCR</strong> on<br />
and off.<br />
4 NU<strong>MB</strong>ER Buttons<br />
5 TV 100+ button<br />
6 Skip button<br />
Press to skip a disc<br />
backwards. Use to skip a<br />
title,chapter or track on a disc.<br />
7 REC button<br />
Press to begin recording.<br />
(<strong>VCR</strong>)<br />
8 Search button<br />
Press to search a disc<br />
backwards.<br />
9 (STOP) button<br />
Press to stop a disc/video tape<br />
during play or record (<strong>VCR</strong>).<br />
10 TV VOL (+,-) button<br />
11 MENU button<br />
Brings up the <strong>DVD</strong>-<strong>VCR</strong><br />
player’s menu.<br />
12 ENTER/➐❷➛❿ buttons<br />
This button functions as a<br />
toggle switch.<br />
13 DISC MENU button<br />
Brings up the Disc menu.<br />
(<strong>DVD</strong>).<br />
14 EZVIEW button<br />
The aspect ratio of a picture<br />
can easily be adjusted<br />
according to the screen size of<br />
your TV (16:9 or 4:3).<br />
15 SUBTITLE button<br />
Press to display the subtitle<br />
language name abbreviation on<br />
screen.<br />
16 MODE button<br />
Use to select the program or<br />
random play.<br />
REPEAT button<br />
Allows you to repeat play a title,<br />
chapter, track, or disc. (<strong>DVD</strong>)<br />
17 INPUT SEL. button<br />
Press to select Line input 1 or 2<br />
in <strong>VCR</strong> mode.<br />
18 <strong>VCR</strong> button<br />
Use to operate the <strong>VCR</strong>.<br />
Œ<br />
´<br />
ˇ<br />
¨<br />
ˆ<br />
Ø<br />
∏<br />
”<br />
’<br />
˝<br />
Ô<br />
apple<br />
Ò<br />
Ú<br />
Æ<br />
ı<br />
ENG-12<br />
˜<br />
¯<br />
˘<br />
¿<br />
¸<br />
˛<br />
◊<br />
±<br />
≠<br />
–<br />
—<br />
÷<br />
®<br />
∑<br />
μ<br />
¥<br />
19 F.ADV/SKIP button<br />
Press to advance play one<br />
frame at a time (<strong>DVD</strong> and<br />
<strong>VCR</strong>). Press to fast forward a<br />
video tape (<strong>VCR</strong>). Press to<br />
select a external signal<br />
source.<br />
20 OPEN/CLOSE button<br />
Use to open and close the<br />
disc tray or eject a video<br />
tape.<br />
21 ZOOM button<br />
To enlarge the picture.<br />
22 Skip button<br />
Press to skip a disc forward.<br />
Use to skip a title, chapter or<br />
track on a disc.<br />
23 SPEED button<br />
Use to select the tape<br />
recording speed.<br />
24 Search button<br />
Press to search a disc<br />
forward.<br />
25 (Play/Pause) button<br />
Press to play or pause the<br />
disc/video tape.<br />
26 TRK/TV CH button<br />
Use to change channels.<br />
(TV) Use to adjust tape<br />
tracking. (<strong>VCR</strong>)<br />
27 AUDIO/TV MUTE button<br />
Use this button to access<br />
various audio functions on a<br />
disc. (<strong>DVD</strong> mode)<br />
This operates as Sound<br />
Mute. (TV mode)<br />
28 RETURN button<br />
Returns to a previous menu.<br />
29 CLEAR button<br />
Use to remove menus or<br />
status displays from the<br />
screen.<br />
30 INFO. button<br />
Displays the current disc<br />
mode. (<strong>DVD</strong>)<br />
31 MARK/SEARCH button<br />
Press to memorize scenes<br />
for replay. (<strong>DVD</strong>)<br />
Displays the <strong>VCR</strong> Function<br />
menu. (<strong>VCR</strong>)<br />
32 ANGLE/TIMER button<br />
Use to access various<br />
camera angles on a disc.<br />
(<strong>DVD</strong>) Displays the Timer<br />
Program menu (<strong>VCR</strong>).
<strong>DVD</strong>-V9700<br />
Chapter 2<br />
C ONNECTIONS<br />
Before Connecting the <strong>DVD</strong>-<strong>VCR</strong><br />
- Always turn off the <strong>DVD</strong>-<strong>VCR</strong>, TV, and other components before you connect or disconnect any cables.<br />
- Refer to the user’s manual of the additional components (such as a TV) you are connecting for more<br />
information on those particular components.<br />
Connecting a Set-top/Cable/Satellite Box to the <strong>DVD</strong>-<strong>VCR</strong><br />
The following instructions show how to connect a Set-Top Box,TV and Amplifier to the <strong>DVD</strong>-<strong>VCR</strong>.<br />
1<br />
Use a TV antenna cable to connect the signal<br />
source coming from the antenna or wall to the<br />
ANT IN jack on the STB.<br />
2<br />
Use the Video/Audio Cable to connect the LINE<br />
OUT jacks on the STB to the AUDIO/VIDEO<br />
LINE IN 1 jacks on the <strong>DVD</strong>-<strong>VCR</strong>..<br />
Video Cable<br />
Audio Cable<br />
3<br />
Select LINE 1 by pressing LINE IN SELECT<br />
button on the front panel or INPUT SEL.<br />
button on remote control in <strong>VCR</strong> mode .<br />
4<br />
Use the Video/Audio Cable to connect the LINE<br />
AUDIO OUT(R/L)/VIDEO OUT jacks on the <strong>DVD</strong>-<br />
<strong>VCR</strong> to the Audio & Video jacks on the TV.<br />
Video Cable<br />
Audio Cable<br />
Tunerless <strong>DVD</strong> <strong>Player</strong> & <strong>VCR</strong><br />
This <strong>DVD</strong>-<strong>VCR</strong> unit does not have a TV tuner. Recording TV broadcasts is possible via Connection to<br />
Cable/Satellite boxes and Multi Channel Video Services.<br />
Notes<br />
- If you want to use other connections to a TV, please refer to the TV connection pages. (See pages 14 to<br />
18)<br />
- If you want to connect to an Amplifier, please refer to the Amplifier connection page. (See pages 19 to 20)<br />
- When you connect a STB through the LINE IN 1 jack of the <strong>DVD</strong>-<strong>VCR</strong>, you still can see the picture from<br />
the STB on your TV set if the <strong>DVD</strong>-<strong>VCR</strong> is turned off.<br />
ENG-13
C ONNECTIONS<br />
Connection to a TV<br />
The following shows examples of connections commonly used to connect the <strong>DVD</strong>-<strong>VCR</strong> with a TV and other<br />
components.<br />
Connecting to a TV with an <strong>HD</strong>MI Jack<br />
1<br />
Using an <strong>HD</strong>MI-<strong>HD</strong>MI cable, connect the <strong>HD</strong>MI<br />
OUT jack on the rear of the <strong>DVD</strong> player to the<br />
<strong>HD</strong>MI IN jack of your TV.<br />
2<br />
Press the input selector on your TV remote<br />
control until the <strong>HD</strong>MI signal from the <strong>DVD</strong> player<br />
appears on your TV screen.<br />
<strong>HD</strong>MI Cable<br />
Not included<br />
<strong>HD</strong>MI VIDEO Specifications<br />
When you press the <strong>HD</strong>MI button on the front panel, 480p, 720p, and 1080p are selected in order.<br />
The first press of the <strong>HD</strong>MI button on the front panel brings up the current resolution.<br />
The second press allows you to change the <strong>HD</strong>MI output resolution.<br />
- Depending on your TV, certain <strong>HD</strong>MI output resolutions may not work.<br />
- Please refer to the user’s manual of your TV.<br />
- When using an <strong>HD</strong>MI connection, the <strong>DVD</strong> player’s output is set to <strong>HD</strong>MI within 10 seconds.<br />
- For better picture quality, set the <strong>HD</strong>MI output resolution to 720p or 1080p (see page 56).<br />
- If you connect an <strong>HD</strong>MI cable between <strong>Samsung</strong> TV and this <strong>DVD</strong> player, you can operate this <strong>DVD</strong> player<br />
using your TV remote control. This is only available with <strong>Samsung</strong> TVs that support Anynet+(<strong>HD</strong>MICEC).(<br />
see page 56-57)<br />
- If your TV has an logo, then it will supports the Anynet+ function.<br />
ENG-14
C ONNECTIONS<br />
● <strong>HD</strong>MI (High Definition Multimedia Interface)<br />
<strong>HD</strong>MI is an interface that enables the digital transmission of video and audio data with just a single cable.<br />
Using <strong>HD</strong>MI, the <strong>DVD</strong> player transmits a digital video and audio signal and displays a vivid picture on<br />
a TV having an <strong>HD</strong>MI input jack.<br />
● <strong>HD</strong>MI connection description<br />
<strong>HD</strong>MI consists of uncompressed video and digital audio data (LPCM or Bit Stream).<br />
- The player outputs only a pure digital signal to the TV through <strong>HD</strong>MI.<br />
- If TV does not support <strong>HD</strong>CP (High-bandwidth Digital Content Protection), snow noise appears on the<br />
screen.<br />
● Why does <strong>Samsung</strong> use <strong>HD</strong>MI?<br />
<strong>HD</strong>MI provides an interface between any compatible digital audio/video source, such as a set-top box, a<br />
<strong>DVD</strong> player, a PC, a video game system, or an AV recei<strong>ver</strong> and a compatible digital audio and/or video<br />
monitor, such as a digital television (DTV).<br />
<strong>HD</strong>MI supports any TV or PC video format with digital high-definition pictures.<br />
ENG-15
C ONNECTIONS<br />
Connecting to a TV (Progressive)<br />
1<br />
Using Component video cables (not included),<br />
connect the COMPONENT VIDEO OUT jacks on<br />
the rear of the <strong>DVD</strong>-<strong>VCR</strong> to the COMPONENT IN<br />
jacks of your TV.<br />
2<br />
Using the audio cables, connect from the AUDIO<br />
OUT or LINE OUT AUDIO (red and white) jacks<br />
on the rear of the <strong>DVD</strong>-<strong>VCR</strong> to the AUDIO (red<br />
and white) IN jacks of your TV.<br />
Turn on the <strong>DVD</strong>-<strong>VCR</strong> and TV.<br />
3<br />
With the unit in Stop mode, set the video output<br />
to Progressive Out in the Setup Menu. Then<br />
press ENTER and progressive will be output.<br />
(See pages 55)<br />
White<br />
Audio Cable<br />
Red<br />
White<br />
Red<br />
Red<br />
Green Blue Red<br />
Blue<br />
Component Cable<br />
(not included)<br />
Green<br />
To see the progressive video output,<br />
- Consult your TV <strong>User</strong>’s <strong>Manual</strong> to find out if your TV supports Progressive Scan.<br />
If Progressive Scan is supported, follow the TV <strong>User</strong>’s <strong>Manual</strong> regarding Progressive Scan<br />
settings in the TV’s menu system.<br />
- Depending on your TV, the connection method may differ from the illustration above.<br />
Note<br />
What is "Progressive Scan"?<br />
Progressive scan has twice as many scanning lines as the interlace output method.<br />
Progressive scanning method provides better and clearer picture quality.<br />
The Component Video jacks only output video from the <strong>DVD</strong> player. To view video from the <strong>VCR</strong>, you must have<br />
the Video/Line Out (yellow) jack connected.<br />
Only the 480p output resolution is possible with Component.<br />
ENG-16
C ONNECTIONS<br />
Connecting to a TV (Interlace)<br />
- Connecting to your TV using Component video cables.<br />
- You will enjoy high quality and accurate color reproduction images. Component video separates the picture<br />
element into black and white(Y), blue(PB), red(PR) signals to present clear and clean images. (Audio signals<br />
are deli<strong>ver</strong>ed through the audio out or line out audio).<br />
1<br />
Using Component video cables (not included),<br />
connect the COMPONENT VIDEO OUT jacks on<br />
the rear of the <strong>DVD</strong>-<strong>VCR</strong> to the COMPONENT IN<br />
jacks of your TV.<br />
2<br />
Using the audio cables, connect from the AUDIO<br />
OUT or LINE OUT AUDIO (red and white) jacks<br />
on the rear of the <strong>DVD</strong>-<strong>VCR</strong> to the AUDIO (red<br />
and white) IN jacks of your TV.<br />
Turn on the <strong>DVD</strong>-<strong>VCR</strong> and TV.<br />
White<br />
Red<br />
Green<br />
Red<br />
Blue<br />
3<br />
Audio Cable<br />
Red<br />
White<br />
Red<br />
Blue Green<br />
Component Cable<br />
(not included)<br />
With the unit in Stop mode, set the video output<br />
to Progressive Out in the Setup Menu. Then<br />
press ENTER and Component Interlace will be<br />
output. (See pages 55)<br />
Notes<br />
- If you want to connect to an Amplifier, please refer to the Amplifier connection page. (See pages 19 to 20)<br />
- The component jack of your TV may be marked “R-Y, B-Y, Y” or “Cr, Cb, Y” instead of “PR, PB, Y”<br />
depending on the manufacturer. The number and position of jacks may vary depending on the TV set.<br />
Please refer to the user's manual of your TV.<br />
- The Component Video Out jacks only output video from the <strong>DVD</strong> player. To view video from the <strong>VCR</strong>, you<br />
must have the Video Out (Yellow) jack connected.<br />
- You can hear sound from the LINE OUT AUDIO or AUDIO OUT (red and white) jacks with a Component<br />
connection. <strong>VCR</strong> audio only outputs through Line Out Audio jacks (Red,White).<br />
ENG-17
C ONNECTIONS<br />
Connecting to a TV (Video)<br />
1<br />
Using video/audio cables, connect the VIDEO<br />
(yellow)/AUDIO (red and white) OUT jacks on<br />
the rear of the <strong>DVD</strong>-<strong>VCR</strong> to the VIDEO<br />
(yellow)/AUDIO (red and white) IN jacks of your<br />
TV.<br />
2<br />
Yellow<br />
Red White<br />
Turn on the <strong>DVD</strong>-<strong>VCR</strong> and TV.<br />
Video Cable<br />
Audio Cable<br />
3<br />
Yellow<br />
Red<br />
White<br />
Press the input selector on your TV remote<br />
control until the Video signal from the <strong>DVD</strong>-<strong>VCR</strong><br />
appears on the TV screen.<br />
Notes<br />
- Noise may be generated if the audio cable is placed too close to the power cable.<br />
- If you want to connect to an Amplifier, please refer to the Amplifier connection page.<br />
(See pages 19 to 20).<br />
- The number and position of jacks may vary depending on your TV set. Please refer to the user's manual of<br />
your TV.<br />
- If there is one audio input jack on the TV, connect it to the LINE OUT AUDIO OUT Left (white) jack of the<br />
<strong>DVD</strong>-<strong>VCR</strong>.<br />
- When you connect an external device (STB or <strong>VCR</strong>) and play it through the LINE IN 1 jack of the <strong>DVD</strong>-<strong>VCR</strong>,<br />
you can still see the display on your TV set although the <strong>DVD</strong>-<strong>VCR</strong> set has been turned off.<br />
ENG-18
C ONNECTIONS<br />
Connection to an Audio System<br />
Connecting to an Audio System (2 Channel Amplifier, Analog)<br />
1<br />
Using the audio cables, connect the (LINE)<br />
AUDIO (red and white) OUT jacks on the rear of<br />
the <strong>DVD</strong>-<strong>VCR</strong> to the AUDIO (red and white) IN<br />
jacks of the Amplifier.<br />
2<br />
Using the video signal cable(s), connect the<br />
VIDEO or COMPONENT OUT jacks on the rear<br />
of the <strong>DVD</strong>-<strong>VCR</strong> to the VIDEO or COMPONENT<br />
IN jack of your TV as described on pages 14 to<br />
18.<br />
Red<br />
Audio Cable<br />
White<br />
Red<br />
White<br />
3<br />
Turn on the <strong>DVD</strong>-<strong>VCR</strong>, TV, and Amplifier.<br />
2-channel<br />
Stereo Amp.<br />
4<br />
Press the input select button of the Amplifier to<br />
select the External input in order to hear sound<br />
from the <strong>DVD</strong>-<strong>VCR</strong>.<br />
Refer to your Amplifier's user manual to set the<br />
Amplifier's audio input.<br />
Notes<br />
- Please turn the volume down when you turn on the Amplifier. Sudden loud sound may cause damage<br />
to the speakers and your ears.<br />
- Please set the audio in the menu screen according to the Amplifier. (See pages 52 to 53)<br />
- The position of jacks may vary depending on the Amplifier.<br />
Please refer to your Amplifier's user manual .<br />
- You can also connect the amplifier using the AUDIO OUT (red and white) jacks from the <strong>DVD</strong>-<strong>VCR</strong>.<br />
ENG-19
C ONNECTIONS<br />
Connecting to an Audio System (Dolby digital, MPEG2 or DTS<br />
Amplifier)<br />
1<br />
Using a Coaxial cable or an Optical cable (not<br />
included), connect the DIGITAL AUDIO OUT<br />
(COAXIAL) or DIGITAL AUDIO OUT (OPTICAL)<br />
jack on the rear of the <strong>DVD</strong>-<strong>VCR</strong> to the DIGITAL<br />
AUDIO IN (COAXIAL) or DIGITAL AUDIO IN<br />
(OPTICAL) jack of the Amplifier.<br />
2<br />
Using the video signal cable(s), connect the<br />
VIDEO or COMPONENT OUT jacks on the rear<br />
of the <strong>DVD</strong>-<strong>VCR</strong> to the VIDEO or COMPONENT<br />
IN jack of your TV as described on pages 14 to<br />
18.<br />
Optical Cable<br />
(not included)<br />
Coaxial Cable<br />
(not included)<br />
3<br />
Turn on the <strong>DVD</strong>-<strong>VCR</strong>, TV, and Amplifier.<br />
Dolby digital or<br />
DTS Amp.<br />
4<br />
Press the input select button of the Amplifier to<br />
select external input in order to hear sound from<br />
the <strong>DVD</strong>-<strong>VCR</strong>.<br />
Refer to your Amplifier's user manual to set the<br />
Amplifier's audio input.<br />
Notes<br />
- Please turn the volume down when you turn on the Amplifier. Sudden loud sound may cause damage<br />
to the speakers and your ears.<br />
- Please set the audio in the menu screen according to the Amplifier. (See pages 52 to 53)<br />
- The jack position may vary depending on the Amplifier.<br />
Please refer to the user's manual of the Amplifier.<br />
ENG-20
C ONNECTIONS<br />
Connecting the Power Cord<br />
1<br />
Your <strong>DVD</strong>-<strong>VCR</strong>'s power cord should be plugged<br />
into a standard 120V/60Hz wall outlet.<br />
2<br />
Turn on the power by pressing the POWER<br />
button on the remote control or on the front<br />
panel.<br />
3<br />
Turn on your TV by pressing the POWER button<br />
on the TV remote control.<br />
4<br />
Press the input selector on your TV remote until<br />
the signal from the <strong>DVD</strong>-<strong>VCR</strong> appears.<br />
ENG-21
Chapter 3<br />
I NITIAL S ETUP<br />
Selecting a Menu Language<br />
Follow these steps to change the on-screen MENU language to English, French or Spanish.<br />
1<br />
Press the MENU button.<br />
2<br />
Press the ➐✓❷ buttons to<br />
select Setup, then press the ❿<br />
or ENTER button.<br />
3<br />
Press the ➐✓❷ buttons to<br />
select Language, then press<br />
the ❿ or ENTER button.<br />
4<br />
Press the ➐✓❷ buttons to<br />
select the appropriate<br />
language : English, Français<br />
or Español.<br />
Press the ENTER button.<br />
5<br />
Press the MENU button to exit.<br />
ENG-22
I NITIAL S ETUP<br />
Setting the Clock<br />
This menu is used to set the current time. You need to set the time to use timer recording.<br />
Setting the Clock <strong>Manual</strong>ly<br />
If Auto Setup fails to set the <strong>DVD</strong>-<strong>VCR</strong>’s internal clock by locating a local TV station, follow these steps to set<br />
the date and time manually.<br />
Note: For accurate Timer Recording, your <strong>DVD</strong>-<strong>VCR</strong>'s internal clock must be set correctly.<br />
1<br />
Press the MENU button.<br />
2<br />
Press the ➐✓❷ buttons to<br />
select Setup, then press the ❿<br />
or ENTER button.<br />
3<br />
Press the ➐✓❷ buttons to<br />
select Clock, then press the ❿<br />
or ENTER button.<br />
4<br />
Use the ➛✓❿ buttons to select<br />
each of the following options,<br />
then use the ➐✓❷ buttons to<br />
set each option.<br />
Press the ENTER button to set<br />
the clock.<br />
6<br />
Press the MENU button to exit.<br />
ENG-23
I NITIAL S ETUP<br />
Setting the Front Panel Display<br />
You can set the Front Panel Display to be bright, dim, or to automatically dim during power off.<br />
1<br />
Press the MENU button.<br />
2<br />
Press the ➐✓❷ buttons to<br />
select Setup, then press the ❿<br />
or ENTER button.<br />
3<br />
Press the ➐✓❷ buttons to<br />
select Front Display, then<br />
press the ❿ or ENTER button<br />
to select Auto, Bright or Dim.<br />
4<br />
Press the MENU button to exit.<br />
■ Auto: Front Panel Display will dim automatically<br />
during power off.<br />
■ Bright: Front Panel Display will be bright.<br />
■ Dim: Front Panel Display will be dim.<br />
ENG-24
I NITIAL S ETUP<br />
Setting the Auto Power Off<br />
This feature automatically turns off your <strong>DVD</strong>-<strong>VCR</strong> if no signal is received and you do not press any buttons for<br />
the selected time.<br />
1<br />
Press the MENU button.<br />
2<br />
Press the ➐✓❷ buttons to<br />
select Setup, then press the ❿<br />
or ENTER button.<br />
3<br />
Press the ➐✓❷ buttons to<br />
select Auto Power Off, then<br />
press the ❿ or ENTER button<br />
to select Off, 1Hr or 2Hr.<br />
4<br />
Press the MENU button to exit.<br />
■<br />
■<br />
■<br />
Off: Auto power off is disabled.<br />
1Hr: <strong>DVD</strong>-<strong>VCR</strong> will auto shut off 1 hour after the last button<br />
is pressed or no signal is received.<br />
2Hr: <strong>DVD</strong>-<strong>VCR</strong> will auto shut off 2 hours after the last button<br />
is pressed or no signal is received.<br />
ENG-25
Chapter 4<br />
<strong>DVD</strong> OPERATIONS<br />
Playing a Disc<br />
Before Play<br />
- Turn on your TV and set it to the correct Video Input on your TV's remote control.<br />
- If you connected an external Audio System, turn on your Audio System and set it to the correct Audio Input.<br />
Playback<br />
1<br />
Press the OPEN/CLOSE ( )<br />
button on the front panel.<br />
2<br />
Place a disc gently into the tray<br />
with the disc’s label facing up.<br />
3<br />
Press the (Play/Pause)<br />
button on your remote control<br />
or on the front panel.<br />
Most discs will start to play<br />
back as soon as the tray<br />
closes.<br />
4<br />
Stopping Play<br />
Press the (Stop) button<br />
during play.<br />
ENG-26<br />
▼Stop/Resume<br />
- Press the (Stop) button once to<br />
stop playback. To resume the<br />
<strong>DVD</strong>/CD from the point where the<br />
disc stopped, press the<br />
(Play/Pause) button.<br />
- Press the (Stop) button twice to<br />
completely stop playback. The next<br />
time you press the (Play/Pause),<br />
the disc will start o<strong>ver</strong> from the<br />
beginning.
<strong>DVD</strong> OPERATIONS<br />
5<br />
Pausing Play<br />
Press the (Play/Pause)<br />
button on your remote control<br />
or on the front panel during<br />
play.<br />
▼-Screen stops, no sound.<br />
- To resume, press the<br />
(Play/Pause) button once again.<br />
Note<br />
If the player is left for about 5 minutes in<br />
pause mode, it will stop.<br />
6<br />
Step Motion Play (Except CD)<br />
Press the F.ADV button on the<br />
remote control during play.<br />
7<br />
Slow Motion Play (Except CD)<br />
Press the / (Search) button<br />
to choose the play speed<br />
between 1/8, 1/4 and 1/2 of<br />
normal during PAUSE or STEP<br />
mode.<br />
8<br />
Removing Disc<br />
Press the OPEN/CLOSE ( )<br />
button on the front panel.<br />
▼-Each time the button is pressed, a<br />
new frame will appear.<br />
- No sound is heard during STEP<br />
mode.<br />
- Press the (Play/Pause) button to<br />
resume normal play.<br />
- You can only perform step motion<br />
play in the forward direction.<br />
▼-No sound is heard during slow mode.<br />
- Press the (Play/Pause) button to<br />
resume normal play.<br />
Note<br />
- This ( ) icon indicates an invalid button<br />
press.<br />
- The Slow Motion feature works in both the<br />
forward and re<strong>ver</strong>se directions.<br />
ENG-27
<strong>DVD</strong> OPERATIONS<br />
Using the Search and Skip Functions<br />
During play, you can search quickly through a chapter or track, and use the skip function to jump to the next<br />
selection.<br />
Searching through a Chapter or Track<br />
During play, press the /<br />
(Search) buttons on the remote<br />
control for more than one<br />
second.<br />
Skipping Tracks<br />
▼If you want to search at a faster speed<br />
on the <strong>DVD</strong> or CD, press the /<br />
(Search) button repeatedly.<br />
<strong>DVD</strong> 2X, 4X, 64X, 128X<br />
CD 2X, 4X, 8X<br />
Notes<br />
- The speed marked in this function may be<br />
different from the actual playback speed.<br />
- No sound is heard during search mode<br />
(Except CD).<br />
During play, press the /<br />
(Skip) buttons.<br />
- When playing a <strong>DVD</strong>, if you press the (Skip) button,<br />
it moves to the next chapter. If you press the (Skip)<br />
button, it moves to the beginning of the chapter.<br />
Pressing the Skip button twice will make the <strong>DVD</strong> move to<br />
the beginning of the previous chapter.<br />
- When playing a CD, if you press the (Skip) button, it<br />
moves to the next track. If you press the (Skip) button, it<br />
moves to the beginning of the track. One more press makes<br />
it move to the beginning of the previous track.<br />
ENG-28
<strong>DVD</strong> OPERATIONS<br />
Using the Display Function<br />
When Playing a <strong>DVD</strong>/MPEG4<br />
1<br />
During play, press the INFO<br />
button on the remote control.<br />
▼You can select information in the<br />
<strong>DVD</strong> Function menu by pressing the<br />
MENU button.<br />
2<br />
Press the ➐✓❷ buttons to<br />
select the desired item.<br />
<strong>DVD</strong><br />
Enter<br />
MPEG4<br />
MP3<br />
Off<br />
Enter<br />
3<br />
Press the ➛✓❿ buttons to<br />
make the desired setup and<br />
then press the ENTER button.<br />
▼<br />
You may use the number buttons of the<br />
remote control to directly access a title,<br />
chapter or time to start the playback<br />
from a desired time.<br />
ENG-29
<strong>DVD</strong> OPERATIONS<br />
4<br />
To exit the menu, press the<br />
INFO button again.<br />
Note<br />
TITLE<br />
CHAPTER<br />
TIME<br />
AUDIO<br />
SUBTITLE<br />
To access the desired title when there is more than one on the disc.<br />
For example, if there is more than one movie on a <strong>DVD</strong>, each movie will be identified.<br />
Most <strong>DVD</strong> discs are recorded in chapters so that you can quickly find a specific scene<br />
Allows playback of the film from a desired time. You must enter the starting time as a reference.<br />
The time search function does not operate on some discs.<br />
Refers to the film's soundtrack language. In the example, the soundtrack is played in English 5.1CH.<br />
A <strong>DVD</strong> disc can have up to eight different soundtracks. The MP3, AC3 and WMA are supported.<br />
(DivX)<br />
Refers to the subtitle languages available in the disc.<br />
You will be able to choose the subtitle languages or, if you prefer, turn them off from the screen.<br />
A <strong>DVD</strong> disc can have up to 32 different subtitles.<br />
ENG-30
<strong>DVD</strong> OPERATIONS<br />
Using the Disc and Title Menu (<strong>DVD</strong>)<br />
1<br />
During playback of a <strong>DVD</strong> disc,<br />
press the MENU button on the<br />
remote control.<br />
▼The MENU button can be used to<br />
access Disc and title menus on a <strong>DVD</strong><br />
during playback.<br />
2<br />
Press the ➐✓❷ buttons to<br />
select Function, then press<br />
the ❿ or ENTER button.<br />
3<br />
Press the ➐✓❷ buttons to<br />
select <strong>DVD</strong> Function, then<br />
press the ❿ or ENTER<br />
button.<br />
4<br />
Press the ➐✓❷ buttons to<br />
select Title Menu or Disc<br />
Menu then press the ❿ or<br />
ENTER button.<br />
Notes<br />
- Depending on the disc, the Disc Menu or<br />
Title Menu may not work.<br />
- You can also use the Disc Menu by using<br />
the DISC MENU button on the remote<br />
control.<br />
- The Title Menu will only be displayed if<br />
there are at least two titles on the disc.<br />
- The Title Menu works only with <strong>DVD</strong>s.<br />
ENG-31
<strong>DVD</strong> OPERATIONS<br />
Using the Function Menu (<strong>DVD</strong>)<br />
1<br />
During the playback of a <strong>DVD</strong><br />
disc, press the MENU button<br />
on the remote control.<br />
▼The MENU button can be used to<br />
access <strong>DVD</strong> functions such as Info,<br />
Zoom, Bookmark, Repeat and EZ view<br />
menu during <strong>DVD</strong> playback.<br />
2<br />
Press the ➐✓❷ buttons to<br />
select Function, then press<br />
the ❿ or ENTER button.<br />
3<br />
Press the ➐✓❷ buttons to<br />
select <strong>DVD</strong> Function, then<br />
press the ❿ or ENTER button.<br />
- Info<br />
(See pages 29 to 30)<br />
- Zoom (See page 41)<br />
- Bookmark<br />
(See pages 39 to 40)<br />
- Repeat (See pages 33)<br />
- EZ View<br />
(See pages 35 to 36)<br />
4<br />
Press the ➐✓❷ buttons to<br />
select one of the five functions.<br />
Then press the ❿ or ENTER<br />
button to access the function.<br />
▼You can also directly select these<br />
functions using their respective buttons<br />
on the remote control.<br />
- INFO<br />
- MARK<br />
- REPEAT<br />
- ZOOM<br />
- EZ VIEW<br />
ENG-32
<strong>DVD</strong> OPERATIONS<br />
Repeat Play<br />
Repeat the current chapter, title, a chosen section (A-B), or all of the disc.<br />
When playing a <strong>DVD</strong><br />
1<br />
During play, press the REPEAT<br />
button on the remote control.<br />
Repeat screen appears.<br />
2<br />
Press the ➛✓❿ buttons to<br />
select Chapter, Title or A-B,<br />
then press the ENTER<br />
button.<br />
<strong>DVD</strong><br />
Off 01 T 01 A - B ENTER REPEAT<br />
▼<br />
- <strong>DVD</strong> repeats play by chapter or title,<br />
and CDs repeat play by disc or.<br />
- Chapter ( ): repeats the chapter that<br />
is playing.<br />
- Title ( T ): repeats the title that is<br />
playing.<br />
- A-B: repeats a segment of the disc<br />
that you select.<br />
Using the A-B Repeat function<br />
1. Press the REPEAT button on the remote control.<br />
2. Press the ➛/❿ button to select A-B button.<br />
3. Press the ENTER button at the point where you want repeat play to start (A).<br />
B is automatically highlighted.<br />
4. Press the ENTER button at the point where you want the repeat play to stop (B).<br />
- To return to normal play, press the CANCEL button.<br />
Note<br />
A-B REPEAT allows you to set point (B) 5 seconds after point (A) has been set.<br />
3<br />
To return to normal play,<br />
press REPEAT button<br />
again, then press the<br />
➛/❿ buttons to select Off<br />
and press ENTER button.<br />
<strong>DVD</strong><br />
Off 01 T 01 A - B ENTER REPEAT<br />
Note<br />
- Depending on the disc, the Repeat<br />
function may not work.<br />
ENG-33
<strong>DVD</strong> OPERATIONS<br />
Slow Play<br />
This feature allows you to slowly to repeat scenes containing sports, dancing, musical instruments being<br />
played etc., so you can study them more closely.<br />
When playing a <strong>DVD</strong><br />
1<br />
During play, press the<br />
PLAY/PAUSE ( ) button.<br />
2<br />
Press the SEARCH ( / )<br />
button to choose the play speed<br />
between 1/2, 1/4 and 1/8 of<br />
normal speed during PAUSE<br />
or STEP mode.<br />
ENG-34
<strong>DVD</strong> OPERATIONS<br />
Adjusting the Aspect Ratio (EZ View)<br />
Set the aspect ratio (length x width) of your TV screen so the <strong>DVD</strong>-<strong>VCR</strong> will display movies at the appropriate<br />
size for your television.<br />
To Playback using Aspect Ratio (<strong>DVD</strong>)<br />
Press the EZ VIEW button on<br />
the remote control.<br />
- The screen size changes<br />
when the button is pressed<br />
repeatedly.<br />
- The screen zoom mode<br />
operates differently<br />
depending on the screen<br />
setting in the Display Setup<br />
menu.<br />
- To ensure correct operation<br />
of the EZ VIEW button, you<br />
should set the correct<br />
aspect ratio in the Display<br />
Setup menu.<br />
(See pages 54 to 57).<br />
WIDE SCREEN<br />
▼The EZ View feature is not available<br />
when the A-B Repeat function is<br />
activated.<br />
If you are using a 16:9 TV<br />
For 16:9 aspect ratio discs<br />
- WIDE SCREEN<br />
Displays the content of the <strong>DVD</strong> title in 16:9<br />
aspect ratio.<br />
- SCREEN FIT<br />
The top and bottom portions of the screen are<br />
cut off. When playing a 2.35:1 aspect ratio disc,<br />
the black bars at the top and bottom of the<br />
screen will disappear. The picture will look<br />
<strong>ver</strong>tically stretched. (Depending on a type of disc,<br />
the black bars may not disappear completely.)<br />
- ZOOM FIT<br />
The top, bottom, left and right of the screen are<br />
cut off and the central portion of the screen is<br />
enlarged.<br />
For 4:3 aspect ratio discs<br />
- NORMAL WIDE<br />
Displays the content of the <strong>DVD</strong> title in 16:9<br />
aspect ratio. The picture will look horizontally<br />
stretched.<br />
- SCREEN FIT<br />
The top and bottom portions of the screen are<br />
cut off and the full screen appears. The picture<br />
will look <strong>ver</strong>tically stretched.<br />
- ZOOM FIT<br />
The top, bottom, left and right portions of the<br />
screen are cut off and the central portion of the<br />
screen is enlarged.<br />
- VERTICAL FIT<br />
When a 4:3 <strong>DVD</strong> is viewed on a 16:9 TV, black<br />
bars will appear at the left and right of the screen<br />
in order to prevent the picture from looking<br />
horizontally stretched.<br />
ENG-35
<strong>DVD</strong> OPERATIONS<br />
If you are using a 4:3 TV<br />
For 16:9 aspect ratio discs<br />
- 4:3 Letter Box<br />
Displays the content of the <strong>DVD</strong> title in 16:9<br />
aspect ratio. The black bars will appear at the top<br />
and bottom of the screen.<br />
- 4:3 Pan Scan<br />
The left and right portions of the screen are cut<br />
off and the central portion of the 16:9 screen is<br />
displayed.<br />
- SCREEN FIT<br />
The top and bottom portions of the screen are<br />
cut off and a full screen appears. The picture will<br />
look <strong>ver</strong>tically stretched.<br />
- ZOOM FIT<br />
The top, bottom, left and right of the screen are<br />
cut off and the central portion of the screen is<br />
enlarged.<br />
For 4:3 aspect ratio discs<br />
- NORMAL SCREEN<br />
Displays the content of the <strong>DVD</strong> title in 4:3<br />
aspect ratio.<br />
- SCREEN FIT<br />
The top and bottom portions of the screen are<br />
cut off and the full screen appears. The picture<br />
will look <strong>ver</strong>tically stretched.<br />
- ZOOM FIT<br />
The top, bottom, left and right portions of the<br />
screen are cut off and the central portion of the<br />
screen is enlarged.<br />
Note<br />
This function may work differently depending on the type of disc.<br />
ENG-36
<strong>DVD</strong> OPERATIONS<br />
Selecting the Audio Language<br />
You can select a desired audio language quickly and easily with the AUDIO button.<br />
Using the AUDIO button (<strong>DVD</strong>/MPEG4)<br />
1<br />
During play, press the<br />
AUDIO button.<br />
Audio languages change<br />
when the ➛/❿☎button is<br />
pressed repeatedly.<br />
The audio languages are<br />
represented by<br />
abbreviations.<br />
<strong>DVD</strong><br />
ENG DOLBY DIGITAL 5.1CH<br />
AUDIO<br />
Notes<br />
- To change the desired audio in the Disc<br />
Menu, press the DISC MENU button.<br />
- This function depends on what audio<br />
languages are encoded on the disc and<br />
may not work on all <strong>DVD</strong>s.<br />
- A <strong>DVD</strong> disc can contain up to 8 audio<br />
languages.<br />
- To have the same audio language come<br />
up whene<strong>ver</strong> you play a <strong>DVD</strong>, see pages<br />
50 to 51.<br />
Press the AUDIO button<br />
on the remocon<br />
repeatedly to select the<br />
desired Audio (MP3,<br />
PCM, WMA, AC3 and<br />
MPEG) on MPEG4 discs<br />
then press the ENTER .<br />
MPEG4<br />
PCM 1/2<br />
AUDIO<br />
▼MPEG4 is a compressed video format<br />
designed to deli<strong>ver</strong> <strong>DVD</strong> quality video at<br />
lower data rates and smaller file sizes.<br />
Types of MPEG4 files are DivX or Xdiv.<br />
These files have an .avi extension.<br />
2<br />
To remove the AUDIO icon,<br />
press the CLEAR or<br />
RETURN button.<br />
ENG-37
<strong>DVD</strong> OPERATIONS<br />
Selecting the Subtitle Language<br />
You can select a desired subtitle quickly and easily with the SUBTITLE button.<br />
Using the SUBTITLE button (<strong>DVD</strong>/MPEG4)<br />
1<br />
During play, press the<br />
SUBTITLE button.<br />
The subtitle changes when<br />
the button is pressed<br />
repeatedly.<br />
The subtitle languages are<br />
represented by abbreviations.<br />
<strong>DVD</strong><br />
Notes<br />
- To change the desired subtitle in the Disc<br />
Menu, press the DISC MENU button.<br />
- This function depends on what subtitles<br />
are encoded on the disc and may not<br />
work on all <strong>DVD</strong>s.<br />
- A <strong>DVD</strong> disc can contain up to 32 subtitle<br />
languages.<br />
- To have the same subtitle language come<br />
up whene<strong>ver</strong> you play a <strong>DVD</strong>,<br />
see pages 50 to 51.<br />
Off<br />
SUBTITLE<br />
An External subtitle option<br />
will appear depending on<br />
the DivX Disc.<br />
MPEG4<br />
Subtitle Selection<br />
External Subtitle Off<br />
readme.TXT<br />
Non-standard fonts are not supported<br />
Enter<br />
Return<br />
Menu<br />
Press Subtitle button on<br />
the remocon repeatedly<br />
to select the desired<br />
subtitle language on an<br />
MPEG4 disc.<br />
MPEG4<br />
Off<br />
SUBTITLE<br />
2<br />
To exit the SUBTITLE<br />
menu, press the CLEAR or<br />
RETURN button.<br />
ENG-38
<strong>DVD</strong> OPERATIONS<br />
Changing the Camera Angle<br />
When a <strong>DVD</strong> contains multiple angles of a particular scene, you can use the ANGLE function.<br />
Using the ANGLE button (<strong>DVD</strong>)<br />
If the disc contains multiple angles, the ANGLE (<br />
) icon appears on the screen.<br />
1<br />
Press the ANGLE button,<br />
then the ANGLE ( ) icon<br />
will appear with the current<br />
angle number and the<br />
number of angles available.<br />
2<br />
Press the ➛✓❿ button<br />
repeatedly to select the<br />
desired angle. To remove the<br />
ANGLE ( ) icon, press the<br />
CLEAR or RETURN button.<br />
4/6<br />
Note<br />
If the disc has only one angle, this feature<br />
won’t work. Currently, <strong>ver</strong>y few discs have<br />
this feature.<br />
Using the Bookmark Function<br />
This feature lets you bookmark sections of a <strong>DVD</strong> so you can quickly find them at a later time.<br />
Using the MARK button (<strong>DVD</strong>)<br />
1<br />
During play, press the MARK<br />
button on the remote control.<br />
2<br />
When you reach the scene<br />
you want to mark, press the<br />
ENTER button. Up to three<br />
scenes may be marked at a<br />
time.<br />
Note<br />
Depending on the disc, the Bookmark<br />
function may not work.<br />
ENG-39
<strong>DVD</strong> OPERATIONS<br />
Recalling a Marked Scene<br />
1<br />
During play, press the MARK<br />
button on the remote control.<br />
2<br />
Press the ➛✓❿ buttons to<br />
select a marked scene.<br />
CLEAR<br />
3<br />
Press the (Play/Pause)<br />
button to play the marked<br />
scene.<br />
Clearing a Bookmark<br />
1<br />
During play, press the MARK<br />
button on the remote control.<br />
2<br />
Press the ➛✓❿ buttons to<br />
select the bookmark<br />
number you want to delete.<br />
CLEAR<br />
3<br />
Press the CLEAR button to<br />
delete a bookmark number.<br />
ENG-40
<strong>DVD</strong> OPERATIONS<br />
Using the Zoom Function (<strong>DVD</strong>)<br />
1<br />
During the playback of a <strong>DVD</strong><br />
disc, press the MENU button<br />
on the remote control.<br />
2<br />
Press the ➐✓❷ buttons to<br />
select Function, then press<br />
the ❿ or ENTER button.<br />
3<br />
Press the ➐✓❷ buttons to<br />
select <strong>DVD</strong> Function, then<br />
press the ❿ or ENTER button.<br />
4<br />
Press the ➐✓❷ buttons to<br />
select Zoom, then press the<br />
❿ or ENTER button.<br />
5<br />
Press the ➐✓❷ or ➛✓❿<br />
buttons to select the part of<br />
the screen you want to<br />
zoom in on.<br />
Press the ENTER button.<br />
▼During <strong>DVD</strong> play, press ENTER to<br />
zoom in 2X/4X/2X/Normal in order.<br />
You can also select the Zoom function<br />
directly using ZOOM button on the<br />
remote control.<br />
Note<br />
Depending on the disc, the Zoom function<br />
may not work.<br />
ENG-41
<strong>DVD</strong> OPERATIONS<br />
Clips Menu for CDAudio/ MP3/ WMA/JPEG/<br />
MPEG4<br />
Discs with MP3/WMA/JPEG/MPEG4 contain individual songs and/or pictures that can be organized into folders<br />
as shown below. They are similar to how you use your computer to put files into different folders.<br />
1<br />
Open the disc tray.<br />
2<br />
Place the disc on the tray.<br />
3<br />
Close the tray.<br />
The tray closes and this<br />
screen displays.<br />
Stop<br />
WMA<br />
JPEG<br />
MP3<br />
MPEG4<br />
Enter<br />
Parent Folder,<br />
Current Folder and<br />
Peer Folders<br />
Off<br />
00:00:00<br />
T<br />
Return<br />
Menu<br />
JPEG file display<br />
- : Name of currently playing file.<br />
- : Current Playback Time.<br />
- : Current Playback Mode : There are four<br />
modes. They can be selected in order by<br />
pressing the REPEAT button.<br />
- Off: Normal Playback<br />
- Track: Repeats the current track.<br />
- Folder: Repeats the current folder.<br />
- Random: Files on the disc will be played<br />
in random order.<br />
Folder Selection<br />
Folder can only be selected in the Stop mode.<br />
- To select the Parent Folder<br />
Press the RETURN button to go to the parent<br />
folder, or press the ➐✓❷ buttons to select “..” and<br />
press the ENTER button to go to the parent folder.<br />
- To select the Peer Folder<br />
Press the ➐✓❷ buttons to select the desired folder,<br />
then the ENTER button.<br />
- To select the Sub-Folder<br />
Press the ➐✓❷ buttons to select the desired folder,<br />
then press the ENTER button.<br />
- : CD Audio file icon.<br />
- : MP3 file icon.<br />
- : WMA file icon.<br />
- : JPEG file icon.<br />
- : AVI file icon.<br />
- : Folder icon.<br />
- : Current Folder icon.<br />
Root<br />
WMA<br />
JPEG<br />
MP3<br />
MUSIC<br />
1st<br />
2nd<br />
SONG FILE 1<br />
SONG FILE 2<br />
Parent Folder<br />
Current Folder<br />
Sub-Folders<br />
Peer Folders<br />
SONG FILE 3<br />
MPEG4 FILES<br />
ENG-42
<strong>DVD</strong> OPERATIONS<br />
CD Audio/MP3/WMA Playback<br />
1<br />
Open the disc tray.<br />
2<br />
Place the disc on the tray.<br />
3<br />
Close the tray.<br />
4<br />
Press the ➐✓❷ buttons to<br />
select a song file.<br />
Press the ENTER button to<br />
begin playback of the song<br />
file.<br />
Stop<br />
Off Off<br />
00:00:00<br />
00:00:23 1_mp3 T<br />
WMA<br />
JPEG<br />
MP3<br />
MPEG4<br />
Because You<br />
Cactus<br />
Sad Day<br />
Wonderful<br />
Enter<br />
Return<br />
Menu<br />
Play<br />
Off Off<br />
Because You 00:00:23<br />
00:00:23 1_mp3 T<br />
...<br />
Because You<br />
Cactus<br />
Sad Dayu<br />
Because You<br />
Wonderful<br />
Cactus<br />
Sad Day<br />
Wonderful<br />
Enter Return REPEAT Repeat<br />
▼When a disc or a folder contains both<br />
MP3 and WMA files, only one type will<br />
be played, not both.<br />
Repeat/Random playback<br />
During play, press the<br />
REPEAT button to change<br />
the playback mode. There<br />
are four modes.<br />
Off, Track, Folder and<br />
Random.<br />
- Off: Normal Playback<br />
- Track: Repeats the current song file.<br />
- Folder: Repeats the song files which have the<br />
same extension in the current folder.<br />
- Random: Song files which have the same<br />
extension will be played in random order.<br />
To resume normal play, press the CLEAR button.<br />
ENG-43
<strong>DVD</strong> OPERATIONS<br />
CD-R MP3/WMA file<br />
When you record MP3 or WMA files on a CD-R,<br />
please refer to the following.<br />
- Your MP3 or WMA files should be ISO 9660 or<br />
JOLIET format.<br />
ISO 9660 format and Joliet MP3 or WMA files are<br />
compatible with Microsoft's DOS and Windows,<br />
and with Apple's Mac. This format is the most<br />
widely used.<br />
- When naming your MP3 or WMA files, do not<br />
exceed 8 characters, and enter “.mp3, .wma”<br />
as the file extension.<br />
General name format : Title.mp3. or Title.wma.<br />
When composing your title, make sure that you<br />
use 8 characters or less, have no spaces in the<br />
name, and avoid the use of special characters<br />
including: (.,/,\,=,+).<br />
- Use a decompression transfer rate of at least<br />
128 Kbps when recording MP3 files.<br />
Sound quality with MP3 files basically depends<br />
on the rate of compression/decompression you<br />
choose. Getting CD audio sound requires an<br />
analog/digital sampling rate, that is con<strong>ver</strong>sion to<br />
MP3 format, of at least 128 Kbps and up to 160<br />
Kbps. Howe<strong>ver</strong>, choosing higher rates, like 192<br />
Kbps or more, only rarely give better sound<br />
quality. Con<strong>ver</strong>sely, files with decompression<br />
rates below 128 Kbps will not be played properly.<br />
- Use a decompression transfer rate of at least<br />
64Kbps when recording WMA files.<br />
Sound quality with WMA files basically depends<br />
on the rate of compression/decompression you<br />
choose.<br />
Getting CD audio sound requires an<br />
analog/digital sampling rate, that is con<strong>ver</strong>sion to<br />
WMA format, of at least 64Kbps and up to<br />
192Kbps.<br />
Con<strong>ver</strong>sely, files with decompression rates below<br />
64Kbps or o<strong>ver</strong> 192Kbps will not be played<br />
properly.<br />
- Do not try recording copyright protected MP3<br />
files.<br />
Certain "secured" files are encrypted and code<br />
protected to prevent illegal copying. These files<br />
are of the following types: Windows MediaTM<br />
(registered trade mark of Microsoft Inc) and<br />
SDMITM (registered trade mark of The SDMI<br />
Foundation). You cannot copy such files.<br />
- Important:<br />
The above recommendations cannot be taken as<br />
a guarantee that the <strong>DVD</strong>-<strong>VCR</strong> will play MP3<br />
recordings, or as an assurance of sound quality.<br />
You should note that certain technologies and<br />
methods for MP3 file recording on CD-Rs<br />
prevent optimal playback of these files on your<br />
<strong>DVD</strong>-<strong>VCR</strong> (degraded sound quality and in some<br />
cases, inability of the player to read the files).<br />
- This unit can play a maximum of 500 files and<br />
500 folders per disc.<br />
ENG-44
<strong>DVD</strong> OPERATIONS<br />
MPEG4 Playback<br />
MPEG4 Play Function<br />
AVI files are used to contain the audio and video data. Only AVI format files with the<br />
“.avi” extensions can be played.<br />
1<br />
Open the disc tray.<br />
Place the disc on the tray.<br />
Close the tray.<br />
Stop<br />
WMA<br />
JPEG<br />
MP3<br />
MPEG4<br />
T<br />
Off<br />
00:00:00<br />
Enter<br />
Return<br />
Menu<br />
2<br />
Press the ➐✓❷☎or ➛✓❿<br />
buttons to select an avi file<br />
(DivX/XviD), then press the<br />
ENTER button.<br />
Stop<br />
Off<br />
/MPEG4 00:00:00<br />
T<br />
...<br />
a01_divx51b-8<br />
a02_divx505b-8<br />
a03_divx502sp-8<br />
a04_divx412-8<br />
Enter<br />
Return<br />
Menu<br />
Repeat Playback<br />
1<br />
Press the REPEAT button to<br />
change playback mode. There<br />
are 3 modes, such as Off,<br />
Title, Folder<br />
- Off : Normal playback.<br />
- Title : Repeats the title<br />
that is playing.<br />
- Folder : Repeats the AVI<br />
files which have the<br />
same extension in the<br />
current folder.<br />
ENG-45
<strong>DVD</strong> OPERATIONS<br />
MPEG4 Function Description<br />
Function Description Reference page<br />
Skip<br />
During play, press the or<br />
( or )<br />
-<br />
Search<br />
( or )<br />
Slow Motion<br />
Play<br />
Step Motion<br />
Play<br />
ZOOM<br />
button, it moves forward<br />
or backward 5 minutes.<br />
During play, press the SEARCH<br />
( or ) button and press<br />
again to search at a faster<br />
speed. Allows you to search<br />
at a faster speed in an AVI<br />
file. (2X, 4X, 8X)<br />
Allows you to search at a<br />
slower speed in an AVI file.<br />
(1/8X, 1/4X, 1/2X)<br />
Each time the STEP button<br />
is pressed, a new frame will<br />
appear.<br />
Allows you to zoom in on the<br />
screen 2X/4X/2X/Normal in<br />
order<br />
- These functions may not work depending on<br />
MPEG4 file.<br />
-<br />
P26<br />
P26<br />
P41<br />
CD-R AVI file<br />
This unit can play the following video compression<br />
formats within the AVI file format:<br />
- DivX 3.11 contents<br />
- DivX 4 contents (Based on MPEG4 Simple Profile)<br />
- DivX 5 contents (MPEG4 simple profile plus<br />
additional features such as bi-directional frames.<br />
Qpel and GMC are also supported.)<br />
- XviD MPEG4 compliant Contents.<br />
This unit supports all resolutions up to maximum<br />
below.<br />
DivX3.11 & DivX4 & XviD<br />
Bitrate may fluctuate:<br />
Device may skip decoding<br />
the high bitrate portions<br />
and begin decoding again<br />
when Bitrate returns to<br />
normal.<br />
DivX5<br />
720 x 480 @30fps<br />
720 x 576 @25fps<br />
: Maximum bitrate : 4Mbps<br />
Notes<br />
- Some MPEG4 files created on a personal computer may not be able to be played back.<br />
That is why Codec Type, Version and Higher resolution higher than the specifications are<br />
not supported.<br />
- This unit supports CD-R/RW written in MPEG4 in accordance with the “ISO9660 format”.<br />
- When unsupported AVI file is played, there will be a message “This file format is not<br />
supported”.<br />
ENG-46
><br />
><br />
<strong>DVD</strong> OPERATIONS<br />
Picture CD Playback<br />
1<br />
Select the desired folder<br />
then press the ENTER<br />
button.<br />
Stop<br />
WMA<br />
JPEG<br />
MP3<br />
MPEG4<br />
T<br />
Off<br />
00:00:00<br />
Enter<br />
Return<br />
Menu<br />
2<br />
Press the ➐✓❷ buttons to<br />
select a Picture file in the<br />
clips menu, then press the<br />
ENTER button.<br />
Stop<br />
Picture 1<br />
...<br />
Picture 1<br />
Picture 2<br />
Picture 3<br />
Enter<br />
Off<br />
00:00:00<br />
Return<br />
Menu<br />
3<br />
Press the INFO. button to<br />
display the menu.<br />
Press the ➛✓❿ buttons to<br />
select the menu you want to<br />
view, then press the ENTER<br />
button.<br />
Rotation<br />
><br />
><br />
Slide Show<br />
Notes<br />
- Press the (Stop) button to return to the<br />
clips menu.<br />
- When playing a Kodak Picture CD, the<br />
><br />
unit displays the Photo directly, not the<br />
clips menu.<br />
><br />
: Each time the ENTER button is pressed,<br />
the picture rotates 90 degrees clockwise.<br />
TIMER:<br />
><br />
Zoom<br />
:- Press the ➐✓❷ button to select the part of the<br />
screen you want to zoom in on.<br />
Press the ENTER button. Each time the<br />
ENTER button is pressed, the picture is<br />
enlarged up to 4X. (2X ➝ 4X ➝ 2X ➝ Normal).<br />
- You can also select the Zoom function by<br />
pressing the ZOOM button on the remote<br />
control.<br />
- : The unit enters slide show mode.<br />
- Before beginning the Slide Show, the picture<br />
interval must be set.<br />
- : When this icon is selected and ENTER is<br />
pressed, the pictures change automatically<br />
with about a 6 second interval.<br />
- : The pictures change automatically with<br />
about a 12 second interval.<br />
- : The pictures change automatically with<br />
about a 18 second interval.<br />
Notes<br />
- Depending on a file size, the amount of time between each picture may be different from the set interval time.<br />
- If you don’t press any button, the slide show will start automatically in about 10 seconds by default.<br />
ENG-47
<strong>DVD</strong> OPERATIONS<br />
CD-R JPEG Discs<br />
- Only files with the “.jpg” and “.JPG” extensions can be played.<br />
- If the disc is not finalized, it will take longer to start playing and not all of the recorded files may be played.<br />
- Only CD-R discs with JPEG files in ISO 9660 or Joliet format can be played.<br />
- The name of the JPEG file may not be longer than 8 characters and should contain no blank spaces or<br />
special characters (. / = +).<br />
- Only a consecutively written multi-session disc can be played. If there is a blank segment in the multisession<br />
disc, the disc can be played only up to the blank segment.<br />
- A maximum of 3000 images can be stored on a single CD.<br />
- Kodak Picture CDs are recommended.<br />
- When playing a Kodak Picture CD, only the JPEG files in the pictures folder can be played.<br />
- Kodak Picture CD: The JPEG files in the pictures folder can be played automatically.<br />
- Konica Picture CD: If you want to see the Picture, select the JPEG from the clips menu.<br />
- Fuji Picture CD: If you want to see the Picture, select the JPEG from the clips menu.<br />
- QSS Picture CD: The unit may not play a QSS Picture CD.<br />
- If the number of files on one Disc is o<strong>ver</strong> 500, only the first 500 JPEG files can be played.<br />
- If the number of folders on one Disc is o<strong>ver</strong> 500, only JPEG files in the first 500 folders can be played.<br />
ENG-48
<strong>DVD</strong> OPERATIONS<br />
Using the Setup Menu<br />
The Setup menu lets you customize your <strong>DVD</strong>-<strong>VCR</strong> by allowing you to select various language preferences,<br />
set up a parental level, and even adjust the player to the type of television screen you have.<br />
1<br />
With the unit in Stop mode,<br />
press the MENU button on the<br />
remote control.<br />
2<br />
Press the ➐✓❷ buttons to<br />
select <strong>DVD</strong>, then press the<br />
❿ or ENTER button.<br />
ŒLanguage Setup: Setup of the Language.<br />
´Audio Setup: Setup of the Audio Options.<br />
ˇDisplay Setup:Setup of the Display Options. Used to select which type of screen you want to watch and<br />
se<strong>ver</strong>al display options.<br />
¨Parental Setup: Setup of the Parental Level. Allows users to set the level necessary to prevent children from<br />
viewing unsuitable movies such as those with violence, adult subject matter, etc.<br />
ˆ DivX(R) Registration: Please use the Registration code to register this player with the DivX(R)<br />
Video On Demand format. To learn more go to www.divx.com/vod.<br />
(see page 61)<br />
3<br />
Press the ➐✓❷ buttons to<br />
access the different<br />
features. Press the ❿ or<br />
ENTER button to access the<br />
sub features.<br />
4<br />
To make the <strong>DVD</strong> setup screen<br />
disappear after setting up,<br />
press the MENU button again.<br />
Note<br />
Depending on the disc, some <strong>DVD</strong> Setup<br />
menu selections may not work.<br />
ENG-49
<strong>DVD</strong> OPERATIONS<br />
Setting Up the Language Features<br />
If you set the audio and subtitle language in advance, the settings will automatically be applied e<strong>ver</strong>y time you<br />
watch a movie.<br />
1<br />
With the unit in Stop mode,<br />
press the MENU button on the<br />
remote control.<br />
2<br />
Press the ➐✓❷ buttons to<br />
select <strong>DVD</strong>, then press the<br />
❿ or ENTER button.<br />
3<br />
Press the ➐✓❷ buttons to<br />
select Language Setup,<br />
then press the ❿ or ENTER<br />
button.<br />
4<br />
Press the ➐✓❷ buttons to<br />
select the desired item, then<br />
press the ❿ or ENTER<br />
button.<br />
5<br />
Press the ➐✓❷ buttons to<br />
select the desired language,<br />
then press the ❿ or ENTER<br />
button.<br />
▼- Once the language is selected, the<br />
screen returns to the Language<br />
Setup menu.<br />
- To make the <strong>DVD</strong> Setup menu<br />
disappear, press the MENU button.<br />
ENG-50
<strong>DVD</strong> OPERATIONS<br />
Language Function<br />
Disc Menu<br />
To set the Disc Menu<br />
Language to your preferred<br />
language, follow these steps.<br />
If your preferred language is<br />
available on a <strong>DVD</strong>, your<br />
Disc Menu Language will<br />
automatically be set to the<br />
language you selected.<br />
▼-<br />
If the selected language is not<br />
recorded on the disc, the original prerecorded<br />
language is selected.<br />
Audio<br />
To set the Audio Language to<br />
your preferred language,<br />
follow these steps. If your<br />
preferred language is<br />
available on a <strong>DVD</strong>, your<br />
Audio Language will<br />
automatically be set to the<br />
language you selected.<br />
Subtitle<br />
To set the Subtitle Language<br />
to your preferred language,<br />
follow these steps. If your<br />
preferred language is<br />
available on a <strong>DVD</strong>, your<br />
Subtitle Language will<br />
automatically be set to the<br />
language you selected.<br />
▼-Select “Original” if you want the<br />
default soundtrack language to be<br />
the original language the disc is<br />
recorded in.<br />
- If the selected language is not<br />
recorded on the disc, the original prerecorded<br />
language is selected.<br />
▼-Select “Automatic” if you want the<br />
subtitle language to be the same as<br />
the language selected as the audio<br />
language.<br />
- Some discs may not contain the<br />
language you select as your initial<br />
language; in that case the disc will<br />
use its original language setting.<br />
ENG-51
<strong>DVD</strong> OPERATIONS<br />
Setting Up the Audio Options<br />
Audio Options allows you to set up sound for use with your external audio system.<br />
1<br />
With the <strong>DVD</strong> in Stop mode,<br />
press the MENU button on the<br />
remote control.<br />
2<br />
Press the ➐✓❷ buttons to<br />
select <strong>DVD</strong>, then press the<br />
❿ or ENTER button.<br />
3<br />
Press the ➐✓❷ buttons to<br />
select Audio Setup, then<br />
press the ❿ or ENTER<br />
button.<br />
4<br />
Press the ➐✓❷ buttons to<br />
select the desired item, then<br />
press the ❿ or ENTER<br />
button.<br />
▼-<br />
To make the <strong>DVD</strong> Setup menu<br />
disappear, press the MENU button.<br />
ENG-52
<strong>DVD</strong> OPERATIONS<br />
Audio Options<br />
Dolby Digital Out<br />
- PCM: Con<strong>ver</strong>ts to<br />
PCM(2CH) audio.<br />
- Bitstream: Outputs Dolby<br />
Digital via the digital<br />
output.<br />
Manufactured under license from Dolby<br />
Laboratories. “Dolby” and the double-D<br />
symbol are trademarks of Dolby<br />
Laboratories.<br />
“DTS” and “DTS Digital Out” are trademarks<br />
of Digital Theater Systems, Inc.<br />
Dynamic Compression<br />
- On: When the moviesoundtracks<br />
are played at<br />
low volume or from smaller<br />
speakers, the system can<br />
apply appropriate compression<br />
to make low-level content more<br />
intelligible and prevent dramatic<br />
passages from getting too loud.<br />
- Off: To select the standard<br />
range.<br />
▼-<br />
Dynamic compression restrains the<br />
dynamic range of the sound, i.e. the<br />
difference between the loud and<br />
quiet passages of a <strong>DVD</strong> audio track.<br />
This is useful when watching a <strong>DVD</strong><br />
late at night.<br />
PCM Down Sampling<br />
- On: Select this when the<br />
Amplifier connected to the<br />
player is not 96KHz<br />
compatible. In this case, the<br />
96KHz signals will be<br />
con<strong>ver</strong>ted down to 48KHZ.<br />
- Off: Select this when the<br />
Amplifier connected to the<br />
player is 96KHz compatible.<br />
In this case, all signals will<br />
be output without any<br />
changes.<br />
Note<br />
Even when PCM Down sampling is Off,<br />
some discs will only output down sampled<br />
audio through the digital outputs.<br />
ENG-53
<strong>DVD</strong> OPERATIONS<br />
Setting Up the Display Options<br />
Display options enable you to set various video functions of the player.<br />
1<br />
With the unit in Stop mode,<br />
press the MENU button on the<br />
remote control.<br />
2<br />
Press the ➐✓❷ buttons to<br />
select <strong>DVD</strong>, then press the<br />
❿ or ENTER button.<br />
3<br />
Press the ➐✓❷ buttons to<br />
select Display Setup, then<br />
press the ❿ or ENTER<br />
button.<br />
4<br />
Press the ➐✓❷ buttons to<br />
select the desired item, then<br />
press the ❿ or ENTER<br />
button.<br />
▼-<br />
To make the <strong>DVD</strong> Setup menu<br />
disappear, press the MENU button.<br />
ENG-54
<strong>DVD</strong> OPERATIONS<br />
Display Options<br />
TV Aspect<br />
Depending on the type of<br />
television you have, you may<br />
want to adjust the aspect<br />
ratio (screen setting).<br />
- 4:3 Letter Box: Select when you want to see the total 16:9<br />
ratio screen the <strong>DVD</strong> supplies, even though you have a TV<br />
with a 4:3 ratio screen. Black bars will appear at the top<br />
and bottom of the screen.<br />
- 4:3 Pan & Scan: Select this for conventional size TVs when<br />
you want to see the central portion of the 16:9 screen.<br />
(Extreme left and right side of movie picture will be cut off.)<br />
- 16:9 Wide: You can view the full 16:9 picture on your wide<br />
screen TV.<br />
Screen Messages<br />
Use to turn on-screen<br />
messages On or Off.<br />
Progressive Out<br />
- ON : Select when you<br />
want to use the<br />
Component (480p) or<br />
<strong>HD</strong>MI<br />
(480p/720p/1080p)<br />
progressive outputs.<br />
- OFF : Select when you<br />
want to use Video/<br />
Component interlace<br />
ENG-55
<strong>DVD</strong> OPERATIONS<br />
<strong>HD</strong>MI<br />
This setting is used when the<br />
<strong>DVD</strong>-<strong>VCR</strong> is connected by<br />
<strong>HD</strong>MI to Display devices (TV,<br />
projector, etc).<br />
Resolution Setting<br />
- Auto : Resolution setting automatically<br />
- <strong>Manual</strong> : Resolution setting <strong>Manual</strong>ly.<br />
Resolution<br />
- 480p : 720 x 480<br />
- 720p : 1280 x 720<br />
- 1080i : 1920 x 1080<br />
- 1080p : 1920 x 1080<br />
ENG-56
<strong>DVD</strong> OPERATIONS<br />
Picture Quality<br />
- Black Level : Adjusts the<br />
brightness of the screen.<br />
(On or Off) This function is<br />
not available in progressive<br />
mode.<br />
- Sharpness : Level 1 ~ Level 5<br />
- Brightness : Level 1 ~ Level 5<br />
- Color Saturation : Level 1 ~ Level 5<br />
● Consult your TV <strong>User</strong>’s <strong>Manual</strong> to find out if your TV supports Progressive Scan. If Progressive Scan is<br />
supported, follow the TV <strong>User</strong>’s <strong>Manual</strong> regarding Progressive Scan settings in the TV’s menu system.<br />
● If the Video Output is set incorrectly, the screen may not display an image.<br />
● The resolutions available for <strong>HD</strong>MI output depend on the connected TV or projector. For more details,<br />
see the user’s manual of your TV or projector.<br />
● When the resolution is changed during playback, it may take a few seconds for a normal image to<br />
appear.<br />
● For better picture quality, set the <strong>HD</strong>MI output resolution to 720p or 1080p.<br />
ENG-57
<strong>DVD</strong> OPERATIONS<br />
Setting Up the Parental Control<br />
The Parental Control function works in conjunction with <strong>DVD</strong>s that have been assigned a rating, which helps<br />
you control the types of <strong>DVD</strong>s that your family watches. There are up to 8 rating levels on a disc.<br />
Setting Up the Rating Level<br />
1<br />
With the unit in stop mode,<br />
press the MENU button on the<br />
remote control.<br />
2<br />
Press the ➐✓❷ buttons to<br />
select <strong>DVD</strong>, then press the<br />
❿ or ENTER button.<br />
3<br />
Press the ➐✓❷ buttons to<br />
select Parental Setup, then<br />
press the ❿ or ENTER<br />
button.<br />
Enter your password.<br />
4<br />
Press the ❿ or ENTER<br />
The Enter Password screen<br />
appears.<br />
ENG-58
<strong>DVD</strong> OPERATIONS<br />
5<br />
Press the ❿ or ENTER<br />
The Enter Password screen<br />
appears.<br />
Note<br />
The default password is 0000.<br />
6<br />
Press the ➐✓❷ buttons to<br />
select the Rating Level you<br />
want, then press the ❿ or<br />
ENTER button.<br />
e.g) Setting up in Level 6.<br />
▼-To make the <strong>DVD</strong> setup menu<br />
disappear, press the MENU button.<br />
- For example, if you select up to Level<br />
6, discs that contain Level 7 or 8 will<br />
not play.<br />
Changing the Password<br />
1<br />
With the unit in stop mode,<br />
press the MENU button on the<br />
remote control.<br />
2<br />
Press the ➐✓❷ buttons to<br />
select <strong>DVD</strong>, then press the<br />
❿ or ENTER button.<br />
3<br />
Press the ➐✓❷ buttons to<br />
select Parental Setup, then<br />
press the ❿ or ENTER<br />
button.<br />
Enter your password.<br />
ENG-59
<strong>DVD</strong> OPERATIONS<br />
4<br />
Press the ➐✓❷ buttons to<br />
select Change Password,<br />
then press the ❿ or ENTER<br />
button.<br />
5<br />
Enter your password, then<br />
press the ❿ or ENTER<br />
button.<br />
Enter your new password,<br />
then press the ❿ or<br />
ENTER button.<br />
▼-To make the <strong>DVD</strong> setup menu<br />
disappear, press the MENU button.<br />
Note<br />
If you forgot your password, power on<br />
the unit with no disc.<br />
Press the / (Search) buttons<br />
simultaneously on the front panel for 5<br />
seconds. The “Reset OK” message will<br />
appear. Press the POWER button.<br />
ENG-60
<strong>DVD</strong> OPERATIONS<br />
DivX(R) Registration<br />
DivX Registration menu has the Registration Code that enables your DivX Certified <strong>Player</strong> to play DivX(R)<br />
Video On Demand file format.<br />
1<br />
With the unit in Stop mode,<br />
press the MENU button on the<br />
remote control.<br />
2<br />
Press the ➐✓❷ buttons to<br />
select <strong>DVD</strong>, then press the<br />
❿ or ENTER button.<br />
3<br />
Press the ➐✓❷ buttons to<br />
select DivX(R) Registration,<br />
then press the ❿ or ENTER<br />
button.<br />
Please use the Registration code to register this player<br />
with the DivX(R) Video On Demand format.<br />
To learn more go to www.divx.com/vod.<br />
4<br />
Press the MENU button to exit.<br />
ENG-61
Chapter 5<br />
<strong>VCR</strong> OPERATIONS<br />
In this chapter, you will learn how to play a video cassette tape, how to use the time counter and memory stop<br />
features, and how to record a program as you are watching TV.<br />
Inserting and Ejecting a Video Cassette<br />
Tape<br />
To Insert a Video Cassette Tape<br />
1<br />
Hold the video cassette tape<br />
window-side up with the arrow<br />
pointing away from you.<br />
2<br />
Gently push the tape through<br />
the compartment door until you<br />
feel the <strong>VCR</strong> pull it.<br />
The <strong>VCR</strong> loads the tape<br />
automatically.<br />
▼-Don’t try to insert a tape upside down<br />
or backwards.<br />
- Use only video tapes labeled “VHS.”<br />
European PAL VHS video tapes and<br />
S-VHS pre-recorded tapes aren’t<br />
compatible with this unit. Choose<br />
brand name, high quality tapes for<br />
best results.<br />
▼-If the safety tab of your video tape<br />
has been removed, the tape begins<br />
to play automatically. You don’t have<br />
to press PLAY. For more information<br />
on the safety tab, see page 74.<br />
To Eject a Video Cassette Tape<br />
1<br />
Press the (Stop) button to<br />
stop playing the tape.<br />
▼When you’re finished playing a prerecorded<br />
video tape, it’s best to rewind it<br />
to the beginning and remove it from the<br />
<strong>VCR</strong> to protect it from wear and tear.<br />
2<br />
Press the EJECT button on the<br />
front panel to eject the tape.<br />
▼After ejecting a tape, you should remove<br />
it completely from the compartment and<br />
turn off the <strong>VCR</strong>.<br />
ENG-62
<strong>VCR</strong> OPERATIONS<br />
Playing a Pre-Recorded Video Cassette Tape<br />
Playing the Tape<br />
1<br />
Insert the video cassette tape.<br />
▼-<br />
For more information on the safety<br />
tab, see page 74.<br />
2<br />
If the tape doesn’t begin to play<br />
automatically, press the<br />
(Play/Pause) button.<br />
3<br />
Pausing Play<br />
While a tape is playing, press<br />
the (Play/Pause) button<br />
when you want to interupt play.<br />
The tape pauses temporarily.<br />
Press the (Play/Pause)<br />
button to resume playing the<br />
tape.<br />
▼- The <strong>VCR</strong> does not play sound while<br />
a video tape is paused.<br />
- See “Using Automatic Tracking” on<br />
the next page.<br />
- If you see white lines on the screen,<br />
see “Using Automatic Tracking” on<br />
page 65.<br />
Note<br />
To view <strong>VCR</strong> playback, you must connect the Video Out (Yellow) to your TV. The <strong>VCR</strong> does not output video<br />
through the Component jacks.<br />
ENG-63
<strong>VCR</strong> OPERATIONS<br />
Special <strong>VCR</strong> Playback Features<br />
While a videotape is playing, you can enjoy a variety of special playback features, including Still, Frame Advance,<br />
Skip, Repeat, and more. Press the Play/Pause button again to resume normal playback.<br />
Frame Advance<br />
In the pause mode, press<br />
F.ADV to advance to the next<br />
frame.<br />
Fps/Rps Review<br />
In Play mode, press /<br />
(Forward) or / (Rewind)<br />
to review at two speeds:<br />
- Picture Search: Press and<br />
release or (SKIP)<br />
buttons to advance the tape<br />
forward or backward at 5<br />
times normal speed.<br />
- Jet Search: Press and hold<br />
down the / (SEARCH)<br />
buttons, then release it to play<br />
back at the normal speed.<br />
SKIP<br />
In Play mode, press the SKIP<br />
button to move ahead exactly<br />
30 seconds. Press the SKIP<br />
button repeatedly up to 4 times<br />
to move ahead 2 minutes.<br />
Repeat<br />
- In Play mode, press the<br />
REPEAT button to review the<br />
last 5 seconds of tape (SP<br />
mode).<br />
- In Play mode, press the<br />
REPEAT button to review the<br />
last 15 seconds of tape (SLP<br />
mode).<br />
ENG-64
<strong>VCR</strong> OPERATIONS<br />
Using Automatic Tracking<br />
The Tracking adjustment removes the white lines that sometimes appear during playback because of slight<br />
differences in recording decks. The TRK button will automatically align the recorded tracks with the playback<br />
heads to solve this problem. You may also set tracking manually.<br />
1<br />
Insert and play a video<br />
cassette tape.<br />
As soon as the tape begins<br />
to play, the <strong>VCR</strong> begins<br />
automatic tracking.<br />
Tracking<br />
2<br />
If automatic tracking doesn’t<br />
remove the streaks from the<br />
picture, press and hold the<br />
TRK/TV CH or TRK/TV<br />
CH button until the<br />
streaks disappear.<br />
ENG-65
<strong>VCR</strong> OPERATIONS<br />
Selecting the Cassette Type<br />
If you wish to use the tape counter to display the time remaining on a cassette, you must indicate the<br />
type of cassette inserted.<br />
1<br />
Press the MENU button on the<br />
remote control.<br />
2<br />
Press the ➐✓❷ buttons to<br />
select <strong>VCR</strong>, then press the<br />
❿ or ENTER button.<br />
n<br />
3<br />
Press the ➐✓❷ buttons to<br />
select Tape Length, then<br />
press the ❿ or ENTER<br />
button to select the correct<br />
cassette length.<br />
Note<br />
This information is usually printed on the<br />
tape box. The menu cycles through: T-120,<br />
T-160 or T-180.<br />
Once the type of cassette is set, the <strong>VCR</strong><br />
can display the amount of time remaining on<br />
the tape when you press the INFO. button.<br />
4<br />
Press the MENU button to exit.<br />
ENG-66
<strong>VCR</strong> OPERATIONS<br />
Setting the Auto Play<br />
If you want your videotapes to play automatically when you insert them, turn on Auto Play.<br />
1<br />
Press the MENU button on the<br />
remote control.<br />
Note<br />
Only tapes that are missing the Record<br />
Safety Tab will play automatically when<br />
inserted (See page 74).<br />
2<br />
Press the ➐✓❷ buttons to<br />
select <strong>VCR</strong>, then press the<br />
❿ or ENTER button.<br />
n<br />
3<br />
Press the ➐✓❷ buttons to<br />
select Auto Play, then press<br />
the ❿ or ENTER button to<br />
select On or Off.<br />
▼- On: The <strong>VCR</strong> will automatically begin<br />
playing a video tape when it is<br />
inserted, as long as the safety<br />
tab of the cassette has been<br />
removed.<br />
- Off: Auto play is disabled.<br />
4<br />
Press the MENU button to exit.<br />
ENG-67
<strong>VCR</strong> OPERATIONS<br />
Setting the Auto Repeat<br />
If you want your videotapes to play repeatedly, turn on Auto Repeat.<br />
1<br />
Press the MENU button on the<br />
remote control.<br />
2<br />
Press the ➐✓❷ buttons to<br />
select <strong>VCR</strong>, then press the<br />
❿ or ENTER button.<br />
n<br />
3<br />
Press the ➐✓❷ buttons to<br />
select Auto Repeat, then<br />
press the ❿ or ENTER<br />
button to select On or Off.<br />
▼-On: The <strong>VCR</strong> will play a tape<br />
repeatedly [unless a tape control<br />
is activated (stop, fast forward or<br />
rewind)].<br />
- Off: Auto Repeat is disabled.<br />
4<br />
Press the MENU button to exit.<br />
ENG-68
<strong>VCR</strong> OPERATIONS<br />
Using the Tape Counter<br />
The tape counter:<br />
- Indicates the elapsed time in the play and record modes (hours, minutes and seconds).<br />
- Is reset when a cassette is inserted in the <strong>DVD</strong>-<strong>VCR</strong>.<br />
- Allows you to easily find the beginning of a sequence.<br />
- If the remaining time is to be calculated correctly, you must indicate the type of cassette being used.<br />
1<br />
Insert a cassette in your <strong>DVD</strong>-<br />
<strong>VCR</strong>. To set the tape counter<br />
to zero at the beginning of a<br />
sequence:<br />
- Press the INFO. button twice<br />
to display the counter<br />
- Press the CLEAR button<br />
when you want to set the<br />
tape counter to zero.<br />
2<br />
When you are ready,<br />
- Start playback or recording.<br />
- Press the (Stop) button.<br />
- To fast-forward or rewind to<br />
the sequence at which the<br />
counter was set to zero, press<br />
the the / (Forward) or<br />
/ (Rewind) buttons on<br />
the remote control.<br />
- Some <strong>DVD</strong>-<strong>VCR</strong> information, such as the counter, can be<br />
displayed on the television screen.<br />
Press the INFO. button:<br />
- Once to display the current function, recording speed and<br />
counter.<br />
- Twice to display the counter only.<br />
- Three times to display the time remaining on the cassette.<br />
- Four times to clear the display.<br />
ENG-69
<strong>VCR</strong> OPERATIONS<br />
Using the Assemble Edit Function<br />
This function allows you to start a new recording at a specific position on the cassette while maintaining a <strong>ver</strong>y<br />
smooth scene change.<br />
1<br />
Insert the cassette to be edited<br />
in your <strong>DVD</strong>-<strong>VCR</strong>.<br />
2<br />
Press the (Play/Pause)<br />
button to start playback.<br />
3<br />
When you reach the position<br />
from which you wish to start<br />
the new recording, press the<br />
(Play/Pause) button.<br />
4<br />
Press the F.ADV button as<br />
often as necessary to advance<br />
frame by frame, until the exact<br />
recording position is located.<br />
5<br />
While the <strong>DVD</strong>-<strong>VCR</strong> is in<br />
pause mode, press the REC<br />
button. The pause mode is<br />
displayed on the screen.<br />
ENG-70
<strong>VCR</strong> OPERATIONS<br />
6<br />
Select the source from which<br />
you wish to record by pressing:<br />
- The CH or button for<br />
television channel.<br />
- The INPUT SEL. button for<br />
the LINE1 or LINE2 input<br />
source.<br />
7<br />
Press the REC button to start<br />
recording. When you have<br />
finished recording, press the<br />
(Stop) button.<br />
Selecting the Audio Output Mode<br />
You can select the mode in which the sound is reproduced on the loudspeakers and AV outputs.<br />
The following options are available.<br />
Press the AUDIO button on the<br />
remote control until the<br />
required option is displayed.<br />
Audio output Mode<br />
- Left : Used to listen to the sound on the left Hi-Fi channel.<br />
- Right: Used to listen to the sound on the right Hi-Fi channel.<br />
- Mono: Used to listen to the sound on the normal mono channel.<br />
- Hi-Fi : Used to listen to Hi-Fi stereo sound on the left and<br />
right channels. When playing back tapes recorded in<br />
Hi-Fi, the sound switches to Hi-Fi after five seconds of<br />
Mono.<br />
ENG-71
<strong>VCR</strong> OPERATIONS<br />
Searching for a Specific Sequence<br />
Each time you record a cassette on this <strong>DVD</strong>-<strong>VCR</strong>, an “index” is automatically marked on the tape when<br />
recording starts.<br />
The Search function allows you to fast-forward or rewind to a specific index and start playback from that point.<br />
Depending on the direction selected, the indexes are numbered as follows:<br />
➔<br />
etc.<br />
Prev<br />
Seq.<br />
Seq. being<br />
played<br />
Next<br />
Seq.<br />
etc.<br />
2 1 1 2<br />
This <strong>DVD</strong>-<strong>VCR</strong> uses a standard indexing system (VISS). As a result, it will recognize any indexes marked by<br />
other <strong>VCR</strong>s using the same system and vice <strong>ver</strong>sa.<br />
1<br />
Press the MENU button on the<br />
remote control.<br />
2<br />
Press the ➐✓❷ buttons to<br />
select Function, then press<br />
the ❿ or ENTER button.<br />
3<br />
Press the ➐✓❷ buttons to<br />
select <strong>VCR</strong> Function, then<br />
press the ❿ or ENTER<br />
button.<br />
<strong>VCR</strong> Function can be<br />
displayed simply by pressing<br />
the SEARCH button.<br />
4<br />
Press the ➐✓❷ buttons to<br />
select the desired item, then<br />
press the ❿ or ENTER<br />
button.<br />
ENG-72
<strong>VCR</strong> OPERATIONS<br />
Variable Search System<br />
Go To [0:00:00] Stop<br />
Use this feature when you<br />
want to search for the 0:00:00<br />
counter position on a<br />
cassette.<br />
Press the CLEAR button at<br />
the point on the tape where<br />
you want to set the counter to [0:00:00].<br />
The <strong>VCR</strong> will rewind or fast forward, searching for the<br />
0:00:00 counter position, and then automatically stop at that<br />
position.<br />
End Search<br />
Use this feature when you<br />
want to search for a blank<br />
position to record a program<br />
on a cassette.<br />
The <strong>VCR</strong> will fast forward,<br />
searching for a blank position,<br />
and then automatically stop at that position.<br />
If the <strong>VCR</strong> reaches the end of the tape during end search,<br />
the tape will be ejected.<br />
Scan and Play<br />
Use scan and play when you<br />
don’t know exactly where a<br />
program is located on a<br />
cassette tape.<br />
- Forward Intro Scan<br />
Select “Forward Intro<br />
Scan”, then press the ENTER button.<br />
- Re<strong>ver</strong>se Intro Scan<br />
Select “Re<strong>ver</strong>se Intro Scan”, then press the ENTER button.<br />
ENG-73
<strong>VCR</strong> OPERATIONS<br />
Basic Recording<br />
You can record a TV show in progress by inserting a blank tape and pressing the REC button.<br />
You can even add time in 30-minute increments up to 4 hours by pressing the REC button repeatedly;<br />
see page 76.<br />
Note<br />
Be sure your videotape has a Record Safety Tab. If the tab is missing, you can co<strong>ver</strong> the opening with a small<br />
piece of tape. Warning: Do not co<strong>ver</strong> this opening unless you are sure you want to record o<strong>ver</strong> the tape.<br />
Before You Begin...<br />
- Power on the <strong>DVD</strong>-<strong>VCR</strong><br />
- Power on the TV<br />
Protecting a Recorded Cassette<br />
Video cassettes have a safety tab to prevent accidental erasure. When this tab has been removed, you cannot<br />
record on the tape.<br />
If you wish to protect a<br />
cassette, break off the tab<br />
using a small screwdri<strong>ver</strong>.<br />
To re-record o<strong>ver</strong> a protected<br />
cassette (safety tab broken),<br />
co<strong>ver</strong> the hole with adhesive<br />
tape.<br />
Recording<br />
1<br />
Insert a blank VHS tape into<br />
the <strong>VCR</strong> deck.<br />
Make sure the tape is long<br />
enough to record the entire<br />
program.<br />
Press the SPEED button to set<br />
the record speed.<br />
(See page 77)<br />
2<br />
Press the INPUT SEL. or button to select Line 1 or 2<br />
if recording from an external device connected to the front or<br />
rear jacks, respectively.<br />
ENG-74
<strong>VCR</strong> OPERATIONS<br />
3<br />
Press the REC button on the<br />
remote control or front panel.<br />
For options while recording is in<br />
progress, see “Special Recording<br />
Features” on this page.<br />
Note<br />
Recording from the <strong>DVD</strong> to the <strong>VCR</strong> is not<br />
possible.<br />
4<br />
Pause/Resume Recording<br />
Press the (Play/Pause)<br />
button.<br />
Press the REC button again to<br />
resume.<br />
5<br />
Stop Recording<br />
Press the (Stop) button.<br />
Special Recording Features<br />
While a recording is in progress, you can watch a <strong>DVD</strong>, or add recording time in 30-minute increments.<br />
To Watch a <strong>DVD</strong> while Recording<br />
Insert a <strong>DVD</strong> in the <strong>DVD</strong> tray and press the<br />
(Play/Pause). The output will automatically change to the<br />
<strong>DVD</strong>.<br />
To Add Recording Time<br />
See One-Touch Recording (OTR) on page 76.<br />
ENG-75
<strong>VCR</strong> OPERATIONS<br />
Using One-Touch Recording<br />
One-Touch Recording (OTR) allows you to add recording time in 30-minute increments up to 4 hours at the<br />
touch of a button.<br />
1<br />
Insert a blank VHS tape into<br />
the <strong>VCR</strong> deck.<br />
2<br />
Use the CH or buttons to select the desired TV<br />
channel, or press the INPUT SEL. button to select Line 1 or<br />
2 if recording from an external device connected to the front<br />
or rear jacks, respectively.<br />
3<br />
Press the REC button on the<br />
remote control or front panel.<br />
4<br />
While in Record mode, press<br />
the REC button again to<br />
activate One-Touch Recording<br />
(OTR).<br />
Record length 0:30 appears<br />
on the On-screen display and<br />
the <strong>DVD</strong>-<strong>VCR</strong> will record for<br />
exactly 30 minutes.<br />
ENG-76
<strong>VCR</strong> OPERATIONS<br />
5<br />
Add Recording Time<br />
Continue pressing REC<br />
button to add recording time<br />
in 30 minute increments up to<br />
4 hours.<br />
The <strong>DVD</strong>-<strong>VCR</strong> stops<br />
recording automatically when<br />
the time has elapsed. The<br />
<strong>DVD</strong>-<strong>VCR</strong> will automatically be<br />
turned off when the OTR<br />
finished.<br />
Record length 0:30 LINE1<br />
SP<br />
Selecting the Recording Speed<br />
You can slow down the recording speed from SP to SLP in order to fit six hours of programming on a T-120<br />
tape.<br />
Press the SPEED button on the<br />
remote control to select the<br />
Record Speed.<br />
- SP: Standard Play, for best<br />
quality.<br />
- SLP: Super Long Play, for<br />
maximum recording<br />
time (3 times SP).<br />
Maximum Recording Time - SP vs. SLP<br />
Tape Length SP (Standard Play) SLP (Super Long Play)<br />
T-120 2 hrs 6 hrs<br />
T-160 2hrs 40 mins 8 hrs<br />
T-180 3 hrs 9 hrs<br />
Note<br />
The selected Record Speed will appear on<br />
the front panel display and on-screen<br />
display.<br />
ENG-77
<strong>VCR</strong> OPERATIONS<br />
Making a Timer Recording<br />
Insert a blank videotape into the <strong>VCR</strong> deck. Be sure to leave the Record Safety Tab intact.<br />
With the Timer Recording function, you can program up to 7 events at a time to record up to a month in<br />
advance.<br />
To Begin Setting the Timer Recording,<br />
- Power On your <strong>DVD</strong>-<strong>VCR</strong>.<br />
- Power On your TV.<br />
1<br />
Press the MENU button on the<br />
remote control.<br />
2<br />
Press the ➐✓❷ buttons to<br />
select PROG, then press the<br />
❿ or ENTER button.<br />
The Timer Program Screen<br />
can be displayed simply by<br />
pressing the TIMER button.<br />
3<br />
Select Line input 1 or 2<br />
Press the ❿ button, then<br />
press the ➐✓❷ buttons to<br />
select Line in 1 or Line in 2.<br />
Press the ❿ button to move<br />
to the next setting.<br />
Note<br />
You can select an external device<br />
connected to L1(Line 1) or L2(Line 2) by<br />
pressing the INPUT SEL. button.<br />
4<br />
Set Time/Date/Speed<br />
Repeat Step 3 above to set<br />
start time, end time, date and<br />
record speed.<br />
Date can be set for one time,<br />
daily or weekly recording.<br />
ENG-78
<strong>VCR</strong> OPERATIONS<br />
Selecting Auto Speed<br />
If the length of the videotape is not long enough for a timer<br />
recording in the SP mode, set the recording tape speed to<br />
“Auto”. Recording will start in the SP mode. If the length is not<br />
long enough, the tape speed will automatically change from SP<br />
mode to SLP mode.<br />
Daily/Weekly Date Programming<br />
Weekly [Sun~Sat]: Use this to record TV programs on the same<br />
Line In at the same time e<strong>ver</strong>y week. Daily [Mon, Tue, Wed,<br />
Thu, Fri]: Use this to record TV programs on the same channel<br />
at the same time e<strong>ver</strong>y day Monday through Friday.<br />
5<br />
Save Timer Recording<br />
Press the RETURN button to<br />
finish setting the timer<br />
recording.<br />
Stop the <strong>DVD</strong>-<strong>VCR</strong> or turn the<br />
power off. Then the <strong>DVD</strong>-<strong>VCR</strong><br />
will automatically turn on and<br />
begin recording at the time you<br />
set.<br />
To stop the timer recording,<br />
press the POWER button or<br />
press the (Stop) button<br />
twice.<br />
ENG-79
<strong>VCR</strong> OPERATIONS<br />
Chapter 6<br />
REFERENCE<br />
Using the TV Buttons on the Remote Control<br />
Your <strong>DVD</strong>-<strong>VCR</strong> remote control will work with <strong>Samsung</strong> televisions and compatible brands.<br />
To determine whether your television is compatible, follow the instructions below.<br />
1 Switch your television on.<br />
2 Point the remote control towards the television.<br />
3 Hold down the TV button and enter the two-figure code corresponding to the brand of your television, by<br />
pressing the appropriate numeric buttons.<br />
TV Codes<br />
BRAND<br />
SAMSUNG 01, 14, 15, 23<br />
DAEWOO 19<br />
EMERSON 21<br />
HITACHI 10<br />
LG 06, 08, 18<br />
LOEWE 28<br />
MAGNAVOX 04<br />
NEWSAN 27<br />
NOBLEX 25<br />
PANASONIC 12, 24<br />
RCA 07, 29<br />
SANYO 05, 20<br />
SHARP 02, 16, 22<br />
SONY 03<br />
TELEFUNKEN 26<br />
TOSHIBA 09<br />
ZENITH 17<br />
CODE<br />
Note<br />
- If your television is compatible with the remote control, it will switch off. It is now programmed to operate<br />
with the remote control.<br />
- If se<strong>ver</strong>al codes are indicated for your television brand, try each one in turn until you find one that works.<br />
You can then control the television using the following buttons.<br />
Button<br />
Function<br />
POWER Used to switch the television on and off.<br />
INPUT SEL. Used to select an external source.<br />
TV VOL + or – Used to adjust the volume of the television.<br />
TV CH ( or ) Used to select the required channel.<br />
TV MUTE Used to toggle the sound on and off.<br />
The various functions will not necessarily work on all televisions. If you encounter problems, operate the<br />
television directly.<br />
ENG-80
M EMO<br />
Troubleshooting<br />
Before contacting a <strong>Samsung</strong> authorized service center, perform the following simple checks.<br />
If you are unable to solve the problem after reading the above instructions, note:<br />
- The model and serial number on the rear of your <strong>DVD</strong>-<strong>VCR</strong><br />
- The warranty information<br />
- A clear description of the problem<br />
Then contact your nearest SAMSUNG service center.<br />
Identifying <strong>DVD</strong> Problems<br />
Problem<br />
No operations can<br />
be performed with<br />
the remote control.<br />
Disc does not play.<br />
5.1 channel sound<br />
is not being<br />
reproduced.<br />
The icon<br />
appears on<br />
screen.<br />
Disc Menu doesn’t<br />
appear.<br />
Play mode differs<br />
from the Setup<br />
Menu selection.<br />
The screen ratio<br />
cannot be changed.<br />
No audio.<br />
• Check the batteries in the remote control.<br />
They may need replacing.<br />
• Operate the remote control at a distance of no more than 20 feet.<br />
• Remove batteries and hold down one or more buttons for se<strong>ver</strong>al<br />
minutes to drain the microprocessor inside the remote control to<br />
reset it. Reinstall batteries and try to operate the remote control<br />
again.<br />
• Ensure that the disc is installed with the label side facing up.<br />
• Check the region number of the <strong>DVD</strong>.<br />
• 5.1 channel sound is reproduced only when the following<br />
conditions are met.:<br />
1) The <strong>DVD</strong>-<strong>VCR</strong> is connected with the proper Amplifier<br />
2) The disc is recorded with 5.1 channel sound.<br />
• Check whether the disc being played has the “5.1 ch” mark on<br />
the outside.<br />
• Check if your audio system is connected and working properly.<br />
• In a <strong>DVD</strong> Setup Menu, is the Audio Output set to Bitstream?<br />
• The features or action cannot be completed at this time because:<br />
1. The <strong>DVD</strong>’s software restricts it.<br />
2. The <strong>DVD</strong>’s software doesn’t support the feature (e.g., angles).<br />
3. The feature is not available at the moment.<br />
4. You’ve requested a title or chapter number or search time that is<br />
out of range.<br />
• Check if the disc has a Menu.<br />
Action<br />
• Some of the functions selected in the Setup Menu may not work<br />
properly if the disc is not encoded with the corresponding<br />
function.<br />
• The Screen Ratio is fixed on your <strong>DVD</strong>s.<br />
• Make sure you have selected the correct Digital Output in the<br />
Audio Options Menu.<br />
Page<br />
P5<br />
P9<br />
P20<br />
-<br />
-<br />
-<br />
P35-36<br />
P52~53<br />
ENG-81
<strong>VCR</strong> OPERATIONS<br />
Problem<br />
The screen is<br />
blocked<br />
Forgot password<br />
If you experience<br />
other problems.<br />
The picture is<br />
noisy or distorted<br />
Action<br />
• Press the / button for more than 5 seconds with no disc in<br />
the unit. All settings will re<strong>ver</strong>t to the factory settings.<br />
• From a cold start with no disc in unit, press the / button<br />
simultaneously on the front panel for 5 seconds. All settings<br />
including the password will re<strong>ver</strong>t to the factory settings. Don't<br />
use this unless absolutely necessary.<br />
• Go to the contents and find the section of the instruction book<br />
that contains the explanations regarding the current problem, and<br />
follow the procedure once again.<br />
• If the problem still cannot be solved, please contact your nearest<br />
authorized service center.<br />
• Make sure that the disc is not dirty or scratched.<br />
• Clean the disc.<br />
Page<br />
-<br />
P58<br />
Identifying <strong>VCR</strong> Problems<br />
Problem<br />
Action<br />
Page<br />
No power<br />
You cannot insert<br />
a video cassette<br />
The television<br />
program was not<br />
recorded<br />
Timer recording<br />
was unsuccessful<br />
No playback picture<br />
or the picture is<br />
distorted<br />
You cannot see<br />
normal broadcasts<br />
Noise bars or<br />
streaks on playback<br />
When the button<br />
is pressed during<br />
playback, the still<br />
picture has se<strong>ver</strong>e<br />
“noise bar” streaks<br />
Video Head<br />
Cleaning<br />
• Check that the power plug is connected to a wall outlet.<br />
• A video cassette can only be inserted with the window<br />
side up and the safety tab facing you.<br />
• Check the <strong>DVD</strong>-<strong>VCR</strong> antenna/cable connections.<br />
• Is the <strong>DVD</strong>-<strong>VCR</strong> tuner properly set?<br />
• Check if the safety tab is intact on the cassette.<br />
• Re-check the recording start/stop time settings.<br />
• If there was a power failure or interruption during timer<br />
recording, the recording will have been cancelled.<br />
• Check to see if you are using a prerecorded tape.<br />
• Check the tuner or external setting. It should be on tuner.<br />
• Check the TV or <strong>VCR</strong> antenna connections.<br />
• Press the TRK buttons to minimize this effect.<br />
• A still picture may have “noise bars”, depending on the<br />
condition of the tape. Press the TRK buttons during slow<br />
motion to minimize this effect.<br />
• If poor pictures appear on a variety of cassettes, the video<br />
heads may need cleaning. This is not a common problem<br />
and unless it appears, the heads should not be cleaned.<br />
When cleaning the video heads, read all instructions<br />
provided with the head cleaning cassette. Incorrect head<br />
cleaning can permanently damage the video heads.<br />
ENG-82<br />
-<br />
P74<br />
-<br />
P78-79<br />
P63<br />
-<br />
P65<br />
-<br />
-
<strong>VCR</strong> OPERATIONS<br />
Technical Specifications<br />
AUDIO<br />
2 Stereo audio inputs, RCA Connector, -8dbm, 47KΩ,<br />
front and rear<br />
Inputs<br />
VIDEO<br />
2 Composite video inputs, RCA Connector, 75Ω, 1Vp-p<br />
AUDIO<br />
1 Stereo audio outputs, RCA Connector, -8dbm, 1.5KΩ<br />
AUDIO (<strong>DVD</strong> only) 2 Digital audio output (1 coaxial, 1 optical)<br />
1 pair Stereo audio outputs<br />
Outputs<br />
VIDEO<br />
1 Composite video output, RCA Connector, 75Ω, 1Vp-p<br />
VIDEO (<strong>DVD</strong> only) 1 Component video output, 75Ω, Y=1.0Vp-p, Pb=0.7Vp-p,<br />
Pr=0.7Vp-p<br />
<strong>HD</strong>MI<br />
1 <strong>HD</strong>MI output<br />
VIDEO SYSTEM<br />
1/2-inch VHS system, 4 rotary head helical scanning;<br />
FM azimuth luminance;chrominance: con<strong>ver</strong>ted sub system<br />
phase shift<br />
AUDIO TRACK<br />
Normal: 1 track; Hi-Fi: 2 track<br />
PLAY/RECORD TIME T-180 tape: SP 3 hours, SLP 9 hours<br />
FF/REW TIME<br />
T-120 tape:
M EMO<br />
ENG-84
M EMO<br />
ENG-85
Contact SAMSUNG WORLD WIDE<br />
If you have any questions or comments relating to <strong>Samsung</strong> products, please contact the SAMSUNG customer care<br />
centre.<br />
Region Country Customer Care Center Web Site<br />
CANADA 1-800-SAMSUNG(726-7864) www.samsung.com/ca<br />
North America MEXICO 01-800-SAMSUNG(726-7864) www.samsung.com/mx<br />
U.S.A 1-800-SAMSUNG(726-7864) www.samsung.com/us<br />
ARGENTINE 0800-333-3733 www.samsung.com/ar<br />
BRAZIL 0800-124-421 , 4004-0000 www.samsung.com/br<br />
CHILE 800-SAMSUNG(726-7864) www.samsung.com/cl<br />
COSTA RICA 0-800-507-7267 www.samsung.com/latin<br />
ECUADOR 1-800-10-7267 www.samsung.com/latin<br />
EL SALVADOR 800-6225 www.samsung.com/latin<br />
GUATEMALA 1-800-299-0013 www.samsung.com/latin<br />
Latin America JAMAICA 1-800-234-7267 www.samsung.com/latin<br />
PANAMA 800-7267 www.samsung.com/latin<br />
PUERTO RICO 1-800-682-3180 www.samsung.com/latin<br />
REP. DOMINICA 1-800-751-2676 www.samsung.com/latin<br />
TRINIDAD & TOBAGO 1-800-SAMSUNG(726-7864) www.samsung.com/latin<br />
VENEZUELA 0-800-100-5303 www.samsung.com/latin<br />
COLO<strong>MB</strong>IA 01-8000112112 www.samsung.com.co<br />
BELGIUM 0032 (0)2 201 24 18 www.samsung.com/be<br />
CZECH REPUBLIC<br />
844 000 844<br />
Distributor pro eskou republiku :<br />
<strong>Samsung</strong> Zrt., eska organizaní složka<br />
www.samsung.com/cz<br />
Vyskoilova 4, 14000 Praha 4<br />
DENMARK 70 70 19 70 www.samsung.com/dk<br />
FINLAND 030-6227 515 www.samsung.com/fi<br />
FRANCE<br />
3260 SAMSUNG(726-7864) or<br />
08 25 08 65 65 ( 0,15/Min)<br />
www.samsung.com/fr<br />
GERMANY 01805 - 121213 ( 0,14/Min) www.samsung.de<br />
HUNGARY 06-80-SAMSUNG(726-7864) www.samsung.com/hu<br />
ITALIA 800-SAMSUNG(726-7864) www.samsung.com/it<br />
Europe LUXE<strong>MB</strong>URG 0035 (0)2 261 03 710 www.samsung.com/be<br />
NETHERLANDS 0900 20 200 88 ( 0,10/Min) www.samsung.com/nl<br />
NORWAY 815-56 480 www.samsung.com/no<br />
POLAND 0 801 801 881 , 022-607-93-33 www.samsung.com/pl<br />
PORTUGAL 80 8 200 128 www.samsung.com/pt<br />
SLOVAKIA 0800-SAMSUNG(726-7864) www.samsung.com/sk<br />
SPAIN 902 10 11 30 www.samsung.com/es<br />
SWEDEN 0771-400 200 www.samsung.com/se<br />
U.K 0870-SAMSUNG(726-7864) www.samsung.com/uk<br />
Republic of Ireland 0818 717 100 www.samsung.com/ie<br />
AUSTRIA 0800-SAMSUNG(726-7864) www.samsung.com/at<br />
Switzerland 0800-SAMSUNG(726-7864) www.samsung.com/ch<br />
RUSSIA 8-800-555-55-55 www.samsung.ru<br />
KAZAHSTAN 8-10-800-500-55-500 www.samsung.kz<br />
UZBEKISTAN 8-800-120-0-400 www.samsung.uz<br />
CIS<br />
KYRGYZSTAN 00-800-500-55-500<br />
UKRAINE 8-800-502-0000 www.samsung.ua<br />
LITHUANIA 8-800-77777 www.samsung.lt<br />
LATVIA 800-7267 www.samsung.com/lv<br />
ESTONIA 800-7267 www.samsung.ee<br />
AUSTRALIA 1300 362 603 www.samsung.com/au<br />
New zealand 0800SAMSUNG(726-7864) www.samsung.com/nz<br />
CHINA 800-810-5858 , 010-6475 1880 www.samsung.com.cn<br />
HONG KONG 3698-4698 www.samsung.com/hk<br />
INDIA 3030 8282 , 1800 110011 www.samsung.com/in<br />
INDONESIA 0800-112-8888 www.samsung.com/id<br />
Asia Pacifi c JAPAN 0120-327-527 www.samsung.com/jp<br />
MALAYSIA 1800-88-9999 www.samsung.com/my<br />
PHILIPPINES 1800-10-SAMSUNG(726-7864) www.samsung.com/ph<br />
SINGAPORE 1800-SAMSUNG(726-7864) www.samsung.com/sg<br />
THAILAND 1800-29-3232 , 02-689-3232 www.samsung.com/th<br />
TAIWAN 0800-329-999 www.samsung.com/tw<br />
VIETNAM 1 800 588 889 www.samsung.com/vn<br />
Turkey 444 77 11 www.samsung.com.tr<br />
Middle East & SOUTH AFRICA 0860-SAMSUNG(726-7864 ) www.samsung.com/za<br />
Africa<br />
800-SAMSUNG (726-7864),<br />
U.A.E<br />
8000-4726<br />
www.samsung.com/mea<br />
ENG-86
Warranty<br />
LIMITED WARRANTY TO ORIGINAL PURCHASER<br />
This SAMSUNG brand product, as supplied and distributed by SAMSUNG ELECTRONICS AMERICA, INC.<br />
(SAMSUNG) and deli<strong>ver</strong>ed new, in the original carton to the original consumer purchaser, is warranted by<br />
SAMSUNG against manufacturing defects in materials and workmanship for the following limited warranty period:<br />
One (1) Year Parts / Ninety days (90) Labor<br />
This limited warranty begins on the original date of purchase, and is valid only on products purchased and used in<br />
the United States, and does not include transportation, installation, removal or reinstallation.<br />
Warranty repairs must be performed by SAMSUNG’S authorized service center. To receive warranty service, the<br />
original dated bill of sale must be presented upon request as proof of purchase to SAMSUNG or SAMSUNG’S<br />
authorized service center. Transportation to and from the service center is the responsibility of the purchaser.<br />
SAMSUNG will repair or replace this product, at our option and at no charge with new or reconditioned parts, if<br />
found to be defective during the limited warranty period specified above. The product must be returned during the<br />
warranty period with transportation charges prepaid to SAMSUNG’s designated service center. Prior to returning<br />
any product for warranty service, the purchaser must contact SAMSUNG for problem determination and service<br />
procedures. SAMSUNG does not warrant uninterrupted or error-free operation of the product.<br />
All replaced parts and products become the property of SAMSUNG and must be returned to SAMSUNG.<br />
Replacement parts and products assume the remaining original warranty, or ninety (90) days, whiche<strong>ver</strong> is longer.<br />
This limited warranty co<strong>ver</strong>s manufacturing defects in materials and workmanship encountered in normal,<br />
noncommercial use of this product and shall not apply to the following, including, but not limited to: damage which<br />
occurs in shipment; applications and uses for which this product was not intended; failures or problems which are<br />
caused by products or equipment not supplied by SAMSUNG; accidents, misuse, abuse, neglect, misapplication,<br />
fire, water, lightning or other acts of nature; incorrect electrical line voltage, fluctuations or surges; damage caused<br />
by improper or faulty installation; improper connection with any peripheral; product alteration or modification;<br />
improper or unauthorized repair; cosmetic damage or exterior finish; product with altered serial numbers; failure to<br />
follow operating instructions, customer adjustments, maintenance and environmental instructions that are co<strong>ver</strong>ed<br />
and prescribed in the instruction book; use of non-SAMSUNG or unauthorized parts, supplies, accessories or<br />
equipment which damage this product or result in service problems; failures or problems due to incompatibility<br />
with other equipment.
Contact SAMSUNG WORLD WIDE<br />
If you have any questions or comments relating to <strong>Samsung</strong> products,<br />
please contact the SAMSUNG customer care center.<br />
☎ 1-800-SAMSUNG (7267864) / www.samsung.com<br />
<strong>Samsung</strong> Electronics America, Inc.<br />
105 Challenger Road<br />
Ridgefield Park, NJ 07660-0511<br />
1-800-SAMSUNG (7267864)<br />
www.samsung.com<br />
US<br />
AK68-01623B-01


