

Samsung 40" Class (40.0" Diag.) LED 5005 Series TV - UN40D5005BFXZA - User Manual (ENGLISH)
Samsung 40" Class (40.0" Diag.) LED 5005 Series TV - UN40D5005BFXZA - User Manual (ENGLISH)
Samsung 40" Class (40.0" Diag.) LED 5005 Series TV - UN40D5005BFXZA - User Manual (ENGLISH)

Create successful ePaper yourself
Turn your PDF publications into a flip-book with our unique Google optimized e-Paper software.
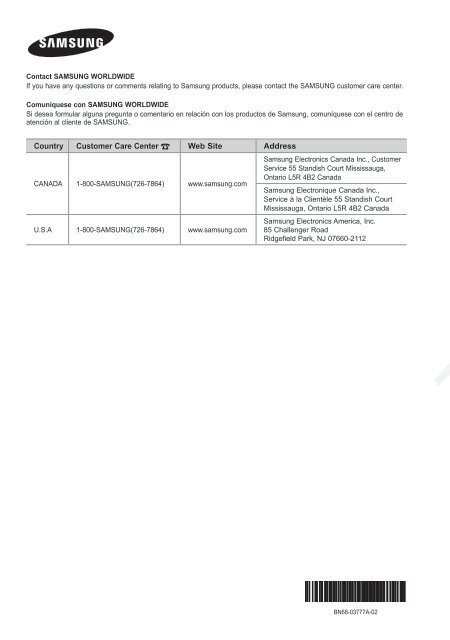
Contact SAMSUNG WORLDWIDE<br />
If you have any questions or comments relating to <strong>Samsung</strong> products, please contact the SAMSUNG customer care center.<br />
Comuníquese con SAMSUNG WORLDWIDE<br />
Si desea formular alguna pregunta o comentario en relación con los productos de <strong>Samsung</strong>, comuníquese con el centro de<br />
atención al cliente de SAMSUNG.<br />
Country Customer Care Center Web Site Address<br />
CANADA 1-800-SAMSUNG(726-7864) www.samsung.com<br />
U.S.A 1-800-SAMSUNG(726-7864) www.samsung.com<br />
<strong>Samsung</strong> Electronics Canada Inc., Customer<br />
Service 55 Standish Court Mississauga,<br />
Ontario L5R 4B2 Canada<br />
<strong>Samsung</strong> Electronique Canada Inc.,<br />
Service à la Clientèle 55 Standish Court<br />
Mississauga, Ontario L5R 4B2 Canada<br />
<strong>Samsung</strong> Electronics America, Inc.<br />
85 Challenger Road<br />
Ridgefield Park, NJ 07660-2112<br />
<strong>User</strong> <strong>Manual</strong><br />
imagine the possibilities<br />
Thank you for purchasing this <strong>Samsung</strong> product.<br />
To receive more complete service, please register<br />
your product at<br />
www.samsung.com/register<br />
Model______________ Serial No.______________<br />
✎✎If you have any questions, please call us at 1-800-SAMSUNG (1-800-726-7864) for assistance.<br />
BN68-03777A BN68-03777A-02
Figures and illustrations in this <strong>User</strong> <strong>Manual</strong> are provided for reference only and may differ from actual product appearance.<br />
Product design and specifications may be changed without notice.<br />
Important Warranty Information Regarding Television Format Viewing<br />
✎✎<br />
See the warranty card for more information on warranty terms.<br />
Wide screen format LCD/<strong>LED</strong> Displays (16:9, the aspect ratio of the screen width to height) are primarily designed to view wide screen format fullmotion<br />
video. The images displayed on them should primarily be in the wide screen 16:9 ratio format, or expanded to fill the screen if your model<br />
offers this feature and the images are constantly moving. Displaying stationary graphics and images on screen, such as the dark sidebars on<br />
nonexpanded standard format television video and programming, should be limited to no more than 5% of the total television viewing per week.<br />
Additionally, viewing other stationary images and text such as stock market reports, video game displays, station logos, web sites or computer<br />
graphics and patterns, should be limited as described above for all televisions. Displaying stationary images that exceed the above guidelines can<br />
cause uneven aging of LCD/<strong>LED</strong> Displays that leave subtle, but permanent burned-in ghost images in the LCD/<strong>LED</strong> picture. To avoid this, vary the<br />
programming and images, and primarily display full screen moving images, not stationary patterns or dark bars. On LCD/<strong>LED</strong> models that offer<br />
picture sizing features, use these controls to view different formats as a full screen picture.<br />
Be careful in the selection and duration of television formats used for viewing. Uneven LCD/<strong>LED</strong> aging as a result of format selection and use, as<br />
well as burned-in images, are not covered by your <strong>Samsung</strong> limited warranty.<br />
• SAMSUNG ELECTRONICS NORTH AMERICAN LIMITED WARRANTY STATEMENT<br />
Subject to the requirements, conditions, exclusions and limitations of the original Limited Warranty supplied with <strong>Samsung</strong> Electronics<br />
(SAMSUNG) products, and the requirements, conditions, exclusions and limitations contained herein, SAMSUNG will additionally provide<br />
Warranty Repair Service in the United States on SAMSUNG products purchased in Canada, and in Canada on SAMSUNG products<br />
purchased in the United States, for the warranty period originally specified, and to the Original Purchaser only.<br />
The above described warranty repairs must be performed by a SAMSUNG Authorized Service Center. Along with this Statement, the Original<br />
Limited Warranty Statement and a dated Bill of Sale as Proof of Purchase must be presented to the Service Center. Transportation to and<br />
from the Service Center is the responsibility of the purchaser. Conditions covered are limited only to manufacturing defects in material or<br />
workmanship, and only those encountered in normal use of the product.<br />
Excluded, but not limited to, are any originally specified provisions for, in-home or on-site services, minimum or maximum repair times,<br />
exchanges or replacements, accessories, options, upgrades, or consumables.<br />
For the location of a SAMSUNG Authorized Service Center, please call toll-free:<br />
––<br />
In the United States : 1-800-SAMSUNG (1-800-726-7864)<br />
––<br />
In Canada : 1-800-SAMSUNG<br />
Still image warning<br />
Avoid displaying still images (such as jpeg picture files) or still image elements (such as <strong>TV</strong> channel logos, panorama or 4:3 image format, stock<br />
or news bars at screen bottom etc.) on the screen. Constant displaying of still pictures can cause ghosting of LCD/<strong>LED</strong> screen, which will affect<br />
image quality. To reduce risk of this effect, please follow below recommendations:<br />
• Avoid displaying the same <strong>TV</strong> channel for long periods.<br />
• Always try to display any image on full screen, use <strong>TV</strong> set picture format menu for best possible match.<br />
• Reduce brightness and contrast values to minimum required to achieve desired picture quality, exceeded values may speed up the burnout<br />
process.<br />
• Frequently use all <strong>TV</strong> features designed to reduce image retention and screen burnout, refer to proper user manual section for details.<br />
Securing the Installation Space<br />
Keep the required distances between the product and other objects (e.g. walls) to ensure proper ventilation.<br />
Failing to do so may result in fire or a problem with the product due to an increase in the internal temperature of the product.<br />
✎✎<br />
When using a stand or wall-mount, use parts provided by <strong>Samsung</strong> Electronics only.<br />
• x If you use parts provided by another manufacturer, it may result in a problem with the product or an injury due to the product falling.<br />
✎✎<br />
The appearance may differ depending on the product.<br />
✎✎<br />
Be careful when you contact the <strong>TV</strong> because some parts can be somewhat hot.<br />
Installation with a stand.<br />
Installation with a wall-mount.<br />
4inches<br />
4inches<br />
4inches<br />
4inches<br />
4inches<br />
4inches<br />
4inches<br />
© 2011 <strong>Samsung</strong> Electronics Co., Ltd. All rights reserved.<br />
2 English
Contents<br />
Getting Started<br />
• y List of Features.......................................................... 4<br />
• y Accessories............................................................... 4<br />
• y Viewing the Control Panel.......................................... 5<br />
• y Viewing the Remote Control...................................... 6<br />
• y Connecting to an Antenna......................................... 7<br />
• y Plug & Play (Initial Setup)........................................... 7<br />
Connections<br />
• y Connecting to an AV Device...................................... 8<br />
• y Changing the Input source...................................... 10<br />
Basic Features<br />
• y How to Navigate Menus.......................................... 11<br />
• y Channel Menu......................................................... 11<br />
Seeing Channels 11<br />
Using Favorite Channels 12<br />
Memorizing channels 12<br />
Editing channels 12<br />
Other Features 12<br />
• y Picture Menu........................................................... 14<br />
Changing the Preset Picture Mode 14<br />
Adjusting picture settings 14<br />
Changing the Picture Options 14<br />
• y Sound Menu............................................................ 16<br />
Changing the Preset Sound Mode 16<br />
Adjusting sound settings 16<br />
Sound Settings 16<br />
• y Setup Menu............................................................. 17<br />
Setting the Time 17<br />
Using the Sleep Timer 17<br />
Setting the On/Off Timer 17<br />
Locking Programs 18<br />
Other Features 19<br />
• y Support Menu......................................................... 20<br />
Advanced Features<br />
• y Media Play............................................................... 21<br />
Connecting a USB Device 21<br />
Other Information<br />
• y Installing the Wall Mount.......................................... 25<br />
• y Securing the <strong>TV</strong> to the Wall<br />
(depending on the model)........................................ 27<br />
• y Anti-Theft Kensington Lock..................................... 29<br />
• y Troubleshooting....................................................... 30<br />
Storage and Maintenance 33<br />
• y Specifications.......................................................... 34<br />
License 34<br />
• y Dimensions............................................................. 35<br />
• y Index....................................................................... 36<br />
<strong>ENGLISH</strong><br />
Check the Symbol!<br />
t ✎ O<br />
This function can be used by pressing<br />
the TOOLS button on the remote<br />
control.<br />
Note :<br />
Important information<br />
Step by step guide :<br />
Informs you how to access<br />
the menu.<br />
English<br />
3
Getting Started<br />
List of Features<br />
■■<br />
Excellent Digital Interface & Networking : With a built-in HD digital tuner, nonsubscription HD broadcasts can be viewed<br />
without a cable box / STB (Set-Top-Box) satellite receiver.<br />
■■<br />
Media Play: Allows you to play music files, and pictures saved on a USB device. (P. 21)<br />
■■<br />
Self <strong>Diag</strong>nosis: You can check picture and sound operation. (P. 20)<br />
Accessories<br />
✎✎Please make sure the following items are included with your <strong>TV</strong>. If any items are missing, contact your dealer.<br />
✎✎The items' colors and shapes may vary depending on the models.<br />
■■<br />
Remote Control (BN59-01006A) & Batteries (AAA x 2)<br />
■■<br />
■■<br />
Warranty Card / Safety Guide / Quick Setup Guide<br />
Owner’s Instructions<br />
■■<br />
■■<br />
Cleaning Cloth (BN63-01798B)<br />
Power Cord<br />
Holder wire stand<br />
(UN40D<strong>5005</strong>BF Model only)<br />
Assembling Holder-wire stand (UN40D<strong>5005</strong>BF Model only)<br />
Input Cables (Sold Separately)<br />
HDMI HDMI-DVI Component Composite (AV) Coaxial (RF)<br />
✎✎Check the cable before plug-in<br />
Cable<br />
Ports<br />
HDMI<br />
USB<br />
Do not plug cable upside down.<br />
Be sure to check before plug-in.<br />
4<br />
English
Viewing the Control Panel<br />
✎✎The product color and shape may vary depending on the model.<br />
01 Getting Started<br />
Control Panel<br />
Speakers<br />
P (Power)<br />
Remote control sensor<br />
SOURCEE<br />
MENU<br />
y<br />
z<br />
Power Indicator<br />
Press to turn the <strong>TV</strong> on and off.<br />
Aim the remote control towards this spot on the <strong>TV</strong>.<br />
Toggles between all the available input sources. In the on-screen menu, use this<br />
button as you would use the ENTERE button on the remote control.<br />
Displays an on-screen menu of your <strong>TV</strong>’s features.<br />
Adjusts the volume. In the on-screen menu, use the y buttons as you would<br />
use the ◄ and ► buttons on the remote control.<br />
Changes the channels. In the on-screen menu, use the z buttons as you<br />
would use the ▼ and ▲ buttons on the remote control.<br />
Blinks and turns off when the power is on and lights up in standby mode.<br />
Standby mode<br />
Do not leave your <strong>TV</strong> in standby mode for long periods of time (when you are away on a holiday, for example). A small amount<br />
of electric power is still consumed even when the power button is turned off. It is best to unplug the power cord.<br />
English<br />
5
Getting Started<br />
Viewing the Remote Control<br />
Turns the <strong>TV</strong> on and off.<br />
Display and select the available video<br />
sources. (P. 10)<br />
Press to directly access to channels.<br />
Press to select additional channels<br />
(digital) being broadcast by the same<br />
station. For example, to select channel<br />
‘54-3’, press ‘54’, then press ‘-’ and ‘3’.<br />
Return to the previous channel.<br />
Cut off the sound temporarily.<br />
Adjusts the volume.<br />
Change channels.<br />
Displays the channel list on the screen. (P. 11)<br />
View the Media Play. (P. 21)<br />
Quickly select frequently used functions.<br />
MEDIA.P<br />
FAV.CH<br />
Displays the main on-screen menu.<br />
Display favorite channel lists on the screen.<br />
(p. 12)<br />
Press to display information on the <strong>TV</strong><br />
screen.<br />
Select on-screen menu items and<br />
change menu values.<br />
Return to the previous menu.<br />
Exit the menu.<br />
Buttons used in the Channel List,<br />
Media Play menu, etc.<br />
A B C D<br />
MTS P.SIZE CC<br />
MTS: Press to choose stereo, mono or<br />
Separate Audio Program (SAP<br />
broadcast). (P. 16)<br />
P.SIZE: Choose the picture size. (P. 15)<br />
CC: Controls the caption decoder. (P. 19)<br />
Installing batteries (Battery size: AAA)<br />
✎✎NOTE<br />
• x Use the remote control within 23 feet from <strong>TV</strong>.<br />
x<br />
Avoid use when nearby fluorescent lights or neon signs.<br />
• x The Color and shape may vary depending on the model.<br />
• Bright light may affect the performance of the remote control.<br />
6<br />
English
Connecting to an Antenna<br />
When the <strong>TV</strong> is initially powered on, basic settings proceed automatically.<br />
✎✎Connecting the power cord and antenna.<br />
✎✎When you move or swivel the <strong>TV</strong> with Antenna cable tightly connected, there is high risk antenna jack on <strong>TV</strong> will be broken off.<br />
✎ ✎ The position of power input port may differ depending on the model.<br />
<strong>TV</strong> Rear Panel<br />
Cable<br />
VHF/UHF Antenna<br />
01 Getting Started<br />
or<br />
Plug & Play (Initial Setup)<br />
When the <strong>TV</strong> is initially powered on, a sequence of on-screen prompts will assist in configuring basic settings. Press the<br />
POWERP button. Plug & Play is available only when the Input source is set to <strong>TV</strong>.<br />
1<br />
2<br />
3<br />
4<br />
5<br />
6<br />
7<br />
Selecting a language Press the ▲ or ▼ button, then press the ENTERE button.<br />
POWER<br />
Select the desired OSD (On Screen Display) language.<br />
Selecting Store Demo Press the ◄ or ► button, then press the ENTERE button.<br />
or Home Use<br />
• y Select the Home Use mode. Store Demo Mode is for retail P<br />
environments.<br />
• y To return the unit’s settings from Store Demo to Home Use<br />
(standard): Press the volume button on the <strong>TV</strong>. When you see the<br />
volume in the OSD, press and hold MENU for 5 sec.<br />
Selecting an antenna Press the ▲ or ▼ button, then press the ENTERE button. Select Air, Cable or Auto.<br />
✎✎In Cable mode, you can select the correct signal source among STD, HRC, and IRC<br />
by pressing the ▲, ▼, ◄ or ► button, then press the ENTERE button.<br />
Selecting a channel The channel search will start automatically.<br />
For more information, refer to Channel → Auto Program. (P. 12)<br />
MEDIA.P<br />
✎✎Press the ENTERE button at any time to interrupt the memorization process.<br />
Setting the Clock Set the Clock Mode automatically or manually.<br />
Mode<br />
✎✎If you select the Auto, set the daylight saving time.<br />
Select the time zone where you live.<br />
Viewing the HD The connection method for the best HD screen quality is displayed.<br />
Connection Guide<br />
Enjoy your <strong>TV</strong>. Press the ENTERE button.<br />
If You Want to Reset This Feature...<br />
OO<br />
MENUm → Setup → Plug & Play → ENTERE<br />
Setup<br />
Plug & Play<br />
Language<br />
Time<br />
Game Mode<br />
V-Chip<br />
Caption<br />
Melody<br />
: English<br />
SLEEP<br />
: Off<br />
: Medium<br />
English<br />
7
Connections<br />
Connecting to an AV Device<br />
Using an HDMI cable or HDMI to DVI Cable: HD connection (up to 1080p)<br />
We recommend using the HDMI connection for the best quality HD picture.<br />
Available devices: DVD, Blu-ray player, HD cable box, HD STB (Set-Top-Box) satellite receiver<br />
BD/DVD player/<br />
HD cable/sat box<br />
<strong>TV</strong> Rear<br />
HDMI OUT<br />
DVI OUT<br />
✎✎HDMI IN 1(DVI), 2<br />
x<br />
R-AUDIO-L PR PB Y<br />
• When using an HDMI/DVI cable connection, you must use the HDMI/DVI IN jack for video. A DVD, Blu-ray<br />
player, HD cable box, HD STB satellite receiver, cable box, or STB satellite receiver may require a DVI-HDMI (DVI<br />
to HDMI) cable or DVI-HDMI (DVI to HDMI) adapter.<br />
• x The picture may not display normally (if at all) or the audio may not work if an external device that uses an older<br />
version of HDMI mode is connected to the <strong>TV</strong>. If such a problem occurs, ask the manufacturer of the external<br />
device about the HDMI version and, if out of date, request an upgrade.<br />
• x Be sure to purchase a certified HDMI cable. Otherwise, the picture may not display or a connection error may<br />
occur.<br />
• x If an HDMI to DVI cable is connected to the HDMI IN 1(DVI) port, the audio does not work.<br />
R-AUDIO-L PR PB Y<br />
Using a Component Cable: (up to 1080p), Using an Audio/Video Cable: (480i only)<br />
Available devices: DVD, Blu-ray player, cable box, STB satellite receiver, VCR<br />
<strong>TV</strong> Rear<br />
Y<br />
W<br />
R<br />
R<br />
W<br />
R<br />
B<br />
G<br />
✎✎When connecting to AV IN, the color of<br />
the AV IN [Y/VIDEO] jack (Green) does not<br />
match the color of the video cable (Yellow).<br />
✎✎For better picture quality, the Component<br />
connection is recommended over the A/V<br />
connection.<br />
G B R<br />
W<br />
R<br />
W R<br />
Y<br />
VIDEO OUT<br />
AUDIO OUT<br />
VCR<br />
AUDIO OUT<br />
COMPONENT OUT<br />
Blu-ray player<br />
WY<br />
WR<br />
W R B G<br />
R-AUDIO-L PR PB Y<br />
R-AUDIO-L R-AUDIO-L PR PB Y<br />
PR PB Y<br />
Yellow Red White Red Blue Green<br />
UDIO-L PR PB Y<br />
8<br />
English
Display Modes (HDMI/DVI Input)<br />
32" : Optimal resolution is 1360x768@60Hz.<br />
Mode Resolution Horizontal Frequency (KHz) Vertical Frequency (Hz) Pixel Clock Frequency (MHz) Sync Polarity (H / V)<br />
IBM<br />
640 x 350 31.469 70.086 25.175 + / -<br />
720 x 400 31.469 70.087 28.322 - / +<br />
MAC<br />
640 x 480 35.000 66.667 30.240 - / -<br />
832 x 624 49.726 74.551 57.284 - / -<br />
31.469 59.940 25.175 - / -<br />
640 x 480<br />
37.861 72.809 31.500 - / -<br />
37.500 75.000 31.500 - / -<br />
37.879 60.317 40.000 + / +<br />
VESA DMT<br />
800 x 600<br />
48.077 72.188 50.000 + / +<br />
46.875 75.000 49.500 + / +<br />
48.363 60.004 65.000 - / -<br />
1024 x 768<br />
56.476 70.069 75.000 - / -<br />
60.023 75.029 78.750 + / +<br />
1360 x 768 47.712 60.015 85.500 + / +<br />
02 Connections<br />
Display Modes (HDMI/DVI Input)<br />
40" : Optimal resolution is 1920 x 1080@60Hz.<br />
Mode Resolution Horizontal Frequency (KHz) Vertical Frequency (Hz) Pixel Clock Frequency (MHz) Sync Polarity (H / V)<br />
IBM<br />
640 x 350 31.469 70.086 25.175 +/-<br />
720 x 400 31.469 70.087 28.322 -/+<br />
640 x 480 35.000 66.667 30.240 -/-<br />
MAC<br />
832 x 624 49.726 74.551 57.284 -/-<br />
1152 x 870 68.681 75.062 100.000 -/-<br />
640 x 480 31.469 59.940 25.175 -/-<br />
640 x 480 37.861 72.809 31.500 -/-<br />
640 x 480 37.500 75.000 31.500 -/-<br />
800 x 600 37.879 60.317 40.000 +/+<br />
800 x 600 48.077 72.188 50.000 +/+<br />
800 x 600 46.875 75.000 49.500 +/+<br />
1024 x 768 48.363 60.004 65.000 -/-<br />
1024 x 768 56.476 70.069 75.000 -/-<br />
1024 x 768 60.023 75.029 78.750 +/+<br />
VESA DMT<br />
1152 x 864 67.500 75.000 108.000 +/+<br />
1280 x 1024 63.981 60.020 108.000 +/+<br />
1280 x 1024 79.976 75.025 135.000 +/+<br />
1280 x 800 49.702 59.810 83.500 -/+<br />
1280 x 800 62.795 74.934 106.500 -/+<br />
1280 x 960 60.000 60.000 108.000 +/+<br />
1360 x 768 47.712 60.015 85.500 +/+<br />
1440 x 900 55.935 59.887 106.500 -/+<br />
1440 x 900 70.635 74.984 136.750 -/+<br />
1680 x 1050 65.290 59.954 146.250 -/+<br />
VESA DMT / D<strong>TV</strong> CEA 1920 x 1080p 67.500 60.000 148.500 +/+<br />
English<br />
9
Connections<br />
✎✎NOTE<br />
x<br />
x<br />
x<br />
x<br />
x<br />
POWER<br />
• For HDMI/DVI cable connection, you must use the HDMI IN 1(DVI) jack.<br />
• The interlace mode is not supported.<br />
• The set might operate abnormally if a non-standard<br />
Pvideo format is selected.<br />
• PC(D-Sub) input is not supported.<br />
• If an HDMI to DVI cable is connected to the HDMI IN 1(DVI) port, the audio does not work.<br />
SERVICE<br />
Connector for service only.<br />
MEDIA.P<br />
Changing the Input source<br />
P.SIZE<br />
Source List<br />
OO<br />
MENUm → Input → Source List → ENTERE<br />
Use to select <strong>TV</strong> or an external input sources such as a DVD / Blu-ray player / cable box / STB satellite<br />
receiver.<br />
■■<br />
<strong>TV</strong> / AV / Component / HDMI1/DVI / HDMI2<br />
✎✎<br />
You can only choose external devices that are connected to the <strong>TV</strong>. In the Source List, connected<br />
inputs will be highlighted.<br />
✎✎<br />
PC(D-Sub) input is not supported. If you want to connect PC to the <strong>TV</strong>, use HDMI1/DVI input.<br />
✎✎<br />
You can use the Edit Name and Information when you press the TOOLS button in the Source<br />
List.<br />
Information<br />
You can see detailed information about the selected external SLEEP device.<br />
S.MODE P.MODE<br />
Edit Name<br />
OO<br />
MENUm → Input → Edit Name → ENTERE<br />
■■<br />
VCR / DVD / Cable STB / Satellite STB / PVR STB / AV Receiver / Game / Camcorder / PC / DVI PC / DVI / <strong>TV</strong> /<br />
IP<strong>TV</strong> / Blu-ray / HD DVD / DMA: Name the device connected to the input jacks to make your input source selection<br />
easier.<br />
✎✎<br />
When connecting a PC to the HDMI IN 1(DVI) port with HDMI cable, you should set the <strong>TV</strong> to PC mode under Edit<br />
Name.<br />
✎✎<br />
When connecting a PC to the HDMI IN 1(DVI) port with HDMI to DVI cable, you should set the <strong>TV</strong> to DVI PC mode<br />
under Edit Name.<br />
✎✎<br />
When connecting an AV devices to the HDMI IN 1(DVI) port with HDMI to DVI cable, you should set the <strong>TV</strong> to DVI<br />
mode under Edit Name.<br />
10 English
Basic Features<br />
How to Navigate Menus<br />
Channel Menu<br />
◄ / ► Adjust the value of an item with the ✎✎Using the color buttons with the Channel List<br />
5 ◄ or ► button. The adjustment in<br />
•A x B Green C D (Zoom): Enlarges or shrinks a channel<br />
the OSD may differ depending on<br />
number.<br />
the selected menu.<br />
A B<br />
ENTER E Press ENTERE to confirm the<br />
•x C D<br />
SLEEP Yellow (Select): S.MODE Selects multiple channel P.MODE lists.<br />
6 selection.<br />
Select desired channels and press the Yellow button<br />
7 EXIT e Press EXIT. to set all the selected channels at the same time. The<br />
c mark appears to the left of the selected channels.<br />
• x T (Tools): Displays the Channel List option menu.<br />
Before using the <strong>TV</strong>, follow the steps below to learn how to<br />
navigate the menu and select and adjust different functions. ¦ ¦ Seeing Channels<br />
1<br />
MEDIA.P<br />
FAV.CH<br />
Channel List<br />
OO<br />
MENUm → Channel → Channel List → ENTERE<br />
POWER Add, delete or set Favorite channels and use<br />
2<br />
the program guide for digital broadcasts.<br />
Select a channel in the All Channels, Added<br />
P Channels, Favorite or Programmed<br />
3 4<br />
screen by pressing the ▲ / ▼ buttons, and<br />
pressing the ENTERE button. Then you<br />
can watch the selected channel.<br />
1 MENU button: Displays the main on-screen menu.<br />
2 ENTERE / Direction button: Move the cursor and<br />
select an item. Confirm the setting.<br />
3 RETURN button: Returns to the previous menu.<br />
4 EXIT button: Exits the on-screen menu.<br />
6<br />
6-1<br />
7-1<br />
Air<br />
♥ <strong>TV</strong> #6<br />
♥ <strong>TV</strong> #7<br />
8 Air<br />
MEDIA.P<br />
How to Operate the OSD (On Screen Display)<br />
9 Air<br />
P.SIZE<br />
9-1 ♥ <strong>TV</strong> #9<br />
The access step may differ depending on the selected menu.<br />
10 Air<br />
10-1 ♥ <strong>TV</strong> #10<br />
MENU m The main menu options appear on<br />
11-1 ♥ <strong>TV</strong> #11<br />
1 the screen:<br />
Air B Zoom C Select T Tools<br />
Picture, Sound, Channel, Setup,<br />
Input, Application, Support.<br />
■ ■ All Channels: Shows all currently available<br />
▲ / ▼ Select an icon with the ▲ or ▼<br />
2<br />
channels.<br />
button.<br />
■ ■ Added Channels: Shows all added channels.<br />
ENTER E Press ENTERE to access the<br />
3 sub-menu.<br />
■ ■ * Favorite: Shows all favorite channels.<br />
▲ / ▼ Select the desired submenu with ■ ■ Programmed: Shows all currently reserved<br />
4 the ▲ or ▼ button.<br />
programs.<br />
(The Options menus may differ depending on the<br />
situation.)<br />
Added Channels<br />
03 Basic Features<br />
Channel Status Display Icons<br />
Icons Operations<br />
c A channel selected.<br />
* A channel set as a Favorite.<br />
) A reserved program.<br />
( A program currently being broadcast.<br />
English<br />
11
Basic Features<br />
¦ ¦ Using Favorite Channels<br />
OO<br />
MENUm → Channel → Channel List → ENTERE<br />
* Add to Favorite / Delete from Favorite t<br />
Set channels you watch frequently as<br />
Favorites.<br />
1. Select a channel and press the TOOLS<br />
button.<br />
2. Add or delete a channel using the Add<br />
to Favorite or Delete from Favorite<br />
menu respectively.<br />
Added Channels<br />
Air<br />
6 Air<br />
6-1 ♥ <strong>TV</strong> #6<br />
7-1 ♥ <strong>TV</strong> #7<br />
8 Air<br />
9 Air<br />
9-1 ♥ <strong>TV</strong> #9<br />
10 Air<br />
10-1 ♥ <strong>TV</strong> #10<br />
11-1 ♥ <strong>TV</strong> #11<br />
B Zoom C Select T Tools<br />
¦ ¦ Memorizing channels<br />
Delete<br />
Add to Favorite<br />
Timer Viewing<br />
Select All<br />
Auto Program<br />
OO<br />
MENUm → Channel → ENTERE<br />
Antenna (Air / Cable) t<br />
Before your television can begin memorizing the available<br />
channels, you must specify the type of signal source that is<br />
connected to the <strong>TV</strong> (i.e. an Air or a Cable system).<br />
Auto Program<br />
■■<br />
Air: Air antenna signal.<br />
■■<br />
Cable: Cable antenna signal.<br />
■■<br />
Auto: Air and Cable antenna.<br />
✎✎NOTE<br />
MEDIA.P<br />
• x When selecting the Cable <strong>TV</strong> system: Selects the<br />
cable system. STD, HRC and IRC identify various<br />
types of cable <strong>TV</strong> systems. Contact your local cable<br />
company to identify the type of cable system that<br />
exists in your particular area. At this point, the signal<br />
source has been selected.<br />
• x After all the available channels are stored, it starts<br />
to remove scrambled channels. The Auto Program<br />
menu then reappears.<br />
How to Stop Auto Programming<br />
1. Press the ENTERE button.<br />
2. A message will ask Stop Auto Program? Select Yes by<br />
pressing the ◄ or ► button.<br />
3. Press the ENTERE button.<br />
¦ ¦ Editing channels<br />
OO<br />
MENUm → Channel → Channel List → ENTERE<br />
Channel Name Edit t<br />
1. Select a channel and press the TOOLS button.<br />
2. Edit the channel name using the Channel Name Edit<br />
menu.<br />
SLEEP<br />
■■<br />
S.MODE P.MODE<br />
Channel Name Edit (analog channels only): Assign your<br />
own channel name.<br />
¦ ¦ Other Features<br />
OO<br />
MENUm → Channel → ENTERE<br />
Clear Scrambled Channel<br />
P.SIZE<br />
This function is used to filter out scrambled channels after<br />
Auto Program is completed. This process may take up to<br />
20~30 minutes.<br />
How to Stop Searching Scrambled Channels<br />
1. Press the ENTERE button to select Stop.<br />
2. Press the ◄ button to select Yes.<br />
3. Press the ENTERE button.<br />
✎✎This function is only available in Cable mode.<br />
12 English
Channel List<br />
OO<br />
MENUm → Channel → Channel List → ENTERE<br />
Channel List Option Menu t<br />
Set each channel using the Channel List menu options (Add/<br />
Delete, Timer Viewing, Select All/ Deselect All, Auto<br />
Program). Option menu items may differ depending on the<br />
channel status.<br />
1. Select a channel and press the TOOLS button.<br />
2. Select a function and change its settings.<br />
■■<br />
■■<br />
■■<br />
■■<br />
■■<br />
Add / Delete: Delete or add a channel to display the<br />
channels you want.<br />
✎✎<br />
NOTE<br />
• x All deleted channels will be shown on the All<br />
Channels menu.<br />
• x A gray-colored channel indicates the channel<br />
has been deleted.<br />
• x The Add menu only appears for deleted channels.<br />
• x Delete a channel from the Added Channels or<br />
Favorite menu in the same manner.<br />
Timer Viewing: You can set a desired channel to be<br />
displayed automatically at the set time; even when you<br />
are watching another channel. Set the current time first<br />
to use this function. (P. 17)<br />
1. Press the ◄ / ► /▲ / ▼ buttons to select the<br />
desired channel in Channel List.<br />
2. Press the TOOLS button, then select Timer Viewing.<br />
3. Scroll up or down to adjust the settings in the box,<br />
or use the numeric buttons on your remote for<br />
entering the date and time.<br />
✎✎<br />
If you selected Once, Everyday, Every Week,<br />
Mon~Fri, Mon~Tue, Wed~Thu, or Sat~Sun in<br />
Repeat, you can enter the date you want.<br />
4. Press the ENTERE button when done.<br />
✎✎<br />
NOTE<br />
• x Only memorized channels can be reserved.<br />
• x Reserved programs will be displayed in the<br />
Programmed menu.<br />
• x When a digital channel is selected, press the ►<br />
button to view the digital program.<br />
Select All: Select all the channels in the channel list.<br />
Deselect All: Deselect all the selected channels.<br />
✎✎<br />
You can only select Deselect All when one or<br />
more channels are selected.<br />
Auto Program: Scans for a channel automatically and<br />
stores in the <strong>TV</strong>. (P.12)<br />
Programmed<br />
(in Channel List)<br />
You can view, modify or delete a show you have reserved to watch.<br />
1. Press the ENTERE button to select Channel List.<br />
2. Press the ◄ and ▼ button to move the Programmed<br />
menu and press the TOOLS button.<br />
■■<br />
■■<br />
■■<br />
■■<br />
Change Info: Change a show you have reserved to<br />
watch.<br />
Cancel Schedules: Cancel a show you have reserved<br />
to watch.<br />
Information: Display a show you have reserved<br />
to watch. (You can also change the reservation<br />
Information.)<br />
Select All / Deselect All: You can select or deselect all<br />
channels in the channel list.<br />
Fine Tune<br />
(analog channels only)<br />
If the reception is clear, you do not have to fine tune the<br />
channel, as this is done automatically during the search and<br />
store operation. If the signal is weak or distorted, fine tune<br />
the channel manually.<br />
• y Select Fine Tune in the Channel menu.<br />
✎✎Fine tuned channels that have been saved are marked<br />
with an asterisk “ * ” on the right-hand side of the<br />
channel number in the channel banner.<br />
✎✎To reset the fine-tuning, select Reset.<br />
03 Basic Features<br />
English<br />
13
Basic Features<br />
Picture Menu<br />
¦ ¦ Changing the Preset Picture Mode<br />
OO<br />
MENUm → Picture → Mode → ENTERE<br />
Mode t<br />
Select your preferred picture type.<br />
■■<br />
Dynamic: Suitable for a bright room.<br />
■■<br />
■■<br />
Standard: Suitable for a normal environment.<br />
Movie: Suitable for watching movies in a dark room.<br />
¦ ¦ Adjusting picture settings<br />
OO<br />
MENUm → Picture → ENTERE<br />
Backlight / Contrast / Brightness /<br />
Sharpness / Color / Tint (G/R)<br />
Your television has several setting options for picture quality<br />
control.<br />
✎✎NOTE<br />
• x When you make changes to Backlight, Contrast,<br />
Brightness, Sharpness, Color or Tint (G/R), the<br />
OSD will be adjusted accordingly.<br />
• x Settings can be adjusted and stored for each<br />
external device connected to the <strong>TV</strong>.<br />
• x Lowering picture brightness reduces power<br />
consumption.<br />
¦ ¦ Changing the Picture Options<br />
Advanced Settings<br />
OO<br />
MENUm → Picture → Advanced Settings →<br />
ENTERE<br />
(available in Standard / Movie mode)<br />
Compared to previous models, new <strong>Samsung</strong> <strong>TV</strong>s have a<br />
more precise picture.<br />
■■<br />
■■<br />
■■<br />
■■<br />
■■<br />
■■<br />
■■<br />
Advanced Settings<br />
Black Tone : Off ►<br />
Dynamic Contrast<br />
Gamma : 0<br />
Color Space<br />
White Balance<br />
Flesh Tone : 0<br />
Edge Enhancement<br />
: Medium<br />
: Native<br />
: On<br />
U Move E Enter R Return<br />
Black Tone (Off / Dark / Darker / Darkest): Select the<br />
black level to adjust the screen depth.<br />
Dynamic Contrast (Off / Low / Medium / High):<br />
Adjust the screen contrast.<br />
Gamma: Adjust the primary color intensity.<br />
Color Space (Auto / Native): Adjust the range of colors<br />
available to create the image.<br />
White Balance: Adjust the color temperature for a more<br />
natural picture.<br />
R-Offset / G-Offset / B-Offset: Adjust each color's<br />
(red, green, blue) darkness.<br />
R-Gain / G-Gain / B-Gain: Adjust each color's (red,<br />
green, blue) brightness.<br />
Reset: Resets the White Balance to it's default settings.<br />
Flesh Tone: Emphasize pink "flesh tone".<br />
Edge Enhancement (Off / On): Emphasize object<br />
boundaries.<br />
14 English
POWER<br />
P<br />
■■<br />
MEDIA.P<br />
Picture Options<br />
OO<br />
MENUm → Picture → Picture Options →<br />
ENTERE<br />
■■<br />
Picture Options<br />
Color Tone : Normal ►<br />
Size : 16:9<br />
Digital Noise Filter<br />
HDMI Black Level<br />
Film Mode<br />
: Auto<br />
: Normal<br />
P.SIZE<br />
Screen Fit: Displays the full image without any cut-off<br />
when HDMI (720p / 1080i / 1080p) or Component<br />
(1080i / 1080p) signals are input.<br />
SLEEP ✎✎NOTE<br />
S.MODE P.MODE<br />
• x After selecting Zoom1, Zoom2 or Wide Fit:<br />
1. Press the ► button to select Position.<br />
: Off<br />
U Move E Enter R Return<br />
Color Tone (Cool / Normal / Warm1 / Warm2)<br />
✎✎<br />
Warm1 or Warm2 will be activated when the<br />
picture mode is Movie.<br />
✎✎<br />
Settings can be adjusted and stored for each<br />
external device connected to an input on the <strong>TV</strong>.<br />
Size: Your cable box/satellite receiver<br />
may have its own set of screen sizes as<br />
well. However, we highly recommend<br />
you use 16:9 mode most of the time.<br />
16:9: Sets the picture to 16:9 wide<br />
mode.<br />
Zoom1: Use for moderate magnification.<br />
Zoom2: Use for a stronger magnification.<br />
Wide Fit: Enlarges the aspect ratio of the picture to fit<br />
the entire screen.<br />
4:3: Sets the picture to basic (4:3) mode.<br />
✎✎<br />
Do not watch in 4:3 format for a long time. Traces<br />
of borders displayed on the left, right and center<br />
of the screen may cause image retention (screen<br />
burn) which are not covered by the warranty.<br />
2. Press the ENTERE button.<br />
3. Press the ▲ or ▼ button to move the picture up<br />
or down.<br />
4. Press the ENTERE button.<br />
5. Press the ► button to select Reset.<br />
6. Press the ENTERE button to reset the picture<br />
to its default position.<br />
• x HD (High Definition): 16:9 - 1080i/1080p (1920x1080),<br />
720p (1280x720)<br />
• x Settings can be adjusted and stored for each<br />
external device you have connected to an input on<br />
the <strong>TV</strong>.<br />
Input Source<br />
A<strong>TV</strong>, AV,<br />
Component (480i, 480p)<br />
D<strong>TV</strong>(1080i),<br />
Component (1080i, 1080p),<br />
HDMI (720p, 1080i, 1080p)<br />
Picture Size<br />
16:9, Zoom1,<br />
Zoom2, 4:3<br />
16:9, 4:3, Wide Fit,<br />
Screen Fit<br />
■■<br />
Digital Noise Filter (Off / Low / Medium / High /<br />
Auto): If the broadcast signal received by your <strong>TV</strong> is<br />
weak, you can activate the Digital Noise Filter feature<br />
to reduce any static and ghosting that may appear on<br />
the screen.<br />
✎✎<br />
When the signal is weak, try other options until the<br />
best picture is displayed.<br />
■■<br />
■■<br />
HDMI Black Level (Low / Normal): Selects the black<br />
level on the screen to adjust the screen depth.<br />
✎✎<br />
Available only in HDMI mode (RGB signals).<br />
Film Mode (Off / Auto): Sets the <strong>TV</strong> to automatically<br />
sense and process film signals from all sources and<br />
adjusts the picture for optimum quality.<br />
✎✎<br />
Available in A<strong>TV</strong>, D<strong>TV</strong>(interlace), AV, COMPONENT<br />
(480i / 1080i) and HDMI (1080i).<br />
Picture Reset<br />
(Reset Picture Mode / Cancel)<br />
Resets your current picture mode to it's default settings.<br />
■■<br />
Reset Picture Mode: Returns all picture values in the<br />
currently selected mode to the default settings.<br />
03 Basic Features<br />
English<br />
15
Basic Features<br />
Sound Menu<br />
¦ ¦ Changing the Preset Sound Mode<br />
OO<br />
MENUm → Sound → Mode → ENTERE<br />
Mode t<br />
■■<br />
■■<br />
■■<br />
■■<br />
■■<br />
Standard: Selects the normal sound mode.<br />
Music: Emphasizes music over voices.<br />
Movie: Provides the best sound for movies.<br />
Clear Voice: Emphasizes voices over other sounds.<br />
Custom: Recalls your customized sound settings.<br />
¦ ¦ Adjusting sound settings<br />
OO<br />
MENUm → Sound → Equalizer → ENTERE<br />
Equalizer<br />
Adjusts the sound mode.<br />
■■<br />
■■<br />
■■<br />
■■<br />
Mode: Selects the sound mode among the predefined<br />
settings.<br />
Balance: Adjusts the balance between the right and left<br />
speaker.<br />
100Hz / 300Hz / 1KHz / 3KHz / 10KHz (Bandwidth<br />
Adjustment): Adjusts the level of specific bandwidth<br />
frequencies.<br />
Reset: Resets the equalizer to its default settings.<br />
¦ ¦ Sound Settings<br />
OO<br />
MENUm → Sound → ENTERE<br />
SRS TruSurround HD (Off / On)<br />
SRS TruSurround HD is a patented SRS technology that<br />
solves the problem of playing 5.1 multichannel content<br />
over two speakers. TruSurround delivers a compelling,<br />
virtual surround sound experience through any two-speaker<br />
playback system, including internal television speakers. It is<br />
fully compatible with all multichannel formats.<br />
Preferred Language<br />
(digital channels only)<br />
Digital-<strong>TV</strong> broadcasts are capable of<br />
simultaneous transmission of many<br />
audio tracks (for example, simultaneous<br />
translations of the MEDIA.P program into foreign<br />
languages).<br />
✎✎You can only select a language among the ones being<br />
broadcasted.<br />
Multi-Track SLEEP Sound (MTS)<br />
S.MODE P<br />
(analog channels only)<br />
■■<br />
■■<br />
Mono: Choose for channels that are<br />
broadcasting in mono or if you are<br />
having difficulty receiving a stereo signal.<br />
Stereo: Choose for channels that are<br />
broadcasting in stereo.<br />
■■<br />
SAP: Choose to listen to the Separate<br />
Audio Program, which is usually a foreign-language<br />
translation.<br />
✎✎Depending on the particular program being broadcast,<br />
you can listen SLEEP to Mono, Stereo or SAP. S.MODE P<br />
Auto Volume (Off / On)<br />
Because each broadcasting station has its own signal<br />
conditions, the volume may fluctuate each time channel<br />
is changed. This feature lets you automatically adjust the<br />
volume of the desired channel by lowering the sound output<br />
when the modulation signal is high or by raising the sound<br />
output when the modulation signal is low.<br />
Sound Reset (Reset All / Reset Sound<br />
Mode / Cancel)<br />
■■<br />
■■<br />
P<br />
Reset All: Resets all sound settings to the factory<br />
defaults.<br />
Reset Sound Mode: Returns all sound values in the<br />
currently selected mode to the default settings<br />
16 English
¦ ¦ Setting the Time<br />
Setup Menu<br />
OO<br />
MENUm → Setup → Time → ENTERE<br />
Time<br />
✎✎The current time will appear every time you press the<br />
INFO button.<br />
■■<br />
Clock: Setting the clock is for using various timer<br />
features of the <strong>TV</strong>.<br />
✎✎<br />
If you disconnect the power cord, you have to set<br />
the clock again.<br />
Clock Mode: Set up the current time manually or<br />
automatically.<br />
––<br />
Auto: Set the current time automatically using the<br />
time from the digital channel.<br />
✎✎<br />
The antenna must be connected in order to set<br />
the time automatically.<br />
––<br />
<strong>Manual</strong>: Set the current time manually.<br />
✎✎<br />
Depending on the broadcast station and signal,<br />
the auto time set up may not be correct. In this<br />
case, set the time manually.<br />
Clock Set: Set the Month, Day, Year, Hour, Minute<br />
and am/pm.<br />
✎✎<br />
Available only when Clock Mode is set to<br />
<strong>Manual</strong>.<br />
✎✎<br />
You can set the Month, Day, Year, Hour and<br />
Minute directly by pressing the number buttons<br />
on the remote control.<br />
Time Zone: Select your time zone.<br />
✎✎<br />
This function is only available when the Clock<br />
Mode is set to Auto.<br />
DST (Daylight Saving Time) (Off / On / Auto):<br />
Switches the Daylight Saving Time function on or off.<br />
✎✎<br />
This function is only available when the Clock<br />
Mode is set to Auto.<br />
¦ ¦ Using the Sleep Timer<br />
OO<br />
MENUm → Setup → Time → Sleep Timer →<br />
ENTERE<br />
■■<br />
Sleep Timer t : Automatically shuts off the <strong>TV</strong><br />
after a preset period of time. (30, 60, 90, 120, 150 and<br />
180 minutes).<br />
✎✎<br />
To cancel the Sleep Timer, select Off.<br />
¦ ¦ Setting the On/Off Timer<br />
OO<br />
MENUm → Setup → Time → Timer 1 →<br />
ENTERE<br />
■■<br />
Timer 1 / Timer 2 / Timer 3: Three different on / off<br />
timer settings can be made. You must set the clock first.<br />
Timer 1<br />
On Time<br />
▲<br />
12 00 am Inactivate<br />
▼<br />
Off Time<br />
12 00 am Inactivate<br />
Volume<br />
Contents<br />
10 <strong>TV</strong> Air 3<br />
Repeat<br />
Sun Mon Tue Wed Thu Fri Sat<br />
Once<br />
L Move U Adjust<br />
E Enter R Return<br />
On Time / Off Time: Set the hour, minute, am/pm<br />
and activate / inactivate. (To activate the timer with the<br />
setting you have chosen, set to Activate.)<br />
Volume: Set the desired volume level.<br />
Contents: When the On Time is activated, you can turn<br />
on a specific channel or play back contents such as<br />
photo or audio files.<br />
––<br />
<strong>TV</strong>/USB: Select <strong>TV</strong> or USB. (Make sure that an USB<br />
device is connected to your <strong>TV</strong>.)<br />
––<br />
Antenna: Show selected antenna.<br />
––<br />
Channel: Select the desired channel.<br />
––<br />
Music: Select the folder containing MP3 files on the<br />
USB device.<br />
––<br />
Photo: Select the folder containing JPEG files on the<br />
USB device.<br />
Repeat: Select Once, Everyday, Mon~Fri, Mon~Sat,<br />
Sat~Sun or <strong>Manual</strong> to set at you convenience. If you<br />
select <strong>Manual</strong>, you can set up the day you want to<br />
activate the timer.<br />
✎✎<br />
The c mark indicates the day is selected.<br />
✎✎Auto Power Off (available only when the <strong>TV</strong> is turned<br />
on by the Timer): The <strong>TV</strong> will be automatically turned off<br />
after 3 hours of being left idle to prevent overheating.<br />
03 Basic Features<br />
English<br />
17
Basic Features<br />
¦ ¦ Locking Programs<br />
OO<br />
MENUm → Setup → V-Chip → ENTERE<br />
V-Chip<br />
The V-Chip feature automatically locks out programs that are<br />
deemed inappropriate for children. The user must enter a<br />
PIN (personal identification number) before any of the V-Chip<br />
restrictions are set up or changed.<br />
✎✎NOTE<br />
• x V-Chip is not available in HDMI or Component<br />
mode.<br />
• x The default PIN number of a new <strong>TV</strong> set is “0-0-0-0”.<br />
• x Allow all: Press to unlock all <strong>TV</strong> ratings.<br />
• x Block all: Press to lock all <strong>TV</strong> ratings.<br />
■■<br />
■■<br />
■■<br />
V-Chip Lock (Off / On): You can block rated <strong>TV</strong><br />
Programs.<br />
<strong>TV</strong> Parental Guidelines: You can block <strong>TV</strong> programs<br />
depending on their rating. This function allows you to<br />
control what your children are watching.<br />
<strong>TV</strong>-Y: Young children / <strong>TV</strong>-Y7: Children 7 and over /<br />
<strong>TV</strong>-G: General audience / <strong>TV</strong>-PG: Parental guidance /<br />
<strong>TV</strong>-14: Viewers 14 and over / <strong>TV</strong>-MA: Mature audience<br />
ALL: Lock all <strong>TV</strong> ratings. / FV: Fantasy violence /<br />
V: Violence / S: Sexual situation / L: Adult Language /<br />
D: Sexually Suggestive Dialog<br />
✎✎<br />
The V-Chip will automatically block certain<br />
categories dealing with more sensitive material.<br />
For example, if you block the <strong>TV</strong>-Y category,<br />
then <strong>TV</strong>-Y7 will automatically be blocked.<br />
Similarly, if you block the <strong>TV</strong>-G category, then<br />
all the categories in the young adult group will<br />
be blocked (<strong>TV</strong>-G, <strong>TV</strong>-PG, <strong>TV</strong>-14 and <strong>TV</strong>-MA).<br />
The sub-ratings (D, L, S, V) work similarly. So,<br />
if you block the L sub-rating in <strong>TV</strong>-PG, then<br />
the L sub-ratings in <strong>TV</strong>-14 and <strong>TV</strong>-MA will<br />
automatically be blocked.<br />
MPAA Rating: You can block movies depending on<br />
their MPAA rating. The Motion Picture Association of<br />
America(MPAA) has implemented a rating system that<br />
provides parents or guardians with advanced information<br />
on which films are appropriate for children.<br />
G: General audience (no restrictions). / PG: Parental<br />
guidance suggested. / PG-13: Parents strongly<br />
cautioned. / R: Restricted. Children under 17 should be<br />
accompanied by an adult. / NC-17: No children under<br />
age 17. / X: Adults only. / NR: Not rated.<br />
✎✎<br />
The V-Chip will automatically block any<br />
category that deals with more sensitive material.<br />
For example, if you block the PG-13 category,<br />
then R, NC-17 and X will automatically be<br />
blocked.<br />
■■<br />
■■<br />
■■<br />
Canadian English: You can block <strong>TV</strong> programs<br />
depending on their Anglophone Canadian.<br />
C: Programming intended for children under age 8. /<br />
C8+: Programming generally considered acceptable for<br />
children 8 years and over to watch on their own. /<br />
G: General programming, suitable for all audiences. /<br />
PG: Parental Guidance. / 14+: Programming contains<br />
themes or content which may not be suitable for viewers<br />
under the age of 14. / 18+: Adult programming.<br />
✎✎<br />
The V-Chip will automatically block any<br />
category that deals with more sensitive material.<br />
For example, if you block the G category, then<br />
PG, 14+ and 18+ will automatically be blocked.<br />
Canadian French: You can block <strong>TV</strong> programs<br />
depending on their French Canadian rating.<br />
G: General / 8 ans+: Programming generally considered<br />
acceptable for children 8 years and over to watch on<br />
their own. / 13 ans+: Programming may not be suitable<br />
for children under the age of 13. /<br />
16 ans+: Programming is not suitable for children under<br />
the age of 16. / 18 ans+: Programming restricted to<br />
adults.<br />
✎✎<br />
The V-Chip will automatically block any category<br />
that deals with more sensitive material. For<br />
example, if you block the 8 ans+ category, then<br />
13 ans+, 16 ans+ and 18 ans+ will automatically<br />
be blocked also.<br />
Downloadable U.S. Rating: Parental restriction<br />
information can be used while watching D<strong>TV</strong> channels.<br />
✎✎<br />
NOTE<br />
• x If information is not downloaded from the<br />
broadcasting station, the Downloadable U.S.<br />
Rating menu is deactivated.<br />
• x Parental restriction information is automatically<br />
downloaded while watching D<strong>TV</strong> channels. It<br />
may take several seconds.<br />
• x The Downloadable U.S. Rating menu<br />
is available for use after information is<br />
downloaded from the broadcasting station.<br />
However, depending on the information from<br />
the broadcasting station, it may not be available<br />
for use.<br />
• x Parental restriction levels differ depending on<br />
the broadcasting station. The default menu<br />
name and Downloadable U.S. Rating change<br />
depending on the downloaded information.<br />
• x Even if you set the on-screen display to another<br />
language, the Downloadable U.S. Rating<br />
menu will appear in English only.<br />
• x The rating will automatically block certain<br />
categories that deal with more sensitive<br />
material.<br />
• x The rating titles (For example: Humor Level..etc)<br />
and <strong>TV</strong> ratings (For example: DH, MH, H..etc)<br />
may differ depending on the broadcasting<br />
station.<br />
18 English
P<br />
■■<br />
Change PIN: The Change PIN screen will appear.<br />
Choose any 4 digits for your PIN and enter it in the Enter<br />
New PIN. Re-enter the same 4 digits in the Confirm<br />
New PIN. When the Confirm screen appears, press the<br />
OK button. Your PIN has been memorized.<br />
How to watch a restricted channel<br />
If the <strong>TV</strong> is tuned to a restricted channel, the V-Chip<br />
will block it. The screen will go blank and the following<br />
message will appear: This channel is blocked by<br />
V-Chip. Please enter the PIN to unblock.<br />
✎✎<br />
If you forget the PIN, press the remote-control<br />
buttons in the following sequence, which resets<br />
the pin to “0-0-0-0” : POWER (off) → MUTE →<br />
8 → 2 → 4 → POWER (on)<br />
¦ ¦ Other Features<br />
OO<br />
MENUm → Setup → ENTERE<br />
Language<br />
Set the menu language.<br />
1. Select Language and press the ENTERE button.<br />
2. Choose desired language and press the ENTERE<br />
button.<br />
✎✎<br />
Choose between English, Español and Français.<br />
Game Mode (Off / On)<br />
When connecting to a game console such as PlayStation<br />
or Xbox, you can enjoy a more realistic gaming experience<br />
by selecting the game menu.<br />
✎✎NOTE<br />
• x Precautions and limitations for game mode<br />
––<br />
To disconnect the game console and connect<br />
another external device, set Game Mode to Off in<br />
the setup menu.<br />
––<br />
If you display the <strong>TV</strong> menu in Game Mode, the<br />
screen shakes slightly.<br />
• x Game Mode is not available when the input source<br />
is set to <strong>TV</strong>.<br />
• x After connecting the game console, set Game Mode<br />
to On. Unfortunately, you may notice reduced picture<br />
quality.<br />
• x If Game Mode is On:<br />
––<br />
Picture mode is set to Standard and Sound mode<br />
is set to Movie.<br />
––<br />
Equalizer is not available.<br />
Caption<br />
(On-Screen Text Messages)<br />
■■<br />
■■<br />
■■<br />
Caption (Off / On): You can switch the<br />
caption function MEDIA.P on or off. If captions are<br />
not available, they will not be displayed<br />
on the screen.<br />
✎✎<br />
The Caption feature does not<br />
work in Component or HDMI<br />
modes.<br />
Caption Mode: You can select the desired caption<br />
mode.<br />
✎✎<br />
The availability of captions depends on the<br />
program being broadcasted.<br />
Default / CC1~CC4 / Text1~Text4: (analog channels<br />
only) The Analog Caption function operates in either<br />
analog <strong>TV</strong> channel mode or when a signal is supplied<br />
from an external device to the <strong>TV</strong>. (Depending on the<br />
broadcasting signal, the Analog Caption function may or<br />
may not work with digital channels.)<br />
Default / Service1~Service6 / CC1~CC4 /<br />
Text1~Text4: SLEEP (digital channels only) The Digital S.MODE Captions<br />
function works with digital channels.<br />
✎✎<br />
Service1~6 may not be available in digital caption<br />
mode depending on the broadcast.<br />
Digital Caption Options: (digital channels only)<br />
Size: Options include Default, Small, Standard and<br />
Large. The default is Standard.<br />
Font Style: Options include Default and Styles 0 to 7.<br />
The default is Style 0.<br />
Foreground Color: Options include Default, White,<br />
Black, Red, Green, Blue, Yellow, Magenta and Cyan.<br />
You can change the color of the letter. The default is<br />
White.<br />
Background Color: Options include Default, White,<br />
Black, Red, Green, Blue, Yellow, Magenta and Cyan.<br />
You can change the background color of the caption.<br />
The default is Black.<br />
Foreground Opacity: This adjusts the opacity of text.<br />
Options include Default, Transparent, Translucent, Solid<br />
and Flashing.<br />
Background Opacity: This adjusts the opacity of<br />
the caption background. Options include Default,<br />
Transparent, Translucent, Solid and Flashing.<br />
Return to Default: This option sets each Size, Font<br />
Style, Foreground Color, Background Color, Foreground<br />
Opacity and Background Opacity to its default.<br />
03 Basic Features<br />
English<br />
19
Basic Features<br />
✎✎<br />
NOTE<br />
x<br />
• Digital Caption Options are available only<br />
when Default and Service1 ~ Service6 can be<br />
selected in Caption Mode.<br />
• x The availability of captions depends on the<br />
program being broadcasted.<br />
• x The Default setting follow the standards set by<br />
the broadcaster.<br />
• x The Foreground and Background cannot be set<br />
to have the same color.<br />
• x You cannot set both the Foreground Opacity<br />
and the Background Opacity to Transparent.<br />
Melody (Off / Low / Medium / High)<br />
Set so that a melody plays when the <strong>TV</strong> is turned on or off.<br />
✎✎NOTE<br />
• x Only available when the Input source is set to <strong>TV</strong>.<br />
To turn the melody off, set Melody to Off.<br />
• x The Melody does not play.<br />
––<br />
When no sound is output from the <strong>TV</strong> because the<br />
MUTE button has been pressed.<br />
––<br />
When no sound is output from the <strong>TV</strong> because the<br />
volume has been reduced to minimum with the<br />
VOL – button.<br />
––<br />
When the <strong>TV</strong> is turned off by Sleep Timer function.<br />
Energy Saving<br />
(Off / Low / Medium / High / Auto)<br />
Adjust the brightness of the <strong>TV</strong> in order to reduce power<br />
consumption. When watching <strong>TV</strong> at night, set the Energy<br />
Saving to High to reduce eye fatigue as well as power<br />
consumption.<br />
Support Menu<br />
OO<br />
MENUm → Support → ENTERE<br />
■■<br />
■■<br />
Sound Test: Use the built-in melody sound to check for<br />
sound problems.<br />
Yes: If you can hear sound only from one speaker or not<br />
at all during the sound test, select Yes. There may be a<br />
problem with the <strong>TV</strong>. Contact <strong>Samsung</strong>’s Call Center for<br />
assistance (1-800-SAMSUNG).<br />
No: If you can hear sound from the speakers, select No.<br />
There may be a problem with your external equipment.<br />
Please check your connections. If the problem persists,<br />
refer to the external device’s user manual.<br />
Signal Strength: (digital channels only) An HD channel’s<br />
reception quality is either perfect or the channels are<br />
unavailable. Adjust your antenna to increase signal<br />
strength.<br />
Software Upgrade<br />
Software Upgrade can be<br />
performed by downloading the<br />
latest firmware from samsung.com<br />
to a USB memory device.<br />
HD Connection Guide<br />
Refer to this information when connecting external devices<br />
to the <strong>TV</strong>.<br />
Contact <strong>Samsung</strong><br />
USB Drive<br />
<strong>TV</strong> Rear Panel<br />
View this information when your <strong>TV</strong> does not work properly<br />
or when you want to upgrade the software. You can find<br />
information regarding our call centers and how to download<br />
products and software.<br />
Self <strong>Diag</strong>nosis<br />
■■<br />
Picture Test: Use to check for picture problems. If the<br />
problem continues to occur, check the Color pattern.<br />
Yes: If the test pattern does not appear or there is<br />
noise in the test pattern, select Yes. There may be a<br />
problem with the <strong>TV</strong>. Contact <strong>Samsung</strong>’s Call Center for<br />
assistance (1-800-SAMSUNG).<br />
No: If the test pattern is properly displayed, select No.<br />
There may be a problem with your external equipment.<br />
Please check your connections. If the problem persists,<br />
refer to the external device’s user manual.<br />
20 English
P<br />
Advanced Features<br />
MEDIA.P<br />
Media Play<br />
Enjoy photos and/or music files saved on a USB<br />
Mass Storage <strong>Class</strong> (MSC) device.<br />
OO<br />
MENUm → Application → Media Play<br />
(USB) → ENTERE<br />
Device Name<br />
USB<br />
SUM<br />
315.0MB/495.0MB Free<br />
03 04 Basic Advanced Features Features<br />
E Enter<br />
e Exit<br />
¦ ¦ Connecting a USB Device<br />
1. Turn on your <strong>TV</strong>.<br />
2. Connect a USB device containing photo and/or music files to the USB jack on the<br />
rear of the <strong>TV</strong>.<br />
3. When the Application selection screen is displayed, press the ► button to select<br />
Media Play (USB), then press the ENTERE button.<br />
<strong>TV</strong> Rear Panel<br />
USB<br />
Photo<br />
SUM<br />
307.2MB/973.7MB<br />
USB Drive<br />
Using the Media Play Menu<br />
Viewing a Photo (or Slide Show)<br />
1. Press the MENU button. Press the ▲ or ▼ button to select<br />
Application, then press the ENTERE button.<br />
Photo<br />
2. Press the ▲or ▼button to select Media Play (USB), then press the<br />
SUM<br />
307.2MB/973.7MB<br />
ENTERE button.<br />
3. Press the ▲or ▼ button to select the corresponding USB Memory<br />
Device, then press the ENTERE button.<br />
DSC_0558.JPG<br />
Photo<br />
✎✎<br />
The Media Play menu differs depending on the USB Memory<br />
580 * 440<br />
78.0KB<br />
Device connected to <strong>TV</strong>.<br />
Photo Music File.....jpg File.....jpg Setup File.....jpg<br />
03 / 14<br />
L Move E Enter R Return<br />
✎✎<br />
Some devices may not be supported due to compatibility<br />
File.....jpg File.....jpg File.....jpg File.....jpg File.....jpg<br />
problems.<br />
SUM<br />
4. Press the ◄ or ► button to select an icon (Photo, Music, Setup),<br />
307.2MB/973.7MB<br />
File.....jpg File.....jpg File.....jpg File.....jpg File.....jpg<br />
then press the ENTERE button.<br />
✎✎It might not work properly with unlicensed multimedia files.<br />
✎✎Need-to-Know List before using Media Play (USB)<br />
DSC_0558.JPG<br />
Photo<br />
• x Only alphanumeric characters must be used as a folder name or file name (photo, music).<br />
580 * 440<br />
78.0KB<br />
• x The file system only supports FAT16/32 (The NTFS file system is not supported) Certain types of File.....jpg USB Digital File.....jpg camera<br />
File.....jpg<br />
03 / 14<br />
and audio devices may not be compatible with this <strong>TV</strong>.<br />
File.....jpg 06-I Will Carry File.....jpg You.mp3 File.....jpg File.....jpg File.....jpg 00:00:00<br />
• x Media Play only supports USB Mass Storage <strong>Class</strong> (MSC) devices. MSC Music is a Mass Storage <strong>Class</strong> Bulk-Only<br />
4.3MB<br />
Transport device. Examples of MSC are Thumb drives and Flash Card Readers. SUM Devices should be connected<br />
307.2MB/973.7MB<br />
2 / 31<br />
01-The Way.mp3 00:03:25<br />
directly to the <strong>TV</strong>’s USB port. USB (HDD) is not supported.<br />
File.....jpg File.....jpg File.....jpg File.....jpg File.....jpg<br />
02-Run To Me.mp3 00:03:25<br />
03-No More Sad Songs.mp3 00:03:25<br />
• x Before connecting your device to the <strong>TV</strong>, please back up your files to prevent them from damage or loss of data.<br />
04-Interference-gold.mp3 00:03:25<br />
05-marketa_irglova-The_hill.mp3 00:03:25<br />
SAMSUNG is not responsible for any data file damage or data loss.<br />
06-I Will Carry You.mp3 00:03:25<br />
SUM<br />
07-marketa_irglova.mp3 00:03:25<br />
• x Please connect directly to the USB port of your <strong>TV</strong>. If you are using a separate<br />
307.2MB/973.7MB<br />
cable connection, there may be a USB<br />
08-Super World.mp3 00:03:25<br />
Compatibility problem.<br />
• x Only MP3 and JPEG file formats are supported.<br />
• x The Media Play (USB) mp3 format only supports music files with a high sampling frequency (32 kHz, 44.1 kHz, or 48<br />
kHz).<br />
06-I Will Carry You.mp3 00:00:00<br />
Music<br />
• x We recommend the sequential jpeg format.<br />
4.3MB<br />
• x Do not disconnect the USB device while it is loading.<br />
2 / 31<br />
Setup<br />
SUM<br />
307.2MB/973.7MB<br />
Photo Music Setup<br />
01-The Way.mp3 00:03:25<br />
02-Run To Me.mp3 00:03:25<br />
03-No More Sad Songs.mp3 00:03:25<br />
04-Interference-gold.mp3 00:03:25<br />
English<br />
05-marketa_irglova-The_hill.mp3 00:03:25<br />
06-I Will Carry You.mp3 00:03:25<br />
07-marketa_irglova.mp3 00:03:25<br />
08-Super World.mp3 00:03:25<br />
21
Advanced Features<br />
• x MSC supports MP3 and JPEG files, and the PTP device supports JPEG files only.<br />
• x MTP (Media Transfer Protocol) is not supported.<br />
x<br />
• The playing duration of an mp3 file may be displayed as “00:00:00” if its playing time information is not found at the<br />
start of the file.<br />
• x The higher the resolution of the image, the longer it takes to display on the screen.<br />
• x The Photo or Music List displays up to 300 folders or files.<br />
• x Loading may take some time depending on the size of the file.<br />
• x MP3 files with DRM that have been downloaded from a non-free site cannot be played.<br />
• x Digital Rights Management (DRM) is a technology that supports the creation, distribution and management of of the<br />
content in an integrated and comprehensive way, including the protection of the rights Photo and interests of the content<br />
SUM<br />
providers, the prevention of the illegal copying of contents, as well as managing billings and settlements.<br />
307.2MB/973.7MB<br />
• x If a USB extension cable is used, the USB device may not be recognized or the files on the device may not be read.<br />
• x If a USB device connected to the <strong>TV</strong> is not recognized, the list of files on the device is corrupted or a file in the list is<br />
not played, connect the USB device to the PC, format the device and check the connection.<br />
• x If a file deleted from the PC is still found when Media Play is run, use the “Empty Photo the Recycle Music Bin” function Setup on the PC<br />
to permanently delete the file.<br />
Photo<br />
Viewing a Photo (or Slide Show)<br />
1. Press the INFO button to display the option View, Start Slide Show,<br />
Delete, Delete All, Deselect All.<br />
2. Press the ▲or ▼button to select Start Slide Show then press the<br />
ENTERE button.<br />
✎✎<br />
During the slide show, files are displayed in order from the<br />
currently shown file.<br />
✎✎<br />
MP3 files can be automatically played during the Slide Show<br />
307.2MB/973.7MB Free<br />
File.....jpg File.....jpg File.....jpg File.....jpg File.....jpg<br />
if the Default Background Music is set to On. To enable this<br />
function, MP3 files and other photo files must be located in the ' Select n Move j Option EPlay R Return<br />
same folder on the USB Memory Device.<br />
✎✎Press the INFO button during the slide show to set the following options Slide Show Speed, Background Music,<br />
Background Music Setting, List. Press the ▲or ▼button to select the option, then press the ENTERE button.<br />
––<br />
After setting the option press the ENTERE button to make a change.<br />
✎✎Press the INFO button during the photo view to set the following options Start Slide Show, Zoom, Rotate, List. Press<br />
the ▲or ▼button to select the option, then press the ENTERE button.<br />
06-I Will Carry You.mp3 00:00:00<br />
Music<br />
4.3MB<br />
––<br />
After setting the option press the ENTERE button to make a change.<br />
Photo<br />
DSC_0558.JPG<br />
580 * 440<br />
78.0KB<br />
Jan 7, 2010 Upper Fold... Folder<br />
03 / 14<br />
2 / 31<br />
SUM<br />
File.....jpg<br />
File.....jpg<br />
USB<br />
1/1 Page<br />
File.....jpg File.....jpg File.....jpg<br />
File.....jpg File.....jpg File.....jpg<br />
01-The Way.mp3 00:03:25<br />
02-Run To Me.mp3 00:03:25<br />
03-No More Sad Songs.mp3 00:03:25<br />
04-Interference-gold.mp3 00:03:25<br />
05-marketa_irglova-The_hill.mp3 00:03:25<br />
SUM<br />
307.2MB/973.7MB<br />
06-I Will Carry You.mp3 00:03:25<br />
07-marketa_irglova.mp3 00:03:25<br />
08-Super World.mp3 00:03:25<br />
Setup<br />
22 English
Music<br />
Using the MP3 List<br />
Folder icon<br />
Music list icon<br />
Photo<br />
SUM<br />
307.2MB/973.7MB<br />
Move to the previous folder stage icon<br />
✎✎The selected file is displayed on the top with its playing time.<br />
Photo Music Setup<br />
1. To select all files or a file, press the INFO button to display the Music<br />
menus.<br />
Press the ENTERE button to select Play / Play Selected Files,<br />
Repeat Music, Delete Selected File / Delete, Delete All or<br />
Deselect All.<br />
2. Press the ▲or ▼button to move to an icon, then press the<br />
ENTERE button.<br />
DSC_0558.JPG<br />
Pressing the ENTERE<br />
Photo<br />
button over a musical note icon immediately<br />
580 * 440<br />
plays the music 78.0KB file.<br />
File.....jpg File.....jpg File.....jpg<br />
03 / 14<br />
Pressing the ENTERE button over a folder icon shows the music<br />
files included in the folder.<br />
File.....jpg<br />
File.....jpg<br />
File.....jpg File.....jpg File.....jpg<br />
Photo<br />
580 * 440<br />
78.0KB<br />
03 / 14<br />
DSC_0558.JPG<br />
File.....jpg File.....jpg File.....jpg<br />
File.....jpg<br />
File.....jpg<br />
Music<br />
File.....jpg File.....jpg File.....jpg<br />
SUM<br />
307.2MB/973.7MB<br />
SUM<br />
307.2MB/973.7MB<br />
File.....jpg File.....jpg<br />
File.....jpg File.....jpg File.....jpg<br />
Photo Music Setup<br />
L Move E Enter R Return<br />
1/4 Page<br />
Music<br />
4.3MB<br />
Jan 7, 2010<br />
2 / 31<br />
Play<br />
Repeat Music<br />
: Off<br />
Delete<br />
Delete All<br />
SUM<br />
307.2MB/973.7MB<br />
Deselect All<br />
06-I Will Carry You.mp3 00:00:00<br />
Upper Folder<br />
Folder<br />
01-The Way.mp3 00:03:25<br />
r<br />
02-Run To Me.mp3 00:03:25<br />
03-No More Sad Songs.mp3 00:03:25<br />
04-Interference-gold.mp3 00:03:25<br />
05-marketa_irglova-The_hill.mp3 00:03:25<br />
06-I Will Carry You.mp3 00:03:25<br />
07-marketa_irglova.mp3 00:03:25<br />
08-Super World.mp3 00:03:25<br />
' Select j n Exit Move j Option E Play R Return<br />
03 04 Basic Advanced Features Features<br />
■■<br />
■■<br />
SUM<br />
307.2MB/973.7MB<br />
Play: Select to play MP3 files. File.....jpg File.....jpg File.....jpg File.....jpg File.....jpg<br />
✎✎<br />
This menu only shows files with the MP3 file extension. Files with other file extensions are not displayed, even if<br />
they are saved on the same USB device.<br />
✎✎<br />
To adjust the music volume, press the y button on the remote control. To mute the sound, press the<br />
MMUTE button on the remote control.<br />
Setup<br />
Repeat Music (On / Off): Select to repeatedly play MP3 files in the current folder.<br />
Playing Music<br />
06-I Will Carry You.mp3 00:00:00<br />
Music<br />
• y Only displays files 4.3MB with the MP3 file extension. Other file extensions are not displayed, even if they are saved on the same<br />
USB device.<br />
2 / 31<br />
01-The Way.mp3 00:03:25<br />
02-Run To Me.mp3 00:03:25<br />
• y If the sound is strange when playing<br />
03-No More Sad<br />
MP3<br />
Songs.mp3<br />
files, adjust the<br />
00:03:25<br />
Equalizer and SRS TruSurround HD in the Sound menu. (An<br />
04-Interference-gold.mp3 00:03:25<br />
over-modulated MP3 file may cause a sound problem.)<br />
05-marketa_irglova-The_hill.mp3 00:03:25<br />
• y Music function information icons06-I Will Carry You.mp3 00:03:25<br />
SUM<br />
307.2MB/973.7MB<br />
Repeat Mode is On.<br />
07-marketa_irglova.mp3 00:03:25<br />
08-Super World.mp3 00:03:25<br />
Repeat Mode is Off.<br />
When pressing the PLAY/PAUSE button on the remote control while music is playing.<br />
When pressing the STOP button on the remote control, the music stops.<br />
Setup<br />
English<br />
23
Advanced Features<br />
Setup<br />
Using the Setup Menu<br />
SUM<br />
307.2MB/973.7MB<br />
03-No More Sad Songs.mp3 00:03:25<br />
04-Interference-gold.mp3 00:03:25<br />
05-marketa_irglova-The_hill.mp3 00:03:25<br />
06-I Will Carry You.mp3 00:03:25<br />
07-marketa_irglova.mp3 00:03:25<br />
08-Super World.mp3 00:03:25<br />
■■<br />
■■<br />
■■<br />
■■<br />
■■<br />
■■<br />
Slide Show Speed: Select to control the slide show speed. You can<br />
select Fast, Normal or Slow.<br />
Background Music: Select to determine whether to play an MP3 file<br />
during a slide show. You can select Music On or Music Off.<br />
Background Music Setting: While a slide show is in progress, use<br />
the Background Music Setting to select a music file to listen to.<br />
Select an MP3 file as the background music.<br />
Repeat Music: Select to determine whether to repeat playing the<br />
music when all MP3 files in the current folder have been played.<br />
Screen Saver: Select to set the waiting time before the screen saver appears. The screensaver will appear when no<br />
button is pressed for 2 hours, 4 hours, 8 hours, 10 hours or Off.<br />
Safe Remove: You can remove the device safely from the <strong>TV</strong>.<br />
Setup Slide Show Speed : Fast<br />
Background Music : On<br />
Background Music Setting<br />
Repeat Music<br />
Screen Saver<br />
Safe Remove<br />
: On<br />
: 2 hours<br />
U Move E Enter R Return<br />
Playing the selected photos / music files<br />
• y Press the Yellow button.<br />
• y Repeat the above operation to select desired photos / music files.<br />
✎✎<br />
Selected photos or files are marked with the symbol c. To cancel a selection, press the Yellow button again.<br />
• y Press the ENTERE button to play the selected photos or files.<br />
24 English
Other Information<br />
Installing the Wall Mount<br />
Assembling the Guide Stand (LCD-<strong>TV</strong> - 32 inches or above)<br />
When installing the <strong>TV</strong> onto a wall, attach the Guide Stand as<br />
shown.<br />
✎✎Use only the Guide Stand provided as an accessory.<br />
(The Guide Stand may differ depending on the model.)<br />
05 Other Information<br />
Guide Stand<br />
Installing the Wall Mount Kit<br />
The wall mount kit (sold separately) allows you to mount the <strong>TV</strong> on the wall.<br />
For detailed information on installing the wall mount, see the instructions provided with the wall mount items. Contact a<br />
technician for assistance when installing the wall mount bracket. <strong>Samsung</strong> Electronics is not responsible for any damage to the<br />
product or injury to yourself or others if you elect to install the <strong>TV</strong> on your own.<br />
Wall Mount Kit Specifications (VESA)<br />
Case A. Installing the SAMSUNG Wall-Mount<br />
Case B. Installing another company’s Wall-Mount<br />
<br />
English<br />
25
Other Information<br />
✎✎The wall mount kit is not supplied, but sold separately.<br />
Install your wall mount on a solid wall perpendicular to the floor. When attaching to other building materials, please contact<br />
your nearest dealer. If installed on a ceiling or slanted wall, it may fall and result in severe personal injury.<br />
✎✎NOTE<br />
• x Standard dimensions for wall mount kits are shown in the table below.<br />
• x When purchasing our wall mount kit, a detailed installation manual and all parts necessary for assembly are provided.<br />
• x Do not use screws that do not comply with the VESA standard screw specifications.<br />
• x Do not use screws that are longer than the standard dimension or do not comply with the VESA standard screw<br />
specifications. Screws that are too long may cause damage to the inside of the <strong>TV</strong> set.<br />
• x For wall mounts that do not comply with the VESA standard screw specifications, the length of the screws may differ<br />
depending on the wall mount specifications.<br />
• x Do not fasten the screws too strongly; this may damage the product or cause the product to fall, leading to personal<br />
injury. <strong>Samsung</strong> is not liable for these kinds of accidents.<br />
• x <strong>Samsung</strong> is not liable for product damage or personal injury when a non-VESA or non-specified wall mount is used or<br />
the consumer fails to follow the product installation instructions.<br />
• x Do not mount the <strong>TV</strong> at more than a 15 degree tilt.<br />
• x Always use two people to mount the <strong>TV</strong> to a wall.<br />
Product Family inches VESA Spec. (A * B) Standard Screw Quantity<br />
19~22 75 X 75<br />
M4<br />
26 200 X 100<br />
LCD-<strong>TV</strong><br />
4<br />
32~40 200 X 200 M6<br />
46 400 X 400 M8<br />
19~22 75 X 75<br />
26 200 X 100<br />
M4<br />
<strong>LED</strong>-<strong>TV</strong> 32~40 200 X 200<br />
4<br />
46~60 400 X 400<br />
M8<br />
65~75 600 X 400<br />
Do not install your Wall Mount Kit while your <strong>TV</strong> is turned on. It may result in personal injury due to<br />
electric shock.<br />
26 English
Parts included in the Kit:<br />
Securing the <strong>TV</strong> to the Wall (depending on the model)<br />
Caution: Pulling, pushing, or climbing on the <strong>TV</strong> may cause the <strong>TV</strong> to fall. In particular, ensure your children<br />
do not hang over or destabilize the <strong>TV</strong>. Doing so may cause the <strong>TV</strong> to tip over, causing serious injuries or<br />
death. Follow all safety precautions provided in the included Safety Flyer with your <strong>TV</strong>. For added stability<br />
and safety, you can purchase and install the anti fall device as described below.<br />
05 Other Information<br />
4<br />
<strong>TV</strong>-Holder Screw 1 (M8 X L28) Screw 2 (M6 X L16) Screw 3 (M4 X L12) Screw 4 (M4 X L16)<br />
Installing the <strong>TV</strong>-Holder<br />
PDP / <strong>LED</strong> / LCD (46<br />
inches or larger)<br />
LCD (32 – 40 inches<br />
models only)<br />
UN**C9000<br />
model only<br />
<strong>LED</strong> / LCD<br />
Plastic Cover only<br />
1. Read these instructions through once before you start.<br />
1<br />
2. Remove the screw attached to the back of your <strong>TV</strong>, and then connect the <strong>TV</strong>-Holder to the <strong>TV</strong> with the screw included in<br />
1<br />
4<br />
4<br />
the <strong>TV</strong>-Holder Kit (1, 2, 3 or 4) that is designated for your <strong>TV</strong>.<br />
1<br />
1<br />
1<br />
1<br />
✎✎<br />
Make sure to use only the appropriate supplied screw. If you use a different screw, you can damage your <strong>TV</strong>.<br />
4<br />
1<br />
4<br />
1<br />
1<br />
1<br />
1<br />
2<br />
1<br />
1<br />
2<br />
2<br />
1<br />
2<br />
1<br />
PDP / <strong>LED</strong> /<br />
LCD (46 inches or larger)<br />
2<br />
LCD<br />
(32 – 40 inches models only)<br />
3<br />
3<br />
3<br />
4 3<br />
1<br />
13<br />
4<br />
1<br />
UN**C9000<br />
model only<br />
<strong>LED</strong> / LCD<br />
Plastic Cover only<br />
1<br />
2<br />
1<br />
2<br />
3<br />
3<br />
English<br />
27
Other Information<br />
3. Firmly fasten the screw you provided (size M4xL20 or similar) to the wall or cabinet where the <strong>TV</strong> is to be installed.<br />
✎✎<br />
If you fasten the screw to the wall, we recommend you drive the screw into a stud. If that is not possible, use a<br />
molly to anchor the screw.<br />
4. Tie the <strong>TV</strong>-Holder cord to the screw fastened to the wall or cabinet so that the <strong>TV</strong> is fixed. See the illustrations below.<br />
✎✎<br />
Install the <strong>TV</strong> close to the wall so that it does not fall.<br />
✎✎<br />
When attaching the <strong>TV</strong>-Holder cord to the wall, tie the cord level with the ground or slanted downwards for safety<br />
purposes.<br />
✎✎<br />
Check the cord occasionally to make sure it is secure.<br />
✎✎<br />
Before moving the <strong>TV</strong>, separate the connected cord first.<br />
Wall<br />
Wall<br />
Wall<br />
5. Verify all connections are properly secured. Periodically check the connections for any sign of fatigue or failure. If you have<br />
any doubt about the security of your connections, contact a professional installer.<br />
28 English
Anti-Theft Kensington Lock<br />
The Kensington Lock is not supplied by <strong>Samsung</strong>. It a device used to physically fix the system when using it in a public place.<br />
The appearance and locking method may differ from the illustration depending on the manufacturer. Refer to the manual<br />
provided with the Kensington Lock for additional information on proper use.<br />
✎✎Please find a “K” icon on the rear of the <strong>TV</strong>. A kensington slot is beside the “K” icon.<br />
✎✎The position and color may differ depending on the model.<br />
To lock the product, follow these steps:<br />
1. Wrap the Kensington lock cable around a large, stationary object such<br />
as desk or chair.<br />
2. Slide the end of the cable with the lock attached through the looped end<br />
of the Kensington lock cable.<br />
3. Insert the locking device into the Kensington slot on the product (1).<br />
4. Lock the lock.<br />
✎✎These are general instructions. For exact instructions, see the <strong>User</strong><br />
manual supplied with the locking device.<br />
✎✎The locking device has to be purchased separately.<br />
✎✎The location of the Kensington slot may be different depending on the <strong>TV</strong> model.<br />
1<br />
<br />
05 Other Information<br />
English<br />
29
Other Information<br />
Troubleshooting<br />
If the <strong>TV</strong> seems to have a problem, first review this list of possible problems and solution. Also review the Troubleshooting<br />
Section in the e-<strong>Manual</strong>. If none of the troubleshooting tips apply, visit www.samsung.com/support or call <strong>Samsung</strong> customer<br />
Service at 1-800-SAMSUNG(1-800-726-7864).<br />
Issues<br />
Flickering and Dimming<br />
Component Connections /<br />
Screen Color<br />
Screen Brightness<br />
Trouble Powering On<br />
Stand Assembly<br />
Cannot find channel<br />
Solutions and Explanations<br />
If your <strong>Samsung</strong> Television is flickering or dimming sporadically, you may need to disable some of<br />
its energy efficient features like the Energy Saving feature. If you follow below step with your remote,<br />
you can turn these features off or on.<br />
• y Energy saving : <strong>User</strong> Menu → Setup → Energy Saving<br />
If you find that the color on your <strong>Samsung</strong> television’s screen is not correct or black and White, first<br />
run a Self <strong>Diag</strong>nosis on the <strong>TV</strong> to make sure there are no device issues.<br />
• y Self <strong>Diag</strong>nosis : <strong>User</strong> Menu → Support → Self <strong>Diag</strong>nosis → Picture Test<br />
If the test is ok, try making sure ;<br />
• y Your connections are all consistent. For example, if you’ve used the AV In jack on your <strong>TV</strong>, make<br />
sure you have used the AV Out jack on your video source.<br />
• y Try making sure you have connected to the correct jacks.<br />
For example, if you use the Component jacks, labeled Pb, Pr, and Y, to connect your <strong>TV</strong> and video<br />
source, make sure you have connected the blue Pb jack on the video source to the blue Pb jack on<br />
the <strong>TV</strong>, the red Pr jack on the source to the red Pr jack on the <strong>TV</strong>.<br />
If you find that the colors on your <strong>Samsung</strong> <strong>TV</strong> are correct but just a little too dark or bright, there<br />
are some settings you should check before calling for a repair.<br />
• y Backlight, Contrast, Brightness, Sharpness, Color, Tint and so on.<br />
Go in to “Picture” on user Menu then try adjusting options mentioned above.<br />
Before Turn on check red light on the right or left bottom of your <strong>TV</strong>. Press power on button on<br />
<strong>TV</strong> or remote and it will blink about 5 times before turning on.<br />
If you find that you are having trouble powering on your <strong>Samsung</strong> television, there are a number of<br />
things to check before making a call to the service department.<br />
• y If you happen to be using the <strong>TV</strong> as a monitor and the stand-by light only blinks for a few seconds when<br />
you press the power button, your PC is in sleep mode. To take your PC out of sleep mode, press a key on<br />
your keyboard or move the mouse. Then try turning your <strong>TV</strong> on.<br />
If you’re sure your power cord, remote control, and PC are functioning properly, you may be having<br />
a cable issue. If you have a cable or satellite box, your <strong>TV</strong> may appear to be off because the cable or<br />
satellite box is not outputting a signal. To test the signal output of your cable or satellite box, press the<br />
guide or info button on the cable or satellite box remote control. If the screen displays the guide or info<br />
data, the problem is caused by the box.<br />
If you have any trouble to assemble the stand though you refer to “Install the Stand” mentioned<br />
at this manual, visit www.samsung.com/spsn then check “2011 Stand Assembly” on “Top 7 <strong>TV</strong><br />
Troubleshooting Tips”.<br />
Re-run plug and play. See page 7 for detail<br />
30 English
Issues<br />
Poor picture<br />
The <strong>TV</strong> image does not look as good as<br />
it did in the store.<br />
Solutions and Explanations<br />
First of all, please perform the Picture Test and confirm that your <strong>TV</strong> is properly displaying the test<br />
image.<br />
• go to MENU - Support - Self <strong>Diag</strong>nosis - Picture Test (P. 20)<br />
If the test image is properly displayed, the poor picture may be caused by the source or signal.<br />
• If you have an analog cable/satellite box, upgrade to a digital set top box. Use HDMI or<br />
Component cables to deliver HD (high definition) picture quality.<br />
• Cable/Satellite subscribers: Try HD stations from the channel line up.<br />
• Air/Cable Antenna connection: Try HD stations after performing Auto Program.<br />
✎✎<br />
Many HD channels are upscaled from SD(Standard Definition) contents.<br />
• Adjust the Cable/Sat box video output resolution to 1080i or 720p.<br />
05 Other Information<br />
The picture is distorted: macroblock<br />
error, small block, dots, pixelization.<br />
• Compression of video contents may cause picture distortion, especially in fast moving pictures<br />
such as sports and action movies.<br />
• Low signal level can cause picture distortion. This is not a <strong>TV</strong> problem.<br />
• Mobile phones used close to the <strong>TV</strong> (up to 3.3ft) may cause noise in picture on analog and<br />
digital <strong>TV</strong>.<br />
Color is wrong or missing. • If you’re using Component connection, make sure the component cables are connected to the<br />
correct jacks. Incorrect or loose connections may cause color problems or a blank screen.<br />
There is poor color or brightness. • Adjust the Picture options in the <strong>TV</strong> menu.<br />
(go to Picture mode / Color / Brightness / Sharpness) (P. 14)<br />
• Adjust Energy Saving option in the <strong>TV</strong> menu.<br />
(go to MENU - Setup - Energy Saving) (P. 20)<br />
• Try resetting the picture to view the default picture setting.<br />
(go to MENU - Picture - Picture Reset) (P. 15)<br />
There is a dotted line on the edge of the<br />
screen.<br />
• If the picture size is set to Screen Fit, change it to 16:9.<br />
• Change cable/satellite box resolution.<br />
The picture is black and white. • If you are using an AV composite input, connect the video cable (yellow) to the Green jack of<br />
component input 1 on the <strong>TV</strong>.<br />
When changing channels, the picture<br />
freezes or is distorted or delayed.<br />
Sound Problem<br />
There is no sound or the sound is too<br />
low at maximum volume.<br />
The picture is good but there is no<br />
sound.<br />
The speakers are making an<br />
inappropriate noise.<br />
• If connected to a cable box, please try to reset it. (reconnect the AC cord and wait until the cable<br />
box reboots. It may take up to 20 minutes)<br />
• Set output resolution of the cable box to 1080i or 720p.<br />
First of all, please perform the Sound Test to confirm that your <strong>TV</strong> audio is properly operating.<br />
• go to MENU - Support - Self <strong>Diag</strong>nosis - Sound Test (P. 19)<br />
If the audio is OK, the sound problem may caused by the source or signal.<br />
• Please check the volume of the device (Cable/Sat Box, DVD, Blu-ray etc) connected to your <strong>TV</strong>.<br />
• If you are using an external device, check the device’s audio output option (ex. you may need to<br />
change your cable box’s audio option to HDMI when you have a HDMI connected to your <strong>TV</strong>).<br />
• If you are using a DVI to HDMI cable, a separate audio cable is required.<br />
• Reboot the connected device by reconnecting the device’s power cable.<br />
• Check the cable connections. Make sure a video cable is not connected to an audio input.<br />
• For Antenna or Cable connections, check the signal information. Low signal level may cause<br />
sound distortion.<br />
• Perform the Sound Test as explained above.<br />
English<br />
31
Other Information<br />
Issues<br />
No Picture, No Video<br />
Solutions and Explanations<br />
The <strong>TV</strong> will not turn on. • Make sure the AC power cord is securely plugged into the wall outlet and the <strong>TV</strong>.<br />
• Make sure the wall outlet is working.<br />
• Try pressing the POWER button on the <strong>TV</strong> to make sure the problem is not the remote.<br />
If the <strong>TV</strong> turns on, refer to ‘Remote control does not work’ below.<br />
The <strong>TV</strong> turns off automatically. • Ensure the Sleep Timer is set to Off in the Setup menu. (P. 17)<br />
• If your PC is connected to the <strong>TV</strong>, check your PC power settings.<br />
• Make sure the AC power cord is plugged in securely to the wall outlet and the <strong>TV</strong>.<br />
• When watching <strong>TV</strong> from an antenna or cable connection, the <strong>TV</strong> will turn off after 10 - 15<br />
minutes if there is no signal.<br />
There is no picture/video. • Check cable connections. (remove and reconnect all cables connected to the <strong>TV</strong> and external<br />
devices).<br />
RF(Cable/Antenna) Connection<br />
• Set your external device’s (Cable/Sat Box, DVD, Blu-ray etc) video outputs to match the<br />
connections to the <strong>TV</strong> input. For example, if an external device’s output is HDMI, it should be<br />
connected to an HDMI input on the <strong>TV</strong>.<br />
• Make sure your connected devices are powered on.<br />
• Be sure to select the <strong>TV</strong>’s correct source by pressing the SOURCE button on the remote<br />
control.<br />
• Reboot the connected device by reconnecting the device’s power cable.<br />
The <strong>TV</strong> is not receiving all channels. • Make sure the coaxial cable is connected securely.<br />
• Please try Auto Program to add available channels to the channel list.<br />
go to MENU - Channel - Auto Program then select Auto and make sure the correct Cable <strong>TV</strong><br />
signal type is set in the menu. There are 3 options. (STD, HRC and IRC) (P. 12)<br />
• Verify the Antenna is positioned correctly.<br />
No Caption on digital channels. • Check Caption Setup menu. Try changing Caption Mode Service 1 to CC1. (P. 19)<br />
• Some channels may not have caption data.<br />
The picture is distorted: macroblock,<br />
error, small block, dots, pixelization.<br />
• Compression of video contents may cause picture distortion. Especially on fast moving pictures<br />
such as sports and action movies.<br />
• A low signal can cause picture distortion. This is not a <strong>TV</strong> problem.<br />
Others<br />
Purple/green rolling horizontal bars and<br />
buzzing noise from the <strong>TV</strong> speakers with<br />
Component cable connection.<br />
• Remove the left and right audio connections from the set-top-box. If the buzzing stops, this<br />
indicates that the set-top-box has a grounding issue. Replace the Component video cables with<br />
an HDMI connection.<br />
The picture will not display in full screen. • HD channels will have black bars on either side of the screen when displaying upscaled SD (4:3)<br />
contents.<br />
• Black bars on the Top & Bottom will be shown on movies that have aspect ratios different from<br />
your <strong>TV</strong>.<br />
• Adjust picture size option on your external device or <strong>TV</strong> to full screen.<br />
The remote control does not work. • Replace the remote control batteries with correct polarity (+/–).<br />
• Clean the transmission window located on the top of the remote.<br />
• Try pointing the remote directly at the <strong>TV</strong> from 5~6 feet away.<br />
32 English
Issues<br />
Others<br />
The cable/set top box remote control<br />
does not turn the <strong>TV</strong> on or off, or adjust<br />
the volume.<br />
Solutions and Explanations<br />
• Program the Cable/Sat remote control to operate the <strong>TV</strong>. Refer to the Cable/Sat user manual<br />
for SAMSUNG <strong>TV</strong> code.<br />
‘Mode Not Supported’ message. • Check the supported resolution of the <strong>TV</strong> and adjust the external device’s output resolution<br />
accordingly. Refer to resolution settings in this manual.<br />
Caption on <strong>TV</strong> menu is greyed out. • Caption can not be selected in the <strong>TV</strong> menu when connected via HDMI or Component.<br />
• Caption must be activated on the external device.<br />
There is a plastic smell from the <strong>TV</strong>. • This smell is normal and will dissipate over time.<br />
<strong>TV</strong> Signal Strength is unavailable in the<br />
Self <strong>Diag</strong>nosis Test menu.<br />
• This function is only available with digital channels with an Antenna (RF/Coax) connection (Air<br />
or Cable). (P. 20)<br />
<strong>TV</strong> is tilted to the right or left side. • Remove the stand base from the <strong>TV</strong> and reassemble.<br />
Channel menu is grey out (unavailable). • Channel menu is only available when the <strong>TV</strong> source is selected (Antenna or Cable).<br />
Your settings are lost after 30 minutes<br />
or every time the <strong>TV</strong> is turned off.<br />
You have intermittent loss of audio or<br />
video.<br />
You see small particles when you look<br />
closely at the edge of the frame of the<br />
<strong>TV</strong>.<br />
POP (<strong>TV</strong>’s internal banner ad) appears<br />
on the screen.<br />
• If <strong>TV</strong> is in the Store Demo mode, it will reset audio and picture settings every 30 minutes.<br />
Please change from Store Demo mode to Home Use mode in the Plug & Play procedure.<br />
Press the SOURCE button to select <strong>TV</strong> mode, go to MENU → Setup → Plug & Play →<br />
ENTERE.<br />
• Check the cable connections and reconnect them.<br />
• Loss of audio or video can be caused by using overly rigid or thick cables. Make sure the<br />
cables are flexible enough for long term use. Mounting the <strong>TV</strong> to the wall, we recommend using<br />
cables with 90 degree connectors.<br />
• This is part of the product’s design and is not a defect.<br />
• Select Home Use under Plug & Play mode.<br />
For details, refer to Plug & Play (Initial Setup). (P. 7)<br />
05 Other Information<br />
✎✎Watch these troubleshooting on video at www.samsung.com/spsn<br />
✎<br />
✎ This TFT LCD/<strong>LED</strong> panel uses a panel consisting of sub pixels which require sophisticated technology to produce.<br />
However, there may be a few bright or dark pixels on the screen. These pixels will have no impact on the performance of<br />
the product.<br />
¦ ¦ Storage and Maintenance<br />
✎✎If you remove the attached sticker on the <strong>TV</strong> screen, clean the residues and then watch <strong>TV</strong>.<br />
Do not spray water or a cleaning agent directly onto the<br />
product. Any liquid that goes into the product may cause a<br />
failure, fire, or electric shock.<br />
Clean the product with a soft cloth dapped in a small<br />
amount of water.<br />
English<br />
33
Other Information<br />
Specifications<br />
Environmental Considerations<br />
Operating Temperature<br />
Operating Humidity<br />
Storage Temperature<br />
Storage Humidity<br />
50°F to 104°F (10°C to 40°C)<br />
10% to 80%, non-condensing<br />
-4°F to 113°F (-20°C to 45°C )<br />
5% to 95%, non-condensing<br />
Model Name LN32D405E3D UN32D4005BD UN40D<strong>5005</strong>BF<br />
Display Resolution 1360X768 1920X1080<br />
Screen Size<br />
(<strong>Diag</strong>onal)<br />
32" <strong>Class</strong><br />
(31.5" measured diagonally)<br />
40" <strong>Class</strong><br />
(40.0" measured diagonally)<br />
Sound Output 5W X 2 10W X 2<br />
Dimensions (WxDxH)<br />
Body<br />
With stand<br />
Weight<br />
Without Stand<br />
With Stand<br />
30.8 X 3.9 X 19.8 inches<br />
(784.4 X 98.1 X 502.9 (mm))<br />
30.8 X 7.1 X 21.4 inches<br />
(784.4 X 182.4 X 545.3 (mm))<br />
16.7 Ibs (7.6 kg)<br />
18.9 Ibs (8.6 kg)<br />
✎✎Design and specifications are subject to change without prior notice.<br />
✎✎This device is a <strong>Class</strong> B digital apparatus.<br />
✎<br />
✎<br />
29.7 X 1.8 X 17.8 inches<br />
(756.4 X 47.8 X 454.0 (mm))<br />
29.7 X 7.1 X 19.6 inches<br />
(756.4 X 182.4 X 498.1 (mm))<br />
13.8 Ibs (6.3 kg)<br />
15.8 Ibs (7.2 kg)<br />
37.1 X 2.0 X 22.1 inches<br />
(943.8 X 51.0 X 561.4 (mm))<br />
37.1 X 8.6 X 23.7 inches<br />
(943.8 X 219.4 X 603.5 (mm))<br />
21.1 Ibs (9.6 kg)<br />
24.2 Ibs (11.0 kg)<br />
✎ For information about power supply, and more about power consumption, refer to the label attached to the product.<br />
✎ Dispose unwanted electronics through an approved recycler. To find the nearest recycling location, go to our website:<br />
www.samsung.com/recyclingdirect or call, (877) 278-0799.<br />
¦ ¦ License<br />
TruSurround HD, SRS and symbol are trademarks of SRS Labs, Inc. TruSurround HD technology<br />
is incorporated under license from SRS Labs, Inc.<br />
Manufactured under license from Dolby Laboratories. Dolby and the double-D symbol are<br />
trademarks of Dolby Laboratories.<br />
Open Source License Notice<br />
In the case of using open source software, Open Source Licenses are available on the product menu.<br />
Open source used in this product can be found on the following webpage. ( http://opensource.samsung.com )<br />
Open source License Notice is written only English.<br />
34 English
■■<br />
FRONT VIEW / SIDE VIEW<br />
2<br />
1<br />
Dimensions<br />
3<br />
5<br />
6<br />
7<br />
05 Other Information<br />
4<br />
8<br />
(Unit: inches)<br />
Model name 1 2 3 4 5 6 7 8<br />
UN32D4005BD 29.7 27.5 15.5 18.2 17.8 19.6 1.8 7.1<br />
UN40D<strong>5005</strong>BF 37.1 34.9 19.7 18.8 22.1 23.7 2.0 8.6<br />
LN32D405E3D 30.8 27.5 15.5 18.1 19.7 21.4 3.4 7.1<br />
■■<br />
JACK PANEL DETAIL / REAR VIEW<br />
1<br />
5<br />
6<br />
6<br />
5<br />
1<br />
2<br />
3<br />
4<br />
4<br />
3<br />
2<br />
(Unit: inches)<br />
Model name 1 2 3 4 5 6<br />
UN32D4005BD 7.2 3.1 5.5 19.5 7.8 7.8<br />
UN40D<strong>5005</strong>BF 9.3 6.2 7.7 23.8 7.8 7.8<br />
LN32D405E3D 9.2 1.9 4.9 21.3 7.8 7.8<br />
NOTE: All drawings are not necessarily to scale. Some dimensions are subject to change without prior notice. Refer to the<br />
dimensions prior to performing installation of your <strong>TV</strong>. Not responsible for typographical or printed errors.<br />
© 2011 <strong>Samsung</strong> Electronics America, Inc<br />
English<br />
35
Other Information<br />
A<br />
Antenna 7<br />
Auto Program 12<br />
B<br />
Balance 16<br />
C<br />
Cables 4<br />
Caption 19<br />
Clear Scrambled Channel 12<br />
Clear Voice 16<br />
Component 8<br />
Composite 4<br />
D<br />
DST (Daylight Saving Time) 17<br />
Dynamic Contrast 14<br />
E<br />
Energy Saving 20<br />
Equalizer 16<br />
F<br />
Index<br />
Favorite Channel 12<br />
H<br />
HD 15<br />
HDMI 8<br />
L<br />
Language 19<br />
License 34<br />
M<br />
Media Play 21<br />
Melody 20<br />
MTS 16<br />
P<br />
Photo view 22<br />
Power Indicator 5<br />
R<br />
Remote Control 6<br />
Reset Picture Mode 15<br />
S<br />
Screen Fit 15<br />
Sleep Timer 17<br />
Slide Show 22<br />
Software Upgrade 20<br />
Source List 10<br />
SRS TruSurround HD 16<br />
Standby mode 5<br />
T<br />
Timer 17<br />
V<br />
Volume 5, 6, 17<br />
W<br />
Wall Mount 25<br />
White Balance 14<br />
Wide Fit 15<br />
36 English


