

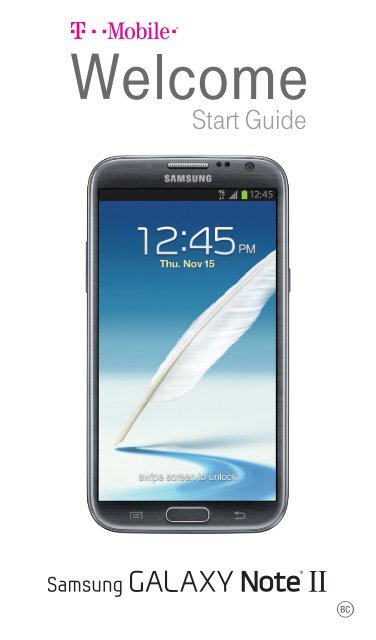
Samsung Galaxy Note II 16GB (T-Mobile) - SGH-T889PSATMB - Quick Start Guide ver. MK3_F3 (ENGLISH(North America),3.82 MB)
Samsung Galaxy Note II 16GB (T-Mobile) - SGH-T889PSATMB - Quick Start Guide ver. MK3_F3 (ENGLISH(North America),3.82 MB)
Samsung Galaxy Note II 16GB (T-Mobile) - SGH-T889PSATMB - Quick Start Guide ver. MK3_F3 (ENGLISH(North America),3.82 MB)

You also want an ePaper? Increase the reach of your titles
YUMPU automatically turns print PDFs into web optimized ePapers that Google loves.
Table of Contents<br />
MY CARRIER 4<br />
SERVICE 5<br />
DEVICE FUNCTIONS 6<br />
SETTING UP YOUR DEVICE 8<br />
Turning Your Device On and Off 11<br />
Locking and Unlocking Screen 11<br />
Initial Device Configuration 11<br />
HOME SCREEN 12<br />
Status Bar 12<br />
Notification Screen 12<br />
CALLING FEATURES 13<br />
Making a Call 13<br />
Ending a Call 14<br />
Answering a Call 14<br />
Rejecting a Call 14<br />
VOICEMAIL 15<br />
Set Up Voicemail 15<br />
Access Voicemail 15<br />
VISUAL VOICEMAIL 16<br />
Initial Configuration and Set Up 16<br />
Checking Visual Voicemail Messages 16<br />
Deleting Visual Voicemail Messages 16
CONTACTS 17<br />
Creating a New Contact 17<br />
Adding a Number to an Existing Contact 17<br />
Deleting an Existing Contact 17<br />
MESSAGING 18<br />
Create and Send a Message 18<br />
CONNECTIONS 19<br />
Connecting to Bluetooth 19<br />
Connecting to Wi-Fi 19<br />
Near Field Communication 20<br />
S Beam 20<br />
Smartphone <strong>Mobile</strong> HotSpot 21<br />
USB Tethering 23<br />
APPS & MORE 25<br />
Installing Apps 25<br />
<strong>Samsung</strong> Smart Switch 25<br />
Gmail (Google Account) 25<br />
Setting Up Your Email Accounts 26<br />
Internet 27<br />
Multi Window 28<br />
Camera 29<br />
Wi-Fi Calling 30<br />
Lock Screen 31
LEGAL 32<br />
APPROVED FIRMWARE VERSIONS 32<br />
INFORMATION ABOUT SAFEGUARDING<br />
HANDSETS 32<br />
EMERGENCY DIALING 33<br />
ADDITIONAL INFORMATION 34
My Carrier<br />
This guide provides you with the information you need to get started.<br />
For more information and additional support, please visit<br />
www.t-mobile.com/support/ where you can:<br />
• Register at my.t-mobile.com/ to check your minutes, pay your<br />
bill, upgrade your phone, and change your rate plan.<br />
• Review your device’s User Manual and troubleshooting FAQs.<br />
• View the latest troubleshooting solutions in the Support<br />
Forums or ask a question of your own.<br />
Access account information from:<br />
1. From the Home screen, tap (Apps) g (T-<strong>Mobile</strong><br />
My Account).<br />
2. If prompted, follow the on-screen information for what’s new<br />
in the app.<br />
3. Choose from an available category such as: Account Info,<br />
Device Support, Notifications, [promotional], and others.<br />
NOTE: Devices and software are constantly evolving—the screen images and<br />
icons you see here are for reference only.
Service<br />
If you are a new T-<strong>Mobile</strong> ® customer and your service has not yet<br />
been activated, call Customer Care at 1-800-937-8997 and a<br />
T-<strong>Mobile</strong> Activations representative will assist you.<br />
You will need the following information when activating<br />
service:<br />
• Your Service Agreement and the agent code on your<br />
Agreement<br />
• Your name, home address, home phone number, and billing<br />
address<br />
NOTE: For business and go<strong>ver</strong>nment accounts, please provide the name of<br />
the organization, the address, and the tax ID.<br />
• Your Social Security number, current dri<strong>ver</strong>’s license number,<br />
and date of birth for credit check purposes<br />
• Your choice of T-<strong>Mobile</strong> rate plan and services<br />
(see www.t-mobile.com for the latest plan information)<br />
• SIM serial number and IMEI number (located on the box<br />
barcode label)<br />
NOTE: By activating service, you acknowledge that you have read,<br />
understand, and agree to be bound by each of T-<strong>Mobile</strong>’s Terms and<br />
Conditions, and your Service Agreement.
Device Functions<br />
Headset<br />
jack<br />
Sensors<br />
Power/lock<br />
Volume<br />
Front<br />
facing<br />
camera<br />
Menu* Home Back*<br />
*Menu and Back illuminates when navigating through the device.
Camera lens<br />
Flash<br />
S Pen<br />
Speaker<br />
Charging/USB port<br />
Microphone<br />
WARNING: Use only <strong>Samsung</strong>-approved charging devices and<br />
batteries. <strong>Samsung</strong> accessories are designed to<br />
maximize battery life. Using other accessories may<br />
invalidate your warranty and may cause damage.
Setting Up Your Device<br />
Step 1. Remove the Back Co<strong>ver</strong><br />
• Place your fingernail in the groove and firmly “pop” the<br />
co<strong>ver</strong> off the device.<br />
Step 2. Install the SIM Card<br />
• Slide the SIM card into the SIM card slot until it is secured<br />
into place.
Step 3. Install the microSD card<br />
NOTE: A microSD card is not included with the product.<br />
• Slide the memory card into the card slot until it is secured<br />
into place.<br />
Step 4. Insert the Battery<br />
• Insert the battery, making sure to align the gold contacts<br />
(1). Press down gently to secure the battery (2).
Step 5. Replace the Back Co<strong>ver</strong><br />
• Position the battery co<strong>ver</strong> o<strong>ver</strong> the battery compartment<br />
and press down firmly along the edges of the co<strong>ver</strong>.<br />
Step 6. Charging the Device<br />
• Before turning on your device, charge it fully. Be sure to<br />
use the charger that came with the device.
IMPORTANT: Verify that the battery is installed prior to connecting the wall<br />
charger. If both the wall charger is connected and the battery<br />
is not installed, the handset will power cycle continuously and<br />
prevent proper operation. Failure to unplug the wall charger<br />
before you remove the battery, can cause the device to become<br />
damaged.<br />
Turning Your Device On and Off<br />
1. To turn ON, press and hold the Power/Lock key.<br />
2. To turn OFF, press and hold Power/Lock key and follow the<br />
prompts.<br />
Locking and Unlocking Screen<br />
1. To Lock, press the Power/Lock key.<br />
2. To Unlock, press the Power/Lock key then swipe your finger<br />
across the screen.<br />
Initial Device Configuration<br />
1. Select a language and tap Next or tap Accessibility if you are<br />
visually impaired or hard of hearing.<br />
2. Follow the on-screen instruction to complete the set up<br />
process.<br />
NOTE: If you do not set up or log into your Gmail account during this process,<br />
you can later access Gmail from within the Applications page.
Home Screen<br />
Swipe your fingers left or right to view the entire Home screen.<br />
You can customize the screen with widgets and shortcuts to your<br />
favorite applications.<br />
Status Bar<br />
The Status bar appears at the top of your Home screen. Icons<br />
indicating your device’s status and new notification alerts appear on<br />
the Status bar.<br />
Notification Area<br />
Status Bar<br />
Status Area<br />
Notification Screen<br />
The Notification area indicates new message events (data sync<br />
status, new messages, calendar events, call status, etc). You can<br />
expand this area to display the Notification screen that provides<br />
more detailed information about the current on-screen notification<br />
icons.
Calling Features<br />
Making a Call<br />
¬ ¬ From the Home screen, tap (Phone).<br />
Dial number<br />
Call<br />
history<br />
Access<br />
contacts list*<br />
Access<br />
frequent<br />
contacts<br />
Tap for<br />
voicemail<br />
Touch and<br />
hold to activate<br />
vibrate mode<br />
Delete<br />
Dial<br />
number<br />
*From the contact list, make a call by sliding your<br />
finger across the contact name from left to right.
Ending a Call<br />
¬ ¬ From within an active call, tap (End Call).<br />
Answering a Call<br />
¬ ¬ At the incoming call screen, touch and slide (Answer)<br />
in any direction to answer the call.<br />
Rejecting a Call<br />
¬ ¬ At the incoming call screen, touch and slide (Reject)<br />
in any direction to route the call to your voicemail system.
Voicemail<br />
Set Up Voicemail<br />
1. From the Home screen, tap (Phone) and then touch and<br />
hold until the device dials your voicemail.<br />
2. Follow the prompts in the new user tutorial to set up your mail<br />
box.<br />
Access Voicemail<br />
1. From the Home screen, tap (Phone) and then touch and<br />
hold . After connection, you will hear your voice greeting.<br />
2. When connected, follow the voice prompts from your voicemail<br />
center.<br />
NOTE: Your voice mailbox is not password protected until you create a<br />
password by following the setup tutorial.
Visual Voicemail<br />
Visual Voicemail enables users to view a list of people who left a<br />
voicemail message, and listen to messages in any order directly<br />
from the device, without calling Voicemail.<br />
Initial Configuration and Set Up<br />
1. From the Home screen, tap (Apps) g<br />
(Visual Voicemail).<br />
2. Read the on-screen information and tap Next.<br />
3. Tap an on-screen voicemail message to play it back.<br />
Checking Visual Voicemail Messages<br />
1. From the Visual Voicemail application screen, tap the voicemail<br />
message you want to play.<br />
2. Tap (Play).<br />
Deleting Visual Voicemail Messages<br />
1. From the Visual Voicemail application screen, tap the voicemail<br />
message you want to delete.<br />
2. Tap (Delete) g OK.
Contacts<br />
Creating a New Contact<br />
1. From the Home screen, tap (Phone).<br />
2. Enter a phone number using the on-screen dialpad.<br />
3. Tap Add to contacts g Create contact or select the<br />
Contact entry from the on-screen list.<br />
4. Tap a destination type (Device, SIM, Microsoft Exchange<br />
ActiveSync, Google, or <strong>Samsung</strong> account) (depending on<br />
where you want to save the new contact information).<br />
5. Enter the desired information into the appropriate fields.<br />
6. Tap Save to store the new entry.<br />
Adding a Number to an Existing Contact<br />
1. From the Home screen, tap (Contacts).<br />
2. Tap a contact name from the list and tap (Edit).<br />
3. Tap within the phone number area and enter a new<br />
phone number.<br />
• If you make a mistake while dialing, tap to clear<br />
the last digit. Touch and hold<br />
sequence.<br />
4. Tap Save to complete and store the new entry.<br />
Deleting an Existing Contact<br />
1. From the Home screen, tap (Contacts).<br />
to clear the entire<br />
2. Touch and hold a contact name from the list and select<br />
Delete g OK.
Messaging<br />
Create and Send a Message<br />
1. From the Home screen, tap (Messaging) g<br />
(Compose).<br />
2. Enter either the recipient’s phone number or e-mail address.<br />
NOTE: If adding a recipient from among Logs, Contacts, or Group, tap the<br />
contact to place a checkmark alongside the entry and tap Done. The<br />
contact will be placed in the recipient field.<br />
3. Tap the Enter message field and use the on-screen keypad<br />
to enter a message.<br />
4. Add more recipients by tapping the recipient field.<br />
5. Tap (Attach) to insert various file types to your message<br />
(such as images, videos, audio files, etc..).<br />
6. Select the file and complete the on-screen instructions to<br />
insert it to the current message.<br />
7. Review your message and tap (Send).
Connections<br />
Connecting to Bluetooth<br />
1. From the Home screen, tap (Menu) g Settings g<br />
Connections tab g Bluetooth.<br />
2. In a single motion touch and slide the Bluetooth slider to the<br />
right to turn it on (<br />
ON ).<br />
3. If necessary, tap Scan. Review the list of disco<strong>ver</strong>ed in-range<br />
Bluetooth ® devices.<br />
4. Tap a device from the list to initiate pairing.<br />
5. Enter the passkey/PIN code, if needed, and tap OK.<br />
6. The external device will then have to also accept the<br />
connection and enter your device’s PIN code. Once<br />
successfully paired to an external device, appears within<br />
the Status area.<br />
Connecting to Wi-Fi<br />
1. From the Home screen, tap (Menu) g Settings g<br />
Connections tab g Wi-Fi.<br />
2. In a single motion touch and slide the Wi-Fi slider to the right<br />
to turn it on (<br />
ON ).<br />
3. Tap Scan to display a list of Wi-Fi networks in-range.<br />
4. Tap a network to connect and enter the password if prompted.<br />
When connected you will see in the status bar.
Near Field Communication<br />
Near Field Communication (NFC), when enabled, allows two<br />
compatible devices to exchange data when they touch each other.<br />
When used in conjunction with S Beam, your device can be used to<br />
share images/videos/files content when<br />
NFC-capable devices are touched.<br />
To activate NFC:<br />
1. From the Home screen, tap (Menu) g Settings g<br />
Connections tab.<br />
2. In a single motion touch and slide the NFC slider to the right to<br />
turn it on (<br />
ON ).<br />
S Beam<br />
This feature (when activated via NFC) allows you to beam large files<br />
directly to another compatible device that is in direct contact. These<br />
files can be larger, such as videos, HD pictures, and other large files.<br />
You can beam images and videos from your gallery, and more.<br />
To activate S Beam:<br />
1. From the Home screen, tap (Menu) g Settings g<br />
Connections tab. Verify the NFC feature is active.<br />
2. If not already active, in a single motion touch and slide the<br />
S Beam slider to the right to turn it on (<br />
ON ).<br />
3. Complete the transfer process between the two NFC-enabled<br />
devices by placing them back to back. This feature can come<br />
in <strong>ver</strong>y handy to quickly share pictures between users with<br />
compatible S Beam devices.
Smartphone <strong>Mobile</strong> HotSpot<br />
This feature allows you to turn your device into a Wi-Fi hotspot. The<br />
feature works best when used in conjunction with 4G and 4G LTE<br />
data services (although 3G service can also be used).<br />
NOTE: The Smartphone <strong>Mobile</strong> HotSpot service cannot be active when device<br />
is connected to Wi-Fi. Please disconnect your Wi-Fi connection prior to<br />
activating this service.<br />
NOTE: You must have qualifying service on your account in order to use the<br />
<strong>Mobile</strong> HotSpot.<br />
To activate the Smartphone <strong>Mobile</strong> HotSpot service for the<br />
first time:<br />
1. From the Home screen, tap (Menu) g Settings g<br />
Connections tab g More networks g Tethering and<br />
<strong>Mobile</strong> HotSpot.<br />
2. In a single motion touch and slide the <strong>Mobile</strong> HotSpot slider<br />
to the right to turn it on.<br />
3. Read the on-screen notification regarding data and tap OK.<br />
4. Edit the Network SSID field and then create a new<br />
Network SSID name.<br />
5. Enable the Broadcast network name (SSID) field if you<br />
would like to broadcast your SSID name to nearby devices.<br />
6. Verify the Security field is set to WPA2 PSK.<br />
7. Enter a new password then write it down.<br />
8. Tap Save to store the new settings.<br />
9. Confirm the <strong>Mobile</strong> HotSpot active icon appears at the<br />
top of the screen.
NOTE: By default, during the initial setup process, the connection is not<br />
secure. It is recommended that you maintain a secure connection by<br />
using a password for communication.<br />
NOTE: Using your 4G service and Smartphone <strong>Mobile</strong> HotSpot drains your<br />
phone’s battery at a much faster rate than when using any other<br />
feature combination. The best way to keep using the phone as a<br />
HotSpot is to have it connected to a power supply.<br />
To change the <strong>Mobile</strong> HotSpot password:<br />
1. From the Home screen, tap (Apps) g (<strong>Mobile</strong><br />
HotSpot).<br />
2. Tap <strong>Mobile</strong> HotSpot g Configure.<br />
3. Tap the Security field and select WPA2 PSK.<br />
4. With security enabled, delete the previous password and<br />
enter a new one into the Password field.<br />
NOTE: The more complex the password, the harder it will be for intruders<br />
to break your security. It is recommended that you not use names,<br />
birthdays, or other personal information.<br />
5. Tap Save to store the new settings.
USB Tethering<br />
This option allows you to share your device’s mobile data connection<br />
via a direct USB connection between your device and a single<br />
computer. The <strong>Mobile</strong> HotSpot connectivity is a wireless <strong>ver</strong>sion<br />
of this same functionality and allows you to provide Internet<br />
connectivity to multiple devices.<br />
• For more information on tethering with operating systems, go<br />
to www.android.com/tether.<br />
• You cannot mount your device’s microSD card to your<br />
computer while using the USB Tethering feature. If additional<br />
software or USB dri<strong>ver</strong>s are required, go to www.samsung.<br />
com/us/support/downloads.<br />
• When you connect your phone to a computer with a USB<br />
cable, you can either share your mobile data connection via<br />
tethering OR you can share files—you cannot do both. Do not<br />
turn on tethering if you want to use your computer to access<br />
your phone’s memory card.<br />
To connect using USB Tethering:<br />
1. From the Home screen, tap (Menu) g Settings g<br />
Connections tab g More networks g Tethering and<br />
<strong>Mobile</strong> HotSpot.<br />
2. Plug in the USB cable between your computer and your device.<br />
3. Tap USB tethering from the Tethering menu. This places a<br />
green check mark next to the entry and activates the feature.<br />
A Tethering or HotSpot active notification briefly appears on<br />
the screen.
4. If prompted, read the on-screen notification regarding data use<br />
and tap OK.<br />
• Look for (Tethering Active) in the Status bar area<br />
of the screen.<br />
5. Read the on-screen notification regarding data use and tap<br />
OK.<br />
To disconnect USB tethering:<br />
1. From the Home screen, tap (Apps) g (<strong>Mobile</strong><br />
HotSpot).<br />
2. Tap USB tethering from the Tethering menu to remove the<br />
check mark and deactivate the feature.<br />
3. Remove the USB cable from the device.
Apps & More<br />
Installing Apps<br />
Apps are available to download from Google Play .<br />
1. From the Home screen, tap (Apps) g<br />
(Play Store).<br />
2. If prompted, follow the on-screen prompts to add an existing<br />
Google account.<br />
<strong>Samsung</strong> Smart Switch<br />
Easily move o<strong>ver</strong> your photos, videos, music, apps and more with<br />
<strong>Samsung</strong> Smart Switch .<br />
Get started today at www.samsungsmartswitch.com<br />
Gmail (Google Account)<br />
Before you can access Google applications, you must first sign into<br />
or set up a new Gmail account. These applications sync between<br />
your device and your online Google account.<br />
¬ ¬ From the Home screen, tap (Apps) g (Gmail).<br />
• Tap New to create a new account and follow the<br />
on-screen instructions.<br />
• Tap Existing if you already have an account, enter<br />
your Email and Password and follow the on-screen<br />
instructions.
Setting Up Your Email Accounts<br />
Check email on the go with popular Internet-based email accounts,<br />
including Yahoo! ® Mail, Hotmail ® , etc..<br />
1. From the Home screen, tap (Apps) g (Email).<br />
2. Enter your email address and password into the appropriate<br />
fields and tap Next.<br />
3. At the Account options screen, select the frequency which the<br />
device should check for new email on the ser<strong>ver</strong> and tap Next.<br />
4. At the Set up email screen, name the account and enter a<br />
screen name to identify yourself on this account.<br />
5. Tap Done to store the new account.<br />
NOTE: Record your email account information. Please keep this document<br />
in a safe place.
Internet<br />
Take the Internet on the go. You can reach the latest news, get the<br />
weather and follow your stocks.<br />
¬ ¬ From the Home screen, (Apps) g (Internet).<br />
To enter a URL:<br />
You can access a website quickly by entering the URL. Websites are<br />
optimized for viewing on your device.<br />
¬ ¬ From the homepage tap the URL field at the top of the screen,<br />
enter the URL and tap .<br />
To add a new window:<br />
1. From your browser window, tap (Window) g<br />
(New window). A new browser window displays.<br />
NOTE: The number of currently open windows is displayed at the top of the<br />
Windows screen.<br />
2. Scroll across the screen to view the currently active windows<br />
and tap an entry to launch the selected Internet window.
Multi Window<br />
Run multiple applications on the current screen at the same time.<br />
NOTE: Only applications found within the Multi window panel can be active<br />
atop another current application on the screen.<br />
1. Activate the Multi Window feature:<br />
• Using two fingers, touch and drag the Status bar<br />
downwards to display additional functions.<br />
• Tap the Multi window entry to activate the feature.<br />
2. To display the Multi window tab, press and hold the<br />
(Back key).<br />
3. With the (Multi window tab) on the left side of the screen,<br />
tap the tab to open the application panel.<br />
Tap to open<br />
and close<br />
panel<br />
Touch and<br />
hold app<br />
to drag on<br />
screen<br />
Tap to adjust<br />
screen size,<br />
switch layouts,<br />
or close<br />
screen<br />
Edit list of<br />
available<br />
apps
Camera<br />
This device gives you the magic of professional digital photography.<br />
With stunning photographic output and a range of exceptionally rich<br />
professional shooting modes, editing features and various apps.<br />
Going pro has ne<strong>ver</strong> been this easy or this fun.<br />
¬ ¬ From the Home screen, tap (Camera).<br />
Switch to<br />
front/back<br />
camera<br />
Flash<br />
Shooting<br />
mode<br />
Charge/<br />
Storage<br />
Camera<br />
mode<br />
Camera<br />
controls<br />
Settings<br />
Effects<br />
Focus<br />
area<br />
View picture/<br />
video gallery
Wi-Fi Calling<br />
Wi-Fi Calling can improve your co<strong>ver</strong>age and allows you to make<br />
phone calls and send messages o<strong>ver</strong> a Wi-Fi network (when a Wi-Fi<br />
network is available).<br />
NOTE: This feature is active by default. If you are in an active Wi-Fi call and<br />
go out of range of your Wi-Fi, the call will be dropped.<br />
Unless your rate plan provides otherwise, Wi-Fi Calling minutes<br />
count the same as T-<strong>Mobile</strong> cellular calling minutes on your bill.<br />
IMPORTANT: You must have a 911 emergency address registered with your<br />
account. Log into your account at www.t-mobile.com.<br />
Go to your profile and click Customer Info and follow the menu<br />
options to register your address.<br />
NOTE: Corporate accounts may require administrator assistance for 911<br />
Address registration.<br />
To register Wi-Fi Calling:<br />
1. Ensure that the Wi-Fi connected icon in the status bar.<br />
2. If (Missing 911 Address) displays in the Status bar:<br />
• Log into your account at www.t-mobile.com.<br />
• Go to your profile and click Customer Info and follow the<br />
menu options to register your address.<br />
3. From the Home screen, tap (Menu) g Settings g<br />
Connections tab g More networks.<br />
4. Tap the Wi-Fi Calling slider to toggle off the feature, tap<br />
it again to reactivate and re-register your device with the<br />
network.<br />
5. Confirm (Wi-Fi Calling Ready) displays in the Status<br />
Bar.
To disable Wi-Fi Calling:<br />
1. From the Home screen, tap (Menu) g Settings g<br />
Connections tab g More networks.<br />
2. Tap the Wi-Fi Calling slider to toggle off the feature.<br />
To change connection preferences:<br />
1. From the Home screen, tap (Menu) g Settings g<br />
Connections tab g More networks g Wi-Fi Calling.<br />
2. Tap Connection Preferences and select your preference.<br />
Lock Screen<br />
This menu contains features that allows you to configure the<br />
device’s security parameters.<br />
To secure data and limit phone access, set the device to require a<br />
screen unlock pattern each time you turn on the device, or e<strong>ver</strong>y<br />
time the phone wakes up from sleep mode (when the screen<br />
automatically turns off).<br />
¬ ¬ From the Home screen, press (Menu) and then tap<br />
Settings g My device tab g Lock screen g Screen<br />
lock.<br />
The Screen lock menu allows to choose from a variety of locking<br />
features.
Legal<br />
APPROVED FIRMWARE VERSIONS<br />
This device will only operate with firmware <strong>ver</strong>sions that have<br />
been approved for use by T-<strong>Mobile</strong> and the device manufacturer. If<br />
unauthorized firmware is placed on the device it will not function.<br />
INFORMATION ABOUT SAFEGUARDING<br />
HANDSETS<br />
T-<strong>Mobile</strong> encourages customers to take appropriate measures<br />
to secure their devices and invites them to take advantage of the<br />
features available on this device to help secure it from theft and/<br />
or other unauthorized access and use. This device has a locking<br />
function (e.g., user-defined codes or patterns) that can serve as a<br />
first line of defense against unauthorized use or access to stored<br />
information. Preloaded security applications that allow customers to<br />
track or locate misplaced devices can be found on se<strong>ver</strong>al T-<strong>Mobile</strong><br />
devices. Lost or stolen devices should be immediately reported to<br />
T-<strong>Mobile</strong> so that proper measures can be taken to protect accounts.<br />
For additional information, visit: www.t-mobile.com/devicesecurity<br />
and http://www.t-mobile.com/Company/PrivacyResources.aspx.
EMERGENCY DIALING<br />
Although all phones are equipped with 9-1-1 emergency calling,<br />
this phone may or may not permit its location to be approximated<br />
during a 9-1-1 call.*<br />
* Availability of this feature depends on upgrades to the (a) wireless<br />
network and (b) 9-1-1 calling system that are required to be<br />
installed by the local 9-1-1 response agency or public safety<br />
answering point (PSAP); these upgrades may not be available<br />
e<strong>ver</strong>ywhere within our wireless co<strong>ver</strong>age area or your roaming<br />
area. This approximation of the phone’s location and the transmittal<br />
of location information are subject to emergency situations,<br />
transmission limits, network problems/limitations, interconnecting<br />
carrier problems, your phone, buildings/tunnels, signal strength<br />
and atmospheric/topographical conditions, and may be curtailed,<br />
interrupted, dropped or refused. The phone’s approximate location<br />
is transmitted to the local 9-1-1 response agency or PSAP while the<br />
call is in progress; this approximation is intended solely to aid the<br />
PSAP in dispatching emergency assistance or to limit the search<br />
area for emergency services personnel. You should not rely solely<br />
on a phone for essential communications (such as a medical or<br />
other emergency). Please see T-<strong>Mobile</strong>’s Terms and Conditions and<br />
Privacy Policy for additional service restrictions and details.
ADDITIONAL INFORMATION<br />
Use of some content or features may incur separate, additional<br />
charges and/or require qualifying service, or access to a Wi-Fi<br />
connection.<br />
Smartphone <strong>Mobile</strong> HotSpot: Qualifying service required. Plan<br />
data allotment applies. Roaming and on-network data allotments<br />
differ; see your selected service for details. Use of connected<br />
devices subject to T-<strong>Mobile</strong> Terms and Conditions.<br />
Messaging/Data: You will be charged for all messaging and data<br />
sent by or to you through the network, regardless of whether or not<br />
data is received. Character length/file size of messages/attachments<br />
may be limited. T-<strong>Mobile</strong> is not liable for content of messages/<br />
attachments or for any failures, delays or errors in any T-<strong>Mobile</strong><br />
generated alerts or notifications. Your data session, plan, or service<br />
may be slowed, suspended, terminated, or restricted if you<br />
use your service in a way that interferes with or impacts our network<br />
or ability to provide quality service to other users, if you roam for a<br />
significant portion of your usage, or if you use a disproportionate<br />
amount of bandwidth during a billing cycle. You may not use your<br />
plan or device for prohibited uses.<br />
Downloads/Applications: T-<strong>Mobile</strong> is not responsible for any<br />
third party content or Web site you may be able to access using your<br />
device. Additional charges may apply; not all downloads available<br />
on all devices. You obtain no rights in downloads; duration of use<br />
may be limited and downloads may be stored solely for use with<br />
your device. T-<strong>Mobile</strong> is not responsible for any download lost due to<br />
your error. T-<strong>Mobile</strong> is not responsible for Apps, including download,<br />
installation, use, transmission failure, interruption or delay, third party
ad<strong>ver</strong>tisements you may encounter while using an App, alterations<br />
any App may make to the functionality of your device, including<br />
any changes that may affect your T-<strong>Mobile</strong> plan, service, or<br />
billing, or any content or website you may be able to access<br />
through an App.<br />
Hearing Aid Compatibility: This phone has been tested and rated<br />
for use with hearing aids for some of the wireless technologies that<br />
it uses. Howe<strong>ver</strong>, there may be some newer wireless technologies<br />
used in this phone that have not been tested yet for use with<br />
hearing aids. It is important to try the different features of this<br />
phone thoroughly and in different locations, using your hearing aid<br />
or cochlear implant, to determine if you hear any interfering noise.<br />
Consult your service provider or the manufacturer of this phone for<br />
information on hearing aid compatibility. If you have questions about<br />
return or exchange policies, consult your service provider or phone<br />
retailer.<br />
Wi-Fi: Device will not transition between Wi-Fi and the cellular<br />
network. Devices using wireless connections may be vulnerable to<br />
unauthorized attempts to access data and software stored on the<br />
device. Plan data allotment applies to use by connected devices<br />
sharing Wi-Fi. Use of connected devices subject to T-<strong>Mobile</strong>’s Terms<br />
and Conditions.<br />
Wi-Fi Calling: Wi-Fi connection required; may decrement plan<br />
minutes. See your selected service for details.
Devices, accessories, and screen images are simulated. See<br />
brochures and Terms and Conditions (including arbitration<br />
provision) at T-<strong>Mobile</strong>.com, for rate plan information, charges<br />
for features and services, and restrictions and details, including<br />
important limitations on availability and reliability of 9-1-1<br />
emergency service when using Wi-Fi calling.
<strong>Note</strong>s<br />
_______________________________________________<br />
_______________________________________________<br />
_______________________________________________<br />
_______________________________________________<br />
_______________________________________________<br />
_______________________________________________<br />
_______________________________________________<br />
_______________________________________________<br />
_______________________________________________<br />
_______________________________________________<br />
_______________________________________________<br />
_______________________________________________<br />
_______________________________________________<br />
_______________________________________________<br />
_______________________________________________<br />
_______________________________________________<br />
_______________________________________________<br />
_______________________________________________<br />
_______________________________________________<br />
_______________________________________________<br />
_______________________________________________
SAMSUNG TELECOMMUNICATIONS AMERICA<br />
1301 E. Lookout Drive | Richardson, TX 75082<br />
1.800.SAMSUNG<br />
www.samsung.com/mobile<br />
©2013 <strong>Samsung</strong> Telecommunications <strong>America</strong>, LLC. <strong>Samsung</strong> and <strong>Galaxy</strong> <strong>Note</strong> are<br />
both trademarks of <strong>Samsung</strong> Electronics Co., Ltd. Google Play, Gmail, and Google are<br />
trademarks of Google, Inc. LTE is a trademark of ETSI. T-<strong>Mobile</strong> and the magenta color<br />
are registered trademarks of Deustche Telekom AG. Other company and product names<br />
mentioned herein may be trademarks of their respective owners. Device and screen images<br />
simulated. Appearance of phone may vary.<br />
TCS520849.1<br />
Printed in Mexico | 11/2013 | GH68-37536A Rev 1.3


