

Cuisinart Electric Meat Grinder -MG-100 - MANUAL
Cuisinart Electric Meat Grinder -MG-100 - MANUAL
Cuisinart Electric Meat Grinder -MG-100 - MANUAL

Create successful ePaper yourself
Turn your PDF publications into a flip-book with our unique Google optimized e-Paper software.
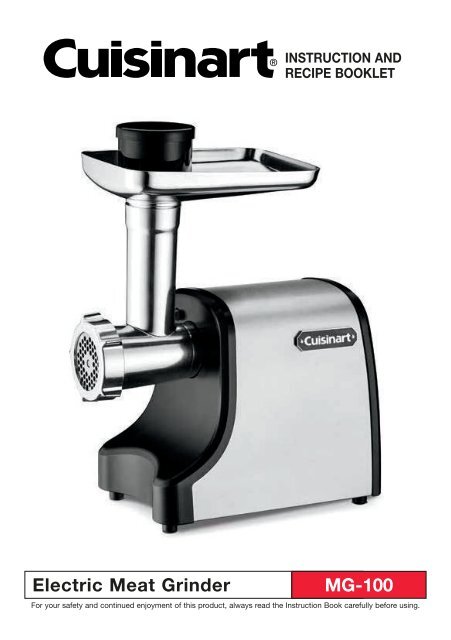
INSTRUCTION AND<br />
RECIPE BOOKLET<br />
<strong>Electric</strong> <strong>Meat</strong> <strong>Grinder</strong><br />
<strong>MG</strong>-<strong>100</strong><br />
For your safety and continued enjoyment of this product, always read the Instruction Book carefully before using.
IMPORTANT<br />
SAFEGUARDS<br />
When using electrical appliances, basic safety<br />
precautions should always be taken, including<br />
the following:<br />
1. READ ALL INSTRUCTIONS.<br />
2. UNPLUG FROM OUTLET WHEN NOT IN<br />
USE, BEFORE PUTTING ON OR TAKING<br />
OFF PARTS, AND BEFORE CLEANING.<br />
3. To protect against risk of electrical shock, do<br />
not put appliance in water or other liquids.<br />
4. This appliance should not be used by or near<br />
children or individuals with certain disabilities.<br />
5. This appliance is not intended for use by<br />
persons (including children) with reduced<br />
physical, sensory or mental capabilities,<br />
or lack of experience and knowledge,<br />
unless they have been given supervision or<br />
instruction concerning use of the appliance by<br />
a person responsible for their safety.<br />
6. Children should be supervised to ensure that<br />
they do not play with the appliance.<br />
7. Avoid contact with moving parts.<br />
8. Never put the unit near a hot burner, in an<br />
oven, or in a dishwasher.<br />
9. Do not operate the <strong>Cuisinart</strong> ® <strong>Electric</strong> <strong>Meat</strong><br />
<strong>Grinder</strong>, or any other electrical equipment,<br />
with a damaged cord or plug, or after the<br />
appliance malfunctions or is dropped or<br />
damaged in any manner. Return to the nearest<br />
authorized service center for examination,<br />
repair, or adjustment.<br />
10. Never feed food by hand; always use the<br />
pusher. Keep hands, hair, clothing and<br />
utensils away from moving discs during<br />
operation to reduce the risk of personal injury<br />
and/or damage to the <strong>Cuisinart</strong> ® <strong>Electric</strong> <strong>Meat</strong><br />
<strong>Grinder</strong>.<br />
11. Do not use outdoors, or use for other than its<br />
intended use.<br />
12. WARNING – THE CUTTING BLADE IS<br />
SHARP; HANDLE WITH CARE BOTH WHEN<br />
USING AND WHEN CLEANING.<br />
13. Do not let cord hang over edge of table or<br />
counter, come into contact with sharp edges,<br />
or touch hot surfaces.<br />
14. Do not pull on the power cord to disconnect.<br />
15. Never plug in the appliance where water may<br />
flood the area.<br />
16. Place the appliance on a firm and stable<br />
surface.<br />
17. NEVER PUT YOUR FINGERS NEAR THE<br />
FOOD CHUTE (GRINDER/FEEDER HEAD)<br />
WHILE GRINDER IS IN OPERATION.<br />
18. Ensure that the appliance is not placed close<br />
to the edge of the table, worktop, etc., where<br />
it can be pushed off or fall.<br />
19. The use of attachments not recommended<br />
or sold by the manufacturer may cause fire,<br />
electric shock or injury.<br />
20. Never use abrasive cleaning agents or<br />
abrasive cloths when cleaning the unit.<br />
21. Do not use fingers to scrape food away from<br />
cutting blade while appliance is plugged in.<br />
Laceration may result.<br />
22. Use the unit only when completely<br />
assembled.<br />
23. Do not leave the <strong>Cuisinart</strong> ® <strong>Electric</strong> <strong>Meat</strong><br />
<strong>Grinder</strong> unattended while it is running.<br />
24. Before using for the first time, remove all<br />
packaging and wash and dry parts.<br />
25. This appliance has a polarized plug (one<br />
blade is wider than the other). To reduce<br />
the risk of electric shock, this plug will fit in<br />
a polarized outlet only one way. If the plug<br />
does not fit the outlet perfectly, reverse the<br />
plug. If it should still not fit, contact a qualified<br />
electrician. Do not modify the plug in any way.<br />
26. Do not operate your appliance in an appliance<br />
garage or under a wall cabinet. When storing<br />
in an appliance garage, always unplug the<br />
unit from the electrical outlet. Not doing<br />
so could create a risk of fire, especially if the<br />
appliance touches the walls of the garage or<br />
the door touches the unit as it closes.<br />
SAVE THESE<br />
INSTRUCTIONS<br />
FOR HOUSEHOLD<br />
USE ONLY<br />
2
CONTENTS<br />
Important Safeguards ........................................ 2<br />
Features ............................................................. 3<br />
Assembling ........................................................ 4<br />
Cleaning and Maintenance ................................ 6<br />
Tips and Hints .................................................... 6<br />
Recipes .............................................................. 6<br />
Warranty ........................................................... 14<br />
12<br />
11<br />
4<br />
14<br />
FEATURES<br />
5<br />
1. ON/OFF/REVERSE switch<br />
2. Motor housing<br />
3. Attachment opening<br />
6<br />
2<br />
4. Food pusher and lid<br />
5. Aluminum hopper<br />
6. <strong>Grinder</strong>/feeder head<br />
7. Feed screw pin<br />
8. Cutting blade<br />
10<br />
7<br />
3<br />
9. Cutting plate (medium)<br />
10. Cutting plate (coarse)<br />
11. Sausage attachment (small)<br />
12. Sausage attachment (large)<br />
13<br />
9<br />
8<br />
13. Screwing ring nut<br />
14. Sausage spacer<br />
1<br />
15. Power cord (not shown)<br />
3
ASSEMBLING<br />
Make sure unit is unplugged<br />
while assembling.<br />
Assemble the meat grinder feeder head prior to<br />
attaching to the housing.<br />
1. Insert the feed screw pin into the open end of<br />
the attachment.<br />
2. Place the cutter with the flat side facing<br />
out toward you over the feed screw pin (this<br />
is an important step or the meat grinder will<br />
not work).<br />
3. Place the grinding plate over the cutter on the<br />
feed screw pin. Align tabs with notches.<br />
4. Screw on the ring nut by turning it clockwise<br />
and hand lightly tighten. Do not over tighten.<br />
5. Fit the hopper onto the top of the meat grinder<br />
and put a mixing bowl under the grinder to<br />
catch food.<br />
6. Insert grinder/feeder head tightly into<br />
attachment opening. Twist on to lock.<br />
7. Use the food pusher to gently feed food, one<br />
piece at a time. Do not overload the feeb tube.<br />
Do not force the food into the grinder/feeder<br />
head.<br />
CUTTING PLATES<br />
Medium Cutting Plate – Great for ground meat<br />
used in soups, or for relishes<br />
Coarse Cutting Plate – Great for ground meat<br />
used in chili and sausages, or for vegetables<br />
THESE PLATES ARE NOT<br />
DISHWASHER SAFE.<br />
PLEASE HAND-WASH ONLY!<br />
DRY COMPLETELY AND<br />
COAT IN VEGETABLE OIL.<br />
NOTE – REVERSE SWITCH<br />
If the motor slows or stops, it may be due to<br />
jammed food. Immediately switch the <strong>Cuisinart</strong> ®<br />
<strong>Electric</strong> <strong>Meat</strong> <strong>Grinder</strong> to its OFF position. Put the<br />
On/Off/Reverse switch in the REVERSE position<br />
to push the food in the opposite direction. Put<br />
the On/Off/Reverse switch in the ON position<br />
and turn the <strong>Electric</strong> <strong>Meat</strong> <strong>Grinder</strong> on again. If<br />
the <strong>Electric</strong> <strong>Meat</strong> <strong>Grinder</strong> should get jammed<br />
again, you may need to switch it off, unplug,<br />
disassemble the grinder head, and clean the<br />
internal parts.<br />
HOW TO USE<br />
1. Before first use, wash and dry all parts of the<br />
<strong>Cuisinart</strong> ® <strong>Electric</strong> <strong>Meat</strong> <strong>Grinder</strong>.<br />
2. Place the <strong>Cuisinart</strong> ® <strong>Electric</strong> <strong>Meat</strong> <strong>Grinder</strong> on a<br />
stable work surface.<br />
3. Make sure the On/Off/Reverse switch is in the<br />
OFF position.<br />
4. Secure the meat grinder assembly to the unit.<br />
5. Insert plug into wall outlet.<br />
6. Place a wide, shallow bowl or plate beneath<br />
the grinder tube to catch food.<br />
7. Switch appliance to ON position. The<br />
<strong>Cuisinart</strong> ® <strong>Electric</strong> <strong>Meat</strong> <strong>Grinder</strong> must ALWAYS<br />
be ON before adding food.<br />
8. Place food on the hopper and use pusher to<br />
feed food through opening.<br />
SAUSAGE MAKER<br />
Assembling Sausage Maker<br />
Attachment<br />
Assemble the sausage maker attachment prior to<br />
attaching to the housing.<br />
1. Insert the feed screw pin into the open end of<br />
the grinder.<br />
4
2. Place the sausage spacer with the notches<br />
fitting into the notch openings on the feed<br />
screw pin.<br />
3. Place the sausage nozzle onto the ring nut<br />
and screw it onto the meat grinder nozzle by<br />
turning it clockwise and lightly hand tighten.<br />
Do not over tighten.<br />
NOTE: To avoid over-stretching and splitting the<br />
casing, do not make the sausages too thick. The<br />
meat mixture will expand slightly during cooking.<br />
To Form Individual Sausages<br />
1. Lay long sausage on flat tray and poke<br />
hole all over with a sharp object, similar in<br />
size to a needle or cake tester, to prevent<br />
air pockets from forming.<br />
2. Twist into sausages – you choose the size<br />
– by twisting each “sausage” first forward,<br />
then backward, to prevent them from<br />
untwisting.<br />
3. Pierce any air pockets you see.<br />
4. For best results, dry uncovered in refrigerator<br />
for about 6 hours, then flip and dry<br />
another 6 hours before cooking.<br />
TO MAKE SAUSAGES<br />
The sausage attachments allow you to blend<br />
meats and spices for homemade sausages.<br />
1. If you have purchased dry casings, they must<br />
be soaked in cold water until they become soft<br />
and pliable, and then rinsed under lukewarm<br />
water, being sure that the water is running<br />
through the casings. Assemble the <strong>Electric</strong><br />
<strong>Meat</strong> <strong>Grinder</strong> with sausage maker attachment<br />
per instructions on page 4–5.<br />
2. Grind meat and seasonings of your choice,<br />
following the instructions on page 4.<br />
3. Place ground meat in the hopper and turn<br />
the unit ON. Push the meat into the die-cast<br />
hopper opening with pusher until the mixture<br />
appears at the end of the sausage attachment.<br />
Turn the unit OFF and tie a knot at the end of<br />
the 2-inch casing overhang.<br />
4. Turn unit ON and feed more ground meat into<br />
the die-cast hopper opening until all the meat<br />
has been used or the casing is approximately 2<br />
inches from being completely full.<br />
5. Turn unit OFF, remove the end of the casing<br />
from the sausage attachment, and tie a knot<br />
in the open end of the casing. Use a knife or<br />
needle to poke holes in the length of sausage<br />
to let out air bubbles.<br />
6. Sausages can be made to the desired length<br />
by twisting the casing at intervals.<br />
5
CLEANING AND<br />
MAINTENANCE<br />
1. Remove the ring nut.<br />
2. Disassemble and wash each part in warm,<br />
soapy water. Dry all of the parts thoroughly. Do<br />
not put any of the metal parts in a dishwasher.<br />
Pusher is top rack dishwasher safe.<br />
3. Reassemble.<br />
4. Wipe the grinding plates with vegetable oil and<br />
wrap each plate with greaseproof paper. This<br />
will prevent discoloring/rusting.<br />
5. Store the sausage attachments and grinding<br />
plates inside the pusher and attach the lid.<br />
6. Any other servicing should be performed by an<br />
authorized service representative.<br />
TIPS AND HINTS<br />
A wide variety of meat dishes, homemade<br />
sausages, chunky spreads, relishes, and purées<br />
are all great ways to use the meat grinder. With<br />
your own meat grinder you know exactly what is<br />
going into your food. You are able to control the<br />
ingredients you use such as cuts of meat, fat, salt<br />
and spices.<br />
For grinding:<br />
• <strong>Meat</strong> should be very well chilled before<br />
grinding. Should meat heat up while grinding,<br />
pause and re-chill meat before grinding again.<br />
Keeping the meat below 45°F is ideal for<br />
grinding and sausage making.<br />
• Cut meat into small 1- to 2-inch cubes for<br />
grinding, removing any skin, but keeping all of<br />
the fat.<br />
• Fatty, cheaper cuts of meat are perfect for the<br />
grinder. Fat gives flavor and juiciness to ground<br />
meats and sausages.<br />
• Coarse plate − Use for coarse-ground textured<br />
items such as coarsely ground beef for chili,<br />
relishes, sauces and salsas.<br />
• Medium plate − Use for medium-ground<br />
textured items, such as medium-ground meat<br />
for sausage, meatballs or meatloaf.<br />
• Be sure to refrigerate any ground meats<br />
immediately. Cook or freeze within 1 or 2 days.<br />
• If grinding bread for breadcrumbs, make sure to<br />
use dry or toasted bread.<br />
• When grinding meats or filling sausages:<br />
6<br />
After the last piece of meat has gone through<br />
the chute, place a slice of bread through the<br />
machine in order to clear the last bit of ground<br />
meat or to clear the sausage nozzle of ground<br />
meat.<br />
For making sausages:<br />
• Soak natural casings in water for at least 30<br />
minutes to an hour and then allow lukewarm<br />
water to run through the entire casing to remove<br />
any excess salt.<br />
• Be sure to fill the entire casing and then prick all<br />
over to release air before twisting into individual<br />
links.<br />
• For casings, 2 feet of medium hog casings<br />
accommodates 1 pound of meat.<br />
• Casings can be difficult to find. The best places<br />
to try are either your local butcher or websites<br />
geared to sausage making.<br />
• Taste your mixture first before stuffing into<br />
casings. Cook a small amount of the mix in a<br />
skillet until it’s cooked through.<br />
RECIPES<br />
Breakfast Sausage. .................. 7<br />
Chicken and Apple Sausage ........... 7<br />
Sweet Italian Sausage ................ 7<br />
Chorizo. ........................... 8<br />
Duck Sausage ...................... 8<br />
Lamb Merguez. ..................... 8<br />
Spicy Venison Sausage ............... 9<br />
Spicy Green Chile<br />
and Chicken Sausage ................ 9<br />
Simply Rich Burgers ................. 9<br />
Mediterranean Lamb Sliders .......... 10<br />
Chicken Burgers<br />
with Mango-Avocado Salsa .......... 10<br />
Bolognese .........................11<br />
<strong>Meat</strong>balls ..........................11<br />
Super Chili ........................ 12<br />
Turkey <strong>Meat</strong>loaf .................... 12
Breakfast Sausage<br />
These savory and sweet sausages make a<br />
welcome addition to the breakfast table.<br />
Makes 3 pounds of sausage, about 25,<br />
¼-cup patties<br />
3 pounds pork shoulder, cut into<br />
1-inch cubes<br />
1 garlic clove, finely chopped<br />
2 tablespoons fresh sage, chopped<br />
½ teaspoon fresh thyme, chopped<br />
1 tablespoon kosher salt<br />
2 tablespoons pure maple syrup<br />
2 tablespoons light brown sugar<br />
1. Mix ingredients together well in a large<br />
stainless steel bowl. Cover with plastic wrap<br />
and place in refrigerator overnight.<br />
2. Once the meat has rested, assemble the meat<br />
grinder fitted with the coarse plate. Turn meat<br />
grinder to ON and grind all ingredients into a<br />
mixing bowl.<br />
3. Form into patties, use crumbled or follow<br />
the instructions on page 5 to make into<br />
sausage links.<br />
Nutritional information per 4-ounce serving:<br />
Calories 146 (69% from fat) · Carb. 2g · Pro. 9g · Fat 11g<br />
Sat. fat 4g · Chol. 39mg · Sod. 320mg<br />
Calc. 5mg · Fiber 0g<br />
Chicken and<br />
Apple Sausage<br />
The apples add some extra sweetness<br />
and flavor to this morning sausage.<br />
Makes 3 pounds of sausage, about 25,<br />
¼-cup patties<br />
3 pounds boneless, skinless chicken<br />
thighs, cut into 1-inch cubes<br />
2 apples (about 14 ounces), peeled, cored<br />
and cut into ½-inch cubes<br />
1 small shallot (about 2 to 3 ounces),<br />
finely chopped<br />
2 tablespoons pure maple syrup<br />
2 teaspoons kosher salt<br />
½ teaspoon freshly ground pepper<br />
1. Mix ingredients together well in a large<br />
stainless steel bowl. Cover with plastic wrap<br />
and place in refrigerator overnight.<br />
2. Once the meat has rested, assemble the meat<br />
grinder fitted with the coarse plate. Turn meat<br />
grinder to ON and grind all ingredients into a<br />
mixing bowl.<br />
3. Form into patties, use crumbled or follow<br />
the instructions on page 5 to make into<br />
sausage links.<br />
Nutritional information per 4-ounce serving:<br />
Calories 120 (45% from fat) · Carb. 4g · Pro. 13g · Fat 6g<br />
Sat. fat 2g · Chol. 71mg · Sod. 373mg<br />
Calc. 11mg · Fiber 0g<br />
Sweet Italian Sausage<br />
Simple ingredients make up this favorite,<br />
all-purpose sausage.<br />
Makes about 3 pounds of sausage, 15−16<br />
sausage links or about 24, ¼-cup patties<br />
3 pounds pork butt, cut into 1-inch cubes<br />
2 garlic cloves, finely chopped<br />
2 tablespoons fennel seeds, toasted<br />
3 tablespoons fresh parsley, chopped<br />
2¼ teaspoons kosher salt<br />
1 teaspoon paprika<br />
1 teaspoon fresh ground black pepper<br />
2 tablespoons dry white wine<br />
1. Mix ingredients together well in a large<br />
stainless bowl. Cover with plastic wrap and<br />
place in the refrigerator overnight.<br />
2. Once meat has rested, assemble the meat<br />
grinder fitted with the coarse plate. Turn meat<br />
grinder to ON and grind all ingredients into a<br />
mixing bowl.<br />
3. Form into patties, use crumbled or follow<br />
the instructions on page 5 to make into<br />
sausage links.<br />
**For Hot Italian Sausage: Add 1 to 2 teaspoons<br />
of crushed red pepper to the mixture.<br />
Nutritional information per 4-ounce serving:<br />
Calories 217 (45% from fat) · Carb. 1g · Pro. 28g<br />
Fat 11g · Sat. fat 4g · Chol. 97mg · Sod. 388mg<br />
Calc. 18mg · Fiber 0g<br />
7
Chorizo<br />
Who knew that tasty chorizo was so easy to make<br />
at home? Chorizo makes an excellent taco filling;<br />
just brown the loose sausage well on the stove for<br />
delicious results.<br />
Makes about 3 pounds of sausage<br />
3 pounds pork shoulder, cut into<br />
1-inch cubes<br />
3 garlic cloves, finely chopped<br />
2 tablespoons ancho chile powder<br />
1 tablespoon paprika<br />
1 tablespoon kosher salt<br />
2 teaspoons ground cumin<br />
1 teaspoon dried oregano<br />
2 teaspoons apple cider vinegar<br />
½ teaspoon freshly ground black pepper<br />
¼ teaspoon cayenne pepper<br />
1. Mix ingredients together well in a large<br />
stainless bowl. Cover with plastic wrap and<br />
place in the refrigerator overnight.<br />
2. Once meat has rested, assemble the meat<br />
grinder fitted with the medium plate. Turn meat<br />
grinder to ON and grind all ingredients into a<br />
mixing bowl.<br />
3. Form into patties, use crumbled or follow<br />
the instructions on page 5 to make into<br />
sausage links.<br />
Nutritional information per 4-ounce serving:<br />
Calories 201 (40% from fat) · Carb. 2g · Pro. 27g · Fat 9g<br />
Sat. fat 3g · Chol. 88mg Sod. 777mg<br />
Calc. 23mg · Fiber 1g<br />
Duck Sausage<br />
This sausage makes an easy yet elegant<br />
dinner paired with some French lentils and<br />
lightly dressed greens.<br />
Makes 2 pounds of sausage, about 16,<br />
¼-cup patties<br />
2 pounds skinless, boneless duck, cut<br />
into 1-inch cubes<br />
2 teaspoons juniper berries, crushed with<br />
the side of a knife<br />
2 garlic cloves, finely chopped<br />
1 teaspoon fresh thyme, finely chopped<br />
1 tablespoon port wine<br />
1½ teaspoons kosher salt<br />
1. Mix ingredients together well in a large<br />
stainless steel bowl. Cover with plastic wrap<br />
and place in refrigerator overnight.<br />
2. Once the meat has rested, assemble the meat<br />
grinder fitted with the coarse plate. Turn meat<br />
grinder to ON and grind all ingredients into a<br />
mixing bowl.<br />
3. Form into patties, use crumbled or follow<br />
the instructions on page 5 to make into<br />
sausage links.<br />
Nutritional information per 4-ounce serving:<br />
Calories 230 (88% from fat) · Carb. 0g · Pro. 7g<br />
Fat 22g · Sat. fat 8g · Chol. 43mg · Sod. 257mg<br />
Calc. 7mg · Fiber 0g<br />
Lamb Merguez<br />
Merguez sausage, with North African origins, gets<br />
its spice and heat from harissa. Depending on<br />
how hot you like it, you can always increase the<br />
amount or add a bit of cayenne.<br />
Makes 2¾ pounds sausage, about 16,<br />
¼-cup patties<br />
2¾ pounds lamb shoulder, cut into<br />
1-inch cubes<br />
¼ cup harissa<br />
2 tablespoons sweet paprika<br />
2 teaspoons kosher salt<br />
1 teaspoon ground cumin<br />
2 garlic cloves, chopped<br />
1. Mix ingredients together well in a large<br />
stainless steel bowl. Cover with plastic wrap<br />
and place in refrigerator overnight.<br />
2. Once the meat has rested, assemble the meat<br />
grinder fitted with the coarse plate. Turn meat<br />
grinder to ON and grind all ingredients into a<br />
mixing bowl.<br />
3. Form into patties, use crumbled or follow<br />
the instructions on page 5 to make into<br />
sausage links.<br />
Nutritional information per 4-ounce serving:<br />
Calories 109 (37% from fat) · Carb. 1g · Pro. 16g<br />
Fat 4g · Sat. fat 1g · Chol. 51mg · Sod. 347mg<br />
Calc. 11mg · Fiber 0g<br />
8
Spicy Venison Sausage<br />
Adding some pork butt makes the sausage a little<br />
moister, but you may use all venison if you wish.<br />
Makes 4 pounds of sausage<br />
3 pounds venison<br />
1 pound pork butt<br />
1 garlic clove, peeled and minced<br />
1½ tablespoons kosher salt<br />
1½ tablespoons freshly ground pepper<br />
2 teaspoons sweet paprika<br />
1 teaspoon honey<br />
1 teaspoon cayenne pepper<br />
½ teaspoon rubbed sage<br />
½ teaspoon savory<br />
1. Remove any visible gristle from meat. Cut<br />
meat into 1-inch cubes. Place in a large bowl<br />
and add the remaining ingredients. Stir well to<br />
combine. Cover and refrigerate for at least 8<br />
hours and up to 24 hours.<br />
2. Assemble <strong>Cuisinart</strong> ® <strong>Electric</strong> <strong>Meat</strong> <strong>Grinder</strong> with<br />
the medium cutting plate. Grind meat, mixing<br />
venison and pork evenly while grinding.<br />
Ground meat may be stuffed into prepared<br />
casings (follow the instructions on page 5) or<br />
formed into patties. Fresh sausage should be<br />
cooked within 24 hours or double-wrapped<br />
and frozen. Cook thoroughly before serving –<br />
internal temperature should register 160°F<br />
when tested with an instant-read thermometer.<br />
3. Sausage may also be smoked in a homestyle<br />
smoker. Use wood flavor of your choice;<br />
suggestions would include hickory or<br />
mesquite. Recommended smoking<br />
temperature is 175F°–200°F, and smoking time<br />
should be 4 to 6 hours. Cook or smoke<br />
sausage thoroughly before serving – internal<br />
temperature should register 160°F when<br />
tested with an instant-read thermometer.<br />
Nutritional information per 4-ounce serving:<br />
Calories 147 (34% from fat) ∙ Carb. 1g ∙ Pro. 23g<br />
Fat 5g ∙ Sat. ∙ Fat 2g ∙ Chol. 33mg ∙ Sod. 686mg<br />
Calc. 15mg ∙ Fiber 0g<br />
Spicy Green Chile<br />
and Chicken Sausage<br />
Jalapeño and green chiles give these<br />
sausages a nice kick.<br />
Makes about 3 pounds of sausage<br />
or 15 sausage links<br />
3 pounds boneless, skinless chicken<br />
thighs, cut into 1-inch cubes<br />
3 garlic cloves, chopped<br />
½ cup loosely packed cilantro, chopped<br />
2 large jalapeño peppers, chopped<br />
4 cans (4 ounces each) chopped green<br />
chiles, well drained<br />
1 tablespoon kosher salt<br />
1 tablespoon tequila<br />
1. Mix ingredients together well in a large<br />
stainless bowl. Cover with plastic wrap and<br />
place in the refrigerator overnight.<br />
2. Once meat has rested, assemble the meat<br />
grinder fitted with the medium plate. Turn<br />
meat grinder to ON and grind all ingredients<br />
into a mixing bowl.<br />
3. Form into patties, use crumbled or follow<br />
the instructions on page 5 to make into<br />
sausage links.<br />
Nutritional information per 4-ounce serving:<br />
Calories 117 (28% from fat) · Carb. 1g · Pro. 18g · Fat 4g<br />
Sat. fat 1g · Chol. 75mg · Sod. 616mg<br />
Calc. 31mg · Fiber 1g<br />
Simply Rich Burgers<br />
These simple burgers get their “richness” and<br />
flavor from the short ribs. Play with the ratio of<br />
the two meats if you prefer a leaner burger.<br />
Makes about 10 burgers<br />
2 pounds sirloin roast, cut into<br />
1-inch cubes<br />
2 pounds short ribs, bones removed<br />
and cut into 1-inch cubes<br />
1. Assemble the meat grinder fitted with the<br />
coarse or medium plate. Turn meat grinder to<br />
ON and grind the meat into a mixing bowl.<br />
9
2. Form into patties, being careful not to<br />
overwork. Cook burgers on the grill or a<br />
heavy-bottomed pan, about 4 to 5 minutes per<br />
side for medium.<br />
Nutritional information per burger:<br />
Calories 400 (55% from fat) · Carb. 0g · Pro. 45g<br />
Fat 24g · Sat. fat 11g · Chol. 163mg · Sod. 115mg<br />
Calc. 34mg · Fiber 0g<br />
Mediterranean<br />
Lamb Sliders<br />
The zip of the garlic and herbs give these zesty<br />
lamb burgers a Mediterranean twist.<br />
Makes about 22, ¼-cup sliders<br />
3 pounds lamb shoulder, cut into<br />
1-inch cubes<br />
2 large garlic cloves, finely chopped<br />
1 tablespoon fresh rosemary, chopped<br />
1 teaspoon fresh thyme, chopped<br />
3 tablespoons fresh parsley, chopped<br />
2 tablespoons dry white wine<br />
1 tablespoon kosher salt<br />
2 teaspoons crushed black pepper<br />
Chicken Burgers with<br />
Mango-Avocado Salsa<br />
Remaining salsa can be served with tortilla<br />
chips—you’re not going to want one bite<br />
to go to waste.<br />
Makes 6 burgers; 3 cups of salsa<br />
Chicken Burgers:<br />
2 pounds boneless, skinless chicken<br />
thighs, cut into 1-inch pieces<br />
1½ teaspoons kosher salt<br />
½ teaspoon freshly ground black pepper<br />
3 scallions, cut into 1-inch pieces<br />
½–1 jalapeño, seeded and cut into 1-inch<br />
pieces<br />
1 teaspoon vegetable oil<br />
Salsa:<br />
1 jalapeño, seeded and finely chopped<br />
¼ cup packed fresh cilantro leaves,<br />
roughly chopped<br />
2 avocados, cut into 1-inch cubes<br />
1 mango, peeled, cut into 1-inch cubes<br />
1 teaspoon kosher salt<br />
1–2 teaspoons freshly squeezed lime juice<br />
1. Mix ingredients together well in a large<br />
stainless steel bowl. Cover with plastic wrap<br />
and place in refrigerator overnight.<br />
2. Once the meat has rested, assemble the meat<br />
grinder fitted with the coarse plate. Turn meat<br />
grinder to ON and grind all ingredients into a<br />
mixing bowl.<br />
3. Form into ¼-cup patties for sliders.<br />
Nutritional information per slider:<br />
Calories 145 (35% from fat) · Carb. 1g · Pro. 21g<br />
Fat 6g · Sat. fat 2g · Chol. 68mg · Sod. 561mg<br />
Calc. 15mg · Fiber 0g<br />
1. Mix burger ingredients together, except the<br />
vegetable oil, in a large stainless bowl. Cover<br />
with plastic wrap and place in the refrigerator<br />
overnight.<br />
2. Prepare the salsa by stirring together all the<br />
salsa ingredients. Taste and adjust seasoning<br />
as desired. Salsa can be made either in<br />
advance and refrigerated, or right before you<br />
grind and cook the burgers.<br />
3. Once meat has rested, assemble the meat<br />
grinder fitted with the coarse plate. Turn meat<br />
grinder to ON and grind all ingredients into a<br />
mixing bowl.<br />
4. Form into 6 equal patties. Put a large, nonstick<br />
pan over medium heat and add oil. When oil is<br />
hot, add ½ of the chicken patties, being<br />
careful not to crowd the pan. Cook each side<br />
6 to 8 minutes until a nice, golden brown crust<br />
forms and the internal temperature reaches<br />
165ºF. Repeat with remaining patties.<br />
10
5. Serve burgers topped with Mango-Avocado<br />
Salsa and a lime wedge. May also be served<br />
on a soft bun like brioche or potato.<br />
Nutritional analysis per serving (1 burger with ½ cup<br />
of salsa): Calories 316 (45% from fat)<br />
Carb. 12g · Pro. 32g · Fat 16g · Sat. fat 3g·<br />
Chol. 125mg · Sod. 1026mg · Calc. 36mg · Fiber 5g<br />
Bolognese<br />
This Italian sauce is a classic; the longer it<br />
simmers, the better the flavors will be. It freezes<br />
beautifully so it can be enjoyed again.<br />
Makes 10 cups<br />
1 pound beef chuck roast, cut into<br />
1-inch cubes<br />
1 pound pork shoulder, cut into<br />
1-inch cubes<br />
¾ pound veal roast, cut into 1-inch cubes<br />
1 tablespoon olive oil<br />
2 medium onions, finely chopped<br />
2 medium carrots, finely chopped<br />
2 medium celery stalks, finely chopped<br />
4 garlic cloves, finely chopped<br />
1½ teaspoons kosher salt, divided<br />
1 cup white wine<br />
½ teaspoon freshly ground pepper<br />
2 cans (28 ounces each) tomatoes,<br />
roughly chopped<br />
1. Assemble the meat grinder fitted with the<br />
coarse plate. Turn meat grinder to ON and<br />
grind the chuck, pork and veal together into a<br />
mixing bowl.<br />
2. Put a small stockpot on the stove over<br />
medium heat and add the oil. Once the oil is<br />
hot, add the chopped vegetables and sauté<br />
until soft and fragrant, about 8 to 10 minutes.<br />
Stir in the ground meat and 1 teaspoon of salt.<br />
Cook until completely browned, breaking up<br />
meat with a wooden spoon as it cooks.<br />
3. Once the meat is brown, add the wine and<br />
allow the mixture to simmer until all the liquid<br />
is evaporated completely.<br />
4. Once all liquid has evaporated, add the<br />
remaining salt, pepper and chopped tomatoes<br />
to the pot and stir ingredients together well.<br />
5. Bring mixture to a slight boil and then reduce<br />
to a simmer for about 3 hours, until meat is<br />
tender and flavors come together well.<br />
This sauce will keep well in the refrigerator for up<br />
to 5 days and in the freezer for 3 months.<br />
Nutritional information per ½-cup serving:<br />
Calories 156 (37% from fat) · Carb. 6g · Pro. 15g<br />
Fat 6g · Sat. fat 2g · Chol. 55mg · Sod. 468mg<br />
Calc. 20mg · Fiber 1g<br />
<strong>Meat</strong>balls<br />
These homemade meatballs are so simple<br />
to prepare. The best part is knowing exactly<br />
what goes into them.<br />
Makes 18 meatballs<br />
1½ pounds beef chuck, cut into<br />
1-inch pieces<br />
½ pound pork shoulder, trimmed of any<br />
excess fat, cut into 1-inch pieces<br />
2 garlic cloves, peeled<br />
½ cup parsley leaves<br />
½ onion, about 6 ounces, cut into<br />
1-inch pieces<br />
½ cup Italian breadcrumbs<br />
2 teaspoons kosher salt<br />
2 large eggs, lightly beaten<br />
1. Preheat oven to 425ºF. Line two baking sheets<br />
with aluminum foil. Set aside.<br />
2. Assemble the meat grinder fitted with the<br />
coarse plate. Turn meat grinder to ON and<br />
grind the beef and pork together with the<br />
garlic, parsley and onion into a mixing bowl.<br />
Add the breadcrumbs, salt and the eggs.<br />
Gently mix together well.<br />
3. Using a ¼-cup measuring cup, form meat<br />
mixture into balls. Bake on prepared baking<br />
sheets until golden brown on all sides, about<br />
25 to 30 minutes.<br />
4. Serve, or add to tomato sauce.<br />
Nutritional analysis per serving (1 meatball):<br />
Calories 119 (46% from fat) · Carb. 3g · Pro. 13g<br />
Fat 6g · Sat. fat 2g · Chol. 60mg · Sod. 128mg<br />
Calc. 17mg · Fiber 0g<br />
11
Super Chili<br />
Don’t be intimidated by the amount of<br />
chili powder in the recipe; most store-bought<br />
varieties lean on the side of mild. However, spice<br />
lovers can turn up the heat by just increasing<br />
the cayenne or stirring in some puréed<br />
chipotle chiles.<br />
Makes about 8 cups<br />
2 pounds beef chuck roast, cut into<br />
1-inch cubes<br />
2 teaspoons vegetable oil, divided<br />
1 medium onion, finely chopped<br />
1 jalapeño, seeded and finely chopped<br />
1 large red pepper, cut into ¼-inch dice<br />
4 garlic cloves, finely chopped<br />
¼ cup chili powder<br />
2 teaspoons dried oregano<br />
2½ teaspoons kosher salt<br />
¼ teaspoon cayenne pepper<br />
1 can (15-ounce) crushed tomatoes<br />
2 cans (15 ounces each) diced tomatoes,<br />
with one can drained<br />
1 cup chicken broth (low sodium)<br />
1. Assemble the meat grinder fitted with the<br />
coarse plate. Turn meat grinder to ON and<br />
grind the beef into a mixing bowl.<br />
2. Put a small stockpot on the stove over<br />
medium heat and add a teaspoon of oil. Once<br />
oil is hot, stir in the ground beef. Cook until<br />
completely browned. Remove and reserve.<br />
Drain off any excess liquid before returning to<br />
the stove.<br />
3. Add the remaining teaspoon of vegetable oil to<br />
the pot. Once hot, add the onion, jalapeño,<br />
red pepper and garlic. Stir together and sauté<br />
until soft and fragrant, about 5 to 8 minutes.<br />
Return the cooked beef to the pot with the<br />
sautéed vegetables. Stir in the chili powder,<br />
oregano, salt and cayenne until fully<br />
combined.<br />
4. Add the crushed and diced tomatoes with the<br />
chicken broth. Bring mixture just to a boil and<br />
then reduce to a simmer and cover.<br />
5. Simmer for about 2 hours. Degrease the<br />
chili by either skimming any excess fat with<br />
a ladle, or by gently blotting the surface with<br />
a paper towel.<br />
6. Taste and adjust seasoning accordingly.<br />
Nutritional information per ½-cup serving:<br />
Calories 133 (50% from fat) · Carb. 5g · Pro. 12g<br />
Fat 8g · Sat. fat 3g · Chol. 41mg · Sod. 539mg<br />
Calc. 30mg · Fiber 2g<br />
Turkey <strong>Meat</strong>loaf<br />
Veggies are added for flavor in this healthier<br />
version of meatloaf.<br />
Makes about 10 servings<br />
Nonstick cooking spray<br />
1½ pounds dark turkey meat, or boneless,<br />
skinless chicken thighs, cut into 1-inch<br />
cubes<br />
1½ cups old-fashioned oats<br />
1 teaspoon olive oil<br />
1 small onion, finely chopped<br />
1 small carrot, finely chopped<br />
1 small celery stalk, finely chopped<br />
2 garlic cloves, peeled and finely<br />
chopped<br />
1 teaspoon kosher salt, divided<br />
½ teaspoon freshly ground black<br />
pepper, divided<br />
8 small baby bella or cremini mushrooms,<br />
chopped<br />
2 large eggs, lightly beaten<br />
1 large egg white<br />
¼ cup ketchup<br />
1 tablespoon tomato paste<br />
½ cup chopped fresh parsley<br />
1 tablespoon chopped fresh thyme<br />
1. Preheat oven to 350°F. Coat a 9 x 5-inch loaf<br />
pan with nonstick cooking spray.<br />
2. Toss the turkey and oats together in a mixing<br />
bowl and let rest in refrigerator until ready to<br />
grind.<br />
3. Put the oil in a medium skillet over medium<br />
heat. Once the oil is hot and shimmering<br />
across the pan, add the onion, carrot, celery,<br />
garlic, ½ teaspoon of salt and ¼ teaspoon of<br />
the pepper. Sauté until fragrant and soft, about<br />
8 to 10 minutes. Add the mushrooms and<br />
12
continue to sauté until soft, an additional 5 to<br />
10 minutes. Allow to cool slightly<br />
4. Mix the eggs, egg white, ketchup and tomato<br />
paste in a large mixing bowl. Add the<br />
remaining salt, pepper, parsley, thyme and<br />
cooked vegetables that have cooled slightly.<br />
5. Assemble the meat grinder fitted with the<br />
medium plate. Turn meat grinder to ON and<br />
grind the turkey and oats into the large mixing<br />
bowl with remaining ingredients.<br />
6. Gently, using hands or a large spoon, blend<br />
together ingredients until completely<br />
combined. Be careful not to over-mix.<br />
7. Place the meatloaf ingredients into the<br />
prepared pan, then into the preheated oven.<br />
8. <strong>Meat</strong>loaf is done when internal temperature<br />
registers 170°F, about 75 minutes. Allow to<br />
rest slightly before removing from pan and<br />
slicing.<br />
Nutritional information per serving:<br />
Calories 238 (48% from fat) ∙ Carb. 13g ∙ Pro. 18g<br />
Fat 13g ∙ Sat. Fat 3g ∙ Chol. 106mg ∙ Sod. 405mg<br />
Calc. 41mg ∙ Fiber 2g<br />
13
LIMITED THREE-YEAR<br />
WARRANTY<br />
(U.S. and Canada ONLY)<br />
This warranty is available to consumers only. You<br />
are a consumer if you own a <strong>Cuisinart</strong> ® <strong>Electric</strong><br />
<strong>Meat</strong> <strong>Grinder</strong> that was purchased at retail for<br />
personal, family or household use. Except as<br />
otherwise required under applicable law, this<br />
warranty is not available to retailers or other<br />
commercial purchasers or owners.<br />
We warrant that your <strong>Cuisinart</strong> ® <strong>Electric</strong> <strong>Meat</strong><br />
<strong>Grinder</strong> will be free of defects in materials and<br />
workmanship under normal home use for 3 years<br />
from the date of original purchase. We<br />
recommend that you visit our website, www.<br />
cuisinart.com for a fast, efficient way to<br />
complete your product registration. However,<br />
product registration does not eliminate the need<br />
for the consumer to maintain the original proof of<br />
purchase in order to obtain the warranty<br />
benefits. In the event that you do not have proof<br />
of purchase date, the purchase date for<br />
purposes of this warranty will be the date of<br />
manufacture.<br />
If your <strong>Cuisinart</strong> ® <strong>Electric</strong> <strong>Meat</strong> <strong>Grinder</strong> should<br />
prove to be defective within the warranty period,<br />
we will repair it, or if we think necessary, replace<br />
it. To obtain warranty service, simply call our tollfree<br />
number 1-800-726-0190 for additional<br />
information from our Consumer Service<br />
Representatives, or send the defective product<br />
to Consumer Service at <strong>Cuisinart</strong>, 7475 North<br />
Glen Harbor Blvd., Glendale, AZ 85307.<br />
To facilitate the speed and accuracy of your<br />
return, please enclose $10.00 for shipping and<br />
handling of the product.<br />
Please pay by check or money order made<br />
payable to <strong>Cuisinart</strong> (California residents need<br />
only supply proof of purchase and should call<br />
1-800-726-0190 for shipping instructions).<br />
NOTE: For added protection and secure<br />
handling of any <strong>Cuisinart</strong> product that is being<br />
returned, we recommend you use a traceable,<br />
insured delivery service. <strong>Cuisinart</strong> cannot be<br />
held responsible for in-transit damage or for<br />
packages that are not delivered to us. Lost and/<br />
or damaged products are not covered under<br />
warranty. Please be sure to include your return<br />
address, daytime phone number, description of<br />
the product defect, product model number<br />
(located on bottom of product), original date of<br />
purchase, and any other information pertinent to<br />
the product’s return.<br />
CALIFORNIA RESIDENTS ONLY<br />
California law provides that for In-Warranty<br />
Service, California residents have the option of<br />
returning a nonconforming product (A) to the<br />
store where it was purchased or (B) to another<br />
retail store that sells <strong>Cuisinart</strong> products of the<br />
same type.<br />
The retail store shall then, at its discretion, either<br />
repair the product, refer the consumer to an<br />
independent repair facility, replace the product,<br />
or refund the purchase price less the amount<br />
directly attributable to the consumer’s prior<br />
usage of the product. If the above two options<br />
do not result in the appropriate relief to the<br />
consumer, the consumer may then take the<br />
product to an independent repair facility if<br />
service or repair can be economically<br />
accomplished. <strong>Cuisinart</strong> and not the consumer<br />
will be responsible for the reasonable cost of<br />
such service, repair, replacement, or refund for<br />
nonconforming products under warranty.<br />
California residents may also, according to their<br />
preference, return nonconforming products<br />
directly to <strong>Cuisinart</strong> for repair, or if necessary,<br />
replacement, by calling our Consumer Service<br />
Center toll-free at 1-800-726-0190. <strong>Cuisinart</strong> will<br />
be responsible for the cost of the repair,<br />
replacement, and shipping and handling for such<br />
products under warranty.<br />
BEFORE RETURNING YOUR<br />
CUISINART PRODUCT<br />
If you are experiencing problems with your<br />
<strong>Cuisinart</strong> product, we suggest that you call our<br />
<strong>Cuisinart</strong> Service Center at 1-800-726-0190<br />
before returning the product for service. If<br />
servicing is needed, a Representative can<br />
confirm whether the product is under warranty<br />
and direct you to the nearest service location.<br />
Your <strong>Cuisinart</strong> ® <strong>Electric</strong> <strong>Meat</strong> <strong>Grinder</strong> has been<br />
manufactured to the strictest specifications and<br />
has been designed for use only in 120-volt<br />
outlets and only with authorized accessories and<br />
replacement parts. This warranty expressly<br />
excludes any defects or damages caused by<br />
attempted use of this unit with a converter, as<br />
well as by use with accessories, replacement<br />
14
parts or repair service other than those<br />
authorized by <strong>Cuisinart</strong>. This warranty does not<br />
cover any damage caused by accident, misuse,<br />
shipment or other than ordinary household use.<br />
This warranty excludes all incidental or<br />
consequential damages. Some states do not<br />
allow the exclusion or limitation of these<br />
damages, so these exclusions may not apply to<br />
you. You may also have other rights, which vary<br />
from state to state.<br />
Important: If the nonconforming product is to be<br />
serviced by someone other than <strong>Cuisinart</strong>’s<br />
Authorized Service Center, please remind the<br />
servicer to call our Consumer Service Center at<br />
1-800-726-0190 to ensure that the problem is<br />
properly diagnosed, the product is serviced with<br />
the correct parts, and the product is still under<br />
warranty.<br />
15
©2016 <strong>Cuisinart</strong><br />
150 Milford Road<br />
East Windsor, NJ 08520<br />
Printed in China<br />
Trademarks or service marks of third parties used herein are<br />
the trademarks or service marks of their respective owners.<br />
16CE019600<br />
IB-14254-ESP


