

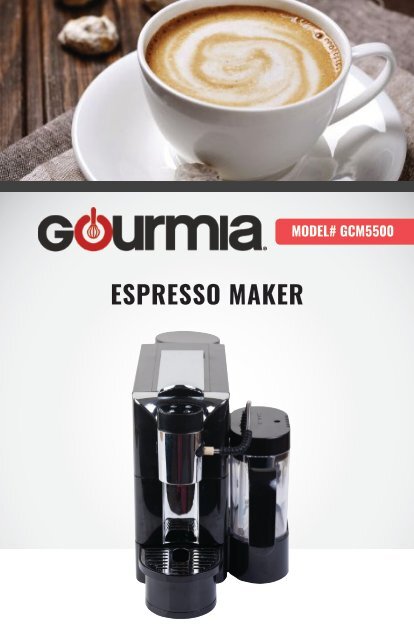
Gourmia GCM5500 Espresso, Cappuccino & Latte Maker -
Gourmia GCM5500 Espresso, Cappuccino & Latte Maker -
Gourmia GCM5500 Espresso, Cappuccino & Latte Maker -

You also want an ePaper? Increase the reach of your titles
YUMPU automatically turns print PDFs into web optimized ePapers that Google loves.
© 2016 <strong>Gourmia</strong><br />
www.<strong>Gourmia</strong>.com<br />
The Steelstone Group<br />
Brooklyn, NY<br />
All rights reserved. No portion of this manual may be reproduced by any means whatsoever<br />
without written permission from The Steelstone Group, except for the inclusion of quotations in a<br />
media review.<br />
Although every precaution has been taken in the preparation of this manual, The Steelstone<br />
Group assumes no responsibility for errors or omissions. Nor is any liability assumed for damages<br />
resulting from the use of the information contained herein. Although every effort has been made<br />
to ensure that the information contained in this manual is complete and accurate, The Steelstone<br />
Group is not engaged in rendering professional advice or services to the individual consumer;<br />
further, The Steelstone Group shall not be held responsible for any loss or damage allegedly<br />
arising from any information or suggestion in this manual.<br />
10 9 8 7 6 5 4 3 2<br />
1<br />
Printed in China
Welcome to Freshly Brewed <strong>Espresso</strong>!<br />
With the purchase of the <strong>Espresso</strong> <strong>Maker</strong>, your enjoyment of rich and delicious<br />
espresso is about one minute away! The art of making espresso can be a fairly<br />
complicated one. But, now you have the <strong>Espresso</strong> <strong>Maker</strong> at your fingertips and,<br />
with the touch of a button, you are ready to make exceptional espresso and a host<br />
of specialty coffee beverages. In addition to the versatile single serve system, the<br />
<strong>Espresso</strong> <strong>Maker</strong> offers the Automatic Milk Frother. With one-touch technology, your<br />
espresso now becomes extra-special!<br />
The automatic brewing system of the <strong>Espresso</strong> <strong>Maker</strong> contains a distinctive<br />
system using espresso capsules to accommodate all your specialty coffee beverages its<br />
like having your own coffee bar at home! From your early-morning Cafe Americano to<br />
your afternoon Affogato and your after-dinner <strong>Cappuccino</strong>, all your favorites are right<br />
here. With variable settings for serving sizes of your choice, and the frothing function<br />
that accompanies hot espresso, you can now experience espresso at its finest. It is so<br />
easy to change capsules; you’ll be able to serve everyone’s favorite brew by switching<br />
capsules in a simple 1-2-3 process.<br />
The following pages of this manual offer full and complete instructions for all<br />
the functions and features of your <strong>Espresso</strong> <strong>Maker</strong>. Please read all safety instructions<br />
and complete directions carefully for safe usage at all times. Thank you for your<br />
purchase! We hope you will enjoy all the innovative products brought to you by our<br />
family at <strong>Gourmia</strong>.
SAFETY FIRST p. 6<br />
FEATURES & FUNCTIONS p. 8<br />
BEFORE FIRST USE & ASSEMBLY p. 10<br />
STEP-BY-STEP ESPRESSO MAKING p. 12<br />
TABLE OF CONTENTS<br />
MAINTENANCE & SERVICE p. 14<br />
5
IMPORTANT SAFEGUARDS<br />
When operating this electric appliance, basic safety instructions should always be<br />
followed. Refer to the following for these instructions.<br />
SAFETY FIRST<br />
1. READ ALL SAFETY & USAGE INSTRUCTIONS BEFORE USING THE ESPRESSO<br />
MAKER<br />
2. EXERCISE EXTREME CAUTION: AVOID ELECTRICAL SHOCK. DO NOT<br />
immerse cord, plug or the <strong>Espresso</strong> <strong>Maker</strong> in water or other liquid.<br />
3. Caution: Hot liquids can cause burns. Do not open cartridge system while<br />
brewing or operating system is in use. Hot steam or water may burn or scald.<br />
Do not operate without using a cup to catch espresso after brewing and do not<br />
hold hands or fingers under the liquid as it streams from the <strong>Espresso</strong> <strong>Maker</strong>.<br />
4. Children should never use the <strong>Espresso</strong> <strong>Maker</strong>; close supervision is required<br />
when appliance is used near children.<br />
5. Never operate the <strong>Espresso</strong> <strong>Maker</strong> with a damaged cord or plug or one that<br />
has malfunctioned or been damaged in any way. Contact Customer Service for<br />
analysis. Do not use extension cords.<br />
6
SAVE THESE INSTRUCTIONS<br />
FOR HOUSEHOLD USE ONLY<br />
This <strong>Espresso</strong> <strong>Maker</strong> has a polarized<br />
plug (one blade is wider than the other).<br />
To reduce the risk of electrical shock, the<br />
plug is intended to be used by inserting<br />
it into the electrical outlet only one way.<br />
If the plug does not fit securely into the<br />
outlet, turn the plug and re-insert. Do<br />
not modify this plug. If the plug does<br />
not fit the outlet securely, call a qualified<br />
electrician for assistance. DO NOT use<br />
this plug with extension cords of<br />
any kind.<br />
SAFETY FIRST<br />
7
B<br />
H<br />
E<br />
F<br />
D<br />
G<br />
C<br />
A<br />
FEATURES & FUNCTIONS<br />
A. <strong>Espresso</strong> <strong>Maker</strong> Base- The <strong>Espresso</strong> <strong>Maker</strong> Base houses the automatic cartridge<br />
system that holds capsules, the Lift Lever, the Dual Position Cup Platform and the<br />
superior 19 Bar Extraction System. The Automatic Milk Frother connects to the Base.<br />
The <strong>Espresso</strong> <strong>Maker</strong> Base also houses the Control Panel with LED Display for easy<br />
operation.<br />
B. Lift Lever- The Lift Lever moves up and back to click and fully expose the capsule<br />
holder. When positioned in the holder, the capsule will be ready for use. See Step-by-<br />
Step Instructions following.<br />
C. Dual Position Cup Platform- The Cup Platform can be adjusted to two different<br />
positions to hold cups of various sizes:<br />
1. Position A – Large cups (10-12 oz) can be accommodated in this position.<br />
8
2. Position B – Small (demitasse) cups (1-4 oz) can be accommodated in this<br />
position.<br />
D. Removable Drip Tray and Grate- The Grate sits on top of the Drip Tray/Used<br />
Pod Container. The Grate allows any liquid that drips or spills to be captured. It can<br />
easily be removed for cleaning.<br />
E. Used Capsule Container- Attached to the Drip Tray, the Used Capsule Container<br />
holds 10 used capsules. Because liquid can drain from the capsules after use, it is<br />
recommended that the Container be emptied regularly and liquid drained out and<br />
cleaned. The empty Container can be dried with a paper towel.<br />
F. Removable Water Reservoir- The Water Reservoir holds a generous quantity<br />
of water, enough for several shots of espresso. Clean as needed for optimal<br />
performance. Refer to the Maintenance section for further information.<br />
G. Automatic Milk Frother- The Automatic Milk Frother attaches to the <strong>Espresso</strong><br />
<strong>Maker</strong> and produces frothed milk automatically when various espresso selections<br />
are made. Add enough milk to reach the MAX Fill Line or at least 4 ounces milk<br />
minimum. If no froth is needed, the Frother Tank need not be attached.<br />
H. Control Panel with LED Display- The LED Display indicates two sizes of<br />
espresso, 1.5 ounces and 3.5 ounces, and two sizes of espresso with froth, 4 ounces<br />
and 6 ounces. The icons are easy to use and illuminated to make your process even<br />
easier.<br />
1. <strong>Espresso</strong> Shot (1.5 oz)<br />
2. Lungo (Extra Long ) <strong>Espresso</strong> Shot (3.5 oz)<br />
3. Cappucino Style – espresso shot; froth on top (4 oz)<br />
4. <strong>Latte</strong> Macchiato – froth; espresso on top (6 oz<br />
FEATURES & FUNCTIONS<br />
1<br />
2<br />
3<br />
4<br />
9
2<br />
3 4<br />
5<br />
10
BEFORE FIRST USE:<br />
1. Using a soft, d<strong>amp</strong> cloth, clean the <strong>Espresso</strong> <strong>Maker</strong> Base, including<br />
accessories, and dry thoroughly with a soft cloth. Do not immerse the<br />
Base, cord or plug in water.<br />
2. Place the <strong>Espresso</strong> <strong>Maker</strong> on a flat counter surface.<br />
3. Plug the <strong>Espresso</strong> <strong>Maker</strong> into a wall outlet.<br />
4. Fill the Removable Water Reservoir to the MAX Fill Line (or above the<br />
MIN Fill Line, as desired) and install onto the <strong>Espresso</strong> <strong>Maker</strong> (fig 1,2).<br />
ASSEMBLY<br />
1. Fill Automatic Milk Frother with milk up to the MAX Fill Line. Place<br />
the frothing tube in the Frother and secure the Lid on top. Attach the<br />
Frother to the <strong>Espresso</strong> <strong>Maker</strong> (fig 3).<br />
2. Install the Milk Frother by sliding it onto the <strong>Espresso</strong> <strong>Maker</strong>. The slot side of<br />
the lid fits into the portal on the <strong>Espresso</strong> <strong>Maker</strong>.<br />
3. Attach the Frother Tube to the <strong>Espresso</strong> <strong>Maker</strong> and the Milk Frother<br />
(fig 4, 5).<br />
BEFORE FIRST USE & ASSEMBLY<br />
11
6 7<br />
8<br />
12
<strong>Espresso</strong> Making:<br />
»»<br />
Place cup on the Cup Platform of your choice (fig 6, 7).<br />
»»<br />
Move the Lift Lever up and back until it clicks into place.<br />
»»<br />
Install an espresso capsule into the open portal. (fig 8).<br />
»»<br />
Close the Lift Lever until it is completely flat.<br />
»»<br />
Press the Power button ON. The icons on the Control Panel will begin to<br />
flash, indicating the water is heating.<br />
»»<br />
When the icons stop flashing, the <strong>Espresso</strong> <strong>Maker</strong> is ready to make<br />
espresso.<br />
»»<br />
Press the desired icon. The <strong>Espresso</strong> <strong>Maker</strong> will begin to operate;<br />
machine will automatically brew the espresso (and froth, if using), and<br />
turn OFF when done.<br />
Using the Automatic Milk Frother:<br />
With a super-easy 60 second frothing system, this Automatic Frother produces<br />
the results every espresso aficionado loves! Follow the easy steps below to<br />
produce perfect froth every time:<br />
»»<br />
When your <strong>Espresso</strong> <strong>Maker</strong> is assembled and ready, select either the<br />
<strong>Cappuccino</strong> Style or <strong>Latte</strong> Macchiato to add froth to your espresso.<br />
»»<br />
Depending on the selection you choose, the <strong>Espresso</strong> <strong>Maker</strong> will either<br />
add froth to your espresso (<strong>Cappuccino</strong> Style) or espresso to the froth<br />
(<strong>Latte</strong> Macchiato).<br />
STEP-BY-STEP ESPRESSO MAKING<br />
» » After making your selection, experiment with other enjoyable flavors<br />
and add-ins to your espresso. Create your own barrista-style espresso<br />
beverages!<br />
13
14
MAINTENANCE<br />
ALWAYS allow the <strong>Espresso</strong> <strong>Maker</strong> to cool completely before cleaning.<br />
Unplug the <strong>Espresso</strong> <strong>Maker</strong> before cleaning.<br />
After each use, clean and dry the Cup Platforms. Use a d<strong>amp</strong> cloth to clean the<br />
exterior of the Base as needed; however, do not immerse the Base in water.<br />
Remove used capsules as needed; rinse and dry the Used Capsule Container.<br />
Wash the Milk Frother Tank in warm, sudsy water, including the plastic tubing<br />
and connector. Rinse and dry thoroughly. Do not place in dishwasher.<br />
Clean the Water Reservoir as needed; de-calcify regularly using tablets or<br />
solutions. DO NOT immerse the Base in water. Use non-abrasive soap only.<br />
WARRANTY & SERVICE<br />
This Limited Warranty is for one full year from the date of purchase. It is<br />
applicable to the original purchaser only and is not transferable to a third party<br />
user. Repair or replacement of defective parts is solely at the seller’s discretion.<br />
In the event that repair isn’t possible, the seller will replace the product/part. If<br />
product repair/replacement won’t suffice, the seller has the option of refunding<br />
the cash value of the product or component returned.<br />
MAINTENANCE & SERVICE<br />
Product defects not covered under the Warranty provisions include normal wear<br />
and damage incurred from use or accidental negligence, misuse of instruction<br />
specifications or repair by unauthorized parties. The manufacturing company<br />
is not liable for any incidental or consequential damages incurred by such<br />
circumstances.<br />
For Customer Service or Questions, Please call: 888-552-0033<br />
www.gourmia.com<br />
15
www.gourmia.com


