

Gourmia GMC780 18-in-1 AnyCooker -
Gourmia GMC780 18-in-1 AnyCooker -
Gourmia GMC780 18-in-1 AnyCooker -

Create successful ePaper yourself
Turn your PDF publications into a flip-book with our unique Google optimized e-Paper software.
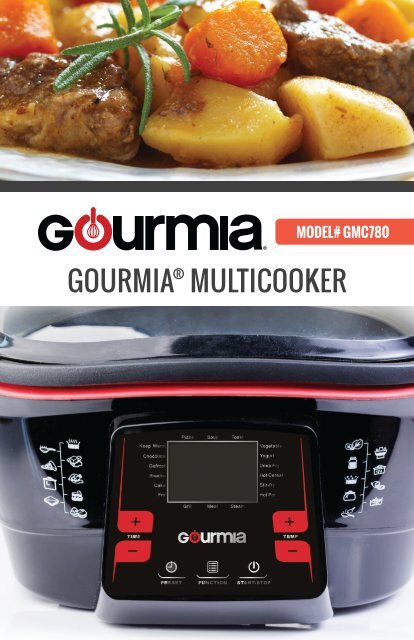
MODEL# <strong>GMC780</strong><br />
GOURMIA ® MULTICOOKER
© 2016 <strong>Gourmia</strong><br />
www.<strong>Gourmia</strong>.com<br />
The Steelstone Group<br />
Brooklyn, NY<br />
All rights reserved. No portion of this manual may be reproduced by any means whatsoever<br />
without written permission from The Steelstone Group, except for the <strong>in</strong>clusion of quotations <strong>in</strong> a<br />
media review.<br />
Although every precaution has been taken <strong>in</strong> the preparation of this manual, The Steelstone<br />
Group assumes no responsibility for errors or omissions. Nor is any liability assumed for damages<br />
result<strong>in</strong>g from the use of the <strong>in</strong>formation conta<strong>in</strong>ed here<strong>in</strong>. Although every effort has been made<br />
to ensure that the <strong>in</strong>formation conta<strong>in</strong>ed <strong>in</strong> this manual is complete and accurate, The Steelstone<br />
Group is not engaged <strong>in</strong> render<strong>in</strong>g professional advice or services to the <strong>in</strong>dividual consumer;<br />
further, The Steelstone Group shall not be held responsible for any loss or damage allegedly<br />
aris<strong>in</strong>g from any <strong>in</strong>formation or suggestion <strong>in</strong> this manual.<br />
Welcome to deliciously easy homemade meals!<br />
With your purchase of the Multicooker, you are ready to enjoy the most delectable,<br />
mouth-water<strong>in</strong>g foods ever! Why? Your Multicooker truly makes so many k<strong>in</strong>ds of<br />
cook<strong>in</strong>g absolutely simple, from tender beef roasts and steamed fish fillets to fondue,<br />
hot pot dishes, hearty soups and more. The Multicooker is essentially your all-<strong>in</strong>-one<br />
kitchen assistant! Gourmet cook<strong>in</strong>g is as easy as press<strong>in</strong>g a few buttons, with preset<br />
times and temperatures ready to sauté, bake, roast, steam, deep fry and braise all<br />
your favorite meals to perfection.<br />
One of the best features of your Multicooker is the easy operat<strong>in</strong>g control panel<br />
that offers clear selections. The pages of this manual give you full and complete<br />
<strong>in</strong>structions for all the functions and features of your Multicooker. Inside, you’ll f<strong>in</strong>d<br />
helpful cook<strong>in</strong>g guides, <strong>in</strong>formation on cook<strong>in</strong>g modes and complete step-by-step<br />
<strong>in</strong>structions for assembl<strong>in</strong>g, operat<strong>in</strong>g, clean<strong>in</strong>g and ma<strong>in</strong>ta<strong>in</strong><strong>in</strong>g your Multicooker.<br />
Please read all safety <strong>in</strong>structions and complete directions carefully for safe usage at<br />
all times.<br />
10 9 8 7 6 5 4 3 2 1<br />
Thank you for your purchase! We hope you will enjoy all the <strong>in</strong>novative products<br />
brought to you by our family at <strong>Gourmia</strong>.<br />
Pr<strong>in</strong>ted <strong>in</strong> Ch<strong>in</strong>a
SAFETY FIRST P. 6<br />
FEATURES & FUNCTIONS p. 8<br />
BEFORE FIRST USE & ASSEMBLY p. 12<br />
STEP BY STEP COOKING p. 14<br />
FRY MODE<br />
CAKE MODE<br />
SNACKS MODE<br />
DEFROST MODE<br />
CHOCOLATE MODE<br />
KEEP WARM MODE<br />
PIZZA MODE<br />
TOAST MODE<br />
SOUP MODE<br />
VEGETABLE MODE<br />
YOGURT MODE<br />
DEEP FRY MODE<br />
HOT CEREAL MODE<br />
STIR-FRY MODE<br />
HOT POT MODE<br />
STEAM MODE<br />
MEAT MODE<br />
GRILL MODE<br />
TABLE OF CONTENTS<br />
MAINTENANCE p. 28<br />
WARRANTY & SERVICE p. 30<br />
5
SAFETY INFORMATION<br />
IMPORTANT SAFEGUARDS<br />
ALWAYS USE THE REMOVABLE COOKING POT WHEN<br />
OPERATING THIS APPLIANCE<br />
When operat<strong>in</strong>g this electric appliance, basic safety <strong>in</strong>structions should always be<br />
followed. Refer to the follow<strong>in</strong>g for these <strong>in</strong>structions.<br />
1. READ ALL SAFETY & USAGE INSTRUCTIONS BEFORE USING<br />
MULTICOOKER.<br />
2. EXERCISE EXTREME CAUTION: AVOID ELECTRICAL SHOCK. DO NOT<br />
immerse cord, plugs or the Multicooker Base <strong>in</strong> water or other liquid.<br />
3. Do not touch the Multicooker Base or Removable Cook<strong>in</strong>g Pot while hot.<br />
Use potholders, oven mitts or tongs to remove food and avoid hot food or<br />
liquid spills.<br />
electric shock, <strong>in</strong>jury or fire.<br />
12. Use only factory cord supplied; NEVER add extension cords. When done<br />
us<strong>in</strong>g, press Start/Stop to turn OFF, then remove plug from appliance<br />
and outlet.<br />
13. Do not use the Multicooker for any use other than <strong>in</strong>tended. Do not use<br />
on a stovetop.<br />
SAVE THESE INSTRUCTIONS<br />
FOR HOUSEHOLD USE ONLY<br />
SAFETY INFORMATION<br />
4. Do not open the Multicooker Lid dur<strong>in</strong>g cook<strong>in</strong>g, unless the Deep Fry Mode<br />
is <strong>in</strong> use. Open<strong>in</strong>g the Lid causes the cook<strong>in</strong>g temperature to drop and also<br />
<strong>in</strong>creases the cook<strong>in</strong>g time as a result. Use pot holders if the Lid must be<br />
opened and stand well away from any escap<strong>in</strong>g steam.<br />
5. Do not place metal plates, trays or other objects <strong>in</strong> the Multicooker, other<br />
than the accessories that are <strong>in</strong>tended for use with the Multicooker, as they<br />
may cause fire and/or short circuit damage.<br />
6. UNPLUG the Multicooker from outlet when not <strong>in</strong> use or before clean<strong>in</strong>g.<br />
Allow the Multicooker to cool before clean<strong>in</strong>g. Do not let cord hang over<br />
edge of table or counter or touch hot surfaces.<br />
Magnetic Breakaway Cord Set: This power<br />
cord is <strong>in</strong>tended to be attached to the<br />
Multicooker and only removed from the<br />
appliance when absolutely necessary. The<br />
female end of this cord that plugs <strong>in</strong>to your<br />
Multicooker has magnetized strips to attach<br />
securely to the appliance.<br />
This cord set operates safely and effectively when placed on a counter near<br />
an electrical outlet. However, if someone pulls on the cord, it will quickly and<br />
smoothly break away from the Multicooker, prevent<strong>in</strong>g the Multicooker from<br />
tipp<strong>in</strong>g over and spill<strong>in</strong>g hot oil, liquid or foods. This helps prevent burns.<br />
7. Children should never use the Multicooker; close supervision is required<br />
when appliance is used near children.<br />
8. Operate the Multicooker on a level surface well away from any hot gas or<br />
electrical burner, heat source, combustible spray cans or pressurized items.<br />
The Multicooker must be level for optimal performance.<br />
9. DO NOT operate the Multicooker outdoors.<br />
10. Never operate the Multicooker with a damaged cord or plug or one that has<br />
malfunctioned or been damaged <strong>in</strong> any way. Immediately contact Customer<br />
Service for analysis.<br />
6<br />
11. DO NOT add unauthorized accessory attachments. Such use may result <strong>in</strong><br />
7
B<br />
FEATURES & FUNCTIONS<br />
A<br />
C<br />
A. Multicooker Base: The Multicooker Base is equipped with built-<strong>in</strong> EasyLift Handle<br />
grooves and houses the heat<strong>in</strong>g unit and Pre-programmed Control Panel. The Base<br />
holds the Removable Cook<strong>in</strong>g Pot and the Tempered Dome Glass Lid.<br />
B.Tempered Dome Glass Lid : An important feature of the Multicooker is the heatresistant<br />
Tempered Dome Glass Lid. Designed as a full view<strong>in</strong>g w<strong>in</strong>dow, the Lid<br />
allows observation of the cook<strong>in</strong>g process without open<strong>in</strong>g the Lid. The Lid <strong>in</strong>cludes<br />
a rubberized safety seal which helps lock moisture <strong>in</strong>to the Pot, provid<strong>in</strong>g nutrient<br />
retention and tender roast<strong>in</strong>g and slow-cook<strong>in</strong>g results. Open<strong>in</strong>g the Lid while<br />
cook<strong>in</strong>g is not recommended, as it reduces the temperature, creat<strong>in</strong>g a longer cook<br />
time. When deep fry<strong>in</strong>g, the Lid should rema<strong>in</strong> off for safety.<br />
To open the Lid after cook<strong>in</strong>g, use the handle on top to lift the Lid up and away from<br />
your face. Care should be taken when open<strong>in</strong>g the Lid, as the collected steam may<br />
be hot. Use pot holders, if needed, to open the Lid and stand well away from any<br />
escap<strong>in</strong>g steam. Place the Lid on a water-resistant surface. Remove the hot food with<br />
tongs or utensils as needed.<br />
C. EasyLift Handle Grooves: The eng<strong>in</strong>eered EasyLift Handle Grooves on the<br />
Multicooker Base allow for the safe movement of the Base, particularly when clean<strong>in</strong>g<br />
or mov<strong>in</strong>g after use. The Multicooker Base should only be moved while it is unplugged<br />
and cool to the touch. The Grooves allow the user to safely remove food or liquids as<br />
needed.<br />
FEATURES & FUNCTIONS<br />
D. Removable Cook<strong>in</strong>g Pot: The die cast alum<strong>in</strong>um Removable Cook<strong>in</strong>g Pot holds the<br />
Accessory Racks and Basket. The Removable Cook<strong>in</strong>g Pot has a wide wrap-around lip<br />
for easy lift<strong>in</strong>g and movement and the <strong>in</strong>terior is nonstick for easy clean-up. Wait until<br />
the Pot has cooled completely before mov<strong>in</strong>g to clean up.<br />
D<br />
E<br />
E. Accessories: The Multicooker comes with the follow<strong>in</strong>g accessories for specialty<br />
cook<strong>in</strong>g.<br />
Deep Fry Basket<br />
Hot Pot & Fondue Rack<br />
Interior Bake/Roast Rack<br />
Steam<strong>in</strong>g Rack<br />
Fondue Forks<br />
EasyLift Handle<br />
8<br />
9
Pre-Programmed Control Panel<br />
The Control Panel houses the “bra<strong>in</strong>s” of the Multicooker. The panel features the LCD<br />
Display that shows temperature and time and it <strong>in</strong>cludes the Modes that have been<br />
pre-programmed with optimal pre-set times and temperatures for each cook<strong>in</strong>g<br />
Mode. Adjustments to the cook<strong>in</strong>g times and temperatures for each Mode are offered<br />
for flexibility.<br />
D<br />
A<br />
B<br />
C<br />
E<br />
A. Pre-set Button: Various Modes offer the choice of select<strong>in</strong>g a Delay Start time. To<br />
use this feature, first select the Function Button and press the Mode Button of your<br />
choice. After select<strong>in</strong>g your Mode, press the Pre-set Button and use the + Button up to<br />
10 hours to Delay Start your cook<strong>in</strong>g process. After choos<strong>in</strong>g your Delay Start time, the<br />
Display time will flash, then countdown until the Mode automatically starts cook<strong>in</strong>g.<br />
B. Function Button: Press to select the Mode of your choice. The Function Button<br />
displays all Modes around the Control Panel. Refer to the Step-by-Step Cook<strong>in</strong>g section<br />
for complete <strong>in</strong>structions <strong>in</strong> each Mode (see p. xx).<br />
Fry Mode<br />
Cake Mode<br />
Snacks Mode<br />
Defrost Mode<br />
Chocolate Mode<br />
Keep Warm Mode<br />
Pizza Mode<br />
Soup Mode<br />
Toast Mode<br />
Vegetable Mode<br />
Yogurt Mode<br />
Deep Fry Mode<br />
Hot Cereal Mode<br />
Stir-Fry Mode<br />
Hot Pot Mode<br />
Steam Mode<br />
Meat Mode<br />
Grill Mode<br />
C. Start/Stop Button: Press to start a Mode or stop a Mode at any time.<br />
FEATURES & FUNCTIONS<br />
D. Time + and – Buttons: Press to either <strong>in</strong>crease/decrease time on pre-programmed<br />
Modes, or to set a Delay Start time.<br />
E. Temperature + and – Buttons: Press to either <strong>in</strong>crease/decrease temperature on<br />
pre-programmed Modes. Note that some Modes will not allow a variable temperature.<br />
11
BEFORE FIRST USE & ASSEMBLY<br />
1. Before us<strong>in</strong>g the Multicooker for the first time, wipe the <strong>in</strong>terior and<br />
exterior of the Base, the Removable Cook<strong>in</strong>g Pot, and Tempered Glass<br />
Lid with a damp cloth and mild soap. Dry with a soft towel. Wash the<br />
accessories <strong>in</strong> warm, sudsy water and dry thoroughly. Do not clean the<br />
cord set.<br />
2. Place the Removable Cook<strong>in</strong>g Pot <strong>in</strong>to the Multicooker Base. Add racks or<br />
the basket if us<strong>in</strong>g, depend<strong>in</strong>g on your Mode choice.<br />
3. Add <strong>in</strong>gredients to the Removable Cook<strong>in</strong>g Pot.<br />
4. Place the Tempered Glass Lid on the Removable Cook<strong>in</strong>g Pot unless us<strong>in</strong>g<br />
a Mode that operates without the Lid. Do not add alum<strong>in</strong>um foil or vent<br />
the Lid.<br />
5. Press the magnetic breakaway cord <strong>in</strong>to the Base and plug the cord <strong>in</strong>to<br />
the wall outlet.<br />
6. The LCD Display will <strong>in</strong>dicate “0:00” time and “0:00” temperature.<br />
BEFORE FIRST USE & ASSEMBLY<br />
13
STEP BY STEP COOKING<br />
Inside your Multicooker, there are <strong>18</strong> Cook<strong>in</strong>g Modes, <strong>in</strong>clud<strong>in</strong>g the Keep Warm<br />
feature. With the versatility of this Multicooker, the <strong>18</strong> Cook<strong>in</strong>g Modes are only the<br />
start<strong>in</strong>g place to create delicious and amaz<strong>in</strong>g dishes. Various times and temperatures<br />
have been pre-set by the factory, so you can either use the Cook<strong>in</strong>g Modes <strong>in</strong> a simple<br />
1-2-3 Step process, or you can start with a Cook<strong>in</strong>g Mode and add or subtract times<br />
and temperatures to vary the results from there. Note that not all Modes <strong>in</strong>clude<br />
variable times and temperatures and some do not <strong>in</strong>clude Delay Start, as food-borne<br />
bacteria makes these options potentially unsafe with<strong>in</strong> certa<strong>in</strong> Modes.<br />
The follow<strong>in</strong>g Cook<strong>in</strong>g Modes can all be utilized <strong>in</strong> the Multicooker and we encourage<br />
you to experiment, try<strong>in</strong>g different dishes and classic favorites, as well. The sky is the<br />
limit with your Multicooker!<br />
I. Cook with Pre-programmed Cook<strong>in</strong>g Mode<br />
II. Cook with Pre-programmed Cook<strong>in</strong>g Mode & Adjust Time & Temperature<br />
III. Add Delay Start to Cook<strong>in</strong>g Mode<br />
STEP BY STEP COOKING<br />
I. Cook with Pre-programmed Cook<strong>in</strong>g Mode<br />
* Press Function Button until LCD Display <strong>in</strong>dicates desired Cook<strong>in</strong>g Mode.<br />
* The LCD Display will <strong>in</strong>dicate the pre-programmed Time and Temperature<br />
for the Cook<strong>in</strong>g Mode selected.<br />
* Press the Start/Stop Button and the cook<strong>in</strong>g process will beg<strong>in</strong>.<br />
* When the Display Timer reaches the read<strong>in</strong>g, “0:00” the Multicooker will<br />
automatically turn Off.<br />
II. Cook with Pre-programmed Cook<strong>in</strong>g Mode & Adjust Time<br />
and Temperature.<br />
* Select the Cook<strong>in</strong>g Mode as described above.<br />
* Use the + or – Button to <strong>in</strong>crease or decrease the Time and/or<br />
Temperature. Each cook<strong>in</strong>g Mode conta<strong>in</strong>s a time and temperature range.<br />
Check the Step-by-Step <strong>in</strong>structions for the range <strong>in</strong> each sett<strong>in</strong>g.<br />
* Press the Start/Stop Button and the cook<strong>in</strong>g process will beg<strong>in</strong>.<br />
15
CAKE MODE<br />
* When the Display Timer reaches the read<strong>in</strong>g, “0:00” the Multicooker will<br />
automatically turn Off.<br />
NOTE: Press the Start/Stop Button at any time to turn the Multicooker Off, if needed.<br />
Press the Start/Stop Button aga<strong>in</strong> to re-start the Mode and cont<strong>in</strong>ue cook<strong>in</strong>g. The<br />
Timer will re-start the countdown.<br />
Preset Temp Preset Time<br />
Optional Temp<br />
Range<br />
Optional Time<br />
Range<br />
Delay Start<br />
284°F 1 hr N/A 01 m<strong>in</strong> – 90 m<strong>in</strong> Yes<br />
STEP BY STEP COOKING<br />
NOTE: Adjust the Time or Temperature while cook<strong>in</strong>g is <strong>in</strong> process by press<strong>in</strong>g the<br />
+ or – Buttons as desired.<br />
III. Add Delay Start to Cook<strong>in</strong>g Mode<br />
* Select Function to choose desired Cook<strong>in</strong>g Mode<br />
* Select Pre-set Button and <strong>in</strong>crease the time desired to hold the start of the<br />
Cook<strong>in</strong>g Mode. The start can be delayed up to 10 hours.<br />
With the versatile nature of the Multicooker, you can easily and effortlessly bake <strong>in</strong> your<br />
Cooker. Here are some handy h<strong>in</strong>ts for bak<strong>in</strong>g:<br />
ALWAYS use the Removable Cook<strong>in</strong>g Pot for bak<strong>in</strong>g. Place prepared <strong>in</strong>gredients <strong>in</strong> the<br />
Removable Cook<strong>in</strong>g Pot, place the Lid on the Pot and watch carefully dur<strong>in</strong>g bak<strong>in</strong>g<br />
to avoid burn<strong>in</strong>g. Baked foods <strong>in</strong> the Deluxe Multicooker will cook faster than normal<br />
bake times.<br />
The heat<strong>in</strong>g element is close to the bottom of the Removable Cook<strong>in</strong>g Pot. If bak<strong>in</strong>g<br />
a heavy-density food, such as cheesecake, use the <strong>in</strong>terior Rack to ensure the bottom<br />
does not burn before the top of the cake is cooked.<br />
STEP BY STEP COOKING<br />
* After choos<strong>in</strong>g the Delay Start time, the Display time will flash, then<br />
illum<strong>in</strong>ate solidly with the Delay Start countdown. When the Timer reaches<br />
“0:00” the Cook<strong>in</strong>g Mode will start automatically.<br />
SNACKS MODE<br />
FRY MODE<br />
Preset Temp Preset Time<br />
Optional Temp<br />
Range<br />
Optional Time<br />
Range<br />
Delay Start<br />
Preset Temp Preset Time<br />
Optional Temp<br />
Range<br />
Optional Time<br />
Range<br />
Delay Start<br />
320°F 30 m<strong>in</strong> 284 - 356°F 1 m<strong>in</strong> – 30 m<strong>in</strong> Yes<br />
392°F 20 m<strong>in</strong> 302 - 464°F 01 m<strong>in</strong> – 10 hrs No<br />
Pan fry<strong>in</strong>g is especially easy <strong>in</strong> the Multicooker. Add a few <strong>in</strong>ches of oil to the<br />
Removable Cook<strong>in</strong>g Pot (or Fry<strong>in</strong>g Basket) and select the Fry Mode. When the oil is<br />
hot, add chicken pieces, fish fillets, turkey cutlets, pork chops or almost any other<br />
cut of meat, poultry or fish and fry to a golden brown. Turn at least once while fry<strong>in</strong>g<br />
to ensure the food is well-cooked and ensure that you’ve cooked foods all the way<br />
through by us<strong>in</strong>g an <strong>in</strong>stant-read thermometer.<br />
Pan fry<strong>in</strong>g potatoes or other vegetable comb<strong>in</strong>ations is equally easy – try sweet potato<br />
cubes, fried and dusted with c<strong>in</strong>namon just before serv<strong>in</strong>g. Or make hash browned<br />
potatoes to serve with morn<strong>in</strong>g omelets. Use pan fry<strong>in</strong>g to add texture and flavor to all<br />
your family favorites!<br />
Snacks and appetizers can easily be prepared <strong>in</strong> the Multicooker. Add one tablespoon<br />
oil to the Removable Cook<strong>in</strong>g Pot and let your imag<strong>in</strong>ation and creativity build perfect<br />
snacks for any occasion. Try quesadillas and guacamole for football parties, perfectly<br />
heated egg rolls, warm tacquitos with sour cream or twice-baked potato sk<strong>in</strong>s. The<br />
follow<strong>in</strong>g h<strong>in</strong>ts and tips will help make your snacks wonderfully flavorful and cooked<br />
to perfection!<br />
Pour 1-2 tablespoons oil <strong>in</strong>to the Removable Cook<strong>in</strong>g Pot before add<strong>in</strong>g foods.<br />
Add uniformly chopped onions, garlic, celery, carrots, herbs and other <strong>in</strong>gredients as<br />
desired.<br />
Use a long-handled wooden or heat-proof spoon or tongs to consistently turn and<br />
move the food around <strong>in</strong> the heated Pot. The foods can easily burn, so remember to<br />
turn them.<br />
Add sauces, w<strong>in</strong>e, soy sauce or small amounts of season<strong>in</strong>g as needed. Check food<br />
frequently to avoid burn<strong>in</strong>g.<br />
16<br />
17
DEFROST MODE<br />
KEEP WARM MODE<br />
Preset Temp Preset Time<br />
Optional Temp<br />
Range<br />
Optional Time<br />
Range<br />
Delay Start<br />
Preset Temp Preset Time<br />
Optional Temp<br />
Range<br />
Optional Time<br />
Range<br />
Delay Start<br />
176°F 1 hr N/A 30 m<strong>in</strong> – 3 hrs Yes<br />
176°F 2 hrs N/A 30 m<strong>in</strong> – 10 hrs Yes<br />
STEP BY STEP COOKING<br />
When ready to defrost meat, produce, or any frozen packaged item, unwrap the<br />
<strong>in</strong>gredients and place <strong>in</strong> the Removable Cook<strong>in</strong>g Pot. Follow the <strong>in</strong>structions for<br />
select<strong>in</strong>g the Defrost Mode and change the time for defrost<strong>in</strong>g, if desired. Add a Delay<br />
Start to choose when defrost<strong>in</strong>g beg<strong>in</strong>s.<br />
CHOCOLATE MODE<br />
The Keep Warm Mode is a great way to “heat and hold” foods until everyone is ready to<br />
eat. The Multicooker offers this convenience for up to 10 hours.<br />
Refer to the safety <strong>in</strong>formation at: www.foodsafety.gov for full details regard<strong>in</strong>g the<br />
process of safely keep<strong>in</strong>g food warm.<br />
PIZZA MODE<br />
STEP BY STEP COOKING<br />
Preset Temp Preset Time<br />
Optional Temp<br />
Range<br />
Optional Time<br />
Range<br />
Delay Start<br />
Preset Temp Preset Time<br />
Optional Temp<br />
Range<br />
Optional Time<br />
Range<br />
Delay Start<br />
140°F 2 hrs 140 - 158°F 30 m<strong>in</strong> – 4 hrs N/A<br />
320°F 40 m<strong>in</strong> 284 - 356°F 1 m<strong>in</strong> – 1 hr Yes<br />
There are few sweet treats more luscious than warm, melted chocolate! This Mode<br />
allows you to melt and hold melted chocolate at the perfect temperature for fondue<br />
or use <strong>in</strong> other recipes. Use a high-quality chocolate for melt<strong>in</strong>g and add your favorite<br />
snack foods for dipp<strong>in</strong>g – try squares of pound cake, fresh strawberries, raspberries,<br />
shortbread cookies and other dessert delights. Use the Fondue Rack after dipp<strong>in</strong>g to<br />
allow the foods to drip before serv<strong>in</strong>g.<br />
A hot homemade pizza is one of the world’s greatest comfort food! Start with<br />
homemade dough (or frozen, thawed dough), place on the <strong>in</strong>terior Rack and parbake<br />
on the Pizza Mode for 15 m<strong>in</strong>utes at 320°F. Remove the dough and Rack and<br />
add topp<strong>in</strong>gs of your choice. Replace the pizza on the Rack and select the Pizza<br />
Mode aga<strong>in</strong>. Bake at the preset sett<strong>in</strong>gs and remove. Let stand for a few m<strong>in</strong>utes<br />
before serv<strong>in</strong>g.<br />
In this specialty Mode, you can also melt cheese to the perfect low temperature for<br />
fondue or simply as a dip. Use a soft, melt<strong>in</strong>g type cheese for best results. Spear bread<br />
cubes on fondue forks to soak up warm cheese, or try cheese with pretzels, crackers<br />
or other yummy comb<strong>in</strong>ations. Use the Fondue Rack and Fondue Forks to create an<br />
<strong>in</strong>stant party!<br />
Preset Temp Preset Time<br />
TOAST MODE<br />
Optional Temp<br />
Range<br />
Optional Time<br />
Range<br />
Delay Start<br />
320°F 20 m<strong>in</strong> N/A 1 m<strong>in</strong> – 30 m<strong>in</strong>s No<br />
Although toast<strong>in</strong>g is typically done with a heat<strong>in</strong>g element on top of the food, this<br />
Multicooker will take care of toast<strong>in</strong>g <strong>in</strong> a flash us<strong>in</strong>g the lower heat<strong>in</strong>g element! For<br />
example, just add thick slices of buttered bread to the Removable Cook<strong>in</strong>g Pot and<br />
select the pre-set temperature and time. Flip the bread slices after 10 m<strong>in</strong>utes and<br />
add th<strong>in</strong> slices of provolone cheese. Wait about 5-10 m<strong>in</strong>utes, remove slices with a<br />
spatula and top each slice with fresh tomato slices. Toasted never tasted so good!
SOUP MODE<br />
Preset Temp Preset Time<br />
Optional Temp<br />
Range<br />
Optional Time<br />
Range<br />
Delay Start<br />
212°F 3 hrs N/A 30 m<strong>in</strong> – 4 hrs Yes<br />
STEP BY STEP COOKING<br />
Soup practically cooks itself <strong>in</strong>side your Multicooker! Use the Soup Mode to set the<br />
time and temperature and walk away until it’s done. Here are some handy tips for<br />
usage:<br />
ALWAYS use the Removable Cook<strong>in</strong>g Pot. Select cuts of meat such as chuck roast and<br />
chuck steak can be cubed and added to potatoes, gra<strong>in</strong>s or rice for hearty, yet tender<br />
meals. Meat should be no more than 2-<strong>in</strong>ches thick and cut <strong>in</strong>to 1-<strong>in</strong>ch cubes.<br />
For a quick twist to save time, add frozen, thawed mixed vegetables for a nutritious<br />
boost to soup. Try easy classic recipes such as Chicken & Rice soup, Old-Fashioned Beef<br />
& Barley Soup or Split Pea & Bacon Soup. Each is hearty enough to serve with a salad<br />
and consider a full meal. On cold w<strong>in</strong>ter nights, serve soups with chicken or turkey over<br />
rice or pasta for <strong>in</strong>credible one-dish d<strong>in</strong>ners.<br />
STEP BY STEP COOKING<br />
VEGETABLE MODE<br />
YOGURT MODE<br />
Preset Temp Preset Time<br />
Optional Temp<br />
Range<br />
Optional Time<br />
Range<br />
Delay Start<br />
Preset Temp Preset Time<br />
Optional Temp<br />
Range<br />
Optional Time<br />
Range<br />
Delay Start<br />
284°F 25 m<strong>in</strong> 284 - 356°F 1 m<strong>in</strong> – 10 hrs Yes<br />
104°F 4 hrs N/A 1 m<strong>in</strong> – 10 hrs N/A<br />
Us<strong>in</strong>g little to no oil or butter, place your favorite garden-fresh vegetables <strong>in</strong> the<br />
Removable Cook<strong>in</strong>g Pot. Add a few tablespoons water and replace the Lid on top.<br />
Select the Vegetable Mode and watch while your vegetables cook to perfection. Try<br />
a medley of colorful vegetables or use this Mode to sauté celery, onions and carrots<br />
before mak<strong>in</strong>g soup.<br />
Homemade yogurt is a tart and tangy treat that is <strong>in</strong>credibly easy to make <strong>in</strong> the<br />
Multicooker. Use this Cook<strong>in</strong>g Mode for a m<strong>in</strong>imum of 4 hours and up to 10 hours to<br />
make thick, creamy and rich homemade yogurt.<br />
Place the Removable Cook<strong>in</strong>g Pot <strong>in</strong>to the Base. Fill up to halfway with water,<br />
depend<strong>in</strong>g on how many jars of yogurt you will be cook<strong>in</strong>g. Place the <strong>in</strong>terior Rack<br />
or the Steam<strong>in</strong>g Rack <strong>in</strong> the Pot and add filled and lidded jars of yogurt <strong>in</strong>to the<br />
Removable Cook<strong>in</strong>g Pot. Set the Yogurt Mode for cook<strong>in</strong>g.<br />
Follow your recipe directions carefully to ensure complete success. Remove jars when<br />
done and cool, then refrigerate until us<strong>in</strong>g.<br />
20<br />
21
DEEP FRY MODE<br />
STIR-FRY MODE<br />
Preset Temp Preset Time<br />
Optional Temp<br />
Range<br />
Optional Time<br />
Range<br />
Delay Start<br />
Preset Temp Preset Time<br />
Optional Temp<br />
Range<br />
Optional Time<br />
Range<br />
Delay Start<br />
410°F 40 m<strong>in</strong> 356 - 410°F 1 m<strong>in</strong> – 2 hrs No<br />
464°F 15 m<strong>in</strong> 284 - 464°F 1 m<strong>in</strong> – 30 m<strong>in</strong> No<br />
STEP BY STEP COOKING<br />
Deep Fry<strong>in</strong>g <strong>in</strong> the Multicooker offers the perfect fry<strong>in</strong>g results – crispy and light<br />
exteriors with a tender <strong>in</strong>terior to all your foods. Use the Fry<strong>in</strong>g Basket and EasyLift<br />
Handle to hold your <strong>in</strong>gredients and fit exactly right <strong>in</strong>to the Multicooker. The secret<br />
to perfect results is the quick, high heat used for fry<strong>in</strong>g and, with the Multicooker,<br />
you’ll f<strong>in</strong>d the pre-set temperature is hot, but not smok<strong>in</strong>g - perfect for your success.<br />
Choose appetizers, snacks, chicken or French fries and be prepared to receive all the<br />
compliments of your family and friends.<br />
The secret to a perfect Stir Fry is to prep the meat and vegetables before start<strong>in</strong>g.<br />
Slice or cut each <strong>in</strong>to very th<strong>in</strong> pieces <strong>in</strong> order to cook quickly at high heat. Stir while<br />
cook<strong>in</strong>g, toss<strong>in</strong>g food <strong>in</strong>gredients with soy sauce, sesame oil and season<strong>in</strong>gs for a quick<br />
boost of flavor. Serve right away – steam<strong>in</strong>g hot is best!<br />
HOT POT MODE<br />
STEP BY STEP COOKING<br />
For tips to success, consider the follow<strong>in</strong>g: use similar sized foods so fry<strong>in</strong>g times are<br />
the same for each batch. Do not fill the oil <strong>in</strong> the Multicooker beyond the MAX Fill L<strong>in</strong>e<br />
<strong>in</strong>dicator. Do not use the Lid while deep fry<strong>in</strong>g.<br />
Do not over-crowd the Fry<strong>in</strong>g Basket, remove moisture from the outside of foods,<br />
batter quickly and let foods dra<strong>in</strong> before fry<strong>in</strong>g, and keep the oil clean by remov<strong>in</strong>g bits<br />
of cooked foods. Keep an eye on foods as they fry and turn each with tongs as needed.<br />
Preset Temp Preset Time<br />
HOT CEREAL MODE<br />
Optional Temp<br />
Range<br />
Optional Time<br />
Range<br />
Delay Start<br />
Preset Temp Preset Time<br />
Optional Temp<br />
Range<br />
Optional Time<br />
Range<br />
Delay Start<br />
428°F 1 hr 248 - 464°F 1 m<strong>in</strong> – 10 hrs Yes<br />
This very popular form of Asian cook<strong>in</strong>g is for all soup-style entrées that conta<strong>in</strong> a<br />
bit of cooked meat, rice or udon noodles, freshly sliced vegetables and, often, hard<br />
cooked eggs. A hot pot meal may also conta<strong>in</strong> large pieces of chicken or fish and other<br />
flavors comb<strong>in</strong>ed with rice. The hot pot creates a one-dish d<strong>in</strong>ner that is sure to satisfy<br />
everyone <strong>in</strong> the family.<br />
230°F 1 hr 212 - 284°F 1 m<strong>in</strong> – 90 m<strong>in</strong> Yes<br />
Your Deluxe Multicooker will prepare hot cereal perfectly! Because there are many<br />
types of hot cereal and cooked gra<strong>in</strong>s, refer to your package <strong>in</strong>structions for exact<br />
measurements of gra<strong>in</strong>-to-liquid for best results.<br />
Try <strong>in</strong>ventive and fun dishes – add jam, fresh fruit, dried fruit and nuts for <strong>in</strong>terest.<br />
ALWAYS use the Removable Cook<strong>in</strong>g Pot when mak<strong>in</strong>g hot cereal. Do not pre-soak<br />
gra<strong>in</strong>s, but r<strong>in</strong>se some <strong>in</strong> water, as desired. Add salt, if desired.<br />
Add 1 tablespoon butter to the hot cereal before cook<strong>in</strong>g to help keep porridge from<br />
stick<strong>in</strong>g and to add a depth of rich flavor.<br />
Add the Keep Warm Mode for up to 4 hours, if desired. Hot cereal will hold safely for<br />
this length of time at a low warm temperature.<br />
22
MEAT MODE<br />
GRILL MODE<br />
Preset Temp Preset Time<br />
Optional Temp<br />
Range<br />
Optional Time<br />
Range<br />
Delay Start<br />
Preset Temp Preset Time<br />
Optional Temp<br />
Range<br />
Optional Time<br />
Range<br />
Delay Start<br />
320°F 30 m<strong>in</strong> 248 - 356°F 1 m<strong>in</strong> to 10 hrs N/A<br />
464°F 30 m<strong>in</strong> 248 - 464°F 1 m<strong>in</strong> to 30 m<strong>in</strong> Yes<br />
STEP BY STEP COOKING<br />
The most tender and delicious large cuts of meat can be easily prepared us<strong>in</strong>g your<br />
Multicooker. Beef cuts such as chuck roasts and round tip roasts are economical,<br />
yet hearty and satisfy<strong>in</strong>g when cooked to perfection <strong>in</strong> the Meat Mode. Try a whole<br />
prepared chicken, stuffed with herbs and orange slices, a pork shoulder roast with<br />
garlic slices or a bone-<strong>in</strong> ham slathered with honey…no matter what cut you choose,<br />
your Meat Mode will make it super easy. The follow<strong>in</strong>g h<strong>in</strong>ts and tips will help along<br />
the way:<br />
• Always use an <strong>in</strong>stant-read meat thermometer to ensure your meat has cooked to the<br />
proper temperature.<br />
Grill<strong>in</strong>g is the perfect midweek cook<strong>in</strong>g choice when time is of the essence and<br />
everyone is hungry! Add one tablespoon oil to the Removable Cook<strong>in</strong>g Pot and use<br />
the preset temperature and time for hamburger patties, steaks, chops and small slider<br />
turkey burgers. Turn burgers at least once to cook thoroughly and watch carefully to<br />
avoid burn<strong>in</strong>g foods as they grill.<br />
Slice vegetables or fruit for grilled flavors as well; try add<strong>in</strong>g one tablespoon butter to<br />
the Removable Cook<strong>in</strong>g Pot, add p<strong>in</strong>eapple slices and grill for a few m<strong>in</strong>utes on each<br />
side to soften. Top with a spr<strong>in</strong>kle of brown sugar and wait until it melts. Serve over ice<br />
cream for a delicious treat.<br />
STEP BY STEP COOKING<br />
• Make sure before cook<strong>in</strong>g that your cut of meat fits the Removable Cook<strong>in</strong>g Pot with<br />
the Lid securely <strong>in</strong> place. Place a bed of sliced onions on the bottom of the Pot, rest<strong>in</strong>g<br />
the roast on top, for superior flavor. Or create a bed of quartered potatoes or sliced<br />
lemons for poultry. The options are endless and the meat will be juicy and tender<br />
when ready to eat.<br />
• Pour 1-2 tablespoons canola oil <strong>in</strong> the Removable Cook<strong>in</strong>g Pot. Cover with cleaned<br />
and quartered carrots, onions, potatoes or turnips and place meat on top of the<br />
vegetables. Add 2-3 cups broth and roast your one-dish d<strong>in</strong>ner until hot and<br />
deliciously hearty.<br />
• When done cook<strong>in</strong>g, move the roast to a cutt<strong>in</strong>g board and wrap or tent with<br />
alum<strong>in</strong>um foil to rest for 10 m<strong>in</strong>utes. This will allow the meat juices to settle. Slice and<br />
serve after rest<strong>in</strong>g.<br />
• If you’d like to make gravy, use the Fry Mode to quickly heat the liquid <strong>in</strong> the<br />
Removable Cook<strong>in</strong>g Pot after remov<strong>in</strong>g the roast. Stir and add ½ cup water mixed<br />
with 1-2 tablespoons cornstarch or flour to thicken the gravy. Add season<strong>in</strong>gs to<br />
flavor and cont<strong>in</strong>ue stirr<strong>in</strong>g and heat<strong>in</strong>g for 5 m<strong>in</strong>utes.<br />
24
STEAM MODE<br />
Preset Temp Preset Time<br />
Optional Temp<br />
Range<br />
Optional Time<br />
Range<br />
Delay Start<br />
428°F 15 m<strong>in</strong> 248 - 464°F 1 m<strong>in</strong> – 30 m<strong>in</strong> Yes<br />
Steam<strong>in</strong>g reta<strong>in</strong>s essential vitam<strong>in</strong>s and m<strong>in</strong>erals that can be lost through other<br />
cook<strong>in</strong>g methods. Steam<strong>in</strong>g also offers very tender results and, as such, is perfectly<br />
suited to seafood, vegetables and other foods that break down quickly with moist<br />
heat. Pour water <strong>in</strong>to the Removable Cook<strong>in</strong>g Pot below the Steam<strong>in</strong>g Rack. Place<br />
foods either directly on the Rack or <strong>in</strong> a small, heat-resistant cookware on the Rack.<br />
The follow<strong>in</strong>g h<strong>in</strong>ts and tips will help you create quick and easy steamed success with<br />
your Multicooker:<br />
STEP BY STEP COOKING<br />
• ALWAYS use the Steam<strong>in</strong>g Rack <strong>in</strong>side the Removable Cook<strong>in</strong>g Pot for steam<strong>in</strong>g.<br />
Always use the Removable Cook<strong>in</strong>g Pot as electrical shock can occur if the heat<strong>in</strong>g<br />
element is exposed to moisture or liquid.<br />
• Place the Rack <strong>in</strong>side the Removable Cook<strong>in</strong>g Pot, then place food directly on the rack<br />
or <strong>in</strong>side a heatproof plate or dish on top of the rack. Make sure the Tempered Glass<br />
Lid can close completely before start<strong>in</strong>g the Steam Mode.<br />
• Place at least 2-<strong>in</strong>ches water <strong>in</strong> the Removable Cook<strong>in</strong>g Pot to allow the Cooker to<br />
steam efficiently. If steam<strong>in</strong>g for more than 30 m<strong>in</strong>utes, fill the water until it reaches<br />
the top of the Rack or bottom of the cook<strong>in</strong>g dish. Check frequently to ensure the Pot<br />
has water and add water, if needed.<br />
• Steamed desserts turn out beautifully <strong>in</strong> the Multicooker. Place the Steam<strong>in</strong>g Rack<br />
<strong>in</strong> the bottom of the Removable Cook<strong>in</strong>g Pot. Pour at least 3 cups water <strong>in</strong>to the Pot<br />
to ensure the Pot does not become dry dur<strong>in</strong>g bak<strong>in</strong>g. Place a heat-proof dish with<br />
your prepared <strong>in</strong>gredients onto the rack. Place the Lid on top and steam per your<br />
recipe. Watch to ensure the Pot has enough water to operate correctly and, if needed,<br />
carefully add water.<br />
27
MAINTENANCE<br />
ALWAYS allow the Multicooker to cool completely before clean<strong>in</strong>g.<br />
Unplug the Multicooker before clean<strong>in</strong>g.<br />
After each use, clean and dry the Multicooker. Use a damp, soapy cloth to clean<br />
the Cooker Base and Tempered Glass Lid. Use only clear water on a cloth to<br />
remove soap. DO NOT immerse the Base <strong>in</strong> water. Use non-abrasive soap only.<br />
After each use, the Removable Cook<strong>in</strong>g Pot may be placed <strong>in</strong> the dishwasher or<br />
washed by hand with the other parts.<br />
MAINTENANCE<br />
29
WARRANTY & SERVICE<br />
This Limited Warranty is for one full year from the date of purchase. It is<br />
applicable to the orig<strong>in</strong>al purchaser only and is not transferable to a third party<br />
user. Repair or replacement of defective parts is solely at the seller’s discretion.<br />
In the event that repair isn’t possible, the seller will replace the product/part. If<br />
product repair/replacement won’t suffice, the seller has the option of refund<strong>in</strong>g<br />
the cash value of the product or component returned.<br />
Product defects not covered under the Warranty provisions <strong>in</strong>clude normal<br />
wear and damage <strong>in</strong>curred from use or accidental negligence, misuse of<br />
<strong>in</strong>struction specifications or repair by unauthorized parties. The manufactur<strong>in</strong>g<br />
company is not liable for any <strong>in</strong>cidental or consequential damages <strong>in</strong>curred by<br />
such circumstances.<br />
WARRANTY & SERVICE<br />
For Customer Service or Questions, Please call: 888-552-0033<br />
www.gourmia.com<br />
31
www.gourmia.com


