

6 Steps To A Radio-Ready Song
6 Steps To A Radio-Ready Song
6 Steps To A Radio-Ready Song

Create successful ePaper yourself
Turn your PDF publications into a flip-book with our unique Google optimized e-Paper software.
RecordingRevolution.com<br />
6 <strong>Steps</strong> <strong>To</strong> A <strong>Radio</strong>-<strong>Ready</strong> <strong>Song</strong><br />
by Graham Cochrane<br />
Thank you for downloading this guide! As a singer/songwriter myself, I know the goal of<br />
every musician in the home studio is to start creating killer songs - songs that sound so<br />
good they could be played on the radio, TV, or just about anywhere. <br />
You probably have great song ideas already but simply aren’t able to get your recordings<br />
to translate from your head to the real world and sound professional. I’m here to help you<br />
with that.<br />
<br />
In this brief guide I’m going to walk you through the 6 steps that every radio-ready song<br />
must go through in order to sound its best. <br />
Even if your music will never be heard on the radio, you still want it to sound good<br />
enough to hang with “the big boys and girls”.<br />
My promise to you is that after reading this guide, you’ll know exactly what it takes to get<br />
the best sounding recordings in your home studio and you’ll be motivated to get back to<br />
work and start creating your best music yet. <strong>Ready</strong> to get started? Let’s dive in<br />
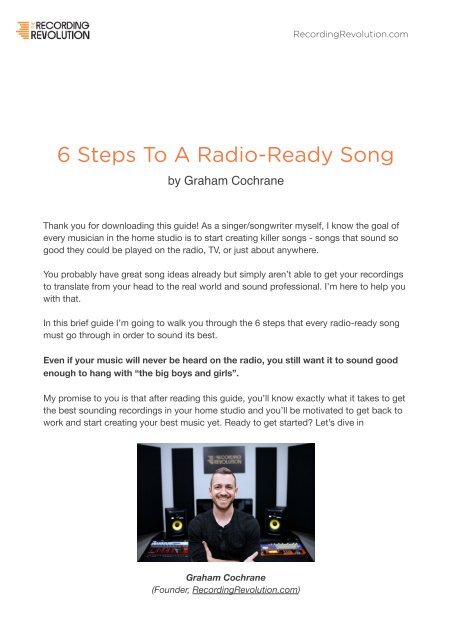
Graham Cochrane<br />
(Founder, RecordingRevolution.com)
STEP 1: Lyrics & Melody<br />
RecordingRevolution.com<br />
The best recordings in the world start long before the recording phase. They begin with<br />
great lyrics and killer melodies.<br />
The best vocal microphone in the world is useless if the song you’re singing has a<br />
boring or hard to remember melody, cumbersome lyrics, and overall bad flow. And<br />
yet it never ceases to amaze me how many home studio musicians assume they have this<br />
part on lock and want to begin talking gear or recording technique.<br />
Before you even think about recording, you must write a great song. Otherwise you’ll<br />
have nothing worth recording and sharing with the world.<br />
Now, what constitutes a “great” song is highly subjective, but allow me to offer what I believe<br />
are the three secrets to crafting killer songs:<br />
<strong>Song</strong>writing Secret #1 - Great songs have memorable melodies.<br />
Melodies drive songs and your song must be memorable, it must get stuck in people’s<br />
heads. So your melody must be memorable. Is your melody par for the course and average?<br />
If so, it’ll get lost with every other song. This is unacceptable. Focus on crafting a<br />
melody that sticks with you long after you hear it.<br />
<strong>Song</strong>writing Secret #2 - Great songs have memorable lyrics.<br />
While melodies drive songs, lyrics lock them into the brain. And don’t worry about writing<br />
the best lyrics in the world - all you need is one really good line or phrase that stays with<br />
people. Do you have a unique or interesting concept, phrase, or line that you can squeeze<br />
into your song? Add that to a powerful memorable melody and you’re on your way!<br />
<strong>Song</strong>writing Secret #3 - Great songs have something surprising.<br />
Most songs follow a predictable pattern (verse, chorus, verse, chorus, bridge, chorus) or<br />
some variations thereof - and that’s OK. But what’s critical is that you leave one surprising<br />
or interesting moment in there for the listener. This could be a simple break down in the<br />
song, a unique sound, or vocal turn. Give the audience that one moment that says “This<br />
is cool, this is different.”
RecordingRevolution.com<br />
That’s it! No matter what genre of music you write - EDM, hip-hop, rock, pop, country,<br />
blues, folk, whatever - if you ensure that each song you craft has memorable melodies, a<br />
memorable lyric or two, and at least one surprising element somewhere inside, you’ll be<br />
sure to have written a song that can compete with the best out there.<br />
The good news about songwriting is this: it can be learned and you get better over<br />
time.<br />
That’s good news because it means you don’t have to be born a great songwriter to write<br />
great songs. You can become great over time. Your songs will get better. Just make sure<br />
each one contains all three “secret” elements.<br />
The bad news about songwriting is that it takes work. It isn’t simply waiting around for<br />
inspiration to strike - or the opposite, just settling for easy to write mediocre songs.<br />
Rather songwriting is work - and if the best songwriters in the world view it that way, so<br />
should you.<br />
Now that you have a great song, it’s important to move on and implement Step 2. Sadly,<br />
this is the most commonly skipped step in all of amateur music making.<br />
<strong>Song</strong>writing Tip: Do you write lyrics first or music? I prefer to write the music first, specifically<br />
the vocal melodies - note for note - before ever thinking about lyrics. Why? Because<br />
they create a wonderful “limitation” and framework for lyric writing.
RecordingRevolution.com<br />
STEP 2: Arrangement & Production<br />
Of all 6 steps in the song creation process, this is the most commonly skipped or rushed<br />
through.<br />
And yet in many ways it’s the most fun and most helpful of them all as it has major implications<br />
on the remaining 4 steps. If you can get this step right your song has the most<br />
potential to be liked by the most people.<br />
What are we talking about? We’re talking about the arrangement of your song. The flow,<br />
the layout of instrumentation. This also includes any and all production decisions as it relates<br />
to beats, loops, and virtual instruments.<br />
Let me ask you a question. If you were to hear your song on the radio, would you<br />
want to change the station after the first verse and chorus? Be honest.<br />
Most songs are super repetitive from a songwriting standpoint. And like I mentioned<br />
above, that’s OK. What’s NOT OK is a simple repetitive song that has a boring arrangement.<br />
One in which every verse sounds the same and every chorus sounds the same.<br />
Think about it - with most popular music, after you’ve heard the first verse and chorus<br />
(the hook) you pretty much know the entire song. So why keep listening?<br />
On most great radio-ready songs, the arrangement is so interesting and always changing<br />
that you DO want to keep listening. How do they do it? By strategically introducing new<br />
and different elements to the song as it progresses. <br />
Here are some common examples of elements YOU can introduce into YOUR songs to<br />
keep the arrangement/production interesting:<br />
● Vocal harmonies<br />
● Vocal effects (telephone vocal, distortion vocal, etc)<br />
● Percussion (shakers/tambourines)<br />
● Synths/strings/pads<br />
● Doubled (or tripled) vocals<br />
● Doubled guitar parts<br />
● Half-time feel or tempo changes
RecordingRevolution.com<br />
Also keep in mind that great songs with killer arrangements don’t just add elements to the<br />
song, they strategically take things away to keep you listening. Some examples include:<br />
● Dropping out all instruments except vocals and drums<br />
● Cutting out everything but the vocal and one guitar/piano<br />
● Removing the bass guitar/synth for a verse<br />
The goal of a good arrangement is to take the listener on a journey and keep them<br />
engaged and excited every step of the way.<br />
You do this by introducing (and removing) different elements from section to section, from<br />
first note to last beat. No two parts of your song should be exactly the same. Listeners’<br />
attention spans are becoming shorter and shorter and they will “move on” if the song<br />
doesn’t progress.<br />
Personally, creating a great arrangement of my own songs creates a tension. I want to<br />
feature all the cool guitar parts, vocal harmonies, and drum break downs - but I can’t do it<br />
all at once. I have to force myself to save some elements for later in the song, trusting<br />
that the surprise and wait will be worth it.<br />
If you can take your well written song and systematically walk through each section (intro,<br />
verse, chorus, verse 2...) and ask yourself this question, you’ll be fine - “What is new or<br />
different about this section?”<br />
Once you can confidently say each moment of your song is fresh, engaging, and different<br />
(even in a small way) you’re ready to begin Step 3.<br />
Arranging Challenge: I want to see how good your ears are (and how much you’ve been<br />
paying attention to Step 2). Take a listen to this real life demo of a song and then the final<br />
“real” recording. How many different arrangement elements can you notice? Write them<br />
each down.
RecordingRevolution.com<br />
STEP 3: Recording<br />
We’ve written a great and memorable song. We’ve crafted a powerful and engaging<br />
arrangement. Now we come to first step that actually deals with the sonics of capturing a<br />
great recording. Finally! <br />
When it comes to sonics (i.e. how your audio will actually sound in the end), no step is<br />
more important than this one. The recording (or “tracking”) phase is what makes or<br />
breaks your final product.<br />
Ironically, no sooner do new home studio owners get into recording do they start to believe<br />
that the mixing phase (Step 5) is where all the “magic” happens. They grow disillusioned<br />
with recording, thinking it purely as a quick “capture the performance” phase and<br />
want to move on to bigger and better things.<br />
I know this is true because I deal with tens of thousands of students every month who<br />
express this sentiment. I also know this to be true, because I’m the same way!<br />
But if you want a radio-ready song, please hear this important truth: the recording<br />
phase is truly where the magic happens - so don’t rush it and don’t settle.<br />
Let’s first assume you already have the necessary equipment to begin recording. If you<br />
don’t (or are simply unsure if you have what you need) here are the only 5 things you need<br />
to get going.<br />
Also if you are looking for some specific setups, here is a $300 studio rig you can use.<br />
So, assuming you have the gear in place and your song is written and arranged - here are<br />
the three key recording truths you need to keep in mind in order to get great recordings in<br />
your home studio…
RecordingRevolution.com<br />
Recording Truth #1 - Mic Placement Is Everything.<br />
What matters more than what mic you use to record is where you put the mic. This is<br />
called mic placement - and it’s the difference maker. Did you know that if you move your<br />
mic an inch or two closer or farther away from your instrument or voice it can drastically<br />
change the bass response? Or that by angling a mic 90 degrees you can turn up (or<br />
down) the brightness?<br />
Don’t just settle for the first place you put the mic. Experiment and tweak until you are<br />
getting the sound you hear in your head. <strong>To</strong> help you out, here are 4 ways to get more out<br />
of your current microphone(s).<br />
Recording Truth #2 - Recording <strong>To</strong>o Loud Is A Problem.<br />
One of the most common mistakes I see people making in the home studio is that they<br />
record their tracks too hot (too loud). This is because somewhere along the line someone<br />
told them to record as loud as you can without clipping (that red light at the top of your<br />
meters). Unfortunately because digital is different than analog, that’s horrible advice.<br />
<strong>To</strong> get a cleaner and more musical recording, grab the gain or volume knob on your audio<br />
interface or preamp and turn it down so that your audio signal inside your software is<br />
peaking at around 50% to 75% of the way up the meter. No louder. Your recordings will<br />
sound cleaner, clearer, and more musical if you follow this advice.<br />
Recording Truth #3 - You Must Think Like A Producer.<br />
Traditionally, major recording sessions involved not just a recording engineer but also a<br />
producer. And what does the producer do? He casts the vision for what the recording<br />
should sound like. While the engineer would choose the right mic, placement, and preamp<br />
level, the producer would map out what kind of sound everyone was shooting for.<br />
<br />
<strong>To</strong>day in your home studio, YOU are the producer, not just the engineer. You have to wear<br />
both hats. And what that means is you must map out what you want the song(s) to sound<br />
like before you ever hit the record button. Move away from asking things like “What do<br />
good drums sound like?” to asking “What do I want these drums to sound like?” <br />
Commit to a sound/vibe in your head and then execute.
RecordingRevolution.com<br />
If you let your recording sessions be shaped by those three truths, you will succeed. If<br />
you spend time playing with the mic placement until you get the sound you want, record<br />
at a nice conservative volume, and do everything from a producer’s mindset - committed<br />
to a sonic vision, your song will sound great.<br />
Maybe not at first - but over time you will get better. <br />
That’s the good news about recording: it’s an art form, not a science. You can learn<br />
it and improve.<br />
Once you’ve recorded all the tracks you want for your song it’s time to move to Step 4<br />
and tighten up those performances so they are a bit more polished.<br />
Recording Challenge: <strong>To</strong> help you think like a producer and record better sounding<br />
tracks, I want you to do some homework. Take 20 minutes today to listen to 3 of your favorite<br />
songs by your favorite artists and write down descriptive words for their sound. How<br />
would you describe the drum sounds? The vocal sounds? What elements do you like or<br />
not like? Why?
RecordingRevolution.com<br />
Step 4 - Editing<br />
One thing I love about digital recording these days is the power of being able to quickly<br />
and easily tighten up and edit my performances. This means I have yet another tool to<br />
help sound my best in the studio. Welcome to my love for editing!<br />
Before digital recording, editing was a pain in the neck. You literally had to take a razor<br />
blade and chop up tape. Then you had to tape the tape back together at the right spot.<br />
Insane right?!<br />
These days you can cut, copy, move, slide, or adjust any track effortlessly and all the<br />
while keep things sounding natural.<br />
The goal for the editing phase is to simply clean up, tighten up, and tune up anything<br />
that isn’t quite up to your standards. I recommend you do this after all recording<br />
is done and before you move on to the mixing phase.<br />
The problem with the editing power all modern recording software (DAWs) has these days<br />
is you can easily go overboard and suck the life and vibe out of your tracks. That’s not the<br />
goal here. Instead I want to give you the four editing moves I do on every song that can<br />
help make your recordings sound more professional but without sounding robotic…
RecordingRevolution.com<br />
Editing Move #1 - Comp Your Multiple Takes.<br />
Did you know that in most software these days you can record multiple takes on one<br />
track? For example, when singing the lead vocal you can record three different takes and<br />
keep them all. Then when you get here to the editing phase, you can do what’s called<br />
comping (creating a composite track) to give you the best parts of each of those takes.<br />
Before doing anything you want to comp together your lead vocal, drum takes, bass<br />
recording, or whatever you captured multiple takes on. Here’s an example of how I do this<br />
with drums.<br />
Editing Move #2 - Tune Your Vocals.<br />
I’ve worked with good singers and I’ve worked with bad singers and I can tell you that I<br />
can only count on one hand the number of times a vocal performance didn’t need any<br />
pitch correction at all.<br />
Whether you use something like Autotune or Melodyne, pitch correction is a normal and<br />
helpful tool in the studio. Why? Because singing with headphones on is an unnatural environment.<br />
Even the best of singers can struggle to sing perfectly in tune in the studio. And<br />
having notes that are obviously sharp or flat can be a huge distraction to a recording.<br />
I recommend you embrace pitch correction, but apply it only as needed - where the vocals<br />
are a distraction. A little here can go a long way!<br />
Editing Move #3 - Clean Up Vocal Breaths.<br />
Once you’ve tuned up your vocals I highly recommend you go through and clean up any<br />
distracting vocal breaths. This will give you a more professional and polished presentation<br />
of your vocal performance.<br />
I can’t tell you the number of songs I’ve listened to by students where I’m distracted by<br />
the lip smacks or random breaths - no matter how good the rest of the mix sounds. Simple<br />
vocal breath cleanup can make all the difference.<br />
Now, some people like to edit out every breath, while others leave it all in. I prefer a hybrid<br />
approach that gives you the best of both worlds.
RecordingRevolution.com<br />
Editing Move #4 - Tighten Up Drums & Bass.<br />
With the power to edit everything the temptation comes to actually edit everything! I don’t<br />
recommend it. Instead, once your vocal is cleaned up and tuned up I recommend you go<br />
for a final big win, which is to manually tighten up your drums and bass tracks where<br />
necessary.<br />
The key here is to do it manually and to do it only where necessary. Don’t make the mistake<br />
I used to make which was to try and quantize every drum hit and bass pluck so that<br />
they were all locked to the grid. Rather, move through the song systematically and manually<br />
cut and slide any notes where you need them.<br />
The big takeaway for editing is this: a little touch up goes a long way, so keep things<br />
natural and subtle.<br />
When you can listen through your recorded tracks and not have anything jump out at you<br />
tuning or timing wise, you know you’re ready to move on to Step 5.<br />
Editing Tip: When editing multitrack drums (i.e. kick, snare, overheads all on different<br />
tracks) be sure to group them all together before making edits. That way they all slide together<br />
and stay in phase. Also be sure to add tiny crossfades at every edit point to ensure<br />
no pops or clicks occur.
RecordingRevolution.com<br />
Step 5 - Mixing<br />
If recording is capturing the song, and editing is polishing the song, then mixing is making<br />
that song jump out of the speakers and hit you in the face (in a good way!).<br />
This is the part of the process where you take a great sounding set of tracks and<br />
present them in their best possible light through use of things like volume, pan, EQ,<br />
compression, reverb, delay, and saturation.<br />
Some of you might skip this step, downplaying its importance. Others of you might over<br />
complicate mixing by making it more than it really is. The wise home studio owner, however,<br />
sees mixing as a critical and yet simple step in the process.<br />
When you boil it all down, a great mix is really comprised of 5 main phases…
RecordingRevolution.com<br />
Mixing Phase #1 - Volume & Pan.<br />
The most important thing you could do is spend time listening to the song on loop in your<br />
software and adjusting the volume faders and pan knobs until every track seems to be in<br />
the optimal place and the song sounds well balanced. Forget any effects at this point.<br />
Just create a good balance with what’s there.<br />
A helpful practice is to set a timer and create a 10 minute mix. This forces you to trust<br />
your instincts, respond to the music, and create an initial balance that best represents<br />
your song.<br />
Mixing Phase #2 - EQ.<br />
Your EQ plugin is your most helpful and powerful tool when it comes to bringing clarity<br />
and excitement to your mix. Try and use your EQ to cut out the bad frequencies, enhance<br />
the good, and open up sonic space in your mix.<br />
In general I’m a fan of subtractive EQ, meaning using EQ as a cutting tool more than a<br />
boosting tool. This creates two huge benefits: more clarity in your mixes and more headroom.<br />
Both of which lead to more musical sounding mixes.<br />
Mixing Phase #3 - Compression.<br />
Next to EQ, compression is your best friend. Use this to control the volume of things like<br />
vocals and pianos as well as to bring punch, fatness, and energy to your tracks. Often the<br />
most confusing of all tools, compression is one of your most powerful.<br />
One thing that might help you to better understand how compressors work is to view<br />
them as simply an automated volume fader. Nothing more. Nothing less.
RecordingRevolution.com<br />
Mixing Phase #4 - Reverb & Delay.<br />
Once you have a well balanced mix that has been cleaned up with EQ and enhanced with<br />
compression, now is a great time to bring in some ambient effects to turn your dry home<br />
recorded tracks into a more studio sound. Using tools like reverb (which emulates the<br />
sound of rooms or halls) and delay (which is like an echo effect) you can make your music<br />
sound larger than life.<br />
It’s easy to go overboard with these effects so consider one reverb as a “glue” to give all<br />
your tracks a unified space. Then consider delays and echos on the lead vocal as a more<br />
obvious “effect”.<br />
Mixing Phase #5 - Automation.<br />
This is an advanced move, but a powerful one nonetheless. After creating a balanced mix<br />
that is well EQ’d, compressed, and tastefully dusted with reverb and delay it’s time to<br />
breathe life into the tracks by automating things like volume and pan.<br />
Your mix should be a living and breathing thing, and the power of your software will allow<br />
you to turn elements of your mix up or down at different points of the song to bring attention<br />
to themselves or create variety.<br />
Mixing is truly where great recordings come alive, but if you’re newer to this it might be<br />
hard to know just exactly the power of a good mix. <br />
So to help you I’ve put together two examples of a song before and after mixing. Listening<br />
to these examples you’ll instantly hear the power of what a simple mix can do for your<br />
song!<br />
Mixing Tip: Don’t let mixing overwhelm or confuse you. At the end of the day, the simple<br />
secret to mixing is summed up in one word: balance. If you can focus creating the right<br />
balance of your tracks in all aspects of the word you’ll do fine.
RecordingRevolution.com<br />
Step 6 - Mastering<br />
Finally we’ve come to our 6th and final step in creating a radio-ready song. Welcome to<br />
the mysterious world of mastering. This is the final step that takes your great sounding<br />
mix and makes it presentable to the rest of the world.<br />
Ironically many newer home studio owners mistake mastering for mixing, thinking<br />
mastering is where you make your song sound amazing. When in fact mastering<br />
done well should be the most subtle of all the steps.<br />
Originally mastering meant simply taking the mix from the studio and preparing it for the<br />
final medium for music consumption: whether it was a vinyl, CD, or MP3. And it still is that<br />
process. Over the years however it’s also come to include some EQ, compression, and of<br />
course loudness maximizing.<br />
And while there are people who specialize in mastering, I’m a champion of self-mastering<br />
and now I want to give you my quick and easy two-step mastering checklist so you know<br />
exactly what to do to prepare your song to be shared with the world…
RecordingRevolution.com<br />
Mastering Step #1 - Reference A Pro Mix.<br />
After you’ve crafted your mix of your song it’s time to make sure your mix is in the ballpark<br />
of a professional song. This is one of the most powerful steps you can take.<br />
Simply import a pro mix of your favorite song in a similar genre as yours, put it on it’s own<br />
track in your software, turn the volume down so it matches that of your mix and flip back<br />
and forth. What do you notice about the pro mix that your mix doesn’t have (or has too<br />
much of).<br />
Using a simple EQ on your mix’s master fader you can do some subtle moves to bring<br />
your mix more closely in line with that of the pro mix.<br />
Mastering Step #2 - Get Your Mix <strong>To</strong> Commercial Volume.<br />
Now that your mix is a little closer sounding to a pro reference, it’s time to get your volume<br />
up to commercial standards.<br />
Have you ever mixed down your song, brought it out to your car, only to discover<br />
that it sounds so much more quiet than everything else? Yeah - me too.<br />
The secret is to use a limiter. And the best part is most DAWs comes with this tool. No<br />
need for additional mastering software. You can increase the volume of your mix in a musical<br />
way in only 60 seconds using this simple method.<br />
Now, mastering can certainly be more complex than that, but at it’s core if all you do are<br />
those two steps: reference a pro mix and use a limiter to get commercial volume, you’ll be<br />
in business.<br />
Going back to Step 5 - Mixing, my goal is to always mix in such a way that hardly any<br />
work is needed in mastering other than volume, and I suggest you work the same way.<br />
Mastering Tip: When doing any processing on your mix for the mastering phase, whether<br />
it’s EQ, compression, saturation, or stereo widening, make sure that you level match the<br />
output of each plugin so you aren’t making the mix louder (except of course for the<br />
limiter). The reason is that we always think that louder sounds better so unless you match<br />
the plugin output to the level without the plugin you can’t know for sure if you’re making<br />
things better!
RecordingRevolution.com<br />
It’s Time <strong>To</strong> Make Music!<br />
That’s it my friend. You now know the 6 steps to crafting a radio-ready song in your home<br />
studio. <br />
You’ve learned that it all starts with writing a great song with an engaging arrangement. <br />
You know that recording is truly where the magic happens in the studio and that you can<br />
even tighten up your tracks with some subtle editing moves. <br />
You know the 5 phases of a great mix and even the 2 steps to a radio-ready master.<br />
You have all the information you need to get started. All that’s left for you is to...well...get<br />
started!<br />
You see the truth about recording music is this: you will only get better results if you<br />
get a lot of experience.<br />
As Jon Acuff would say, you have to “put in the reps” as a home studio owner and start<br />
writing, recording, mixing and releasing music. It’s the only guaranteed way to improve at<br />
this craft. And to be honest, it’s a whole lot of fun!<br />
I want to thank you for downloading this guide and for reading it! If you ever get stuck in<br />
your music making journey I’m here for you. <br />
With 1000+ articles and videos on the subject of making music in the home studio, The<br />
Recording Revolution is your place to check in and get the info you need.<br />
And you can always reach out to me to say “hi” anytime. I’d love to hear from you!<br />
Now, stop reading this and get back to work in your studio!<br />
Here’s to making better music,<br />
Graham Cochrane (Founder, RecordingRevolution.com)