

Cuisinart 5-Piece Pasta Maker -CTG-00-PM - MANUAL
Cuisinart 5-Piece Pasta Maker -CTG-00-PM - MANUAL
Cuisinart 5-Piece Pasta Maker -CTG-00-PM - MANUAL

Create successful ePaper yourself
Turn your PDF publications into a flip-book with our unique Google optimized e-Paper software.
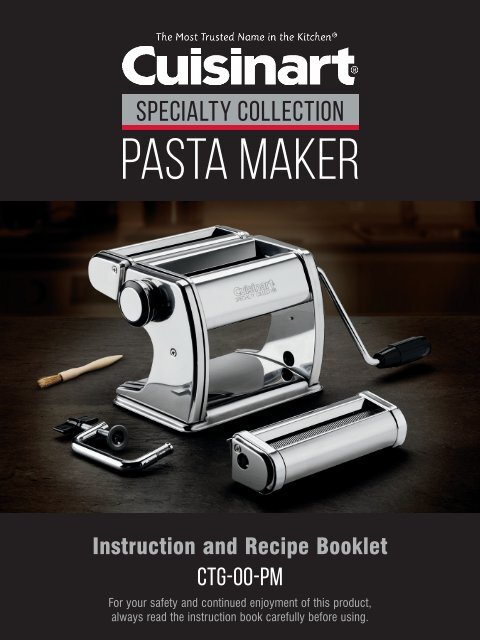
SPECIALTY Collection<br />
PASTA MAKER<br />
Instruction and Recipe Booklet<br />
<strong>CTG</strong>-<strong>00</strong>-<strong>PM</strong><br />
For your safety and continued enjoyment of this product,<br />
always read the instruction book carefully before using.
CONTENTS<br />
Use and Care ............................................... 3<br />
Rolling <strong>Pasta</strong> Sheets .......................................... 3<br />
Making Fettuccine or Spaghetti................................. 5<br />
Tips and Hints................................................ 5<br />
Warranty . . . . . . . . . . . . . . . . . . . . . . . . . . . . . . . . . . . . . . . . . . . . . . . . . . . . 7<br />
Recipes ................................................. 8–19<br />
Product Registration ..................................... 20–23<br />
2
<strong>Pasta</strong> roller<br />
Adjustable thickness dial<br />
Rolling handle<br />
6.5mm Fettucine cutter<br />
Counter Clamp<br />
2mm Spaghetti cutter<br />
Cleaning brush<br />
USE AND CARE<br />
DO NOT WASH, RINSE, OR SUBMERGE in water.<br />
1. Use the cleaning brush to dust off excess flour.<br />
2. Allow any residual dough on the attachment to dry before removing<br />
it with cleaning brush.<br />
ROLLING PASTA SHEETS<br />
1. Prepare pasta dough as directed by recipe.<br />
2. After dough has rested and is ready to roll, cut<br />
the dough into four pieces, about 2½ ounces<br />
each. Cover dough with plastic wrap or a damp<br />
paper towel so it doesn’t dry out.<br />
1<br />
3. Flatten one piece of dough into a disc about<br />
3 inches wide and ¼ inch thick. Set roller to<br />
Setting 1 (figure 1). Insert the disc into the roller<br />
3
and rotate the handle clockwise to start rolling<br />
the pasta. Pass the disc through the roller about<br />
3 times to begin kneading. Fold the disc in half,<br />
left to right (figure 2), rotate it 90 degrees, and<br />
pass it through the roller again. Then, fold the<br />
sheet in half again, left to right, and rotate it 90<br />
degrees; pass it through the roller again (figure<br />
3). Repeat these two steps 10 to 15 times until<br />
pasta starts to feel silky and smooth. TIP: If the<br />
pasta starts to stick to the roller, lightly dust<br />
the rolled pasta sheet with “<strong>00</strong>” flour. Do not<br />
dust roller.<br />
2<br />
3<br />
4. Once the pasta sheet is silky smooth and pliable,<br />
use the knob to set the pasta roller to Setting 2<br />
and pass the pasta sheet through twice. Do not fold. Repeat this<br />
step on Settings 3 and 4. If the pasta sheet becomes long and tricky<br />
to work with, cut the sheet in thirds with a sharp knife.<br />
5. Repeat step 4 at each remaining setting to achieve desired<br />
thickness. Recommended settings are 4 for spaghetti, 6 for<br />
fettuccine, 6 for hand-cut pappardelle or lasagna and 9 for filled<br />
pastas like ravioli and tortellini.<br />
6. As pasta sheets are rolled out, store on a baking sheet, generously<br />
dusting the sheet and each layer with semolina flour. Repeat with<br />
remaining pieces.<br />
4
MAKING FETTUCCINE OR SPAGHETTI<br />
1. Attach the desired pasta cutter to the pasta<br />
maker by sliding it into the brackets located on<br />
the front of the pasta roller (figure 4). Transfer<br />
the handle from the roller to the cutter.<br />
4<br />
2. Insert the dusted pasta sheet into the cutter<br />
and rotate the handle clockwise to cut the<br />
pasta (figure 5). Transfer the cut pasta to a tray<br />
dusted with semolina flour. Sprinkle the pasta<br />
with more semolina flour to prevent sticking;<br />
excess will fall off during cooking.<br />
5<br />
3. After all pasta is cut, cook or store in refrigerator<br />
for up to 3 days. Alternatively, cut pasta may be<br />
dried and stored for up to 3 months.<br />
TIPS AND HINTS<br />
• The key to making fresh pasta is to have the right feel of the dough.<br />
It is important that the dough is not too moist or too dry. The dough<br />
should be pliable and come together in one ball. It should not be<br />
sticky to the touch.<br />
• It may be necessary to experiment with the fresh egg pasta recipe a<br />
few times to get the feel of the dough and the pasta-making<br />
process.<br />
• The humidity of the day can greatly affect the pasta dough. If the<br />
day is very humid, watch and feel the dough when you are finished<br />
kneading. If it is still sticky, knead in one tablespoon of flour at a<br />
time until the stickiness disappears.<br />
• When making fettuccini or spaghetti, separate pasta as soon as it is<br />
cut from the pasta maker. Toss freshly cut pasta with semolina flour<br />
to prevent sticking. Pile semolina-dusted noodles together in loose<br />
5
undles on a flat, clean surface.<br />
• Fresh pasta is best if cooked immediately. If storing, place fresh<br />
pasta dough or noodles in plastic bags and keep refrigerated for up<br />
to 3 days. Fresh pasta dries very quickly and becomes fragile easily.<br />
• To cook pasta, generously salt 6 quarts of boiling water. Add pasta<br />
slowly and separately; make sure no pasta is sticking together<br />
before adding to water. Cook until tender, about 3 to 8 minutes,<br />
based on the shape and thickness of the pasta. Stir pasta and drain<br />
in a colander.<br />
6
WARRANTY<br />
LIFETIME WARRANTY (U.S. and Canada ONLY)<br />
<strong>Cuisinart</strong> ® Tools & Gadgets are warranted to be free of defects in<br />
material and workmanship under normal home use from the date of<br />
original purchase throughout the original purchaser’s lifetime. If your<br />
tool/gadget should prove to be defective within your lifetime, we will<br />
repair it (or, if we think it necessary, replace it) without charge to you,<br />
except for shipping and handling. To obtain warranty service, please<br />
call our Consumer Service Center toll-free at 1-8<strong>00</strong>-726-0190, or write<br />
to Consumer Service Center, <strong>Cuisinart</strong>, 150 Milford Road, East Windsor,<br />
NJ 08520. To facilitate the speed and accuracy of your return, please<br />
enclose $7.<strong>00</strong> for shipping and handling of the product. Be sure to<br />
include a return address, description of the product problem, phone<br />
number, and any other information pertinent to the product’s return.<br />
Please pay by check or money order made payable to <strong>Cuisinart</strong>. This<br />
warranty excludes damage caused by accident, misuse or abuse,<br />
including damage caused by overheating, and it does not apply to<br />
scratches, stains, discoloration or other damage to external or internal<br />
surfaces that does not impair the functional utility of the tool/gadget.<br />
This warranty also expressly excludes all incidental or consequential<br />
damages. Some states do not allow the exclusion or limitation of<br />
incidental or consequential damages, so the foregoing limitation or<br />
exclusion may not apply to you. This warranty gives you specific legal<br />
rights, and you may also have other rights, which vary from state to<br />
state.<br />
CALIFORNIA RESIDENTS ONLY<br />
California residents should call 1-8<strong>00</strong>-726-0190 for shipping<br />
instructions. <strong>Cuisinart</strong> will be responsible for the cost of the repair,<br />
replacement, and shipping and handling of such nonconforming<br />
products under warranty.<br />
7
RECIPES<br />
<strong>Pasta</strong> Dough<br />
Although traditionally made by hand, pasta dough can also be made in either<br />
the stand mixer or food processor. Each method yields the same result, so opt<br />
for the one that works best for you.<br />
Makes 10 ounces, about 3 to 4 servings<br />
1 cup “<strong>00</strong>” flour<br />
⅓ cup semolina flour<br />
2 large eggs<br />
By Hand<br />
1. Put the “<strong>00</strong>” flour in the center of a clean work surface. Top with the<br />
semolina flour. Using your fingers, make a well in the center of the pile,<br />
about 6 inches in diameter. Crack the eggs into the center of the well. While<br />
being careful to not break the circle of flour, use a fork to lightly beat the<br />
eggs inside the well.<br />
2. Once the eggs are beaten, slowly and evenly mix in some flour from the<br />
inside of the circle. Continue mixing in flour until a dough forms.<br />
3. Once a dough forms, use your hands to knead in as much of the remaining<br />
flour that the dough will allow. (The dough will stop picking up flour when<br />
enough has been kneaded in.)<br />
4. Continue kneading until a smooth, firm ball forms, about 10 minutes total.<br />
When done, the dough should spring back when touched.<br />
5. Wrap with plastic and let rest at room temperature for at least 20 minutes.<br />
<strong>Pasta</strong> dough should be used within a day or two after it is made. It can also<br />
be frozen for up to 3 months.<br />
Stand Mixer Instructions<br />
1. Put the eggs, “<strong>00</strong>” flour, and semolina into the <strong>Cuisinart</strong>® stand mixer’s<br />
bowl. Attach the dough hook and mix on Speed 4 to combine.<br />
2. Allow to mix until dough mostly comes together, about 4 to 6 minutes. At<br />
about 5 minutes of mixing, check the texture. If it is too dry, add water 1<br />
tablespoon at a time; alternatively, if it is too wet, add “<strong>00</strong>” flour 1<br />
tablespoon at a time to desired consistency. Keep in mind this dough won’t<br />
8
esemble a smooth ball, it will only just come together in large chunks with<br />
some possible smaller bits to knead in by hand. Should any flour or loose<br />
dry bits be left behind at the bottom of the bowl, leave them there and do<br />
not incorporate into final dough.<br />
3. Transfer dough to a lightly floured surface and knead all dough together into<br />
a ball by hand until smooth and springs back to the touch, about 2 minutes.<br />
4. Wrap in plastic wrap and let rest at room temperature for at least 20<br />
minutes before using. <strong>Pasta</strong> dough should be used within a day or two after<br />
it is made. It can also be frozen for up to 3 months.<br />
Food Processor Instructions<br />
1. Put the flours in the work bowl of a <strong>Cuisinart</strong>® food processor fitted with the<br />
metal chopping blade. Pulse to sift.<br />
2. With the machine running, add the eggs through the small feed tube, one at<br />
a time. Continue to process until a dough ball forms. Allow the dough ball to<br />
knead for about 45 seconds to one minute. Should dough be too sticky add<br />
“<strong>00</strong>” flour 1 tablespoon at a time until ball is smooth and firm. When done,<br />
the dough should spring back when touched.<br />
3. Wrap with plastic and let rest at room temperature for at least 20 minutes.<br />
<strong>Pasta</strong> dough should be used within a day or two after it is made. It can also<br />
be frozen for up to 3 months.<br />
Nutritional information per serving (based on 4 servings):<br />
Calories 155 (1% from fat) • carb. 32g • pro. 6g • fat 0g • sat. fat 0g<br />
chol. 0mg • sod. 28mg • calc. 1mg • fiber 1g<br />
9
Basil <strong>Pasta</strong><br />
The subtle flavor of the basil pairs nicely with the Garlic and Oil Sauce. Keep in<br />
mind, any herb or combination of herbs can be substituted for the basil to create<br />
your own flavor. A food processor makes pasta making a breeze!<br />
Makes 10 ounces (about 3 to 4 servings)<br />
1½ cups packed fresh basil<br />
1¼ cups “<strong>00</strong>” flour<br />
⅓ cup semolina flour<br />
½ teaspoon kosher salt<br />
2 large eggs<br />
1. Put the basil into the work bowl of a <strong>Cuisinart</strong>® food processor fitted with<br />
the metal chopping blade. Process for about 10 to 12 seconds, until finely<br />
chopped.<br />
2. Scrape the sides of the work bowl and then add the flours and salt. Process<br />
to incorporate ingredients. While the machine is running, add the eggs<br />
through the small feed tube, one at a time. Continue to process once a<br />
dough ball forms, about 45 seconds to one minute to knead. Should dough<br />
be too sticky, add “<strong>00</strong>” flour 1 tablespoon at a time until ball is smooth and<br />
firm. When done, the dough should spring back when touched.<br />
3. Wrap with plastic and let rest at room temperature for at least 20 minutes.<br />
<strong>Pasta</strong> dough should be used soon after it is made, within a day or two. It can<br />
also be frozen for up to 3 months.<br />
Nutritional information per serving (based on 4 servings):<br />
Calories 209 (10% from fat) • carb. 38g • pro. 90g • fat 2g • sat. fat 1g<br />
chol. 108mg • sod. 3<strong>00</strong>mg • calc. 26mg • fiber 1g<br />
10
Garlic and Oil Sauce<br />
Simple sauce that packs a lot of flavor.<br />
Makes about ¼ cup<br />
¼ cup extra virgin olive oil<br />
1 garlic clove, thinly sliced<br />
Pinch red pepper flakes<br />
1 recipe fresh pasta, cooked, with hot pasta water reserved<br />
2 tablespoons fresh parsley, roughly chopped<br />
Grated cheese for serving (optional)<br />
1. In a large saucepan, heat the oil and garlic over medium to medium-low heat<br />
until golden and fragrant, about 5 to 6 minutes. Add the red pepper flakes<br />
and cook for 1 additional minute.<br />
2. Remove from heat and add 2 ounces of cooking water from the pasta. Add<br />
the cooked and drained pasta, and return the pan to the heat. Cook over<br />
medium heat until the pasta water evaporates, about 1 to 2 minutes. Stir in<br />
the parsley and remove from heat. Serve immediately with grated cheese if<br />
desired.<br />
Nutritional information per serving (1 cup):<br />
Calories 81 (62% from fat) • carb. 7g • pro. 2g • fat 6g • sat. fat 1g<br />
chol. 0mg • sod. 338mg • calc. 29mg • fiber 2g<br />
11
Spaghetti Carbonara<br />
Minimal ingredients make this creamy and decadent recipe easy to make any night<br />
of the week.<br />
Makes 3 to 4 servings<br />
2 eggs, beaten<br />
¼ cup grated Pecorino Romano<br />
2 teaspoons olive oil<br />
4 ounces thinly sliced pancetta, cut into ½-inch pieces<br />
10 ounces fresh spaghetti (one batch of spaghetti per the recipe<br />
on page 8)<br />
1. Bring a large pot of salted water to a boil. In a small bowl, stir together the<br />
eggs and cheese. Reserve.<br />
2. Heat the olive oil in a large skillet over medium heat. When hot, add the<br />
pancetta and cook until rendered and crispy, about 5 to 7 minutes.<br />
3. When the pancetta is almost cooked, add the pasta to the boiling water.<br />
Cook until just tender, about 1 to 2 minutes. Use tongs to carefully drain and<br />
transfer the spaghetti to the skillet with the pancetta. Stir and remove from<br />
heat. Let pasta cool slightly and, while stirring constantly, slowly add in the<br />
egg and cheese mixture. Stir slowly and constantly to prevent the eggs from<br />
scrambling.<br />
4. Once the egg and cheese mixture is added, stir in some of the cooking water<br />
until desired consistency is achieved. Serve immediately with freshly ground<br />
black pepper.<br />
Nutritional information per serving (based on 4 servings)<br />
Calories 337 (41% from fat) • carb. 33g • pro. 17g • fat 15g • sat. fat 5g<br />
chol. 138mg • sod. 656mg •calc. 27mg • fiber 1g<br />
12
Marinara Sauce<br />
Makes about 3½ cups<br />
3 tablespoons olive oil<br />
3 garlic cloves, chopped<br />
½ medium yellow onion, chopped<br />
1 can (28 ounces) whole plum tomatoes<br />
½ teaspoon dried oregano<br />
¼ teaspoon freshly ground black pepper<br />
¼ teaspoon kosher salt<br />
2 tablespoons fresh basil, torn into pieces<br />
1 tablespoon granulated sugar<br />
1. Put the olive oil in a large saucepan set over medium-low heat. Once the oil<br />
is hot, add the garlic and onion and sauté until softened and fragrant, but<br />
not browned, about 5 minutes. Add the tomatoes, with their juices; crush<br />
slightly with the back of a wooden spoon. Bring to a strong simmer. Stir in<br />
the oregano, pepper and salt; and simmer for 20 to 30 minutes, until slightly<br />
thickened. Stir in basil and sugar and then simmer an additional 10 minutes<br />
to blend flavors.<br />
2. Using a <strong>Cuisinart</strong>® Hand Blender, take pan off heat and blend the sauce until<br />
smooth. Be sure to keep the metal blade completely submerged while<br />
blending. Taste and adjust seasoning as desired.<br />
Nutritional information per serving (½ cup)<br />
Calories 102 (60% from fat) • carb. 9g • pro. 1g • fat 7g • sat. fat 1g<br />
chol. 0mg • sod. 378mg • calc. 28mg • fiber 1g<br />
13
Classic Lasagna<br />
Here we give you the basic lasagna recipe with creamy ricotta filling layered with flavorful<br />
meat sauce. Using homemade noodles makes this dish melt in your mouth with each bite.<br />
For the vegetarians out there, we give tips on how to create a meat-free version, too!<br />
Makes 10 to 12 servings<br />
1 recipe <strong>Pasta</strong> Dough, page 8<br />
Salted water, for cooking pasta noodles<br />
Ice water, for cooling pasta<br />
Semolina flour, for dusting<br />
3½ cups marinara sauce, page 13 for recipe or use store bought, divided<br />
2 tablespoons olive oil<br />
1 garlic clove, finely chopped<br />
1 medium onion, finely chopped<br />
1 medium to large carrot, finely chopped<br />
¾ teaspoon kosher salt, divided<br />
¼ teaspoon freshly ground black pepper, divided<br />
1 pound lean ground beef<br />
½ cup dry white wine<br />
1 pound ricotta (strained if it seems particularly watery)<br />
½ cup grated Pecorino Romano<br />
8 ounces mozzarella, low moisture, shredded<br />
1. Roll the prepared pasta dough as instructed for lasagna on page 3. Rolled<br />
pasta sheets should be cut into about 6-inch pieces to make it easiest for<br />
cooking and assembly.<br />
2. Prepare your workspace: Bring salted water to a boil in a stockpot. While<br />
water is heating, put a large bowl of ice water near to the stove for easy<br />
transferring; reserve. Put a sheet pan or platter lightly dusted with semolina<br />
to prevent sticking. Have parchment paper and plastic wrap nearby for<br />
layering pasta.<br />
3. Once water boils, cook pasta sheets for 1 minute. Be sure not to overcrowd<br />
the pot so the pasta does not stick together (about 6 noodles at one time<br />
should be good for most stockpots). Immediately transfer to ice water to<br />
stop the cooking process. Pat dry and transfer to sheet pan/platter. Repeat<br />
14
with remaining pasta, layering parchment paper dusted with semolina on<br />
top of each layer of pasta. When ice water gets warm, refresh with<br />
additional ice. Once last layer of pasta has been cooked and transferred to<br />
the pan/platter, cover loosely with plastic wrap. Reserve while preparing the<br />
meat sauce.<br />
4. Prepare the meat sauce.* Put the oil in a large sauté pan set over medium<br />
heat. Once the oil is hot, add the garlic, onion and carrot with a pinch each<br />
of the salt and pepper. Sauté until vegetables are softened, about 5 to 8<br />
minutes. Increase heat to medium-high and add the ground beef with an<br />
additional pinch of the salt and pepper. Cook, stirring often, until the meat is<br />
cooked through (it should no longer be red). Add the wine and cook until<br />
evaporated. Once evaporated, stir in the marinara sauce and remaining salt<br />
and pepper. Reduce heat to medium-low to bring the sauce to a simmer.<br />
Cook to meld flavors and until the sauce is slightly reduced, about 15<br />
minutes. Remove from heat and reserve.<br />
5. Preheat oven to 375°F with the rack in the middle position. **<br />
6. Assemble the lasagna: Spread about ¾ cup of the marinara sauce in the<br />
bottom of the pan. Cover with the cooked lasagna noodles, cutting into<br />
smaller pieces to be sure there are no gaps. Top with 1¼ cups of the meat<br />
sauce and then dollop ⅔ cup of the ricotta on top of that. Sprinkle 2<br />
tablespoons of the Pecorino on top and then finish with ⅔ cup of the<br />
mozzarella. Repeat in the same fashion starting with the noodles (excluding<br />
the marinara), following with the meat sauce and cheeses two additional<br />
times (this will make for 3 layers). Top with a final layer of noodles and then<br />
spread a thin layer of sauce to cover noodles, about ½ cup, and then<br />
sprinkle with 2 tablespoons of Pecorino.<br />
7. Put assembled lasagna in the preheated oven and cook until the filling is<br />
bubbling, about 35 minutes.<br />
8. Serve with additional marinara sauce on the side.<br />
Nutritional information per serving (based on 12 servings – with meat sauce)<br />
Calories 348 (53% from fat) • carb. 19g • pro. 21g • fat 20g • sat. fat 9g<br />
chol. 52mg • sod. 583mg • calc. 281mg • fiber 1g<br />
Nutritional information per serving (based on 12 servings – without meat sauce)<br />
Calories 313 (55% from fat) • carb. 22g • pro. 14g • fat 19g • sat. fat 7g<br />
chol. 29mg • sod. 599mg • calc. 286mg • fiber 2g<br />
15
*If you are avoiding meat, this can be easily transformed into a vegetarian dish.<br />
In place of the meat sauce, use only marinara sauce. Where the recipe calls for<br />
“1¼ cups meat sauce” in Step 5, substitute ½ cup marinara. All other<br />
ingredients and instructions remain the same.<br />
**If you wish to serve the following day, or freeze for the future, assemble the<br />
lasagna as written, but then wrap very well with plastic and store in the<br />
refrigerator overnight, or freeze up to 1 month (if freezing, place a piece of<br />
parchment or wax paper directly on the top layer of the lasagna to prevent any<br />
freezer burn). Prior to baking, bring to room temperature.<br />
16
Angel Wing Cookies<br />
Popular amongst several European cultures, these cookies are most<br />
commonly enjoyed around Christmas and Easter.<br />
Makes about 60 cookies<br />
2 large eggs<br />
3 tablespoons sugar<br />
Pinch salt<br />
2 tablespoons vegetable oil<br />
2 tablespoons freshly squeezed orange juice<br />
2 cups unbleached, all-purpose flour, divided<br />
Vegetable oil, for frying<br />
Powdered sugar, for dusting<br />
1. Put the eggs, sugar and salt in a medium bowl. Whisk until thick and sugar<br />
is dissolved.<br />
2. Whisk in the vegetable oil and orange juice. Once combined, add the flour<br />
and use a wooden spoon to incorporate.<br />
3. Once a dough ball forms, transfer to a clean work surface and knead until<br />
smooth, about 5 minutes. When done, the dough should spring back<br />
when touched.<br />
4. Wrap in plastic and let dough rest for about 20 minutes.<br />
5. When ready to roll, cut dough into about 8 pieces. Roll until setting 6,<br />
following the instructions on page 3.<br />
6. Once dough is rolled out, use a crimped pastry cutter to cut each sheet on<br />
the bias into pieces that are about 2 inches wide. Pinch each in the center<br />
to form “angel wings,” a shape similar to a bow tie.*<br />
7. Fill a medium stockpot with ⅓ vegetable oil. Heat the oil to 375°F. While the<br />
oil is heating, line a baking sheet with paper towels and set aside.<br />
8. When oil is ready, carefully add 1 bow tie at a time to the pot. Do not<br />
overcrowd. Fry until each bow tie is lightly golden on one side, about 30<br />
17
seconds, and then flip to finish cooking, about 30 more seconds. Transfer to<br />
the baking sheet lined with paper towels.<br />
9. When all the bow ties are fried, transfer to a serving platter and sprinkle<br />
with powdered sugar.<br />
*Alternatively, instead of pinching dough pieces into “angel wings,” they can be<br />
fried and broken up to be served with the Cannoli Dip recipe on page 19.<br />
Nutritional information per cookie<br />
Calories 56 (73% from fat) • carb. 3g • pro. 1g • fat 5g • sat. fat 0g<br />
chol. 0mg • sod. 4mg • calc. 0mg • fiber 0g<br />
18
Cannoli Dip<br />
Serve this dip with your Angel Wing Cookies, or use to fill cannoli shells.<br />
Makes about 5 cups<br />
3 pounds whole-milk ricotta, drained overnight in a strainer/colander<br />
lined with paper towels<br />
¾ cup confectioners sugar, sifted<br />
Pinch kosher salt<br />
½ teaspoon ground cinnamon<br />
2 teaspoons pure vanilla extract<br />
1 cup mini chocolate chips<br />
1. In a large bowl, whisk together the drained ricotta, sifted confectioners<br />
sugar, cinnamon and vanilla extract. When smooth, fold in the chocolate<br />
chips. Refrigerate until ready to use.<br />
Nutritional information per serving (about 2½ tablespoons)<br />
Calories 104 (50% from fat) • carb. 11g • pro. 1g • fat 6g • sat. fat 3g • chol. 30mg<br />
sod. 44mg • calc. 9mg • fiber 0g<br />
19
REGISTER YOUR PRODUCT NOW!<br />
Complete the two easy steps to register your product and receive<br />
premium customer service, special offers and more!<br />
STEP 1<br />
TAKE A PHOTO<br />
Take a photo of your Photoregister Code below including the points<br />
20
STEP 2<br />
SEND IT IN<br />
SMARTPHONE US/CANADA<br />
Text photo to 71403<br />
OR<br />
EMAIL WORLDWIDE<br />
cuisinart@photoregister.com<br />
OR<br />
ONLINE WORLDWIDE<br />
register.cuisinart.com<br />
Need help? Visit Photoregister.com/help or text HELP to 71403.<br />
21<br />
W-9/026-ESP-C
¡REGISTRA TU PRODUCTO AHORA!<br />
¡Completa dos pasos sencillos para registrar el proucto recibe<br />
servicio de alta calidad, ofertas especiales y mucho más!<br />
PASO 1<br />
SACA UNA FOTO<br />
Saca una foto del código Photoregister SM<br />
debajo, incluyendo los puntos<br />
22
PASO 2<br />
ENVÍALA<br />
TELÉFONO MÓVIL EE. UU./CANADÁ<br />
Envía la foto a 71403<br />
O<br />
CORREO ELECTRÓNICO DESDE CUALQUIER PARTE DEL MUNDO<br />
cuisinart@photoregister.com<br />
OR<br />
EN LÍNEA DESDE CUALQUIER PARTE DEL MUNDO<br />
register.cuisinart.com<br />
¿Necesitas ayuda? Visita Photoregister.com/help o envía AYUDA a 71403.<br />
23<br />
W-9/026-ESP-C
<strong>Cuisinart</strong> offers an extensive assortment of top quality products to<br />
make life in the kitchen easier than ever. Try some of our other<br />
countertop appliances and cookware, and Savor the Good Life ® .<br />
www.cuisinart.com<br />
©2017 <strong>Cuisinart</strong><br />
150 Milford Road, East Windsor, NJ 08520<br />
Printed in China<br />
17CT031640<br />
IB-15<strong>00</strong>6


