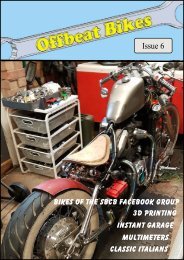
Royal Enfield Special Issue
Enfield BobberBuild
Enfield BobberBuild
- No tags were found...
You also want an ePaper? Increase the reach of your titles
YUMPU automatically turns print PDFs into web optimized ePapers that Google loves.
Contact:- offbeatbikesmagazine@gmail.com<br />
Website:- offbeatbikesmagazine.co.uk<br />
Facebook:- Offbeat Bikes Magazine<br />
Hello Everybody,<br />
Welcome to this special issue of Offbeat Bikes.<br />
In this issue we look at just one bike. It’s an <strong>Enfield</strong> Bobber<br />
built by Shed Built Custom Bikes Facebook group member,<br />
Mick Webb. Mick diligently documented the build of this bike<br />
on the group’s Facebook page, and I wanted to pull all the<br />
posts together so that we could see how the bike evolved.<br />
Looking through the posts,it was soon obvious what the<br />
secret is to Mick’s successful project building - it’s simple, he<br />
works very hard on them! From the project’s start on the 3 rd of<br />
June 2017, with the purchase of the donor bike, to the last<br />
posted picture of the finished bike at the start of April 2018,<br />
barely a weekend went past without Mick making some<br />
progress on the build and posting the outcome on Facebook.<br />
And I didn’t realise just how many posts and pictures there<br />
were until I started to collate them. There were over 70<br />
Facebook posts and 300 plus pictures to look through!<br />
I hope browsing through this may inspire you to get out into<br />
the shed and work on your own projects. And reinforce the<br />
belief that if you just keep working away, you will finish that<br />
project - eventually…
3 rd June 2017<br />
A new arrival to the<br />
Webb household<br />
signifies the start of<br />
a new project.
10 th June<br />
In short order, Mick<br />
strips off the bodywork,<br />
removes the motor and<br />
starts eyeing up the<br />
suspension in order to<br />
alter the stance of the<br />
bike.
17 th - 18 th June<br />
Front end lowered. Motor temporarily goes back in so<br />
that back end can be adjusted to provide the correct<br />
stance. New style pine suspension struts may not catch<br />
on!
24 th ,25 th and 26 th June
Swingarm needed to be cut and extended 70mm.<br />
Steel slugs being turned on the lathe (left).<br />
Top pic: Standard length swingarm.<br />
Bottom pic: Extended swingarm.
1 st - 2 nd July<br />
Swingarm slugs. First tacked in place,<br />
then finish welded
Above: Frame de-lugged and<br />
strengthening plate welded<br />
across swingarm.<br />
Below: Surplus frame lugs!<br />
8 th July
15 th - 16 th July<br />
Motor out again!<br />
This time to be rebuilt.
Motor cleaned<br />
and<br />
disassembled.<br />
22 nd - 23 rd July
13 th , 18 th - 20 th August<br />
Casings cleaned, polished and back together.<br />
First of many parts deliveries arrives.
2 nd - 3 rd September<br />
Removing<br />
powdercoat and<br />
paint using paint<br />
stripper and<br />
scotch-brite wheel.<br />
First coats of fresh<br />
paint going on.
Remaining engine parts replaced, fettled, painted<br />
and installed as required.
7 th - 10 th & 23 rd September
29 th - 30 th September<br />
Dummy oil tank taking<br />
shape.
Above: Swingarm brace shaped for clearance.<br />
Lower mudguard lugs tacked in place.<br />
Below: Rear mudguard in place.<br />
1 st & 7 th October
8 th , 13 th & 21 st October<br />
Top: Time for a seat! Cardboard template cut,<br />
ready and waiting for steel to turn up.<br />
Below: Seat base cut, formed and fitted.
22 nd October<br />
Above: Number plate<br />
bracket purchased from a<br />
Twisted Iron autojumble.<br />
Straight home to fab up a<br />
mounting bracket!<br />
Below: Started trimming<br />
surplus off tank and<br />
started battery tray<br />
fabrication. Not sure<br />
about rear light …<br />
28 th October
3 rd - 5 th November<br />
Clockwise from top left:<br />
Parts for new rear light<br />
turn up.<br />
After bit of lathework and<br />
head scratching,<br />
new rear light mounted to<br />
number plate.
Fork lowers polished.<br />
Spacers made to<br />
compensate for shorter<br />
springs, and fork legs<br />
back together with new<br />
seals.<br />
10 th - 12 th November
Above: Lots and lots of prep work and then<br />
painting.<br />
Below: Looks good so far – shame the wheels have<br />
to come back off for re-spoking.<br />
19 th , 23 rd - 25 th November
26 th November<br />
Luckily sidestand has enough lean without altering.<br />
Now to pull apart and paint brackets and foot rests.<br />
3 rd December<br />
Mudguard and<br />
dummy oil tank<br />
filled and prepped<br />
for paint.
Exhaust wrapped, rear<br />
mudguard, dummy oil<br />
tank and rear light<br />
fitted.<br />
8 th - 10 th December
17 th December<br />
Decided to shorten<br />
sidestand after all …<br />
22 nd December<br />
and to paint, instead of<br />
re-spoke, wheels.
28 th & 29 th December<br />
Just back from Hitchcocks Motorcycles with<br />
(hopefully) the last bits needed.<br />
Seat upholstered and fitted.
Carb fettled<br />
and fitted.<br />
30 th & 31 st December<br />
Starting to look<br />
more and more<br />
like a finished<br />
bike.
1 st January 2018<br />
Tappets done, primary cover<br />
sprayed and fitted....<br />
14 th January<br />
Started on wiring...<br />
Quick check to see<br />
how bright brake<br />
light was.
Wiring, wiring<br />
and more<br />
wiring!<br />
27 th & 28 th January
10 th & 11 th February<br />
…and yet more<br />
wiring!
Successful<br />
visit to<br />
MOT test<br />
centre.<br />
10 th March<br />
17 th February<br />
Bike ran for<br />
first time<br />
today.<br />
11 th , 13 th and 17 th March<br />
Finally, the last piece of<br />
the jigsaw.<br />
Tank primed, painted and<br />
decals added.
The finished bike. Great job by Mick, but then he<br />
does have some previous form when it comes to bike<br />
building. See below!


