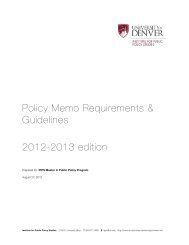
Template Website Guide & Consulting Process - University of Denver
Template Website Guide & Consulting Process - University of Denver
Template Website Guide & Consulting Process - University of Denver

Create successful ePaper yourself
Turn your PDF publications into a flip-book with our unique Google optimized e-Paper software.
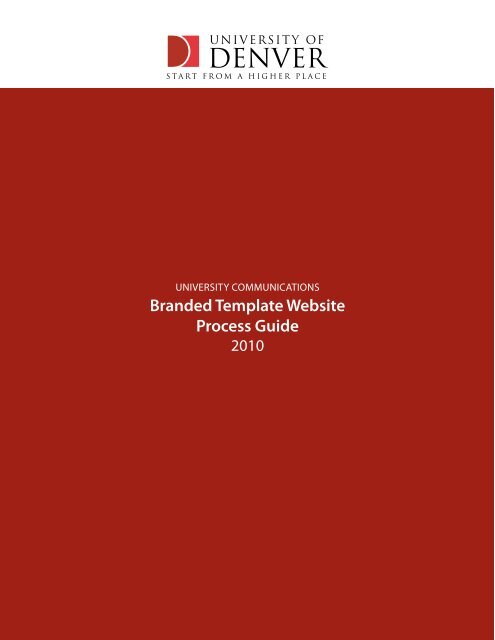
UNIVERSITY COMMUNICATIONS<br />
Branded <strong>Template</strong> <strong>Website</strong><br />
<strong>Process</strong> <strong>Guide</strong><br />
2010
<strong>Template</strong> <strong>Website</strong> <strong>Guide</strong> & <strong>Consulting</strong> <strong>Process</strong><br />
A <strong>Guide</strong><br />
If you are a <strong>University</strong> <strong>of</strong> <strong>Denver</strong> department, organization or other affiliated group interested in bringing<br />
your Web presence under the umbrella <strong>of</strong> the <strong>University</strong> <strong>of</strong> <strong>Denver</strong> brand, then this guide is for you.<br />
This guide has three main objectives. The first is to outline and explain the process by which the <strong>University</strong><br />
Communications team will <strong>of</strong>fer you guidance in creating your website within the DU-branded template.<br />
This includes navigation structure, content, and image assets. The second objective is to provide you some<br />
best practices regarding information architecture and content with examples <strong>of</strong> the page templates. The<br />
third and final objective is provide you with the image assets necessary to create your site.<br />
You will be responsible for creating your website, from navigation structure to content to building<br />
the actual Web pages. Once you have completed and published your page, you will be responsible for<br />
maintaining and updating your website.<br />
Table <strong>of</strong> Contents<br />
<strong>Process</strong> Flow Diagram ...........................................................................................................................................<br />
<strong>Process</strong> and Hand<strong>of</strong>fs ..........................................................................................................................................<br />
Kick Off ........................................................................................................................................................<br />
Information Architecture & Content .................................................................................................<br />
Design and Development ....................................................................................................................<br />
Training .......................................................................................................................................................<br />
Review and Site Launch ........................................................................................................................<br />
3<br />
4<br />
4<br />
5<br />
6<br />
7<br />
8<br />
2
<strong>Template</strong> <strong>Website</strong> <strong>Guide</strong> & <strong>Consulting</strong> <strong>Process</strong><br />
<strong>Process</strong> Workflow<br />
KICK OFF<br />
YOU contact UCOMM<br />
with a request for a new<br />
website.<br />
Assets:<br />
YOU should gather all<br />
photos, graphics and<br />
videos for the project.<br />
Design:<br />
YOU & UCOMM will<br />
create graphic assets as<br />
needed<br />
Final Review:<br />
UCOMM reviews the<br />
site before notifying<br />
UTS to publish it.<br />
LIVE WEBSITE:<br />
YOU continue to<br />
manage and update<br />
your website via the<br />
CMS.<br />
UCOMM explains site<br />
creation process and<br />
deliverables.<br />
KICK OFF: Yammer is used throughout the process to keep everyone involved<br />
up to date as far as the progress <strong>of</strong> the project. Yammer also provides a<br />
convenient central source for sharing and keeping �les.<br />
Content:<br />
UCOMM will review your<br />
content documents and<br />
o�er suggestions.<br />
IA (INFORMATION ARCHITECTURE) & CONTENT: Determines site organization<br />
and navigation, which both inform and are in�uenced by content<br />
requirements.<br />
Development:<br />
UCOMM will review<br />
any requirements for<br />
special site features.<br />
Production Review:<br />
YOU review the site<br />
and let UCOMM know<br />
it’s ready to go live.<br />
UCOMM creates a<br />
Yammer group for<br />
YOU and the project.<br />
IA & Content:<br />
YOU write the page<br />
content based on IA.<br />
Design/Dev:<br />
UCOMM relays any<br />
special requirements<br />
needed for training to<br />
UTS.<br />
DESIGN & DEVELOPMENT: Based on IA and content, you should know what<br />
assets you need (images, online forms, buttons, URL redirects, videos, etc.)<br />
and work with Design and Dev to implement.<br />
Site Creation:<br />
YOU create the pages,<br />
navigation and content<br />
and place assets via the<br />
CMS.<br />
TRAINING & LAUNCH: The CMS templates are �exible with multiple content<br />
formats and a highly customizable right rail for banners, videos, brief info<br />
bullets or other call outs.<br />
Once the process is complete you can continue to develop, re�ne and<br />
update content on your own.<br />
IA:<br />
YOU create the site map<br />
for UCOMM review.<br />
IA:<br />
UCOMM reviews IA doc<br />
and provides feedback.<br />
Development:<br />
UCOMM creates server<br />
directories, permissions<br />
and URL per the Site<br />
Checklist.<br />
Training:<br />
YOU & UTS schedule<br />
training to learn how to<br />
create your website<br />
within the CMS.<br />
3
<strong>Template</strong> <strong>Website</strong> <strong>Guide</strong> & <strong>Consulting</strong> <strong>Process</strong><br />
<strong>Process</strong> & Hand<strong>of</strong>fs<br />
Even for a small website, the creation and launch process requires the contributions <strong>of</strong> a number <strong>of</strong> people<br />
in different areas at different times. Any breakdown <strong>of</strong> communication during the process slows the<br />
whole procession <strong>of</strong> efforts required to launch the site. This document and the supporting documents<br />
are intended to keep everyone on the same page throughout the process and give all contributors the<br />
necessary lead time.<br />
Where possible this document will indicate who’s responsible for each stage and who takes up the following<br />
stage. The “stage handler” will indicate on Yammer when the stage is finished so everyone will know.<br />
There are a number <strong>of</strong> additional supporting documents that will be<br />
referenced here as they enter into the process. Their initial reference in this<br />
guide will be marked with a document icon on the right side <strong>of</strong> the page.<br />
Kick Off<br />
Once you notify Loren Kielly (loren.kielly@du.edu) that you want a new<br />
site, then things get under way. To facilitate conversation and keep<br />
everyone up to date, we use Yammer. Loren or someone in <strong>University</strong><br />
Communications (UComm) will create a Yammer group for the project and<br />
invite you to join.<br />
In addition to sharing conversations, Yammer is also used to post and share<br />
files throughout the process. As things progress, the Yammer group will<br />
contain site maps, content documents, images, style guides and checklists.<br />
The first document you’ll need is the Site Checklist. This checklist<br />
will inform all the following steps and get everyone on the same page<br />
regarding your website’s requirements. Please answer all the questions<br />
and feel free to ask about anything you’re unsure about. Once you’ve<br />
completed this step, post the Site Checklist to the Yammer group.<br />
You’re ready to move on to the Information Architecture and Content<br />
phase.<br />
NEW<br />
DOC<br />
Kick Off Steps<br />
1. You Contact Loren at<br />
UComm regarding a new<br />
website.<br />
2. Loren creates a Yammer<br />
group for the project.<br />
3. Via Yammer, UComm<br />
provides this guide<br />
and the Site Checklist<br />
document.<br />
4. You fill out the Site<br />
Checklist and post it to the<br />
Yammer group.<br />
NEW<br />
DOC<br />
Example Doc.pdf<br />
Site Checklist.doc<br />
4
<strong>Template</strong> <strong>Website</strong> <strong>Guide</strong> & <strong>Consulting</strong> <strong>Process</strong><br />
IA & Content<br />
Information architecture (IA) is the broad term for the organization and<br />
navigation choices in your website. In tandem with well-constructed<br />
content, it allows a visitor to your website to find information as quickly<br />
and easily as possible, especially if they’ve never visited your website<br />
before.<br />
Accessible content depends on good information architecture. Intuitively<br />
useful architecture depends on well-organized content. Typically, people<br />
find it easier to create a site map first and then develop content based on<br />
the architecture <strong>of</strong> the site map.<br />
As this is a big task, we provide several additional documents to help you<br />
out. The Site Map Example is a good model to follow when creating your<br />
site map. Use whatever s<strong>of</strong>tware works for you when creating the site map<br />
diagram, but post it in a widely accessible format such as .ppt, .pdf, or .doc.<br />
The Content Questionnaire will help you consider your full content<br />
needs. Remember, content incorporates more than just text. The content<br />
phase may involve collecting existing photography and video or setting up<br />
shoots for new photos and video.<br />
The Content Style <strong>Guide</strong> helps maintain a consistent formatting style and<br />
language tone through all DU communications. Following the Content<br />
Style <strong>Guide</strong> will accelerate the content review process.<br />
The Content <strong>Template</strong> document gives you an easy model to consider all<br />
the components <strong>of</strong> your Web page. Typical components include the main<br />
body <strong>of</strong> content, page titles, metadata, keywords, banners and call outs for<br />
the right rail area.<br />
As you are compiling the content and organization <strong>of</strong> your website, it’s<br />
helpful to keep in mind the Web page formats available within the DU<br />
templates. Click on the images below to view the typical page formats in<br />
your Web browser.<br />
<strong>Template</strong> Page Types<br />
One Column Three Column Two Column Left Two Column Right<br />
IA & Content Steps<br />
1. Look through the Site<br />
Map Example, Content<br />
Style <strong>Guide</strong>, and Content<br />
<strong>Template</strong> documents.<br />
2. Assess the information<br />
that’s valuable to your<br />
users, categorize it by<br />
page, and organize it into<br />
a site map.<br />
3. Fill out a Content<br />
<strong>Template</strong> for each page<br />
based on your site map.<br />
4. Post your site map and<br />
content templates to<br />
Yammer for review by<br />
UComm.<br />
5. UComm provides<br />
feedback via Yammer.<br />
6. You make changes as<br />
necessary and repost.<br />
Repeat steps 4 - 6 until<br />
everyone is happy.<br />
7. UComm notifies the<br />
Yammer Group that the<br />
IA & Content phase is<br />
complete.<br />
NEW<br />
DOC Site Map<br />
Example.doc<br />
NEW<br />
DOC Content<br />
Questionnaire.<br />
doc<br />
NEW<br />
DOC Content Style<br />
<strong>Guide</strong>.doc<br />
NEW<br />
DOC Content<br />
<strong>Template</strong>.doc<br />
5
<strong>Template</strong> <strong>Website</strong> <strong>Guide</strong> & <strong>Consulting</strong> <strong>Process</strong><br />
IA & Content (cont.)<br />
In addition to viewing the templates, it’s helpful to see how some other groups have implemented their<br />
websites using the templates.<br />
Site Examples<br />
• Marisco Institute<br />
• Campus Safety<br />
• Sustainability<br />
Once you’ve completed your site map and content documents, post them to the Yammer group for review<br />
by UComm. Kate Johnson (kate.johnson@du.edu) and Valerie Singleton (valerie.singleton@du.edu) focus<br />
on providing feedback on content. Ross Mansfield (ross.mansfield@du.edu) focuses on providing feedback<br />
on the site map. Suggestions, advice and edits will all be posted on the Yammer group. Use the feedback<br />
to update your site map and content documents and post the latest versions back to Yammer. The feedback<br />
and revision loop continues until everyone is satisfied. With the final versions <strong>of</strong> the site map and content<br />
documents on Yammer, Kate, Valerie and Ross will indicate via Yammer that the project is ready to move to<br />
the next phase.<br />
Design & Development<br />
This phase depends heavily on the information you provided in the Site<br />
Checklist.<br />
Identifying and creating the visual assets for your site is the first part <strong>of</strong> this<br />
phase. After creating the content and site checklist, you should already<br />
have an idea <strong>of</strong> the assets you want to use on your site. The <strong>Template</strong>-<br />
ImageAssets-Preview.pdf document shows you the types and sizes <strong>of</strong> the<br />
various images, banners, call outs and buttons used in the DU templates.<br />
If you already have photos for your website, post them on Yammer with<br />
their intended usage (large title banner, inline photo, right rail banner, etc.).<br />
If you need to find additional photography, DU has a large collection <strong>of</strong><br />
photos available in various sizes on the DU Internal Flickr account.<br />
If you are handy with Photoshop, Ross Mansfield can provide a Photoshop<br />
template that will help you create the image assets to the proper<br />
dimensions. If image editing isn’t your thing, Ross can work with you to<br />
create the desired images. Either way, all final image assets are posted to<br />
the Yammer group.<br />
In order to place videos on your website, the video files need to be<br />
Design & Dev Steps<br />
1. Identify images and video<br />
you want to use.<br />
2. Find additional photos on<br />
the DU Internal Flickr<br />
account.<br />
3. Post photos and intended<br />
usage to the Yammer<br />
group.<br />
4. For videos, you will need<br />
the Web address (URL) to<br />
the video .flv file on the<br />
DU media server.<br />
5. Using the <strong>Template</strong> Image<br />
Assets document, you<br />
and UComm create your<br />
image assets and post<br />
them to Yammer.<br />
NEW<br />
DOC<br />
<strong>Template</strong>-<br />
ImageAssets-<br />
Preview.pdf<br />
6
<strong>Template</strong> <strong>Website</strong> <strong>Guide</strong> & <strong>Consulting</strong> <strong>Process</strong><br />
Design & Dev (cont.)<br />
converted to Flash flv files and added to the DU media server. You will<br />
need the Web address (URL) to the video file on the media server in<br />
order to add the video to your website. If the video was shot by a DU<br />
videographer, chances are that the video already resides on the DU media<br />
server in the proper format. If you’re unsure about the format or location <strong>of</strong><br />
your video, please contact your videographer or the Penrose Library media<br />
group for help.<br />
While you and Ross work out the images for your website, Matt<br />
Eschenbaum will use the information in your Site Checklist to create the<br />
server directories, users and permissions necessary for your upcoming<br />
CMS training with UTS. At this stage Matt will also address any specific<br />
functionality requests regarding URL redirects, forms, remotely managed<br />
pages, etc. New code development for the DU templates is frozen, but<br />
Matt may be able to point you toward existing functionality and widgets<br />
that do what you need.<br />
Once design and development are ready to go, Matt and Ross will inform<br />
you and Mary Sue Brown via Yammer that you’re ready to move into<br />
the training phase. Usually, training should not be scheduled until the<br />
previous phases are complete.<br />
Training<br />
Training will introduce you to the CMS (Content Management System) that<br />
is used to build and manage the DU website.<br />
Work with Mary Sue in UTS to schedule your training session. She’ll look<br />
over the requirements <strong>of</strong> your website and tailor the training session<br />
accordingly. Depending on your situation, she can break the training into<br />
two sessions for building and populating the website. You should plan on<br />
sending at least two people to the training session for continuity purposes.<br />
Once in training, you can create the pages and navigation for your site and<br />
then add the appropriate content and imagery to each page. A typical<br />
training session lasts two to three hours.<br />
Upon completion <strong>of</strong> training, you’ll have the knowledge and access to the<br />
CMS necessary to finish building out your website.<br />
Design & Dev Steps<br />
6. UComm creates<br />
users, directories and<br />
permissions in preparation<br />
for training.<br />
7. UComm informs UTS <strong>of</strong><br />
any special requirements<br />
and redirects.<br />
8. UComm and UTS confirm<br />
everything is ready to go<br />
via Yammer.<br />
9. You and UTS schedule a<br />
training session.<br />
Training Steps<br />
1. Schedule training with<br />
Mary Sue in UTS.<br />
2. Plan on sending at least<br />
two people from your<br />
group to training.<br />
3. Complete training and<br />
finish building your<br />
website through the CMS.<br />
7
<strong>Template</strong> <strong>Website</strong> <strong>Guide</strong> & <strong>Consulting</strong> <strong>Process</strong><br />
Review & Launch<br />
Initially, your website will live on a staging server. The staging server is<br />
only visible within the DU network. This gives all involved an opportunity<br />
to review the site in its finished form and make any tweaks necessary. Once<br />
you and your group are satisfied with the staging site, you can ask UComm<br />
for a quick review.<br />
At this point, you should work with Matt Eschenbaum in UComm to<br />
schedule the launch date for the new site. UTS will enable any redirects<br />
and launch your site to the live server. At this stage, it’s also a good idea to<br />
confirm that all content on a pre-existing website is accounted for as the<br />
old site will go away.<br />
Once the site is live, your access to the CMS will allow you to continually<br />
update and manage the website as necessary. You can also schedule other<br />
members <strong>of</strong> your group for a shorter CMS training course that focuses on<br />
the maintenance <strong>of</strong> a website. Mary Sue is the contact for scheduling these<br />
training sessions too.<br />
Review & Launch Steps<br />
1. Review your completed<br />
site on the staging server<br />
and make any necessary<br />
changes.<br />
2. Ask UComm to review<br />
your site on the staging<br />
server.<br />
3. Schedule a date with<br />
UComm and UTS to<br />
launch your site to the live<br />
server.<br />
4. Continue to update and<br />
maintain your website on<br />
your own!<br />
8