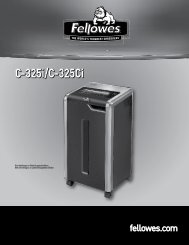
Create successful ePaper yourself
Turn your PDF publications into a flip-book with our unique Google optimized e-Paper software.
A<br />
B<br />
C<br />
3<br />
Equipment Parts<br />
1. Punching/Crimping Handle<br />
2. Punching Area<br />
3. Adjustable Margin Guide<br />
4. Wire Size Selector<br />
5. Paper Support<br />
6. Binding Support<br />
7. Crimping Area<br />
8. Crimping Area Adjustor Dial<br />
9. Waste Paper Tray<br />
10. Crimping Area Size Indicator<br />
10<br />
7<br />
Assembly<br />
2<br />
5<br />
To assemble your <strong>WB</strong> <strong>100</strong> Wire Binding Machine,<br />
simply attach the Punching Handle to the right side of<br />
the machine and secure with the screw supplied.<br />
Next, attach Paper Support in Crimping Area as show<br />
in the diagram.<br />
Using the Binding<br />
Machine<br />
Punching holes<br />
1. Holes should always be centered between the top<br />
and the bottom of paper edge. To center holes, set<br />
the adjustable margin guide on the left-side of the<br />
machine <strong>for</strong> oversized covers (8-3/4" x 11-1/4")<br />
or letter size documents (8-1/2" x 11"). For<br />
optimum results, first use several “practice sheets”<br />
to set up margin guide position.<br />
8<br />
4<br />
1<br />
6<br />
9<br />
2. Slide all sheets to the back of the punching area.<br />
Note: a maximum of 8 sheets can be<br />
punched at a time.<br />
3. Lower the handle to punch holes in paper.<br />
4. Return handle to its original vertical position and<br />
remove sheets.<br />
5. Repeat until all sheets and covers have been<br />
punched.<br />
Determining Wire Size<br />
The <strong>WB</strong> <strong>100</strong> Binding Machine has a built-in Wire Size<br />
Selector to simplify the binding process. To determine<br />
correct size, insert entire document to be bound under<br />
Wire Size Selector. Move Selector downward until the<br />
bottom portion touches document. Read the<br />
corresponding Wire Size on the Selector.<br />
Binding the Document<br />
1. Move the Crimping Area Adjustor to the correct<br />
position so it corresponds with the appropriate<br />
Wire Size according to the Wire Size Selector.<br />
2. Place wire on binding support hooks with open<br />
side facing upward. Slide plastic guide strip above<br />
hooks to the right to lock wire binding in place.<br />
3. Insert the punched sheets onto the wire binding.<br />
NOTE: For a correctly bound presentation, the<br />
opening of the binding should be placed between<br />
the last page and back cover of the document.<br />
4. Slide plastic guide strip to the left, back to its<br />
original starting position, and remove entire<br />
presentation.<br />
5. Holding document in a vertical position, carefully<br />
insert wire binding element into the Crimping<br />
Area.<br />
NOTE: Wire Binding element should be in an<br />
inverted "U" position.<br />
6. To secure document, crimp Wire Binding element<br />
by lowering the Punching\Crimping Handle.<br />
7. Return handle to its original vertical position and<br />
remove document.<br />
Emptying Paper Clippings<br />
To remove, simply slide the waste paper tray out<br />
from the right side of the machine.<br />
To prevent clogging and jamming, be sure to empty<br />
waste paper tray frequently.