
You also want an ePaper? Increase the reach of your titles
YUMPU automatically turns print PDFs into web optimized ePapers that Google loves.
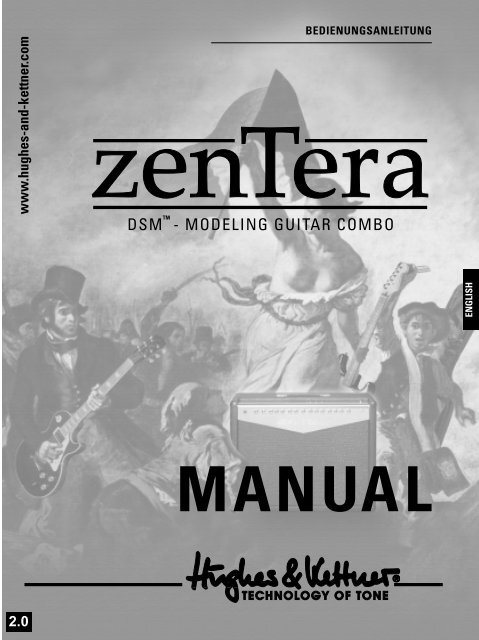
www.hughes-and-kettner.com<br />
2.0<br />
BEDIENUNGSANLEITUNG<br />
MANUAL<br />
ENGLISH
ZENTERA - MANUAL<br />
TABLE OF CONTENTS<br />
1.0 QUICK START GUIDE OR OPERATING MANUAL? . . . . .6<br />
2.0 POWERING UP . . . . . . . . . . . . . . . . . . . . . . . . . . . . . . .6<br />
3.0 AMP MODELS AND EFFECTS . . . . . . . . . . . . . . . . . . . .6<br />
3.1 AMP MODELS . . . . . . . . . . . . . . . . . . . . . . . . . . . . . . .6<br />
3.2 EFFECTS . . . . . . . . . . . . . . . . . . . . . . . . . . . . . . . . . . . .7<br />
4.0 STANDARD SETUP/CABLE CONNECTIONS . . . . . . . . . .7<br />
5.0 JACKS AND CONTROL FEATURES . . . . . . . . . . . . . . . .7<br />
5.1 OVERVIEW . . . . . . . . . . . . . . . . . . . . . . . . . . . . . . . . . .7<br />
5.2 THE ZENTERA ® 'S DISPLAY . . . . . . . . . . . . . . . . . . . . . . . .7<br />
5.3 JACKS AND CONTROL FEATURES IN DETAIL . . . . . . . .8<br />
6.0 SPECIAL FUNCTIONS . . . . . . . . . . . . . . . . . . . . . . . . .11<br />
6.1 PRE EFFECT MODE . . . . . . . . . . . . . . . . . . . . . . . . . . .11<br />
6.2 GLOBAL EQ . . . . . . . . . . . . . . . . . . . . . . . . . . . . . . . .11<br />
6.3 TUNER . . . . . . . . . . . . . . . . . . . . . . . . . . . . . . . . . . . . .11<br />
6.4 STORE (NAME) . . . . . . . . . . . . . . . . . . . . . . . . . . . . . .12<br />
6.5 FOOTSWITCH . . . . . . . . . . . . . . . . . . . . . . . . . . . . . . .12<br />
6.6 TAP . . . . . . . . . . . . . . . . . . . . . . . . . . . . . . . . . . . . . . .12<br />
7.0 THE SYSTEM MENU . . . . . . . . . . . . . . . . . . . . . . . . . . .12<br />
7.1 MEMORY PROTECTION . . . . . . . . . . . . . . . . . . . . . . .12<br />
7.2 MODE . . . . . . . . . . . . . . . . . . . . . . . . . . . . . . . . . . . .12<br />
7.3 WAKE UP . . . . . . . . . . . . . . . . . . . . . . . . . . . . . . . . . .12<br />
7.4 READ VALUES . . . . . . . . . . . . . . . . . . . . . . . . . . . . . . .13<br />
7.5 MIDI SETUP BASE CHANNEL . . . . . . . . . . . . . . . . . . . .13<br />
7.6 MIDI PROGCHG . . . . . . . . . . . . . . . . . . . . . . . . . . . .13<br />
7.7 MIDI SETUP DEVICE ID . . . . . . . . . . . . . . . . . . . . . . . .13<br />
7.8 MIDI SYSEX SEND . . . . . . . . . . . . . . . . . . . . . . . . . . . .13<br />
7.9 MIDI SYSEX RECEIVE . . . . . . . . . . . . . . . . . . . . . . . . .13<br />
7.10 MIDI DUMP . . . . . . . . . . . . . . . . . . . . . . . . . . . . . . . . .13<br />
7.11 MIDI MAPPING . . . . . . . . . . . . . . . . . . . . . . . . . . . . .13<br />
7.12 FOOTSWITCH ASSIGN . . . . . . . . . . . . . . . . . . . . . . . .13<br />
7.13 VOLUME PEDAL . . . . . . . . . . . . . . . . . . . . . . . . . . . . .14<br />
7.14 VOL. PEDAL RANGE MIN., VOL. PEDAL RANGE MAX. .14<br />
7.15 CV PED TYPE . . . . . . . . . . . . . . . . . . . . . . . . . . . . . . .14<br />
7.16 CV PED CALIB MIN/MAX . . . . . . . . . . . . . . . . . . . . . .14<br />
7.17 Z-BOARD BANK CHANGE . . . . . . . . . . . . . . . . . . . . .14<br />
7.18 Z-BOARDCALIB . . . . . . . . . . . . . . . . . . . . . . . . . . . . .14<br />
7.19 VERSION . . . . . . . . . . . . . . . . . . . . . . . . . . . . . . . . . .14<br />
8.0 MAINTENANCE AND CARE . . . . . . . . . . . . . . . . . . .14<br />
9.0 TROUBLESHOOTING . . . . . . . . . . . . . . . . . . . . . . . . . .14<br />
10.0 TECHNICAL SPECIFICATIONS . . . . . . . . . . . . . . . . . .15<br />
11.0 APPENDIX . . . . . . . . . . . . . . . . . . . . . . . . . . . . . . . . .15<br />
11.1 TABLE: EFFECTS AND EFFECT PARAMETERS . . . . . . . .15<br />
11.2 MIDI IMPLEMENTATION CHART . . . . . . . . . . . . . . . . .28<br />
11.3 AC POWER AND THE GLOBAL CURRENT ADAPTER . . .31<br />
GLOSSARY OF SYMBOLS<br />
W Turn knob<br />
r Tap knob or button (click)<br />
s Tap knob or button twice (double-click)<br />
t Hold knob or button pressed for a bit longer<br />
(click and hold briefly)<br />
CONGRATULATIONS AND THANK YOU<br />
FOR CHOOSING THE ZENTERA!<br />
The zenTera ® converges the most sought-after amps and effects in<br />
the history of guitar amplification in an easy-to-handle, combo-sized<br />
package. And it does it with mind-bending authenticity, delivering<br />
an audio experience you won't soon forget.<br />
The secret behind the zenTera ® 's sonic sorcery is Dynamic Sector<br />
Modeling (DSM TM ). We poked and probed every group of<br />
components (sectors) in the original amps and we analyzed the<br />
dynamic interaction between these sectors. One of the things we<br />
found is that tone is a sum greater than its many parts and that it is<br />
the musical quality of the individual component groups and their<br />
dynamic reciprocation that make the difference. These findings<br />
flowed into the making of digital models. Thus the zenTera ® is able to<br />
faithfully replicate each amp, the full sweep of its dynamic range, its<br />
inherent sonic personality, and all its unique sound-shaping options.<br />
Another example of the zenTera ® 's innovative technology is the<br />
24-bit A/D converter in its preamp section. Tweaked specifically for<br />
processing guitar signals, it enables the zenTera ® to handle signal<br />
peaks of up to 116 decibels. This makes the zenTera ® is the world's first<br />
digital amp that is able to capture the full dynamic range of the<br />
guitar. Until now this extraordinary dynamic range was solely the<br />
domain of tube amps.<br />
But that's not all: In the engine room of the zenTera ® there toil not<br />
one but two of the latest-generation 32-bit floating point DSPs. Their<br />
computing power is what translates the technology of DSM TM into<br />
soul-stirring, to-die-for tone. Furthermore, they guarantee that the<br />
zenTera ® reproduces signals without any perceptible latency. But the<br />
bottom line is tone, and zenTera ® delivers it in truckloads replete with<br />
dynamics galore and lively, utterly true responsiveness to your<br />
attack.<br />
In the zenTera ® you have 11 different amp models at your fingertips.<br />
Each amp type's tone controls respond faithfully as if you were tweaking<br />
your tone on the original. This lets you dial in every sound swiftly<br />
and intuitively just like you are accustomed to doing on analog<br />
amps. But there's more cooking in the zenTera ® 's sonic kitchen - a<br />
smorgasbord of studio-quality effects, emulations of vintage stomp<br />
boxes and a faithfully replicated spring reverb. These effects, just like<br />
the amp's parameter controls, are intuitive to tweak, without the<br />
nerve-racking tedium of stepping through menus. All settings may be<br />
stored as presets in 128 slots (100 user presets + 28 factory sounds)<br />
and called up via the front panel, footswitch or MIDI controllers.<br />
With this array of user-friendly features, the zenTera ®<br />
handles like a dream.<br />
Packing a powerful punch, the zenTera ® 's beefy 2 x100 W stereo<br />
power amp is coupled with two Celestion Vintage 30 loudspeakers.<br />
This combination cuts through the din at any stage volume and<br />
enables you to make your musical statement under even<br />
the most demanding conditions.<br />
A built-in tuner, a TAP function that lets you sync up delay time, a<br />
serial FX loop, an analog and digital recording output, a headphones<br />
jack and many other practical features give you the<br />
remarkable level of convenience that you've come to expect<br />
from Hughes & Kettner gear.<br />
With the zenTera ® , you've bought a stake in the future. Its MIDI interface<br />
lets you upload software upgrades at any time and even swap<br />
sounds and system settings with other zenTera ® owners.<br />
HERE'S HOPING THAT YOU GET AS BIG A KICK OUT<br />
OF THE ZENTERA'S TONE AS WE DID DEVELOPING<br />
THE TECHNOLOGY BEHIND IT!<br />
5<br />
ENGLISH
ZENTERA-MANUAL<br />
BEFORE POWERING UP- Check and make sure that the local<br />
current and the amp's AC power rating are identical before you<br />
plug the zenTera ® 's mains cord into an AC outlet. - Ensure that air<br />
can circulate freely around your amp's ventilation ducts. - Place<br />
the amp on a stable platform where it is not exposed to<br />
mechanical shocks and will not endanger the safety of anyone<br />
nearby. Avoid temperature extremes and excessive humidity,<br />
both of which can damage the amp and may cause an<br />
electrical shock. - The manufacturer is not liable for any<br />
damage to the amp due to improper use.<br />
Important information! Note that the zenTera should not be<br />
exposed to extreme cold over longer periods. Though unlikely, it<br />
is possible that the internal battery will lose its charge. This battery<br />
provides power to the system when it is switched off. Under<br />
normal conditions, it is recharged when you power the amp up.<br />
1.0 QUICK START GUIDE OR OPERATING MANUAL?<br />
We've included a quick guide for all those who are raring to go<br />
right now and can't be bothered to wade through the entire<br />
owner's <strong>manual</strong>. In just a few steps, it will familiarize you with the<br />
sound-shaping features of the zenTera ® and explain its key<br />
functions. Even if this quick guide provides enough information to<br />
let you get off to a good start, please bear in mind that the<br />
zenTera ® 's possibilities are legion. You won't find out about all of<br />
them until you take the time to read the owner's <strong>manual</strong>.<br />
2.0 POWERING UP<br />
Activate the zenTera ® by flipping the POWER switch located on<br />
the far right. The zenTera ® will go on line in one of two statuses,<br />
loading either the preset that was active before the amp was<br />
switched off or the last setting that was dialed in before the amp<br />
was switched off. These two possibilities are explained in greater<br />
detail in section 7.3, WAKE UP.<br />
3.0 AMP MODELS AND EFFECTS<br />
3.1 AMP MODELS<br />
You can select from among eleven different models of amps -<br />
herein called amp types - by rotating the zenTera ® 's WAMP TYPE<br />
knob. Every amp type has a distinctive sonic personality that is<br />
best suited for very specific styles of music. In addition to vintage<br />
milestones that literally made amp history, the zenTera ® also offers<br />
emulations of some contemporary amps. In the following, we'll<br />
take a quick look at each amp type.<br />
BLACK FACE<br />
This American beauty is the definitive amp for classic clean tone.<br />
Although you'd be hard-pressed to drive it into the distortion zone, its big<br />
sound and enormous punch left an indelible mark on several of styles of<br />
music - it even helped shape certain playing techniques. This piece of<br />
gear has won friends and influenced people far and wide, from funk<br />
rhythm kings to jazz masters, from blues howlers to country pickers.<br />
Note that the BRIGHT function found on the original is integrated into the<br />
zenTera ® 's GAIN knob. GAIN settings of up to 5.0 (12 o'clock position)<br />
elicit that characteristic treble boost of the original's BRIGHT switch. The<br />
top end is not boosted at higher settings.<br />
TWEED DELUXE<br />
The kid brother of the big tweed amp, its raw, throaty textures are held<br />
in high esteem by connoisseurs of vintage grit. A purist's dream come<br />
true, its simple yet brilliant circuitry delivers earthy, fat tweed tone<br />
unrivalled by any other amp.<br />
On the downside, the original was equipped with just one tone knob, so<br />
we elected to assign a sound-shaping functionality to the 3-band EQ<br />
and the PRESENCE knob for this emulation. This gives you a lot more<br />
musically meaningful tweaking options without sacrificing the tone that<br />
makes this amp type so special.<br />
6<br />
TWEED 4 x 10<br />
The ultimate vintage blues amp revered by almost all historic greats of<br />
the genre, it still spells bliss for many a modern-day blues blaster. The<br />
breadth and depth of its dynamic range and its fat, expressive lead<br />
tone are what made it famous. From squeaky clean to a throaty growl<br />
and all points in between, this amp puts meaning into the phrase "living<br />
on blues power."<br />
BRIT EL 84<br />
The amp for classic guitar-driven pop and rock. Judging by the many<br />
stellar songwriters who appear on its reference list, this amp would<br />
undoubtedly be the hands-down winner in a poll of song-smiths.<br />
Unarguably, its EL84-loaded, Class A power amp delivers the sweetest<br />
harmonic distortion of all tube amps. And its flexible tone controls with<br />
the legendary Cut and Top Boost circuits elicit chiming, sparkling<br />
sounds as well as fat lead tone. Cranked wide open, it also delivers<br />
gritty, roots rock-approved goods.<br />
Note that the zenTera ® 's PRESENCE knob takes over the CUT function.<br />
The Top Boost circuit is integrated into the MID knob, which is handy<br />
because this lets you dial smoothly rather than switch hard from<br />
Normal to Top Boost mode.<br />
PLEXI 50<br />
This British EL34-powered classic made music history. Many a genredefining<br />
steel-string slinger wielded its considerable sonic clout to leave<br />
an indelible mark on the face of modern music. With its hair-trigger<br />
response, the PLEXI will do exactly what the position of your guitar's<br />
volume knob tells it to. Turn the volume down low, and you get fat,<br />
clean tone with shimmering top end. As you crank the knob, you can<br />
hear that vintage rock roar unfold.<br />
PLEXI 100<br />
The PLEXI on steroids, this 100-watt sensation literally rocked the late '60s<br />
and continued to dominate the heavy rock scene throughout the '70s<br />
and well into the '80s. A staple of innumerable rock productions, this<br />
amp's dynamic response made it the tool of choice for many an audio<br />
alchemist. Indeed, it can be said with some authority that this beast's<br />
big, cutting sound defined what great rock tone is all about. It will also<br />
make you the object of fear and loathing in your neighborhood,<br />
because you won't feel the full fury of its sonic assault until you crank it<br />
to the hilt.<br />
BRIT HI GAIN<br />
A logical outgrowth of the razor-edged sound of British steel, this amp<br />
delivers gear-grinding overdrive and meltdown lead sounds with truckloads<br />
of sustain and in-your-face punch. The tone controls are tweaked<br />
to deliver the response of a modern-day boutique amp, adding many<br />
shades and hues to your sonic palette. Less subtly, its scooped mids<br />
elicit a merciless metal edge, while its over-the-top high end has been<br />
rumored to peal paint at a hundred paces.<br />
ULTRA GAIN<br />
A zenTera ® special, this is what you get when you hop up a British<br />
100-watt amp until it is hot enough to roast weenies. And, frankly, the<br />
result is awe-inspiring - the fattest and most creamy lead sound<br />
imaginable.<br />
USA HI GAIN<br />
This amp's peerless tone is the product of three rectifier tubes.<br />
A real firecracker, it throws red-hot sparks of distortion for a fresh,<br />
dynamic tone. With its fat, bad and downright angry overdrive, this<br />
amp can take on many guises. Playing a key role in the rise of grunge<br />
in the '90s, it has since become the tool of choice for New Metal<br />
merchants. And with good reason, for few other amps can match its<br />
intensity and depth of musical expression, particularly for soloing.<br />
ACOUSTIC AMP<br />
This is the DSM TM version of the Montana, Hughes & Kettner's<br />
acoustic amp.<br />
W : TURN KNOB r : CLICK s : DOUBLE-CLICK t : CLICK AND HOLD BRIEFLY
ZENTERA - MANUAL<br />
JAZZ CLEAN<br />
This amp type is based on a Hughes & Kettner rig that debuted back in<br />
the '80s, specifically the clean channel of the ATS 112, which many jazz<br />
guitarists still consider a benchmark for this style.<br />
3.2 EFFECTS<br />
The zenTera ® offers an arsenal stocked with hip yet practical<br />
effects for which the gigging guitarist will find plenty of use. In<br />
addition to standard reverb, delay and modulation effects, the<br />
archive also features emulations of classic stomp boxes (e.g. fuzz)<br />
and vintage effect devices (e.g. tape echo devices).<br />
An excellent spring reverb simulation is also onboard.<br />
To learn more about the amp's effects offerings, check out<br />
Chapter 6.1, PRE EFFECT MODE, and the tables depicted under<br />
heading 11.1 in the appendix.<br />
4.0 STANDARD SETUP/CABLE CONNECTIONS<br />
MIXING CONSOLES<br />
Z-BOARD<br />
MIDI CONTROLLER<br />
EXPRESSION<br />
PEDAL<br />
COMPUTER<br />
RECORDING<br />
OUT<br />
INPUT<br />
IN OUT<br />
SEND RETURN<br />
SPEAKERS<br />
5.0 JACKS AND CONTROL FEATURES<br />
5.1 OVERVIEW<br />
The zenTera ® 's user panel is essentially divided into two segments,<br />
the amp section and the effect section.<br />
TUNER STORE<br />
FX-UNIT<br />
amp section effect section<br />
SUSTAIN PEDAL<br />
PHONES<br />
INPUT POWER<br />
GAIN AMP TYPE BASS MID TREBLE PRESENCE PRESET DELAY<br />
VOLUME MASTER<br />
MOD FX REVERB TYPE PARA 1 PARA 2<br />
The layout of the amp section should look familiar to you - it is<br />
arranged much like that of an analog amp. The GAIN, BASS, MID,<br />
TREBLE, PRESENCE and VOLUME knobs rotate to a far left and far<br />
right position. You can dial in values of 0 to 10. Only the AMP TYPE<br />
knob spins completely around.<br />
The knobs of the selected amp type respond just like those on<br />
the original model, which means that in this respect the zenTera ®<br />
handles exactly like its analog forebears. In some cases, however,<br />
it gives you additional tweaking options beyond those of the<br />
original. This bit of icing on what was already a great cake is no<br />
novelty feature. You'll find that the extra sound-shaping options<br />
come in handy and that they make musical sense.<br />
The effect section puts an array of delay, modulation and reverb<br />
effects at your disposal. Here you'll find it easy to dial in<br />
satisfactory sounds without a great deal of editing.<br />
All effects can be switched PRE or POST preamp.<br />
FS-5<br />
PRE is comparable to a stomp box that plugs into the front panel<br />
input. The latter option taps into the stereo signal circuit located<br />
before the power amp, giving you stereo effects.<br />
5.2 THE ZENTERA ® 'S DISPLAY<br />
The zenTera ® 's display responds immediately to each handling<br />
operation and menu change. It always indicates the parameter<br />
that you are currently editing and jumps to the next display as<br />
soon as you activate another knob or menu. There's one<br />
exception - the amp's master level (as determined by the<br />
MASTER knob on the far right) is independent of all other settings.<br />
Note that the master volume is not indicated in the display.<br />
In standard display mode, the zenTera ® indicates the name of the<br />
preset, the number of its memory slot, the name of the amp<br />
simulation as well as any effect blocks that you may have<br />
activated. The following diagram should clear up any questions<br />
you might have about what's what in the display.<br />
Large numerical display:<br />
number of the current preset (1 - 100, P1 - P28)<br />
Top text line: name of the preset<br />
Bottom text line: selected amp type<br />
PRESET: It lights up when the amp is in the standard display mode. The<br />
bar below PRESET illuminates when you edit a preset's settings.<br />
INS-FX: It lights up if one of the PRE effects is activated for this preset. If<br />
you elect to use a wah-wah, the bar below INS-FX lights up as soon as<br />
the wah-wah is activated via the connected pedal. The bar lights up in<br />
the usual manner for the remaining PRE effects.<br />
DELAY: It lights up when one of the delay effects is activated in the preset.<br />
If you choose to patch in the effect via the PRE circuit, the bar<br />
below DELAY lights up.<br />
MOD FX: It lights up when one of the modulation effects is activated in<br />
the preset. If you choose to patch in the effect via the PRE circuit, the<br />
bar below MOD FX lights up.<br />
REVERB: It lights up when one of the reverb effects is activated in the<br />
preset. If you choose to patch in the effect via the PRE circuit, the bar<br />
below REVERB lights up.<br />
When you edit one of the preset's parameters, say W BASS, you<br />
will see the word BASS displayed in the lower text line and the<br />
value indicated in the large numerical display. The bar below<br />
PRESET will light up.<br />
Note: To reset the amp to standard display mode after you've<br />
edited a parameter, simply double-click s TUNER. Or you can<br />
wait five seconds or so for the zenTera ® to take a time out and<br />
automatically reset to standard display mode.<br />
W : TURN KNOB r : CLICK s : DOUBLE-CLICK t : CLICK AND HOLD BRIEFLY<br />
7<br />
ENGLISH
ZENTERA-MANUAL<br />
5.3 JACKS AND CONTROL FEATURES IN DETAIL<br />
FRONT PANEL<br />
INPUT: Connect your electric guitar or pick-up-equipped acoustic<br />
guitar to this input (it accepts all input levels).<br />
GAIN W : This knob serves different purposes depending on the<br />
selected amp type:<br />
Some of the original models (BLACK FACE, TWEED DELUXE) don't<br />
come with a master volume. For this breed of amp, GAIN<br />
responds just like a regular volume knob.<br />
For models that are equipped with both gain and master knob,<br />
the GAIN knob serves the same purpose as the gain knob on the<br />
original.<br />
AMP TYPE: This knob carries out four functions.<br />
W Turn the knob to select the desired amp type.<br />
r Tap it to activate PRE EFFECT MODE (for more info, check out<br />
section 6.1, PRE EFFECT MODE). This mode puts different distortion,<br />
wah-wah and compressor effects at your disposal. Unlike<br />
the other effects found in the effect section, the only signal<br />
routing option for these effects is PRE, in other words, in front<br />
of the input.<br />
t Press and hold to set PRE EFFECT MODE to BYPASS.<br />
s Lots of amps are equipped with jacks offering high and low<br />
input sensitivity. On the zenTera ® , you can switch between the<br />
two options by means of an analog stage located in front of<br />
the input transformer. A double-click selects HI input sensitivity,<br />
another double click selects LOW input sensitivity.<br />
8<br />
The two options yield very different sonic results. Experiment to<br />
find out which option works best for the given application,<br />
guitar etc. If your axe is equipped with powerful pick-ups,<br />
LOW will certainly be your better bet.<br />
TONE CONTROLS W : BASS, MID, TREBLE and PRESENCE knobs.<br />
These knobs work like those on the original amp and their<br />
response depends on the amp type that you have selected.<br />
Since some of the original amps don't have a presence knob or<br />
a 3-band EQ, the zenTera ® 's knobs are assigned special functions<br />
to replicate all of the originals' tweaking options (for an in-depth<br />
explanation of this, see 3.0 AMP MODELS).<br />
TUNER STORE<br />
INPUT GAIN AMP TYPE BASS MID TREBLE PRESENCE VOLUME PRESET MOD FX DELAY REVERB TYPE PARA 1 PARA 2 MASTER<br />
POWER<br />
VOLUME W : Controls preset volume. Unlike the setting of the<br />
power amp MASTER knob located on the far right, you can store<br />
this parameter. This is a handy feature because it lets you dial in<br />
the desired balance of the relative levels for all presets.<br />
PRESET: This knob performs two functions.<br />
W Turn the knob to select from among the 128 possible presets.<br />
The presets are activated immediately as soon as you dial<br />
them in, meaning that you don't have to confirm your<br />
selection. Memory slots 1 to 100 are designed to<br />
accommodate user presets. Slots 101 (P1) to 128 (P28) are<br />
factory presets that you can copy but not overwrite.<br />
t Press and hold the knob to switch the GLOBAL EQ ON or OFF.<br />
(for more info, see 6.2, GLOBAL EQ).<br />
MOD FX, DELAY and REVERB:<br />
Each of these knobs can perform three functions:<br />
W Turn the knob to activate the respective effect block and<br />
control the volume of the effect that you want to mix to the<br />
dry signal. (To learn more about selecting an effect, see the<br />
following section under TYPE and the tables in the appendix<br />
depicted under 11.1).<br />
r Tap it to activate the respective effect block without<br />
changing the effect volume setting. This is a handy option<br />
when you just want to check the effect settings or edit<br />
parameters other than its volume.<br />
t Press and hold it to bypass the given effect. This lets you A/B<br />
the sound with and without effect. rTap it again to<br />
reactivate the effect. Note: The effect is also switched to<br />
bypass when you turn VMOD FX, DELAY or REVERB to the<br />
far left position.<br />
W : TURN KNOB r : CLICK s : DOUBLE-CLICK t : CLICK AND HOLD BRIEFLY
ZENTERA - MANUAL<br />
TYPE: This knob lets you dial in an effect (a chorus, a flanger and<br />
so forth). It actually serves two purposes:<br />
W Turn the knob to select from among the different modulation,<br />
delay and reverb effects depending on which effect block is<br />
currently active (to find out which effects you have available,<br />
check out the following example table and the tables in the<br />
appendix under 11.1).<br />
Note: The TYPE knob will only respond when an effect block has<br />
been activated. For more on this, see MOD FX, DELAY, REVERB<br />
above.<br />
r Tap it to select the PRE signal routing option, which is akin to<br />
plugging a stomp box into the front panel<br />
input. The display indicates that this option has<br />
been selected when the bar located below<br />
DELAY, MOD FX or REVERB lights up. Tap it<br />
again to switch the effect to POST, in other<br />
words, in front of the power amp and therefore generally in<br />
stereo. The bar will disappear from the display. The two options<br />
yield very different sonic results. A pre effect runs through all amp<br />
sectors while a post effect is inserted very near the end of the<br />
signal chain. Here too you should experiment to find out which<br />
signal routing configuration works best for which situation.<br />
Example table featuring modulation effects.<br />
TYPE PARA 1 PARA 2<br />
Chorus Mono Rate 0.1 - 10.0 Depth 0 - 100<br />
Chorus Stereo Rate 0.1 - 10.0 Depth 0 - 100<br />
Flanger 1 Mono Rate 0.1 - 10.0 Intensity 0 - 100<br />
Flanger 1 Stereo Rate 0.1 - 10.0 Intensity 0 - 100<br />
Flanger 2 Mono Rate 0.0 - 10.0 Intensity 0 - 100<br />
Flanger 2 Stereo Rate 0.0 - 10.0 Intensity 0 - 100<br />
Phaser Rate 0.1 - 10.0 Colour 0 - 100<br />
Phaser XL Rate 0.1 - 10.0 Colour 0 - 100<br />
Tremolo Rate 0.5 - 10.0 Shape 0 - 100<br />
TUNER STORE<br />
INPUT GAIN AMP TYPE BASS MID TREBLE PRESENCE VOLUME PRESET MOD FX DELAY REVERB TYPE PARA 1 PARA 2 MASTER<br />
POWER<br />
PARA 1 and PARA 2: These also serve two purposes<br />
W Turn the knob to edit the parameters of the selected effect.<br />
To learn more about editing an effect, see the table above and<br />
the tables in the appendix depicted under 11.1.<br />
r Tap it to load the current value of the parameter into the<br />
display without changing it.<br />
s PARA 2 also serves another purpose: A standard sustain pedal<br />
for switching presets may be connected to the zenTera (see<br />
also Rear Panel Connections, FOOTSWITCH). To be able to<br />
switch back and forth between two presets, you must first<br />
mark one of the presets. To do this, simply double click<br />
sPARA 2. To learn more about this, read section 6.5,<br />
FOOTSWITCH.<br />
MASTER W : It controls the level of the power amp.<br />
This knob is global, meaning that it affects all presets.<br />
Its setting cannot be stored.<br />
TUNER: It performs three functions:<br />
r Tap it to activate the built-in tuning device. You'll find a<br />
detailed description of this function under 6.3, TUNER.<br />
t Press and hold it to access the system menu (see 7.0).<br />
r You can tap TUNER once or twice (depending on the<br />
currently active mode) to exit all functions and menus and<br />
return to standard display mode.<br />
STORE: It saves preset settings (see 6.4, STORE).<br />
TAP: This button lets you <strong>manual</strong>ly sync the delay effect up to the<br />
tempo of a song. Simply r tap in the desired speed. The<br />
zenTera ® gauges the time between taps and synchronizes the<br />
delay accordingly. TAP will of course only work when a delay<br />
effect is active. (To learn how to activate it, see MOD FX, DELAY,<br />
REVERB above.)<br />
Beyond that, the TAP function lets you record short guitar patterns<br />
(e.g. rhythmic sequences) that the zenTera ® will play back in<br />
repetitive loops, which you can then solo over or use to create<br />
interlocking grooves. You'll out more about this sampling option<br />
under 6.6, TAP.<br />
W : TURN KNOB r : CLICK s : DOUBLE-CLICK t : CLICK AND HOLD BRIEFLY<br />
9<br />
ENGLISH
ZENTERA-MANUAL<br />
REAR PANEL<br />
MAINS IN: Connect the factory-included mains cord to this<br />
socket. Ensure the amp's voltage rating matches your local AC<br />
voltage rating before you plug the cord into the wall socket (see<br />
11.3). The mains fuse bracket is located next to this the socket.<br />
When replacing blown fuses, make sure you use specified<br />
replacement fuses only (see 10. TECHNICAL SPECIFICATIONS).<br />
SPEAKER LEFT/RIGHT: The zenTera ® is equipped with stereo outputs<br />
for the internal loudspeakers as well as for the connection of<br />
extension cabinets. When you opt to connect external cabinets,<br />
make absolutely sure that the overall impedance does not fall<br />
below the minimum permissible impedance of 6 ohms per channel.<br />
This means that you can connect, for example, a cabinet<br />
with at least 8 ohms in addition to the internal loudspeaker.<br />
The following table indicates the possible speaker connection<br />
options for each channel:<br />
Jack 1 Jack 2<br />
Internal 16 ohms -<br />
Internal 16 ohms External 16 ohms<br />
Internal 16 ohms External 8 ohms<br />
External 16 ohms -<br />
- External 8 ohms<br />
External 16 ohms External 16 ohms<br />
External 16 ohms External 8 ohms<br />
Note: Read section 7.2, MODE, to find out how to adjust the<br />
zenTera ® to the given speaker configuration.<br />
EFFECTS LOOP: Serial stereo/stereo insert for connecting<br />
external effect devices. In the signal chain, the EFFECTS LOOP is<br />
located after the D/A converter and in front of the power amp<br />
volume knob.<br />
Note: Bear in mind that the overall sound quality depends to a<br />
considerable degree on the quality of the external effect device<br />
since the entire signal is routed through it in series.<br />
• SEND: Connect this output to the input of your effect device.<br />
In view of the fact that they route out signals without speaker<br />
simulation, the SEND jacks may also be used as a line out for<br />
connecting external power amps.<br />
• RETURN: Connect the output of your effects device to this jack.<br />
You can also use the RETURN jacks to connect an external<br />
signal source such as an audio playback device. However,<br />
keep in mind that in this case the zenTera ® 's signal is muted,<br />
which means that if you patch in an external signal here, you<br />
can’t play along with it over the zenTera ® .<br />
10<br />
MAINS IN + VOLTAGE SELECTOR:<br />
REPLACE FUSES ONLY WITH SAME TYPE + RATING<br />
230 V~ = T 2.5 A<br />
SPEAKERS LEFT<br />
100 V~ = T 6.3 A<br />
MADE IN ST. WENDEL/GERMANY<br />
117 V~ = SB 5 A<br />
100 WATTS<br />
50 - 60 HZ<br />
EXTERN. INTERN.<br />
MAX. POWER CONSUMPTION 720 VA<br />
CAUTION!<br />
TO PREVENT THE RISK OF FIRE AND SHOCK<br />
HAZARD DON´T EXPOSETHIS APPLIANCE TO<br />
MOISTURE OR RAIN. DO NOT OPEN CASE;<br />
NO USER SERVICEABLE PARTS INSIDE.<br />
REFER SERVICING TO QUALIFIED SERVICE<br />
PERSONNEL.<br />
REAR PANEL AND VENTILATION OPENINGS<br />
MAY BECOME TOO HOT TO TOUCH!<br />
Ser. No.<br />
EXTERNAL SPEAKER MIN. 8 Ω<br />
INTERNAL SPEAKER MIN. 16 Ω<br />
SPEAKERS RIGHT SERIAL EFFECTS LOOP<br />
100 WATTS<br />
RETURN<br />
SEND<br />
EXTERN. INTERN.<br />
LEFT RIGHT LEFT RIGHT<br />
EXTERNAL SPEAKER MIN. 8 Ω<br />
INTERNAL SPEAKER MIN. 16 Ω<br />
HEAD<br />
PHONES<br />
MIDI + STAGEBOARD PHANTOM POWER FUSE<br />
T 500 mA / SB 500 mA<br />
HEADPHONES: Connect headphones to this jack. You can control<br />
the volume of the headphones output separately. Like the<br />
RECORDING OUT, this circuit features speaker simulation that<br />
replicates the sound and setup of the original amp.<br />
Note that the internal loudspeakers are not disconnected<br />
automatically when you plug in headphones. If you want to<br />
mute the zenTera ® 's speakers, turn the MASTER volume knob<br />
all the way down.<br />
RECORDING OUT: Analog and digital stereo output for<br />
connecting the zenTera ® to a mixing console or a PC.<br />
Note: The EFFECTS LOOP is not routed to the RECORDING OUT.<br />
• ANALOG LEFT/RIGHT: Patches out the RECORDING OUT signal<br />
at line level with integrated simulation of the original amps'<br />
speakers.<br />
• DIGITAL S/PDIF: The digital version of the RECORDING OUT<br />
(24 bits; 44,1 kHz sampling rate).<br />
STAGE BOARD: 9-pin port designed to take the optional Hughes &<br />
Kettner Z-Board or the optional FS-5, a 5-way foot switch.<br />
Note: This is not an interface for connecting a PC.<br />
MIDI IN/OUT/THRU: Standard MIDI trio. Connect a standard MIDI<br />
board here. It also serves as the interface for loading software<br />
updates and creating preset backups. The IN port is powered via<br />
a phantom power circuit equipped with a discrete fuse.<br />
4<br />
1<br />
6<br />
2<br />
RECORDING OUT STAGE<br />
BOARD<br />
ANALOG DIGITAL<br />
LEFT RIGHT S/PDIF<br />
IN OUT THRU<br />
Pin function<br />
1: MIDI Out + (current source)<br />
2: n.c.<br />
3: MIDI Out – (current sink)<br />
4: MIDI In + (current source)<br />
5: MIDI In – (current sink)<br />
6: Phantom Power +<br />
(approx. 11 V DC/ max. 600 mA)<br />
7: Phantom Power -<br />
FOOT FOOT<br />
SWITCH PEDAL<br />
T : UP / TOGGLE<br />
R : DOWN<br />
T : + 5 V / R : CV<br />
S: GROUND<br />
FOOTSWITCH: Stereo jack for connecting a 1-way or 2-way sustain<br />
pedal. It lets you switch to the next higher preset number (UP) or<br />
next lower preset (DOWN) or also back and forth between two<br />
presets (TOGGLE). For the latter alternative, you have to assign a<br />
marker to one of the two presets (see 6.5, FOOTSWITCH). Go to<br />
the system menu (see 7.12, FOOTSWITCH ASSIGN) to select the<br />
desired UP/DOWN/TOGGLE function.<br />
Note: The zenTera ® detects the polarity (1-way or 2-way) of the<br />
connected sustain pedal when it is switched on.<br />
FOOT PEDAL: Stereo jack designed to take an expression pedal<br />
such as a volume or wah-wah pedal. The volume function is the<br />
default setting unless you assigned a wah-wah effect for the<br />
given preset in PRE EFFECT MODE. (see 6.1, PRE EFFECT MODE).<br />
W : TURN KNOB r : CLICK s : DOUBLE-CLICK t : CLICK AND HOLD BRIEFLY<br />
5<br />
3<br />
7
ZENTERA - MANUAL<br />
6.0 SPECIAL FUNCTIONS<br />
6.1 PRE EFFECT MODE<br />
The following effects are available to you in this mode (see also<br />
the table INS-FX in the appendix under 11.1). Unlike the other<br />
effects found in the effect section, the only signal routing option<br />
for these effects is PRE, in other words, in front of the input:<br />
Wah Wah: '60s vintage wah-wah<br />
Wah Wah 2: contemporary wah-wah with more bottom end<br />
Fix Wah: both wah-wahs with fixed frequency (as if you left the<br />
wah-wah pedal on in a certain position)<br />
Mod Wah: automatic version of the two wah-wahs<br />
Compressor: three compressors with different attack times - short,<br />
medium, long<br />
Tube Scream, Fuzz: two legendary distortion boxes<br />
Tap r AMP TYPE briefly to access PRE EFFECT MODE.<br />
In PRE EFFECT MODE, select the desired effect via WTYPE. Use WPARA 1 and WPARA 2 to edit the given effect parameters.<br />
Press and hold tAMP TYPE to set PRE EFFECT MODE to<br />
BYPASS This lets you A/B the sound with and without effect.<br />
If you want to use an expression pedal (see FOOTPEDAL in the<br />
section above) to create wah-wah effects, you must use W TYPE<br />
to assign WAH or WAH 2 to the given presets.<br />
6.2 GLOBAL EQ<br />
If you use your zenTera ® in different venues, you may occasionally<br />
find it necessary to adjust its settings to suit the acoustics of the<br />
given room, for example, to cut back the bass frequencies for<br />
smaller clubs' stages. The GLOBAL EQ lets you do this quickly<br />
without having to adjust the settings of all presets.<br />
To activate the GLOBAL EQ, press and hold the t PRESET knob.<br />
EQUALIZER ON or OFF will appear in the display. If OFF appears,<br />
press and hold t PRESET once more.<br />
The EQ will activate and the BASS, MID, TREBLE and PRESENCE<br />
knobs are enabled.<br />
W BASS adjusts the bottom end, W MID the low mids, W TREBLE<br />
the upper mids, and W PRESENCE the top end frequencies. You<br />
can switch the EQ ( t PRESET) on and off to hear how the<br />
modifications affect the sound.<br />
Once you are satisfied, leave the EQ on and exit the menu by<br />
briefly tapping r TUNER.<br />
Note: If the GLOBAL EQ was on when you switched the amp off,<br />
the amp will indicate this when you switch it on again. EQUALIZER<br />
ON will flash in the display for about eight seconds. The idea here<br />
is of course to remind you that the EQ is still enabled. If you are in<br />
a different venue, you should switch the GLOBAL EQ off or<br />
readjust it.<br />
6.3 TUNER<br />
Activate the built-in tuning device by tapping r TUNER with your<br />
fingertip. The term TUNER will appear in the first line of the display.<br />
A large “+” appears when the string’s pitch is sharp (too high), a<br />
“-“ when the pitch is flat (too low), and “OK” when the string is<br />
tuned to pitch. You can also see this indicated in the chain of<br />
lights at the bottom of the display.<br />
Various values can appear in the second line.<br />
Let’s take a look at these:<br />
1) The selected center frequency of the reference note A is indicated<br />
at the beginning of the line. You can adjust it within a<br />
range of 435 to 445 hertz using PARA 1. This lets you calibrate<br />
the TUNER should the need arise.<br />
2) You can opt to mute the zenTera while you are tuning. Use<br />
PARA 2 to preset the amp’s level for the duration of the tuning<br />
procedure: M = muted, 1, 2 ,3 = three different levels. The<br />
given setting appears in the display following the center frequency.<br />
3) The pitch of the most recently played string is indicated at the<br />
end of the second display line.<br />
W : TURN KNOB r : CLICK s : DOUBLE-CLICK t : CLICK AND HOLD BRIEFLY<br />
11<br />
ENGLISH
ZENTERA-MANUAL<br />
6.4 STORE (NAME):<br />
Press r STORE to save preset settings.<br />
The indicator in the display will flash.<br />
Then select the desired memory slot for the preset by means of<br />
the W PRESET knob.<br />
In order to name the preset, use W PARA 1 to move the cursor<br />
and select the desired letters, numbers or symbols from the<br />
available font. If you tap r PARA 2 once you have made your<br />
selection, the cursor will automatically jump to the next position,<br />
sparing you the necessity of having to navigate with PARA 1.<br />
The preset is stored by pressing r STORE repeatedly.<br />
You can cancel the storage process at any time by pressing<br />
r TUNER or r TAP.<br />
Note1: Solely the PRESET and PARA knobs are enabled during the<br />
storage process. All other knobs are disabled.<br />
Note2: If you want to edit and store presets you must deactivate<br />
the „MEMORY PROTECTION“ in the system menu. See 7.1 below.<br />
6.5 FOOTSWITCH<br />
You can connect a standard 1-way or 2-way sustain pedal to the<br />
zenTera ® and use it to switch to the next higher preset number<br />
(UP) or next lower preset (DOWN), or back and forth between<br />
two presets (TOGGLE). Go to the system menu to assign the<br />
desired UP/DOWN/TOGGLE function<br />
(see 7.12, FOOTSWITCH ASSIGN).<br />
The zenTera ® detects the type of connected switch.<br />
In order to be able to switch back and forth between two presets<br />
with a 1-way or 2-way sustain pedal, you have to select the<br />
appropriate setting in the system menu and you must assign a<br />
marker to one of the two presets. To this end, select the desired<br />
WPRESET and double-click sPARA 2. This sets the marker. Select<br />
the second WPRESET. You can then switch back and forth via<br />
sustain pedal between this most recently selected preset and the<br />
preset that you assigned the marker to. This is a convenient<br />
option when just two sounds will suffice, say when you're<br />
rehearsing one song.<br />
6.6 TAP<br />
In addition to letting you sync up delay to the tempo of a song<br />
<strong>manual</strong>ly (see 5.3, TAP), the TAP button gives you another option:<br />
you can use it to create short samples of guitar patterns or riffs.<br />
The zenTera ® plays these samples back in repetitive loops so that<br />
you can play a melody or another riff over them.<br />
The optionally available Stageboard is far better suited for this<br />
purpose than the TAP button on the amp, because you have to<br />
press and hold the latter while you're recording samples. Using<br />
the Stageboard frees up both hands, which tends to make<br />
playing somewhat easier for most of us.<br />
To sample a riff, proceed as follows:<br />
• Tap the rDELAY knob. You have just set the amp to DELAY<br />
mode.<br />
• Then select one of the "HOLD" delay effects by turning the<br />
WTYPE knob (see the table below).<br />
12<br />
If you want your sample to repeat at an unvarying volume level,<br />
set FEEDBACK to 100 via WPARA 2. At values lower than 100, the<br />
volume of the sample becomes softer with every repetition.<br />
Press and hold the TAP button while you record your sample.<br />
When you release the button, the zenTera ® will generate a loop<br />
that is played back repeatedly.<br />
DELAY<br />
TYPE PARA 1 PARA 2<br />
Hold Echo >>PLEASE USE TAP BUTTON
ZENTERA - MANUAL<br />
sound that you had been using would be available again without<br />
having to dial it in again in the event of a power outage or<br />
similar mishap.<br />
You can choose the preferred alternative in the system menu of<br />
the zenTera ® .<br />
Turn the WTYPE knob until WAKE UP appears in the display.<br />
Use the WPARA 1 / WPARA 2 knobs to set either LAST PRESET or<br />
LAST SETTING.<br />
7.4 READ VALUES<br />
If you want the amp to display the parameters of a preset as<br />
they were when it was originally created so that you can view<br />
them, use W TYPE to dial up this menu. This is a special feature<br />
designed specifically to display all of a preset's settings.<br />
This spares you the hassle of checking out each parameter<br />
individually via its respective knob and prevents you from<br />
unintentionally editing these settings. You can call up all settings<br />
one after another via W PARA 1 or W PARA 2. They are displayed<br />
in the following sequence:<br />
• Preset Name<br />
• Amp Type<br />
• Sensitivity<br />
• Gain<br />
• Bass<br />
• Mid<br />
• Treble<br />
• Presence<br />
• Volume<br />
• Insfx Name<br />
• Insfx Para1<br />
• Insfx Para2<br />
• Modfx Name<br />
• Modfx Mix<br />
• Modfx Para1<br />
• Modfx Para2<br />
• Modfx Pre bzw.<br />
Modfx Post<br />
• Delfx Name<br />
• Delfx Mix<br />
7.5 MIDI SETUP BASE CHANNEL<br />
Here you can define the MIDI base channel over which the<br />
zenTera ® communicates. Turn W TYPE until MIDI SETUP BASE<br />
CHANNEL appears in the display. Use the W PARA 1 / W PARA 2<br />
knobs to set the desired channel (1-16).<br />
7.6 MIDI PROGCHG<br />
This submenu determines if and how the zenTera sends MIDI program<br />
change messages (these are commands that change presets<br />
remotely via MIDI) and how it responds when it receives<br />
these messages.<br />
Turn WTYPE until MIDI PROGCHG appears in the display. Using<br />
WPARA 1 or WPARA 2, select the desired mode from the following<br />
options:<br />
PROGCHG OFF: The zenTera does not send MIDI program changes,<br />
nor does it respond to incoming messages. For example, this<br />
option does not allow you to address an external effect device<br />
via MIDI, and you cannot use a MIDI switcher to change the<br />
zenTera’s presets.<br />
PROGCHG ONLY: This is the default in Software 2.0. The zenTera<br />
sends and processes MIDI program changes. Note that messages<br />
are sent without bank select commands because these are irrelevant<br />
(for the time being, that is). More on this in the next section.<br />
PROGCHG CC00 and CC32: MIDI program changes are sent with<br />
bank select commands. Though this option is unnecessary at this<br />
point, it will become very useful if and when a future software<br />
upgrade provides the zenTera with over 128 memory slots.<br />
7.7 MIDI SETUP DEVICE ID<br />
You may at some point elect to connect several zenTera ® s in a<br />
MIDI chain and need to address these individually via MIDI SysEx<br />
commands. The MIDI device ID rather than the MIDI base<br />
channel is used for this purpose. To this end, select the menu via<br />
TYPE and choose a device ID between 1 and 127 (default<br />
W<br />
value = 1) using WPARA 1 or WPARA 2.<br />
• Delfx Para1<br />
• Delfx Para2<br />
• Delay Pre bzw.<br />
Delay Post<br />
• Rev Name<br />
• Revfx Mix<br />
• Rev Para1<br />
• Rev Para2<br />
• Reverb Pre bzw.<br />
Reverb Post<br />
7.8 MIDI SYSEX SEND<br />
This menu lets you determine if the zenTera ® responds to MIDI<br />
requests by sending SysEx data (for example, presets and system<br />
settings). Turn W TYPE until MIDI SYSEX SEND appears in the<br />
display. Then enter YES or NO via the W PARA 1 or W PARA 2<br />
knobs.<br />
7.9 MIDI SYSEX RECEIVE<br />
This submenu lets you set the zenTera ® so that it is able to Receive<br />
SysEx data. Turn WTYPE until MIDI SYSEX RECEIVE appears in the<br />
display. Then enter YES or NO via the WPARA 1 or WPARA 2<br />
knobs.<br />
7.10 MIDI DUMP<br />
This menu lets you create backups of your settings on an external<br />
storage medium such as your PC. This comes in handy if, for<br />
example, you play in several bands. With this option, you can<br />
download the presets that you need for each band from your<br />
archive whenever you need them. Beyond that, you can swap<br />
presets with other zenTera ® users via MIDI DUMP. And this of<br />
course affords you data protection in the unlikely event that your<br />
zenTera ® has to go in for repairs and you want to use a backup<br />
amp.<br />
Connect your zenTera ® 's MIDI OUT port with the MIDI IN port of<br />
your PC or another zenTera ® .<br />
Turn WTYPE until MIDI DUMP appears in the display. Use<br />
PARA 2 to select the MIDI data that you want<br />
W PARA 1 or W<br />
the zenTera ® to send:<br />
For the record, ACTIVE PRESET sends the currently active preset,<br />
ALL PRESET sends all presets. SYSTEM CONFIG sends the system<br />
menu’s settings, MIDI MAP sends the data contained in the MIDI<br />
MAPPING menu (see section 7.11), and ALL sends all stored data.<br />
Send data by tapping r PARA 1.<br />
SYSEX SEND must be set to YES to ensure data is transferred<br />
correctly. If your zenTera is receiving data from another zenTera ® ,<br />
a PC or similar device, MIDI SYSEX RECEIVE must be set to YES.<br />
You can also of course request the zenTera’s settings via MIDI<br />
(REQUEST; see the appendix).<br />
To ensure flawless uploading, MIDI SYSEX SEND must be set to YES.<br />
If you want to download data from another zenTera ® , a PC or<br />
similar device, make sure that you set MIDI SYSEX RECEIVE to YES.<br />
You can of course request the zenTera ® 's settings via MIDI<br />
(REQUEST; see appendix for details).<br />
7.11 MIDI MAPPING<br />
If you employ a MIDI foot controller, use this menu to determine<br />
which of the zenTera ® 's presets are switched through program<br />
change messages sent from the foot controller. This is a<br />
particularly handy option when you want to the switch an<br />
external signal processor's effect programs at the same time via<br />
MIDI.<br />
Use WTYPE to dial in the MIDI MAPPING menu. Tap rPARA 1 or<br />
rPARA 2 to switch the function ON or OFF. Turn W<br />
PARA 1 to dial<br />
in one of the program numbers of your MIDI foot controller.<br />
Turn W PARA 2 to assign to this memory slot one of the zenTera ® 's<br />
128 presets.<br />
7.12 FOOTSWITCH ASSIGN<br />
Using a standard 1-way or 2-way sustain pedal, you can switch<br />
presets upwards (UP) or downwards (DOWN), or you can switch<br />
back and forth between two presets (TOGGLE). This menu lets<br />
you select the desired UP/DOWN/TGL function.<br />
W : TURN KNOB r : CLICK s : DOUBLE-CLICK t : CLICK AND HOLD BRIEFLY<br />
13<br />
ENGLISH
ZENTERA-MANUAL<br />
Turn W TYPE until FOOTSWITCH ASSIGN appears in the display.<br />
Select UP, DWN or TGL using the W PARA 1 or W PARA 2 knobs.<br />
If you opt for the TOGGLE function, see section 6.5 above for<br />
further instructions.<br />
7.13 VOLUME PEDAL<br />
This menu lets you determine at which point in the signal chain a<br />
connected volume pedal or the volume pedal of the optionally<br />
available Z-Board regulates the amp’s level.<br />
Turn WTYPE until VOLUME PEDAL appears in the display. Using<br />
WPARA 1 or WPARA 2, select the desired mode from the<br />
following options:<br />
AMP VOLUME: With this option, the pedal controls the amp<br />
section’s Volume knob, meaning that it adjusts the pre-effect<br />
section volume level. The volume value programmed in the<br />
preset has priority when you change a preset, and it is activated<br />
first. The level will not change until you operate the pedal.<br />
GLOBAL: With this option, the pedal controls the amp’s Master<br />
knob, meaning that it adjusts the overall output level. Even if you<br />
change a preset, the level is still determined by the pedal, or<br />
more accurately, its current value.<br />
7.14 VOLUME PEDAL RANGE MINIMUM,<br />
VOLUME PEDAL RANGE MAXIMUM<br />
If you have connected an expression pedal to the jack on the<br />
rear panel of the zenTera ® , you can define the desired volume<br />
control range for the pedal in these submenus. The same of<br />
course holds true for the volume pedal on the optionally<br />
available Stageboard.<br />
Turn WTYPE until the appropriate menu appears in the display.<br />
Select values between 0.0 and 9.9 using the WPARA 1 or<br />
WPARA 2 knobs.<br />
7.15 CV PED TYPE<br />
This menu lets you select a linear or a logarithmic action for your<br />
foot pedal's control range (linear = uniformly increasing volume,<br />
logarithmic = at first a steep and then a flatter rise in the volume<br />
curve).<br />
Turn W TYPE until CV PED TYPE appears in the display. Select<br />
LINEAR TYPE or LOG TYPE using W PARA 1 or W PARA 2.<br />
7.16 CV PED CALIB MIN/MAX<br />
You can calibrate a connected expression pedal here. Turn<br />
WTYPE until the CV PED CALIB SET TO MIN menu appears in the<br />
display. Set your foot pedal so that it rests at its minimum position<br />
(MIN, with the heel all the way back and the toe pointing up)<br />
and confirm by tapping rPARA 1 or rPARA 2. The display<br />
automatically pages to the next menu, CV PED CALIB SET TO<br />
MAX. Floor the pedal so that it rests at its maximum position and<br />
tap rPARA 1 again. Your pedal is now calibrated and ready to<br />
“rock”.<br />
7.17 Z-BOARD BANK CHANGE<br />
This menu lets you define how the zenTera ® responds to bank<br />
change commands sent from the Z-Board. This command can<br />
either access a preset of the next bank directly, meaning that<br />
the preset is activated immediately along with the bank change.<br />
Note that in this case the Z-Board switches in increments of five.<br />
This means that if you are currently using preset 23, a bank change<br />
command automatically activates preset 28. If you do not<br />
want presets to be switched in this manner, you can opt for pure<br />
bank change functionality. In this case, the next bank is always<br />
called up without accessing a preset directly. You then have to<br />
activate one of this bank's presets separately by stepping on the<br />
appropriate switch on the Z-Board.<br />
Turn W TYPE until the menu appears in the display. Use W PARA 1<br />
to select DIR for the former, BNK for the latter option.<br />
14<br />
Note: For an in-depth explanation of the workings of the Z-Board,<br />
please consult the Z-Board owner's <strong>manual</strong>.<br />
7.18 Z-BOARDCALIB<br />
As described above in section 7.16 for a connected expression<br />
pedal, you can also calibrate the optional Z-Board.<br />
Proceed as follows:<br />
Turn WTYPE until the Z-BOARDCALIB SET WAH MIN menu appears<br />
in the display. Set the wah-wah pedal of the Z-Board so that it<br />
rests at its minimum position (with the heel all the way back and<br />
the toe pointing up) and confirm by tapping rPARA 1 or<br />
rPARA 2. The display automatically pages to the next menu,<br />
SET WAH MAX. Floor the pedal so that it rests at its maximum<br />
position and tap rPARA 1 again.<br />
The display automatically pages to the next menu, SET VOLUME<br />
MIN, which lets you calibrate the volume pedal. The procedure is<br />
the same as for calibrating the wah-wah pedal. Set the volume<br />
pedal so that it rests at its minimum position and confirm by<br />
tapping rPARA 1 or rPARA 2. The display automatically<br />
pages to the next menu, SET VOLUME MAX. Floor the pedal so<br />
that it rests at its maximum position and tap rPARA 1 again.<br />
7.19 VERSION<br />
This menu tells you which software versions the individual<br />
modules of your zenTera ® are running.<br />
Turn W TYPE until the menu appears in the display. Then you can<br />
call up the versions with W PARA 1 or W PARA 2.<br />
8.0 MAINTENANCE AND CARE<br />
The zenTera ® does not require service of any type. There are<br />
however a few basic rules that will extend the service life of your<br />
amp enormously:<br />
• Make sure all peripheral devices, cords and cables are in a<br />
state of good repair! Defective speaker cables are the most<br />
common cause of power amp failure. Poor-quality cables will<br />
cause hum and undesirable noise.<br />
• Ensure plenty of air can circulate around your amp's ventilation<br />
ducts at all times.<br />
• Definitely avoid exposure to mechanical shocks and extreme<br />
heat, dust and particularly moisture.<br />
• Be picky about the kind of peripheral devices you connect to<br />
your amp and always check out their specs before you plug<br />
them in. Never connect speaker cabinets with an ohm rating<br />
lower than the zenTera ® is designed to handle. Under no<br />
circumstances should you connect devices with high output<br />
signal levels (e.g. power amps) to your amp's input.<br />
• Be sure the AC power source delivers the current that your<br />
amp is designed to handle before you plug it in. When in<br />
doubt about the local rating, ask the venue's sound technician<br />
or a stage hand.<br />
• Refrain from DIY repairs! To be on the safe side, you should also<br />
have a qualified technician replace internal fuses.<br />
9.0 POSSIBLE ERROR SOURCES/<br />
TROUBLESHOOTING<br />
E1) The zenTera ® won't power up when you switch it on:<br />
• It's not getting AC power. Check the mains cable to see if it is<br />
connected properly!<br />
• The mains fuse is defective. Replace the fuse with another<br />
identical fuse. If this fuse also blows, be sure to talk to your<br />
local Hughes & Kettner dealer.<br />
W : TURN KNOB r : CLICK s : DOUBLE-CLICK t : CLICK AND HOLD BRIEFLY
ZENTERA - MANUAL<br />
E2) The zenTera ® is cabled up and connected properly, but no<br />
sound is audible.<br />
• One or more of the volume knobs or the master knob is/are<br />
turned all the way down. Dial in higher settings.<br />
• The internal speakers are not connected. Plug them in.<br />
• The zenTera ® is in TUNER mode, which means that it is muted.<br />
Quit TUNER mode by tapping the r TUNER button.<br />
• A shorted external speaker cable caused one of the internal<br />
fuses to blow. Have a qualified technician change the fuse<br />
(ensure the replacement fuse bears the proper rating).<br />
• The volume pedal of the connected Z-Board is set to the<br />
minimum position. Floor the pedal.<br />
E3) The zenTera ® will not respond to the Z-Board or footswitch.<br />
• The connector of the Z-Board or footswitch is not plugged in<br />
correctly or at all. Plug it into the zenTera ® , ensuring that it is<br />
seated firmly.<br />
E4) The sound is totally distorted when you activate a connected<br />
effects device.<br />
• The input of the effect device is being overdriven. If it is<br />
equipped with a level meter or other level indicator, check the<br />
signal level and back off the signal processor's input sensitivity<br />
(via a knob labeled "Input" or "Gain").<br />
E5) The signal level drops considerably when you connect an<br />
external effects device,<br />
• The effect device is sending the signal back at too low a level.<br />
Turn up the signal processor's output level.<br />
E6) A connected MIDI controller is not getting operating voltage<br />
via the phantom power feed of the MIDI IN port:<br />
• The MIDI cable is defective. Replace it with a new cable.<br />
• The phantom power fuse tripped. Replace the blown fuse<br />
making sure that the replacement has the same specs as the<br />
original fuse.<br />
10.0 TECHNICAL SPECIFICATIONS<br />
PREAMP SECTION<br />
INPUT -10 dBV / 1 M ohm<br />
FX RETURN L/R 0 dBV / 10 K ohms<br />
FX SEND L/R 0 dBV / 220 ohms<br />
RECORDING OUT L/R 0 dBV / 220 ohms<br />
POWER AMP SECTION<br />
OUTPUT POWER 2 x 100 watts into 6 ohms<br />
2 x 60 watts into 16 ohms<br />
FREQUENCY RESPONSE 20 Hz - 20 KHz<br />
SPEAKER OUTS Minimum impedance per channel:<br />
6 ohms (1 x 16 ohms + 1 x 8 ohms)<br />
LOUDSPEAKER Celestion Vintage 30, 16 ohms<br />
HEADPHONES OUT 500 mW into 4 - 600 ohms<br />
General Specifications<br />
MAINS VOLTAGE 230 volts AC (European version)<br />
117 volts AC (North American version)<br />
100 volts AC (Japanese version)<br />
MAX. POWER CONSUMP. 708 VA<br />
MAINS FUSE T 2.5 A (230 V model)<br />
T 5 A (117 V model)<br />
T 6.3 A (100 V model)<br />
EXTERNAL FUSES T 500 mA MIDI Phantom<br />
INTERNAL FUSES 2 x T 5 A (power amp)<br />
1 x T 2.5 A (DSP)<br />
2 x T 500 mA (analog section)<br />
DIMENSIONS (W X H X D) 750 x 585 x 300 mm<br />
WEIGHT 30 kg<br />
11.0 APPENDIX<br />
11.1 TABLE: EFFECTS AND EFFECT PARAMETERS<br />
The following overview gives you a survey of all of the zenTera ® 's<br />
effects and effect parameters. Note that you must first activate the<br />
appropriate effect menu before you can enter and edit settings.<br />
Activate INS FX by tapping the r AMP TYPE knob and the remaining<br />
menus by turning or tapping Wr MOD FX, DELAY and/or REVERB.<br />
INS FX<br />
TYPE PARA 1 PARA 2<br />
Wah Wah - - - -<br />
Wah Wah 2 - - - -<br />
Fix Wah Frequency 0.23 - 1.55 - -<br />
Fix Wah 2 Frequency 0.50 - 2.21 - -<br />
Mod Wah Rate 0.0 - 10.0 Intensity 0 - 100<br />
Mod Wah 2 Rate 0.0 - 10.0 Intensity 0 - 100<br />
Comp Short Make Up Gain 0.0 - 15.0 Intensity 0 - 100<br />
Comp Medium Make Up Gain 0.0 - 15.0 Intensity 0 - 100<br />
Comp Long Make Up Gain 0.0 - 15.0 Intensity 0 - 100<br />
Tube Scream Gain 0.0 - 10.0 Level 0.0 - 10.0<br />
Fuzz Gain 0.0 - 10.0 Level 0.0 - 10.0<br />
MOD FX<br />
TYPE PARA 1 PARA 2<br />
Chorus Mono Rate 0.1 - 10.0 Depth 0 - 100<br />
Chorus Stereo Rate 0.1 - 10.0 Depth 0 - 100<br />
Flanger 1 Mono Rate 0.1 - 10.0 Intensity 0 - 100<br />
Flanger 1 Stereo Rate 0.1 - 10.0 Intensity 0 - 100<br />
Flanger 2 Mono Rate 0.0 - 10.0 Intensity 0 - 100<br />
Flanger 2 Stereo Rate 0.0 - 10.0 Intensity 0 - 100<br />
Phaser Rate 0.1 - 10.0 Colour 0 - 100<br />
Phaser XL Rate 0.1 - 10.0 Colour 0 - 100<br />
Tremolo Rate 0.5 - 10.0 Shape 0 - 100<br />
DELAY<br />
TYPE PARA 1 PARA 2<br />
Echo Time 10 ms - 2 s Feedback 0 - 100<br />
Ping Pong Time 10 ms - 2 s Feedback 0 - 100<br />
Tape Echo Time 10 ms - 2 s Feedback 0 - 100<br />
Tape Hallo Time 10 ms - 2 s Feedback 0 - 100<br />
Tape Multi Time 10 ms - 2 s Feedback 0 - 100<br />
Hold Echo >>PLEASE USE TAP BUTTON>PLEASE USE TAP BUTTON>PLEASE USE TAP BUTTON
ZENTERA-MANUAL<br />
11.2 MIDI IMPLEMENTATION CHART<br />
28<br />
MIDI Implementation Chart v. 2.0 (page 1 of 3)<br />
Manufacturer: Hughes & Kettner Model: Zentera Version: 2.01 Date: 05.12.00/AP<br />
Transmitted Recognized Remarks<br />
1. Basic Information<br />
MIDI channels 1-16 1-16<br />
Note Numbers - -<br />
Program Change Yes 1) Bank Select Response? (Yes / No)<br />
If yes, list banks utilized in remarks column<br />
Yes 1)<br />
Adjustable via System Menu<br />
Modes supported: Mode 1:Omni-On, Poly (Yes/No)<br />
Mode 2:Omni-On, Mono (Yes/No)<br />
Mode 3:Omni-Off, Poly (Yes/No)<br />
Mode 4:Omni-Off, Mono (Yes/No)<br />
Multi Mode (Yes/No)<br />
Mode 3 / 4: Omni Off<br />
Note-On Velocity (Yes/No) No No<br />
Note-Off Velocity (Yes/No) No No<br />
Channel Aftertouch (Yes/No) No No<br />
Poly (Key) Aftertouch (Yes/No) No No<br />
Pitch Bend (Yes/No) No No<br />
Active Sensing (Yes / No) No No<br />
System Reset (Yes / No) No No<br />
Tune Request (Yes / No) No No<br />
System Exclusive: Sample Dump Standard (Yes/No)<br />
Device Inquiry (Yes/No)<br />
File Dump (Yes/No)<br />
MIDI Tuning (Yes/No)<br />
Master Volume (Yes/No)<br />
Notation Information (Yes/No)<br />
Turn GM1 System On (Yes/No)<br />
Turn GM2 System On (Yes/No)<br />
Turn GM System On (Yes/No)<br />
Other (note in Remarks column)<br />
No<br />
No<br />
No<br />
No<br />
No<br />
No<br />
No<br />
No<br />
No<br />
Yes<br />
No<br />
No<br />
No<br />
No<br />
No<br />
No<br />
No<br />
No<br />
No<br />
Yes<br />
NRPNs (Yes/No) No No<br />
RPN 00 (Pitch Bend Sensitivity) (Yes / No)<br />
RPN 01 (Channel Fine Tune) (Yes/No)<br />
RPN 02 (Channel Coarse Tune) (Yes/No)<br />
RPN 03 (Tuning Program Select (Yes/No)<br />
RPN 04 (Tuning Bank Select) (Yes/No)<br />
RPN 05 (Modulation Depth Range) (Yes/No)<br />
2. MIDI Timing and Synchronisation<br />
MIDI Clock (Yes/No) No No<br />
Song Position Pointer (Yes/No) No No<br />
Song Select (Yes/No) No No<br />
Start (Yes/No)<br />
Continue (Yes/No)<br />
Stop (Yes/No)<br />
No<br />
No<br />
No<br />
No<br />
No<br />
No<br />
No<br />
No<br />
No<br />
MIDI Time Code (Yes/No) No No<br />
MIDI Machine Control (Yes/No) No No<br />
MIDI Show Control (Level/No)<br />
3. Extensions Compatibility<br />
No No<br />
General MIDI compatible? (Level(s)/No)<br />
Is GM default power-up mode? (Level/No)<br />
No<br />
DLS compatible (Level(s)/No)<br />
Import DLS Files? (Type(s)/No)<br />
Export DLS Files? (Type(s)/No)<br />
No<br />
Import Standard MIDI Files (Type(s)/No)<br />
Export Standard MIDI Files (Type(s)/No)<br />
NOTES<br />
No<br />
No<br />
No<br />
No<br />
No<br />
No<br />
No<br />
No<br />
No<br />
No<br />
Data Dumps for<br />
User Preset Data,<br />
Global Data,<br />
Firmware Update<br />
MIDI Program Change Map<br />
Factory Preset Data
ZENTERA - MANUAL<br />
MIDI Implementation Chart v. 2.0 (page 2 of 3)<br />
Manufacturer: Hughes & Kettner Model: Zentera Version: 2.01 Date: 05.12.00/AP<br />
Controller # Function Transmitted (Y/N) Recognized (Y/N) Remarks<br />
0 Bank Select (MSB) Yes Yes<br />
1 Modulation Wheel (MSB) No No<br />
2 Breath Controller (MSB) No No<br />
3<br />
4 Foot Controller (MSB) No No<br />
5 Portamento Time (MSB) No No<br />
6 Data Entry (MSB) No No<br />
7 Channel Volume (MSB) No No<br />
8 Balance (MSB) No No<br />
9<br />
10 Pan (MSB) No No<br />
11 Expression (MSB) No No<br />
12 Effect Control 1 (MSB) No No<br />
13 Effect Control 2 (MSB) No No<br />
14<br />
15<br />
16 General Purpose Controller 1 (MSB) No No<br />
17 General Purpose Controller 2 (MSB) No No<br />
18 General Purpose Controller 3 (MSB) No No<br />
19 General Purpose Controller 4 (MSB) No No<br />
20<br />
21<br />
22<br />
23<br />
24<br />
25<br />
26<br />
27<br />
28<br />
29<br />
30<br />
31<br />
32 Bank Select (LSB) Yes Yes<br />
33 Modulation Wheel (LSB) No No<br />
34 Breath Controller (LSB) No No<br />
35<br />
36 Foot Controller (LSB) No No<br />
37 Portamento Time (LSB) No No<br />
38 Data Entry (LSB) No No<br />
39 Channel Volume (LSB) No No<br />
40 Balance (LSB) No No<br />
41<br />
42 Pan (LSB) No No<br />
43 Expression (LSB) No No<br />
44 Effect Control 1 (LSB) No No<br />
45 Effect Control 2 (LSB) No No<br />
46<br />
47<br />
48 General Purpose Controller 1 (LSB) No No<br />
49 General Purpose Controller 2 (LSB) No No<br />
50 General Purpose Controller 3 (LSB) No No<br />
51 General Purpose Controller 4 (LSB) No No<br />
52<br />
53<br />
54<br />
55<br />
56<br />
57<br />
58<br />
59<br />
60<br />
61<br />
62<br />
63<br />
29
ZENTERA-MANUAL<br />
30<br />
MIDI Implementation Chart v. 2.0 (page 3 of 3)<br />
Manufacturer: Hughes & Kettner Model: Zentera Version: 2.01 Date: 05.12.00/AP<br />
Controller # Function Transmitted (Y/N) Recognized<br />
(Y/N)<br />
64 Sustain Pedal No No<br />
65 Portamento On/Off No No<br />
66 Sostenuto No No<br />
67 Soft Pedal No No<br />
68 Legato Footswitch No No<br />
69 Hold 2 No No<br />
70 Sound Controller 1 Sound Variation No No<br />
71 Sound Controller 2 Timbre No No<br />
72 Sound Controller 3 Release Time No No<br />
73 Sound Controller 4 Attack Time No No<br />
74 Sound Controller 5 Brightness No No<br />
75 Sound Controller 6 Decay Time No No<br />
76 Sound Controller 7 Vibrato Rate No No<br />
77 Sound Controller 8 Vibrato Depth No No<br />
78 Sound Controller 9 Vibrato Delay No No<br />
79 Sound Controller 10 No No<br />
80 General Purpose Controller 5 No No<br />
81 General Purpose Controller 6 No No<br />
82 General Purpose Controller 7) No No<br />
83 General Purpose Controller 8 No No<br />
84<br />
85<br />
86<br />
87<br />
88<br />
89<br />
90<br />
Portamento Control No No<br />
91 Effects 1 Depth Reverb Send Level No No<br />
92 Effects 2 Depth No No<br />
93 Effects 3 Depth Chorus Send Level No No<br />
94 Effects 4 Depth No No<br />
95 Effects 5 Depth No No<br />
96 Data Increment No No<br />
97 Data Decrement No No<br />
98 Non-Registered Parameter N. (LSB) No No<br />
99 Non-Registered Parameter N. (MSB) No No<br />
100 Registered Parameter Number (LSB) No No<br />
101<br />
102<br />
103<br />
104<br />
105<br />
106<br />
107<br />
108<br />
109<br />
110<br />
111<br />
112<br />
113<br />
114<br />
115<br />
116<br />
117<br />
118<br />
119<br />
Registered Parameter Number (MSB) No No<br />
Channel Mode Messages<br />
120 All Sound Off No No<br />
121 Reset All Controllers No No<br />
122 Local Control On/Off No No<br />
123 All Notes Off No No<br />
124 Omni Mode Off No No<br />
125 Omni Mode On No No<br />
126 Poly Mode Off No No<br />
127 Poly Mode On No No<br />
Remarks
ZENTERA - MANUAL<br />
11.3 AC POWER AND THE GLOBAL CURRENT ADAPTER<br />
NOTE: Before plugging into the wall socket, make certain the<br />
amp is set to the proper voltage for your locale. You can read the<br />
amp's voltage setting in the Voltage Selector window found on<br />
the back of the unit. Also check the fuse specifications printed<br />
above the amp's power cord socket, and ensure that the fuses<br />
you are using have the correct value for your local current.<br />
zenTera ® can operate at AC currents of 230 volts, 117 volts or<br />
100 volts. Use the VOLTAGE SELECTOR to adjust the voltage<br />
accordingly (see Diagram 1):<br />
• Press the fuse's safety latch (1) towards the window (3) with a<br />
small screwdriver and remove it with the two fuses.<br />
• Pull the cartridge (4) out of its socket.<br />
• Rotate the cartridge (4) and plug it back into the socket so the<br />
desired voltage is legible.<br />
• Replace the previously mounted fuses (5). Make certain the<br />
values of your fuses are identical to those required for your<br />
local voltage. The values are specified above the amp's power<br />
cord socket.<br />
• Reinsert the fuse cartridge (2) with the new fuses (5).<br />
• Before you plug into the wall socket, check again to ensure the<br />
correct voltage rating is legible in the VOLTAGE SELECTOR<br />
window (3).<br />
11.3 NETZANSCHLUSS UND WELTSPANNUNGSADAPTION<br />
HINWEIS: Stellen Sie bitte vor dem Anschluß des zenTera ® sicher,<br />
daß die vorhandene Netzspannung mit dem im Sichtfenster des<br />
VOLTAGE SELECTORS angegebenen Spannungswert übereinstimmt.<br />
Überprüfen Sie auch die Sicherungswerte entsprechend<br />
dem Aufdruck nahe der Anschlußbuchse.<br />
Der zenTera ® kann an den Netzspannungen 230 V, 117 V und<br />
100 V betrieben werden. Die Anpassung erfolgt mittels des in die<br />
Netzbuchse integrierten VOLTAGE SELECTORS. Dazu wird wie folgt<br />
vorgegangen (siehe Abb.1):<br />
• Mittels eines kleinen Schraubenziehers die Sperre (1) des<br />
Sicherungshalters in Richtung Sichtfenster (3) drücken und<br />
diesen zusammen mit den beiden Sicherungen herausziehen.<br />
• Den Steckeinsatz (4) herausziehen.<br />
• Der Steckeinsatz (4) wird so gedreht und wieder eingesteckt,<br />
daß der Aufdruck der gewünschten Netzspannung nach außen<br />
zeigt.<br />
• Die vorher montierten Sicherungen (5) werden ersetzt.<br />
Verwende nur den nahe der Anschlußbuchse aufgedruckten<br />
Sicherungswert, der für die neue Netzspannung vorgesehen ist!<br />
• Den Sicherungshalter (2) zusammen mit den neuen<br />
Sicherungen (5) einsetzen.<br />
• Vor dem Netzanschluß nochmals prüfen, ob der richtige<br />
Spannungswert im Sichtfenster (3) des VOLTAGE SELECTORS<br />
erkennbar ist.<br />
MAINS IN / VOLTAGE SELECTOR<br />
31