

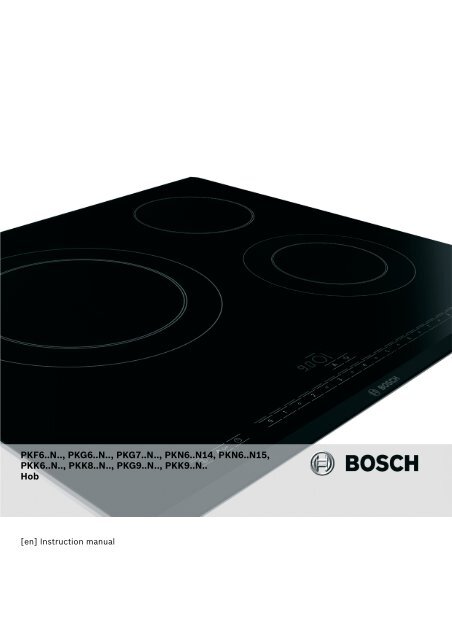
PKF6..N.., PKG6..N.., PKG7..N.., PKN6..N14 - Appliances Online
PKF6..N.., PKG6..N.., PKG7..N.., PKN6..N14 - Appliances Online
PKF6..N.., PKG6..N.., PKG7..N.., PKN6..N14 - Appliances Online

You also want an ePaper? Increase the reach of your titles
YUMPU automatically turns print PDFs into web optimized ePapers that Google loves.
<strong>PKF6.</strong>.N.., <strong>PKG6.</strong>.N.., <strong>PKG7.</strong>.N.., <strong>PKN6.</strong>.<strong>N14</strong>, <strong>PKN6.</strong>.N15,<br />
PKK6..N.., PKK8..N.., PKG9..N.., PKK9..N..<br />
Hob<br />
[en] Instruction manual
2<br />
����������<br />
������<br />
����<br />
����������<br />
������<br />
������<br />
����������<br />
���������<br />
������<br />
����������<br />
���������<br />
� � � � � � � � � �<br />
������<br />
�������<br />
������<br />
�������<br />
����������<br />
����<br />
������<br />
����������<br />
���������<br />
� � � � � � � � � �<br />
������<br />
�������<br />
� � � � � � � � � � � � � � � � � � � �<br />
�<br />
������<br />
�������<br />
��������� ����<br />
� � � � � � � � � �<br />
���������<br />
����������<br />
�������<br />
����<br />
����������<br />
�������<br />
������<br />
������<br />
�������<br />
������<br />
� � � � � � � � � �<br />
�������<br />
�������<br />
� � � � � � � � � �<br />
������<br />
������
����������<br />
��������� �������<br />
� � � � � � � � � �<br />
������ ����<br />
Ú Table of contents[en] Instruction manual<br />
Safety precautions..................................................................... 3<br />
Causes of damage .............................................................................4<br />
Environmental protection ......................................................... 5<br />
Environmental protection...................................................................5<br />
Tips for saving energy .......................................................................5<br />
Getting to know your appliance................................................ 5<br />
The control panel................................................................................5<br />
The hotplates .......................................................................................5<br />
Residual heat indicator......................................................................6<br />
Setting the hob........................................................................... 6<br />
Switching the hob on and off ...........................................................6<br />
Setting a hotplate................................................................................6<br />
Table of cooking times ......................................................................6<br />
Electronic boil start control ...................................................... 7<br />
Setting the electronic boil start control...........................................7<br />
Table of cooking times for electronic boil start control...............8<br />
Tips for the electronic boil start control..........................................8<br />
Childproof lock........................................................................... 8<br />
Switching the childproof lock on and off........................................8<br />
ã=Safety precautions<br />
Please read this manual carefully.<br />
Please keep the instruction and<br />
installation manual as well as the<br />
appliance certificate in a safe place<br />
for later use or for subsequent<br />
owners.<br />
Check the appliance for damage after<br />
unpacking it. Do not connect the<br />
appliance if it has been damaged in<br />
transport.<br />
This appliance is intended for<br />
domestic use and the household<br />
environment only. This appliance<br />
must only be used for food<br />
preparation. Do not leave the<br />
Automatic childproof lock ................................................................. 8<br />
Timer ............................................................................................9<br />
Automatic hotplate switch-off ........................................................... 9<br />
Automatic timer ................................................................................... 9<br />
Kitchen timer........................................................................................ 9<br />
Automatic time limit ...................................................................9<br />
Wipe protection...........................................................................9<br />
Basic settings ...........................................................................10<br />
Changing basic settings................................................................. 10<br />
Cleaning and care.....................................................................11<br />
Ceramic ............................................................................................. 11<br />
Hob surround ................................................................................... 11<br />
Rectifying faults........................................................................11<br />
After-sales service....................................................................11<br />
Produktinfo<br />
Additional information on products, accessories, replacement<br />
parts and services can be found at www.bosch-home.com and<br />
in the online shop www.bosch-eshop.com<br />
appliance unattended during<br />
operation.<br />
This appliance may be used by<br />
children 8 years old and older and by<br />
persons with reduced physical,<br />
sensory or mental capacity or a lack<br />
of experience or knowledge if they<br />
are supervised or they have been<br />
instructed about the safe use of the<br />
appliance and have understood the<br />
associated dangers.<br />
Never let children play with the<br />
appliance. Cleaning and user<br />
maintenance must not be carried out<br />
by unsupervised children.<br />
3
Risk of fire!<br />
■ Hot oil and fat can ignite very<br />
quickly. Never leave hot fat or oil<br />
unattended. Never use water to put<br />
out burning oil or fat. Switch off the<br />
hotplate. Extinguish flames carefully<br />
using a lid, fire blanket or something<br />
similar.<br />
Risk of fire!<br />
■ The hotplates become very hot.<br />
Never place combustible items on<br />
the hob. Never place objects on the<br />
hob.<br />
Risk of fire!<br />
■ The appliance gets hot. Do not keep<br />
combustible objects or aerosol cans<br />
in drawers directly underneath the<br />
hob.<br />
Risk of fire!<br />
■ The hob switches off automatically<br />
and can no longer be operated. It<br />
may switch on unintentionally at a<br />
later point. Switch off the circuit<br />
breaker in the fuse box. Contact the<br />
after-sales service.<br />
Risk of burns!<br />
■ The hotplates and surrounding area<br />
become very hot. Never touch the<br />
hot surfaces. Children under 8 years<br />
Causes of damage<br />
Caution!<br />
■ Rough pot and pan bases scratch the ceramic.<br />
■ Avoid boiling pots dry. This may cause damage.<br />
■ Never place hot pots or pans on the control panel, the<br />
display area or the surround. This may cause damage.<br />
Overview<br />
The following table provides an overview of the most frequent<br />
kinds of damage:<br />
4<br />
old must be kept at a safe distance<br />
from the appliance.<br />
Risk of burns!<br />
■ The hotplate heats up but the<br />
display does not work. Switch off the<br />
circuit breaker in the fuse box.<br />
Contact the after-sales service.<br />
Risk of electric shock!<br />
■ Cracks or fractures in the glass<br />
ceramic may cause electric shocks.<br />
Switch off the circuit breaker in the<br />
fuse box. Contact the after-sales<br />
service.<br />
Risk of electric shock!<br />
■ Cleaning the appliance with steam<br />
may cause electric shocks. Do not<br />
use steam cleaners.<br />
Risk of electric shock!<br />
■ Incorrect repairs are dangerous.<br />
Repairs must only be carried out by<br />
a trained after-sales engineer. If the<br />
appliance is defective, switch off the<br />
circuit breaker in the fuse box.<br />
Risk of injury!<br />
Saucepans may suddenly jump due<br />
to liquid between the pan base and<br />
the hotplate. Always keep the hotplate<br />
and saucepan bases dry.<br />
■ Damage can occur if hard or pointed objects fall on the hob.<br />
■ Aluminium foil and plastic containers melt on hot hotplates.<br />
Oven protective foil is not suitable for your hob.<br />
Damage Cause Action<br />
Stains Food spills Remove spills immediately with a glass scraper.<br />
Unsuitable cleaning agents Only use cleaning agents which are suitable for ceramic<br />
Scratches Salt, sugar and sand Do not use the hob as a work surface or storage space.<br />
Rough pot and pan bases scratch the Check your cookware.<br />
ceramic.<br />
Discolouration Unsuitable cleaning agents Only use cleaning agents which are suitable for ceramic<br />
Pan abrasion (e.g. aluminium) Lift the pots and pans when moving them.<br />
Blisters Sugar, food with a high sugar content Remove spills immediately with a glass scraper.
Environmental protection<br />
Unpack the appliance and dispose of the packaging in an<br />
environmentally-responsible manner.<br />
Environmental protection<br />
This appliance is labelled in accordance with the<br />
European Directive 2002/96/EU concerning used<br />
electrical and electronic appliances (WEEE –<br />
waste electrical and electronic equipment). The<br />
guideline determines the framework for the return<br />
and recycling of used appliances as applicable.<br />
Tips for saving energy<br />
■ Always use the right lid for the pan in question. Cooking<br />
without the lid requires four times as much energy.<br />
Getting to know your appliance<br />
The instruction manual is the same for various different hobs.<br />
An overview of the models with their dimensions is given on<br />
page 2.<br />
The control panel<br />
Controls<br />
When you touch a symbol, the respective function is activated.<br />
The hotplates<br />
������������<br />
������������������<br />
�������������<br />
������������<br />
������������<br />
�������������<br />
�����������������<br />
�������<br />
������������������<br />
�������������<br />
���������������<br />
������������������<br />
■ Use pots and pans with even bases. Using cookware with<br />
uneven bases increases energy consumption.<br />
■ The diameter of the base of your pot or pan should match the<br />
size of the hotplate. In particular, if pots that are too small are<br />
placed on the hotplate, energy is wasted. Please note:<br />
Cookware manufacturers often specify the diameter of the<br />
top of the pan. This is usually bigger than the diameter of the<br />
base of the pan.<br />
■ Use a small pan for small quantities of food. A larger, less full<br />
saucepan requires more energy.<br />
■ Use only a little water when cooking. This saves energy. It<br />
also preserves vitamins and minerals in vegetables.<br />
■ Switch to a lower heat setting as soon as possible.<br />
■ Use the residual heat of the hob. For longer cooking times,<br />
you can switch the hotplate off 5 - 10 minutes before the end<br />
of the cooking time.<br />
�����������<br />
��������������������<br />
� � � � � � � � � �<br />
Notes<br />
Hotplate Activating and deactivating<br />
$ Single-circuit hotplate<br />
ð Dual-circuit hotplate Select the hotplate and touch the ð activation symbol<br />
æ Extended cooking zone Select the hotplate and touch the ð activation symbol<br />
When the hotplate is activated: the corresponding indicator lights up.<br />
When the hotplate is switched on: the last selected size is automatically selected again<br />
��������������<br />
������������������������<br />
���������������������<br />
■ The settings will remain unchanged if you touch several<br />
symbols at once. This allows you to wipe up spills on the<br />
control panel.<br />
■ Always keep the controls dry. Moisture reduces their<br />
effectiveness.<br />
5
Residual heat indicator<br />
The hob has a two-stage residual heat indicator for each<br />
hotplate.<br />
Setting the hob<br />
This section informs you how to set the hotplates. The table<br />
shows heat settings and cooking times for various meals.<br />
Switching the hob on and off<br />
The main switch is used to switch the hob on and off.<br />
To switch on: touch the # symbol. A signal sounds. The<br />
indicator above the main switch and the $ hotplate indicator<br />
light up. The hob is ready for use.<br />
To switch off: touch the # symbol until the display above the<br />
main switch and the hotplate indicators $ go out. All hotplates<br />
are switched off. The residual heat indicator remains on until<br />
the hotplates have cooled down sufficiently.<br />
Note: The hob switches off automatically if all hotplates have<br />
been switched off for more than 15 seconds.<br />
Setting a hotplate<br />
Set the required heat setting in the settings range.<br />
Heat setting 1 = lowest setting<br />
Heat setting 9 = highest setting<br />
There is an intermediate setting between each heat setting. This<br />
is marked in the control panel with the Û symbol.<br />
Table of cooking times<br />
The following table provides some examples.<br />
Cooking times and heat settings may vary depending on the<br />
type of food, its weight and quality. Deviations are therefore<br />
possible.<br />
Melting<br />
Chocolate, cooking chocolate, butter, honey<br />
Gelatine<br />
Heating and keeping warm<br />
Stew (e.g. lentil stew)<br />
Milk**<br />
Heating sausages in water**<br />
Defrosting and heating<br />
Frozen spinach<br />
Frozen goulash<br />
Poaching, simmering<br />
Dumplings<br />
Fish<br />
White sauces, e.g. béchamel sauce<br />
Emulsified sauces, e.g. béarnaise sauce, hollandaise sauce<br />
* Continue cooking without a lid<br />
** Without lid<br />
6<br />
If • appears in the display the hob is still hot. It may be used,<br />
for example, to keep a small meal warm or to melt cooking<br />
chocolate. As the hotplate cools down further, the display<br />
changes to œ. The display remains lit until the hotplate has<br />
cooled sufficiently.<br />
Set the heat setting<br />
1. Touch the $ symbol to select the hotplate.<br />
‹.‹ lights up on the heat setting display and the $ symbol<br />
for the selected hotplate lights up brightly.<br />
2. Set the desired heat setting on the control panel.<br />
��� ���<br />
� �<br />
� �<br />
Note: Hotplate temperature is regulated by the heat switching<br />
on and off. The heat may also switch on and off at the highest<br />
setting.<br />
To change the heat setting:<br />
Select the hotplate and set the desired ongoing cooking setting<br />
in the settings range.<br />
To switch off the hotplate:<br />
Select the hotplate and set to 0 in the settings range.<br />
When heating thick liquids, stir regularly.<br />
For bringing liquids to the boil, use heat setting 9.<br />
Ongoing cooking<br />
setting<br />
1-2<br />
1-2<br />
1-2<br />
1.5-2.5<br />
3-4<br />
2.5-3.5<br />
2.5-3.5<br />
4.5-5.5<br />
4-5*<br />
1-2<br />
3-4<br />
Ongoing cooking<br />
time in minutes<br />
-<br />
-<br />
-<br />
-<br />
-<br />
20-30 mins<br />
10-15 mins<br />
20-30 mins<br />
10-15 mins<br />
3-6 mins<br />
8-12 mins
Boiling, steaming, stewing<br />
Rice (with double the quantity of water)<br />
Rice pudding<br />
Unpeeled boiled potatoes<br />
Boiled potatoes<br />
Pasta, noodles<br />
Stew, soups<br />
Vegetables<br />
Vegetables, frozen<br />
Cooking in a pressure cooker<br />
Braising<br />
Roulades<br />
Pot roasts<br />
Goulash<br />
Frying**<br />
Escalope, plain or breaded<br />
Escalope, frozen<br />
Cutlet, plain or breaded<br />
Steak (3 cm thick)<br />
Poultry breast (2 cm thick)<br />
Chicken breast, frozen<br />
Fish and fish fillet, plain<br />
Fish and fish fillet, breaded<br />
Fish and fish fillet, breaded and frozen, e.g. fish fingers<br />
Scampi and prawns<br />
Stir fry, frozen<br />
Pancakes<br />
Omelette<br />
Fried eggs<br />
Deep-fat frying (fry 150-200g per portion continuously in 1-2 litres oil**)<br />
Frozen products, e.g. chips, chicken nuggets<br />
Croquettes<br />
Meat balls<br />
Meat, e.g. chicken portions<br />
Fish, breaded or battered<br />
Vegetables, mushrooms, breaded or battered<br />
Small items, e.g. doughnuts, fruit in batter<br />
* Continue cooking without a lid<br />
** Without lid<br />
Electronic boil start control<br />
The electronic boil start control heats the hotplate using the<br />
highest heat setting and then switches down to the simmer<br />
setting you have selected.<br />
The time taken for the hotplate to heat up depends on the<br />
simmer setting selected.<br />
Ongoing cooking<br />
setting<br />
2-3<br />
1.5-2.5<br />
4-5<br />
4-5<br />
6-7*<br />
3.5-4.5<br />
2.5-3.5<br />
3.5-4.5<br />
4-5<br />
4-5<br />
4-5<br />
2.5-3.5<br />
6-7<br />
6-7<br />
6-7<br />
7-8<br />
5-6<br />
5-6<br />
5-6<br />
6-7<br />
6-7<br />
7-8<br />
6-7<br />
6-7<br />
3.5-4.5<br />
5-6<br />
8-9<br />
7-8<br />
7-8<br />
6-7<br />
5-6<br />
5-6<br />
4-5<br />
Ongoing cooking<br />
time in minutes<br />
15-30 mins<br />
25-35 mins<br />
25-30 mins<br />
15-25 mins<br />
6-10 mins<br />
15-60 mins<br />
10-20 mins<br />
10-20 mins<br />
-<br />
50-60 mins<br />
60-100 mins<br />
50-60 mins<br />
6-10 mins<br />
8-12 mins<br />
8-12 mins<br />
8-12 mins<br />
10-20 mins<br />
10-30 mins<br />
8-20 mins<br />
8-20 mins<br />
8-12 mins<br />
4-10 mins<br />
6-10 mins<br />
continuous<br />
continuous<br />
3-6 mins<br />
Setting the electronic boil start control<br />
The electronic boil start control can only be activated in the first<br />
30 seconds after you have switched on the hotplate:<br />
1. Set the desired simmer setting for the hotplate.<br />
2. Touch the ‘ symbol.<br />
The electronic boil start control is activated. ‘ and the ongoing<br />
cooking setting flash alternately.<br />
After the food has been brought to the boil, only the simmer<br />
setting remains lit in the display.<br />
-<br />
-<br />
-<br />
-<br />
-<br />
-<br />
-<br />
7
Table of cooking times for electronic boil start control<br />
The table below shows which dishes electronic boil start control<br />
can be used for.<br />
Tips for the electronic boil start control<br />
Electronic boil start control is designed to conserve food's<br />
nutritional value while using little water for cooking.<br />
Childproof lock<br />
You can use the childproof lock to prevent children from<br />
switching on the hotplates.<br />
Switching the childproof lock on and off<br />
The hob must be switched off.<br />
To switch on: touch the D symbol for approx. 4 seconds. The<br />
D symbol lights up for 4 seconds. The hob is locked.<br />
To switch off: touch the D symbol for approx. 4 seconds. The<br />
hob is unlocked.<br />
8<br />
The smaller quantities specified are for the smaller hotplates<br />
and the larger quantities are for the larger hotplates. The values<br />
given are guidelines.<br />
Dish with electronic boil start control<br />
Heating<br />
Quantity Heat setting Total cooking time<br />
in minutes<br />
Stock<br />
500 ml-1 litre A 7-8<br />
4-7 mins<br />
Thick soups<br />
500 ml-1 litre A 2-3<br />
3-6 mins<br />
Milk**<br />
Heating and keeping warm<br />
200-400 ml A 1-2<br />
4-7 mins<br />
Stew (e.g. lentil stew)<br />
Defrosting and heating<br />
400-800 g A 1-2 -<br />
Frozen spinach<br />
300-600 g A 2.5-3.5 10-20 mins<br />
Frozen goulash<br />
Poaching<br />
500g-1 kg A 2.5-3.5 20-30 mins<br />
Fish<br />
Boiling<br />
300-600 g A 4-5* 20-25 mins<br />
Rice (with double the quantity of water)<br />
125-250 g A 2-3<br />
20-25 mins<br />
Unpeeled boiled potatoes with 1-3 cups of water<br />
750 g-1.5 kg A 4-5<br />
30-40 mins<br />
Boiled potatoes with 1-3 cups of water<br />
750 g-1.5 kg A 4-5<br />
20-30 mins<br />
Vegetables with 1-3 cups of water<br />
500g-1 kg A 2.5-3.5 15-20 mins<br />
Frozen vegetables with 1-3 cups of water<br />
Braising<br />
500g-1 kg A 4.5-5.5 15-20 mins<br />
Roulades<br />
4 pieces A 4-5<br />
50-60 mins<br />
Pot roasts<br />
Frying**<br />
1 kg<br />
A 4-5<br />
80-100 mins<br />
Escalope, plain or breaded<br />
1-2<br />
A 6-7<br />
8-12 mins<br />
Cutlet, plain or breaded<br />
1-2<br />
A 6-7<br />
8-12 mins<br />
Steak (3 cm thick)<br />
1-2<br />
A 7-8<br />
8-12 mins<br />
Fish and fish fillet, breaded<br />
1-2<br />
A 6-7<br />
8-12 mins<br />
Fish and fish fillet, breaded and frozen, e.g. fish fingers<br />
200-300 g A 6-7<br />
8-12 mins<br />
Pancakes<br />
A 6-7<br />
continuous frying<br />
* Continue cooking without a lid<br />
** Without lid<br />
■ Add only approximately 3 cups of water to the food for large<br />
hotplates and approximately 2 cups of water for small<br />
hotplates.<br />
■ Place a lid on the saucepan.<br />
■ Electronic boil start control is not suitable for food that is<br />
cooked in a large volume of water (e.g. pasta).<br />
Automatic childproof lock<br />
This function automatically activates the childproof lock every<br />
time you switch the hob off.<br />
Switching on and off<br />
You can find out how to switch the automatic childproof lock on<br />
and off in the Basic settings section.
Timer<br />
The timer can be used in two different ways:<br />
■ To switch a hotplate off automatically<br />
■ As a kitchen timer<br />
Automatic hotplate switch-off<br />
Enter a cooking time for the relevant hotplate. When the<br />
cooking time has elapsed, the hotplate switches off<br />
automatically.<br />
Setting the cooking time<br />
The hotplate must be selected and set.<br />
1. Touch the 0 symbol twice. The ‹ indicator for the desired<br />
hotplate lights up. The r symbol appears and ‹‹ lights up<br />
in the timer display.<br />
��<br />
2. Within the next 10 seconds, set the desired cooking time<br />
from the range of settings.<br />
��<br />
��<br />
The cooking time counts down.<br />
When the cooking time has elapsed<br />
When the cooking time has elapsed, the hotplate switches off.<br />
‹.‹ lights up on the hotplate indicator. A signal sounds. ‹‹<br />
Automatic time limit<br />
If a hotplate is in use for a long time without the setting being<br />
changed, the automatic time limit is activated.<br />
The hotplate stops heating. ”‰ lights up in the hotplate<br />
indicator.<br />
Wipe protection<br />
���<br />
���<br />
� � � � � �<br />
� � � � � �<br />
If you wipe over the control panel while the hob is switched on,<br />
settings may be altered.<br />
To prevent this from happening, your hob has a wipe protection<br />
function. Touch the - symbol. A signal sounds. The control<br />
��<br />
��<br />
lights up on the timer display for 10 seconds. Touch the 0<br />
symbol. The displays go out and the acoustic signal ceases.<br />
Changing or cancelling the cooking time<br />
Select the hotplate and touch the 0 symbol twice. Change the<br />
cooking time or set to ‹‹ in the settings area.<br />
Notes<br />
■ If you have set the kitchen timer, the time on the kitchen timer<br />
will always be shown on the timer display. To call up the<br />
cooking time for a hotplate, select the hotplate and touch the<br />
0 symbol twice. The cooking time appears for 10 seconds in<br />
the timer display.<br />
■ If you have set cooking times for several hotplates, the<br />
cooking time for the selected hotplate always appears in the<br />
timer display.<br />
■ You can set a cooking time of up to 99 minutes.<br />
Automatic timer<br />
You can use this function to preselect a cooking time for all<br />
hotplates. Each time a hotplate is switched on, the preselected<br />
cooking then counts down. When the cooking time has<br />
elapsed, the hotplate switches off automatically.<br />
You can find out how to switch on the automatic timer in the<br />
Basic settings section.<br />
Note: You can change the cooking time for a hotplate or switch<br />
off the automatic timer for the hotplates.<br />
Select the hotplate and touch the 0 symbol twice. Change the<br />
cooking time or set to ‹‹ in the settings area.<br />
Kitchen timer<br />
You can use the kitchen timer to set a time of up to 99 minutes.<br />
It runs independently of all the other settings.<br />
Setting procedure<br />
1. Touch the 0 symbol, the V indicator for the kitchen timer<br />
lights up. ‹‹ lights up on the timer display.<br />
2. Set the desired time in the settings range.<br />
The timer starts counting down after a few seconds.<br />
When the time has elapsed<br />
A signal sounds once the time has elapsed. ‹‹ lights up on<br />
the timer display. The V indicator for the kitchen timer lights<br />
up. After 10 seconds, the indicator switches off.<br />
Changing the time<br />
Touch the 0 symbol, the V indicator for the kitchen timer<br />
lights up. Set the desired time in the settings range.<br />
The display goes out when you touch any control. You can<br />
make new settings.<br />
When the time limit is activated depends on the heat setting<br />
selected (1 to 10 hours).<br />
panel is locked for 30 seconds. You can now wipe over the<br />
control panel without altering any settings.<br />
Note: The main switch is excluded from the wipe protection<br />
function. You can switch off the hob at any time.<br />
9
Basic settings<br />
Your appliance has various basic settings. You can adapt these<br />
settings to your needs.<br />
Indicator Function<br />
‚ Automatic childproof lock<br />
Changing basic settings<br />
The hob must be switched on.<br />
1. Switch on the hob.<br />
2. Within the next 10 seconds, touch the 0 symbol for<br />
4seconds.<br />
‚ appears on the left-hand display and ‹ on the right-hand<br />
display.<br />
3. Touch the 0 symbol repeatedly until the desired symbol<br />
appears on the left-hand display.<br />
4. Set the desired value on the control panel.<br />
10<br />
‹ Switched off.*<br />
‚ Switched on.<br />
ƒ Audible signal<br />
‹ Confirmation signal and operation error signal switched off.<br />
‚ Only operation error signal switched on.<br />
ƒ Confirmation signal and operation error signal switched on.*<br />
† Automatic timer<br />
‹ Switched off.<br />
‚-ŠŠ Duration after which the hotplates switch off<br />
‡ Duration of the timer end signal<br />
‚ 10 seconds.*<br />
ƒ n30 seconds<br />
„ 1 minute.<br />
ˆ Activation of the filament circuits<br />
‹ Switched off.<br />
‚ Switched on.<br />
ƒ Last setting before the hotplate was switched off.*<br />
Š Time for selecting the hotplate<br />
‹ Unlimited: The last selected hotplate can always be adjusted without having to select it again.<br />
‚ Once you select a hotplate, you have 10 seconds to adjust it, after which you will have to select it again in order to<br />
be able to adjust it.<br />
‹ Reset to basic setting<br />
‹ Switched off.<br />
‚ Switched on.<br />
*Basic setting<br />
� � � � � �<br />
5. Touch the 0 symbol for 4 seconds.<br />
The setting is activated.<br />
� � � � � �<br />
�<br />
Switching off<br />
To exit the basic setting, switch off the hob with the main switch<br />
and make new settings.<br />
�
Cleaning and care<br />
The information in this section provides help on how best to<br />
care for your hob.<br />
Suitable maintenance and cleaning products can be purchased<br />
from the after-sales service or in our e-Shop.<br />
Ceramic<br />
Clean the hob after each use. This will prevent spills from<br />
burning onto the ceramic.<br />
Only clean the hob when it has cooled down sufficiently.<br />
Use only cleaning agents which are suitable for ceramic. Follow<br />
the cleaning instructions on the packaging.<br />
Never use:<br />
■ Undiluted washing-up liquid<br />
■ Detergent intended for dishwashers<br />
■ Scouring agents<br />
Rectifying faults<br />
Malfunctions often have simple explanations. Please read the<br />
following notes before calling the after-sales service.<br />
After-sales service<br />
Our after-sales service is there for you if your appliance should<br />
need to be repaired. We are committed fo find the best solution<br />
also in order to avoid an unnecessary call-out.<br />
E number and FD number:<br />
Please quote the E number (product number) and the FD<br />
number (production number) of your appliance when<br />
contacting the after-sales service. The rating plate bearing<br />
these numbers can be found on the appliance certificate.<br />
Please note that a visit from an after-sales service engineer is<br />
not free of charge, even during the warranty period.<br />
Please find the contact data of all countries in the enclosed<br />
customer service list.<br />
■ Harsh cleaning agents such as oven spray or stain remover<br />
■ Abrasive sponges<br />
■ High-pressure cleaners or steam jet cleaners<br />
Ground-in dirt can be best removed with a glass scraper,<br />
available from retailers. Please note the manufacturer's<br />
instructions.<br />
You can also obtain a suitable glass scraper from our aftersales<br />
service or from the e-Shop.<br />
Hob surround<br />
To prevent damage to the hob surround, please observe the<br />
following instructions:<br />
■ Use only warm, soapy water.<br />
■ Do not use harsh or abrasive agents.<br />
■ Do not use the glass scraper.<br />
Indicator Fault Action<br />
Blank There is no power supply. Check the household fuse for the appliance. Check whether there is a power<br />
cut by trying other electronic appliances.<br />
“ is flashing<br />
Ҥ +<br />
number<br />
The controls are damp or an object is<br />
resting on them.<br />
Dry the controls or remove the object.<br />
Electronic fault. Switch the appliance off and back on again after about 30 seconds using<br />
either the household fuse or the circuit breaker in the fuse box. Contact the<br />
after-sales service if this appears in the display again.<br />
”ƒ The electronics have overheated and<br />
have switched off the corresponding<br />
hotplate.<br />
”… The electronics have overheated and<br />
have switched off all hotplates.<br />
”‰ The hotplate was in operation for too<br />
long and has switched itself off.<br />
* Do not place hot pans close to or on the control panel<br />
Wait until the electronics have cooled down sufficiently. Then touch a control<br />
for the hotplate.*<br />
Wait until the electronics have cooled down sufficiently. Then touch any control.*<br />
You can switch the hotplate back on again immediately.<br />
To book an engineer visit and product advice<br />
GB 0844 8928979<br />
Calls from a BT landline will be charged at up to 3<br />
pence per minute. A call set-up fee of up to 6 pence may<br />
apply.<br />
IE 01450 2655<br />
Trust the expertise of the manufacturer, and rest assured that<br />
the repair will be carried out by trained service technicians<br />
using original spare parts for your domestic appliance.<br />
11
Robert Bosch Hausgeräte GmbH<br />
Carl-Wery-Straße 34<br />
81739 München<br />
Germany<br />
www.bosch-home.com<br />
*9000637648*<br />
9000637648<br />
910202


