
Create successful ePaper yourself
Turn your PDF publications into a flip-book with our unique Google optimized e-Paper software.
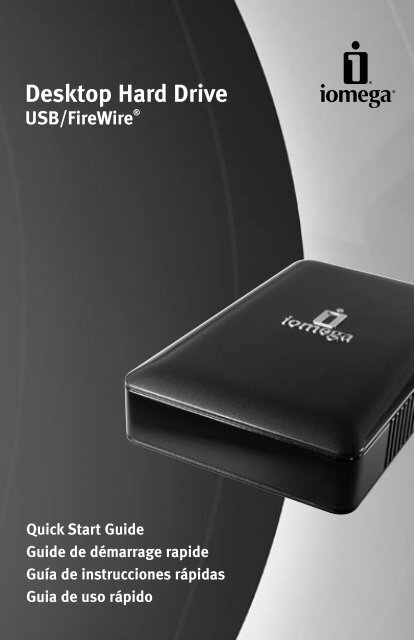
Desktop Hard Drive<br />
USB/FireWire ®<br />
Quick Start Guide<br />
Guide de démarrage rapide<br />
Guía de instrucciones rápidas<br />
Guia de uso rápido
If you have a problem, we can help. Please do NOT return this product to the store!<br />
Your answer is on the web. Visit our award-winning web support site www.iomega.com.<br />
Select your region, then select Support & <strong>Download</strong>s.<br />
Si vous avez un problème, nous pouvons vous aider. NE RENVOYEZ PAS ce produit au<br />
magasin !<br />
Votre réponse est sur le Web. Site Web d’assistance primé www.iomega.com.<br />
Sélectionnez votre région puis Support et téléchargements.<br />
Si tiene algún problema, podemos ayudar. ¡Por favor, NO devuelva este producto a la tienda!<br />
Su respuesta está en la web. Destacado sitio Web de atención al cliente<br />
www.iomega.com. Elija su región y luego seleccione Suporte y Descargas.<br />
Se você tiver um problema, nós podemos ajudar. NÃO devolva esse produto à loja!<br />
A resposta para você está na web. Site da web vencedor de prêmios www.iomega.com.<br />
Selecione a sua região e Suporte e <strong>Download</strong>s.<br />
This equipment complies with Part 15 of the FCC Rules. Operation is subject to the following conditions: (1) This device<br />
may not cause harmful interference, and (2) this device must accept any interference received, including interference that<br />
may cause undesired operation.<br />
NOTE: This equipment has been tested and found to comply with the limits for a Class B digital device, pursuant to<br />
part 15 of the FCC Rules. These limits are designed to provide reasonable protection against harmful interference in a<br />
residential installation. This equipment generates, uses and can radiate radio frequency energy and, if not installed and<br />
used in accordance with the instructions, may cause harmful interference to radio communications. However, there is no<br />
guarantee that interference will not occur in a particular installation. If this equipment does cause harmful interference to<br />
radio or television reception, which can be determined by turning the equipment off and on, the user is encouraged to try<br />
to correct the interference by one of more or the following measures:<br />
• Reorient or relocate the receiving antenna.<br />
• Increase the separation between the equipment and receiver.<br />
• Connect the equipment into an outlet on a circuit different from that to which the receiver is connected.<br />
• Consult the dealer or an experienced radio/TV technician for help.
Contents • Matières • Contenido • Conteúdo<br />
Quick Install . . . . . . . . . . . . . . . . . . . . . . . . . . . . . . . . . . . . . . . . 4<br />
Using Your Drive . . . . . . . . . . . . . . . . . . . . . . . . . . . . . . . . . . . . . . 6<br />
Troubleshooting . . . . . . . . . . . . . . . . . . . . . . . . . . . . . . . . . . . . . . 6<br />
Limited Warranty . . . . . . . . . . . . . . . . . . . . . . . . . . . . . . . . . . . . . 10<br />
Customer Support . . . . . . . . . . . . . . . . . . . . . . . . . . . . . . . . . . . . 12<br />
Installation rapide . . . . . . . . . . . . . . . . . . . . . . . . . . . . . . . . . . . . . 4<br />
Utilisation du lecteur . . . . . . . . . . . . . . . . . . . . . . . . . . . . . . . . . . . 7<br />
Dépannage . . . . . . . . . . . . . . . . . . . . . . . . . . . . . . . . . . . . . . . . . 7<br />
Garantie Limitée . . . . . . . . . . . . . . . . . . . . . . . . . . . . . . . . . . . . . 10<br />
Assistance clientèle . . . . . . . . . . . . . . . . . . . . . . . . . . . . . . . . . . . 12<br />
Instalación rápida . . . . . . . . . . . . . . . . . . . . . . . . . . . . . . . . . . . . . 5<br />
Uso de la unidad . . . . . . . . . . . . . . . . . . . . . . . . . . . . . . . . . . . . . . 8<br />
Solución de problemas . . . . . . . . . . . . . . . . . . . . . . . . . . . . . . . . . . 8<br />
Garantía Limitada . . . . . . . . . . . . . . . . . . . . . . . . . . . . . . . . . . . . 11<br />
Asistencia al cliente . . . . . . . . . . . . . . . . . . . . . . . . . . . . . . . . . . . 12<br />
Instalação rápida . . . . . . . . . . . . . . . . . . . . . . . . . . . . . . . . . . . . . 5<br />
Utilização da unidade . . . . . . . . . . . . . . . . . . . . . . . . . . . . . . . . . . . 9<br />
Solução de problemas . . . . . . . . . . . . . . . . . . . . . . . . . . . . . . . . . . . 9<br />
Garantia Limitada . . . . . . . . . . . . . . . . . . . . . . . . . . . . . . . . . . . . 11<br />
Suporte ao cliente . . . . . . . . . . . . . . . . . . . . . . . . . . . . . . . . . . . . 12
4<br />
External<br />
Hard Drive<br />
Windows<br />
Mac<br />
Start Up<br />
Mise en route<br />
Start<br />
Inicio<br />
Inicialização<br />
Instalación<br />
31387200<br />
Avvio<br />
www.iomega.com<br />
USB<br />
Copyright © 2004 <strong>Iomega</strong> Corporation.<br />
All rights reserved.<br />
1. Insert the Solutions CD. If it does not start<br />
automatically, double click the CD icon in My<br />
Computer, Windows ®<br />
Explorer or on the Mac ®<br />
desktop,<br />
then double click the Start icon. Connect the drive to<br />
the computer after the Solutions CD has checked your<br />
system.<br />
2. Connect the included power supply to the back of the<br />
drive. Place the drive on a stable surface and connect<br />
the power supply to a power outlet.<br />
CAUTION! To avoid damage to the power supply<br />
connector, make sure it is aligned correctly before<br />
plugging it into the drive. Do not move the drive while<br />
it is powered up to avoid drive damage or data loss.<br />
3. Identify the appropriate cable and connect it to the<br />
back of the drive. Never connect the drive to the<br />
computer with more than one cable.<br />
4. Connect the other end of the cable to the port on your<br />
computer.<br />
The drive icon should appear in My Computer,<br />
Windows Explorer or on the Mac Desktop. After the<br />
drive is recognized by the operating system, install<br />
the software from the Solutions CD.<br />
PC USERS: If your drive includes FireWire 800, your<br />
computer will not recognize the drive until it is<br />
reformatted. See page 7 for more information.<br />
CAUTION! To prevent data loss, do not disconnect the<br />
drive during data transfer (drive activity light flashing).<br />
Refer to the user’s manual on the Solutions CD for<br />
instructions on disconnecting the drive.<br />
Quick Install • Installation rapide<br />
<br />
1. Insérez le CD Solutions. S’il ne démarre pas<br />
automatiquement, double-cliquez sur l’icône du CD<br />
dans le Poste de travail, dans l’Explorateur Windows ®<br />
ou sur le bureau Mac ®<br />
, puis double-cliquez sur l’icône<br />
Démarrer. Connectez le lecteur à l’ordinateur après<br />
que le CD Solutions a vérifié votre système.<br />
2. Connectez l’alimentation incluse à l’arrière du<br />
lecteur. Placez le lecteur sur une surface stable et<br />
connectez l’alimentation à une prise secteur.<br />
ATTENTION ! Pour éviter d’endommager le connecteur<br />
d’alimentation, assurez-vous de son alignement<br />
avant de le raccorder au lecteur. Ne déplacez pas<br />
le lecteur alors qu’il est sous tension pour éviter de<br />
l’endommager ou de perdre des données.<br />
3. Identifiez le bon câble et connectez-le à l’arrière du<br />
lecteur. Ne connectez jamais le lecteur à l’ordinateur<br />
à l’aide de plusieurs câbles.<br />
4. Connectez l’autre extrémité du câble au port de votre<br />
ordinateur.<br />
L’icône du lecteur doit apparaître dans le Poste de<br />
travail, l’Explorateur Windows ou sur le bureau du<br />
Mac. Une fois le lecteur reconnu par le système<br />
d’exploitation, installez le logiciel à partir du CD<br />
Solutions.<br />
UTILISATEURS PC : Si le lecteur comprend le FireWire<br />
800, vous devrez le reformater pour que l’ordinateur<br />
puisse le reconnaître. Reportez-vous à la page 8 pour<br />
plus d’informations.<br />
ATTENTION ! Pour éviter toute perte de données, ne<br />
déconnectez pas le lecteur pendant un transfert de<br />
données (voyant d’activité du lecteur clignotant). Reportezvous<br />
au guide de l’utilisateur sur le CD Solutions pour<br />
obtenir des instructions sur la déconnexion du lecteur.
Instalación rápida • Instalação rápida<br />
<br />
1. Introduzca el CD de soluciones. Si la instalación no<br />
se inicia automáticamente, haga doble clic en el<br />
icono del CD en Mi PC, en el Explorador de Windows ®<br />
Explorer o en el escritorio de Mac ®<br />
y, a continuación,<br />
haga doble clic en el icono Iniciar. Conecte la unidad<br />
al ordenador después de que el CD de Soluciones<br />
haya comprobado el sistema.<br />
2. Conecte el cable de alimentación incluido a la parte<br />
posterior de la unidad. Coloque la unidad sobre una<br />
superficie estable y conecte el cable de alimentación<br />
a una toma eléctrica.<br />
¡PRECAUCIÓN! Para evitar daños al conector de<br />
alimentación, asegúrese de que esté correctamente<br />
alineado antes de enchufarlo a la unidad. No mueva<br />
la unidad mientras esté encendida para evitar<br />
posibles daños en la unidad o la pérdida de datos.<br />
3. Identifique el cable adecuado y conéctelo a la<br />
conexión en la parte posterior de la unidad. Nunca<br />
conecte la unidad al ordenador con más de un cable.<br />
4. Conecte el otro extremo del cable al puerto del<br />
ordenador.<br />
El icono de la unidad aparecerá en Mi PC, el<br />
Explorador de Windows o en el escritorio de Mac. Una<br />
vez que el sistema operativo reconozca la unidad,<br />
instale el software desde el CD de Soluciones.<br />
USUARIOS DE PC: Si la unidad dispone de FireWire<br />
800, el ordenador no la reconocerá hasta que se<br />
vuelva a formatear. Consulte la página 9 para obtener<br />
más información.<br />
¡PRECAUCIÓN! Para impedir la pérdida de datos, no<br />
desconecte la unidad durante el proceso de transferencia<br />
de datos (la luz de actividad de la unidad parpadea).<br />
Consulte el manual de usuario del CD de Soluciones para<br />
obtener instrucciones acerca de la desconexión de la<br />
unidad.<br />
1. Insira o CD Soluções. Caso ele não seja iniciado<br />
automaticamente, clique duas vezes no ícone do CD<br />
em Meu computador, no Windows ®<br />
Explorer ou na<br />
mesa do Mac ®<br />
e, em seguida, clique duas vezes no<br />
ícone Iniciar. Conecte a unidade ao computador após<br />
o CD Soluções verificar seu sistema.<br />
2. Conecte a fonte de alimentação que acompanha<br />
o produto à parte traseira da unidade. Coloque a<br />
unidade em uma superfície estável e conecte a fonte<br />
de alimentação a uma tomada elétrica.<br />
CUIDADO! Para evitar danos ao conector da fonte de<br />
alimentação, certifique-se de que ele esteja alinhado<br />
corretamente antes de encaixá-lo na unidade. Não<br />
mexa na unidade enquanto ela estiver ligada para<br />
evitar danos à mesma ou perda de dados.<br />
3. Identifique o cabo apropriado e conecte-o à entrada<br />
USB na parte traseira da unidade. Nunca conecte a<br />
unidade ao computador através de mais de um cabo.<br />
4. Conecte a outra extremidade do cabo à porta do seu<br />
computador.<br />
O ícone da unidade aparecerá em Meu computador,<br />
no Windows Explorer ou na mesa do Mac. Assim que<br />
a unidade for reconhecida pelo sistema operacional,<br />
instale o software a partir do CD Soluções.<br />
USUÁRIOS DE PC: Se a unidade possuir o FireWire<br />
800, seu computador não reconhecerá a unidade até<br />
que ela seja reformatada. Veja a página 10 para obter<br />
mais informações.<br />
CUIDADO! A fim de evitar a perda de dados, não<br />
desconecte a unidade durante a transferência de dados<br />
(luz de atividade da unidade piscando). Consulte o manual<br />
do usuário no CD Soluções para obter instruções sobre<br />
como desconectar a unidade.<br />
5
Disconnecting the Drive<br />
6<br />
Using Your Drive<br />
Always use the safe removal procedure for your operating system when disconnecting the drive.<br />
CAUTION! To prevent data loss, do not disconnect the drive during data transfer (activity light flashing). Use caution<br />
when moving the drive while it is connected to power.<br />
Using the <strong>Iomega</strong> ® Hard Drive Side Stand (Some Models)<br />
The side stand is stored on the bottom of the drive. To use the side stand, remove the bottom plate from the hard drive.<br />
Lock the bottom plate tabs securely into the vent slots on the side of the drive opposite the drive access light.<br />
Locating the <strong>Iomega</strong> Hard Drive Registration Number (Some Models)<br />
On some models the registration number is stored under the drive’s bottom plate. To find the serial number, remove the<br />
bottom plate from the hard drive (as shown in the first illustration above).<br />
Troubleshooting<br />
PC USERS: Formatting the <strong>Iomega</strong> Hard Drive<br />
The FireWire 800/400/USB 2.0 model ships preformatted as a Macintosh Extended (HFS+) volume. This format is not<br />
recognized on Windows operating systems, and you must reformat the drive to either FAT32 or NTFS. Users with Windows<br />
XP/2000 can use the following instructions to format the drive. Users with Windows 98/Me, visit the support section on<br />
www.iomega.com to find detailed formatting instructions.<br />
CAUTION! Reformatting the <strong>Iomega</strong> Hard Drive will erase all existing data on the drive.<br />
1. Connect the <strong>Iomega</strong> Hard Drive to your computer following the instructions on page 4.<br />
2. Open Windows Disk Management (right click on My Computer, select Manage, and click on Disk Management).<br />
3. If the Disk Wizard opens, click Next. Select the disk, click Next, then Finish.<br />
If the Wizard does not open, locate the drive in the lower list. Look for a disk that does not show a drive letter or file<br />
system. Right click on the drive name and select Initialize Disk (Windows XP) or Write Signature (Windows 2000),<br />
then OK.<br />
4. The drive will now appear as Unallocated and the bar will be black. Right click on the black bar and select New<br />
Partition (Windows XP) or Create Partition (Windows 2000).<br />
5. When the Partition Wizard opens, click Next.<br />
6. Verify that the partition type is Primary partition and click Next.<br />
7. Leave the maximum disk space selected and click Next.<br />
8. Assign the next drive letter available and click Next.<br />
9. To format the drive with an NTFS file system, click Next, then click Finish. The drive will be ready to use when the<br />
format completes.<br />
NOTE: If you want to use the drive with other operating systems, download the <strong>Iomega</strong> FAT32 Formatter from the<br />
Support and <strong>Download</strong>s area on www.iomega.com and use it to change the format to FAT32 (provides cross-platform<br />
compatibility).<br />
User’s Manual<br />
A complete user’s manual in HTML format is available on the Support & <strong>Download</strong>s area on www.iomega.com.
Déconnexion du lecteur<br />
Utilisation du lecteur<br />
Utilisez toujours la procédure de retrait sécurisée de votre système d’exploitation lors de la déconnexion du lecteur.<br />
ATTENTION ! Pour éviter toute perte de données, ne déconnectez pas le lecteur pendant un transfert de données (voyant<br />
d’activité clignotant). Déplacez le lecteur avec prudence lorsqu’il est connecté à l’alimentation.<br />
Utilisation du support latéral du disque dur <strong>Iomega</strong> (Certains modèles)<br />
La façade inférieure peut servir de support latéral. Pour utiliser le support latéral, retirez la façade inférieure du disque<br />
dur. Fixez fermement les ergots de la façade inférieure dans les trous d’aération sur le côté de l’appareil à l’opposé du<br />
voyant lumineux du disque dur.<br />
Localisation du numéro d’enregistrement du disque dur <strong>Iomega</strong> (Certains modèles)<br />
Sur certains modèles, le numéro d’enregistrement se situe sous la façade inférieure du lecteur. Pour localiser le numéro<br />
de série, retirez le plateau inférieur du disque dur (comme illustré à la première figure ci-dessus).<br />
Dépannage<br />
UTILISATEURS PC : Formatage du disque dur <strong>Iomega</strong><br />
Le modèle FireWire 800/400/USB 2.0 est livré préformaté au format HFS+ (Macintosh Extended). Ce format n’est pas<br />
reconnu par les systèmes d’exploitation Windows : vous devez reformater le lecteur au format FAT32 ou NTFS. Les<br />
utilisateurs de Windows XP/2000 peuvent suivre les instructions ci-dessous pour formater le lecteur. Les utilisateurs de<br />
Windows 98/Me sont invités à visiter la section assistance du site www.iomega.com pour obtenir des instructions de<br />
formatage détaillées.<br />
ATTENTION ! Le reformatage du disque dur <strong>Iomega</strong> efface l’intégralité des données enregistrées sur le disque.<br />
1. Connectez le disque dur <strong>Iomega</strong> à votre ordinateur en suivant les instructions de la page 4.<br />
2. Ouvrez l’utilitaire de gestion des disques de Windows (cliquez avec le bouton droit de la souris sur Poste de travail,<br />
Gérer, puis Gestion des disques).<br />
3. Si l’Assistant lecteur s’ouvre, cliquez sur Suivant. Sélectionnez le lecteur, cliquez sur Suivant puis sur Terminer.<br />
Si l’Assistant ne s’ouvre pas, recherchez le lecteur dans la liste inférieure. Recherchez un disque ne présentant<br />
ni lettre de lecteur ni système de fichiers. Cliquez avec le bouton droit de la souris sur le nom du lecteur et<br />
sélectionnez Initialiser le lecteur (Windows XP) ou Ecrire une signature (Windows 2000) puis OK.<br />
4. Le disque apparaît comme Non attribué et la barre doit être noire. Cliquez avec le bouton droit sur la barre noire et<br />
sélectionnez Nouvelle partition (Windows 2000) ou Créer une partition (Windows XP).<br />
5. Lorsque l’Assistant Création de partition s’ouvre, cliquez sur Suivant.<br />
6. Vérifiez que le type de partition sélectionné est bien Partition primaire, puis cliquez sur Suivant.<br />
7. Sélectionnez l’espace disque maximum disponible et cliquez sur Suivant.<br />
8. Attribuez la prochaine lettre de lecteur disponible au disque et cliquez sur Suivant.<br />
9. Pour formater le disque avec système de fichiers NTFS, cliquez sur Suivant, puis sur Terminer. Le disque peut être<br />
utilisé dès que le formatage est terminé.<br />
REMARQUE : pour utiliser le périphérique avec d’autres systèmes d’exploitation, téléchargez <strong>Iomega</strong> FAT32 Formatter<br />
(logiciel de formatage <strong>Iomega</strong> FAT32) à partir de la section Support et Téléchargement du site www.iomega.com, puis<br />
utilisez ce logiciel pour formater le périphérique au format FAT32, permettant la compatibilité inter plate-formes.<br />
Guide de l’utilisateur<br />
Un guide de l’utilisateur complet est disponible au format HTML dans la section Support et Téléchargement du site<br />
www.iomega.com.<br />
7
Desconexión de la unidad<br />
8<br />
Uso de la unidad<br />
Utilice siempre un procedimiento de desconexión seguro para su sistema operativo al desconectar la unidad.<br />
PRECAUCION: Para impedir la pérdida de datos, no desconecte la unidad durante el proceso de transferencia de datos<br />
(la luz de actividad parpadea). Tenga precaución al transportar la unidad cuando esté conectada a la alimentación.<br />
Uso del soporte lateral para la unidad de disco duro <strong>Iomega</strong> (algunos modelos)<br />
La placa inferior se puede utilizar como un soporte lateral. Para utilizar el soporte lateral, extraiga la placa inferior de la<br />
unidad de disco duro. Fije bien las pestañas de la placa en las ranuras de ventilación situadas en el lateral de la unidad<br />
opuesto a la luz de acceso a la unidad.<br />
Búsqueda del número de registro de la unidad de disco duro <strong>Iomega</strong> (algunos modelos)<br />
En determinados modelos, el número de registro se ubica bajo la placa inferior de la unidad. Para localizar el número de<br />
serie, retire la placa inferior del disco duro (como se muestra en la primera ilustración más arriba).<br />
Solución de problemas<br />
USUARIOS DE PC: Formateo de la unidad de disco duro <strong>Iomega</strong><br />
El modelo FireWire 800/400/USB 2.0 viene preformateado como un volumen extendido de Macintosh (HFS+). Los<br />
sistemas operativos de Windows no reconocen este formato y, por lo tanto, debe volver a formatear la unidad en FAT32 o<br />
NTFS. Los usuarios que disponen de Windows XP/2000 pueden seguir las instrucciones que se muestran a continuación<br />
para formatear la unidad. Los usuarios que disponen de Windows 98/Me, deben visitar la sección de soporte de<br />
www.iomega.com para obtener instrucciones detalladas acerca del formateo.<br />
¡PRECAUCIÓN! Si vuelve a formatear la unidad de disco duro <strong>Iomega</strong>, se eliminarán los datos existentes en la unidad.<br />
1. Conecte el disco duro <strong>Iomega</strong> al ordenador siguiendo las instrucciones que se muestran en la página 5.<br />
2. Abra Administración de discos de Windows (haga clic con el botón derecho del ratón en Mi PC, seleccione<br />
Administrar y, a continuación, haga clic en Administración de discos).<br />
3. Si se abre el asistente para discos, haga clic en Siguiente. Seleccione el disco, haga clic en Siguiente y, a<br />
continuación, en Finalizar.<br />
Si el asistente no se abre, localice la unidad en la lista de abajo. Busque un disco que no tenga letra de unidad<br />
asignada o sistema de archivos. Haga clic con el botón derecho del ratón en el nombre de la unidad y seleccione<br />
Inicializar disco (Windows XP) o Escribir firma (Windows 2000). A continuación, haga clic en Aceptar.<br />
4. A continuación, la unidad aparecerá como No asignado y la barra se mostrará negra. Haga clic con el botón derecho<br />
del ratón en la barra negra y seleccione Nueva partición (Windows XP) o Crear partición (Windows 2000).<br />
5. Cuando se abra la ventana del asistente para particiones, haga clic en Siguiente.<br />
6. Compruebe que el tipo de partición sea Partición primaria y haga clic en Siguiente.<br />
7. Deje el máximo espacio en el disco seleccionado y haga clic en Siguiente.<br />
8. Asigne la siguiente letra de unidad disponible y haga clic en Siguiente.<br />
9. Para formatear la unidad con un sistema de archivos NTFS, haga clic en Siguiente y, a continuación, en Finalizar.<br />
Cuando el formateo finalice, la unidad estará lista para ser utilizada.<br />
NOTA: Si desea utilizar la unidad con otros sistemas operativos, descargue el software <strong>Iomega</strong> FAT32 Formatter<br />
(Formateador) del área de asistencia y descargas del sitio www.iomega.com y utilícelo para cambiar el formato a FAT32<br />
(proporciona compatibilidad entre plataformas).<br />
Manual del usuario<br />
El manual de usuario completo en formato HTML está disponible en el área de asistencia y descargas del sitio<br />
www.iomega.com.
Desconexão da unidade<br />
Utilização da unidade<br />
Sempre utilize o procedimento de remoção segura do sistema operacional ao desconectar a unidade.<br />
CUIDADO! A fim de evitar a perda de dados, não desconecte a unidade durante a transferência de dados (luz de<br />
atividade da unidade piscando). Tenha cuidado ao mover a unidade, quando ela estiver recebendo energia.<br />
Utilização do apoio lateral do disco rígido <strong>Iomega</strong> (Alguns modelos)<br />
A placa inferior pode ser usada como apoio lateral. Para usar o apoio lateral, remova a placa inferior do disco rígido.<br />
Trave as lingüetas da placa inferior de forma segura nos slots de saída na parte lateral da unidade oposta à luz de<br />
acesso da unidade.<br />
Localização do número de registro do disco rígido <strong>Iomega</strong> (Alguns modelos)<br />
Em alguns modelos, o número de registro está gravado embaixo da placa inferior da unidade. Para encontrar o número<br />
de série, remova a placa inferior do disco rígido (como mostrado na primeira ilustração acima).<br />
Solução de problemas<br />
USUÁRIOS DE PC: Formatação do disco rígido <strong>Iomega</strong><br />
Os modelos FireWire 800/400/USB 2.0 são fornecidos pré-formatados como um volume Macintosh Extended (HFS+).<br />
Esse formato não é reconhecido em sistemas operacionais Windows; você deve reformatar a unidade para os formatos<br />
FAT32 ou NTFS. Os usuários do Windows XP/2000 podem utilizar as instruções a seguir para formatar a unidade.<br />
Os usuários de Windows 98/Me devem visitar a seção de suporte no site www.iomega.com para obter instruções<br />
detalhadas sobre a formatação.<br />
CUIDADO! Reformatar o <strong>Iomega</strong> Hard Drive irá apagar todos os dados existentes na unidade.<br />
1. Conecte o disco rígido <strong>Iomega</strong> ao seu computador, seguindo as instruções da página 5.<br />
2. Abra o Gerenciamento de Disco do Windows (clique com o botão direito do mouse em Meu Computador, selecione<br />
Gerenciar e, em seguida, clique em Gerenciamento de Disco).<br />
3. Se o Assistente de Disco abrir, clique em Avançar. Selecione o disco, clique em Avançar e Concluir.<br />
Se o assistente não abrir, localize a unidade na lista inferior. Procure um disco que não tenha uma letra de unidade<br />
ou um sistema de arquivos. Clique com o botão direito do mouse no nome da unidade, selecione Inicializar Disco<br />
(Windows XP) ou Gravação de Assinaturas (Windows 2000) e OK.<br />
4. A unidade aparecerá como Não Alocada e a barra estará preta. Clique com o botão direito do mouse na barra preta e<br />
selecione Nova Partição (Windows XP) ou Criar Partição (Windows 2000).<br />
5. Quando o Assistente de Partição do Windows abrir, clique em Avançar.<br />
6. Verifique se o tipo de partição é Partição primária e clique em Avançar.<br />
7. Marque o espaço máximo de disco e clique em Avançar.<br />
8. Atribua a próxima letra de unidade disponível e clique em Avançar.<br />
9. Para formatar a unidade com um sistema de arquivos NTFS, clique em Avançar e, em seguida, em Concluir. A<br />
unidade estará pronta para uso quando a formatação estiver concluída.<br />
NOTA: caso deseje usar a unidade com outros sistemas operacionais, faça o download do <strong>Iomega</strong> FAT32 Formatter<br />
(Formatador <strong>Iomega</strong> FAT32) na área de Suporte e <strong>Download</strong>s a partir da página www.iomega.com. Altere para o formato<br />
FAT32 (oferece compatibilidade entre diferentes plataformas).<br />
Manual do usuário<br />
Está disponível na área de Suporte e <strong>Download</strong>s no site www.iomega.com a versão completa do manual do usuário em<br />
formato HTML.<br />
9
10<br />
Limited Warranty • Garantie Limitée<br />
Garantía limitada • Garantia limitada<br />
<strong>Iomega</strong> warrants this hardware product to be free from defects in materials and workmanship for a period of one (1) year (90 days for<br />
reconditioned products) from the date of purchase. This non-transferable, limited warranty is only to you, the first end-user purchaser.<br />
This warranty does not apply to: (a) <strong>Iomega</strong> software products; (b) expendable components such as fuses or bulbs; or (c) third party<br />
products, hardware or software, supplied with the warranted product. <strong>Iomega</strong> makes no warranty of any kind on such products which, if<br />
included, are provided “AS IS.” This warranty also excludes damage caused by accident, misuse, abuse, use of non-<strong>Iomega</strong> approved media,<br />
exposure of media to excessive magnetic fields, or external environmental causes.<br />
Your sole and exclusive remedy for a covered defect is repair or replacement of the defective product, at <strong>Iomega</strong>’s sole option and expense<br />
(shipping may be charged), and <strong>Iomega</strong> may use new or refurbished parts or products to do so. If <strong>Iomega</strong> is unable to repair or replace a<br />
defective product, your alternate exclusive remedy shall be a refund of the original purchase price.<br />
The above is <strong>Iomega</strong>’s entire obligation to you under this warranty. IN NO EVENT SHALL IOMEGA BE LIABLE FOR INDIRECT, INCIDENTAL,<br />
CONSEQUENTIAL OR SPECIAL DAMAGES OR LOSSES, INCLUDING LOSS OF DATA, USE, OR PROFITS EVEN IF IOMEGA HAS BEEN ADVISED OF THE<br />
POSSIBILITY OF SUCH DAMAGES. In no event shall <strong>Iomega</strong>’s liability exceed the original purchase price of the drive or the media disk. Some<br />
jurisdictions do not allow the exclusion or limitation of incidental or consequential damages, so the above limitation or exclusion may not<br />
apply to you.<br />
Obtaining Warranty Service<br />
You must notify <strong>Iomega</strong> within the warranty period to receive warranty service. <strong>Iomega</strong>’s specific customer support policies (including fees<br />
for services) and procedures change as technology and market conditions dictate. To obtain information about <strong>Iomega</strong>’s current policies or<br />
warranty service, please visit our website at www.iomega.com/supportpolicy.html or write to: <strong>Iomega</strong> Customer Service, 1821 West 4000<br />
South, Roy, UT 84067.<br />
Limitations<br />
THE ABOVE WARRANTY IS EXCLUSIVE AND IN LIEU OF ALL OTHER WARRANTIES, EXPRESS OR IMPLIED. To the extent permitted by applicable<br />
law, IOMEGA SPECIFICALLY DISCLAIMS ANY IMPLIED WARRANTIES, INCLUDING ANY IMPLIED WARRANTY OF MERCHANTABILITY OR FITNESS FOR<br />
A PARTICULAR PURPOSE. Any implied warranty required by applicable law shall be limited in duration to the express warranty term. Some<br />
jurisdictions do not allow disclaimers of implied warranties or limitations on how long an implied warranty lasts, so the above limitation may<br />
not apply to you.<br />
This warranty gives you specific legal rights and you may also have other rights that vary from jurisdiction to jurisdiction. Any suit for breach<br />
of any warranty on your Product must be filed within one (1) year of the first date the suit could have been brought.<br />
<strong>Iomega</strong> garantit que ce produit est exempt de tous vices dans les matériels de fabrication pendant la période de um (1) ano (90 dias pour<br />
produtos recondicionados. Cette garantie limitée est strictement personnelle et s’applique uniquement au premier utilisateur final.<br />
Cette garantie ne s’applique pas aux: (a) logiciels <strong>Iomega</strong>; (b) composants remplaçables tels que les fusibles ou les ampoules; et (c) produits<br />
tiers, matériels ou logiciels fournis avec le produit garanti. <strong>Iomega</strong> ne garantit en aucun cas que tels produits, s’ils sont inclus, soient fournis<br />
“EN L’ETAT”. Sont exclus les dommages causés par accident, mauvaise utilisation, abus d’utilisation, non-utilisation des supports <strong>Iomega</strong><br />
approuvés, exposition excessive des supports à des champs magnétiques ou conditions liées à l’environnement extérieur.<br />
Votre unique recours exclusif pour un vice couvert est la réparation ou le remplacement du produit défectueux à l’unique convenance et aux<br />
frais de <strong>Iomega</strong> (l’expédition pourra vous être facturée). <strong>Iomega</strong> est autorisé à utiliser des pièces ou des produits neufs ou remis à neuf pour<br />
ce faire. Si <strong>Iomega</strong> est dans l’incapacité de réparer ou de remplacer un produit défectueux, l’autre recours exclusif sera le remboursement du<br />
prix d’achat d’origine.<br />
Les mentions précisées constituent l’ensemble des obligations de <strong>Iomega</strong> envers vous dans le cadre de cette garantie. EN AUCUN CAS,<br />
IOMEGA NE SERA TENU POUR RESPONSABLE DE DOMMAGES OU DE PERTES INDIRECTES, INCIDENTS DIRECTS OU SPECIAUX, TELS QUE LA<br />
PERTE DE DONNEES, D’UTILISATION, OU DE PROFITS MEME SI IOMEGA A ETE AVERTI DE L’EVENTUALITE DE TELS DOMMAGES. En aucun<br />
cas la responsabilité de <strong>Iomega</strong> n’excèdera pas le prix d’achat d’origine du lecteur ou du support de disquette. Certaines juridictions ne<br />
permettent pas l’exclusion ou la limitation de dommages directs ou indirects. Ainsi, les limitations et les exclusions précisées peuvent ne<br />
pas s’appliquer à vous.<br />
Obtention d'une intervention en garantie<br />
Pour bénéficier des services sous garantie, vous devez avertir <strong>Iomega</strong> pendant la période de garantie.<br />
Les procédures et les politiques de <strong>Iomega</strong> en matière d'assistance clientèle (notamment la tarification des services) changent en fonction<br />
de l'évolution des technologies et des conditions du marché. Pour obtenir des informations sur les politiques actuelles de <strong>Iomega</strong> ou sur les<br />
service de garantie, visitez notre site Web à l'adresse suivante :<br />
www.iomega.com/supportpolicy.html ou écrivez à l'adresse : <strong>Iomega</strong> Customer Service, 1821 West 4000 South, Roy, UT 84067, USA.<br />
Limites<br />
LA GARANTIE PRECISEE EST EXCLUSIVE ET SE SUBSTITUE A TOUTE AUTRE GARANTIE, EXPRESSE OU TACITE. Dans les limites prévues par la loi,<br />
IOMEGA RENONCE EXPRESSEMENT A TOUTES GARANTIES TACITES, Y COMPRIS TOUTES GARANTIES TACITES DE COMMERCIALISATION ET DE<br />
CONVENANCE A UN USAGE PARTICULIER. Toute garantie implicite requise par la loi sera limitée dans le temps selon les conditions de garantie<br />
expresses. Certaines juridictions ne permettent pas la renonciation aux garanties implicites ou les limitations de durée de garantie. Ainsi, les<br />
limitations précisées peuvent ne pas s’appliquer à vous.<br />
Cette garantie vous octroie des droits légaux spécifiques et il se peut que vous bénéficiez d’autres droits propres à votre juridiction. Toute<br />
réclamation quant à la garantie de votre produit doit être déposée dans un délai d’un an à compter de la première date à laquelle cette<br />
réclamation a été soumise.
<strong>Iomega</strong> garantiza que este producto de hardware se encontrará libre de defectos de fabricación y materiales durante el período de un (1) año<br />
(90 días por los productos <strong>Iomega</strong> actualizados). Esta garantía es intransferible y está limitada al primer comprador.<br />
Esta garantía no es aplicable a: (a) productos de software <strong>Iomega</strong>; (b) componentes perecederos, como fusibles o bombillas; o (c) productos,<br />
hardware o software de otros fabricantes suministrados con el producto garantizado. <strong>Iomega</strong> no ofrece garantía de ningún tipo sobre dichos<br />
productos, que se proporcionarán “TAL CUAL” en todos los casos en que sean incluidos. Quedan excluidos los casos de daños por accidente,<br />
uso incorrecto, abuso, uso particularmente intensivo, utilización de medios no suministrados o aprobados por <strong>Iomega</strong>, exposición de los<br />
medios a un exceso de campos magnéticos y causas externas.<br />
La única solución de un defecto cubierto es la reparación o sustitución del producto defectuoso, a discreción y cargo de <strong>Iomega</strong> (el porte<br />
puede ser cobrado). <strong>Iomega</strong> podrá utilizar para tal fin piezas o productos nuevos o restaurados. Si <strong>Iomega</strong> no puede reparar o sustituir el<br />
producto defectuoso, la única alternativa posible será el reembolso del precio de compra original.<br />
Los casos citados anteriormente son las únicas obligaciones contraídas por <strong>Iomega</strong> mediante esta garantía. IOMEGA NO SERÁ EN NINGÚN<br />
CASO RESPONSABLE DE LOS DAÑOS O PÉRDIDAS INDIRECTAS, INCIDENTALES, CONSECUENCIALES O ESPECIALES, INCLUIDA LA PÉRDIDA DE<br />
DATOS, USO O BENEFICIOS INCLUSO CUANDO IOMEGA HAYA SIDO INFORMADA DE LA POSIBILIDAD DE QUE SE PODRÍAN PRODUCIR TALES<br />
DAÑOS. La responsabilidad de <strong>Iomega</strong> nunca excederá el precio de compra original de la unidad o el disco. Algunas jurisdicciones no permiten<br />
la exclusión o limitación de daños incidentales o consecuenciales, por lo que la limitación o exclusión anterior podría ser irrelevante para<br />
usted.<br />
Obtención de servicio por garantía<br />
Debe notificar a <strong>Iomega</strong> dentro del período de la garantía para recibir servicio cubierto por ésta. La política y procedimientos de asistencia<br />
al cliente de <strong>Iomega</strong> (incluidas las tarifas de los servicios) cambian al ritmo que lo hacen la tecnología y las condiciones del mercado.<br />
Para obtener información sobre las políticas actuales de <strong>Iomega</strong> o el servicio de garantía, visite nuestro sitio web en www.iomega.com/<br />
supportpolicy.html o escriba a Asistencia técnica de <strong>Iomega</strong> a la siguiente dirección: <strong>Iomega</strong> Customer Service, 1821 West 4000 South, Roy,<br />
UT 84067, USA.<br />
Limitaciones<br />
LA GARANTÍA ANTERIOR ES EXCLUSIVA Y PREVALECE SOBRE TODAS LAS DEMÁS GARANTÍAS, YA SEAN EXPRESAS O IMPLÍCITAS. Dentro de los<br />
márgenes permitidos por la ley aplicable, IOMEGA RENUNCIA ESPECÍFICAMENTE A LA RESPONSABILIDAD DE CUALQUIER GARANTÍA IMPLÍCITA,<br />
INCLUIDA CUALQUIER GARANTÍA IMPLÍCITA DE COMERCIALIDAD O IDONEIDAD PARA UN PROPÓSITO CONCRETO.<br />
Las garantías implícitas requeridas por la ley aplicable verán su duración limitada al período de garantía. Algunas jurisdicciones no permiten<br />
la renuncia de la responsabilidad de las garantías implícitas o limitaciones de la duración de las mismas, por lo que la limitación anterior<br />
podría ser irrelevante para usted.<br />
Esta garantía le otorga derechos legales específicos. Además, usted puede disponer de otros derechos que difieran entre distintas<br />
jurisdicciones. Cualquier demanda de incumplimiento de la garantía del producto deberá procesarse en el plazo de un año a partir de la<br />
fecha en que se realizó la demanda.<br />
A <strong>Iomega</strong> garante este produto de hardware como isento de defeitos de material e mão-de-obra pelo período de um (1) ano (90 dias para<br />
produtos recondicionados). Esta garantia limitada e intransferível é somente para você, o primeiro comprador usuário final.<br />
Esta garantia não se aplica a: (a) produtos de software da <strong>Iomega</strong>; (b) componentes consumíveis, como fusíveis ou bulbos; ou (c) produtos<br />
de terceiros, de hardware ou software, fornecidos com o produto garantido. A <strong>Iomega</strong> não dá garantia de nenhum desses produtos, os quais,<br />
quando incluídos, são fornecidos “NO ESTADO”. São excluidos os danos causados por acidente, má utilização, abuso, uso mais pesado<br />
que o normal, uso de mídia não fornecida ou não aprovada pela <strong>Iomega</strong>, exposição da mídia a campos magnéticos excessivos ou causas<br />
ambientais externas.<br />
A sua única e exclusiva reparação por um defeito coberto pela garantia é o reparo ou substituição do produto defeituoso, unicamente às<br />
expensas e à escolha da <strong>Iomega</strong> (a remessa pode ser cobrada), que pode utilizar peças ou produtos novos ou recondicionados para tanto. Se<br />
a <strong>Iomega</strong> não puder reparar ou substituir um produto defeituoso, a sua reparação alternativa exclusiva deverá ser uma restituição do preço<br />
original da aquisição.<br />
O exposto acima é toda a obrigação da <strong>Iomega</strong> para com você sob esta garantia. EM NENHUMA EVENTUALIDADE A IOMEGA PODERÁ SER<br />
RESPONSABILIZADA POR PERDAS OU DANOS INDIRETOS, INCIDENTAIS, CONSEQÜENTES OU ESPECIAIS, INCLUINDO PERDA DE DADOS, USO<br />
OU LUCROS, MESMO QUE A IOMEGA TENHA SIDO ADVERTIDA QUANTO À POSSIBILIDADE DE TAIS DANOS. Em nenhuma eventualidade a<br />
responsabilização da <strong>Iomega</strong> deverá exceder o preço original da aquisição da unidade ou do disco de mídia. Algumas jurisdições não<br />
permitem a exclusão ou limitação de danos incidentais ou conseqüentes, portanto a limitação ou exclusão acima pode não se aplicar a você.<br />
Obtenção de serviço de garantia<br />
É necessário notificar a <strong>Iomega</strong> dentro do período de garantia para usufruir de seus serviços. A política e os procedimentos de suporte<br />
específicos da <strong>Iomega</strong> (incluindo taxas de serviços) variam conforme as condições de tecnologia e mercado. Para obter informações sobre<br />
as políticas atuais da <strong>Iomega</strong> ou serviços de garantia, visite nosso site na web em www.iomega.com/supportpolicy.html ou escreva para o<br />
Serviço de atendimento ao cliente da <strong>Iomega</strong> no endereço: <strong>Iomega</strong> Customer Service, 1821 West 4000 South, Roy, UT 84067, USA.<br />
Limitações<br />
A GARANTIA ACIMA É EXCLUSIVA E SUBSTITUI TODAS AS OUTRAS GARANTIAS, EXPRESSAS OU IMPLÍCITAS. Na extensão permitida pelas leis<br />
aplicáveis, A IOMEGA DESOBRIGA-SE ESPECIFICAMENTE DE QUAISQUER GARANTIAS IMPLÍCITAS INCLUINDO QUALQUER GARANTIA IMPLÍCITA<br />
DE COMERCIALIZAÇÃO OU ADEQUAÇÃO A UM DETERMINADO PROPÓSITO. Quaisquer garantias implícitas exigidas pelas leis aplicáveis<br />
deverão ser limitadas, em duração, ao prazo da garantia expressa. Algumas jurisdições não permitem a desobrigação de garantias implícitas<br />
ou limitações sobre a duração de uma garantia implícita, portanto a limitação acima pode não se aplicar a você.<br />
Esta garantia lhe concede direitos legais específicos, mas você também pode ter outros direitos que variem conforme a jurisdição. Qualquer<br />
processo judicial por violação de qualquer garantia sobre o seu Produto deve ser feito no prazo de 1 ano, a contar da primeira data na qual a<br />
ação poderia ter sido movida.<br />
11
Customer Support • Assistance clientèle<br />
Asistencia al cliente • Suporte ao cliente<br />
For service and support for your <strong>Iomega</strong> product, visit us at www.iomega.com.<br />
Pour obtenir du service et de l’assistance pour votre produit <strong>Iomega</strong>, visitez notre site à l’adresse suivante :<br />
www.iomega.com.<br />
Para obtener información sobre servicio y asistencia técnica para su producto <strong>Iomega</strong>, visítenos en www.iomega.com.<br />
Para obter serviços e suporte para seu produto <strong>Iomega</strong>, visite-nos no site www.iomega.com.<br />
Copyright © 2006 <strong>Iomega</strong> Corporation. All rights reserved. <strong>Iomega</strong>, the stylized “i” logo, and all <strong>Iomega</strong> brand blocks are either registered<br />
trademarks or trademarks of <strong>Iomega</strong> Corporation in the United States and/or other countries. Microsoft and Windows are either registered<br />
trademarks or trademarks of Microsoft Corporation in the United States and/or other countries. Apple, Macintosh, Mac, and FireWire are<br />
either registered trademarks or trademarks of Apple Computer, Inc. in the United States and/or other countries. Certain other product names,<br />
brand names, and company names may be trademarks or designations of their respective owners.<br />
31439404 5/09/06 b