lICUAdoRA - Applica Use and Care Manuals
lICUAdoRA - Applica Use and Care Manuals
lICUAdoRA - Applica Use and Care Manuals
Create successful ePaper yourself
Turn your PDF publications into a flip-book with our unique Google optimized e-Paper software.
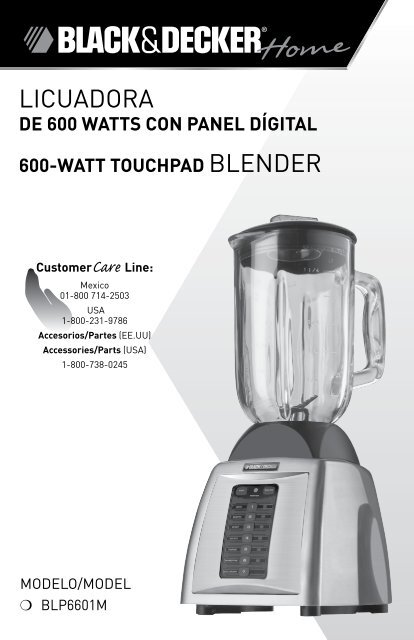
<strong>lICUAdoRA</strong><br />
de 600 watts con panel dÍgital<br />
600-watt toUcHpad BleNdeR<br />
customer<strong>Care</strong> line:<br />
Mexico<br />
01-800 714-2503<br />
USA<br />
1-800-231-9786<br />
accesorios/partes (ee.UU)<br />
accessories/parts (USA)<br />
1-800-738-0245<br />
Modelo/Model<br />
❍ BlP6601M
por favor lea este instructivo antes de usar el producto.<br />
instRUcciones iMpoRtantes<br />
de segURidad<br />
Cu<strong>and</strong>o se utilizan aparatos eléctricos, siempre se debe respetar<br />
ciertas medidas de seguridad, incluyendo las siguientes:<br />
❍ Por favor lea todas las instrucciones.<br />
❍ A fin de protegerse contra el riesgo de un choque eléctrico,<br />
asegúrese que la base de la licuadora, el cable y el enchufe no<br />
puedan entrar en contacto con agua u otro líquido.<br />
❍ Todo aparato eléctrico utilizado en la presencia de menores de<br />
edad o por ellos mismos requiere la supervisión de un adulto.<br />
❍ desconecte el aparato del tomacorriente cu<strong>and</strong>o no esté en<br />
funcionamiento, antes de instalar o retirar las piezas y antes de<br />
limpiarlo.<br />
❍ evite el contacto con las piezas móviles.<br />
❍ No se debe utilizar ningún aparato eléctrico que tenga el cable<br />
o el enchufe averiado, que presente un problema de<br />
funcionamiento o que esté dañado. devuelva el aparato al centro<br />
de servicio autorizado más cercano para que lo examinen,<br />
reparen o ajusten o llame gratis al número que aparece en la<br />
cubierta de este manual.<br />
❍ el uso de accesorios no recomendados por el fabricante del<br />
aparato, podría ocasionar fuego, descarga eléctrica o lesiones<br />
personales.<br />
❍ este aparato no se debe utilizar a la intemperie.<br />
❍ No permita que el cable cuelgue del borde de la mesa ni del<br />
mostrador.<br />
❍ No se debe introducir las manos ni los utensilios adentro de la<br />
jarra, a fin de evitar el riesgo de serias lesiones a las personas<br />
o daños a la licuadora. Se puede utilizar un raspador siempre<br />
que la licuadora no esté en funcionamiento.<br />
❍ las cuchillas tienen filo y se deben manejar con prudencia.<br />
❍ A fin de evitar el riesgo de lesiones, nunca coloque el montaje de<br />
las cuchillas sobre la base sin antes ajustar bien la jarra.<br />
❍ Siempre haga funcionar la licuadora con la tapa en su lugar.<br />
❍ Para licuar líquidos calientes, se debe retirar el tapón del<br />
centro de la tapa.<br />
❍ este aparato se debe utilizar solamente con el fin previsto.<br />
conseRVe estas<br />
instRUcciones.<br />
este aparato eléctrico es para uso doméstico<br />
únicamente.<br />
encHUFe polaRiZado (solamente en los modelos de 1 0V)<br />
este aparato cuenta con un enchufe polarizado (un contacto es más ancho que<br />
el otro). A fin de reducir el riesgo de un choque eléctrico, este enchufe encaja<br />
en un tomacorriente polarizada en un solo sentido. Si el enchufe no entra en el<br />
tomacorriente, inviértalo y si aun así no encaja, consulte con un electricista.<br />
Por favor no trate de alterar esta medida de seguridad.<br />
toRnillo de segURidad<br />
advertencia: este aparato cuenta con un tornillo de seguridad para evitar<br />
la remoción de la cubierta exterior del mismo. a fin de reducir el riesgo de<br />
incendio o de choque eléctrico, por favor no trate de remover la cubierta<br />
exterior. este producto no contiene piezas reparables por el consumidor.<br />
toda reparación se debe llevar a cabo únicamente por personal de servicio<br />
autor izado.<br />
caBle elÉctRico<br />
el cable de este aparato fue escogido a fin de evitar el riesgo de enredarse<br />
o de tropezar con un cable de mayor longitud. Cualquier cable de extensión<br />
que se deba emplear, deberá estar calificado para nada menor de<br />
15 amperios. (Para aquellos productos de 220 voltios, se deberá utilizar un<br />
cable de extensión no menor de 6 amperios). Cu<strong>and</strong>o utilice un cable de<br />
extensión, asegúrese que no interfiera con la superficie de trabajo ni que<br />
cuelgue de manera que alguien se pueda tropezar. A fin de aumentar la vida<br />
útil del cable, no tire de él ni maltrate las uniones del cable con el enchufe ni<br />
con el aparato.<br />
nota: Si el cordón de alimentación esta dañado, en América latina debe<br />
sustituirse por personal calificado o por el centro de servicio autorizado.<br />
espaÑol
este producto puede variar ligeramente del que aparece ilustrado.<br />
a<br />
<br />
<br />
<br />
<br />
<br />
1. tapón<br />
. tapa<br />
. Jarra<br />
. asa<br />
. Junta<br />
6. Montaje de las cuchillas<br />
7. Base de la jarra<br />
8. Botón de apagado<br />
9. luz indicadora de funcionamiento<br />
10. Botón de pulso<br />
11. Botones de velocidades<br />
1 . Base<br />
3/4<br />
1/2<br />
1/4<br />
<br />
1 1/4<br />
1<br />
LT<br />
STIR<br />
BLEND<br />
CHOP<br />
GRATE<br />
PUREE<br />
SMOOTIE<br />
ICE-CRUSH<br />
7<br />
6<br />
OFF<br />
5<br />
4<br />
3<br />
2<br />
POWER<br />
1<br />
<br />
PULSE<br />
<br />
<br />
<br />
<br />
<br />
como usar<br />
este producto es para uso doméstico solamente.<br />
pasos pReliMinaRes<br />
• Retire el material de empaque y toda calcomanía del producto.<br />
• lave todas las piezas removibles según las instrucciones en la sección de<br />
CUIdAdo y lIMPIezA de este manual.<br />
instalaciÓn de la JaRRa (B)<br />
1. Invierta la jarra de la licuadora sobre una<br />
superficie plana, en el mostrador o superficie de<br />
trabajo.<br />
2. Coloque la junta en cima del montaje de las<br />
cuchillas.<br />
3. Coloque el montaje de las cuchillas, con la junta<br />
en la abertura inferior y las cuchillas orientadas<br />
B<br />
hacia abajo.<br />
4. Coloque la base de la jarra en la jarra y gire hacia la derecha hasta<br />
apretar.<br />
5. Una vez ensamblada, invierta la jarra en posición derecha.<br />
6. Coloque la tapa sobre la jarra, con el tapón en su lugar.<br />
7. desenrolle el cable situado en el inferior de la base del aparato.<br />
8. Coloque la jarra sobre la base de potencia. la licuadora está lista para<br />
usar.<br />
paRa UsaR sU licUadoRa<br />
1. Asegúrese que el aparato esté en la posición de apagado (oFF).<br />
2. Agregue los alimentos que desea licuar adentro de la jarra.<br />
3. Coloque la tapa sobre la jarra y asegúrese que el tapón de la tapa esté<br />
en su lugar.<br />
4. enchufe el cable eléctrico a un tomacorriente.<br />
nota: Jamás desatienda la licuadora cu<strong>and</strong>o esté en uso. Cu<strong>and</strong>o use<br />
alimentos duros como hielo, queso, nueces y granos de café, mantenga una<br />
mano sobre la tapa para mantener la licuadora firme en su lugar.<br />
5. escoja la velocidad que mejor corresponda a la tarea de licuado.<br />
6. Para moler café o nueces, o cu<strong>and</strong>o se<br />
trate de mezclas pesadas, use el botón<br />
de pulsación (PUlSe) por unos segundos<br />
y luego, suéltelo (c). la licuadora se<br />
apaga automáticamente cu<strong>and</strong>o uno<br />
suelta el botón de pulsación.<br />
c<br />
LT<br />
OFF<br />
1<br />
3/4<br />
1 1/4<br />
1/4<br />
1/2<br />
STIR 1<br />
BLEND 2<br />
CHOP 3<br />
GRATE<br />
PUREE<br />
SMOOTIE<br />
ICE-CRUSH<br />
OFF<br />
7<br />
6<br />
5<br />
4<br />
PULSE<br />
POWER<br />
1/4<br />
1 1/4<br />
3/4<br />
1/2<br />
1<br />
LT<br />
PULSE<br />
espaÑol
7. Abra el tapón de la tapa para añadir ingredientes<br />
mientras la licuadora está en funcionamiento, y deje<br />
caer los ingredientes a través de a abertura (d).<br />
importante: no retire la tapa mientras la licuadora esté<br />
en funcionamiento.<br />
8. Cu<strong>and</strong>o termine, presione el botón oFF.<br />
9. Para retirar la jarra, sujete el mango y levante para<br />
arriba.<br />
10. Retire la tapa para verter.<br />
d<br />
11. Siempre desenchufe el aparato cu<strong>and</strong>o no esté<br />
en uso.<br />
dispositiVo especial<br />
• Presione un solo botón a la vez.<br />
• la unidad cuenta con un sistema inteligente de apagado automático de<br />
2 minutos para las velocidades de 1 a 14 y de 20 segundos para la función<br />
de pulso. Si esto ocurre, la luz indicadora de funcionamiento cambia a<br />
intermitente, desconecte la unidad y espere 30 segundos para restablecer.<br />
• Vuelva a enchufar el aparato. Si la luz indicadora se mantiene intermitente,<br />
deje de utilizar el aparato y comuníquese con su centro de servicio.<br />
• la unidad contiene un sistema de protección el cual apaga la unidad<br />
automáticamente para evitar un sobrecalentamiento del motor. espere<br />
5 minutos a que la unidad se enfríe. desenchufe y después enchufe de nuevo<br />
para hacerla funcionar.<br />
conseJos Y tÉcnicas de licUado<br />
• Corte los alimentos en pedazos no mayores de 2 cm antes de introducirlos a<br />
la licuadora.<br />
• Cu<strong>and</strong>o los ingredientes salpiquen en los bordes de la jarra o si la mezcla es<br />
demasiado espesa, presione el botón oFF para apagar el aparato. Retire la<br />
tapa y use una espátula plástica para raspar los lados de la jarra y distribuir<br />
los alimentos hacia el centro de las aspas. Coloque la tapa nuevamente y<br />
continúe licu<strong>and</strong>o.<br />
• el aparato siempre debe tener la tapa bien colocada cu<strong>and</strong>o está en<br />
funcionamiento.<br />
• No cloque la jarra de la licuadora sobre la base cu<strong>and</strong>o el motor esté en<br />
operación.<br />
• el tapón de la tapa equivale a ¹/3 de taza líquida y<br />
puede ser usado para agregar ingredientes líquidos,<br />
como jugo, leche, crema y licor (e).<br />
• Antes de preparar migajas de pan, picar nueces<br />
o moler café, asegúrese que la jarra esté bien seca.<br />
• Cu<strong>and</strong>o use la función de pulsación, hágalo en<br />
intervalos cortos. espere que las cuchillas dejen de<br />
girar. No use la pulsación por más de 2 minutos.<br />
• <strong>Use</strong> el botón de pulsación cu<strong>and</strong>o prepare bebidas que<br />
incluyen cubos de hielo; esto ayuda a producir una<br />
e<br />
textura más suave.<br />
1 1/4<br />
1 1/4<br />
1/4<br />
1<br />
3/4<br />
1/2<br />
1/4<br />
1<br />
3/4<br />
1/2<br />
LT<br />
LT<br />
• es provecho iniciar el ciclo de licuado a la velocidad más baja y después<br />
aumentar la velocidad, si es necesario.<br />
• Cu<strong>and</strong>o uno licua ingredientes calientes, siempre se<br />
debe abrir el tapón de la tapa y dejarlo entreabierto,<br />
con la parte abierta, alejada de uno (F). Cierre<br />
la tapa con un paño para evitar salpicaduras y<br />
solamente utilice la velocidad 1. No licue más<br />
de 2 1 ⁄2 a 3 tazas a la vez.<br />
• no introduzca ninguno de los siguientes en la licuadora:<br />
• Trozos gr<strong>and</strong>es de alimentos congelados<br />
• Alimentos duros como los nabos crudos, camotes ni papas<br />
• Huesos<br />
• Salami duro ni pepperoni<br />
• líquidos hirviendo (dejar enfriar 5 minutos antes de licuarlos.)<br />
• tareas no recomendadas para la licuadora:<br />
• Batir crema<br />
• Batir claras de huevo a punto de nieve<br />
• Amasar<br />
• deshacer papas<br />
• Moler carnes<br />
• extraer jugo de frutas y vegetales<br />
6 7<br />
F<br />
1 1/4<br />
1<br />
3/4<br />
1/2<br />
1/4<br />
LT<br />
espaÑol
coMo escogeR las Velocidades<br />
ReVolVeR (1) Reconstitución de jugos congelados y mezclas<br />
para bebidas<br />
Preparación de aderezos para ensaladas<br />
Budines<br />
deshacer sopas calientes<br />
MeZclaR ( ) Revolver mezcla para gofres y panqueques<br />
Batir huevos para tortillas de huevo o natillas<br />
Migar pan o galletas<br />
picaR ( ) Picar nueces de consistencia fina o gruesa<br />
Vegetales y frutas<br />
gRate ( ) Moler queso duro<br />
Moler granos de café<br />
desHaceR ( ) Alimentos para bebé, frutas y vegetales<br />
Preparación de salsas<br />
Moler especias<br />
sMootHie (6) Bebidas proteínicas<br />
leche malteada<br />
Bebidas de fruta congelada<br />
tRitURaR Hielo (7) Para mayor control, esta función se maneja<br />
como pulsación<br />
cuidado y limpieza<br />
este producto no contiene piezas reparables por el consumidor. Para<br />
servicio, por favor consulte con personal calificado.<br />
liMpieZa<br />
1. Antes de limpiar, apague y desconecte el aparato.<br />
2. levante la jarra por el mango para quitarla de la base.<br />
3. Gire la base hacia la izquierda para aflojar y retirarla.<br />
4. Retire la junta y el montaje de las cuchillas.<br />
advertencia: las cuchillas tienen filo, manéjelas con mucho cuidado.<br />
5. Retire la tapa y el tapón de la tapa.<br />
6. lave las piezas removibles a mano o en la máquina lavaplatos. Coloque<br />
la jarra en la b<strong>and</strong>eja inferior de la máquina lavaplatos y las demás piezas<br />
en la b<strong>and</strong>eja superior solamente.<br />
consejo práctico:<br />
• Para una limpieza rápida, agregue a la jarra 1 taza de agua caliente y una<br />
gota de líquido detergente.<br />
• Cubra la jarra y agite el jabón en el ciclo, “STIR” por 30 segundos.<br />
• deseche el líquido y enjuague bien la jarra.<br />
importante:<br />
• no introduzca las piezas de la jarra en agua hirviendo.<br />
• no sumerja la base en ningún líquido. limpie la base del aparato con<br />
un paño humedecido y séquela bien.<br />
• Remueva las manchas persistentes, frot<strong>and</strong>o con un paño humedecido<br />
un limpiador no abrasivo.<br />
nota: Si cae líquido en la base de potencia, límpiela bien con un paño seco.<br />
No use almohadillas abrasivas ni limpiadores fuertes en las piezas ni en el<br />
acabado del producto.<br />
8 9<br />
espaÑol
solUciÓn de pRoBleMas o Fallas<br />
pRoBleMa caUsa posiBle solUciÓn<br />
la base no se Se ha producido un Coloque la jarra sobre<br />
separa de la jarra. vacío. la licuadora y gírela<br />
hacia la izquierda<br />
hasta que se separe<br />
de su base.<br />
la base de la jarra le falta la junta o ésta Verifique que la jarra<br />
pierde líquido. no está debidamente esté armada<br />
colocada. correctamente.<br />
el aparato no el aparato no está Verifique que el<br />
se enciende. conectado. aparato esté<br />
conectado a un<br />
enchufe que funciona.<br />
la mezcla parece No hay suficiente Apague la licuadora<br />
no licuarse líquido en la mezcla o y vuelva a distribuir<br />
hay demasiado hielo. los alimentos con una<br />
espátula de goma.<br />
Agregue líquido a la<br />
mezcla y utilice la<br />
función de pulso para<br />
ayudar a que se licue.<br />
las hierbas o el la jarra, los alimentos Asegúrese siempre de<br />
pan quedan en las y las cuchillas no están tque la jarra, las<br />
paredes de la jarra secos. cuchillas y los<br />
y no se pican. alimentos que se van<br />
picar estén secos.<br />
la jarra se separa Se giró la jarra Al retirar la jarra<br />
de la base cu<strong>and</strong>o mientras se la retiraba de la base de la<br />
se retira de la de la base de la licuadora, álcela<br />
licuadora. el licuadora. hacia arriba, no la<br />
líquido se derrama gire.<br />
sobre el mostrador<br />
Recetas<br />
colada de Mango<br />
1 taza de jugo de uva blanca y melocotón<br />
½ taza mezcla congelada para piña colda<br />
2 tazas rebanadas de melocotón congelado<br />
1 mango maduro cortado en pedazos de ¾ pulg.<br />
1 taza cubos de hielo<br />
Combine en la licuadora todos los ingredientes, siguiendo el orden de la<br />
lista. Coloque la tapa sobre la jarra. Pulse varias veces, 5 segundos a la<br />
vez para mezclar los ingredientes y comenzar a triturar el hielo. licue a<br />
la velocidad SMooTHIe (6) por 25 segundos hasta que la mezcla resulte<br />
cremosa. Apague la licuadora y sirva de inmediato.<br />
Rinde aprox. 4 1 ⁄2 tazas<br />
BeBida de Banana Y naRanJa<br />
2 tazas jugo de naranja<br />
1 taza yogurt de vainilla<br />
2 bananas medianas, cortadas en pedazos de 2 pulg.<br />
1 1 ⁄2 tazas de fresas congeladas<br />
2 cdtas de miel<br />
Combine en la licuadora todos los ingredientes, siguiendo el orden de la<br />
lista. Coloque la tapa sobre la jarra. Pulse varias veces, 5 segundos a la<br />
vez para mezclar los ingredientes y comenzar a triturar el hielo. licue a la<br />
velocidad SMooTHIe (6) por 30 segundos hasta que la mezcla resulte suave.<br />
Apague la licuadora y sirva de inmediato.<br />
Rinde aprox. 5 1 ⁄2 tazas<br />
BeBida eneRgÉtica de MelocotÓn Y cReMa<br />
1 taza leche descremada, baja en grasa<br />
1 taza yogurt congelado<br />
1 lata (16 oz) de melocotón rebanado, escurrido y enfriado<br />
3 cdta germen de trigo<br />
2 cdtas miel<br />
1 1 ⁄2 tazas cubos de hielo<br />
Combine en la licuadora todos los ingredientes, siguiendo el orden de la<br />
lista. Coloque la tapa sobre la jarra. Pulse varias veces, 5 segundos a la<br />
vez para mezclar los ingredientes y comenzar a triturar el hielo. licue a la<br />
velocidad SMooTHIe (6) por 30 segundos hasta que la mezcla resulte suave.<br />
Apague la licuadora y sirva de inmediato.<br />
Rinde aprox. 5 tazas<br />
10 11<br />
espaÑol
caldo de piMientos RoJos asados<br />
3 pimientos rojos medianos, cortados por mitad, sin semillas<br />
1 cebolla gr<strong>and</strong>e picada (aprox.1 1 ⁄2 tazas)<br />
1 taza apio picado<br />
2 dientes de ajo gr<strong>and</strong>e, picado<br />
2 cdas aceite de oliva<br />
3 tazas caldo<br />
1 taza jugo vegetal V-8<br />
½ cdta sal<br />
¼ cdta pimienta negra<br />
Crema agria<br />
Cebollinos frescos recortados<br />
Coloque los pimientos con la piel hacia arriba en una b<strong>and</strong>eja de hornear.<br />
Ase a temperatura alta hasta que la piel de los pimientos se torne oscura.<br />
Retire los pimientos de la b<strong>and</strong>eja de hornear póngalos en una bolsa plástica;<br />
cierre bien la bolsa y deje reposar a temperatura ambiental por 10 minutos.<br />
Retire los pimientos de la bolsa. Pele y deseche la piel de los pimientos y<br />
córtelos en trozos de 1 pulgada.<br />
Con una cuchara, pase 2 1 ⁄2 tazas de la mezcla de sopa a la licuadora. Cubra y<br />
retire el tapón; coloque el tapón entreabierto, con la parte destapada alejada<br />
del cuerpo. Cubra la tapa con una toalla y licue la mezcla en la velocidad.<br />
STIR (1) hasta quedar suave y cremosa. Vierta en una taza de medir. Repita con<br />
la mezcla sobrante hasta deshacerse como puré. Regrese la sopa a la cacerola<br />
y revuelva hasta calentarla bien.<br />
Corone con los cebollinos y la crema agria.<br />
Rinde aprox. 6 tazas<br />
sopa de espinaca con cURRY RoJo<br />
1 ramo de cebollinos, rebanados (aprox., 1 taza)<br />
2 dientes de ajo mediano, picado<br />
2 cdas margarina o mantequilla<br />
4 tazas caldo de pollo<br />
1 1 ⁄2 tazas papas cortadas en cubitos<br />
1 cdta curry rojo<br />
½ cdta sal<br />
¼ cdta pimienta negra<br />
12 oz espinaca fresca<br />
Crema agria<br />
Cuscurros con sabor a sazón César<br />
en una cacerola mediana, cocine la cebolla y el ajo a fuego medio hasta<br />
abl<strong>and</strong>ar. Agregue el caldo de pollo, papas, curry, sal y pimienta. lleve a un<br />
hervor. Cubra y cocine a fuego lento por 8 minutos. Agregue la espinaca<br />
y deje cocinar unos 3 minutos hasta que se abl<strong>and</strong>e bien. Retire del fuego<br />
y deje reposar por 5 minutos.<br />
Con una cuchara, pase 2 1 ⁄2 tazas de la mezcla de sopa a la licuadora. Cubra<br />
y retire el tapón; coloque el tapón entreabierto, con la parte destapada<br />
alejada del cuerpo. Cubra la tapa con una toalla y licue la mezcla en la<br />
velocidad STIR (1) hasta quedar suave y cremosa. Vierta en una taza de<br />
medir. Repita con la mezcla sobrante hasta deshacerse como puré. Regrese<br />
la sopa a la cacerola y revuelva constantemente.<br />
Corone con los cebollinos y los cuscurros.<br />
Rinde aprox 6½ tazas<br />
1 1<br />
espaÑol
HUMMUs de toMate secado al sol<br />
2 latas (16 oz cada una) garbanzo<br />
¹/3 taza de jugo de limón fresco<br />
2 cdas aceite de oliva<br />
3 cdas tahini (pasta de semilla de ajonjolí)<br />
2 ajos gr<strong>and</strong>es<br />
½ cdta sal<br />
¼ cdta comino en polvo<br />
½ taza de tomates secados al sol<br />
2 cdtas perejil fresco<br />
escurra los garbanzos, conserv<strong>and</strong>o el líquido. en la licuadora, combine el jugo<br />
de limón, aceite, garbanzos, tahini, ajo, sal y comino. Pulse varias veces,<br />
5 segundos a la vez para mezclar bien los ingredientes. licue a la velocidad<br />
PURee (5) por 30 segundos hasta que la mezcla resulte suave. Puede agregar<br />
de 2 a 3 cdas del jugo de los garbanzos a través de la abertura de la tapa.<br />
Apague la licuadora.<br />
Vierta la mezcla en un tazón y añada los tomates y el perejil. Sirva de inmediato<br />
o cubra y refrigere hasta estar listo para servir.<br />
Servir con pedazos de pan tipo pita.<br />
Rinde aprox. 3 tazas<br />
ensalada de Repollo Y ManZana<br />
1 huevo gr<strong>and</strong>e<br />
1 yema de huevo<br />
¼ cdta mostaza en polvo<br />
¼ cdta sal<br />
¹/8 cdta pimienta<br />
¼ taza vinagre de arroz<br />
²/ ³ taza aceite vegetal<br />
4 tazas repollo desmenuzado para ensalada<br />
2 tazas manzanas, “Granny Smith” picadas<br />
1 cebolla morada, picada (aprox. ½ taza)<br />
½ cacahuetes dulces, picados<br />
½ taza pasas blancas<br />
Combine en la licuadora, 1 huevo gr<strong>and</strong>e, la yema de huevo y ¼ cdta de<br />
mostaza en polvo. Mezcle en la primera velocidad STIR (1) por 10 segundos.<br />
Agregue el vinagre de arroz y continúe mezcl<strong>and</strong>o por 20 segundos a la<br />
misma velocidad. Retire el tapón de la tapa y vierta un flujo continuo de<br />
aceite por 1 minuto. Raspe la mezcla de la jarra.<br />
en un tazón gr<strong>and</strong>e, combine los ingredientes restantes y cubra bien con el<br />
aderezo. deje enfriar por una hora o hasta servir.<br />
Rinde 6 porciones<br />
salsa de toMate Y pepino<br />
1 ramo de cebollinos, rebanados (aprox., 1 taza)<br />
3 a 4 jalapeños, sin semilla y cortados en pedazos de 1 pulg.<br />
3 dientes de ajo gr<strong>and</strong>es<br />
4 tomates medianos, sin el corazón y cortados en pedazos de 1 pulg.<br />
1 pepino mediano, pelado, sin semillas y cortado en pedazos de 1 pulg.<br />
½ taza hoja de cilantro, suelto<br />
Jugo de 1 limón<br />
½ cdta sal<br />
1 lata (16 oz) frijoles negros, enjuagados y escurridos<br />
Combine en la licuadora los cebollinos, jalapeños y el ajo. Coloque la<br />
tapa sobre la jarra. Pulse varias veces, 5 segundos a la vez para picar los<br />
ingredientes. Agregue los demás ingredientes hasta picar los vegetales en<br />
pedazos gruesos. Pase la mezcla a un tazón y agregue los frijoles negros.<br />
Cubra y refrigere por lo menos 1 hora antes de servir.<br />
Sirva con nachos.<br />
Rinde aprox. 4 tazas<br />
1 1
¿necesita aYUda?<br />
Para servicio, reparaciones o preguntas relacionadas al producto, por favor llame al<br />
número del centro de servicio que se indica para el país donde usted compró su producto.<br />
No devuélva el producto al fabricante. llame o lleve el producto a un centro de servicio<br />
autorizado.<br />
dos aÑos de gaRantÍa liMitada<br />
(no aplica en México, estados Unidos o canadá)<br />
¿Qué cubre la garantía?<br />
• la garantía cubre cualquier defecto de materiales o de mano de obra que no haya sido<br />
generado por el uso incorrecto del producto.<br />
¿por cuánto tiempo es válida la garantía?<br />
• Por dos años a partir de la fecha original de compra mientras que tenga una prueba de<br />
la compra.<br />
¿cómo se obtiene el servicio necesario?<br />
• Conserve el recibo original como comprobante de la fecha de compra, comuníquese<br />
con el centro de servicio de su país y haga efectiva su garantía si cumple lo indicado en<br />
el manual de instrucciones.<br />
¿cómo se puede obtener servicio?<br />
• Conserve el recibo original de compra.<br />
• Por favor llame al número del centro de servicio autorizado.<br />
¿Qué aspectos no cubre esta garantía?<br />
• los productos que han sido utilizados en condiciones distintas a las normales.<br />
• los daños ocasionados por el mal uso, el abuso o negligencia.<br />
• los productos que han sido alterados de alguna manera.<br />
• los daños ocasionados por el uso comercial del producto.<br />
• los productos utilizados o reparados fuera del país original de compra.<br />
• las piezas de vidrio y demás accesorios empacados con el aparato.<br />
• los gastos de tramitación y embarque asociados al reemplazo del producto.<br />
• los daños y perjuicios indirectos o incidentales.<br />
¿Qué relación tiene la ley estatal con esta garantía?<br />
• esta garantía le otorga derechos legales específicos y el consumidor podría tener<br />
otros derechos que varían de una región a otra.<br />
póliza de garantía<br />
(Válida sólo para México)<br />
duración<br />
<strong>Applica</strong> Manufacturing, S. de R. l. de C.V. garantiza este producto por 2 años a partir<br />
de la fecha original de compra.<br />
¿Qué cubre esta garantía?<br />
esta Garantía cubre cualquier defecto que presenten las piezas, componentes y la<br />
mano de obra contenidas en este producto.<br />
Requisitos para hacer válida la garantía<br />
Para reclamar su Garantía deberá presentar al Centro de Servicio Autorizado la póliza<br />
sellada por el establecimiento en donde adquirió el producto. Si no la tiene, podrá<br />
presentar el comprobante de compra original.<br />
¿donde hago válida la garantía?<br />
llame sin costo al teléfono 01 800 714 2503, para ubicar el Centro de Servicio<br />
Autorizado más cercano a su domicilio en donde usted podrá encontrar partes,<br />
componentes, consumibles y accesorios.<br />
procedimiento para hacer válida la garantía<br />
Acuda al Centro de Servicio Autorizado con el producto con la póliza de Garantía<br />
sellada o el comprobante de compra original, ahí se reemplazará cualquier pieza o<br />
componente defectuoso sin cargo alguno para el usuario final. esta Garantía incluye<br />
los gastos de transportación que se deriven de su cumplimiento.<br />
excepciones<br />
esta Garantía no será válida cu<strong>and</strong>o el producto:<br />
A) Se hubiese utilizado en condiciones distintas a las normales.<br />
B) No hubiese sido operado de acuerdo con el instructivo de uso que le acompaña.<br />
C) Cu<strong>and</strong>o el producto hubiese sido alterado o reparado por personas no autorizadas<br />
por <strong>Applica</strong> Manufacturing, S. de R. l. de C.V.<br />
nota: Usted podra encontrar partes, componentes, consumibles y accesorios en los<br />
centros de servicios autorizados. esta garantía incluyen los gastos de transportación<br />
que se deriven de sus cumplimiento dentro de sus red de servicio.<br />
16 17<br />
espaÑol
Por favor llame al número correspondiente que aparece en la lista a continuación<br />
para solicitar que se haga efectiva la garantía y donde Ud. puede solicitar servicio,<br />
reparaciones o partes en el país donde el producto fué comprado. También puede<br />
consultarnos en el e-mail servicio@applicamail com.mx<br />
argentina<br />
SeRVICIo TeCNICo CeNTRAl<br />
ATTeNdANCe<br />
Avda. Monroe N° 3351<br />
Buenos Aires – Argentina<br />
Fonos: 0810 – 999 - 8999<br />
011 - 4545 - 4700<br />
011 – 4545 – 5574<br />
supervision@attendance.com.ar<br />
chile<br />
MASTeR SeRVICe SeRVICeNTeR<br />
Nueva los leones N° 0252<br />
Providencia<br />
Santiago – Chile<br />
Fono Servicio: (562) – 232 77 22<br />
servicente@servicenter.cl<br />
colombia<br />
PlINAReS<br />
Avenida Quito # 88A-09<br />
Bogotá, Colombia<br />
Tel. sin costo 01 800<br />
7001870<br />
costa Rica<br />
Aplicaciones electromecanicas, S.A.<br />
Calle 26 Bis y Ave. 3<br />
San Jose, Costa Rica<br />
Tel.: (506) 257-5716 / 223-0136<br />
ecuador<br />
Servicio Master de ecuador<br />
Av. 6 de diciembre 9276 y los Alamos<br />
Tel. (593) 2281-3882<br />
el salvador<br />
Calle San Antonio Abad 2936<br />
San Salvador, el Salvador<br />
Tel. (503) 2284-8374<br />
guatemala<br />
MacPartes SA<br />
3ª Calle 414 zona 9<br />
Frente a Tecun<br />
Tel. (502) 2331-5020 / 2332-2101<br />
Honduras<br />
ServiTotal<br />
Contigua a Telecentro<br />
Tegucigalpa, Honduras,<br />
Tel. (504) 235-6271<br />
México<br />
Articulo 123 # 95 local 109 y 112<br />
Col. Centro, Cuauhtemoc,<br />
México, d.F.<br />
Tel. 01 800 714 2503<br />
nicaragua<br />
ServiTotal<br />
de semáforo de portezuelo<br />
500 metros al sur.<br />
Managua, Nicaragua,<br />
Tel. (505) 248-7001<br />
panamá<br />
Servicios Técnicos CAPRI<br />
Tumbamuerto Boulevard<br />
el dorado Panamá<br />
500 metros al sur.<br />
Tel. 3020-480-800 sin costo<br />
(507) 2360-236 / 159<br />
perú<br />
Servicio Central Fast Service<br />
Av. Angamos este 2431<br />
San Borja, lima Perú<br />
Tel. (511) 2251 388<br />
puerto Rico<br />
Buckeye Service<br />
Jesús P. Piñero #1013<br />
Puerto Nuevo, SJ PR 00920<br />
Tel.: (787) 782-6175<br />
Republica dominicana<br />
Plaza lama, S.A.<br />
Av, duarte #94<br />
Santo domingo,<br />
República dominicana<br />
Tel.: (809) 687-9171<br />
Venezuela<br />
Inversiones BdR CA<br />
Av. Casanova C.C.<br />
City Market Nivel Plaza local 153<br />
diagonal Hotel Melia,<br />
Caracas.<br />
Tel. (582) 324-0969<br />
www.applicaservice.com<br />
servicio@applicamail.com<br />
Sello del distribuidor:<br />
Fecha de compra:<br />
Modelo:<br />
código de fecha / date code<br />
comercializado por:<br />
<strong>Applica</strong> Manufacturing, S. de R. l. de C.V.<br />
Presidente Mazarik No111, 1er Piso<br />
Col. Chapultepec Morales, Mexico d.F<br />
deleg. Miguel Hidalgo<br />
CP 11570<br />
MeXICo<br />
servicio y Reparación<br />
Art. 123 No. 95<br />
Col. Centro, C.P. 06050<br />
deleg. Cuauhtemoc<br />
servicio al consumidor,<br />
Venta de Refacciones y Accesorios<br />
01 800 714 2503<br />
es una marca registrada de The Black & decker Corporation,<br />
Towson, Maryl<strong>and</strong>, e.U.<br />
Fabricado en la República Popular de China<br />
Impreso en la República Popular de China<br />
importado por / imported by:<br />
applica aMeRicas, inc.<br />
Av. Juan B Justo 637 Piso 10<br />
(C1425FSA) Ciudad Autonoma de Buenos Aires<br />
Argentina<br />
c.U.i.t no. 30-69729892-0<br />
600 w 1 0 V<br />
18<br />
importado por / imported by:<br />
applica ManUFactURing, s. de R. l. de c. V.<br />
Presidente Mazarik No111, 1er Piso<br />
Col. Chapultepec Morales, Mexico d.F<br />
deleg. Miguel Hidalgo<br />
CP 11570<br />
MeXICo<br />
Teléfono: (55) 5263-9900<br />
del interior marque sin costo<br />
01 (800) 714 2503<br />
19<br />
60 Hz<br />
CAT. NO. EHB500<br />
TYPE 1 160 W 120 V<br />
AC ONLY 60Hz<br />
espaÑol
please Read <strong>and</strong> save this <strong>Use</strong> <strong>and</strong> care Book.<br />
iMpoRtant saFegUaRds<br />
When using electrical appliances, basic safety precautions should<br />
always be followed, including the following:<br />
❍ Read all instructions.<br />
❍ To protect against risk of electrical shock, do not put blender<br />
base, cord, or plug in water or other liquid.<br />
❍ Close supervision is necessary when any appliance is used by or<br />
near children.<br />
❍ Unplug from outlet when not in use, before putting on or taking<br />
off parts, <strong>and</strong> before cleaning.<br />
❍ Avoid contacting moving parts.<br />
❍ do not operate any appliance with a damaged cord or plug or<br />
after the appliance malfunctions or is dropped or damaged in<br />
any manner. Return the appliance to the nearest authorized<br />
service facility for examination, repair, or electrical or<br />
mechanical adjustment. or, call the appropriate toll-free number<br />
listed on the cover of this manual.<br />
❍ The use of attachments, including canning jars, not<br />
recommended or sold by the appliance manufacturer may cause<br />
fire, electric shock, or injury.<br />
❍ do not use outdoors.<br />
❍ do not let the plug or cord hang over the edge of table or<br />
counter.<br />
❍ Keep h<strong>and</strong>s <strong>and</strong> utensils out of container while blending to<br />
reduce the risk of severe injury to persons or damage to the<br />
blender. A scraper may be used but must be used only when the<br />
blender is not running.<br />
❍ Blades are sharp. H<strong>and</strong>le carefully.<br />
❍ To reduce the risk of injury, never place cutter assembly blades<br />
on base without the jar properly attached.<br />
❍ Always operate blender with cover in place.<br />
❍ When blending hot liquids, remove center piece of two-piece<br />
cover.<br />
❍ do not use appliance for other than intended use.<br />
saVe tHese instRUctions.<br />
this product is for household use only.<br />
polaRiZed plUg (1 0V Models only)<br />
This appliance has a polarized plug (one blade is wider than the other). To reduce<br />
the risk of electric shock, this plug is intended to fit into a polarized outlet only<br />
one way. If the plug does not fit fully into the outlet, reverse the plug. If it still<br />
does not fit, contact a qualified electrician. do not attempt to modify the plug in<br />
any way.<br />
taMpeR-Resistant scRew<br />
warning: this appliance is equipped with a tamper-resistant screw to<br />
prevent removal of the outer cover. to reduce the risk of fire or electric<br />
shock, do not attempt to remove the outer cover. there are no userserviceable<br />
parts inside. Repair should be done only by authorized service<br />
personnel.<br />
electRical coRd<br />
The cord of this appliance was selected to reduce the possibility of tangling<br />
in or tripping over a longer cord. If more length is needed, use an extension<br />
cord rated no less than 15-amperes. (For 220 volts rated products, use an<br />
extension cord rated no less than 6-amperes). When using an extension cord,<br />
do not let it drape over the working area or dangle where someone could<br />
accidentally trip over it. H<strong>and</strong>le cord carefully for longer life; avoid jerking or<br />
straining it at outlet <strong>and</strong> appliance connections.<br />
taMpeR-Resistant scRew<br />
warning : This appliance is equipped with a tamper-resistant screw to prevent<br />
removal of the outer cover. To reduce the risk of fire or electric shock, do not<br />
attempt to remove the outer cover. There are no user-serviceable parts inside.<br />
Repair should be done only by authorized service personnel.<br />
note: If the power supply cord is damaged, it should be replaced by qualified<br />
personnel; in latin America, by an authorized service center.<br />
0 1<br />
englisH
product may vary slightly from what is illustrated. How to <strong>Use</strong><br />
a<br />
1. lid cap<br />
. lid<br />
. Jar<br />
. H<strong>and</strong>le<br />
. gasket<br />
6. Blade assembly<br />
7. Jar base<br />
8. oFF button<br />
9. power indicator light<br />
10. pUlse button<br />
11. speed buttons<br />
1 . power base<br />
<br />
<br />
<br />
<br />
<br />
3/4<br />
1/2<br />
1/4<br />
<br />
1 1/4<br />
1<br />
LT<br />
STIR<br />
BLEND<br />
CHOP<br />
GRATE<br />
PUREE<br />
SMOOTIE<br />
ICE-CRUSH<br />
7<br />
6<br />
OFF<br />
5<br />
4<br />
3<br />
2<br />
POWER<br />
1<br />
<br />
PULSE<br />
<br />
<br />
<br />
<br />
<br />
This unit is for household use only.<br />
getting staRted<br />
• Remove all packing material <strong>and</strong> any stickers from the product.<br />
• Wash all removable parts as instructed in CARe ANd CleANING section<br />
of this manual.<br />
BlendeR JaR asseMBlY (B)<br />
1. Turn blender jar upside down <strong>and</strong> place flat on<br />
countertop or work surface.<br />
2. Put the gasket on top of the blade assembly.<br />
3. Place the blade assembly with gasket in bottom<br />
opening of the jar with blades down.<br />
4. Place jar base onto jar <strong>and</strong> rotate clockwise<br />
B<br />
until it is tight.<br />
5. Turn assembled jar right side up.<br />
6. Place lid with lid cap in place on blender jar.<br />
7. Uncoil power cord from storage area under the base.<br />
8. Place jar on power base. Blender is now ready for use.<br />
Using YoUR BlendeR<br />
1. Make sure appliance is oFF.<br />
2. Place foods to be blended into jar.<br />
3. Place lid on jar; make sure lid cap is in place.<br />
4. Plug power cord into st<strong>and</strong>ard electrical outlet.<br />
note: When in use do not leave blender unattended. When using hard foods,<br />
such as ice, cheese, nuts <strong>and</strong> coffee beans, keep one h<strong>and</strong> on the lid to keep<br />
blender in place.<br />
5. Select the speed that best suits your desired task.<br />
6.For blending tasks such as grinding coffee<br />
beans or nuts, or when blending thick<br />
mixtures, use the PUlSe button for several<br />
seconds; then release (c). Releasing the<br />
PUlSe button automatically turns the<br />
blender off.<br />
c<br />
LT<br />
OFF<br />
1<br />
3/4<br />
1 1/4<br />
1/4<br />
1/2<br />
STIR 1<br />
BLEND 2<br />
CHOP 3<br />
GRATE<br />
PUREE<br />
SMOOTIE<br />
ICE-CRUSH<br />
OFF<br />
7<br />
6<br />
5<br />
4<br />
PULSE<br />
POWER<br />
1/4<br />
1 1/4<br />
3/4<br />
1/2<br />
1<br />
LT<br />
PULSE<br />
englisH
d<br />
1 1/4<br />
1<br />
3/4<br />
LT<br />
7. open the lid cap to add ingredients while the blender<br />
is running, <strong>and</strong> drop ingredients through the opening<br />
(d).<br />
important: do not remove the lid while the blender is<br />
running.<br />
8. When finished, press the oFF button.<br />
9. To remove the jar, grasp the h<strong>and</strong>le <strong>and</strong> lift up.<br />
10. Remove the lid to pour.<br />
11. Always unplug the appliance when not in use.<br />
special FeatURes<br />
• Remember to press one button at a time.<br />
• The unit has an intelligent fuse system that automatically shuts off the unit<br />
after 2 minutes for speeds 1 to 14 <strong>and</strong> after 20 seconds for the pulse function.<br />
If this occurs, the power indicator light starts blinking, unplug the unit <strong>and</strong><br />
wait 30 seconds.<br />
• Plug in the unit. If the power indicator light continues to blink, stop using the<br />
unit <strong>and</strong> contact the service center for instructions.<br />
• The unit has a motor overheating protection system that automatically shuts<br />
off the motor to protect it from overheating. Wait 5 minutes for unit to cool<br />
down. Unplug the unit then plug again to resume operation.<br />
Blending tips <strong>and</strong> tecHniQUes<br />
• Cut food into pieces no larger than ¾-inch for use in the blender.<br />
• When ingredients splatter onto the sides of the jar,<br />
or the mixture is very thick, press the oFF button to<br />
turn appliance off. Remove the lid <strong>and</strong> use a rubber<br />
spatula to scrape down the sides of the jar <strong>and</strong> to<br />
redistribute the food, pushing food toward the blades.<br />
Replace the lid <strong>and</strong> continue blending.<br />
• Appliance should always have cover in place when<br />
in use.<br />
• do not place blender jar on base when motor is<br />
running.<br />
• The lid cap holds ¹/ ³ cup liquid <strong>and</strong> can be used when<br />
e<br />
adding ingredients such as juices, milk, cream <strong>and</strong><br />
liquor (e).<br />
• When making bread crumbs, chopping nuts or grinding coffee beans, make<br />
sure blender jar is completely dry.<br />
• When using the PUlSe function, use short bursts. Allow the blades to stop<br />
rotating between pulses. do not use PUlSe for more than 2 minutes.<br />
• <strong>Use</strong> the PUlSe button when preparing beverages that include ice cubes; this<br />
helps to produce a smoother texture.<br />
• It is helpful to begin the blending process on the lowest speed <strong>and</strong> then<br />
increase to a higher speed, if necessary.<br />
1 1/4<br />
1/2<br />
1/4<br />
1<br />
3/4<br />
1/2<br />
1/4<br />
LT<br />
F<br />
1 1/4<br />
1<br />
3/4<br />
1/2<br />
1/4<br />
LT<br />
• When blending hot ingredients always open the<br />
lid cap <strong>and</strong> replace it ajar with the opened side<br />
away from you (F). Cover lid with a cloth to avoid<br />
splattering <strong>and</strong> only use speed 1. do not blend more<br />
than 2 1 ⁄2 to 3 cups at a time.<br />
• do not place any of the following in the blender:<br />
• large pieces of frozen foods<br />
• Tough foods such as raw turnips, sweet potatoes <strong>and</strong> potatoes<br />
• Bones<br />
• Hard salami, pepperoni<br />
• Boiling liquids (cool for 5 minutes before placing in blender jar.)<br />
• tasks not recommended for the blender:<br />
• Whipping cream<br />
• Beating egg whites<br />
• Mixing dough<br />
• Mashing potatoes<br />
• Grinding meats<br />
• extracting juice from fruits <strong>and</strong> vegetables<br />
englisH
selecting a speed<br />
stiR (1) Reconstituting frozen juices <strong>and</strong> drink mixes<br />
Preparing salad dressings<br />
Puddings<br />
Pureeing hot liquids<br />
Blend ( ) Blending pancake <strong>and</strong> waffle batter or mixes<br />
Beating eggs for omelets <strong>and</strong> custards<br />
Making cookie <strong>and</strong> bread crumbs<br />
cHop ( ) Coarse to fine chopping of nuts,<br />
Vegetables <strong>and</strong> fruits<br />
gRate ( ) Grinding hard cheeses<br />
Grinding coffee beans<br />
pURee ( ) Baby foods - fruits <strong>and</strong> vegetables<br />
Preparing sauces <strong>and</strong> salsas<br />
Coarse to fine grinding of spices<br />
sMootHie (6) Protein drinks<br />
Milkshakes <strong>and</strong> malts<br />
Frozen drinks; smoothies<br />
ice cRUsH (7) For greater control, this function operates<br />
As a PUlSe function<br />
care <strong>and</strong> cleaning<br />
This product contains no user serviceable parts. Refer service to qualified<br />
service personnel.<br />
cleaning<br />
1. Before cleaning, turn off <strong>and</strong> unplug the appliance.<br />
2. lift the jar by the h<strong>and</strong>le off the power base.<br />
3. Remove jar base by turning it counterclockwise until loose.<br />
4. Remove the gasket <strong>and</strong> the blade assembly.<br />
caution: Blades are sharp, h<strong>and</strong>le carefully.<br />
5. Remove lid <strong>and</strong> lid cap.<br />
6. Wash removable parts by h<strong>and</strong> or in the dishwasher. Place the jar on the<br />
bottom rack <strong>and</strong> the rest of the parts on the top rack only.<br />
Helpful tip:<br />
• For quick clean-up, combine 1 cup hot water <strong>and</strong> a drop of liquid dish soap<br />
to the blender jar.<br />
• Cover <strong>and</strong> blend on STIR for about 30 seconds.<br />
• discard liquid <strong>and</strong> rinse thoroughly.<br />
important:<br />
• do not place the jar parts in boiling liquids.<br />
• do not immerse the base in liquid. wipe the unit base with a damp cloth<br />
<strong>and</strong> dry thoroughly.<br />
• Remove stubborn spots by rubbing with a damp cloth <strong>and</strong> nonabrasive<br />
cleaner.<br />
note: If liquids spill onto the power base, wipe with a damp cloth <strong>and</strong> dry<br />
thoroughly. do not use rough scouring pads or cleansers on parts or finish.<br />
6 7<br />
englisH
tRoUBlesHooting<br />
pRoBleM possiBle ca<strong>Use</strong> solUtion<br />
Jar bottom does A vacuum has been Place the jar on the<br />
not come off of jar. formed. blender <strong>and</strong> turn<br />
counter clockwise until<br />
jar is released from the<br />
bottom.<br />
liquid is leaking Gasket is either missing Check that jar is<br />
from bottom of jar. or not in place correctly. assembled correctly.<br />
Appliance does Appliance is not Check that appliance<br />
not turn on. plugged in. is plugged into<br />
a working outlet.<br />
Mixture in blender Not enough liquid in Turn the blender off<br />
does not seem to mixture being blended <strong>and</strong> use a rubber<br />
be blending. or too much ice. spatula to redistribute<br />
the food; add some<br />
liquid <strong>and</strong> pulse the<br />
mixture to aid in the<br />
blending process.<br />
Herbs or bread are Blender jar, food to be Always make sure that<br />
sticking to sides of chopped <strong>and</strong> blade are the jar, the blade <strong>and</strong><br />
blender <strong>and</strong> not not dry. the food to be chopped<br />
getting chopped. are dry.<br />
Jar separates from Jar was twisted when When removing jar<br />
bottom when being being removed from from blender base,<br />
removed from base of blender. simply lift up; do<br />
blender. liquid not twist.<br />
spills onto counter.<br />
Recipes<br />
Mango colada<br />
1 cup white grape <strong>and</strong> peach juice drink<br />
½ cup frozen piña colada drink mix<br />
2 cups frozen peach slices<br />
1 ripe mango, cut in ¾-inch chunks<br />
1 cup ice cubes<br />
In blender container, combine all ingredients in order listed. Place cover on<br />
jar. Pulse several times for about 5 seconds each to blend ingredients <strong>and</strong><br />
begin crushing ice. Blend on SMooTHIe (6) until smooth <strong>and</strong> creamy, about<br />
25 seconds. Turn blender off <strong>and</strong> serve immediately.<br />
Makes about 4 1 ⁄2 cups<br />
Banana oRange sMootHie<br />
2 cups orange juice<br />
1 cup vanilla yogurt<br />
2 medium bananas, cut into 2-inch pieces<br />
1 1 ⁄2 cups frozen strawberries<br />
2 tbsp. honey<br />
In blender container, combine all ingredients in order listed. Place cover on<br />
jar. Pulse several times for about 5 seconds each to blend ingredients. Blend<br />
on SMooTHIe (6) until smooth <strong>and</strong> well blended, about 30 seconds. Turn<br />
blender off <strong>and</strong> serve immediately.<br />
Makes about 5 1 ⁄2 cups<br />
peacHes <strong>and</strong> cReaM eneRgY dRinK<br />
1 cup low fat buttermilk<br />
1 cup frozen peach yogurt<br />
1 can (16 oz.) chilled <strong>and</strong> well drained sliced peaches<br />
3 tbsp. wheat germ<br />
2 tbsp. honey<br />
1 1 ⁄2 cups ice cubes<br />
In blender container, combine all ingredients in order listed. Place cover on<br />
jar. Pulse several times for about 5 seconds each to blend ingredients <strong>and</strong><br />
begin crushing ice. Blend on SMooTHIe (6) until smooth <strong>and</strong> well blended,<br />
about 30 seconds. Turn blender off <strong>and</strong> serve immediately.<br />
Makes about 5 cups<br />
8 9<br />
englisH
Roasted Red peppeR BisQUe<br />
3 medium red peppers, halved <strong>and</strong> seeded<br />
1 large onion, chopped (about 1 1 ⁄2 cups)<br />
1 cup chopped celery<br />
2 large cloves garlic, minced<br />
2 tbsp. olive oil<br />
3 cups vegetable broth or stock<br />
1 cup V-8 vegetable juice<br />
½ tsp. salt<br />
¼ tsp. black pepper<br />
Sour cream<br />
Snipped fresh chives<br />
Place peppers skin side up on shallow baking pan. Broil on high until skins<br />
are blackened <strong>and</strong> blistered. Remove from pan <strong>and</strong> place in plastic bag; close<br />
securely <strong>and</strong> allow to st<strong>and</strong> at room temperature for 10 minutes. Remove from<br />
bag <strong>and</strong> peel, discarding skin. Cut into 1-inch pieces.<br />
Meanwhile, in saucepan, cook onion, celery <strong>and</strong> garlic in oil over medium heat,<br />
stirring often, until onions are softened. Add chopped peppers, vegetable broth,<br />
vegetable juice, salt <strong>and</strong> pepper. Bring to boil. Cover <strong>and</strong> simmer 10 minutes.<br />
Remove from heat <strong>and</strong> let st<strong>and</strong> at least 5 minutes.<br />
Spoon about 2 1 ⁄2 cups soup mixture into blender jar. Cover <strong>and</strong> remove lid cap;<br />
replace it ajar with open side facing away. Cover lid with cloth. Blend on<br />
STIR (1) until creamy <strong>and</strong> smooth. Pour into measuring cup. Repeat with<br />
remaining mixture until all is pureed. Return soup to saucepan <strong>and</strong> heat,<br />
stirring.<br />
Serve garnished with sour cream <strong>and</strong> chives.<br />
Makes about 6 cups.<br />
Red cURRRY spinacH soUp<br />
1 bunch green onions, sliced (about 1 cup)<br />
2 medium cloves garlic, minced<br />
2 tbsp. butter or margarine<br />
4 cups chicken broth or stock<br />
1 1 ⁄2 cups cubed peeled potatoes<br />
1 tsp. red curry<br />
½ tsp. salt<br />
¼ tsp. black pepper<br />
12 ounces fresh spinach<br />
Sour cream<br />
Caesar flavored croutons<br />
In medium saucepan, cook onions <strong>and</strong> garlic in butter over medium heat<br />
until tender. Add chicken broth, potatoes curry, salt <strong>and</strong> pepper. Bring to boil.<br />
Cover <strong>and</strong> simmer 8 minutes. Add spinach; continue cooking until spinach is<br />
wilted (about 3 minutes). Remove from heat <strong>and</strong> let st<strong>and</strong> at least 5 minutes.<br />
Spoon about 2 1 ⁄2 cups soup mixture into blender jar. Cover <strong>and</strong> remove lid<br />
cap; replace it ajar with open side facing away. Cover lid with cloth. Blend<br />
on STIR (1) until creamy <strong>and</strong> smooth. Pour into measuring cup. Repeat with<br />
remaining mixture until all is pureed. Return soup to saucepan <strong>and</strong> heat,<br />
stirring often.<br />
Serve with a dollop of sour cream <strong>and</strong> garnish with croutons.<br />
Makes about 6 1 ⁄2 cups<br />
0 1<br />
englisH
sUndRied toMato HUMMUs<br />
2 cans (16 oz. ea.) chick peas<br />
¹/ ³ cup fresh lemon juice<br />
2 tbsp. olive oil<br />
3 tbsp. tahini (sesame seed paste)<br />
2 large cloves garlic<br />
½ tsp. salt<br />
¼ tsp. ground cumin<br />
½ cup chopped sundried tomatoes<br />
2 tbsp. chopped parsley<br />
drain chick peas, reserving liquid.<br />
In blender jar, combine lemon juice, oil, chick peas, tahini, garlic, salt <strong>and</strong><br />
cumin. Place cover on jar. Pulse several times for about 5 seconds each to blend<br />
ingredients. Blend on PURee (5) until smooth <strong>and</strong> well blended, about<br />
30 seconds. If mixture is thick, add 2 to 3 tbsp. reserved chick pea liquid through<br />
lid cap opening. Turn blender off.<br />
Spoon mixture into bowl; blend in tomatoes <strong>and</strong> parsley. Serve immediately<br />
or cover <strong>and</strong> refrigerate until ready to serve.<br />
Serve with toasted pita wedges.<br />
Makes about 3 cups<br />
apple caBBage slaw<br />
1 large egg<br />
1 egg yolk<br />
¼ tsp. dry mustard<br />
¼ tsp. salt<br />
¹/8 tsp. pepper<br />
¼ cup rice vinegar<br />
²/ ³ cup vegetable oil<br />
4 cups packaged cabbage slaw mix<br />
2 cups coarsely chopped Granny Smith apples<br />
1 small purple onion, chopped (about ½ cup)<br />
½ cup coarsely chopped honey roasted peanuts<br />
½ cup golden raisins<br />
In blender container, combine 1 large egg, 1 egg yolk <strong>and</strong> ¼ tsp. dry mustard.<br />
Blend on STIR (1) for 10 seconds. Add rice vinegar <strong>and</strong> blend on STIR (1) for<br />
20 seconds. Remove lid cap <strong>and</strong> with blender running drizzle in vegetable oil<br />
in slow steady stream (about 1 minute). Scrape down container.<br />
In large bowl, combine remaining ingredients <strong>and</strong> spoon dressing over all;<br />
toss to coat. Cover <strong>and</strong> chill about 1 hour or until ready to serve.<br />
Makes 6 servings<br />
englisH
toMato cUcUMBeR salsa<br />
1 bunch green onions, sliced (about 1 cup)<br />
3 to 4 jalapenos, seeded <strong>and</strong> cut into 1-inch pieces<br />
3 large cloves garlic<br />
4 medium tomatoes, cored <strong>and</strong> cut into 1-inch pieces<br />
1 medium cucumber, peeled, seeded <strong>and</strong> cut into 1-inch pieces<br />
½ cup cilantro leaves, loosely packed<br />
Juice of 1 lime<br />
½ tsp. salt<br />
1 can (16 oz.) black beans, rinsed <strong>and</strong> drained<br />
In blender container, combine green onion, jalapenos <strong>and</strong> garlic. Place cover on<br />
jar. Pulse several times for about 5 seconds each to chop ingredients.<br />
Add remaining ingredients <strong>and</strong> pulse several times until vegetables are coarsely<br />
chopped <strong>and</strong> mixture is blended.<br />
Spoon into bowl. Stir in black beans. Cover <strong>and</strong> refrigerate at least 1 hour<br />
or until ready to serve.<br />
Serve with tortilla chips.<br />
Makes about 4 cups.<br />
need Help?<br />
For service, repair or any questions regarding your appliance, call the appropriate<br />
800 number on cover of this book. Please do not return the product to the place of<br />
purchase. Also, please do not mail product back to manufacturer, nor bring it to a<br />
service center. you may also want to consult the website listed on the cover of this<br />
manual.<br />
two-Year limited warranty<br />
(applies only in the United states <strong>and</strong> canada)<br />
what does it cover?<br />
• Any defect in material or workmanship provided; however, <strong>Applica</strong>’s liability will not<br />
exceed the purchase price of product.<br />
For how long?<br />
• Two years from the date of original purchase with proof of such purchase.<br />
what will we do to help you?<br />
• Provide you with a reasonably similar replacement product that is either new or<br />
factory refurbished.<br />
How do you get service?<br />
• Save your receipt as proof of date of sale.<br />
• Visit the online service website at www.prodprotect.com/applica, or call toll-free<br />
1-800-231-9786, for general warranty service.<br />
• If you need parts or accessories, please call 1-800-738-0245.<br />
what does your warranty not cover?<br />
• damage from commercial use<br />
• damage from misuse, abuse or neglect<br />
• Products that have been modified in any way<br />
• Products used or serviced outside the country of purchase<br />
• Glass parts <strong>and</strong> other accessory items that are packed with the unit<br />
• Shipping <strong>and</strong> h<strong>and</strong>ling costs associated with the replacement of the unit<br />
• Consequential or incidental damages (Please note, however, that some states do<br />
not allow the exclusion or limitation of consequential or incidental damages, so this<br />
limitation may not apply to you.)<br />
How does state law relate to this warranty?<br />
• This warranty gives you specific legal rights. you may also have other rights that<br />
vary from state to state or province to province.<br />
is a registered trademark of The Black & decker Corporation,<br />
Towson, Maryl<strong>and</strong>, USA<br />
Made in People’s Republic of China<br />
Printed in People’s Republic of China<br />
englisH
© 2010 <strong>Applica</strong> Consumer Products, Inc.<br />
2009/11-16-67S/e


