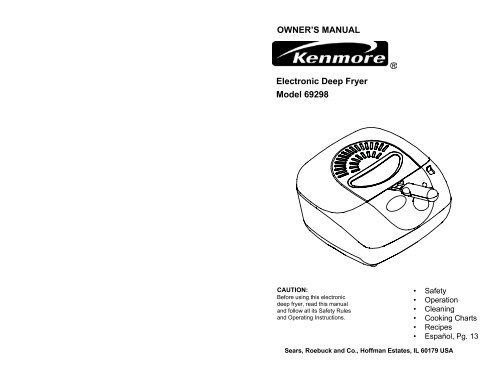
OWNER'S MANUAL Electronic Deep Fryer Model 69298 - Shark
OWNER'S MANUAL Electronic Deep Fryer Model 69298 - Shark
OWNER'S MANUAL Electronic Deep Fryer Model 69298 - Shark

Create successful ePaper yourself
Turn your PDF publications into a flip-book with our unique Google optimized e-Paper software.
OWNER’S <strong>MANUAL</strong><br />
<strong>Electronic</strong> <strong>Deep</strong> <strong>Fryer</strong><br />
<strong>Model</strong> <strong>69298</strong><br />
CAUTION:<br />
Before using this electronic<br />
deep fryer, read this manual<br />
and follow all its Safety Rules<br />
and Operating Instructions.<br />
• Safety<br />
• Operation<br />
• Cleaning<br />
• Cooking Charts<br />
• Recipes<br />
• Español, Pg. 13<br />
Sears, Roebuck and Co., Hoffman Estates, IL 60179 USA
SEARS WARRANTY<br />
FULL ONE YEAR WARRANTY ON KENMORE <strong>Electronic</strong> <strong>Deep</strong> <strong>Fryer</strong><br />
If this Kenmore <strong>Electronic</strong> <strong>Deep</strong> <strong>Fryer</strong> fails due to a defect in material or<br />
workmanship within one year from date of purchase, Sears will replace it free of<br />
charge.<br />
WARRANTY SERVICE<br />
To obtain replacement under this warranty, return this Kenmore <strong>Electronic</strong> <strong>Deep</strong><br />
<strong>Fryer</strong> to your nearest Sears Store in the United States.<br />
This warranty only applies while the Kenmore <strong>Electronic</strong> <strong>Deep</strong> <strong>Fryer</strong> is used in the<br />
United States.<br />
This warranty gives you specific legal rights, and you may also have other rights<br />
which vary from state to state.<br />
Sears, Roebuck and Co., Dept. 817WA, Hoffman Estates, IL 60179<br />
Customer Service Department 1-800-798-7398<br />
IMPORTANT SAFETY INSTRUCTIONS<br />
5. Unplug from outlet when not in use<br />
and before cleaning. Allow to cool<br />
before putting on or taking off parts<br />
and before cleaning the appliance.<br />
6. Do not operate any appliance with a<br />
damaged cord or plug, or after the<br />
appliance malfunctions, has been<br />
dropped or damaged in any manner.<br />
Return the <strong>Electronic</strong> <strong>Deep</strong> <strong>Fryer</strong> to the<br />
nearest service facility for examination<br />
and repair.<br />
10. The use of accessory attachments<br />
not recommended by the appliance<br />
manufacturer may cause injuries.<br />
11. Always insert heating element in the<br />
appliance before plugging into a<br />
wall outlet. To disconnect, press<br />
power button to turn the unit “Off”<br />
and then remove plug from wall<br />
outlet. Wait for the unit to cool<br />
completely before removing the<br />
heating element.<br />
Pollo a la Kiev<br />
4 pechugas de pollo deshuesadas<br />
y despellejadas<br />
1 cucharada de cebolla picada<br />
1 cucharada de perejil<br />
1 1/2 cucharadita de sal<br />
RECETAS<br />
4 onza mantequilla, ablandar<br />
4 onza blanca pan migaja<br />
1/2 taza de harina para uso general<br />
1 huevo<br />
Precalentar el aceite a 182ºC (360°F). Colocar las pechugas de pollo entre dos<br />
envolturas plásticas y golpear con un mazo para aplanarlas hasta 1/2 cm. (1/4”) de<br />
espesor. Quitar la envoltura plástica. Mezclar la cebolla, el perejil y la sal, y<br />
espolvorear la mezcla sobre las presas de pollo. Cortar 8 trozos de mantequilla y<br />
aplicar un trozo hacia el extremo de cada pieza de pollo. Enrollar las piezas de pollo<br />
comenzando del extremo con la mantequilla, compactando los bordes de la carne.<br />
Presionarlas y sellarlas bien. (No se debe ver mantequilla por los costados ni saliendo<br />
del pollo). Sujetar los enrollados de pollo con palillos mondadientes, espolvorearles<br />
harina y sumergirlos en huevo batido. Luego espolvorearles migajas de pan, dejar<br />
que los enrollados se enfríen por lo menos 1 hora o hasta que se asienten y<br />
colocarlos dentro de la canastilla freidora en una sola capa. Sumergir la canastilla en<br />
el aceite y cocinar por 5 a 7 minutos o hasta que se doren. Para probar el grado de<br />
cocción, retirar un enrollado del aceite con un tenedor. Cuando el tenedor entre<br />
fácilmente en el enrollado, el pollo está listo.<br />
When using electrical appliances, basic safety precautions should always be<br />
Hush Puppies<br />
followed, including the following: 1 3/4 taza de harina de maíz<br />
1/2 cucharadita de sal de ajo (o 1/4 de<br />
1.<br />
2.<br />
Read all instructions carefully before<br />
use.<br />
Do not touch hot surfaces, always use<br />
7. Never plug in before unit is<br />
assembled or before oil is added<br />
to Oil Container.<br />
1/2 taza de harina de uso general<br />
3/4 cucharadita de polvo de hornear<br />
1/2 cucharadita de sal<br />
1 cucharadita de azúcar<br />
cucharadita de ajo en polvo)<br />
1/2 taza cebolla picada<br />
1 taza de leche batida<br />
1 huevo<br />
3.<br />
4.<br />
handles or knobs.<br />
To protect against electrical shock, do<br />
not immerse cord and plugs in water or<br />
other liquids.<br />
Close supervision is necessary when<br />
any appliance is used by or near<br />
children.<br />
8.<br />
9.<br />
Never overfill the fryer with oil. Fill<br />
only between the minimum and<br />
maximum levels, as indicated inside<br />
the oil container.<br />
Be sure handle is properly<br />
assembled to the basket and locked<br />
in place. (See assembly<br />
instructions.)<br />
Precalentar el aceite a 190ºC (375°F). Cernir conjuntamente la harina de maíz, la harina<br />
de trigo, el polvo de hornear, la sal, el azúcar y la sal de ajo (o polvo de ajo). Combinar<br />
el huevo con la leche y agregarlos gradualmente a los ingredientes secos hasta lograr<br />
una mezcla húmeda. Sumergir la canastilla en el aceite caliente y echar la mezcla por<br />
cucharaditas llenas en el aceite caliente para cocinar unas cuantas a la vez. Darle<br />
vuelta a los Hush Puppies una vez si fuese necesario para dorarlos y cocinarlos hasta<br />
que se tuesten. Sacarlos de la freidora y drenarlos sobre toallas de papel o en repisas<br />
escurridoras.<br />
Donut Rápidos<br />
SAVE THESE INSTRUCTIONS<br />
1 lata de 10 porciones de buñuelos refrigerados<br />
2 cucharadas de canela molida<br />
1/2 taza de azúcar<br />
Precalentar el aceite a 190ºC (375°F). Sacar los buñuelos de la lata y aplanarlos<br />
levemente entre las palmas de la mano. Hacerle un orificio en el centro a cada buñuelo<br />
con el dedo para darle forma de donuts. freír por 2 minutos, dándole vuelta una vez o<br />
hasta que se doren. Sacar los donuts de la canastilla y drenarlos en toallas de papel o<br />
sobre rejillas drenadoras. Rodar los donuts sobre la mezcla de azúcar con canela.<br />
Servir calientes.<br />
Para variar trate de rodar los donuts en una mezcla de 1 taza de azúcar en polvo, 1/2<br />
cucharadita de vainilla y 4 cucharadas de leche. Se puede agregar más leche hasta<br />
lograr la consistencia deseada.<br />
Printed in China 25<br />
1
Manzanas Fritas<br />
3 tazas de harina para todo uso<br />
2 cucharaditas de polvo de hornear 1/2<br />
cucharadita de sal<br />
1 taza de azúcar<br />
1 huevo ligeramente batido<br />
RECETAS<br />
4 cucharadas de aceite de cocinar<br />
1 cucharadita de extracto de vainilla<br />
Jugo de 1 naranja (1/3 taza)<br />
1 taza de manzana picada<br />
Precalentar el aceite a 190ºC (375°F). Mezclar la harina, el polvo de hornear, la sal y<br />
el azúcar y colocar la mezcla a un lado. Mezclar el huevo, el aceite y la vainilla.<br />
Mezclar los ingredientes secos y líquidos moviéndolos para que se mezclen<br />
completamente. Agregar el jugo de naranja y los trozos de manzana y mezclarlos<br />
bien. Colocar la mezcla en la canastilla y sumergirla cuidadosamente en el aceite<br />
caliente para evitar que salpique. freír por aproximadamente 2 minutos o hasta que<br />
las manzanas queden crocantes y bien tostadas. Retirar la canastilla del aceite y<br />
drenarla. Para mejores resultados, servir caliente. Se sugiere servir con una bola de<br />
helados de vainilla encima.<br />
Batido de Cerveza para Pescado o Pollo<br />
2 huevos (separados)<br />
1 cucharada de aceite o mantequilla<br />
1 cucharadita de sal<br />
1/4 cucharadita de pimienta negra molida<br />
1 1/3 taza de harina para uso general<br />
3/4 cerveza sin gas<br />
Pechugas deshuesadas de pollo (opcional)<br />
Filetes de pescado o pescado para freír<br />
(opcional)<br />
Precalentar el aceite a 182ºC (360°F). Batir las yemas de los huevos con el aceite o<br />
mantequilla sal y pimienta. Agregarle la cerveza y la harina alternativamente a la<br />
mezcla. Batir los ingredientes bien y refrigerar por 3 a 12 horas. Cuando se vaya a<br />
usar la mezcla, echarle lentamente 2 claras de huevo bien batidas. Apretar el<br />
pescado o las pechugas deshuesadas de pollo para eliminarle el exceso de líquido,<br />
cubrirlas con la harina, sumergirlas en el batido de cerveza y volver a cubrir con<br />
harina. Colocar el pescado cuidadosamente en la canastilla ya sumergida en el aceite<br />
caliente. Freír por 3 ó 5 minutos o hasta que las presas se doren. Freír el pollo por 5<br />
a 10 minutos (dependiendo de su espesor) o hasta que se tueste o quede<br />
completamente cocido.<br />
Pollo Frito Sumergido<br />
1 pollo para freír (1 a 1 1/2 Kg., 2 a 3 Lb.)<br />
1 1/2 taza de harina para uso general<br />
1 cucharadita de polvo sazonador<br />
1/4 cucharadita de sal<br />
1/4 cucharadita de ajo en polvo (opcional)<br />
1/4 cucharadita de sazonador para aves<br />
(opcional)<br />
1 1/2 taza de leche<br />
Precalentar el aceite a 182ºC (360°F). Combinar la harina y los sazonadores y<br />
mezclarlos bien. Envolver las presas de pollo con harina sazonada, sumergirlas en<br />
la leche y después volverles a echar harina. Colocar las presas de pollo en la<br />
canastilla y sumergirla en el aceite precalentado. Freír por 15 a 20 minutos o hasta<br />
que las presas queden tostadas o completamente cocidas.<br />
ADDITIONAL IMPORTANT SAFEGUARDS<br />
12. Extreme caution must be used<br />
when moving any appliance<br />
containing hot oil or other hot<br />
liquids.<br />
13. Do not leave appliance unattended<br />
while in use.<br />
14. Do not use outdoors.<br />
15. Do not let cord hang over the edge<br />
of the table, counter or touch hot<br />
surfaces.<br />
16. Do not place on or near a hot gas or<br />
electric burner, or in a heated oven.<br />
17. Do not use appliance for other than<br />
intended household use.<br />
18. Ensure that the basket handle is<br />
correctly assembled and locked in<br />
place. (See assembly instructions.)<br />
SPECIAL INSTRUCTIONS<br />
• A short power supply cord is provided<br />
to reduce the risk resulting from<br />
becoming entangled in or tripping<br />
over a longer cord. An extension<br />
cord (or longer detachable cord) is<br />
not recommended for use with<br />
deep fryers.<br />
• Never plug in the control panel before<br />
it is installed in the body of the fryer<br />
with the heating element inside the oil<br />
container.<br />
• Do not immerse the control panel and<br />
heating element in water.<br />
• When opening the lid after frying, first<br />
release the lid by pushing the latch<br />
with your finger, then wait a moment to<br />
allow the steam inside to escape<br />
before opening fully.<br />
• To avoid a circuit overload, do not<br />
operate another high wattage<br />
appliance on the same circuit.<br />
• This appliance has a polarized plug<br />
(one blade is wider than the other). To<br />
reduce the risk of electric shock, this<br />
plug is intended to fit into a polarized<br />
outlet only one way. If the plug does<br />
not fit fully into the outlet, reverse the<br />
plug. If it still does not fit, contact a<br />
qualified electrician. Do not attempt to<br />
modify the plug in any way.<br />
SAVE THESE INSTRUCTIONS<br />
FOR HOUSEHOLD USE ONLY<br />
24 2
GETTING TO KNOW YOUR DEEP FRYER<br />
17<br />
1. Removable Cover<br />
2. Filter<br />
3. Viewing Window<br />
4. Oil Container<br />
5. Cover Release Button<br />
6. Cool Touch Exterior<br />
7. Heating Elements<br />
8. Removable Control Panel<br />
with Heating Element<br />
Technical Specifications<br />
Voltage: 120V., 60Hz.<br />
Power: 1700 Watts<br />
Oil Capacity: Min. 7 cups (1.75 Liters)<br />
Max. 12 cups (3 Liters)<br />
9. LED Display Screen<br />
10. Temperature & Timer Control Knob<br />
11. Ready Indicator Light<br />
12. Reset Button<br />
13. Start (Power) Button<br />
14. Frying Basket<br />
15. Frying Basket Handle<br />
16. Oil Draining Hook<br />
17. “Break Away” Power Cord<br />
3<br />
4<br />
Cordón de Suministro Eléctrico<br />
Desmontable<br />
INSTRUCCIONES PARA OPERAR<br />
La Freidora KENMORE está diseñada<br />
especialmente teniendo en cuenta la<br />
seguridad. La freidora tiene un cordón<br />
de suministro eléctrico separable que<br />
es exclusivo. Está diseñado para que<br />
se “separe” de la freidora en caso que<br />
se tire del cordón accidentalmente. La<br />
intención es evitar volcar la freidora y<br />
prevenir un derrame peligroso de aceite<br />
caliente. La intención NO es que se<br />
desconecte de la freidora durante el<br />
uso normal.<br />
Para colocar el cordón de suministro<br />
eléctrico, ver la instrucciones en el<br />
enchufe que dice “ESTE LADO PARA<br />
ARRIBA” (THIS SIDE UP). Insertar el<br />
enchufe en el tomacorriente hembra de<br />
la freidora. Se sentirá un tirón<br />
magnético. Insertar el enchufe hasta<br />
que se le logre la conexión. (Fig. 10)<br />
Fig. 10<br />
23<br />
CUIDADO: Para desconectar la<br />
freidora del suministro eléctrico, NO<br />
desenchufar el cordón de la freidora.<br />
Siempre desconectar el enchufe del<br />
tomacorriente de la pared primero,<br />
antes de quitarle el cordón a la<br />
freidora.<br />
ADVERTENCIA: El cordón “Separable”<br />
no es para que se desconecte de la<br />
freidora durante su operación normal; si<br />
no únicamente por accidente. Si el<br />
cordón se desconectase de la freidora<br />
durante la operación, el usuario debe<br />
desenchufarlo inmediatamente del<br />
tomacorriente antes de intentar<br />
reconectar el cordón en el tomacorriente<br />
de la freidora, porque de lo contrario,<br />
podrían producirse lesiones.<br />
CUIDADO: No intentar burlar la<br />
conexión magnética tratando de fijar el<br />
cordón permanentemente a la freidora.
Graduación de Temperatura<br />
Los siguientes tiempos de cocción<br />
reflejan únicamente el tiempo necesario<br />
para freír con la canastilla llena hasta la<br />
mitad. El tiempo exacto puede diferir<br />
dependiendo de la cantidad, preferencias<br />
personales, tamaño y espesor de las<br />
piezas, etc. En general graduar a<br />
temperaturas más bajas para alimentos<br />
delicados (verduras, pescados) y más<br />
altas para alimentos congelados (papas<br />
fritas, pollo).<br />
Alimento<br />
INSTRUCCIONES PARA OPERAR FEATURES OF KENMORE ELECTRONIC DEEP FRYER<br />
Minutos<br />
de<br />
Cocción<br />
Temp.<br />
°F / °C<br />
Papas fritas 6 a 9 375/190<br />
Filetes de<br />
pescado<br />
3 a 5 320/160<br />
Palillos de pollo 6 a 8 350/177<br />
Piezas de pollo 13 a 20 350/177<br />
Zapallitos fritos 3 320/160<br />
Champiñones fritos 3 320/160<br />
Anillos de cebolla 3 320/160<br />
Donuts, buñuelos,<br />
picarones<br />
Beignets de<br />
Manzana<br />
3 a 5 350 / 177<br />
4 350 / 177<br />
Camarones 4 a 6 320 / 160<br />
Para Guardar o Reutilizar el Aceite<br />
• Asegurarse que la freidora esté<br />
desenchufada y que el aceite se haya<br />
enfriado. (aproximadamente 2 horas)<br />
antes de intentar vaciar el aceite o<br />
limpiar la unidad.<br />
• No es necesario cambiar el aceite<br />
después de cada uso. En general, el<br />
aceite se contamina rápidamente<br />
cuando se fríen alimentos con proteínas<br />
(aves, carnes, pescados). Cuando el<br />
aceite se usa principalmente para freír<br />
papas, el mismo aceite puede<br />
reutilizarse de 8 a 10 veces; sin<br />
embargo, el mismo aceite no debe<br />
usarse por más de 6 meses.<br />
• Para filtrar el aceite, cerciorarse que se<br />
haya enfriado antes de vaciarlo a un<br />
contenedor o botella de aceite (Fig. 8).<br />
Lavar y secar la tina para aceite y la<br />
canastilla de freír. Verter el aceite en la<br />
tina haciéndolo pasar por un colador de<br />
malla de alambre o de papel filtrante.<br />
(Fig. 9)<br />
22<br />
Guardado del<br />
aceite usado<br />
Fig. 8<br />
Fig. 9<br />
Filtrado del<br />
aceite usado<br />
Instrucciones para Limpiar<br />
ADVERTENCIA: Siempre presionar<br />
el botón interruptor “Start/Stop” para<br />
apagar el elemento calentador y<br />
desenchufar la freidora del<br />
tomacorriente. Permitir que la<br />
freidora y el aceite se enfríen<br />
completamente (aprox. 2 horas) antes<br />
de limpiarla. Nunca sumergir el panel<br />
de control, el cordón, el enchufe, ni el<br />
casco de la freidora en agua ni líquido<br />
alguno.<br />
• Para mejores resultados en el uso<br />
de la freidora, leer y seguir todas las<br />
instrucciones en este manual.<br />
• Nunca sumergir el panel de control,<br />
el cordón, el enchufe ni el casco de<br />
la freidora en agua ni otro líquido; ni<br />
colocarlos dentro del lavavajillas.<br />
• Limpiar el panel de control y el caso<br />
de la freidora sólo con un paño<br />
húmedo.<br />
• La tina de aceite, la canastilla<br />
freidora y la tapa pueden lavarse en<br />
la repisa superior del lavavajillas.<br />
Para desmontar la tapa, abrirla y<br />
tirar de ella derecho hacia arriba.<br />
• No usar tipo alguno de almohadillas<br />
abrasivas o lana de acero para<br />
limpiar el enchufe hembra magnético<br />
para el cordón.<br />
• No usar alcohol ni soluciones<br />
limpiadoras para limpiar la freidora.<br />
1. ELECTRONIC CONTROL<br />
Easy to operate and read<br />
control panel. Provides<br />
accurate temperature<br />
and cook time setting. (See<br />
cooking chart for suggested<br />
temperatures and cooking times.<br />
2. TEMPERATURE SETTINGS<br />
A wide range of available<br />
settings for more precise<br />
cooking. Large Control Knob for<br />
easy turning (See cooking chart<br />
for suggested temperatures and<br />
cooking times.<br />
3. RESET BUTTON<br />
Quickly shut OFF fryer with the<br />
press of a button.<br />
4. READY LIGHT<br />
The ready light will turn “Green”<br />
when the correct temperature has<br />
been reached.<br />
4<br />
Oil Level<br />
Indicator<br />
5. FILL LEVEL INDICATOR<br />
Indicates maximum and minimum<br />
levels of cooking oil for proper<br />
cooking.<br />
6. COOL TOUCH BODY<br />
For added protection during<br />
cooking.<br />
7. SAFETY OVERLOAD<br />
FUSE<br />
<strong>Fryer</strong> will shut OFF to<br />
prevent possible overheating.<br />
8. DETACHABLE POWER<br />
CORD<br />
The power supply cord is<br />
designed to “Break Away”<br />
from the fryer body in the<br />
event that the power cord is<br />
inadvertently pulled. This is<br />
intended to prevent the<br />
tipping of the appliance and<br />
hazardous spillage of hot oil.
Before Using Your <strong>Deep</strong> <strong>Fryer</strong><br />
Make sure the fryer is unplugged. Wash<br />
the Frying Basket and Oil Container in<br />
hot , soapy water. Wipe dry thoroughly.<br />
Wipe the Removable Heating Control<br />
Panel and Heating Elements with a<br />
damp,soapy cloth. Wipe dry thoroughly.<br />
NOTE: Any water left in Oil Container or<br />
on Frying Basket can cause heated oil to<br />
splatter or “pop” during cooking. Special<br />
care should be taken to ensure that the<br />
oil filter in the removable cover is<br />
completely dry, otherwise the filter will<br />
not function properly. If not dry, steam<br />
may be trapped within the fryer during<br />
use and cause serious burns when<br />
opened.<br />
Assembling Your <strong>Deep</strong> <strong>Fryer</strong><br />
Caution: Never turn on the fryer when<br />
the oil pan is empty. Always ensure the<br />
fryer is out of the reach of children.<br />
Always use fryer on a flat, heat<br />
resistant surface.<br />
1. Place oil container inside base of<br />
deep fryer.<br />
2. Slide control panel with heating<br />
element downward until it connects<br />
with the control panel terminal on the<br />
outside of the fryer. The automatic<br />
safety switch ensures that the unit will<br />
not operate unless the control panel<br />
has been inserted correctly into the<br />
electric interface on the control panel<br />
terminal. ( Fig. 1)<br />
OPERATING INSTRUCTIONS INSTRUCCIONES PARA OPERAR<br />
Fig. 1<br />
WARNING: Never plug in the <strong>Deep</strong><br />
<strong>Fryer</strong> before filling with oil. Always<br />
unplug the appliance when not in use.<br />
3. Pour cooking oil into Oil Container.<br />
Do NOT exceed “MAX” level for<br />
cooking oil. (Fig. 2)<br />
Fig. 2<br />
Max level<br />
for cooking oil.<br />
4. Attach the “Break Away” Power<br />
Cord. When attaching the power<br />
cord, you will feel a magnetic pull<br />
on the cord. (Fig. 3)<br />
Fig. 3<br />
5. Attach the Basket Handle to the<br />
Frying Basket by pressing inward<br />
on the side of the handle to<br />
depress the handle shafts. Place<br />
the handle shaft into the mating<br />
slots inside the fryer basket, make<br />
sure the ends are in place and<br />
secure. (Fig. 4)<br />
Press here to insert handle<br />
shafts into basket<br />
Fig. 4<br />
Uso de Manteca Sólida<br />
ADVERTENCIA: NO SE RECOMIENDA<br />
usar manteca sólida en la tina de aceite<br />
ni en la canastilla freidora.<br />
• Si se usase manteca vegetal sólida,<br />
primero derretirla en otra sartén y<br />
después verterla cuidadosamente en<br />
la tina para aceite.<br />
• La manteca vegetal usada<br />
previamente que se hubiese<br />
solidificado en la tina para aceite,<br />
debe sacarse y derretirse en otra<br />
sartén antes de volverse a utilizar.<br />
ADVERTENCIA: Si se trata de derretir<br />
la manteca solidificada en la tina para<br />
aceite, existe el riesgo de que se derrita<br />
súbitamente y salpique desde el fondo<br />
a través de la capa superior de grasa<br />
todavía sólida; por lo tanto, SÓLO<br />
hacer lo siguiente:<br />
• Asegurarse que la manteca esté a la<br />
temperatura del ambiente porque si<br />
estuviese muy fría salpicará.<br />
• Agujerear la manteca con un tenedor.<br />
Cerciorarse que la tapa esté cerrada<br />
en forma segura mientras la manteca<br />
se derrite. Calentar la manteca<br />
lentamente en la temperatura más<br />
baja.<br />
CUIDADO: Nunca enchufar la freidora en<br />
el tomacorriente antes de llenar el aceite<br />
hasta el nivel especificado. Siempre<br />
cerciorarse que la freidora esté completa<br />
y adecuadamente ensamblada antes de<br />
enchufarla al tomacorriente.<br />
IMPORTANTE: Asegurarse que el panel<br />
de control esté instalado correctamente<br />
en la freidora, de lo contrario, no<br />
funcionará. Esto no es un defecto. La<br />
freidora tiene un interruptor de seguridad<br />
que evita que se encienda<br />
accidentalmente.<br />
• Graduar la temperatura girando la<br />
perilla de control. La temperatura se<br />
regula de 155 °F a 375 °F.<br />
5 21<br />
Llenado de la Tina de Aceite<br />
ADVERTENCIA: Nunca enchufar la<br />
freidora antes de llenar el aceite hasta el<br />
nivel indicado. Siempre cerciorarse que el<br />
panel de control esté instalado en forma<br />
segura en la freidora y que el elemento<br />
calentador esté en el aceite en la tina antes<br />
de enchufar la unidad.<br />
• Usar aceite vegetal combinado, puro de<br />
maíz o de canola (semilla de colza). No<br />
usar aceite de oliva, margarina, manteca<br />
ni goteos.<br />
• El nivel del aceite siempre debe<br />
mantenerse entre las marcas de mínimo<br />
y máximo indicadas en el interior de la<br />
tina. Revisar el nivel del aceite antes de<br />
cada uso. Para mejores resultados,<br />
mantener el nivel de aceite cerca de la<br />
línea del máximo (10 tazas / 2,5 Lt.).<br />
Nunca mezclar aceites ni grasas<br />
diferentes. No mezclar aceite viejo con<br />
aceite nuevo.<br />
Nivel Máx para el<br />
aceite de cocina.<br />
Fig. 7<br />
Precalentamiento<br />
CUIDADO: Nunca enchufar la freidora<br />
antes de echarle el aceite y siempre<br />
desenchufarla cuando no esté en uso.<br />
• Asegurarse que el nivel del aceite esté<br />
entre las marcas del máximo y mínimo<br />
dentro de la tina de aceite.<br />
• La canastilla para freír no debe estar<br />
sumergida en el aceite durante el<br />
precalentamiento.<br />
• Colocar la tapa en la freidora.<br />
• Enchufar la freidora a un tomacorriente<br />
de 120 voltios.<br />
• Para encender, presionar el interruptor a<br />
la posición “On”. La unidad emitirá un<br />
tono y la luz indicadora se encenderá<br />
para avisar que la freidora está<br />
energizada.<br />
• Programar la temperatura girando la<br />
perilla de control a la temperatura<br />
deseada.
13. Cuando termine de freír, presionar<br />
el botón interruptor “Start/Stop” y<br />
desenchufar la freidora del<br />
tomacorriente. Permitir que el<br />
aceite en la tina se enfríe<br />
completamente por<br />
aproximadamente 2 horas antes de<br />
intentar evacuarlo y limpiar la<br />
freidora.<br />
NOTA: NO desconectar la freidora del<br />
tomacorriente halando del “Cordón<br />
Separable”.<br />
ADVERTENCIA: No obstante que la<br />
freidora tiene un casco exterior que se<br />
mantiene frío al tacto, para evitar<br />
posibles lesiones o quemaduras, nunca<br />
tocar sus partes metálicas porque<br />
podrían estar calientes.<br />
IMPORTANTE<br />
• No echar alimentos congelados en la<br />
canastilla freidora cuando está<br />
sumergida en el aceite caliente.<br />
• Primero colocar los alimentos en la<br />
canastilla, no dejarlos caer en el<br />
aceite caliente. No sobrellenar la<br />
canastilla y nunca exceder las<br />
cantidades máximas recomendadas.<br />
Para mejores resultados y un menor<br />
tiempo de cocción, sólo llenar la<br />
canastilla hasta la mitad.<br />
• La canastilla tiene una capacidad<br />
aproximada de 1/2 kg. (1 Lb). O sea<br />
el equivalente a 3 ó 4 piezas de pollo<br />
de tamaño promedio.<br />
• NO llenar la canastilla excediendo la<br />
línea del nivel MAX con alimentos<br />
congelados.<br />
Fritura de Alimentos<br />
ADVERTENCIA: Para freír los alimentos,<br />
sacar la canastilla de la freidora antes de<br />
colocarle los alimentos a freírse porque el<br />
aceite salpicará y producirá quemaduras.<br />
ADVERTENCIA: Cuando se frían<br />
alimentos congelados, como papas fritas,<br />
no se debe exceder de 3/4 Lb. (350 grs.).<br />
Eliminar todo el hielo suelto de los<br />
alimentos congelados antes de freírlos<br />
porque de lo contrario el aceite se<br />
rebalsará de la freidora.<br />
CUIDADO: Nunca enchufar el panel de<br />
control si no está instalado en la freidora.<br />
No sumergir el panel de control, el<br />
cordón, ni el enchufe en agua ni otro<br />
líquido.<br />
CUIDADO : Esta unidad no debe usarse<br />
para hervir agua.<br />
INSTRUCCIONES PARA OPERAR OPERATING INSTRUCTIONS<br />
20<br />
• Siempre usar la canastilla freidora para<br />
freír alimentos.<br />
• Siempre cerrar la tapa durante la fritura.<br />
• Cuando se precaliente el aceite, la luz<br />
roja se encenderá para indicar que el<br />
aceite ha llegado a la temperatura<br />
deseada.<br />
• Introducir la canastilla lentamente en el<br />
aceite caliente, de lo contrario se<br />
rebalsará o salpicará.<br />
• Colocar la tapa cuidadosamente.<br />
• Es normal que escape vapor por los<br />
costados de la tapa cuando se fría.<br />
• Evitar pararse demasiado cerca a la<br />
freidora cuando esté cocinando.<br />
ADVERTENCIA: Cuando se abra la<br />
tapa, levantarla levemente y esperar a que<br />
el vapor escape antes de abrirla<br />
completamente. Mantener la cara alejada<br />
de la freidora para evitar quemaduras por<br />
el vapor.<br />
Consejos para Freír<br />
• Para evitar la acumulación de<br />
condensación en la ventana de la tapa,<br />
frotarle un poco de aceite de cocina.<br />
• No mezclar aceites diferentes ni agregar<br />
aceite nuevo al viejo.<br />
• Reemplazar el aceite regularmente. En<br />
general, el aceite se contamina<br />
rápidamente cuando se fríen alimentos<br />
con proteína (aves, carnes, pescados).<br />
Cuando el aceite se usa principalmente<br />
para freír papas y se filtra después de<br />
cada uso, el mismo aceite puede<br />
reutilizarse de 8 a 10 veces, pero<br />
durante no más de 6 meses.<br />
• Siempre reemplazar el aceite tan pronto<br />
comience a formar espuma al<br />
calentarse, cuando se vuelva oscuro,<br />
adquiera un olor o sabor rancio o se<br />
vuelva espeso.<br />
• Asegurarse que los alimentos a freírse<br />
estén secos.<br />
• Sacar el hielo suelto de los alimentos a<br />
freírse.<br />
• Para cocinar las piezas uniformemente,<br />
deben ser del mismo tamaño y grosor.<br />
• Las piezas más gruesas demorarán más<br />
en cocinar.<br />
Using Your <strong>Deep</strong> <strong>Fryer</strong><br />
WARNING: Never plug the <strong>Deep</strong><br />
<strong>Fryer</strong> into an electrical outlet before<br />
filling with oil. Always unplug the<br />
appliance when not in use.<br />
Once all components of the <strong>Deep</strong> <strong>Fryer</strong><br />
are assembled, you are ready to use the<br />
appliance.<br />
1. Plug power cord into electrical outlet.<br />
You will hear three beeps from the<br />
unit and the Ready Indicator light will<br />
illuminate (red).<br />
2. Press the “Start” (power) Button and<br />
the Ready Indicator Light will<br />
illuminate (green).<br />
3. The top of the LED Display Screen<br />
will default to the temperature of<br />
325° F and the bottom will show “--:--”<br />
for the time. (Fig. 6)<br />
4. To set the desired time for frying,<br />
press the Temperature & Timer<br />
Control Knob once and the bottom of<br />
the LED Screen will flash. Turn to the<br />
left to decrease the time and to the<br />
right to increase. The maximum<br />
amount of time that can be<br />
programmed is 15:59 minutes. If you<br />
wish a longer frying time, set the time<br />
display to show “--:--”. This means<br />
that the unit will continue to work until<br />
you press the “Start” (power) button<br />
and remove the plug from the wall<br />
outlet.<br />
5. To set the desired frying temperature,<br />
press the Temperature & Timer<br />
Control Knob again and turn the knob<br />
to the left to decrease the<br />
temperature or to the right to<br />
increase. The range of temperature is<br />
between 155° F and 385° F.<br />
6. When you have finished setting the<br />
time and the temperature, the unit is<br />
ready to be used. Close the cover and<br />
let the oil reach the set temperature.<br />
7. When the oil in the deep fryer has<br />
reached the set temperature, open<br />
the cover, place the frying basket<br />
onto the Oil Draining Hook, put food<br />
into the Frying Basket and carefully<br />
lower the Frying Basket into the hot<br />
oil. Close the cover.<br />
6<br />
Fig. 6<br />
8. Cook food according to<br />
recommended cooking chart or until<br />
desired doneness. It is normal for<br />
steam to escape through the sides of<br />
the cover while frying.<br />
9. If you have pre-set a time for the<br />
<strong>Deep</strong> <strong>Fryer</strong>, you will hear six (6)<br />
beeps when the cooking time has<br />
elapsed and the heating element will<br />
turn off.<br />
10. When cooking is complete, open the<br />
Cover carefully to avoid burns<br />
caused by escaping steam. Lift the<br />
Frying Basket and hook it onto the<br />
Oil Draining Hook to allow the food<br />
to drain.<br />
11. Remove the food from the Frying<br />
Basket by:<br />
Lifting the Frying Basket by its<br />
handle and CAREFULLY pouring<br />
food onto a plate covered with<br />
paper towels or into desired<br />
serving utensil.<br />
Using tongs to grasp the food from<br />
the frying basket and placing into<br />
serving utensil.<br />
12. Repeat procedure for remaining<br />
food to be cooked.<br />
NOTE: Always replace or remove the<br />
Frying Basket carefully when<br />
cooking. Oil is very hot and can<br />
cause severe injury.
13. When cooking is completed, press<br />
the “Start/Stop” button and remove<br />
the plug from the electrical outlet.<br />
Allow the oil in the Oil Container to<br />
cool completely for approximately<br />
two (2) hours before attempting to<br />
remove the oil and clean the <strong>Deep</strong><br />
<strong>Fryer</strong>.<br />
NOTE: Do NOT disconnect the <strong>Deep</strong><br />
<strong>Fryer</strong> by pulling on the “Break Away”<br />
Power Cord.<br />
WARNING: Although your <strong>Deep</strong><br />
<strong>Fryer</strong> has a Cool Touch Exterior, to<br />
avoid possible injury or burns, never<br />
touch any metal parts on the <strong>Deep</strong><br />
<strong>Fryer</strong> because they may be hot.<br />
IMPORTANT<br />
• Do not fill the Frying Basket with frozen<br />
food when basket is immersed in hot<br />
oil.<br />
• Place the food in the Frying Basket. Do<br />
not drop food into hot cooking oil. Do<br />
not overfill it and never exceed the<br />
maximum quantities. For optimum<br />
results and shorter frying time, basket<br />
should be only 1/2 full.<br />
• The basket has approximately 1 lb.<br />
food capacity. It will hold 3-4 average<br />
size pieces of chicken.<br />
• Do NOT fill the basket higher than the<br />
MAX line on the basket with frozen<br />
food.<br />
Frying Food<br />
WARNING: When frying foods, remove<br />
the Frying Basket from the <strong>Deep</strong> <strong>Fryer</strong><br />
before filling with frozen food because oil<br />
will spatter and can cause burns.<br />
WARNING: When frying frozen foods<br />
such as French Fries, you should not<br />
exceed 3/4 Lb. (350 gr.) or less. Clean off<br />
any ice from frozen food prior to frying.<br />
Failure to do so may cause fryer to<br />
overflow when food is placed in oil.<br />
CAUTION: Never plug in the Control<br />
Panel when it is not assembled to the<br />
fryer body. Do not immerse the Control<br />
Panel, Power Cord or plug in water or<br />
any other liquid.<br />
CAUTION: This unit should not be<br />
used to boil water.<br />
OPERATING INSTRUCTIONS<br />
7<br />
• Always use the Frying Basket to fry food.<br />
• Always close the Cover during frying.<br />
• When the oil is pre-heated, Ready<br />
Indicator Light will come on indicating<br />
the desired oil temperature has been<br />
reached.<br />
• Slowly lower the Frying Basket into the<br />
hot oil. Lowering the Frying Basket too<br />
quickly can result in the oil overflowing<br />
and splashing.<br />
• Replace the Cover carefully.<br />
• It is normal for steam to escape through<br />
the sides of the Cover while frying.<br />
• Avoid standing too close to the <strong>Deep</strong><br />
<strong>Fryer</strong> while it is cooking.<br />
WARNING: When opening the Cover<br />
after frying, lift up the Cover slightly, then<br />
wait to allow steam to escape before<br />
opening the Cover completely. Keep face<br />
away from unit to avoid burns caused by<br />
escaping steam.<br />
Frying Tips<br />
• To avoid condensation buildup on the<br />
Cover Window - rub a little cooking oil<br />
on window.<br />
• Do not mix different oils or new and old<br />
oil together.<br />
• Replace oil regularly. In general, oil<br />
used to fry food with protein, (such as<br />
poultry, meat and fish) should not be<br />
reused. When oil is used mainly to fry<br />
potatoes and is filtered after each use,<br />
it can be used up to 8 to 10 times, but<br />
do not use the same oil for more than<br />
6 months.<br />
• Always replace all oil as soon as it<br />
starts foaming when heated or when<br />
color becomes dark or when it has a<br />
rancid smell or taste or becomes<br />
syrupy.<br />
• Make sure that the food to be fried is<br />
dry.<br />
• Remove loose ice from frozen food<br />
before frying.<br />
• To cook evenly, pieces should be the<br />
same size and thickness.<br />
• Thicker pieces will take longer to cook.<br />
Uso de la Freidora<br />
ADVERTENCIA: Nunca enchufar la<br />
freidora antes de llenarla y siempre<br />
desenchufarla cuando no esté en uso.<br />
La freidora puede usarse una vez que<br />
todos sus componentes estén instalados.<br />
1. Enchufar el cordón en el<br />
tomacorriente. La unidad emitirá tres<br />
tonos y la luz indicadora roja se<br />
encenderá.<br />
2. Presionar el botón del interruptor<br />
“Start” y la luz indicadora cambiará a<br />
verde.<br />
3. La parte superior del visualizador<br />
digital indicará la temperatura<br />
programada de fábrica que es 325° F<br />
y la parte inferior “--:--” para el tiempo<br />
de cocción. (Fig. 6)<br />
4. Para programar el tiempo de fritura,<br />
presionar la perilla de control y<br />
temporizador una vez. La sección<br />
inferior del visualizador se volverá<br />
intermitente. Girar la perilla a la<br />
izquierda para disminuirlo el tiempo y<br />
hacia la derecha para aumentar. El<br />
tiempo máximo programable es 15:59<br />
minutos. Si se desea un tiempo de<br />
fritura mayor, programar el<br />
visualizador para que aparezca “--:--”.<br />
De esta forma la unidad funcionará<br />
ininterrumpidamente hasta volver a<br />
presionar el botón interruptor “Start” y<br />
que se desenchufe del tomacorriente.<br />
5. Para programar la temperatura de la<br />
fritura, volver a presionar el botón de<br />
control y girarlo a la izquierda para<br />
disminuirla la temperatura o a la<br />
derecha para aumentar. El rango de<br />
temperatura varía entre 155ºF y<br />
385° F.<br />
6. Cuando se termine de programar el<br />
tiempo de la fritura y la temperatura,<br />
la unidad esta apta para usarse.<br />
Cerrar la tapa y esperar a que el<br />
aceite alcance la temperatura<br />
programada.<br />
INSTRUCCIONES PARA OPERAR<br />
19<br />
Fig. 6<br />
7. Cuando el aceite haya alcanzado la<br />
temperatura programada, abrir la tapa<br />
e insertar la canastilla freidora en el<br />
gancho para drenaje de aceite,<br />
colocarle el alimento, introducir la<br />
canastilla en el aceite caliente y<br />
colocar la tapa.<br />
8. Cocinar los alimentos de acuerdo a los<br />
tiempos recomendados en la cartilla o<br />
hasta alcanzar el grado de cocción<br />
deseado. Es normal que escape<br />
vapor por los costados de la tapa<br />
cuando se esté friendo.<br />
9. Si se ha programado el tiempo de<br />
cocción, cuando se cumpla, la freidora<br />
emitirá 6 tonos y el elemento<br />
calentador se apagará.<br />
10. Al terminar de cocinar, abrir la tapa<br />
cuidadosamente para evitar<br />
quemaduras por el vapor que escapa<br />
de la freidora. Levantar la canastilla<br />
freidora y colgarla del gancho para<br />
drenaje de aceite.<br />
11. Para servir los alimentos:<br />
Levantar la canastilla<br />
cuidadosamente agarrándola por el<br />
asa y volcar el alimento frito en un<br />
plato o fuente de servir cubierto con<br />
papel toalla.<br />
Sacándolos con una tenaza para<br />
servirlos.<br />
12. Repetir el procedimiento para el resto<br />
de los alimentos por cocinarse.<br />
NOTA: Siempre introducir o retirar la<br />
canastilla freidora cuidadosamente. El<br />
aceite estará muy caliente y podrá<br />
causar lesiones serias..
Antes de Usar la Freidora<br />
INSTRUCCIONES PARA OPERAR OPERATION INSTRUCTIONS<br />
Asegurarse que la freidora esté<br />
desenchufada. Lavarla la canastilla<br />
freidora y la tina de aceite en agua<br />
caliente jabonosa. Secarlas<br />
completamente frotándolas con un paño.<br />
Frotar con un paño humedecido con agua<br />
jabonosa tanto el panel de control<br />
desmontable con elemento calentador,<br />
como los elementos calentadores y<br />
secarlos completamente frotándolos con<br />
una toalla.<br />
NOTA: Cualquier residuo de agua dejado<br />
en la tina de aceite o en la canastilla<br />
freidora, podrá hacer que el aceite<br />
caliente salpique durante la cocción. Se<br />
debe tener cuidado especial en<br />
asegurarse que el filtro de aceite en la<br />
tapa desmontable esté completamente<br />
seco, de lo contrario, no funcionará<br />
adecuadamente. Si no estuviese seco, el<br />
vapor quedará atrapado dentro de la<br />
freidora durante el uso y causará lesiones<br />
serias cuando se destape.<br />
Ensamblaje de la Freidora<br />
Cuidado: Nunca encender la freidora<br />
cuando la tina de aceite esté vacía.<br />
Siempre asegurarse que la freidora<br />
esté fuera del alcance de los niños.<br />
Siempre usar la freidora sobre una<br />
superficie plana y resistente al calor.<br />
1. Colocar el aceite en la tina de la<br />
freidora.<br />
2. Instalar el panel de control en la<br />
freidora insertando su elemento<br />
calentador apuntando hacia abajo en<br />
la base hasta que su terminal haga<br />
contacto con el terminal en la parte<br />
exterior de la freidora Un interruptor<br />
automático de seguridad impedirá<br />
que la unidad funcione a menos que<br />
el terminal del panel de control esté<br />
correctamente instalado en el<br />
conector de la freidora. ( Fig. 1)<br />
Fig. 1<br />
18<br />
ADVERTENCIA: Nunca enchufar la<br />
freidora antes de llenarla y siempre<br />
desenchufarla cuando no esté en uso.<br />
3. Llenar la tina con aceite de cocina<br />
sin exceder la marca “MAX”<br />
(Fig. 2)<br />
Fig. 2<br />
Nivel Máx para el<br />
aceite de cocina.<br />
4. Conectar el cordón eléctrico en la<br />
freidora hasta sentir un tirón<br />
magnético del cordón (Fig. 3)<br />
Fig. 3<br />
5. Instalar el asa en la canastilla de<br />
freír presionando hacia el centro<br />
las perillas con gancho del asa.<br />
Colocar las puntas dobladas del<br />
mango en las ranuras de la<br />
canastilla freidora cerciorándose<br />
que queden aseguradas en<br />
posición. (Fig. 4)<br />
Presionar aquí para<br />
Insertar los brazos del<br />
asa en la canastilla<br />
Fig. 4<br />
Using Solid Fat<br />
WARNING: It is NOT RECOMMENDED<br />
to put solid shortening in the Oil Container<br />
or the Frying Basket.<br />
• If using solid vegetable shortening, melt<br />
it first in a separate pan and then very<br />
carefully pour the melted fat into the Oil<br />
Container.<br />
• Previously used solid vegetable<br />
shortening which has curdled and<br />
hardened in the Oil Container should be<br />
removed from the Oil Container and<br />
melted in a separate pan before reusing.<br />
WARNING: If you try to melt the<br />
solidified fat in the Oil Container, there is a<br />
risk of warm melted fat suddenly sputtering<br />
from below through the still solid top layer<br />
of fat.<br />
Therefore use ONLY the following<br />
procedure:<br />
• Make sure the fat is at room<br />
temperature. If the fat is very cold, there<br />
is a greater risk of splashing.<br />
• Using a fork, carefully make some holes<br />
in the fat. Make sure the Cover is<br />
securely closed while fat is melting. Heat<br />
fat slowly - on lowest temperature<br />
setting.<br />
CAUTION: Never plug in the <strong>Deep</strong> <strong>Fryer</strong><br />
before filling with oil to specified level.<br />
Always make sure <strong>Deep</strong> <strong>Fryer</strong> is properly<br />
and completely assembled before using or<br />
plugging into wall outlet.<br />
IMPORTANT: Ensure the Control Panel<br />
is fitted correctly to the main unit,<br />
otherwise the unit will not function. This is<br />
not a defect. This product is fitted with a<br />
safety switch to prevent the unit from<br />
turning on accidentally.<br />
• Set the required temperature by turning<br />
the Temperature/Timer Control Knob. –<br />
The temperature is adjustable from<br />
155 °F to 375 °F.<br />
• Use blended vegetable oil, pure corn oil<br />
or canola (rapeseed) oil. Do not use<br />
olive oil, margarine, lard or drippings.<br />
• The oil level must always be maintained<br />
between the minimum and the<br />
maximum levels marked inside the oil<br />
container. (Fig. 7) Check the oil<br />
level before each use. For best results,<br />
keep the oil close to the maximum level<br />
(10 cups/2.5 liters). Never mix different<br />
oils and fats together. Do not mix old<br />
8<br />
Filling the Oil Container With Oil<br />
WARNING: Never plug in the <strong>Deep</strong><br />
<strong>Fryer</strong> before filling with oil to specified<br />
level. Always make sure Control Panel is<br />
securely in place in the body and the<br />
Heating Element is inside the oil in the oil<br />
container before plugging in.<br />
and new oil.<br />
Fig. 7<br />
Pre-Heating<br />
Max level for<br />
cooking oil.<br />
CAUTION: Never plug in the <strong>Deep</strong><br />
<strong>Fryer</strong> before filling with oil. Always<br />
unplug the appliance when not in use.<br />
• Make sure the oil level in the Oil<br />
Container is between the "minimum "<br />
and " maximum " lines inside the Oil<br />
Container.<br />
• The Frying Basket should not be<br />
immersed in the oil during the preheating.<br />
• Close Cover.<br />
• Plug the appliance into a 120-volt<br />
outlet.<br />
• Press the On/Off Switch to ON. The<br />
Power Indicator Light will come on,<br />
showing that the power is on.<br />
• Turn the Temperature Control Knob<br />
to the desired temperature setting.
OPERATION INSTRUCTIONS CARACTERÍSTICAS DE LA FREIDORA ELECTRÓNICA<br />
Temperature Settings<br />
KENMORE<br />
The following cooking times reflect only<br />
the approximate time needed to fry one<br />
basket 1/2 full. The exact time may be<br />
different depending on actual quantity,<br />
personal cooking preferences, size and<br />
thickness of pieces, etc. In general, use<br />
lower settings for delicate foods<br />
(vegetables, fish) and higher settings<br />
for frozen foods, French Fries and<br />
Chicken.<br />
Food Cooking Time Temp.<br />
French Fries 6-9 minutes 375°F<br />
Fish Fillets 3-5 minutes 320°F<br />
Chicken<br />
Fingers<br />
Chicken<br />
Pieces<br />
6-8 minutes 350°F<br />
13-20 minutes 350°F<br />
Fried Zucchini 3 minutes 320°F<br />
Fried<br />
Mushrooms<br />
3 minutes 320°F<br />
Onion Rings 3 minutes 320°F<br />
Donuts 3-5 minutes 350°F<br />
Apple<br />
Beignets<br />
4 minutes 350°F<br />
Shrimp 4-6 minutes 320°F<br />
To Store or Reuse Cooking Oil<br />
• Make sure the <strong>Deep</strong> <strong>Fryer</strong> is<br />
unplugged and the oil has cooled<br />
(approximately 2 hours) before<br />
attempting to clean or store the <strong>Deep</strong><br />
<strong>Fryer</strong>.<br />
• The oil does not need to be changed<br />
after each use. We do not<br />
recommend storing and reusing oil<br />
that was used for frying high protein<br />
foods such as poultry, fish or other<br />
meats. When oil is mainly used to fry<br />
potatoes and is filtered after each<br />
use, it can be used 8 to 10 times.<br />
However, do not use the same oil for<br />
longer than 6 months.<br />
9<br />
• To filter the oil, first make sure the oil<br />
has cooled and then empty the oil<br />
from the Oil Container into a storage<br />
container or bottle. (Fig. 8) Wash and<br />
dry the Oil Container and basket. To<br />
reuse, refill the Oil Container with<br />
the oil, pouring the oil through a wire<br />
strainer or paper filter. (Fig. 9)<br />
Fig. 8<br />
Storing used oil<br />
Fig. 9<br />
Cleaning Instructions<br />
Filtering used oil<br />
WARNING: Always press the<br />
“Start/Stop” Button to stop the heating<br />
element from heating and remove the<br />
plug from the wall socket before<br />
cleaning. Allow the <strong>Deep</strong> <strong>Fryer</strong> and<br />
the oil to to cool completely<br />
(approximately 2 hours) before<br />
cleaning. Never immerse the Control<br />
Panel, cord, plug or main enclosure in<br />
water or any other liquid.<br />
• Please read and follow all<br />
instructions in this manual for best<br />
results with your <strong>Deep</strong> <strong>Fryer</strong>.<br />
• Never immerse the Control Panel,<br />
cord, plug or main enclosure in water<br />
or any other liquid.<br />
• Do not place the Control Panel, cord,<br />
plug or main enclosure in the<br />
dishwasher.<br />
• Clean the Control Panel and main<br />
enclosure only with a damp cloth.<br />
• The Oil Container, Frying Basket and<br />
Cover can be washed in the top rack<br />
of the dishwasher. To remove the<br />
cover, open it and lift it straight up.<br />
• Do not use any type of abrasive pad<br />
or steel wool to clean the Power<br />
Cord magnetic socket.<br />
• Do not use alcohol or cleaning<br />
solutions to clean <strong>Deep</strong> <strong>Fryer</strong>.<br />
1. CONTROL ELECTRÓNICO<br />
Panel de control fácil de operar y<br />
de leer. Graduación más precisa<br />
de la temperatura y el tiempo de<br />
cocción. (Ver la cartilla de cocción<br />
para las temperaturas y tiempos<br />
sugeridos).<br />
2. GRADUACIÓN DE TEMPERATURA<br />
Dispone de un amplio rango de<br />
temperaturas para una cocción más<br />
precisa. Tiene una perilla de control<br />
grande fácil de girar. (Ver la cartilla de<br />
cocción para las temperaturas y tiempos<br />
sugeridos).<br />
3. BOTÓN DE REINICIALIZACIÓN<br />
Apague la freidora rápidamente con la<br />
presión de un botón.<br />
4. LUZ INDICADORA DE<br />
ESTAR LISTA<br />
La luz indicadora verde se<br />
encenderá para indicar que la<br />
freidora ha alcanzado la<br />
temperatura programada.<br />
17<br />
Indicador<br />
de Nivel<br />
de Aceite<br />
5. INDICADOR DE NIVEL DE<br />
LLENADO DE ACEITE<br />
Indica los niveles máximo y mínimo<br />
del aceite para una cocción<br />
adecuada.<br />
6. CASCO QUE SE MANTIENE<br />
FRÍO AL TACTO<br />
Para protección adicional durante<br />
la cocción.<br />
7. FUSIBLE DE SEGURIDAD<br />
PARA SOBRECARGA<br />
La freidora se apagará<br />
automáticamente para evitar un<br />
posible recalentamiento.<br />
8. CORDÓN SEPARABLE<br />
El cordón de suministro eléctrico<br />
está diseñado para que se<br />
desconecte de la freidora en<br />
caso de un jalón inadvertido.<br />
Con esto se intenta prevenir la<br />
volcadura de la freidora y el<br />
derrame peligroso del aceite<br />
caliente.
FAMILIARIZÁNDOSE CON LA FREIDORA OPERATION INSTRUCTIONS<br />
17<br />
1. Tapa desmontable<br />
2. Filtro<br />
3. Ventana<br />
4. Tina de aceite<br />
5. Botón de seguro de la tapa<br />
6. Casco exterior frío al tacto<br />
7. Elementos calentadores<br />
8. Panel de control desmontable<br />
con elemento calentador<br />
Especificaciones Técnicas<br />
Voltaje: 120V., 60Hz.<br />
Potencia: 1700 Wats<br />
Capacidad de aceite: Mín. 7 tazas (1,75 Litros)<br />
Máx. 12 tazas (3 Litros)<br />
9. Visualizador digital<br />
10. Perilla de control de temperatura y del<br />
temporizador<br />
11. Luz indicadora de estar lista<br />
12. Botón de reinicialización<br />
13. Botón interruptor<br />
14. Canastilla de freír<br />
14. Asa de la canastilla de freír<br />
16. Gancho colgador para drenar aceite<br />
17. Cordón eléctrico separable<br />
16<br />
4<br />
Detachable “Break Away”<br />
Power Cord<br />
Your KENMORE <strong>Deep</strong> <strong>Fryer</strong> has been<br />
specifically designed with your safety in<br />
mind. Your <strong>Deep</strong> <strong>Fryer</strong> has a unique<br />
detachable power supply cord. This<br />
power supply cord is designed to<br />
“Break Away” from the fryer in the event<br />
that the power cord or fryer is<br />
inadvertently pulled or tugged. This is<br />
intended to prevent the tipping of the<br />
appliance and hazardous spillage of hot<br />
oil.It is NOT intended to disconnect the<br />
fryer during normal use<br />
To connect the power cord - note the<br />
instructions on the cord plug area -<br />
“THIS SIDE UP”. Place cord into<br />
opening - you will feel the magnetic pull.<br />
Slide cord into slot until it connects.<br />
(Fig. 10)<br />
Fig. 10<br />
10<br />
CAUTION: Do not use the “Break -<br />
Away” Power Cord to disconnect the<br />
<strong>Deep</strong> <strong>Fryer</strong>. Always disconnect plug<br />
from electrical outlet first before<br />
removing the power cord.<br />
WARNING: The “Break-Away”<br />
Power Cord is only for accidental<br />
disconnection of the <strong>Deep</strong> <strong>Fryer</strong>. It is<br />
not to be removed during normal<br />
operation. If the cord should be<br />
disconnected from the unit during<br />
operation, the user should<br />
immediately unplug the power cord<br />
from the electrical wall outlet before<br />
any attempt to reconnect the magnetic<br />
cord back to the deep fryer unit. Do<br />
not come in contact with the magnetic<br />
connection of the power cord while it<br />
is plugged into electrical wall outlet.<br />
Injury can occur.<br />
CAUTION: Do not attempt to defeat<br />
the magnetic cord connection by<br />
attempting to permanently attach the<br />
power cord to the <strong>Deep</strong> fryer.
Apple Fritters<br />
3 cups all-purpose flour<br />
2 teaspoons baking powder<br />
1/2 teaspoon salt<br />
1 cup sugar<br />
1 egg, lightly beaten<br />
RECIPES PAUTAS IMPORTANTES ADICIONALES DE SEGURIDAD<br />
4 tablespoons cooking oil<br />
1 teaspoon vanilla extract<br />
juice of 1 orange (1/3 cup)<br />
1 cup chopped apple<br />
Preheat oil to 375°F. Combine flour, baking powder, salt and sugar: set aside.<br />
Combine egg, cooking oil and vanilla. Combine dry and liquid ingredients, stir<br />
to blend thoroughly. Add orange juice and apple, mix well. Drop from<br />
teaspoon into hot oil.(Basket should be lowered into oil so drop carefully -<br />
avoiding splattering oil). Fry approximately 2 minutes or until crisp and very<br />
brown. Remove from oil and drain. Dust with powered sugar or a mixture of<br />
granulated sugar and cinnamon. Serve warm for best results.<br />
Try topping with a scoop of vanilla ice cream for an added treat.<br />
Beer Batter for Fish or Chicken<br />
2 eggs (separated)<br />
1 tablespoon oil or butter<br />
1 teaspoon salt<br />
1/4 teaspoon ground black pepper<br />
1 1/3 cup all-purpose flour<br />
3/4 cup flat beer<br />
Boneless chicken breasts (optional)<br />
Fish fillets or frying fish (optional)<br />
Preheat oil to 360°F. Beat egg yolks with oil or butter,salt and pepper.<br />
Alternately add the beer and flour to the mixture. Beat ingredients well,<br />
refrigerate for 3 to 12 hours. When you are ready to use mixture, gently fold in<br />
2 stiffly beaten egg whites. Pat fish or boneless chicken breasts to remove<br />
excess liquid. Coat lightly with flour then dip into beer batter. Place fish in hot<br />
carefully(basket should already be lowered into oil) and fry for 3 to 5 minutes<br />
or until golden brown. Fry chicken 5 to 10 minutes(depending on thickness) or<br />
until brown and fully cooked.<br />
<strong>Deep</strong> Fried Chicken<br />
1 fryer chicken (2 to 3 lbs.)<br />
1 1/2 cup all-purpose flour<br />
1 teaspoon seasoned salt<br />
1/4 teaspoon salt<br />
1/4 teaspoon garlic powder (optional)<br />
1/4 teaspoon poultry seasoning(optional)<br />
1 1/2 cup milk)<br />
Preheat oil to 360°F. Combine flour and seasonings, mixing well. Dip or roll<br />
chicken in seasoned flour, dip into milk, and then flour again. Place into<br />
Frying Basket, lower basket into preheated oil. Fry for 15 to 20 minutes or<br />
until golden brown and fully cooked.<br />
12. Se debe tener mucho cuidado<br />
cuando se mueva la freidora<br />
conteniendo aceite u otros líquidos<br />
calientes.<br />
13 No dejar el artefacto desatendido<br />
cuando esté en uso.<br />
14. No usar en exteriores.<br />
15. No permitir que el cordón cuelgue<br />
del borde de la mesa ni que haga<br />
contacto con superficies calientes.<br />
16. No colocar sobre ni cerca de<br />
quemadores de gas o eléctricos ni<br />
dentro de un horno caliente.<br />
17. Sólo operar este artefacto para uso<br />
doméstico.<br />
18. Cerciorarse que el asa esté instalada<br />
correctamente en la canastilla y<br />
asegurada en posición. (Ver las<br />
instrucciones de ensamblaje.)<br />
INSTRUCCIONES ESPECIALES<br />
• Para reducir el riesgo de tropezarse o<br />
enredarse, este artefacto tiene un cordón<br />
eléctrico corto. No se recomienda usar<br />
un cordón de extensión (ni un cordón<br />
más largo) en las freidoras.<br />
• Nunca enchufar el panel de control al<br />
tomacorriente antes de instalar el<br />
elemento calentador en la freidora y de<br />
haber llenado la tina con aceite.<br />
• No sumergir el panel de control ni el<br />
elemento calentador en agua.<br />
• Para abrir la tapa después de freír,<br />
primero soltar el seguro con el dedo y<br />
esperar un momento para que el vapor<br />
escape antes de abrir completamente.<br />
• Para evitar recargar el circuito, no operar<br />
otro artefacto de alto wataje<br />
simultáneamente en el mismo circuito.<br />
• Este artefacto tiene un enchufe<br />
polarizado (una espiga es más ancha<br />
que la otra) y entra en un tomacorriente<br />
polarizado sólo en una forma. Si no entra<br />
completamente, inviértalo. Si aún así no<br />
entra, llamar a un electricista calificado<br />
para que instale un tomacorriente<br />
adecuado. No modificar el enchufe en<br />
forma alguna.<br />
CONSERVAR ESTAS INSTRUCTIONS<br />
SÓLO PARA USO DOMÉSTICO<br />
11 15
GARANTÍA DE SEARS<br />
GARANTÍA TOTAL DE UN AÑO DE LA FREIDORA ELECTRÓNICA KENMORE<br />
Si esta freidora fallase por algún defecto de materiales o de fabricación dentro del<br />
primer año a partir de su fecha de compra, Sears la reemplazará sin costo.<br />
GARANTÍA DE SERVICIO<br />
Para cambiar esta olla al amparo de la garantía, devuélvala a la tienda Sears más<br />
cercana en los EE.UU.<br />
Esta garantía se aplica a esta freidora mientras se use en los EE.UU.<br />
Esta garantía le otorga derechos legales específicos y usted también podría tener<br />
otros derechos que varían de un estado a otro.<br />
Sears, Roebuck and Co., Dept. 817WA, Hoffman Estates, IL 60179<br />
Customer Service Department 1-800-798-7398<br />
INSTRUCCIONES IMPORTANTES DE SEGURIDAD<br />
Al usar artefactos eléctricos siempre se deben tomar precauciones básicas de<br />
seguridad, incluyendo las siguientes:<br />
1. Leer todas las instrucciones<br />
cuidadosamente.<br />
2. No tocar las superficies calientes.<br />
Siempre agarrar de las asas y perillas.<br />
3. Para proteger contra el riesgo de choque<br />
eléctrico, no sumergir el cordón, el<br />
enchufe ni la unidad en agua ni líquido<br />
alguno.<br />
4. Se requiere supervisión estrecha cuando<br />
los niños usen cualquier artefacto o<br />
cuando se opere cerca de ellos.<br />
5. Siempre desenchufar la unidad del<br />
tomacorriente cuando no esté en uso,<br />
antes de instalarle o desmontarle piezas<br />
y antes de limpiarla.<br />
6. No operar artefacto alguno que tenga el<br />
cordón o el enchufe dañado o después<br />
que hubiese funcionado mal o que se<br />
hubiese dañado de cualquier forma.<br />
Devolverla al servicentro más cercano<br />
para su revisión y reparación.<br />
7. Nunca enchufar la unidad antes de<br />
ensamblarla o de echarle aceite a la<br />
tina.<br />
8. Nunca sobrellenar de aceite. Llenar<br />
sólo hasta un nivel entre las marcas<br />
de “mínimo” y “máximo” indicadas<br />
en el interior de la tina.<br />
9. Cerciorarse que el asa esté instalada<br />
correctamente en la canastilla y<br />
asegurada en posición. (Ver las<br />
instrucciones de ensamblaje.<br />
10. El uso de accesorios no<br />
recomendados por el fabricante<br />
puede causar riesgos o lesiones.<br />
11. Siempre insertar primero el elemento<br />
calentador en el artefacto antes de<br />
enchufarlo al tomacorriente. Para<br />
sacar el elemento calentador,<br />
primero apagar la unidad<br />
presionando el botón interruptor y<br />
después desenchufar la freidora del<br />
tomacorriente y esperar que enfríe<br />
completamente antes de sacar el<br />
elemento calentador.<br />
CONSERVE ESTAS INSTRUCCIONES<br />
Impreso en China<br />
14<br />
Chicken Kiev<br />
RECIPES<br />
4 whole boneless, skinless chicken breasts<br />
1 tablespoon chopped onion<br />
1 tablespoon parsley<br />
1 1/2 teaspoon salt<br />
12<br />
4 oz. butter, softened<br />
4 oz. dry white bread crumbs<br />
1/2 cup all-purpose flour<br />
1 egg<br />
Preheat oil to 360°F. Place chicken breast between two pieces of plastic<br />
wrap. Pound with wooden mallet to flatten chicken to 1/4 inch thick. Remove<br />
plastic.Combine onion, parsley and salt. Sprinkle chicken with mixture.Cut<br />
butter into 8 pieces. Place a piece of butter on seasoned chicken toward one<br />
end. Roll as jelly roll, starting at end with butter, tucking in sides of meat.<br />
Press to seal well. (No butter should be seen on the sides or coming from the<br />
chicken.) Secure with toothpicks. Dust with flour, dip into beaten egg. Then<br />
roll in bread crumbs. Chill rolls of chicken for at least one hour or until it has<br />
set. Place rolled chicken in a single layer in Frying Basket. Lower basket into<br />
preheated oil. Cook 5 to 7 minutes or until brown. To test for doneness,<br />
remove a piece of chicken from cooking oil. When a fork can be inserted with<br />
ease, chicken is done.<br />
Hush Puppies<br />
1 3/4 cup cornmeal<br />
1/2 cup all-purpose flour<br />
3/4 teaspoon baking soda<br />
1/2 teaspoon salt<br />
1 teaspoon sugar<br />
1/2 teaspoon garlic salt (or 1/4 teaspoon<br />
garlic powder )<br />
1/2 cup chopped onion<br />
1 cup buttermilk<br />
1 egg<br />
Preheat oil to 375°F. Sift together cornmeal, flour, baking soda,salt, sugar<br />
and garlic salt (or powder). Combine egg and buttermilk, add to dry<br />
ingredients gradually, stirring until mixture is moist. Drop batter by<br />
teaspoonfuls into preheated oil(basket should already be lowered) frying a<br />
few at a time. Turn hush puppies once - if needed to evenly brown and cook<br />
until golden brown. Remove and drain on paper towels or food draining rack.<br />
Quick Doughnuts<br />
1 10 count can of refrigerated can biscuits<br />
2 tablespoons ground cinnamon<br />
1/2 cup sugar<br />
Preheat oil to 375°F. Remove biscuits from can. Take each biscuit and flatten<br />
slightly with palm of hand. Punch holes in center of each biscuit with your<br />
finger to shape into doughnuts. Fry 2 minutes - turning once or until brown.<br />
Remove from basket and drain on paper towels or food draining rack. Roll<br />
doughnut in mixture of cinnamon and sugar. Serve warm.<br />
Try rolling doughnut in a mixture of 1 cup Ten X powdered sugar, 1/2<br />
teaspoon vanilla and 4 tablespoon milk for a different treat. You may add<br />
more milk to achieve your desired consistency.
Manual del Operador<br />
Freidora Electrónica<br />
<strong>Model</strong>o <strong>69298</strong><br />
CUIDADO:<br />
Antes de usar esta freidora<br />
electrónica, leer este manual y<br />
seguir todas sus reglas de<br />
seguridad e instrucciones de<br />
operación.<br />
• Seguridad<br />
• Operación<br />
• Limpieza<br />
• Cartillas para cocinar<br />
• Recetas<br />
• Español<br />
Sears, Roebuck and Co., Hoffman Estates, IL 60179 USA