AXIS T91A Mounting Accessories
AXIS T91A Mounting Accessories
AXIS T91A Mounting Accessories

You also want an ePaper? Increase the reach of your titles
YUMPU automatically turns print PDFs into web optimized ePapers that Google loves.
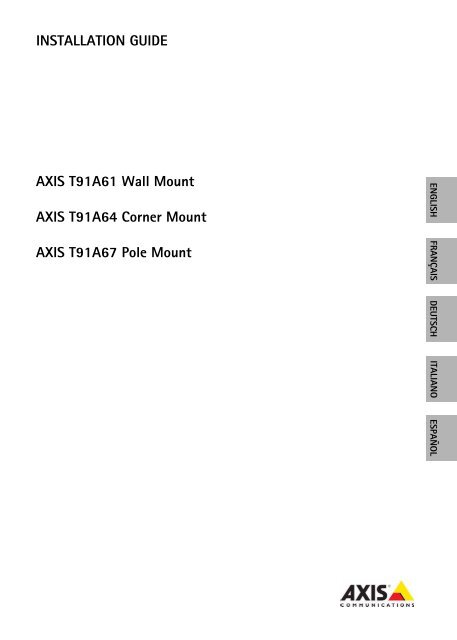
INSTALLATION GUIDE<br />
<strong>AXIS</strong> <strong>T91A</strong>61 Wall Mount<br />
<strong>AXIS</strong> <strong>T91A</strong>64 Corner Mount<br />
<strong>AXIS</strong> <strong>T91A</strong>67 Pole Mount<br />
ENGLISH FRANÇAIS DEUTSCH ITALIANO ESPAÑOL
About this Document<br />
This document includes instructions for installing the<br />
<strong>AXIS</strong> <strong>T91A</strong> <strong>Mounting</strong> <strong>Accessories</strong>.<br />
Equipment Modifications<br />
This equipment must be installed and used in strict<br />
accordance with the instructions given in the user<br />
documentation.<br />
Liability<br />
Every care has been taken in the preparation of this<br />
document. Please inform your local Axis office of any<br />
inaccuracies or omissions. Axis Communications AB<br />
cannot be held responsible for any technical or<br />
typographical errors and reserves the right to make<br />
changes to the product and documentation without<br />
prior notice. Axis Communications AB makes no<br />
warranty of any kind with regard to the material<br />
contained within this document, including, but not<br />
limited to, the implied warranties of merchantability<br />
and fitness for a particular purpose. Axis<br />
Communications AB shall not be liable nor responsible<br />
for incidental or consequential damages in connection<br />
with the furnishing, performance or use of this material.<br />
Support<br />
Should you require any technical assistance, please<br />
contact your Axis reseller. If your questions cannot be<br />
answered immediately, your reseller will forward your<br />
queries through the appropriate channels to ensure a<br />
rapid response. If you are connected to the Internet, you<br />
can:<br />
• find answers to resolved problems in the FAQ database.<br />
Search by product, category, or phrases<br />
• report problems to Axis support by logging in to your<br />
private support area.
<strong>AXIS</strong> <strong>T91A</strong> Installation Guide Page 3<br />
<strong>AXIS</strong> <strong>T91A</strong> <strong>Mounting</strong> <strong>Accessories</strong><br />
This installation guide provides instructions for installing the wall/corner/pole mounting accessories<br />
for Axis network cameras. For all other aspects of using the Axis network camera, please see the<br />
Installation Guide and User’s Manual, available from www.axis.com/techsup<br />
Installation steps<br />
• Check the package contents against the list below<br />
• Hardware overview. See page 4<br />
• Installation instructions for:<br />
• <strong>AXIS</strong> <strong>T91A</strong>61 Wall mount on page 5<br />
• <strong>AXIS</strong> <strong>T91A</strong>64 Corner mount on page 6<br />
• <strong>AXIS</strong> <strong>T91A</strong>67 Pole mount on page 7<br />
Package contents<br />
This document describes the installation procedure for the <strong>AXIS</strong> <strong>T91A</strong>61 Wall Mount, <strong>AXIS</strong> <strong>T91A</strong>64<br />
Corner Mount and <strong>AXIS</strong> <strong>T91A</strong>67 Pole Mount. Please check the corresponding package contents,<br />
depending on the purchased product.<br />
Item Models/variants/notes<br />
<strong>AXIS</strong> <strong>T91A</strong>61<br />
<strong>AXIS</strong> <strong>T91A</strong>64<br />
<strong>AXIS</strong> <strong>T91A</strong>67<br />
Wall mount bracket including holder<br />
Corner mount bracket (<strong>AXIS</strong> <strong>T91A</strong>61 required)<br />
4 M8x22 screws<br />
Pole mount bracket<br />
steel straps (steel strap tool not supplied)<br />
Important!<br />
This product must be used in<br />
compliance with local laws and<br />
regulations.<br />
ENGLISH
Page 4 <strong>AXIS</strong> <strong>T91A</strong> Installation Guide<br />
Hardware overview<br />
Metal tabs<br />
for temporary<br />
support<br />
Side cover<br />
(remove for cable)<br />
Wall/corner bracket holder<br />
Locking tab<br />
Holes for<br />
mounting<br />
screws (6)<br />
Wall/corner/pole bracket<br />
Safety wire<br />
Torx T30<br />
screws (3)<br />
Corner mount bracket<br />
Slots for<br />
unit holders (3)<br />
Steel straps<br />
(requires steel strap tool<br />
- not supplied)<br />
Screw hole (top)<br />
Mounted<br />
this way up<br />
Pole mount
<strong>AXIS</strong> <strong>T91A</strong> Installation Guide Page 5<br />
Install the <strong>AXIS</strong> <strong>T91A</strong>61 Wall Mount<br />
1. Refer to Hardware overview, on page 4 for information on the supplied<br />
parts.<br />
2. Route the network cable.<br />
3. Attach the wall bracket holder in the desired position using screws that<br />
are appropriate for the wall material and the weight of the camera and<br />
bracket.<br />
4. The wall bracket can temporarily be hooked on the wall bracket holder, in order to easily route<br />
the cable through the bracket (fig 1 & 2):<br />
Tabs<br />
fig. 1<br />
Slide bracket between the<br />
tabs on the bracket holder<br />
fig. 2<br />
Swing wall bracket<br />
to the side for<br />
temporary support<br />
Locking tab<br />
5. Route the network cable through wall bracket, securing it in the cable holder (fig. 3).<br />
6. Pull the locking tab and unhook the wall bracket from the temporary position (fig. 2).<br />
7. Use the screws to secure the wall bracket to the wall bracket holder.<br />
fig. 3<br />
Cable Cable<br />
holder<br />
8. Refer to the Installation Guide for the network camera for instructions on how to attach the<br />
camera to the bracket.<br />
ENGLISH
Page 6 <strong>AXIS</strong> <strong>T91A</strong> Installation Guide<br />
Install the <strong>AXIS</strong> <strong>T91A</strong>64 Corner Mount<br />
1. Refer to Hardware overview, on page 4 for information on the supplied<br />
parts.<br />
2. Attach the corner bracket in the desired position using screws that are<br />
appropriate for the wall material and the weight of the camera and<br />
bracket.<br />
3. Attach the wall bracket holder to the corner bracket using the supplied<br />
screws.<br />
4. The wall bracket can temporarily be hooked on the wall bracket holder, in order to easily route<br />
the cable through the bracket (fig 1 & 2):<br />
Tabs<br />
fig. 1<br />
Slide bracket between the<br />
tabs on the bracket holder<br />
fig. 2<br />
Swing wall bracket<br />
to the side for<br />
temporary support<br />
Locking tab<br />
5. Route the network cable through wall bracket, securing it in the cable holder (fig. 3).<br />
6. Press the locking tab and unhook the wall bracket from the temporary position (fig. 2).<br />
7. Use the supplied screws to secure the wall bracket to the wall bracket holder.<br />
fig. 3<br />
Cable<br />
holder<br />
Cable<br />
8. Refer to the Installation Guide for the network camera for instructions on how to attach the<br />
camera to the bracket.
<strong>AXIS</strong> <strong>T91A</strong> Installation Guide Page 7<br />
Install the <strong>AXIS</strong> <strong>T91A</strong>67 Pole Mount<br />
1. Refer to Hardware overview, on page 4 for information on the supplied<br />
parts.<br />
1. Route the network cable through the bracket, securing it with the<br />
cable holder (see fig. 4).<br />
2. Use the supplied steel straps to attach the bracket to the pole and<br />
tighten with a steel strap tool (not supplied).<br />
fig. 4<br />
Cable<br />
holder<br />
Cable<br />
holder<br />
Cable<br />
Steel straps<br />
fig. 5<br />
Pole mount<br />
3. Refer to the Installation Guide supplied with the network camera for instructions on how to<br />
attach the camera to the bracket.<br />
ENGLISH
Page 8 <strong>AXIS</strong> <strong>T91A</strong> Installation Guide<br />
Technical Data<br />
Size (width/height/depth)<br />
Wall/corner bracket holder<br />
<strong>AXIS</strong> <strong>T91A</strong>61<br />
Wall Mount<br />
140 x 200 x 270mm<br />
5.6 x 8 x 10.7 inches<br />
<strong>AXIS</strong> <strong>T91A</strong>64<br />
Corner Mount<br />
345 x 200 x 185mm<br />
13.6 x 8 x 7.3 inches<br />
<strong>AXIS</strong> <strong>T91A</strong>67<br />
Pole Mount<br />
140 x 200 x 270mm<br />
5.6 x 8 x 10.7 inches<br />
Weight 1350g / 3.0lbs 1270g / 2.8lbs 1170g / 2.6lbs<br />
Pole size - - 100 - 150mm<br />
(4 - 6 inches)<br />
Max. weight supported 15kg / 33lbs 15kg / 33lbs 15kg / 33lbs<br />
Material Aluminum Aluminum Aluminum<br />
Color code NCS S 1002-B NCS S 1002-B NCS S 1002-B<br />
<strong>Mounting</strong> holes (diameter) 9mm / 0.35 inch 10mm / 0.4 inch -<br />
96mm (3.8”)<br />
124mm (4.9”)
<strong>AXIS</strong> <strong>T91A</strong> Guide d’installation Page 9<br />
Accessoires de montage <strong>AXIS</strong> <strong>T91A</strong><br />
Ce guide d’installation vous explique comment installer les accessoires de montage mural, de<br />
montage d’angle et de montage sur poteau pour les caméras réseaux Axis. Pour plus d’informations<br />
sur tous les autres aspects liés à l’utilisation de la caméra réseau Axis, reportez-vous au guide<br />
d’installation et au manuel de l’utilisateur, disponible sur le site web www.axis.com/techsup<br />
Procédure d’installation<br />
• Vérification du contenu de l’emballage par rapport à<br />
la liste ci-dessous<br />
• Vue d’ensemble du matériel. Reportez-vous à la<br />
page 10<br />
• Instructions pour l’installation des dispositifs<br />
suivants :<br />
• <strong>AXIS</strong> <strong>T91A</strong>61 Montage mural à la page 11<br />
• <strong>AXIS</strong> <strong>T91A</strong>64 Montage d’angle à la page 12<br />
• <strong>AXIS</strong> <strong>T91A</strong>67 Montage sur poteau à la page 13<br />
Contenu de l’emballage<br />
Ce document décrit la procédure d’installation du montage mural <strong>AXIS</strong> <strong>T91A</strong>61, du montage d’angle<br />
<strong>AXIS</strong> <strong>T91A</strong>64 et du montage sur poteau <strong>AXIS</strong> <strong>T91A</strong>67. Veuillez vérifier le contenu de l’emballage en<br />
fonction du produit acheté.<br />
Article Modèles/variantes/remarques<br />
<strong>AXIS</strong> <strong>T91A</strong>61<br />
<strong>AXIS</strong> <strong>T91A</strong>64<br />
<strong>AXIS</strong> <strong>T91A</strong>67<br />
Support de montage mural avec dispositif de fixation<br />
Important !<br />
Ce produit doit être utilisé<br />
conformément aux lois et<br />
dispositions locales en vigueur.<br />
Support de monture d’angle (<strong>AXIS</strong> <strong>T91A</strong>61 requis)<br />
4 vis M8x22<br />
Support de montage sur poteau<br />
bandes en acier (outil de fixation des bandes en acier non fourni)<br />
FRANÇAIS
Page 10 <strong>AXIS</strong> <strong>T91A</strong> Guide d’installation<br />
Vue d’ensemble du matériel<br />
Pattes en<br />
métal pour<br />
un support<br />
temporaire<br />
Dispositif de fixation du support de montage<br />
mural et de montage d’angle<br />
Couvercle latéral<br />
(retirer pour<br />
passer le câble)<br />
Patte de blocage<br />
Trous pour les<br />
vis de<br />
montage (6)<br />
Support de montage d’angle<br />
Trou pour les vis<br />
(partie supérieure)<br />
Support mural/support d’angle/support<br />
de montage sur poteau<br />
Vis<br />
Torx T30 (3)<br />
Logements pour<br />
les supports de rack (3)<br />
Fil de sécurité<br />
Bandes en acier<br />
(nécessitent un outil de fixation<br />
: non fourni)<br />
Monté<br />
dans ce sens<br />
(vers le haut)<br />
Montage sur poteau
<strong>AXIS</strong> <strong>T91A</strong> Guide d’installation Page 11<br />
Installation du montage mural <strong>AXIS</strong> <strong>T91A</strong>61<br />
1. Reportez-vous à la section Vue d’ensemble du matériel, page 10 pour des<br />
informations sur les pièces fournies.<br />
2. Acheminez le câble réseau.<br />
3. Fixez le dispositif de fixation du support mural dans la position<br />
souhaitée en utilisant des vis appropriées au matériau mural et au poids<br />
de la caméra et du support.<br />
4. Le support mural peut être temporairement accroché sur le dispositif de fixation du support<br />
mural afin d’acheminer facilement le câble dans le support (figures 1 et 2) :<br />
Pattes<br />
Figure 1<br />
Glisser le support entre<br />
les pattes sur le dispositif<br />
de fixation du support<br />
Figure 2<br />
Faire pivoter le<br />
support mural vers<br />
le côté pour obtenir<br />
un support temporaire<br />
Patte de blocage<br />
5. Acheminez le câble réseau dans le support mural, en le fixant dans le dispositif de support du<br />
câble (figure 3).<br />
6. Tirez la patte de blocage et décrochez le support mural de la position temporaire (figure 2).<br />
7. Utilisez les vis pour fixer le support mural au dispositif de fixation du support mural.<br />
Figure 3<br />
Support Câble<br />
du câble<br />
8. Reportez-vous au guide d’installation de la caméra réseau pour savoir comment fixer la caméra<br />
au support.<br />
FRANÇAIS
Page 12 <strong>AXIS</strong> <strong>T91A</strong> Guide d’installation<br />
Installation du montage d’angle <strong>AXIS</strong> <strong>T91A</strong>64<br />
1. Reportez-vous à la section Vue d’ensemble du matériel, page 10 pour des<br />
informations sur les pièces fournies.<br />
2. Fixez le support d’angle dans la position souhaitée en utilisant des vis qui<br />
sont appropriées au matériau mural et au poids de la caméra et du<br />
support.<br />
3. Fixez le dispositif de fixation du support mural au support d’angle en<br />
utilisant les vis fournies.<br />
4. Le support mural peut être temporairement accroché sur le dispositif de fixation du support<br />
mural afin d’acheminer facilement le câble dans le support (figures 1 et 2) :<br />
Pattes<br />
Figure 1<br />
Glisser le support entre<br />
les pattes sur le dispositif<br />
de fixation du support<br />
Figure 2<br />
Faire pivoter le<br />
support mural vers<br />
le côté pour obtenir<br />
un support temporaire<br />
Patte de blocage<br />
5. Acheminez le câble réseau dans le support mural, en le fixant dans le dispositif de support du<br />
câble (figure 3).<br />
6. Appuyez sur la patte de blocage et décrochez le support mural de la position temporaire<br />
(figure 2).<br />
7. Utilisez les vis pour fixer le support mural au dispositif de fixation du support mural.<br />
Figure 3<br />
Support<br />
du câble<br />
Câble<br />
8. Reportez-vous au guide d’installation de la caméra réseau pour savoir comment fixer la caméra<br />
au support.
<strong>AXIS</strong> <strong>T91A</strong> Guide d’installation Page 13<br />
Installation du montage sur poteau <strong>AXIS</strong> <strong>T91A</strong>67<br />
1. Reportez-vous à la section Vue d’ensemble du matériel, page 10 pour<br />
des informations sur les pièces fournies.<br />
1. Acheminez le câble réseau dans le support, en le fixant dans le<br />
dispositif de support du câble (figure 4).<br />
2. Utilisez les bandes en acier fournies pour fixer le support au poteau<br />
et les resserrer à l’aide de l’outil de fixation des bandes en acier (non fourni).<br />
Figure 4<br />
Support<br />
du câble<br />
Support<br />
du câble<br />
Câble<br />
Bandes en acier<br />
Figure 5<br />
Montage sur poteau<br />
3. Reportez-vous au guide d’installation fourni avec la caméra réseau pour savoir comment fixer<br />
la caméra au support.<br />
FRANÇAIS
Page 14 <strong>AXIS</strong> <strong>T91A</strong> Guide d’installation<br />
Données techniques<br />
Dimensions (largeur/<br />
hauteur/profondeur)<br />
<strong>AXIS</strong> <strong>T91A</strong>61<br />
Montage mural<br />
<strong>AXIS</strong> <strong>T91A</strong>64<br />
Montage d’angle<br />
Dispositif de fixation du support de montage mural et de montage d’angle<br />
<strong>AXIS</strong> <strong>T91A</strong>67<br />
Montage sur poteau<br />
140 x 200 x 270 mm 345 x 200 x 185 mm 140 x 200 x 270 mm<br />
Poids 1 350 g 1 270 g 1 170g<br />
Dimensions du poteau - - 100 à 150 mm<br />
Poids maximum 15 kg 15 kg 15 kg<br />
Matériau Aluminium Aluminium Aluminium<br />
Code de couleur NCS S 1002-B NCS S 1002-B NCS S 1002-B<br />
Trous de fixation (diamètre)<br />
9 mm 10 mm -<br />
96 mm<br />
124 mm
<strong>AXIS</strong> <strong>T91A</strong> Installationsanleitung Page 15<br />
<strong>AXIS</strong> <strong>T91A</strong> Montagezubehör<br />
Dieses Handbuch enthält Anweisungen zur Anbringung von Wand-, Eck- und Masten-Halterungen<br />
für Netzwerk-Kameras von Axis. Alle weiteren Hinweise zur Verwendung der Axis Netzwerk-Kamera<br />
finden Sie im Installationshandbuch und im Benutzerhandbuch, die auf unserer Webseite unter<br />
www.axis.com/techsup zur Verfügung stehen.<br />
Installationsschritte<br />
• Prüfen Sie, ob alle in der nachfolgenden Liste<br />
aufgeführten Komponenten vorhanden sind.<br />
• Hardwareübersicht. Siehe Seite 16<br />
• Installationsanweisungen für:<br />
• <strong>AXIS</strong> <strong>T91A</strong>61 Wandhalterung auf Seite 17<br />
• <strong>AXIS</strong> <strong>T91A</strong>64 Eckhalterung auf Seite 18<br />
• <strong>AXIS</strong> <strong>T91A</strong>67 Masten-Halterung auf Seite 19<br />
Inhalt des Produktpakets<br />
In diesem Dokument wird die Montage der <strong>AXIS</strong> <strong>T91A</strong>61 Wandhalterung, der <strong>AXIS</strong> <strong>T91A</strong>64<br />
Eckhalterung und der <strong>AXIS</strong> <strong>T91A</strong>67 Masten-Halterung beschrieben. Bitte prüfen Sie den Paketinhalt<br />
für das jeweilige Produkt.<br />
Komponente Modelle/Varianten/Anmerkungen<br />
<strong>AXIS</strong> <strong>T91A</strong>61<br />
<strong>AXIS</strong> <strong>T91A</strong>64<br />
<strong>AXIS</strong> <strong>T91A</strong>67<br />
Bodenplatte mit Wandhalterung<br />
Wichtig!<br />
Verwenden Sie dieses Produkt<br />
unter Beachtung der geltenden<br />
rechtlichen Bestimmungen.<br />
Eckhalterung (<strong>AXIS</strong> <strong>T91A</strong>61 erforderlich)<br />
4 M8x22-Schrauben<br />
Masten-Halterung<br />
Stahlbänder (Stahlbandwerkzeug im Lieferumfang nicht enthalten)<br />
DEUTSCH
Seite 16 <strong>AXIS</strong> <strong>T91A</strong> Installationsanleitung<br />
Hardwareübersicht<br />
Metallstifte<br />
für<br />
vorübergehende<br />
Befestigung<br />
Bodenplatte für Wand-/Eckhalterung<br />
Seitliche Abdeckung<br />
(für Kabel<br />
abnehmen)<br />
Feststellstift<br />
Löcher für<br />
Befestigungsschrauben<br />
(6)<br />
Wand-/Eck-/Masten-Halterung<br />
Eckhalterung<br />
Torx T30-<br />
Schrauben (3)<br />
Aussparungen für<br />
Kamerabefestigungen (3)<br />
Sicherheitsdraht<br />
Stahlbänder<br />
(Stahlbandwerkzeug erforderlich<br />
- im Lieferumfang nicht enthalten)<br />
Schraubloch (oben)<br />
Wird in dieser<br />
Richtung<br />
angebracht<br />
Masten-Halterung
<strong>AXIS</strong> <strong>T91A</strong> Installationsanleitung Page 17<br />
Montage der <strong>AXIS</strong> <strong>T91A</strong>61 Wandhalterung<br />
1. Informationen zu den Zubehörteilen finden Sie unter Hardwareübersicht,<br />
auf Seite 16.<br />
2. Verlegen Sie das Netzwerkkabel.<br />
3. Bringen Sie die Bodenplatte an der gewünschten Position an. Verwenden<br />
Sie Schrauben, die für das Wandmaterial sowie das Gewicht der Kamera<br />
und des Trägers geeignet sind.<br />
4. Sie können die Wandhalterung vorübergehend an der Bodenplatte einhaken, damit sich das<br />
Kabel leichter durch die Halterung führen lässt (Abb. 1 & 2):<br />
Haltestifte<br />
Abb. 1<br />
Schieben Sie die Halterung<br />
zwischen die Haltestifte<br />
auf die Bodenplatte<br />
Abb. 2<br />
Klappen Sie die<br />
Wandhalterung zur<br />
Seite, um sie vorübergehend<br />
zu befestigen<br />
Feststellstift<br />
5. Führen Sie das Netzwerkkabel durch die Wandhalterung und sichern Sie es im Kabelhalter<br />
(Abb. 3).<br />
6. Drücken Sie den Feststellstift und lösen Sie die vorübergehende Befestigung der<br />
Wandhalterung (Abb. 2).<br />
7. Befestigen Sie die Wandhalterung mit den Schrauben an der Bodenplatte.<br />
Abb. 3<br />
Kabel Kabel<br />
Halterung<br />
8. Informationen darüber, wie die Kamera an der Halterung angebracht wird, finden Sie im<br />
Installationshandbuch zur Netzwerk-Kamera.<br />
DEUTSCH
Seite 18 <strong>AXIS</strong> <strong>T91A</strong> Installationsanleitung<br />
Montage der <strong>AXIS</strong> <strong>T91A</strong>64 Eckhalterung<br />
1. Informationen zu den Zubehörteilen finden Sie unter Hardwareübersicht,<br />
auf Seite 16.<br />
2. Bringen Sie den Eckhalterung an der gewünschten Position an.<br />
Verwenden Sie dabei Schrauben, die für das Wandmaterial sowie das<br />
Gewicht der Kamera und des Trägers geeignet sind.<br />
3. Befestigen Sie mit den mitgelieferten Schrauben die Bodenplatte an der<br />
Eckhalterung.<br />
4. Sie können die Wandhalterung vorübergehend an der Bodenplatte einhaken, damit sich das<br />
Kabel leichter durch die Halterung führen lässt (Abb. 1 & 2):<br />
Haltestifte<br />
Abb. 1<br />
Schieben Sie die Halterung<br />
zwischen die Haltestifte<br />
auf die Bodenplatte<br />
Abb. 2<br />
Klappen Sie die<br />
Wandhalterung zur<br />
Seite, um sie vorübergehend<br />
zu befestigen<br />
Feststellstift<br />
5. Führen Sie das Netzwerkkabel durch die Wandhalterung und sichern Sie es im Kabelhalter<br />
(Abb. 3).<br />
6. Drücken Sie den Feststellstift und lösen Sie die vorübergehende Befestigung der<br />
Wandhalterung (Abb. 2).<br />
7. Befestigen Sie die Wandhalterung mit den mitgelieferten Schrauben an der Bodenplatte.<br />
Abb. 3<br />
Kabel<br />
Halterung<br />
Kabel<br />
8. Informationen darüber, wie die Kamera an der Halterung angebracht wird, finden Sie im<br />
Installationshandbuch zur Netzwerk-Kamera.
<strong>AXIS</strong> <strong>T91A</strong> Installationsanleitung Page 19<br />
Montage der <strong>AXIS</strong> <strong>T91A</strong>67 Masten-Halterung<br />
1. Informationen zu den Zubehörteilen finden Sie unter<br />
Hardwareübersicht, auf Seite 16.<br />
1. Führen Sie das Netzwerkkabel durch die Halterung und sichern Sie es<br />
im Kabelhalter (siehe Abb. 4).<br />
2. Bringen Sie die Halterung unter Verwendung der mitgelieferten<br />
Stahlbänder am Mast an und ziehen Sie sie mit dem Werkzeug für Stahlbänder (nicht im<br />
Lieferumfang enthalten) fest.<br />
Abb. 4<br />
Kabel<br />
Halterung<br />
Kabel<br />
Halterung<br />
Kabel<br />
Stahlbänder<br />
Abb. 5<br />
Masten-Halterung<br />
3. Informationen darüber, wie die Kamera an der Halterung angebracht wird, finden Sie im<br />
Installationshandbuch zur Netzwerk-Kamera.<br />
DEUTSCH
Seite 20 <strong>AXIS</strong> <strong>T91A</strong> Installationsanleitung<br />
Technische Daten<br />
<strong>AXIS</strong> <strong>T91A</strong>61<br />
Wandhalterung<br />
Bodenplatte für Wand-/Eckhalterung<br />
<strong>AXIS</strong> <strong>T91A</strong>64<br />
Eckhalterung<br />
<strong>AXIS</strong> <strong>T91A</strong>67<br />
Masten-Halterung<br />
Größe (Breite/Höhe/Tiefe) 140 x 200 x 270 mm 345 x 200 x 185 mm 140 x 200 x 270 mm<br />
Gewicht 1.350 g 1.270 g 1.170 g<br />
Größe des Masts - - 100 - 150 mm<br />
Max. zulässiges Gewicht 15 kg 15 kg 15 kg<br />
Material Aluminium Aluminium Aluminium<br />
Farbcode NCS S 1002-B NCS S 1002-B NCS S 1002-B<br />
Montagebohrung<br />
(Durchmesser)<br />
9 mm 10 mm -<br />
96 mm<br />
124 mm
Guida all’installazione per le staffe <strong>AXIS</strong> <strong>T91A</strong> Page 21<br />
Staffe <strong>AXIS</strong> <strong>T91A</strong><br />
Questa guida all'installazione fornisce le istruzioni per l'installazione delle staffe a parete, ad<br />
angolo o su un palo delle videocamere di rete Axis. Per altre informazioni relative all'utilizzo delle<br />
videocamere di rete di Axis, vedere la Guida all'installazione e la Guida per l'utente disponibili sul<br />
sito web www.axis.com/techsup.<br />
Procedura di installazione<br />
• Controllare il contenuto della confezione utilizzando<br />
l'elenco fornito di seguito.<br />
• Panoramica dell'hardware. Vedere la Pagina 22<br />
• Istruzioni per l'installazione di:<br />
• <strong>AXIS</strong> <strong>T91A</strong>61 Staffa per pareti; vedere a Pagina 23<br />
• <strong>AXIS</strong> <strong>T91A</strong>64 Staffa per angoli; vedere a Pagina 24<br />
• <strong>AXIS</strong> <strong>T91A</strong>67 Staffa per pali; vedere a Pagina 25<br />
Contenuto della confezione<br />
Questo documento illustra la procedura di installazione della staffa per pareti <strong>AXIS</strong> <strong>T91A</strong>61, della<br />
staffa per angoli <strong>AXIS</strong> <strong>T91A</strong>64 e della staffa per pali <strong>AXIS</strong> <strong>T91A</strong>67. Controllare che tutti i<br />
componenti siano presenti nella confezione, a seconda del prodotto acquistato.<br />
Articolo Modelli/varianti/note<br />
<strong>AXIS</strong> <strong>T91A</strong>61<br />
<strong>AXIS</strong> <strong>T91A</strong>64<br />
<strong>AXIS</strong> <strong>T91A</strong>67<br />
Staffa per il montaggio a parete con supporto<br />
Importante!<br />
Il prodotto deve essere utilizzato<br />
in conformità alle leggi e alle<br />
disposizioni locali.<br />
Staffa per il montaggio ad angolo (richiede <strong>AXIS</strong> <strong>T91A</strong>61)<br />
4 viti M8x22<br />
Staffa per il montaggio su palo<br />
Fascette in acciaio (l'attrezzo per il fissaggio delle fascette in acciaio non è<br />
incluso)<br />
ITALIANO
Pagina 22 Guida all'installazione per le staffe <strong>AXIS</strong> <strong>T91A</strong><br />
Panoramica dell’hardware<br />
Supporto per la staffa di montaggio a parete/ad angolo<br />
Linguette in<br />
metallo per<br />
il fissaggio<br />
temporaneo<br />
Copertura laterale<br />
(rimuoverla per<br />
inserire il cavo)<br />
Linguetta di blocco<br />
Fori per<br />
le viti<br />
di montaggio (6)<br />
Staffa per il montaggio ad angolo<br />
Foro per vite<br />
(superiore)<br />
Staffa per il montaggio a parete/ad angolo/su palo<br />
Viti<br />
Torx T30 (3)<br />
Fessure per<br />
i supporti dell'unità (3)<br />
Cavo di sicurezza<br />
Fascette in acciaio<br />
(da fissare con l'apposito attrezzo<br />
non fornito in dotazione)<br />
Montare<br />
in questa<br />
direzione<br />
Supporto per il montaggio<br />
su palo
Guida all’installazione per le staffe <strong>AXIS</strong> <strong>T91A</strong> Page 23<br />
Installazione del supporto per il montaggio a parete<br />
<strong>AXIS</strong> <strong>T91A</strong>61<br />
1. Vedere la sezione Panoramica dell’hardware, a pagina 22 per informazioni<br />
sulle parti fornite.<br />
2. Installare il cavo di rete.<br />
3. Montare il supporto della staffa per il montaggio a parete nella<br />
posizione desiderata utilizzando viti idonee al materiale della parete e al peso della<br />
videocamera e della staffa.<br />
4. La staffa per il montaggio a parete può essere temporaneamente agganciata all'apposito<br />
supporto per rendere più agevole l'inserimento del cavo nella staffa (Figure 1 e 2):<br />
Linguette<br />
Figura 1<br />
Inserire la staffa tra le<br />
linguette sul supporto<br />
della staffa<br />
Figura 2<br />
Ruotare la staffa<br />
su un lato per disporre<br />
del supporto temporaneo<br />
Linguetta di blocco<br />
5. Inserire il cavo di rete nella staffa per il montaggio a parete, fissandolo al supporto del cavo<br />
(Figura 3).<br />
6. Tirare la linguetta di blocco e sganciare la staffa per il montaggio a parete dalla posizione<br />
temporanea (Figura 2).<br />
7. Utilizzare le viti per fissare la staffa per il montaggio a parete all'apposito supporto.<br />
Figura 3<br />
Fermacavo<br />
Cavo<br />
8. Vedere la Guida all'installazione della videocamera per le istruzioni sul fissaggio della<br />
videocamera alla staffa.<br />
ITALIANO
Pagina 24 Guida all'installazione per le staffe <strong>AXIS</strong> <strong>T91A</strong><br />
Installazione del supporto per il montaggio ad angolo<br />
<strong>AXIS</strong> <strong>T91A</strong>64<br />
1. Vedere la sezione Panoramica dell’hardware, a pagina 22 per informazioni<br />
sulle parti fornite.<br />
2. Montare la staffa per il montaggio ad angolo nella posizione desiderata<br />
utilizzando viti idonee al materiale della parete e al peso della<br />
videocamera e della staffa.<br />
3. Fissare il supporto della staffa per il montaggio a parete alla staffa per il montaggio ad<br />
angolo utilizzando le viti fornite in dotazione.<br />
4. La staffa per il montaggio a parete può essere temporaneamente agganciata all'apposito<br />
supporto per rendere più agevole l'inserimento del cavo nella staffa (Figure 1 e 2):<br />
Linguette<br />
Figura 1<br />
Inserire la staffa tra le<br />
linguette sul supporto<br />
della staffa<br />
Figura 2<br />
Ruotare la staffa<br />
su un lato per disporre<br />
del supporto temporaneo<br />
Linguetta di blocco<br />
5. Inserire il cavo di rete nella staffa per il montaggio a parete, fissandolo al supporto del cavo<br />
(Figura 3).<br />
6. Premere la linguetta di blocco e sganciare la staffa per il montaggio a parete dalla posizione<br />
temporanea (Figura 2).<br />
7. Utilizzare le viti fornite in dotazione per fissare la staffa per il montaggio a parete all'apposito<br />
supporto.<br />
Figura 3<br />
Fermacavo<br />
Cavo<br />
8. Vedere la Guida all'installazione della videocamera per le istruzioni sul fissaggio della<br />
videocamera alla staffa.
Guida all’installazione per le staffe <strong>AXIS</strong> <strong>T91A</strong> Page 25<br />
Installazione del supporto per il montaggio su palo<br />
<strong>AXIS</strong> <strong>T91A</strong>67<br />
1. Vedere la sezione Panoramica dell’hardware, a pagina 22 per<br />
informazioni sulle parti fornite.<br />
1. Inserire il cavo di rete nella staffa, fissandolo al fermacavo (vedere la<br />
Figura 4).<br />
2. Utilizzare le fascette in acciaio fornite in dotazione per fissare la staffa sul palo, quindi serrarle<br />
con l'apposito attrezzo (non fornito in dotazione).<br />
Figura 4<br />
Fermacavo<br />
Ferma-<br />
cavo<br />
Cavo<br />
Fascette in<br />
acciaio<br />
Figura 5<br />
Supporto per il montaggio<br />
su palo<br />
3. Vedere la Guida all'installazione fornita con la videocamera per istruzioni su come fissare la<br />
videocamera alla staffa.<br />
ITALIANO
Pagina 26 Guida all'installazione per le staffe <strong>AXIS</strong> <strong>T91A</strong><br />
Dati tecnici<br />
Dimensioni (larghezza/<br />
altezza/profondità)<br />
<strong>AXIS</strong> <strong>T91A</strong>61<br />
Supporto per il<br />
montaggio a parete<br />
Supporto per la staffa di montaggio a parete/ad angolo<br />
<strong>AXIS</strong> <strong>T91A</strong>64<br />
Supporto per il<br />
montaggio ad angolo<br />
<strong>AXIS</strong> <strong>T91A</strong>67<br />
Supporto per il<br />
montaggio su palo<br />
140 x 200 x 270 mm 345 x 200 x 185 mm 140 x 200 x 270 mm<br />
Peso 1350 g 1270 g 1170 g<br />
Dimensioni del palo - - 100 - 150 mm<br />
Peso max. sostenuto 15 kg 15 kg 15 kg<br />
Materiale Alluminio Alluminio Alluminio<br />
Codice colori NCS S 1002-B NCS S 1002-B NCS S 1002-B<br />
Fori di montaggio<br />
(diametro)<br />
9 mm 10 mm -<br />
96 mm<br />
124 mm
<strong>AXIS</strong> <strong>T91A</strong> Guia de instalación Page 27<br />
Accesorios de montaje de <strong>AXIS</strong> <strong>T91A</strong><br />
En esta guía de instalación se proporcionan las instrucciones de instalación de los accesorios de<br />
montaje en pared/esquina/poste de las cámaras de red Axis. Para cualquier otra cuestión relativa al<br />
uso de la cámara de red Axis, consulte la Guía de instalación y el Manual del usuario, disponibles en<br />
www.axis.com/techsup.<br />
Pasos para la instalación<br />
• Verifique el contenido del paquete con la lista que<br />
aparece más abajo<br />
• Presentación del hardware. Consulte la página 28<br />
• Instrucciones de instalación para:<br />
• <strong>AXIS</strong> <strong>T91A</strong>61 Wall Mount en la página 29<br />
• <strong>AXIS</strong> <strong>T91A</strong>64 Corner Mount en la página 30<br />
• <strong>AXIS</strong> <strong>T91A</strong>67 Pole Mount en la página 31<br />
Contenido del paquete<br />
En este documento se describe el procedimiento de instalación para <strong>AXIS</strong> <strong>T91A</strong>61 Wall Mount, <strong>AXIS</strong><br />
<strong>T91A</strong>64 Corner Mount y <strong>AXIS</strong> <strong>T91A</strong>67 Pole Mount. Compruebe el contenido del paquete<br />
correspondiente, en función del producto adquirido.<br />
Artículo Modelos/variantes/notas<br />
<strong>AXIS</strong> <strong>T91A</strong>61<br />
<strong>AXIS</strong> <strong>T91A</strong>64<br />
<strong>AXIS</strong> <strong>T91A</strong>67<br />
Escuadra de montaje en pared incluyendo soporte<br />
¡Importante!<br />
Este producto debe utilizarse de<br />
conformidad con la legislación y<br />
normativas locales.<br />
Escuadra de montaje en esquina (<strong>AXIS</strong> <strong>T91A</strong>61 necesario)<br />
4 tornillos M8x22<br />
Escuadra de montaje en poste<br />
abrazaderas de acero (herramienta para abrazaderas de acero no suministrada)<br />
ESPAÑOL
Página 28 <strong>AXIS</strong> <strong>T91A</strong> Guía de instalación<br />
Presentación del hardware<br />
Lengüetas<br />
metálicas<br />
para soporte<br />
temporal<br />
Cubierta lateral<br />
(extraer para<br />
cableado)<br />
Soporte para escuadra en pared/esquina<br />
Lengüeta de bloqueo<br />
Orificios para<br />
tornillos<br />
de montaje (6)<br />
Escuadra de pared/esquina/poste<br />
Tornillos<br />
Torx T30 (3)<br />
Escuadra de montaje en esquina<br />
Ranuras para<br />
soportes de unidad (3)<br />
Cable de seguridad<br />
Abrazaderas de acero<br />
(herramienta para abrazaderas de acero necesaria<br />
no suministrada)<br />
Orificio para tornillo<br />
(parte superior)<br />
Montaje<br />
en esta<br />
dirección<br />
Montaje en poste
<strong>AXIS</strong> <strong>T91A</strong> Guia de instalación Page 29<br />
Instalación de <strong>AXIS</strong> <strong>T91A</strong>61 Wall Mount<br />
1. Para obtener más información sobre las piezas suministradas, consulte<br />
Presentación del hardware, en la página 28.<br />
2. Extienda los cables de red.<br />
3. Conecte el soporte de escuadra de pared en la posición deseada<br />
utilizando los tornillos más adecuados según el material de la pared y el<br />
peso de la cámara y de la escuadra.<br />
4. La escuadra de pared se puede enganchar al soporte de escuadra de pared para poder extender<br />
fácilmente el cable a través de la escuadra (figuras 1 y 2):<br />
Lengüetas<br />
fig. 1<br />
Deslizar escuadra entre las<br />
lengüetas en el soporte de<br />
escuadra<br />
fig. 2<br />
Inclinar escuadra<br />
de pared hacia el<br />
lado para conseguir<br />
soporte temporal<br />
Lengüeta de bloqueo<br />
5. Extienda el cable de red a través de la escuadra de pared, asegurándolo en el soporte para cable<br />
(fig. 3).<br />
6. Tire de la lengüeta de bloqueo y desenganche la escuadra de pared de la posición temporal<br />
(fig. 2).<br />
7. Utilice los tornillos para asegurar la escuadra de pared al soporte de escuadra de pared.<br />
fig. 3<br />
Soporte Cable<br />
para cable<br />
8. Consulte la Guía de instalación de la cámara de red para obtener instrucciones sobre cómo<br />
conectar la cámara a la escuadra.<br />
ESPAÑOL
Página 30 <strong>AXIS</strong> <strong>T91A</strong> Guía de instalación<br />
Instalación de <strong>AXIS</strong> <strong>T91A</strong>64 Corner Mount<br />
1. Para obtener más información sobre las piezas suministradas, consulte<br />
Presentación del hardware, en la página 28.<br />
2. Conecte la escuadra de esquina en la posición deseada utilizando los<br />
tornillos más adecuados según el material de la pared y el peso de la<br />
cámara y de la escuadra.<br />
3. Conecte el el soporte de escuadra de pared a la escuadra de esquina<br />
mediante los tornillos suministrados.<br />
4. La escuadra de pared se puede enganchar al soporte de escuadra de pared para poder extender<br />
fácilmente el cable a través de la escuadra (figuras 1 y 2):<br />
Lengüetas<br />
fig. 1<br />
Deslizar escuadra entre las<br />
lengüetas en el soporte de<br />
escuadra<br />
fig. 2<br />
Inclinar escuadra<br />
de pared hacia el<br />
lado para conseguir<br />
soporte temporal<br />
Lengüeta de bloqueo<br />
5. Extienda el cable de red a través de la escuadra de pared, asegurándolo en el soporte para cable<br />
(fig. 3).<br />
6. Presione la lengüeta de bloqueo y desenganche la escuadra de pared de la posición temporal<br />
(fig. 2).<br />
7. Utilice los tornillos suministrados para asegurar la escuadra de pared al soporte de escuadra<br />
de pared.<br />
fig. 3<br />
Soporte Cable<br />
para cable<br />
8. Consulte la Guía de instalación de la cámara de red para obtener instrucciones sobre cómo<br />
conectar la cámara a la escuadra.
<strong>AXIS</strong> <strong>T91A</strong> Guia de instalación Page 31<br />
Instalación de <strong>AXIS</strong> <strong>T91A</strong>67 Pole Mount<br />
1. Para obtener más información sobre las piezas suministradas,<br />
consulte Presentación del hardware, en la página 28.<br />
1. Extienda el cable de red a través de la escuadra, asegurándolo en el<br />
soporte para cable (consulte la fig. 4).<br />
2. Utilice las abrazaderas de acero suministradas para conectar la<br />
escuadra al poste y apriételas con una herramienta para abrazaderas de acero (no<br />
suministrada).<br />
fig. 4<br />
Soporte<br />
para cable<br />
Soporte<br />
para cable<br />
Cable<br />
Abrazaderas<br />
de acero<br />
fig. 5<br />
Montaje en poste<br />
3. Consulte la Guía de instalación suministrada con la cámara de red para obtener instrucciones<br />
sobre cómo conectar la cámara a la escuadra.<br />
ESPAÑOL
Página 32 <strong>AXIS</strong> <strong>T91A</strong> Guía de instalación<br />
Datos técnicos<br />
Tamaño (anchura/altura/<br />
profundidad)<br />
<strong>AXIS</strong> <strong>T91A</strong>61<br />
Wall Mount<br />
Soporte para escuadra de pared/esquina<br />
96 mm<br />
<strong>AXIS</strong> <strong>T91A</strong>64<br />
Corner Mount<br />
<strong>AXIS</strong> <strong>T91A</strong>67<br />
Pole Mount<br />
140 x 200 x 270 mm 345 x 200 x 185 mm 140 x 200 x 270 mm<br />
Peso 1.350 g 1.270 g 1.170 g<br />
Tamaño del poste - - 100 - 150 mm<br />
Peso máx. admitido 15 kg 15 kg 15 kg<br />
Material Aluminio Aluminio Aluminio<br />
Código de colores NCS S 1002-B NCS S 1002-B NCS S 1002-B<br />
Orificios de montaje<br />
(diámetro)<br />
9 mm 10 mm -<br />
124 mm
Installation Guide Ver.1.20<br />
<strong>AXIS</strong> <strong>T91A</strong>61/64/67 Printed: July 2009<br />
© Axis Communications AB, 2009 Part No. 36092