OPERATOR'S MANUAL - Ppe-pressure-washer-parts.com
OPERATOR'S MANUAL - Ppe-pressure-washer-parts.com
OPERATOR'S MANUAL - Ppe-pressure-washer-parts.com

You also want an ePaper? Increase the reach of your titles
YUMPU automatically turns print PDFs into web optimized ePapers that Google loves.
OPERATOR’S <strong>MANUAL</strong><br />
<strong>MANUAL</strong> DEL OPERADOR<br />
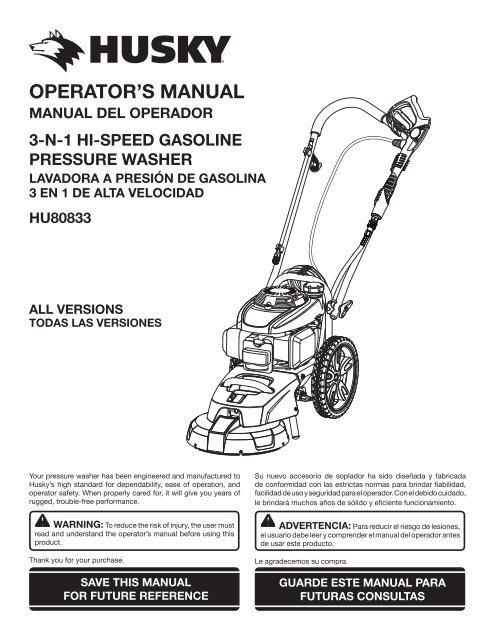
3-N-1 hi-speed gasoline<br />
<strong>pressure</strong> <strong>washer</strong><br />
LAVADORA A PRESIÓN DE GASOLINA<br />
3 EN 1 DE ALTA VELOCIDAD<br />
HU80833<br />
ALL VERSIONS<br />
TODAS LAS VERSIONES<br />
Your <strong>pressure</strong> <strong>washer</strong> has been engineered and manufactured to<br />
Husky’s high standard for dependability, ease of operation, and<br />
operator safety. When properly cared for, it will give you years of<br />
rugged, trouble-free performance.<br />
Su nuevo accesorio de soplador ha sido diseñada y fabricada<br />
de conformidad con las estrictas normas para brindar fiabilidad,<br />
facilidad de uso y seguridad para el operador. Con el debido cuidado,<br />
le brindará muchos años de sólido y eficiente funcionamiento.<br />
WARNING: To reduce the risk of injury, the user must<br />
read and understand the operator’s manual before using this<br />
product.<br />
Thank you for your purchase.<br />
SAVE THIS <strong>MANUAL</strong><br />
FOR FUTURE REFERENCE<br />
ADVERTENCIA: Para reducir el riesgo de lesiones,<br />
el usuario debe leer y <strong>com</strong>prender el manual del operador antes<br />
de usar este producto.<br />
Le agradecemos su <strong>com</strong>pra.<br />
GUARDE ESTE <strong>MANUAL</strong> PARA<br />
FUTURAS CONSULTAS
See this fold-out section for all the figures referenced<br />
in the operator’s manual.<br />
Vea esta sección de la página desplegable para<br />
todas las figuras mencionó en el manual del operador.<br />
i
Fig. 1<br />
E<br />
K<br />
L<br />
A<br />
J<br />
B<br />
D<br />
I<br />
C<br />
M<br />
H<br />
O<br />
N<br />
S<br />
T<br />
F<br />
G<br />
Q<br />
P<br />
U<br />
V<br />
R<br />
A - Nozzle holder with spring clip (sujetador de boquillas con resorte de<br />
soporte)<br />
B - Quick connect nozzles (boquilla de conexión rápida)<br />
C - Soap Blaster nozzle (Soap Blaster boquilla)<br />
D - Nozzle cleaning tool (limpiador del boquilla)<br />
E - Injection hose (manguera de inyección)<br />
F - Self-coiling garden hose (manguera de jardín que se enrollaautomáticamente)<br />
G - Cleaning deck (unidad de limpieza)<br />
H - High <strong>pressure</strong> hose storage (almacenamiento de la manguera de<br />
alta presión)<br />
I - Spray wand (tubo rociador)<br />
J - Garden hose storage (almacenamiento de la manguera de jardín)<br />
K - Handle bar (mango)<br />
L - Trigger with lock out (gatillo con seguro)<br />
M - Trigger handle (mango del gatillo)<br />
N - Trigger handle holders (sujetadores del mango del gatillo)<br />
O - High <strong>pressure</strong> hose (manguera de alta presión)<br />
P - Choke lever (palanca del anegador)<br />
Q - Fuel valve (válvula de <strong>com</strong>bustible)<br />
R - Engine switch (interruptor del motor)<br />
S - Fuel cap (tapa del tanque de <strong>com</strong>bustible)<br />
T - Recoil starter (arrancador retráctil)<br />
U - Fuel tank (tanque del <strong>com</strong>bustible)<br />
V - Oilcap / dipstick (tapa del aceite con varilla de nivel)<br />
Fig. 2 Fig. 3 Fig. 4<br />
B<br />
A<br />
c<br />
D<br />
A<br />
b<br />
e<br />
A - Handle spacers (espaciador de la mango)<br />
B - Handle bar ( barra de la mango)<br />
C - Handle knob (perilla del mango)<br />
D - Acorn nut (tuerca ciega)<br />
E - Handle bolts retracted until flush with<br />
spacer (pernos del mango retraídos hasta<br />
alinearse con el espaciador)<br />
A - Spray wand (tubo rociador)<br />
B - Storage clips ( clip del almacenamiento)<br />
B<br />
a<br />
A - Bottom trigger handle holder (sujetador<br />
inferior del mango del gatillo)<br />
B - Top trigger handle holder (sujetador<br />
superior del mango del gatillo)<br />
ii
Fig. 5 Fig. 9 Fig. 12<br />
a<br />
A<br />
B<br />
A<br />
d<br />
C<br />
c<br />
D<br />
A - Handle lock (seguro del mango)<br />
Fig. 6<br />
A<br />
B<br />
D<br />
C<br />
A - Injection hose filter (filtro de inyección<br />
transparente)<br />
B - Detergent (detergente)<br />
C - Injection hose (manguera de inyección)<br />
D - Injection hose fitting (adaptador de la<br />
manguera de inyección)<br />
Fig. 10<br />
b<br />
A - Quick connect coupler (collarin accíonado<br />
por resorte)<br />
B - Deck inlet plug (clavija de entrada de la<br />
unidad)<br />
C - High <strong>pressure</strong> water supply hose (manguera<br />
de suministro de agua de alta presión)<br />
D - Cleaning deck (unidad de limpieza)<br />
Fig. 13<br />
A - Trigger handle (mango del gatillo)<br />
B - Outlet coupler (acoplador de salida)<br />
C - Spray wand (tubo rociador)<br />
D - Release (aflojar)<br />
B<br />
A<br />
Fig. 7<br />
A<br />
A<br />
b<br />
A - Trigger handle outlet coupler (acoplador de<br />
salida del mango del gatillo)<br />
B - High <strong>pressure</strong> water supply hose (manguera<br />
de suministro de agua de alta presión)<br />
B<br />
C<br />
A - Water intake (entrada de agua)<br />
B - Garden hose (manguera de jardín)<br />
Fig. 11<br />
Fig. 14<br />
A<br />
B<br />
A - Inlet coupler (acoplador de entrada)<br />
B - High <strong>pressure</strong> hose (manguera de<br />
alta presión)<br />
C - Collar (casquillo)<br />
Fig. 8<br />
A<br />
b<br />
A - Collar (casquillo)<br />
B - Threaded nipple (conexión roscada)<br />
A<br />
b<br />
A - Garden hose hanger strap (tira para colgar la<br />
manguera de jardín)<br />
B - Self-coiling garden hose (manguera de<br />
jardín que se enrolla automáticamente)<br />
iii<br />
A - Deck inlet plug (clavija de entrada de la<br />
unidad)<br />
B - Quick connect coupler (collarin accíonado<br />
por resorte)
Fig. 15<br />
Fig. 17 Fig. 20<br />
A<br />
A<br />
A<br />
B<br />
A - Slot (ranura)<br />
B - Lock out (seguro)<br />
B<br />
B<br />
Fig. 21<br />
A<br />
A - Oil cap / dipstick (tapa del aceite con varilla<br />
de nivel)<br />
B - Upper fill level (nivel de carga superior)<br />
E<br />
B<br />
C<br />
Fig. 16<br />
D<br />
C<br />
D<br />
A<br />
A - Funnel (embudo)<br />
B - Fuel cap (tapa del tanque de <strong>com</strong>bustible)<br />
Fig. 18<br />
B<br />
F<br />
A - Recoil starter (arrancador retráctil)<br />
B - Choke (anegador)<br />
C - Start (arranque)<br />
D - Run (marcha)<br />
E - On (encendido)<br />
F - Off (apagado)<br />
G - Fuel valve (válvula de <strong>com</strong>bustible)<br />
Fig. 19<br />
A<br />
G<br />
E<br />
A - Nozzle (boquilla)<br />
B - “Click” (“clic”)<br />
C - Quick-connect collar (casquillo de conexión<br />
rápida)<br />
D - Spray wand (tubo rociador)<br />
E - Soap Blaster (Soap Blaster)<br />
F - Short range detergent application (aplicación<br />
de detergente corto plazo)<br />
G - Long range detergent application (aplicación<br />
de detergente largo plazo)<br />
Fig. 22<br />
A<br />
G<br />
F<br />
A - Trigger (gatillo)<br />
A<br />
A - Engine switch (interruptor del motor)<br />
B<br />
C<br />
A - Detergent container (recipiente del<br />
detergente)<br />
B - Injection hose (manguera de inyección)<br />
C - Soap Blaster nozzle (Soap Blaster<br />
boquilla)<br />
iv
Fig. 23<br />
A<br />
B<br />
Fig. 30<br />
A<br />
B<br />
A - long range (largo plazo)<br />
B - short range (corto plazo)<br />
Fig. 24 Fig. 27<br />
to move the <strong>pressure</strong> <strong>washer</strong><br />
para mover la máquina<br />
A - Nozzle opening (abertura de la boquilla)<br />
B - After tightening securely, nozzle<br />
opening should be pointed in<br />
same direction as spray bar .<br />
(Luego de ajustarla correctamente, la<br />
abertura de la boquilla y el tubo rociador<br />
deben apuntar hacia la misma dirección.)<br />
Fig. 31<br />
A<br />
B<br />
Fig. 25<br />
Fig. 28<br />
A<br />
B<br />
A - Air filter cover (tapa del filtro de aire)<br />
B - Shroud (cubierta)<br />
C - Air filter (filtro de aire)<br />
D - Air filter cover (tapa del filtro de aire)<br />
C<br />
D<br />
Fig. 32<br />
Fig. 26<br />
b<br />
a<br />
A - Paper clip (clips de papel)<br />
B - Nozzle (boquilla)<br />
Fig. 29<br />
to store the machine<br />
para guardar la máquina<br />
b<br />
A<br />
A - To lift the <strong>pressure</strong> <strong>washer</strong> (para levantar la<br />
lavadora a presión)<br />
B - Carrying handles (mangos de traslado)<br />
A - Spray bar (tubo rociador)<br />
B - Paper clip (clips de papel)<br />
v
TABLE OF CONTENTS<br />
ÍNDICE DE CONTENIDO<br />
• Introduction....................................................................................................................................................................... 2<br />
Introducción<br />
• Important Safety Instructions............................................................................................................................................ 3<br />
Instrucciones de seguridad importantes<br />
• Specific Safety Rules........................................................................................................................................................ 4<br />
Reglas de seguridad específicas<br />
• Symbols.........................................................................................................................................................................5-6<br />
Símbolos<br />
• Features............................................................................................................................................................................ 6<br />
Características<br />
• Assembly........................................................................................................................................................................7-9<br />
Armado<br />
• Operation.....................................................................................................................................................................9-11<br />
Funcionamiento<br />
• Maintenance..............................................................................................................................................................11-12<br />
Mantenimiento<br />
• Troubleshooting............................................................................................................................................................... 13<br />
Solución de problemas<br />
• Warranty.......................................................................................................................................................................... 14<br />
Garantía<br />
• Parts Ordering and Service................................................................................................................................Back Page<br />
Pedidos de piezas y servicio............................................................................................................................................. Pág. posterior<br />
introduction<br />
Introducción<br />
This product has many features for making its use more pleasant and enjoyable. Safety, performance, and dependability<br />
have been given top priority in the design of this product making it easy to maintain and operate.<br />
* * *<br />
Este producto ofrece numerosas características para hacer más agradable y placentero su uso. En el diseño de este producto<br />
se ha conferido prioridad a la seguridad, el desempeño y la fiabilidad, por lo cual se facilita su manejo y mantenimiento.<br />
2
IMPORTANT SAFETY INSTRUCTIONS<br />
WARNING:<br />
Read and understand all instructions. Failure to follow<br />
all instructions listed below may result in electric shock,<br />
fire and/or carbon monoxide poisoning which will cause<br />
death or serious personal injury.<br />
READ ALL INSTRUCTIONS<br />
• Know your tool. Read the operator’s manual carefully.<br />
Learn the machine’s applications and limitations as well<br />
as the specific potential hazards related to this tool.<br />
• Keep guards in place and in working order. Never operate<br />
the tool with any guard or cover removed. Make sure<br />
all guards are operating properly before each use.<br />
• Remove adjusting keys and wrenches. Form habit of<br />
checking to see that keys and adjusting wrenches are<br />
removed from tool before turning it on.<br />
• To reduce the risk of injury, keep children and visitors<br />
away. All visitors should wear safety glasses and be kept<br />
a safe distance from work area.<br />
• Keep the area of operation clear of all persons,<br />
particularly small children, and pets.<br />
• Do not operate the engine in a confined space where<br />
dangerous carbon monoxide fumes can collect.<br />
Carbon monoxide, a colorless, odorless, and extremely<br />
dangerous gas, can cause unconsciousness or death.<br />
• Use right tool. Don’t force tool or attachment to do a<br />
job it was not designed for. Don’t use it for a purpose not<br />
intended.<br />
• Dress properly. Do not wear loose clothing, gloves,<br />
neckties, or jewelry. They can get caught and draw you<br />
into moving <strong>parts</strong>. Rubber gloves and nonskid footwear<br />
are re<strong>com</strong>mended when working outdoors. Also wear<br />
protective hair covering to contain long hair.<br />
• Do not operate the equipment while barefoot or when<br />
wearing sandals or similar lightweight footwear. Wear<br />
protective footwear that will protect your feet and improve<br />
your footing on slippery surfaces.<br />
• Exercise caution to avoid slipping or falling.<br />
• Always wear safety glasses with side shields. Everyday<br />
eyeglasses have only impact-resistant lenses; they are<br />
not safety glasses.<br />
• Don’t overreach or stand on unstable support. Keep<br />
proper footing and balance at all times.<br />
• Use only re<strong>com</strong>mended accessories. The use of<br />
improper accessories may cause risk of injury.<br />
• Follow the maintenance instructions specified in this<br />
manual.<br />
• Check damaged <strong>parts</strong>. Before further use of the tool, a<br />
guard or other part that is damaged should be carefully<br />
checked to determine that it will operate properly and<br />
perform its intended function. Check for alignment of<br />
moving <strong>parts</strong>, binding of moving <strong>parts</strong>, breakage of <strong>parts</strong>,<br />
mounting, and any other conditions that may affect its<br />
operation. A guard or other part that is damaged must<br />
be properly repaired or replaced by an authorized service<br />
center to avoid risk of personal injury.<br />
• Never leave tool running unattended. Turn power off.<br />
Don’t leave tool until it <strong>com</strong>es to a <strong>com</strong>plete stop.<br />
• Keep the engine free of grass, leaves, or grease to<br />
reduce the chance of a fire hazard.<br />
• Keep the exhaust pipe free of foreign objects.<br />
• Follow manufacturer’s re<strong>com</strong>mendations for safe<br />
loading, unloading, transport, and storage of<br />
machine.<br />
• Be thoroughly familiar with controls. Know how to stop<br />
the product and bleed <strong>pressure</strong> quickly.<br />
• Keep tool dry, clean, and free from oil and grease.<br />
Always use a clean cloth when cleaning. Never use<br />
brake fluids, gasoline, petroleum-based products, or any<br />
solvents to clean tool.<br />
• Stay alert and exercise control. Watch what you are<br />
doing and use <strong>com</strong>mon sense. Do not operate tool when<br />
you are tired. Do not rush.<br />
• Do not operate the product while under the influence<br />
of drugs, alcohol, or any medication.<br />
• Check the work area before each use. Remove all<br />
objects such as rocks, broken glass, nails, wire, or string<br />
which can be thrown or be<strong>com</strong>e entangled in the<br />
machine.<br />
• Do not use tool if switch does not turn it off. Have<br />
defective switches replaced by an authorized service<br />
center.<br />
• Before cleaning, repairing, or inspecting, shut off the<br />
engine and make certain all moving <strong>parts</strong> have stopped.<br />
Disconnect the spark plug wire, and keep the wire away<br />
from the plug to prevent accidental starting.<br />
• Avoid dangerous environment. Don’t use in damp or<br />
wet locations or expose to rain. Keep work area well<br />
lit.<br />
• Never use in an explosive atmosphere. Normal<br />
sparking of the motor could ignite fumes.<br />
• Do not operate while smoking or near an open<br />
flame.<br />
• Do not operate around dry brush, twigs, cloth rags, or<br />
other flammable materials.<br />
• WARNING: Risk of injection or injury – Do not direct<br />
discharge stream at persons.<br />
3 — English
Specific SAFETY RULES<br />
• Never direct a water stream toward people or pets,<br />
or any electrical device.<br />
• Before starting any cleaning operation, close doors<br />
and windows. Clear the area to be cleaned of debris,<br />
toys, outdoor furniture, or other objects that could create<br />
a hazard.<br />
• Never pick up or carry a machine while the engine is<br />
running.<br />
• Never start the machine if ice has formed in any part<br />
of the equipment.<br />
• Do not use acids, alkalines, solvents, flammable<br />
material, bleaches, or industrial grade solutions<br />
in this product. These products can cause physical<br />
injuries to the operator and irreversible damage to the<br />
machine.<br />
• Always operate the machine on a level surface. If the<br />
engine is on an incline, it could seize due to improper<br />
lubrication (even at the maximum oil level).<br />
• WARNING: High <strong>pressure</strong> jets can be dangerous if<br />
subject to misuse. The jet must not be directed at<br />
persons, animals, electrical devices, or the machine<br />
itself.<br />
• Never attempt to make any adjustments while the<br />
engine (motor) is running (except where specifically<br />
re<strong>com</strong>mended by the manufacturer).<br />
• Protective covers must always cover rotating <strong>parts</strong><br />
when the engine is running.<br />
• Keep cooling air intake (recoil starter area) and muffler<br />
side of the engine at least 3 feet away from buildings,<br />
obstructions, and other <strong>com</strong>bustible objects.<br />
• Keep the engine away from flammables and other<br />
hazardous materials.<br />
• Keep away from hot <strong>parts</strong>. The muffler and other engine<br />
<strong>parts</strong> be<strong>com</strong>e very hot; use caution.<br />
• Do not touch the spark plug and ignition cable when<br />
starting and operating the engine.<br />
• Check fuel hoses and joints for looseness and fuel<br />
leakage before each use.<br />
• Check bolts and nuts for looseness before each use.<br />
A loose bolt or nut may cause serious engine problems.<br />
• Always refuel outdoors. Never refuel indoors or in a<br />
poorly ventilated area.<br />
• keep garden hose away from your feet while operating<br />
this product. A garden hose in your walking path could<br />
be a tripping hazard.<br />
• Never store the machine with fuel in the fuel tank<br />
inside a building where ignition sources are present,<br />
such as hot water and space heaters, clothes dryers,<br />
and the like.<br />
• If the fuel tank has to be drained, do this outdoors.<br />
• To reduce the risk of fire and burn injury, handle fuel<br />
with care. It is highly flammable.<br />
• Do not smoke while handling fuel.<br />
• Add fuel before starting the engine. Never remove the<br />
cap of the fuel tank or add fuel while the engine is running<br />
or when the engine is hot.<br />
• Loosen fuel cap slowly to release <strong>pressure</strong> and to keep<br />
fuel from escaping around the cap.<br />
• Replace all fuel tank and container caps securely.<br />
• Wipe spilled fuel from the unit. Move 30 feet away from<br />
refueling site before starting engine.<br />
• If fuel is spilled, do not attempt to start the engine but<br />
move the machine away from the area of spillage and<br />
avoid creating any source of ignition until fuel vapors<br />
have dissipated.<br />
• Never attempt to burn off spilled fuel under any<br />
circumstances.<br />
• Before storing, allow the engine to cool.<br />
• Store fuel in a cool, well-ventilated area, safely away<br />
from spark and/or flame-producing equipment.<br />
• Store fuel in containers specifically designed for this<br />
purpose.<br />
• Empty fuel tank and restrain the unit from moving<br />
before transporting in a vehicle.<br />
• When servicing use only identical replacement <strong>parts</strong>.<br />
Use of any other <strong>parts</strong> may create a hazard or cause<br />
product damage.<br />
• This product is designed to operate using cold water<br />
only.<br />
• Make sure minimum clearance of 3 feet is maintained<br />
from <strong>com</strong>bustible materials.<br />
• Never spray close to the surface to be cleaned as you<br />
can damage the surface.<br />
• Do not use the spring clip for support of human weight,<br />
playground equipment, or athletic or overhead lifting of a<br />
load. Holds up to 5 lbs.<br />
• Save these instructions. Refer to them frequently and<br />
use them to instruct other users. If you loan someone this<br />
tool, loan them these instructions also.<br />
4 — English
SYMBOLS<br />
The following signal words and meanings are intended to explain the levels of risk associated with this product.<br />
SYMBOL SIGNAL MEANING<br />
DANGER:<br />
WARNING:<br />
CAUTION:<br />
CAUTION:<br />
Indicates an imminently hazardous situation, which, if not avoided, will<br />
result in death or serious injury.<br />
Indicates a potentially hazardous situation, which, if not avoided, could<br />
result in death or serious injury.<br />
Indicates a potentially hazardous situation, which, if not avoided, may result<br />
in minor or moderate injury.<br />
(Without Safety Alert Symbol) Indicates a situation that may result in property<br />
damage.<br />
Some of the following symbols may be used on this product. Please study them and learn their meaning. Proper interpretation<br />
of these symbols will allow you to operate the product better and safer.<br />
SYMBOL NAME DESIGNATION/EXPLANATION<br />
Safety Alert<br />
Indicates a potential personal injury hazard.<br />
Wet Conditions Alert<br />
Do not expose to rain or use in damp locations.<br />
Read The Operator’s Manual<br />
Eye Protection<br />
Hot Surface<br />
Risk of Injections<br />
Risk of Explosion<br />
Risk of Fire<br />
Toxic Fumes<br />
Kickback<br />
To reduce the risk of injury, user must read and understand operator’s<br />
manual before using this product.<br />
Always wear safety goggles or safety glasses with side shields and, as<br />
necessary, a full face shield when operating this product.<br />
To reduce the risk of injury or damage, avoid contact with any hot<br />
surface.<br />
To reduce the risk of injection or injury, never direct a water stream<br />
towards people or pets or place any body part in the stream. Leaking<br />
hoses and fittings are also capable of causing injection injury. Do not<br />
hold hoses or fittings.<br />
Fuel and its vapors are explosive and can cause severe burns or<br />
death.<br />
Fuel and its vapors are extremely flammable and explosive. Fire can<br />
cause severe burns or death.<br />
Gas products emit carbon monoxide, an odorless, colorless,<br />
poison gas. Breathing carbon monoxide can cause nausea,<br />
fainting, or death.<br />
To reduce the risk of injury from kickback, hold the spray wand securely<br />
with both hands when the machine is on.<br />
5 — English
SYMBOLS<br />
Electric Shock<br />
Failure to use in dry conditions and to observe safe practices can result<br />
in electric shock.<br />
Chemical Burns<br />
To reduce the risk of injury or damage, DO NOT USE ACIDS, ALKALINES,<br />
BLEACHES, SOLVENTS, FLAMMABLE MATERIAL, OR INDUSTRIAL<br />
GRADE SOLUTIONS in this product.<br />
Risk of Injections<br />
To reduce the risk of injection or severe injury, keep hands and feet away<br />
from the cleaning deck while the <strong>pressure</strong> <strong>washer</strong> is running.<br />
Risk of Injections<br />
To reduce the risk of injection or severe injury, only use cleaning deck<br />
on flat, horizontal surfaces. Never lift cleaning deck from the cleaning<br />
surface while operating the <strong>pressure</strong> <strong>washer</strong>.<br />
PRODUCT SPECIFICATIONS<br />
FEATURES<br />
Engine.............................................................................................................................................................Honda GCV160<br />
Fuel Tank Capacity......................................................................................................................................................0.29 gal<br />
Maximum Pounds Per Square Inch Pressure*.......................................................................................................... 2,600 psi<br />
Maximum Gallons Per Minute*...................................................................................................................................2.3 gpm<br />
Maximum Inlet Water Temperature.................................................................................................................................104˚F<br />
*Max. rating determined by PWMA Standard 101<br />
KNOW YOUR <strong>pressure</strong> <strong>washer</strong><br />
See Figure 1.<br />
The safe use of this product requires an understanding of<br />
the information on the tool and in this operator’s manual as<br />
well as a knowledge of the project you are attempting. Before<br />
use of this product, familiarize yourself with all operating<br />
features and safety rules.<br />
cleaning deck<br />
The cleaning deck can be used to clean large flat areas using<br />
less time and energy than when using the spray wand.<br />
engine switch<br />
The engine switch is used in <strong>com</strong>bination with the recoil<br />
starter grip to start the engine. It is also used to turn the<br />
engine off.<br />
Fuel tank<br />
This fuel tank has a maximum capacity of 0.29 gal. Use<br />
unleaded automotive gasoline in the engine.<br />
high <strong>pressure</strong> HOSE storage<br />
Once the high <strong>pressure</strong> hose is rolled, hang it on the back<br />
of the machine using the hook-and-loop strap to secure in<br />
place.<br />
HONDA GCV160 engine<br />
This Honda engine enables the <strong>pressure</strong> <strong>washer</strong> to achieve<br />
2,600 psi (pounds per square inch) at a rate of 2.3 gpm<br />
(gallons per minute). Please read the engine manual included<br />
with this product.<br />
nozzle holder with spring clip<br />
The spring clip attached to the nozzle holder allows you to<br />
clip the nozzle holder to the unit or wear it on your belt for<br />
convenience.<br />
recoil starter<br />
The recoil starter is pulled to start the machine.<br />
SOAP BLASTER NOZZLE<br />
The soap blaster nozzle can be easily adjusted for long<br />
range or short range cleaning.<br />
SPARK ARRESTOR<br />
This engine is not factory equipped with a spark arrestor.<br />
In some areas it is illegal to operate an engine without a spark<br />
arrestor. A spark arrestor is available by calling customer<br />
service for assistance.<br />
THERMAL RELIEF VALVE<br />
This pump feature will prevent water temperatures from<br />
reaching harmful levels by releasing a small amount of<br />
water. Once the water has drained, the thermal relief valve<br />
will reset itself.<br />
trigger handle<br />
The trigger handle has a gripping surface that provides added<br />
control of the spray wand and helps reduce fatigue.<br />
trigger with lock out<br />
Pulling the trigger releases a stream of water for high<br />
<strong>pressure</strong> cleaning. The lock out provides protection against<br />
unauthorized use.<br />
6 — English
ASSEMBLY<br />
UNPACKING<br />
This product requires assembly.<br />
n Carefully cut the box down the sides then remove the<br />
product and any accessories from the box. Make sure<br />
that all items listed in the packing list are included.<br />
NOTE: This product is heavy. To avoid back injury, lift with<br />
your legs, not your back, and get help when needed.<br />
n Inspect the product carefully to make sure no breakage<br />
or damage occurred during shipping.<br />
n Do not discard the packing material until you have carefully<br />
inspected and satisfactorily operated the product.<br />
n If any <strong>parts</strong> are damaged or missing, please call<br />
1-866-340-3912 for assistance.<br />
WARNING:<br />
Do not use this product if any <strong>parts</strong> on the Packing List<br />
are already assembled to your product when you unpack<br />
it. Parts on this list are not assembled to the product by<br />
the manufacturer and require customer installation. Use<br />
of a product that may have been improperly assembled<br />
could result in serious personal injury.<br />
PACKING LIST<br />
Pressure Washer<br />
Trigger Handle<br />
25 ft. High Pressure Hose<br />
Self-Coiling Garden Hose<br />
Spray Wand<br />
Quick-Connect Nozzle (3)<br />
Soap Blaster Nozzle<br />
Nozzle Holder with Spring Clip<br />
Nozzle Cleaning Tool<br />
Injection Hose and Filter<br />
Top Trigger Handle Holder<br />
Bottom Trigger Handle Holder<br />
Trigger Handle Holder Screws (4)<br />
Trigger Handle Holder Nuts (4)<br />
Handle Bar<br />
Cleaning deck<br />
4-Cycle Engine Lubricant (SAE 10W30)<br />
Operator’s Manual<br />
WARNING:<br />
If any <strong>parts</strong> are damaged or missing do not operate this<br />
product until the <strong>parts</strong> are replaced. Failure to heed this<br />
warning could result in serious personal injury.<br />
WARNING:<br />
Do not attempt to modify this product or create accessories<br />
not re<strong>com</strong>mended for use with this product. Any<br />
such alteration or modification is misuse and could result<br />
in a hazardous condition leading to possible serious<br />
personal injury.<br />
WARNING:<br />
To prevent accidental starting that could cause serious<br />
personal injury, always disconnect the engine spark plug<br />
wire from the spark plug when assembling <strong>parts</strong>.<br />
INSTALLing the handle bar<br />
See Figures 2 - 3.<br />
n Remove the acorn nuts and handle knobs from frame.<br />
n Retract handle bolts until end of bolts are flush with handle<br />
spacers.<br />
n Install handle bar as shown. Handle bar should rest in<br />
grooves of spacers and holes in handle bar should align<br />
with handle bolts.<br />
n Press handle bolts through openings in handle bar.<br />
n Re-thread knobs on handle bolts and tighten to secure.<br />
n Re-thread acorn nuts on end of handle bolts and tighten<br />
with wrench (not provided).<br />
n Place spray wand into storage clips located on the side<br />
of handle bar.<br />
installing trigger handle holders<br />
See Figures 4 - 5.<br />
n Place top trigger handle holder over handle bar and align<br />
holes.<br />
n Secure using screws and nuts as shown.<br />
n While holding screw with Phillips screwdriver, tighten each<br />
nut with wrench to secure.<br />
n Repeat process to install bottom trigger handle holder.<br />
n Clip flat area of trigger handle into top holder and bottom<br />
ribbed area of trigger handle into bottom holder. Slide<br />
forward until trigger handle rests securely in holders.<br />
n Rotate trigger handle so that bottom edge of handle snaps<br />
into handle lock.<br />
assembling the spray wand<br />
See Figure 6.<br />
n Insert the end of the spray wand into the trigger handle<br />
outlet coupler as shown in figure 6 and push together<br />
until coupler snaps into place.<br />
7 — English
ASSEMBLY<br />
connecting high <strong>pressure</strong> hose to<br />
TRIGGER HANDLE<br />
See Figure 7.<br />
n Screw the collar on the high <strong>pressure</strong> hose into the<br />
trigger handle inlet coupler by turning the hose collar<br />
clockwise.<br />
n Pull on the hose to be certain it is properly secured.<br />
connecting the high <strong>pressure</strong> hose to<br />
the pump<br />
See Figure 8.<br />
n Align the collar on the threaded nipple on the pump.<br />
n Insert the nozzle on the end of the high <strong>pressure</strong> hose<br />
collar into the threaded nipple.<br />
n Turn the collar clockwise to tighten the hose securely to<br />
the pump.<br />
n Pull on the hose to be certain it is properly secured.<br />
attaching INJECTION hose<br />
See Figure 9.<br />
Before detergent can be used with this machine, the injection<br />
hose must be attached.<br />
n Open the cap of your detergent container.<br />
n Push the injection hose filter onto the end of the injection<br />
hose. Insert the injection hose into your cleaning solution<br />
so the injection hose filter rests at the bottom of the<br />
detergent container.<br />
n Push the open end of the injection hose securely over the<br />
fitting as shown in figure 9.<br />
connecting the garden hose to the<br />
<strong>pressure</strong> <strong>washer</strong><br />
See Figures 10 - 11.<br />
The water supply must <strong>com</strong>e from a water main. NEVER use<br />
hot water or water from pools, lakes, etc. For ease of use,<br />
a self-coiling garden hose is provided.<br />
Note: When using the self-coiling garden hose, be sure<br />
that the hose does not be<strong>com</strong>e crimped during use as this<br />
may cause damage to the pump.<br />
Before connecting the garden hose to the <strong>pressure</strong><br />
<strong>washer</strong>:<br />
n Run water through the hose for 30 seconds to clean any<br />
debris from the hose.<br />
n Inspect the screen in the water intake.<br />
n If the screen is damaged, do not use the machine until<br />
the screen has been replaced.<br />
n If the screen is dirty, clean it before connecting the garden<br />
hose to the machine.<br />
To connect the garden hose to the machine:<br />
n If using a garden hose that is not self-coiling, straighten<br />
the garden hose.<br />
NOTE: There must be a minimum of 10 feet of unrestricted<br />
hose between the <strong>pressure</strong> <strong>washer</strong> intake and the hose<br />
faucet or shut off valve (such as a “Y” shut off connector).<br />
n With the hose faucet turned <strong>com</strong>pletely off, attach the<br />
end of the garden hose to the water intake. Tighten by<br />
hand.<br />
n Wrap the garden hose hanger strap around the garden<br />
hose to keep it close to the handle and out of the way.<br />
installing cleaning deck<br />
See Figures 12 - 14.<br />
To install the cleaning deck on the <strong>pressure</strong> <strong>washer</strong>:<br />
n Connect the lower end of the high <strong>pressure</strong> water supply<br />
hose to the cleaning deck by inserting the deck inlet plug<br />
into the quick connect coupler on the water supply hose.<br />
Push ends together until coupler snaps into position.<br />
n Slide cleaning deck and <strong>pressure</strong> <strong>washer</strong> housing together<br />
until the connection is secure.<br />
n Insert upper end of high <strong>pressure</strong> water supply hose into<br />
trigger handle outlet coupler and push ends together until<br />
coupler snaps into position.<br />
To install the cleaning deck on the spray wand:<br />
n Assemble the trigger handle and spray wand as described<br />
previously in this manual.<br />
n Insert cleaning deck inlet plug into the spray wand quick<br />
connect coupler and push ends together until coupler<br />
snaps into position.<br />
WARNING:<br />
To reduce the risk of injection or injury, only use the<br />
cleaning deck on flat, horizontal surfaces. Never lift the<br />
cleaning deck from the cleaning surface while operating<br />
the <strong>pressure</strong> <strong>washer</strong>.<br />
adding LUBRICANT to the engine<br />
See Figure 15.<br />
NOTE: This machine has been shipped with approximately<br />
2 oz. of lubricant in the engine from testing. You must add<br />
lubricant to the engine before starting it the first time.<br />
CAUTION:<br />
Any attempt to start the engine without adding lubricant<br />
will result in engine failure not covered under warranty.<br />
n Place <strong>pressure</strong> <strong>washer</strong> on a flat, level surface.<br />
n Unscrew the oil cap / dipstick by turning counterclockwise.<br />
n Using 4-stroke engine lubricant (SAE 10W30), fill to the<br />
upper level of the oil filter neck (18 oz., 4-cycle engine<br />
lubricant provided).<br />
8 — English
ASSEMBLY<br />
n Replace the oil cap / dipstick and securely tighten.<br />
NOTE: This engine has a total lubricant capacity of 20 oz.<br />
(.6 liters).<br />
adding gasoline to THE FUEL tank<br />
See Figure 16.<br />
WARNING:<br />
Gasoline and its vapors are highly flammable and<br />
explosive. To prevent serious personal injury and property<br />
damage, handle gasoline with care. Keep away from<br />
ignition sources, handle outdoors only, do not smoke<br />
while adding fuel, and wipe up spills immediately.<br />
When adding gas to the <strong>pressure</strong> <strong>washer</strong>, make sure the unit<br />
is sitting on a flat, level surface. If the engine is hot, let the<br />
<strong>pressure</strong> <strong>washer</strong> cool before adding gas. Always fill the<br />
fuel tank outdoors with the machine turned off.<br />
NOTE: Use unleaded gas only. Do not mix lubricant with<br />
gas.<br />
n Before removing the fuel cap, clean the area around it.<br />
Remove the fuel cap.<br />
n Insert a clean funnel into the fuel tank then slowly<br />
pour gasoline into the tank. Fill tank to approximately<br />
1-1/2 in. below the top of the tank neck (this allows for<br />
fuel expansion).<br />
n Replace fuel cap and tighten until the cap “clicks.”<br />
n Clean up any spills before starting the engine.<br />
OPERATION<br />
WARNING:<br />
Do not allow familiarity with the product to make you careless.<br />
Remember that a careless fraction of a second is<br />
sufficient to inflict serious injury.<br />
WARNING:<br />
Always wear safety goggles or safety glasses with side<br />
shields when operating power tools. Failure to do so could<br />
result in objects being thrown into your eyes, resulting in<br />
possible serious injury.<br />
WARNING:<br />
Do not use any attachments or accessories not re<strong>com</strong>mended<br />
by the manufacturer of this product. The use of<br />
attachments or accessories not re<strong>com</strong>mended can result<br />
in serious personal injury.<br />
WARNING:<br />
Never direct a water stream toward people or pets, or<br />
any electrical device. Failure to heed this warning could<br />
result in serious injury.<br />
Applications<br />
You may use this product for the purposes listed below:<br />
• Using cleaning deck: removing dirt and mold from decks<br />
and cement patios<br />
• Using spray wand: cleaning cars, boats, motorcycles,<br />
outdoor furniture, grills, and house siding<br />
9 — English<br />
starting and stopping the <strong>pressure</strong><br />
<strong>washer</strong><br />
See Figures 17 - 18.<br />
caution:<br />
Do not run the pump without the water supply connected<br />
and turned on.<br />
Before starting the engine:<br />
• Connect all hoses.<br />
• Check all fluids (lubricant and gas).<br />
• Turn on the garden hose then squeeze the trigger to<br />
relieve air <strong>pressure</strong>; hold the trigger until a steady stream<br />
of water appears.<br />
To start the engine:<br />
• Turn the fuel valve to the ON position.<br />
• Put the engine switch in the ON position.<br />
• Pull choke.<br />
• Grasp recoil starter and pull slowly until resistance is felt.<br />
Give recoil starter a short, brisk pull to start the engine.<br />
NOTE: Do not allow the recoil starter to snap back after<br />
starting; return it gently to its original place.<br />
• Let engine run for several seconds, then push choke in.<br />
To stop the engine:<br />
• Put the engine switch in the OFF position.<br />
• Turn the fuel valve to the OFF position.<br />
using the spray wand trigger<br />
See Figures 19 - 20.<br />
For greater control and safety, keep both hands on the<br />
trigger handle at all times.<br />
n Pull back and hold the trigger to operate the <strong>pressure</strong><br />
<strong>washer</strong>.
OPERATION<br />
n Release the trigger to stop the flow of water through the<br />
nozzle.<br />
To engage the lock out:<br />
n Push up on the lock out until it clicks into the slot.<br />
To disengage the lock out:<br />
n Push the lock out down and into its original position.<br />
For the most effective cleaning, the spray nozzle should be<br />
between 8 in. and 24 in. from the surface to be cleaned. If<br />
the spray is too close it can damage the cleaning surface.<br />
SELECTing the RIGHT QUICK-CONNECT<br />
NOZZLE FOR THE JOB<br />
See Figure 21.<br />
Before starting any cleaning job, determine the best nozzle<br />
for the job. Each of the nozzles has a different spray<br />
pattern. The nozzle patterns are: 25° (for general purpose<br />
or large surfaces), 15° (for tough jobs), 0° (for spot cleaning<br />
or hard-to-reach areas), and the Soap Blaster nozzle (for<br />
long and short range detergent application).<br />
WARNING:<br />
NEVER change nozzles without locking the lock out on<br />
the trigger handle and never point the wand at your<br />
face or at others. The quick-connect feature contains<br />
small springs that could eject the nozzle with some force.<br />
Failure to heed this may cause personal injury.<br />
Using the quick-connect collar, changing nozzles is easy.<br />
n Turn off the <strong>pressure</strong> <strong>washer</strong> and shut off the water<br />
supply. Pull trigger to release water <strong>pressure</strong>.<br />
To connect a nozzle to the trigger handle:<br />
n Engage the lock out on the trigger handle by pushing up<br />
on the lock out until it clicks into the slot.<br />
n Push the nozzle into the quick-connect collar until it clicks<br />
in place and is secured properly.<br />
To disconnect a nozzle from the trigger handle once the<br />
cleaning job is <strong>com</strong>plete:<br />
n Turn off the <strong>pressure</strong> <strong>washer</strong> and shut off the water<br />
supply. Point nozzle in a safe direction and pull trigger to<br />
release water <strong>pressure</strong>.<br />
n Engage the lock out on the trigger handle by pushing up<br />
on the lock out until it clicks into the slot.<br />
n Remove the nozzle by placing hand over nozzle then<br />
pulling back the quick-connect collar. Place nozzle in the<br />
nozzle holder for storage.<br />
washing with detergent<br />
See Figures 22 - 23.<br />
NOTE: When using detergent, the coiled high <strong>pressure</strong><br />
hose can be relocated to the hook-and-loop strap located<br />
behind the handle bar instead of the strap located on the<br />
carrying handle.<br />
Use only detergents designed for <strong>pressure</strong> <strong>washer</strong>s; household<br />
detergents, acids, alkalines, bleaches, solvents, flammable<br />
material, or industrial grade solutions can damage<br />
the pump. Many detergents may require mixing prior to use.<br />
10 — English<br />
Prepare cleaning solution as instructed on the solution bottle.<br />
n Place the injection hose in the bottom of the detergent<br />
bottle/container.<br />
n Install the Soap Blaster nozzle on the spray wand.<br />
n Spray the detergent on a dry surface using long, even,<br />
overlapping strokes. To prevent streaking, do not allow<br />
detergent to dry on the surface.<br />
For long range detergent application:<br />
With the Soap Blaster nozzle installed on the spray wand and<br />
the engine shut off, pull nozzle up until it clicks into place.<br />
For short range detergent application:<br />
With the Soap Blaster nozzle installed on the spray wand<br />
and the engine turned off, push the Soap Blaster nozzle<br />
down as far as it will go.<br />
Before shutting off the engine:<br />
n Place the injection hose in a bucket of clean water.<br />
n Flush for 1 - 2 minutes (spray clear water through the<br />
spray wand).<br />
n Shut off the engine.<br />
NOTE: Shutting OFF ( O ) the engine will not relieve <strong>pressure</strong><br />
in the system. Point nozzle in a safe direction and pull trigger<br />
to release water <strong>pressure</strong>.<br />
rinsing with the <strong>pressure</strong> <strong>washer</strong><br />
n Turn off the <strong>pressure</strong> <strong>washer</strong> and shut off the water<br />
supply. Point nozzle in a safe direction and pull trigger to<br />
release water <strong>pressure</strong>.<br />
n Engage the lock out on the trigger handle by pushing up<br />
on the lock out until it clicks into the slot.<br />
n Remove the nozzle by placing hand over nozzle then<br />
pulling back the quick-connect collar. Place nozzle in the<br />
nozzle storage area on the top of the machine.<br />
n Select the right nozzle for the job:<br />
• Use medium <strong>pressure</strong> nozzle (green) for items such as<br />
a car or boat.<br />
• Use higher <strong>pressure</strong> nozzle for jobs such as stripping<br />
paint and degreasing the driveway. When using these<br />
nozzles, test a small area first to avoid surface damage.<br />
n Start at the top of the area to be rinsed and work down,<br />
overlapping the strokes.<br />
using the cleaning deck<br />
See Figures 24 - 25.<br />
n Install the cleaning deck and connect the garden hoses<br />
as described in the assembly section of this manual.<br />
n Start the <strong>pressure</strong> <strong>washer</strong> as described earlier in this<br />
manual.<br />
n Walk slowly behind the cleaning deck, cleaning as you<br />
go.<br />
NOTE: If striping or swirling occurs, slow your pace.<br />
If problem continues, see Troubleshooting later in this<br />
manual.
Operation<br />
CAUTION:<br />
Striking any raised obstacle which using with the cleaning<br />
deck will damage the unit. If contact does occur and<br />
causes vibration when operating the <strong>pressure</strong> <strong>washer</strong>,<br />
stop and replace the spray bar. Continuing to operate<br />
the unit without replacing the spray bar could result in<br />
serious injury or damage to the unit.<br />
NOTE: See figure 29 on page 20 for the location of the<br />
spray bar.<br />
lifting and moving the <strong>pressure</strong><br />
<strong>washer</strong><br />
See Figures 26 - 27.<br />
NOTE: The <strong>pressure</strong> <strong>washer</strong> is heavy and may require two<br />
people when lifting.<br />
To lift the <strong>pressure</strong> <strong>washer</strong>:<br />
n Turn the <strong>pressure</strong> <strong>washer</strong> off. Point nozzle in a safe direction<br />
and pull trigger to release water <strong>pressure</strong>.<br />
n Turn fuel valve to OFF position to prevent spilling fuel.<br />
n Lift using the carrying handles.<br />
To move the <strong>pressure</strong> <strong>washer</strong>:<br />
n Turn the <strong>pressure</strong> <strong>washer</strong> off. Point nozzle in a safe direction<br />
and pull trigger to release water <strong>pressure</strong>.<br />
n Tilt the machine toward you until it balances on the wheels<br />
then roll the machine to the desired position.<br />
NOTE: When a detergent bottle is installed, use the garden<br />
hose storage hook-and-loop strap to hold the coils of the<br />
high <strong>pressure</strong> hose while transporting.<br />
MAINTENANCE<br />
WARNING:<br />
When servicing, use only identical replacement <strong>parts</strong>.<br />
Use of any other <strong>parts</strong> may create a hazard or cause<br />
product damage.<br />
WARNING:<br />
Always wear safety goggles or safety glasses with side<br />
shields during power tool operation or when blowing<br />
dust. If operation is dusty, also wear a dust mask.<br />
WARNING:<br />
Before inspecting, cleaning or servicing the machine, shut<br />
off engine, wait for all moving <strong>parts</strong> to stop, and disconnect<br />
spark plug wire and move it away from spark plug.<br />
Failure to follow these instructions can result in serious<br />
personal injury or property damage.<br />
GENERAL MAINTENANCE<br />
Avoid using solvents when cleaning plastic <strong>parts</strong>. Most<br />
plastics are susceptible to damage from various types of<br />
<strong>com</strong>mercial solvents and may be damaged by their use. Use<br />
clean cloths to remove dirt, dust, oil, grease, etc.<br />
WARNING:<br />
Do not at any time let brake fluids, gasoline, petroleumbased<br />
products, penetrating oils, etc., <strong>com</strong>e in contact<br />
with plastic <strong>parts</strong>. Chemicals can damage, weaken or<br />
destroy plastic which may result in serious personal<br />
injury.<br />
Only the <strong>parts</strong> shown on the <strong>parts</strong> list are intended to be<br />
repaired or replaced by the customer. All other <strong>parts</strong> should<br />
be replaced at an authorized service center.<br />
Before running the engine, perform the following preoperation<br />
steps:<br />
n Check that all bolts, nuts, etc., are securely tightened.<br />
n Make sure the air filter is clean.<br />
n Check both the engine lubricant level and the fuel tank<br />
level; refill as needed.<br />
n Inspect the work area for hazards.<br />
n If there is excessive noise or vibration, stop the unit<br />
immediately.<br />
nozzle maintenance<br />
See Figures 28 - 30.<br />
Excessive pump <strong>pressure</strong> (a pulsing sensation felt while<br />
squeezing the trigger) may be the result of a clogged or<br />
dirty nozzle.<br />
n Turn off the <strong>pressure</strong> <strong>washer</strong> and shut off the water<br />
supply. Point nozzle in a safe direction and pull trigger to<br />
release water <strong>pressure</strong>.<br />
n Remove the nozzle from the spray wand.<br />
NOTE: Never point the spray wand at your face.<br />
11 — English
MAINTENANCE<br />
n Using the nozzle cleaning tool provided, free any foreign<br />
materials clogging or restricting the nozzle.<br />
n Using a garden hose, flush debris out of nozzle by back<br />
flushing (running the water through the nozzle backwards<br />
or from the outside to the inside).<br />
n Reconnect the nozzle to the spray wand.<br />
n Turn on the water supply and start the engine.<br />
To clean nozzles on cleaning deck:<br />
n Turn off the <strong>pressure</strong> <strong>washer</strong> and shut off the water<br />
supply. With the surface cleaner on the ground, pull trigger<br />
to release water <strong>pressure</strong>.<br />
n Disconnect cleaning deck from <strong>pressure</strong> <strong>washer</strong> or spray<br />
wand.<br />
n Using a wrench (not provided), remove the nozzle from<br />
the spray bar.<br />
NOTE: Never point the spray bar at your face.<br />
n Using the nozzle cleaning tool provided, free any foreign<br />
materials clogging or restricting the nozzle.<br />
n Using a garden hose, flush debris out of nozzle by back<br />
flushing (running the water through the nozzle backwards<br />
or from the outside to the inside).<br />
n Reconnect the nozzle to the spray bar and tighten securely.<br />
After tightening, make sure the nozzle opening is<br />
pointed in the same direction as the spray bar as shown<br />
in figure 30.<br />
n Reconnect the cleaning deck to the spray wand or <strong>pressure</strong><br />
<strong>washer</strong>.<br />
n Turn on the water supply and start the engine.<br />
cleaning the air filter<br />
See Figure 31.<br />
A dirty air filter will cause starting difficulty, loss of<br />
performance, and shorten the life span of the engine. Check<br />
the air filter monthly. For best performance, replace the air<br />
filter at least once a year.<br />
n Push the tab on the air filter cover to open, then remove<br />
the air filter cover.<br />
n Lift the edge of the air filter carefully and pull it out.<br />
n Lightly tap or blow out dirt particles from filter.<br />
n Reinstall the air filter cover.<br />
NOTE: Make sure the filter is seated properly inside the<br />
cover. Installing the filter incorrectly will allow dirt to enter<br />
the engine, causing rapid engine wear.<br />
STORING the <strong>pressure</strong> <strong>washer</strong><br />
See Figure 32.<br />
Store the <strong>pressure</strong> <strong>washer</strong> with the gas tank empty by either<br />
draining the tank or running the <strong>pressure</strong> <strong>washer</strong> until the<br />
gas runs out. Allow 30 minutes of “cool down” time before<br />
storing the machine. Store in a dry, covered area where the<br />
weather can’t damage it.<br />
It is important to store this product in a frost-free area. Always<br />
empty water from all hoses and the pump before storing.<br />
NOTE: Use of a fuel stabilizer and pump saver will give you<br />
better performance and increase the life of the machine.<br />
Discharge Fuel:<br />
Drain the fuel tank <strong>com</strong>pletely. Stored gas can go stale in<br />
30 days.<br />
Engine Lubricant:<br />
Drain the lubricant and replace with fresh, clean lubricant.<br />
Spark Plug:<br />
n Disconnect spark plug wire and remove the spark plug.<br />
Pour about a teaspoon of clean, air-cooled, four-cycle<br />
lubricant through the spark plug hole into the <strong>com</strong>bustion<br />
chamber.<br />
n Leaving the spark plug out, pull the starter cord two or<br />
three times to coat the inside of the cylinder wall.<br />
n Inspect the spark plug and clean or replace, as necessary.<br />
n Reinstall the spark plug, but leave the spark plug wire<br />
disconnected.<br />
Air Filter:<br />
n Clean the air filter.<br />
Hoses and Pump:<br />
Flush the injection hose with clean water for 1-2 minutes.<br />
Remove all hoses. Empty the pump by pulling on the recoil<br />
starter about 6 times. This should remove most of the liquid<br />
from the pump.<br />
Handle Bar:<br />
NOTE: Before lowering the handle bar, disconnect the high<br />
<strong>pressure</strong> water hose from the trigger handle outlet coupler.<br />
n To lower the handle bar for storage, remove the acorn<br />
nut and knob.<br />
n Rotate handle bar forward to the next indentation in<br />
handle spacer.<br />
n Retighten knob and acorn nut to secure.<br />
preparing for use after storage<br />
n Restore handle to operating position.<br />
n Pull the recoil starter grip three or four times to clean<br />
lubricant from the <strong>com</strong>bustion chamber.<br />
n Remove spark plug from the cylinder. Wipe lubricant from<br />
the spark plug and return it to the cylinder.<br />
n Reconnect the spark plug wire.<br />
n Refuel the machine as described earlier in the operator’s<br />
manual.<br />
12 — English
troubleshooting<br />
Problem Cause Solution<br />
Engine fails to start 1. No fuel in tank 1. Fill tank<br />
2. Fuel valve turned off 2. Turn fuel valve on<br />
3. Engine switch in OFF position 3. Turn engine switch to ON position<br />
4. Spark plug shorted or fouled 4. Replace spark plug<br />
5. Spark plug is broken (cracked<br />
porcelain or electrodes broken)<br />
6. Ignition lead wire shorted, broken,<br />
or disconnected from spark plug<br />
5. Replace spark plug<br />
6. Replace lead wire or attach to spark plug<br />
7. Ignition inoperative 7. Contact authorized service center<br />
Engine hard to start 1. Water in gasoline 1. Drain entire system and refill with fresh fuel<br />
2. Weak spark at spark plug 2. Contact authorized service center<br />
Engine lacks power 1. Dirty air filter 1. Clean or replace air filter<br />
Detergent fails to mix with<br />
spray<br />
Pump doesn’t produce<br />
<strong>pressure</strong><br />
Machine doesn’t reach high<br />
<strong>pressure</strong><br />
1. Detergent injection hose is not<br />
properly submerged<br />
1. Insert injection hose into detergent<br />
container or detergent bottle<br />
2. High <strong>pressure</strong> nozzle attached 2. Use Soap Blaster Nozzle to apply<br />
detergent<br />
1. Low <strong>pressure</strong> nozzle installed 1. Replace with high <strong>pressure</strong> nozzle<br />
2. Inadequate water supply 2. Provide adequate water flow<br />
3. Trigger handle or spray wand leaks 3. Check connections and / or replace trigger<br />
handle or spray wand<br />
4. Nozzle is clogged 4. Clean nozzle<br />
5. Pump is faulty 5. Contact authorized service center<br />
6. Air in line 6. Squeeze trigger on trigger handle to remove<br />
air from line<br />
1. Diameter of garden hose is too<br />
small<br />
1. Replace with 3/4 in. garden hose<br />
2. Water supply is restricted 2. Check garden hose for kinks, leaks, and<br />
blockages<br />
3. Not enough inlet water 3. Open water source full force<br />
4. Wrong nozzle is attached 4. Attach the high <strong>pressure</strong> nozzle<br />
Striping, swirl patterns,<br />
or other marks appear in<br />
cleaned surface<br />
5. Air in hose causing spray bar to turn<br />
too slowly<br />
1. Pace is too fast 1. Slow your pace<br />
2. Cleaning deck brush skirt bristles are<br />
worn<br />
5. Disconnect trigger handle and let water run<br />
until steady stream<br />
2. Replace cleaning deck brush skirt<br />
3. Feet on frame assembly are worn 3. Replace frame assembly feet<br />
4. Air in hose causing spray bar to turn<br />
too slowly<br />
4. Disconnect trigger handle and let water run<br />
until steady stream<br />
13 — English
warranty<br />
LIMITED NON-ENGINE WARRANTY STATEMENT<br />
Techtronic Industries North America, Inc. warrants to the original retail purchaser that this HUSKY ® brand <strong>pressure</strong><br />
<strong>washer</strong> is free from defect in material and workmanship and agrees to repair or replace, at Techtronic Industries North<br />
America, Inc.’s discretion, any defective product free of charge within this time period from the date of purchase:<br />
Two years if the product is used for personal, family or household use.<br />
This warranty extends to the original retail purchaser only and <strong>com</strong>mences on the date of the original retail purchase.<br />
Any part of this product found in the reasonable judgment of Techtronic Industries North America, Inc. to be defective<br />
in material or workmanship will be repaired or replaced, without charge for <strong>parts</strong> and labor, by an Authorized Service<br />
Center for HUSKY ® brand <strong>pressure</strong> <strong>washer</strong>s (Authorized HUSKY ® Service Center).<br />
The product, including any defective part, must be returned to an Authorized HUSKY ® Service Center within the<br />
warranty period. The expense of delivering the product to the service center for warranty work and the expense of<br />
returning it back to the owner after repair or replacement will be paid for by the owner. Techtronic Industries North<br />
America, Inc.’s responsibility in respect to claims is limited to making the required repairs or replacements and no<br />
claim of breach of warranty shall be cause for cancellation or rescission of the contract of sale of any HUSKY ® brand<br />
<strong>pressure</strong> <strong>washer</strong>. Proof of purchase will be required by the dealer to substantiate any warranty claim. All warranty<br />
work must be performed by an authorized Techtronic Industries North America, Inc. service center.<br />
This warranty does not cover any product that has been subject to misuse, neglect, negligence, or accident, or that is<br />
used for rental or <strong>com</strong>mercial purposes, or that has been operated in any way contrary to the operating instructions<br />
as specified in the Techtronic Industries North America, Inc. operator’s manual. This warranty does not apply to any<br />
damage to the product that is the result of improper maintenance or to any product that has been altered or modified<br />
so as to adversely affect the products operation, performance or durability or that has been altered or modified so as<br />
to change its intended use. The warranty does not extend to repairs made necessary by normal wear or by the use<br />
of <strong>parts</strong> or accessories which are either in<strong>com</strong>patible with the HUSKY ® brand <strong>pressure</strong> <strong>washer</strong> or adversely affect its<br />
operation, performance or durability.<br />
In addition, this warranty does not cover:<br />
A. Tune-ups – Air filters, gas filters, spark plugs<br />
B. Wear items – Hoses, connector fittings, spray nozzles, wheels, trigger handle, spray wand, detergent bucket,<br />
detergent tank, deck bristles<br />
Techtronic Industries North America, Inc. reserves the right to change or improve the design of any HUSKY ® brand<br />
<strong>pressure</strong> <strong>washer</strong> without assuming any obligation to modify any product previously manufactured.<br />
ALL IMPLIED WARRANTIES ARE LIMITED IN DURATION TO THE STATED WARRANTY PERIOD. ACCORDINGLY,<br />
ANY SUCH IMPLIED WARRANTIES INCLUDING MERCHANTABILITY, FITNESS FOR A PARTICULAR PURPOSE,<br />
OR OTHERWISE, ARE DISCLAIMED IN THEIR ENTIRETY AFTER THE EXPIRATION OF THE APPROPRIATE ONE-<br />
YEAR, WARRANTY PERIOD. Techtronic Industries North America, INC.’S OBLIGATION UNDER THIS<br />
WARRANTY IS STRICTLY AND EXCLUSIVELY LIMITED TO THE REPAIR OR REPLACEMENT OF DEFECTIVE PARTS<br />
AND Techtronic Industries North America, INC. DOES NOT ASSUME OR AUTHORIZE ANYONE TO AS-<br />
SUME FOR THEM ANY OTHER OBLIGATION. SOME STATES DO NOT ALLOW LIMITATIONS ON HOW LONG AN<br />
IMPLIED WARRANTY LASTS, SO THE ABOVE LIMITATION MAY NOT APPLY TO YOU. Techtronic Industries<br />
North America, INC. ASSUMES NO RESPONSIBILITY FOR INCIDENTAL, CONSEQUENTIAL OR OTHER DAM-<br />
AGES INCLUDING, BUT NOT LIMITED TO EXPENSE OF RETURNING THE PRODUCT TO AN AUTHORIZED HUSKY ®<br />
SERVICE CENTER AND EXPENSE OF DELIVERING IT BACK TO THE OWNER, MECHANIC’S TRAVEL TIME, TELE-<br />
PHONE OR TELEGRAM CHARGES, RENTAL OF A LIKE PRODUCT DURING THE TIME WARRANTY SERVICE IS<br />
BEING PERFORMED, TRAVEL, LOSS OR DAMAGE TO PERSONAL PROPERTY, LOSS OF REVENUE, LOSS OF<br />
USE OF THE PRODUCT, LOSS OF TIME, OR INCONVENIENCE, SOME STATES DO NOT ALLOW THE EXCLUSION<br />
OR LIMITATION OF INCIDENTAL OR CONSEQUENTIAL DAMAGES, SO THE ABOVE LIMITATION OR EXCLUSION<br />
MAY NOT APPLY TO YOU.<br />
This warranty gives you specific legal rights, and you may also have other rights which vary from state to state.<br />
This warranty applies to all HUSKY ® brand <strong>pressure</strong> <strong>washer</strong> manufactured by Techtronic Industries North America,<br />
Inc. and sold in the United States and Canada.<br />
To locate your nearest Authorized HUSKY ® Service Center, dial 1-866-340-3912.<br />
14 — English
INSTRUCCIONES DE SEGURIDAD IMPORTANTES<br />
ADVERTENCIA:<br />
Lea y <strong>com</strong>prenda todas las instrucciones. El<br />
incumplimiento de todas las instrucciones siguientes<br />
puede causar descargas eléctricas, incendio o<br />
intoxicación por monóxido de carbono, lo cual puede<br />
causar la muerte o lesiones graves.<br />
LEA TODAS LAS INSTRUCCIONES<br />
• Familiarícese con la herramienta. Lea cuidadosamente<br />
el manual del operador. Aprenda los usos y limitaciones<br />
de la máquina, así <strong>com</strong>o los posibles peligros específicos<br />
de esta herramienta.<br />
• Mantenga las protecciones en su lugar y en buenas<br />
condiciones de trabajo. Nunca utilice la herramienta<br />
con ninguna de las protecciones o cubiertas quitadas.<br />
Asegúrese de que todas las protecciones estén<br />
funcionando de forma correcta antes de utilizar la unidad.<br />
• Retire toda llave y herramienta de ajuste. Adquiera el<br />
hábito de verificar que se haya retirado de la herramienta<br />
eléctrica toda llave y herramienta de ajuste antes de<br />
encenderla.<br />
• Para reducir el riesgo de lesiones, mantenga a alejados<br />
a niños y demás circunstantes. Todos los presentes deben<br />
llevar puestos anteojos de seguridad y permanecer a una<br />
distancia segura del área de trabajo.<br />
• Mantenga alejadas del área de trabajo a todas las<br />
personas, particularmente a los niños de corta edad, y<br />
también a las mascotas.<br />
• No haga funcionar el motor en un espacio confinado<br />
donde se puedan recolectar las emanaciones de monóxido<br />
de carbono. El monóxido de carbono, un gas incoloro,<br />
inodoro y sumamente peligroso, puede causar la pérdida<br />
de la conciencia o la muerte.<br />
• Use la herramienta adecuada a la tarea. No fuerce la<br />
herramienta ni ningún accesorio a efectuar tareas para<br />
las que no están hechos. No la use para propósitos no<br />
indicados en las instrucciones.<br />
• Vístase adecuadamente. No vista ropas, guantes, corbatas<br />
o joyas holgadas. Pueden resultar atrapadas y tirar de usted<br />
hacia piezas en movimiento. Se re<strong>com</strong>iendan guantes y<br />
calzado antiderrapantes al trabajar al aire libre. Si tiene el<br />
pelo largo cúbraselo de alguna manera para contenerlo.<br />
• No accione el equipo cuando esté descalzo o al llevar<br />
puestas sandalias o calzado liviano similar. Use calzado<br />
de seguridad que le proteja sus pies y mejore su postura<br />
en superficies resbaladizas.<br />
• Tenga suma precaución para evitar resbalarse o caer.<br />
• Siempre use gafas de seguridad con protección lateral.<br />
Los anteojos de uso diario tienen lentes resistentes a golpes<br />
únicamente; no son anteojos de seguridad.<br />
• No se estire ni se pare en un soporte inestable. Mantenga<br />
una postura firme y buen equilibrio en todo momento.<br />
• Utilice sólo accesorios re<strong>com</strong>endados. El empleo de<br />
accesorios inadecuados puede presentar riesgos de<br />
lesiones.<br />
• Siga las instrucciones de la mantenimiento especificadas<br />
en este manual.<br />
• Inspeccione las piezas dañadas. Antes de seguir utilizando<br />
la herramienta, es necesario inspeccionar cuidadosamente<br />
toda protección o pieza dañada para determinar si<br />
funcionará correctamente y desempeñará la función a la que<br />
está destinada. Verifique la alineación de las partes móviles,<br />
que no haya atoramiento de las mismas, que no haya piezas<br />
rotas, el montaje de las piezas y cualquier otra condición<br />
que pudiera afectar su funcionamiento. Toda protección<br />
o pieza que esté dañada debe repararse apropiadamente<br />
o reemplazarse en un centro de servicio autorizado.<br />
• Nunca deje desatendida ninguna herramienta en<br />
funcionamiento. Apague la herramienta. No se aleje de<br />
la herramienta hasta no verla <strong>com</strong>pletamente detenida.<br />
• Conserve el motor limpio de césped, hojas o grasa a<br />
fin de reducir el riesgo de incendio.<br />
• Mantenga el tubo de escape libre de objetos extraños.<br />
• Siga las re<strong>com</strong>endaciones del fabricante para lograr la<br />
carga, descarga, transporte y almacenamiento seguros<br />
de la máquina.<br />
• Familiarícese <strong>com</strong>pletamente con los controles. Aprenda<br />
a detener la máquina y a liberar rápidamente la presión.<br />
• Mantenga la herramienta seca, limpia y libre de aceite<br />
y grasa. Siempre utilice un paño limpio para la limpieza<br />
de la unidad. Nunca utilice fluidos para frenos, gasolina,<br />
productos a base de petróleo ni solventes para limpiar la<br />
herramienta.<br />
• Permanezca alerta y en control. Preste atención a lo<br />
que esté haciendo y aplique el sentido <strong>com</strong>ún. No utilice<br />
la herramienta cuando esté cansado. No se apresure.<br />
• No utilice la unidad si se encuentra bajo los efectos de<br />
drogas, alcohol o medicamentos.<br />
• Revise el área de trabajo cada vez antes de utilizar esta<br />
herramienta. Retire todos los objetos <strong>com</strong>o piedras, vidrio<br />
roto, clavos, alambre o cuerda que puedan salir disparados<br />
o enredarse en la máquina.<br />
• No utilice la herramienta si el interruptor no apaga.<br />
Lleve todo interruptor defectuoso a un centro de servicio<br />
autorizado para que lo reparen.<br />
• Antes de limpiar, reparar o inspeccionar la máquina,<br />
apague el motor y cerciórese de que se hayan detenido<br />
todas las partes en movimiento. Desconecte el cable de<br />
la bujía, y mantenga dicho cable alejado de la bujía para<br />
evitar el arranque accidental de la unidad.<br />
• Evite tener un entorno de trabajo peligroso. No utilice<br />
herramientas eléctricas en lugares húmedos o mojados ni<br />
las exponga a la lluvia. Mantenga bien iluminada el área<br />
de trabajo.<br />
• Nunca utilice la unidad en una atmósfera explosiva.<br />
El chispeo normal del motor podría encender los gases<br />
presentes.<br />
• No utilice la unidad mientras fuma ni cerca de llamas<br />
abiertas.<br />
• No utilice la unidad cerca de vegetación o ramas secas,<br />
paños de textiles ni otros materiales inflamables.<br />
• ADVERTENCIA: Riesgo de inyección o de lesión – No<br />
dirija el chorro hacia las personas.<br />
3 — Español
Reglas de seguridad específicas<br />
• Nunca dirija un chorro de agua en dirección de personas<br />
o animales, ni hacia dispositivos eléctricos.<br />
• Antes de iniciar cualquier operación de limpieza, cierre<br />
puertas y ventanas. Despeje el área a limpiar y elimine<br />
cualesquier desechos, juguetes, muebles de patio u otros<br />
objetos que pudiesen crear un peligro.<br />
• Nunca alce ni transporte una máquina mientras se<br />
encuentre en marcha.<br />
• Nunca ponga en marcha la máquina si se ha formado<br />
hielo en cualquier parte del equipo.<br />
• No use soluciones ácidas, alcalinas, solventes,<br />
materiales inflamables o de grado industrial en este<br />
producto. Estos productos pueden causar lesiones físicas<br />
al operador y daños irreparables a la máquina.<br />
• Siempre ponga en marcha la máquina en superficies<br />
niveladas. Si el motor se encuentra inclinado, podría<br />
agarrotarse debido a la lubricación insuficiente (incluso<br />
con el nivel de aceite al máximo).<br />
• ADVERTENCIA: Los chorros de alta presión pueden<br />
ser peligrosos si se utilizan indebidamente. Nunca dirija<br />
el chorro a personas, animales, dispositivos eléctricos ni<br />
a la máquina misma.<br />
• Nunca intente efectuar ajuste alguno mientras el motor<br />
está en marcha (excepto cuando así lo re<strong>com</strong>iende<br />
específicamente el fabricante).<br />
• Cuando el motor esté en marcha, es imperativo que<br />
las cubiertas de protección cubran las partes en<br />
movimiento.<br />
• Mantenga la entrada de aire de enfriamiento (el área<br />
del arrancador retráctil) y el lado del silenciador alejados<br />
un mínimo de 91 cm (tres pies) de cualquier edificación,<br />
obstrucciones y otros objetos <strong>com</strong>bustibles.<br />
• Mantenga alejado el motor de materiales inflamables<br />
y de otros materiales peligrosos.<br />
• Evite el contacto con las partes calientes de la unidad.<br />
El silenciador y otras partes del motor se calientan mucho;<br />
tenga precaución.<br />
• No toque la bujía ni el cable de ignición durante el<br />
arranque ni durante el funcionamiento del motor.<br />
• Cada vez antes de usar la unidad, inspeccione las<br />
mangueras de <strong>com</strong>bustible y los acoplamientos<br />
pertinentes para verificar que no estén flojos ni haya<br />
derrames de <strong>com</strong>bustible.<br />
• Antes de cada uso, inspeccione los pernos y las tuercas<br />
para verificar que están apretados. Una tuerca o perno<br />
sueltos pueden causar problemas graves en el motor.<br />
• Siempre reabastezca el <strong>com</strong>bustible al aire libre.<br />
Nunca reabastezca el <strong>com</strong>bustible en espacios interiores<br />
ni en áreas con ventilación insuficiente.<br />
• Nunca guarde la máquina con <strong>com</strong>bustible en el<br />
tanque dentro de un edificio donde haya presentes<br />
fuentes de ignición, <strong>com</strong>o el agua caliente y calentadores<br />
locales, secadoras de ropa y cosas parecidas.<br />
• Mantenga los pies alejados de la manguera de jardín<br />
al utilizar este producto. Si la manguera de jardín se<br />
interpone en su camino, corre el riesgo de tropezarse.<br />
• Si es necesario vaciar el tanque de <strong>com</strong>bustible,<br />
hágalo al aire libre.<br />
• Para reducir el riesgo de incendio o de lesiones por<br />
quemadura, maneje con cuidado el <strong>com</strong>bustible. Es<br />
sumamente inflamable.<br />
• No fume mientras esté mezclando el <strong>com</strong>bustible o<br />
reabasteciendo el tanque.<br />
• Reabastezca de <strong>com</strong>bustible la unidad antes de<br />
arrancar el motor. Nunca retire la tapa del tanque de<br />
<strong>com</strong>bustible ni lo reabastezca mientras esté encendida<br />
o caliente la unidad.<br />
• Afloje la tapa del tanque de <strong>com</strong>bustible lentamente<br />
para aliviar la presión y evitar que se escape <strong>com</strong>bustible<br />
por la tapa.<br />
• Vuelva a colocar firmemente la tapa del tanque de<br />
<strong>com</strong>bustible y la del recipiente.<br />
• Limpie todo el <strong>com</strong>bustible que se haya derramado<br />
de la unidad. Aléjese por lo menos 9 metros (30 pies)<br />
del sitio de reabastecimiento de <strong>com</strong>bustible antes de<br />
encender el motor.<br />
• Si se derrama <strong>com</strong>bustible, no intente arrancar el<br />
motor; aleje la máquina del área del derramamiento y<br />
evite causar una fuente de ignición hasta que se disipen<br />
los vapores del <strong>com</strong>bustible.<br />
• Nunca intente en ninguna circunstancia eliminar el<br />
<strong>com</strong>bustible derramado quemándolo.<br />
• Antes de guardar la unidad deje que se entrie el motor.<br />
• Guarde la unidad en un lugar frío y bien ventilado, a una<br />
distancia segura de todo equipo generador de chispas o<br />
llamas.<br />
• Guarde el <strong>com</strong>bustible en recipientes diseñados<br />
específicamente para tal fin.<br />
• Antes de transportar la unidad en un vehículo, vacíe<br />
el tanque de <strong>com</strong>bustible e inmovilícela.<br />
• Al dar servicio a la unidad, sólo utilice piezas de<br />
repuesto idénticas. El empleo de piezas diferentes puede<br />
causar un peligro o dañar el producto.<br />
• Este producto está diseñado para funcionar sólo con<br />
agua fría.<br />
• Asegúrese de que haya una distancia mínima de<br />
91 cm (tres pies) de todo material <strong>com</strong>bustible.<br />
• Nunca rocío cierra a la superficie para ser limpiado<br />
<strong>com</strong>o usted puede dañar la superficie.<br />
• No utilizor el resorte de soporte para sostener peso<br />
humano, equipos para juegos o atlético, o una carga<br />
suspendiad. Sostiene hasta approx. 2,29 kg.<br />
• Guarde estas instrucciones. Consúltelas frecuentemente<br />
y utilícelas para instruir a otros usuarios. Si presta a alguien<br />
esta herramienta, facilítele también las instrucciones.<br />
4 — Español
SÍMBOLOS<br />
Las siguientes palabras de señalización y sus significados tienen el objeto de explicar los niveles de riesgo<br />
relacionados con este producto.<br />
SÍMBOLO SEÑAL SIGNIFICADO<br />
PELIGRO:<br />
ADVERTENCIA:<br />
PRECAUCIÓN:<br />
PRECAUCIÓN:<br />
Indica una situación peligrosa inminente, la cual, si no se evita, causará la muerte o lesiones serias.<br />
Indica una situación peligrosa posible, la cual, si no se evita, podría causar la muerte<br />
o lesiones serias.<br />
Indica una situación peligrosa posible, la cual, si no se evita, podría causar lesiones<br />
menores o leves.<br />
(Sin el símbolo de alerta de seguridad) Indica una situación que puede producir daños<br />
materiales.<br />
Es posible que se empleen en esta producto algunos de los siguientes símbolos. Le suplicamos estudiarlos y<br />
aprender su significado. Una correcta interpretación de estos símbolos le permitirá utilizar mejor y de manera más segura<br />
la producto.<br />
SÍMBOLO NOMBRE DENOMINACIÓN/EXPLICACIÓN<br />
Alerta de seguridad<br />
Indica un peligro posible de lesiones personales.<br />
Alerta: Condiciones húmedas No exponga la unidad a la lluvia ni la use en lugares húmedos.<br />
Lea el manual del operador<br />
Protección ocular<br />
Superficie caliente<br />
Riesgo de inyecciones<br />
Riesgo de explosión<br />
Riesgo de incendio<br />
Emanaciones tóxicas<br />
Contragolpe<br />
Para reducir el riesgo de lesiones, el usuario debe leer y <strong>com</strong>prender<br />
el manual del operador antes de usar este producto.<br />
Cuando utilice este producto, póngase siempre gafas de<br />
seguridad o anteojos protectores con protección lateral, según sea<br />
necesario, y una careta protectora <strong>com</strong>pleta.<br />
Para reducir el riesgo de lesiones corporales o daños materiales evite<br />
tocar toda superficie caliente.<br />
Para reducir el riesgo de una inyección o lesión, nunca dirija un chorro<br />
de agua hacia personas o mascotas ni ponga ninguna parte del cuerpo<br />
en el chorro. Las fugas presentes en mangueras y acopladores también<br />
pueden causar lesiones por inyección. No sujete ninguna manguera<br />
ni acoplador.<br />
El <strong>com</strong>bustible y los vapores del mismo son explosivos y pueden<br />
causar quemaduras graves e incluso la muerte.<br />
El <strong>com</strong>bustible y los vapores del mismo son extremadamente<br />
inflamables y explosivos. El fuego puede causar quemaduras graves<br />
e incluso la muerte.<br />
Los aparatos de gasolina emiten monóxido de carbono, un gas tóxico<br />
incoloro e inodoro. Si se inhala monóxido de carbono puede causarse<br />
náusa, desmayo o la muerte.<br />
Para reducir el riesgo de lesiones por un contragolpe, sujete<br />
firmemente el tubo rociador con ambas manos cuando esté<br />
encendida la máquina.<br />
5 — Español
SÍMBOLOS<br />
Descarga eléctrica<br />
Quemaduras químicas<br />
Riesgo de inyecciones<br />
Riesgo de inyecciones<br />
Si no se usa la unidad en condiciones secas y no se observan prácticas<br />
seguras de trabajo, puede producirse una descarga eléctrica.<br />
Para reducir el riesgo de lesiones o daños físicos, NO USE<br />
SOLUCIONES ÁCIDAS, ALCALINAS, BLANQUEADORES,<br />
SOLVENTES, MATERIALES INFLAMABLES O DE GRADO<br />
INDUSTRIAL en este producto.<br />
Para reducir el riesgo de inyección o lesión grave. Mantenga las<br />
manos y los pies alejados de la unidad mientras la lavadora a presión<br />
está en funcionamiento.<br />
Para reducir el riesgo de inyección o lesión grave. Use la unidad<br />
de limpieza sólo sobre superficies planas y horizontales. Nunca<br />
levante la unidad de limpieza de la superficie de limpieza al utilizar<br />
la lavadora a presión.<br />
CARACTERÍSTICAS<br />
ESPECIFICACIONES DEL PRODUCTO<br />
Motor.........................................................................................................................................................................Honda GCV160<br />
Capacidad del tanque de <strong>com</strong>bustible.................................................................................................................1,1 litros (0,29 gal)<br />
Presión máxima*.............................................................................................................................................17 930 kPa (2 600 psi)<br />
Flujo máximo*.................................................................................................................................................... 9,09 LPM (2,3 gpm)<br />
Temperatura máxima de agua de cala..........................................................................................................................40 ˚C (104 ˚F)<br />
*Máximo que valora determinado por el estándar de PWMA 101<br />
FAMILIARÍCESE CON LA LAVADORA DE<br />
PRESIÓN<br />
Vea la figura 1.<br />
Para usar este producto con la debida seguridad se debe<br />
<strong>com</strong>prender la información indicada en la herramienta misma<br />
y en este manual, y se debe <strong>com</strong>prender también el trabajo<br />
que intenta realizar. Antes de usar este producto, familiarícese<br />
con todas las características de funcionamiento y normas de<br />
seguridad del mismo.<br />
UNIDAD DE LIMPIEZA<br />
La unidad de limpieza permite limpiar extensas áreas planas y<br />
ahorra tiempo y energía en <strong>com</strong>paración con el tubo rociador.<br />
interruptor del motor<br />
El interruptor del motor se utiliza en <strong>com</strong>binación con el mango<br />
del arrancador retráctil para arrancar del motor. Además se<br />
utiliza para apagar del motor.<br />
Tanque de <strong>com</strong>bustible<br />
Este tanque de <strong>com</strong>bustible tiene una capacidad de<br />
1,1 litros (0,29 gal). Use gasolina sin plomo para vehículos.<br />
ALMACENAMIENTO DE LA MANGUERA DE ALTA<br />
PRESIÓN<br />
Una vez que la manguera de alta presión esté enrollada, cuélguela<br />
en la parte trasera de la máquina utilizando la tira de gancho y<br />
lazada para ajustarla correctamente.<br />
MOTOR HONDA GCV160<br />
Este motor de Honda permite a la lavadora a presión alcanzar<br />
2 600 psi (libras por pulg. cuadrada) a una velocidad de<br />
9,09 LPM (2,3 gpm). Lea el manual del motor incluido con este<br />
producto.<br />
6 — Español<br />
SUJETADOR DE BOQUILLAS CON RESORTE DE<br />
SOPORTE<br />
El resorte de soporte unido al sujetador de boquillas permite<br />
fijar este sujetador a la unidad, o permite calzarlo en su cinturón<br />
para mayor <strong>com</strong>odidad.<br />
ARRANCADOR RETRÁCTIL<br />
Con un tirón del arrancador retráctil se arranca el motor.<br />
SOAP BLASTER boquilla<br />
Este soap blaster boquillla puede ser ajustado fácilmente<br />
para limpiar a largo plazo o a corto plazo.<br />
supresor de CHISPAS<br />
Este motor no está equipado de fábrica con un supresor chispas.<br />
En algunas áreas es ilegal el operar un motor sin supresor<br />
de chispas. Hay disponible un supresor de chispas llame al<br />
departamento de atención al consumidor y le brindaremos<br />
asistencia<br />
Válvula de seguridad térmica<br />
Este dispositivo de la bomba evita que la temperatura del agua<br />
alcance un nivel peligroso; para ello, deja salir una pequeña<br />
cantidad de agua. Una vez salida el agua, la válvula de seguridad<br />
térmica se reinicializa automáticamente.<br />
mango del gatillo<br />
El mango del gatillo dispone de una superficie de sujeción<br />
ranurada la cual proporciona control adicional de dicho tubo y<br />
reduce la fatiga del operador.<br />
GATILLO CON SEGURO<br />
Al tirar del gatillo sale un chorro de agua para limpiar con<br />
alta presión. El seguro ofrece protección contra todo uso no<br />
autorizado.
ARMADO<br />
DESEMPAQUETADO<br />
Este producto requiere armarse.<br />
n Corte cuidadosamente los lados de la caja y después<br />
retire la producto y cualesquier accesorios de la caja.<br />
Asegúrese de que estén presentes todos los artículos<br />
enumerados en la lista de empaquetado.<br />
NOTA: Esta producto es pesada. Para evitar sufrir lesiones<br />
en la columna, levante con las piernas, no con la<br />
espalda, y obtenga ayuda cuando sea necesario.<br />
n Inspeccione cuidadosamente la producto para asegurarse<br />
de que no haya sufrido ninguna rotura o daño<br />
durante el transporte.<br />
n No deseche el material de empaquetado hasta que haya<br />
inspeccionado cuidadosamente la producto y la haya<br />
utilizado satisfactoriamente.<br />
n Si hay piezas dañadas o faltantes, le suplicamos llamar<br />
al 1-866-340-3912, donde le brindaremos asistencia.<br />
ADVERTENCIA:<br />
No utilice este producto si alguna pieza incluida en<br />
la lista de contenido ya está ensamblada al producto<br />
cuando lo desempaqueta. El fabricante no ensambla<br />
las piezas de esta lista en el producto. Éstas deben ser<br />
instaladas por el usuario. El uso de un producto que<br />
puede haber sido ensamblado de forma inadecuada<br />
podría causar lesiones personales graves.<br />
LISTA DE EMPAQUETADO<br />
Lavadora de presión<br />
Mango del gatillo<br />
Manguera de alta presión de 7,6 m (25 pies)<br />
Manguera de jardín que se enrolla automáticamente<br />
Tubo rociador<br />
Boquilla de conexión rápida (3)<br />
Soap Blaster boquilla<br />
Sujetador de boquillas con resorte de soporte<br />
Limpiador de boquillas<br />
Manguera y filtro de inyección<br />
Sujetador superior del mango del gatillo<br />
Sujetador inferior del mango del gatillo<br />
Tornillo de sujetador del mango del gatillo (4)<br />
Tuerca de sujetador del mango del gatillo (4)<br />
Barra de la mango<br />
Unidad de limpieza<br />
Lubricante para motor de 4 tiempos (SAE 10W30)<br />
Manual del operador<br />
ADVERTENCIA:<br />
Si hay piezas dañadas o faltantes, no utilice esta<br />
producto sin haber reemplazado todas las piezas. La<br />
inobservancia de esta advertencia podría causar posibles<br />
lesiones serias.<br />
ADVERTENCIA:<br />
No intente modificar esta producto ni hacer accesorios<br />
no re<strong>com</strong>endados para la misma. Cualquier alteración o<br />
modificación constituye maltrato, el cual puede causar<br />
una condición peligrosa, y <strong>com</strong>o consecuencia posibles<br />
lesiones serias.<br />
ADVERTENCIA:<br />
Para evitar un arranque accidental que podría causar<br />
lesiones corporales graves, siempre desconecte el cable<br />
de la bujía del motor de la bujía misma al ensamblar las<br />
piezas.<br />
Instalación del BARRA DE LA MANGO<br />
Vea las figuras 2 y 3.<br />
n Retire del armazón la tuerca ciega y las perillas del<br />
mango.<br />
n Presione los pernos del mango hasta que el extremo de<br />
éstos quede alineado con los espaciadores del mango.<br />
n Instale la barra del mango <strong>com</strong>o se indica. La barra del<br />
mango debe apoyarse en las ranuras de los espaciadores<br />
y los agujeros de esta barra deben alinearse con los<br />
pernos del mango.<br />
n Presione los pernos del mango a través de las aberturas<br />
de la barra del mango.<br />
n Ensarte las perillas en los pernos del mango y ajústelas<br />
correctamente.<br />
n Ensarte las tuercas ciegas en el extremo de los pernos<br />
del mango y ajústelas con una llave (no viene incluida).<br />
n Coloque el tubo rociador en los clips de almacenamiento<br />
ubicados en la barra del mango.<br />
INSTALACIÓN DE LOS SUJETADORES DEL<br />
MANGO DEL GATILLO<br />
Vea las figuras 4 y 5.<br />
n Ubique el sujetador del mango del gatillo superior sobre<br />
la barra del mango y alinee los agujeros del sujetador con<br />
los de la barra.<br />
n Asegure con sus tuercas y nuts <strong>com</strong>o se muestra.<br />
n Mientras sostiene el tornillo con un destornillador Phillips,<br />
ajuste cada tuerca con la llave.<br />
n Repita los pasos para instalar el sujetador del mango del<br />
gatillo inferior.<br />
n Ajuste el área plana del mango del gatillo en el sujetador<br />
superior y el área inferior con ranuras del mango del<br />
gatillo en el sujetador inferior. Deslice hacia delante hasta<br />
que el mango del gatillo se trabe correctamente en los<br />
sujetadores.<br />
7 — Español
ARMADO<br />
n Gire el mango del gatillo para que el borde inferior del mango<br />
encaje en el seguro del mango.<br />
ARMADO DEL TUBO ROCIADOR<br />
Vea la figura 6.<br />
n Introduzca el extremo del tubo rociador en el acoplador de<br />
salida del mango del gatillo, <strong>com</strong>o se indica en la figura 6,<br />
y ejerza presión hasta que el acoplador encaje correctamente.<br />
CóMO CONECTAR LA MANGUERA DE ALTA PRESIóN<br />
AL MANGO DEL GATILLO<br />
Vea la figura 7.<br />
n Enrosque el casquillo de la manguera de alta presión en el<br />
acoplador de entrada el mango del gatillo; para ello, gire a<br />
la derecha el casquillo de la manguera.<br />
n Tire de la manguera para asegurarse de que esté<br />
debidamente asegurada.<br />
CóMO CONECTAR LA MANGUERA DE ALTA PRESIóN<br />
A LA BOMBA<br />
Vea la figura 8.<br />
n Alinee el casquillo con la conexión roscada de la bomba.<br />
n Coloque el extremo del casquillo de la manguera de alta<br />
presión en la conexión roscada.<br />
n Gire a la derecha el casquillo y fije firmemente la manguera<br />
a la bomba.<br />
n Tire de la manguera para asegurarse de que esté<br />
debidamente asegurada.<br />
CóMO CONECTAR LA MANGUERA DE INyECCIóN<br />
Vea la figura 9.<br />
Para poder utilizar detergente con esta máquina debe estar<br />
conectada la manguera de inyección.<br />
n Desmontaje la tapa de recipiente del detergente.<br />
n Empuje el filtro de inyección transparente en el fin de flexible<br />
d’injection. Introduzca la manguera de inyección en la<br />
solución de limpieza para que esta manguera filtre los restos<br />
de la base del recipiente de detergente.<br />
n Monte firmemente el extremo abierto de la manguera<br />
transparente de inyección en el conector anillado, <strong>com</strong>o se<br />
muestra en la figura 9.<br />
CóMO CONECTAR UNA MANGUERA DE jARDÍN A LA<br />
LAVADORA DE PRESIóN<br />
Vea las figuras 10 a 11.<br />
El suministro de agua debe venir de la tubería principal de agua.<br />
NUNCA use agua caliente o agua de piscinas, lagos, etc. Para<br />
facilitar el uso, se proporciona una manguera de jardín que se<br />
enrolla automáticamente.<br />
NOTA: Al usar la manguera de jardín que se enrolla automáticamente,<br />
asegúrese de que no se doble ya que se podría dañar<br />
la bomba.<br />
Antes de conectar una manguera de jardín a la lavadora<br />
de presión:<br />
n Deje correr agua por la manguera durante 30 segundos para<br />
limpiar toda la basura que pueda haber en el interior de la<br />
misma.<br />
n Inspeccione el cedazo de la entrada de agua.<br />
n Si está dañado el cedazo, no utilice la máquina sino hasta<br />
haber reemplazado aquél.<br />
n Si está sucio el cedazo, límpielo antes de conectar la<br />
manguera de jardín a la máquina.<br />
Para conectar una manguera de jardín a la máquina:<br />
n Si utiliza una manguera de jardín que no se enrolla automáticamente,<br />
desenrolle la manguera de jardín.<br />
NOTA: Debe haber un mínimo de 3 metros (10 pies) de<br />
manguera sin ninguna restricción en el flujo de la misma,<br />
entre la entrada de la lavadora de presión y el grifo o válvula<br />
de cierre (<strong>com</strong>o un conector de cierre en “Y”).<br />
n Teniendo el grifo de la manguera <strong>com</strong>pletamente cerrado,<br />
conecte el extremo de la manguera de jardín a la entrada<br />
de agua. Efectúe el apriete con la mano.<br />
n Enrolle la tira para colgar la manguera de jardín alrededor<br />
de ésta de manera que dicha manguera permanezca cerca<br />
del mango y no estorbe.<br />
INSTALACIÓN DE LA UNIDAD DE LIMPIEZA<br />
Vea las figuras 12 a 14.<br />
Para instalar la unidad de limpieza en la lavadora a<br />
presión:<br />
n Conecte el extremo inferior de la manguera de suministro<br />
de agua de la lavadora a presión a la unidad de limpieza<br />
introduciendo la clavija de entrada de la unidad en el collarín<br />
accionado por resortes que se encuentra en la manguera de<br />
suministro de agua. Ejerza presión sobre ambos extremos<br />
hasta que el acoplador encaje correctamente.<br />
n Deslice la unidad de limpieza y el alojamiento de la lavadora<br />
a presión hasta conectarlas correctamente.<br />
n Introduzca el extremo superior de la manguera de suministro<br />
de agua de la lavadora a presión en el acoplador de salida<br />
del mango del gatillo y ejerza presión sobre ambos extremos<br />
hasta que el acoplador encaje correctamente.<br />
Para instalar la unidad de limpieza en el tubo rociador:<br />
n Arme el mango del gatillo y el tubo rociador <strong>com</strong>o se indicó<br />
anteriormente en este manual.<br />
n Introduzca la clavija de entrada de la unidad de limpieza en<br />
el collarín accionado por resortes y empuje ambos extremos<br />
hasta que el acoplador encaje correctamente.<br />
ADVERTENCIA:<br />
Para reducir el riesgo de inyección o lesión, sólo utilice la<br />
unidad de limpieza sobre superficies planas y horizontales.<br />
Nunca levante la unidad de limpieza de la superficie de<br />
limpieza al utilizar la lavadora a presión.<br />
AbASTECIMIENTO DE LubRICANTE DEL MOTOR<br />
Vea la figura 15.<br />
NOTA: Esta máquina se embarcó con cerca de dos onzas de<br />
lubricante de las pruebas en el motor. Es necesario abastecer de<br />
lubricante el motor antes de arrancarlo por primera vez.<br />
PRECAUCIÓN:<br />
Cualquier intento de arrancar el motor sin abastecerlo de<br />
lubricante puede causar la des<strong>com</strong>postura del mismo que<br />
no está cubierta por la garantía.<br />
n Coloque la lavadora de presión sobre una superficie<br />
horizontal nivelada.<br />
8 — Español
ARMADO<br />
n Desenrosque la tapa del aceite con varilla de nivel; para ello,<br />
gírela a la izquierda.<br />
n Vierta el lubricante para motor de cuatro tiempos (SAE<br />
10W30) y llene el depósito hasta el nivel superior del cuello<br />
del filtro de aceite (se suministran 18 onzas de lubricante<br />
para motor de cuatro tiempos).<br />
n Vuelva a colocar la tapa del aceite con varilla de nivel y<br />
apriétela firmemente.<br />
NOTA: Este motor tiene una capacidad de lubricante de 0,6<br />
litros (20 onzas).<br />
AbASTECIMIENTO DEL TANquE DE GASOLINA<br />
Vea la figura 16.<br />
ADVERTENCIA:<br />
La gasolina y los vapores de la misma son extremadamente<br />
inflamables y explosivos. Para evitar lesiones y daños físicos<br />
serios, maneje con cuidado la gasolina. Manténgala lejos de<br />
fuentes de ignición, manéjela solamente al aire libre, no fume<br />
mientras vierta la gasolina y limpie de inmediato cualquier<br />
derramamiento que ocurra.<br />
Al abastecer de gasolina la lavadora de presión, asegúrese de<br />
que la unidad esté asentada en una superficie horizonal nivelada.<br />
Si está caliente el motor, permita que se enfríe la lavadora de<br />
presión antes de reabastecerla de gasolina. SIEMPRE llene el<br />
tanque al aire libre y teniendo apagada la máquina.<br />
NOTA: Use sólo gasolina sin plomo. No mezcle con lubricante<br />
la gasolina.<br />
n Antes de retirar la tapa del <strong>com</strong>bustible, limpie el área<br />
circundante de la unidad. Retire la tapa del <strong>com</strong>bustible.<br />
n Introduzca un embudo limpio en el tanque de <strong>com</strong>bustible<br />
y después vierta lentamente la gasolina en el tanque. Llene<br />
el tanque hasta una altura aproximada de 38 mm (1-1/2<br />
pulg.) abajo de la parte superior del cuello del tanque (para<br />
permitir la expansión del <strong>com</strong>bustible).<br />
n Vuelva a colocar la tapa del <strong>com</strong>bustible y apriétela<br />
firmemente la tapa “clic”.<br />
n Limpie todo <strong>com</strong>bustible derramado antes de encender la<br />
máquina.<br />
FUNCIONAMIENTO<br />
ADVERTENCIA:<br />
No permita que su familarización con las herramientas lo<br />
vuelva descuidado. Tenga presente que un descuido de un<br />
instante es suficiente para causar una lesión grave.<br />
ADVERTENCIA:<br />
Cuando utilice herramientas, póngase siempre gafas de<br />
seguridad o anteojos protectores con protección lateral.<br />
La inobservancia de esta advertencia puede causar el<br />
lanzamiento de objetos a los ojos, y por consecuencia<br />
posibles lesiones serias.<br />
ADVERTENCIA:<br />
No utilice ningún aditamento o accesorio no re<strong>com</strong>endado<br />
por el fabricante de esta herramienta. El empleo de<br />
aditamentos o accesorios no re<strong>com</strong>endandos podría causar<br />
lesiones serias.<br />
ADVERTENCIA:<br />
Nunca dirija un chorro de agua en dirección de personas o<br />
animales, ni hacia dispositivos eléctricos. La inobservancia<br />
de esta advertencia podría causar lesiones serias.<br />
Usos<br />
Esta herramienta puede emplearse para los fines enumerados<br />
abajo:<br />
• Uso de la unidad de limpieza: retire la suciedad y el moho<br />
de las terrazas y patios de cemento<br />
• Uso del tubo rociador: para limpiar vehículos, barcos<br />
deportivos, motocicletas, muebles para el exterior, parrillas<br />
para asar y revestimientos de paredes<br />
ENCENDIDO Y APAGADO DE LA LAVADORA DE<br />
PRESIÓN<br />
Vea las figuras 17 y 18.<br />
precaución:<br />
No ponga en marcha la bomba antes de conectar y abrir el<br />
suministro de agua.<br />
Antes de arrancar el motor:<br />
• Conecte todas las mangueras<br />
• Revise todos los fluidos (lubricante y gasolina)<br />
• Abra el grifo del agua y luego oprima gatillo para purgar<br />
la presión de aire; mantenga oprimido el gatillo hasta que<br />
aparezca un chorro de agua estable.<br />
Para arrancar el motor:<br />
• Ponga la válvula de <strong>com</strong>bustible en la posición ON<br />
(marcha).<br />
• Ponga el interruptor del motor en la posición ON<br />
(marcha).<br />
• Tire anegador.<br />
• Sujete el arrancador retráctil y tire lentamente del mismo<br />
hasta sentir resistencia. Dé al arrancador retráctil un tirón<br />
corto y enérgico para arrancar el motor.<br />
NOTA: No permita que el arrancador retráctil se retraiga<br />
violentamente después de arrancar; regréselo suavemente<br />
a su lugar original.<br />
• Permita que motor corra por varios segundos, entonces<br />
empuje se anegador.<br />
9 — Español
FUNCIONAMIENTO<br />
Para apagar el motor:<br />
• Ponga el interruptor del motor en la posición OFF<br />
(apagado).<br />
• Ponga la válvula de <strong>com</strong>bustible en la posición OFF<br />
(apagado).<br />
uso del mango del gatillo<br />
Vea las figuras 19 y 20.<br />
Para mayor control y seguridad, mantenga ambas manos en<br />
el mango de gatillo todo el tiempo.<br />
n Para iniciar el chorro de agua, oprima y no suelte el gatillo.<br />
n Para interrumpir el flujo del chorro de agua por la boquilla,<br />
suelte el gatillo.<br />
Para accionar el seguro:<br />
n Suba el seguro hasta dejarlo trabado en la ranura.<br />
Para quitar el seguro:<br />
n Baje el seguro a su posición original.<br />
Para lograr la limpieza más eficaz, la boquilla rociadora debe<br />
estar de 203 mm a 610 mm (de 8 pulg. a 24 pulg.) de la superficie<br />
por limpiar. Si está demasiado cerca el chorro, puede dañar la<br />
superficie que está limpiándose.<br />
SELECCIÓN DE LA BOQUILLA CORRECTA DE<br />
CONEXIÓN RÁPIDA PARA CADA TRABAJO<br />
Vea la figura 21.<br />
Antes de empezar cualquier trabajo de limpieza, determine cuál<br />
es la mejor boquilla para el trabajo. Cada una de las boquillas<br />
tiene un patrón de rociado diferente. Los patrones de rociado<br />
son: 25° (para propósito general o superficies grandes), 15°<br />
(para trabajos duros), 0° (para limpiar de lugar o para alto a<br />
alcanza áreas), y este Soap Blaster boquillla (para aplicación<br />
de detergente a largo plazo o a corto plazo ).<br />
ADVERTENCIA:<br />
NUNCA cambie boquillas sin trabar el seguro de apagado<br />
en el mango de gatillo y nunca apunte el rociador hacia<br />
su cara o la de otros. La característica de conexión rápida<br />
contiene resortes pequeños que pueden expulsar la boquilla<br />
con cierta fuerza. La inobservancia de esta advertencia<br />
podría causar lesiones personales.<br />
Con el casquillo de conexión rápida es fácil cambiar la boquilla.<br />
n Apague la lavadora de presión y cierre el suministro de agua.<br />
Oprima el gatillo para purgar el agua.<br />
Para conectar una boquilla el mango de gatillo:<br />
n Accione el seguro el el mango de gatillo; para ello, suba<br />
aquél hasta que se trabe en la ranura.<br />
n Empuje la boquilla hacia el interior del casquillo de conexión<br />
rápida hasta que se trabe en su lugar y quede debidamente<br />
asegurado.<br />
Para desconectar la boquilla el mango de gatillo una vez<br />
<strong>com</strong>enzado el trabajo de limpieza:<br />
n Apague la lavadora de presión y cierre el suministro de agua.<br />
Apunte la boquilla hacia una dirección segura y oprima el<br />
gatillo para purgar el agua.<br />
n Accione el seguro el el mango de gatillo; para ello, suba<br />
aquél hasta que se trabe en la ranura.<br />
n Retire la boquilla del coloque la mano sobre la boquilla y tire<br />
del casquillo de conexión rápida hacia atrás. Para guardar<br />
la boquilla, colóquela en el sujetador de boquillas.<br />
lavado con detergente<br />
Vea las figuras 22 - 23.<br />
NOTA: Cuando utilice detergente, la manguera de alta presión<br />
enrollada puede reubicarse en la tira de gancho y lazada ubicada<br />
detrás de la barra del mango en vez de colocarla en la tira que<br />
está en el mango de traslado.<br />
Use sólo detergentes diseñados para lavadoras de presión;<br />
los detergentes caseros, soluciones ácidas, alcalinas,<br />
blanqueadores, solventes, materiales inflamables o de grado<br />
industrial pueden dañar la bomba. Numerosos detergentes<br />
requieren mezclarse antes de usarse. Prepare la solución de<br />
limpieza de conformidad con las instrucciones de la botella<br />
correspondiente.<br />
n Quite la tapa del recipiente del detergente y vierta detergente<br />
en el recipiente. Vuelva la tapa del recipiente.<br />
n Coloque la boquilla Soap Blaster en el tubo rociador.<br />
n Rocíe el detergente en una superficie seca, con pasadas<br />
largas uniformes traslapadas. Para evitar la formación de<br />
franjas, no permita que seque el detergente en la superficie.<br />
Para aplicación de detergente a largo plazo:<br />
Con el Soap Blaster boquilla instalación el tubo de rociador<br />
y apague el motor, tire la boquilla arriba hasta que se trabe en<br />
su lugar.<br />
Para aplicación de detergente a corto plazo:<br />
Con el Soap Blaster boquilla instalación el tubo de rociador<br />
y apague el motor, empuje la boquilla hacia la Soap Blaster<br />
boquilla hacia abajo por lo que irá.<br />
Antes de apagar el motor:<br />
n Coloque la manguera de inyección en un balde de agua<br />
limpia.<br />
n Lávela internamente durante uno o dos minutos (expulse<br />
agua limpia por el tubo rociador).<br />
n Apague el motor.<br />
NOTA: Apagando el motor, posición ( O ) del interruptor, no se<br />
purga del sistema la presión interna. Apunte la boquilla hacia<br />
una dirección segura y oprima el gatillo para purgar el agua a<br />
presión.<br />
ENJUAGADO CON LA LAVADORA DE<br />
PRESIÓN<br />
n Apague la lavadora de presión y cierre el suministro de agua.<br />
Apunte la boquilla hacia una dirección segura y oprima el<br />
gatillo para purgar el agua.<br />
n Accione el seguro el mango de gatillo; para ello, suba aquél<br />
hasta que se trabe en la ranura.<br />
n Para retirar la boquilla, coloque una mano sobre la boquilla y<br />
luego tire del collar de conexión rápido. Coloque la boquilla<br />
en el área de almacenamiento de la boquilla en la parte<br />
superior de la unidad.<br />
n Siempre utilice la boquilla adecuada a la tarea:<br />
• Use la boquilla de presión baja (la verde) para objetos<br />
<strong>com</strong>o un coche o un bote.<br />
10 — Español
FUNCIONAMIENTO<br />
• Use la boquilla de presión alta (la roja) para tareas <strong>com</strong>o<br />
desprender pintura o desgrasar el camino de entrada.<br />
Cuando utilice estas boquillas, pruebe en un área pequeña<br />
primero para evitar dañar la superficie.<br />
n Comience por la parte superior por enjuagar y avance hacia<br />
abajo, traslapando cada pasada.<br />
USO DE LA UNIDAD DE LIMPIEZA<br />
Vea las figuras 24 - 25.<br />
n Instale la unidad de limpieza y conecte las mangueras de<br />
jardín <strong>com</strong>o se describe en la sección Armado de este<br />
manual.<br />
n Arranque la lavadora a presión <strong>com</strong>o se indicó anteriormente<br />
en este manual.<br />
n Camine lentamente detrás de la unidad de limpieza y vaya<br />
limpiando a medida que avanza.<br />
NOTA: Si la unidad deja marcas en la superficie, disminuya<br />
su marcha. Si el problema continúa, vea la sección Solución<br />
de problemas más adelante en este manual.<br />
PRECAUCIÓN:<br />
Golpear cualquier obstáculo por sobre el nivel del piso con<br />
la unidad de limpieza dañará la unidad. Si esto ocurre y<br />
se produce una vibración al utilizar la lavadora a presión,<br />
detenga la unidad y reemplace el tubo rociador. Si continúa<br />
utilizando la unidad sin reemplazar el tubo rociador, podrán<br />
producirse lesiones graves o daños en la unidad.<br />
NOTA: Vea la figura 29 en la página 20 para conocer la ubicación<br />
del tubo rociador.<br />
CÓMO LEVANTAR Y MOVER LA LAVADORA A<br />
PRESIÓN<br />
Vea las figuras 26 - 27.<br />
NOTA: La lavadora a presión es pesada y posiblemente se<br />
necesiten dos personas para levantarla.<br />
Para levantar la lavadora a presión:<br />
n Apague la lavadora de presión. Apunte la boquilla hacia una<br />
dirección segura y oprima el gatillo para purgar el agua a<br />
presión.<br />
n Ponga la válvula de <strong>com</strong>bustible en la posición OFF<br />
(APAGADO) para evitar el derramarse.<br />
n Levante la unidad por los mangos de traslado.<br />
Para mover la lavadora a presión:<br />
n Apague la lavadora de presión. Apunte la boquilla hacia una<br />
dirección segura y oprima el gatillo para purgar el agua a<br />
presión.<br />
n Incline la máquina hacia usted hasta equilibrarla sobre las<br />
ruedas y después empújela a la posición deseada.<br />
NOTA: Cuando coloque la botella de detergente, utilice la tira<br />
de gancho y lazada de alojamiento de la manguera de jardín<br />
para sostener los rollos de la manguera de alta presión durante<br />
el traslado.<br />
MANTENIMIENTO<br />
ADVERTENCIA:<br />
Al dar servicio a la unidad, sólo utilice piezas de repuesto<br />
idénticas. El empleo de piezas diferentes puede causar un<br />
peligro o dañar el producto.<br />
ADVERTENCIA:<br />
Siempre use gafas de seguridad o anteojos protectores con<br />
protección lateral al usar herramientas eléctricas o al soplar<br />
el polvo con aire <strong>com</strong>primido. Si la operación genera mucho<br />
polvo, también póngase una mascarilla contra el polvo.<br />
ADVERTENCIA:<br />
Antes de inspeccionar, limpiar o dar servicio a la máquina,<br />
apague el motor, espere a que se detengan todas las piezas<br />
en movimiento, desconecte el cable de la bujía y aléjelo de<br />
ésta. El incumplimiento de cualquiera de estas instrucciones<br />
puede causar lesiones serias.<br />
MANTENIMIENTO GENERAL<br />
Evite el empleo de solventes al limpiar piezas de plástico. La<br />
mayoría de los plásticos son susceptibles a diferentes tipos<br />
de solventes <strong>com</strong>erciales y pueden resultar dañados. Utilice<br />
paños limpios para eliminar la suciedad, el polvo, el aceite, la<br />
grasa, etc.<br />
ADVERTENCIA:<br />
No permita en ningún momento que fluidos para<br />
frenos, gasolina, productos a base de petróleo, aceites<br />
penetrantes, etc., lleguen a tocar las piezas de plástico.<br />
Las sustancias químicas pueden dañar, debilitar<br />
o destruir el plástico, lo cual a su vez puede producir<br />
lesiones corporales serias.<br />
Solamente las piezas mostradas en la lista de piezas pueden<br />
ser reparadas o cambiadas por el consumidor. Todas las piezas<br />
restantes deben ser reemplazadas en un centro de servicio<br />
autorizado.<br />
Antes de encender el motor realice los siguientes pasos<br />
previos:<br />
n Verifique que todos los pernos, tuercas, etc., estén<br />
firmemente apretados.<br />
n Asegúrese de que esté limpio el filtro.<br />
n Revise tanto el nivel de lubricante del motor <strong>com</strong>o el nivel<br />
del tanque de <strong>com</strong>bustible; reabastézcalos según sea<br />
necesario.<br />
n Inspeccione el área de trabajo para ver si hay peligros<br />
presentes.<br />
n Si hay ruido o vibración excesivos, apague de inmediato la<br />
unidad.<br />
Mantenimiento de las boquillas<br />
Vea las figuras 28 a 30.<br />
La presión excesiva de la bomba (se siente una sensación de<br />
pulsación al estar oprimiendo el gatillo) puede deberse a que<br />
la boquilla está tapada o sucia.<br />
11 — Español
n Apague la lavadora de presión y cierre el suministro de agua.<br />
Apunte la boquilla hacia una dirección segura y oprima el<br />
gatillo para purgar el agua.<br />
n Retire la boquilla del tubo rociador.<br />
NOTA: Nunca se apunte el tubo rociador a la cara.<br />
n Con el limpiador de boquillas libere toda materia extraña<br />
que tape o restrinja el flujo a través de la boquilla.<br />
n Con una manguera de jardín expulse de la boquilla toda<br />
la basura presente con un contraflujo (haciendo pasar<br />
hacia atrás agua por la boquilla, o sea del exterior hacia el<br />
interior.<br />
n Vuelva a conectar la boquilla al tubo rociador.<br />
n Abra el suministro de agua y arranque el motor.<br />
Para limpiar las boquillas en la unidad de limpieza:<br />
n Apague la lavadora de presión y cierre el suministro de agua.<br />
Coloque el limpiador de superficies en el suelo y oprima el<br />
gatillo para purgar el agua.<br />
n Desconecte la unidad de limpieza de la lavadora a presión<br />
o del tubo rociador.<br />
n Con una llave (no viene incluida), retire la boquilla del tubo<br />
rociador.<br />
NOTA: Nunca coloque el tubo rociador en dirección al<br />
rostro.<br />
n Con el limpiador de boquillas libere toda materia extraña<br />
que tape o restrinja el flujo a través de la boquilla.<br />
n Con una manguera de jardín expulse de la boquilla toda<br />
la basura presente con un contraflujo (haciendo pasar<br />
hacia atrás agua por la boquilla, o sea del exterior hacia el<br />
interior.<br />
n Conecte nuevamente la boquilla al tubo rociador y ajústelo<br />
correctamente. Luego de ajustarla, asegúrese de que la<br />
abertura de la boquilla y el tubo rociador apunten en la<br />
misma dirección, <strong>com</strong>o se indica en la figura 30.<br />
n Conecte nuevamente la unidad de limpieza al tubo rociador<br />
o a la lavadora a presión.<br />
n Abra el suministro de agua y arranque el motor.<br />
LIMPIEZA DEL FILTRO DE AIRE<br />
Vea la figura 31.<br />
Un filtro sucio puede causar dificultades de arranque, pérdida<br />
de rendimiento y acortar la vida útil del motor. Inspeccione<br />
mensualmente el filtro de aire. Para lograr un desempeño<br />
óptimo de la unidad, reemplace el filtro de aire por lo menos<br />
una vez al año.<br />
n Empuje la orejeta la tapa del filtro de aire para abrir y retire<br />
la tapa del filtro de aire.<br />
n Levante cuidadosamente el borde del filtro de aire y<br />
retírelo.<br />
n Golpee levemente o limpie con un chorro de aire toda<br />
partícula de polvo del filtro.<br />
n Vuelva a instalar el filtro.<br />
NOTA: Asegúrese de que el filtro esté asentado correctamente<br />
en el interior de la tapa. Si se instala de forma incorrecta el<br />
filtro el polvo entra en el motor y causa un rápido desgaste<br />
del mismo.<br />
MANTENIMIENTO<br />
GUARDADO DE LA LAVADORA DE PRESIÓN<br />
Vea la figura 32.<br />
Guarde la lavadora de presión con el tanque de gasolina vacío;<br />
para ello, vacíe el tanque o mantenga encendida la máquina<br />
12 — Español<br />
hasta agotar el <strong>com</strong>bustible. Permita un período de enfriamiento<br />
de 30 minutos antes de guardar la máquina. Guarde la unidad<br />
en un lugar seco y cubierto, en el cual no pueda resultar dañada<br />
a la intemperie.<br />
Es importante guardar este producto en un área protegida<br />
contra la congelación. Siempre vacíe todas las mangueras,<br />
la bomba, el tanque de <strong>com</strong>bustible y el balde de detergente<br />
antes de guardar la unidad.<br />
NOTA: Si utiliza un estabilizador de <strong>com</strong>bustible y un protector<br />
de bombas obtendrá un mejor desempeño de la bomba y<br />
aumentará la vida de servicio de la máquina.<br />
Combustible:<br />
Drene <strong>com</strong>pletamente el tanque de <strong>com</strong>bustible. La gasolina<br />
puede echarse a perder en 30 días.<br />
Lubricante del motor:<br />
Drene el lubricante viejo y reemplácelo con lubricante nuevo<br />
limpio.<br />
Bujía:<br />
n Desconecte el cable de la bujía y retire ésta. Vierta cerca<br />
de una cucharada chica de lubricante limpio para motor de<br />
cuatro tiempos a través del agujero de la bujía, en el interior<br />
de la cámara de <strong>com</strong>bustión.<br />
n Teniendo la bujía afuera, tire de la cuerda del arrancador<br />
dos o tres veces para recubrir el interior de la pared del<br />
cilindro.<br />
n Inspeccione la bujía y límpiela o reemplácela según sea<br />
necesario.<br />
n Vuelva a instalar la bujía, pero deje desconectado el cable<br />
de la misma.<br />
Filtro de aire:<br />
n Limpie el filtro de aire.<br />
Mangueras y bomba:<br />
Lave interiormente la manguera de inyección con agua limpia<br />
durante uno o dos minutos. Retire las mangueras. Vacíe<br />
la bomba; para ello, tire del arrancador retráctil seis veces<br />
aproximadamente. De esta manera se elimina de la bomba la<br />
mayoría del líquido.<br />
Barra del mango:<br />
NOTA: Antes de bajar la barra del mango, desconecte del<br />
mango del gatillo la manguera de agua de alta presión.<br />
n Para plegar la barra del mango y guardarla, retire la tuerca<br />
ciega y la perilla.<br />
n Gire la barra del mango para colocarla en la siguiente muesca<br />
del espaciador del mango.<br />
n Ajuste nuevamente la perilla y la tuerca ciega para asegurarla.<br />
Preparación de la unidad para usarla después<br />
de tenerla guardada<br />
n Vuelva a colocar el mango en la posición de funcionamiento.<br />
n Tire del arrancador retráctil tres o cuatro veces para limpiar<br />
el lubricante de la cámara de <strong>com</strong>bustión.<br />
n Retire la bujía del cilindro. Limpie el lubricante de la bujía y<br />
vuelva a ponerla en el cilindro.<br />
n Vuelva a conectar el cable de la bujía.<br />
n Reabastezca de <strong>com</strong>bustible la máquina de la forma descrita<br />
anteriormente en el manual del operador.
solución de problemas<br />
Problema Causa Solución<br />
El motor no arranca 1. No hay <strong>com</strong>bustible en el tanque 1. Reabastezca el tanque<br />
2. Válvula de <strong>com</strong>bustible cerrada 2. Abra la válvula del <strong>com</strong>bustible<br />
3. Interruptor del motor en la posición de<br />
APAGADO<br />
3. Coloque el interruptor del motor en la posición de<br />
ENCENDIDO<br />
4. Falló o tiene corta la bujía 4. Reemplace la bujía<br />
5. Se rompió la bujía (se rajó la porcelana o se<br />
rompieron los electrodos<br />
6. El cable de ignición tiene corto, está roto o<br />
desconectado de la bujía caso<br />
5. Reemplace la bujía<br />
6. Reemplace el cable de ignición o conéctelo a la<br />
bujía<br />
Cuesta trabajo arrancar el<br />
motor<br />
7. El sistema de ignición no funciona 7. Comuníquese con un centro de servicio<br />
autorizado<br />
1. Hay agua en la gasolina 1. Drene todo el sistema y reabastézcalo con<br />
<strong>com</strong>bustible nuevo<br />
2. Está débil la chispa de la bujía 2. Comuníquese con un centro de servicio<br />
autorizado<br />
Le falta potencia al motor 1. Está sucio el filtro de aire 1. Limpie o reemplace el filtro de aire<br />
E l d e t e rg e n t e n o e s t á<br />
mezclándose en el rocío<br />
1. La manguera de inyección del detergente no<br />
está sumergida correctamente<br />
2. La boquilla de alta presión es la que está<br />
conectada<br />
1. Introduzca la manguera de inyección en el<br />
recipiente o botella del detergente<br />
2. Para aplicar el detergente use la boquilla de Soap<br />
Blaster<br />
La bomba no genera presión<br />
1. La boquilla de baja presión es la que está 1. Reemplácela por la boquilla de alta presión.<br />
instalada<br />
2. El suministro de agua es inadecuado 2. Suministre un flujo de agua adecuado<br />
3. Mango del gatillo o tubo de rociador 3. Verifique las conexiones y/o tiene fugas reemplace<br />
el mango del gatillo o tubo de rociador<br />
4. Está tapada la boquilla 4. Limpie la boquilla<br />
5. Está defectuosa la bomba 5. Comuníquese con un centro de servicio<br />
autorizado.<br />
6. Aire en el conductor 6. Oprima el gatillo el mango del gatillo para eliminar<br />
el aire del conductor<br />
La máquina no alcanza presión<br />
alta<br />
1. Está demasiado pequeño el diámetro de la<br />
manguera de jardín<br />
1. Reemplácela con una manguera de 19 mm (3/4<br />
pulg)<br />
2. Está restringido el suministro de agua 2. Revise la manguera de jardín para ver si tiene<br />
dobleces, fugas o bloqueos<br />
3. No hay suficiente agua en la entrada 3. Abra el suministro de agua a toda su capacidad<br />
4. Está puesta una boquilla equivocada 4. Instale la boquilla de alta presión<br />
Se producen rayas u otras<br />
marcas en la superficie que<br />
se limpia<br />
5. Presencia de aire en la manguera que hace<br />
que el movimiento del tubo rociador sea<br />
demasiado lento<br />
1. Se desplaza muy rápido 1. Disminuya la marcha<br />
2. Las cerdas de la escobilla que se encuentra<br />
en la unidad de limpieza están desgastadas<br />
3. Las patas del conjunto de armazón están<br />
desgastadas<br />
4. Presencia de aire en la manguera que hace<br />
que el movimiento del tubo rociador sea<br />
demasiado lento<br />
5. Desconecte el mango del gatillo y permita que el<br />
agua corra hasta lograr un flujo continuo<br />
2. Reemplace la escobilla que se encuentra en la<br />
unidad de limpieza<br />
3. Reemplace las patas del conjunto de armazón<br />
4. Desconecte el mango del gatillo y permita que el<br />
agua corra hasta lograr un flujo continuo<br />
13 — Español
garantía<br />
DECLARACIÓN DE GARANTÍA LIMITADA CON EXCEPCIÓN DEL MOTOR<br />
Techtronic Industries North America, Inc. garantiza al <strong>com</strong>prador original al menudeo que este producto de la<br />
marca HUSKY ® carece de defectos en los materiales y en la mano de obra, y acuerda reparar o remplazar, a la<br />
sola discreción de Techtronic Industries North America, Inc., cualquier producto defectuoso, sin cargo alguno al<br />
<strong>com</strong>prador, dentro de los siguientes períodos de tiempo a partir de la fecha de <strong>com</strong>pra:<br />
Dos años si el producto se emplea para uso personal, familiar o doméstico.<br />
Esta garantía únicamente se ofrece al <strong>com</strong>prador original al menudeo y <strong>com</strong>ienza en la fecha de la <strong>com</strong>pra original<br />
al menudeo.<br />
Cualquier parte de este producto que, a juicio razonable de Techtronic Industries North America, Inc., tenga defectos<br />
en los materiales o en la mano de obra, será reparado o reemplazado por un centro de servicio autorizado de<br />
lavadoras de presión HUSKY ® (un centro de servicio autorizado de HUSKY ® ).<br />
El producto, incluida toda pieza defectuosa, debe enviarse a un establecimiento de servicio autorizado HUSKY ®<br />
dentro del período de la garantía. El gasto de enviar el producto al centro de servicio para cualquier trabajo cubierto por la<br />
garantía, así <strong>com</strong>o el gasto de devolverlo al propietario después de la reparación, correrán por cuenta del propietario. La<br />
responsabilidad de Techtronic Industries North America, Inc. con respecto a todo reclamo se limita a las reparaciones<br />
o reemplazo del producto, y ningún reclamo de incumplimiento de la garantía será causante de la cancelación o<br />
rescisión del contrato de venta de ninguna lavadora de presión de la marca HUSKY ® . En el establecimiento se<br />
requerirá el recibo de <strong>com</strong>pra para respaldar cualquier reclamo al amparo de la garantía. Todo trabajo cubierto en<br />
la garantía debe ser realizado por un centro de servicio autorizado de Techtronic Industries North America, Inc.<br />
Esta garantía no cubre ningún producto que haya sido sujeto a un uso indebido, maltrato, negligencia o accidente, que<br />
haya sido usado para propósitos de alquiler o <strong>com</strong>erciales, o que haya sido utilizado de cualquier forma contraria a las<br />
instrucciones de manejo especificadas en el manual del operador del producto de Techtronic Industries North America,<br />
Inc. Esta garantía no cubre ningún daño sufrido por el producto causado por un mantenimiento inadecuado, ni ningún<br />
producto que haya sido alterado o modificado de manera que haya resultado afectado desfavorablemente el funcionamiento,<br />
el desempeño o la durabilidad del producto, o haya cambiado el uso para el que fue diseñado. La garantía no cubre las<br />
reparaciones que resulten necesarias por el desgaste normal o por el uso de piezas o accesorios que sean in<strong>com</strong>patibles<br />
con la lavadora de presión HUSKY ® o que afecten adversamente su funcionamiento, desempeño o durabilidad.<br />
Además, esta garantía no cubre:<br />
A. Afinación – Filtros de aire, filtros de gasolina y bujías<br />
B. Artículos sujetos a desgaste – Mangueras, adaptadores, boquillas rociadoras, ruedas, mango del gatillo, tubo<br />
rociador, balde de detergente, tanque de detergente, cerdas de la unidad<br />
Techtronic Industries North America, Inc. se reserva el derecho a cambiar o mejorar el diseño de cualquier lavadora de<br />
presión de la marca HUSKY ® sin asumir ninguna obligación de modificar ningún producto fabricado previamente.<br />
TODAS LAS GARANTÍAS IMPLÍCITAS ESTÁN LIMITADAS EN DURACIÓN SEGÚN EL PERÍODO DE GARANTÍA<br />
DECLARADA. COMO CORRESPONDE, TODA GARANTÍA IMPLÍCITA, INCLUIDAS LAS DE COMERCIABILIDAD,<br />
IDONEIDAD PARA UN PROPÓSITO EN PARTICULAR, O DE CUALQUIER OTRO TIPO, SE DESCONOCE POR<br />
COMPLETO DESPUÉS DEL PERÍODO DE GARANTÍA CORRESPONDIENTE DE UN AÑO. DE CONFORMIDAD CON<br />
ESTA GARANTÍA, LA OBLIGACIÓN DE Techtronic Industries North America, inc. SE LIMITA ESTRICTA<br />
Y EXCLUSIVAMENTE A LA REPARACIÓN O REEMPLAZO DE LAS PIEZAS DEFECTUOSAS, Y Techtronic<br />
Industries North America, inc. NO ASUME NINGUNA OTRA OBLIGACIÓN, NI AUTORIZA A NADIE ASUMIRLA A<br />
NOMBRE DE DICHA COMPAÑÍA. ALGUNOS ESTADOS NO PERMITEN LIMITACIONES EN CUANTO A LA DURACIÓN<br />
DE UNA GARANTÍA IMPLÍCITA, POR LO CUAL ES POSIBLE QUE LA LIMITACIÓN ANTERIOR NO SE APLIQUE<br />
EN SU CASO. Techtronic Industries North America, Inc., NO ASUME NINGUNA RESPONSABILIDAD<br />
POR DAÑOS INCIDENTES, CONSECUENTES, NI DE NINGÚN OTRO TIPO, COMO EL GASTO DE DEVOLVER EL<br />
PRODUCTO A UN CENTRO DE SERVICIO AUTORIZADO DE HUSKY ® Y LOS GASTOS PARA DEVOLVER DICHO<br />
PRODUCTO A SU PROPIETARIO RESPECTIVO, EL TIEMPO DE VIAJE DEL MECÁNICO, LLAMADAS TELEFÓNICAS<br />
O TELEGRAMAS, EL ALQUILER DE EQUIPOS SIMILARES DURANTE EL TIEMPO DE REALIZACIÓN DEL SERVICIO<br />
EN VIRTUD DE LA GARANTÍA, VIAJES, PÉRDIDAS O DAÑOS A ARTÍCULOS DE PROPIEDAD PERSONAL, PÉRDIDA<br />
DE INGRESOS, PÉRDIDA DE USO DEL PRODUCTO, PÉRDIDA DE TIEMPO, O INCONVENIENCIA; ALGUNOS<br />
ESTADOS NO PERMITEN LA EXCLUSIÓN NI LA LIMITACIÓN DE LOS DAÑOS DIRECTOS O INDIRECTOS, POR<br />
LO CUAL LA LIMITACIÓN O EXCLUSIÓN ANTERIOR QUIZÁS NO SE APLIQUE EN SU CASO.<br />
Esta garantía le confiere derechos legales específicos, y es posible que usted goce de otros derechos, los cuales<br />
pueden variar de estado a estado.<br />
Esta garantía se aplica a todas las lavadoras de presión de la marca HUSKY ® fabricadas por Techtronic Industries<br />
North America, Inc. y vendidos en Estados Unidos y Canadá.<br />
Para encontrar el centro de servicio autorizado HUSKY ® más cercano a usted, llame al 1-866-340-3912.<br />
14 — Español
NOTES / NOTAS<br />
15
OPERATOR’S <strong>MANUAL</strong><br />
<strong>MANUAL</strong> DEL OPERADOR<br />
ALL VERSIONS / TOUTES LES VERSIONS /<br />
TODAS LAS VERSIONES<br />
3-N-1 hi-speed gasoline<br />
<strong>pressure</strong> <strong>washer</strong><br />
LAVADORA A PRESIÓN DE GASOLINA<br />
3 EN 1 DE ALTA VELOCIDAD<br />
HU80833<br />
WARNING:<br />
The engine exhaust from this product contains chemicals<br />
known to the State of California to cause cancer, birth<br />
defects, or other reproductive harm.<br />
CALIFORNIA PROPOSITION 65<br />
ADVERTENCIA:<br />
Las emanaciones provenientes del escape del motor de este<br />
producto contienen sustancias químicas reconocidas por el<br />
estado de California <strong>com</strong>o causantes de cáncer, defectos<br />
congénitos y otras afecciones del aparato reproductor.<br />
CALIFORNIA - PROPUESTA DE LEY NÚM. 65<br />
• Parts and Service<br />
Prior to requesting service or purchasing replacement <strong>parts</strong>, please obtain your model and serial number<br />
from the product data plate.<br />
• MODEL NO._________________________________• HU80833<br />
SERIAL NO.___________________________________<br />
• How to obtain Replacement Parts:<br />
Now that you have purchased your product, should a need ever exist for repair <strong>parts</strong> or service, simply contact<br />
your nearest Authorized Service Center. Be sure to provide all pertinent facts when you call or visit. Please<br />
call 1-866-340-3912 for your nearest Authorized Service Center.<br />
• How to obtain Customer or Technical Support:<br />
To obtain Customer or Technical Support please contact us at 1-866-340-3912.<br />
• Piezas de repuesto y servicio<br />
Antes de solicitar servicio técnico o <strong>com</strong>prar piezas de repuesto, obtenga su modelo y número de serie de<br />
la placa de datos del producto.<br />
• NÚMERO DE MODELO_______________________• HU80833 NÚMERO DE SERIE___________________________<br />
• Cómo obtener piezas de repuesto:<br />
Ahora que ha adquirido este producto, si alguna vez llega a necesitar piezas de repuesto o servicio,<br />
simplemente <strong>com</strong>uníquese con el centro de servicio autorizado más cercano. Asegúrese de proporcionar<br />
todos los datos pertinentes al llamar o al presentarse personalmente. Le suplicamos llamar al<br />
1-866-340-3912 y le proporcionaremos los datos del centro de servicio autorizado más cercano.<br />
• CÓMO OBTENER SERVICIO O ASISTENCIA TÉCNICA AL CONSUMIDOR:<br />
Para obtener Servicio o Asistencia Técnica al Consumidor, sírvase <strong>com</strong>unicarse con nosotros llamando al<br />
1-866-340-3912.<br />
987000-268<br />
3-05-09 (REV:01)<br />
TECHTRONIC INDUSTRIES NORTH AMERICA, INC.<br />
Hwy 8<br />
Pickens, SC 29671 USA<br />
1-866-340-3912<br />
15 — Español