Operator'sIVianual - Ppe-pressure-washer-parts.com
Operator'sIVianual - Ppe-pressure-washer-parts.com
Operator'sIVianual - Ppe-pressure-washer-parts.com

You also want an ePaper? Increase the reach of your titles
YUMPU automatically turns print PDFs into web optimized ePapers that Google loves.
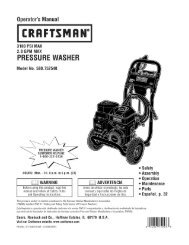
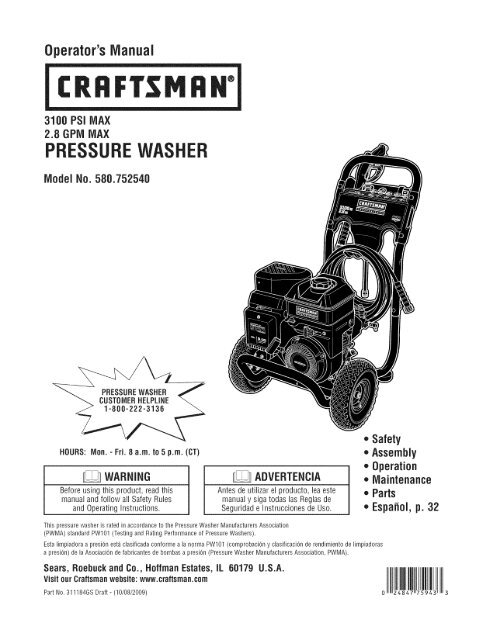
<strong>Operator'sIVianual</strong><br />
®<br />
3100 PSi iViAX<br />
2.8 GPMMAX<br />
iViodelNo. 580.752540<br />
HOURS: IVlon.- Fri. B a.m. to 5 p.m. (CT)<br />
WARNING<br />
Before using this product, readthis<br />
manual and follow all Safety Rules<br />
and Operating instructions.<br />
ADVERTENCIA<br />
Antes de utilizar el producto, lea este<br />
manual y siga todas las Reglasde<br />
Seguridad e Instrucciones de Uso.<br />
,, Safety<br />
,, Assembly<br />
,, Operation<br />
,,Maintenance<br />
,, Parts<br />
,, Espafiol, p. 32<br />
This <strong>pressure</strong> <strong>washer</strong> is rated in accordance to the Pressure Washer Manufacturers Association<br />
(PWMA) standard PWl01 (Testing and Rating Performance of Pressure Washers).<br />
Esta limpiadora a presiOnest_ clasificada conforme a la norrna PWl01 (<strong>com</strong>probaciOn y clasificaciOn de rendimiento de limpiadoras<br />
a presiOn) de la AsociaciOn de fabricantes de bombas a presiOn (Pressure Washer Manufacturers Association, PWMA).<br />
Sears, Roebuck and Co., HoffrnanEstates,IL 60179 U.S.A.<br />
Visit our Craftsman website: www.craftsman.<strong>com</strong><br />
Part No. 311184G8 Draft - (10/08/2009)<br />
3
WARRANTY .......................................... 2<br />
REPAIR PROTECTIONAGREEMENT........................ 2<br />
SAFETYRULES...................................... 3-5<br />
FEATURESAND CONTROLS.............................. 6<br />
ASSEMBLY........................................ 7-10<br />
OPERATION....................................... 11-15<br />
SPECIFICATIONS..................................... 16<br />
MAINTENANCE.................................... 17-20<br />
STORAGE........................................... 21<br />
TROUBLESHOOTING.................................. 22<br />
NOTES ............................................. 23<br />
REPLACEMENTPARTS.............................. 24-29<br />
EMISSIONCONTROLWARRANTY ..................... 30-31<br />
ESPANOL......................................... 32-55<br />
HOW TO ORDERPARTS ........................<br />
BACKPAGE<br />
CRAFTSMANLIMITEDWARRANTY<br />
If this Craftsman product fails due to a defect in material or workmanship within two years from the date of purchase, return it<br />
to any Sears store, Sears Parts & RepairService Center, or other Craftsman outlet in the United Statesfor free repair (or<br />
replacement if repair proves impossible).<br />
This warranty applies for only 90 days from the date of purchase if this product is ever used for <strong>com</strong>mercial or rental<br />
purposes.<br />
This warranty coversONLYdefects in material and workmanship. Sears wilt NOTpay for:<br />
• Expendableitems that can wear out from normal use within the warranty period, such as spray guns, hoses, nozzle<br />
extensions, nozzles,filters and spark plugs.<br />
• Repairsnecessarybecauseof accident, or failure to operate or maintain the product according to all supplied instructions.<br />
Preventivemaintenance,or repairs necessarydue to improper fuel mixture, contaminated or stalefuel.<br />
This warranty givesyou specific legal rights, and you may also have other rights which vary from state to state.<br />
Sears, Roebuck and Co., HoffmanEstates,IL 60179<br />
Congratulations on making a smart purchase.<br />
Your new Craftsman® product is designed and manufactured<br />
for years of dependableoperation. But like all products, it<br />
may require repair from time to time. That's when having a<br />
Repair Protection Agreement can saveyou money and<br />
aggravation.<br />
Here's what the Repair Protection Agreement* includes:<br />
* Expert service by our 10,000 professional repair<br />
specialists<br />
, Unlimited serviceand no chargefor <strong>parts</strong> and labor on<br />
all covered repairs<br />
, Product replacementup to $1500 if your covered<br />
product can't be fixed<br />
, Discountof 10% from regular price of service and related<br />
installed <strong>parts</strong> not covered by the agreement; also, 10%<br />
off regular price of preventive maintenance check<br />
, Fast help by phone-we caii it Rapid Resolution- phone<br />
support from a Sears representative.Think of us as a<br />
"talking owner's manual".<br />
Onceyou purchasethe Repair Protection Agreement, a<br />
simple phone carl is all it takes for you to schedule service.<br />
You can call anytime day or night, or schedule a service<br />
appointment online.<br />
The Repair Protection Agreement is a risk-free purchase. If<br />
you cancelfor any reasonduring the product warranty<br />
period, we will provide a full refund. Or, a prorated refund<br />
anytime after the product warranty period expires. Purchase<br />
your Repair Protection Agreement today!<br />
Some limitations and exclusions apply. Forprices and<br />
additional informationin the U.S.A. call 1-800-827-6655.<br />
* Coverage in Canada varies on some items. For full<br />
details, cail Sears Canada at 1-800-361-6665.<br />
Sears Installation Service<br />
For Sears professional installation of home appliances,<br />
garagedoor openers, water heaters,and other major home<br />
items, in the U.S.A.or Canadacall 1-800-4-1VlY-HOIVlE®.<br />
© 2010
Important<br />
with<br />
Readthis<br />
your <strong>pressure</strong><br />
manual carefully<br />
<strong>washer</strong>.<br />
and<br />
Knowits<br />
be<strong>com</strong>e<br />
applications,<br />
familiar<br />
its limitations, and any hazardsinvolved.<br />
ToxicFumes<br />
Slippery Surface<br />
Safety Information<br />
Safety Symbols and Meanings<br />
Kickback<br />
Fall<br />
ElectricalShock<br />
FluidInjection<br />
Fire Explosion Operator'sManual<br />
MovingParts FlyingObjects ChemicalBurn Hot Surface<br />
,A The safety alert symbol indicates a potential personal<br />
injury hazard.A signal word (DANGER,WARNING,or<br />
CAUTION)is usedwith the alert symbol to designatea degree<br />
or level of hazardseriousness. A safety symbol may be used<br />
to representthe type of hazard.The signal word NOTICEis<br />
used to addresspractices not relatedto personal injury.<br />
A. DANGERindicates a hazardwhich, if not avoided, will<br />
result in death or serious injury.<br />
A. WARNINGindicates a hazardwhich, if not avoided, could<br />
result in death or serious injury.<br />
A. CAUTIONindicates a hazardwhich, if not avoided, could<br />
result in minor or moderate injury.<br />
NOTICEaddress practices not related to personal injury.<br />
A. WARNING The engine exhaust from this product<br />
contains chemicals known to the Stateof California to<br />
cause cancer, birth defects, or other reproductive harm.<br />
A. WARNING This product contains lead and lead<br />
<strong>com</strong>pounds, known to the State of Californiato cause<br />
birth defects or other reproductive harm. Washyour<br />
hands after handling this product.<br />
A. WARNING Running engine gives off carbon<br />
monoxide, an odorless, colorless, poison gas.<br />
_ Breathing carbon monoxide<br />
can cause<br />
headache,<br />
fatigue, dizziness,vomiting, confusion, seizures,<br />
nausea,fainting or death.<br />
Some chemicals or detergents may be harmful if inhaled<br />
or ingested, causing severenausea,fainting, or<br />
poisoning.<br />
• Operate<strong>pressure</strong><strong>washer</strong>ONLYoutdoors.<br />
• Keepexhaustgasfromenteringa confinedareathrough<br />
windows,doors,ventilationintakes,or otheropenings.<br />
• DONOTstartor run engineindoorsor in anenclosedarea,<br />
evenif windowsanddoorsareopen.<br />
• Usea respiratoror maskwheneverthereis a chancethat<br />
vaporsmaybeinhaled.<br />
• Readall instructionswith masksoyou arecertainthe maskwill<br />
providethe necessaryprotectionagainstinhalingharmful<br />
vapors.<br />
A. WARNING ChemicalBurn Hazard.<br />
.... Chemicalscould cause bodily injury, property<br />
_: damage or death.<br />
• DONOTusecausticliquidwith <strong>pressure</strong><strong>washer</strong>.<br />
• UseONLY<strong>pressure</strong><strong>washer</strong>safedetergents/soaps.Followall<br />
manufacturersinstructions.
A. WARNING Starter cord kickback (rapid retraction) can<br />
result in bodily injury. Kickbackwill pull hand and<br />
,_arm toward enginefaster than you can let go.<br />
Broken bones,fractures, bruises, or sprains<br />
could result.<br />
• NEVERpull starter cord without first relieving spray gun<br />
<strong>pressure</strong>.<br />
• When starting engine, pull cord slowly until resistance is felt<br />
and then pull rapidly to avoid kickback.<br />
• After each starting attempt, where enginefails to run, always<br />
point spray gun in safe direction, press red button and squeeze<br />
spray gun trigger to releasehigh <strong>pressure</strong>.<br />
• Firmly grasp spray gun with both hands when using high<br />
<strong>pressure</strong> spray to avoid injury when spray gun kicks back.<br />
A. WARNING Risk of electrocution.<br />
"_.dh Contactwith power source can causeelectric<br />
shock or burn.<br />
• NEVERspraynearpowersource.<br />
A. WARNING The high <strong>pressure</strong> stream of water that<br />
this and equipment its underlying produces tissues, can leading cut through to serious skin<br />
injury and possible amputation.<br />
Spray gun traps high water <strong>pressure</strong>, even when engine is<br />
stopped and water is disconnected, which can cause<br />
injury.<br />
• DONOT allow CHILDRENto operate <strong>pressure</strong> <strong>washer</strong>.<br />
• NEVERrepair high <strong>pressure</strong> hose. Replaceit.<br />
• NEVERrepair leaking connections with sealant of any kind.<br />
Replaceo-ring or seal.<br />
• NEVERconnect high <strong>pressure</strong> hose to nozzleextension.<br />
• Keep high <strong>pressure</strong> hose connected to pump and spray gun<br />
while system is pressurized.<br />
• ALWAYS point spray gun in safedirection, press red button<br />
and squeezespray gun trigger to releasehigh <strong>pressure</strong>, every<br />
time you stop engine.<br />
• NEVERaim spray gun at people,animals, or plants.<br />
• DO NOTsecure spray gun in open position.<br />
• DO NOTleavespray gun unattendedwhile machine is running.<br />
• NEVERuse a spray gun which does not have a trigger lock or<br />
trigger guard in placeand in working order.<br />
• Always be certain spray gun, nozzlesand accessoriesare<br />
correctly attached.<br />
A. WARNING Fuel and its vapors are extremely<br />
flammable<br />
WHENADDING OR DRAININGFUEL<br />
and explosive.<br />
Fire or explosion can cause severe burns<br />
or death.<br />
* Turn <strong>pressure</strong><strong>washer</strong> OFFand let it cool at least2 minutes<br />
before removing fuel cap. Loosen cap slowly to relieve <strong>pressure</strong><br />
in tank.<br />
, Fill or drain fuel tank outdoors.<br />
, DONOT overfill tank. Allow spacefor fuel expansion.<br />
, If fuel spills, wait until it evaporates before starting engine.<br />
, Keepfuel away from sparks, open flames, pilot lights, heat, and<br />
other ignition sources.<br />
, DONOT light a cigarette or smoke.<br />
WHENSTARTINGEQUIPMENT<br />
* Ensurespark plug, muffler, fuel cap,and air cleanerare in place.<br />
* DO NOTcrank enginewith spark plug removed.<br />
WHEN OPERATINGEQUIPMENT<br />
* DONOTtip engine or equipment at angle which causes fuel to<br />
spill.<br />
* DONOT spray flammable liquids.<br />
WHEN TRANSPORTING,MOVING OR REPAIRINGEQUIPMENT<br />
, Transport/move/repair with fuel tank EMPTYor with fuel shutoff<br />
valve OFF.<br />
, DONOTtip engine or equipment at angle which causes fuel to<br />
spill.<br />
, Disconnect spark plug wire.<br />
WHEN STORINGFUEL OR EQUIPMENTWITH FUEL IN TANK<br />
* Store away from furnaces, stoves, water heaters, clothes<br />
dryers, or other appliancesthat have pilot light or other ignition<br />
source becausethey can ignitefuel vapors.<br />
A. WARNING Contact with muffler area can result in<br />
serious burns.<br />
_ _ Exhaust heat/gases can ignite<br />
<strong>com</strong>bustibles, structures or damage<br />
fuel tank causing a fire.<br />
• DO NOTtouch hot <strong>parts</strong> and AVOID hot exhaust gases.<br />
• Allow equipment to cool before touching.<br />
• Keep at least5 feet (152 cm) of clearanceon all sides of<br />
<strong>pressure</strong> <strong>washer</strong> including overhead.<br />
• It is a violation of California Public Resource Code,Section<br />
4442, to use or operate the engine on any forest-covered,<br />
brush-covered, or grass-covered land unless the exhaust<br />
system is equipped with a spark arrester, as defined in Section<br />
4442, maintained in effective working order. Other states or<br />
federal jurisdictions may have similar laws.<br />
Contact the original equipment manufacturer, retailer, or dealer<br />
to obtain a spark arrester designed for the exhaust system<br />
installed on this engine.<br />
• Replacement <strong>parts</strong> must be the same and installed in the same<br />
position as the original <strong>parts</strong>.
_i, WARNING Use of <strong>pressure</strong> <strong>washer</strong> can create<br />
_' puddles Kickback and from slippery spray gun surfaces. can cause you<br />
to fall.<br />
• Operate <strong>pressure</strong><strong>washer</strong> from a stable surface.<br />
• The cleaning areashould have adequateslopes and drainageto<br />
reduce the possibility of a fall due to slippery surfaces.<br />
• Be extremely careful if you must use the <strong>pressure</strong><strong>washer</strong> from<br />
a ladder, scaffolding, or any other similar location.<br />
• Firmly grasp spray gun with both hands when using high<br />
<strong>pressure</strong> spray to avoid injury when spray gun kicks back.<br />
A, WARNING Unintentional sparking can result in fire or<br />
_¢<br />
electric shock.<br />
WHENADJUSTINGOR MAKING REPAIRSTO YOURPRESSURE<br />
WASHER<br />
• Disconnect the spark plug wire from the spark plug and place<br />
the wire where it cannot contact spark plug.<br />
WHENTESTINGFOR ENGINESPARK<br />
• Use approved spark plug tester.<br />
• DONOT check for spark with spark plug removed.<br />
A, WARNING Starter and other rotating <strong>parts</strong> can<br />
entangle hands, hair, clothing, or accessories.<br />
. NEVERoperate<strong>pressure</strong><strong>washer</strong>withoutprotectivehousingor<br />
covers.<br />
. DONOTwearlooseclothing,jewelryor anythingthat maybe<br />
caughtin thestarteror otherrotating<strong>parts</strong>.<br />
* Tieuplonghairandremovejewelry.<br />
A, WARNING Risk of eye injury.<br />
Spray can splash back or propel objects.<br />
• Always wear indirect vented (chemical splash) safety goggles<br />
marked to <strong>com</strong>ply with ANSI Z87.1 when using or in vicinity of<br />
this equipment.<br />
• NEVERsubstitute safety glasses or dry-condition goggles for<br />
indirect vented safety goggles.<br />
NOTICE High <strong>pressure</strong> spray may damage fragile items<br />
including glass.<br />
• DONOTpointspraygunat glasswhenusingred(0°) spraytip.<br />
= NEVERaimspraygunat plants.<br />
NOTICE Improper treatment of <strong>pressure</strong> <strong>washer</strong> can<br />
damage it and shorten its life.<br />
• If you have questions about intended use,ask dealer or contact<br />
Sears.<br />
• NEVERoperate units with broken or missing <strong>parts</strong>, or without<br />
protective housing or covers.<br />
• DO NOT by-pass any safety device on this machine.<br />
• DONOT tamper with governed speed.<br />
• DONOT operate <strong>pressure</strong> <strong>washer</strong> above rated <strong>pressure</strong>.<br />
• DONOT modify <strong>pressure</strong> <strong>washer</strong> in any way.<br />
• Before starting <strong>pressure</strong> <strong>washer</strong> in cold weather, check all <strong>parts</strong><br />
of the equipment to be sure ice has not formed there.<br />
• NEVERmove machine by pulling on hoses. Use handle provided<br />
on unit.<br />
• Check fuel system for leaks or signs of deterioration, such as<br />
chafed or spongy hose, loose or missing clamps, or damaged<br />
tank or cap. Correct all defects before operating <strong>pressure</strong> <strong>washer</strong>.<br />
• This equipment is designedto be used with Searsauthorized <strong>parts</strong><br />
ONLY.If equipment is used with <strong>parts</strong> that DONOT<strong>com</strong>ply with<br />
minimum specifications, user assumesall risks and liabilities.
KNOWYOURPRESSUREWASHER<br />
[_<br />
Readthe Operator's Manual and safety rules before operating your <strong>pressure</strong> <strong>washer</strong>.<br />
Comparethe illustrations with your <strong>pressure</strong><strong>washer</strong> to familiarize yourself with the locations of various controls and<br />
adjustments. Savethis manual for future reference.<br />
A - Spray Gun-- Controls the application of water onto<br />
cleaning surface with trigger device, includes trigger lock.<br />
B - Spray Tips- Detergent,0°, 25°, 15° and 40°: for<br />
various high <strong>pressure</strong> cleaning applications.<br />
C - Accessory Tray -- Provides convenient storage for<br />
accessories, such as gun, spray tips, etc.<br />
D - Nozzle Extensionwith QuickConnect --<br />
switch betweenfive different spray tips.<br />
Allows you to<br />
E - High Pressure Hose-- Connectone end of hose to water<br />
pump and the other end to spray gun.<br />
F - Warning/Operating Instructions Tag -- identifies hazards<br />
and proper procedure to start/stop <strong>pressure</strong> <strong>washer</strong>.<br />
G - Fuel Tank -- Fill tank with regular unleadedfuel. Always<br />
leave room for fuel expansion.<br />
H - Choke Lever-<br />
Usedwhen starting a cold engine.<br />
J- Fuel Valve-- Used to turn fuel supply on and off to<br />
engine.<br />
I( - Throttle Lever -- Sets engine in starting mode for recoil<br />
starter and stops a running engine.<br />
L - Air Filter -- Protects engine by filtering dust and debris<br />
out of intake air.<br />
M - Recoil Starter --<br />
Usedfor starting the engine manually.<br />
N - DetergentSiphoning Tube/Filter -- Useto siphon<br />
<strong>pressure</strong><strong>washer</strong> safedetergents into the low <strong>pressure</strong><br />
stream.<br />
P - Automatic Cool DownSystem -- Cycleswater through<br />
pump when water reaches125°-155°F. Warm water wiii<br />
discharge from pump onto ground. This system prevents<br />
internal pump damage.<br />
R - Water Inlet --<br />
S - Oil Drain --<br />
Connectionfor garden hose.<br />
Drain engine oil here.<br />
T- Oil Fill -- Checkand add engine oil here.<br />
U - High Pressure Outlet --<br />
hose.<br />
V - Pump --<br />
Items Not Shown:<br />
Develops high <strong>pressure</strong>.<br />
Connection for high <strong>pressure</strong><br />
Identification Label (near rear of base plate) -- Provides<br />
model and serial number of <strong>pressure</strong><strong>washer</strong>. Pleasehave<br />
these readily available if calling for assistance.<br />
Engine Identification -- Provides model, type and code of<br />
engine. Pleasehave these readily available if calling for<br />
assistance.
Your <strong>pressure</strong> <strong>washer</strong> requires some assembly and is ready<br />
for use only after it has been properly serviced with the<br />
re<strong>com</strong>mended oil and fuel.<br />
If you have any problemswith the assemblyof your<br />
<strong>pressure</strong><strong>washer</strong>, please call the <strong>pressure</strong><strong>washer</strong> helpline<br />
at 1=800-222-3136.<br />
UNPACKTHEPRESSUREWASHER<br />
Attach Handleand Accessory Tray<br />
1. Place handle (A) onto handle supports (B) connectedto<br />
main unit. Make sure holes (C) in handle align with holes<br />
(C) on handlesupports.<br />
1. Remove everything from carton except <strong>pressure</strong><strong>washer</strong>.<br />
2. Opencarton <strong>com</strong>pletely by cutting each corner from top<br />
to bottom.<br />
3. Remove <strong>pressure</strong> <strong>washer</strong> from carton.<br />
CARTONCONTENTS<br />
Check all contents. If any <strong>parts</strong> are missing or damaged,call<br />
the <strong>pressure</strong> <strong>washer</strong> helplineat 1-800-222-3136.<br />
* Main Unit<br />
* Handle<br />
* Accessory Tray<br />
* High PressureHose<br />
* Spray Gun<br />
* Nozzle Extensionwith Quick Connect Fitting<br />
* Oil Bottle<br />
* Parts Bag(which includes the following):<br />
* Operator's Manual<br />
* Owner's Registration Card<br />
* Bag containing 5 multi-colored Spray Tips<br />
* HandleFasteningHardwareKit (whichincludes):<br />
* Carriage Bolt (2)<br />
* Plastic Knob (2)<br />
* Tree Clips (4)<br />
Be<strong>com</strong>efamiliar with each piece before assembling the<br />
<strong>pressure</strong> <strong>washer</strong>, identify all contents with the illustration on<br />
page 6. if any <strong>parts</strong> are missing or damaged, call the<br />
<strong>pressure</strong> <strong>washer</strong> helpline at 1-800-222-3136.<br />
ASSEMBLINGPRESSUREWASHER<br />
Your Craftsman <strong>pressure</strong> <strong>washer</strong> will needassembly before<br />
operation:<br />
1. Fill out and send in registration card.<br />
2. Attach handle and accessory tray.<br />
3. Add oil to engine crankcase.<br />
4. Add fuel to fuel tank.<br />
5. Connect <strong>pressure</strong> hose to spray gun and pump.<br />
6. Connect water supply to pump.<br />
7. Attach spray tip extension to spray gun.<br />
8. Select/attach quick connect spray tip to spray tip<br />
extension.<br />
NOTICE It may be necessaryto move the handlesupports<br />
from side to side in order to align the handleso it will slide<br />
over the handlesupports.<br />
2. insert carriage bolts (D) through holes from inside of<br />
unit and attach a plastic knob (E) from outside of unit.<br />
Tighten by hand.<br />
3. Placeaccessory tray (F) over holes (G) on handle<br />
(viewing from front of unit). Push the tree clips (H) into<br />
the holes until they sit fiat against the accessory tray.<br />
/<br />
/<br />
4. insert multi-colored quick connect spray tips and other<br />
supplied accessories in spaces provided in accessory<br />
tray. SeeHow to UseAccessory Tray.
Add EngineOil<br />
1. Place <strong>pressure</strong> <strong>washer</strong> on a flat, level surface.<br />
2. Cleanarea around oil fill and remove yellow oil fill cap.<br />
3. Using oil funnel (optional), slowly pour contents of<br />
provided oil bottle into oil fill opening (A) to the point of<br />
overflowing (B).<br />
NOTICE Improper treatment of <strong>pressure</strong> <strong>washer</strong> can<br />
damage it and shorten its life.<br />
• DO NOTattempt to crank or start the engine before it has been<br />
properly serviced with the re<strong>com</strong>mended oil. This may result in an<br />
enginefailure.<br />
4. Replaceoil fill cap and fully tighten.<br />
Add Fuel<br />
Fuel mustmeet these requirements:<br />
• Clean,fresh, unleaded gasoline.<br />
• A minimum of 87 octane/87 AKI (91 RON). High altitude<br />
use, see High Altitude.<br />
• Gasoline with up to 10% ethanol (gasohol) or up to 15%<br />
MTBE (methyl tertiary butyl ether) is acceptable.<br />
NOTICE Avoid <strong>pressure</strong> <strong>washer</strong> damage.<br />
Failureto follow Operator's Manual for fuel<br />
re<strong>com</strong>mendations voids warranty.<br />
• DONOTuseunapprovedgasolinesuchasE85.<br />
• DONOTmixoil in gasoline.<br />
• DONOTmodifyengineto runonalternatefuels.<br />
A. WARNING Fueland its vapors are extremely<br />
flammable and explosive.<br />
Fire or explosion can causesevere burns<br />
or death.<br />
WHENADDINGFUEL<br />
• Turn <strong>pressure</strong><strong>washer</strong> OFFand let it cool at least 2 minutes<br />
before removing fuel cap. Loosen cap slowly to relieve <strong>pressure</strong><br />
in tank.<br />
e<br />
e<br />
e<br />
e<br />
Fill fuel tank outdoors.<br />
DONOT overfill tank. Allow spacefor fuel expansion.<br />
If fuel spills, wait until it evaporatesbefore starting engine.<br />
Keepfuel away from sparks, open flames, pilot lights, heat, and<br />
other ignition sources.<br />
DONOT light a cigarette or smoke.<br />
To protect the fuel system from gum formation, mix in a fuel<br />
stabilizer when adding fuel. See Storage.All fuel is not the<br />
same. If you experiencestarting or performance problems<br />
after using fuel, switch to a different fuel provider or change<br />
brands. This engine is certified to operate on gasoline. The<br />
emission control system for this engine is EM (Engine<br />
Modifications).<br />
1. Cleanareaaround fuel fill cap, removecap.<br />
2. Slowly add regular unleadedfuel (C) to fuel tank (D). Be<br />
careful not to overfill. Allow about 1.5" (4 cm) (E) of tank<br />
spacefor fuel expansion.<br />
.INNf-......__f-...,.._jf-......,_jNf_._f_......_NNNNN<br />
3. Install fuel cap and wait for any spilled fuel to evaporate.<br />
CAUTION! Alcohol-blended fuels (called gasohol, ethanol or<br />
methanol) can attract moisture, which leadsto separation and<br />
formation of acids during storage. Acidic gas can damage the<br />
fuel system of an enginewhile in storage.<br />
To avoid engine problems, the fuel system should be treated<br />
with a fuel preserveror emptied before storage of 30 days or<br />
longer. If adding a fuel preserver, fill the fuel tank with fresh<br />
fuel. If only partially filled, air in the tank will promote fuel<br />
deterioration during storage. If fuel preserver is not used,<br />
drain the fuel tank, start the engine and let it run until the fuel<br />
lines and carburetor are empty. Usefresh fuel next season.<br />
SeeStorage for additional information.<br />
NEVERuse engine or carburetor cleaner products in the fuel<br />
tank as permanent damage may occur.
HighAltitude<br />
At altitudes over 5,000 feet (1524 meters), a minimum<br />
85 octane/ 85 AKI (89 RON)gasoline is acceptable.To<br />
remain emissions <strong>com</strong>pliant, high altitude adjustment is<br />
required. Operation without this adjustment will cause<br />
decreasedperformance, increasedfuel consumption, and<br />
increased emissions. Seea qualified Sears dealer for high<br />
altitude adjustment information. Operation of the engineat<br />
altitudes below 2,500 feet (762 meters) with the high altitude<br />
kit is not re<strong>com</strong>mended.<br />
FreshStart® Fuel Cap<br />
The FreshStart® fuel cap (A) is designed to hold a<br />
cartridge (B) which contains fuel preserver. Adding fuel<br />
preserver helps keep fuel fresh and carburetors clean for<br />
easier starting all season long. The FreshStart® fuel cap, if<br />
equipped with a cartridge, automatically drips concentrated<br />
fuel preserverinto your fuel tank so you don't have to add it<br />
yourself.<br />
1. Uncoil high <strong>pressure</strong> hose and attach one end of hose to<br />
base of spray gun. Tighten by hand.<br />
A. WARNING The high <strong>pressure</strong> stream of water that<br />
this and equipment its underlying produces tissues, can leading cut through to serious skin<br />
injury and possible amputation.<br />
= NEVERconnect high <strong>pressure</strong> hose to nozzleextension.<br />
= Keep high <strong>pressure</strong> hose connected to pump and spray gun<br />
while system is pressurized.<br />
= Always be certain spray gun, nozzlesand accessoriesare<br />
correctly attached.<br />
2. Attach other end of high <strong>pressure</strong> hose to high <strong>pressure</strong><br />
outlet on pump. Tighten by hand.<br />
NOTICE FreshStart® fuel preservercartridge is availableas<br />
an optional accessory,retail item 7133386. It is not included<br />
with the <strong>pressure</strong><strong>washer</strong>. Contactthe original equipment<br />
manufacturer, retailer,or dealerto obtain a cartridge designed<br />
for the FreshStart® fuel cap installed on this engine.<br />
Read and follow all instructions andwarnings given in the<br />
FreshStart® fuel preservercartridge package.<br />
Connect Hoseand Water Supplyto Pump<br />
3. Before connecting garden hose to water inlet, inspect<br />
inlet screen(C). Cleanscreen if it contains debris or have<br />
it replacedif damaged. DONOTrun <strong>pressure</strong> <strong>washer</strong> if<br />
inlet screenis damaged or missing.<br />
NOTICE DO NOTrun the pump without the water supply<br />
connected and turned on.<br />
= Damageto equipmentresultingfrom failureto followthis<br />
instructionwill voidwarranty.<br />
NOTICE Remove and discard the shipping caps from the<br />
pump's high <strong>pressure</strong> outlet and water inlet before attaching<br />
hoses.<br />
4. Run water through garden hose for 30 seconds to flush<br />
it of debris. Turn off water.<br />
NOTICE DO NOTsiphon standing water for the water<br />
supply. Use ONLYcold water (less than 100°F).<br />
5. Connectgarden hose (not to exceed50 feet in length) to<br />
water inlet. Tighten by hand.
NOTICE Using a OneWay Valve (vacuum breaker or check<br />
valve) at pump inlet can causepump or inlet connector<br />
damage.<br />
• ThereMUSTbeat leastten feetof unrestrictedgardenhose<br />
betweenthe <strong>pressure</strong><strong>washer</strong>inletandanydevice,suchasa<br />
vacuumbreakeror checkvalve.<br />
• Damageto equipment resulting from failure to follow this<br />
instruction will void warranty.<br />
A, WARNING Risk of eye injury.<br />
Spray can splash backor propel objects.<br />
• Always wear indirect vented (chemical splash) safety goggles<br />
marked to <strong>com</strong>ply with ANSI Z87.1 when using or in vicinity of<br />
this equipment.<br />
• NEVERsubstitute safety glasses or dry-condition goggles for<br />
indirect vented safety goggles.<br />
Checklist Before Starting<br />
Engine<br />
Reviewthe unit to ensure you have performed all of the<br />
following:<br />
1. Besure to read Safety Rules and Operationsections<br />
before using the <strong>pressure</strong> <strong>washer</strong>.<br />
2. Makesure handleis in place and secure.<br />
3. Checkthat oil has beenadded to proper level in engine<br />
crankcase.<br />
4. Add proper fuel to fuel tank.<br />
5. Checkfor proper hose connections (high <strong>pressure</strong> and<br />
water supply) and that there are no kinks, cuts, or<br />
damageto the high <strong>pressure</strong> hose.<br />
6. Provide proper water supply (not to exceed100°F).<br />
6. Turn ONthe water, press red button (A) on the gun and<br />
squeezethe trigger to purgethe pump system of air and<br />
impurities.<br />
10
HOWTO USEYOURPRESSUREWASHER<br />
If you have any problems operating your <strong>pressure</strong> <strong>washer</strong>,<br />
please call the <strong>pressure</strong> <strong>washer</strong> helpline at 1-800-222-3136.<br />
PressureWasherLocation<br />
PressureWasher Clearance<br />
_lLWARNING Exhaust heat/gases can ignite<br />
<strong>com</strong>bustibles, structures or damagefuel tank<br />
causing a fire.<br />
• Keepat least 5 ft. (152 cm) clearanceon all sides of <strong>pressure</strong><br />
<strong>washer</strong> including overhead.<br />
Place <strong>pressure</strong> <strong>washer</strong> outdoors in an area that will not<br />
accumulate deadly exhaust gas. DO NOTplace <strong>pressure</strong><br />
<strong>washer</strong> where exhaust gas (A) could accumulate and enter<br />
inside or be drawn into a potentially occupied building.<br />
Ensure exhaust gas is kept awayfrom any windows, doors,<br />
ventilation intakes, or other openings that can allow exhaust<br />
gas to collect in aconfined area. Prevailing winds and air<br />
currents should be taken into consideration when positioning<br />
_ressure<strong>washer</strong>.<br />
_lLWARNING Running enginegives off carbon<br />
monoxide, an odorless, colorless, poisonous gas.<br />
_ Breathing<br />
carbon monoxide<br />
can cause headache,<br />
fatigue, dizziness,vomiting, confusion, seizures,<br />
nausea,fainting or death.<br />
• Operate<strong>pressure</strong><strong>washer</strong>ONLYoutdoors.<br />
• Keepexhaustgasfromenteringa confinedareathrough<br />
windows,doors,ventilationintakes,or otheropenings.<br />
= DONOTstartor runengineindoorsor in anenclosedarea,<br />
evenif windowsanddoorsareopen.<br />
To Start Your Pressure Washer<br />
To start your engine-powered <strong>pressure</strong><strong>washer</strong> for the first<br />
time, follow these instructions step-by-step. This information<br />
also applies wheneveryou start the engine after you have let<br />
the <strong>pressure</strong> <strong>washer</strong> sit idle for at leasta day.<br />
1. Place <strong>pressure</strong><strong>washer</strong> outside nearan water source<br />
capableof supplying water at a flow rate greater than<br />
3.8 gallons per minute and no less than 20 PSi at<br />
<strong>pressure</strong><strong>washer</strong> end of garden hose.<br />
2. Checkthat high <strong>pressure</strong> hose is tightly connected to<br />
spray gun and pump. SeeAssembly for illustrations.<br />
3. Makesure unit is in a level position.<br />
4. Connectgarden hose to water inlet on <strong>pressure</strong><strong>washer</strong><br />
pump.<br />
NOTICE DO NOTrun the pump without the water supply<br />
connected and turned on.<br />
• Damageto equipmentresultingfromfailureto followthis<br />
instructionwill voidwarranty.<br />
.<br />
.<br />
Turn ONthe water, press red button on the gun and<br />
squeezethe trigger to purge the pump system of air and<br />
impurities.<br />
Attach nozzleextension to spray gun. Tighten by hand.<br />
7. Choosespray tip you want to use, pull back on collar of<br />
nozzleextension, insert spray tip and releasecollar. Tug<br />
on spray tip to make sure it is securely in place.See How<br />
to UseSpray Tips.<br />
8. Rotate fud shut-off valveto "On" position (B) (fully<br />
counter-clockwise).<br />
11
. Move throttle lever (A) to "Fast" position, shown here as<br />
a rabbit.<br />
10. Move choke lever (B) to "Choke" position.<br />
NOTICE For a warm engine, be sure the choke lever is in the<br />
"Run" position.<br />
NOT/CE Before starting the <strong>pressure</strong> <strong>washer</strong>, be sure you<br />
are wearing safety goggles as described below.<br />
A. WARNING Risk of eye injury.<br />
Spray can splash backor propel objects.<br />
• Always wear indirect vented (chemical splash) safety goggles<br />
marked to <strong>com</strong>ply with ANSI Z87.1 when using or in vicinity of<br />
this equipment.<br />
• NEVERsubstitute safety glasses or dry-condition goggles for<br />
indirect vented safety goggles.<br />
1. When starting engine, position yourself as<br />
re<strong>com</strong>mended and grasp starter grip handle and pull<br />
slowly until you feel some resistance. Then pull rapidly<br />
to start engine.<br />
A. WARNING Starter cord kickback (rapid retraction) can<br />
result in bodily injury. Kickbackwill puff hand and<br />
_,__ arm toward enginefaster than you can let go.<br />
Broken bones,fractures, bruises, or sprains<br />
could result.<br />
• NEVERpull startercordwithoutfirst relievingspraygun<br />
<strong>pressure</strong>.<br />
• Whenstartingengine,pullcordslowlyuntil resistanceisfelt<br />
andthenpull rapidlyto avoidkickback.<br />
• Aftereachstartingattempt,whereenginefailsto run,always<br />
pointspraygunin safedirection,pressredbuttonandsqueeze<br />
sprayguntriggerto releasehigh<strong>pressure</strong>.<br />
• Firmlygraspspraygunwithboth handswhenusinghigh<br />
<strong>pressure</strong>sprayto avoidinjurywhenspraygunkicksback.<br />
2. Return recoil starter slowly. DO NOTlet rope "snap<br />
back" against starter.<br />
13. When engine starts, slowly move choke lever to "Run"<br />
position, as engine warms. If engine falters, move choke<br />
lever to "Choke" position, then to "Run" position.<br />
14. After each starting attempt, where engine fails to run,<br />
always point gun in safe direction, press red button and<br />
squeezespray gun trigger to releasehigh <strong>pressure</strong>.<br />
Move choke leverto "Choke" position, and repeat steps<br />
11 through 13.<br />
15. If enginefails to start after six pulls, move choke lever to<br />
"Run" position, and repeatsteps 11 through 13.<br />
NOTICE Always keep the throttle lever in the "Fast" position<br />
when operating the <strong>pressure</strong><strong>washer</strong>.<br />
_i. WARNING The high <strong>pressure</strong> stream of water that<br />
this and equipment its underlying produces tissues, can leading cut through to serious skin<br />
injury and possible amputation.<br />
Spray gun traps high water <strong>pressure</strong>, even when engine is<br />
stopped and water is disconnected, which can cause<br />
injury.<br />
• DONOTallowCHILDRENto operate<strong>pressure</strong><strong>washer</strong>.<br />
• Keephigh<strong>pressure</strong>hoseconnectedto pumpandspraygun<br />
whilesystemis pressurized.<br />
• NEVERaim spraygunat people,animals,or plants.<br />
• DONOTsecurespraygunin openposition.<br />
• DONOTleavespraygununattendedwhilemachineis running.<br />
• NEVERuseaspraygunwhichdoesnot haveatriggerlockor<br />
triggerguardinplaceandin workingorder.<br />
• Alwaysbecertainspraygun,nozzlesandaccessoriesare<br />
correctlyattached.<br />
12
_i, WARNING Contact with muffler area can result in<br />
serious burns.<br />
_<br />
Exhaust<br />
heat/gases can ignite<br />
<strong>com</strong>bustibles, structures or damage<br />
fuel tank causing a fire.<br />
* DO NOTtouch hot <strong>parts</strong> and AVOID hot exhaust gases.<br />
* Allow equipment to cool before touching.<br />
* Keepat least5 feet (152 cm) of clearanceon all sides of<br />
<strong>pressure</strong> <strong>washer</strong> including overhead.<br />
* It is a violation of California Public Resource Code,Section<br />
4442, to use or operatethe engine on any forest-covered,<br />
brush-covered, or grass-covered landunless the exhaust<br />
system is equipped with a spark arrestor, as defined in Section<br />
4442, maintained in effective working order. Otherstates or<br />
federal jurisdictions may havesimilar laws.<br />
Contact the original equipment manufacturer, retailer, or dealer<br />
to obtain a spark arrestor designed for the exhaustsystem<br />
installed on this engine.<br />
* Replacement<strong>parts</strong> must be the sameand installed in the same<br />
position as the original <strong>parts</strong>.<br />
Howto UseAccessory Tray<br />
The unit is equippedwith an accessory tray with placesto<br />
store your spray gun, spray tip extension and quick connect<br />
spray tips. There is also a hook at the front of the accessory<br />
tray to hold your high <strong>pressure</strong> hose.<br />
NOTICE The extra hole in the tray is for storing a utility<br />
brush. The extra clip in the tray is for storing a turbo spray<br />
tip. The brush and turbo nozzleare NOTincluded with your<br />
<strong>pressure</strong><strong>washer</strong>. You can buy these items as optional<br />
accessories.<br />
1. Place spray tip extension through hole on accessory tray,<br />
as shown.<br />
Howto Stop Your PressureWasher<br />
1. Releasespray gun trigger and let engine idle for two<br />
minutes.<br />
2. Move throttle to SLOW position, then STOPposition.<br />
_i, WARNING<br />
occur.<br />
Backfire,fire or engine damagecould<br />
• DONOTstopenginebymovingchokecontrolto "Choke"<br />
position(1_1).<br />
3. Rotate fuel shut-off valve to "Off" position.<br />
4. ALWAYS point spray gun in a safe direction, push red<br />
button and squeezespray gun trigger to releaseretained<br />
high water <strong>pressure</strong>.<br />
NOTICE Spray gun traps high water <strong>pressure</strong>, even when<br />
engine is stopped and water is disconnected.<br />
2. Place spray gun through hole on accessory tray on right<br />
side of unit.<br />
3. insert multi-colored spray tips in spaces provided in<br />
accessory tray.<br />
4. Hang high <strong>pressure</strong> hose on hook attached to accessory<br />
tray on front of tray as shown.<br />
A, WARNING The high <strong>pressure</strong> stream of water that<br />
this and equipment its underlying produces tissues, can leadingto cut through serious skin<br />
injury and possible amputation.<br />
Spray gun traps high water <strong>pressure</strong>, even when engine is<br />
stopped and water is disconnected, which can cause<br />
injury.<br />
* Keephigh<strong>pressure</strong>hoseconnectedto pumpandspraygun<br />
whilesystemis pressurized.<br />
* ALWAYSpointspraygunin safedirection,pressredbutton<br />
andsqueezesprayguntriggerto releasehigh<strong>pressure</strong>,every<br />
timeyou stopengine.<br />
13
How to Use Spray Tips<br />
The quick-connect on the nozzleextension allows you to<br />
switch betweenfive different quick connect spray tips. Spray<br />
tips can be changed while <strong>pressure</strong><strong>washer</strong> is running once<br />
spray gun trigger lock is engaged. The spray tips vary the<br />
spray pattern as shown below.<br />
Follow these instructionsto changespraytips:<br />
1. Pull back collar on quick-connect and pull current spray<br />
tip off. Store spray tips in holder provided on the<br />
accessory tray.<br />
A, WARNING The high <strong>pressure</strong> stream of water that<br />
this and equipment its underlying produces tissues, can leadingto cut through serious skin<br />
injury and possible amputation.<br />
• NEVERexchangespraytipswithoutthetriggerlockedonthe<br />
spraygun.<br />
• DONOTtwist spraytips whilespraying.<br />
2. Select desired spray tip:<br />
* For delicate rinse (lower <strong>pressure</strong> and higher flow),<br />
for gentle cleaning of cars/trucks, boats, RV's, patio<br />
furniture, lawn equipment, etc., select white 40°<br />
spray tip.<br />
, For general rinsing (medium <strong>pressure</strong> and medium<br />
flow), ideal for most all purpose cleaning such as<br />
home siding, brick patios, wood decks, driveways<br />
and sidewalks, garagefloors, etc., select green 25°<br />
or yellow 15° spray tip.<br />
* For maximum rinsing (higher <strong>pressure</strong> and lower<br />
flow), for stubborn or hard to reach surface such as<br />
second story surfaces, paint removal, oil stains, rust<br />
removal or other stubborn substances (tar, gum,<br />
grease,wax, etc.), select red 0° spray tip.<br />
, To apply detergent, applies project specific cleaners<br />
to help break down stubborn dirt and grime on a<br />
variety of surfaces, select black detergent spray tip.<br />
3. Pull backon collar,insert new spraytip and releasecollar.<br />
Tug on spraytip to makesure it is securelyin place.<br />
UsageTips<br />
* For most effective cleaning, keep spray tip from 8 to<br />
24 inches (20 to 61 cm) awayfrom cleaning surface.<br />
, If you get spray tip too close, especiallyusing a high<br />
<strong>pressure</strong>spray tip, you may damagesurface being cleaned.<br />
, DONOTget closer than 6 inches (15 cm) when cleaning<br />
tires.<br />
Cleaningand Applying Detergent<br />
A, WARNING ChemicalBurn Hazard.<br />
.,-..... Chemicalscould cause bodily injury, property<br />
_ damage or death.<br />
• DONOTusecausticliquidwith <strong>pressure</strong><strong>washer</strong>.<br />
• UseONLY<strong>pressure</strong><strong>washer</strong>safedetergents/soaps.Followall<br />
manufacturersinstructions.<br />
To apply detergent, follow these steps:<br />
1. Review use of spray tips.<br />
2. Preparedetergent solution as required by job.<br />
3. Place small filter end of detergent siphoning tube into<br />
detergent container.<br />
NOT/CE Contact with the hot muffler can damage detergent<br />
siphoning tube.<br />
• When inserting the siphon into a detergent solution bottle, route<br />
the tube so as to keep it from inadvertently contacting the hot<br />
muffler.<br />
NOT/CE Make sure the filter is fully submerged in detergent<br />
while applying detergent.<br />
4. Make sure black spray tip is installed.<br />
NOTICE Detergent cannot be applied with the high <strong>pressure</strong><br />
spray tips (White, Green,Yellow or Red).<br />
5. Make sure garden hose is connected to water inlet.<br />
Checkthat high <strong>pressure</strong> hose is connected to spray gun<br />
and pump. Turn on water.<br />
LOWPressure<br />
\<br />
High Pressure<br />
Useto<br />
apply<br />
detergent<br />
'L V ' '<br />
Black White 40°<br />
2600 PSi<br />
2.8 GPM<br />
Green25° Yellow 15°<br />
2800 PSi 2800 PSi<br />
2.7 GPM 2.7 GPM<br />
Red 0°<br />
3100 PSi<br />
2.5 GPM<br />
14
NOTICE You must attach all hoses before you start the<br />
engine.<br />
* Starting the engine without all the hoses connected and without<br />
the water turned ONwill damage the pump.<br />
. Damageto equipment resulting from failure to follow this<br />
instruction will void warranty.<br />
.<br />
7.<br />
Start enginefollowing instructions How to Start Your<br />
Pressure Washer.<br />
Apply detergent to a dry surface, starting at lower<br />
portion of areato be washedand work upward, using<br />
long, even,overlapping strokes.<br />
8. Allow detergent to "soak in" for 3-5 minutes before<br />
washing and rinsing. Reapplyas neededto prevent<br />
surface from drying. DO NOTallow detergentto dry on<br />
(prevents streaking).<br />
NOTICE You must flush the detergent siphoning system<br />
after each use by placing the filter into a bucket of clean<br />
water, then run the <strong>pressure</strong> <strong>washer</strong> in low <strong>pressure</strong> for 1-2<br />
minutes.<br />
Pressure Washer Rinsing<br />
For Rinsing:<br />
1. Remove black spray tip from nozzleextension.<br />
2. Select and install desired high <strong>pressure</strong> spray tip<br />
following instructions How to UseSpray Tips.<br />
3. Keepthe spray gun a safe distance from the areayou<br />
plan to spray.<br />
_i, WARNING<br />
fall.<br />
Kickbackfrom spray gun can causeyou to<br />
• Operate<strong>pressure</strong><strong>washer</strong>from astablesurface.<br />
• Beextremelycarefulif you mustusethe <strong>pressure</strong><strong>washer</strong>from<br />
a ladder,scaffolding,or anyothersimilarlocation.<br />
• Firmlygraspspraygunwith bothhandswhen usinghigh<br />
<strong>pressure</strong>sprayto avoidinjurywhenspraygunkicksback.<br />
Cleaning Detergent Siphoning Tube<br />
If you used the detergent siphoning tube, you must flush it<br />
with clean water before stopping the engine.<br />
1. Placedetergent siphoning tube/filter in a bucket full of<br />
clean water.<br />
.<br />
3.<br />
4.<br />
5.<br />
6.<br />
Remove high <strong>pressure</strong> spray tip from spray tip<br />
extension.<br />
Select and install black detergent spray tip following<br />
instructions How to UseSpray Tips.<br />
Flushfor 1-2 minutes.<br />
Shut off engine following instructions How to Stop<br />
Pressure Washerand turn off water supply.<br />
ALWAYS point spray gun in a safe direction push red<br />
button and squeezespray gun trigger to release retained<br />
high water <strong>pressure</strong>.<br />
NOTICE Spray gun traps high water <strong>pressure</strong>, even when<br />
engine is stopped and water is disconnected.<br />
_i, WARNING The high <strong>pressure</strong> stream of water that<br />
this and equipment its underlying produces tissues, can leading cut through to serious skin<br />
injury and possible amputation.<br />
Spray gun traps high water <strong>pressure</strong>, even when engine is<br />
stopped and water is disconnected, which can cause<br />
injury.<br />
= Keephigh<strong>pressure</strong>hoseconnectedto pumpandspraygun<br />
whilesystemis pressurized.<br />
• ALWAYSpointspraygunin safedirection,pressredbutton<br />
andsqueezesprayguntriggerto releasehigh<strong>pressure</strong>,every<br />
timeyoustopengine.<br />
Automatic Cool DownSystem(Thermal Relief)<br />
If you run the engine on your <strong>pressure</strong> <strong>washer</strong> for<br />
3-5 minutes without pressing the trigger on the spray gun,<br />
circulating water in the pump can reach temperatures above<br />
125°F. The system engages to cool the pump by discfiarging<br />
the warm water onto the ground.<br />
4. Apply a high <strong>pressure</strong> spray to a small area and then<br />
check surface for damage. If no damage is found, you<br />
can assume it is okay to continue rinsing.<br />
5. Start at top of areato be rinsed, working down with<br />
same overlapping strokes as you used for cleaning.<br />
15
ENGINETECHNICALiNFORMATiON<br />
This is a single cylinder, overhead valve (OHV), air cooled<br />
engine, it is a low emissions engine.<br />
In the State of California, Model 120000 engines are certified<br />
by the California Air Resources Boardto meet emissions<br />
standards for 125 hours. Such certification does not grant<br />
the purchaser, owner or operator of this engine any<br />
additional warranties with respect to the performance or<br />
operational life of this engine. The engine is warranted solely<br />
according to the product and emissions warranties stated<br />
elsewherein this manual.<br />
Power Ratings<br />
The gross power rating for individual gas engine models is<br />
labeled in accordancewith SAE(Society of Automotive<br />
Engineers) code J1940 (Small Engine Power & Torque<br />
Rating Procedure), and rating performance has been<br />
obtained and corrected in accordancewith SAEJ1995<br />
(Revision 2002-05). Torque values are derived at 3060 RPM;<br />
horsepower values are derived at 3600 RPM. Actual gross<br />
engine power will be lower and is affected by, among other<br />
things, ambient operating conditions and engine-to-engine<br />
variability. Given both the wide array of products on which<br />
engines are placed andthe variety of environmental issues<br />
applicable to operating the equipment, the gas engine will not<br />
develop the rated gross power when used in a given piece of<br />
power equipment (actual "on-site" or net power). This<br />
difference is due to a variety of factors including, but not<br />
limited to, accessories (air cleaner, exhaust, charging,<br />
cooling, carburetor, fuel pump, etc.), application limitations,<br />
ambient operating conditions (temperature, humidity,<br />
altitude), and engine-to-engine variability. Dueto<br />
manufacturing and capacity limitations, Briggs & Stratton<br />
may substitute an engine of higher rated power for this<br />
Series engine.<br />
This <strong>pressure</strong><strong>washer</strong> is rated in accordanceto the Pressure<br />
Washer Manufacturers Association (PWMA) standard PW101<br />
(Testing and Rating Performance of PressureWashers).<br />
PRODUCTSPECiFiCATiONS<br />
PressureWasherSpecifications<br />
Max Outlet Pressure .......................<br />
Max Flow Rate.............................<br />
Detergent Mix ........................<br />
Water Supply Temperature ..........<br />
EngineSpecifications<br />
3,100 PSi<br />
2.8 GPM<br />
Use as directed<br />
Not to exceed100%<br />
Bore ................................<br />
2.672 in. (68mm)<br />
Stroke ..............................<br />
2.204 in. (56mm)<br />
Displacement ........................<br />
12.48 in. (206cc)<br />
SparkPlug<br />
ResistorType: ............. Briggs & Stratton 491055S<br />
Long Life Platinum: .......... Briggs & Stratton 5066D<br />
SetGapTo: ......................<br />
0.030inch (0.76mm)<br />
ArmatureAir Gap: ........... 0.010-0.014in.(0.25-0.36mm)<br />
Valveclearancewithvalvespringsinstalledandpiston1/4in.<br />
(6 mm)pasttop deadcenter(checkwhenengineis cold).<br />
Intake .................... 0.004-0.006in.(0.10-0.15mm)<br />
Exhaust .................. 0.009-0.011in.(0.23-0.28mm)<br />
FuelCapacity...............................<br />
1.6 Quarts<br />
0il Capacity........................<br />
20 Ounces(0.6 liter)<br />
NOTICE For practical operation, the engine load should not<br />
exceed85% of rated power. Enginepower will decrease<br />
3-1/2% for each 1,000 feet (300 meters) above sea level and<br />
1% for each 10° F (5.6° C) above 77° F (25° C). It should<br />
operate satisfactorily at an angle up to 15°.<br />
16
OWNER'SRESPONSiBiLiTiES<br />
Follow the hourly or calendar intervals, whichever occurs<br />
first. More frequent service is required when operating in<br />
adverseconditions noted below.<br />
* Changeengine oil<br />
* Check/clean water inlet screen'<br />
* Check high <strong>pressure</strong> hose<br />
* Check detergentsiphoning hose<br />
* Check spray gun and assembly for leaks<br />
* Cleandebris<br />
* Check engineoil level<br />
• Service engineair cleaner2<br />
* Service spark plug<br />
* Cleancooling system2<br />
Clean if clogged. Replace if perforated or torn.<br />
2Service more often under dirty or dusty conditions.<br />
GeneralRe<strong>com</strong>mendations<br />
Regular maintenance will improve the performance and<br />
extendthe life of the <strong>pressure</strong><strong>washer</strong>. Seeany Sears or<br />
other qualified service dealerfor service.<br />
The <strong>pressure</strong> <strong>washer</strong> warranty does not cover items that<br />
have beensubjected to operator abuse or negligence.To<br />
receivefull value from the warranty, the operator must<br />
maintain <strong>pressure</strong><strong>washer</strong> as instructed in this manual<br />
including proper storage as detailed in Storage.<br />
Some adjustments will needto be made periodically to<br />
properly maintain your <strong>pressure</strong><strong>washer</strong>.<br />
All service and adjustments should be made at least once<br />
each season. Follow the requirements in the Maintenance<br />
Schedule chart above.<br />
NOTICE Oncea year you should clean or replace the spark<br />
plug and replace the air filter. A new spark plug and clean air<br />
filter assure proper fuel-air mixture and helpyour engine run<br />
better and last longer.<br />
Pump Oil<br />
DO NOTattempt any oil maintenance on this pump. The<br />
pump is pre-iubricated and sealedfrom the factory, requiring<br />
no additional maintenancefor the life of the pump.<br />
EmissionsControl<br />
Maintenance,replacement, or repair of the emissions<br />
controldevices and systemsmay be performed by any nonroad<br />
engine repair establishment or individual. However,<br />
to obtain "no charge" emissions control service, the work<br />
must be performed by a factory authorizeddealer. Seethe<br />
Emissions Warranty.<br />
BeforeEachUse<br />
1. Checkengine oil level.<br />
2. Cleandebris.<br />
3. Checkwater inlet screenfor damage.<br />
4. Checkhigh <strong>pressure</strong> hose for leaks.<br />
5. Checkgun and spray tip extension assemblyfor leaks.<br />
6. Purge pump of air and contaminants.<br />
PRESSUREWASHERMAINTENANCE<br />
Clean Debris<br />
Daily or before use, clean accumulateddebris from <strong>pressure</strong><br />
<strong>washer</strong>. Keeplinkage, spring and controls clean. Keeparea<br />
around and behind muffler free from any <strong>com</strong>bustible debris.<br />
inspect cooling air slots and openings on the <strong>pressure</strong><br />
<strong>washer</strong>. Theseopenings must be kept clean and<br />
unobstructed.<br />
Pressure<strong>washer</strong> <strong>parts</strong> should be kept clean to reduce the<br />
risk of overheating and ignition of accumulated debris.<br />
* Usea damp cloth to wipe exterior surfaces clean.<br />
NOTICE improper treatment of <strong>pressure</strong><strong>washer</strong> can<br />
damage it and shorten its life.<br />
• DONOTinsertanyobjectsthroughcoolingslots.<br />
* Usea soft bristle brush to loosen caked on dirt, oil, etc.<br />
* Usea vacuum cleaner to pick up loose dirt and debris.<br />
Checkand Clean Inlet Screen<br />
Examinegarden hose inlet screen. Cleanif it is clogged or<br />
replace if it is torn.<br />
CheckHigh Pressure Hose<br />
High <strong>pressure</strong> hoses can develop leaksfrom wear, kinking,<br />
or abuse, inspect hose before each use. Check for cuts,<br />
leaks, abrasions, bulging of cover, or damage or movement<br />
of couplings. If any of these conditions exist, replace hose<br />
immediately.<br />
_lLWARNING The high <strong>pressure</strong> stream of water that<br />
this and equipment its underlying produces tissues, can leading cut through to serious skin<br />
injury and possible amputation.<br />
• NEVERrepairhigh<strong>pressure</strong>hose.Replaceit.<br />
• ReplacementhoseratingMUSTexceedmaximum<strong>pressure</strong><br />
ratingof unit.<br />
17
CheckSpray Gunand Spray Tip Extension<br />
Examinehoseconnectionto spraygun and makesure it is<br />
secure.Testtrigger by pressingit and makingsure it springs<br />
backinto placewhenyou releaseit. Do not depressredbutton<br />
andtest trigger.Youshould not beableto presstrigger. Replace<br />
spraygun immediatelyif it fails anyof thesetests.<br />
SprayTip Maintenance<br />
A pulsing sensation felt while squeezingthe spray gun trigger<br />
may be causedby excessive pump <strong>pressure</strong>. The principal<br />
causeof excessive pump <strong>pressure</strong> is a spray tip clogged or<br />
restricted with foreign materials, such as dirt, etc. To correct<br />
the problem, immediately clean the spray tip following these<br />
instructions:<br />
1. Shut off engine and turn off water supply.<br />
2. ALWAYSpoint spray gun in a safe direction, press red<br />
button and and squeezespray gun trigger to release<br />
retained high water <strong>pressure</strong>.<br />
O-Ring Maintenance<br />
Purchasean O-Ring RepairKit, item 7175116, at your local<br />
Searsor by calling 1-888-4-1VlY-NOME(469-4663) or onlineat<br />
www.sears.<strong>com</strong>,it is not includedwith the <strong>pressure</strong><strong>washer</strong>.<br />
This kit includesreplacemento-rings anda waterinlet filter.<br />
Referto the instructionsheetprovidedin the kit to serviceyour<br />
unit's o-rings.<br />
A. WARNING The high <strong>pressure</strong> stream of water that<br />
this and equipment its underlying produces tissues, can leading cut through to serious skin<br />
injury and possible amputation.<br />
* NEVERrepairleakingconnectionswithsealantof any kind.<br />
Replaceo-ringor seal.<br />
ENGINEMAINTENANCE<br />
_lL WARNING Unintentional sparking can result in fire or<br />
A. WARNING The high <strong>pressure</strong> stream of water that<br />
_¢<br />
electric shock.<br />
this and equipment its underlying produces tissues, can leadingto cut through serious skin<br />
injury and possible amputation.<br />
Spray gun traps high water <strong>pressure</strong>, even when engine is<br />
stopped and water is disconnected, which can cause<br />
injury.<br />
* Keephigh<strong>pressure</strong>hoseconnectedto pumpandspraygun<br />
whilesystemis pressurized.<br />
* ALWAYSpointspraygunin safedirection,pressredbutton<br />
andsqueezesprayguntriggerto releasehigh<strong>pressure</strong>,every<br />
timeyou stopengine.<br />
3. Remove spray tip from end of spray tip extension.<br />
4. Use a small paper clip to free any foreign material<br />
clogging or restricting spray tip (A).<br />
5. Remove spray tip extension from spray gun.<br />
6. Usinga garden hose, remove additionaldebris by back<br />
flushingwater through spray tip extension. Backflush<br />
between 30 to 60 seconds.<br />
7. Reinstall spray tip into spray tip extension.<br />
8. Reconnectspray tip extension to spray gun.<br />
9. Make sure garden hose is connected to water inlet.<br />
Checkthat high <strong>pressure</strong> hose is connected to spray gun<br />
and pump. Turn on water.<br />
10. Start enginefollowing instructions How to Start Your<br />
Pressure Washer.<br />
11. Test <strong>pressure</strong><strong>washer</strong> by operating with each quick<br />
connect spray tip.<br />
WHENADJUSTINGOR MAKING REPAIRSTOYOUR PRESSURE<br />
WASHER<br />
* Disconnect the spark plug wire from the spark plug and place<br />
the wire where it cannot contact spark plug.<br />
WHENTESTINGFOR ENGINESPARK<br />
* Useapproved spark plug tester.<br />
* DONOT check for spark with spark plug removed.<br />
Oil<br />
Oil Re<strong>com</strong>mendations<br />
We re<strong>com</strong>mend the use of Briggs & Stratton Warranty<br />
Certified oils for best performance. Other high-quality<br />
detergent oils are acceptable if classified for service SF,SG,<br />
SH,SJ or higher. DO NOTuse special additives.<br />
Outdoor temperatures determine the proper oil viscosity for<br />
the engine. Usethe chart to select the best viscosity for the<br />
outdoor temperature range expected.<br />
oF<br />
104___ 506886 _o__<br />
32 .o<br />
14<br />
-4<br />
-22<br />
oc<br />
\ 40<br />
;_30<br />
_°_20<br />
10<br />
_m m 0<br />
-20<br />
--_C °<br />
-30<br />
* Below40°F(4°C)the useof SAE30will resultin hardstarting.<br />
** Above80°F(27°C)the useof 10W30maycauseincreasedoil<br />
consumption.Checkoil levelmorefrequently.<br />
O<br />
certification OTICE Synthetic mark and oil API meeting service ILSACGF-2,API<br />
symbol with<br />
"SJ/0F ENERGYCONSERVING"or higher, is an<br />
acceptable oil at all temperatures. Useof synthetic oil<br />
does not alter required oil change intervals.<br />
18
CheckingOilLevel<br />
Oil level should be checked prior to each use or at least every<br />
8 hours of operation. Keepoil level maintained.<br />
1. Make sure <strong>pressure</strong> <strong>washer</strong> is on a level surface.<br />
2. Remove oil fill cap and wipe clean with cloth.<br />
3. Verify oil is at the point of overflowing at oil fill opening.<br />
Replaceand tighten oil fill cap.<br />
ServiceAir Cleaner<br />
Your engine will not run properly and may be damaged if you<br />
run it with a dirty air cleaner. Service more often if operating<br />
under dirty or dusty conditions. Replacementsare available<br />
at your local Sears service center.<br />
To servicethe air cleaner, follow these steps:<br />
1. Loosen screw (A) and tilt cover (B) down.<br />
Adding Engine Oil<br />
1. Make sure <strong>pressure</strong> <strong>washer</strong> is on a level surface.<br />
2. Check oil level as described in Checking OilLevel.<br />
3. if needed,slowly pour oil into oil fill opening to the point<br />
of overflowing at oil fill cap.<br />
4. Replaceand tighten oil fill cap.<br />
ChangingEngineOil<br />
If you are using your <strong>pressure</strong><strong>washer</strong> under extremely dirty<br />
or dusty conditions, or in extremely hot weather, change oil<br />
more often.<br />
A. CAUTION Avoid prolonged or repeatedskin contact<br />
with used motor oil.<br />
• Usedmotoroil hasbeenshownto causeskincancerin certain<br />
laboratoryanimals.<br />
• Thoroughlywashexposedareaswith soapandwater.<br />
KEEPOUTOFREACHOFCHILDREN.DON'T<br />
POLLUTE.CONSERVERESOURCES.RETURN<br />
USEDOIL TO COLLECTIONCENTERS.<br />
Change oil while engine is still warm from running,as<br />
follows:<br />
1. Make sure unit is on a level surface.<br />
2. Disconnect the spark plug wire from the spark plug and<br />
place the wire where it cannot contact spark plug.<br />
3. Cleanarea around oil drain plug (A). The oil drain plug is<br />
located at base of engine, opposite carburetor.<br />
2. Carefully remove cartridge (C) assembly.<br />
3. To clean cartridge, gently tap pleated paperside on a fiat<br />
surface.<br />
4. Reinstall clean or new cartridge assembly inside cover.<br />
5. insert cover's tabs (B) into slots in bottom of base (E).<br />
6. Tilt cover up and tighten screw securely to base.<br />
NOTICE You can purchasenew air filter elements by calling<br />
1-800-4-1MIY-NOIVIE (469-4663).<br />
ServiceSparkPlug<br />
Changingthe spark plug will help your engine to start easier<br />
and run better.<br />
1. Cleanareaaround spark plug.<br />
2. Removeand inspect spark plug.<br />
3. Replacespark plug if electrodes are pitted, burned or<br />
porcelain is cracked. Usethe re<strong>com</strong>mended replacement<br />
plug. SeeSpecifications.<br />
4. Checkelectrode gap with wire feeler gauge and reset<br />
spark plug gap to re<strong>com</strong>mended gap if necessary(see<br />
Specifications).<br />
4. Remove oi drain plug and drain oi <strong>com</strong>pletely into a<br />
suitable container.<br />
5. Reinstall oil drain plug and tighten securely. Remove oil<br />
fill cap.<br />
6. Slowly pour oil (about 20 oz.) into oil fiii opening (B) to<br />
the point of overflowing (C) at oil fill cap.<br />
7. Reinstall oil fill cap. Finger tighten cap securely.<br />
8. Wipe up any spilled oil.<br />
5. install spark plug and tighten firmly.<br />
NOTICE You can purchasea new spark plug by calling<br />
1-8OO-4-1MIY-NOIMIE (469-4663).<br />
19
inspectIVlufflerand SparkAttester<br />
Inspectthe muffler for cracks, corrosion, or other damage.<br />
Removethe spark arrester, if equipped,and inspect for<br />
damageor carbon blockage, if replacement<strong>parts</strong> are required,<br />
makesure to use only original equipmentreplacement<strong>parts</strong>.<br />
A, WARNING Contact with muffler area can result in<br />
serious burns.<br />
_ Exhaust heat/gases can ignite<br />
<strong>com</strong>bustibles, structures or damage<br />
fuel tank causing a fire.<br />
* DO NOTtouch hot <strong>parts</strong> and AVOID hot exhaust gases.<br />
* Allow equipment to cool before touching.<br />
* Keepat least 5 feet (152 cm) of clearanceon all sides of<br />
<strong>pressure</strong> <strong>washer</strong> including overhead.<br />
* It is a violation of California Public Resource Code,Section<br />
4442, to use or operatethe engine on any forest-covered,<br />
brush-covered, or grass-covered land unless the exhaust<br />
system is equipped with a spark arrester, as defined in Section<br />
4442, maintained in effective working order. Otherstates or<br />
federal jurisdictions may havesimilar laws.<br />
Contact the original equipment manufacturer, retailer, or dealer<br />
to obtain a spark arrester designed for the exhaustsystem<br />
installed on this engine.<br />
* Replacement<strong>parts</strong> must be the sameand installed in the same<br />
position as the original <strong>parts</strong>.<br />
Air Cooling System<br />
Over time debris may accumulate in cylinder cooling fins and<br />
cannot be observedwithout partial engine disassembly. For<br />
this reason,we re<strong>com</strong>mend you have a qualified Sears<br />
service dealer clean the cooling system per re<strong>com</strong>mended<br />
intervals (see MaintenanceSchedule). Equally important is to<br />
keep top of engine free from debris. See CleanDebris.<br />
Carburetor Adjustment<br />
The carburetor on this engine is low emission. It is equipped<br />
with a non-adjustable idle mixture valve. Top speed has been<br />
set at the factory. If adjustment is required, see an authorized<br />
service dealer.<br />
Ak CAUTION Excessively high operating speeds increase<br />
risk of injury and damage to <strong>pressure</strong> <strong>washer</strong>.<br />
Excessively low speeds impose a heavy load.<br />
• DO NOTtamper with governed speed.Pressure<strong>washer</strong><br />
supplies correct ratedfrequency and voltage when running at<br />
governed speed.<br />
• DO NOTmodify <strong>pressure</strong> <strong>washer</strong> in any way.<br />
AFTEREACHUSE<br />
Water should not remain in the unit for long periods of time.<br />
Sediments or minerals can deposit on pump <strong>parts</strong> and<br />
"freeze" pump action. Follow these procedures after every<br />
use:<br />
1. Shut off engine, turn off water supply, point gun in a<br />
safedirection, press red button and squeezetrigger to<br />
relieve trapped <strong>pressure</strong> and let engine cool.<br />
Ak WARNING The high <strong>pressure</strong> stream of water that<br />
this and equipment its underlying produces tissues, can leading cut through to serious skin<br />
injury and possible amputation.<br />
Spray gun traps high water <strong>pressure</strong>, even when engine is<br />
stopped and water is disconnected, which can cause<br />
injury.<br />
* Keephigh<strong>pressure</strong>hoseconnectedto pumpandspraygun<br />
whilesystemis pressurized.<br />
* ALWAYSpointspraygunin safedirection,pressredbutton<br />
andsqueezesprayguntriggerto releasehigh<strong>pressure</strong>,every<br />
timeyoustopengine.<br />
.<br />
.<br />
.<br />
5.<br />
6.<br />
Disconnect hose from spray gun and high <strong>pressure</strong><br />
outlet on pump. Drain water from hose,gun, and spray<br />
tip extension. Usea ragto wipe off the hose.<br />
Empty pump of aii pumped liquids by puffing recoil<br />
handleabout 6 times. This should remove most liquid in<br />
pump.<br />
Coil high <strong>pressure</strong> hose on hook provided on accessory<br />
tray.<br />
Store unit in a clean, dry area.<br />
If storing for more than 30 days see Long Term Storage<br />
on next page.<br />
Ak WARNING Fueland its vapors are extremely<br />
flammable and explosive.<br />
Fire or explosion can causesevere burns<br />
or death.<br />
WHENSTORINGFUELOREQUIPMENTWITHFUELINTANK<br />
* Storeawayfrom furnaces,stoves,waterheaters,clothes<br />
dryers,or otherappliancesthathavepilot lightor other<br />
ignitionsourcebecausetheycan ignitefuel vapors.<br />
2O
WINTERSTORAGE<br />
NOTICE You must protect your unit from freezing<br />
temperatures.<br />
• Failure to do so will permanently damage your pump and render<br />
your unit inoperable.<br />
• Freezedamage is not covered under warranty.<br />
To protectthe unit from freezing temperatures:<br />
1. Follow steps 1-4 in the previous section AfterEach Use.<br />
2. Use pump saver, availableat Sears retail item 7174403,<br />
to treat pump. This minimizes freezedamage and<br />
lubricates pistons and seals.<br />
3. If pump saver is not available,connect a 3-foot section<br />
of garden hose to water inlet adapter. Pour<br />
RV-antifreeze (antifreeze without alcohol) into hose. Pull<br />
recoil handletwice. Disconnect 3-foot hose.<br />
4. Store unit in a clean,dry area.<br />
LONGTERIViSTORAGE<br />
If you do not plan to use the <strong>pressure</strong> <strong>washer</strong> for more than<br />
30 days, you must preparethe engine and pump for long<br />
term storage.<br />
It is important to prevent gum deposits from forming in<br />
essential fuel system <strong>parts</strong> such as the carburetor, fuel filter,<br />
fuel hose or tank during storage. Also, experienceindicates<br />
that alcohol-blended fuels (called gasohol, ethanol or<br />
methanol) can attract moisture, which leadsto separation<br />
and formation of acids during storage. Acidic gas can<br />
damage the fuel system of an enginewhile in storage.<br />
Protect Fuel System<br />
Fuel Additive:<br />
Fuel can be<strong>com</strong>estale when stored over 30 days. Stale fuel<br />
causes acid and gum deposits to form in the fuel system or<br />
on essential carburetor <strong>parts</strong>. To keep fuel fresh, use Briggs<br />
& Stratton FRESHSTART® fuel stabilizer, available as a<br />
liquid additive or a drip concentrate cartridge.<br />
There is no needto drain gasoline from the engine if a fuel<br />
stabilizer is added according to instructions. Run the engine<br />
for 2 minutes to circulate the stabilizer throughout the fuel<br />
system. The engine andfuel can then be stored up to<br />
24 months.<br />
If gasoline in the engine has not beentreated with a fuel<br />
stabilizer, it must be drained into an approved container. Run<br />
the engine until it stops from lack of fuel. The use of a fuel<br />
stabilizer in the storage container is re<strong>com</strong>mended to<br />
maintain freshness.<br />
ChangeOil<br />
While engine is still warm, drain oil from crankcase. Refill<br />
with re<strong>com</strong>mended grade. See ChangingEngine Oil.<br />
Protect Pump<br />
To protect the pump from damage caused by mineral<br />
deposits or freezing, use PumpSaver, item 7174403, to treat<br />
pump. This prevents freeze damageand lubricates pistons<br />
and seals.<br />
NOTICE PumpSaveris available as an optional accessory, it<br />
is not included with the <strong>pressure</strong> <strong>washer</strong>. Contactyour local<br />
Searsservice center to purchase PumpSaver.<br />
NOTICE You must protect your unit from freezing<br />
temperatures.<br />
• Failureto do so will permanently damage your pump and render<br />
your unit inoperable.<br />
• Freezedamage is not covered under warranty.<br />
To use PumpSaver, make sure the <strong>pressure</strong><strong>washer</strong> is turned<br />
off and disconnected from supply water. Readand follow all<br />
instructions and warnings given on the PumpSavercontainer.<br />
Other Storage Tips<br />
1. DO NOTstore fuel from one seasonto another unless it<br />
has been treated as described in Protect Fuel System.<br />
.<br />
3.<br />
Replacefuel container if it starts to rust. Rust and/or dirt<br />
in fuel can cause problems if it's used with this unit.<br />
Coverunit with a suitable protective cover that does not<br />
retain moisture.<br />
A WARNING<br />
Storage covers can be flammable.<br />
• DO NOT placea storage cover over a hot <strong>pressure</strong> <strong>washer</strong>.<br />
• Let equipment cool for a sufficient time before placing the<br />
cover on the equipment.<br />
4. Store unit in a clean and dry area.<br />
21
Problem<br />
Pumphas following problems:<br />
failure to produce<strong>pressure</strong>,<br />
erratic <strong>pressure</strong>, chattering,loss<br />
of <strong>pressure</strong>, low water volume.<br />
Detergentfails to mix with spray.<br />
Enginerunsgoodat no-load but<br />
"bogs" when load is added.<br />
Enginewill not start; or startsand<br />
runs rough.<br />
Cause<br />
1. Water inlet is blocked.<br />
2. inadequatewater supply.<br />
3. inlet hose is kinkedor leaking.<br />
4. Clogged inlet hose strainer.<br />
5. Water supply is over IO0°F.<br />
6. High <strong>pressure</strong> hose is blocked or<br />
leaks.<br />
7. Gun leaks.<br />
8. Spray tip is obstructed.<br />
9. Pump is faulty.<br />
1. Detergentsiphoning tube is not<br />
submerged.<br />
2. Detergentsiphoning tube/filter is<br />
clogged or cracked.<br />
3. High <strong>pressure</strong> spray tip installed.<br />
Engine speed is too slow.<br />
1. Throttle lever in "Stop" position.<br />
2. Fuel valve in "Off" position.<br />
3. Dirty air cleaner.<br />
4. Out of fuel.<br />
5. Stale fuel.<br />
6. Spark plug wire not connected to<br />
spark plug.<br />
7. Badspark plug.<br />
8. Water in fuel.<br />
9. Overchoking.<br />
10. Excessivelyrich fuel mixture.<br />
Correction<br />
1. Cieariniet.<br />
2. Provide adequatewater flow.<br />
i<br />
i3. Straighten inlet hose, patch leak.<br />
4. Checkand clean inlet hose strainer.<br />
5. Provide cooler water supply.<br />
6. Clear blocks in high <strong>pressure</strong> hose or<br />
replace hose.<br />
7. Replacegun.<br />
8. Cleanspray tip.<br />
9. Contact Sears service facility.<br />
1. insert detergent siphoning tube into<br />
detergent.<br />
2. Cleanor replacefilter/detergent<br />
siphoning tube.<br />
3. Replacehigh <strong>pressure</strong> spray tip with<br />
black spray tip.<br />
Move throttle control to FASTposition, if<br />
engine still "bogs down", contact Sears<br />
service facility.<br />
1. Move throttle lever to "Fast" position.<br />
2. Move fuel valve to "On" position.<br />
3. Cleanor replaceair cleaner.<br />
4. Fill fuel tank.<br />
5. Drain fuel tank; fill with fresh fuel.<br />
6. Connect wire to spark plug.<br />
7. Replacespark plug.<br />
i<br />
i8. Drain fuel tank; fill with fresh fuel.<br />
9. Openchoke fully and crank engine.<br />
10. Contact Sears service facility.<br />
Engineshutsdown during Out of fuel. Fill fuel tank.<br />
operation.<br />
Engine Jackspower.<br />
Engine "hunts" or falters.<br />
Dirty air filter.<br />
Choke is openedtoo soon.<br />
Replaceair filter.<br />
Move choke to halfway position until engine<br />
runs smoothly.<br />
22
CRAFTSMAN3100 PSi PressureWasher580.752540<br />
IVlainUnit = ExplodedView<br />
/ /<br />
/ ,<br />
/'
CRAFTSMAN3100 PSi PressureWasher580.752540<br />
IVlainUnit = Parts List<br />
Item Part # Description<br />
1 AD201455GS BASE<br />
2 AD199110GS HANDLE<br />
3 311178GS BILLBOARD<br />
4 192134GS KIT-VIBRATIONMOUNT<br />
5 203901GS PUMP<br />
6 208673GS VALVE-THERMALRELIEF<br />
7 23139DGS KEY<br />
8 B2384GS FILTER-GARDENHOSE<br />
9 204085GS KIT-WATERINLET<br />
10 192914GS KIT-CHEMINJ<br />
11 189971GS KIT-CHEMiCALHOSE<br />
12 B2203GS KIT-HARDWAREHANDLE<br />
13 209283GS HOSE<br />
14 311185GS KiT-QCNOZZLES<br />
195983AGS NOZZLE-QCRED<br />
195983ABGS NOZZLE-QCYELLOW<br />
195983ACGS NOZZLE-QCGREEN<br />
195983ADGS NOZZLE-QCWHITE<br />
198841GS NOZZLE-QCBLACK<br />
15 192310GS MOUNT-VIBRATiON<br />
16 200595GS EXTENSION-QC<br />
17 199990GS GUN<br />
18 192131GS KIT-HARDWAREPUMPMOUNTING<br />
19 311470GS KIT-WHEEL<br />
191265GS E-RING<br />
900 NSP ENGINE(121012-0122-B8) (see pages<br />
26-29)<br />
PartsNot illustrated<br />
Part #<br />
311184GS<br />
208097GS<br />
695755<br />
AB3061BGS<br />
311177GS<br />
311240GS<br />
200658GS<br />
194256GS<br />
Optional Accessories<br />
7175187<br />
7175197<br />
7175124<br />
7175122<br />
7175116<br />
7175129<br />
7175121<br />
7174402<br />
7174403<br />
7133386<br />
7174404<br />
7174405<br />
7174406<br />
Description<br />
MANUAL-OPERATOR'S<br />
AXLE<br />
KNOB-THROTTLE<br />
OIL BOTTLE<br />
DECAL-Engine<br />
DECAL-AirCleaner<br />
DECAL-Recoil<br />
TAG-WARNING<br />
Not illustrated<br />
GardenHoseQuick Connect<br />
Accessory Quick Connect<br />
Rotating Brush Kit<br />
30' ReplacementHose<br />
0 Ring Repair Kit<br />
Turbo Nozzle<br />
25' Extension Hose<br />
HoseReel<br />
Pump Saver<br />
CARTRIDGE,FreshStart<br />
Project Pro® PerfectMixTM Multi-<br />
Purpose and Vehicle Cleaner<br />
Project Pro® PerfectMixTM Concrete,<br />
Brick, andTile Cleaner<br />
Project Pro® PerfectMixTM Mold and<br />
Mildew Cleaner<br />
25
ENGINE,8riogs& $tratton, 121012- ExplodedView<br />
J<br />
415_ 12<br />
12191<br />
307<br />
S<br />
%<br />
22<br />
746 %<br />
742<br />
552<br />
24 0<br />
332<br />
146<br />
®<br />
718_:)<br />
2_<br />
15A<br />
@<br />
_32A_<br />
91_<br />
635<br />
914A<br />
914B<br />
45<br />
B<br />
35 238<br />
1029<br />
o_o__<br />
_I_S__<br />
1034<br />
869 (_<br />
26
@ @ 1270<br />
ENGINE,Briogs & $tratton, 121012- ExplodedView<br />
957A<br />
365<br />
i 633 8<br />
692<br />
130 %<br />
95 _<br />
io8_<br />
_8_I 276<br />
186_<br />
190(_<br />
__<br />
lO_<br />
958<br />
276<br />
358 ENGINE GASKET SET<br />
12<br />
1022<br />
868<br />
993<br />
51% 883_<br />
1095 VALVE GASKET SET<br />
868 _ 1022<br />
121 CARBURETOR OVERHAUL KIT<br />
1o4<br />
127 0 _ _)16 3_ 276<br />
137<br />
633 e_<br />
633A<br />
_<br />
27
ENGINE,8riogs & $tratton, 121012- ExplodedView<br />
836 _ 356 _<br />
96 _ 425<br />
613A<br />
832 @<br />
613T 632_<br />
300<br />
11/"_<br />
51<br />
334<br />
281_663 _<br />
37<br />
23<br />
1070<br />
1005<br />
455<br />
592<br />
®<br />
65 @@<br />
I<br />
456<br />
597_<br />
332<br />
1210<br />
1901_<br />
1211<br />
621 _ 188 _i_<br />
28
ENGINE,Briogs& Stratton, 121012- Parts List<br />
item Part#<br />
1 697322<br />
2 399269<br />
3 299819s<br />
5 699486<br />
7 698210<br />
11 692600<br />
12 699485<br />
13 699482<br />
15 691686<br />
15A 691682<br />
16 699445<br />
18 699804<br />
20 692550<br />
21 281658s<br />
22 699478<br />
23 699488<br />
24 222698s<br />
25 791968<br />
793000<br />
26 791969<br />
793001<br />
27 691866<br />
28 499423<br />
29 690124<br />
30 791584<br />
32 691664<br />
32A 695759<br />
33 499642<br />
34 795443<br />
35 691304<br />
36 691304<br />
37 699661<br />
40 692194<br />
45 690977<br />
46 693404<br />
51 692555<br />
55 791848<br />
58 693389<br />
60 490652<br />
65 690837<br />
65A 699228<br />
78 699205<br />
95 691636<br />
97 690024<br />
98 398185<br />
104 691242<br />
108 692567<br />
109 690023<br />
117 690048<br />
118 497315<br />
121 792006<br />
122 795643<br />
125 698474<br />
127 691739<br />
130 691181<br />
133 398187<br />
134 398188<br />
137 693981<br />
146 690979<br />
155 698214<br />
161 699207<br />
163 696024<br />
186 692317<br />
187 791766<br />
187A 791867<br />
188 699479<br />
190 699220<br />
192 694543<br />
209 692579<br />
209A 691278<br />
219 693578<br />
220 691724<br />
222 793108<br />
227 794367<br />
Description<br />
CylinderAssembly<br />
Kit-Bushing!Seal(MagnetoSide)<br />
Seal-Oil(MagnetoSide)<br />
Head-Cylinder<br />
Gasket=CylinderHead<br />
Tube=Breather<br />
Gasket=Crankcase<br />
Screw(CylinderHead)<br />
Plug-OilDrain<br />
Plug-OilDrain<br />
Crankshaft<br />
Cover=Crankshaft<br />
Seal-Oil(PTOSide)<br />
Cap-OilFill<br />
Screw(CrankcaseCover/Sump)<br />
Flywheel<br />
Key-Flywheel<br />
PistonAssembly(Standard)<br />
PistonAssembly(.020" Oversize)<br />
Ring Set(Standard)<br />
Ring Set(.020" Oversize)<br />
Lock-PistonPin<br />
Pin-Piston<br />
Rod-Connecting<br />
Dipper-ConnectingRod<br />
Screw(ConnectingRod)(Short)<br />
Screw(ConnectingRod)(Long)<br />
Valve-Exhaust<br />
Valve-Intake<br />
Spring-Valve(Intake)<br />
Spring-Valve(Exhaust)<br />
Guard-Flywheel<br />
Retainer-Valve<br />
Tappet-Valve<br />
Camshaft<br />
Gasket-Intake<br />
Housing-RewindStarter<br />
Rope-Starter<br />
Grip-StarterRope<br />
Screw(RewindStarter) (SAE)<br />
Screw(RewindStarter) (Metric) (Original<br />
Equipment)<br />
Screw(FlywheelGuard)<br />
Screw(ThrottleValve)<br />
Shaft-Throttle<br />
Kit-Idle Speed<br />
Pin-FloatHinge<br />
Valve-Choke<br />
Shaft-Choke<br />
Jet-Main (Standard)<br />
Jet-Main (HighAltitude)<br />
Kit-CarburetorOverhaul<br />
Spacer-Carburetor<br />
Carburetor<br />
Plug-Welch<br />
Valve-Throttle<br />
Float-Carburetor<br />
Kit-Needle/Seat<br />
Gasket-FloatBowl<br />
Key-Timing<br />
Plate-CylinderHead<br />
Base-AirCleaner<br />
Gasket-AirCleaner<br />
Connector-Hose<br />
Line-Fuel(CutTo RequiredLength)<br />
Line-Fuel(Formed)<br />
Screw(Control Bracket)<br />
Screw(FuelTank)<br />
Adjustor-RockerArm<br />
Spring-Governor<br />
Spring-Governor(Platinum)<br />
Gear-Governor<br />
Washer(GovernorGear)<br />
Bracket-Control<br />
Lever-GovernorControl<br />
item<br />
238<br />
276<br />
281<br />
300<br />
304<br />
305<br />
306<br />
307<br />
332<br />
333<br />
334<br />
337<br />
356<br />
358<br />
365<br />
415<br />
425<br />
445<br />
455<br />
456<br />
459<br />
505<br />
552<br />
562<br />
592<br />
597<br />
601<br />
608<br />
613<br />
613A<br />
615<br />
616<br />
619<br />
621<br />
632<br />
633<br />
633A<br />
635<br />
663<br />
677<br />
689<br />
692<br />
718<br />
741<br />
742<br />
746<br />
830<br />
832<br />
836<br />
851<br />
868<br />
869<br />
883<br />
914<br />
914A<br />
914B<br />
957<br />
957A<br />
958<br />
968<br />
971<br />
972<br />
975<br />
993<br />
1005<br />
1022<br />
1023<br />
1026<br />
1029<br />
1034<br />
1070<br />
1095<br />
1210<br />
1211<br />
Part#<br />
691300<br />
271716<br />
793122<br />
693593<br />
699598<br />
699480<br />
795334<br />
699483<br />
792723<br />
695711<br />
699477<br />
491055s<br />
692390<br />
791797<br />
699484<br />
693463<br />
699208<br />
491588s<br />
692591<br />
692299<br />
281505s<br />
691251<br />
692346<br />
691119<br />
690800<br />
691696<br />
791850<br />
795930<br />
699209<br />
699203<br />
692576<br />
692547<br />
699230<br />
692310<br />
693408<br />
693867<br />
691321<br />
692076<br />
699206<br />
699203<br />
691855<br />
690572<br />
690959<br />
695087<br />
692564<br />
790278<br />
694544<br />
693583<br />
699632<br />
493880s<br />
795440<br />
691155<br />
691893<br />
699480<br />
692557<br />
697551<br />
795027<br />
792647<br />
698180<br />
692584<br />
690370<br />
694260<br />
790559<br />
694088<br />
692592<br />
691890<br />
499924<br />
790287<br />
691230<br />
691343<br />
699201<br />
791798<br />
791849<br />
791849<br />
Description<br />
Valve-Cap<br />
Washer-Sealing<br />
Panel-Control<br />
Muffler<br />
Housing-Blower<br />
Screw (BlowerHousing)<br />
Shield-Cylinder<br />
Screw (CylinderShield)<br />
Nut (Flywheel)<br />
Armature-Magneto<br />
Screw (MagnetoArmature)<br />
Plug-Spark<br />
Wire-Stop<br />
GasketSet-Engine<br />
Screw (Carburetor)<br />
Plug(CrankcaseCover)<br />
Screw (Air CleanerCover)<br />
Filter-AirCleanerCartridge<br />
Cup-Flywheel<br />
Plate-PawlFriction<br />
PawI-Ratchet<br />
Nut (GovernorControlLever)<br />
Bushing-GovernorCrank<br />
Bolt (GovernorControl Lever)<br />
Nut (RewindStarter)<br />
Screw (PawlFrictionPlate)<br />
Clamp-Hose(Green)<br />
Starter-Rewind<br />
Screw (Muffler) (M6x2OmmLong)<br />
Screw (Muffler)<br />
Retainer-GovernorShaft<br />
Crank-Governor<br />
Screw (CylinderHeadPlate)<br />
Switch-Stop<br />
Spring/Link-MechanicalGovernor<br />
Seal-Choke/ThrottleShaft (ChokeShaft)<br />
Seal-Choke/ThrottleShaft (ThrottleShaft)<br />
Boot-SparkPlug<br />
Screw (ControlPanel)<br />
Screw (Muffler Deflector)<br />
Spring-Friction(RewindStarter)<br />
Spring-Detent<br />
Pin-Locating<br />
Gear-Timing<br />
Retainer-ERing<br />
Gear-Idler<br />
Stud-RockerArm<br />
Guard-Muffler<br />
Screw (Muffler Guard)(M6x14mm Long)<br />
Terminal-SparkPlug<br />
Seal-Valve<br />
Seal-Valve<br />
Gasket-Exhaust<br />
Screw (RockerCover) (Bottom)<br />
Screw (RockerCover) (Top)<br />
Screw (RockerCover) (Center)<br />
Cap-FuelTank<br />
Cap-FuelTank(OriginalEquipment)<br />
Valve-FuelShut Off<br />
Cover-AirCleaner<br />
Screw (Air CleanerBaseto Carburetor)<br />
Tank-Fuel<br />
Bowl-Float<br />
Gasket-CylinderHeadPlate<br />
Fan-Flywheel<br />
Gasket-RockerCover<br />
Cover-Rocker<br />
Rod-Push<br />
Arm-Rocker<br />
Guide-PushRod<br />
Screw (FlywheelFan)<br />
GasketSet-Valve<br />
Pulley/SpringAssembly (Pulley)<br />
Pulley/SpringAssembly (Spring)<br />
29
California, U.S. EPA,and Sears Emissions<br />
ControlWarrantyStatement<br />
YourWarranty RightsAnd Obligations<br />
The California Air Resources Board, U.S. EPA,and Sears,<br />
Roebuck and Co., U.S.A.(Sears) are pleasedto explain the<br />
emissions control system warranty on your Model Year2008<br />
and later engine/equipment. In California, new small off-road<br />
engines must be designed, built, and equippedto meet the<br />
State's stringent anti-smog standards. Sears must warrant<br />
the emissions control system on your engine/equipment for<br />
the periods of time listed below provided there has been no<br />
abuse, neglect, or impropermaintenance of your small offroad<br />
engine.<br />
Your emissions control system may include<strong>parts</strong> such as<br />
the carburetor or fuel injection system, fuel tank, ignition<br />
system, and catalytic converter. Also includedmay be hoses,<br />
belts, connectors, sensors, and other emissions-related<br />
assemblies. Where a warrantable condition exists, Sears will<br />
repair your engine/equipment at no cost to you including<br />
diagnosis, <strong>parts</strong>, and labor.<br />
Manufacturer'sWarrantyCoverage:<br />
Small off-road engines arewarranted for two years. If any<br />
emissions-related part on your engine/equipment is<br />
defective, the part will be repaired or replaced by Sears.<br />
Owner'sWarrantyResponsibilities:<br />
* As the small engine/equipment owner, you are<br />
responsiblefor the performance of the required<br />
maintenance listedinyour owner's manual. Sears<br />
re<strong>com</strong>mendsthat you retain all receipts covering<br />
maintenance on your engine/equipment, but Sears<br />
cannot deny warranty solely for the lackof receipts or<br />
your failure to ensure the performance of all scheduled<br />
maintenance.<br />
• As the engine/equipment owner, you should however<br />
be aware that Sears may deny you warranty coverage if<br />
your engine/equipment or a part has failed due to<br />
abuse, neglect, improper maintenance,or unapproved<br />
modifications.<br />
• You are responsiblefor presentingyour<br />
engine/equipment to a Sears distribution center,<br />
servicing dealer, or other equivalent entity, as<br />
applicable, as soon as a problem exists. The warranty<br />
repairs should be <strong>com</strong>pleted in a reasonableamount of<br />
time, not to exceed30 days. If you have any questions<br />
regardingyour warranty rights and responsibilities, you<br />
should contact Sears at (800) 469-4663.<br />
Sears EmissionsControl Warranty Provisions<br />
The following arespecific provisions relativeto your<br />
Emissions Control Warranty Coverage. it is in addition to the<br />
Searsengine warranty for non-regulated engines found in<br />
the Operator's Manual.<br />
1. Warranted Emissions Parts<br />
Coverageunder this warranty extends only to the <strong>parts</strong><br />
listed below (the emissions control systems <strong>parts</strong>) to<br />
the extent these <strong>parts</strong> were present on the engine<br />
purchased.<br />
a. Fuel Metering System<br />
• Cold start enrichment system (soft choke)<br />
• Carburetorand internal<strong>parts</strong><br />
• Fuel pump<br />
• Fuel line, fuel line fittings, clamps<br />
• Fueltank, cap and tether<br />
• Carbon canister<br />
b. Air Induction System<br />
• Air cleaner<br />
• intake manifold<br />
• Purge and vent line<br />
c. ignition System<br />
• Spark plug(s)<br />
• Magneto ignition system<br />
d. Catalyst System<br />
• Catalytic converter<br />
• Exhaust manifold<br />
• Air injection system or pulse valve<br />
e. Miscellaneous items Usedin Above Systems<br />
• Vacuum, temperature, position, time sensitive<br />
valves and switches<br />
• Connectorsand assemblies<br />
2. Length of Coverage<br />
For a period of two years from date of original<br />
purchase, Sears warrants to the original purchaser and<br />
each subsequent purchaser that the engine is designed,<br />
built, and equipped so as to conform with all applicable<br />
regulations adopted by the Air ResourcesBoard; that it<br />
is free from defects in material and workmanship that<br />
could causethe failure of a warranted part; and that it is<br />
identical in aii material respects to the enginedescribed<br />
in the manufacturer's application for certification. The<br />
warranty period begins on the date the engine is<br />
originally purchased.<br />
In the USA and Canada,a 24-hour hotline, 1-800-469-4663, has a menu of pro-recorded messages offering you product maintenance<br />
information.<br />
3O
Thewarrantyonemissions-related <strong>parts</strong>isasfollows:<br />
• Any warranted part that is not scheduledfor<br />
replacementas required maintenancein the owner's<br />
manual supplied, is warranted for the warranty period<br />
stated above. If any such part fails during the period of<br />
warranty coverage, the part will be repairedor replaced<br />
by Sears at no charge to the owner. Any such part<br />
repairedor replaced under the warranty will be<br />
warranted for the remaining warranty period.<br />
• Any warranted part that is scheduled only for regular<br />
inspection in the owner's manual supplied, is warranted<br />
for the warranty period stated above. Any such part<br />
repairedor replaced under warranty will be warranted<br />
for the remaining warranty period.<br />
• Any warranted part that is scheduledfor replacementas<br />
requiredmaintenancein the owner's manualsupplied, is<br />
warrantedfor the period of time prior to the first<br />
scheduledreplacementpoint for that part. If the part fails<br />
prior to the first scheduled replacement,the part will be<br />
repairedor replacedby Searsat no charge to the owner.<br />
Any such part repairedor replacedunder warranty will be<br />
warrantedfor the remainderof the period prior to the<br />
first scheduledreplacementpoint for the part.<br />
• Add on or modified <strong>parts</strong> that are not exempted by the<br />
Air Resources Board may not be used.The use of any<br />
non exempted add on or modified <strong>parts</strong> by the owner<br />
will be grounds for disallowing a warranty claim. The<br />
manufacturer will not be liable to warrant failures of<br />
warranted <strong>parts</strong> caused by the use of a non exempted<br />
add on or modified part.<br />
3. ConsequentialCoverage<br />
Coverageshall extend to the failure of any engine<br />
<strong>com</strong>ponents causedby the failure of any warranted<br />
emissions <strong>parts</strong>.<br />
4. Claims and CoverageExclusions<br />
Warranty claims shall be filed according to the<br />
provisions of the Sears engine warranty policy.<br />
Warranty coveragedoes not apply to failures of<br />
emissions <strong>parts</strong> that are not original equipment Sears<br />
<strong>parts</strong> or to <strong>parts</strong> that fail due to abuse, neglect, or<br />
improper maintenance as set forth in the Sears engine<br />
warranty policy. Sears is not liable for warranty<br />
coverageof failures of emissions <strong>parts</strong> caused by the<br />
use of add-on or modified <strong>parts</strong>.<br />
LookFor ReJevantEmissionsDurability Periodand Air<br />
Index Information OnYour EngineEmissionsLabeJ<br />
Enginesthat are certified to meet the California Air Resources<br />
Board (CARB)Emissions Standard must display information<br />
regarding the Emissions Durability Period and the Air Index.<br />
The engine manufacturer makes this information availableto<br />
the consumer on emissions labels. The engine emissions<br />
labelwill indicate certification information.<br />
The Emissions Durability Perioddescribes the number of<br />
hours of actual running time for which the engine is certified<br />
to be emissions <strong>com</strong>pliant, assuming proper maintenance in<br />
accordance with the Operating & Maintenance Instructions.<br />
The following categories are used:<br />
Moderate: Engine is certified to be emissions <strong>com</strong>pliant for<br />
125 hours of actual engine running time.<br />
Intermediate: Engineis certified to be emissions <strong>com</strong>pliant<br />
for 250 hours of actual engine running time.<br />
Extended: Engineis certified to be emissions <strong>com</strong>pliant for<br />
500 hours of actual engine running time.<br />
For example, a typical walk-behind lawn mower is used 20 to<br />
25 hours per year. Therefore, the Emissions Durability<br />
Period of an enginewith an intermediate rating would<br />
equate to 10 to 12 years.<br />
Small off-road engines are certified to meet the United States<br />
Environmental Protection Agency (USEPA) Phase2<br />
emissions standards. For Phase 2 certified engines,the<br />
Emissions Compliance Period referred to on the Emissions<br />
Compliance label indicates the number of operating hours for<br />
which the engine has been shown to meet Federalemissions<br />
requirements.<br />
For engines lessthan 225 cc displacement.<br />
Category C = 125 hours<br />
Category B = 250 hours<br />
CategoryA = 500 hours<br />
For engines of 225 cc or more displacement.<br />
Category C = 250 hours<br />
Category B = 500 hours<br />
CategoryA = 1000 hours<br />
31
GARANTIA .......................................... 32<br />
CONTRATODEPROTECCIONPARA REPARACIONES......... 32<br />
REGLASDESEGURiDAD ............................ 33-35<br />
CARACTERiSTICASY CONTROLES....................... 36<br />
MONTAJE ........................................ 37-40<br />
OPERACION....................................... 41-45<br />
ESPECIFICACIONES................................... 46<br />
MANTENIMIENTO .................................. 47-51<br />
ALMACENAMlENTO ................................... 52<br />
REPARACIONDEDAVIes REPUESTOS .................... 53<br />
GARANTIADEL CONTROLDEEMISIONES ............... 54-55<br />
COMe ORDENARPARTES ............... PAGINAPOSTERIOR<br />
GARANTJALllVliTADADECRAFTSMAN<br />
Si este producto de Craftsman falla debido a defectos de materiales o mane de obra en el plazode dos a_os a partir de la fecha de <strong>com</strong>pra,<br />
devu_lvalo a cualquier aimac_n Sears, centre de reparaci6n y repuestos Sears, u otro punto de venta de Craftsman de los Estados Unidos<br />
para su reparaci6n gratuita o, en case de que _sta no sea posible, para su sustituci6n.<br />
Esta garantia se reducir_ a 90 dias desde la fecha de <strong>com</strong>pra si este producto se utiliza en alg_n memento con fines <strong>com</strong>erciales o de<br />
alquiler.<br />
Esta garantia SOLOcubre defectos de materiales y de mane de obra. Sears NOpagard:<br />
= Los elementos que pueden desgastarseen condiciones de use normaies dentro dei periodo de garantia, <strong>com</strong>e pistoias rociadoras,<br />
mangueras, proiongadores de boquilla, boquillas, filtros y bujias.<br />
• Reparaciones necesarias debido a accidentes o fallos que se deriven de la incapacidad para operar o mantener el producto de acuerdo<br />
con todas las instrucciones facilitadas.<br />
• Mantenimiento preventive o reparaciones necesarias debido al use de mezclas de <strong>com</strong>bustible inadecuadas o de <strong>com</strong>bustible<br />
contaminado o pasado.<br />
Esta garantia le otorga determinados derechos legales yes posible que tenga otros derechos que pueden variar de una provincia a otra.<br />
Sears, Roebuck and Co., HoffrnanEstates,IL 60179<br />
Felicidadesper realizar una <strong>com</strong>pra inteligente.<br />
Su nuevo producto Craftsman® est_dise_ado y fabricado para<br />
funcionar de manerafiable durante muchos a_os. Pero <strong>com</strong>e todos<br />
los productos, es posible que requiera reparaci6n ocasionalmente.<br />
Es en esos mementos, tenet un contrato de protecci6n para<br />
reparaciones puede ahorrarle dinero y molestias.<br />
A continuaci6nse rnenciena Jeque eJcentrate de pretecci6npara<br />
reparaciones* conternpJa:<br />
* Servicie experte de nuestros 10.000 especiaiistas profesionaies<br />
en reparaci6n.<br />
, Servicie ilimitade y sin ceste en partes y mane de obra en<br />
todas las reparaciones incluidas en la cobertura.<br />
, Cambie del preductoper hasta $1.500 si el producto incluido<br />
en ia cobertura no se puede reparar.<br />
, Un 10% de descuente en el precio normal de servicio yen<br />
partes instaladas relacionadas no inciuidas en la cobertura dei<br />
contrato; asimismo, un 10% de descuento en ei precio normal<br />
de revisiones de mantenimiento preventive.<br />
, Ayudatelef6nica r_pida. Nuestro servicio de Soluci6n r_pida<br />
consiste en apoyo telef6nico per un representante de Sears.<br />
Piense que somos un "manual dei usuario parlante".<br />
Una vez que adquiera ei contrato de protecci6n para reparaciones,<br />
s61otiene que hacer una sencilla Ilamadateief6nica para programar<br />
un servicio. Puede Ilamara cualquier hera dei dia o la noche, o<br />
programar una cita de servicio en linea.<br />
El contrato de protecci6n para reparacioneses una <strong>com</strong>pra segura.<br />
Si io cancela per cualquier motive durante el periodo de garantia del<br />
producto, le reembolsaremos el total de su dinero o una parte<br />
proporcional en cualquier memento posterior al vencimiento del<br />
periodo de garantia del producto. Adquiera hey su contrato de<br />
protecci6n para reparaciones.<br />
Apiican aJgunaslirnitacienes y exciusienes. Para conocerprecies<br />
y obtener inforrnaci6n adicional en EE. UU., JJarneaJ<br />
1-800-827-6655.<br />
* La coberturaen Canaddvaria en deterrninades articules. Para<br />
obtener redes los detaJJes,cernuniquesea Sears Canad_ aJ<br />
1-800-361-6665,<br />
Serviciede instaiaci6ndeSears<br />
Para solicitar un servicio de instalaci6n per parte de un profesional<br />
de Sears para aparatos dom6sticos, puertas autom_ticas de garajes,<br />
calentadores de agua y otros articulos dom_sticos importantes en<br />
EE. UU. o Canada,<strong>com</strong>uniquese al 1-800-4-1ViY-HOIViE®.<br />
32
Leaestemanualminuciosamente<br />
partesyel funcionamientodesum_quinalimpiadoraa<br />
y conozca fondolas<br />
presi6n.Conozcasusaplicaciones,suslirnitacionesy los<br />
peligrosinvolucrados.<br />
Informaci6nimportantede seguridad<br />
SirnboJossobre Jaseguridady significados<br />
GasesT6xicos<br />
SuperficiesResbalosas<br />
Partesen Movimiento<br />
Fuego<br />
Explosi6n<br />
SuperficieCaliente<br />
5-<br />
Caer<br />
ObjetosVoiadores<br />
DescargaEl(ictrica<br />
InyeccidnLiquida<br />
ManualdelOperafio<br />
QuemaduraQuimica Contragolpe<br />
_lLElsimbolo de alerta de seguridad indica un posible<br />
riesgo parasu integridad fisica. Se utiiiza una paiabrade<br />
se_alizaci6n (PELIGRO,ADVERTENCIAo PRECAUCiON)<br />
junto con el simbolo de alerta paradesignar un grado o<br />
nivel de gravedad de riesgo. Se puede utiiizar un simbolo de<br />
seguridad para representarel tipo de riesgo. La palabrade<br />
se_alizaci6nAVISO se utiiiza para hacer referenciaa una<br />
pr_.cticano relacionadacon una lesi6n fisica.<br />
J_.PELIGROindica un riesgo que, de no evitarse, provocard<br />
la muerte o lesiones de gravedad.<br />
_lLADVERTENCIAindica un riesgo que, de no evitarse,<br />
podrfa provocar la muerte o lesiones de gravedad.<br />
J_.PRECAUCIONindica un riesgo que, de no evitarse,podrfa<br />
provocar lesiones leveso moderadas.<br />
AI/ISO hace referenciaa una pr_.cticano relacionada con una<br />
lesi6n fisica.<br />
_lLADVERTENCIA Elescapedei motor de este producto<br />
contiene eiementos quimicos reconocidos en el Estadode<br />
California por producir c_.ncer,defectos de nacimiento u<br />
otros da_os de tipo reproductivo.<br />
_lLADVERTENCIA Esteproducto contiene plomo y<br />
<strong>com</strong>puestos de plomo declaradoscausantes de<br />
malformaciones y otros defectos cong6nitos por el Estado<br />
de California. Ldveselas manos despu6s de manipular<br />
esteproducto.<br />
_lL ADVERTENCIA AI motor funcionar, se produce<br />
mon0xido de carbono, un gas inodoro y<br />
venenoso.<br />
Respirar mon0xido de carbono puede provocar<br />
dolor de cabeza, fatiga, mareos, v0mitos, confusion,<br />
ataques, n_.useas, desmayos o inciuso la muerte.<br />
Algunas sustancias quimicas o los detergentes pueden<br />
ser perjudiciaies si inhalados o ingeridos, causando la<br />
n_.usea severa, desmayando o para envenenar.<br />
• Opereel limpiadora a presi6n SOLAMENTEal aire iibre.<br />
• Aseg_resede que los gases de escape no puedanentrar por<br />
ventanas, puertas, tomas de aire de ventilaci6n u otras<br />
aberfuras en un espacio cerrado en ei que puedanacumularse.<br />
• NOarranque ni dejefuncionar el motor en interiores ni en<br />
zonas cerradas,aunque hayaventanasy puertas abiertas.<br />
• Utilice un respirador o m_scara siempre que exista la<br />
posibiiidad de inhaiar vapores.<br />
• Leatodas las instrucciones de la m_scara paraasegurarsede<br />
que le brindar_ la protecci6n necesafia contra la inhalaci6nde<br />
vapores nocivos.<br />
_lLADVERTENCIA Riesgode eiectrocuci0n.<br />
_.l|h Elcontacto con los cablesel6ctricos puede<br />
provocar electrocuci0n y quemaduras.<br />
• NUNCArodecercadeunafuentedeenergiael_ctfica.<br />
_lLADVERTENCiA Peligro de quemadura quimica.<br />
, ...... Los productos quimicos podrianprovocarlesiones,<br />
_ da_os materialesdegravedado la muerte.<br />
e<br />
e<br />
NO use liquido c_ustico con la limpiadora a presi6n.<br />
Use EXCLUSIVAMENTEdetergenteso jabonesespeciaies para<br />
la limpiadora a presi6n. Sigatodas las instrucciones del<br />
fabricante.<br />
33
A ADVERTENCIA El retroceso (repliegue r_.pido) del<br />
cable del arrancador puede producir<br />
lesiones. El<br />
,_ retroceso impedir_, que el usuario suelte ei cable a<br />
tiempo y tirar_ de su mano y brazo hacia el motor.<br />
Como resultado, podrian producirse fracturas,<br />
contusiones 0 esguinces.<br />
• NUNCAtire dei cable dei arrancador sin eiiminar previamentela<br />
presi6n de la pistola rociadora.<br />
• Cuandoarranque el motor, tire ientamente dei cable hasta<br />
sentir una resistenciay, a continuaci6n, tire r_pidamente de _i<br />
para evitar su retroceso.<br />
• Despu_s de cada intento de arranque, cuando ei motor no<br />
consiga arrancar, apunte con la pistola rociadora hacia una<br />
direcci6n segura, pulse el bot6n rojo y apriete ei gatillo para<br />
descargar la presi6n.<br />
• Sujete firmemente la pistola rociadora con ambas manos<br />
cuando aplique un rociado a alta presi6n paraevitar lesiones<br />
cuando se produzca el retroceso de la pistola.<br />
A ADVERTENCIA El contacto con la zona dei silenciador<br />
puede producir quemaduras graves.<br />
,_:_,,_ _ Los gases y ei calor de escape pueden<br />
inflamar los matefiales <strong>com</strong>bustibles y<br />
las estructuras 0 da_ar el dep6sito de <strong>com</strong>bustible y<br />
provocar un incendio.<br />
• NOtoque ias superficies calientes y evite losgases dei escapea<br />
alta temperatura.<br />
• Permita que el equipo se enffie antes de tocaflo.<br />
• Deje un espacio minimo de 1.5 m (5 pies) airededor del<br />
limpiadora a presi6n, incluida la parte superior.<br />
• Utilizar el motor en un terreno boscoso, con maleza o cubierto<br />
de hierba constituye una infracci6n al C6digo de recursos<br />
p_blicos de California,a menos que el sistema de escape est_<br />
equipado con una pantalla apagachispas,de acuerdo a la<br />
definici6n de la Secci6n4442, que se mantenga en buenas<br />
condiciones de funcionamiento. En otros estados o<br />
jurisdicciones federales puede haber leyes similares en vigor.<br />
P6ngase en contacto con el fabricante, el vendedor o el<br />
distribuidor del equipo original paraobtener una pantalla<br />
apagachispasdise_ada parael sistema de escape instaladoen<br />
este motor.<br />
• Las piezasde recambio debenser las mismas que las piezas<br />
originales y estar instaladasen la misma posici6n.<br />
A AI:IVERTENCIALa gasolina y sus vapores son<br />
extremadamenteinfiamables y<br />
_ explosivos.<br />
Elfuego o una explosi6n pueden causar<br />
quemaduras severase inclusive la muerte.<br />
CUANDOANADACOMBUSTIBLE 0 VACiEELDEPOSITO<br />
• Apague el limpiadora a presi6n (posici6n OFF)y d_jelo enfriar al<br />
menos por 2 minutos antes de remover la tapa de la<br />
<strong>com</strong>bustible. Afioje la tapa lentamente paradejar que la presi6n<br />
salga del tanque.<br />
• Llene o vacie el dep6sito de <strong>com</strong>bustible a la intemperie.<br />
• NO Ilenedemasiado eltanque. Permita al menos espacio para<br />
la expansi6n del <strong>com</strong>bustible.<br />
• Si se ha derramado <strong>com</strong>bustible, esperea que se evapore antes<br />
de arrancar el motor.<br />
• Mantenga la gasolina alejada de chispas, llamasabiertas,<br />
pilotos, calory otras fuentes de ignici6n.<br />
• NOencienda un cigarrillo o fume.<br />
CUANDOPONGAEN FUNCIONAMIENTOEL EQUIPO<br />
• Compruebe que la bujia, el silenciador, el tap6n del dep6sito de<br />
<strong>com</strong>bustible y el fiitro de aire est_n instaiados.<br />
• NOarranque el motor sin la bujia instaiada.<br />
CUANDOOPEREELEQUIPO<br />
• NO incline ei motor o ei equipo, de tai maneraque la gasolina<br />
se puedaderramar.<br />
• NO rode liquidos inflamabies.<br />
AL TRANSPORTAR,MOVER0 REPARAREQUIPO<br />
• Transporte, mover o repare ei equipo con ei tanque de<br />
<strong>com</strong>bustible vacio, o con lav_lvula paraapagar ei <strong>com</strong>bustible,<br />
apagada(posici6n OFF).<br />
• NO incline ei motor o ei equipo, de tai maneraque la gasolina<br />
se puedaderramar.<br />
• Desconecteei cable de la bujia.<br />
CUANDOALIVlACENE0 GUARDEELEQUIPOCONCOMBUSTIBLE<br />
EN ELTANQUE<br />
• Almacenealejado de calderas, estufas, calentadores de agua,<br />
secadoras de ropa u otros aparatos eiectrodom_sticos que<br />
posean pilotos u otras fuentes de ignici6n, porque ellos pueden<br />
encender los vapores de la <strong>com</strong>bustible.<br />
A AI:IVERTENCIA Ei uso de limpiadora a presi6n puede<br />
A ADVERTENCIA El arrancador y otras piezas que rotan<br />
pueden accesorios. enredar las manos, el pelo, la ropa, o los<br />
• NUNCAutiiice la limpiadora a presi6n sin sus carcasaso tapas<br />
de protecci6n.<br />
• NO use ropa suelta, joyaso elementos que puedan quedar<br />
atrapados en el arranque o en otras partes rotatorias.<br />
• Ate paraarriba ei pelo largo y quite la joyefia.<br />
2 _.. crearresbalosas.lOs cbarcos y superficies<br />
El retroceso de la pistola rociadora<br />
puede provocar caidas.<br />
• Utilice la limpiadora a presi6n desde una superficie estable.<br />
• El_rea de limpieza deber_ tener inclinaciones y drenajes<br />
adecuadospara disminuir la posibilidad de caidasdebido a<br />
superficies resbalosas.<br />
• Extreme las precaucionessi necesita utilizar la limpiadora a<br />
presi6n desde una escalera, un andamio u otro lugar similar.<br />
• Sujete firmemente la pistola rociadora con ambas manos<br />
cuando aplique un rociado a alta presi6n paraevitar lesiones<br />
cuando se produzca el retroceso de la pistola.<br />
34
A. ABVERTENCIA El chorro de agua a alta presi6n que<br />
este los tejidos equiposubcut_.neos, produce, puede provocando atravesar iesiones ia piei y de<br />
gravedad que podrian dar lugar a la amputaci6n<br />
de un miembro.<br />
La pistoia rociadora contiene agua a alta presi6n incluso con<br />
ei motor parado y el agua desconectada, que puede causar<br />
la herida.<br />
• NO permita en ning0n momento que NI_IOSoperen la m_quina<br />
limpiadoraa presi6n.<br />
• NUNCAreparela manguerade alta presi6n. Remplacela.<br />
• NUNCAutilice ning0n tipo de sellador para reparar unafuga en<br />
una conexi6n. Sustituya la junta t6rica o la junta.<br />
• NUNCAconecte la manguerade alta presi6n al prolongador de<br />
la boquilla.<br />
• Mantenga conectada ia mangueraa la m_quina o a la pistola de<br />
rociado cuando ei sistema est_ presurizado.<br />
• SIEMPREque pareel motor, apunte con la pistola rociadora<br />
hacia una direcci6n segura, pulse el bot6n rojo y apriete el<br />
gatillo paradescargar la presi6n.<br />
• NUNCAapunte la pistola a la genre, animaies o plantas.<br />
• NOfije la pistola rociadora en la posici6n abierta.<br />
• NOabandone la pistola rociadora cuando la m_quina est_ en<br />
funcionamiento.<br />
• NUNCAutilice una pistola rociadora cuyo seguro o protecci6n<br />
para el gatillo no est_ en perfecto estadode funcionamiento.<br />
• Aseg0rese en todo momento de conectar correctamente la<br />
pistola rociadora, lasboquiNasy los accesorios.<br />
A. ADVERTENCIA Chispear involuntario puede tener<br />
"_=h, <strong>com</strong>o resultado el fuego o el golpe<br />
el6ctrico.<br />
AV/SO El rociado de alta presi6n puede da_ar elementos<br />
fr_.giles, incluyendo el vidrio.<br />
* NOdirija la pistola rociadora hacia un cristai cuando utiNcela<br />
punta de rocio de roja de 0°.<br />
* NUNCAapunte la pistola a plantas.<br />
,dlflSO El tratamiento inadecuado del limpiadora a presi6n<br />
puede da_arlo y acortar su vida productiva.<br />
• Si usted tiene alguna pregunta acercade ias finalidades de uso dei<br />
generador, preg0ntele a su concesionario o contacte a Sears.<br />
• NUNCAdeber_n ser operadas las unidades con partes rotas o<br />
ausentes, o sin la caja o cubiertas de protecci6n.<br />
• NOeiuda ning0n dispositivo de seguridad de esta m_quina.<br />
• NOintente alterar la veiocidad controlada.<br />
• NOutilice la limpiadora a presi6n por encima de su presi6n<br />
nominal.<br />
• NOhaga ninguna modificaci6n en la Nmpiadoraa presi6n.<br />
• Antes de poner en marcha la m_quina Nmpiadoraa presi6n en<br />
cNmafrfo, revise todas las partesdel equipo y aseg0rese de que<br />
no se hayaformado hieio sobre eNas.<br />
• NUNCAmuevala m_quina halando ia manguera de alta presi6n.<br />
UtiNcela manija que viene con la unidad.<br />
• Reviseque el sistema de <strong>com</strong>bustible no presentefugas o signos<br />
de deterioro, <strong>com</strong>o manguerasdesgastadaso porosas,<br />
sujetadoresflojos o ausentes,tapa o tanque da_ados. Corrija<br />
todos los defectosantes de operar la m_quina Nmpiadoraa<br />
presi6n.<br />
• Elequipo de alta presi6n est6,dise_ado paraser utiNzado<br />
UNICAMENTEcon las partes autorizadasSears.Si utiliza este<br />
equipo con partes que no cumplan con las especificaciones<br />
mfnimas, ei usuario asume todos los riesgos y responsabilidades.<br />
CUANDOAJUSTEO HAGAREPARACIONESA SU MAQUINA<br />
LIMPIADORAA PRESI6N<br />
• Siempre desconecte el alambre de la bujia y col6quelo donde<br />
no pueda entrar en contacto con la bujia.<br />
CUANDOPRUEBELABUJiADELMOTOR<br />
• UtiNceun <strong>com</strong>probador de bujbs homologado.<br />
• NO<strong>com</strong>prueba la chispa sin la bujfa instaiada.<br />
A. ABVERTENCIA Riesgode lesionesoculares.<br />
El agua rociada puede salpicar o propulsar<br />
objetos.<br />
• CuandoutiNceeste equipo o est_ cerca de 61,siempre use gafas<br />
de seguridad con ventiiaci6n indirecta (contra salpicaduras de<br />
productos qufmicos) marcadaspara cumplir con ANSi Z87.1.<br />
• NUNCAse ponga gafas de seguridad ni gafas para entornos<br />
secos <strong>com</strong>o sustituto de las gafas de seguridad con ventilaci6n<br />
indirecta.<br />
35
CONOZCASU iViAQUINASISTEIViADE LllViPIEZA<br />
Lea el IVlanuaidei Operafio y ias regias de segufidad antes de poner en marcha su sistema de iimpieza.<br />
Compare las ilustracionescon su sistema de limpieza parafamiliafizarse con lasubicaciones de los diferentes controles y ajustes.<br />
Guarde este manual para referencias futuras.<br />
A - PistoJade Rociado -- Controla la aplicaci6n de agua sobre la<br />
superficie de limpieza con el gatillo. Incluye cerrojo de<br />
seguridad.<br />
B - Puntas de rocio -- Detergente, 0°, 15°, 25°, 40°: paradiferentes<br />
aplicaciones de limpieza de alta presi6n.<br />
C - Bandeja de Accesorios - Permite almacenar c6modamente los<br />
accesorios de serie y opcionales (cepillos, turbo vafillas, etc.).<br />
D - Extensi6n para Boquillas con Coaexi6a Rdpida --<br />
usar cinco boquillas diferentes.<br />
Le permite<br />
E - Maaguera de alia presi6a-- Conecte un extremo a la pistola<br />
de rociado y el otro extremo a la toma de alta presi6n.<br />
F - Etiquetade Advertencia e Instrucciones-- Identifica los<br />
riesgos e indica el procedimiento adecuado de puesta en marcha<br />
o de parada de la limpiadora a presi6n.<br />
G - Tanque del Combustible -- Llene el tanque con gasolina<br />
regular sin contenido de plomo en este punto. Siempre<br />
habitaci6n de hoja para la expansi6n dei <strong>com</strong>bustible.<br />
H - Perilla del Cebador --<br />
Usadapara arranque de motores frios.<br />
J - Vdlvula de Combustible -- Permite abrir y cerrar la<br />
alimentaci6n de <strong>com</strong>bustible al motor.<br />
K - Palanca de Control de la Vdlvula de Regulaci6a -- Coloca el<br />
motor en modo de arranque para el arrancador de retroceso y<br />
detiene el motor en funcionamiento.<br />
L - Filtrode Aire -- Ei elemento de filtro tipo seco iimita la cantidad<br />
de suciedad y polvo que se introduce en ei motor.<br />
IVi- Arrancadorde Retroceso-- Usadoparaarrancarelmotor<br />
manualmente.<br />
N - Tubo/filtrode inyecci6nde detergente - Permite inyectar<br />
detergentes para limpiadoraa presi6n en el circuito de baja<br />
presi6n.<br />
P - Automdtico se Enfria Sistema -- Los ciclos regan por bomba<br />
cuando agua alcanza 125°-155°F. Entibiar agua descargar_de la<br />
bomba en el suelo. Estesistema previene el da_o interno de<br />
bomb&<br />
R - Entrada de Agua --<br />
S - Tap6n de Vaciado de Aceite--<br />
motor.<br />
T - Tapa del Dep6sitodel Aceite --<br />
U - Toma de AIta Presi6n--<br />
presi6n.<br />
V - Bomba --<br />
No mostrado:<br />
Conexi6n para la manguera de jardin.<br />
Permite vaciar el aceite del<br />
Llene el motor con aceiteaqui.<br />
Conexi6n para la manguera de alta<br />
Desarrolla alta presi6n de agua.<br />
Etiqueta de Identificaci6n(el trasero cercanode plato<br />
despreciable) -- Proporciona el modelo y el n_mero de serie de<br />
limpiadoraa presi6n. Tenga por favor estos prontamente disponible<br />
cu_ndo Ilamar para la ayuda.<br />
Identificaci6nde Motor-- Proporciona el modelo, tipo y el c6digo<br />
de motor. Tenga por favor estos prontamente disponible cu_ndo<br />
llamarpara la ayuda.<br />
36
Susistema delimpieza requiere deciertoensamble yestar_ lista<br />
paraserusado_nicamente despu_s dehaber depositado el<br />
<strong>com</strong>bustible yelaceite re<strong>com</strong>endado.<br />
Sitieneproblemasconel ensambledesum_quinalimpiadoraa<br />
presi6n,llamea la lineadeayudade la m_quinalimpiadoraa<br />
presi6nal 1-800-222-3136.<br />
Desembalela Limpiadora a Presi6n<br />
1. Saquetodo el contenido de la caja de cart6n, a excepci6n de la<br />
limpiadora a presi6n.<br />
2. Abra <strong>com</strong>pletamente la caja de cart6n cortando cada una de<br />
sus esquinas de arriba abajo.<br />
3. Saque la limpiadoraa presi6n de la caja de cart6n.<br />
Contenido de la Caja<br />
Revise el contenido de la caja. Si alguna de las partes no est_<br />
presente o est_ da_ada, Ilame a la linea de ayuda de la m_quina<br />
limpiadora a presi6n al 1-800-222-3136.<br />
• La unidad principal<br />
• Manubrio<br />
• Bandeja de accesorios<br />
• La mangueradealta presi6n<br />
• Pistola de rociado<br />
• Extensi6n de la boquilla con conector r_pido<br />
• Aceite para motor<br />
• Bolsa de partes (incluye los elementos descritos a continuaci6n)<br />
• Manual del operador<br />
• Tarjeta de la matricula<br />
• Bolsa con 5 puntas de rociado de conexiones r_pidas<br />
multicolores<br />
• Piezaspara la manubrio (incluye Io siguiente):<br />
• Pernos de cabeza redonda (2)<br />
• Perilla Pl_stica (2)<br />
• Pinzasde _rbol (4)<br />
Familiaricesecon cada parte antes de ensambiar la m_quina<br />
limpiadora a presi6n. Compare el contenido con la ilustraci6n de la<br />
p_gina 36. Si alguna de la partes no est_ presenteo se encuentra<br />
da_ada, Ilame a la linea de ayuda de la m_quina limpiadora a<br />
presi6n al 1-800-222-3136.<br />
iViONTAJE[}EL LllViPIADORA PRESION<br />
Usted deberA Ilevar a cabo los siguientes procedimientos antes de<br />
poner en funcionamiento su sistema de limpieza:<br />
1. Llene y mande en tarjeta de matricula.<br />
2. Conecte manubrio y bandeja de accesorios.<br />
3. A_adaaceite al motor.<br />
4. A_adagasolina al tanque de <strong>com</strong>bustible.<br />
5. Conectemangueraa alta presi6n a pistola rociadora y a bomba.<br />
6. Conecte el suministro de agua a bomba.<br />
7. Conecte boquilla la extensi6n al pistola rociadora.<br />
8. Selecto/conecta r_pido conecta punta de rociado a la extensi6n<br />
de la boquilla.<br />
Conecteel iVlanubrioy Bandejade Accesorios<br />
. Coloque el manubrio (A) a lado de los soportes del mismo (B)<br />
que ya est_n adheridos a ia unidad principal. Aseg_rese de que<br />
los orificios (C) en el manubrio est_n aiineados con los orificios<br />
(C) en los soportes dei mismo manubrio.<br />
AVISO Tal vez ser_ necesario mover los soportes del manubrio de<br />
un lado a otro para alinear el manubrio de tal manera que pueda<br />
deslizarsesobre los soportes del mismo manubrio.<br />
2. Inserte el perno del soporte (D) a trav_s de los orificios desde<br />
fuera de la unidad y sujete una perilla de pl_stico (E) desde el<br />
interior de la misma unidad. Apriete manualmente.<br />
. Coloque la bandeja de accesorios (F) sobre los orificios del<br />
manubrio (H) (vista desde la parte delantera de la unidad).<br />
Presione las pinzasde _rbol (G) para introducirlas en los<br />
orificios hasta que queden a nivel con la bandejade<br />
accesorios.<br />
/<br />
. Inserte las puntas de rociado multicolores y el resto de los<br />
accesorios en los espacios correspondientes de la bandeja de<br />
accesorios. Consulte C6mo Usar la Bandejade Accesorios.<br />
37
Aoregue Aceite de Motor<br />
1. Coloque la limpiadora a presi6n en una superficie plana y<br />
nivelada.<br />
2. Limpie la zona de alrededor del orificio de Ilenado de aceite y<br />
quite el tap6n amarillo.<br />
3. Con la ayuda de un embudo (opcional), vierta lentamente todo<br />
el contenido de la botella de aceite por el orificio de Ilenado (A)<br />
hasta el punto de desbordamiento (B).<br />
AV/SO El tratamiento inadecuado del limpiadora a presiOn<br />
puede da_arlo y acortar su vida productiva.<br />
• NO procure acodar ni empezarel motor antes ha sido atendido a<br />
apropiadamente con el aceite re<strong>com</strong>endado. Esto puedetener<br />
<strong>com</strong>o resultado una averia del motor.<br />
4. Vuelva a colocar el tap6n y apri_telo firmemente.<br />
Aoreoue Gasolina<br />
EJ<strong>com</strong>bustibledebe reunir Jossiguientes requisites:<br />
• Gasolina sin plomo fimpia y nueva.<br />
• Un minimo de 87 octanos/87 AKI (91 RON). Para uso a gran<br />
altitud, consulte Gran altitud.<br />
• El motor admite gasolinacon hastaun 10% de etanol (gasohol)o<br />
hasta un 15% de MTBE(_ter metil terbutflico).<br />
_lL ADVERTENCIA<br />
La gasolina y sus vapores son<br />
extremadamente infiamables y<br />
_ explosivos.<br />
El fuego o una explosi6n pueden causar<br />
quemaduras severas e inclusive la muerte.<br />
CUANDOANADACOMBUSTIBLEELDEPOSITO<br />
• Apague el limpiadora a presi6n (posici6n OFF)y d_jelo enfriar al<br />
menos por 2 minutos antes de remover la tapa de la<br />
<strong>com</strong>bustible. Afioje la tapa lentamente paradejar que la presi6n<br />
salga del tanque.<br />
• Llene el dep6sito de <strong>com</strong>bustible a la intemperie.<br />
• NO Ilenedemasiado eltanque. Permita al menos espacio para<br />
la expansi6n del <strong>com</strong>bustible.<br />
• Si se ha derramado <strong>com</strong>bustible, esperea que se evapore antes<br />
de arrancar el motor.<br />
• Mantenga la gasolina alejada de chispas, llamasabiertas,<br />
pilotos, calor y otras fuentes de ignici6n.<br />
• NOencienda un cigarrillo o fume.<br />
Para evitar la formaci6n de carbonilla en el circuito de <strong>com</strong>bustible,<br />
siempre que a_ada <strong>com</strong>bustible, m_zclelo con un estabilizador.<br />
Consulte Almacenamiento.NOtodos los <strong>com</strong>bustibles son iguales.<br />
Si detecta problemas de arranque o de rendimiento despu_s de<br />
utifizar un <strong>com</strong>bustible, pruebe a cambiar de proveedor o de marca.<br />
Estemotor est_ certificado parafuncionar con gasolina. Su sistema<br />
de control de emisiones es EM (Modificaciones del motor).<br />
1. Limpie el _rea alrededor de la tapa de Ilenado del <strong>com</strong>bustible,<br />
retire latapa.<br />
2. A_ada lentamente gasolina sin plomo (C) al dep6sito de<br />
<strong>com</strong>bustible (D). NOa_ada <strong>com</strong>bustible en exceso. Deje<br />
aproximadamente 4 cm (1,5") de espacio (E) en el dep6sito<br />
para permitir la expansi6n del <strong>com</strong>bustible, <strong>com</strong>o se muestra.<br />
AVISO Evite el da_o del limpiadora a presiOn.<br />
El fracaso para seguir Manual de Operario para el<br />
<strong>com</strong>bustible rec<strong>com</strong>endations garanfia de vacios.<br />
• NO utilice gasolina no autorizada; por ejemplo, E85.<br />
• NO mezcleaceite con gasolina.<br />
• NO modifique el motor para hacerlofuncionar con otros<br />
<strong>com</strong>bustibles.<br />
3. Instale la tapa del tanque de <strong>com</strong>bustible y la espera para<br />
alg_n <strong>com</strong>bustible rociado paraevaporar.<br />
iPRECAUCION! Los <strong>com</strong>bustibles con mezcla de alcohol (gasohol,<br />
etanol o metanol) pueden atraer ia humedad y provocar la<br />
separaci6ny formaci6n de _cidos durante ei almacenamiento. Los<br />
gases_cidos pueden da_ar ei circuito de <strong>com</strong>bustible y el motor<br />
durante el almacenamiento.<br />
Para evitar este tipo de problemas, vacie el circuito de <strong>com</strong>bustible<br />
cuando vaya a almacenar la unidad durante 30 dias o m_s. Vacie el<br />
dep6sito de <strong>com</strong>bustible, arranque el motor y d_jelo funcionar hasta<br />
que los conductos de <strong>com</strong>bustible y el carburador queden vacios.<br />
Utilice <strong>com</strong>bustible nuevo la pr6xima temporada. Para obtener m_s<br />
informaci6n al respecto, consulte Almacenambnto.<br />
NUNCAutilice productos limpiadores para motores o carburadores<br />
en el dep6sito de <strong>com</strong>bustible, ya que podrian provocar da_os<br />
permanentes.<br />
38
GranaJtitud<br />
En altitudes superiores a 1.524 metros (5.000 pies), se deberA<br />
utilizar gasolina con un minimo de 85 octanes / 85 AKI (89 RON).<br />
Para seguir cumpliendo la normativa sobre emisiones, es necesario<br />
ajustar la unidad parasu use a gran altitud. De no realizarse este<br />
ajuste, el rendimiento se reducir_ y el consume de <strong>com</strong>bustible y<br />
las emisiones aumentar_n. Para obtener m_s informaci6n sobre el<br />
ajuste para gran altitud, consulte con un distribuidor cualificado de<br />
Sears. No se re<strong>com</strong>ienda utilizar el motor a altitudes inferiores a<br />
762 metros (2.500 pies) con el juego de gran altitud.<br />
Tap6n de <strong>com</strong>bustibleFresh Start@<br />
Eltap6n de <strong>com</strong>bustible FreshStart® (A) estA dise_ado para<br />
albergar un cartucho (B) con aditivo para<strong>com</strong>bustible. La adici6n<br />
de un aditivo para<strong>com</strong>bustible ayuda a mantener el <strong>com</strong>bustible en<br />
buen estado y los carburadores limpios parafacilitar el arranque<br />
durante toda latemporada. Eltap6n de <strong>com</strong>bustible Fresh Start(b, si<br />
est_ equipado con un cartucho, suministra autom_ticamente el<br />
aditivo de <strong>com</strong>bustible concentrado en el tanque de <strong>com</strong>bustible, de<br />
forma que usted no tenga que agregarlo.<br />
AiflSO Elcartucho de aditivo para <strong>com</strong>bustible Fresh Start(b est_<br />
disponible <strong>com</strong>e un accesorio opcional, nOmero de cat,logo<br />
7174403. No est_ incluido en la limpiadora a presi6n. P6ngase en<br />
contacto con el fabricante del equipo original, el vendedor o el<br />
distribuidor paraobtener un cartucho dise_ado para el tap6n de<br />
<strong>com</strong>bustible Fresh Start(b instalado en este motor.<br />
Conectela iVlanoueray el Surninistrode Aoua a<br />
la Bomba<br />
AV/SO NO hagafuncionar la bomba si no tiene el<br />
suministro conectado y abierto.<br />
• Elda_oa lalimpiadoraa presi6n,resultadodeiadesatenci6na<br />
estaprecauci6n,noser_cubiertoper lagarantia.<br />
AI/ISO Antes de conectar las mangueras, retire y deseche los<br />
tapones de transporte de la salida de alta presi6n y de la entrada de<br />
agua de la bomba.<br />
1. Retroceda ia mangueraa aita presi6n y conecte a la base de la<br />
pistola rociadora. Apriete con ia mane.<br />
.<br />
_i, ADVERTENCIA El chorro de agua a aita presi6n que<br />
,_ este los tejidos equiposubcut_neos, produce, puede provocando atravesar iesiones ia piei y de<br />
gravedad que podrian dar lugar a la amputaci6n<br />
de un miembro.<br />
• NUNCAconecte la manguerade alta presi6n al prolongador de<br />
la boquilla.<br />
• Mantenga conectada la mangueraa ia m_quina o a la pistola de<br />
rociado cuando el sistema est_ presurizado.<br />
• Aseg_reseen todo memento de conectar correctamente la<br />
pistola rociadora, las boquillas y losaccesorios.<br />
Conecte ei otro extreme de la manguera a alta presi6n, a la<br />
salida de alta presi6n de la bomba. Apriete con la mane.<br />
Lea y siga todas las instrucciones y advertencias del paquete del<br />
cartucho de aditivo para<strong>com</strong>bustible FreshStart(b.<br />
.<br />
Antes de que conecte la manguerade jardin a la entrada de<br />
agua, inspeccione el colador de la entrada (C). Limpie el colador<br />
si tiene residues o solicite su remplazo si est_ da_ado. NOhaga<br />
funcienar la Jimpiaderaa presi6n si eJfiJtre de entrada faJta<br />
e est_ dafiado.<br />
39
4. Hagacorrer el agua a trav_s de la manguera de su jardin por<br />
30 segundos para Nmpiarcualquier es<strong>com</strong>bro que se<br />
encuentre en ella. Desconecteel agua.<br />
AVISO Hace NOagua de parar de siphon para el abastecimiento de<br />
agua. Useagua SOLOfria (menos que IO0°F).<br />
AVISO El uso de una v_.lvula unidireccional (igualador de<br />
presi6n o v_.lvula de retenci6n) en ia entrada de la bomba<br />
puede producir da_os en la bomba o en el conector de<br />
entrada.<br />
• DEBEhaber un minimo de 3 metros (10 pies) de manguera de<br />
riego libre entre la entrada de ia Nmpiadoraa presi6n y cualquier<br />
dispositivo, <strong>com</strong>o un igualador de presi6n o una v_lvula de<br />
retenci6n).<br />
• El da_o a ia iimpiadora a presi6n, resultado de ia desatenci6na<br />
esta precauci6n, no ser_ cubierto por la garantfa.<br />
5. Conecte la manguerade jardin (no exceder 50 pies en la<br />
Iongitud) a la entrada del agua. Apriete con la mano.<br />
Listade Revision Previa ai Arranque del Motor<br />
Revise la unidad paraasegurarse que ha Ilevadoa cabo los<br />
siguientes procedimientos:<br />
1. Aseg0rese de leer las secciones Reglas de Seguridady<br />
Operaci4n antes de usar el limpiadora a presi6n.<br />
2. Revise que los sujetadores del carrete de la manguera est_n<br />
apretados.<br />
3. Revise que haya sido depositado aceite y est_ al nivel correcto<br />
en la caja del cigOe_aldel motor.<br />
4. Deposite la gasolina adecuadaen ei tanque del <strong>com</strong>bustible.<br />
5. Revise quetodas las conexiones de las mangueras (alta<br />
presi6n y suministro de agua) est_n apretadas correctamente y<br />
que no existan dobleces, cortes o da_o de la manguera de alta<br />
presi6n.<br />
6. Proporcione el suministro de agua adecuado(que no exceda<br />
los IO0°F).<br />
A. ADVERTENCIA Riesgode lesionesoculares.<br />
El agua rociada puede salpicar o propulsar<br />
objetos.<br />
• CuandoutiNceeste equipo o est_ cerca de 61,siempre use gafas<br />
de seguridad con ventiiaci6n indirecta (contra salpicaduras de<br />
productos quimicos) marcadaspara cumplir con ANSi Z87.1.<br />
• NUNCAse ponga gafas de seguridad ni gafas para entornos<br />
secos <strong>com</strong>o sustituto de las gafas de seguridad con ventilaci6n<br />
indirecta.<br />
6. ABRA ei agua, apunte con la pistola hacia una direcci6n segura<br />
presione el seguro (bot6n rojo) (A) y apriete el gatillo para<br />
eNminarel aire y las impurezas dei sistema de bombeo.<br />
4O
COMOUSARSU LIMPIADORAA PRESI6N<br />
Si tiene problemas con el funcionamiento de su m_quina Nmpiadora<br />
a presi6n, por favor Namea la Nneade ayuda de la m_quina<br />
Nmpiadoraa presi6n al 1-800-222-3136,<br />
Ubicaci6ndel lirnpiadoraa presi6n<br />
Espaciolibre alrededordel limpiadoraa presi6fl<br />
IL ADVERTENCIA Los gasesy el caior de escape<br />
pueden inflamar los materiales <strong>com</strong>bustibles y<br />
las estructuras 0 da_ar el dep6sito de<br />
<strong>com</strong>bustible y provocar un incendio.<br />
• Dejeunespaciominimode1.5 m (5 pies)airededordel<br />
Nmpiadora presi6n,incluidalapartesuperior.<br />
Coloque ia Nmpiadoraa presi6n a la intemperie en una zona en<br />
donde no se acumulen gases de escape mortales. AsegOresede que<br />
los gases de escape (A) no puedan entrar por ventanas, puertas,<br />
tomas de aire de ventilaci6n u otras aberturas en un espacio<br />
cerrado en el que puedan acumuiarse. Tenga en cuenta los vientos y<br />
las corriente de aire preponderantes cuando eNjala ubicaci6n del<br />
Nmpiadoraa presi6n.<br />
IL ADVERTENCIA AI motor funcionar, se produce<br />
mon6xido de carbono, un gas inodoro y<br />
venenoso.<br />
Respirar mon6xido de carbono puede provocar<br />
dolor de cabeza,fatiga, mareos, v6mitos, confusi6n,<br />
ataques, n_.useas,desmayos o incluso la muerte.<br />
• Opereel Nmpiadorapresi6nSOLAMENTEalaireNbre.<br />
• AsegOresedequelos gasesdeescapeno puedanentrarpor<br />
ventanas,puertas,tomasdeairedeventilaci6nuotras<br />
aberturasen unespaciocerradoeneiquepuedanacumularse.<br />
• NOarranqueni dejefuncionarel motoreninterioresni en<br />
zonascerradas,aunquehayaventanasy puertasabiertas.<br />
Para porteren rnarcha el lirnpiadoraa presi6n<br />
Para darle arranque a su sistema de limpieza movido a motor por<br />
primera vez, siga estas instrucciones paso a paso. Esta informaci6n<br />
acerca de la puestaen marcha inicial tambi_n es v_Ndapara cuando<br />
vaya a darle arranque al motor despu_s de haberlo dejado la<br />
m_quina limpiadora a presi6n fuera de funcionamiento por Io<br />
menos un dia.<br />
1. Coloque la m_quina Nmpiadoraa presi6n en un _rea cercanaa<br />
una suministro de agua exterior capaz de abastecer agua a un<br />
volumen mayor de 3.8 galones por minuto en no menos que<br />
20 PSI en el fin de arandelade presi6n de la manga del jardin.<br />
2. Revise que la manguera de alta presi6n se encuentre<br />
conectada firmemente a la pistola de rociado y a la bomba. Vea<br />
Montaje.<br />
3. AsegOreseque la unidad est_ nivelada.<br />
4. Conecte la manguera de jardin a la entrada dei agua. Aprietela<br />
con la mano.<br />
AV/SO NO hagafuncionar la bomba si no tiene el<br />
suministro conectado y abierto.<br />
• Elda_oa laNmpiadora presi6n,resultadodeiadesatenci6na<br />
estaprecauci6n,noser_cubiertopor lagarantfa.<br />
5. Abra ei agua,apunte con la pistoia hacia una direcci6n segura<br />
presione el seguro (bot6n rojo) y apriete el gatiNopara eliminar<br />
eiaire y las impurezas del sistema de bombeo.<br />
6. Conecte la extensi6n de la boquilla a la pistola rociadora.<br />
Apri_tela con las manos.<br />
7. ENjala punta de rociado que desee usar, tire hacia atr_s del<br />
aniiio dei prolongador de la boquiNa,inserte la punta de<br />
rociado y sueite ei aniNo.Tire de la punta de rociado para<br />
<strong>com</strong>probar que est_ bien montada. Consulte C6mo usar de<br />
puntas de rociado.<br />
8. Gire la vfilvula del <strong>com</strong>bustible a la posici6n "On"(B). El asidero<br />
de la v_lvula del <strong>com</strong>bustible debe ser vertical (se_alar hacia el<br />
suelo) para el <strong>com</strong>bustible parafluir.<br />
41
. Mueva el control de la v_lvula de admisi6n (A) a la posici6n<br />
"RApido"("Fast"), que se distingue con la figura de un conejo.<br />
%<br />
10. Muevala palancadelahogador(B)a laposici6n"Ahogado"<br />
("Choke").<br />
AVISO En el caso de que el motor est_caliente, aseg_resede que la<br />
palancadel ahogador se encuentreen la posici6n "Enmarcha" ("Run").<br />
AI//SO Antes de arrancar la limpiadora a presi6n, aseg_resede<br />
ponerse gafas de seguridad <strong>com</strong>o se describe a continuaci6n.<br />
_i, ADVERTENCIA Riesgo de lesiones oculares.<br />
El agua rociada puede salpicar o propulsar<br />
objetos.<br />
* Cuandoutifice este equipo o est_ cerca de _l, siempre use gafas<br />
de seguridad con ventilaci6n indirecta (contra salpicaduras de<br />
productos quimicos) marcadaspara cumplir con ANSI Z87.1.<br />
, NUNCAse ponga gafas de seguridad ni gafas para entornos<br />
secos <strong>com</strong>o sustituto de las gafas de seguridad con ventilaci6n<br />
indirect&<br />
11. Cuandoarranque el motor, col6quese en la posici6n que se<br />
re<strong>com</strong>ienda a continuaci6n. Sujete la manija y hale ligeramente<br />
la manija del arranque hasta que sienta cierta resistencia.<br />
Despu_s hAlelarApidamente.<br />
A. ADVERTENCIA El retroceso (repliegue r_.pido) del<br />
cable del arrancador puedeproducir lesiones. El<br />
,_ retroceso impedir_, que el usuario suelte el cable a<br />
tiempo y tirar_, de su mano y brazo hacia el motor.<br />
Como resultado, podrian producirse fracturas,<br />
contusiones 0 esguinces.<br />
• NUNCAtire del cane del arrancador sin eliminar previamentela<br />
presi6n de la pistola rociadora.<br />
• Cuandoarranque el motor, tire lentamente del cable hasta<br />
sentir una resistenciay, a continuaci6n, tire rApidamentede (il<br />
para evitar su retroceso.<br />
• Despu_sde cadaintento de arranque, cuando el motor no<br />
consiga arrancar, apunte con la pistola rociadora haciauna<br />
direcci6n segura, pulse el bot6n rojo y apriete el gatillo para<br />
descargar la presi6n.<br />
• Sujete firmemente la pistola rociadora con ambas manos<br />
cuando aplique un rociado a alta presi6n paraevitar lesiones<br />
cuando se produzca el retroceso de la pistol&<br />
12. Jale la cuerda de arranque lentamente.NOpermita que la cuerda<br />
regresebruscamenteen contra del arrancador.<br />
13. Cuandoarranque el motor, mueva lentamente la palancadel<br />
ahogador a la posici6n "En marcha" ("Run"). Si el motor falla,<br />
mueva la palancaa la posici6n "Ahogado"("Choke"), y despu_s<br />
a la posici6n "En marcha" ("Run").<br />
14. Despu_sde cada intento de arranque,cuando el motor no<br />
consigaarrancar, apunte con la pistola rociadora haciauna<br />
direcci6n segura, pulseel bot6n rojo y apriete el gatillo para<br />
descargarla presi6n. Muevala palancadel ahogador a la<br />
posici6n "Ahogado" ("Choke"),y repite los pasos 11 por 13.<br />
15. Si el motor no arranca despu_sde 6 tirones, mueva la palanca<br />
del ahogador a la posici6n "Enmarcha"("Run"), y repite los<br />
pasos 11 por 13.<br />
,4VISO Siempre mantenga la control de v_lvula de regulaci6n en el<br />
"Rdpido" ("Fast") posicione cu_ndo operar la limpiadora a presi6n.<br />
A. ADVERTENCIA Elchorro de agua a aita presi6n que<br />
este los tejidos equiposubcut_.neos,provocando produce, puedeatravesariesionesde<br />
ia piei y<br />
gravedad que podrian dar lugar a la amputaci6n<br />
de un miembro.<br />
Lapistoiarociadoracontieneaguaaalta presi6n inclusocon<br />
ei motor paradoy el aguadesconectada,quepuedecausar<br />
la herida.<br />
• NOpermitaen ning_nmomentoqueNI_IOSoperenla m_quina<br />
limpiadoraa presi6n.<br />
• Mantengaconectadala manguer a iam_quinao a lapistolade<br />
rociadocuandoelsistemaest_presurizado.<br />
• NUNCAapuntelapistolaala gente,animaleso plantas.<br />
• NOfije la pistolarociadoraenlaposici6nabierta.<br />
• NOabandonelapistolarociadoracuandolam_quinaest_en<br />
funcionamiento.<br />
• NUNCAutilice una pistola rociadora cuyo seguro o protecci6n<br />
para ei gatillo no est_ en perfecto estadode funcionamiento.<br />
• Aseg_reseen todo momento de conectar correctamente la<br />
pistola rociadora, las boquillas y los accesorios.<br />
42
A, ADVERTENCIA El contacto con la zona dei silenciador<br />
puede producir quemaduras graves.<br />
_,_,,,_>_,,_ Los gases y ei calor de escape pueden<br />
inflamar los materiales <strong>com</strong>bustibles y<br />
las estructuras 0 dafiar el dep6sito de <strong>com</strong>bustible y<br />
provocar un incendio.<br />
• NOtoque ias superficies calientes y evite losgases dei escapea<br />
alta temperatura.<br />
• Permita que el equipo se enfrb antes de tocarlo.<br />
• Deje un espacio mfnimo de 1.5 m (5 pies) airededor del<br />
limpiadora a presi6n, incluida la parte superior.<br />
• Utilizar el motor en un terreno boscoso, con maleza o cubierto<br />
de hierba constituye una infracci6n al C6digo de recursos<br />
pOblicosde California,a menos que el sistema de escape est_<br />
equipado con una pantalla apagachispas,de acuerdo a la<br />
definici6n de la Secci6n4442, que se mantenga en buenas<br />
condiciones de funcionamiento. En otros estados o<br />
jurisdicciones federales puede haber byes similares en vigor.<br />
P6ngase en contacto con el fabricante, el vendedor o el<br />
distribuidor del equipo original paraobtener una pantalla<br />
apagachispasdise_ada parael sistema de escape instaladoen<br />
este motor.<br />
• Las piezasde recambio debenser las mismas que las piezas<br />
originales y estar instaladasen la misma posici6n.<br />
C6modelener su limpiadora a presi6n<br />
1. Suelte el gatiNode la pistola rociadora y dejefuncionar el<br />
motor al ralentf durante dos minutos.<br />
C6mo usar la bandeja de accesorios<br />
La unidad est_ equipada con una bandejade accesorios con<br />
habit_culos paraguardar ia pistola rociadora, ei prolongador de la<br />
boquilla y ias puntas de rociado. La parte delantera de la bandeja<br />
tambi_n incluye un gancho para sujetar la manguera de alta presi6n.<br />
/IV/SO El orificio adicional de la bandeja permite guardar un<br />
cepillo. La pinzaadicional de la bandeja permite guardar una<br />
boquilla turbo. La limpiadora a presi6n NO incluye el cepillo ni la<br />
boquilb turbo Puedeadquirir estos elementos <strong>com</strong>o accesorios<br />
opcionales.<br />
1. Paseel prolongador de la boquilla por el orificio de la bandeja<br />
de accesorios segOnse indica.<br />
2. Mueva el acelerador a la posici6n "Slow" (Lento), y luego a la<br />
posici6n "Step" (Parada).<br />
A. ADVERTENCIA El motor podria petardear,<br />
incendiarse o dafiarse.<br />
• NOcoloque la palancaestranguladora en la posici6n "Choke"<br />
(1",1)para parar el motor.<br />
3. Gire la v_lvula de <strong>com</strong>bustible hasta la posici6n "Off".<br />
4. SIEMPREfusil de punto en una direcci6n segura, presione ei<br />
seguro (bot6n rojo) y el disparador del fusil del rocio del<br />
estruj6n para Nberarla presi6n retenida de la pleamar.<br />
/IV#SO La pistoia rociadora contiene agua a alta presi6n incluso con<br />
ei motor parado y el agua desconectada.<br />
A. ADVERTENCIA Elchorro de agua a alta presi6n que<br />
este los tejidos equiposubcut_.neos,provocando produce, puede atravesariesionesde<br />
ia piei y<br />
gravedad que podrian dar lugar a la amputaci6n<br />
de un miembro.<br />
La pistolarociadoracontieneaguaaalta presi6n inclusocon<br />
ei motor paradoy elaguadesconectada,quepuedecausar<br />
la herida.<br />
• Mantengaconectadaia manguer a iam_quinao a lapistolade<br />
rociadocuandoeisistemaest_presurizado.<br />
• SIEMPREquepareei motor,apunteconlapistolarociadora<br />
haciaunadirecci6nsegura,presioneei seguro(bot6nrojo)y<br />
aprieteei gatilloparadescargarlapresi6ny evitareiretroceso.<br />
.<br />
3.<br />
4.<br />
Coloque la pistob rociadora en el orificio situado a la derecha<br />
de la bandeja de accesorios.<br />
Inserte las puntas de rociado muiticolores en el orificio de la<br />
bandejade accesorios <strong>com</strong>o se muestra.<br />
Cueigue la manguera de alta presi6n del gancho situado en la<br />
parte delantera de la bandejade accesorios, <strong>com</strong>o se muestra.<br />
43
C6rflousar las puntasde rocio<br />
La conexi6n r_pida de la extensi6n para boquillas le permite usar<br />
cinco puntas de rocio diferentes. Siempre que est(iactivado el<br />
seguro del gatillo de la pistola rociadora, se pueden cambiar las<br />
puntas de rociado con la limpiadora a presi6n en funcionamiento.<br />
Las puntas de rocio tienen diferentes patrones de rociado <strong>com</strong>o se<br />
ilustra a continuaci6n.<br />
Para cambiar las puntasde rocio:<br />
1. Desplace haciaatr_s el anillo del conector r_pido y tire de las<br />
puntas de rocio. Guarde las puntas de rocio en el soporte de la<br />
prolongador de la boquilla.<br />
_i, ABVERTENCIA El chorro de agua a alta presiOn que<br />
este los tejidos equiposubcut_.neos, produce, puede provocando atravesar lesiones la piel y de<br />
gravedad que podrian dar lugar a la amputaciOn<br />
de un miembro.<br />
= NUNCAintercambiepuntas de rocio sin haber asegurado el<br />
cerrojo de seguridad del gatillo.<br />
= NOtuerza puntas de rocio al rociar.<br />
2. Seleccione la punta de rociado deseada:<br />
= Para un enjuagado suave (baja presi6n y mayor caudal),<br />
para una limpieza suave de coches/camiones, barcos,<br />
RVs, muebles de jardin, cortac6spedes, etc., seleccione la<br />
punta de rociado blanca de 40°.<br />
* Para un enjuagadogeneral (media presi6n y medio<br />
caudal), id6neo parala mayoria de las limpiezas, <strong>com</strong>o<br />
revestimientos exteriores, patios de ladrillo, suelos de<br />
madera, entradas,aceras, suelos de garaje, etc.,<br />
seleccione la puntade rociado verde 25° o amarilla de 15°.<br />
* Para un enjuagado de m_xima potencia (alta presi6n y<br />
bajo caudal), para superficies rebeldes o de dificil acceso,<br />
<strong>com</strong>o superficies de phntas altas, eliminaci6n de pintura,<br />
manchas de aceite, eliminaci6n de 6xido u otras<br />
sustancias dificiles (alquitr_n, resina, grasa, cera, etc.),<br />
seleccione la punta de rociado roja de 0°.<br />
, Para aplicar productos detergentes o limpiadores<br />
especificos que ayuden a des<strong>com</strong>poner la suciedad<br />
rebelde en distintas superficies, seleccione la punta de<br />
rociado de detergente negra.<br />
3. Desplacehacia atr_s el anillo, inserte la nueva punta de rociado<br />
y suelte el anillo. Tire de la punta de rociado para <strong>com</strong>probar<br />
que estAbien montada.<br />
Use inclina<br />
• Para una limpieza m_s efectiva, mantenga la boquilla de rociado<br />
de 20 a 61 cm (8 a 24 pulgadas)de la superficie de limpieza.<br />
• Si coloca la boquilla de rociado demasiado cerca podda da_ar<br />
la superficie, especialmente cuando est(i usando el modo de<br />
alta presi6n.<br />
• NOcoloque la boquilla a menos de 15 cm (6 pulgadas) cuando<br />
est(i limpiando Ilantas.<br />
Limpiezay apiicaci6ndel detergente<br />
e<br />
e<br />
_i, ADVERTENCIA Peligro de quemadura quimica.<br />
____.. Los productos quimicos podrianprovocarlesiones,<br />
E"'_ da_os materialesdegravedado la muerte.<br />
NO use liquido c_ustico con la limpiadora a presi6n.<br />
Use EXCLUSIVAMENTEdetergenteso jabonesespeciaies para<br />
la limpiadora a presi6n. Sigatodas las instrucciones del<br />
fabricante.<br />
Para apJicar eJ detergente, siga los siguientespasos:<br />
1. Revise ei uso de las puntas de rocio.<br />
2. Prepare la soluci6n detergente siguiendo las instrucciones del<br />
fabricante.<br />
3. Coloque el extremo peque_o del filtro del tubo de inyecci6nde<br />
detergente dentro del contenedor del detergente.<br />
,zllf/$O Aseg_rese de que el filtro est_ totalmente sumergido<br />
mientras aplica el detergente.<br />
All/SO Ei contacto con el silenciador a aita temperatura<br />
puede producir da_os en el tubo de inyecci6n de detergente.<br />
. Cuandocoloque ei filtro en ia botella dei detergente, coloque el<br />
tubo de maneraque no entre en contacto accidentalmente con ei<br />
silenciador caliente.<br />
4. Aseg_rese de que la puntas de rocio negra est_ instaladaen la<br />
extensi6n para boquillas.<br />
La Presi6n<br />
Baja Usada<br />
para aplicar<br />
quimicos<br />
La Presi6n AJta<br />
i<br />
i<br />
i i i i<br />
i<br />
/<br />
1i<br />
Negra<br />
400 Blanca<br />
2600 PSi<br />
2.8 GPM<br />
25oVerde<br />
15oAmarilla<br />
2800 PSi 2800 PSi<br />
2.7 GPM 2.7 GPM<br />
0° Roja<br />
3100 PSi<br />
2.5 GPM<br />
44
AVISO NOse puedeaplicar detergente con las puntas de rocio de<br />
alta presi6n (Blanca, Verde, Amarilla o Roja).<br />
5. Aseg_resede que la mangueradel jardin est_ conectada a la<br />
entrada de agua. Compruebe que la manguera de alta presi6n<br />
est_ conectada a la pistola rociadora y a la bomba. Abra la<br />
alimentaci6n de agua.<br />
AV/SO Usted deber_, conectar todas las mangueras antes<br />
de darle arranque al motor.<br />
* Arrancar el motor sin tener todas las manguerasconectadasy sin<br />
el suministro de agua ABIERTO(ON) causar_ el da_o de la<br />
bomba.<br />
* El da_o a la limpiadora a presi6n, resultado de la desatenci6na<br />
esta precauci6n, no ser_ cubierto por la garantia.<br />
6. Marcha el motor siguiendo las instrucciones de la secci6n<br />
C6mo poner en funcionamiento ia limpbdora a presi6n.<br />
7. Aplique el detergente sobre la superficie seca, <strong>com</strong>enzando en<br />
la parte inferior del _,reay dirigi_ndose haciaarriba, utilizando<br />
movimientos largos, parejos y superpuestos.<br />
8. Permita que el detergente penetre de 3 a 5 minutos antes de<br />
enjuagar. Vuelva a aplicar cuando sea necesario para evitar que<br />
la superficie se seque. NOpermita que el detergentese seque.<br />
Si permite que el detergente se seque, la superficie podria<br />
quedar con manchas.<br />
AVI$O Usted deber_ lavar el sistema de inyecci6n de quimicos<br />
despu_s de cada uso colocando el filtro en un balde de agua limpia<br />
y haciendo funcionar la m_quina limpiadora a presi6n de 1 a 2<br />
minutos en el modo de baja presi6n.<br />
Enjuaoede la mziquinalimpiadoraa presi6n<br />
Para enjuage:<br />
1. Retire la punta de rodo negra para detergente de la extensi6n<br />
para boquillas.<br />
2. Seleccione e instalela punta de rodo de alta presi6n que desee<br />
siguiendo las instrucciones de C6mo usar /as puntas de rocfo.<br />
3. Mantenga la pistola de rociado a una distancia segura del _rea<br />
que planearociar.<br />
_lL ADVERTENCIA<br />
El retroceso de la pistola rociadora<br />
Limpiezadel tube de inyecci6nde detergente<br />
Si us6 el tubo, debe lavarlo con agua limpia antes de parar el motor.<br />
1. Coloque el filtro y la inyecci6n de detergente en un balde Ileno<br />
de agua fimpia.<br />
2. Quite la punta de rocio de alta presi6n del prolongador de la<br />
boquilla.<br />
3. Seleccione e instale la punta de rocio negra (detergente)<br />
siguiendo las instrucciones de la secci6n C6mo usar/as puntas<br />
de rocfo.<br />
4. Lavede 1 a 2 minutos.<br />
5. Pare el motor siguiendo las instrucciones de la secci6n C6mo<br />
detener su limpiadora a presi6n y cierre la entrada de agua.<br />
6. SIEMPREapunte la pistola rociador hacia una direcci6n<br />
segura, oprima ei bot6n rojo y apriete el gatillo de la pistola<br />
rociadora para liberar la presi6n.<br />
AV/SO La pistola rociadora contiene agua a alta presi6n incluso<br />
cuando el motor est_ apagado y el tubo de agua est_ desconectado.<br />
A. ADVERTENCIA El chorro de agua a aita presi6n que<br />
este los tejidos equipo subcut_.neos, produce, puede provocando atravesar iesiones ia piei y de<br />
gravedad que podrian dar lugar a la amputaci6n<br />
de un miembro.<br />
La pistola rociadora contiene agua a alta presi6n incluso con<br />
ei motor parado y el agua desconectada, que puede causar<br />
la herida.<br />
• Mantenga conectada la mangueraa ia m_quina o a la pistola de<br />
rociado cuando el sistema est_ presurizado.<br />
• SIEMPREque pareei motor, apunte con la pistola rociadora<br />
hacia una direcci6n segura, presione ei seguro (bot6n rojo) y<br />
apriete el gatillo para descargar la presi6n y evitar el retroceso.<br />
Sisterfla de enfriarfliento<br />
(alivio t6rrflico)<br />
automdtico<br />
Elagua que circula dentro de la bomba puedeaicanzartemperaturas<br />
entre los 125°-155°F si hace funcionar el motor de su m_quina<br />
limpiadora a presi6n de 3 a 5 minutos sin oprimir el gatillo de la<br />
pistola de rociado. El sistema de enfriamiento autom_tico se activa a<br />
estatemperatura y enfria la bomba descargando agua caliente en el<br />
piso, evitando asi el da_o interno de la bomba.<br />
puedeprovocar<br />
caidas.<br />
, Utilice la limpiadora a presi6n desde una superficie estable.<br />
* Extreme las precaucionessi necesita utilizar la limpiadora a<br />
presi6n desde una escalera, un andamio u otro lugar similar.<br />
* Sujete firmemente la pistola rociadora con ambas manos<br />
cuando aplique un rociado a alta presi6n paraevitar lesiones<br />
cuando se produzca el retroceso de la pistola.<br />
4. Aplique un rociado de alta presi6n en un _rea peque_a,<br />
despu6s revise si la superficie presenta da_os. Si no encuentra<br />
da_os, puede continuar con el trabajo de limpieza.<br />
5. Comienceen la parte superior del _rea que va a enjuagar,<br />
dirigi_ndose hacia abajo con los mismos movimientos<br />
superpuestos que utiliz6 parael limpieza.<br />
45
INFORIViACI6NTf:CNICASOBREEL<br />
MOTOR<br />
El motor es de uno cilindros, de vAIvulasen cabeza (OHV),<br />
refrigerado por aire y de baja emisi6n.<br />
En el Estado de California, los motores de la serie 120000 han<br />
obtenido la certificaci6n del California Air Resources Board (Consejo<br />
de recursos de aire de California) de cumplimiento de la normativa<br />
sobre emisiones durante 125 horas. Esta certificaci6n no supone<br />
para el <strong>com</strong>prador, el propietafio o el usuafio ninguna garantia<br />
adicional en Io relativo al rendimiento y a la vida _til del motor. Las<br />
garantias del motor ata_en exclusivamente al producto y alas<br />
emisiones que se declaran en este manual.<br />
Potencianominal<br />
El valor de potencia bruta de cada modelo de motor de gasolina se<br />
indica en la etiqueta conforme a los requisitos del c6digo J1940<br />
(Procedimiento de valoraci6n de potencia y par de peque_os<br />
motores) de la SAE (Society of Automotive Engineers,Sociedad de<br />
ingenieros de automoci6n). Los valores nominales se han obtenido<br />
y corregido conforme al c6digo SAEJ1995 (Revisi6n 2002-05). Los<br />
valores de par se obtienen a 3060 rpm, y los valores de potencia, a<br />
3600 rpm. La potencia bruta real del motor ser_ inferior y<br />
dependerA,entre otros factores, de las condiciones ambientales de<br />
uso y de las variaciones entre distintos motores del mismo modelo.<br />
Dada la amplia vafiedad de productos que utilizan nuestros motores<br />
y la multitud de factores ambientales que puedenafectar a su<br />
funcionamiento, es posible que el motor de gasolina no desarrolle<br />
toda su potencia bruta nominal en determinados equipos (potencia<br />
"en la aplicaci6n" o neta real). Estadiferencia se debe, entre otros, a<br />
los siguientes factores: accesorios (filtro de aire, escape,carga,<br />
reffigeraci6n, carburador, bomba de <strong>com</strong>bustible, etc.), limitaciones<br />
de la aplicaci6n, condiciones ambientales de uso (temperatura,<br />
humedad, altitud) y variaciones entre distintos motores de un<br />
mismo modelo. Briggs & Stratton podr_ sustituir el motor de esta<br />
serie por otro de mayor potencia nominal en caso de limitaciones<br />
de fabficaci6n o capacidad.<br />
Esta limpiadora a presi6n est_ clasificada conforme a la norma<br />
PW101 (<strong>com</strong>probaci6n y clasificaci6n de rendimiento de<br />
limpiadoras a presi6n) de laAsociaci6n de fabricantes de bombas a<br />
presi6n (Pressure Washer Manufacturers Association, PWMA).<br />
ESPECIFICACIONESDELPRODUCTO<br />
Espe.cificacionesde la mziquina iimpiadoraa<br />
presion<br />
Presi6n de salida m_xima .........................<br />
Caudalm_ximo ..................................<br />
3,100 PSi<br />
2.8 GPM<br />
Mezcla de quimicos .................. Use seg_n instrucciones<br />
Temperatura del suministro<br />
de agua ............................ Que no exceda los 100°F<br />
Especificacionesdel motor<br />
DiAmetrode camisa ..................<br />
Carrera ............................<br />
Desplazamiento ......................<br />
Bujia<br />
Tipo de re6stato: .................<br />
Tipo de larga de vida de phtino: .......<br />
Calibrar Separaci6na: .............<br />
Entrehierro del inducido: .......................<br />
68 mm (2,672 pulgadas)<br />
56 mm (2,204 pulgadas)<br />
206 cc (12,48 pulgadas)<br />
Briggs & Stratton 491055S<br />
Briggs & Stratton 5066D<br />
0.030 pulgadas (0.76 mm)<br />
0,25-0,36 mm<br />
(0,010-0,014<br />
pulgadas)<br />
Holgura de la v_lvula con muelles de v_lvula instalados y pist6n de<br />
6 mm (0,25 pulgadas) pasado el punto muerto superior (<strong>com</strong>probar<br />
con el motor en frio)<br />
Admisi6n ............... 0,10-0,15 mm (0,004-0,006 pulgadas)<br />
Escape .................<br />
Capacidadde Gasolina ..........................<br />
Capacidadde Aceite ......................<br />
0,23-0,28 mm (0,009-0,011 pulgadas)<br />
1.6 Cuartos<br />
0.6 litros (20 onzas)<br />
AVISO Para que el rendimiento sea 6ptimo, la carga del motor no<br />
debe superar el 85% de su potencia nominal. La potencia del motor<br />
se reducir_ un 3,5% por cada300 metros (1.000 pies) de altitud y<br />
un 1% por cada 5,6 °C (10 °F) a partir de 25 °C (77 °C). FuncionarA<br />
satisfactoriamente en un Angulo de hasta 15°.<br />
46
RECOlViENDACIONES GENERALES<br />
Plan de rnantenirniento<br />
Siga los intervalosde horas o de calendario, los que sucedan antes.<br />
Si opera en condiciones adversas (se_aladasm_s abajo) es<br />
necesado un mantenimiento m_sfrecuente.<br />
;ii<br />
• Cambieel aceitedel motor<br />
* Revise/limpie el filtro de la entrada de agua'<br />
* Revise la manguera de alta presiOn<br />
* Revise la manguera del detergente<br />
* Revise la pistola aspersora y verifique que no haya<br />
fugas en el ensamblaje<br />
* Limpie los residuos<br />
, Compruebeel nivel de aceite<br />
* Mantenimiento Gel filtro de aire2<br />
J[ [ ; } [ { } J %} ; ; ; ; ; ; ; ; ; ; ; ; ; ; ; ; ; ; ; ; ; ; ; ; ; ; ; ; ; ; ; ; ; ; ; ; ; ; ; ; ;<br />
* Cambie el aceite del motor 2<br />
* Inspeccione el silenciador y la pantalla apagachispas<br />
, Servicio a la bujia<br />
* Limpie el sistema de refrigeraciOn 2<br />
Limpiar si est_ obstruido. Remplazar si est_ perforado o roto.<br />
2 Servicio m_s a menudo bajo condiciones de suciedad o polvo.<br />
Recornenclaciones0enerales<br />
El mantenimiento peri6dico mejorar_ el rendimiento y prolongar_ la<br />
vida _til del limpiadora a presidn. Si necesita asistencia, consulte<br />
con un distribuidor de Sears o con otro distribuidor cualificado.<br />
La garantiade la m_quina limpiadora a presi6n NOcubre los<br />
elementos que hansido sujetos a abuso o negligenciapor parte del<br />
operador. Parahacerv_lida la cobertura total de lagaranth, el<br />
operadordeber_ mantener la lavadorade presi6ntal y <strong>com</strong>o se indica<br />
en el manual,incluyendosu adecuadoalmacenamiento,<strong>com</strong>o se<br />
describeen la secci6nAlmacenamientoen el Inviernoy<br />
Almacenambnto prolongado.<br />
AIII$O<br />
Una vez al a_o, usted deber_ limpiar o remplazar la bujia y<br />
el filtro de aire. Una bujia nueva y un filtro de aire limpio garantizan<br />
una mezclade <strong>com</strong>bustible-aire adecuaday le ayuda a su motor a<br />
funcionar mejor y a tener una vida _til m_s prolongada.<br />
Bornba de aceite<br />
NO realice ninguna operaci6n de mantenimiento con el aceite de la<br />
bomba. La bomba se suministra prelubricada y sellada en f_brica, y<br />
no requiere lubricaci6n adicional durante su vida _til.<br />
Control de emisiones<br />
Cuaiquierestahlecimientoo individuoespecializadoen ia<br />
reparaci6ndemotoresquenoseande automoci6npuede<br />
encargarsedeimantenimiento, ia sustituci6ny ia reparaci6nde<br />
losdispositivos y sistemasde controldeemisiones.Noobstante,<br />
pararealizarlarevisi6ngratuitadecontroldeemisiones,deber_<br />
acudira undistribuidorautorizadoporelfabricante.V(iaseGarantfa<br />
deemisiones.<br />
Antesde carlauso<br />
1. Revise el nivel de aceite del motor.<br />
2. Limpie los residuos.<br />
3. Revise si existen da_os en el colador de la entrada de agua.<br />
4. Revise si existen da_os en el manguera del detergente.<br />
5. Revise si existen fugas en el conjunto de la extensi6n para<br />
boquillas y pistola.<br />
6. Elimine el aire y los contaminantes de la bomba.<br />
iVlANTENIiVilENTODE LA iViAQUINA<br />
LIIViPIADORA PRESION<br />
Lirnpielos Resicluos<br />
Limpie a diario, o antes de cada uso, los residuos acumulados en el<br />
limpiadora a presi6n. Mantenga limpias las conexiones, los muelles<br />
y los mandos. Limpie todo resto de <strong>com</strong>bustible de la zona que<br />
rodea al silenciador y de detr_s del mismo. Inspeccione las ranuras<br />
paraaire de enfriamiento y la apertura del limpiadora a presi6n.<br />
Estasaperturas deber_n mantenerselimpias y despejadas.<br />
Mantenga limpios los <strong>com</strong>ponentes del limpiadora a presi6n para<br />
reducir el riesgo de sobrecalentamiento e ignici6nde los residuos<br />
acumulados.<br />
* Utilice un trapo h_medo para limpiar las superficies exteriores.<br />
AI/ISO Eltratamiento inadecuadodel limpiadora a presiOn<br />
puededa_arlo y acortar su vida productiva.<br />
= NOinsertecualquierobjetoatrav(isdelasranurasdeenfriamiento.<br />
* Puede usar un cepillo de cerdas suaves para retirar la suciedad<br />
endurecida, aceite, etc.<br />
, Puede usar una m_quina aspiradora paraeliminar suciedad y<br />
residuos sueltos.<br />
Revisey Lirnpieel Colador de Entrada<br />
Examineel colador de entrada de la manguera de jardin.Limpielo si<br />
est_tapado o remplacelo si est_ roto.<br />
47
Revise la iVlanouerade Alla Presi6n<br />
Las mangueras de alta presi6n pueden desarroNarfugas debido al<br />
desgaste, dobleces o abuso. Revise la mangueraantes de cada uso.<br />
Revise si existen cortes, fugas, abrasiones, levantamiento de la<br />
cubierta, da_o o movimiento de los acoplamientos. Si existe<br />
cualquiera de estas condiciones, remplace la manguera<br />
inmediatamente.<br />
A. ADVERTENCIA Elchorro de agua a alta presi6n que<br />
.<br />
4.<br />
Remuevala punta de rocio del extremo de la extensi6n de la<br />
boquilla.<br />
Use el peque_o sujeta papelespara liberar cualquier material<br />
extra_o que est_tapando la punta de rocio (A).<br />
este los tejidos equiposubcut_.neos,provocando produce, puede atravesariesionesde<br />
ia piei y<br />
gravedad que podrian dar lugar a la amputaci6n<br />
de un miembro.<br />
• NUNCArepareia mangueradealtapresi6n.Remplacela.<br />
• Remplaceiacon unamangueraquecumplaconlacapacidad<br />
minimadepresi6ndesu limpiadoraa presi6n.<br />
5.<br />
6.<br />
Retire la extensi6n para boquiNasde la pistola.<br />
Usando una manguerade jardfn, remueva cualquier desecho<br />
adicional, poniendo agua en la extensi6n de la boquiNa.Haga<br />
_sto de 30 a 60 segundos.<br />
Revise ia pislolay ia exlensi6npara boquiiias<br />
Examinezle branchement du boyau au pistolet _ pulv_risation et<br />
assurez-vous que le branchement est sonde. Faites i'essai de ia<br />
d_tente en appuyant sur le bouton rouge et en vous assurant que la<br />
d_tente revient } sa position initiale Iorsquevous la rei_chez.Vous<br />
ne devriez pas _,treen mesure d'actionner la d6tente sans avoir<br />
appuy_ sur le bouton rouge. Remplacezie pistolet } pulv_risation<br />
imm_diatement s'il _choue un de ces essais.<br />
IVlanlenimienlode ia Punlas de Rocio<br />
Si siente una sensaci6n pulsante al momento de apretar el gatiNode<br />
la pistola rociadora, puedeque sea causada por la presi6n excesiva<br />
en la bomba. La causa principal de la presi6n excesivaen la bomba<br />
es cuando la punta de rocfo se encuentra atascada o tapada con<br />
materiales extra_os, tales <strong>com</strong>o tierra, etc. Para corregir el<br />
problema, limpie inmediatamente la punta de rocio siga las<br />
instrucciones siguientes:<br />
1. Apague el motor y apague el suministro de agua.<br />
2. Apunte SIEMPREcon la pistola rociadora hacia una direcci6n<br />
segura, pulse el bot6n rojo y apriete el gatiNo paradescargar el<br />
agua a alta presi6n restante.<br />
A. ADVERTENCIA Elchorro de agua a alta presi6n que<br />
este los tejidos equiposubcut_.neos,provocando produce, puede atravesariesionesde<br />
ia piei y<br />
gravedad que podrian dar lugar a la amputaci6n<br />
de un miembro.<br />
La pistolarociadoracontieneaguaaalta presi6n inclusocon<br />
ei motor paradoy elaguadesconectada,quepuedecausar<br />
la herida.<br />
• Mantengaconectadala manguer a iam_quinao a lapistolade<br />
rociadocuandoeisistemaest_presurizado.<br />
• SIEMPREquepareei motor,apunteconlapistolarociadora<br />
haciaunadirecci6nsegura,presioneei seguro(bot6nrojo)y<br />
aprieteei gatilloparadescargarlapresi6ny evitareiretroceso.<br />
7. Instale de nuevo la punta de rocio en la extensi6n.<br />
8. Conectede nuevo laextensi6nde la boquillaa lapistola rociadora.<br />
9. Aseg0rese de que la manguera del jardfn est_ conectada a la<br />
entradade agua. Compruebe que la manguerade aita presi6n<br />
est_conectada a la pistola rociadora y a la bomba. Abra la<br />
alimentaci6n de agua.<br />
10. Ponga en marcha ei motor siguiendo las instrucciones de la<br />
secci6n C6mo poner en funcionamiento la limpiadora a<br />
presi6n.<br />
11. Pruebe el limpiadora a presi6n ai hacerfuncionar con cada una<br />
de las puntas de rocio de conexiones r_pidas que viene con ei<br />
Nmpiadoraa presi6n.<br />
iVlantenimienlode losAniiios '0'<br />
Compre una O-Juego de Reparaci6nde Anillo, n0mero de cat,logo<br />
7175116, en sus Sears locales o llamando 1-800-4-MY-HOME (469-<br />
4663) o en Ifneaen www.sears.<strong>com</strong>. No se incluye con la arandelade<br />
la presi6n. Estejuego incluye los anillos dei reemplazoO y de filtro de<br />
caia de agua. Refi_rasea la hojade la instrucci6n proporcionada en el<br />
juego paraatendera su unidad'los anillos de s O.<br />
A. ADVERTENCIA Elchorro de agua a aita presi6n que<br />
este los tejidos equiposubcut_.neos,provocando produce, puedeatravesariesionesde<br />
ia piei y<br />
gravedad que podrian dar lugar a la amputaci6n<br />
de un miembro.<br />
• NUNCAutilicening0ntipo deselladorpararepararunafugaen<br />
unaconexi6n.Sustituyalajuntat6ricao lajunta.<br />
48
iViANTENIMIENTODELMOTOR<br />
_i, ADVERTENCiA Chispear involuntario puede tener<br />
",dh <strong>com</strong>o resultado el fuego o el golpe<br />
el6ctrico.<br />
CUANDOAJUSTE0 HAGAREPARACIONESA SU IViAQUINA<br />
LIMPIADORAA PRESION<br />
• Siempre desconecte el alambre de la bujia y col6quelo donde<br />
no pueda entrar en contacto con la bujia.<br />
CUANDOPRUEBELABUJJADELMOTOR<br />
• Utilice un <strong>com</strong>probador de bujbs homologado.<br />
• NO<strong>com</strong>prueba la chispa sin la bujia instaiada.<br />
Aceite<br />
Re<strong>com</strong>endacionesobreeJaceite<br />
Para obtener el mejor rendimiento, re<strong>com</strong>endamos utilizar aceites<br />
certificados con garantia Briggs & Stratton. Tambi6n se pueden<br />
utilizar otros aceites detergentes de alta calidad con clasificaci6n de<br />
servicio SF, SG, SH, SJ o superior. NOutilice aditivos especiales.<br />
Las temperaturas exteriores determinan la viscosidad adecuada del<br />
aceite para el motor. Utilice el cuadro paraseleccionar la mejor<br />
viscosidad para el intervalo de temperatura exterior previsto.<br />
oF<br />
104<br />
86<br />
68<br />
50<br />
32<br />
14<br />
-4<br />
-22<br />
oC<br />
____-- uo_-- " _,n>_20__" m 3040100<br />
-20<br />
' -30<br />
Adici6n de Aceite dei Motor<br />
1. Coloque el limpiadoraa presi6n sobre una superficie nivelada.<br />
2. Compruebe ei nivel de aceite tal <strong>com</strong>o se indica en la secci6n<br />
ComprobaciSn del nivel de aceite.<br />
3. Si es necesario, vierta lentamenteaceite por el orificio de<br />
Ilenadohasta el punto de desbordamiento en ei tap6n de<br />
Ilenadode aceite.<br />
4. Instaleei tap6n de Ilenadode aceite, apriete firmemente.<br />
Cambio de Aceite deJ Motor<br />
Si est_ utilizando su generador bajo condiciones de extrema<br />
suciedad o polvo, o en un clima demasiado caliente, haga ei cambio<br />
de aceite m_s frecuentemente.<br />
_i, PRECAUCION Eviteel contacto prolongado o repetido<br />
de piel con aceite usado de motor.<br />
• Elaceiteusadodelmotorhasidomostradoalcancerdelapiei<br />
deiacausaenciertosanimalesdellaboratorio.<br />
• Completamentelavadoexpuso_reasconel jab6ny elagua.<br />
MANTENERFUERADELALCANCEDELOSNI_IOS.NO<br />
CONTAMINE. CONSERVELOSRECURSOS. DEPOSITEL<br />
ACEITEUSADOENUNPUNTODERECOGIDA.<br />
Cambie ei aceite cuando eJmotor siga estando caliente despu_s<br />
de haber funcionado:<br />
1. Aseg_rese de que la unidad est_ en una superficie plana.<br />
2. Desconecteel cablede la bujia de esta y col6quelo donde no<br />
puedaentrar en contacto con la bujia.<br />
3. Limpie la zona de alrededor del tap6n de vaciado de aceite (A),<br />
situado en la basedei motor, al otro lado del carburador.<br />
)<br />
* Por debajo de 4 °C (40 °F), el uso de aceite SAE30 provocar_<br />
dificultades de arranque.<br />
** Por encima de 27 °C (80 °F) el uso de aceite 10W30 puede<br />
aumentar el consumo de aceite. Compruebe el nivel de aceite<br />
con mayor frecuencia.<br />
O<br />
especificaciones VI$O Todo aceite ILSACGF-2,con sint_tico que cumpla marcadelas<br />
certificaci6n API<br />
y con simbolo de servicioAPI (se muestra a la izquierda)<br />
con "SJ/OFENERGYCONSERVING"o superior es un aceite<br />
aceptablea todas las temperaturas. El uso de aceitesint_tico<br />
no altera los intervalosde cambio de aceite indicados.<br />
Comprobaci6n dei nivel de aceite<br />
Compruebe el nivel de aceite antes de cada uso o cada 8 horas de<br />
funcionamiento, <strong>com</strong>o minimo. Rellenesi es necesario.<br />
1. Coloque el limpiadora a presi6n sobre una superficie nivelada.<br />
2. Quite el tap6n de Ilenado de aceite y limpielo con un trapo.<br />
3. Compruebe que el aceite Ilega hasta el punto de<br />
desbordamiento en el orificio de Ilenado.<br />
4. Quite eltap6n de Ilenadode aceite y vacie todo el aceite en un<br />
recipiente adecuado.<br />
5. Vuelva a colocar el tap6n de vaciado y apri_teio bien. Quite el<br />
tap6n de Ilenado de aceite.<br />
6. Vierta lentamente unos 0,6 litros (20 onzas) de aceite por el<br />
orificio de Ilenado (B) hasta el punto de desbordamiento (C).<br />
7. Vuelva a colocar el tap6n de Ilenadode aceite. Apri_telo<br />
firmemente a mano.<br />
8. Limpie los residuos de aceite.<br />
9. Conecte de nuevo alambre de bujia al bujia.<br />
4. Instaie el tap6n de Ilenado de aceite, apriete firmemente.<br />
49
Servicio dei Depuradorde Aire<br />
Su motor no funcionar_ adecuadamentey puede da_arse si usted Io<br />
hacefuncionar con un depurador de aire sucio. Suministre servicio<br />
m_s frecuentemente si la unidad funciona bajo condiciones de<br />
mucha suciedad o polvo. Los repuestos se encuentran disponibles<br />
en su centro de servicio local Sears.<br />
Para dar servicioal fiitro de aire, siga los pasosque se detallan a<br />
continuaci6n:<br />
1. Afioje eltornillo (A) y quite la cubierta (B).<br />
©<br />
.<br />
3.<br />
4.<br />
5.<br />
6.<br />
Remueva cuidadosamente el cartucho (C).<br />
Para limpiar el cartucho, golpee ligeramente su costado de<br />
papel plegado sobre una superificie firme.<br />
Reinstale el juego de cartucho nuevo o limpio debajo de la<br />
cubierta.<br />
Inserte las lengOetas(D) de la cubierta en las ranuras que se<br />
encuentran en el fondo de la base (E).<br />
Coloque la cubierta en su lugar y apriete el tornillo firmemente<br />
a la base.<br />
AVISO Usted puede<strong>com</strong>prar los elementos del filtro de aire<br />
nuevos Ilamando al 1-800-4-MY-HOIViE(469-4663).<br />
Remplace la Bujia<br />
Cambie la bujia ayudar_ a su motor a arrancar m_s f_cilmente y<br />
funcionar mejor.<br />
1. Limpie el _reaalrededor de la bujia y retirela.<br />
2. Retire y revise la bujia.<br />
3. Cambie la bujia si los electrodos est_n picados o quemados o<br />
si la porcelana est_ agrietada. Utilice la bujia de repuesto<br />
re<strong>com</strong>endada. Consulte Especificaciones.<br />
4. Compruebe la separaci6n del electrodo con un calibrador de<br />
alambre y ajuste el espacio de la bujia a la medida<br />
re<strong>com</strong>endada si fuera necesafio (v_ase Especificaciones).<br />
5. Instale la bujia y aprietela firmemente.<br />
AFISO<br />
Puedeadquirir nuevos bujia al n_mero telef6nico<br />
1-800-4-MY-HOME(469-4663).<br />
Inspeccione el silenciadory la pantalla<br />
apagachispas<br />
Inspeccione que el silenciador no presentefisuras, corrosi6n u<br />
otros da_os. Desmonte la pantallaapagachispas, si cuenta con una,<br />
y verifique que no presente da_os ni obstrucci6n por carb6n. En<br />
caso de que se necesiten piezasde recambio, aseg_rese de usar<br />
solamente piezasde recambio originales parael equipo.<br />
AV/$O Para obtener el n_mero de parte Ilame al 1-800-4-1ViY-<br />
HOME(469-4663).<br />
_i, ADVERTENCIA El contacto con la zona dei silenciador<br />
puede producir quemaduras graves.<br />
_ _ Los gasesy ei caior de escape pueden<br />
infiamar los materiales <strong>com</strong>bustibles y<br />
las estructuras o dafiar el dep6sito de <strong>com</strong>bustible y<br />
provocar un incendio.<br />
• NOtoque ias superficies calientes y evite los gases del escape a<br />
alta temperatura.<br />
• Permita que ei equipo se enffie antes de tocaflo.<br />
• Deje un espacio minimo de 1.5 m (5 pies) airededor del<br />
limpiadoraa presi6n, incluidaia parte superior.<br />
• Utilizar ei motor en un terreno boscoso, con maleza o cubierto<br />
de hierba constituye una infracci6n al C6digo de recursos<br />
p_blicos de California,a menos que ei sistema de escape est_<br />
equipado con una pantallaapagachispas, de acuerdo a la<br />
definici6n de la Secci6n 4442, que se mantenga en buenas<br />
condiciones de funcionamiento. En otros estados o<br />
jurisdicciones federales puede haber leyes similares en vigor.<br />
P6ngaseen contacto con el fabricante, el vendedor o el<br />
distribuidor del equipo original para obtener una pantalla<br />
apagachispasdise_ada paraei sistema de escape instaiado en<br />
este motor.<br />
• Las piezasde recambio deben ser las mismas que las piezas<br />
originales y estar instaiadasen la misma posici6n.<br />
Sisterna de Refrigeraci6n de Aire<br />
Con el tiempo, se pueden acumular residuos en las aletas de<br />
refrigeraci6n del cilindro y pasar inadvertidos mientras no se<br />
desmonte parcialmente el motor. Re<strong>com</strong>endamos que encargue la<br />
fimpieza del sistema de refrigeraci6n a un distfibuidor autorizado de<br />
servicio Sears siguiendo los intervalos re<strong>com</strong>endados (consulte la<br />
secci6n Calendario de Mantenimiento). Es igualmente importante<br />
que no se acumulen residuos en el motor. Consulte la secci6n<br />
Limpie los Residuos.<br />
Ajuste del carburador<br />
El carburador de este motor es de bajaemisi6n. Est_equipado con<br />
una v_lvula de mezcla de ralenti no ajustabley, en algunos casos,<br />
con ralenti regulado. Los niveles de ralenti regulado y velocidad<br />
m&xima se ajustan en laf_brica. Si es necesario modificarlos, acuda<br />
a un distribuidor autorizado de Briggs & Stratton.<br />
_i, PRECAUCION Las velocidades de operaciOn en<br />
exceso, aumentan los riesgos de heridas y dafios al<br />
limpiadora a presi6n.<br />
Las velocidades bajan en exceso, imponen una carga muy<br />
pesada.<br />
• NOcambie ninguna velocidad determinada. El limpiadora a<br />
presi6n suministra una frecuencia y un voltaje caiificado cuando<br />
funciona a una velocidad determinada.<br />
• NO modifique al limpiadora a presi6n en ninguna forma.<br />
5O
DESPUESDECADAUSO<br />
No deberA haber agua en la unidad por largos periodos de tiempo.<br />
Los sedimentos de minerales se pueden depositar en partes de la<br />
bombay "congelar" su funcionamiento. Lleve a cabo estos<br />
procedimientos despu_s de cada uso:<br />
1. Pare el motor, cierre la alimentaciOn de agua, apunte con la<br />
pistola rociadora hacia una direcciOn segura, pulse el botOn<br />
rojo y apriete el gatillo para descargar la presiOn.Deje enfriar<br />
el motor.<br />
_lLADVERTENCIA Elchorro de agua a alta presiOnque<br />
este lostejidos equiposubcut_.neos,provocando produce, puede atravesarlesionesde<br />
la piel y<br />
gravedad que podrian dar lugara la amputaciOn<br />
de un miembro.<br />
La pistolarociadoracontieneaguaaalta presiOninclusocon<br />
el motor paradoy elaguadesconectada,quepuedecausar<br />
la herida.<br />
• Mantengaconectadala manguer a lamAquinao a lapistolade<br />
rociadocuandoelsistemaest(ipresurizado.<br />
• SIEMPREquepareel motor,apunteconlapistolarociadora<br />
haciaunadirecciOnsegura,presioneel seguro(botOnrojo)y<br />
aprieteel gatilloparadescargarlapresidny evitarelretroceso.<br />
2. Desconecte manga del fusil del rodo y salida alta de presidn<br />
en la bomba. Desag_Jeagua de la manga, del fusil, y de la<br />
extensidn de boquilla. Use un harapo para quitar la manga.<br />
3. Saquetodos los liquidos de la bomba halando la manija de<br />
retroceso aproximadamente 6 veces. Esto deberAevacuar la<br />
mayoria del liquido de la bomba.<br />
4. Enrolle la mangueray cu_lguela del gancho situado en el<br />
bandeja de accesorios.<br />
5. AImacene la unidad en una Area limpiay seca.<br />
6. Si planeaalmacenar la unidad por mAs de 30 dias, vea la<br />
seccidn Almacenambnto Prolongado en prdxima pAgina.<br />
_i, ADVERTENCIA La gasolina y sus vapores son<br />
extremadamenteinfiamables y<br />
_ explosivos.<br />
Elfuego o una explosion pueden causar<br />
quemaduras severase inclusive la muerte.<br />
CUANDOALIVlACENE 0 GUARDELEQUIPOCONCOMBUSTIBLE<br />
ENELTANQUE<br />
• AImacenealejado de calderas, estufas, calentadores de agua,<br />
secadoras de ropa u otros aparatos electrodom(isticos que<br />
posean pilotos u otras fuentes de igniciOn,porque ellos pueden<br />
encender losvapores de la <strong>com</strong>bustible.<br />
51
ALIViACEHAIVilENTO PARAIHVIERHO<br />
AI/ISO Usted deber_, proteger su unidad de las<br />
temperaturas de congelamiento.<br />
• Si no Io hace, da_ar_ permanentementela bombay la unidad no<br />
podr_ funcionar.<br />
• La garantia no cubre el da_o de la unidad ocasionado por<br />
congelamiento.<br />
Para proteger la unidad de las temperaturas de congelamiento:<br />
1. Siga los pasos 1-4 en la secci6n previa Despues de CadaUso.<br />
2. Utilice un protector de bomba, disponible en Sears con el<br />
n_mero de cat,logo 7174403 paracuidar la bomba. Aqu_l<br />
protege a la unidad contra el congelamiento y lubrica tanto los<br />
pistones <strong>com</strong>o los empaques.<br />
3. Si el protector de bomba no est_ disponibie, conecte un tramo<br />
de 3 pies de manguera de jardin a la entrada de agua.Vierta<br />
anticongelante RV (anticongelante sin alcohol) en la manguera.<br />
Jale la manija de arranque dos veces. Desconecte despu_s la<br />
manguera de 3 pies.<br />
4. AImacenela unidad en una _rea limpia y seca.<br />
ALMACENAMIENTOPROLONGABO<br />
Si usted no planea usar la m6,quinalimpiadora a presi6n por m_s de<br />
30 dias, deber_ preparar el motor para un almacenamiento<br />
prolongado.<br />
Es importante evitar la formaci6n de dep6sitos de goma en las<br />
partes esenciales del sistema del <strong>com</strong>bustible tales <strong>com</strong>o<br />
carburador, filtro del <strong>com</strong>bustible, manguera o tanque del<br />
<strong>com</strong>bustible durante el almacenamiento. Tambi_n, la experiencia<br />
indica que los <strong>com</strong>bustibles con mezclasde alcohol (llamados<br />
gasohol, etanol o metanol) pueden atraer la humedad, Io que Ileva a<br />
la separaci6n y formaci6n de _cidos durante el almacenamiento. La<br />
gasolina _cida puede da_ar el sistema del <strong>com</strong>bustible de un motor<br />
durante el almacenamiento.<br />
Proteja el Sisiema de Combustible<br />
Aditivopara Combustible:<br />
El <strong>com</strong>bustible puede estar pasado30 dias despu_s de su<br />
almacenamiento. El <strong>com</strong>bustible pasado provoca la formaci6n de<br />
residuos _cidos y de carbonilla en el circuito de <strong>com</strong>bustible yen<br />
los <strong>com</strong>ponentes b_sicos dei carburador. Para mantener ei<br />
<strong>com</strong>bustible en buen estado, utilice el estabilizador de <strong>com</strong>bustible<br />
FRESHSTART® de Briggs & Stratton en cualquiera de sus<br />
variantes: liquido o cartucho concentrado con goteo.<br />
Si se a_ade un estabilizador de <strong>com</strong>bustible conforme alas<br />
instrucciones, no ser_ necesario vaciar el motor de <strong>com</strong>bustible.<br />
Hagafuncionar el motor durante dos minutos paraque ei<br />
estabiiizador circule por todo el circuito de <strong>com</strong>bustible. El motor y<br />
el <strong>com</strong>bustible se pueden aimacenar hasta 24 meses.<br />
Si no se ha a_adido un estabilizador de <strong>com</strong>bustible a la gasolina,<br />
deber_ vaciar <strong>com</strong>pletamente el motor utiiizando un contenedor<br />
homologado. Deje funcionar ei motor hasta que se agote ei<br />
<strong>com</strong>bustible. Se re<strong>com</strong>ienda utilizar un estabilizador de <strong>com</strong>bustible<br />
en ei contenedor de almacenamiento para mantener la gasolina en<br />
buen estado.<br />
Cambiode aceite<br />
Con el motor todavia caliente, drene el aceite de la caja del cig_Je_al.<br />
Vuelva a Ilenarlo con ei grado de aceite re<strong>com</strong>endado.Vea Cambio<br />
de Aceite del Motor en la secci6n Mantenimiento del Motor.<br />
Protecci6n de la Bomba<br />
Para proteger la bomba frente a los da_os que causan los dep6sitos<br />
minerales o la congelaci6n, use PumpSaver, n_mero de cat,logo<br />
7174403, para cuidar la bomba. Esto evita los da_os derivados de la<br />
congelaci6n y lubrica los pistones y las juntas.<br />
/IV/SO El PumpSaver est_n disponible s61o<strong>com</strong>o un accesorio<br />
opcional. NO es incluido con la arandela de la presi6n. Avise el m_s<br />
cercano servicio autorizado central para <strong>com</strong>prar PumpSaver.<br />
AV/SO Usted deber_ proteger su unidad de las<br />
temperaturas de congelamiento.<br />
• Si no Io hace, da_ar_ permanentemente la bombay la unidad no<br />
podr_ funcionar.<br />
• La garantia no cubre el da_o de la unidad ocasionado por<br />
congelamiento.<br />
AI uso el PumpSaver,cerci6rese la arandelade la presi6n se apagay<br />
desconectadel agua del suministro. Leay siga todas instrucciones y<br />
lasadvertencias dadasen el contenedor de PumpSaver.<br />
Otras sugerenciaspara el almacenarniento<br />
1. NOguarde <strong>com</strong>bustible de una temporada a otra a menos que<br />
Io hayatratado <strong>com</strong>o se indica en la secci6n Aditivo para<br />
<strong>com</strong>bustible.<br />
2. Reemplacela caneca de gasolina si <strong>com</strong>ienza a oxidarse. El<br />
6xido y/o la suciedad en la gasolina le causar_ problemas.<br />
3. Cubra su unidad con una cubierta de protecci6n adecuadaque<br />
no retenga humedad.<br />
e<br />
e<br />
A AI:IVERTENCIALas cubiertas para almacenamiento<br />
_<br />
pueden ser inflamables.<br />
NOcoloqueunacubiertaencimadeunlimpiadoraa presidn<br />
caiiente.<br />
Deje que la unidad se enfrie Io suficientementeantes de que le<br />
coloque la cubierta.<br />
4. Almacene la unidad en un _rea limpia y seca.<br />
52
Problema<br />
LabombapresentaBos<br />
siguientesproblemas:no<br />
producepresi6no produceuna<br />
presi6nerrada,traqueteo,<br />
p_rdidade presi6n,bajo<br />
voJumende agua=<br />
El detergentenosemezcJacon<br />
el rociado=<br />
El motorfuncionabien cuando<br />
no tiene cargas,pero funciona<br />
"maJ" cuando Se conecta una<br />
carga.<br />
El motornoarranca;o arrancay<br />
funcionareal.<br />
El motorseapagadurantela<br />
operaci6n=<br />
El motornotiene fuerza=<br />
Cagsa<br />
1. EstAusando la puntas de rocio de baja<br />
presi6n (negra).<br />
2. La entrada de agua estAbloqueada.<br />
3. Suministro de agua inadecuado.<br />
4. La manguera de entrada estAdoblada o<br />
presentafugas.<br />
5. El colador de la manguera de la entradade<br />
agua est_ tapado.<br />
6. El suministro de agua est_ por encima de<br />
los 100°F.<br />
7. La manguera de alta presi6n est_<br />
bloqueada o presentafugas.<br />
8. La pistola presentafugas.<br />
9. La punta de rodo estAobstruida.<br />
10. Bomba defectuosa.<br />
1. Eltubo de succi6n de detergente no estA<br />
sumergido.<br />
2. Elfiltro de quimicos est_tapado.<br />
3. Est_usando la puntas de rocio de alta<br />
presi6n.<br />
Lavelocidaddelmotoresdemasiadolenta.<br />
1. Control de lav_lvula de admisi6n en la<br />
posici6n de "Stop" (Parada).<br />
2. V_lvula dei <strong>com</strong>bustible en posici6n "Off".<br />
3. Bajo nivel de aceite.<br />
4. Depurador de aire sucio.<br />
5. Sin <strong>com</strong>bustible.<br />
6. Combustible vieja.<br />
7. El alambre de la bujia no est_ conectado a<br />
la bujia.<br />
8. Bujia mala.<br />
9. Agua en la <strong>com</strong>bustible.<br />
10. Mezcla de <strong>com</strong>bustible demasiado rica.<br />
1. Sin <strong>com</strong>bustible.<br />
2. Bajo nivel de aceite.<br />
Filtro de aire sucio.<br />
Soluci6n<br />
1. Gamblela puntas de rocio a una de las puntas<br />
de rocio de alta presi6n.<br />
2. Limpie la entrada.<br />
3. Proporcione fiujo de agua adecuado.<br />
4. Estire la manguera de entrada, coloque un<br />
parche en la fuga.<br />
5. Revisey limpie el colador de la manguera de<br />
entrada.<br />
6. Proporcione suministro de agua m_s fria.<br />
7. Retire las obstrucciones de la manguerade<br />
salida.<br />
8. Remphce la pistola.<br />
9. Limpie la punta de rocio.<br />
10. Contacteel distfibuidor de servicio autorizado.<br />
1. Coloque el tubo de succi6n de detergente en el<br />
detergente.<br />
2. Limpie o remplace el filtro/tubo de succi6n de<br />
detergente.<br />
3. Use la puntas de rocio de baja presi6n (negra).<br />
Muevael control de la v_lvula de regulaci6n a la<br />
posici6n FAST(RAPIDO).Si el motor continua<br />
funcionando mal, p6ngase en contacto con el<br />
distfibuidor de servicio autorizado.<br />
1. Coloque del control de la v_lvula de admisi6n<br />
en la posici6n de "R_pido"("Fast").<br />
2. Girela v_lvula del <strong>com</strong>bustible a la posici6n "On".<br />
3. Llene la caja del cig_Je_alhasta el nivel<br />
correcto.<br />
4. Limpie o remplace el depurador de aire.<br />
5. Llene ei tanque de <strong>com</strong>bustible.<br />
6. Drene el tanque de <strong>com</strong>bustible; II_nelo con<br />
<strong>com</strong>bustible fresco.<br />
7. Conecte el aiambre a la bujia.<br />
8. Remplacela bujia.<br />
9. Drene el tanque de <strong>com</strong>bustible; II_nelo con<br />
<strong>com</strong>bustible fresco.<br />
10. Contacteel distfibuidor de servicio autorizado.<br />
1. Llene el tanque de <strong>com</strong>bustible.<br />
2. Llene la caja del cig_Je_alhasta el nivel<br />
correcto.<br />
Remplaceei filtro de aire.<br />
53
Garantiade controlde ernisionesde California,<br />
U.S. EPAy Sears<br />
Berechosy obliga¢iones de la garantia<br />
CaliforniaAir ResourcesBoard, U.S. EPAy Sears, Roebuck<br />
and Co. U.S.A.(Sears) le expiican a continuaci6n ia garanfia<br />
dei sistema de control de emisiones de su motor/equipo<br />
modeio 2008 y posteriores. EnCalifornia, los nuevos<br />
motores peque_os para m_.quinasde servicio debenestar<br />
dise_ados, fabricados y equipados conforme a los exigentes<br />
est_.ndaresde lucha contra ia contaminaci6n del Estado.<br />
Sears garantiza el sistema de control de emisiones de su<br />
motor/equipo durante los periodos que se indican a<br />
continuaci6n, siempre que no haya habido use indebido,<br />
negligencia o mantenimiento indebido del motor peque_o<br />
para m_.quinasde servicio.<br />
Su sistemade control de emisiones puedeincluir <strong>com</strong>ponentes<br />
<strong>com</strong>e el carburadoroei sistemade inyecci6n de<strong>com</strong>bustible,<br />
el tanque de<strong>com</strong>bustible, ei sistemade arranquey el<br />
convertidor cataiitico.Tambi6npuedeinciuir mangueras,<br />
correas, conectores,detectoresy otros conjuntos relacionados<br />
con ias emisiones.Si se cumpien las condicionesde ia<br />
garantia,Searsreparar_,el motor/equipo sin coste alguno,<br />
incluido el diagn6stico,los <strong>com</strong>ponentesy la mane de obra.<br />
Cobertura de la garantia del fabricante:<br />
Los motores peque_os param_quinas de servicio tienen dos<br />
a_os de garantia. Si aig_n <strong>com</strong>ponente del motor!equipo<br />
relacionado con las emisiones estuviera defectuoso, Sears Io<br />
reparar_,o sustituir_..<br />
Responsabilidades de la garantfa del propietario:<br />
* Comepropietariodel motor/equipo peque_o,ustedes<br />
responsabiede Ilevara cabotodas las operacionesde<br />
mantenimientoque se enumeranenel manualdei<br />
propietario.Sears re<strong>com</strong>iendaconservartodas las<br />
facturas reiativasai mantenimientodei motor/equipo, pero<br />
Searsno puededenegarla garantiabas_.ndose<br />
Onicamenteen ia faitade facturaso en laimposibilidad<br />
per parte del propietariode asegurarla correcta<br />
realizaci6nde todas las operacionesde mantenimiento.<br />
. Comepropietariodel motor/equipo,debeser consciente<br />
deque Searspuededenegarla coberturade lagarantiasi<br />
el motor/equipoo uno de sus <strong>com</strong>ponentesfaiia debido a<br />
un use indebidoo negiigente,un mantenimiento<br />
inadecuadoo modificacionesno autorizadas.<br />
• Usted es responsablede presentar su motor/equipo a<br />
un centre de distribuci6n de Sears,distribuidor<br />
autorizadode servicio u otra entidad equivaiente, segOn<br />
corresponda, en ei memento en que surja un probiema.<br />
Las reparacionescubiertas per la garanfia se ilevar_.na<br />
cabo en un plazo razonable,no superior a 30 dias en<br />
ningOncase. En case de preguntas sobre los derechos<br />
y responsabiiidades relatives a la garanfia, p6ngase en<br />
contacto con Sears Namandoai (800) 469-4663.<br />
Disposicionesde la garantia contradefectos deJ sistema<br />
de control de emisiones de Sears<br />
A continuaci6n se detaiian las disposiciones concretas<br />
reiativas a la Cobertura de ia garantia contra defectos dei<br />
sistema de control de emisiones. Se a_adena la garantia de<br />
motores de Sears para motores no regulados, que figura en<br />
el Manual del Operario.<br />
1. Piezasgarantizadas<br />
.<br />
La presente garantia cubre Onicamentelas piezas que<br />
se enumeran a continuaci6n (piezas del sistema de<br />
control de emisiones) siempre que tales piezas<br />
estuvieran presentes en el motor adquirido.<br />
a. Sistema de regulaci6n de <strong>com</strong>bustible<br />
• Sistema de enriquecimiento para arranqueen trio<br />
(estrangulador electr6nico)<br />
• Carburador y piezasinternas<br />
• Bomba de <strong>com</strong>bustible<br />
• Conducto de <strong>com</strong>bustible, acoplamientos del<br />
conducto de <strong>com</strong>bustible, abrazaderas<br />
• Dep6sito de <strong>com</strong>bustible, tap6n y cadena<br />
• Bote de carbono<br />
b. Sistema de inducci6n de aire<br />
• Filtro de aire<br />
• Colector de admisi6n<br />
• Linea de purga y ventilaci6n<br />
c. Sistema de encendido<br />
• Bujia(s)<br />
• Sistema de encendido magn6tico<br />
d. Sistema catalizador<br />
• Convertidor catalitico<br />
• Colector de escape<br />
• Sistema de inyecciOnde aire o v_.lvulade impulse<br />
e. Elementos diversos utiNzadosen los sistemas<br />
anteriores<br />
• V_.lvuiasy conmutadores de aspiraci6n,<br />
temperatura, posici6n y temporizados<br />
• Conectoresy unidades<br />
Duraci6n de la cobertura<br />
Duranteun periodode dos a_os desdelafechade <strong>com</strong>pra<br />
original,Searsgarantizaal propietariooriginaly a todo<br />
propietarioposteriorque ei motor est,.dise_ado,fabricado<br />
y equipadoconformea la normativavigenteadoptadaper<br />
elAir ResourcesBoard;que no tienedefectosde<br />
materialesni de mane deobra queprovoquenel fallo de<br />
un <strong>com</strong>ponentecubierto;y quees id6nticoen todos los<br />
aspectosmateriaiesai motor descrito en laaplicaci6nde<br />
certificaci6ndelfabricante.Elperiodode garantia<br />
<strong>com</strong>ienzaen lafechade adquisici6noriginaldel motor.<br />
En EE.UU.y Canad_contamoscon una Ifneade emergencialas 24 horas (1-800-469-4663), queofrece un men0de mensajespregrabadoscon informaci6n sobre<br />
mantenimientode productos.<br />
54
Lagaranfiadelos<strong>com</strong>ponentes relacionados conlas<br />
emisioneslasiguiente:<br />
• Los failos de todo <strong>com</strong>ponente cubierto por ia garanfia<br />
que no se debasustituir <strong>com</strong>o parte dei plan de<br />
mantenimiento obligatorio detaliado en ei manual del<br />
propietario entregado quedar_.ncubiertos por la<br />
garantia durante el periodo de la garantia especificado<br />
anteriormente. Si aiguno de estos <strong>com</strong>ponentes faiia<br />
durante ei periodo de cobertura de ia garantia, deber_.<br />
ser reparado o sustituido pot Sears sin cargo aiguno<br />
para el propietario. Los <strong>com</strong>ponentes que se repareno<br />
sustituyan en virtud de la garanfia estar_.ncubiertos por<br />
la garanfia durante el periodo de garantia restante.<br />
• Los fallos de todo <strong>com</strong>ponente cubierto por ia garanfia<br />
que s61ose deba inspeccionar peri6dicamente seg_n el<br />
manual del propietario entregado quedar_.ncubiertos<br />
por ia garantia durante ei periodo de ia garantia<br />
especificadoanteriormente. Los <strong>com</strong>ponentes que se<br />
repareno sustituyan en virtud de la garantia estar_.n<br />
cubiertos por la garanfia durante el periodo de garanfia<br />
restante.<br />
• Los failos de todo <strong>com</strong>ponente cubierto por la garanfia<br />
que se deba sustituir <strong>com</strong>o parte del plan de<br />
mantenimiento obligatorio detailado en el manual del<br />
propietario entregado quedar_.ncubiertos por la<br />
garantia hastael momento en que se indique que es<br />
necesario hacer ia primera sustituci6n. Si el<br />
<strong>com</strong>ponente falla antes de la fecha de la primera<br />
sustituci6n, ser_.reparadoo sustituido por Searssin<br />
cargo alguno parael propietario. Los <strong>com</strong>ponentes que<br />
se repareno sustituyan en virtud de ia garantia estar_n<br />
cubiertos por la garantia durante el periodo de garanfia<br />
hasta Ilegar a la fecha de la primera sustituci6n.<br />
• No se podr_.nutilizar <strong>com</strong>ponentes <strong>com</strong>plementarios o<br />
modificados no exentos por ei Air ResourcesBoard. Ei<br />
uso de <strong>com</strong>ponentes <strong>com</strong>plementarios o modificados<br />
no exentos por parte dei propietario dar_.lugar a la<br />
anuiaci6n de la garantia. El fabricante no ser_.<br />
responsablede los falios de <strong>com</strong>ponentes cubiertos por<br />
la garanfia que se debanai uso de un <strong>com</strong>ponente<br />
<strong>com</strong>plementafio o modificado no exento.<br />
3. Cobertura de da_os derivados<br />
Lacobertura se ampiiar_,a los fallos de cualquier<br />
<strong>com</strong>ponente del motor derivados del fallo de cualquier<br />
<strong>com</strong>ponente reiacionado con el sistema de emisiones<br />
cubierto por la garantia.<br />
4. Solicitudes y exclusiones de cobertura<br />
Las solicitudes de garanfia se cumplimentar_.ncon<br />
arreglo a las disposiciones de ia politica de garantia de<br />
motores Sears. La cobertura no aplica a los fallos de<br />
<strong>com</strong>ponentes reiacionadoscon el sistema de emisiones<br />
cubiertos por la garantia que no sean originales de<br />
Searsni a los fallos debidos a uso indebido, negligencia<br />
o mantenimiento inadecuado,conforme alas<br />
disposiciones de la politica de garanfia de motores<br />
Sears.Sears no ser_.responsablede la cobertura de la<br />
garantia de fallos de <strong>com</strong>ponentes relacionadoscon el<br />
sistema de emisiones cubiertos por ia garanfia<br />
provocados por el uso de <strong>com</strong>ponentes<br />
<strong>com</strong>plementarios o modificados.<br />
Consulte la informaci6nsobreel periodode durabilidad de<br />
las emisiones y el indice de aire en la etiqueta de<br />
emisiones del motor<br />
Motores peque_os para m_.quinasde servicio con<br />
certificaciOnde cumplimiento de la normativa sobre<br />
emisiones del CaliforniaAir ResourcesBoard (CARB)deben<br />
mostrar informaciOnsobre el periodo de durabilidad de las<br />
emisiones y el indice de aire. El fabricante del motor ofrece<br />
esta informaciOnal consumidor medianteetiquetas de<br />
emisiones. La etiqueta de emisiones del motor contiene la<br />
informaciOn de certificaciOn.<br />
Ei Periodo de Durabilidadde las Emisiones indica el<br />
n_mero de horas durante las cualesel motor puede<br />
funcionar cumpliendo las normas sobre emisiones, siempre<br />
que se reaiicen las operacionesde mantenimiento que se<br />
detallan en ias instrucciones de uso y mantenimiento. Se<br />
utilizan las siguientes categorias:<br />
IVlederado:El motor est,. certificado para cumplir la<br />
normativa sobre emisiones durante 125 horas de<br />
funcionamiento real.<br />
Intermedio: El motor est,. certificado para cumplir la<br />
normativa sobre emisiones durante 250 horas de<br />
funcionamiento real.<br />
Prolongado: Ei motor est,. certificado para cumplir la<br />
normativa sobre emisiones durante 500 horas de<br />
funcionamiento real.<br />
Por ejempio, un cortac6sped con operario a pie se suele<br />
utilizar entre 20 y 25 horas al a_o. Por tanto, el Periede de<br />
Durabilidadde las Emisiones de un motor con clasificaci6n<br />
intermedia equivaldria a 10-12 a_os.<br />
Los motores cuentan con ia certificaci6n de cumpiimiento de<br />
la fase 2 de ias normativas sobre emisiones de la United<br />
States Environmental Protection Agency (USEPA,Agencia<br />
estadounidensede protecci6n del medioambiente). En el<br />
caso de los motores con certificaci6n de fase 2, el periodo de<br />
cumplimiento de ia normativa sobre emisiones que figura en<br />
la etiqueta de cumplimiento de emisiones indica el nOmero<br />
de horas de funcionamiento durante las cuales el motor ha<br />
demostrado cumplir los requisitos federales sobre emisiones.<br />
Paramotores de menos de 225 cc:<br />
CategoriaC = 125 horas<br />
CategoriaB = 250 horas<br />
CategoriaA = 500 horas.<br />
Paramotores de 225 cc o m_.s:<br />
CategoriaC = 250 horas<br />
CategoriaB = 500 horas<br />
CategoriaA = 1000 horas.<br />
55
Your Home<br />
For expert troubleshooting and home solutions<br />
advice:<br />
www.managemyhome.<strong>com</strong><br />
For repair - in your home - of all major brand appliances,<br />
lawn and garden equipment, or heating and cooling systems,<br />
no matter who made it, no matter who sold it!<br />
For the replacement <strong>parts</strong>, accessories and<br />
owner's manuals that you need to do-it-yourself.<br />
For Sears professional installation of home appliances<br />
and items like garage door openers and water heaters.<br />
1-800-4-MY-HOME ® (1-800-469-4663)<br />
Call anytime, day or night (U.S.A. and Canada)<br />
www.sears.<strong>com</strong><br />
www.sears.ca<br />
Our Home<br />
For repair of carry-in items like vacuums, lawn equipment,<br />
and electronics, call anytime for the location of your nearest<br />
Sears Parts & Repair Service Center<br />
1-800-488-1222 (U.S.A.) 1-800-469-4663 (Canada)<br />
www.sears.<strong>com</strong><br />
www.sears.ca<br />
To purchase a protection agreement on a product serviced by Sears:<br />
1-800-827-6655 (U.S.A.)<br />
Para pedir servicio<br />
de reparaci6n<br />
a domicilio, y para ordenar piezas:<br />
1-888-SU-HOGAR ®<br />
(1-888-784-6427)<br />
1-800-361-6665 (Canada)<br />
Au Canada pour service en fran(_ais:<br />
1-800-LE-FOYER Mc<br />
(1-800-533-6937)<br />
www.sears.ca<br />
TM<br />
® Registered Trademark / Trademark / SMService Mark of Sears Brands, LLC<br />
® Marca Registrada / TMMarca de Fabrica / SM Marca de Servicio de Sears Brands, LLC<br />
MCMarque de <strong>com</strong>merce / MDMarque d6pos6e de Sears Brands, LLC © Sears Brands, LLC