2-slice digital toaster tostadora digital de 2 rebanadas - Applica Use ...
2-slice digital toaster tostadora digital de 2 rebanadas - Applica Use ...
2-slice digital toaster tostadora digital de 2 rebanadas - Applica Use ...
You also want an ePaper? Increase the reach of your titles
YUMPU automatically turns print PDFs into web optimized ePapers that Google loves.
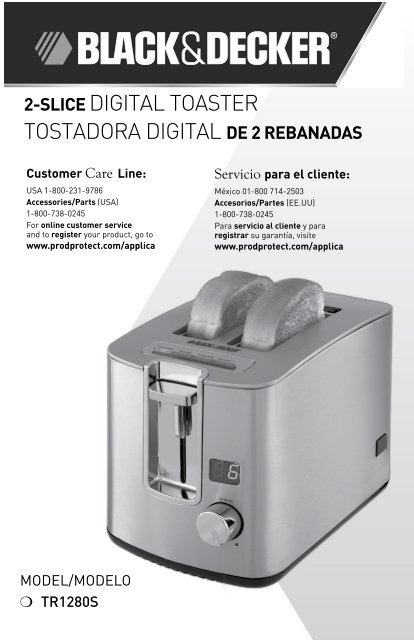
2-SLICE DIGITAL TOASTER<br />
TOSTADORA DIGITAL DE 2 REBANADAS<br />
Customer Care Line:<br />
USA 1-800-231-9786<br />
Accessories/Parts (USA)<br />
1-800-738-0245<br />
For online customer service<br />
and to register your product, go to<br />
www.prodprotect.com/applica<br />
Servicio para el cliente:<br />
México 01-800 714-2503<br />
Accesorios/Partes (EE.UU)<br />
1-800-738-0245<br />
Para servicio al cliente y para<br />
registrar su garantía, visite<br />
www.prodprotect.com/applica<br />
Mo<strong>de</strong>l/Mo<strong>de</strong>lo<br />
❍ TR1280S
Please Read and Save this <strong>Use</strong> and Care Book<br />
IMPORTANT SAFEGUARDS<br />
When using electrical appliances, basic safety precautions should always<br />
be followed, including the following:<br />
❍ Read all instructions.<br />
❍ Do not touch hot surfaces. <strong>Use</strong> handles or knobs.<br />
❍ To protect against electrical shock, do not immerse cord, plug, or<br />
appliance in water or other liquid.<br />
❍ Close supervision is necessary when any appliance is used by or near<br />
children.<br />
❍ Unplug from outlet when not in use and before cleaning. Allow to cool<br />
before putting on or taking off parts.<br />
❍ Do not operate any appliance with a damaged cord or plug or after the<br />
appliance malfunctions or has been damaged in any manner. Return<br />
the appliance to an authorized service facility for examination, repair,<br />
or adjustment. Or, call the toll-free number on the cover of this<br />
manual.<br />
❍ The use of accessory attachments not recommen<strong>de</strong>d by the appliance<br />
manufacturer may cause injuries.<br />
❍ Do not use outdoors.<br />
❍ Do not let cord hang over edge of table or counter or touch hot<br />
surfaces.<br />
❍ Do not place on or near a hot gas or electric burner or in a heated<br />
oven.<br />
❍ To disconnect, turn any control to OFF, then remove plug from wall<br />
outlet.<br />
❍ Do not use appliance for other than inten<strong>de</strong>d use.<br />
❍ Oversized foods, metal foil packages, or utensils must not be inserted<br />
in a <strong>toaster</strong>, as they may create a fire or risk of electric shock.<br />
❍ A fire may occur if the <strong>toaster</strong> is covered or touching flammable<br />
material, including curtains, draperies, walls and the like, when in<br />
operation.<br />
❍ Do not attempt to dislodge food when <strong>toaster</strong> is plugged in.<br />
SAVE THESE INSTRUCTIONS.<br />
This product is for household use only.<br />
POLARIZED PLUG (120V Mo<strong>de</strong>ls Only)<br />
This appliance has a polarized plug (one bla<strong>de</strong> is wi<strong>de</strong>r than the other).<br />
To reduce the risk of electric shock, this plug is inten<strong>de</strong>d to fit into a<br />
polarized outlet only one way. If the plug does not fit fully into the outlet,<br />
reverse the plug. If it still does not fit, contact a qualified electrician. Do<br />
not attempt to modify the plug in any way.<br />
TAMPER-RESISTANT SCREW<br />
Warning: This appliance is equipped with a tamper-resistant screw<br />
to prevent removal of the outer cover. To reduce the risk of fire or<br />
electric shock, do not attempt to remove the outer cover. There are<br />
no user-serviceable parts insi<strong>de</strong>. Repair should be done only by<br />
authorized service personnel.<br />
ELECTRICAL CORD<br />
a) A short power-supply cord (or <strong>de</strong>tachable power-supply cord) is to<br />
be provi<strong>de</strong>d to reduce the risk resulting from becoming entangled in<br />
or tripping over a longer cord.<br />
b) Longer <strong>de</strong>tachable power-supply cords or extension cords are<br />
available and may be used if care is exercised in their use.<br />
c) If a long <strong>de</strong>tachable power-supply cord or extension cord is used,<br />
1) The marked electrical rating of the <strong>de</strong>tachable power-supply<br />
cord or extension cord should be at least as great as the<br />
electrical rating of the appliance,<br />
2) If the appliance is of the groun<strong>de</strong>d type, the extension cord<br />
should be a grounding-type 3-wire cord, and<br />
3) The longer cord should be arranged so that it will not drape over<br />
the countertop or tabletop where it can be pulled on by children<br />
or tripped over.<br />
Note: If the power supply cord is damaged, it should be replaced by<br />
qualified personnel; in Latin America, by an authorized service center.<br />
ENGLISH<br />
2<br />
3
Product may vary slightly from what is illustrated.<br />
<br />
<br />
1. Toast control lever<br />
2. Cancel button<br />
3. Bagel button<br />
4. Frozen button<br />
5. Reheat button<br />
6. Extra-wi<strong>de</strong> slots with self-adjusting gui<strong>de</strong>s<br />
† 7. Removable crumb tray (back of unit) (Part # TR1280S-01)<br />
8. One-touch retractable cord button<br />
9. Function indicator lights<br />
10. Digital countdown timer<br />
11. Toast sha<strong>de</strong> selector knob<br />
Note: † indicates consumer replaceable/removable parts<br />
<br />
<br />
<br />
<br />
<br />
<br />
How to <strong>Use</strong><br />
This product is for household use only.<br />
GETTING STARTED<br />
• Remove all packing material, labels and any stickers.<br />
• Remove and save literature.<br />
• Please go to www.prodprotect.com/applica to register your warranty.<br />
• Place sli<strong>de</strong> out crumb tray in slot located in back.<br />
• Place <strong>toaster</strong> on a flat, level surface, where the top of the unit has enough<br />
space for the heat to flow without damaging the cabinets or walls.<br />
• To adjust the cord length follow directions as instructed in EXTENDING<br />
AND RETRACTING THE CORD section of this manual.<br />
• Remove tie from cord and unwind.<br />
• Plug unit into electrical outlet.<br />
DIGITAL COUNTDOWN TIMER<br />
The <strong>digital</strong> display shows selected toast sha<strong>de</strong> before toasting countdown<br />
begins (minutes displayed). After the countdown reaches 1 minute, the display<br />
will show the seconds remaining.<br />
BUILT-IN TOAST CONTROL LEVER RISE<br />
This <strong>toaster</strong> has a built-in toast control lever rise. If toasted food does not<br />
clear the top of the <strong>toaster</strong> use the toast control lever to raise the food for<br />
"easy removal.<br />
USING YOUR TOASTER<br />
Be sure to make selections for each slot immediately after pressing the toast<br />
control lever.<br />
1. Adjust the toast sha<strong>de</strong> selector knob to the <strong>de</strong>sired setting (1 through 7).<br />
Note: When using for the first time, select setting 4. Re-adjust the setting to<br />
suit your personal preference on successive toasting operations.<br />
Hint: When toasting thin <strong>slice</strong>d breads, use a lighter setting than you would<br />
normally select.<br />
2. Place <strong>slice</strong>d bread or other foods into the slots and press the toast control<br />
lever down until it locks into place. The bread gui<strong>de</strong>s will automatically<br />
adjust to hold the food in place.<br />
Note: The <strong>digital</strong> display shows selected toast sha<strong>de</strong> before toasting<br />
countdown begins (minutes displayed). After the countdown reaches 1 minute,<br />
the display will show the seconds remaining.<br />
3. When selecting BageL , FrozeN or Reheat function, you must press the<br />
toast control lever before selecting one of these settings.<br />
Important: If the wrong button is selected, press the CANCEL button and<br />
re-select the <strong>de</strong>sired cycle.<br />
4. When toasting is complete, the toast control lever goes up and the unit<br />
shuts off.<br />
ENGLISH<br />
4<br />
5
Care and Cleaning<br />
This product contains no user serviceable parts. Refer service to qualified service<br />
personnel.<br />
CLEANING<br />
Always unplug the cord from the electrical outlet and allow the <strong>toaster</strong> to cool<br />
before cleaning. Do not immerse the <strong>toaster</strong> in water.<br />
Crumb Tray<br />
1. The crumb tray is located in the back of the <strong>toaster</strong>. To remove it just pull<br />
it out.<br />
2. Dispose of crumbs and wash the tray in warm, sudsy water.<br />
Note: The tray is not dishwasher safe. You can remove stubborn spots with a<br />
nylon mesh pad.<br />
3. Be sure to dry thoroughly before slipping the tray back into the <strong>toaster</strong>.<br />
Cleaning Outsi<strong>de</strong> Surfaces<br />
Important: The unit gets hot. Allow the <strong>toaster</strong> to cool completely<br />
before cleaning.<br />
• Wipe the exterior with a damp cloth or sponge and dry with a paper towel.<br />
• Do not use strong cleaners or abrasives that may scratch surfaces and never<br />
spray cleaners directly onto the <strong>toaster</strong>.<br />
EXTENDING AND RETRACTING THE CORD<br />
• The retractable cord reel is operated by a spring which rewinds the cord<br />
automatically.<br />
• It is fitted with a ratchet, making it very easy to extend and retract the cord.<br />
To extend the cord:<br />
1. Pull on the cord gently until <strong>de</strong>sired length has been reached.<br />
Note: Extend the cord and lock it at anytime the ratchet is heard.<br />
2. Allow the reel to slowly retract the cord until it locks into place.<br />
To retract the cord:<br />
1. When retracting the cord, hold the plug with one hand and pull the cord away<br />
from the <strong>toaster</strong> to retract. Holding the plug firmly, press the cord retract<br />
button and gui<strong>de</strong> the cord into the cord storage area.<br />
2. The cord reel is compact for multi-layer retracting of the cord. In case cord is<br />
not fully rewound, pull out the cord and steer cord evenly onto the reel.<br />
Note: Keep hands away from cord when pressing the cord retract button.<br />
NEED HELP?<br />
For service, repair or any questions regarding your appliance, call the<br />
appropriate 800 number on cover of this book. Please DO NOT return the<br />
product to the place of purchase. Also, please DO NOT mail product back to<br />
manufacturer, nor bring it to a service center. You may also want to consult<br />
the website listed on the cover of this manual.<br />
Two-Year Limited Warranty<br />
(Applies only in the United States and Canada)<br />
What does it cover?<br />
• Any <strong>de</strong>fect in material or workmanship provi<strong>de</strong>d; however, <strong>Applica</strong>’s liability<br />
will not exceed the purchase price of product.<br />
For how long?<br />
• Two years from the date of original purchase with proof of such purchase.<br />
What will we do to help you?<br />
• Provi<strong>de</strong> you with a reasonably similar replacement product that is either<br />
new or factory refurbished.<br />
How do you get service?<br />
• Save your receipt as proof of date of sale.<br />
• Visit the online service website at www.prodprotect.com/applica, or call<br />
toll-free 1-800-231-9786, for general warranty service.<br />
• If you need parts or accessories, please call 1-800-738-0245.<br />
What does your warranty not cover?<br />
• Damage from commercial use<br />
• Damage from misuse, abuse or neglect<br />
• Products that have been modified in any way<br />
• Products used or serviced outsi<strong>de</strong> the country of purchase<br />
• Glass parts and other accessory items that are packed with the unit<br />
• Shipping and handling costs associated with the replacement of the unit<br />
• Consequential or inci<strong>de</strong>ntal damages (Please note, however, that some<br />
states do not allow the exclusion or limitation of consequential or inci<strong>de</strong>ntal<br />
damages, so this limitation may not apply to you.)<br />
How does state law relate to this warranty?<br />
• This warranty gives you specific legal rights. You may also have other rights<br />
that vary from state to state or province to province.<br />
ENGLISH<br />
is a tra<strong>de</strong>mark of The Black & Decker Corporation,<br />
Towson, Maryland, USA<br />
Ma<strong>de</strong> and Printed in People’s Republic of China<br />
6<br />
7
Por favor lea este instructivo antes <strong>de</strong> usar el producto.<br />
INSTRUCCIONES IMPORTANTES<br />
DE SEGURIDAD<br />
Cuando se utilizan aparatos eléctricos, siempre se <strong>de</strong>be respetar ciertas<br />
medidas <strong>de</strong> seguridad, incluyendo las siguientes:<br />
❍ Por favor lea todas las instrucciones.<br />
❍ No toque las superficies calientes. <strong>Use</strong> las asas o las perillas.<br />
❍ A fin <strong>de</strong> protegerse contra un choque electrico y lesiones a las<br />
personas, no sumerja el cable, los enchufes ni el aparato en agua ni<br />
en ningun otro liquido.<br />
❍ Todo aparato electrico usado en la presencia <strong>de</strong> los ninos o por ellos<br />
mismos requiere la supervision <strong>de</strong> un adulto.<br />
❍ Desconecte el aparato <strong>de</strong>l tomacorriente cuando no este en uso y<br />
antes <strong>de</strong> limpiarlo. Espere que el aparato se enfrie antes <strong>de</strong> instalarle<br />
o retirarle piezas y antes <strong>de</strong> limpiarlo.<br />
❍ No use ningun aparato electrico que tenga el cable o el enchufe<br />
averiado, que presente un problema <strong>de</strong> funcionamiento o que<br />
este danado. Acuda a un centro <strong>de</strong> servicio autorizado para<br />
que lo examinen, reparen o ajusten o llame gratis al numero<br />
correspondiente en la cubierta <strong>de</strong> este manual.<br />
❍ El uso <strong>de</strong> accesorios no recomendados por el fabricante <strong>de</strong>l aparato<br />
pue<strong>de</strong> ocasionar incendio, choque electrico o lesiones a las personas.<br />
❍ No use este aparato a la intemperie.<br />
❍ No permita que el cable cuelgue <strong>de</strong>l bor<strong>de</strong> <strong>de</strong> la mesa o <strong>de</strong>l<br />
mostrador ni que entre en contacto con superficies calientes.<br />
❍ No coloque el aparato sobre ni cerca <strong>de</strong> las hornillas <strong>de</strong> gas o<br />
electricas ni a<strong>de</strong>ntro <strong>de</strong> un horno caliente.<br />
❍ Tome mucha precaucion al mover <strong>de</strong> un lugar a otro un aparato que<br />
contenga aceite u otros liquidos calientes.<br />
❍ Siempre conecte primero el cable al aparato y <strong>de</strong>spues, enchufelo a<br />
un tomacorriente. Para <strong>de</strong>sconectar, ajuste todo control a la posicion<br />
<strong>de</strong> apagado (OFF) y <strong>de</strong>spues, retire el enchufe <strong>de</strong> la toma <strong>de</strong> corriente.<br />
❍ Este aparato se <strong>de</strong>be usar unicamente con el fin previsto.<br />
❍ A fin <strong>de</strong> evitar el riesgo <strong>de</strong> incendio o choque electrico, nunca<br />
introduzca en el aparato alimentos <strong>de</strong>masiado gran<strong>de</strong>s, utensilios ni<br />
envolturas <strong>de</strong> metal.<br />
❍ Existe el riesgo <strong>de</strong> incendio si el tostador permanece cubierto<br />
o en contacto con materiales inflamables, incluyendo cortinas,<br />
tapiceria, pare<strong>de</strong>s y <strong>de</strong>mas superficies semejantes mientras esta<br />
en funcionamiento.<br />
❍ No trate <strong>de</strong> <strong>de</strong>strabar los alimentos cuando el tostador este<br />
enchufado.<br />
CONSERVE ESTAS<br />
INSTRUCCIONES.<br />
Este aparato eléctrico es para uso doméstico solamente.<br />
ESPAÑOL<br />
8<br />
9
ENCHUFE POLARIZADO (Solamente en los mo<strong>de</strong>los <strong>de</strong> 120V)<br />
Este aparato cuenta con un enchufe polarizado (un contacto es más<br />
ancho que el otro). A fin <strong>de</strong> reducir el riesgo <strong>de</strong> un choque eléctrico, este<br />
enchufe encaja en un tomacorriente polarizada en un solo sentido. Si el<br />
enchufe no entra en el tomacorriente, inviértalo y si aun así no encaja,<br />
consulte con un electricista. Por favor no trate <strong>de</strong> alterar esta medida <strong>de</strong><br />
seguridad.<br />
TORNILLO DE SEGURIDAD<br />
Advertencia: Este aparato cuenta con un tornillo <strong>de</strong> seguridad para<br />
evitar la remoción <strong>de</strong> la cubierta exterior <strong>de</strong>l mismo. A fin <strong>de</strong> reducir el<br />
riesgo <strong>de</strong> incendio o <strong>de</strong> choque eléctrico, por favor no trate <strong>de</strong> remover<br />
la cubierta exterior. Este producto no contiene piezas reparables por<br />
el consumidor. Toda reparación se <strong>de</strong>be llevar a cabo únicamente por<br />
personal <strong>de</strong> servicio autorizado.<br />
Este producto pue<strong>de</strong> variar ligeramente <strong>de</strong>l que aparece ilustrado.<br />
<br />
<br />
<br />
ESPAÑOL<br />
CABLE ELÉCTRICO<br />
a) El producto se <strong>de</strong>be <strong>de</strong> proporcionar con un cable eléctrico corto (o<br />
uno separable), a fin <strong>de</strong> reducir el riesgo <strong>de</strong> tropezar o <strong>de</strong> enredarse<br />
en un cable más largo.<br />
b) Existen cables eléctricos más largos y separables o cables <strong>de</strong><br />
extensión que uno pue<strong>de</strong> utilizar si toma el cuidado <strong>de</strong>bido.<br />
c) Si se utiliza un cable separable o <strong>de</strong> extensión,<br />
1) El régimen nominal <strong>de</strong>l cable separable o <strong>de</strong>l cable <strong>de</strong> extensión<br />
<strong>de</strong>be ser, como mínimo, igual al <strong>de</strong>l régimen nominal <strong>de</strong>l aparato.<br />
2) Si el aparato es <strong>de</strong> conexión a tierra, el cable <strong>de</strong> extensión <strong>de</strong>be ser<br />
un cable <strong>de</strong> tres alambres <strong>de</strong> conexión a tierra.<br />
3) Uno <strong>de</strong>be <strong>de</strong> acomodar el cable más largo <strong>de</strong> manera que no<br />
cuelgue <strong>de</strong>l mostrador o <strong>de</strong> la mesa, para evitar que un niño tire<br />
<strong>de</strong>l mismo o que alguien se tropiece.<br />
Nota: Si el cordón <strong>de</strong> alimentación esta dañado, en América Latina <strong>de</strong>be<br />
sustituirse por personal calificado o por el centro <strong>de</strong> servicio autorizado.<br />
<br />
<br />
<br />
<br />
<br />
1. Palanca <strong>de</strong> control <strong>de</strong> tostado<br />
2. Botón <strong>de</strong> cancelación (Cancel)<br />
3. Botón para bagels (bagel)<br />
4. Botón para alimentos congelados (frozen)<br />
5. Botón <strong>de</strong> recalentamiento (reheat)<br />
6. Ranuras anchas con guías auto-ajustables<br />
† 7. Ban<strong>de</strong>ja <strong>de</strong>slizante para las migas (atras <strong>de</strong> la unidad)<br />
(Pieza NoTR1280S-01)<br />
8. Botón para el cable retractable<br />
9. Luces indicadoras para cada función<br />
10. Reloj <strong>digital</strong> automático<br />
11. Selector <strong>de</strong> nivel <strong>de</strong> tostado<br />
Nota: † indica piezas removibles / reemplazables por el consumidor<br />
10<br />
11
Como usar<br />
Esta unidad ha sido diseñada únicamente para uso doméstico.<br />
CÓMO EMPEZAR:<br />
• Retire todo el material <strong>de</strong> empaque, calclmanía y cualquier adhesivo.<br />
• Retire y conserve el manual <strong>de</strong> uso y cuidado.<br />
• Coloque la ban<strong>de</strong>ja <strong>de</strong>slizante para migas en la ranura ubicada atras <strong>de</strong> la<br />
<strong>tostadora</strong>.<br />
• Coloque la unidad sobre una superficie plana, <strong>de</strong> manera que la parte superior<br />
<strong>de</strong> la unidad tenga suficiente espacio para que el calor fluya sin dañar<br />
armarios o pare<strong>de</strong>s.<br />
• Para ajustar el largo <strong>de</strong>l cable siga las indicaciones según las instrucciones<br />
PARA EXTENDER Y RETRACTAR EL CABLE en la sección <strong>de</strong> este manual.<br />
• Retire el lazo <strong>de</strong>l cable y <strong>de</strong>senrolle el cable.<br />
• Enchúfelo a un tomacorriente.<br />
RELOJ DIGITAL AUTOMÁTICO<br />
La pantalla <strong>digital</strong> muestra la selección <strong>de</strong>l grado <strong>de</strong> tostado antes que comience<br />
la cuenta regresiva (mostrando los minutos). Después que la cuenta regresiva<br />
llegue a 1 minuto, la pantalla mostrará los segundos restantes.<br />
PALANCA DE CONTROL DE TOSTADO CON ELEVADOR INCORPORADO<br />
Esta <strong>tostadora</strong> incorpora un elevador <strong>de</strong> la palanca <strong>de</strong> control. Si el alimento<br />
tostado no sobresale <strong>de</strong> la <strong>tostadora</strong>, utilice la palanca <strong>de</strong> control<br />
para elevarlo y po<strong>de</strong>r extraerlo fácilmente.<br />
USANDO SU TOSTADORA<br />
Realice los ajustes para cada ranura inmediatamente <strong>de</strong>spués <strong>de</strong> pulsar la<br />
palanca <strong>de</strong> control.<br />
1. Ajuste el selector <strong>de</strong> tostado al nivel <strong>de</strong>seado (<strong>de</strong>l 1 al 7).<br />
Nota: La primera vez que utilice la <strong>tostadora</strong>, elija el ajuste 4. En usos<br />
posteriores, reajuste la <strong>tostadora</strong> a sus preferencias.<br />
Consejo: Si tuesta tostadas finas, elija un ajuste <strong>de</strong> nivel más bajo <strong>de</strong> lo normal.<br />
2. Coloque la rebanada <strong>de</strong> pan u otro alimento en las ranuras y empuje hacia<br />
abajo la palanca <strong>de</strong> control hasta que que<strong>de</strong> encajada en la parte inferior <strong>de</strong><br />
la unidad. Las guías para el pan se ajustarán automáticamente para sujetar el<br />
alimento.<br />
Nota: La pantalla <strong>digital</strong> muestra la selección <strong>de</strong>l grado <strong>de</strong> tostado antes que<br />
comience la cuenta regresiva (mostrando los minutos). Después que la cuenta<br />
regresiva llegue a 1 minuto, la pantalla mostrará los segundos restantes.<br />
3. Si elige las funciones <strong>de</strong> bagels (BAGEL), congelado (FROZEN) y<br />
recalentamiento (REHEAT), <strong>de</strong>be presionar la palanca <strong>de</strong> control antes <strong>de</strong><br />
elegir uno <strong>de</strong> estos ajustes.<br />
Importante: Si presiona el botón equivocado, presione el botón <strong>de</strong> cancelación<br />
(CANCEL) y seleccione la opción <strong>de</strong>seada.<br />
4. Cuando finalice el proceso <strong>de</strong> tostado, la palanca <strong>de</strong> control se elevará y<br />
la unidad se apagará.<br />
FUNCIÓN DE CANCELACIÓN<br />
El botón <strong>de</strong> cancelación (CANCEL) se ilumina automáticamente cuando<br />
la palanca <strong>de</strong> control <strong>de</strong> tostado se presiona y se mantiene encendida hasta<br />
que el ciclo <strong>de</strong> tostado se acaba o el botón <strong>de</strong> cancelación (CANCEL)<br />
se presiona.<br />
FUNCIÓN DE BAGEL<br />
Esta función sirve para tostar bagels, molletes o panecillos por el lado <strong>de</strong><br />
corte, calentando la cara exterior.<br />
1. Ajuste el selector <strong>de</strong> tostado al nivel <strong>de</strong>seado (<strong>de</strong>l 1 al 7).<br />
2. Introduzca el bollo en la ranura con el lado <strong>de</strong> corte mirando al interior <strong>de</strong><br />
la <strong>tostadora</strong>.<br />
3. Empuje la palanca <strong>de</strong> control hacia abajo hasta que que<strong>de</strong> encajada y, a<br />
continuación, pulse el botón <strong>de</strong> función <strong>de</strong> (BAGEL). Las guías para el pan<br />
se ajustarán automáticamente para sujetar las <strong>rebanadas</strong> <strong>de</strong> bagel.<br />
Nota: La pantalla <strong>digital</strong> muestra la selección <strong>de</strong>l grado <strong>de</strong> tostado antes que<br />
comience la cuenta regresiva (mostrando los minutos). Después que la cuenta<br />
regresiva llegue a 1 minuto, la pantalla mostrará los segundos restantes.<br />
Nota: El botón <strong>de</strong> (BAGEL) hasta que finaliza el proceso <strong>de</strong> tostado o hasta que<br />
se presione el botón <strong>de</strong> cancelación (CANCEL).<br />
Importante: Si presiona el botón equivocado, presione el botón <strong>de</strong><br />
cancelación (CANCEL) y seleccione la opción <strong>de</strong>seada.<br />
4. Cuando finalice el proceso <strong>de</strong> tostado, la palanca <strong>de</strong> control se elevará y la<br />
unidad se apagará.<br />
FUNCIÓN DE ALIMENTOS CONGELADOS<br />
Esta función sirve para <strong>de</strong>scongelar y tostar pan, bagels, gofres y pastelitos<br />
congelados.<br />
1. Ajuste el selector <strong>de</strong> tostado al nivel <strong>de</strong>seado (<strong>de</strong>l 1 al 7).<br />
2. Introduzca el alimento en la ranura o ranuras.<br />
3. Empuje la palanca <strong>de</strong> control hacia abajo hasta que que<strong>de</strong> encajada.<br />
Nota: La pantalla <strong>digital</strong> muestra la selección <strong>de</strong>l grado <strong>de</strong> tostado antes que<br />
comience la cuenta regresiva (mostrando los minutos). Después que la cuenta<br />
regresiva llegue a 1 minuto, la pantalla mostrará los segundos restantes.<br />
4. Pulse el botón <strong>de</strong> congelado (FROZEN) (para panes y gofres) o los<br />
botones congelado (FROZEN) y bagel (BAGEL). Los botones permanecerán<br />
iluminados hasta que finalicen los procesos <strong>de</strong> <strong>de</strong>scongelación y tostado o<br />
hasta que se presione el botón <strong>de</strong> cancelación (CANCEL).<br />
Importante: Si presiona el botón equivocado, presione el botón <strong>de</strong><br />
cancelación (CANCEL) y seleccione la opción <strong>de</strong>seada.<br />
5. Cuando finalice el proceso <strong>de</strong> tostado, la palanca <strong>de</strong> control se elevará y la<br />
unidad se apagará.<br />
FUNCIÓN DE RECALENTAMIENTO<br />
Sirve para calentar alimentos que se han tostado anteriormente y se han<br />
enfriado.<br />
1. Introduzca en la ranura el alimento previamente tostado.<br />
ESPAÑOL<br />
12<br />
13
Nota: No recaliente alimentos que llevan mantequilla o cualquier otro<br />
ingrediente.<br />
2. No es necesario que ajuste el selector <strong>de</strong> nivel <strong>de</strong> tostado.<br />
3. Empuje la palanca <strong>de</strong> control hacia abajo hasta que que<strong>de</strong> encajada.<br />
Nota: La pantalla <strong>digital</strong> muestra la selección <strong>de</strong>l grado <strong>de</strong> tostado antes que<br />
comience la cuenta regresiva (mostrando los minutos). Después que la cuenta<br />
regresiva llegue a 1 minuto, la pantalla mostrará los segundos restantes.<br />
4. Presione el botón <strong>de</strong> recalentamiento (REHEAT).<br />
Importante: Si presiona el botón equivocado, presione el botón <strong>de</strong> cancelación<br />
(CANCEL) y seleccione la opción <strong>de</strong>seada.<br />
5. Cuando finalice el proceso <strong>de</strong> recalentamiento, la palanca <strong>de</strong> control<br />
se elevará y la unidad se apagará.<br />
CONSEJOS ÚTILES<br />
• En el caso <strong>de</strong> los alimentos <strong>de</strong> preparación rápida como los Pop Tarts (tostadas<br />
rellenas) y gofres congelados, siga las instrucciones <strong>de</strong>l envase.<br />
• Para obtener mejores resultados, mantenga limpia la ban<strong>de</strong>ja para las migas.<br />
• Esta <strong>tostadora</strong> incorpora un elevador <strong>de</strong> la palanca <strong>de</strong> control. Si el alimento<br />
tostado no sobresale <strong>de</strong> la <strong>tostadora</strong>, utilice la palanca <strong>de</strong> control para elevarlo<br />
y po<strong>de</strong>r extraerlo fácilmente.<br />
• No introduzca tenedores o los <strong>de</strong>dos en la ranura <strong>de</strong> la <strong>tostadora</strong>.<br />
• Si el alimento queda atascado, <strong>de</strong>senchufe la unidad, y suba y baje la palanca<br />
<strong>de</strong> control para <strong>de</strong>senganchar el alimento.<br />
• No utilice utensilios metálicos para elevar el alimento y extraerlo <strong>de</strong><br />
la <strong>tostadora</strong>, ni para <strong>de</strong>senganchar alimentos atascados.<br />
• Para interrumpir el proceso <strong>de</strong> tostado en cualquier momento, pulse el botón<br />
<strong>de</strong> cancelación (CANCEL).<br />
Cuidado y limpieza<br />
Este producto no contiene piezas que puedan ser arregladas por el usuario.<br />
En caso <strong>de</strong> requerir una reparación o mantenimiento, póngase en contacto con<br />
personal cualificado para ello.<br />
LIMPIEZA<br />
Desenchufe siempre el cable <strong>de</strong> la toma <strong>de</strong> corriente y <strong>de</strong>je que la <strong>tostadora</strong> se<br />
enfríe antes <strong>de</strong> limpiarla. No sumerja la <strong>tostadora</strong> en agua.<br />
Ban<strong>de</strong>ja para migas<br />
1. La ban<strong>de</strong>ja para migas se encuentra en la parte posterior <strong>de</strong> la <strong>tostadora</strong>. Para<br />
removerla simplemente saquela.<br />
2. Limpie la ban<strong>de</strong>ja para migas y lávela con agua caliente y jabonosa.<br />
No introduzca la ban<strong>de</strong>ja la máquina lavaplatos. Pue<strong>de</strong> limpiar las manchas<br />
rebel<strong>de</strong>s con un paño <strong>de</strong> nylon.<br />
3. Seque bien la ban<strong>de</strong>ja antes <strong>de</strong> introducirla en la <strong>tostadora</strong>.<br />
Limpieza <strong>de</strong> las superficies exteriores<br />
Importante: La unidad se calienta bastante. Deje que se enfríe por completo<br />
antes <strong>de</strong> limpiarla.<br />
• Limpie el exterior con una esponja o paño húmedo y séquelo con papel<br />
toalla.<br />
• No utilice limpiadores o abrasivos fuertes que puedan rayar las superficies,<br />
y nunca rocíe limpiadores directamente sobre la <strong>tostadora</strong>.<br />
PARA EXTENDER Y RETRACTAR EL CABLE<br />
• El cable retractable funciona por medio <strong>de</strong> un muelle que rebobina el cable<br />
automáticamente.<br />
• Está equipado con un trinquete, que hace muy fácil el exten<strong>de</strong>r y retractar<br />
el cable.<br />
Para exten<strong>de</strong>r el cable:<br />
1. Hale el cable suavemente hasta alcanzar el largo <strong>de</strong>seado.<br />
Nota: Extienda el cable y encájelo en su lugar cada vez que escuche el<br />
trinquete.<br />
2. Permita que el carrete retracte el cable lentamente hasta que encaje<br />
en su lugar.<br />
Para retractar el cable:<br />
1. Al retractar el cordón, sujete el enchufe con una mano y hale el cable lejos<br />
<strong>de</strong> la <strong>tostadora</strong> para retractarlo. Mientras sujeta el enchufe firmemente,<br />
presione el botón para retractar el cable y guie el cable hacia el area <strong>de</strong><br />
almacenaje.<br />
2. El carrete <strong>de</strong>l cordón es compacto y permite múltiples capas para retractar<br />
el cordón. En caso <strong>de</strong> que el cordón no esté totalmente enrollado, hale el<br />
cordón y encarrilelo en una manera uniforme en el carrete.<br />
Nota: Mantenga las manos lejos <strong>de</strong>l cable cuando presione el botón para<br />
retractar el cable<br />
ESPAÑOL<br />
14<br />
15
¿NECESITA AYUDA?<br />
Para servicio, reparaciones o preguntas relacionadas al producto, por favor llame al<br />
número <strong>de</strong>l centro <strong>de</strong> servicio que se indica para el país don<strong>de</strong> usted compró su producto.<br />
NO <strong>de</strong>vuélva el producto al fabricante. Llame o lleve el producto a un centro <strong>de</strong> servicio<br />
autorizado.<br />
DOS AÑOS DE GARANTÍA LIMITADA<br />
(No aplica en México, Estados Unidos o Canadá)<br />
¿Qué cubre la garantía?<br />
• La garantía cubre cualquier <strong>de</strong>fecto <strong>de</strong> materiales o <strong>de</strong> mano <strong>de</strong> obra que no haya sido<br />
generado por el uso incorrecto <strong>de</strong>l producto.<br />
¿Por cuánto tiempo es válida la garantía?<br />
• Por dos años a partir <strong>de</strong> la fecha original <strong>de</strong> compra mientras que tenga una prueba <strong>de</strong><br />
la compra.<br />
¿Cómo se obtiene el servicio necesario?<br />
• Conserve el recibo original como comprobante <strong>de</strong> la fecha <strong>de</strong> compra, comuníquese<br />
con el centro <strong>de</strong> servicio <strong>de</strong> su país y haga efectiva su garantía si cumple lo indicado en<br />
el manual <strong>de</strong> instrucciones.<br />
¿Cómo se pue<strong>de</strong> obtener servicio?<br />
• Conserve el recibo original <strong>de</strong> compra.<br />
• Por favor llame al número <strong>de</strong>l centro <strong>de</strong> servicio autorizado.<br />
¿Qué aspectos no cubre esta garantía?<br />
• Los productos que han sido utilizados en condiciones distintas a las normales.<br />
• Los daños ocasionados por el mal uso, el abuso o negligencia.<br />
• Los productos que han sido alterados <strong>de</strong> alguna manera.<br />
• Los daños ocasionados por el uso comercial <strong>de</strong>l producto.<br />
• Los productos utilizados o reparados fuera <strong>de</strong>l país original <strong>de</strong> compra.<br />
• Las piezas <strong>de</strong> vidrio y <strong>de</strong>más accesorios empacados con el aparato.<br />
• Los gastos <strong>de</strong> tramitación y embarque asociados al reemplazo <strong>de</strong>l producto.<br />
• Los daños y perjuicios indirectos o inci<strong>de</strong>ntales.<br />
¿Qué relación tiene la ley estatal con esta garantía?<br />
• Esta garantía le otorga <strong>de</strong>rechos legales específicos y el consumidor podría tener otros<br />
<strong>de</strong>rechos que varían <strong>de</strong> una región a otra.<br />
es una marca registrada <strong>de</strong> The Black & Decker Corporation,<br />
Towson, Maryland, E.U.<br />
Fabricado e Impreso en la República Popular <strong>de</strong> China<br />
© 2010 - 2011 <strong>Applica</strong> Consumer Products, Inc.<br />
2010/8-4-16E/S


