SUNWAY M XS - Santerno
SUNWAY M XS - Santerno
SUNWAY M XS - Santerno

Create successful ePaper yourself
Turn your PDF publications into a flip-book with our unique Google optimized e-Paper software.
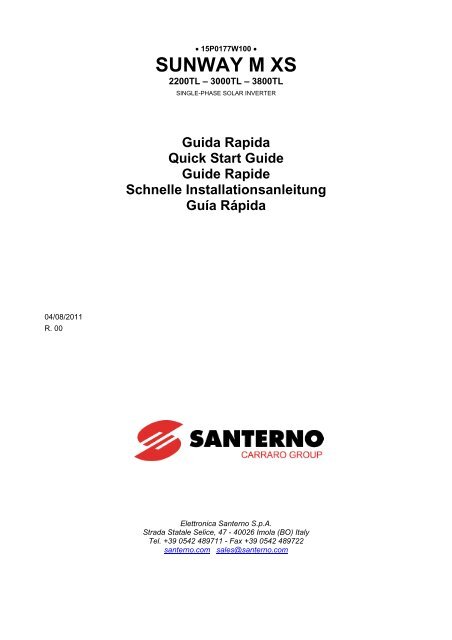
15P0177W100 <br />
<strong>SUNWAY</strong> M <strong>XS</strong><br />
2200TL – 3000TL – 3800TL<br />
SINGLE-PHASE SOLAR INVERTER<br />
Guida Rapida<br />
Quick Start Guide<br />
Guide Rapide<br />
Schnelle Installationsanleitung<br />
Guía Rápida<br />
04/08/2011<br />
R. 00<br />
Elettronica <strong>Santerno</strong> S.p.A.<br />
Strada Statale Selice, 47 - 40026 Imola (BO) Italy<br />
Tel. +39 0542 489711 - Fax +39 0542 489722<br />
santerno.com sales@santerno.com
<strong>SUNWAY</strong> M <strong>XS</strong><br />
2200 TL<br />
3000 TL<br />
3800 TL
GUIDA RAPIDA<br />
<strong>SUNWAY</strong> M <strong>XS</strong><br />
PERICOLO<br />
EFFETTUARE SEMPRE IL COLLEGAMENTO A TERRA.<br />
ITALIANO<br />
ATTENZIONE<br />
L’inverter <strong>SUNWAY</strong> M <strong>XS</strong> deve essere usato unicamente alimentato da campo fotovoltaico e per il funzionamento in<br />
parallelo con la rete. Ogni altro utilizzo è da considerarsi improprio.<br />
PERICOLO<br />
COLLEGAMENTO A CAMPO FOTOVOLTAICO – Quando i pannelli fotovoltaici sono esposti alla radiazione solare<br />
producono una tensione DC che viene applicata all’inverter.<br />
POSSIBILITÀ DI SHOCK ELETTRICI – Non toccare parti elettriche dell’inverter o effettuare operazioni con questo<br />
alimentato e attendere sempre almeno 5 minuti dal momento in cui è stata tolta l’alimentazione DC e AC prima di<br />
effettuare interventi, poiché l’inverter accumula energia elettrica al suo interno.<br />
ESPLOSIONE E INCENDIO – Rischio di esplosione e incendio possono sussistere installando l’apparecchiatura in locali<br />
dove sono presenti vapori infiammabili. Montare l’apparecchiatura al di fuori di ambienti con pericolo di esplosione e<br />
incendio.<br />
ATTENZIONE<br />
Non connettere tensioni di alimentazione superiori alla nominale. In caso venga applicata una tensione superiore alla<br />
nominale possono verificarsi guasti ai circuiti interni.<br />
In caso di applicazione in ambienti con possibile presenza di sostanze combustibili e/o esplosive consultare le norme<br />
correlate.<br />
In caso di allarme consultare il capitolo relativo alla diagnostica nella Guida all’Installazione e alla Programmazione.<br />
Riavviare l’apparecchiatura solo dopo aver individuato il problema ed eliminato l’inconveniente.<br />
Non effettuare test di isolamento tra i terminali di potenza o tra i terminali di comando.<br />
Assicurarsi di aver serrato correttamente le viti delle morsettiere di collegamento.<br />
Le condizioni ambientali influenzano significativamente la vita prevista dell’inverter. Non installarlo in locali che non<br />
rispettino le condizioni indicate.<br />
Le schede elettroniche contengono componenti sensibili alle cariche elettrostatiche. Non toccare le schede se non<br />
strettamente necessario. In tal caso, utilizzare accorgimenti per la prevenzione dei danni provocati dalle scariche<br />
elettrostatiche.<br />
Alcune parti del prodotto (pareti laterali, dissipatore e induttanze) possono raggiungere temperature fino a 100°C. È<br />
necessario osservare tutte le precauzioni al fine di evitare ustioni.<br />
TARGHETTE IDENTIFICATIVE<br />
1/30
<strong>SUNWAY</strong> M <strong>XS</strong><br />
GUIDA RAPIDA<br />
CONDIZIONI AMBIENTALI DI STOCCAGGIO, INSTALLAZIONE E FUNZIONAMENTO<br />
Modello <strong>SUNWAY</strong> M <strong>XS</strong> 2200TL 3000TL 3800TL<br />
Grado di protezione<br />
Dimensioni meccaniche (l x h x p) (mm) 332 x 562 x 185<br />
Peso (kg) 17.5 20.8 21.6<br />
Temperatura ambiente di funzionamento -25 °C ÷ +60 °C<br />
Temperatura nominale di funzionamento* -25 °C ÷ +45 °C<br />
Temperatura ambiente di immagazzinamento e trasporto -25 °C ÷ +70 °C<br />
Numero massimo di <strong>SUNWAY</strong> M <strong>XS</strong> imballati sovrapponibili 3<br />
Luogo di installazione<br />
Altitudine<br />
Umidità ambiente di funzionamento<br />
Umidità ambiente di immagazzinamento<br />
Umidità ambiente durante il trasporto<br />
Pressione atmosferica di funzionamento e stoccaggio<br />
Pressione atmosferica durante il trasporto<br />
IP65<br />
Installazione all’aperto, grado di inquinamento 3 o migliore.<br />
Non installare esposto alla luce diretta del sole, in presenza di<br />
polveri conduttive, gas corrosivi, vibrazioni. Non installare in<br />
ambienti salini.<br />
Fino a 2000m s.l.m. Per altitudini superiori consultare la Guida<br />
all’Installazione e alla Programmazione del Sunway M <strong>XS</strong>.<br />
Da 0 % a 100 %, da 1 g/m 3 a 25 g/m 3 , senza condensa o<br />
formazione di ghiaccio (classe 3k3 secondo EN50178).<br />
Da 0 % a 100 %, da 1 g/m 3 a 25 g/m 3 , senza condensa o<br />
formazione di ghiaccio (classe 1k3 secondo EN50178).<br />
Massimo 100 %. Fino a 60 g/m 3 , una leggera formazione di<br />
condensa può verificarsi con l’apparecchiatura non in funzione<br />
(classe 2k3 secondo EN50178).<br />
Da 86 kPa a 106 kPa (classi 3k3 e 1k4 secondo EN50178).<br />
Da 70 kPa a 106 kPa (classe 2k3 secondo EN50178).<br />
*Oltre la temperatura ambiente di 45 °C, il <strong>SUNWAY</strong> M <strong>XS</strong> riduce automaticamente la potenza erogata per evitare il<br />
surriscaldamento. Vedere le caratteristiche tecniche del prodotto.<br />
SPECIFICHE DI INGRESSO E USCITA DEL PRODOTTO E DIMENSIONAMENTO IMPIANTO<br />
Modello <strong>SUNWAY</strong> M <strong>XS</strong> 2200TL 3000TL 3800TL<br />
INGRESSO<br />
Potenza di picco massima del generatore fotovoltaico (Wp) 2400 3600 4500<br />
Tensione MPPT dell’inverter (Vdc) 125 - 480<br />
Tensione massima campo fotovoltaico (Vdc) 580<br />
Corrente massima di ingresso del generatore fotovoltaico (A) 12.5 2 x 10 2 x 12.5<br />
Sezione cavo (1 stringa, mm 2 ) 4<br />
Tipo di cavo<br />
Unipolare<br />
USCITA<br />
Tensione nominale di uscita (Vac) 230<br />
Corrente nominale di uscita (Aac) 9.6 13.3 16.5<br />
Corrente nominale interruttore magnetotermico di protezione 16 16 25<br />
Sezione cavo (mm²) 2.5 4 4<br />
Tipo di cavo<br />
Tripolare con doppio isolamento (fase+neutro+terra)<br />
Diametro esterno cavo di connessione (mm) 14-18<br />
Lunghezza spelatura (mm) 10<br />
Coppia di serraggio (Nm) 1.2<br />
2/30
GUIDA RAPIDA<br />
<strong>SUNWAY</strong> M <strong>XS</strong><br />
MONTAGGIO A MURO<br />
Utilizzare la staffa in dotazione. Rispettare gli spazi liberi riportati in figura attorno all’apparecchiatura:<br />
ITALIANO<br />
200<br />
332 185<br />
51 115 115 51<br />
68<br />
31<br />
120<br />
120<br />
FIXING HOLES<br />
FOR HANGING<br />
THE INVERTER<br />
TO THE WALL<br />
562<br />
150<br />
HANGING<br />
POINTS<br />
HANDLES<br />
ATTENZIONE<br />
Evitare di montare il <strong>SUNWAY</strong> M <strong>XS</strong> esposto all’azione diretta della radiazione solare o al di sopra di fonti di calore.<br />
COLLEGAMENTO A TERRA E SEQUENZA DI ALLACCIAMENTO<br />
PERICOLO<br />
Connettere sempre la terra di protezione.<br />
ATTENZIONE<br />
L’allacciamento elettrico del <strong>SUNWAY</strong> M <strong>XS</strong> deve avvenire nella sequenza di seguito riportata:<br />
1. Collegamento a terra del prodotto;<br />
2. Allacciamento alla rete elettrica;<br />
3. Allacciamento al campo fotovoltaico.<br />
3/30
<strong>SUNWAY</strong> M <strong>XS</strong><br />
GUIDA RAPIDA<br />
Prima di eseguire ogni connessione elettrica, garantire il collegamento a terra del prodotto. Il prodotto viene fornito con<br />
connettori ad innesto rapido sia per il collegamento con la rete elettrica che per la connessione alle stringhe del campo<br />
fotovoltaico.<br />
ALLACCIAMENTO ALLA RETE ELETTRICA<br />
Effettuare il collegamento alla rete elettrica utilizzando i connettori a innesto rapido forniti col prodotto. Occorre collegare<br />
terra di protezione (PE), linea (L) e neutro (N).<br />
PERICOLO<br />
Prima di effettuare operazioni sulla rete elettrica verificare sempre l’assenza di tensione.<br />
ATTENZIONE<br />
PROTEZIONE CORRENTE DIFFERENZIALE – Gli inverter Sunway M <strong>XS</strong> sono compatibili con interruttori<br />
differenziali di tipo A esterni, secondo norme vigenti, poiché per costruzione non possono generare correnti differenziali<br />
DC, anche in condizioni di singolo guasto.<br />
Installare sempre un interruttore magnetotermico e un interruttore differenziale a protezione della linea dedicata<br />
all’inverter. L’interruttore differenziale deve avere una soglia di intervento minima di 100 mA per ogni inverter installato.<br />
DIAGRAMMA DI CONNESSIONE<br />
4/30
GUIDA RAPIDA<br />
<strong>SUNWAY</strong> M <strong>XS</strong><br />
COLLEGAMENTO AC<br />
Preparazione del cavo di collegamento AC da utilizzare sul connettore fornito<br />
ITALIANO<br />
Insulation Strip Length X = 8<br />
Conductor Cross Section 2.5 mm 2 – 4 mm 2 AWG 12-18<br />
Diametro esterno del cavo 13 - 18 mm<br />
Procedura di montaggio del cavo nel connettore<br />
5/30
<strong>SUNWAY</strong> M <strong>XS</strong><br />
GUIDA RAPIDA<br />
COLLEGAMENTO DC<br />
Cable<br />
Tipo di<br />
connettore<br />
Sezione del<br />
cavo<br />
Diametro<br />
esterno<br />
del cavo<br />
Lunghezza<br />
L<br />
LC4-CP…4 4 mm 2 (AWG12) 6mm +1<br />
LC4-CP…6 6 mm 2 6.3-7.8mm<br />
(AWG10)<br />
6mm +1<br />
Crimpare il cavo nel frutto del connettore mediante la pinza Lumberg (LC4-CX CZK48) (non fornita in dotazione).<br />
Aprire la pinza (inserto K)<br />
Inserire il frutto del connettore nel diametro corretto (4.0 o 6.0) della pinza e bloccarlo con l’inserto K<br />
Chiudere la pinza senza serrare il frutto, quindi rilasciare l’inserto K<br />
Inserire la parte scoperta del cavo nel frutto<br />
Serrare la pinza fino a fine corsa<br />
Inserire il frutto nel connettore<br />
AUTOTEST PROTEZIONE DI INTERFACCIA RETE ITALIANA<br />
Questa funzione permette di effettuare la verifica del funzionamento del dispositivo di disconnessione dalla rete elettrica<br />
(Protezione di Interfaccia) come richiesto dal gestore di rete (Guida per le connessioni alla rete elettrica di Enel<br />
Distribuzione, Ed. 1.1 - 1/244 Dicembre 2009).<br />
I test che si possono effettuare sono la verifica di intervento della protezione per minima e massima tensione e per<br />
minima e massima frequenza. Durante il test, l’inverter varia automaticamente la soglia di scatto della grandezza che si<br />
intende verificare, fino a quando non interviene la protezione al raggiungimento del valore misurato, permettendo così di<br />
verificare l’apertura del relè che connette l’inverter alla rete elettrica. Ciò è segnalato dall’arresto dell’inverter,<br />
dall’apertura del contattore di interfaccia e dal valore di soglia che si fissa al valore di intervento. Viene<br />
contemporaneamente mostrato il tempo di intervento della protezione.<br />
Dopo alcuni secondi l’inverter riprende automaticamente il funzionamento normale ripristinando i valori di default. La<br />
successione dei distacchi dell’inverter in seguito alle varie fasi del test è registrata nello Storico Eventi.<br />
6/30
QUICK START GUIDE<br />
<strong>SUNWAY</strong> M <strong>XS</strong><br />
DANGER<br />
ALWAYS PROVIDE GROUNDING CONNECTION.<br />
CAUTION<br />
The <strong>SUNWAY</strong> M <strong>XS</strong> inverters must be power supplied from the photovoltaic field only and must operate in parallel with<br />
the grid. Any other use is to be considered improper and dangerous (non-compliant use).<br />
DANGER<br />
CONNECTION TO THE PV FIELD – When the PV panels are exposed to solar radiation, DC voltage is produced, that is<br />
applied to the inverter.<br />
ELECTRICAL SHOCK HAZARD – Never touch the inverter electrical parts when the inverter is on; always wait at least<br />
5 minutes after switching off the inverter, because electric energy is accumulated inside the inverter frame.<br />
EXPLOSION AND FIRE – Explosion and fire hazard exists if the equipment is installed in presence of flammable fumes.<br />
Do not install the inverter in places exposed to explosion risks and fire hazard.<br />
ENGLISH<br />
CAUTION<br />
Do not connect supply voltages exceeding the equipment rated voltage to avoid damaging the internal circuits.<br />
If the equipment is installed in environments containing combustible and/or explosive substances, please refer to the<br />
relevant standards concerned.<br />
In case of alarm trip, a comprehensive review of the DIAGNOSTICS section in the Installation and Programming<br />
Instructions Manual is recommended. Restart the equipment only after removing the cause responsible for the alarm.<br />
Do not perform any isolation test between the power terminals or the control terminals.<br />
Make sure that the fastening screws of the connection terminals are properly tightened.<br />
Respect the environmental requirements for the equipment installation.<br />
Electronic boards contain components sensitive to electrostatic discharge. Avoid touching them, unless it is strictly<br />
necessary. Be careful to avoid damages due to electrostatic discharge.<br />
Some parts of the inverter, such as the side walls of the enclosure, the heatsink and the inductances, may reach<br />
temperatures as high as 100°C. Take any precautions to avoid burns.<br />
NAMEPLATES<br />
7/30
<strong>SUNWAY</strong> M <strong>XS</strong><br />
QUICK START GUIDE<br />
ENVIRONMENTAL REQUIREMENTS FOR STORAGE, INSTALLATION AND OPERATION<br />
<strong>SUNWAY</strong> M <strong>XS</strong> Model 2200TL 3000TL 3800TL<br />
Degree of protection<br />
Dimensions 332 x 562 x 185<br />
Weight (kg) 17.5 20.8 21.6<br />
Operating ambient temperature -25 °C ÷ +60 °C<br />
Rated operating temperature* -25 °C ÷ +45 °C<br />
Ambient temperatures for storage and transport -25 °C ÷ +70 °C<br />
Maximum number of packed <strong>SUNWAY</strong> M <strong>XS</strong> inverters that<br />
can be stacked up<br />
Installation environment<br />
Altitude<br />
Operating ambient humidity<br />
Storage ambient humidity<br />
Ambient humidity during transport<br />
Storage and operating atmospheric pressure<br />
Atmospheric pressure during transport<br />
IP65<br />
3<br />
Pollution degree 3 or better.<br />
Do not install in direct sunlight and in places exposed to<br />
conductive dust, corrosive gas, vibrations, water sprinkling or<br />
dripping; do not install in salty environments.<br />
Up to 2000m a.s.l. For higher altitudes please refer to the<br />
Installation and Programming Instructions Manual of the Sunway<br />
M <strong>XS</strong>.<br />
0 % to 100 %, from 1 g/m 3 to 25 g/m 3 , non-condensing and nonfreezing<br />
(class 3k3 according to EN50178).<br />
0 % to 100 %, from 1 g/m 3 to 25 g/m 3 , non-condensing and nonfreezing<br />
(class 1k3 according to EN50178).<br />
Max. 100%. Up to 60g/m 3 , condensation may appear when the<br />
equipment is not running (class 2k3 according to EN50178).<br />
86 kPa to 106 kPa (class 3k3 and 1k4 according to EN50178).<br />
70 kPa to 106 kPa (class 2k3 according to EN50178).<br />
*When the ambient temperature exceeds 45 °C, the <strong>SUNWAY</strong> M <strong>XS</strong> will automatically decrease its output power to<br />
avoid overheating. Please refer to the specifications of the product.<br />
INPUT AND OUTPUT SPECIFICATIONS OF THE <strong>SUNWAY</strong> M <strong>XS</strong> AND PLANT DIMENSIONING<br />
<strong>SUNWAY</strong> M <strong>XS</strong> Model 2200TL 3000TL 3800TL<br />
INPUT<br />
Maximum peak power (Wp) of the photovoltaic field 2400 3600 4500<br />
MPPT voltage of the inverter (Vdc) 125 - 480<br />
Max. voltage (Vdc) of the PV field 580<br />
Maximum current (A) of the photovoltaic generator 12.5 2 x 10 2 x 12.5<br />
Cable cross-section (1 string, mm 2 ) 4<br />
Type of cable<br />
Unipolar<br />
OUTPUT<br />
Rated output voltage (Vac) 230<br />
Rated output current (Aac) 9.6 13.3 16.5<br />
Rated current of the MCCB 16 16 25<br />
Cable cross-section (mm²) 2.5 4 4<br />
Type of cable<br />
Three-pole, double insulation cable (phase+neutral+ground)<br />
Outer diameter of the connection cable (mm) 14-18<br />
Cable stripping (mm) 10<br />
Tightening torque (Nm) 1.2<br />
8/30
QUICK START GUIDE<br />
<strong>SUNWAY</strong> M <strong>XS</strong><br />
WALL MOUNTING<br />
Use the bracket supplied. Provide adequate clearance around the inverter for the free circulation of air through the<br />
equipment:<br />
200<br />
332 185<br />
51 115 115 51<br />
68<br />
31<br />
120<br />
120<br />
FIXING HOLES<br />
FOR HANGING<br />
THE INVERTER<br />
TO THE WALL<br />
562<br />
ENGLISH<br />
150<br />
HANGING<br />
POINTS<br />
HANDLES<br />
CAUTION<br />
Do not expose the <strong>SUNWAY</strong> M <strong>XS</strong> to direct solar radiation or to heat sources.<br />
ELECTRICAL CONNECTION AND GROUNDING<br />
DANGER<br />
Always connect protective earth.<br />
CAUTION<br />
Follow the sequence below to carry out the electrical connection of the <strong>SUNWAY</strong> M <strong>XS</strong>:<br />
1. Carry out the ground connection of the inverter;<br />
2. Carry out the electrical connection to the grid;<br />
3. Carry out the electrical connection of the inverter to the photovoltaic field.<br />
9/30
<strong>SUNWAY</strong> M <strong>XS</strong><br />
QUICK START GUIDE<br />
Carry out the ground connection of the inverter before carrying out any electrical connection. The <strong>SUNWAY</strong> M <strong>XS</strong> is<br />
supplied with a three-wire cable for the connection to the grid. First connect the yellow-green wire to the ground of the<br />
electrical system external to the inverter. The yellow-green wire is internally connected to the Protective Earth of the<br />
circuit.<br />
CONNECTION TO THE GRID<br />
Connect the <strong>SUNWAY</strong> M <strong>XS</strong> to the grid using the snap-in connectors supplied with the product. Connect the line (L),<br />
neutral (N) and protective earth (PE).<br />
DANGER<br />
Always remove voltage before operating on the grid.<br />
CAUTION<br />
PROTECTION AGAINST DIFFERENTIAL CURRENT – The inverters of the <strong>SUNWAY</strong> M <strong>XS</strong> series are compatible with<br />
external RCDs of type A according to the regulations in force, because, by construction, they cannot generate DC<br />
differential currents, even under single fault conditions.<br />
Always install a MCCB to protect the electric circuit. The minimum trip threshold of the RCD shall be 100 mA for every<br />
inverter installed.<br />
WIRING DIAGRAM<br />
10/30
QUICK START GUIDE<br />
<strong>SUNWAY</strong> M <strong>XS</strong><br />
AC CONNECTION<br />
Preparing the AC connection cable to be used for the connector supplied.<br />
Insulation Strip Length X = 8<br />
Conductor Cross Section 2.5 mm 2 – 4 mm 2 AWG 12-18<br />
Outer diameter of the cable 13 - 18 mm<br />
ENGLISH<br />
Inserting the cable into the connector<br />
11/30
<strong>SUNWAY</strong> M <strong>XS</strong><br />
QUICK START GUIDE<br />
DC CONNECTION<br />
Cable<br />
Type of<br />
connector<br />
Cable crosssection<br />
Outer<br />
diameter<br />
Length<br />
L<br />
LC4-CP…4 4 mm 2 (AWG12)<br />
6mm +1<br />
6.3-7.8mm<br />
LC4-CP…6 6 mm 2 (AWG10) 6mm +1<br />
Crimp the cable in the connector insert module using the Lumberg crimp tool (LC4-CX CZK48) (the crimp tool is not<br />
standard supplied).<br />
• Open the crimp tool (insert K)<br />
• Fit the insert module into the correct diameter (4.0 to 6.0) of the crimp tool and lock it with insert K<br />
• Close the crimp tool without tightening the insert module, then release insert K<br />
• Fit the stripped cable section into the insert module<br />
• Tighten the crimp tool completely<br />
Fit the insert module into the connector.<br />
12/30
GUIDE RAPIDE<br />
<strong>SUNWAY</strong> M <strong>XS</strong><br />
DANGER<br />
EFFECTUER TOUJOURS LE RACCORDEMENT DE MISE À LA TERRE.<br />
ATTENTION<br />
L’onduleur <strong>SUNWAY</strong> M <strong>XS</strong> ne doit être alimenté que par le champ photovoltaïque et il doit opérer en parallèle avec le<br />
réseau. Toute autre utilisation est impropre et non conforme.<br />
DANGER<br />
RACCORDEMENT AU CHAMP PHOTOVOLTAÏQUE – Lorsque les panneaux photovoltaïques sont exposés au<br />
rayonnement solaire, ils produisent une tension CC qui est appliquée à l’onduleur.<br />
POSSIBILITÉ DE CHOCS ÉLECTRIQUES – Ne pas toucher les parties électriques de l’onduleur lorsque celui-ci est<br />
alimenté. Attendre toujours au moins 5 minutes à partir du moment où l’alimentation CA et CC a été coupée avant<br />
d’effectuer des interventions sur les parties électriques, car l’onduleur accumule de l’énergie électrique à l’intérieur.<br />
EXPLOSION ET INCENDIE – Il existe toujours des risques d’explosion et d’incendie lorsque l’on installe l’appareillage<br />
dans des locaux qui contiennent des vapeurs inflammables. Ne pas installer l’appareillage dans des locaux à risque<br />
d’explosion et d’incendie.<br />
ATTENTION<br />
Ne pas brancher de tensions d’alimentation supérieures à la tension nominale. Si une tension supérieure à la tension<br />
nominale est appliquée, cela peut provoquer des défaillances aux circuits internes.<br />
En cas d’application dans des milieux dans lesquels il peut y avoir des substances combustibles et/ou explosives,<br />
consulter les normes y relatives.<br />
En cas d’alarme, consulter le chapitre relatif au Diagnostic dans le Guide à l’Installation et à la Programmation du<br />
Sunway M <strong>XS</strong>. Faire redémarrer l’appareillage uniquement après avoir trouvé le problème et éliminé l’inconvénient.<br />
Ne pas exécuter de tests d'isolation entre les bornes de puissance ou entre les bornes de commande.<br />
S'assurer que les vis des borniers de puissance et de commande sont bien serrées.<br />
Puisque les conditions environnementales peuvent influencer la durée prévue de l'appareillage, ne pas installer<br />
l’onduleur dans des milieux qui ne respectent pas les conditions indiquées dans ce Guide.<br />
Les cartes électroniques contiennent des composants sensibles aux charges électrostatiques. Ne pas toucher les cartes<br />
si cela n’est pas strictement nécessaire. Dans ce cas, utiliser toutes les précautions pour prévenir les dommages<br />
provoqués par les décharges électrostatiques.<br />
Certaines parties du produit, telles que les parois latérales du coffret, le dissipateur et les inductances, peuvent atteindre<br />
des températures jusqu’à 100 °C. Observer toutes les précautions nécessaires afin d’éviter les brûlures.<br />
FRANÇAIS<br />
PLAQUETTES SIGNALÉTIQUES<br />
13/30
<strong>SUNWAY</strong> M <strong>XS</strong><br />
GUIDE RAPIDE<br />
CONDITIONS ENVIRONNEMENTALES D'INSTALLATION, DE STOCKAGE ET DE FONCTIONNEMENT<br />
<strong>SUNWAY</strong> M <strong>XS</strong> – Modèle 2200TL 3000TL 3800TL<br />
Degré de protection<br />
IP65<br />
Dimensions mécaniques 332 x 562 x 185<br />
Poids (kg) 17.5 20.8 21.6<br />
Température ambiante de fonctionnement -25 °C ÷ +60 °C<br />
Température nominale de fonctionnement* -25 °C ÷ +45 °C<br />
Température ambiante de stockage et de transport -25 °C ÷ +70 °C<br />
Nombre maximum d’onduleurs <strong>SUNWAY</strong> M <strong>XS</strong> emballés<br />
empilables<br />
3<br />
Installation en plein air mais protégé du rayonnement solaire direct.<br />
Degré de pollution 3 ou meilleur.<br />
Lieu d’installation<br />
Ne pas installer en présence de poussières conductrices, de gaz<br />
corrosifs, de vibrations, d’éclaboussures ou d’infiltrations d’eau. Ne<br />
pas installer dans des milieux salins.<br />
Jusqu’à 2000m au-dessus du niveau de la mer. Pour des altitudes<br />
Altitude<br />
supérieures, consulter le Guide à l’Installation et à la Programmation<br />
du Sunway M <strong>XS</strong>.<br />
Humidité du milieu de fonctionnement<br />
0 % à 100 %, 1 g/m 3 à 25 g/m 3 , sans condensation ou formation de<br />
glace (classe 3k3 selon EN50178).<br />
Humidité ambiante de stockage<br />
0 % à 100 %, 1 g/m 3 à 25 g/m 3 , sans condensation ou formation de<br />
glace (classe 1k3 selon EN50178).<br />
Maximum 100 %. Jusqu’à 60 g/m 3 , une légère formation de<br />
Humidité ambiante pendant le transport<br />
condensation peut se vérifier lorsque l’appareillage ne fonctionne<br />
pas (classe 2k3 selon EN50178).<br />
Pression atmosphérique de fonctionnement et de stockage 86 kPa à 106 kPa (classes 3k3 et 1k4 selon EN50178).<br />
Pression atmosphérique durant le transport<br />
70 kPa à 106 kPa (classe 2k3 selon EN50178).<br />
*Au-dessus d’une température ambiante de 45 °C, l’onduleur <strong>SUNWAY</strong> M <strong>XS</strong> réduit automatiquement la puissance<br />
fournie pour éviter la surchauffe. Cf. les caractéristiques techniques du produit.<br />
CARACTÉRISTIQUES D’ENTRÉE ET DE SORTIE DE L’ONDULEUR ET DIMENSIONNEMENT DE<br />
L’INSTALLATION PV<br />
Modello <strong>SUNWAY</strong> M <strong>XS</strong> 2200TL 3000TL 3800TL<br />
ENTRÉE<br />
Puissance de crête maximum du générateur photovoltaïque<br />
(Wp)<br />
2400 3600 4500<br />
Tension MPPT de l’onduleur (Vcc) 125 - 480<br />
Tension maximum du champ PV (Vcc) 580<br />
Courant maximum d’entrée du générateur PV (A) 12.5 2 x 10 2 x 12.5<br />
Section du câble (1 string, mm 2 ) 4<br />
Type de câble<br />
Unipolaire<br />
SORTIE<br />
Tension nominale de sortie (Vca) 230<br />
Courant nominal de sortie (Aca) 9.6 13.3 16.5<br />
Courant nominal du disjoncteur boîtier moulé 16 16 25<br />
Section du câble (mm²) 2.5 4 4<br />
Type de câble<br />
Tripolaire, double isolement (phase+neutre+terre)<br />
Diamètre extérieur du câble de raccordement (mm) 14-18<br />
Longueur du câble dénudé (mm) 10<br />
Couple de serrage (Nm) 1.2<br />
14/30
GUIDE RAPIDE<br />
<strong>SUNWAY</strong> M <strong>XS</strong><br />
FIXATION MURALE<br />
Utiliser le support mural fourni. Respecter les espaces libres suivants autour de l’appareillage :<br />
200<br />
332 185<br />
51 115 115 51<br />
68<br />
31<br />
120<br />
120<br />
FIXING HOLES<br />
FOR HANGING<br />
THE INVERTER<br />
TO THE WALL<br />
562<br />
150<br />
HANGING<br />
POINTS<br />
HANDLES<br />
FRANÇAIS<br />
ATTENTION<br />
Ne pas monter le <strong>SUNWAY</strong> M <strong>XS</strong> exposé directement au rayonnement solaire ou au-dessus de sources de chaleur.<br />
RACCORDEMENT À LA TERRE ET SÉQUENCE DE CONNEXION<br />
DANGER<br />
Raccorder toujours la terre de protection.<br />
ATTENTION<br />
Raccorder le <strong>SUNWAY</strong> M <strong>XS</strong> suivant la séquence ci-dessous :<br />
1. Raccordement de mise à la terre de l’onduleur ;<br />
2. Raccordement au réseau électrique ;<br />
3. Raccordement au champ PV.<br />
15/30
<strong>SUNWAY</strong> M <strong>XS</strong><br />
GUIDE RAPIDE<br />
Avant d’effectuer toute connexion électrique, s’assurer que l’appareillage est correctement mis à la terre. La fourniture en<br />
standard du produit comprend un câble à trois conducteurs pour la connexion au réseau électrique. Le conducteur<br />
jaune-vert est raccordé intérieurement à la terre du circuit (PE) et au coffret. Le conducteur jaune-vert doit être raccordé<br />
le premier à la terre de l’installation externe à l’onduleur.<br />
RACCORDEMENT AU RÉSEAU ÉLECTRIQUE<br />
Effectuer le raccordement au réseau électrique en utilisant le connecteurs fournis avec le produit. Raccorder la terre de<br />
protection (PE), la ligne (L) et le neutre (N).<br />
DANGER<br />
Vérifier l’absence de tension avant d’effectuer toute opération sur le réseau électrique.<br />
ATTENTION<br />
PROTECTION CONTRE LES COURANTS DIFFÉRENTIELS – Les onduleurs Sunway M <strong>XS</strong> sont compatibles<br />
avec les dispositifs à courant différentiel résiduel externe de type A, selon les normes en vigueur, car, par construction,<br />
ils ne peuvent pas produire de courants différentiels CC, même dans de conditions de premier défaut.<br />
Installer toujours un disjoncteur boîtier moulé et un DDR de protection de la ligne d’alimentation de l’onduleur. Le DDR<br />
doit avoir un seuil de déclenchement minimum de 100 mA pour chaque onduleur installé.<br />
SCHÉMA DE CONNEXION<br />
16/30
GUIDE RAPIDE<br />
<strong>SUNWAY</strong> M <strong>XS</strong><br />
RACCORDEMENT CA<br />
Préparation du câble de raccordement CA à utiliser sur le connecteur fourni<br />
Longueur câble dénudé (isolement) X = 8<br />
Section du conducteur 2.5 mm 2 – 4 mm 2 AWG 12-18<br />
Diamètre extérieur du câble<br />
13 - 18 mm<br />
Procédure de montage du câble dans le connecteur<br />
FRANÇAIS<br />
17/30
<strong>SUNWAY</strong> M <strong>XS</strong><br />
GUIDE RAPIDE<br />
RACCORDEMENT CC<br />
Câble<br />
Type de<br />
connecteur<br />
Section du<br />
câble<br />
Diamètre<br />
extérieur<br />
du câble<br />
Longueur<br />
L<br />
LC4-CP…4 4 mm 2 (AWG12)<br />
6mm +1<br />
6.3-7.8mm<br />
LC4-CP…6 6 mm 2 (AWG10) 6mm +1<br />
Crimper le câble dans le connecteur à l’aide d’une pince Lumberg (LC4-CX CZK48) (non fournie en standard).<br />
• Ouvrir la pince (élément K)<br />
• Insérer l’insert du connecteur dans le diamètre correct (4.0 ou 6.0) de la pince et le bloquer par l’élément K<br />
• Fermer la pince sans serrer l’insert, puis enlever l’élément K<br />
• Insérer la partie du câble dénudé dans l’insert<br />
• Serrer la pince jusqu’à la butée<br />
Insérer l’insert dans le connecteur<br />
18/30
SCHNELLE ANLEITUNG<br />
<strong>SUNWAY</strong> M <strong>XS</strong><br />
GEFAHR<br />
NEHMEN SIE STETS DEN ERDANSCHLUSS VOR.<br />
ACHTUNG<br />
Der Wechselrichter <strong>SUNWAY</strong> M <strong>XS</strong> darf ausschließlich durch photovoltaisches Feld versorgt und für den Parallelbetrieb<br />
mit dem Netz verwendet werden. Ein verschiedener Gebrauch ist als unsachgemäß zu betrachten.<br />
GEFAHR<br />
ANSCHLUSS AN PHOTOVOLTAISCHES FELD – Wenn die Photovoltaikpaneele der Sonnenstrahlung ausgesetzt<br />
werden, erzeugen sie eine DC-Spannung, die am Wechselrichter angebracht wird.<br />
MÖGLICHKEIT VON STROMSCHLÄGEN – Berühren Sie keine elektrischen Teile des an Spannung gelegten<br />
Wechselrichters. Vor jedem Eingriff an elektrischen Teilen warten Sie mindestens 5 Minuten nach der<br />
Stromversorgungsunterbrechung (DC und AC), da sich im Inneren des Wechselrichters elektrische Energie ansammelt.<br />
EXPLOSIONS- UND FEUERBRUNSTGEFAHR – Das Gerät darf nicht in Räumlichkeiten aufgestellt werden, in denen<br />
entflammbare Dämpfe vorhanden sind: Es entstehen nämlich Explosions- und Feuerbrunstgefahren.<br />
ACHTUNG<br />
Verwenden Sie keine Versorgungsspannungen, deren Werte die Nennspannung überschreiten. Falls eine höhere<br />
Spannung als die Nennspannung angelegt wird, können Schäden an den internen Schaltkreisen auftreten.<br />
Bei der Anwendung in Räumlichkeiten, in denen Brennstoffe und/oder explosive Stoffe vorhanden sind, sind die damit<br />
verbundenen Normen durchzulesen.<br />
Beim Auftreten eines Alarmzustandes ist das Kapitel über die Fehlersuche in der Installations- und<br />
Programmieranleitung durchzulesen. Erst nach der Auffindung des Problems und dessen Beseitigung darf das Gerät<br />
wieder in Betrieb gesetzt werden.<br />
Führen Sie keine Isolationstests zwischen den Leistungsklemmen oder den Steuerklemmen durch.<br />
Stellen Sie sicher, dass Sie die Schrauben der Steuer- und Leistungsklemmenbretter ordnungsgemäß festgezogen haben.<br />
Da die Umgebungsbedingungen die vorgesehene Lebensdauer des Wechselrichters stark beeinflussen, darf der<br />
Wechselrichter nicht an Orten installiert werden, in denen die oben genannten Umgebungsbedingungen nicht<br />
eingehalten sind.<br />
Die elektronischen Karten enthalten Komponenten, die gegenüber elektrostatischen Ladungen empfindlich sind.<br />
Berühren Sie diese Karten nicht, sofern es nicht unbedingt nötig ist. Wenden Sie gegebenenfalls Vorsichtsmaßnahmen<br />
zur Verhütung von Schäden durch elektrostatische Entladungen an.<br />
Einige Teile des Wechselrichters (Seitenwände, Ableiter und Drosseln) können Temperaturen bis 100° erreichen. Alle<br />
nötigen Maßnahmen treffen, um Hauptverbrennungen zu vermeiden.<br />
IDENTIFIKATIONSTYPENSCHILD<br />
DEUTSCH<br />
19/30
<strong>SUNWAY</strong> M <strong>XS</strong><br />
SCHNELLE ANLEITUNG<br />
UMGEBUNGSBEDINGUNGEN FÜR LAGERUNG, INSTALLATION UND BETRIEB<br />
Modell <strong>SUNWAY</strong> M <strong>XS</strong> 2200TL 3000TL 3800TL<br />
Schutzgrad<br />
Mechanische Größen (L x H x T) (mm) 332 x 562 x 185<br />
Gewicht (kg) 17.5 20.8 21.6<br />
Betriebsumgebungstemperatur -25 °C ÷ +60 °C<br />
Betriebsnenntemperatur* -25 °C ÷ +45 °C<br />
Umgebungstemperatur während der Lagerung und des<br />
Transports<br />
Max. Anzahl von übereinander legbaren, verpackten<br />
<strong>SUNWAY</strong> M <strong>XS</strong><br />
Installationsort<br />
Höhe<br />
Umgebungsfeuchtigkeit während des Betriebs<br />
Feuchtigkeit der Lagerungsumgebung<br />
Umgebungsfeuchtigkeit während des Transports<br />
Luftdruck während des Betriebs und der Lagerung<br />
Luftdruck während des Transports<br />
IP65<br />
-25 °C ÷ +70 °C<br />
3<br />
Freiluftinstallation, Umweltverschmutzungsgrad 3 oder höher.<br />
Das Gerät darf weder so eingebaut werden, dass es direkter<br />
Sonneneinstrahlung ausgesetzt ist, noch dürfen leitfähiger Staub,<br />
korrosive Gase, Schwingungen vorhanden sein. Nicht in einer<br />
Umgebung mit stark salzhaltiger Luft einbauen.<br />
Bis zu 2000 m ü.d.M. Im Falle von größeren Höhen siehe die<br />
Installations- und Programmieranleitung des Sunway M <strong>XS</strong>.<br />
Von 0 % bis 100 %, von 1 g/m 3 bis 25 g/m 3 , ohne Kondensierung<br />
bzw. Eisbildung (Klasse 3k3 nach EN50178).<br />
Von 0 % bis 100 %, von 1 g/m 3 bis 25 g/m 3 , ohne Kondensierung<br />
bzw. Eisbildung (Klasse 1k3 nach EN50178).<br />
Max. 100 %. Bis 60 g/m 3 , eine leichte Kondensierung kann bei<br />
nicht in Betrieb stehendem Gerät auftreten (Klasse 2k3 nach<br />
EN50178).<br />
86 kPa bis 106 kPa (Klassen 3k3 und 1k4 gemäß EN50178).<br />
70 kPa bis 106 kPa (Klassen 2k3 gemäß EN50178).<br />
* Bei einer Umgebungstemperatur höher als 45 °C, reduziert <strong>SUNWAY</strong> M <strong>XS</strong> automatisch die Leistungsabgabe, um eine<br />
eventuelle Überhitzung zu vermeiden. Siehe technische Eigenschaften des Produkts.<br />
EIN- UND AUSGANGSDATEN DES PRODUKTS UND ANLAGENDIMENSIONIERUNG<br />
Modell <strong>SUNWAY</strong> M <strong>XS</strong> 2200TL 3000TL 3800TL<br />
EINGANG<br />
Maximale Spitzenleistung des Photovoltaik-Generators (Wp) 2400 3600 4500<br />
MPPT-Spannung des Wechselrichters (Vdc) 125 - 480<br />
Maximale Leistung des photovoltaischen Felds (Vdc) 580<br />
Maximaler Eingangsstrom des Photovoltaik-Generators (A) 12.5 2 x 10 2 x 12.5<br />
Kabelquerschnitt (1 String, mm 2 ) 4<br />
Kabeltyp<br />
Einpolig<br />
AUSGANG<br />
Ausgangsnennspannung (Vac) 230<br />
Ausgangsnennstrom (Aac) 9.6 13.3 16.5<br />
Nennstrom des thermischen Schutzautomaten 16 16 25<br />
Kabelquerschnitt ( mm 2 ) 2.5 4 4<br />
Kabeltyp<br />
Dreipolig mit Doppelisolierung (Phase+Nulleiter+Erdung)<br />
Außendurchmesser des Anschlusskabels (mm) 14-18<br />
Abisolierungslänge (mm) 10<br />
Anzugsmoment (Nm) 1.2<br />
20/30
SCHNELLE ANLEITUNG<br />
<strong>SUNWAY</strong> M <strong>XS</strong><br />
WANDBEFESTIGUNG<br />
Verwenden Sie den mitgelieferten Bügel. Berücksichtigen Sie die in der Abbildung gezeigten freien Räume um das Gerät:<br />
200<br />
332 185<br />
51 115 115 51<br />
68<br />
31<br />
120<br />
120<br />
FIXING HOLES<br />
FOR HANGING<br />
THE INVERTER<br />
TO THE WALL<br />
562<br />
150<br />
HANGING<br />
POINTS<br />
HANDLES<br />
ACHTUNG<br />
Bei der Montage darf <strong>SUNWAY</strong> M <strong>XS</strong> nicht der direkten Sonnenstrahlung ausgesetzt oder über Wärmequellen<br />
positioniert werden.<br />
DEUTSCH<br />
ERDUNGSANSCHLUSS UND ANSCHLUSSANWEISUNGEN<br />
GEFAHR<br />
Verbinden Sie immer den Erdschlussschutz.<br />
ACHTUNG<br />
Der elektrische Anschluss des <strong>SUNWAY</strong> M <strong>XS</strong> muss gemäß der folgenden Reihenfolge ausgeführt werden:<br />
1. Erdungsanschluss des Produktes;<br />
2. Anschluss an das Stromnetz;<br />
3. Anschluss an das photovoltaische Feld.<br />
21/30
<strong>SUNWAY</strong> M <strong>XS</strong><br />
SCHNELLE ANLEITUNG<br />
Vor Ausführen eines elektrischen Anschlusses muss der Erdungsanschluss des Produktes gewährleistet werden. Das<br />
Produkt wird mit einem Schnellanschlussstecker sowohl für den Anschluss an das Stromnetz als auch für den Anschluss<br />
an die Strings des photovoltaischen Felds geliefert werden.<br />
ANSCHLUSS AN DAS STROMNETZ<br />
Der Anschluss an das Stromnetz ist mit Hilfe der mit dem Produkt gelieferten Schnellanschlussstecker auszuführen.<br />
Schließen Sie Erdleitung (PE), Leitung (L) und Nullleiter (N) an.<br />
GEFAHR<br />
Vor Ausführen von Arbeiten an dem Stromnetz vergewissern Sie sich immer, dass das Gerät nicht unter<br />
Spannung steht.<br />
ACHTUNG<br />
DIFFERENTIALSTROMSCHUTZ – Die Wechselrichter <strong>SUNWAY</strong> M <strong>XS</strong> verfügen über den Schutz gegen DC-<br />
Differentialstrom und sind daher kompatibel mit den externen Schutzvorrichtungen des Typs A gemäß den<br />
geltenden Gesetzten, da sie infolge ihrer Struktur keinen DC-Differentialstrom auch unter „Single-Fault“-<br />
Bedingungen erzeugen können.<br />
Installieren Sie immer einen thermischen Sicherungsautomaten und einen Differentialstrom als<br />
Schutzvorrichtung der Wechselrichter-Leitung. Der Differentialschalter muss eine min. Ansprechschwelle von<br />
100 mA für jeden installierten Wechselrichter aufweisen.<br />
ANSCHLUSSSCHEMA<br />
22/30
SCHNELLE ANLEITUNG<br />
<strong>SUNWAY</strong> M <strong>XS</strong><br />
AC-ANSCHLUSS<br />
Vorbereitung des AC-Anschlusskabels, das mit dem geliefertern Stecker zu verwenden ist.<br />
Montageverfahren des Kabels in den Stecker<br />
Insulation Strip Length X = 8<br />
Conductor Cross Section 2.5 mm 2 – 4 mm 2 AWG 12-18<br />
Außendurchmesser des<br />
13 - 18 mm<br />
Kabels<br />
DEUTSCH<br />
23/30
<strong>SUNWAY</strong> M <strong>XS</strong><br />
SCHNELLE ANLEITUNG<br />
DC-ANSCHLUSS<br />
Kabel<br />
Steckertyp<br />
Kabel-<br />
Querschnitt<br />
Außendurc<br />
hmesser<br />
des<br />
Kabels<br />
Länge L<br />
LC4-CP…4 4 mm 2 (AWG12)<br />
6mm +1<br />
6.3-7.8mm<br />
LC4-CP…6 6 mm 2 (AWG10) 6mm +1<br />
Das Kabel im Schaltteil des Steckers mit Hilfe der Lumberg-Crimpzange (LC4-CX CZK48) (nicht mitgeliefert) crimpen.<br />
• Die Zange (Einsatz K) öffnen<br />
• Den Schaltteil des Steckers in den richtigen Durchmesser (4.0 oder 6.0) der Crimpzange einführen und mit dem<br />
Einsatz K sperren.<br />
• Die Zange schließen, ohne den Schaltteil anzuziehen, und den Einsatz K loslassen.<br />
• Den ungedeckten Kabelteil in den Schaltteil einführen<br />
• Die Zange bis zum Endanschlag anziehen<br />
Den Schaltteil in den Stecker einführen<br />
24/30
GUÍA RÁPIDA<br />
<strong>SUNWAY</strong> M <strong>XS</strong><br />
PELIGRO<br />
EFECTÚE SIEMPRE LA CONEXIÓN A TIERRA.<br />
CUIDADO<br />
El inversor <strong>SUNWAY</strong> M <strong>XS</strong> se debe utilizar sólo con alimentación de campo fotovoltaico y para el funcionamiento en<br />
paralelo con la red. Utilizaciones de tipo diferente deben considerarse impropias.<br />
PELIGRO<br />
CONEXIÓN AL CAMPO FOTOVOLTAICO – Cuando los paneles fotovoltaicos están expuestos a la radiación solar,<br />
producen una tensión CC que se aplica al inversor.<br />
POSIBLES CHOQUES ELÉCTRICOS – No toque partes eléctricas del inversor o efectúe operaciones con el inversor<br />
alimentado y espere siempre por lo menos 5 minutos del momento en que se quitó la alimentación CC y CA antes de<br />
efectuar posibles intervenciones, ya que el inversor acumula energía eléctrica en su interior.<br />
EXPLOSIÓN E INCENDIO – Pueden existir riesgos de explosión e incendio instalando el equipo en lugares donde hay<br />
vapores inflamables. Instale el equipo fuera de ambientes caracterizados por el peligro de explosión e incendio.<br />
CUIDADO<br />
No conecte tensiones de alimentación superiores a aquélla nominal. Si se aplica una tensión superior a aquélla nominal,<br />
pueden ocurrir averías en los circuitos internos.<br />
Si se aplica en ambientes con posible presencia de sustancias combustibles y/o explosivas, consulte las normas<br />
relacionadas.<br />
En caso de alarma, consulte el capítulo relativo al diagnóstico en la Guía a la Instalación y a la Programación.<br />
Rearranque el equipo sólo después de haber identificado el problema y después de haber eliminado el inconveniente.<br />
No efectúe pruebas de aislamiento entre los terminales de potencia o entre los terminales de mando.<br />
Asegúrese de que se hayan apretado los tornillos de manera correcta en los terminales de conexión.<br />
Las condiciones ambientales influyen de manera significativa en la vida prevista del inversor. No instálelo en ambientes<br />
que no respeten las condiciones indicadas.<br />
Las tarjetas electrónicas contienen componentes sensibles a las cargas electrostáticas. Toque las tarjetas sólo si hace<br />
falta. En este caso, utilice una prevención contra los daños causados por las cargas electrostáticas.<br />
Algunas partes del producto (paredes laterales, disipador e inductancias) pueden alcanzar temperaturas hasta los<br />
100°C. Hay que cumplir con todas las precauciones para evitar quemaduras.<br />
PLACAS DE IDENTIFICACIÓN<br />
ESPAÑOL<br />
25/30
<strong>SUNWAY</strong> M <strong>XS</strong><br />
GUÍA RÁPIDA<br />
CONDICIONES AMBIENTALES DE ALMACENAJE, INSTALACIÓN Y FUNCIONAMIENTO<br />
Modelo <strong>SUNWAY</strong> M <strong>XS</strong> 2200TL 3000TL 3800TL<br />
Nivel de protección<br />
Dimensiones mecánicas (an. x al. x pr.) (mm) 332 x 562 x 185<br />
Peso (kg) 17.5 20.8 21.6<br />
Temperatura ambiente de funcionamiento -25 °C ÷ +60 °C<br />
Temperatura nominal de funcionamiento* -25 °C ÷ +45 °C<br />
Temperatura ambiente de almacenaje y transporte -25 °C ÷ +70 °C<br />
Número máximo de <strong>SUNWAY</strong> M <strong>XS</strong> embalados que se<br />
pueden sobreponer<br />
Lugar de instalación<br />
Altitud<br />
Humedad ambiente de funcionamiento<br />
Humedad ambiente de almacenaje<br />
Humedad ambiente durante el transporte<br />
Presión atmosférica de funcionamiento y almacenaje<br />
Presión atmosférica durante el transporte<br />
IP65<br />
3<br />
Instalación al aire libre, nivel de contaminación 3 o mejor.<br />
No instale con exposición a la luz directa del sol, en presencia de<br />
polvos conductivos, gases corrosivos, vibraciones. No instale en<br />
ambientes salinos.<br />
Hasta 2000m s.n.m. En caso de altitudes superiores, consulte la<br />
Guía a la Instalación y a la Programación del Sunway M <strong>XS</strong>.<br />
De 0% a 100%, de 1 g/m 3 a 25 g/m 3 , sin agua de condensación o<br />
formación de hielo (clase 3k3 según EN50178).<br />
De 0% a 100%, de 1 g/m 3 a 25 g/m 3 , sin agua de condensación o<br />
formación de hielo (clase 1k3 según EN50178).<br />
Máximo 100%. Hasta 60 g/m 3 , una ligera formación de agua de<br />
condensación puede ocurrir con el equipo no en funcionamiento<br />
(clase 2k3 según EN50178).<br />
De 86 kPa a 106 kPa (clases 3k3 y 1k4 según EN50178).<br />
De 70 kPa a 106 kPa (clase 2k3 según EN50178).<br />
*Si se supera la temperatura ambiente de 45°C, el <strong>SUNWAY</strong> M <strong>XS</strong> reduce automáticamente la potencia suministrada<br />
para evitar el sobrecalentamiento. Véanse las características técnicas del producto.<br />
ESPECIFICACIONES DE ENTRADA Y SALIDA DEL PRODUCTO Y DIMENSIONAMIENTO DE LA<br />
INSTALACIÓN<br />
Modelo <strong>SUNWAY</strong> M <strong>XS</strong> 2200TL 3000TL 3800TL<br />
ENTRADA<br />
Potencia de pico máxima del generador fotovoltaico (Wp) 2400 3600 4500<br />
Tensión MPPT del inversor (Vcc) 125 - 480<br />
Tensión máxima campo fotovoltaico (Vcc) 580<br />
Corriente máxima de entrada del generador fotovoltaico (A) 12.5 2 x 10 2 x 12.5<br />
Sección del cable (1 string, mm 2 ) 4<br />
Tipo de cable<br />
Unipolar<br />
SALIDA<br />
Tensión nominal de salida (Vca) 230<br />
Corriente nominal de salida (Aca) 9.6 13.3 16.5<br />
Corriente nominal interruptor magnetotérmico de protección 16 16 25<br />
Sección del cable (mm²) 2.5 4 4<br />
Tipo de cable<br />
De tres polos con doble aislamiento (fase+neutro+tierra)<br />
Diámetro externo cable de conexión (mm) 14-18<br />
Longitud peladura (mm) 10<br />
Par de apriete (Nm) 1.2<br />
26/30
GUÍA RÁPIDA<br />
<strong>SUNWAY</strong> M <strong>XS</strong><br />
MONTAJE A PARED<br />
Utilice el estribo abastecido. Respete los espacios libres indicados en la figura alrededor del equipo:<br />
200<br />
332 185<br />
51 115 115 51<br />
68<br />
31<br />
120<br />
120<br />
FIXING HOLES<br />
FOR HANGING<br />
THE INVERTER<br />
TO THE WALL<br />
562<br />
150<br />
HANGING<br />
POINTS<br />
HANDLES<br />
CUIDADO<br />
Evite montar el <strong>SUNWAY</strong> M <strong>XS</strong> con exposición a la acción directa de la radiación solar o encima de fuentes de calor.<br />
CONEXIÓN A TIERRA Y SECUENCIA DE CONEXIÓN<br />
PELIGRO<br />
Conecte siempre la tierra de protección.<br />
ESPAÑOL<br />
CUIDADO<br />
La conexión eléctrica del <strong>SUNWAY</strong> M <strong>XS</strong> se debe efectuar en la secuencia indicada a continuación:<br />
1. Conexión a tierra del producto;<br />
2. Conexión a la red eléctrica;<br />
3. Conexión al campo fotovoltaico.<br />
27/30
<strong>SUNWAY</strong> M <strong>XS</strong><br />
GUÍA RÁPIDA<br />
Antes de efectuar cada conexión eléctrica, asegúrese de que se haya efectuado la conexión a tierra del producto. El<br />
producto se abastece con conectores de acoplamiento rápido tanto para la conexión a la red eléctrica como para la<br />
conexión a las strings del campo fotovoltaico.<br />
CONEXIÓN A LA RED ELÉCTRICA<br />
Efectúe la conexión a la red eléctrica utilizando los conectores de acoplamiento rápido abastecidos con el producto. Hay<br />
que conectar la tierra de protección (PE), la línea (L) y el neutro (N).<br />
PELIGRO<br />
Antes de efectuar operaciones en la red eléctrica, compruebe siempre que no haya tensión.<br />
CUIDADO<br />
PROTECCIÓN CORRIENTE DIFERENCIAL – Los inversores Sunway M <strong>XS</strong> están compatibles con los interruptores<br />
diferenciales de tipo A externos, según las normas en vigor, ya que, por su específica construcción, no pueden generar<br />
corrientes diferenciales CC, incluso en condiciones de primer defecto.<br />
Instale siempre un interruptor magnetotérmico y un interruptor diferencial como dispositivo de protección de la línea<br />
dedicada al inversor. El interruptor diferencial debe tener un umbral de intervención mínima igual a 100 mA para cada<br />
inversor instalado.<br />
DIAGRAMA DE CONEXIÓN<br />
28/30
GUÍA RÁPIDA<br />
<strong>SUNWAY</strong> M <strong>XS</strong><br />
CONEXIÓN CA<br />
Preparación del cable de conexión CA que se debe utilizar en el conector abastecido<br />
Insulation Strip Length X = 8<br />
Conductor Cross Section 2.5 mm 2 – 4 mm 2 AWG 12-18<br />
Diámetro externo del cable<br />
13 - 18 mm<br />
Procedimiento de montaje del cable en el conector<br />
ESPAÑOL<br />
29/30
<strong>SUNWAY</strong> M <strong>XS</strong><br />
GUÍA RÁPIDA<br />
CONEXIÓN CC<br />
Cable<br />
Tipo de<br />
conector<br />
Sección del<br />
cable<br />
Diámetro<br />
externo<br />
del cable<br />
Longitud L<br />
LC4-CP…4 4 mm 2 (AWG12)<br />
6mm +1<br />
6.3-7.8mm<br />
LC4-CP…6 6 mm 2 (AWG10) 6mm +1<br />
Engarce el cable en el zócalo del conector mediante la pinza Lumberg (LC4-CX CZK48) (no abastecida en el equipo<br />
estándar).<br />
• Abra la pinza (inserto K)<br />
• Inserte el zócalo del conector en el diámetro correcto (4,0 o 6,0) de la pinza y bloquéelo con el inserto K<br />
• Cierre la pinza sin apretar el zócalo, luego libere el inserto K<br />
• Inserte la parte descubierta del cable en el zócalo<br />
• Apriete la pinza hasta el final de carrera<br />
Inserte el zócalo en el conector<br />
30/30