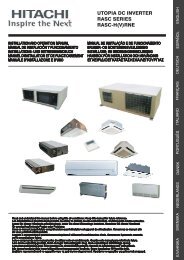
INSTALLATIONSANLEITUNGEN - Kälte Bast GmbH
INSTALLATIONSANLEITUNGEN - Kälte Bast GmbH
INSTALLATIONSANLEITUNGEN - Kälte Bast GmbH

Create successful ePaper yourself
Turn your PDF publications into a flip-book with our unique Google optimized e-Paper software.
S<br />
T<br />
U<br />
EG<br />
I<br />
F<br />
D<br />
E<br />
P<br />
GR<br />
EG<br />
I<br />
F<br />
D<br />
E<br />
P<br />
GR<br />
EG<br />
I<br />
F<br />
D<br />
LEFT REAR TUBING<br />
Insert the tubes connecting the units from the outside, then bend them right<br />
and remove the inferior removable part of the frame. Hang up the unit and<br />
extend the support on the back of indoor unit to make the connection easier.<br />
USCITA TUBAZIONI LATO SINISTRO POSTERIORE<br />
Inserire le tubazioni di collegamento dall’esterno, quindi piegarle verso destra,<br />
rimuovere la parte inferiore amovibile della struttura. Appendere l’unità ed<br />
estendere il supporto posteriore per facilitare il lavoro di collegamento.<br />
SORTIE TUYAUX ARRIERE GAUCHE<br />
Introduire les tuyaux de connexion de l'extérieur, les plier à droite, enlever la partie<br />
inférieure amovible de la structure. Accrocher l'unité et étendre le support arriére<br />
pour faciliter les opérations de branchement.<br />
LINKS VERROHRUNG HINTEN<br />
Die Verbindunskabel zwischen der Einheiten von außen strecken, sie nach rechts<br />
biegen, den unteren abnehmbaren Teil der Struktur entfernen. Die Einheit hängen<br />
und den unteren Halter erstrecken, um die Verbindungsarbeiten zu erleichtern.<br />
SALIDA TUBOS LADO POSTERIOR IZQUIERDO<br />
Introducir los tubos de conexión desde fuera y doblarlos hacia la derecha. Quitar<br />
la parte amovible inferior de la estructura. Colgar la unidad y colocar un soporte<br />
parta facilitar las operaciones de conexión.<br />
CONEXÃO DA TUBAGEM POSTERIOR DO LADO ESQUERDO<br />
Introduza a tubagem de ligaçao das unidades através do exterior. Dobre-as para<br />
a direita e remova a parte extraível inferior da unidade. Pendure a unidade e<br />
coloque um suporte traseiro para facilitar a ligação.<br />
EXODOS SWLHNWN STO PISW ARISTERA TMHMA<br />
Bavlte tou" swlhvne" suvndesh" apov thn exwterikh pleuravv, lugivste tou" pro" ta<br />
dexiav kai bgavlte to kavtw apospwvmeno tmhvma th" kataskeuhv". Kremavste th<br />
monavda kai epekteivnate to pivsw sthvrigma gia na dieukoluvnete th suvndesh.<br />
Push lightly to fix the structure to the rear panel.<br />
Applicare una leggera pressione per agganciare la struttura al pannello posteriore.<br />
Pousser légèrement pour accrocher la structure au panneau arrière.<br />
Das Gitter leicht drücken, um es an die Rückwand zu hängen.<br />
Presionar ligeramente para enganchar la estructura en el panel trasero.<br />
Pressione ligeiramente para prender a unidade ao painel posterior.<br />
Sprwvxte elafrav gia na sterewqeiv to suvsthma sto pivsw plaivsio.<br />
Predispose the terminals of the wire to connect to the terminal strip, connect them<br />
and secure the wiring with clamp provided. (See wiring diagrams).<br />
WARNING<br />
Loose wiring may cause the terminal to overheat or result in unit<br />
malfunction. A fire hazard may also exist. Therefore, be sure all wiring is<br />
tightly connected.<br />
Predisporre i fili elettrici per il collegamento alla morsettiera, collegarli e bloccare<br />
il cavo con il parastrappo. (V. schemi elettrici).<br />
Accertarsi che i terminali dei cavi elettrici siano ben stretti sulla morsettiera.<br />
Terminali non stretti causano surriscaldamento alla morsettiera, problemi<br />
al funzionamento del condizionatore d'aria con pericolo di inizio d'incendio.<br />
Préparer les fils électriques pour le branchement dans la boîte à bornes et les<br />
connecter. (Voir schéma pour le branchement).<br />
S'assurer que les bornes des câbles électriques soient bien serrées sur<br />
la boîte à bornes. Des bornes mal serrées provoquent la surchauffe de la<br />
boîte à bornes, des problèmes de fonctionnement du climatiseur, avec<br />
des danger d'incendies.<br />
Die Leitungen für die Klemmbrett-Verbindung vorbereiten und sie verbinden.<br />
(Sieh elektrische Angaben).<br />
Stellen Sie sich sicher, daß alle Kabelverbindungen fest sind.<br />
Lose Kabel können zur Überhitzung des Anschlüsses oder Fehlfunktion<br />
des Gerätes führen. Feuergefahr mag ebenfalls bestehen.<br />
9<br />
AVVERTIMENTO<br />
DANGER<br />
WARNUNG