Quick Installation Guide Guide d'Installation Rapide ... - Thecus
Quick Installation Guide Guide d'Installation Rapide ... - Thecus
Quick Installation Guide Guide d'Installation Rapide ... - Thecus

Create successful ePaper yourself
Turn your PDF publications into a flip-book with our unique Google optimized e-Paper software.
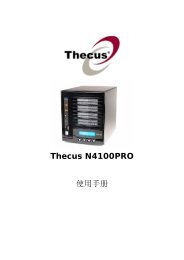
<strong>Thecus</strong> Technology Corporation<br />
TM<br />
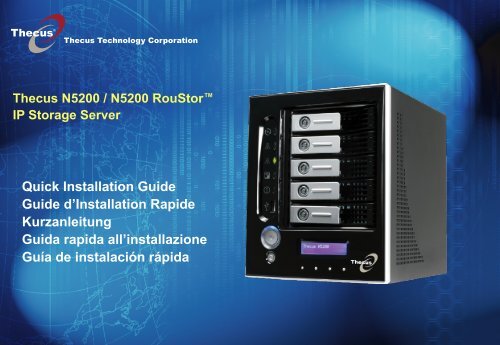
<strong>Thecus</strong> N5200 / N5200 RouStor<br />
IP Storage Server<br />
<strong>Quick</strong> <strong>Installation</strong> <strong>Guide</strong><br />
<strong>Guide</strong> d’<strong>Installation</strong> <strong>Rapide</strong><br />
Kurzanleitung<br />
Guida rapida all’installazione<br />
Guía de instalación rápida
1<br />
EN<br />
FR<br />
DE<br />
IT<br />
ES<br />
Hard disk drive installation<br />
<strong>Installation</strong> du disque dur<br />
Festplatteninstallation<br />
Installazione del disco<br />
Instalación de la unidad de disco duro<br />
2<br />
EN<br />
FR<br />
DE<br />
IT<br />
ES<br />
Network cable connection<br />
Conect Ethernet cable to the WAN port on<br />
N5200 and connect the other end to your switch/hub/router.<br />
Branchement du câble réseau<br />
Branchez le câble Ethernet au port WAN sur le N5200 et branchez<br />
l’autre extrémité sur votre commutateur/concentrateur/routeur<br />
Netzwerkkabel-Verbindung<br />
Verbinden Sie das Netzwerkkabel mit dem WAN Port der N5200<br />
und mit Ihrem Switch/Hub/Router:<br />
Connessione del cavo di rete<br />
Collegare il cavo Ethernet alla porta WAN del N5200 e connettere<br />
l’altra estremità al Vs. switch/hub/router.<br />
Conexión del cable de red<br />
Conecte el cable Ethernet al puerto WAN del N5200 y conecte el otro<br />
extremo a su conmutador/concentrador/enrutador.
3<br />
EN<br />
FR<br />
DE<br />
IT<br />
ES<br />
Power cable connection & Power on<br />
Branchement du câble d’alimentation et mise sous tension<br />
Stromkabelverbindung & Anschalttaste<br />
Connessione del cavo di alimentazione ed accensione<br />
Conexión del cable de alimentación y encendido<br />
EN Start Web User Interface<br />
4<br />
FR<br />
DE<br />
IT<br />
ES<br />
After N5200 boots up, the default IP address is 192.168.1.100. The default<br />
administrator’s username/password is admin/admin.<br />
Démarrage de l'interface utilisateur Web<br />
Après de démarrage du N5200, l’adresse IP par défaut est 192.168.1.100.<br />
Les noms d’utilisateur et mot de passe administrateur par défaut sont admin/admin.<br />
Starten des WEB Benutzer-Interfaces<br />
Nachdem die N5200 gestartet ist, erhält diese die Standard IP Adresse 192.168.1.100.<br />
Die vorgegebenen Administrator Anmeldedaten für Username/Passwort sind admin/admin.<br />
Esecuzione dell’interfaccia Web<br />
A termine della procedura di avviamento, N5200 assume l’indirizzo IP di default<br />
192.168.1.100. Per default, username/password di amministratore sono admin/admin.<br />
Inicio de la interfaz Web de usuario<br />
Tras el arranque de N5200, la dirección IP predeterminada es 192.168.1.100.<br />
El nombre de usuario y la contraseña predeterminados del administrador son admin/admin.
5<br />
EN<br />
FR<br />
DE<br />
IT<br />
ES<br />
Wizard<br />
You can also install the Setup Wizard in the CD for easy installation.<br />
A. <strong>Installation</strong>: Insert the installation CD into your CD-ROM drive. The <strong>Installation</strong> of Setup Wizard will launch from CD<br />
automatically. (For MAC OS X users, double click on <strong>Thecus</strong> Setup Wizard 1.1.6.dmg)<br />
B. Device Discovery: The Setup Wizard will start and automatically detect all <strong>Thecus</strong>’ Storage devices on your network.<br />
Assistant<br />
Vous pouvez également installer l’assistant de configuration du CD pour une installation facile.<br />
A. <strong>Installation</strong>: Insérez le CD d’installation dans votre lecteur CD-ROM. L’installation de l’assistant de configuration sera<br />
lancéautomatiquement à partir du CD. (Pour les utilisateurs MAC OS X, double-cliquez sur <strong>Thecus</strong> Setup Wizard 1.1.6.dmg)<br />
B. Détection des périphériques: L’assistant de Configuration démarre et détecte automatiquement tous les périphériques de<br />
stockage <strong>Thecus</strong> sur votre réseau.<br />
Wizard<br />
Sie können ebenso den, auf der CD vorhandenen, “Setup Wizard” für eine einfache <strong>Installation</strong> verwenden.<br />
A. <strong>Installation</strong>: Legen Sie die <strong>Installation</strong>s-CD in Ihr CD-ROM Laufwerk. Die <strong>Installation</strong> des „Setup Wizards” startet von der CD<br />
automatisch. (MAC OS X Benutzer starten bitte die Datei “<strong>Thecus</strong> Setup Wizard 1.1.6.dmg“ durch einen Doppelklick)<br />
B. Geräte Ermittlung: Der “Setup Wizard” startet und findet automatisch alle, im Netzwerk befindlichen, <strong>Thecus</strong> Speichergeräte.<br />
Wizard<br />
Per una semplice installazione si può anche lanciare la procedura di<br />
installazione assistita (Setup Wizard) contenuta sul CD.<br />
A. Installazione: Inserire il CD di installazione nel lettore CD. L’installazione<br />
di “Setup Wizard” partirà automaticamente. (Per MAC OS X utenti, doppio<br />
scatti sopra <strong>Thecus</strong> Setup Wizard 1.1.6.dmg)<br />
B. Scansione dei Device: Setup Wizard partirà ed automaticamente andrà<br />
alla ricerca di tutti i dispositivi <strong>Thecus</strong> presenti in rete.<br />
Asistente<br />
Para facilitar el proceso, también puede instalar en asistente de instalación<br />
del CD.<br />
A. Instalación: Inserte el CD de instalación en la unidad de CD-ROM.<br />
La instalación del Asistente de instalación se iniciará automáticamente<br />
desde el CD. (Los usuarios de MAC OS X deberán hacer doble clic en<br />
<strong>Thecus</strong> Setup Wizard 1.1.6.dmg)<br />
B. Detección de dispositivos: El Asistente de instalación iniciará y detectará<br />
automáticamente todos los dispositivos de almacenamiento <strong>Thecus</strong> de su red.
5<br />
EN<br />
FR<br />
DE<br />
IT<br />
ES<br />
C. Login<br />
Login into N5200 with administrator’s account and password.<br />
C. Connexion<br />
Connectez-vous au N5200 avec le compte et le mot de passe<br />
administrateur.<br />
C. Anmeldung<br />
Melden Sie sich mit dem Administrator Konto und Passwort an.<br />
C. Login<br />
Loggarsi al N5200 con le credenziali di amministratore.<br />
C. Inicio de sesión<br />
Inicie sesión en el N5200 con la cuenta y la contraseña del<br />
administrador.<br />
EN<br />
FR<br />
DE<br />
IT<br />
ES<br />
D. Network Setting<br />
Name your N5200 system and configure the networkess. You<br />
can choose either fixed IP or DHCP.<br />
D. Configuration réseau<br />
Attribuez un nom à votre système N5200 et configurez l’adresse IP<br />
réseau. Vous pouvez choisir entre une IP fixe ou DHCP.<br />
D. Netzwerkeinstellung<br />
Benennen Sie Ihre N5200 und konfigurieren Sie die Netzwerk IP<br />
Adresse. Sie können zwischen einer festen IP oder DHCP wählen.<br />
D. Impostazioni di rete<br />
Rinominate il Vs. sistema N5200 e configurate l’indirizzo IP di rete.<br />
Si può scegliere di assegnare un indirizzo IP statico o, in alternativa,<br />
configurarlo in DHCP.<br />
D. Configuración de red<br />
Ponga un nombre al sistema N5200 y configura la dirección IP de red.<br />
Puede optar por una IP fija o por un protocolo de configuración dinámica de host (DHCP).
5<br />
EN<br />
FR<br />
DE<br />
IT<br />
ES<br />
E. Change Admin Password<br />
E. Changement du mot de passe administrateur<br />
E. Änderung des Admin Passwortes<br />
E. Modifica della password di amministratore<br />
E. Cambio de la contraseña de administrador<br />
EN<br />
FR<br />
DE<br />
IT<br />
ES<br />
F. Start Browser<br />
Finished! Access the current N5200 administrator Web User Interface<br />
pressing the “Start Browser” button.<br />
F. Démarrage du navigateur<br />
Terminé ! Accédez à la page Web administrateur N5200 courante en<br />
appuyant sur le bouton “Start Browser”.<br />
F. Browser starten<br />
Fertig! Verbinden Sie sich nun mit dem aktuellen N5200 “Administrator<br />
WEB Interface” indem Sie auf “Start Browser” klicken.<br />
F. Partenza del browser<br />
Finito ! Accedere all’interfaccia Web di amministrazione cliccando su<br />
“Start Browser”.<br />
F. Inicio del navegador<br />
Ya ha terminado. Acceda a la interfaz Web de usuario de administrador<br />
del N5200 actual pulsando el botón “Start Browser” (Iniciar navegador).<br />
Refer to user’s manual in the CD for advanced settings and managements.<br />
For more information or on-line resources, please visit http://www.thecus.com.<br />
Copyright© 2006 <strong>Thecus</strong> Technology Corp. All rights reserved.<br />
<strong>Thecus</strong> and other names of <strong>Thecus</strong> products are trademarks or registered<br />
trademark of <strong>Thecus</strong> Technology Corp. Other products and company names<br />
mentioned herein are trademarks of their respective companies.