

How to Use - Black and Decker Appliances
How to Use - Black and Decker Appliances
How to Use - Black and Decker Appliances
- No tags were found...

Create successful ePaper yourself
Turn your PDF publications into a flip-book with our unique Google optimized e-Paper software.
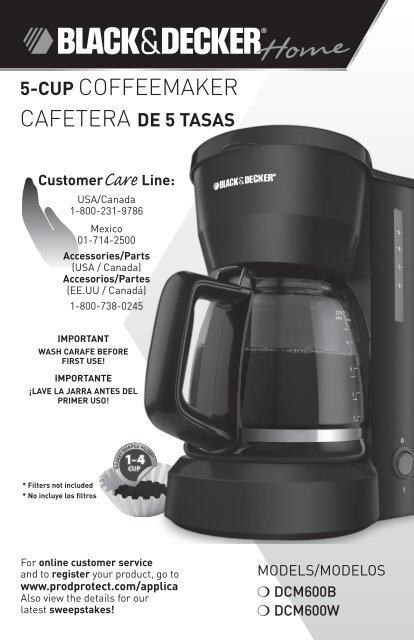
5-CUP COFFEEMAKER<br />
CAFETera DE 5 tasAs<br />
Cus<strong>to</strong>merCare Line:<br />
USA/Canada<br />
1-800-231-9786<br />
Mexico<br />
01-714-2500<br />
Accessories/Parts<br />
(USA / Canada)<br />
Accesorios/Partes<br />
(EE.UU / Canadá)<br />
1-800-738-0245<br />
IMPORTANT<br />
WASH CARAFE BEFORE<br />
FIRST USE!<br />
IMPORTANTE<br />
¡LAVE LA JARRA ANTES DEL<br />
PRIMER USO!<br />
* Filters not included<br />
* No incluye los filtros<br />
For online cus<strong>to</strong>mer service<br />
<strong>and</strong> <strong>to</strong> register your product, go <strong>to</strong><br />
www.prodprotect.com/applica<br />
Also view the details for our<br />
latest sweepstakes!<br />
ModelS/ModElOS<br />
❍ DCM600B<br />
❍ DCM600W
Please Read <strong>and</strong> Save this <strong>Use</strong> <strong>and</strong> Care Book<br />
IMPORTANT SAFEGUARDS<br />
When using electrical appliances, basic safety precautions should always<br />
be followed <strong>to</strong> reduce the risk of fire, electric shock <strong>and</strong>/or injury <strong>to</strong><br />
persons, including the following:<br />
❍ Read all instructions.<br />
❍ Do not <strong>to</strong>uch hot surfaces. <strong>Use</strong> h<strong>and</strong>le or knobs.<br />
❍ To protect against electric shock, do not place cord, plug or appliance<br />
in water or other liquids.<br />
❍ Close supervision is necessary when any appliance is used by or near<br />
children.<br />
❍ Unplug from outlet when not in use <strong>and</strong> before cleaning. Allow <strong>to</strong> cool<br />
before putting on or taking off parts <strong>and</strong> before cleaning the appliance.<br />
❍ Do not operate any appliance with a damaged cord or plug or after the<br />
appliance malfunctions, or has been damaged in any manner. Return<br />
the appliance <strong>to</strong> the nearest authorized service facility for examination,<br />
repair or adjustment. Or, call the appropriate <strong>to</strong>ll-free number on the<br />
cover of this manual.<br />
❍ The use of an accessory not evaluated for use with this appliance may<br />
cause injuries.<br />
❍ Do not use outdoors.<br />
❍ Do not let cord hang over the edge of table or counter, or <strong>to</strong>uch hot<br />
surfaces.<br />
❍ Do not place on or near a hot gas or electric burner or in a heated<br />
oven.<br />
❍ To disconnect, turn any control <strong>to</strong> OFF (O), then remove plug from wall<br />
outlet.<br />
❍ Do not use this appliance for other than intended use.<br />
❍ Keep lid on the carafe when in use.<br />
❍ Scalding may occur if the lid is removed during the brewing cycles.<br />
❍ The carafe is designed for use with this appliance. It must never be<br />
used on a range <strong>to</strong>p.<br />
❍ Do not set a hot carafe on a wet or cold surface.<br />
❍ Do not use a cracked carafe or a carafe having a loose or weakened<br />
h<strong>and</strong>le.<br />
❍ Do not clean carafe with cleansers, steel wool pads or other<br />
abrasive material.<br />
SAVE THESE INSTRUCTIONS.<br />
This product is for household use only.<br />
POLARIZED PLUG (120V Models Only)<br />
This appliance has a polarized plug (one blade is wider than the<br />
other). To reduce the risk of electric shock, this plug is intended <strong>to</strong> fit<br />
in<strong>to</strong> a polarized outlet only one way. If the plug does not fit fully in<strong>to</strong><br />
the outlet, reverse the plug. If it still does not fit, contact a qualified<br />
electrician. Do not attempt <strong>to</strong> modify the plug in any way.<br />
TAMPER-RESISTANT SCREW<br />
Warning: This appliance is equipped with a tamper-resistant screw<br />
<strong>to</strong> prevent removal of the outer cover. To reduce the risk of fire or<br />
electric shock, do not attempt <strong>to</strong> remove the outer cover. There are<br />
no user-serviceable parts inside. Repair should be done only by<br />
authorized service personnel.<br />
ELECTRICAL CORD<br />
a) A short power-supply cord (or detachable power-supply cord) is <strong>to</strong><br />
be provided <strong>to</strong> reduce the risk resulting from becoming entangled in<br />
or tripping over a longer cord.<br />
b) Longer detachable power-supply cords or extension cords are<br />
available <strong>and</strong> may be used if care is exercised in their use.<br />
c) If a long detachable power-supply cord or extension cord is used,<br />
1) The marked electrical rating of the detachable power-supply<br />
cord or extension cord should be at least as great as the<br />
electrical rating of the appliance,<br />
2) If the appliance is of the grounded type, the extension cord<br />
should be a grounding-type 3-wire cord, <strong>and</strong><br />
3) The longer cord should be arranged so that it will not drape over<br />
the counter<strong>to</strong>p or table<strong>to</strong>p where it can be pulled on by children<br />
or tripped over.<br />
Note: If the power supply cord is damaged, it should be replaced by<br />
qualified personnel; in Latin America, by an authorized service center.<br />
ENGLISH
Product may vary slightly from what is illustrated.<br />
<strong>How</strong> <strong>to</strong> <strong>Use</strong><br />
A<br />
1. One-piece cover<br />
2. Filter basket holder<br />
† 3. Removable filter basket (inside) (Part# DCM600-FILTER)<br />
4. Easy-view water window<br />
5. Water <strong>and</strong> brewed coffee markings<br />
<br />
COFFEE<br />
5<br />
4<br />
3<br />
2<br />
-5-<br />
-4-<br />
-3-<br />
-2-<br />
<br />
O<br />
I<br />
<br />
<br />
<br />
<br />
<br />
<br />
This unit is for household use only.<br />
GETTING STARTED<br />
• Remove all packing materials <strong>and</strong> any stickers from the product.<br />
• Remove <strong>and</strong> save literature.<br />
• Please go <strong>to</strong> www.prodprotect.com/applica <strong>to</strong> register your warranty.<br />
• Wash all removable parts as instructed in Care <strong>and</strong> Cleaning section of this<br />
manual.<br />
• Open one-piece cover.<br />
• Pour fresh cold water in<strong>to</strong> water reservoir up <strong>to</strong> 5-cup mark.<br />
• Place empty basket-style paper filter in<strong>to</strong> removable filter basket.<br />
• Place basket in<strong>to</strong> filter basket holder.<br />
• Uncoil power cord <strong>and</strong> plug in<strong>to</strong> st<strong>and</strong>ard electrical outlet.<br />
• Brew water through appliance without adding coffee grounds. This removes any<br />
dust or residue that may remain in the system during the manufacturing process.<br />
• Discard the water from the carafe <strong>and</strong> paper filter from filter basket.<br />
• Turn off the appliance; unplug <strong>and</strong> allow appliance <strong>to</strong> cool down.<br />
BREWING COFFEE<br />
1. Open one-piece cover.<br />
2. Pour fresh cold water up <strong>to</strong> desired level mark in<strong>to</strong> water reservoir.<br />
3. Place empty basket-style paper filter in<strong>to</strong> the removable filter basket.<br />
4. Insert filter basket in<strong>to</strong> filter basket holder.<br />
5. Add desired amount of ground coffee.<br />
Note: Not sure how much coffee <strong>to</strong> use Begin by using 1 level tablespoon of<br />
medium grind coffee for each cup of coffee <strong>to</strong> be brewed.<br />
6. Close lid securely.<br />
7. Place empty carafe on the “Keep Hot” carafe plate.<br />
8. Plug cord in<strong>to</strong> st<strong>and</strong>ard electrical outlet.<br />
9. Press on/off (I/O) switch but<strong>to</strong>n; red light comes on <strong>and</strong> brewing begins.<br />
10. Replace the carafe on the “Keep Hot” carafe plate when not serving <strong>to</strong> keep<br />
coffee hot.<br />
11. Unplug appliance when not in use.<br />
ENGLISH<br />
† 6. Duralife carafe 5 cups / 25 oz. / 740 ml<br />
(Part# DCM600B-01 (B), DCM600W-01 (W))<br />
COFFEE BREWING TIPS<br />
<br />
7. Lighted on/off (I/O) switch<br />
8. Nonstick “Keep Hot” carafe plate<br />
9. Cord s<strong>to</strong>rage (not shown)<br />
Note: † indicates consumer replaceable/removable parts<br />
• Stir coffee in carafe before serving <strong>to</strong> evenly distribute the flavor.<br />
• Coffee that is poured during brewing cycle may vary in strength from the finished<br />
brew.<br />
• Not sure how much coffee <strong>to</strong> use Begin by using 1 level tablespoon of medium<br />
grind coffee for each cup of coffee <strong>to</strong> be brewed.<br />
• For variety, add a 2-inch piece of lemon or orange peel <strong>to</strong> the coffee grounds<br />
before brewing.
• For a special occasion, whip some heavy cream with 1 or 2 tablespoons of hazel nut,<br />
chocolate or almond liqueur. <strong>Use</strong> <strong>to</strong> <strong>to</strong>p off each cup of coffee.<br />
• Add a 2-inch piece of vanilla bean <strong>to</strong> the sugar bowl. You’ll be surprised at how good<br />
it tastes.<br />
• Keep your coffeemaker scrupulously clean; you will be pleased with the flavor.<br />
Care <strong>and</strong> Cleaning<br />
This appliance contains no user-serviceable parts. Refer service <strong>to</strong> qualified<br />
service personnel.<br />
CLEANING<br />
1. Be sure the unit is unplugged <strong>and</strong> cooled.<br />
2. Open the one-piece cover, remove the filter basket (lift straight up).<br />
3. Discard the paper filter from the filter basket.<br />
4. Wash the filter basket, carafe <strong>and</strong> carafe lid in the dishwasher, <strong>to</strong>p-rack<br />
only, or h<strong>and</strong>-wash in warm, sudsy water.<br />
5. To clean inside one-piece cover, open the cover <strong>and</strong> allow it <strong>to</strong> rest in the<br />
open position.<br />
6. Pull showerhead out from under the guide, wipe<br />
surfaces with a damp cloth, then place showerhead<br />
under guide <strong>and</strong> close the cover (B).<br />
CLEANING TIPS<br />
• Excessive steaming or a prolonged brewing cycle is a sign that a cleaning<br />
is needed.<br />
• The frequency of flushing out deposits is determined by your usage <strong>and</strong><br />
water hardness.<br />
• During cleaning, more steaming occurs than when brewing coffee <strong>and</strong><br />
there may be some spitting.<br />
CARAFE CARE<br />
A damaged carafe may result in possible burns from a hot liquid. To avoid<br />
breaking:<br />
• Do not allow all liquid <strong>to</strong> evaporate from the carafe while on the "Keep<br />
Hot" carafe plate or heat the carafe when empty.<br />
• Discard the carafe if damaged in any manner. A chip or crack could<br />
result in breakage.<br />
• Do not use abrasive scouring pads or cleansers, they will scratch <strong>and</strong><br />
weaken the glass.<br />
• Do not place the carafe on or near a hot gas or electric burner, in a<br />
heated oven or in a microwave oven.<br />
• Avoid rough h<strong>and</strong>ling <strong>and</strong> sharp blows.<br />
ENGLISH<br />
B<br />
CLEANING WITH VINEGAR<br />
Mineral deposits left by hard water can clog your coffeemaker. Cleaning is<br />
recommended once a month.<br />
1. Pour white vinegar in<strong>to</strong> water reservoir up <strong>to</strong> 2-cup level on water window.<br />
2. Add cold water up <strong>to</strong> 5-cup line.<br />
3. Place a paper filter in the filter basket <strong>and</strong> close the cover.<br />
4. Set empty carafe on the "Keep Hot" carafe plate.<br />
5. Turn on coffeemake r <strong>and</strong> let half the cleaning solution brew in<strong>to</strong> carafe<br />
(until water level goes down <strong>to</strong> around 3). Turn off coffeemaker <strong>and</strong> let it<br />
soak for at least 15 minutes <strong>to</strong> soften the deposits.<br />
6. Turn on coffeemaker <strong>and</strong> brew remaining cleaning solution in<strong>to</strong> carafe.<br />
7. Turn off coffeemaker, empty carafe <strong>and</strong> discard soiled filter.<br />
8. Fill reservoir with cold water <strong>to</strong> 5-cup line, replace empty carafe, then turn<br />
on coffeemaker for a complete brew cycle <strong>to</strong> flush out remaining cleaning<br />
solution. You may wish <strong>to</strong> repeat this step <strong>to</strong> eliminate any remaining<br />
vinegar smell/taste.<br />
9. Wash the brew basket <strong>and</strong> carafe as instructed in CLEANING.<br />
WARNING<br />
RISK OF FIRE OR ELECTRIC SHOCK. DO NOT OPEN.<br />
The lightning symbol refers <strong>to</strong> “dangerous voltage”; the exclamation symbol<br />
refers <strong>to</strong> maintenance instructions. See below.<br />
Warning: To reduce the risk of fire or electric shock, do not remove the cover<br />
of the coffeemaker. There are no user-serviceable parts inside. Repair should<br />
be done by authorized service personnel only.
TROUBLESHOOTING<br />
PROBLEM POSSIBLE CAUSE SOLUTION<br />
Coffeemaker does<br />
not turn on.<br />
Coffeemaker is<br />
leaking.<br />
Brewing takes <strong>to</strong>o<br />
long.<br />
Coffee is not<br />
brewing.<br />
Coffeemaker brews<br />
clear water.<br />
Filter basket<br />
overflows.<br />
Grounds in brewed<br />
coffee.<br />
Coffeemaker is not<br />
plugged in.<br />
• Water reservoir may<br />
be overfilled.<br />
• Carafe may not be<br />
correctly placed on<br />
“Keep Hot” carafe<br />
plate.<br />
Coffeemaker might<br />
need cleaning.<br />
Water reservoir might<br />
be empty.<br />
There may be no coffee<br />
grounds in removable<br />
filter basket.<br />
Carafe may be<br />
improperly placed on<br />
“Keep Hot” carafe plate.<br />
Filter <strong>and</strong>/or filter<br />
basket are not properly<br />
placed.<br />
Check <strong>to</strong> be sure appliance<br />
is plugged in <strong>to</strong> a working<br />
outlet <strong>and</strong> the on/off (I/O)<br />
switch is powered on.<br />
• Make sure water<br />
reservoir has not been<br />
filled beyond MAX fill<br />
line.<br />
• Make sure carafe is<br />
placed correctly on<br />
“Keep Hot” carafe plate<br />
<strong>and</strong> is centered under<br />
filter basket holder.<br />
Follow procedure in CARE<br />
AND CLEANING.<br />
Make sure water reservoir<br />
has sufficient water <strong>to</strong><br />
brew desired number of<br />
cups of coffee.<br />
Add sufficient amount of<br />
coffee grounds <strong>to</strong> paper<br />
filter in removable filter<br />
basket.<br />
Remove carafe <strong>and</strong> insert<br />
so that carafe rests<br />
comfortably within grooves<br />
on “Keep Hot” carafe plate.<br />
Insert paper filter in<strong>to</strong> filter<br />
basket <strong>and</strong> insert basket<br />
properly in<strong>to</strong> holder.<br />
NEED HELP<br />
For service, repair or any questions regarding your appliance, call the appropriate<br />
800 number on cover of this book. Please DO NOT return the product <strong>to</strong> the place of<br />
purchase. Also, please DO NOT mail product back <strong>to</strong> manufacturer, nor bring it <strong>to</strong> a<br />
service center. You may also want <strong>to</strong> consult the website listed on the cover of this<br />
manual.<br />
Two-Year Limited Warranty<br />
(Applies only in the United States <strong>and</strong> Canada)<br />
What does it cover<br />
• Any defect in material or workmanship provided; however, Applica’s liability will not<br />
exceed the purchase price of product.<br />
For how long<br />
• Two years after date of purchase.<br />
What will we do <strong>to</strong> help you<br />
• Provide you with a reasonably similar replacement product that is either new or<br />
fac<strong>to</strong>ry refurbished.<br />
<strong>How</strong> do you get service<br />
• Save your receipt as proof of date of sale.<br />
• Visit the online service website at www.prodprotect.com/applica, or call <strong>to</strong>ll-free<br />
1-800-231-9786, for general warranty service.<br />
• If you need parts or accessories, please call 1-800-738-0245.<br />
What does your warranty not cover<br />
• Damage from commercial use<br />
• Damage from misuse, abuse or neglect<br />
• Products that have been modified in any way<br />
• Products used or serviced outside the country of purchase<br />
• Glass parts <strong>and</strong> other accessory items that are packed with the unit<br />
• Shipping <strong>and</strong> h<strong>and</strong>ling costs associated with the replacement of the unit<br />
• Consequential or incidental damages (Please note, however, that some states do<br />
not allow the exclusion or limitation of consequential or incidental damages, so this<br />
limitation may not apply <strong>to</strong> you.)<br />
<strong>How</strong> does state law relate <strong>to</strong> this warranty<br />
• This warranty gives you specific legal rights. You may also have other rights that<br />
vary from state <strong>to</strong> state or province <strong>to</strong> province.<br />
ENGLISH<br />
is a trademark of The <strong>Black</strong> & <strong>Decker</strong> Corporation,<br />
Towson, Maryl<strong>and</strong>, USA<br />
<br />
Made in People’s Republic of China<br />
Printed in People’s Republic of China
Por favor lea este instructivo antes de usar el produc<strong>to</strong>.<br />
INSTRUCCIONES IMPORTANTES<br />
DE SEGURIDAD<br />
Cu<strong>and</strong>o se utilizan apara<strong>to</strong>s eléctricos, siempre se debe respetar ciertas<br />
medidas de seguridad a fin de reducir el riesgo de un incendio, un choque<br />
eléctrico y (o) lesiones a las personas, incluyendo las siguientes:<br />
❍ Por favor lea <strong>to</strong>das las instrucciones.<br />
❍ No <strong>to</strong>que las superficies calientes Utilice las asas o las perillas.<br />
❍ A fin de protegerse contra el riesgo de un choque eléctrico, no coloque<br />
el apara<strong>to</strong> de manera que el cable, el enchufe o el mismo apara<strong>to</strong> entre<br />
en contac<strong>to</strong> con agua o cualquier otro líquido.<br />
❍ Todo apara<strong>to</strong> eléctrico utilizado en la presencia de menores de edad<br />
o por ellos mismos requiere la supervisión de un adul<strong>to</strong>.<br />
❍ Desconecte el apara<strong>to</strong> del <strong>to</strong>macorriente cu<strong>and</strong>o no esté en<br />
funcionamien<strong>to</strong> y antes de limpiarlo. espere que el apara<strong>to</strong> se enfríe<br />
antes de instalar o retirar las piezas y antes de limpiarlo.<br />
❍ No se debe utilizar ningún apara<strong>to</strong> eléctrico que tenga el cable o el<br />
enchufe averiado, que presente un problema de funcionamien<strong>to</strong> o que<br />
esté dañado. Devuelva el apara<strong>to</strong> al centro de servicio au<strong>to</strong>rizado más<br />
cercano para que lo examinen, reparen o ajusten. También puede llamar<br />
gratis al número apropiado que aparece en la cubierta de este manual.<br />
❍ El uso de un accesorio no evaluado para ser utilizado con este apara<strong>to</strong><br />
podría ocasionar lesiones personales.<br />
❍ No utilice la jarra si el vidrio se encuentra rajado o si el asa está<br />
débil.<br />
❍ No limpie la jarra con limpiadores abrasivos, con almohadillas de<br />
fibra de metal ni demás limpiadores abrasivos.<br />
CONSERVE ESTAS<br />
INSTRUCCIONES.<br />
Este apara<strong>to</strong> eléctrico es para uso doméstico<br />
únicamente.<br />
ENCHUFE POLARIZADO (Solamente para los modelos de 120V)<br />
Este apara<strong>to</strong> cuenta con un enchufe polarizado (un contac<strong>to</strong> es más<br />
ancho que el otro). A fin de reducir el riesgo de un choque eléctrico,<br />
este enchufe encaja en un <strong>to</strong>macorriente polarizada en un solo sentido.<br />
Si el enchufe no entra en el <strong>to</strong>macorriente, inviértalo y si aun así no<br />
encaja, consulte con un electricista. Por favor no trate de alterar esta<br />
medida de seguridad<br />
TORNILLO DE SEGURIDAD<br />
Advertencia: Este apara<strong>to</strong> cuenta con un <strong>to</strong>rnillo de seguridad para<br />
evitar la remoción de la cubierta exterior del mismo. A fin de reducir<br />
el riesgo de incendio o de choque eléctrico, por favor no trate de<br />
remover la cubierta exterior. Este produc<strong>to</strong> no contiene piezas<br />
reparables por el consumidor. Toda reparación se debe llevar a cabo<br />
únicamente por personal de servicio au<strong>to</strong>rizado<br />
CABLE ELÉCTRICO<br />
❍ Este apara<strong>to</strong> no se debe utilizar a la intemperie.<br />
a) El produc<strong>to</strong> se debe de proporcionar con un cable eléctrico cor<strong>to</strong> (o<br />
❍ No permita que el cable cuelgue del borde de la mesa o del mostrador<br />
uno separable), a fin de reducir el riesgo de tropezar o de enredarse<br />
ni que entre en contac<strong>to</strong> con las superficies calientes.<br />
en un cable más largo.<br />
❍ No coloque el apara<strong>to</strong> sobre ni cerca de las hornillas de gas o eléctricas b) Existen cables eléctricos más largos y separables o cables de<br />
ni adentro de un horno caliente.<br />
extensión que uno puede utilizar si <strong>to</strong>ma el cuidado debido.<br />
❍ Para desconectar el apara<strong>to</strong>, ajuste <strong>to</strong>do control a la posición de<br />
c) Si se utiliza un cable separable o de extensión,<br />
apagado (O) y luego, desconecte el apara<strong>to</strong> del <strong>to</strong>macorriente.<br />
1) El régimen nominal del cable separable o del cable de extensión<br />
❍ El apara<strong>to</strong> se debe de utilizar únicamente con el fin previs<strong>to</strong>.<br />
debe ser, como mínimo, igual al del régimen nominal del apara<strong>to</strong>.<br />
❍ La jarra debe permanecer tapada cu<strong>and</strong>o está en uso.<br />
2) Si el apara<strong>to</strong> es de conexión a tierra, el cable de extensión debe<br />
ser un cable de tres alambres de conexión a tierra.<br />
❍ Existe el riesgo de quemaduras si uno retira la tapa durante los ciclos<br />
de colado.<br />
3) Uno debe de acomodar el cable más largo de manera que no<br />
cuelgue del mostrador o de la mesa, para evitar que un niño tire<br />
❍ La jarra está diseñada para ser utilizada con este apara<strong>to</strong>. Jamás se<br />
del mismo o que alguien se tropiece.<br />
deberá utilizar sobre la estufa.<br />
Nota: Si el cordón de alimentación esta dañado, en América Latina<br />
❍ Nunca coloque una jarra caliente sobre una superficie fría ni húmeda. debe sustituirse por personal calificado o por el centro de servicio<br />
10<br />
au<strong>to</strong>rizado.<br />
11<br />
ESPAÑOL
El produc<strong>to</strong> puede variar ligeramente del que aparece ilustrado.<br />
A<br />
1. Tapa enteriza<br />
2. Soporte del ces<strong>to</strong><br />
3. Ces<strong>to</strong> removible para el filtro (adentro)<br />
4. Tanque de agua con nivel de tazas marcado<br />
5. Marcas para el café y el agua<br />
6. Jarra Duralife 5 tazas / 25 oz / 740 ml<br />
7. Interrup<strong>to</strong>r de encender/apagar (I/O)<br />
8. Placa calefac<strong>to</strong>ra antiadherente<br />
9. Guardacable (no ilustrado)<br />
<br />
COFFEE<br />
5<br />
4<br />
3<br />
2<br />
-5-<br />
-4-<br />
-3-<br />
-2-<br />
<br />
O<br />
I<br />
<br />
<br />
<br />
<br />
<br />
<br />
Como usar<br />
Este apara<strong>to</strong> es solamente para uso doméstico.<br />
PASOS PRELIMINARES<br />
• Retire <strong>to</strong>do material de empaque y calcomanía adherida al produc<strong>to</strong>.<br />
• Retire y conserve el manual de uso y cuidado.<br />
• Por favor, visite www.prodprotect.com/applica para registrar su garantía.<br />
• Lave <strong>to</strong>das las piezas según las instrucciones en la sección de cuidado<br />
y limpieza de este manual.<br />
• Vierta agua fría en el tanque de agua hasta el nivel que indica 5 tazas.<br />
• Coloque un filtro vacío de papel en el ces<strong>to</strong> removible.<br />
• Coloque el ces<strong>to</strong> removible en el soporte para el mismo.<br />
• Desenrolle y enchufe el cable a un <strong>to</strong>macorriente normal.<br />
• Cuele agua a través del apara<strong>to</strong>, sin agregar café molido. Es<strong>to</strong> elimina<br />
cualquier residuo de polvo que pudiera haber en el sistema debido al<br />
proceso de fabricación.<br />
• Deseche tan<strong>to</strong> el agua de la jarra como el filtro de papel.<br />
• Apague y desconecte el apara<strong>to</strong>; espere que se enfríe.<br />
PREPARACIÓN DEL CAFÉ<br />
1. Abra la tapa enteriza.<br />
2. Llene el tanque con agua fría hasta el nivel deseado<br />
3. Coloque un filtro adentro del ces<strong>to</strong> removible para el filtro.<br />
4. Coloque el ces<strong>to</strong> para el filtro adentro del compartimien<strong>to</strong> respectivo.<br />
5. Agregue la cantidad de café molido deseada.<br />
Nota: Si tiene duda de cuán<strong>to</strong> café usar, comience por medir 1 cucharadita<br />
rasada de café molido de textura media por cada taza de café a colar.<br />
6. Cierre y asegure bien la tapa.<br />
7. Coloque la jarra vacía sobre la placa calefac<strong>to</strong>ra.<br />
8. Enchufe el cable a un <strong>to</strong>macorriente normal.<br />
9. Presione el interrup<strong>to</strong>r de encender/apagar (I/O); aparece la luz roja<br />
indicadora de funcionamien<strong>to</strong> y comienza el ciclo de colado.<br />
10. Después de servir, mantenga la jarra sobre la placa calefac<strong>to</strong>ra para<br />
conservar caliente el café.<br />
11. Desconecte la cafetera cu<strong>and</strong>o no esté en uso.<br />
CONSEJOS PARA COLAR CAFÉ<br />
• Revuelva el café de la jarra antes de servirlo para distribuir bien el sabor.<br />
• El café que uno sirve durante el ciclo de colado puede variar en<br />
intensidad.<br />
• ¿Tiene duda de cuán<strong>to</strong> café usar Comience por medir 1 cucharada<br />
rasada de café molido de textura media por cada taza de café a colar.<br />
• Para variar, antes de colar, agregue al café molido un pedazo de<br />
12<br />
2 pulgadas de piel de limón o naranja.<br />
13<br />
ESPAÑOL
• Para una ocasión especial, puede batir crema y agregar 1 o 2 cucharas de<br />
licor de avellana, chocolate o almendra para coronar cada taza de café.<br />
• Agregue a la azucarera un pedazo de 2 pulgadas de grano de vainilla.<br />
Sorprendentemente, resulta muy sabrosa.<br />
• Para un café de buen sabor, siempre conserve su cafetera sumamente limpia.<br />
Cuidado y limpieza<br />
Este apara<strong>to</strong> no contiene piezas reparables por el consumidor. Para servicio, por<br />
favor acuda a personal calificado.<br />
LIMPIEZA<br />
1. Asegúrese que el apar<strong>to</strong> esté apagado y que se haya enfriado.<br />
2. Abra la tapa enteriza, retire el ces<strong>to</strong> removible para el filtro (alzar derecho para<br />
arriba).<br />
3. Deseche el filtro de papel.<br />
4. Lave el ces<strong>to</strong> removible, la jarra y la tapa de la jarra en la b<strong>and</strong>eja superior de<br />
la máquina lavapla<strong>to</strong>s, o a mano con agua tibia jabonada.<br />
5. Para limpiar el interior de la tapa del tanque, abra la tapa enteriza permitiendo<br />
que ésta descanse en posición abierta.<br />
6. Tire del distribuidor de agua desde debajo de la guía,<br />
limpie las superficies con un paño humedecido,<br />
coloque el distribuidor debajo de la guía y cierre la tapa<br />
(B).<br />
B<br />
LIMPIAR CON VINAGRE<br />
Los depósi<strong>to</strong>s minerales que provienen del agua dura pueden obstruir la cafetera.<br />
Se recomienda una limpieza una vez al mes.<br />
1. Vierta vinagre blanco adentro del tanque de agua hasta la marca que indica<br />
2 tazas en el nivel de llenado.<br />
2. Agregue agua fría hasta el nivel que indica 5 tazas.<br />
3. Coloque un filtro de papel en el ces<strong>to</strong> removible y cierre la tapa.<br />
4. Coloque la jarra vacía sobre la placa calefac<strong>to</strong>ra.<br />
5. Encienda la cafetera y permita que se cuele la mitad de la solución de limpieza<br />
adentro de la jarra (hasta que el agua alcance aproximadamente el tercer<br />
nivel). Apague la cafetera y espere 15 minu<strong>to</strong>s para dar lugar a que se abl<strong>and</strong>en<br />
los depósi<strong>to</strong>s minerales.<br />
6. Encienda la cafetera y permita que se cuele el res<strong>to</strong> de la solución adentro<br />
de la jarra.<br />
7. Apague la cafetera, vacíe la jarra y deseche el filtro.<br />
8. Llene el tanque con agua fría hasta el nivel 5, coloque la jarra vacía<br />
nuevamente sobre la placa calefac<strong>to</strong>ra, y encienda la cafetera para colar<br />
un ciclo comple<strong>to</strong>, con el fin de eliminar <strong>to</strong>do residuo de la solución de<br />
limpieza. Puede ser necesario repetir este proceso para eliminar por<br />
comple<strong>to</strong> el olor y el sabor del vinagre.<br />
9. Lave el ces<strong>to</strong> removible para el filtro y la jarra según las instrucciones en la<br />
sección de LIMPIEZA.<br />
MANTENIMIENTO DE SU CAFETERA<br />
• El exceso de vapor o los ciclos de colado prolongados, indican que la<br />
cafetera requiere limpieza.<br />
• La frecuencia con que se debe eliminar los depósi<strong>to</strong>s minerales varía según<br />
el uso de la cafetera y la dureza del agua.<br />
• Durante el ciclo de limpieza, la cafetera puede salpicar y producir más vapor<br />
que de costumbre.<br />
CUIDADO DE LA JARRA<br />
Una jarra dañada puede resultar en posibles quemaduras debido al líquido<br />
caliente. Para evitar que la jarra se rompa:<br />
• No permita que se evapore <strong>to</strong>da el agua mientras la jarra permanece sobre<br />
la placa calefac<strong>to</strong>ra, y jamás caliente la jarra est<strong>and</strong>o vacía.<br />
• Deseche la jarra si presenta cualquier daño. Una jarra astillada o rajada se<br />
puede quebrar fácilmente.<br />
• Para no rallar ni debilitar el vidrio de la jarra, nunca use limpiadores fuertes<br />
ni almohadillas abrasivas.<br />
• No coloque la jarra sobre ni cerca de una hornilla de gas o eléctrica, ni<br />
adentro de un horno caliente ni en uno de microonda.<br />
• Evite el manejo brusco y los golpes.<br />
PRECAUCIÓN<br />
RIESGO DE INCENDIO O DE CHOQUE ELÉCTRICO. NO ABRA.<br />
El símbolo de un rayo indica voltaje peligroso. El signo de exclamación indica<br />
importantes instrucciones de mantenimien<strong>to</strong>. Consulte a continuación:<br />
Precaución: Para reducir el riesgo de incendio o de choque eléctrico, no<br />
retire la cubierta de la cafetera. No contiene por dentro partes reparables por<br />
el consumidor. Cualquier reparación deberá ser efectuada únicamente por<br />
personal au<strong>to</strong>rizado.<br />
ESPAÑOL<br />
14 15
Resolución de problemas o fallas<br />
Problema Posible Causa Solución<br />
La cafetera no<br />
enciende.<br />
La cafetera gotea.<br />
El ciclo de colado se<br />
demora demasiado.<br />
El café no se cuela.<br />
La cafetera<br />
cuela agua clara<br />
solamente.<br />
El ces<strong>to</strong> de colar se<br />
desborda.<br />
Hay residuos de<br />
molido en el café<br />
colado.<br />
La cafetera no está<br />
enchufada.<br />
• El tanque de<br />
agua podría estar<br />
demasiado lleno.<br />
• La jarra puede<br />
no estar colocada<br />
correctamente<br />
sobre la placa<br />
calefac<strong>to</strong>ra.<br />
La cafetera podría<br />
requerir una<br />
limpieza.<br />
El tanque de agua<br />
podría estar vacío.<br />
Podría no haber<br />
café molido en el<br />
ces<strong>to</strong> removible<br />
para el filtro.<br />
La jarra podría estar<br />
mal colocada sobre<br />
la placa calefac<strong>to</strong>ra.<br />
El filtro y(o) el ces<strong>to</strong><br />
removible no están<br />
bien instalados en<br />
su lugar<br />
Asegúrese que el apara<strong>to</strong> esté<br />
conectado a un <strong>to</strong>macorriente<br />
activa y de haber presionado el<br />
interrup<strong>to</strong>r de encende/apagar<br />
(I/O).<br />
• Asegúrese de no sobrepasar<br />
el nivel de llenado máximo.<br />
• Asegúrese que la jarra esté<br />
bien colocada sobre la placa<br />
calefac<strong>to</strong>ra y centrada debajo<br />
del ces<strong>to</strong> removible.<br />
Siga las instrucciones de<br />
limpieza bajo CUIDADO Y<br />
LIMPIEZA.<br />
Asegúrese que el tanque tenga<br />
suficiente agua para colar<br />
el número de tazas de café<br />
deseadas.<br />
Agregue suficiente café molido<br />
al filtro de papel, que encaja<br />
adentro del ces<strong>to</strong> removible.<br />
Retire y coloque la jarra<br />
de manera que descanse<br />
cómodamente dentro de las<br />
ranuras de la placa calefac<strong>to</strong>ra.<br />
Inserte el filtro de papel<br />
adentro del ces<strong>to</strong> removible y<br />
asegúrese de colocar el ces<strong>to</strong><br />
correctamente en su lugar.<br />
¿NECESITA AYUDA<br />
Para servicio, reparaciones o preguntas relacionadas al produc<strong>to</strong>, por favor llame al<br />
número del centro de servicio en el país donde usted compró su produc<strong>to</strong>. NO devuelva<br />
el produc<strong>to</strong> al fabricante. Llame o lleve el produc<strong>to</strong> a un centro de servicio au<strong>to</strong>rizado.<br />
DOS AÑOS DE GARANTÍA LIMITADA<br />
(No aplica en México, Estados Unidos o Canadá)<br />
¿Qué cubre la garantía<br />
• La garantía cubre cualquier defec<strong>to</strong> de materiales o de mano de obra. Applica no se<br />
responsabiliza por ningún cos<strong>to</strong> que exceda el valor de compra del produc<strong>to</strong>.<br />
¿Por cuán<strong>to</strong> tiempo es válida la garantía<br />
• Por dos años a partir de la fecha original de compra.<br />
¿Cómo se puede obtener servicio<br />
• Conserve el recibo original de compra.<br />
• Por favor llame al número del centro de servicio au<strong>to</strong>rizado.<br />
Esta garantía no cubre:<br />
• Los produc<strong>to</strong>s que han sido utilizados en condiciones distintas a las normales<br />
• Los daños ocasionados por el mal uso, el abuso o negligencia.<br />
• Los produc<strong>to</strong>s que han sido alterados de alguna manera<br />
• Los daños ocasionados por el uso comercial del produc<strong>to</strong><br />
• Los produc<strong>to</strong>s utilizados o reparados fuera del país original de compra<br />
• Las piezas de vidrio y demás accesorios empacados con el apara<strong>to</strong><br />
• Los gas<strong>to</strong>s de tramitación y embarque asociados al reemplazo del produc<strong>to</strong><br />
• Los daños y perjuicios indirec<strong>to</strong>s o incidentales<br />
Póliza de Garantía<br />
(Válida sólo para México)<br />
Duración<br />
Applica Manufacturing, S. de R. L. de C.V. garantiza este produc<strong>to</strong> por 2 años a partir<br />
de la fecha original de compra.<br />
¿Qué cubre esta garantía<br />
Esta Garantía cubre cualquier defec<strong>to</strong> que presenten las piezas, componentes y la<br />
mano de obra contenidas en este produc<strong>to</strong>.<br />
Requisi<strong>to</strong>s para hacer válida la garantía<br />
Para reclamar su Garantía deberá presentar al Centro de Servicio Au<strong>to</strong>rizado la póliza<br />
sellada por el establecimien<strong>to</strong> en donde adquirió el produc<strong>to</strong>. Si no la tiene, podrá<br />
presentar el comprobante de compra original.<br />
¿Donde hago válida la garantía<br />
Llame sin cos<strong>to</strong> al teléfono 01 800 714 2503, para ubicar el Centro de Servicio<br />
Au<strong>to</strong>rizado más cercano a su domicilio en donde usted podrá encontrar partes,<br />
componentes, consumibles y accesorios.<br />
Procedimien<strong>to</strong> para hacer válida la garantía<br />
Acuda al Centro de Servicio Au<strong>to</strong>rizado con el produc<strong>to</strong> con la póliza de Garantía<br />
sellada o el comprobante de compra original, ahí se reemplazará cualquier pieza o<br />
componente defectuoso sin cargo alguno para el usuario final. Esta Garantía incluye<br />
los gas<strong>to</strong>s de transportación que se deriven de su cumplimien<strong>to</strong>.<br />
ESPAÑOL<br />
16 17
Excepciones<br />
Esta Garantía no será válida cu<strong>and</strong>o el produc<strong>to</strong>:<br />
A) Se hubiese utilizado en condiciones distintas a las normales.<br />
B) No hubiese sido operado de acuerdo con el instructivo de uso que le acompaña.<br />
C) Cu<strong>and</strong>o el produc<strong>to</strong> hubiese sido alterado o reparado por personas no au<strong>to</strong>rizadas<br />
por Applica Manufacturing, S. de R. L. de C.V.<br />
Nota: Usted podra encontrar partes, componentes, consumibles y accesorios en los<br />
centros de servicios au<strong>to</strong>rizados. Esta garantía incluyen los gas<strong>to</strong>s de transportación que<br />
se deriven de sus cumplimien<strong>to</strong> dentro de sus red de servicio.<br />
Por favor llame al número correspondiente que aparece en la lista a continuación<br />
para solicitar que se haga efectiva la garantía y donde Ud. puede solicitar servicio,<br />
reparaciones o partes en el país donde el produc<strong>to</strong> fué comprado. También puede<br />
consultarnos en el e-mail. “servicio@applicamail.com.mx<br />
Argentina<br />
Servicio Central Attendace<br />
Monroe 3351 Ciudad<br />
Autónoma de Bs. As.<br />
Buenos Aires Argentina<br />
Tel. 0810-999-8999<br />
Chile<br />
Servicio Máquinas y<br />
Herramientas Ltda.<br />
Av. Apoquindo No. 4867 -<br />
Las Condes<br />
Santiago, Chile<br />
Tel.: (562) 263-2490<br />
Colombia<br />
PLINARES<br />
Avenida Qui<strong>to</strong> # 88A-09<br />
Bogotá, Colombia<br />
Tel. sin cos<strong>to</strong> 01 800<br />
7001870<br />
Costa Rica<br />
Aplicaciones<br />
Electromecanicas, S.A.<br />
Calle 26 Bis y Ave. 3<br />
San Jose, Costa Rica<br />
Tel.: (506) 257-5716<br />
223-0136<br />
Ecuador<br />
Servicio Master de<br />
Ecuador<br />
Av. 6 de Diciembre 9276<br />
y los Alamos<br />
Tel. (593) 2281-3882<br />
El Salvador<br />
Calle San An<strong>to</strong>nio Abad<br />
2936<br />
San Salvador, El Salvador<br />
Tel. (503) 2284-8374<br />
Guatemala<br />
MacPartes SA<br />
3ª Calle 414 Zona 9<br />
Frente a Tecun<br />
Tel. (502) 2331-5020<br />
2332-2101<br />
Honduras<br />
ServiTotal<br />
Contigua a Telecentro<br />
Tegucigalpa, Honduras,<br />
Tel. (504) 235-6271<br />
México<br />
Articulo 123 # 95 Local<br />
109 y 112<br />
Col. Centro, Cuauhtemoc,<br />
México, D.F.<br />
Tel. 01 800 714 2503<br />
Nicaragua<br />
ServiTotal<br />
De semáforo de portezuelo<br />
500 metros al sur.<br />
Managua, Nicaragua,<br />
Tel. (505) 248-7001<br />
Panamá<br />
Servicios Técnicos CAPRI<br />
Tumbamuer<strong>to</strong> Boulevard<br />
El Dorado Panamá<br />
500 metros al sur.<br />
Tel. (507) 2360-236<br />
(507) 2360-159<br />
Perú<br />
Servicio Central Fast<br />
Service<br />
Av. Angamos Este 2431<br />
San Borja, Lima Perú<br />
Tel. (511) 2251 388<br />
Puer<strong>to</strong> Rico<br />
Buckeye Service<br />
Jesús P. Piñero #1013<br />
Puer<strong>to</strong> Nuevo, SJ PR<br />
00920<br />
Tel.: (787) 782-6175<br />
Republica Dominicana<br />
Plaza Lama, S.A.<br />
Av, Duarte #94<br />
San<strong>to</strong> Domingo,<br />
República Dominicana<br />
Tel.: (809) 687-9171<br />
Venezuela<br />
Inversiones BDR CA<br />
Av. Casanova C.C.<br />
City Market Nivel Plaza<br />
Local 153<br />
Diagonal Hotel Melia,<br />
Caracas.<br />
Tel. (582) 324-0969<br />
www.applica-latam.com<br />
servicio@applicamail.com.mx<br />
Sello del Distribuidor:<br />
Fecha de compra:<br />
Modelo:<br />
Código de fecha / Date Code<br />
Comercializado por:<br />
Applica Manufacturing, S. de R. L. de C.V.<br />
Presidente Mazarik No111, 1er Piso<br />
Col. Chapultepec Morales, Mexico D.F<br />
Deleg. Miguel Hidalgo<br />
CP 11570<br />
MEXICO<br />
Servicio y Reparación<br />
Art. 123 No. 95<br />
Col. Centro, C.P. 06050<br />
Deleg. Cuauhtemoc<br />
Servicio al Consumidor,<br />
Venta de Refacciones y Accesorios<br />
01 800 714 2503<br />
es una marca registrada de The <strong>Black</strong> & <strong>Decker</strong> Corporation,<br />
Towson, Maryl<strong>and</strong>, E.U.<br />
Fabricado en la República Popular de China<br />
Impreso en la República Popular de China<br />
Importado por / Imported by:<br />
Applica Americas, Inc.<br />
Av. Juan B Jus<strong>to</strong> 637 Piso 10<br />
(C1425FSA) Ciudad Au<strong>to</strong>noma de Buenos Aires<br />
Argentina<br />
C.U.I.T No. 30-69729892-0<br />
Importado por / Imported by:<br />
650 W 120 V 60 Hz<br />
APPLICA MANUFACTURING, S. DE R. L. DE C. V.<br />
Presidente Mazarik No111, 1er Piso<br />
Col. Chapultepec Morales, Mexico D.F<br />
Deleg. Miguel Hidalgo<br />
CP 11570<br />
MEXICO<br />
Teléfono: (55) 5263-9900<br />
Del interior marque sin cos<strong>to</strong><br />
01 (800) 714 2503<br />
18 19<br />
ESPAÑOL
Copyright © 2009 Applica Consumer Products, Inc.<br />
R12009/2-13-14E/S<br />
20<br />
Printed on recycled paper.<br />
Impreso en papel reciclado.


