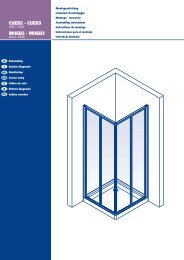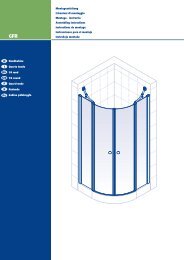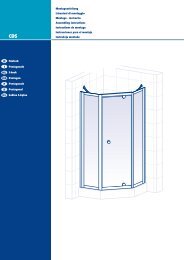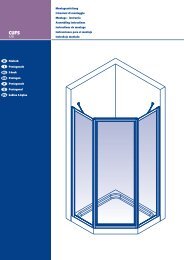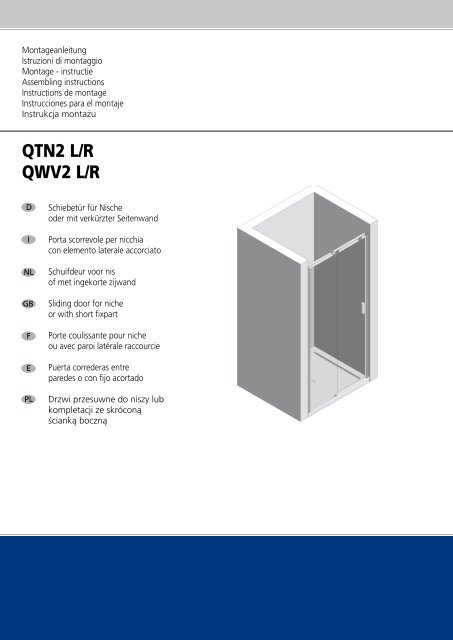
QTN2 L/R QWV2 L/R - Herbovital
QTN2 L/R QWV2 L/R - Herbovital
QTN2 L/R QWV2 L/R - Herbovital

Create successful ePaper yourself
Turn your PDF publications into a flip-book with our unique Google optimized e-Paper software.
<strong>QTN2</strong><strong>QWV2</strong> L/Rgo to<strong>QTN2</strong> L/Rgo to1Achtung: Von min. ... bis max. ... Maß einhalten.Attenzione: Installare entro min. ... e max. … mm.Let op: van....tot....maat aanhouden.Attention: Fix between min. … and max. … mm.Attention: de min ...à max. ....tenir les mesures.Atención: Fijar entre min. … y max. … mm.Uwaga! Nale˝y zachowaç wymiar min. ... do maks. ... .3 6<strong>QTN2</strong> L/R32 mm<strong>QTN2</strong> 1000 min. 970 - max. 1005<strong>QTN2</strong> 1200 min. 1170 - max. 1205<strong>QTN2</strong> 1400 min. 1370 - max. 14055 mm<strong>QTN2</strong> 1600 min. 1570 - max. 160532 mm<strong>QTN2</strong> L/R + <strong>QWV2</strong> L/R0 mm0 mm25 mm5 mm<strong>QTN2</strong> 1000 min. 970 - max. 1005<strong>QTN2</strong> 1200 min. 1170 - max. 1205<strong>QTN2</strong> 1400 min. 1370 - max. 1405<strong>QTN2</strong> 1600 min. 1570 - max. 1605<strong>QWV2</strong> 750 min. 730 - max. 755<strong>QWV2</strong> 800 min. 780 - max. 805<strong>QWV2</strong> 900 min. 880 - max. 905<strong>QWV2</strong> 1000 min. 980 - max. 1005
<strong>QTN2</strong>1230 mm453,9 x 3831M4x82M4x81 24
<strong>QTN2</strong>M4x62+-+-132 mm5
<strong>QTN2</strong>12345 mm53,9 x 38621343,9 x 38532 mm7
<strong>QTN2</strong>2 3 41153,9 x 383,9 x 38581ONLY: <strong>QTN2</strong>212M4x10M4x103354459<strong>QTN2</strong>
<strong>QTN2</strong>12ONLY: <strong>QWV2</strong>213M4x10M4x1035445<strong>QWV2</strong>10425M6x1863111
-+-+<strong>QTN2</strong>1M4x82M4x812121M4x6213
<strong>QTN2</strong>413,5x9,523,9x383,9x3831412 mm15
<strong>QTN2</strong>4max. 2 mm123,5x9,531617
<strong>QTN2</strong>32118ONLY: <strong>QWV2</strong>1432<strong>QWV2</strong>19
<strong>QTN2</strong>1min. 2 mm23min. 2 mm20min. 18 mm12321
24 h22
<strong>QTN2</strong> LEL0336EL0417PLC464KLE001SRAKFB3938BGRQ060< 1600 mm= EL0410> 1600 mm= EL0411KLE001KLEQ161PLMD86BKLEQ059SRAM58PLQ160KLEQ007SRAKFB3938SRAM410KZKLEC194-03SRAM510S3KVSRAMU527S8PRBQ004-02EL0020KLE001SRAKFB3938KLEL108KLEL109SRAM48KFSSRAM46KVEL0418GUMQ029EL0400SRAM616KZNKLET025KLEQ003KLEQ013-01SRAM48KZEL0400SRAM616KZNKLET025KLEQ003KLEQ013-01SRAM48KZSRAM510S3KVSRAMU527S8SRAM410KZKLEC194-03EL0416SRAKFB3938KLFQ007-01KLE001EL0415PRHQ009GUML016< 1600 mm = EL0406> 1600 mm = EL0407EL0398GUMQ029-01KLE001SRAKFB3938PRHC429-01PRHC430EL0020KLEL108KLEL109BGRQ033PLQ030PLQ031SRAKV3516KLEQ032SRAM48KFSEL0403PLQ023PLQ022KLEQ040PLQ146GUMQ042-01PRBE356EL0415EL0414PLQ034
6 PFL/PFR<strong>QWV2</strong> REL0336EL0432PLC463EL0020KLEL108KLEL109KLE001SRAKFB3938SRAM48KFSPLQ071SRAKFS3595KLE001EL0396SRAKFB3938PLQ024PLMD39EL0430SRAKFS3595KLE001SRAKFB3938GUML016PRHQ011PRHK068SRAKFS3595EL0020KLEL108KLEL109KLE001SRAKFB3938PRHC429-01PRHC430PLMD39SRAKFS3595KLE001SRAKFB3938SRAM48KFSSRAKFS3595PLMD39SRAKFS3595KLE001SRAKFB3938Montageset
6 PFL/PFR<strong>QWV2</strong> LEL0336EL0433PLC464KLE001SRAKFB3938EL0020KLEL108KLEL109SRAM48KFSPLQ071KLE001SRAKFB3938SRAKFS3595EL0396PLQ024PLMD39SRAKFS3595EL0431KLE001SRAKFB3938GUML016PRHQ011PRHK068SRAKFS3595KLE001SRAKFB3938PRHC429-01PRHC430EL0020KLEL108KLEL109SRAM48KFSPLMD39SRAKFS3595KLE001SRAKFB3938SRAKFS3595MontagesetPLMD39SRAKFS3595KLE001SRAKFB3938
<strong>QTN2</strong> REL0508EL0336PRBQ004-01KLEQ007SRAKFB3938SRAM410KZKLEC194-03SRAM510S3KVSRAMU527S8KLE001KLEQ161PLMD86BKLEQ059SRAM58PLQ160BGRQ060< 1600 mm= EL0412> 1600 mm= EL0413PLC463KLE001SRAKFB3938EL0020SRAKFB3938KLEQ007-02KLE001SRAM510S3KVSRAMU527S8SRAM410KZKLEC194-03EL0416KLEQ003SRAM48KZEL0400SRAM616KZNKLET025KLEQ013-01KLEQ003SRAM48KZEL0400SRAM616KZNKLET025KLEQ013-01EL0419SRAM46KVGUMQ029KLEL108KLEL109SRAM48KFSKLE001SRAKFB3938EL0415PRHQ009GUML016EL0399GUMQ029-02< 1600 mm = EL0408> 1600 mm = EL0409BGRQ033PLQ030PLQ031SRAKV3516KLEQ032EL0020KLEL108KLEL109KLE001SRAKFB3938PRHC429-01PRHC430EL0403PLQ023SRAM48KFSPLQ022KLEQ040PLQ146GUMQ042-02EL0415PRBE356PLQ035EL0509
D I NLWichtig! Importante! Belangrijk!Bitte überprüfen Sie Ihre Duschkabine vor der Montage aufTransportschäden. Für Schäden an bereits montierten Produktenkann keine Haftung übernommen werden.Zur Reinigung benutzen Sie ein PH-neutrales Reinigungsmitteloder den von uns empfohlenen Spezialreiniger. Verwenden Siekeine scheuernden, alkalischen, säure- oder chlorhaltigen Reinigungsmittelsowie Oxidations- und Lösungsmittel.Prima del montaggio controllare se il prodotto ha subito dannidi trasporto. Per danni su prodotti già montati non possiamoassumerci alcuna responsabilità.Per la pulizia utilizzare un detergente con un PH neutrale oppureil detergente neutrale da noi consigliato. Non utilizzaresolventi, detergenti abrasivi, acidi, alcalini, ossidanti o contententicloro.Werkzeuge für die Montage: Utensili per il montaggio: Benodigd gereedschap:Wasserwaage, Bleistift, Körner, Hammer, Bohrmaschine,Steinbohrer 6mm, Kreuzschraubenzieher, Schraubenzieher,Stahlbohrer 3mm, Silikon.livella, matita, bulino, martello, trapano, punta da muro 6mm, per acciaio 3 mm, cacciavite a croce, cacciavite piatto,silicone.Vóór montage dient U het artikel op eventuele transportbeschadigingenof fabrieksfouten te kontroleren. Voor schade aan reedsgemonteerde onderdelen kunnen wij niet aansprakelijk gesteldworden.Voor de reiniging dient u een PH neutraal reinigingsmiddel of deaanbevolen Sealskin douchereiniger te gebruiken. Geen verdunner,alkalische, zuur, chloor of schurende middelen gebruiken.Kruiskopschroevendraaier, schroevendraaier, waterpas, potlood,boormachine, steenboor 6mm, staalboor 3mm, siliconen3 Zeichnung bezieht sich auf Linksanschlag. Bei Rechtsanschlagbeginnen Sie auf der rechten Seite.Achtung: Kontrollieren Sie die Beschaffenheit der Wand,Licht-, Gas- und Wasserleitungen.Die mit der Kabine mitgelieferten Dübel und Schrauben sindnur für sämtliche Beton- und Mauerwerkbaustoffe geeignet.Für Wände anderer Bauart müssen Sie dafür geeignetes Befestigungsmaterialverwenden.Verwenden Sie nur Silikon oder Dichtungsmasse, welche fürdie Oberflächen und Materialien geeignet sind, an denen dieDuschkabine montiert wird. Die Befestigung an der Wand,die Montage und die Silikonierung der Duschkabine müssensorgfältig und professionell durchgeführt werden. Falls Fragenbezüglich der Montage entstehen sollten, wenden Sie sich bittean Ihren Wiederverkäufer.3 Il disegno è riferito al montaggio porta a sinistra. Perquanto concorre il montaggio a destra iniziare a destra.Attenzione: controlli le condizioni nelle quali si trovano sia laparete che le linee di gas, corrente ed acqua.I tasselli e le viti fornite a corredo alla cabina doccia sono adattiper materiale edile in cemento armato e di costruzione perpareti. Per pareti di tipo costruttivo diverso deve utilizzare materialedi fissaggio in funzione del materiale edilizio.Utilizzi solo silicone o materiale isolante adatto alle superficisulle quali verrà montata la cabina doccia. Il fissaggio a parete,il montaggio e la siliconatura della cabina doccia devono essereeseguiti in modo preciso e professionale. Se dovesse averedomande in riferimento al montaggio, si rivolga per favoreal grossista.3 De tekening heeft betrekking op een linkszijdige montage.Bij rechtszijdige montage, rechts beginnen.Let op: Controleer de muur op licht, gas- en waterleidingen.De bij de douchecabine meegeleverde pluggen en schroeven zijnuitsluitend voor beton en steen geschikt. Voor wanden van eenander bouwmateriaal dient u daarvoor geschikt bevestigmateriaalaan te schaffen.Gebruik uitsluitend siliconen of een andere applicatiekit, welkegeschikt is voor het oppervlak en het materiaal wat aan dedouchecabine gemonteerd wordt. De bevestiging aan de wand,de montage en het siliconeren van de douchecabine moet zorgvuldigen professioneel worden uitgevoerd. Indien u vragen heefttijdens de montage wordt vriendelijk verwezen naar uw wederverkoper.5 Feineinstellung Seitenwand: 5 Regolazionje fine elemento laterale: 5 Fijn afstelling van de zijwand:Die Justierung erfolgt mittels Drehen an der Schraube La regolazione avviene per mezzo dell'avvitamento della vite De afstelling gebeurd door middel van het draaien aan de schroeven.11 Das Abtropfgummi in die aufgeklebte Aluschiene einschieben.11 Inserire il profilo antigocciolamento nel profilo alluminioincollato sul vetro11 Duw het waterkeringstrip in het gelijmde aluminiumspoor.15 Feineinstellung Tür: 15 Regolazione fine porta: 15 Fijn afstelling van de deur:Mittels der Verstellschraube kann die Tür nachjustiert werden.Per mezzo della vite di adattabilità si può regolare a seguire Middels de verstelschroeven kan de deur nagesteld worden.laporta.16 Sollte die Magnetleiste nach der Regulierung der Ausgleichsprofilenicht auf der ganzen Länge schließen, habenSie die Möglichkeit die Profile leicht aus dem Glas zu klopfen,damit die Magnete perfekt schließen.16 Qualora dopo aver regolato le antine il profilo magneticonon dovesse chiudersi per tutta la sua lunghezza basterà semplicementebattere leggermente (nel punto in cui si è formatala fessura) tra il profilo e il vetro. Questa quindi si chiuderàperfettamente.16 Wanneer de magneten na het instellen nog niet precies sluiten,kunt u d.m.v. een hamer en een blokje de profielen lichtaankloppen.21 Die Schwallschutzleiste auf der Duschtasse fixieren. Hierzuden unteren Kanal mit Silikon füllen. Die Schwallschutzleistemuss sich vor dem Türelement befinden.21 Applicare il profilo anti-allagamento sul piatto docciariempiendo la canalina inferiore con il silicone avendo curache si trovi all’esterno del vetro-porta.21 De lekdorpel op de douchebak monteren. Hiervoor de holleruimte aan de onderkant van de lekdorpel vullen met siliconenkit. De lekdorpel moet vóór het deurdeel zitten.22 Anschließend Kabine und Fließen reinigen und die Gläservon außen mit Silikon abdichten. Vor Benutzen der DuscheSilikon mindestens 24 Stunden aushärten lassen.22 Successivamente prego pulire la cabina doccia e le piastrellee siliconare lungo i profili di compensazione e lungo ilcristallo. Prima di utilizzare la cabina doccia fare indurire il siliconeper minimo 24 ore.22 Eerst de cabine en tegels schoonmaken, dan het muurprofielen het glas aan de buitenzijde siliconeren. De siliconen moet eerst24 uur drogen voordat u een douche kunt nemen.Zum herausnehmen • foglio da staccare • om uit te nemen • take out the folder • à enlever • oja a extraer
GB F EImportant! Attention! Importante!Before assembling the shower, please control if the producthas been damaged by the transport. We don’t assume responsibilityfor damaged products which are already assembled.For cleaning use a pH-neutral cleaning agent or the specialcleaner recommended by us. Not to use are solvents, as well asalkaline, solvent -, acid- and chloric or scrubbing agents.Avant de commencer les opérations de montage, assurezvouzque votre cabine n'a subi aucun dommage durant letransport. Les réclamations pour cause de dommage ne peuventêtre acceptées lorsque la cabine est déjà placée.Pour nettoyer veuillez utiliser s’il vous plaît un produit de nettoyageavec PH neutre ou le produit spéciale recommandé parnous. N’utilisez pas des solvants, ainsi qu’alcalins, acides ouproduits avec du clore ou agressif.Required assembly tools: Outils requis: Herramientas por el montaje:Water level, pencil, hammer, drill, drill 6 mm, cross-shapedscrewdriver, screwdriver, steeldrill 3mm, silicon.tournevis cruciforme, niveau à bulle, crayon, perceuse, mèchede 6 mm pour pierre, mèche de 3 mm pour acier et silicon.Antes del montaje controlar si el producto tiene daños detrasporte. Para daños a productos ya montados no asumamosalguna responsabilidad. Limpiar cada semana con agua y jabón,no utilizar diluentes, detergentes rasgueantes, bencina, ...Para la limpieza utilizar un detergente con un PH neutral o eldetergente neutral recomendado de duka. No utilizar diluentesy/o substancias alcalinas, substancias que contienen solventes,ácidos, cloro o materias abrasivas.Nivel, lápiz, puntero, martillo, tallador, punta de 6 mm, 3 mmpor acero, destornillador a cruz, destornillador plano y silicón.3 Drawing indicates left side hinge. For right side hingeplease start installation on right side.Attention: please ensure to check the wall condition and theposition of electrical wiring, gas and water piping.Plugs and screws, provided with the shower enclosure, areonly suitable for masonry walls. For different wall constructionandmaterial types, please use the appropriate fixing means.Use only sealants suitable for the surfaces and materials onwhich the shower enclosure will be installed. Erection, installation,fixing on the wall and sealing of the shower enclosuremust be properly done according to good practice. In case ofdoubt on erection and installation procedures, please contactthe reseller.3 Le dessin concerne un montage initial à gauche, lors d'unmontage inital à droite, commencer à droite.Attention: il est important de vérifier l'absence de canalisationsd'eau, de gaz ou de câbles électriques dans le mur.Les chevilles et vis fournies avec la cabine ne sont appropriéespour tous les matériaux de maçonnerie et bétons. Pour desmurs réalisés avec d’autre matériaux veuillez utiliser pour celadu matériel de fixation approprié.N'utilisez que du silicone ou un produit d'étanchéité quiest approprié aux surfaces et matériaux, auxquels la cabinedouche sera installée. La fixation au mur, l'assemblage et lesiliconnage de la cabine de douche doivent être mis en oeuvresoigneusement et professionnellement. Si des questions devaientnaître concernant l'assemblage, veuillez vous adresserà votre détaillant.3 El dibujo fue hecho para una situación con puerta a izquierda.Si tiene que montar la puerta e la derecha, empezar, porfavor, po el lado derecho.Atención: controlar por favor las condiciones de las paredes y laubicación de líneas de gas, energía y agua.Los tacos y los tornillos enviados juntos a la mampara sonadecuados para material edil en cemento y para material deconstrucción de paredes. Para paredes realizadas con materialconstructivo diferente tiene que utilizar material de fijación enfunción del material de construcción.Utilizar solo silicón o material de insolación adapto a las superficiessobre las que se fija la mampara. La fijación a pared, elmontaje y la siliconatura de la mampara tienen que ser hechasen manera precisa y profesional. Si tiene preguntas al respectodel montaje, las rogamos de contactar el distributor.5 Fine adjustment of the side panel 5 Réglage fine paroi latérale: 5 Regulación fine elemento fijoThe adjustment can be done by turning the screw L'ajustement a lieu au moyen de tourner à la vis. El ajustamiento se hace con el tornillo.11 Push the horizontal sealing into the glued aluminum rail. 11 Poussez le profil de renvoi d‘eau dans le rail en aluminiumcollé.11 Empuje la junta horizonzal en el carril de aluminio pegado.15 Fine adjustment of the door: 15 Réglage fine porte: 15 Regulación fine puerta:With the regulations-screw, the door can be adjusted.Au moyen de la vis de réglage on peut pendant les années A trabes delos tornillosse puede re-posicionar la puerta.réguler la porte.16 If the magnetic profiles after the regulation of the compensationprofiles does not close on the whole length, Youhave the possibility to knock out of the glass the magneticprofile fixed on it.16 Si le profil avec aimant ne devait pas fermer sur la longueurentière, après le réglage des profils de compensation,vous avez la possibilité de déplacer les profils du verre, afinque les aimants ferment parfaitement.16 Si después de la regulación de los perfiles de compensación,los dos perfiles con el imán no cierran totalmente la cabinade ducha, Ud. tiene también la posibilidad de golpear un pocoel perfil con el imán afuera del vidrio y arreglar al final in estemodo la cerrada de la cabina de ducha.21 Fix the anti-inundation profile on the shower tray. Thereforefill the channel on the lower side with silicon. The antiinundationprofile has to be positioned in front of the doorelement.21 Monter le profil de retenue d'eau sur le receveur douche.A cet effet, remplir le canal inférieur avec du silicone. Le profilde retenue d'eau doit se trouver devant l’èlément de laporte.21 Fijar el perfil anti-inundación sobre el plato de ducha. Paraesto llenar el canal inferior con silicón. El perfil antiinundacióntiene que ser puesto enfrente a la puerta.22 At least please clean the shower enclosure and the tilesand proof the compensation profiles and the glass from outsidewith silicone. Before using the shower enclosure let passminimum 24 hours.22 Ensuite nettoyer la cabine et les carreaux et rejointoyeravec silicone la cabine du côté extérieure. Respecter pour lesilicone un délai de durcissement de 24 heueres.22 Después limpiar la cabina de ducha y los azulejos y siliconarlos perfiles de compensación y el cristal desde afuera. Antes deutilizar la cabina de ducha esperar para mínimo 24 horas, asíque se seca el silicón.Zum herausnehmen • foglio da staccare • om uit te nemen • take out the folder • à enlever • oja a extraer
PLWa˝ne!Przed rozpocz´ciem monta˝u kabin´ nale˝y sprawdziç podkàtem ewentualnych uszkodzeƒ transportowych. Nie ponosisi´ odpowiedzialnoÊci za szkody wykryte na w∏aÊnie montowanychproduktach.Do mycia i piel´nacji prosz´ u˝ywaç Êrodków czyszczàycho odczynie PH oboj´tnym lub polecany przez nas specjalnypreparat. Nie nale˝y stosowaç rozpuszczalników, jak równie˝preparatów alkalicznych, kwaÊnych, zawierajàcych chlorlub posiadajàych w∏aÊciwoÊci Êcierne.Narz´dzia niezb´dne do monta˝u:poziomica, o∏ówek, punktak, m∏otek, wiertarka, wiert∏o dokamienia 6 mm, Êrubokr´t krzy˝akowy, Êrubokr´t, wiert∏o dostali 3 mm.3 Rysunek dotyczy zawiasu lewego. W przypadku zawiasuprawego nale˝y rozpoczàç od strony prawei.Uwaga!Prosz´ sprawdziç jakoÊç i stan Êciany oraz przebieginstalacji elektrycznej, gazowej i wodnej.Dostarczone w komplecie z kabinà ko∏ki rozporowe i wkr´tynadajà si´ wy∏àcznie do Êian murowanych. Do Êian wykonanychw systemie lekkiej zabudowy lub innych nale˝y zastosowaçodmienne systemy mocowaƒ.Prosz´ zwróciç uwag´ na to, aby zastosowany zosta∏ rodzajsilikonu w∏aÊciwy dla powierzchni na jakiej zamontowano kabin´.Monta˝ kabiny i jej uszczelnienie musi zostaç wykonanezgodnie z instrukcjà! W wypadku wàtpliwoÊci prosimy zwróciçsi´ o pomoc do dystrybutora lub naszego przedstawicielstwa.5 Ustawianie Êcianki bocznej:Regulacja odbywa si´ poprzez pokr´canie Êruby.11 Listwa zbierajàca wsunàç15 Ustawianie drzwi:Za pomocà Êruby regulacyjnej mo˝na dokonaç regulacji drzwi.16 JeÊli po regulacji profili wyrównujàcych uszczelka magnetycznanie domyka∏aby si´ na ca∏ej d∏ugoÊci, wówczas nale˝yw odpowiednim miejscu lekko jà wybiç z elementu szklanego,aby uszczelki perfekcyjnie domyka∏y si´ na ca∏ej d∏ugoÊci.21 Profil chroniàcy przed rozpryskujàcà si´ wodà nale˝y zamontowaçna brodziku. Spodni kana∏ profila nale˝y wczeÊniejwype∏niç silikonem. Profil musi si´ znajdowaç przed elementemdrzwiowym.22 Na koniec nale˝y wyczyÊciç kabin´ oraz p∏ytki, a tak˝e uszczelniçsilikonem od zewnàtrz profile wyrównujàce oraz szybyÊcianek bocznych. Monta˝owy element pomocniczy nale˝yusunàç 24 godziny po zasilikonowaniu. Silikon musi twardnieçco najmniej 24 godziny przed rozpocz´ciem korzystania z kabiny.Zum herausnehmen • foglio da staccare • om uit te nemen • take out the folder • à enlever • oja a extraer
Zum herausnehmen • foglio da staccare • om uit te nemen • take out the folder • à enlever • oja a extraer
Der Produzent behält sich jederzeit das Recht, ohne Vorbescheid Abänderungen vorzunehmen.Il produttore si riserva il diritto di apportare modifiche al prodotto senza preavviso.De producent houdt zich het recht voor, ten alle tijde zonder tegenbericht veranderingen door te voeren.The producer reserves the right to modify the product at any time without prior notice.Le producteur se réserve le droit de modifier le produit sans aucun préavis.El productor se reserva el derecho de aportar modificaciones al producto sin previo aviso.Producent zastrzega sobie prawo do wprowadzania zmian bez uprzedniego powiadamiania.vermon<strong>QTN2</strong>-13.07.2009