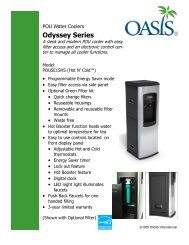
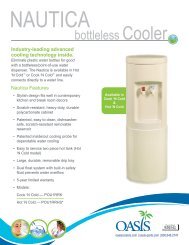
water cooler models bpa1sk, bpa1shs, bpi1sk, bpi1shs, bpd1sk
water cooler models bpa1sk, bpa1shs, bpi1sk, bpi1shs, bpd1sk
water cooler models bpa1sk, bpa1shs, bpi1sk, bpi1shs, bpd1sk
You also want an ePaper? Increase the reach of your titles
YUMPU automatically turns print PDFs into web optimized ePapers that Google loves.
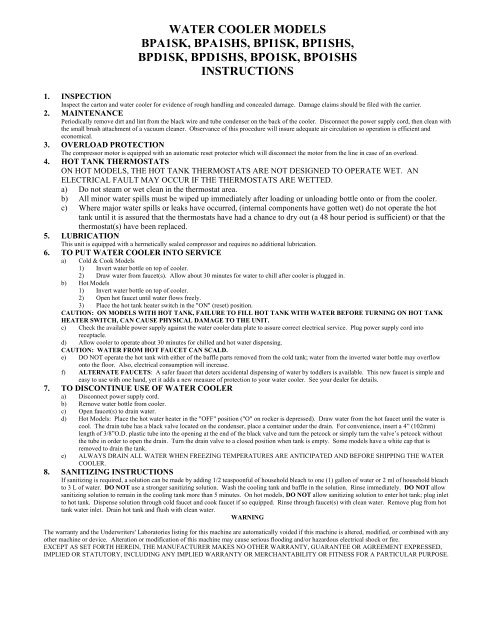
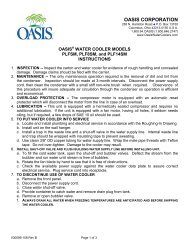
WATER COOLER MODELSBPA1SK, BPA1SHS, BPI1SK, BPI1SHS,BPD1SK, BPD1SHS, BPO1SK, BPO1SHSINSTRUCTIONS1. INSPECTIONInspect the carton and <strong>water</strong> <strong>cooler</strong> for evidence of rough handling and concealed damage. Damage claims should be filed with the carrier.2. MAINTENANCEPeriodically remove dirt and lint from the black wire and tube condenser on the back of the <strong>cooler</strong>. Disconnect the power supply cord, then clean withthe small brush attachment of a vacuum cleaner. Observance of this procedure will insure adequate air circulation so operation is efficient andeconomical.3. OVERLOAD PROTECTIONThe compressor motor is equipped with an automatic reset protector which will disconnect the motor from the line in case of an overload.4. HOT TANK THERMOSTATSON HOT MODELS, THE HOT TANK THERMOSTATS ARE NOT DESIGNED TO OPERATE WET. ANELECTRICAL FAULT MAY OCCUR IF THE THERMOSTATS ARE WETTED.a) Do not steam or wet clean in the thermostat area.b) All minor <strong>water</strong> spills must be wiped up immediately after loading or unloading bottle onto or from the <strong>cooler</strong>.c) Where major <strong>water</strong> spills or leaks have occurred, (internal components have gotten wet) do not operate the hottank until it is assured that the thermostats have had a chance to dry out (a 48 hour period is sufficient) or that thethermostat(s) have been replaced.5. LUBRICATIONThis unit is equipped with a hermetically sealed compressor and requires no additional lubrication.6. TO PUT WATER COOLER INTO SERVICEa) Cold & Cook Models1) Invert <strong>water</strong> bottle on top of <strong>cooler</strong>.2) Draw <strong>water</strong> from faucet(s). Allow about 30 minutes for <strong>water</strong> to chill after <strong>cooler</strong> is plugged in.b) Hot Models1) Invert <strong>water</strong> bottle on top of <strong>cooler</strong>.2) Open hot faucet until <strong>water</strong> flows freely.3) Place the hot tank heater switch in the "ON" (reset) position.CAUTION: ON MODELS WITH HOT TANK, FAILURE TO FILL HOT TANK WITH WATER BEFORE TURNING ON HOT TANKHEATER SWITCH, CAN CAUSE PHYSICAL DAMAGE TO THE UNIT.c) Check the available power supply against the <strong>water</strong> <strong>cooler</strong> data plate to assure correct electrical service. Plug power supply cord intoreceptacle.d) Allow <strong>cooler</strong> to operate about 30 minutes for chilled and hot <strong>water</strong> dispensing.CAUTION: WATER FROM HOT FAUCET CAN SCALD.e) DO NOT operate the hot tank with either of the baffle parts removed from the cold tank; <strong>water</strong> from the inverted <strong>water</strong> bottle may overflowonto the floor. Also, electrical consumption will increase.f) ALTERNATE FAUCETS: A safer faucet that deters accidental dispensing of <strong>water</strong> by toddlers is available. This new faucet is simple andeasy to use with one hand, yet it adds a new measure of protection to your <strong>water</strong> <strong>cooler</strong>. See your dealer for details.7. TO DISCONTINUE USE OF WATER COOLERa) Disconnect power supply cord.b) Remove <strong>water</strong> bottle from <strong>cooler</strong>.c) Open faucet(s) to drain <strong>water</strong>.d) Hot Models: Place the hot <strong>water</strong> heater in the "OFF" position ("O" on rocker is depressed). Draw <strong>water</strong> from the hot faucet until the <strong>water</strong> iscool. The drain tube has a black valve located on the condenser, place a container under the drain. For convenience, insert a 4” (102mm)length of 3/8”O.D. plastic tube into the opening at the end of the black valve and turn the petcock or simply turn the valve’s petcock withoutthe tube in order to open the drain. Turn the drain valve to a closed position when tank is empty. Some <strong>models</strong> have a white cap that isremoved to drain the tank.e) ALWAYS DRAIN ALL WATER WHEN FREEZING TEMPERATURES ARE ANTICIPATED AND BEFORE SHIPPING THE WATERCOOLER.8. SANITIZING INSTRUCTIONSIf sanitizing is required, a solution can be made by adding 1/2 teaspoonful of household bleach to one (1) gallon of <strong>water</strong> or 2 ml of household bleachto 3 L of <strong>water</strong>. DO NOT use a stronger sanitizing solution. Wash the cooling tank and baffle in the solution. Rinse immediately. DO NOT allowsanitizing solution to remain in the cooling tank more than 5 minutes. On hot <strong>models</strong>, DO NOT allow sanitizing solution to enter hot tank; plug inletto hot tank. Dispense solution through cold faucet and cook faucet if so equipped. Rinse through faucet(s) with clean <strong>water</strong>. Remove plug from hottank <strong>water</strong> inlet. Drain hot tank and flush with clean <strong>water</strong>.WARNINGThe warranty and the Underwriters' Laboratories listing for this machine are automatically voided if this machine is altered, modified, or combined with anyother machine or device. Alteration or modification of this machine may cause serious flooding and/or hazardous electrical shock or fire.EXCEPT AS SET FORTH HEREIN, THE MANUFACTURER MAKES NO OTHER WARRANTY, GUARANTEE OR AGREEMENT EXPRESSED,IMPLIED OR STATUTORY, INCLUDING ANY IMPLIED WARRANTY OR MERCHANTABILITY OR FITNESS FOR A PARTICULAR PURPOSE.
Enfriadores de Agua ModelosBPA1SK, BPA1SHS, BPI1SK, BPI1SHS,BPD1SK, BPD1SHS, BPO1SK, BPO1SHSInstrucciones1. InspecciónRevise el cartón y el enfriador buscando evidencia de maltrato en el transporte y/odaño oculto. Reclamos por daños deberá hacerse al transportista.2. MantenimientoPeriódicamente quite polvo y pelusa del cable negro y del tubo condensador en laparte posterior del enfriador. Desconecte el tomacorriente, y luego limpie con uncepillo o accesorio de una aspiradora. Observar este procedimiento asegurará unaadecuada circulación de aire para que la operación sea eficiente y económica.3. Protección contra sobre cargaEl moto-compresor está equipado con un protector térmico de reinicio automático elcual desconectará el moto-compresor de la línea en caso de una sobre carga.4. Termostatos del tanque calienteEN MODELOS CON VALVULA CALIENTE, LOS TERMOSTATOS DEL TANQUECALIENTE NO ESTÁN DISEÑADOS PARA OPERAR MOJADOS. UNA FALLAELÉCTRICA PUEDE OCURRIR SI LOS TERMOSTATOS SON MOJADOS.5. LubricaciónEsta unidad está equipada con un moto-compresor herméticamente sellado y norequiere de lubricación adicional.6. Para poner a funcionar el enfriadora) Modelos Fría y Temperatura Ambiente1) Coloque el botellón de agua invertido en la parte superior del enfriador.2) Saque agua de las válvulas.3) Conecte el tomacorriente del enfriador en el enchufe.4) Espere 30 minutos para que el agua se enfríe una vez que el enfriadorsea conectado.b) Modelos Caliente y Fría1) Coloque el botellón de agua invertido en la parte superior del enfriador2) Abra la válvula de agua caliente hasta que fluya libremente.3) Coloque el interruptor del calentador del tanque caliente en posición “ON”(Reset).4) Conecte el tomacorriente del enfriador en el enchufe.PRECAUCIÓN: EN MODELOS CON TANQUE CALIENTE, EL NO PONERAGUA EN EL TANQUE CALIENTE ANTES DE ENCENDER ELINTERRUPTOR DEL CALENTADOR DEL TANQUE CALIENTE, PUEDECAUSAR DAÑO FÍSICO A LA UNIDAD.c) Revise el suministro de voltaje en su localidad contra lo estipulado en la placa dedatos del enfriador para asegurar servicio eléctrico correcto.d) Permita al enfriador operar 30 minutos antes de tomar agua caliente o fría.Precaución: Agua de la válvula caliente puede escaldar.e) No opere el tanque caliente con cualquiera de los deflectores removidos deltanque frío; agua del botellón invertido puede tirarse al suelo. También, elconsumo eléctrico aumentara.f) Válvulas Alternas: Una válvula que evita la toma accidental de agua por niños seencuentra disponible. Esta nueva válvula es simple y fácil de operar con unamano, pero le da una medida de protección a su enfriador. Vea a su distribuidorpara mas detalles.
7. Para discontinuar el uso del enfriador de agua.a) Desconecte el tomacorriente.b) Quite el botellón del enfriador.c) Abra la(s) válvula(s) para drenar el agua.d) Modelos con válvula Caliente: Ponga el calentador de agua caliente en posición“OFF” (Se aplana la “O” en la palanca). Drene agua de la válvula caliente hastaque el agua este fresca. El tubo de dren tiene una válvula negra localizada en elcondensador, coloque un contenedor debajo del dren. Para su conveniencia,inserte un pedazo de tubo de plástico de 4 pulgadas de longitud con un diámetroexterior de 3/8 de pulgada en la apertura del final de la válvula negra y de vueltaal grifo o simplemente de vuelta al grifo sin el tubo para abrir el dren. De vueltaa la válvula del dren a la posición de cerrado cuando el tanque esté vacío.Algunos modelos tienen una tapa blanca que se retira para drenar el tanque.e) SIEMPRE DRENE TODA EL AGUA CUANDO SE ANTICIPANTEMPERATURAS AMBIENTE DE CONGELACIÓN O ANTES DE EMBARCAREL ENFRIADOR.8. Instrucciones de HigieneSi se requiere higienizar, una solución puede hacerse al agregar media cucharadade blanqueador a 3 litros de agua. NO UTILIZE una solución higienizada masfuerte. Lave el enfriador y deflector en la solución. NO PERMITA que la soluciónhigienizada se quede en el tanque de enfriamiento mas de 5 minutos. En modeloscalientes, NO PERMITA que la solución higienizada entre al tanque caliente;conecte la entrada al tanque caliente. Pase la solución a través de la válvula fría yla válvula ambiente si así está equipada. Enjuague la(s) válvula(s) con aguacaliente. Quite el tapón de la entrada del tanque de agua caliente. Drene el tanquecaliente y enjuague con agua limpia.AvisoLa garantia y el enlistado ante Underwriters Laboratories para este aparato soncompletamente anulados si este aparato es alterado, modificado o combinado conalgun otro aparato o artefacto. Alteracion o modificacion de este aparato puedecausar inundacion seria y/o descarga electrica o fuego.Ademas de lo aqui senalado, el fabricante no ofrece ninguna otra garantia, oacuerdo expreso, denotado o estatutario, incluyendo cualquier garantia denotada onegociabilidad o aptitud para cualquier proposito.
222 East Campus View Blvd. • Columbus, OH 43235 U.S.A.1-800-950-3226www.oasis<strong>cooler</strong>s.comis a trademark of Oasis International030099-222 Rev E© 2009 Oasis International


