by Stone & Sannini - EKA Group
by Stone & Sannini - EKA Group
by Stone & Sannini - EKA Group

Create successful ePaper yourself
Turn your PDF publications into a flip-book with our unique Google optimized e-Paper software.
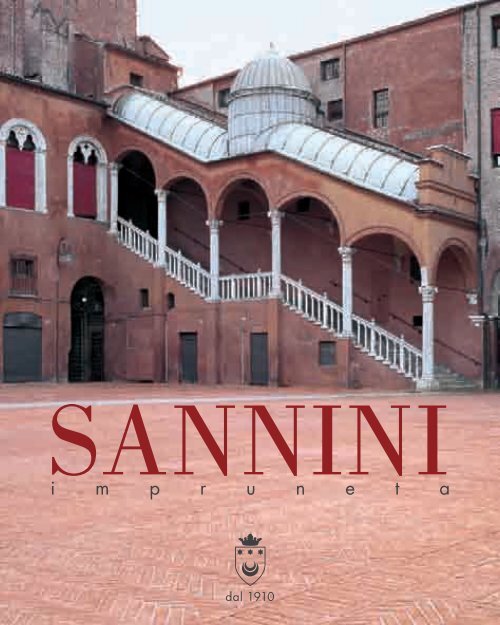
SANNINI<br />
i m p r u n e t a<br />
dal 1910
i m p r u n e t a<br />
SANNINI<br />
dal 1910
cotto imprunetino and new architecture - cotto imprunetino und moderne architektur - cotto imprunetino and new architecture<br />
brushed cotto - gebürsteter cotto - cotto poncé<br />
gently brushed and honed - sanft angeschliffener cotto - surface sannini<br />
honed cotto - mattgeschliffener cotto - cotto poli<br />
natural extruded - natur stranggezogen - extrudé naturel<br />
polished cotto - halbglänzend geschliffen - tecno<br />
extruded rustic handmade texture - stranggezogen mit handgemachter Optik - extrudé avec aspect “fait à la main”<br />
ready-to-use cotto - cotto endbehandelt - cotto prêt à l’emploi<br />
hand made classic - klassisch handgemacht - cotto fait à la main classique<br />
earth tones cotto - handgemacht erdfarben - argiles chromatiques<br />
handmade glazed - majolika handgemacht - terres vitrifiées<br />
manufactured handmade - industriell handgemacht - fait à la main industriel<br />
manufactured handmade - industriell handgemacht - fait à la main industriel<br />
special formats and accessories - spezialteile - formats spéciaux et compléments<br />
mosaics, inlays, fillets, dots, frets, rosettes - mosaike, intarsien, bordüren, einlagen, rosetten - mosaïques, marqueteries et décors<br />
vases and classical accessories - handmodellierte vasen und dekorationselemente - vases et accessoires classiques<br />
boutique range vases - vasen linea boutique - vases ligne boutique<br />
paving elements and accessories - cotto elemente für den aussenbereich - éléments et accessoires d’extérieurs<br />
urban furnishing - stadtmöbel - équipement urbain<br />
cotto reassembled with resin - gemahlener cotto mit harzen gebunden - cotto assemblé avec résine<br />
curtain walls - vorgehangene fassaden - parois ventilées<br />
prefabrication in cotto - fertigbauelemente in cotto - préfabriqués en cotto<br />
window cotto-aluminium - fenster cotto-aluminium - fenètre cotto-aluminium<br />
systems of laying and textures - verlegesysteme und tessierungen - systèmes de montage et textures<br />
SANNINI<br />
i m p r u n e t a<br />
cotto d’impruneta e nuova architettura<br />
cotto arrotato<br />
superficie sannini<br />
cotto levigato<br />
litos<br />
tecno<br />
fornace sannini<br />
flash system<br />
cotto fatto a mano classico<br />
argille cromatiche<br />
terre invetriate<br />
poggio sannini<br />
poggio al sole<br />
formati speciali, complementi e listelli<br />
mosaici e decori<br />
vasi - terrecotte artistiche<br />
vasi - linea boutique<br />
externa<br />
arredo urbano<br />
cottostone<br />
pareti ventilate<br />
prefabbricare con elementi in cotto<br />
finestra in cotto-alluminio<br />
sistemi di montaggio e textures<br />
3<br />
9<br />
21<br />
29<br />
37<br />
43<br />
51<br />
57<br />
63<br />
79<br />
87<br />
93<br />
101<br />
109<br />
115<br />
129<br />
145<br />
159<br />
167<br />
179<br />
185<br />
203<br />
221<br />
225<br />
263
87<br />
179<br />
21<br />
185<br />
167<br />
9<br />
79<br />
225<br />
63<br />
57<br />
115<br />
37<br />
51<br />
129<br />
203<br />
109<br />
101<br />
221<br />
263<br />
29<br />
51<br />
93<br />
159<br />
145<br />
argille cromatiche<br />
arredo urbano<br />
cotto arrotato<br />
cottostone<br />
externa<br />
cotto d’impruneta e nuova architettura<br />
cotto fatto a mano classico<br />
finestra in cotto alluminio<br />
flash system<br />
fornace sannini<br />
formati speciali, complementi e listelli<br />
cotto levigato<br />
litos<br />
mosaici e decori<br />
pareti ventilate<br />
poggio al sole<br />
poggio sannini<br />
prefabbricare con elementi in cotto<br />
sistemi di montaggio e textures<br />
superficie sannini<br />
tecno<br />
terre invetriate<br />
vasi - linea boutique<br />
vasi - terrecotte artistiche
Showroom B.P. Studio, Firenze.<br />
Progetto di Claudio Nardi.<br />
Foto di Alessandro Ciampi.<br />
B.P. Studio Showroom, Florence.<br />
Project <strong>by</strong> Claudio Nardi.<br />
Photo <strong>by</strong> Alessandro Ciampi.<br />
Presentiamo in questo nuovo catalogo i prodotti della nostra argilla,<br />
che mantengono lo stile di due antiche famiglie, <strong>Sannini</strong> e Poccianti,<br />
legate fra loro da più generazioni.<br />
Sfogliando le pagine che seguono si può comprendere l’impegno<br />
dell’azienda nel realizzare prodotti d’avanguardia, progettati<br />
per soddisfare le esigenze del moderno abitare e mantenere allo<br />
stesso tempo il valore della tradizione legata alla nostra lunga storia.<br />
Come presidente dell’azienda insieme ai Poccianti della<br />
generazione emergente, Guido, Roberto e Ranieri, affiancati<br />
da validi collaboratori, mi auguro che il catalogo risponda alle<br />
aspettative dei nostri clienti.<br />
In this new catalogue we present the products of our clay which preserve the<br />
style of two ancient families, <strong>Sannini</strong> and Poccianti, who have been closely tied<br />
for generations. Leafing through the pages which follow, the company is clearly<br />
dedicated to creating avant-garde products, designed to satisfy the needs of modern<br />
living and at the same time preserve the value of tradition, linked to our long history.<br />
As president of the company together with Guido, Roberto and Ranieri, the Pocciantis<br />
of the emerging generation, flanked <strong>by</strong> valid collaborators, I hope that the catalogue<br />
meets the expectations of our clients.<br />
Mit diesem neuen Katalog stellen wir die Produkte unserer Tonerde vor. Es wird der<br />
Stil zweier Familien alter Herkunft - <strong>Sannini</strong> und Poccianti - die seit Generationen<br />
miteinander verbunden sind, beibehalten. Beim Lesen der folgenden Seiten zeigt sich<br />
das Engagement der Firma beim Entwickeln von Produkten der Avantgarde, die dazu<br />
dienen, den Anforderungen des modernen Wohnens gerecht zu werden und zugleich<br />
den Wert einer an unsere lange Geschichte gebundenen Tradition beizubehalten.<br />
Als Vorsitzender der Firma hoffe ich zusammen mit den Poccianti der jüngeren<br />
Generation, Guido, Roberto und Ranieri, die von wertvollen Mitarbeiten umgeben<br />
sind, daß unser Katalog die Erwartungen unserer Kunden erfüllt.<br />
Nous avons le plaisir dans ce nouveau catalogue de vous présenter les produits<br />
de notre argile, qui perpétuent la tradition de deux familles historiques, <strong>Sannini</strong> et<br />
Poccianti, unies par des liens solides depuis plusieurs générations. Dans les pages<br />
qui suivent, il sera facile de se rendre compte des efforts soutenus par l’usine pour<br />
produire des articles d’avant-garde, conçus pour satisfaire les exigences de l’habitat<br />
moderne et maintenir dans le même élan les valeurs traditionnelles fruits de notre<br />
histoire. En tant que Président de la société, avec la nouvelle génération Poccianti,<br />
Guido, Roberto et Ranieri, sans oublier notre équipe de collaborateurs de premier<br />
plan, je souhaite vivement que ce catalogue réponde à vos attentes.<br />
IL PRESIDENTE<br />
Prof. Francesco Poccianti<br />
7
Cotto d’Impruneta e nuova architettura<br />
Opus Reticulatum, Villa Adriana, Roma.<br />
Foto di Alfonso Acocella.<br />
Opus Reticulatum, Villa Adriana, Rome.<br />
Photo <strong>by</strong> Alfonso Acocella.<br />
COTTO D’IMPRUNETA<br />
AND NEW ARCHITECTURE<br />
“In that May in the late fifties Italy is still<br />
intact, and only critical spirits note, with<br />
a negative judgement gratifying their own<br />
narcissism, the first signs of the new epoch<br />
which is about to deface, for eternity, the<br />
old cities and countryside”. Thus Pier Paolo<br />
Pasolini, on page 42 of Petrolio, the romance<br />
published after his death, measures, with his<br />
interior measure, the state of the territory and<br />
the awareness of the imminent change. It is<br />
certainly not a matter of literary fiction; if<br />
anything it is a poetic, unscientific evaluation,<br />
perception in the form of a completely<br />
erroneous and at the same time completely<br />
true assertion. Following the thread of this<br />
analogy one may want to assert, not only<br />
in this context, that in that May with respect<br />
to tradition, the process of manufacturing,<br />
extraction and firing of clay is updated;<br />
the product is improved, and the typical,<br />
honoured cotto proposed to that other industry,<br />
responsible for building for Man, modifying<br />
the urban and rural environment. Repeat<br />
that terracotta becomes popular, also among<br />
the building sites of the extensive post-war<br />
reconstruction which coincides with the socalled<br />
economical boom. As history advances<br />
it will be adopted in many other projects - all<br />
testo di Vittorio Savi<br />
“In quel maggio della fine degli Anni Cinquanta, l’Italia è ancora<br />
intatta, e soltanto gli spiriti critici notano, con un giudizio negativo<br />
dal quale sentivano gratificato il proprio narcisismo, i primi indizi<br />
della nuova epoca, che sta per deturpare per l’eternità le vecchie<br />
città e le vecchie campagne”. Così, Pier Paolo Pasolini, alla pagina<br />
42 di Petrolio, il suo romanzo apparso postumo, misura con il metro<br />
interiore lo stato del territorio, nonché la coscienza del cambiamento<br />
imminente. Certo, non si tratta di finzione letteraria, casomai di<br />
valutazione poetica, ascientifica, percepibile in forma di asserzione<br />
apodittica del tutto erronea e, insieme, completamente vera.<br />
Sul filo della lasca analogia, ci verrebbe voglia di sostenere, non solo<br />
per l’occasione, che, nel maggio dei tardi anni cinquanta, l’industria<br />
imprunetina, nel rispetto della tradizione, va rinnovando il processo<br />
produttivo, l’estrazione e la cottura dell’argilla; ottimizza il prodotto;<br />
propone il tipico, onorato laterizio, a quell’altra industria, addetta<br />
a edificare la casa dell’uomo e modificare l’ambiente urbano<br />
e extraurbano. E di ripetere che il cotto è accolto favorevolmente, non<br />
a caso raggiunge senza difficoltà i cantieri dell’estrema ricostruzione<br />
postbellica, coincidente con l’avvio del cosiddetto boom economico.<br />
Con il trascorrere della storia, ne raggiungerà molti altri - tutti quelli<br />
COTTO D’IMPRUNETA<br />
UND MODERNE ARCHITEKTUR<br />
“In jenem Monat Mai Ende der 50er<br />
Jahre, als in Italien noch alles in Ordnung<br />
war, bemerkten nur die kritischen Geister<br />
mit negativem Urteil und narzistischer<br />
Befriedigung die ersten Indizien der neuen<br />
Epoche und die Verunstaltung der alten<br />
Städte und Landschaften für die Ewigkeit.“<br />
So mißt Pier Paolo Pasolini auf Seite 42, in<br />
dem postum erschienenen Roman Petruli,<br />
mit innerem Maß die Stimmung des Landes<br />
sowie das Bewußtsein der bevorstehenden<br />
Veränderungen. Sicherlich handelt es sich<br />
nicht um eine literarische Fiktion, eher<br />
um eine poetische, unwissenschaftliche<br />
Beurteilung, wahrnehmbar in der Form von<br />
unwiderlegbaren, falschen Behauptungen,<br />
die jedoch insgesamt gesehen, wahr sind. Es<br />
kommt der Wille auf, die schwache Analogie<br />
unterstützen zu wollen, nicht nur aufgrund des<br />
Zufalls, daß in jenem Mai der 50er Jahre die<br />
Cottoindustrie in Impruneta eine Erneuerung<br />
der Produktion, der Tonverarbeitung und des<br />
Brennvorgangs erfährt. Das Produkt wird<br />
optimiert und der typische hochgeschätzte<br />
Cottostein geht in die andere Industrie,<br />
in die des privaten Wohnungsbaus und<br />
der Umgestaltung der Architektur in Stadt<br />
und Land. Es ist zu wiederholen, daß der<br />
COTTO D’IMPRUNETA<br />
ET NOUVELLE ARCHITECTURE<br />
“Ce mois de Mai qui signe la fin des années<br />
cinquante, l’Italie est encore vierge, et seuls<br />
quelques esprits subtils notent, avec des<br />
accents négatifs qui gratifiaient leur seul<br />
narcissisme, les prémisses de la nouvelle<br />
ère qui se prépare à bouleverser pour<br />
l’éternité le vieil ordonnancement des villes<br />
et campagnes”. C’est avec ces mots que Pier<br />
Paolo Pasolini, à la page 42 de Petrolio, son<br />
roman posthume, mesure avec ses paramètres<br />
intimes l’état du territoire et la conscience<br />
émergente du changement qui s’annonce. Il<br />
ne s’agit pas de fiction littéraire, mais d’une<br />
vision poétique, empirique qui prend la forme<br />
d’affirmations éthérées à la fois fantaisistes<br />
et lucides. Dans le droit fil des analogies, il<br />
nous vient à l’esprit, et pas seulement pour le<br />
cas qui nous intéresse, que c’est également<br />
en Mai des dernières années cinquante que<br />
l’industrie imprunetina, dans le respect de la<br />
tradition, décide du renouveau des process de<br />
production, extraction et cuisson des argiles;<br />
optimise le produit; repropose ce glorieux<br />
matériau à l’industrie qui construit l’habitat<br />
de l’homme et modèle ses environnements<br />
urbains et extra-urbains. Il faut rappeler aussi<br />
que le cotto est accueilli favorablement et<br />
tout naturellement par les chantiers de la<br />
9
Cupola di Santa Maria del Fiore, Firenze.<br />
Progetto di Filippo Brunelleschi.<br />
Foto di Carlo Cantini (archivio <strong>Sannini</strong>).<br />
Dome of Santa Maria del Fiore, Florence.<br />
Project <strong>by</strong> Filippo Brunelleschi.<br />
Photo <strong>by</strong> Carlo Cantini (<strong>Sannini</strong> archive).<br />
Pagina successiva/next page:<br />
Biblioteca Laurenziana, Firenze.<br />
Progetto Michelangelo Buonarroti.<br />
Foto Istituto Fotografico Editoriale Scala.<br />
Biblioteca Laurenziana, Florence.<br />
Project <strong>by</strong> Michelangelo Buonarroti.<br />
Photo Istituto Fotografico Editoriale Scala.<br />
those where it should be used: with the sad<br />
exception of the Piazza Signoria in Florence<br />
(it being impossible to restore the original<br />
cotto pavers of a workmanship comparable,<br />
in terms of rendition, with the tile roof of<br />
Brunelleschi’s dome, one opts for a depressing<br />
artificial stone paving). And nevertheless no,<br />
but really no architecture, designed, built<br />
or shelved, between 1960 and the year<br />
2000, in Italy and abroad, has succeeded<br />
in interpreting Imprunetino terracotta in<br />
the right key, or carried it to the heights<br />
of the architectural, material and spatial<br />
values characterised <strong>by</strong> the works of Tuscan<br />
Renaissance, and Florentine in particular,<br />
from the Michelozzi’s Marciana Library to<br />
Michelangelo’s Laurenziana Library, and the<br />
buildings we love. Countless objections would<br />
be raised if one tried to prove the contrary.<br />
Above all - and this observation is annoying<br />
rather than insidious - it doesn’t matter if the<br />
solution is unsuccessful, the problem is badly<br />
posed, architecture, in concrete or in brick,<br />
should be a matter of quantity and not quality,<br />
quantity to solve the housing problem, the<br />
need for buildings, as well as completing<br />
the devastation of the landscape: and on<br />
the wavelength of the architecturally correct<br />
the countless positive, not to say seductive,<br />
examples illustrated in this catalogue should<br />
move, or rather stir. In spite of this, we<br />
che avrebbe dovuto con la penosa eccezione del cantiere di piazza<br />
Signoria a Firenze (diffidato dal rifare l’originario ammattonato,<br />
manufatto bellissimo per resa qualitativa appaiabile al manto<br />
di embrici della cupola del Brunelleschi; incaricato invece<br />
della deprimente lastricatura di pietra artificiale). E aggiungere che<br />
però nessuna ma proprio nessuna architettura progettata, costruita,<br />
o rimasta ineseguita, tra il 1960 e il 2000, in Italia o altrove,<br />
sa interpretare il cotto imprunetino nella chiave giusta né sa valersene<br />
per sollevarsi all’altezza dei valori architettonici, materici e spaziali,<br />
peculiari delle opere del Rinascimento toscano, fiorentino<br />
in particolare, dalla biblioteca marciana di Michelozzo<br />
alla biblioteca laurenziana di Michelangelo, passando<br />
per le fabbriche che amiamo.<br />
A dimostrare il contrario, si alzerebbe subito la folla delle obbiezioni.<br />
Anzitutto, l’osservazione più fastidiosa che insidiosa: non conta<br />
che la risoluzione sia fallimentare, il problema è posto male,<br />
l’architettura, di cemento o mattone, dovrebbe rendersi quantitativa,<br />
e non qualitativa, quantitativa per soddisfare la fame di alloggio,<br />
il fabbisogno edilizio, e completare la devastazione del paesaggio…<br />
Sulla lunghezza d’onda dell’architecturally correct, si muoverebbero,<br />
bevorzugt verwendete Cotto, der sich<br />
ohne Probleme in den Wiederaufbau der<br />
Nachkriegszeit einfügt, mit dem sogenannten<br />
Wirtschaftsboom zusammenfällt. Im Lauf der<br />
Geschichte entstehen viele andere Projekte<br />
in Cotto, mit der schmerzhaften Ausnahme<br />
der Entseelung der “Piazza Signoria“ in<br />
Florenz (die ursprüngliche Cottopflasterung,<br />
wunderschöner handgeschlagener Cotto,<br />
qualitativ vergleichbar mit den Dachziegeln<br />
der Brunelleschikuppel, rausgerissen und<br />
stattdessen mit deprimierenden, künstlichen<br />
Steinplatten zugepflastert). Es ist anzuführen,<br />
daß keine, aber auch nicht eine einzige<br />
geplante, gebaute oder unausgeführte<br />
Architektur zwischen 1960 und 2000 in und<br />
außerhalb Italiens, den Cotto Imprunetino<br />
mit dem richtigen Schlüssel zu interpretieren<br />
und zu schätzen weiß, um sich auf die<br />
hohen Werte der Architektur, Materie und<br />
des Raumes zu erheben, wie zum Beispiel<br />
die Werke der toskanischen Renaissance,<br />
speziell der florentinischen von der Biblioteca<br />
Marciana von Michelozzo bis zur Biblioteca<br />
Laurenziana von Michelangelo, oder auch die<br />
historischen Gebäude, die wir so sehr lieben.<br />
Um das Gegenteil zu beweisen würden sich<br />
sofort zahllose Einwände erheben. Der erste<br />
Einwand, mehr ärgerlich als hinterlistig: es<br />
ist unwichtig, ob das Ergebnis gescheitert ist,<br />
das Problem ist noch viel schwerwiegender:<br />
Vittorio Savi<br />
reconstruction après-guerre, en parallèle avec<br />
le boom économique qui a marqué cette<br />
période. Par la suite, le matériau contamine<br />
les opérateurs du secteur -au départ hostiles-<br />
à la triste exception du chantier de piazza<br />
Signoria de Florence (qui s’est vu interdire la<br />
production originaire de la brique, matériau<br />
splendide qui rappelle le manteau de noues<br />
de la coupole de Brunelleschi; qui fut chargé<br />
par contre des dallages déprimants en<br />
pierre artificielle). Il faut ajouter qu’aucune<br />
architecture, sans exception, projetée,<br />
construite, ou inachevée, entre les années<br />
60 et l’an 2000, en Italie ou ailleurs, ne sait<br />
interpréter le cotto imprunetino dans la clé<br />
correcte ni ne sait mettre à profit ce produit<br />
pour atteindre les sommets architectoniques,<br />
en termes de matières et d’espaces, atteints<br />
par les chefs-d’oeuvre de la renaissance<br />
Toscane et plus précisément Florentine, de la<br />
bibliothèque marciana de Michelozzo à la<br />
bibliothèque laurenziana de Michelangelo,<br />
en passant par les fabriques qui nous sont<br />
chères. Si nous affirmions le contraire nous<br />
assisterions à une véritable levée de boucliers.<br />
Tout d’abord, l’observation plus fastidieuse<br />
que perverse: peu importe que la solution<br />
soit destinée à l’échec, le problème n’est<br />
pas là, l’architecture, ciment ou briques, doit<br />
être jugée du point de vue quantitatif, et<br />
pas qualitatif, pour satisfaire les besoins de<br />
11
Palazzo Farnese, Roma.<br />
Foto di Massimo Listri.<br />
Palazzo Farnese, Rome.<br />
Photo <strong>by</strong> Massimo Listri.<br />
have to agree with Pasolini and assert, or<br />
rather repeat, that the architectural potential<br />
of Imprunetino terracotta is great, but the<br />
designs including the use of brick materials<br />
for construction, facing and decoration on the<br />
contrary disappointing. It is really best not to<br />
ruin the beauty of this page with a kind of<br />
apocalyptic lament. Unlike Pasolini, we should<br />
point out to ourselves, architects, planners<br />
and designers, the main stages of the theorydesign<br />
path that may lead to a new, authentic<br />
Imprunetino terracotta architecture. Outlines<br />
of a perspective which <strong>by</strong> themselves may be<br />
able to assimilate the value of the numerous<br />
examples, indicating some as ideal models. In<br />
the first place one must be able to overcome<br />
the misunderstanding that design is divided<br />
into construction, facing and ornaments. Here,<br />
and forever, the creative act appears unitary<br />
and synthetic, even if it may be sub-divided<br />
into different phases and strategies. Having<br />
overcome this concept one inevitably tends<br />
to reject a classification of materials. More<br />
specifically, as the Renaissance artist did more<br />
or less intuitively, the designer sees terracotta<br />
as matter rather than as material, a sole matter<br />
which remains true to its nature during the<br />
metamorphoses, faithful to its essential, even<br />
spiritual character (as the body contains the<br />
spirit and the brain, the spiritual principle)<br />
even in the manifestation of the essential<br />
si agiterebbero quasi, gli innumerevoli esempi positivi, per non dire<br />
seducenti, illustrati sontuosamente da questo catalogo.<br />
Ciò nonostante, simili a Pasolini, sentiamo di dover affermare,<br />
anzi ripetere sia pure apoditticamente, grande è la valenza<br />
architettonica del cotto imprunetino; deludente il progetto<br />
comprensivo dell’impiego del materiale laterizio da costruzione,<br />
da rivestimento, da decorazione.<br />
Davvero non conviene guastare la bellezza tipografica di questa<br />
pagina con una specie di lamento apocalittico. A differenza<br />
di Pasolini, converrà indicare a noi stessi, architetti, progettisti<br />
e designers, le principali tappe del cammino teorico-progettuale,<br />
in grado di condurre alla nuova architettura del cotto imprunetino.<br />
Una prospettiva, che di per sé stessa sa risucchiare il valore degli<br />
esempi profusi qui - accreditandone alcuni come autentici modelli<br />
ideali.<br />
In primo luogo, bisognerà superare il fraintendimento che il<br />
progetto si divida nei fuochi della costruzione, del rivestimento,<br />
dell’ornamentazione.<br />
Qui, l’ideazione sembrerà essere qualcosa di unitario e sintetico,<br />
se pure articolabile in varie fasi e strategie differenti.<br />
die Architektur in Beton oder Stein muß der<br />
Quantität und nicht der Qualität genügen, der<br />
Quantität um die Nachfrage nach Wohnungen<br />
und Baubedarf zu stillen, und um die<br />
Zerstörung der Landschaft zu vervollständigen.<br />
Auf der Wellenlänge von „architecturally<br />
correct“ befinden sich die unzähligen positiven<br />
Beispiele, um nicht zu sagen Verführungen,<br />
die in diesem Katalog illustriert sind. Trotzdem,<br />
ähnlich wie Pasolini, fühlen wir das Bedürfnis<br />
bestätigen, ja sogar wiederholen zu müssen:<br />
groß ist die architektonische Bedeutung des<br />
Cotto Imprunetino, enttäuschend aber die<br />
augenblickliche Anwendung von Baumaterial,<br />
Verkleidung und Dekoration in Cotto. Aber<br />
es lohnt sich nicht, die Schönheit dieser<br />
Seite mit einer apokalyptischen Beschwerde<br />
zu verschandeln. Im Unterschied zu<br />
Pasolini müssen wir selbst, als Architekten,<br />
Konstrukteure und Designer, erkennen, welche<br />
Entwicklungsstufen in der Projektplanung zu<br />
einer neuen, authentischen Architektur des<br />
Cotto Imprunetino führen. Eine Perspektive,<br />
die für sich selbst die hier großzügig<br />
dargestellten Beispiele zu assorbieren weiß<br />
und einige als authentische Idealmodelle<br />
anerkennt. Zuerst muß das Mißverständnis<br />
überwunden werden, daß das Projekt sich<br />
in Konstruktion, Ausbau und Dekor unterteilt.<br />
Hier scheint die Planung einheitlich und<br />
synthetisch zu sein, wenn auch unterteilbar<br />
Vittorio Savi<br />
logements, de constructions, et pour parfaire<br />
la destruction complète des paysages. Sur la<br />
longueur d’onde de l’architecturally correct,<br />
on verrait se lever en masse, presque en<br />
émeute, les innombrables exemples positifs,<br />
pour ne pas dire séduisants, illustrés de<br />
façon somptueuse dans ce catalogue.<br />
Ceci dit, emboîtant le pas à Pasolini, nous<br />
sommes en devoir d’affirmer, voire répéter<br />
apodictiquement, combien est grande la<br />
valeur architectonique du cotto imprunetino;<br />
combien sont décevants, par contre, les<br />
idéaux qui se limitent à de pauvres matériaux<br />
de construction, de revêtement, de décoration.<br />
Notre propos n’est pas de gâcher la beauté<br />
typographique de cette page par une espèce<br />
de lamentation apocalyptique. A la différence<br />
de Pasolini, il est plus constructif d’indiquer<br />
à nous-mêmes, architectes, concepteurs et<br />
décorateurs, les principales étapes du chemin<br />
théorico-réaliste, qui portera vers la nouvelle<br />
architecture du cotto imprunetino. Une<br />
perspective qui sait articuler avec style les<br />
exemples donnés dans ces pages - en faisant<br />
de certains modèles présentés de véritables<br />
idéaux. En premier lieu, il faudra dépasser le<br />
malentendu qui divise le secteur en catégories<br />
distinctes à savoir construction, revêtement et<br />
décoration. A ce propos, la théorie propose<br />
une vision unitaire et synthétique du problème,<br />
tout en étant articulée en plusieurs phases et<br />
15
Vittorio Savi<br />
A questo superamento segue, né può essere diversamente, il rifiuto<br />
della classificazione del materiale. Per l’esattezza, come faceva<br />
l’artista rinascimentale, il progettista prende in considerazione il cotto<br />
non come materiale, bensì come materia, materia unica che, durante<br />
la metamorfosi, resta tale, essenziale, perfino spirituale (come<br />
il corpo contiene l’anima) anche nelle manifestazioni delle parti<br />
costitutive dell’opera (murature, pavimenti, soffitti di coperture);<br />
nelle espressioni delle superfici, pavimentali, parietali, infradossali,<br />
extradossali; negli accenti dei pannelli decorativi, statue, vasi, tirati<br />
a mano, vasi bellissimi da esterno e da interno.<br />
Tale l’ispirazione teorica; essa è solo il presupposto, ma basamento<br />
per lo slancio con cui affrontare i passaggi della consueta ricerca<br />
tipologica, insediativa, contestualizzante.<br />
Quando tutto ciò sarà paradigmaticamente eseguito, ormai la vita<br />
dell’uomo sarà assai complessa, mentre il teatro della vicenda,<br />
cioè l’architettura, si sarà specificato, caratterizzato, approfondito<br />
sino a coincidere con la materia pura.<br />
Nel frattempo, anche il cyberspazio avrà conosciuto il proprio destino,<br />
sarà in-materia, inetta a delimitare e trattenere alcunché, tranne lo<br />
spazio del pessimo Nulla.<br />
parts of the work (walls, floors, roof); in the<br />
expression of the surfaces, floors, partitions,<br />
internal and external details; in the accents of<br />
the decorative panels, statues, vases, beautiful<br />
handmade vases for indoors and outdoors.<br />
This theoretical inspiration may only be a<br />
premise, but it provides an inspiration with<br />
which to face the phases of ordinary research<br />
of categories, type of settlement, environment.<br />
When all this has been paradigmatically<br />
accomplished, Man’s life will have become<br />
very complex, while the theatre of the<br />
events, the architecture, will have become<br />
specific, characterised, exhaustively studied<br />
until it coincides with the pure material. In<br />
the meanwhile also cyberspace will have<br />
known its fate, it will immaterialize, unable<br />
to withhold anything, except the space of an<br />
obscure nothingness.<br />
in verschiedene Phasen und Strategien.<br />
Dem folgt zwangsweise die Ablehnung<br />
der Klassifizierung der Materialien. Wie<br />
schon in der Renaissance verstanden,<br />
interpretiert der Architekt den Cotto nicht als<br />
Material, sondern als Materie, einzigartige<br />
Materie, die während der Metamorphose<br />
unverändert bleibt, essentiell, sogar spirituell<br />
(wie der Körper die Seele beinhaltet);<br />
auch im konstruktiven Teil des Werkes<br />
(Maurerarbeiten, Böden, Verkleidungen);<br />
in der Gestaltung von Oberflächen,<br />
Bodenbelägen, Wandverkleidungen, Innen-<br />
und Außenanlagen; in den künstlerischen<br />
Akzenten von handgemachten Statuen und<br />
Vasen für Garten- und Innenarchitektur.<br />
Diese theoretische Inspiration ist, wenn auch<br />
nur Annahme, die Basis für den Impuls , die<br />
Forschung nach Kategorien, Bezugspunkten<br />
und Zusammenhängen, anzugehen. Wenn all<br />
das musterhaft ausgeführt sein wird, wird das<br />
Leben des Menschen schon sehr komplex sein,<br />
während sich der Schauplatz der Architektur<br />
spezifiziert, charakterisiert und vertieft haben<br />
und mit der puren Materie eins sein wird. In<br />
der Zwischenzeit wird auch der Cyberspace<br />
sein genaues Schicksal erfahren haben:<br />
er wird materialisiert sein, jedoch unfähig,<br />
Grenzen zu setzen, außer den Raum des<br />
schlichten Nichts zu begrenzen.<br />
Casa Malaparte, Capri.<br />
Foto archivio Fondazione Malaparte.<br />
Casa Malaparte, Capri.<br />
Photo Fondazione Malaparte archive.<br />
stratégies différentes. Une fois cette première<br />
étape franchie, il devient sine qua non de<br />
revisiter la classification des matériaux.<br />
A l’image de l’artiste renaissance, il faut<br />
concevoir le cotto non plus comme un matériau<br />
de plus, mais comme matière, primordiale et<br />
unique qui, nonobstant ses métamorphoses,<br />
conserve son essence originelle, au sens le<br />
plus spirituel du terme, (comme le corps sert<br />
de berceau à l’âme) même dans les aspects<br />
les plus structurels des ouvrages (maçonneries,<br />
carrelages, plafonds); dans les interprétations<br />
des surfaces, carrelages, murs, infra et<br />
extrados; dans les accents décoratifs, statues,<br />
vases, tous tirés à la main, vases merveilleux<br />
pour extérieurs et intérieurs. Nous touchons<br />
ici à la racine de l’inspiration théorique; cette<br />
dernière est la prémisse fondamentale, creuset<br />
qui servira de base aux élans nécessaires<br />
à affronter les étapes de la recherche<br />
typologique conventionnelle, intégrative et<br />
contextuelle. Quand toute cette alchimie sera<br />
paradigmatiquement effectuée, les évolutions<br />
humaines seront devenues trop complexes,<br />
alors que le théâtre des événements, à savoir<br />
l’architecture, se sera défini, caractérisé,<br />
approfondi jusqu’à coïncider avec l’essence<br />
du matériel. Entre-temps, le cyberespace luiaussi<br />
aura fait connaissance avec son destin,<br />
sous l’emblème de l’in-materia, incapable<br />
de délimiter et de retenir quoi que ce soit, à<br />
l’exception des expressions ultimes du Vide<br />
désespérant.<br />
17
Chiesa di Atlàntida, Uruguay,<br />
il coro visto dalla Cappella della Vergine.<br />
Progetto di Eladio Dieste.<br />
Foto di Vicente del Hamo Hernandez.<br />
The Atlàntida Church, Uruguay,<br />
the choir seen from the Chapel of Our Lady.<br />
Project <strong>by</strong> Eladio Dieste.<br />
Photo <strong>by</strong> Vicente del Hamo Hernandez.<br />
Chiesa di Atlàntida, Uruguay,<br />
vista laterale della chiesa di Atlàntida<br />
con la torre campanaria.<br />
Progetto di Eladio Dieste.<br />
Foto di Vicente del Hamo Hernandez.<br />
The Atlàntida Church, Uruguay,<br />
lateral view of church with the bell tower.<br />
Project <strong>by</strong> Eladio Dieste.<br />
Photo <strong>by</strong> Vicente del Hamo Hernandez.<br />
Pagina successiva/next page:<br />
Isolato di Schützenstraße, Berlino.<br />
Progetto di Aldo Rossi.<br />
Foto di Markus Hawlik.<br />
Schützenstraße block, Berlin.<br />
Project <strong>by</strong> Aldo Rossi.<br />
Photo <strong>by</strong> Markus Hawlik.<br />
19
ushed cotto<br />
gebürsteter cotto<br />
cotto poncé<br />
Extruded terracotta with rustic surface, known and used for decades<br />
owing to its particular brushed finish. This category is constituted <strong>by</strong> a<br />
wide range of products which have contributed to spreading the image<br />
of Tuscan tradition throughout the world.Its characteristic roughness<br />
is obtained <strong>by</strong> working the surface of the material with steel brushes<br />
prior to firing. It is laid according to the traditional system or with<br />
adhesive. Advised width of grout joints minimum 3 mm. For indoor<br />
and outdoor use irrespective of environmental or climatic factors. The<br />
transpiring nature of the terracotta guarantees a healthy and particularly<br />
comfortable environment. To be treated after laying if used for interiors.<br />
Available also in Flash version.<br />
“Cotto Arrotato”, der gebürstete Cotto, ist der Belag, der allgemein<br />
bekannt ist. Er bringt eine gute Portion Toskana auch in ganz entfernte<br />
Breitengrade. Seit Jahrzehnten schätzen Designer, Architekten und<br />
Bauherren dieses stranggezogene Material wegen seiner typischen<br />
Bürstung. Dafür bearbeitet <strong>Sannini</strong> den Rohling mit Eisenbürsten und<br />
prägt so die rustikale Oberfläche. Ein Bodenbelag mit “Cotto Arrotato”<br />
bringt eine ganz natürliche Atmosphäre ins Haus, zudem gewährleistet<br />
die Atmungsfähigkeit des Cotto ein gesundes Wohlfühl-Klima.<br />
Wegen seiner guten wärmephysikalischen Eigenschaften eignet er<br />
sich besonders für Fußbodenheizung. Arrotierten Cotto können Sie bei<br />
<strong>Sannini</strong> aus einer umfassenden Produktpalette wählen: von Fliesen in<br />
unterschiedlichen Größen über Formteile bis zu Bordüren. Die Fliesen<br />
können traditionell verlegt oder verklebt werden. Fugenbreiten ab fünf<br />
Millimetern aufwärts sind empfehlenswert.<br />
“Cotto Arrotato” eignet sich für Innen- und Außenbereiche<br />
gleichermaßen und ist auch als “Flash” erhältlich.<br />
Cotto extrudé à faces rustiques, connu et utilisé depuis des décennies<br />
pour sa finition particulière poncée. Les éléments de cette famille<br />
forment une gamme complète de produits qui ont contribué à<br />
développer l’image de la tradition Toscane dans le monde. Sa rugosité<br />
caractéristique est obtenue par travail du matériau cru avec brosses en<br />
acier. Posé par système traditionnel ou par collants.<br />
Joint minimum conseillé 3 mm. Destination intérieurs et extérieurs,<br />
sans exclusion pour causes environnementales ou climatiques. La<br />
transpiration typique du cotto garantit des ambiances saines et<br />
particulièrement confortables. A traiter dans les intérieurs après la pose.<br />
Disponible en version Flash.<br />
cotto arrotato<br />
Cotto estruso con superficie rustica, conosciuto<br />
e utilizzato da decenni per la sua particolare<br />
finitura arrotata. Gli elementi di questa<br />
famiglia definiscono una gamma completa<br />
di prodotti che hanno contribuito a diffondere<br />
l’immagine della tradizione toscana nel<br />
mondo. La caratteristica superficie è ottenuta<br />
attraverso il trattamento del materiale crudo<br />
con spazzole d’acciaio.<br />
Si posa secondo il sistema tradizionale o<br />
a collante. Fuga consigliata minimo mm<br />
3. Destinazione interni ed esterni senza<br />
esclusioni per fattori ambientali o climatici. La<br />
caratteristica traspirante del cotto garantisce<br />
un ambiente sano e particolarmente<br />
confortevole. Da trattare negli interni dopo la<br />
posa. Disponibile anche nella versione Flash.<br />
21
Cotto arrotato<br />
TECHNICAL CHARACTERISTICS<br />
Technical data<br />
technical<br />
characteristics norms EN-norm values <strong>Sannini</strong> values<br />
length<br />
thickness<br />
straightness<br />
of sides<br />
rectangularity<br />
surface flatness<br />
centre curvature<br />
surface flatness<br />
edge curvature<br />
surface flatness<br />
warpage<br />
surface quality<br />
water<br />
absorption<br />
modulus<br />
of ropture<br />
scratch hardness<br />
of surface<br />
(Mohs)<br />
abrasion<br />
resistance<br />
linear thermal<br />
expansion<br />
thermal shock<br />
resistance<br />
res. to household<br />
chemical swimming<br />
pool water cleansers<br />
resistance to acid<br />
and alkalis<br />
frost<br />
resistance<br />
sliding<br />
resistance<br />
UNI EN 98 ± 1,5% max.<br />
corresponding<br />
UNI EN 98<br />
UNI EN 98<br />
UNI EN 98<br />
UNI EN 98<br />
UNI EN 98<br />
UNI EN 98<br />
UNI EN 98<br />
UNI EN 99<br />
UNI EN 100<br />
UNI EN 101<br />
UNI EN 102<br />
UNI EN 103<br />
UNI EN 104<br />
ASTM/C 484<br />
ISO 10545<br />
ISO 10545<br />
UNI EN 202<br />
DM 236/89<br />
DIN 51130<br />
± 10% max.<br />
± 10% max.<br />
± 1,5% max.<br />
± 1% max.<br />
± 1% max.<br />
± 1,5% max.<br />
percentage of acceptable<br />
tiles in the lot free<br />
visible defects 95 min.<br />
average value 310N/mm 2<br />
unglazed tiles 5 min.<br />
removed volume in mm 3 771max.<br />
coefficient linear thermal<br />
expansion from ambient<br />
temparature 0,40<br />
test on inclined plan<br />
corresponding<br />
corresponding<br />
corresponding<br />
corresponding<br />
corresponding<br />
corresponding<br />
corresponding<br />
5,6<br />
> 20 N/mm 2<br />
5<br />
218,1 mm 3<br />
4,39(x10 -6 °C -1 )<br />
resistant<br />
resistant<br />
resistant<br />
resistant<br />
resistant<br />
µ = 0,86<br />
R12<br />
FORMATI<br />
40x40 sp.1,6<br />
16x16in h.0,62in<br />
30x30 sp.1,4<br />
12x12in h. 0,55in<br />
25x25 sp.1,4<br />
10x10in h. 0,55in<br />
20x20 sp.1,4<br />
8x8in h. 0,55in<br />
12,5x12,5 sp.1,4<br />
5x5in h. 0,55in<br />
25x50 sp.1,4<br />
10x20in h. 0,55in<br />
18x36 sp.1,5<br />
7x14in h. 0,6in<br />
15x30 sp.1,4<br />
6x12in h. 0,55in<br />
14x28 sp.1,4<br />
5,5x11in h. 0,55in<br />
6x28 sp.1,5<br />
2,4x11in h. 0,6in<br />
Per altri elementi speciali come formato e utilizzo vedi anche<br />
“formati speciali e complementi”.<br />
- elemento ad “L” con gocciolatoio 33x14x4,5cm<br />
- coprimuro 33cm<br />
- terminale coprimuro 33cm<br />
- cimasa con gocciolatoio 25x34cm<br />
Alcuni elementi del cotto arrotato sono disponibili nella versione Flash,<br />
vedi “cottoflash system”.<br />
For other special elements and sizes see also “formati speciali e complementi”.<br />
See also “cottoflash system”.<br />
Andere Artikel und Formate siehe “formati speciali e complementi”.<br />
Siehe auch “CottoFlash System”.<br />
Pour d’autres éléments spéciaux en format et utilisation, voir également<br />
“formats spéciaux et compléments”.<br />
Voir ”cottoflash system”.<br />
25x36 sp.1,4<br />
10x14in h. 0,55in<br />
gradino<br />
step<br />
Stufe<br />
marche<br />
30x36 sp.1,4<br />
12x14in h. 0,55in<br />
gradino<br />
step<br />
Stufe<br />
marche<br />
36x36 sp.1,9<br />
14x14in h. 0,75in<br />
angolare<br />
corner step<br />
Stufenecke<br />
angle<br />
9x33 sp.1,4<br />
3,5x13in h. 0,55in<br />
battiscopa<br />
skirting<br />
Sockel<br />
plinthe<br />
9x45 sp.1,5<br />
3,5x18in h. 0,6in<br />
battiscopa gradini<br />
skirting step<br />
Stufensockel<br />
plinthe marche<br />
7x30 sp.2,0<br />
2,8x12in<br />
listello<br />
h. 0,79in<br />
25
gently brushed and honed<br />
sanft angeschliffener cotto<br />
surface sannini<br />
Extruded terra cotta obtained through a new procedure studied<br />
to create a soft, velvety finish. With Superficie <strong>Sannini</strong> a refined<br />
alternative to the brushed terracotta, reinterpreting a solid tradition<br />
in an original way, is offered. Achieved prior to firing with special<br />
abrasive grindstones. It is laid according to the traditional system or<br />
with adhesive. Advised width of joints minimum 3 mm. For indoor and<br />
outdoor use irrespective of environmental or climatic factors. To be<br />
treated after laying if used for interiors. Its use is particularly interesting<br />
and suggestive in today’s architecture.<br />
Available also in Super System version.<br />
Superficie <strong>Sannini</strong> heißt die Alternative zum traditionsreichen,<br />
gebürsteten Cotto. Um die besonders sanfte Oberfläche zu erhalten<br />
wird der stranggezogene Cotto vor dem Brennen mit speziellen<br />
Scheiben geglättet. Die so erzielte Oberfläche findet in der modernen<br />
Architektur sowohl im Objekt wie auch im Privaten immer mehr Freunde.<br />
Superficie <strong>Sannini</strong> wird bei einer Fugenbreite von drei Millimetern<br />
klassisch verarbeitet. Das Material kann mit Nachbehandlung Innen und<br />
ohne Nachbehandlung Außen eingesetzt werden.<br />
Ist auch als Super System erhöltlich.<br />
Matériau extrudé obtenu par un nouveau procédé étudié pour réaliser<br />
une finition soft à l’aspect velouté. Avec ses surfaces, <strong>Sannini</strong> offre<br />
une proposition raffinée d’élaboration du cotto poncé, originale tout<br />
en s’intégrant dans une tradition solide. Obtenu avant cuisson par<br />
des meules abrasives spéciales. Posé par système traditionnel ou<br />
par collants. Joint minimum conseillé 3 mm. Destination intérieurs<br />
et extérieurs, sans exclusion pour causes environnementales ou<br />
climatiques. A traiter dans les intérieurs après la pose. Son utilisation<br />
est particulièrement intéressante et suggestive dans les architectures<br />
modernes.<br />
Disponible en version Super System.<br />
superficie sannini<br />
Cotto estruso ottenuto per lavorazione<br />
con un nuovo procedimento studiato per<br />
realizzare una finitura soft dall’aspetto<br />
vellutato. Con Superficie <strong>Sannini</strong> l’azienda<br />
offre una alternativa raffinata al cotto arrotato<br />
reinterpretando in modo originale una<br />
tradizione consolidata. Ottenuto prima della<br />
cottura con speciali mole abrasive.<br />
Si posa secondo il sistema tradizionale o<br />
a collante. Fuga consigliata minimo mm<br />
3. Destinazione interni ed esterni senza<br />
esclusioni per fattori ambientali o climatici.<br />
Da trattare negli interni dopo la posa. Il<br />
suo utilizzo è particolarmente interessante e<br />
suggestivo nell’architettura di oggi.<br />
Disponibile anche nella versione Super System.<br />
29
Superficie <strong>Sannini</strong><br />
TECHNICAL CHARACTERISTICS<br />
Technical data<br />
technical<br />
characteristics norms EN-norm values <strong>Sannini</strong> values<br />
length<br />
thickness<br />
straightness<br />
of sides<br />
rectangularity<br />
surface flatness<br />
centre curvature<br />
surface flatness<br />
edge curvature<br />
surface flatness<br />
warpage<br />
surface quality<br />
water<br />
absorption<br />
modulus<br />
of ropture<br />
scratch hardness<br />
of surface<br />
(Mohs)<br />
abrasion<br />
resistance<br />
linear thermal<br />
expansion<br />
thermal shock<br />
resistance<br />
res. to household<br />
chemical swimming<br />
pool water cleansers<br />
resistance to acid<br />
and alkalis<br />
frost<br />
resistance<br />
sliding<br />
resistance<br />
static coefficient<br />
of friction<br />
UNI EN 98 ± 1,5% max.<br />
corresponding<br />
UNI EN 98<br />
UNI EN 98<br />
UNI EN 98<br />
UNI EN 98<br />
UNI EN 98<br />
UNI EN 98<br />
UNI EN 98<br />
UNI EN 99<br />
UNI EN 100<br />
UNI EN 101<br />
UNI EN 102<br />
UNI EN 103<br />
UNI EN 104<br />
ISO 10545<br />
ISO 10545<br />
UNI EN 202<br />
DM 236/89<br />
DIN 51130<br />
ASTM/C 1028<br />
± 10% max.<br />
± 10% max.<br />
± 1,5% max.<br />
± 1% max.<br />
± 1% max.<br />
± 1,5% max.<br />
percentage of acceptable<br />
tiles in the lot free<br />
visible defects 95 min.<br />
average value 310N/mm 2 > 20 N/mm 2<br />
unglazed tiles 5 min.<br />
removed volume in mm 3 771max.<br />
coefficient linear thermal<br />
expansion from ambient<br />
temparature 0,40<br />
test on inclined plan<br />
on dry surface<br />
on wet surface<br />
corresponding<br />
corresponding<br />
corresponding<br />
corresponding<br />
corresponding<br />
corresponding<br />
corresponding<br />
5,6<br />
5<br />
218,1 mm 3<br />
4,39(x10 -6<br />
°C -1 )<br />
resistant<br />
resistant<br />
resistant<br />
resistant<br />
µ = 0,70<br />
R 13<br />
0,87<br />
0,85<br />
FORMATI<br />
30x30 sp.1,4<br />
12x12in h. 0,55in<br />
15x30 sp.1,4<br />
6x12in h. 0,55in<br />
7x28 sp.2,5<br />
2,8x11in h. 1in<br />
regolo<br />
paver<br />
Pflaster<br />
pavés<br />
I regoli sono disponibili anche nella versione “litos” ed “externa”.<br />
A richiesta per forniture speciali sono disponibili con finitura sannini<br />
i formati per i pavimenti della serie cotto arrotato.<br />
Alcuni elementi del superficie sannini sono disponibili nella versione<br />
Super, vedi “super system”.<br />
See also “litos” and “externa”.<br />
At request other floor tiles with superficie sannini finish available.<br />
See also “super system”<br />
Siehe auch “Litos” und “Externa”.<br />
Auf Anfrage andere Bodenplatten mit Superficie <strong>Sannini</strong> Oberfläche erhältlich.<br />
Siehe auch “Super System”.<br />
Voir également “litos” et “externa”<br />
Pour les cas spéciaux possibilité de commander en finition <strong>Sannini</strong><br />
les formats pour carrelages de la série cotto poncé.<br />
Voir ”super system”.<br />
30x36 sp.1,4<br />
12x14in h. 0,55in<br />
gradino<br />
step<br />
Stufe<br />
marche<br />
36x36 sp.1,9<br />
14x14in h. 0,75in<br />
angolare<br />
corner step<br />
Stufenecke<br />
angle<br />
9x33 sp.1,4<br />
3,5x13in h. 0,55in<br />
battiscopa<br />
skirting<br />
Sockel<br />
plinthe<br />
9x45 sp.1,4<br />
3,5x18in h. 0,55in<br />
battiscopa gradini<br />
skirting step<br />
Stufensockel<br />
plinthe marche<br />
33
honed cotto<br />
mattgeschliffener cotto<br />
cotto poli<br />
Extruded terracotta tiles with smooth opaque surface obtained after<br />
firing with the traditional method of honing. In the history of terracotta<br />
floors, honed tiles with their distinguishable matt finish call to mind<br />
the palaces of Renaissance Florence. They are laid according to the<br />
traditional system or with adhesive. Advised width of joints minimum 3<br />
mm. The product’s slight irregularity in width and surface finish betrays<br />
the artisan method of working <strong>by</strong> hand. Preferred use in interiors,<br />
particularly for important restorations. To be treated after laying.<br />
“Cotto Levigato” ist die Bezeichnung für stranggezogenen Cotto,<br />
der nach dem Brennen traditionell geschliffen wird. So entsteht eine<br />
matte, lichte Oberfläche, die an die großen Palazzi der Florentiner<br />
Renaissance erinnert. Leichte Abweichungen in Oberfläche und<br />
Stärke gehen auf die handwerkliche Herstellung zurück und geben<br />
dem mattgeschliffenen Cotto seinen besonderen Charme. Bevorzugter<br />
Einsatzort von “Cotto Levigato” sind hochwertige Sanierungen und<br />
elegante Privatambiente. Die Verlegung erfolgt nach traditioneller<br />
Methode bei einer empfohlenen Fugenbreite von mindestens drei<br />
Millimetern. “Cotto Levigato” sollte in erster Linie Innen verlegt werden,<br />
und nach der Verarbeitung empfiehlt sich eine Endbehandlung.<br />
Cotto extrudé avec surface lisse opaque obtenue après cuisson par<br />
la méthode traditionnelle du polissage. Dans l’histoire du carrelage<br />
en cotto, le “poli”, avec sa finition mat reconnaissable entre toutes,<br />
rappelle l’image des demeures patriciennes de la Florence renaissance.<br />
Posé par système traditionnel ou par collants. Joint minimum conseillé<br />
3 mm. Le travail artisanal se caractérise par de légères différences<br />
d’épaisseur et transmet au produit la substance de sa genèse.<br />
Destination prioritaire les intérieurs, en particulier les grandes<br />
interventions de restauration. A traiter après la pose.<br />
cotto levigato<br />
Cotto estruso con superficie liscia opaca<br />
ottenuta dopo la cottura con il tradizionale<br />
metodo della levigatura.<br />
Nella storia delle pavimentazioni in cotto il<br />
“levigato”, con la sua riconoscibile finitura<br />
matt, ricorda l’immagine dei palazzi signorili<br />
della Firenze rinascimentale. Si posa secondo<br />
il sistema tradizionale o a collante. Fuga<br />
consigliata minimo mm 3. La lavorazione<br />
artigianale è caratterizzata da leggere<br />
differenze di spessore che conferiscono<br />
al prodotto la sostanza della sua genesi.<br />
Destinazione preferenziale per interni,<br />
in particolare per importanti interventi di<br />
restauro.<br />
Da trattare dopo la posa.<br />
37
Cotto levigato<br />
TECHNICAL CHARACTERISTICS<br />
Technical data<br />
technical<br />
characteristics norms EN-norm values <strong>Sannini</strong> values<br />
length<br />
thickness<br />
straightness<br />
of sides<br />
rectangularity<br />
surface flatness<br />
centre curvature<br />
surface flatness<br />
edge curvature<br />
surface flatness<br />
warpage<br />
surface quality<br />
water<br />
absorption<br />
modulus<br />
of ropture<br />
scratch hardness<br />
of surface<br />
(Mohs)<br />
abrasion<br />
resistance<br />
linear thermal<br />
expansion<br />
thermal shock<br />
resistance<br />
res. to household<br />
chemical swimming<br />
pool water cleansers<br />
resistance to acid<br />
and alkalis<br />
frost<br />
resistance<br />
sliding<br />
resistance<br />
UNI EN 98 ± 1,5% max.<br />
corresponding<br />
UNI EN 98<br />
UNI EN 98<br />
UNI EN 98<br />
UNI EN 98<br />
UNI EN 98<br />
UNI EN 98<br />
UNI EN 98<br />
UNI EN 99<br />
UNI EN 100<br />
UNI EN 101<br />
UNI EN 102<br />
UNI EN 103<br />
UNI EN 104<br />
ISO 10545<br />
ISO 10545<br />
UNI EN 202<br />
ASTM/C 1026<br />
DM 236/89<br />
± 10% max.<br />
± 10% max.<br />
± 1,5% max.<br />
± 1% max.<br />
± 1% max.<br />
± 1,5% max.<br />
percentage of acceptable<br />
tiles in the lot free<br />
visible defects 95 min.<br />
average value 310N/mm 2 > 25,2 N/mm 2<br />
unglazed tiles 5 min.<br />
removed volume in mm 3 771max.<br />
coefficient linear thermal<br />
expansion from ambient<br />
temparature 0,40 µ = 0,64<br />
FORMATI<br />
30x30 sp. 1,2<br />
12x12in h. 0,48in<br />
25x25 sp. 1,2<br />
10x10in h. 0,48in<br />
18x36 sp. 1,2<br />
7x14in h. 0,48in<br />
14x28 sp. 1,2<br />
5,5x11in h. 0,48in<br />
25x36 sp. 1,2<br />
10x14in h. 0,48in<br />
gradino<br />
step<br />
Stufe<br />
marche<br />
30x36 sp. 1,2<br />
12x14in h. 0,48in<br />
gradino<br />
step<br />
Stufe<br />
marche<br />
36x36 sp. 1,7<br />
14x14in h. 0,67in<br />
angolare<br />
corner step<br />
Stufenecke<br />
angle<br />
9x33 sp. 1,2<br />
3,5x13in h. 0,48in<br />
battiscopa<br />
skirting<br />
Sockel<br />
plinthe<br />
41
natural extruded<br />
natur stranggezogen<br />
extrudé naturel<br />
Extruded clay which is then simply fired without altering the surface.<br />
Subtly streaked finish obtained <strong>by</strong> the natural coloration of salts brought<br />
to the surface prior to firing, in the delicate phase of drying. The<br />
material with its natural skin maintains a light tonality, the result of a<br />
method of working which gives the product an essential and totally pure<br />
aspect. The unusual surface has a poor yet sought-after aspect which is<br />
what makes it so exclusive. It is laid according to the traditional system<br />
or with adhesive. Advised width of joints minimum 3 mm. For indoor<br />
and outdoor use irrespective of environmental factors, which in fact<br />
enhance the characteristics of the product over time. To be treated after<br />
laying if used for interiors. Available also in “Flash” version.<br />
“Litos” sind die Produkte aus reiner Tonerde, die stranggezogen ist,<br />
einfach gebrannt und nicht oberflächenbearbeitet.<br />
In der Trocknungsphase vor dem Brennen kommen Salze an die<br />
Fliesenoberfläche, tönen sie hell und sorgen für ein bewegtes Farbspiel.<br />
Es entsteht eine feine Patinierung, die sogenannte “extruder memory”.<br />
Dieses so geschaffene essentielle und exklusive Ambiente wird durch die<br />
mit der Zeit auftretende Patina noch interessanter. Auch “Litos” eignet<br />
sich ohne Einschränkung für Innen- und Außenbereiche und sollte bei<br />
fünf Millimetern Fugenbreite traditionell verlegt werden.<br />
Innen ist eine fachgemäße Endbehandlung empfohlen.<br />
Diesen puristischen Cotto gibt es auch als “Flash”.<br />
Terre extrudée et simplement cuite sans interventions ou traitements<br />
superficiels. Finition striée obtenue par la coloration naturelle des<br />
sels affleurés en surface avant cuisson pendant la phase délicate du<br />
séchage. Le matériau brut maintient une légère tonalité claire, résultat<br />
d’un travail qui donne au produit un aspect essentiel et totalement<br />
pur. La surface particulière, rendue vibratile par une fine patine,<br />
manifeste sa propre identité par un aspect pauvre mais recherché.<br />
Posé par système traditionnel ou par collants. Joint minimum conseillé<br />
3 mm. Destination intérieurs et extérieurs, sans exclusion pour causes<br />
environnementales ou climatiques qui, au contraire, exaltent dans le<br />
temps les caractéristiques du produit. A traiter dans les intérieurs après la<br />
pose. Disponible également en version “Flash”.<br />
litos<br />
Terra estrusa e semplicemente cotta senza<br />
interventi o trattamenti superficiali.<br />
Finitura striata ottenuta attraverso la naturale<br />
colorazione dei sali portati in superficie<br />
prima della cottura nella delicata fase della<br />
essiccazione. Il materiale lasciato intonso<br />
mantiene una leggera tonalità chiara, risultato<br />
di una lavorazione che dona al prodotto<br />
un’immagine essenziale e totalmente pura.<br />
La particolare superficie, resa vibratile da<br />
una sottile patinatura, manifesta la propria<br />
esclusività attraverso un aspetto povero<br />
ma ricercato. Si posa secondo il sistema<br />
tradizionale o a collante. Fuga consigliata<br />
minimo mm 3. Destinazione interni ed esterni<br />
senza esclusioni per fattori ambientali che<br />
viceversa esaltano, nel tempo le caratteristiche<br />
del prodotto. Da trattare negli interni dopo<br />
la posa. Disponibile anche nella versione<br />
“Flash”.<br />
43
Litos<br />
TECHNICAL CHARACTERISTICS<br />
Technical data<br />
technical<br />
characteristics norms EN-norm values <strong>Sannini</strong> values<br />
length<br />
thickness<br />
straightness<br />
of sides<br />
rectangularity<br />
surface flatness<br />
centre curvature<br />
surface flatness<br />
edge curvature<br />
surface flatness<br />
warpage<br />
surface quality<br />
water<br />
absorption<br />
modulus<br />
of ropture<br />
scratch hardness<br />
of surface<br />
(Mohs)<br />
abrasion<br />
resistance<br />
resistance<br />
to light<br />
thermal shock<br />
resistance<br />
res. to household<br />
chemical swimming<br />
pool water cleansers<br />
resistance to acid<br />
and alkalis<br />
frost<br />
resistance<br />
sliding<br />
resistance<br />
static coefficient<br />
of friction<br />
UNI EN 98 ± 1,5% max.<br />
corresponding<br />
UNI EN 98<br />
UNI EN 98<br />
UNI EN 98<br />
UNI EN 98<br />
UNI EN 98<br />
UNI EN 98<br />
UNI EN 98<br />
UNI EN 99<br />
ASTM/C 373<br />
UNI EN 100<br />
ASTM/C 648<br />
UNI EN 101<br />
UNI EN 102<br />
ASTM/C 501<br />
DIN 51094<br />
UNI EN 104<br />
ISO 10545<br />
ISO 10545<br />
UNI EN 202<br />
ASTM/C 1026<br />
DM 236/89<br />
DIN 51130<br />
ASTM/C 1028<br />
± 10% max.<br />
± 10% max.<br />
± 1,5% max.<br />
± 1% max.<br />
± 1% max.<br />
± 1,5% max.<br />
percentage of acceptable<br />
tiles in the lot free<br />
visible defects 95 min.<br />
average value 310N/mm2 > 13 N/mm2 662<br />
unglazed tiles 5 min.<br />
removed volume in mm 3 771max.<br />
free of visible defects<br />
free of visible defects<br />
free of visible defects<br />
unglazed tiles<br />
free of visible defects<br />
leather on dry surface µ > 0,40<br />
test on inclined plan<br />
on dry surface<br />
on wet surface<br />
corresponding<br />
corresponding<br />
corresponding<br />
corresponding<br />
corresponding<br />
corresponding<br />
corresponding<br />
5,6<br />
4,3<br />
5<br />
511 mm 3<br />
51<br />
resistant<br />
resistant<br />
resistant<br />
resistant<br />
resistant<br />
resistant<br />
µ = 0,82<br />
R10<br />
0,86<br />
0,78<br />
FORMATI<br />
La finitura litos è abbinabile a tutti i prodotti della serie “externa”.<br />
Alcuni elementi litos sono disponibili nella versione Flash.<br />
I regoli sono disponibili anche nella versione “superficie sannini”,<br />
nella versione “externa” e nella versione “graffiato”<br />
Litos finish can be combined with all “externa” products.<br />
See also “flash system”, “superficie sannini” and “graffiato”.<br />
30x30 sp. 1,6<br />
12x12in h. 0,62in<br />
14x28 sp. 1,6<br />
5,5x11in h. 0,62in<br />
25x36 sp. 1,6<br />
10x14in h. 0,62in<br />
gradino<br />
step<br />
Stufe<br />
marche<br />
30x36 sp. 1,6<br />
12x14in h. 0,62in<br />
gradino<br />
step<br />
Stufe<br />
marche<br />
Litos Oberfläche kann mit allen “Externa” Produkten kombiniert werden.<br />
Siehe auch “Flash System”, “superficie sannini” und “graffiato”.<br />
La finition litos est combinable avec tous les produits de la série ”externa”.<br />
Voir également “Flash system”, ”surface <strong>Sannini</strong>” et “graffiato”.<br />
36x36 sp. 2,5<br />
14x14in h. 1in<br />
angolare<br />
corner step<br />
Stufenecke<br />
angle<br />
9x33 sp. 1,3/1,6<br />
3,5x13in h. 0,5/0,62in<br />
battiscopa<br />
skirting<br />
Sockel<br />
plinthe<br />
7x30 sp. 3<br />
2,8x12in h. 1,2in<br />
regolo<br />
paver<br />
Pflaster<br />
paves<br />
7x30 sp. 2,2<br />
2,8x12in h. 0,87in<br />
regolo<br />
paver<br />
Pflaster<br />
paves<br />
4,5x27 sp. 4<br />
1,8x10,5in h. 1,6in<br />
regolino<br />
paver<br />
Pflaster<br />
paves<br />
47
polished cotto<br />
halbglänzend geschliffen<br />
tecno<br />
Fine-grained extruded terracotta, semi-glossy with perfectly smoothed<br />
surface. Chamfered material with sides and thickness rectified and<br />
gauged. With its perfectly regular dimensions it proves particularly apt<br />
for lining large surfaces that require quick and easy laying<br />
as well as mechanical resistance. Though suitable for mounting<br />
according to the traditional system, Tecno should ideally be laid using<br />
an adhesive. Advised width of joints 1 mm so as to enhance the regular<br />
features of the single elements. Tecno, created <strong>by</strong> <strong>Sannini</strong>, displays fine<br />
colour effects of clay components, obtained <strong>by</strong> a constant granulometric<br />
distribution of clay. Advised for use in interiors of residential,<br />
commercial and public buildings and in the cladding of façades.<br />
To be treated after laying.<br />
Tecno ist das optimale Produkt für die Verlegung von Großflächen,<br />
die belastbar und stabil sein müssen.<br />
Es handelt sich dabei um stranggezogenen, feinkörnigen,<br />
halbglänzenden Cotto mit ganz fein geschliffener Oberfläche. Die<br />
einzelnen Fliesen sind seiten- und stärkenkalibriert und gefast. Tecno<br />
besticht durch gleichmäßige Körnung und Maßhaltigkeit. Das Material<br />
eignet sich vor allem für Gebäude mit Geschäfts- und Publikumsverkehr,<br />
aber auch zur Fassadenverkleidung. Verarbeitet wird Tecno mit einer<br />
Fugenbreite von 1 mm. Nach der Verlegung müssen die Böden<br />
behandelt werden.<br />
Cotto extrudé grain fin, semi-brillant avec surfaces parfaitement polie.<br />
Matériel biseauté avec côtés et épaisseurs rectifiés et calibrés.<br />
Avec ses constantes d’exactitude et d’homogénéité des dimensions,<br />
il se démontre particulièrement adapté au revêtement de grandes<br />
surfaces où l’on recherche la facilité de pose et la résistance<br />
mécanique. Tout en acceptant le montage selon le système traditionnel,<br />
le cotto Tecno est indiqué pour le montage par collant.<br />
Joint conseillé 1 mm de façon à exalter les caractéristiques de régularité<br />
des éléments dans les différents formats.<br />
Le Tecno <strong>Sannini</strong> offre un jeu chromatique splendide grâce à la<br />
distribution granulométrique des composants. Destination conseillée<br />
pour intérieurs résidentiels, commerciaux et publics, ou le revêtement<br />
des façades. A traiter après la pose.<br />
tecno<br />
Cotto estruso a grana fine, semilucido<br />
con superficie perfettamente levigata.<br />
Materiale bisellato con lati e spessore<br />
rettificati e calibrati. Con le sue perfette<br />
e costanti specifiche dimensionali risulta<br />
particolarmente adatto per il rivestimento di<br />
grandi superfici dove è richiesta facilità di<br />
posa e resistenza meccanica. Adatto per<br />
essere montato secondo il sistema tradizionale<br />
il cotto Tecno è indicato per montaggio a<br />
collante. Fuga consigliata mm 1 in modo<br />
da esaltare le caratteristiche di regolarità<br />
dei singoli elementi nei diversi formati. Il<br />
Tecno realizzato da <strong>Sannini</strong> presenta un<br />
bellissimo gioco cromatico ottenuto da una<br />
costante distribuzione granulometrica dei<br />
componenti. Destinazione consigliata per<br />
interni residenziali, commerciali e pubblici e<br />
nel rivestimento delle facciate.<br />
Da trattare dopo la posa.<br />
51
Tecno<br />
TECHNICAL CHARACTERISTICS<br />
Technical data<br />
technical<br />
characteristics norms EN-norm values <strong>Sannini</strong> values<br />
length<br />
thickness<br />
straightness<br />
of sides<br />
rectangularity<br />
surface flatness<br />
centre curvature<br />
surface flatness<br />
edge curvature<br />
surface flatness<br />
warpage<br />
surface quality<br />
water<br />
absorption<br />
modulus<br />
of ropture<br />
scratch hardness<br />
of surface<br />
(Mohs)<br />
abrasion<br />
resistance<br />
linear thermal<br />
expansion<br />
thermal shock<br />
resistance<br />
res. to household<br />
chemical swimming<br />
pool water cleansers<br />
resistance to acid<br />
and alkalis<br />
frost<br />
resistance<br />
sliding<br />
resistance<br />
UNI EN 98 ± 1,5% max.<br />
corresponding<br />
UNI EN 98<br />
UNI EN 98<br />
UNI EN 98<br />
UNI EN 98<br />
UNI EN 98<br />
UNI EN 98<br />
UNI EN 98<br />
UNI EN 99<br />
UNI EN 100<br />
UNI EN 101<br />
UNI EN 102<br />
UNI EN 103<br />
UNI EN 104<br />
ISO 10545<br />
ISO 10545<br />
UNI EN 202<br />
ASTM/C 1026<br />
DM 236/89<br />
± 10% max.<br />
± 10% max.<br />
± 1,5% max.<br />
± 1% max.<br />
± 1% max.<br />
± 1,5% max.<br />
percentage of acceptable<br />
tiles in the lot free<br />
visible defects 95 min.<br />
average value 310N/mm 2 > 25,2 N/mm 2<br />
unglazed tiles 5 min.<br />
removed volume in mm 3 771max.<br />
coefficient linear thermal<br />
expansion from ambient<br />
temparature 0,40 µ = 0,64<br />
FORMATI<br />
38x38 sp. 1,4<br />
15x15in h. 0,55in<br />
28x28 sp. 1,1<br />
11x11in h. 0,43in<br />
14x28 sp. 1,1<br />
5,5x11in h. 0,43in<br />
28x34 sp. 1,2<br />
11x13,5in h. 0,48in<br />
gradino<br />
step<br />
Stufe<br />
marche<br />
34x34 sp. 1,7<br />
13,5x13,5in h. 0,67in<br />
angolare<br />
corner step<br />
Stufenecke<br />
angle<br />
9x28 sp. 1<br />
3,5x11in h. 0,4in<br />
battiscopa<br />
skirting<br />
Sockel<br />
plinthe<br />
55
stranggezogen mit handgermachter Optik<br />
extruded rustic handmade texture<br />
extrudé avec aspect “fait à la main”<br />
Fornace <strong>Sannini</strong> renews the tradition of cotto combining the tactile<br />
pleasure of a hand made product with the strength and absorption<br />
properties of the best industrial products.<br />
Manufactured employing state-of-the-art extrusion technology, each<br />
single piece has, similar to handmade tiles, its own distinct identity. The<br />
special light colour is given <strong>by</strong> a composition of our best clay, the Terra<br />
d’Impruneta.Suitable for both rustic and classic settings, Fornace <strong>Sannini</strong><br />
is the ideal material for restoration and refurbishment or for new high<br />
quality architectural projects. Fornace <strong>Sannini</strong> can be used for interiors<br />
and exterios indistinctively.To be laid accordingly to the traditional<br />
system with minimum joints of 5 mm.<br />
Available also in Super version.<br />
Fornace <strong>Sannini</strong> verbindet den Charme eines handgefertigten Produktes<br />
mit den höchsten technischen Ansprüchen eines Industrieproduktes und<br />
lässt so die Tradition des Cottos wiederaufleben.<br />
Obwohl im stranggezogenen Herstellungsverfahren gefertigt wird,<br />
zeichnet sich jede einzelne Fliese, wie bei der handwerklichen<br />
Verarbeitung, durch ihre unverkennbare und einzigartige Oberfläche<br />
aus.Der besondere, helle Farbton ist einer Mischung unserer besten<br />
Tonerde, der Terra d‘Impruneta, zu verdanken.<br />
Fornace <strong>Sannini</strong> ist sowohl für rustikale als auch klassische Ambiente<br />
geeignet und findeti in hochwertigen Sanierungen wie auch in der<br />
modernen Architektur Anwendung. Fugenbreite min. 5 mm. Fornace<br />
<strong>Sannini</strong> eignet sich gleichermaßen für Innen- und Außenbereiche.<br />
Ist auch in Super erhöltlich.<br />
Fornace <strong>Sannini</strong> renouvelle la tradition du Cotto en unissant la<br />
fascination tactile du produit fait main aux caractéristiques de résistance<br />
et d’absorption des meilleurs produits industriels.<br />
Réalisé au moyen de technologies avancées d’extrusion, chaque<br />
élément maintient, comme dans tout travail artisanal, une identité<br />
incomparable. La teinte claire particulière est obtenue grâce à une<br />
composition du meilleur de notre terre d’Impruneta.<br />
Adapté aux ambiances rustiques et classiques, Fornace <strong>Sannini</strong> est<br />
le revêtement idéal pour la restauration ou pour les nouvelles<br />
architectures de haute qualité.Il peut être utilisé en intérieurs<br />
et en extérieurs ou pour réaliser de splendides dessous de toits.<br />
Pose traditionnelle avec jointoiement minimum de 5 mm.<br />
Disponible en version Super.<br />
fornace sannini<br />
Fornace <strong>Sannini</strong> rinnova la tradizione del<br />
cotto unendo il fascino tattile del prodotto<br />
fatto a mano, con le caratteristiche di<br />
resistenza ed assorbimento dei migliori<br />
prodotti industriali. Realizzato con avanzate<br />
tecnologie di estrusione, ogni singolo<br />
elemento mantiene, come nelle lavorazioni<br />
artigianali, una propria inconfondibile<br />
identità. Il particolare colore chiaro è ottenuto<br />
attraverso una composizione della nostra<br />
migliore Terra d’Impruneta. Adatto sia per<br />
ambienti rustici che classici, Fornace <strong>Sannini</strong><br />
è il rivestimento ideale per il restauro o per<br />
nuove architetture di elevate qualità.<br />
Può essere impiegato sia in interni<br />
che in esterni o per realizzare splendidi<br />
sottotetti. Si posa con il sistema tradizionale<br />
con fughe di almeno 5mm. È disponibile sia<br />
al naturale che Super già pronto e trattato.<br />
Disponibile anche nella versione Super.<br />
57
Fornace <strong>Sannini</strong><br />
TECHNICAL CHARACTERISTICS<br />
Technical data<br />
technical<br />
characteristics norms EN-norm values <strong>Sannini</strong> values<br />
length<br />
thickness<br />
straightness<br />
of sides<br />
rectangularity<br />
surface flatness<br />
centre curvature<br />
surface flatness<br />
edge curvature<br />
surface flatness<br />
warpage<br />
surface quality<br />
water<br />
absorption<br />
modulus<br />
of ropture<br />
scratch hardness<br />
of surface<br />
(Mohs)<br />
abrasion<br />
resistance<br />
resistance<br />
to light<br />
thermal shock<br />
resistance<br />
res. to household<br />
chemical swimming<br />
pool water cleansers<br />
resistance to acid<br />
and alkalis<br />
frost<br />
resistance<br />
sliding<br />
resistance<br />
static coefficient<br />
of friction<br />
UNI EN 98 ± 1,5% max.<br />
corresponding<br />
UNI EN 98<br />
UNI EN 98<br />
UNI EN 98<br />
UNI EN 98<br />
UNI EN 98<br />
UNI EN 98<br />
UNI EN 98<br />
UNI EN 99<br />
ASTM/C 373<br />
UNI EN 100<br />
ASTM/C 648<br />
UNI EN 101<br />
UNI EN 102<br />
ASTM/C 501<br />
DIN 51094<br />
UNI EN 104<br />
ISO 10545<br />
ISO 10545<br />
ISO 10545<br />
DM 236/89<br />
DIN 51130<br />
ASTM/C 1028<br />
± 10% max.<br />
± 10% max.<br />
± 1,5% max.<br />
± 1% max.<br />
± 1% max.<br />
± 1,5% max.<br />
percentage of acceptable<br />
tiles in the lot free<br />
visible defects 95 min.<br />
average value 310N/mm2 > 13 N/mm2 662<br />
unglazed tiles 5 min.<br />
removed volume in mm 3 771max.<br />
free of visible defects<br />
free of visible defects<br />
free of visible defects<br />
unglazed tiles<br />
free of visible defects<br />
leather on dry surface µ > 0,40<br />
test on inclined plan<br />
on dry surface<br />
on wet surface<br />
corresponding<br />
corresponding<br />
corresponding<br />
corresponding<br />
corresponding<br />
corresponding<br />
corresponding<br />
5,6<br />
4,3<br />
5<br />
511 mm 3<br />
51<br />
resistant<br />
resistant<br />
resistant<br />
resistant<br />
resistant<br />
resistant<br />
µ = 0,82<br />
R10<br />
0,86<br />
0,78<br />
FORMATI<br />
30x30 sp. 1,6<br />
12x12in h. 0,62in<br />
15x30 sp. 1,6<br />
6x12in h. 0,62in<br />
Gli elementi Fornace <strong>Sannini</strong> sono disponibili anche nella versione<br />
“Flash System”.<br />
For factory-finished version see “Flash System”<br />
Endbehandelte Fornace: siehe auch “Flash System”.<br />
Pour Fornace “pret à l’emploi” voir également “Flash System”.<br />
30x36 sp. 1,6<br />
12x14in h. 0,62in<br />
gradino<br />
step<br />
Stufe<br />
marche<br />
9x33 sp. 1,6<br />
3,5x13in h. 0,62in<br />
battiscopa<br />
skirting<br />
Sockel<br />
plinthe<br />
7x30 sp. 5<br />
2,8x12in h. 2in<br />
regolo<br />
paver<br />
Pflaster<br />
paves<br />
7x30 sp. 2,2<br />
2,8x12in h. 0,87in<br />
regolo<br />
paver<br />
Pflaster<br />
paves<br />
61
eady-to-use cotto<br />
cotto endbehandelt<br />
cotto prêt à l’emploi<br />
Flashsystem is an exclusive method of treatment carried out in the<br />
factory <strong>by</strong> <strong>Sannini</strong>. It entails a complete cycle of working, using avantgarde<br />
techniques and products studied to preserve the terracotta’s<br />
natural qualities as a sign of respect to the environment and its<br />
ecosystem. All materials used for the treatment of Flash are non-toxic,<br />
and being water-based, do not contain solvents.<br />
Essential feature of Flashsystem is its in-depth protection which<br />
guarantees resistance to stains, damp rings and efflorescences, although<br />
the original transpiring nature of the material is maintained. As a<br />
consequence, the cladding with these ready-to-use products presents<br />
itself with the colour and aspect of terracotta treated traditionally on site<br />
with acids and waxing. Such operations become superfluous<br />
since Flash products do not alter when laid if the mounting instructions<br />
are followed correctly. With Cottoflash System, the floors take on a<br />
traditional aspect and tonality, attaining warm and transparent hues<br />
which only an expert hand would manage to achieve. It is evidently<br />
economical and also a time-saver in that it is easy to use and there are<br />
no risks linked to an incorrect post-mounting treatment.<br />
“Cottoflash-System” heißt die exklusive Endbehandlungsmethode, die<br />
<strong>Sannini</strong> bereits im Werk ausführt. Wesentlich ist der dabei entstehende<br />
Tiefenschutz: Er sorgt für Fleckenunempfindlichkeit, vermeidet<br />
Feuchtigkeitsflecken und aufsteigende Ausblühungen und behält<br />
gleichzeitig die ursprüngliche Transpirationsfähigkeit des Cottos. Zudem<br />
basieren alle Materialien, die zur Herstellung von Flash verwendet<br />
werden, auf Wasser und hinterlassen keine toxischen Rückstände. So<br />
bleibt der traditionell ökologische Wert der Tonerde aus Impruneta<br />
erhalten. Bei DIN-gerechter Verlegung und Beachtung der <strong>Sannini</strong>-<br />
Hinweise wird der Aufwand für die Verlegung und Endreinigung<br />
auf ein Minimum beschränkt, wobei die Einsparung von Zeit und<br />
Geld wesentlich ist. Wegen der gewachsten Oberfläche ist Flash für<br />
Außenbereiche nicht geeignet. Mit “Cottoflash-System” erreichen die<br />
Cottoböden wunderschöne warme und transparente Farben.<br />
Flashsystem est la méthode exclusive de traitement réalisée en usine<br />
par <strong>Sannini</strong>, grâce à un cycle complet utilisant des techniques et des<br />
produits d’avant-garde étudiés pour maintenir le naturel absolu du cotto<br />
en respectant l’environnement et son écosystème.<br />
Tous les matériaux utilisés pour rendre Flash les produits <strong>Sannini</strong><br />
sont atoxiques sans solvants (les produits sont à base d’eau).<br />
Une caractéristique fondamentale du Flashsystem consiste en une<br />
protection en profondeur qui garantit une insensibilité aux taches et<br />
évite les halos d’humidité et les efflorescences, tout en préservant la<br />
transpiration originale du matériau. Par conséquent, les revêtements<br />
avec ces produits prêts à l’emploi se présentent à l’achat avec l’aspect<br />
et la couleur du cotto traité en traditionnel par lavage et cirage sur<br />
place, qui deviennent superflus car les produits flash ne s’altèrent pas<br />
lors de la pose si les opérations sont effectuées correctement. Avec<br />
CottoFlash System, les carrelages se présentent sous l’aspect et la<br />
tonalité habituels, et atteignent les valeurs chromatiques chaudes et<br />
transparentes que seuls les experts réussissent à obtenir. L’économie<br />
réalisée en termes financiers et de temps, liée à la facilité d’utilisation<br />
et l’élimination des risques liés à une exécution incorrecte artisanale du<br />
traitement post pose est évidente.<br />
flash system<br />
Flashsystem è l’esclusivo metodo di trattamento<br />
realizzato in fabbrica da <strong>Sannini</strong>, attraverso<br />
un ciclo completo di lavorazione realizzata<br />
con tecniche e prodotti d’avanguardia studiati<br />
per mantenere l’assoluta naturalezza della<br />
terra cotta nel rispetto dell’ambiente e del suo<br />
ecosistema.<br />
Tutti i materiali impiegati per rendere<br />
Flash i prodotti <strong>Sannini</strong> sono atossici e<br />
privi di solventi essendo a base d’acqua.<br />
Caratteristica fondamentale del Flashsystem<br />
consiste in una protezione in profondità che<br />
garantisce insensibilità alle macchie evitando<br />
aloni di umidità e efflorescenze di risalita, pur<br />
mantenendo la traspirazione originaria del<br />
materiale. Conseguentemente i rivestimenti<br />
con questi prodotti già pronti all’uso, si<br />
presentano all’acquisto con l’aspetto ed il<br />
colore del cotto trattato tradizionalmente con i<br />
lavaggi e la ceratura sul posto, che divengono<br />
superflui poiché i prodotti flash non si alterano<br />
nella posa se si seguono correttamente le<br />
istruzioni di montaggio.<br />
Con CottoFlash System i pavimenti si<br />
presentano con l’aspetto e la tonalità consuete<br />
raggiungendo valori cromatici caldi e<br />
trasparenti che soltanto esperti operatori<br />
riuscirebbero ad ottenere. Risulta evidente il<br />
risparmio economico e di tempo connesso<br />
alla facilità di utilizzo e l’eliminazione dei<br />
rischi legati ad una non corretta esecuzione<br />
artigianale del trattamento post posa.<br />
63
CottoFlash Arrotato<br />
TECHNICAL CHARACTERISTICS<br />
Technical data<br />
technical<br />
characteristics norms EN-norm values <strong>Sannini</strong> values<br />
length<br />
thickness<br />
straightness<br />
of sides<br />
rectangularity<br />
surface flatness<br />
centre curvature<br />
surface flatness<br />
edge curvature<br />
surface flatness<br />
warpage<br />
surface quality<br />
water<br />
absorption<br />
modulus<br />
of ropture<br />
scratch hardness<br />
of surface<br />
(Mohs)<br />
abrasion<br />
resistance<br />
linear thermal<br />
expansion<br />
res. to household<br />
chemical swimming<br />
pool water cleansers<br />
resistance to acid<br />
and alkalis<br />
frost<br />
resistance<br />
sliding<br />
resistance<br />
static coefficient<br />
of friction<br />
UNI EN 98 ± 1,5% max.<br />
corresponding<br />
UNI EN 98<br />
UNI EN 98<br />
UNI EN 98<br />
UNI EN 98<br />
UNI EN 98<br />
UNI EN 98<br />
UNI EN 98<br />
UNI EN 99<br />
B5 6431<br />
UNI EN 100<br />
UNI EN 101<br />
UNI EN 102<br />
UNI EN 103<br />
ISO 10545<br />
ISO 10545<br />
UNI EN 202<br />
DIN 51130<br />
ASTM/C 1028<br />
± 10% max.<br />
± 10% max.<br />
± 1,5% max.<br />
± 1% max.<br />
± 1% max.<br />
± 1,5% max.<br />
percentage of acceptable<br />
tiles in the lot free<br />
visible defects 95 min.<br />
average value 3 20 N/mm 2<br />
unglazed tiles 5 min.<br />
removed volume in mm 3 771max.<br />
coefficient linear thermal<br />
expansion from ambient<br />
temparature
CottoFlash Litos<br />
TECHNICAL CHARACTERISTICS<br />
Technical data<br />
technical<br />
characteristics norms EN-norm values <strong>Sannini</strong> values<br />
length<br />
thickness<br />
straightness<br />
of sides<br />
rectangularity<br />
surface flatness<br />
centre curvature<br />
surface flatness<br />
edge curvature<br />
surface flatness<br />
warpage<br />
surface quality<br />
water<br />
absorption<br />
modulus<br />
of ropture<br />
scratch hardness<br />
of surface<br />
(Mohs)<br />
abrasion<br />
resistance<br />
res. to household<br />
chemical swimming<br />
pool water cleansers<br />
resistance to acid<br />
and alkalis<br />
frost<br />
resistance<br />
sliding<br />
resistance<br />
static coefficient<br />
of friction<br />
UNI EN 98 ± 1,5% max.<br />
corresponding<br />
UNI EN 98<br />
UNI EN 98<br />
UNI EN 98<br />
UNI EN 98<br />
UNI EN 98<br />
UNI EN 98<br />
UNI EN 98<br />
UNI EN 99<br />
UNI EN 100<br />
UNI EN 101<br />
UNI EN 102<br />
ISO 10545<br />
ISO 10545<br />
UNI EN 202<br />
DIN 51130<br />
ASTM/C 1028<br />
± 10% max.<br />
± 10% max.<br />
± 1,5% max.<br />
± 1% max.<br />
± 1% max.<br />
± 1,5% max.<br />
percentage of acceptable<br />
tiles in the lot free<br />
visible defects 95 min.<br />
average value 310N/mm 2 > 20 N/mm 2<br />
unglazed tiles 5 min.<br />
removed volume in mm 3 771max.<br />
free of visible defects<br />
unglazed tiles<br />
free of visible defects<br />
test on inclined plan<br />
on dry surface<br />
on wet surface<br />
corresponding<br />
corresponding<br />
corresponding<br />
corresponding<br />
corresponding<br />
corresponding<br />
corresponding<br />
4,6<br />
5<br />
511 mm 3<br />
not resistant<br />
not resistant<br />
not resistant<br />
R9<br />
0,76<br />
0,74<br />
CottoFlash Poggio <strong>Sannini</strong><br />
TECHNICAL CHARACTERISTICS<br />
Technical data<br />
technical<br />
characteristics norms EN-norm values <strong>Sannini</strong> values<br />
surface quality<br />
water<br />
absorption<br />
modulus<br />
of ropture<br />
scratch hardness<br />
of surface<br />
(Mohs)<br />
abrasion<br />
resistance<br />
linear thermal<br />
expansion<br />
res. to household<br />
chemical swimming<br />
pool water cleansers<br />
resistance to acid<br />
and alkalis<br />
frost<br />
resistance<br />
sliding<br />
resistance<br />
static coefficient<br />
of friction<br />
UNI EN 98<br />
UNI EN 99<br />
UNI EN 100<br />
UNI EN 101<br />
ISO 10545<br />
ISO 10545<br />
UNI EN 202<br />
DIN 51130<br />
percentage of acceptable<br />
tiles in the lot free<br />
visible defects 95 min.<br />
UNI EN 102 removed volume<br />
UNI EN 103<br />
ASTM/C 1028<br />
test on inclined plan R10<br />
on dry surface<br />
on wet surface<br />
corresponding<br />
13%<br />
> 12,2 N/mm 2<br />
4<br />
1116 mm 3<br />
7,0x(10 -6<br />
°C -1 )<br />
not resistant<br />
not resistant<br />
not resistant<br />
0,84<br />
0,85<br />
67
CottoFlash Superficie <strong>Sannini</strong><br />
TECHNICAL CHARACTERISTICS<br />
Technical data<br />
technical<br />
characteristics norms EN-norm values <strong>Sannini</strong> values<br />
length<br />
thickness<br />
straightness<br />
of sides<br />
rectangularity<br />
surface flatness<br />
centre curvature<br />
surface flatness<br />
edge curvature<br />
surface flatness<br />
warpage<br />
surface quality<br />
water<br />
absorption<br />
modulus<br />
of ropture<br />
scratch hardness<br />
of surface<br />
(Mohs)<br />
abrasion<br />
resistance<br />
linear thermal<br />
expansion<br />
thermal shock<br />
resistance<br />
res. to household<br />
chemical swimming<br />
pool water cleansers<br />
resistance to acid<br />
and alkalis<br />
frost<br />
resistance<br />
sliding<br />
resistance<br />
thermal<br />
conductivity<br />
static coefficient<br />
of friction<br />
UNI EN 98 ± 1,5% max.<br />
corresponding<br />
UNI EN 98<br />
UNI EN 98<br />
UNI EN 98<br />
UNI EN 98<br />
UNI EN 98<br />
UNI EN 98<br />
UNI EN 98<br />
UNI EN 99<br />
UNI EN 100<br />
UNI EN 101<br />
UNI EN 102<br />
UNI EN 103<br />
UNI EN 104<br />
ISO 10545<br />
ISO 10545<br />
ASTM/C 1026<br />
DM 236/89<br />
DIN 51130<br />
ISO 8302<br />
ASTM/C 1028<br />
± 10% max.<br />
± 10% max.<br />
± 1,5% max.<br />
± 1% max.<br />
± 1% max.<br />
± 1,5% max.<br />
percentage of acceptable<br />
tiles in the lot free<br />
visible defects 95 min.<br />
average value 310N/mm 2 > 20 N/mm 2<br />
unglazed tiles 5 min.<br />
removed volume in mm 3 771max.<br />
coefficient linear thermal<br />
expansion from ambient<br />
temparature 0,40<br />
test on inclined plan<br />
on dry surface<br />
on wet surface<br />
corresponding<br />
corresponding<br />
corresponding<br />
corresponding<br />
corresponding<br />
corresponding<br />
corresponding<br />
5,6<br />
5<br />
218,1 mm 3<br />
4,39(x10 -6<br />
°C -1 )<br />
resistant<br />
resistant<br />
resistant<br />
resistant<br />
µ = 0,70<br />
R 9<br />
7,71 W(m 2 .K)<br />
0,76<br />
0,74<br />
CottoFlash Fornace <strong>Sannini</strong><br />
TECHNICAL CHARACTERISTICS<br />
Technical data<br />
technical<br />
characteristics norms EN-norm values <strong>Sannini</strong> values<br />
length<br />
thickness<br />
straightness<br />
of sides<br />
rectangularity<br />
surface flatness<br />
centre curvature<br />
surface flatness<br />
edge curvature<br />
surface flatness<br />
warpage<br />
surface quality<br />
water<br />
absorption<br />
modulus<br />
of ropture<br />
scratch hardness<br />
of surface<br />
(Mohs)<br />
abrasion<br />
resistance<br />
resistance<br />
to light<br />
thermal shock<br />
resistance<br />
res. to household<br />
chemical swimming<br />
pool water cleansers<br />
resistance to acid<br />
and alkalis<br />
frost<br />
resistance<br />
sliding<br />
resistance<br />
static coefficient<br />
of friction<br />
UNI EN 98 ± 1,5% max.<br />
corresponding<br />
UNI EN 98<br />
UNI EN 98<br />
UNI EN 98<br />
UNI EN 98<br />
UNI EN 98<br />
UNI EN 98<br />
UNI EN 98<br />
UNI EN 99<br />
ASTM/C 373<br />
UNI EN 100<br />
ASTM/C 648<br />
UNI EN 101<br />
UNI EN 102<br />
ASTM/C 501<br />
DIN 51094<br />
UNI EN 104<br />
ISO 10545<br />
ISO 10545<br />
ISO 10545<br />
DM 236/89<br />
DIN 51130<br />
ASTM/C 1028<br />
± 10% max.<br />
± 10% max.<br />
± 1,5% max.<br />
± 1% max.<br />
± 1% max.<br />
± 1,5% max.<br />
percentage of acceptable<br />
tiles in the lot free<br />
visible defects 95 min.<br />
average value 310N/mm2 > 13 N/mm2 662<br />
unglazed tiles 5 min.<br />
removed volume in mm 3 771max.<br />
free of visible defects<br />
free of visible defects<br />
free of visible defects<br />
unglazed tiles<br />
free of visible defects<br />
leather on dry surface µ > 0,40<br />
test on inclined plan<br />
on dry surface<br />
on wet surface<br />
corresponding<br />
corresponding<br />
corresponding<br />
corresponding<br />
corresponding<br />
corresponding<br />
corresponding<br />
5,6<br />
4,3<br />
5<br />
511 mm 3<br />
51<br />
resistant<br />
resistant<br />
resistant<br />
resistant<br />
resistant<br />
resistant<br />
µ = 0,82<br />
R10<br />
0,86<br />
0,78<br />
69
CottoFlash<br />
FORMATI<br />
arrotato<br />
30x30 sp. 1,4<br />
12x12in h. 0,55in<br />
15x30 sp. 1,4<br />
6x12in h. 0,55in<br />
30x34 sp. 1,4<br />
12x13,5in h. 0,55in<br />
gradino<br />
step<br />
Stufe<br />
marche<br />
36x36 sp. 1,6<br />
14x14in h. 0,62in<br />
angolare<br />
corner step<br />
Stufenecke<br />
angle<br />
9x33 sp. 1,4<br />
3,5x13in h. 0,55in<br />
battiscopa<br />
skirting<br />
Sockel<br />
plinthe<br />
9x45 sp. 1,4<br />
3,5x18in h. 0,55in<br />
battiscopa gradini<br />
skirting step<br />
Stufensockel<br />
plinthe marche<br />
litos<br />
30x30 sp. 1,6<br />
12x12in h. 0,62in<br />
14x28 sp. 1,6<br />
5,5x11in h. 0,62in<br />
30x36 sp. 1,6<br />
12x14in h. 0,62in<br />
gradino<br />
step<br />
Stufe<br />
marche<br />
36x36 sp. 2,5<br />
14x14in h. 1in<br />
angolare<br />
corner step<br />
Stufenecke<br />
angle<br />
9x33 sp. 1,6<br />
3,5x13in h. 0,62in<br />
battiscopa<br />
skirting<br />
Sockel<br />
plinthe<br />
poggio sannini<br />
30x30 sp. 3<br />
12x12in h. 1,2in<br />
15x30 sp. 3<br />
6x12in h. 1,2in<br />
30x30 sp. 3<br />
12x12in h. 1,2in<br />
gradino<br />
step<br />
Stufe<br />
marche<br />
30x30 sp. 3<br />
12x12in h. 1,2in<br />
angolare<br />
corner step<br />
Stufenecke<br />
angle<br />
9x30 sp. 2,1<br />
3,5x12in h. 0,83in<br />
battiscopa<br />
skirting<br />
Sockel<br />
plinthe<br />
superficie sannini<br />
30x30 sp. 1,4<br />
12x12in h. 0,55in<br />
15x30 sp. 1,6<br />
6x12in h. 0,62in<br />
30x34 sp. 1,4<br />
12x13,5in h. 0,55in<br />
gradino<br />
step<br />
Stufe<br />
marche<br />
36x36 sp. 1,9<br />
14x14in h. 0,75in<br />
angolare<br />
corner step<br />
Stufenecke<br />
angle<br />
9x33 sp. 1,4<br />
3,5x13in h. 0,55in<br />
battiscopa<br />
skirting<br />
Sockel<br />
plinthe<br />
9x45 sp. 1,4<br />
3,5x18in h. 0,55in<br />
battiscopa gradini<br />
skirting step<br />
Stufensockel<br />
plinthe marche<br />
fornace sannini<br />
30x30 sp. 1,6<br />
12x12in h. 0,62in<br />
15x30 sp. 1,6<br />
6x12in h. 0,62in<br />
30x36 sp. 1,6<br />
12x14in h. 0,62in<br />
gradino<br />
step<br />
Stufe<br />
marche<br />
9x33 sp. 1,6<br />
3,5x13in h. 0,62in<br />
battiscopa<br />
skirting<br />
Sockel<br />
plinthe<br />
cottoflash cleaner<br />
Detergente acido protetto:<br />
soluzione acquosa di acido solido<br />
emulsionante protetto per togliere<br />
residui cementizi, calcare e ruggine ed<br />
efflorescenze.<br />
Buffered acid Cleaner:<br />
Buffered solid acid liquid emulsion designed<br />
to remove incrostations, rust, cement residues<br />
and efflorescences.<br />
Saures und geschütztes Reinigungsmittel:<br />
Wässerige Lösung aus fester Säure,<br />
Schutzemuliermittel zur Entfernung von<br />
Mörtelresten, Kalk, Rost, Ausblühungen.<br />
Détergent acide protégé:<br />
Solution aqueuse d’acide solide émulsifiant<br />
protégé pour retirer les résidus de ciment, le<br />
calcaire et la rouille.<br />
cottoflash pro<br />
Protettivo autolucidante per il primo<br />
intervento di manutenzione<br />
e la successiva conservazione<br />
Emulsione acquosa di cere e resine<br />
naturali dure - tensioattive.<br />
Self-polishing protective agent preserves<br />
Cottoflash.<br />
Water based emulsion combines natural<br />
hard resins<br />
and waxes with surface active agents.<br />
Selbstglanz-Schutzmittel für Cottoflash<br />
Bodenpflege.<br />
Wässerige Emulsion aus natürlichen, harten<br />
Wachsen und Harzsorten, oberflächenaktiv.<br />
Protecteur autolissant pour la première<br />
intervention de maintenance<br />
et la conservation qui suivra.<br />
Emulsion aqueuse de cires et de résines<br />
naturelles dures-tensioactives.<br />
71
COTTOFLASH È UN PRODOTTO FINITO<br />
<strong>Sannini</strong> Impruneta consegna CottoFlash<br />
già trattato e perfettamente “finito”<br />
e come tale, durante tutta l’operazione<br />
di posatura, necessita dell’attenzione<br />
e della cura riservate normalmente<br />
a questo tipo di prodotto. È quindi<br />
importantissima l’opera del posatore e<br />
del direttore del cantiere.<br />
POSA IN OPERA A “REGOLA D’ARTE”<br />
La posa in opera può essere fatta sia<br />
a caldana (malta) che a collante.<br />
Va eseguita “a regola d’arte”,<br />
utilizzando solo materiali di qualità,<br />
avendo l’accortezza di miscelare<br />
le leggere stonalità delle mattonelle.<br />
Importante. Con una spugna inumidita<br />
asportare sistematicamente le tracce di<br />
malta o collante prima che secchino.<br />
La rimozione di residui secchi o<br />
incrostazioni danneggerebbero<br />
la finitura!<br />
PRECAUZIONI DOPO LA POSA<br />
Come durante l’operazione di posa,<br />
anche nel proseguimento dei lavori<br />
(tinteggiatura delle pareti, etc...),<br />
CottoFlash deve essere trattato con<br />
cura. Si raccomanda pertanto di<br />
proteggere il pavimento con materiali<br />
che permettano la traspirazione (carta,<br />
teli e similari) evitando materiali<br />
sintetici.<br />
RIPULITURA PER LA CONSEGNA<br />
Prima della consegna al Cliente<br />
effettuare su CottoFlash una prima<br />
manutenzione di consegna.<br />
1. Lavare con Cottoflash Cleaner per<br />
la rimozione risolutiva dei residui<br />
di sporco seguendo le istruzioni<br />
riportate sulla confezione.<br />
2. Dopo il lavaggio applicare<br />
uniformemente Cottoflash-Pro puro,<br />
protettivo con conservazione,<br />
come da istruzioni in etichetta.<br />
CONSEGNA DEL PAVIMENTO<br />
Cottoflash è così pronto per vivere<br />
nel tempo, sempre perfetto con la<br />
normale manutenzione del cotto trattato<br />
tradizionalmente. Per la normale<br />
pulizia domestica basta usare un<br />
semplice straccio inumidito d’acqua o<br />
di un comune detergente neutro non<br />
contenente ammoniaca.<br />
L’eventuale opacità dovuta all’usura<br />
si elimina facilmente con applicazioni<br />
di Cottoflash-pro puro, steso<br />
uniformemente con uno straccio umido<br />
e pulito.<br />
COTTOFLASH IS FACTORY-FINISHED<br />
<strong>Sannini</strong> Impruneta delivers CottoFlash<br />
products ready-treated, with a perfect<br />
finish, and particular care and attention<br />
are therefore required when<br />
the tiles are laid, as with any product<br />
of this type.The roles played <strong>by</strong><br />
the tile-layer and building site manager<br />
are particularly important.<br />
LAYING TO ”PROFESSIONAL<br />
STANDARDS”<br />
Laying can be done equally well either<br />
with mortar or adhesive. It must be<br />
done to “professional standards”, using<br />
only quality materials and being aware<br />
of the possible different shades which<br />
are characteristic for cotto.<br />
Important: Systematically wipe away<br />
any remnants of mortar or adhesive<br />
with a damp sponge before they dry.<br />
Removing remnants when they are<br />
dried or hardened will spoil the finish!<br />
PRECAUTION AFTER LAYING<br />
CottoFlash must be treated carefully<br />
in all the subsequent operations (wall<br />
painting, etc...). You are recommended<br />
to cover the flooring with materials that<br />
allow transpiration (paper, cloth, etc.),<br />
avoiding synthetic materials.<br />
FINAL CLEANING<br />
Before handing over the floor to the<br />
customer, carry out the following initial<br />
maintenance operations:<br />
1. Clean the floor with COTTOFLASH<br />
CLEANER to remove any remaining<br />
dirt, following the instructions on the<br />
label.<br />
2. After cleaning apply a uniform coat<br />
of undiluted COTTOFLASH-PRO,<br />
a protective and preserving agent,<br />
following the instructions on the label.<br />
HANDING OVER THE FINISHED FLOOR<br />
COTTOFLASH is now ready to start its<br />
life as a perfect floor, requiring only the<br />
normal maintenance for a traditionally<br />
treated cotto surface.<br />
For normal domestic cleaning, simply<br />
use a cloth dampened with water<br />
or any normal neutral, ammoniacfree<br />
detergent. Any dullness caused<br />
<strong>by</strong> wear is easy to remove with<br />
concentrated COTTOFLASH-PRO,<br />
spread evenly with a damp, clean<br />
cloth.<br />
COTTOFLASH IST ENDBEHANDELT<br />
<strong>Sannini</strong> Impruneta liefert die CottoFlash-<br />
Fliesen endbehandelt und verlegefertig.<br />
Sie müssen mit der für derartig<br />
hochwertige Fliesen üblichen Sorgfalt<br />
verlegt werden.Die gewissenhafte<br />
Arbeit von Fliesenleger und Bauleiter<br />
sind daher für die Qualität des Cotto-<br />
Fußbodens ausschlaggebend.<br />
FACHMÄNNISCHES VERLEGEN<br />
NACH “DEN REGELN DER KUNST”<br />
CottoFlash kann sowohl im Mörtelbett<br />
als auch im Klebeverfahren (Flexkleber)<br />
verlegt werden. Das Verlegen muß<br />
nach “allen Regeln der Kunst” und<br />
unter Verwendung erstklassiger<br />
Materialien erfolgen. Bitte dabei<br />
auch die cottotypischen Farbnuancen<br />
beachten.<br />
Wichtig: Spuren von Mörtel oder<br />
Fertigkleber mit einem feuchten<br />
Schwamm sofort beseitigen, da das<br />
spätere Entfernen die Wachsschicht<br />
beschädigen kann.<br />
VORSICHTSMAßNAHMEN NACH<br />
DEM VERLEGEN<br />
CottoFlash muß auch bei<br />
Nachfolgearbeiten (z.B. Malerarbeiten)<br />
mit Sorgfalt behandelt werden.<br />
Schützen Sie den Fußboden mit<br />
atmungsaktivem Material (Papier,<br />
Filzpappe und ähnliches) und<br />
vermeiden Sie Synthetikmaterial.<br />
ENDREINIGUNG<br />
Vor der Übergabe an den Kunden muß<br />
wie folgt vorgegangen werden:<br />
1. Nach den Anweisungen mit<br />
COTTOFLASH CLEANER reinigen,<br />
um die letzten Schmutzrückstände<br />
und unsichtbaren Zementschleier zu<br />
entfernen.<br />
2. Anschließend nach den Anweisungen<br />
auf dem Etikett gleichmäßig<br />
unverdünntes COTTOFLASH-PRO<br />
auftragen, das eine schützende<br />
Langzeitwirkung hat.<br />
ÜBERGABE DES FUSSBODENS<br />
Damit ist COTTOFLASH<br />
gebrauchsbereit und bleibt mit<br />
derselben normalen Pflege, wie<br />
sie für traditionell behandelten<br />
Cotto empfohlen wird, lange<br />
perfekt und schön.Für die laufende<br />
Haushaltsreinigung empfehlen<br />
wir nasses Wischen mit klarem<br />
Wasser oder mit einem neutralen,<br />
ammoniakfreien Reinigungsmittel.<br />
Erscheint die Wachsschicht zu stumpf,<br />
sollte sie mit unverdünntem<br />
COTTOFLASH-PRO aufgefrischt<br />
werden. In stark beanspruchten<br />
Bereichen muß häufiger mit Cottoflash<br />
Pro nachgefettet werden.<br />
COTTOFLASH EST UN PRODUIT FINI<br />
<strong>Sannini</strong> Impruneta livre CottoFlash déjà<br />
traité et parfaitement ”fini”.<br />
A ce titre, pendant toute l’opération de<br />
pose, le produit nécessite l’attention<br />
et le soin réservés normalement à ce<br />
type de produit. Le travail du poseur<br />
et du directeur de chantier est donc<br />
déterminant.<br />
POSE DANS LA “LA REGLE DE L’ART”<br />
La pose peut être faite sur couche<br />
isolante (mortier) ou collant.<br />
Elle doit être faite selon les règles de<br />
l’art, en n’utilisant que des produits de<br />
qualité, en ayant soin de mélanger<br />
les disparités de teintes des carreaux.<br />
Important. Avec une éponge humide<br />
retirer systématiquement les traces de<br />
mortier ou de collant avant qu’elles ne<br />
sèchent. L’élimination des résidus secs<br />
ou autres incrustations porterait atteinte<br />
à la finition!<br />
PRECAUTIONS APRES LA POSE<br />
Comme pendant l’opération de pose,<br />
au cours des travaux suivants (peinture<br />
des murs, etc...), CottoFlash doit être<br />
traité avec soin. Nous recommandons<br />
de protéger le carrelage avec des<br />
produits qui permettent la transpiration<br />
(papier, toiles ou autres) en évitant les<br />
matières synthétiques.<br />
NETTOYAGE AVANT LIVRAISON<br />
Avant la livraison au client, effectuer<br />
sur CottoFlash un premier entretien.<br />
1. Laver avec COTTOFLASH CLEANER<br />
pour éliminer les résidus<br />
de saletés en suivant les instructions<br />
sur l’emballage.<br />
2. Après le lavage, appliquer<br />
uniformément Cottoflash-Pro pur,<br />
protecteur avec conservation, en<br />
suivant les instructions sur l’étiquette.<br />
LIVRAISON DU CARRELAGE<br />
Cottoflash sera ainsi prêt à vivre<br />
dans le temps, toujours parfait, sous<br />
réserve d’entretien normal du cotto<br />
traité de façon traditionnelle.<br />
Pour le nettoyage domestique normal,<br />
utiliser un linge humide d’eau ou de<br />
détergent neutre sans ammoniaque.<br />
L’opacité due à l’usure s’élimine<br />
facilement en appliquant Cottoflash-pro<br />
pur, appliqué uniformément avec un<br />
linge humide et propre.<br />
73
MANUTEZIONE ORDINARIA<br />
Mantenere CottoFlash sempre bello<br />
e pulito è facile. Basta usare un<br />
semplice straccio inumidito d’acqua<br />
o di un comune detergente, anche<br />
igienizzante. L’eventuale opacità,<br />
che si può verificare col tempo e<br />
con l’usura, si elimina applicando<br />
ogni tanto con uno straccio umido,<br />
un protettore di conservazione come<br />
COTTOFLASH PRO.<br />
ROUTINE MAINTENANCE TIP<br />
It doesn’t take much to keep your<br />
CottoFlash floor covering clean<br />
and attractive. Just wipe the tiles<br />
with a cloth moistened with water<br />
or ordinary detergent, a disinfectant<br />
can also be used. The tiles may<br />
become dull with time or wear.<br />
To polish the tiles, apply a protective<br />
agent such as COTTOFLASH PRO<br />
from time to time with a damp cloth.<br />
REGELMÄSSIGE REINIGUNG<br />
Den CottoFlash Fußboden stets in<br />
gepflegtem Zustand zu halten,<br />
ist nicht schwer. Es genügen<br />
Wischlappen, Wasser und ein<br />
handelsüblicher und nachfettender<br />
Bodenreiniger.Mit der Zeit<br />
auftretende matte Stellen lassen sich<br />
durch gelegentliches unverdünntes<br />
Auftragen eines nachfettenden<br />
Mittels (COTTOFLASH PRO)<br />
beseitigen.<br />
MAINTENANCE ORDINAIRE<br />
Maintenir CottoFlash toujours beau<br />
et propre est facile. Utiliser un linge<br />
humide d’eau ou de détergent,<br />
même stérilisant. L’opacité, que<br />
l’on peut constater avec le temps<br />
et l’usure, s’élimine en appliquant<br />
de temps en temps, avec un<br />
linge humide, un protecteur de<br />
conservation comme COTTOFLASH<br />
PRO.<br />
COSA NON FARE<br />
CottoFlash è un cotto tradizionale<br />
trattato con un sistema ed elementi<br />
naturali che ne rispettano la<br />
traspirazione e la rigenerabilità.<br />
E’ quindi necessario evitare l’uso<br />
di alcune sostanze che ne possono<br />
danneggiare la protezione<br />
superficiale.<br />
WHAT TO AVOID<br />
CottoFlash is a traditional Cotto<br />
which is treated using methods and<br />
natural substances allowing the tile<br />
to breathe and regenerate.<br />
It is therefore important to avoid any<br />
substance which might damage the<br />
protected surface of the tile.<br />
WAS SIE NICHT TUN SOLLTEN<br />
CottoFlash ist ein traditioneller<br />
echter Cotto; er wird mit exklusiven<br />
Natursubstanzen, die das<br />
Material atmen lassen und dessen<br />
Regenerierung ermöglichen,<br />
grundversiegelt.Daher sollten Sie alle<br />
Reinigungsmittel vermeiden, die die<br />
Schutzschicht der Fliesen angreifen<br />
können.<br />
A EVITER<br />
CottoFlash est un cotto traditionnel<br />
traité par un procédé et<br />
des produits naturels qui en<br />
respectent la transpiration et la<br />
régénération. Eviter l’utilisation de<br />
certaines substances qui risquent<br />
d’endommager la protection<br />
superficielle.<br />
PRONTO INTERVENTO<br />
CottoFlash è stato sottoposto<br />
ad un trattamento protettivo che<br />
evita l’assorbimento di sostanze<br />
macchianti. Di norma quindi le<br />
comuni macchie domestiche non<br />
costituiscono un problema.<br />
DEALING WITH STAINS<br />
CottoFlash tiles undergo a special<br />
protective treatment which prevents<br />
the absorption of substances likely<br />
to leave stains. As a rule, ordinary<br />
household stains are therefore easily<br />
removeable.<br />
SOFORTHILFE<br />
CottoFlash ist versiegelt, damit die<br />
Fliesen keine fleckbildenden Stoffe<br />
aufsaugen können. Im Normalfall<br />
gibt es also bei haushaltsüblichen<br />
Flecken keine Probleme.<br />
INTERVENTION D’URGENCE<br />
CottoFlash a été soumis<br />
à un traitement de protection qui<br />
évite l’absorption de substances<br />
tachantes. En général, les taches<br />
domestiques normales ne sont pas<br />
un problème.<br />
E SE…<br />
Vi sono agenti che possono<br />
intaccare la finitura di CottoFlash,<br />
come quella di ogni pavimento in<br />
cotto trattato con sostanze naturali,<br />
deteriorandolo esteticamente.<br />
Comunque COTTOFLASH E’<br />
SEMPRE RIGENERABILE.<br />
IF HOWEVER…<br />
Like any other Cotto floor treated<br />
with natural materials, there are<br />
certain substances which may<br />
damage the surface of your<br />
CottoFlash tiles and impair their<br />
aesthetic finish.<br />
COTTOFLASH TILES CAN ALWAYS<br />
BE RESTORED TO THEIR FORMER<br />
SPLENDOUR.<br />
UND IM FALL, WENN…<br />
Es gibt jedoch Substanzen, die<br />
die Oberflächenversiegelung des<br />
CottoFlash (so wie jeden anderen<br />
mit Natursubstanzen behandelten<br />
Cotto-Fußboden) angreifen und<br />
unschöne Stellen zurücklassen.<br />
COTTOFLASH LÄSST SICH IMMER<br />
REGENERIEREN.<br />
ET SI…<br />
Il existe des produits susceptibles<br />
d’attaquer la finition de CottoFlash,<br />
ainsi que celle de tout carrelage en<br />
cotto traité par substances naturelles,<br />
en le détériorant encore plus. Dans<br />
tous les cas COTTOFLASH EST<br />
TOUJOURS REGENERABLE.<br />
77
hand made<br />
handgemacht<br />
cotto fait à la main<br />
Protagonist of the magnificent classical tradition of architecture, from<br />
ancient Roman times to this day, innumerable buildings have been built<br />
with manually moulded terracotta tiles.<br />
At <strong>Sannini</strong>, this prestigious and now rare artisan procedure is effected<br />
<strong>by</strong> skilled workmen who model the clay with their bare hands using<br />
single wooden moulds obtained from splendid originals of the 17th<br />
century. There is no other force or energy, if not that of man, to drive<br />
the raw material into the moulds. Following drying, the material is<br />
extracted and brick <strong>by</strong> brick the edges are hand-trimmed with a knife.<br />
Loaded again <strong>by</strong> hand onto trolleys the clay remains in the kiln for four<br />
days in a direct flame, awaiting complete firing.<br />
The rough surface, the opaque colour which absorbs the light and<br />
throws out unmistakable reflections and tones, and the irregularities<br />
make each element a unique and unrepeatable exemplar.<br />
It is mounted according to the traditional system with 5 mm joints.<br />
For inside use to be treated after installation. On request also honed<br />
version available.<br />
“Fatto a mano classico” lautet die Bezeichnung für klassisch<br />
handgemachten Cotto, das Material der großen Architektur Italiens. Bei<br />
<strong>Sannini</strong> setzen erfahrene Meister dieses mittlerweile selten gewordene<br />
Handwerk fort. Sie modellieren die Erde mit bloßen Händen in<br />
Holzrahmen, die Originalen aus dem 17. Jahrhundert entsprechen.<br />
Nach dem Trocknen wird das Rohmaterial aus den Formen genommen,<br />
und die Ränder werden mit dem Messer von Hand nachgezogen<br />
und gesäubert. Wiederum per Hand auf Gestelle geladen wandern<br />
die Platten in Tunnelöfen, wo sie bei direkter Flamme vier Tage lang<br />
gebrannt werden. Diese Handarbeit im wahrsten Sinne des Wortes<br />
läßt jede Fliese zum Unikat werden. Mit rauher Oberfläche und matter<br />
Farbe absorbieren sie Licht auf ganz besondere Weise und schaffen die<br />
charakteristischen Lichteffekte, die Liebhaber so schätzen. Verarbeitet<br />
wird “Fatto a mano classico” traditionell und mit einer Fuge von<br />
mindestens fünf Millimetern. Endbehandlung für den Innenbereich wird<br />
empfohien. Auf anfrage auch geschliffen erhältlich.<br />
Protagoniste de la magnificience de la grande tradition classique<br />
de l’architecture, des temps de la Rome antique jusqu’à nos jours,<br />
d’innombrables usines sont construites et réalisées avec des éléments<br />
en cotto modelés à la main. Chez <strong>Sannini</strong>, ce procédé artisanal<br />
prestigieux et désormais rare est pratiqué par un corps de métier habile<br />
qui travaille aux mains nues la terre dans des moules traditionnels<br />
en bois calquant les modèles originaux du 17ème siècle. Il n’y a<br />
pas d’autre force, d’autre énergie, que la force vive de l’homme<br />
pour presser la matière première dans les moules. Le matériau, après<br />
séchage, est extrait et retouché à la main pour éliminer les bavures,<br />
brique après brique, au couteau. Chargée encore à la main sur les<br />
chariots, la terre <strong>Sannini</strong> reste pendant quatre jours au four à flamme<br />
directe en attendant la cuisson complète.<br />
La surface rugueuse, la couleur opaque qui absorbe la lumière et offre<br />
des reflets et des tonalités sans pareils, les irrégularités font de chaque<br />
pièce un prototype unique non reproductible. Les briques se montent<br />
selon le système traditionnel avec des joints de 5 mm minimum.<br />
A traiter après la pose pour intérieurs. Sur commande en finition poli<br />
disponible.<br />
cotto fatto a mano classico<br />
Protagonista della magnificenza della grande<br />
tradizione classica dell’architettura, dai<br />
tempi di Roma antica fino ai giorni nostri,<br />
innumerevoli fabbriche sono costruite e<br />
realizzate con elementi in cotto modellati<br />
manualmente. In <strong>Sannini</strong>, questo prestigioso<br />
e ormai raro procedimento artigianale,<br />
viene perpetrato da abili maestranze che<br />
modellano a mani nude la terra all’interno di<br />
singoli stampi di legno ricavati da splendidi<br />
originali del seicento. Non vi è altra forza,<br />
altra energia, se non quella dell’uomo per<br />
sospingere la materia prima nelle forme.<br />
Materia che dopo l’essiccazione viene<br />
estratta e ripresa in mano per l’eliminazione<br />
della bava dai bordi, mattone per mattone, a<br />
coltello. Caricata ancora a mano sui carrelli<br />
la terra <strong>Sannini</strong> resta per quattro giorni in<br />
forno a fiamma diretta in attesa della completa<br />
cottura. La superficie ruvida, il colore opaco<br />
che assorbe la luce e regala riflessi e tonalità<br />
inconfondibili, le irregolarità rendono ogni<br />
elemento un esemplare unico e irripetibile.<br />
Si monta secondo il sistema tradizionale con<br />
fughe di minimo 5 mm. Da trattare negli<br />
interni dopo la posa. A richiesta è disponibile<br />
anche la versione levigata.<br />
79
Cotto fatto a mano classico<br />
TECHNICAL CHARACTERISTICS<br />
Technical data<br />
technical<br />
characteristics norms EN-norm values <strong>Sannini</strong> values<br />
surface quality<br />
water<br />
absorption<br />
modulus<br />
of ropture<br />
scratch hardness<br />
of surface<br />
(Mohs)<br />
abrasion<br />
resistance<br />
linear thermal<br />
expansion<br />
res. to household<br />
chemical swimming<br />
pool water cleansers<br />
resistance to acid<br />
and alkalis<br />
frost<br />
resistance<br />
sliding<br />
resistance<br />
UNI EN 98<br />
UNI EN 99<br />
UNI EN 100<br />
UNI EN 101<br />
UNI EN 102<br />
UNI EN 103<br />
ISO 10545<br />
ISO 10545<br />
UNI EN 202<br />
DM 236/89<br />
DIN 51130<br />
percentage of acceptable<br />
tiles in the lot free<br />
visible defects 95 min.<br />
leather on dry surface µ > 0,40<br />
test on inclined plan<br />
corresponding<br />
7,3<br />
= 13,7 N/mm 2<br />
5<br />
1116<br />
7,0(x10 -6<br />
°C -1 )<br />
resistant<br />
resistant<br />
resistant<br />
µ = 0,75<br />
R12<br />
FORMATI<br />
Per altri colori abbinabili al cotto fatto a mano<br />
classico vedi anche “argille cromatiche”. Su richiesta<br />
quotazioni per altri formati e su superficie levigate.<br />
Other sizes at request, see also “argille cromatiche” and<br />
honed surfaces.<br />
Andere Formate auf Anfrage. Siene auch “argille cromatiche”<br />
und Geschliffene Oberflächen.<br />
Autres formats sur commande. Voir aussi “argille cromatiche”<br />
et surfaces polis.<br />
40x40 sp. 3,4<br />
16x16in h. 1,34in<br />
30x30 sp. 2,6<br />
12x12in h. 1,02in<br />
25x25 sp. 2,6<br />
10x10in h. 1,02in<br />
20x20 sp 2,6<br />
8x8in h. 1,02in<br />
20x40 sp. 3,4<br />
8x16in h. 1,34in<br />
15x30 sp. 2,6<br />
6x12in h. 1,02in<br />
25x36 sp. 3,4<br />
10x14in h. 1,34in<br />
gradino<br />
step<br />
Stufe<br />
marche<br />
36x36 sp. 3,4<br />
16x14in h. 1,34in<br />
angolare<br />
corner step<br />
Stufenecke<br />
angle<br />
8x33 sp. 1,8<br />
3,1x13in h. 0,71in<br />
battiscopa<br />
skirting<br />
Sockel<br />
plinthe<br />
7x30 sp. 2,6<br />
2,8x12in<br />
listello<br />
h. 1,02in<br />
83
earth tones cotto<br />
handgemacht erdfarben<br />
argiles chromatiques<br />
<strong>Sannini</strong>’s Argille Cromatiche obtained through an accurate selection of<br />
raw materials, add to the artisan charm of hand made terracotta, the<br />
precious enrichment of natural minerals which chromatically transform<br />
the material. Again manually pressed and shaped in single moulds,<br />
these products in exclusive colours are modelled in two different<br />
tonalities and formats. The originality of these clays permits the design<br />
of polychrome laying and the use of the material within new ambits<br />
where colour combinations and contrasts are experimented.<br />
It is laid in the same way as a hand made tile, according to the<br />
traditional system with 5 mm minimum joints. Also honed version<br />
available (h. 2,3 cm). On request also honed version available.<br />
Argille Cromatiche heißen die zwei farblichen Varianten, Anthrazit und<br />
Honiggelb, des handgemachten Cottos aus der exklusiven Galestro-<br />
Ader in Impruneta. <strong>Sannini</strong> sucht die Tonerde besonders sorgfältig aus<br />
und ergänzt die natürlichen Mineralien Titanium und Magnesium, die<br />
den Ton farblich verändern. So entstehen zwei feine Erdfarben, mit<br />
denen besonders interessante Kontraste geschaffen werden können.<br />
Im Spiel mit diesen Naturfarben können reizvolle Akzente mit<br />
handgemachtem Cotto gesetzt werden. Empfohlen ist die traditionelle<br />
Verlegung mit fünf Millimetern Fugenbreite. Auch geschliffen erhältlich<br />
(h. 2,3 cm). Auf anfrange auch Geschliffen erhältlich.<br />
Les argiles chromatiques <strong>Sannini</strong> ajoutent à la fascination artisanale<br />
du cotto fait main le précieux des minéraux naturels qui transforment<br />
chromatiquement le matériau. Pressés et formés manuellement dans des<br />
moules individuels, ces produits à la couleur exclusive sont modelés<br />
en différents tonalités et formats. L’originalité de ces argiles permet<br />
de concevoir des revêtements polychromes et d’utiliser le matériau<br />
à l’intérieur de nouvelles ambiances formées de combinaisons et<br />
contrastes de couleurs. Se pose, comme les produits faits main<br />
classiques, avec le système traditionnel avec joints de minimum 5 mm.<br />
Disponibile aussi en finition poli (h. 2,3 cm). sur commande en finition<br />
poli disponible.<br />
argille cromatiche<br />
Le argille cromatiche di <strong>Sannini</strong> aggiungono<br />
al fascino artigianale del cotto fatto a mano<br />
il prezioso arricchimento di minerali naturali<br />
che trasformano cromaticamente il materiale.<br />
Pressati e formati ancora manualmente in<br />
singoli stampi, questi prodotti dal colore<br />
esclusivo vengono modellati in due diverse<br />
tonalità e formati. L’originalità di queste argille<br />
consente la progettazione di rivestimenti<br />
policromi e l’utilizzazione del materiale<br />
all’interno di nuovi ambiti disegnati<br />
da abbinamenti e contrasti di colore.<br />
Si posa, come un fatto a mano classico,<br />
secondo il sistema tradizionale con fughe di<br />
minimo 5 mm. A richiesta è disponibile anche<br />
la versione levigata.<br />
87
Argille cromatiche<br />
TECHNICAL CHARACTERISTICS<br />
Technical data<br />
technical<br />
characteristics norms EN-norm values <strong>Sannini</strong> values<br />
surface quality<br />
water<br />
absorption<br />
modulus<br />
of ropture<br />
scratch hardness<br />
of surface<br />
(Mohs)<br />
abrasion<br />
resistance<br />
linear thermal<br />
expansion<br />
res. to household<br />
chemical swimming<br />
pool water cleansers<br />
resistance to acid<br />
and alkalis<br />
frost<br />
resistance<br />
sliding<br />
resistance<br />
UNI EN 98<br />
UNI EN 99<br />
UNI EN 100<br />
UNI EN 101<br />
UNI EN 102<br />
UNI EN 103<br />
ISO 10545<br />
ISO 10545<br />
UNI EN 202<br />
DM 236/89<br />
DIN 51130<br />
percentage of acceptable<br />
tiles in the lot free<br />
visible defects 95 min.<br />
leather on dry surface µ > 0,40<br />
test on inclined plan<br />
corresponding<br />
7,3<br />
= 13,7 N/mm 2<br />
5<br />
1116<br />
7,0(x10 -6<br />
°C -1 )<br />
resistant<br />
resistant<br />
resistant<br />
µ ≥ 0,75<br />
R 12<br />
FORMATI<br />
Disponibile nei colori giallo e antracite.<br />
Su richiesta quotazioni per altri formati e su superfici<br />
levigate.<br />
Available in two tonalities: “giallo” and “antracite”.<br />
See also “argille cromatiche” and honed surfaces.<br />
Erhältlich in gelb und anthrazit.<br />
Siehe auch “argille cromatiche” und Geschliffene Oberflächen.<br />
Disponible dans les couleurs jaune et anthracite.<br />
Voir aussi “argille cromatiche” et surfaces polis.<br />
40x40 sp.3,4<br />
16x16in h. 1,34in<br />
30x30 sp. 2,6<br />
12x12in h. 1,02in<br />
15x30 sp. 2,6<br />
6x12in h. 1,02in<br />
25x36 sp. 3,4<br />
10x14in h. 1,34in<br />
gradino<br />
step<br />
Stufe<br />
marche<br />
36x36 sp. 3,4<br />
14x14in h. 1,34in<br />
angolare<br />
corner step<br />
Stufenecke<br />
angle<br />
8x33 sp. 1,8<br />
3,1x13in h. 0,71in<br />
battiscopa<br />
skirting<br />
Sockel<br />
plinthe<br />
91
handmade glazed<br />
majolika handgemacht<br />
terres vitrifiées<br />
A variant on earth tones, the glazed handmade tiles propose<br />
a series of majolica in four pastel colours which shift from white<br />
to pink like a beach at sunset, and from aquamarine green<br />
to intense blue, calling to mind the colours of the deep sea.<br />
The glaze is spread onto the precious Poggio <strong>Sannini</strong> tiles while<br />
the surface is still wet and penetrates deep down, amalgamating<br />
perfectly with the clay. The firing process melts both into a single<br />
essence. Advised width of joints minimum 5 mm. For indoor use. The<br />
product is guaranteed to be acid-resistant and completely<br />
stain-proof, although its aspect displays all the charm of a craft product.<br />
“Terre invetriate” ist die glasierte Poggio-Fliese mit einer Auswahl von<br />
Majoliken in vier exklusiven Pastellfarben. Dieses top-exklusive Material<br />
findet man in modernen Villen und gutsanierten Herrschaftshäusern, wo<br />
es für harmonische Farbvarianten sorgt. Eine Farbpalette von Weiß bis<br />
Rosa und von Aquamaringrün<br />
bis zu intensivem Blau zaubert einen besonderen, mediterranen<br />
Charme. <strong>Sannini</strong> trägt die Glasur auf die noch feuchte Oberfläche der<br />
Fliesen aus der Poggio-Produktion auf, damit sie durchgängig mit der<br />
Tonerde verschmilzt. Durch das anschließende Brennen werden Glasur<br />
und Tonerde dann endgültig eine festgefügte Einheit.<br />
In der Verarbeitung von “Terre invetriate” wird eine Fugenbreite<br />
von mindestens fünf Millimetern empfohlen. Die hochwertige Glasur<br />
garantiert Säurefestigkeit und Fleckunempfindlichkeit.<br />
Variante sur le thème de la terre, les argiles vitrifiées<br />
proposent une série de majoliques en 4 couleurs pastel qui passent du<br />
blanc au rose, comme une plage au couchant, et du vert<br />
eau-marine au bleu intense inspiré par les variétés du fond marin.<br />
L’émail appliqué sur le support précieux du Poggio <strong>Sannini</strong> encore<br />
humide pénètre en profondeur et s’amalgame parfaitement avec la<br />
terre que le processus de cuisson marie en un seul corps. Joint conseillé<br />
minimum 5 mm. Conseillé pour les intérieurs avec la certitude de<br />
disposer d’un produit insensible aux acides et complètement intachable<br />
tout en gardant son aspect fascinant de produit artisanal.<br />
terre invetriate<br />
Variante sui toni dell’argilla, le terre invetriate<br />
propongono una successione di maioliche<br />
in quattro colori pastello che si spostano dal<br />
bianco al rosa,<br />
come una spiaggia al tramonto, e dal<br />
verde acquamarina al blu intenso tratto per<br />
analogia dalle diversità del fondo del mare.<br />
Lo smalto steso sul prezioso sottofondo del<br />
Poggio <strong>Sannini</strong> con la superficie ancora<br />
umida penetra in profondità amalgamandosi<br />
perfettamente alla terra che il processo di<br />
cottura fonde in unico corpo. Fuga consigliata<br />
minimo 5 mm. Destinazione interni con<br />
la certezza di un prodotto inattaccabile<br />
dagli acidi e completamente antimacchia<br />
nonostante il suo aspetto mostri intatto il<br />
fascino di un prodotto artigianale.<br />
93
ianco luna<br />
verde acqua marina<br />
rosa antico<br />
blu lavanda<br />
Terre invetriate<br />
TECHNICAL CHARACTERISTICS<br />
Technical data<br />
technical<br />
characteristics norms EN-norm values <strong>Sannini</strong> values<br />
surface quality<br />
water<br />
absorption<br />
modulus<br />
of ropture<br />
scratch hardness<br />
of surface<br />
(Mohs)<br />
abrasion<br />
resistance<br />
linear thermal<br />
expansion<br />
thermal shock<br />
resistance<br />
res. to household<br />
chemical swimming<br />
pool water cleansers<br />
resistance to acid<br />
and alkalis<br />
frost<br />
resistance<br />
sliding<br />
resistance<br />
static coefficient<br />
of friction<br />
UNI EN 98<br />
UNI EN 99<br />
UNI EN 100<br />
UNI EN 101<br />
UNI EN 102<br />
UNI EN 103<br />
UNI EN 104<br />
ISO 10545<br />
ISO 10545<br />
UNI EN 202<br />
DM 236/89<br />
DIN 51130<br />
ASTM/C 1028<br />
percentage of acceptable<br />
tiles in the lot free<br />
visible defects 95 min.<br />
removed volume<br />
leather on dry surface µ > 0,40<br />
test on inclined plan<br />
≥ 0,60<br />
on dry surface<br />
on wet surface<br />
corresponding<br />
13%<br />
> 12,2 N/mm 2<br />
4<br />
1116 mm 3<br />
7,0(x10 -6 °C -1 )<br />
resistant<br />
resistant<br />
resistant<br />
(low concentration)<br />
resistant<br />
µ = 0,86<br />
R 12<br />
0,84<br />
0,85<br />
FORMATI<br />
15x30 sp. 3<br />
6x12in h. 1,2in<br />
bianco luna<br />
15x30 sp. 3<br />
6x12in h. 1,2in<br />
verde acqua marina<br />
15x30 sp. 3<br />
6x12in h. 1,2in<br />
rosa antico<br />
15x30 sp. 3<br />
6x12in h. 1,2in<br />
blu lavanda<br />
9x30 sp. 2,1<br />
3,5x12in h. 0,83in<br />
battiscopa<br />
skirting<br />
Sockel<br />
plinthe<br />
97
manufactured handmade<br />
industriell handgemacht<br />
fait main industriel<br />
Poggio <strong>Sannini</strong> blends all the charm and plasticity of the traditional<br />
form of manual working, proposing a sapient, innovative fusion<br />
between ancient methods and the need to obtain a product that is more<br />
regular in its dimensions and surface.<br />
The productive system, again involving the repetitive creation of single<br />
pieces, uses the clays of the <strong>Sannini</strong> pits, confirming all the qualities,<br />
which have made Impruneta famous as a place and symbol. Poggio<br />
<strong>Sannini</strong> can be used both indoors and outdoors, for floors, walls, or<br />
as ceiling tiles.Like a hand made tile, it requires a traditional mounting<br />
method with 5 mm joints and a post-laying treatment. Flash version is<br />
also available if a ready-to-use product is required.<br />
On request also honed version available (h. 2,6 cm).<br />
Poggio <strong>Sannini</strong> hat die Charakteristik handgemachter Fliesen und<br />
besticht durch seinen hellen Farbton und die weniger rauhe Oberfläche.<br />
Für diese Produkte hat <strong>Sannini</strong> das traditionelle Herstellungsverfahren<br />
für handgemachte Cottofliesen mit moderner Technik verknüpft.<br />
Das Ergebnis sind Boden- und Wandbeläge für Innen und Außen.<br />
Poggio <strong>Sannini</strong> eignet sich besonders für Renovierungen und den<br />
Landhausstil und wird bei einer Fugenbreite von mindestens fünf<br />
Millimetern traditionell verlegt. Eine Nachbehandlung im Innenbereich<br />
ist erforderlich. Auf Wunsch gibt es Poggio <strong>Sannini</strong> auch in Flash,<br />
also mit endbehandelter Oberfläche.<br />
Auf Anfrage auch geschliffen erhältlich (h. 2,6 cm).<br />
Poggio <strong>Sannini</strong> réunit l’attrait et le corps du travail artisanal manuel en<br />
proposant un mélange savant et original des vieilles techniques et la<br />
nécessité d’obtenir un produit plus constant en dimensions et surfaces.<br />
Le système de production toujours lié au geste répétitif de la pièce<br />
formée à l’unité utilise les terres des carrières <strong>Sannini</strong>, en confirmant<br />
toutes les qualités qui ont rendu célèbre dans le monde l’Impruneta<br />
comme région et comme symbole. Poggio <strong>Sannini</strong> peut être utilisé pour<br />
les intérieurs et les extérieurs, au sol, sur les murs, ou comme plafond.<br />
Comme tous les produits faits main, le produit doit être posé en<br />
traditionnel avec joints de 5 mm et traitement après la pose.<br />
Disponibilité d’une version Flash pour un produit prêt à l’emploi.<br />
Sur commande en finition poli disponible (h. 2,6 cm).<br />
poggio sannini<br />
Poggio <strong>Sannini</strong> riunisce tutto il fascino e<br />
la corposità della tradizionale lavorazione<br />
manuale proponendo un sapiente e originale<br />
connubio tra antichi procedimenti e la<br />
necessità di ottenere un prodotto più costante<br />
nelle dimensioni e nella superficie. Il sistema<br />
produttivo sempre legato alla gestualità<br />
ripetitiva del pezzo formato singolarmente<br />
utilizza le terre delle cave <strong>Sannini</strong>,<br />
confermando tutte le qualità che hanno reso<br />
celebre nel mondo l’Impruneta come luogo<br />
e come simbolo. Poggio <strong>Sannini</strong> può essere<br />
usato per interni e per esterni, a pavimento,<br />
in parete, o come tavella sottotetto. Come un<br />
fatto a mano richiede una posa tradizionale<br />
con fuga di minimo 5 mm ed un trattamento<br />
successivo alla posa per gli interni.<br />
È disponibile anche la versione Flash per<br />
avere un prodotto pronto all’uso, e la versione<br />
levigata in spessore 2,6 cm.<br />
101
103
Poggio <strong>Sannini</strong><br />
TECHNICAL CHARACTERISTICS<br />
Technical data<br />
technical<br />
characteristics norms EN-norm values <strong>Sannini</strong> values<br />
surface quality<br />
water<br />
absorption<br />
modulus<br />
of ropture<br />
scratch hardness<br />
of surface<br />
(Mohs)<br />
abrasion<br />
resistance<br />
linear thermal<br />
expansion<br />
thermal shock<br />
resistance<br />
res. to household<br />
chemical swimming<br />
pool water cleansers<br />
resistance to acid<br />
and alkalis<br />
frost<br />
resistance<br />
sliding<br />
resistance<br />
static coefficient<br />
of friction<br />
UNI EN 98<br />
UNI EN 99<br />
UNI EN 100<br />
UNI EN 101<br />
UNI EN 102<br />
UNI EN 103<br />
UNI EN 104<br />
ISO 10545<br />
ISO 10545<br />
UNI EN 202<br />
DM 236/89<br />
DIN 51130<br />
ASTM/C 1028<br />
percentage of acceptable<br />
tiles in the lot free<br />
visible defects 95 min.<br />
removed volume<br />
leather on dry surface µ > 0,40<br />
test on inclined plan<br />
≥ 0,60<br />
on dry surface<br />
on wet surface<br />
corresponding<br />
13%<br />
> 12,2 N/mm 2<br />
4<br />
1116 mm 3<br />
7,0(x10 -6 °C -1 )<br />
resistant<br />
resistant<br />
resistant<br />
(low concentration)<br />
resistant<br />
µ = 0,86<br />
R 12<br />
0,84<br />
0,85<br />
FORMATI<br />
30x30 sp. 3<br />
12x12in h. 1,2in<br />
15x30 sp. 3<br />
6x12in h. 1,2in<br />
30x30 sp. 3<br />
12x12in h. 1,2in<br />
gradino<br />
step<br />
Stufe<br />
marche<br />
30x30 sp. 3<br />
12x12in h. 1,2in<br />
angolare<br />
corner step<br />
Stufenecke<br />
angle<br />
Disponibile anche nella versione flash,<br />
vedi “cottoflash system”.<br />
See also “flash system”.<br />
Siehe auch “Flash System”.<br />
Voir aussi “flash system”<br />
9x30 sp. 1,8<br />
3,5x12in h. 0,71in<br />
battiscopa<br />
skirting<br />
Sockel<br />
plinthe<br />
29x30 sp. 3,7<br />
11,5x12in h. 1,45in<br />
coprimuro<br />
coping tile<br />
Mauerabdeckung<br />
revetement mural<br />
14x29 sp. 4,5<br />
5,5x11,5in h. 1,8in<br />
5x28 sp. 4,5<br />
2x11in<br />
listello<br />
h. 1,8in<br />
7x28 sp. 3<br />
2,8x11in h. 1,2in<br />
listello preinciso<br />
levigato<br />
30x30 sp. 2,6<br />
12x12in h. 1,02in<br />
15x30 sp. 2,6<br />
6x12in h. 1,02in<br />
30x30 sp. 2,6<br />
12x12in h. 1,02in<br />
gradino<br />
step<br />
Stufe<br />
marche<br />
30x30 sp. 2,6<br />
12x12in h. 1,02in<br />
angolare<br />
corner step<br />
Stufenecke<br />
angle<br />
105
107
manufactured handmade<br />
industriell handgemacht<br />
fait main industriel<br />
Poggio al Sole, created in response to the necessity to offer a product<br />
with a light colour. Same as Poggio <strong>Sannini</strong> blends all the charm and<br />
plasticity of the traditional form of manual working.<br />
Poggio al Sole can be used both indoors and outdoors, for floors,<br />
walls, or as ceiling tiles, of 3 cm thickness. On request, they may be<br />
up to 5 cm where the brick attains the solidity of a vehicular trafficresistantproduct.<br />
Poggio al sole, unsere Antwort auf die Nachfrage nach hellem Cotto.<br />
Wie auch “Poggio <strong>Sannini</strong>” hat die Charakteristik handgemachter<br />
Fliesen und besticht durch seinen hellen Farbton und die weniger<br />
rauhe Oberfläche. Für diese Produkte hat <strong>Sannini</strong> das traditionelle<br />
Herstellungsverfahren für handgemachte Cottofliesen mit moderner<br />
Technik verknüpft. Das Ergebnis sind Boden- und Wandbeläge für Innen<br />
und Außen, drei oder fünf Zentimeter stark.<br />
Poggio al Sole, nâit pour l’exigence de pouvoir disponser d’un produit<br />
avec tonalité claire. Même comme Poggio <strong>Sannini</strong> réunit l’attrait et le<br />
corps du travail artisanal manuel. Poggio al Sole peut être utilisé pour<br />
les intérieurs et les extérieurs, au sol, sur les murs, ou comme plafond<br />
en épaisseur 3 cm et sur demande jusqu’à 5 cm, où la pâte atteint la<br />
dureté d’un produit routier.<br />
poggio al sole<br />
Poggio al Sole, nasce dall’esigenze di poter<br />
disporre di un prodotto dalla tonalità chiara e<br />
come il Poggio <strong>Sannini</strong>, riunisce tutto il fascino<br />
e la corposità della tradizionale lavorazione<br />
manuale. Poggio al sole può essere usato<br />
per interni e per esterni, a pavimento, in<br />
parete, o come tavella sottotetto nello spessore<br />
da 3 cm e a richiesta fino a 5 cm, dove<br />
l’impasto raggiunge la durezza di un prodotto<br />
carrabile.<br />
109
111
Poggio al Sole<br />
TECHNICAL CHARACTERISTICS<br />
Technical data<br />
technical characteristics norms EN-norm values <strong>Sannini</strong> values<br />
percentage of acceptable<br />
surface quality UNI EN 98 tiles in the lot free corresponding<br />
visible defects 95 min.<br />
linear thermal UNI EN 103 7,0(x10- 6 °C-1)<br />
expansion<br />
water absorption UNI EN 99 12,90%<br />
modulus of ropture UNI EN 100 > 12,2 N/mm 2<br />
scratch hardness<br />
of surface UNI EN 101 4<br />
(Mohs)<br />
abrasion resistance UNI EN 102 removed volume 1116 mm 3<br />
res. to household<br />
chemical swimming ISO 10545 resistant<br />
pool water cleansers<br />
resistance to acid ISO 10545 resistant<br />
and alkalis (low concentration)<br />
frost resistance UNI EN 202 resistant<br />
DM 236/89 leather on dry surface µ > 0,40 µ= 0,75<br />
sliding resistance DIN 51130 test on inclined plan<br />
(classic) DIN 51097 inclination corner > 30°<br />
thermal shock UNI EN 104 resistant<br />
resistance<br />
FORMATI<br />
30x30 sp. 3<br />
12x12in h. 1,2in<br />
15x30 sp. 3<br />
6x12in h. 1,2in<br />
14x29,5 sp. 4,5<br />
5,5x11,8in h. 1,8in<br />
5x28 sp. 4,5<br />
2x11in h. 1,8in<br />
listello<br />
113
formati speciali, complementi e listelli<br />
formati speciali e complementi<br />
Per completare la vasta gamma dei propri<br />
prodotti, <strong>Sannini</strong> produce accessori e<br />
complementi che rendono possibile la<br />
realizzazione in cotto di elementi architettonici<br />
particolari e di vasto utilizzo.<br />
Elementi ad L per rifinire le zone di bordo<br />
delle superfici di rivestimento, una cimasa<br />
con gocciolatoio per davanzali o balconi,<br />
un bordo piscina antiscivolo ed altri formati<br />
e pezzi speciali che con la serie externa,<br />
gli elementi di arredo urbano e le pregiate<br />
terrecotte artistiche rendono la progettazione<br />
un’arte libera e piacevole.<br />
listelli<br />
Questo capitolo è dedicato alla famiglia dei<br />
listelli e riassume tutti i formati (stretti e lunghi)<br />
con i relativi spessori; si possono trovare già<br />
all’interno del catalogo nelle varie famiglie<br />
di appartenenza suddivise per superficie di<br />
finitura. Nelle seguenti pagine i listelli sono<br />
accomunati in modo da evidenziare le qualità<br />
compositive di un formato che la tradizione<br />
architettonica ha da sempre impiegato con<br />
originalità, ottenendo ottimi risultati grazie<br />
anche alla suadente ritmicità che le loro<br />
caratteristiche misure consentono, sia nella<br />
disposizione a “spina di pesce” sia a “correre”.<br />
115
special formats and accessories<br />
spezialteile<br />
format speciaux et compléments<br />
To complete the wide range of its products, <strong>Sannini</strong> produces<br />
various accessories which make it possible to create special<br />
terracotta architectural elements with a vast number of uses.<br />
L-shaped elements to finish edges of surfaces for cladding,<br />
a cyma with a drip for window-sills or balconies, anti-slip<br />
borders for swimming pools and other special formats and<br />
pieces, together with the externa series, the elements of urban<br />
furnishing and the precious artistic terracottas, make design a<br />
free and pleasurable art.<br />
“Formati speciali e complementi” umfaßt alle Formstücke<br />
und Sonderteile der <strong>Sannini</strong>-Kollektion, die große Architektur<br />
zu dem machen, was sie ist: die Realisierung einer guten<br />
Architektenidee. Zu den Formstücken gehören unter anderem<br />
Winkelstücke für Abgrenzungen von Verlegeflächen,<br />
Abschlußplatten mit Tropfnase für Fensterbänke und Balkone<br />
und rutschfeste Umrandungen für Schwimmbecken. Neben der<br />
Serie Externa und den Dekorationselementen für Gärten lassen<br />
auch etliche andere Sonderteile kreative Pläne Wirklichkeit<br />
werden.<br />
Pour compléter sa vaste gamme, <strong>Sannini</strong> produit des<br />
accessoires et des compléments qui rendent possibles la<br />
réalisation en cotto d’éléments d’architecture particuliers et<br />
polyvalents. Eléments en L pour finir les bords des surfaces<br />
de revêtement, une cimaise avec gouttière pour façades ou<br />
balcons, un rebord de piscine antiglisse et autres formats<br />
et pièces spéciales qui avec la série externa, les éléments<br />
décoratifs urbains et les précieux cotto artistiques font de la<br />
construction un art libre et agréable.<br />
special formats, accessories and listelli<br />
spezialteile, listelli<br />
format speciaux, compléments et listelli<br />
listelli<br />
This section is dedicated to the range of fillets and summarizes<br />
all the sizes (narrow and long) with their relative thicknesses;<br />
they can be found in the catalogue and are divided into various<br />
categories according to surface finish. On the following pages<br />
the fillets are united to highlight the compositional features of<br />
a format that architectural tradition has always used originally,<br />
obtaining excellent results also thanks to the smooth rhythm their<br />
typical sizes permit, both in the “herringbone” and “border tile”<br />
arrangements.<br />
Dieses Kapitel ist den Riemchen - oder italienisch “Listelli”<br />
- gewidmet und bietet eine reiche Auswahl an verschiedenen<br />
Formaten und Oberflächenbeschaffenheiten an.<br />
Mit der Zusammenstellung wird die innenarchitektonische<br />
Aussagefähigkeit der Listelli, sowohl traditionell als auch aktuell,<br />
herausgestellt. Bestechend ist der Eindruck der rhythmischen<br />
Folge bei den unterschiedlichen Verlegarten.<br />
Alle Listelli werden noch einmal, nach Oberflächenbeschaffenhe<br />
it geordnet, in den einzelnen Kapiteln besprochen.<br />
Ce chapitre est dédié à la famille des listels et résume tous les<br />
formats (étroits et longs) avec leurs épaisseurs correspondantes;<br />
on peut déjà les trouver à l’intérieur du catalogue dans les<br />
différentes familles d’appartenance divisées par surface de<br />
finition. Dans les pages qui suivent, les listels sont réunis de<br />
manière à mettre en évidence les qualités de la composition<br />
d’un format que la tradition architectonique a depuis toujours<br />
employé de façon originale, en obtenant d’excellents résultats<br />
également grâce à la fascinante rythmicité que leurs mesures<br />
caractéristiques permettent d’offrir, tant dans la pose “en<br />
chevrons” que “linéaire”.<br />
117
Formati speciali e complementi<br />
FORMATI<br />
Per altri elementi speciali come formato e utilizzo vedi anche i prodotti<br />
della serie “externa”.<br />
For other special elements and sizes see also “externa” and “litos”.<br />
Andere Artikel und Formate siehe “Externa” und “Litos”.<br />
10-12-15-17-21-23,5-26-29-31<br />
x33 sp. 1,6<br />
4-4,7-6-6,7-8,3-9,3-10,2-11,5-12,2<br />
x13in h. 1,62in<br />
arrotato<br />
coprimuro<br />
coping tile<br />
Mauerabdeckung<br />
revêtement mural<br />
10-12-15-17-21-23,5-26-29-31<br />
x33 sp. 1,6<br />
4-4,7-6-6,7-8,3-9,3-10,2-11,5-12,2<br />
x13in h. 1,62in<br />
arrotato<br />
terminale coprimuro<br />
coping tile terminal<br />
Mauerabdeckung Endstück<br />
terminal de revêtement mural<br />
Pour d’autres éléments spéciaux en format et utilisation voir aussi “externa” et “litos”.<br />
29x30 sp. 3,7<br />
11,5x12in h. 1,45in<br />
poggio sannini<br />
coprimuro<br />
coping tile<br />
Mauerabdeckung<br />
revetement mural<br />
25x34 sp. 1,6<br />
10x13,5in h. 0,62in<br />
arrotato<br />
cimasa con gocciolatoio<br />
cimase with drip-moulding<br />
Abschlußplatte mit Ablaufrinne<br />
cimaise avec gouttière<br />
33x34 sp. 3 - 6<br />
13x13,5in h. 1,2-2,4in<br />
litos<br />
bordo piscina<br />
swimming-pool edge<br />
Schwimmbeckenumrandung<br />
bord piscine<br />
33x14x4,5 sp. 1,5<br />
13x5,5x2,2in h. 0,60in<br />
arrotato<br />
elemento ad “L” con gocciolatoio<br />
L-element with drip moulding<br />
Winkelstück mit Ablaufrinne<br />
élément en “L” avec gouttlière<br />
119
Listelli<br />
FORMATI<br />
6x28 sp. 1,5<br />
2,4x11in h. 0,60in<br />
arrotato<br />
7x30 sp. 2<br />
2,8x12in h. 0,79in<br />
arrotato<br />
7x28 sp. 3<br />
2,8x11in h. 1,2in<br />
graffiato<br />
7x28 sp. 2,5<br />
2,8x11in h. 1in<br />
superficie sannini<br />
7x30 sp. 3<br />
2,8x12in h. 1,2in<br />
litos<br />
7x30 sp. 2,2<br />
2,8x12in h. 0,87in<br />
litos<br />
4,5x27 sp. 4<br />
1,8x10,5in h. 1,6in<br />
litos regolino<br />
7x30 sp. 5<br />
2,8x12in h. 1,97in<br />
externa<br />
7x30 sp. 5<br />
2,8x12in h. 2in<br />
fornace sannini<br />
7x30 sp. 2,2<br />
2,8x12in h. 0,87in<br />
fornace sannini<br />
5x28 sp. 4,5<br />
2x11in h. 1,8in<br />
poggio sannini<br />
7x28 sp. 3<br />
2,8x11in h. 1in<br />
poggio sannini preinciso<br />
5x28 sp. 4,5<br />
2x11in h. 1,8in<br />
poggio al sole<br />
7x30 sp. 2,6<br />
2,8x12in h. 1,1in<br />
fatto a mano classico<br />
4x20 sp. 1,3<br />
1,6x8in h. 0,51in<br />
terra serena<br />
121
arrotato brushed cotto<br />
gebürsteter cotto cotto poncé<br />
graffiato<br />
superficie sa nnini gently brushed and honed<br />
sanft angeschliffener cotto surface sannini<br />
123<br />
litos 7x30 cm natural extruded<br />
natur stranggezogen extrudé naturel
fornace sannini<br />
poggio sannini<br />
poggio al sole<br />
125<br />
fatto a mano
127
mosaici e decori<br />
mosaici<br />
Con i prodotti della serie mosaici, <strong>Sannini</strong><br />
offre la possibilità di utilizzare il cotto nei<br />
formati tradizionalmente legati alle tessere<br />
vitree o ceramiche. Da oggi sarà possibile<br />
rivestire cucine in muratura, bagni, superfici<br />
curvilinee attraverso una minuta texture di<br />
cotto ottenuta con una complessa lavorazione:<br />
la levigatura, per ottenere superfici calibrate;<br />
il taglio, per raggiungere i formati desiderati;<br />
la burattatura, per smussare gli angoli vivi;<br />
il montaggio e l’incollaggio manuale di tutti<br />
gli elementi su un’apposita struttura a rete<br />
di carta. I materiali musivi in cotto della<br />
<strong>Sannini</strong> sono forniti in elementi di dimensione<br />
30x30 cm, inscatolati. L’aspetto e la finitura<br />
della superficie particolarmente morbida e<br />
vellutata, costituisce una via intermedia tra la<br />
sobrietà dei materiali <strong>Sannini</strong> e la perfezione<br />
dei prodotti levigati. “Mosaico” e “Opus<br />
Incertum” sono disponibili anche con marmo.<br />
decori<br />
Per arricchire le pavimentazioni, secondo<br />
una tradizione rinascimentale legata alla<br />
alternanza di cotto e marmo, <strong>Sannini</strong> propone<br />
una serie esclusiva di elementi in materiali<br />
lapidei naturali di diverse tonalità e formati.<br />
Listelli, tozzetti, greche, rosoni e ventagli,<br />
consentono di progettare e disegnare<br />
liberamente diverse partiture ornamentali<br />
in modo che i decori siano coordinati<br />
dimensionalmente, in particolare nello<br />
spessore, con i diversi prodotti <strong>Sannini</strong>,<br />
dall’estruso industriale al plasmato a mano.<br />
129
mosaics<br />
mosaike<br />
mosaïques<br />
With the products in the mosaics series, <strong>Sannini</strong> offers the possibility<br />
of using terracotta in formats traditionally associated with glass or<br />
ceramic tesserae. It is now possible to tile masonry kitchens, bathrooms<br />
and curvilinear surfaces with a minute texture of terracotta obtained<br />
with a complex manufacturing process: smoothing to obtain calibrated<br />
surfaces, cutting to obtain the required sizes, tumbling to round off<br />
sharp corners, installation and manual gluing of all the elements onto a<br />
specific paper-mesh structure. <strong>Sannini</strong> terracotta mosaic materials come<br />
in boxes of 30x30x1 cm elements. The particularly smooth and velvety<br />
appearance and finish of the surface is midway between the sobriety<br />
of <strong>Sannini</strong> materials and the perfection of polished products.<br />
Die Cottomosaike sind in ihrer Schlichtheit eine Bereicherung für<br />
die Innenarchitektur und bieten einen Kontrast zu der Opulenz<br />
der traditionellen Marmor-und Glasmosaiken. Vielfältig sind die<br />
Anwendungsbereiche: nicht nur in Küche und Bad, auch in Wellness-<br />
und Hotelbereichen können interessante Highlights gesetzt werden.<br />
Die kalibrierten und getrommelten Mosaikstücke werden von Hand auf<br />
Papiernetz verklebt und erreichen den Endkunden kartonverpackt im<br />
Format 30x30x1 cm.<br />
Avec les produits de la série mosaïques, <strong>Sannini</strong> offre la possibilité<br />
d’utiliser le cotto dans les formes traditionnellement liées aux petits<br />
formats vitreux ou céramiques. Dorénavant il sera possible de revêtir<br />
les cuisines en maçonnerie, les salles de bains, les surfaces curvilignes,<br />
au moyen d’une texture minutieuse en cotto, obtenue grâce à une<br />
série complexe d’opérations: le polissage, pour obtenir des surfaces<br />
calibrées; la coupe, pour réaliser les formats désirés; l’émoussement,<br />
pour arrondir les angles vifs; le montage et l’encollage manuel de<br />
tous les éléments sur une structure spéciale en mailles de papier. Les<br />
matériaux mosaïques en cotto de <strong>Sannini</strong> sont fournis en éléments<br />
de dimensions 30x30 cm, mis en boîtes. L’aspect et la finition de la<br />
surface, particulièrement douce et veloutée, représentent une voie<br />
intermédiaire entre la sobriété des matériaux <strong>Sannini</strong><br />
et la perfection des produits polis.<br />
“Mosaico” e “Opus Incertum” sono disponibili anche con marmo “giallo reale”.<br />
“Mosaico” and “Opus Incertum” are available also with marble “giallo reale”.<br />
“Mosaico” und “Opus Incertum” sind auch mit Marmor erhältlich “giallo reale”.<br />
“Mosaico” et “Opus Incertum” sont aussi disponibles avec marbre “giallo reale”.<br />
Mosaici<br />
FORMATI<br />
30x30 sp. 1<br />
12x12in h. 0,4in<br />
mosaico<br />
2,7x2,7<br />
1,05x1,05in<br />
30x30 sp. 1<br />
12x12in h. 0,4in<br />
mosaico<br />
2x2<br />
0,79x0,79in<br />
30x30 sp. 1<br />
12x12in h. 0,4in<br />
texture<br />
2x7<br />
0,79x2,8in<br />
30x30 sp. 1<br />
12x12in h. 0,4in<br />
listelli irregolari<br />
1,5x7/10<br />
0,60x2,8/4in<br />
30x30 sp. 1<br />
12x12in h. 0,4in<br />
opus incertum<br />
131
133
135
137
139
fillets, dots, frets, rosettes<br />
bordüren, einlagen, rosetten<br />
décors<br />
To enrich the floors, according to a Renaissance tradition where<br />
terracotta and marble are alternated, <strong>Sannini</strong> proposes an<br />
exclusive series of elements in natural stone of varying tonalities<br />
and formats. Fillets, dots, frets and rosettes enable one to freely<br />
plan and design different ornamental surfaces so that<br />
the decorations are dimensionally co-ordinated, particularly in<br />
thickness, with the various <strong>Sannini</strong> products, from the industrially<br />
extruded product to the hand-moulded one.<br />
Decori nennt <strong>Sannini</strong> Bordüren, Einleger und Rosetten aus<br />
Naturstein, die noch mehr Gestaltungsspielraum geben.<br />
Schließlich haben schon die Baumeister der Renaissance Cotto<br />
und Naturstein geschickt kombiniert. Zum Programm gehören<br />
Marmorbordüren und -einleger in verschiedenen Farben und<br />
Größen, Mosaikbordüren, Rosetten und Halbrosetten.<br />
Alle Decori können zusammen mit verschiedenen Plattenstärken<br />
verarbeitet werden.<br />
Pour enrichir les carrelages, selon la tradition de la Renaissance<br />
liée à l’alternance cotto/marbre, <strong>Sannini</strong> propose une série<br />
exclusive d’éléments en pierres naturelles de diverses tonalités<br />
et formats. Listels, cabochons, grecques, rosettes et éventails<br />
permettent de concevoir et de dessiner librement plusieurs<br />
partitions ornementales de façon à ce que les décors soient<br />
coordonnés en dimensions, en particulier les épaisseurs, avec<br />
les autres produits <strong>Sannini</strong>, de l’extrudé industriel au moulé<br />
main.<br />
rosone Brunelleschi<br />
rosone Michelangelo<br />
rosone Borromini<br />
Decori<br />
141
Decori<br />
FORMATI<br />
ø 80<br />
ø 31,5<br />
Michelangelo<br />
ø 66x66<br />
ø 26x26<br />
Brunelleschi<br />
ø 65<br />
ø 25,5<br />
Borromini<br />
ø 40<br />
ø 16<br />
ventaglio<br />
9,3x20<br />
3,6x8in<br />
Giotto<br />
12,5x22<br />
5x8,6in<br />
Donatello<br />
12,5x29,5<br />
5x11,6in<br />
Vasari<br />
6x20<br />
2,4x8in<br />
Buontalenti<br />
8x20<br />
3,1x8in<br />
Ammannati<br />
143
vases and classical accessories<br />
vasen und dekorationselemente<br />
vases et accessoires classiques<br />
With the original moulds of its historical Gipsoteca, <strong>Sannini</strong> has revived<br />
the ancient method of working the terracottas of Impruneta. Orci,<br />
conche, vases, basins, amphorae, statues, small columns and classical<br />
furnishing accessories derived from the history of the Italian garden,<br />
entirely hand made and with decoration, all rigorously perfected with a<br />
chisel. It is a prize collection of works which transform craft production<br />
into art pieces of limited circulation. The forms appear enhanced <strong>by</strong><br />
the exceptional characteristics of the raw material, derived from the<br />
exclusive “galestro” vein whose resistance makes the modeller’s work a<br />
task of absolute dedication and talent.<br />
If the vases are outside they need drainage in the bottom.<br />
“Terrecotte artistiche” umfaßt alle Produkte, die <strong>Sannini</strong>-Modellier-<br />
Meister nach überlieferter Tradition von Hand herstellen. Dazu gehören<br />
unter anderem Orci, Conche, Pflanzgefäße, Amphoren, Statuen,<br />
Säulen und verschiedene klassische Dekoelemente aus der italienischen<br />
Gartenarchitektur. Erst mit der Wiederentdeckung der Originalformen<br />
seiner historischen Gipsothek konnte das Werk die traditionsreiche<br />
Herstellung von Terracotten wieder aufnehmen. Dabei werden die<br />
einzelnen Produkte ausschließlich von Hand geformt und sorgfältig mit<br />
dem Ziselierstift nachgearbeitet. Die Stückzahl ist begrenzt.<br />
Wenn die Vasen im Freien stehen, muß für Wasserablauf gesorgt<br />
werden.<br />
Avec les moules originaux de sa fameuse Gypsothèque, <strong>Sannini</strong> a remis<br />
au goût du jour l’artisanat antique des cotto de l’Impruneta. Jarres,<br />
vases, cruches, amphores, statues, colonnes et éléments décoratifs<br />
classiques dérivés de l’histoire du jardin à l’italienne, entièrement<br />
faits main et avec décorations, le tout passé au ciselet. Il s’agit d’une<br />
collection d’oeuvres de grand prix qui transforment la production<br />
artisanale en pièces artistiques de tirage limité. Les formes sont exaltées<br />
par les caractéristiques exceptionnelles de la matière première, dérivées<br />
de la veine “galestro” dont la résistance fait du travail du formeur un<br />
véritable engagement allié au talent.<br />
Il faut une possibilité de drainage si les vases sont situés à l’exterieur.<br />
vasi - terrecotte artistiche<br />
Con gli stampi originali della sua storica<br />
Gipsoteca, <strong>Sannini</strong> ha ripristinato l’antica<br />
lavorazione artigianale delle terrecotte<br />
dell’Impruneta. Orci, vasi, conche, anfore,<br />
statue, colonnini, e complementi di arredo<br />
classici derivati dalla storia del giardino<br />
all’italiana, interamente fatti a mano e con<br />
decorazioni, tutte rigorosamente ripassate a<br />
cesello. Si tratta di una collezione di opere<br />
di grande pregio che trasformano la<br />
produzione artigianale in pezzi d’arte in<br />
tirature limitate. Le forme risultano esaltate<br />
dalle eccezionali caratteristiche della materia<br />
prima, derivata dall’esclusiva vena “galestro”<br />
la cui resistenza rende l’opera del modellatore<br />
un lavoro di assoluto impegno e talento.<br />
Per l’uso in esterno devono essere muniti di<br />
foro di drenaggio.<br />
145
147<br />
progetto arch. Aldo Rossi
149
Terrecotte artistiche<br />
FORMATI<br />
h.91 ø 65<br />
mod. 116<br />
h.76 ø 58<br />
mod. 120<br />
h.94 ø 63<br />
mod. 121<br />
h.88 ø 50<br />
mod. 133<br />
h.99 ø 36<br />
mod. 134<br />
h.56 ø 40<br />
mod. 300<br />
h.63 ø 44<br />
mod. 303<br />
h.49 ø 58<br />
mod. 301<br />
h.48 ø 50<br />
mod. 302<br />
h.47 ø 39<br />
mod. 404<br />
h.65 ø 58<br />
mod. 600<br />
h.60 ø 45<br />
mod. 602<br />
h.45 ø 35<br />
mod. 606<br />
h.56 ø 37<br />
mod. 616<br />
h.98 ø 68<br />
mod. 618<br />
h.66 ø 80<br />
mod. 913<br />
h.52 ø 33<br />
mod. 942<br />
h.44 ø 74<br />
mod. 959<br />
h.105 ø 85<br />
mod. 987<br />
37x38x62<br />
mod. 320<br />
h.110 ø 34<br />
mod. 520<br />
h.40x42x81<br />
mod. 330<br />
h.60 ø 50<br />
mod. 216<br />
h.75 ø 64<br />
mod. 218<br />
h.90 ø 80<br />
mod. 220<br />
h.39 ø 60<br />
mod. 215<br />
h.54 ø 70<br />
mod. 217<br />
h.73 ø 98<br />
mod. 219<br />
h.120x37x33<br />
mod. 510<br />
h.70<br />
ø 45 base<br />
ø 103 piano<br />
mod. 530<br />
h.68x57x42<br />
mod. 531<br />
h.60x10x10<br />
mod. 1/100<br />
h.65x13x13<br />
mod. 2/130<br />
h.63x15x15<br />
mod. 3/150<br />
h.96x17x17<br />
mod. 4/170<br />
h.78x53<br />
mod. 408<br />
h.107x140<br />
mod. 1714<br />
h.177x50x50<br />
mod. 2<br />
estate<br />
summer<br />
Sommer<br />
Eté<br />
h.174x50x47<br />
mod. 3<br />
autunno<br />
autumn<br />
Herbst<br />
Automne<br />
h.178x50x50<br />
mod. 4<br />
inverno<br />
winter<br />
Winter<br />
Hiver<br />
h.176x60x50<br />
mod. 5<br />
primavera<br />
spring<br />
Frühjahr<br />
Printemps<br />
151
153
Lavorazione manuale delle terrecotte artistiche,<br />
azienda <strong>Sannini</strong>, foto Pietro Savorelli<br />
Manufacture of handmade vases and classical accessories,<br />
<strong>Sannini</strong> factory, photo Pietro Savorelli<br />
155
157
Il Giubileo cristiano trae la sua ispirazione dal Giubileo Ebraico detto anche anno Sabbatico. Durante tale anno la terra doveva riposare quindi non si seminava, inoltre<br />
si condonavano i debiti, si liberavano gli schiavi e le proprietà ritornavano al primo padrone. Questo avveniva ogni cinquanta anni.<br />
Il Giubileo cristiano invita alla conversione evangelica, al pentimento, alla carità verso il prossimo, alla liberazione dei mali sociali, al rinnovamento della vita morale,<br />
oltre alla visita della Basilica di San Pietro per chiedere l’indulgenza plenaria per la remissione delle proprie pene.<br />
Il Giubileo cristiano detto anno Santo è proclamato ogni venticinque anni, in questa occasione viene aperta, nelle quattro basiliche papali, la porta Santa. L’apertura<br />
della porta è celebrata in San Pietro, dal Pontefice, alla vigilia di Natale per dare inizio all’anno Santo e viene chiusa con la benedizione della calce e dei mattoni,<br />
simboli della costruzione della casa di Dio, il Natale successivo. Nel 1975, ultimo anno Santo, la <strong>Sannini</strong> è stata scelta per coniare i mattoni della porta Santa.<br />
The Christian Jubilee draws inspiration from the Jewish Jubilee, also known as the Sabbatical year. During this year, the earth was supposed to rest, so sowing ceased.<br />
Furthermore, debts were remitted, slaves were freed and properties returned to their initial owners. This happened every fifty years. The Christian Jubilee invites<br />
evangelical conversion, repentance, charity towards one’s fellow-men, deliverance from social ills, the renewal of moral life, including a visit of St. Peter’s Basilica to<br />
request plenary indulgence for the remission of one’s sufferings.<br />
The Christian Jubilee, known as Holy year, is proclaimed every twenty five years. On this occasion, the Porta Santa is opened in the four papal basilicas. The opening of<br />
the Porta is celebrated in St. Peter’s <strong>by</strong> the Pontiff on Christmas Eve to inaugurate the Holy year. It is closed the following Christmas with the benediction of the lime and<br />
bricks, constructional symbols of the house of God. In 1975, the last Holy year, <strong>Sannini</strong> was chosen to coin the bricks of the Porta Santa.<br />
Die Vorbereitungen für das Jahr 2000, das Heilige Jahr, laufen in aller Welt. Zum letzten Heiligen Jahr vor fünfundzwanzig Jahren, 1975, wurde <strong>Sannini</strong> auserwählt,<br />
die ”Bausteine” für die ”Porta Santa” zu formen, zu prägen und zu brennen. Mit diesen gesegneten Steinen wurde das Heilige Portal 1975 zugemauert. Getreu der<br />
christlichen Überlieferung wird der Papst im Jahre 2000 mit einem symbolischen Hammerschlag auf die <strong>Sannini</strong>-Steine die ”Porta Santa” wieder öffnen. Das christliche<br />
Jubiläumsjahr geht in langer Tradition zurück auf das hebräische Jubiläumsjahr und erinnert an die moralischen Werte in unserer Gesellschaft. Es ruft auf zur Besinnung<br />
auf das Evangelium, zur Sühne, zur Nächstenliebe und zur Befreiung von sozialer Not. Außerdem wird mit dem Besuch des Petersdomes in Rom der vollkommene Ablaß<br />
gewährt. Alle 25 Jahre proklamiert der Vatikan dieses Heilige Jahr und öffnet in den vier päpstlichen Basiliken die ”Porta Santa”. In der Weihnachtsnacht zu Beginn des<br />
Heiligen Jahres öffnet der Pontifex das Heilige Portal im Petersdom, um es im darauffolgenden Jahr wiederum in der Weihnachtsnacht zu schließen.<br />
Le jubilé chrétien tire son inspiration du jubilé hébreu, ou année sabbatique. Pendant cette période, la terre devait reposer et l’on ne cultivait pas, les dettes étaient<br />
effacées, les esclaves libérés et les propriétés rendues à leurs premiers propriétaires. Ceci arrivait tous les 50 ans.<br />
Le Jubilé chrétien invite à la conversion évangélique, au repentir, à la charité, à la libération des maux de la société, au renouveau moral, outre la visite à la Basilique<br />
San Pietro de Rome, pour implorer l’indulgence pleinière en rémission des péchés.<br />
Le Jubilé chrétien, baptisé année Sainte est proclamé tous les 25 ans. A cette occasion, on ouvre dans les 4 basiliques papales la porte Sainte. L’ouverture de la porte<br />
est célébrée à San Pietro par le souverain pontife la veille de Noël pour donner le départ à l’année Sainte, et se termine par la bénédiction de la chaux et des briques,<br />
symboles de la construction évangélique, le Noël suivant. En 1975, dernière année Sainte, <strong>Sannini</strong> a été choisie pour frapper les briques de la porte Sainte.<br />
boutique range vases<br />
vasen linea boutique<br />
vases ligne boutique<br />
Simplified models and moulds make the artistic terracottas of <strong>Sannini</strong><br />
available for a wider, more essential production, allowing more rapid<br />
supplying and working times, yet preserving all the charm of handchiselled<br />
works. The clay of these products is pure and unaltered <strong>by</strong><br />
additives. It is Impruneta clay, mixed with water, dried in a humid<br />
environment to allow natural slow drying, and then fired.<br />
If the vases are outside they need drainage in the bottom.<br />
“Linea Boutique” bezeichnet die vereinfachten Modelle und Formen,<br />
die es ermöglichen “Terrecotte Artistiche” für einen breiteren<br />
Interessentenkreis anzubieten. Doch trotz des geringeren Zeit- und<br />
Materialaufwands verlieren die handziselierten Arbeiten nichts von ihrem<br />
Reiz. Auch für diese Produkte wird reiner Impruneta-Ton verwendet, den<br />
<strong>Sannini</strong> mit Wasser vermischt, modelliert und an der Luft in feuchter<br />
Umgebung trocknet. Erst nach der natürlichen Trocknung kommen die<br />
Vasen und Dekoelemente in den Ofen.<br />
Wenn die Vasen im Freien stehen, muß für Wasserablauf gesorgt<br />
werden.<br />
Modèles et moules simplifiés rendent les cotto artistiques <strong>Sannini</strong><br />
disponibles pour une production développée tout en restant essentielle,<br />
permettant ainsi des temps plus rapides d’approvisionnement et de<br />
travail, tout en maintenant intact l’attrait exercé par les ouvrages ciselés<br />
à la main. La terre de ces produits est vierge et n’est altérée en aucune<br />
façon par des additifs. Il s’agit de l’argile Impruneta travaillée à l’eau,<br />
séchée à l’air ambiant humide pour obtenir un séchage lent et naturel,<br />
pour être ensuite cuite au feu.<br />
Il faut une possibilité de drainage si les vases sont situés à l’exterieur.<br />
vasi linea boutique<br />
Modelli e stampi semplificati rendono le<br />
terrecotte artistiche di <strong>Sannini</strong> disponibili<br />
per una produzione più ampia ed<br />
essenziale consentendo tempi più rapidi<br />
di approvvigionamento e lavorazione pur<br />
mantenendo intatto il fascino delle opere<br />
cesellate a mano. La terra di questi prodotti è<br />
pura e non viene alterata con alcun additivo,<br />
si tratta di argilla dell’Impruneta impastata con<br />
acqua, asciugata all’aria in ambiente umido<br />
per consentire una lenta essiccazione naturale<br />
e cotta al fuoco.<br />
Per l’uso in esterno devono essere muniti di<br />
foro di drenaggio.<br />
159
161
Vasi linea boutique<br />
FORMATI<br />
h.13 ø 28<br />
mod. 205<br />
h.15 ø 34<br />
mod. 206<br />
h.15 ø 40<br />
mod. 207<br />
h.17 ø 38<br />
mod. 209<br />
h.17 ø 40<br />
mod. 210<br />
h.25 ø 20<br />
mod. 212<br />
h.76 ø 51<br />
mod. 213<br />
h.76 ø 51<br />
mod. 213B<br />
h.76 ø 50<br />
mod. 213SC<br />
h.60 ø 50<br />
mod. 216LB<br />
h.75 ø 64<br />
mod. 218LB<br />
h.90 ø 80<br />
mod. 220LB<br />
h.54 ø 70<br />
mod. 217SF<br />
h.22x40x18<br />
mod. 312<br />
h.43 ø 41<br />
mod. 607<br />
h.31 ø 48<br />
mod. 608<br />
h.40 ø 23<br />
mod. 609CB<br />
h.46 ø 26<br />
mod. 610CB<br />
h.44 ø 60<br />
mod. 619<br />
h.21 ø 40<br />
mod. 626<br />
h.35 ø 38<br />
mod. 901<br />
h.20 ø 46<br />
mod. 902<br />
h.34 ø 45<br />
mod. 905<br />
h.20 ø 42<br />
mod. 907<br />
h.28 ø 56<br />
mod. 908<br />
h.49 ø 42<br />
mod. 909<br />
h.47 ø 49<br />
mod. 910<br />
h.25 ø 48<br />
mod. 915<br />
h.28 ø 36<br />
mod. 919<br />
h.44 ø 52<br />
mod. 922<br />
h.17 ø 23<br />
mod. 923<br />
h.24 ø 33<br />
mod. 924<br />
h.32 ø 42<br />
mod. 925<br />
h.17 ø 23<br />
mod. 923R<br />
h.24 ø 33<br />
mod. 924R<br />
h.32 ø 42<br />
mod. 925R<br />
h.28 ø 52<br />
mod. 929<br />
h.38 ø 42<br />
mod. 930<br />
h.27 ø 28<br />
mod. 948<br />
h.30 ø 46<br />
mod. 958<br />
h.41 ø 35<br />
mod. 964<br />
h.44 ø 38<br />
mod. 949<br />
h.39 ø 60<br />
mod. 215LB<br />
h.54 ø 70<br />
mod. 217LB<br />
h.73 ø 98<br />
mod. 219LB<br />
163
165
paving elements and accessories<br />
cotto elemente für den aussenbereich<br />
éléments et accessoires d’extérieurs<br />
Externa is a system of modular terracotta elements dedicated to the<br />
great tradition of the Italian piazza, conceived as an architectural<br />
space and also as a tangible manifestation of constructional sapience<br />
and material culture. A full range of elements is offered for the design<br />
of external areas, like up to 5 cm thick paving with a high resistance<br />
to vehicular traffic and frost, in different sizes with mechanical<br />
characteristics comparable to those of the best stone materials such<br />
as granite. Its pale colour together with its natural and very fine grain<br />
respond to the quest for a balanced relationship between man and his<br />
surroundings, stimulating innovative ideas both in contemporary and<br />
historical contexts, for public spaces as well as private residences.<br />
Four basic sizes for paving, designed for laying with 8 mm joints and<br />
perfectly suitable for laying dry on sand. Thickness, shape and technical<br />
specifications such as absorption make the Externa series a unique<br />
material of its kind.<br />
“Externa” ist ein umfassendes System von kombinierbaren<br />
Cotto-Elementen für die Gestaltung von Städten und Wohnanlagen.<br />
Dieses Cotto-Modul-System bietet maximale Planungsfreiheit<br />
mit einem ökologisch wertvollen Material.<br />
“Externa” ist frostsicher, extrem widerstandsfähig und bei einer<br />
Plattenstärke von fünf Zentimetern befahrbar. In allen mechanischen<br />
Eigenschaften läßt sich “Externa” mit harten Graniten vergleichen und<br />
erfüllt alle Kriterien der europäischen Normen. Hinzu kommen die von<br />
Gestaltern geschätzten Cotto-Merkmale, die mit ihrer hellen Farbe und<br />
der feinen Körnung ein natürliches Ambiente schaffen.<br />
Das Cotto-Modul-System besteht aus vier Grundformaten für<br />
Pflasterungen mit einer empfohlenen Fugenbreite von acht Millimetern<br />
und kann auch trocken im Sandbett verlegt werden. Ergänzend<br />
im Programm ist eine Vielzahl von Spezialteilen wie zum Beispiel<br />
Rundelemente für Kanten, Abflußrinnen oder Mauerabdeckungen.<br />
Externa est un système d’éléments composables en cotto dédié à la<br />
grande tradition de la piazza italienne entendue outre que comme<br />
espace architectonique également comme manifestation concrète<br />
du savoir construire et de culture des matériaux. Il s’agit d’une ligne<br />
complète destinée à la réalisation d’extérieurs avec des carrelages<br />
roulables haute résistance d’une épaisseur jusqu’à 5 cm résistants au<br />
gel, en plusieurs formats avec caractéristiques mécaniques comparables<br />
à celles des meilleurs matériaux comme le granit par exemple. Sa<br />
coloration rosée, son grain naturel et très fin répondent à la recherche<br />
d’équilibre entre homme et environnement, stimulant les utilisations<br />
originelles dans des contextes contemporains et dans des sites<br />
historiques, espaces publics et résidences privées. Quattre formats de<br />
base pour carrelages avec joint conseillé de 8 mm avec possibilité<br />
de pose à sec sur lit de sable. Epaisseurs, formes et caractéristiques<br />
techniques, telle l’absorption, font de la série Externa un matériau<br />
unique en son genre.<br />
externa<br />
Externa è un sistema di elementi componibili<br />
in cotto dedicata alla grande tradizione della<br />
piazza italiana intesa oltre che come spazio<br />
architettonico, anche come manifestazione<br />
concreta di sapienza costruttiva e cultura<br />
materica. Si tratta di una linea completa per<br />
la progettazione di ambienti in esterno come<br />
pavimentazioni carrabili ad alta resistenza con<br />
spessore fino a 5 cm e resistenti al gelo, in<br />
diversi formati con caratteristiche meccaniche<br />
paragonabili a quelle dei migliori materiali<br />
lapidei come i graniti.<br />
La sua colorazione rosata, la sua grana<br />
naturale e finissima rispondono alla ricerca di<br />
equilibrio tra uomo ed ambiente stimolando<br />
utilizzi originali sia in contesti contemporanei<br />
che in siti storici, sia per spazi pubblici che<br />
residenze private. Quattro formati base per<br />
pavimentazioni con una fuga consigliata di 8<br />
mm con possibilità di posa a secco su letto di<br />
sabbia. Spessori, forme e specifiche tecniche,<br />
quali l’assorbimento, fanno della serie Externa<br />
un materiale unico nel suo genere.<br />
167
169
Externa<br />
TECHNICAL CHARACTERISTICS<br />
Technical data<br />
length<br />
thickness<br />
straightness<br />
of sides<br />
rectangularity<br />
surface flatness<br />
centre curvature<br />
surface flatness<br />
edge curvature<br />
surface flatness<br />
warpage<br />
surface quality<br />
water<br />
absorption<br />
modulus<br />
of ropture<br />
scratch hardness<br />
of surface<br />
(Mohs)<br />
abrasion<br />
resistance<br />
linear thermal<br />
expansion<br />
res. to household<br />
chemical swimming<br />
pool water cleansers<br />
resistance to acid<br />
and alkalis<br />
frost<br />
resistance<br />
sliding<br />
resistance<br />
compression<br />
resistance<br />
impact<br />
resistance<br />
UNI EN 98 ± 1,5% max.<br />
corresponding<br />
UNI EN 98<br />
UNI EN 98<br />
UNI EN 98<br />
UNI EN 98<br />
UNI EN 98<br />
UNI EN 98<br />
UNI EN 98<br />
UNI EN 99<br />
UNI EN 100<br />
UNI EN 101<br />
UNI EN 102<br />
UNI EN 103<br />
ISO 10545<br />
ISO 10545<br />
UNI EN 202<br />
DM 236/89<br />
DIN 51130<br />
DIN 51097<br />
RD 2234/39<br />
± 10% max.<br />
± 10% max.<br />
± 1,5% max.<br />
± 1% max.<br />
± 1% max.<br />
± 1,5% max.<br />
percentage of acceptable<br />
tiles in the lot free<br />
visible defects 95 min.<br />
average value 310N/mm 2 > 20 N/mm 2<br />
unglazed tiles 5 min.<br />
removed volume in mm 3 771max.<br />
coefficient linear thermal<br />
expansion from ambient<br />
temparature 0,40<br />
test on inclined plan<br />
inclination corner<br />
corresponding<br />
corresponding<br />
corresponding<br />
corresponding<br />
corresponding<br />
corresponding<br />
corresponding<br />
4,5%<br />
6<br />
565 mm 3<br />
4,22(x10 -6<br />
°C -1 )<br />
resistant<br />
resistant<br />
resistant<br />
µ = 0,66<br />
R10<br />
> 30°<br />
46,33 N/mm 2<br />
9,4 J<br />
FORMATI<br />
30x30 sp. 5<br />
12x12in h. 2in<br />
canaletta<br />
channel<br />
Rinne<br />
goulotte<br />
30x30 sp. 5<br />
12x12in h. 2in<br />
griglia<br />
drain channel<br />
Abflußrinne<br />
grille<br />
30x5 sp. 3<br />
12x2in h. 1,2in<br />
bordo<br />
coved element for borders<br />
Rundelement für Kanten<br />
élément courbé pour bords<br />
Per altri elementi speciali come formato e utilizzo vedi anche listelli.<br />
See also “superficie sannini” and “litos”<br />
Siehe auch “superficie sannini” und “litos”<br />
Voir aussi “superficie sannini” et “litos”<br />
La serie “externa” è stata disegnata dall’arch. Franco Facchinelli e Alberto Grassi<br />
“externa” design <strong>by</strong> arch. Franco Facchinelli e Alberto Grassi<br />
“Externa” Entwurf Arch. Franco Facchinelli und Alberto Grassi<br />
“externa” a été déssinée par l’arch. Franco Facchinelli et Alberto Grassi<br />
30x30 sp. 5<br />
12x12in h. 2in<br />
pavimenti<br />
paving<br />
Pflasterungen<br />
carrelage<br />
15x30 sp. 5<br />
6x12in h. 2in<br />
15x30 sp. 2<br />
6x12in h. 0,79in<br />
7x30 sp. 5<br />
2,8x12in h. 0,79in<br />
171
173
175
177
urban furnishing<br />
stadtmöbel<br />
équipement urbain<br />
A wide range of accessories for urban furnishing, created to satisfy<br />
both the needs of the public space and those of domestic living.<br />
A range, which alternates classic and modern elements, composed of<br />
litter bins, traffic bollards, vases and spheres.<br />
A series reflecting continual research and the desire to satisfy new<br />
ideas, stimulated <strong>by</strong> the demand for high performance which, today,<br />
our technologies and skilled hands make possible.<br />
“Arredo Urbano”, die Serie für Stadtmöbel, bietet ein reiches Sortiment<br />
für die Stadtgestaltung. Dabei können klassische Elemente mit modernen<br />
kombiniert, und zwischen unterschiedlichen Abfallbehältern, Pollern und<br />
Dekorationselementen ausgewählt werden. Auf Anfrage realisieren die<br />
Ingenieure von <strong>Sannini</strong> auch Sonderanfertigungen für Architekten und<br />
Designer.<br />
Une vaste série de compléments pour l’équipement urbain présente une<br />
typologie d’utilisation pensée pour satisfaire les exigences d’espace<br />
public et les nécessités de l’habitat domestique. Une ligne qui alterne<br />
les éléments aux parfums classiques et modernes composée de panier<br />
à déchets, barrières de circulation, jarres, vases, boules etc... Un<br />
programme qui suppose une recherche continue, une philosophie<br />
tendue vers de nouvelles idées et nouvelles possibilités d’utilisation pour<br />
répondre à des sollicitations particulières que notre technologie et nos<br />
artisans rendent aujourd’hui possibles.<br />
arredo urbano<br />
Una ampia serie di complementi per l’arredo<br />
urbano che presenta una tipologia di utilizzo<br />
pensata per soddisfare sia le esigenze dello<br />
spazio pubblico, sia le necessità dell’abitare<br />
domestico. Una linea che alterna elementi<br />
di sapore classico e moderno composta<br />
da portarifiuti, dissuasori di traffico, orci,<br />
vasi, sfere. Un programma che presuppone<br />
una ricerca continua, una filosofia tesa a<br />
soddisfare nuove idee e nuove possibilità di<br />
impiego sollecitate da richieste di prestazioni<br />
particolari che le nostre tecnologie e le nostre<br />
maestranze rendono oggi realizzabili.<br />
179
FORMATI<br />
h.82 ø 40<br />
h. 32 ø 16<br />
portarifiuti<br />
litter bin<br />
Abfallbehälter<br />
panier à déchets<br />
h.62 ø 40<br />
h. 24,5 ø 16<br />
dissuasore di traffico<br />
traffic bollard<br />
Poller<br />
rallentisseur<br />
h.46x50x140<br />
h18x20x55<br />
panca<br />
bench<br />
Bank<br />
banc<br />
ø 23<br />
ø 9<br />
mod. 609<br />
sfere<br />
spheres<br />
kugel<br />
spheres<br />
ø 27<br />
ø 10,5<br />
mod. 610<br />
sfere<br />
spheres<br />
kugel<br />
spheres<br />
181
183
cotto reassembled with resin<br />
gemahlener cotto mit harzen gebunden<br />
cotto assemblé avec résine<br />
Can one talk about a revolution with regard to a material? In the case<br />
of Cottostone, reality goes far beyond the imagination, making possible<br />
through advanced technologies what in nature is unfeasible.<br />
The ancient tradition of “coccio pesto” (crushed terracotta), which can<br />
be found in the houses of Pompeii and many Palaeo-Christian basilicas,<br />
is adopted with exceptionally large terracotta slabs measuring a<br />
maximum of 140 x 305 cm. On one hand we have terracotta made<br />
from clay dried in kilns at over 1000 °C and on the other, blocks<br />
of material obtained from the mountains and then cut into slabs for<br />
cladding: <strong>Sannini</strong>, in a joint-venture with <strong>Stone</strong> Italiana, patenting this<br />
new material - a blend of history and technology - has succeeded in<br />
founding two different cultures, two different methods of use, associating<br />
the qualities of one to those of the other. The traditional limitations of<br />
dimension are nothing but a memory, while an unknown world for<br />
terracotta is opening, a world of raised floors in reinforced Cottostone,<br />
cavity walls and all the potential uses of stone known to this day. In its<br />
basic sizes of 60 and 120 cm, Cottostone leaves the factory chamfered<br />
and gauged. Currently available in three variations with the best quality<br />
cotto, crushed and bound with special resins and natural quartz, this<br />
material is an absolute novelty to the world and represents <strong>Sannini</strong>’s<br />
challenge to conquer the third millennium.<br />
Cottostone ist eine patentierte Neuheit, die auf dem Joint-Venture<br />
von <strong>Sannini</strong> mit <strong>Stone</strong> Italiana beruht. Zur Herstellung wird <strong>Sannini</strong>-<br />
Cotto bester Qualität zerkleinert und gemahlen und anschließend mit<br />
speziellen Harzen und natürlichen Quarzen gebunden.<br />
Damit wird die uralte Tradition des Coccio Pesto, den man in den<br />
Häusern von Pompeji und in vielen frühchristlichen Basiliken findet, mit<br />
fortschrittlichster Technologie neu interpretiert. Das Endprodukt kann<br />
wie Naturstein eingesetzt werden. So sind zum Beispiel Doppelböden<br />
mit armiertem Cottostone möglich oder hinterlüftete Fassaden in<br />
Großformaten bis zu 140 x 305 Zentimeter.<br />
Die Formate 30 x 60, 60 x 60 und 60 x 120 Zentimeter verlassen<br />
die Fabrik gefast und kalibriert. Zur Zeit kann unter vier Cottostone-<br />
Kreationen ausgewählt werden, Palladiana, Cocciopesto, Tecnostone.<br />
Est-il possible de parler de révolution à propos de matériau? Dans le cas<br />
du Cottostone, la réalité dépasse l’imagination et rend possible, par<br />
l’utilisation de technologies avancées, ce qui est impensable dans la<br />
nature. La tradition antique du coccio pesto que l’on retrouve dans les<br />
maisons de Pompei et dans de nombreuses basiliques paléochrétiennes<br />
est remise au goût du jour sous la forme de grandes dalles de cotto de<br />
dimensions exceptionnelles, jusqu’à un maximum de 140 x 305 cm de<br />
base. Le cotto est de l’argile séchée dans les fours à plus de 1000°.<br />
Les montagnes fournissent les blocs et les éléments de revêtement.<br />
<strong>Sannini</strong>, en joint-venture avec <strong>Stone</strong> Italiana, a breveté ce nouveau<br />
matériau, synthèse d’histoire et de technologie, réussissant à fondre deux<br />
cultures, deux traditions, en associant les qualités de l’une et de l’autre.<br />
Les limitations dimensionnelles traditionnelles sont un souvenir, alors que<br />
s’ouvre un monde inconnu pour le cotto, lié aux carrelages surélevés<br />
en Cottostone armé, aux parois ventilées, et à toutes ces utilisations et<br />
réalisations possibles avec les pierres jusqu’à aujourd’hui inconnues.<br />
Cottostone, en formats de base 60 et 120 cm, sort de l’usine biseauté et<br />
calibré.Disponible en 3 choix de la meilleure qualité, broyé et composé<br />
avec des résines spéciales et des quartz naturels, ce matériau constitue<br />
une nouveauté absolue dans le monde, le défi <strong>Sannini</strong> à la conquête du<br />
troisième millénaire.<br />
cottostone<br />
<strong>by</strong> <strong>Stone</strong> & <strong>Sannini</strong><br />
Si può parlare di rivoluzione a proposito<br />
di un materiale? Nel caso del Cottostone la<br />
realtà supera di gran lunga l’immaginazione<br />
rendendo possibile, attraverso l’uso di<br />
tecnologie avanzatissime, ciò che in natura<br />
è irrealizzabile. La tradizione antichissima<br />
del coccio pesto che si ritrova nelle case<br />
di Pompei così come in molte basiliche<br />
paleocristiane, diviene utilizzabile in grandi<br />
lastre di cotto di misure eccezionali, fino ad un<br />
massimo di 140 x 305 cm di base.<br />
Se il cotto è argilla essiccata nei forni ad oltre<br />
mille gradi di temperatura e dalle montagne<br />
si ricavano blocchi e poi lastre di materiale<br />
per rivestimento, <strong>Sannini</strong>, in joint-venture con<br />
la <strong>Stone</strong> Italiana, brevettando questo nuovo<br />
materiale, sintesi di storia e tecnologia, è<br />
riuscita a fondere due diverse culture, due<br />
diversi modi d’uso associando le qualità<br />
dell’uno a quelle dell’altro.<br />
Le limitazioni dimensionali tradizionali sono un<br />
ricordo, mentre si apre un mondo sconosciuto<br />
per il cotto, legato ai pavimenti sopraelevati<br />
in Cottostone armato, alle pareti ventilate, e a<br />
tutti quegli usi e quelle realizzazioni possibili<br />
con i materiali lapidei fino ad oggi conosciuti.<br />
Cottostone nei formati base 60 e 120 cm esce<br />
di fabbrica bisellato e calibrato.<br />
Disponibile oggi in tre impasti di cotto della<br />
migliore qualità frantumato e legato con<br />
speciali resine e quarzi naturali, questo<br />
materiale costituisce una novità assoluta nel<br />
mondo, la sfida <strong>Sannini</strong> alle conquiste<br />
del terzo millennio.<br />
185
187
Cottostone<br />
TECHNICAL CHARACTERISTICS<br />
Technical data<br />
technical<br />
characteristics norms EN-norm values <strong>Sannini</strong> values<br />
apparent<br />
volumic mass EN WI M v =2192kg/m 3<br />
water<br />
absorption EN WI C=0,5%<br />
flexural<br />
strenght EN WI R tf =(33,2±2,4)MPa<br />
linear thermal<br />
expansion UNI EN 202<br />
coefficient linear thermal<br />
expansion from ambient 1,9x10⁻⁶ temparature
Manuale di posa e di manutenzione<br />
Tecnostone<br />
Use and maintenance manual<br />
Recommended adhesives<br />
Our materials have minimum water absorption<br />
qualities because they are manufactured using<br />
high pressure vacuum industrial procedures.<br />
This results in a high level of compactness which<br />
is accentuated <strong>by</strong> the minimal percentage of<br />
structural polyester resin which is subjected to<br />
hot catalysis. The high level of compactness<br />
and the minimum water absorption means<br />
that traditional laying methods, which require<br />
the use notable quantities of water, are not<br />
recommended. When the water cannot<br />
escape through the underlying screed, the<br />
grooves between the tiles or the perimeter<br />
border, it results in detachment and tension<br />
which inevitably lead the tiles to warp in an<br />
uncontrolled manner. Existing commercial<br />
adhesives are ideal for fixing with as they are<br />
composed of sand and cement with synthetic<br />
latex additives and they respond well to stress<br />
and thermal strain.<br />
Example of use: for internal flooring and<br />
coverings we recommend the use of the<br />
“two-component” Granirapid Mapei, which is<br />
made up of component A (bag of powder) and<br />
component B (tin of latex).<br />
The laying mixture is obtained <strong>by</strong> mixing<br />
Gli adesivi consigliati<br />
I nostri materiali hanno minimi valori di assorbimento di acqua perché ottenuti con<br />
un procedimento industriale ad elevata pressione sottovuoto. Ne segue una elevata<br />
compattezza potenziata anche dalla presenza nell’impasto di una minima percentuale<br />
di resina strutturale poliestere catalizzata a caldo. La particolare compattezza e il minimo<br />
valore di assorbimento sconsigliano metodi di posa tradizionali che richiedono l’uso<br />
di notevoli quantità di acqua. Quando l’acqua non trova sfogo nel massetto sottostante,<br />
dalle fughe, dal perimetro di rispetto, crea stacchi e tensioni che portano inevitabilmente<br />
ad imbarcamenti delle marmette a movimenti non controllabili.<br />
Gli adesivi esistenti in commercio sono ideali per la posa, additivati con lattici sintetici<br />
e composti da sabbie e cementi, sopportano bene le sollecitazioni tra cui quelle termiche<br />
a cui viene sottoposto il nostro materiale.<br />
Esempio di utilizzo: per pavimenti interni e rivestimenti consigliamo l’uso del “bicomponente”<br />
Granirapid Mapei, costituito dal componente A (sacco di polvere) e componente B (fustino<br />
di lattice). L’impasto per la posa si ottiene mescolando A+B, e cioè i 25Kg di A con<br />
i 5.5 Kg di B. Come da istruzioni indicate sulle confezioni, si consiglia l’impiego<br />
di un agitatore meccanico, facendo attenzione a versare sempre la polvere nel lattice<br />
e non viceversa.<br />
Esempio di utilizzo: per applicazioni particolari consigliamo l’uso di un adesivo con<br />
caratteristiche specifiche quali il Keralastic (adesivo poliuretanico bicomponente).<br />
Consente l’aggrappaggio su gomma PVC, metallo, legno, ecc. soprattutto in presenza<br />
di elevata umidità, per l’applicazione di grandi formati, e con rilevanti escursioni termiche<br />
e perciò dilatazioni.<br />
L’impasto si effettua versando l’induritore B nella pasta, in seguito agitare con un<br />
miscelatore meccanico fino ad ottenere un impasto perfettamente omogeneo. Ricordiamo<br />
che l’incollaggio in esterno dei nostri materiali non è consigliato poichè tali materiali sono<br />
studiati per applicazioni in esterno con montaggio a secco, mediante semplice appoggio<br />
nel caso di pavimenti sopraelevati, o con fissaggi meccanici per pareti.<br />
Corretta applicazione dell’adesivo.<br />
La corretta applicazione dell’adesivo, da utilizzare in interno, offre un buon aggrappaggio<br />
del nostro materiale.Si consiglia l’uso di una spatola dentata per l’applicazione dell’adesivo<br />
in modo che la quantità stesa sul sottofondo assicuri una bagnatura almeno dell’80%<br />
delle lastre o marmette Cottostone. Per la posa di grandi formati (maggiori di cm 30x30)<br />
e per superfici sottoposte a traffico intenso (ospedali, stabilimenti, grandi magazzini,<br />
ecc.) si consiglia il sistema a doppia spalmatura, ciò garantisce la bagnatura del 100%<br />
della superficie.Per ben utilizzare il collante conviene seguire le dosi e le indicazioni del<br />
fabbricante. La misura della spatola dentata sarà scelta in funzione della dimensione delle<br />
lastre e lo stato del sottofondo.<br />
Handbuch zur Anwendung und<br />
Instandhaltung<br />
Ratschläge zur Klebung<br />
Unsere Materialien haben, dank der<br />
Verarbeitung mit hoher Unterdruckpressung,<br />
minimale Wasserabsorptionswerte. Daraus<br />
ergibt sich eine hohe Dichte, die durch das<br />
Vorhandensein eines minimalen Prozentsatzes<br />
von Polyesterharz, beim Ofenkatalyseverfahren<br />
noch erhöht wird. Wegen dieser hohen Dichte<br />
und der niedrigen Wasseraufnahme erweisen<br />
sich herkömmliche Verlegemethoden, bei denen<br />
große Wassermengen benötigt werden, als<br />
ungeeignet. Wenn das Wasser weder vom<br />
unterliegenden Boden, noch durch die Fugen<br />
ablaufen kann, entstehen Spannungen und<br />
Abhebungen, die folglich zu Verwerfungen<br />
der Fliesen und zu nicht kontrollierbaren<br />
Bewegungen führen. Die im Verkauf erhältlichen<br />
Klebemittel sind ideal für die Verlegung: Durch<br />
den Zusatz von synthetischem Latex sowie<br />
Sand- und Zementbestandteilen vertragen sie<br />
die Temperaturschwankungen, denen unsere<br />
Produkte standhalten. Anwendungsbeispiel:<br />
Bei Fußböden in Innenräumen und<br />
Wandverkleidungen empfehlen wir den<br />
“Zwei-Komponenten” Kleber Granirapid<br />
Mapei, der sich aus Komponente A (Sack mit<br />
Pulver) und Komponente B ( Kübel mit Latex)<br />
Manuel d’emploi et d’entretient<br />
Les adhésifs conseillés<br />
Nos matériaux ont des valeurs minimes<br />
d’absorption d’eau parce qu’obtenus au moyen<br />
d’un procédé industriel à pression très élevée et<br />
sous vide. Il s’ensuit une compacité très élevée<br />
et intensifiée par la présence dans le mélange<br />
d’un pourcentage minime de résine structurelle<br />
polyester catalysée à chaud. La haute compacité<br />
et la valeur minimale d’absorption déconseillent<br />
les méthodes de pose traditionnelles qui<br />
requièrent l’emploi de grandes quantités<br />
d’eau. Quand l’eau ne trouve pas une sortie<br />
dans la couche sousjacente, des fentes, du<br />
périmètre de bordure, elle crée des fissures et<br />
des tensions qui poussent inévitablement aux<br />
cambrures des dalles, mouvements tout à fait<br />
incontrôlables. Les adhésifs existant dans le<br />
commerce sont parfaits pour la pose, enrichis<br />
de latex synthétique et composés de sable<br />
et ciment; ils supportent bien les contraintes,<br />
entre autres thermiques, auxquelles est soumis<br />
notre matériel.<br />
Exemple d’emploi: pour les dallages intérieurs<br />
et les revêtements, nous conseillons l’emploi<br />
du “bi-composant” Granirapid Mapei, obtenu<br />
avec le composant A (sac de poudre) et le<br />
composant B (baril de latex). Le mélange pour<br />
Palladiana<br />
A+B, i.e. 25 Kg of A with 5.5 Kg of B.<br />
As indicated in the instructions on the<br />
packing, the use of a mechanical agitator is<br />
recommended, paying attention to always pour<br />
the powder into the latex and not<br />
vice versa. Example of use: for special uses we<br />
recommend the use of a high quality adhesive<br />
such as Keralistic (two-component polyurethane<br />
adhesive). This allows adhesion to PVC rubber,<br />
metal, wood etc. especially when there is a high<br />
level of humidity, when large sizes are used<br />
and when there are high thermal ranges and<br />
consequently expansion. The adhesive is made<br />
<strong>by</strong> pouring the hardener B into the mixture,<br />
then stirred using a mechanical mixer until a<br />
perfectly homogenous paste is obtained. We<br />
remind customers that it is not recommended<br />
to glue this material in exteriors. Any exterior<br />
applications requires dry installation either<br />
through raised floors or through mechanical<br />
anchoring in cladding.<br />
Correct use of adhesives<br />
A correct use of the adhesive (interior<br />
applications) is necessary in order to obtain<br />
good bonding of our materials. We recommend<br />
the use of a serrated spatula to apply the<br />
adhesive, so that the quantity extended onto<br />
the foundations ensures coverage/soaking of<br />
at least 80% of the Cottostone slabs or tiles.<br />
Si consiglia di stendere il collante su piccole quantità per volta, assicurandosi di posare<br />
le marmette entro il tempo aperto di posa del collante.<br />
Esempio di consumi utilizzando l’adesivo Granirapid: (spatola n.5) per l’applicazione di<br />
formati normali 3,5-4 Kg/mq; (spatola n.6) per l’applicazione di formati grandi 5-6Kg/mq;<br />
(spatola n.10) per l’applicazione su sottofondi irregolari 8Kg/mq e oltre.<br />
Esempio di consumi utilizzando l’adesivo Keralastic: (spatola n.4) per l’applicazione<br />
di formati normali 2,5 Kg/mq; (spatola n.5) per l’applicazione di formati grandi 5 Kg/mq e<br />
per impermiabilizzazioni di superfici 3/3, 5 Kg/mq.<br />
Stato e buona preparazione del sottofondo<br />
Lo stato e la buona preparazione sono condizioni per la corretta applicazione delle nostre<br />
lastre e marmette. I supporti o sottofondi devono essere di buona qualità, privi di difetti,<br />
eseguita a regola d’arte assolutamente: asciutti, stabili, solidi, resistenti alla compressione,<br />
sufficientemente piani ed esenti da polvere, grassi, cere, vernici, agenti disarmanti e<br />
quant’altro possa pregiudicare la buona adesione. Le superfici in calcestruzzo debbono<br />
aver raggiunto una sufficiente maturazione, i massetti di anidrite o le pareti in gesso devono<br />
essere trattati con adeguati Primer prima di procedere alla posa.<br />
La maturazione del massetto si valuta intorno ai 6-8 giorni per cm di spessore, salvo<br />
l’impiego di impasti di cementi speciali a rapido indurimento.<br />
Eventuali sottofondi preesistenti costituiti da calcestruzzo, marmette, ceramica o marmo<br />
devono risultare solidi, privi di crepe, ben ancorati al fondo, resistenti ai carichi previsti<br />
e completi di adeguati giunti strutturali.<br />
Indicazioni su come e quando posizionare le lastre<br />
e le marmette in modo corretto<br />
La temperatura dell’ambiente deve essere compresa tra i + 5 °e i +30°C: l’umidità residua<br />
del sottofondo deve essere minore o uguale al 3-5% circa; la differenza di planarità del<br />
sottofondo deve essere massimo 3mm/ml. Il taglio delle marmette richiede l’uso del disco<br />
diamantato oppure una taglierina ad acqua fresa sempre diamantata.<br />
Si consiglia di posizionare le marmette e le lastre di considererevoli dimensioni con<br />
l’ausilio di una ventosa, per assicurare il contatto con il sottofondo conviene batterle con<br />
un martello di gomma evitando il formarsi di bolle d’ aria e vuoti. La buona posa e il<br />
corretto allineamento delle marmette richiede l’uso di giunti aperti ed uniformi usando<br />
appositi distanziatori in nylon. La posa a giunti uniti è rigorosamente vietata ad eccezione<br />
di particolari condizioni e comunque, per piccole superfici. La larghezza dei giunti varia a<br />
seconda del formato e dovrà essere conforme al regolamento europeo (con valori minimi da<br />
2 a 5 millimetri), e in funzione dei formati e sollecitazioni termiche.<br />
zusammensetzt. A und B werden vermischt,<br />
und zwar 25 kg A mit 5,5 kg B. Gemäß der<br />
Packungsanleitung sollte ein mechanischer<br />
Aufrührer verwendet werden; weiterhin<br />
sollte beachtet werden, daß das Pulver in<br />
das Latex gerührt wird und nicht umgekehrt.<br />
Anwendungsbeispiel: Für Sonderverlegungen<br />
sollte ein Kleber mit starkem Haftvermögen,<br />
wie z.B.<br />
Keralastic (2-Komponenten Polyurethan-Leim),<br />
der für PVC, Metall, Holz, usw. geeignet<br />
ist, verwendet werden- insbesondere für<br />
Großformate bei erhöhter Feuchtigkeit<br />
sowie bei Temperaturschwankungen, die<br />
Ausdehnungen hervorrufen.<br />
Man mische den Härter unter die Paste, und<br />
verrühre mit einem mechanischen Rührer<br />
bis eine homogene Masse entsteht. Wir<br />
weisen darauf hin, daß von einer Klebung<br />
im Außenbereich abgeraten wird. Bei<br />
Außenanwendungen soll das Material entweder<br />
als Doppelboden verlegt, bzw in der Fassade<br />
mechanisch verankert werden.<br />
Korrektes Kleben<br />
Bei der Innenverlegung muß der Klebstoff<br />
vorschriftsmäßig, da die korrekte Haftung<br />
unseres Materials davon abhängt.<br />
Wir empfehlen Zahnspachteln, damit eine<br />
80% ige Benetzung der Cottostone Fliesen<br />
la pose s’obtient en mélangeant A+B, c’està-dire<br />
25 kg de A et 5,5 kg de B. Selon le<br />
mode d’emploi donné sur les emballages, il<br />
est conseillé d’utiliser un agitateur mécanique<br />
en faisant attention à verser toujours la poudre<br />
dans le latex et non pas le contraire. Exemple<br />
d’emploi: pour des applications particulières,<br />
nous conseillons l’emploi d’un adhésif avec des<br />
caractéristiques élevées tel que le Keralastic<br />
(adhésif polyuréthanine bi-composant).<br />
Celui-ci permet l’accrochage sur caoutchouc<br />
P.V.C., métal, bois, etc., surtout quand le<br />
degré d’humidité est élevé, dans l’application<br />
de grands formats et pour des amplitudes<br />
thermiques élevées et par conséquent des<br />
dilatations. Le mélange s’obtient en versant<br />
le durcisseur B dans la pâte, ensuite on agite<br />
avec un mélangeur mécanique afin d’obtenir<br />
un mélange parfaitement homogène. Nous<br />
rappelons que l‘encollage à l‘éxterieur de<br />
nos matériaux n‘est pas recommandé parce<br />
que le matérial meme requet une application<br />
mechanique , comme des planches<br />
techniques où un ancrage mechanique pour<br />
les facades.<br />
Application correcte de l’adhésif<br />
Un bon accrochage de notre matérial, pour<br />
des interieurs, dépend d‘une application<br />
correcte de l’adhésif. On conseille l’emploi<br />
191
Cocciopesto<br />
For the laying of larger sizes (greater than<br />
30x30 cm) and for areas subjected to heavy<br />
traffic (hospitals, factories, large stores etc.)<br />
we recommend the double spreading system<br />
as this guarantees soaking of 100% of the<br />
surface. To use the adhesive effectively it is<br />
necessary to follow the manufacturer’s dosage<br />
and instructions. The size of the toothed spatula<br />
should be chosen according to the size of the<br />
slabs and the state of the foundations. We<br />
recommend spreading a small quantity of<br />
adhesive at a time, ensuring that the tiles are<br />
laid within the laying time of the adhesive.<br />
Example of consumption using the Granirapid<br />
adhesive: (spatula no. 5) for the installation of<br />
normal sizes 3,5 - 4 Kg/sqm; (spatula no. 6)<br />
for the installation of large sizes 5 - 6 Kg/sqm;<br />
(spatula no.10) for installation on irregular<br />
foundations 8 Kg/sqm and beyond.<br />
Example of consumption using Keralistic:<br />
(spatula no.4) for the installation of normal<br />
sizes 2,5 Kg/sqm; (spatula no. 5) for the<br />
installation of large sizes 5 Kg/sqm and for<br />
the waterproofing of surfaces 3 - 3,5 Kg/sqm.<br />
State and preparation of the foundations<br />
The state and good preparation are<br />
fundamental for the correct installation of<br />
our tiles and slabs. The supporting surfaces<br />
or foundations must be absolutely dry, stable,<br />
solid, resistant to compression, sufficiently<br />
Devono comunque essere rispettati i giunti di dilatazione preesistenti e previsti giunti di<br />
frazionamento suddividendo le aree da pavimentare in riquadri da ml 4x4 o 6x6, mediante<br />
l’inserimento di uno speciale profilato in PVC da 5-10 mm. Lungo i bordi perimetrali ed in<br />
corrispondenza di tutti i muri, pilastri e gradini ecc. conviene sistemare giunti di grandezza<br />
adeguata tali da consentire il riempimento con sigillante siliconico mono-componente. Le<br />
fughe da sigillare devono essere preventivamente pulite per tutto lo spessore, vanno rimosse<br />
eventuali tracce di collante, quindi vanno riempite con il sigillante adeguato comprimendolo<br />
con una spatola liscia. Immediatamente bisogna asportare il sigillante eccedente con<br />
una spugna umida. La sigillatura delle fughe può essere eseguita con apposite polveri<br />
preconfezionate in vari colori e granulometrie diverse, in funzione della larghezza delle<br />
fughe, queste ultime possono essere additivate con lattice per migliorare la pulibilità, la<br />
resistenza, l’impermeabilità e l’elasticità.<br />
Note e suggerimenti per il dopo posa<br />
A posa avvenuta, quando l’adesivo ha iniziato la fase di presa, non rimuovere le lastre,<br />
qualora fosse necessario riposizionarle è opportuno togliere completamente l’adesivo<br />
dal sottofondo e dal retro della lastra con una spatola, quindi rimettere il collante secondo<br />
modi indicati in precedenza. L’eccesso di collante che in fase di posa potrebbe affiorare<br />
va immediatamente rimosso con una spugna umida per evitare possibili danni sulla superficie<br />
delle lastre. Qualsiasi lavoro di cantiere si svolga va tenuto conto che le marmette vengono<br />
fornite prelucidate e perciò temono danneggiamenti. In ogni caso se si prevedono ulteriori<br />
lavori, le marmette posate vanno protette con robusti teli di polietilene o speciali guaine<br />
protettive che lascino libera la traspirazione. Nelle zone più esposte al passaggio o<br />
laddove si prevedono lavorazioni pesanti e lo spostamento di carichi e/o trabatelli, meglio<br />
ricoprire la superficie pavimentata con pannelli di legno.<br />
Nelle zone esposte al sole battente e a temperature superiori ai 30°C è consigliabile<br />
proteggere il pavimento con panni umidi per almeno 24 ore dopo la posa.<br />
Posa erronea e ripristino per usura: consigli per la rilevigatura e rilucidatura<br />
Qualora per motivi incidentali (difetti di planarità dovuti a cattiva posa, danneggiamenti<br />
e altro) e a distanza di tempo per ripristino dall’usura, le marmette della Cottostone<br />
richiedano di essere rilevigate e rilucidate si consiglia di concordare con l’azienda <strong>Sannini</strong><br />
le fasi ed i modi delle operazioni. Prima di procedere con il lavoro, è opportuno per tutti<br />
i tipi di lastre e marmette,provare la sequenza di levigatura e lucidatura in una porzione<br />
limitata di pavimento e accertarne il risultato finale. (Le modalità di levigatura e lucidatura<br />
in opera del prodotto Cottostone composto di quarzo sono, di massima, simili a quelle<br />
comunemente usate per il granito e i materiali duri).<br />
gewährleistet ist. Für die Verlegung von<br />
Großformaten (größer als 30x30) und für<br />
Oberflächen, die starker Beanspruchung<br />
ausgesetzt sind (z.B. in Krankenhäusern,<br />
Betrieben, Kaufhäusern, usw.) sollten zwei<br />
Lagen Kleber aufgetragen werden, um<br />
eine 100% ige Benetzung der Oberfläche<br />
zu gewährleisten. Die Anwendungs- und<br />
Dosierungsanleitung des Herstellers sollte<br />
unbedingt befolgt werden. Die Größe der<br />
Zahnspachteln sollte je nach Abmessung der<br />
Platten und des Zustands des Untergrundes<br />
ausgewählt werden. Es wird empfohlen, den<br />
Klebstoff auf kleine Flächen zu streichen, um<br />
sicher zu gehen, daß die Fliesen innerhalb der<br />
Dauer der Klebebereitschaft des Klebers verlegt<br />
werden können.<br />
Mengenverbrauchsbeispiel bei Granirapid<br />
(Spachtel Nr.5) für die Klebung von<br />
Normalgrößen 3,5 - 4 kg/m 2 ;<br />
(Spachtel Nr.6) für die Klebung von<br />
Großformaten 5 - 6 kg/m 2 ;<br />
(Spachtel Nr.10) für unregelmäßige<br />
Unterlagen 8 kg/m 2 und darüber. Beispiel<br />
zum Mengenverbrauch von Keralastic:<br />
(Spachtel Nr.4) für Normalgrößen 2,5<br />
kg/m 2 . (Spachtel Nr.5) für Großformate<br />
5 kg/m 2 , sowie für die Abdichtung der<br />
Bodenoberflächen 3 - 3,5 kg/m 2 .<br />
Zustand und korrekte Vorbereitung des<br />
Untergrundes<br />
d’une spatule dentée pour l’application de<br />
l’adhésif de façon que la quantité étalée sur<br />
la chape assure un mouillage de 80% au<br />
moins des planchers et des dalles <strong>Stone</strong>. Pour<br />
la pose de grands formats (plus de 30x30 cm)<br />
et pour les surfaces à trafic intense (hôpitaux,<br />
usines, grands magasins, etc.), on conseille le<br />
système à double enduisage afin de garantir<br />
le mouillage de la surface à 100%. Pour bien<br />
utiliser l’adhésif, il convient de respecter les<br />
doses et les instructions du fabricant. La taille<br />
de la spatule dentée sera choisie en fonction<br />
de la dimension des planchers et l’état de la<br />
chape. On conseille d’étaler l’adhésif peu à<br />
peu en prenant garde à poser les dalles dans<br />
le délai de pose de l’adhésif.<br />
Exemple de consommation dans l’emploi de<br />
l’adhésif Granirapid: (spatule N°5)<br />
pour l’application de formats normaux<br />
3,5 - 4 kg/m 2 ; (spatule N°6) pour l’application<br />
des grands formats 5 - 6 kg/m 2 ; (spatule<br />
N°10) pour l’application sur les couches<br />
irréguliéres 8 kg/m 2 et plus.<br />
Exemple de consommation dans l’emploi<br />
de l’adhésif Keralastic: (spatule N°4) pour<br />
l’application de formats normaux 2,5 kg/m 2 ;<br />
(spatule N°5) pour l’application de grands<br />
formats 5 kg/m 2 et pour l’imperméabilisation<br />
des surfaces 3 - 3,5 kg/m 2 .<br />
Etat et bonne préparation de la chape<br />
level and free of dust, grease, wax, paint,<br />
dismantling agents and anything else which<br />
could prejudice the efficacy of the adhesion.<br />
Concrete surfaces must be sufficiently mature,<br />
foundations in anhydride screeds or chalk<br />
walls must be treated with adequate primers<br />
before beginning installation. The maturity of<br />
screeds is calculated as about 6 - 8 days per<br />
cm of thickness, unless special quick-drying<br />
cements are used. Any pre-existing concrete,<br />
tiled, ceramic or marble foundations must be<br />
solid, free of cracks, well attached to the base,<br />
resistant to the loads foreseen and complete<br />
with adequate structural joints.<br />
Indications as to how and when to position the<br />
slabs and tiles correctly.<br />
The environmental temperature must be<br />
between +5° and +30°C: the residual humidity<br />
of the foundations must be less than or equal<br />
to about 3 - 5%; the difference in evenness<br />
of the foundations must be a maximum of 3<br />
mm/ml, a diamond disc or a diamond water<br />
cutter is required to cut tiles. We recommend<br />
the positioning of tiles and<br />
the large-sized slabs with the help of a sucker.<br />
In order to ensure contact with the foundations<br />
it is advisable to tap tiles with a rubber hammer<br />
to avoid the formation of air bubbles and empty<br />
spaces. Good laying and the correct alignment<br />
of the tiles requires the use of open and uniform<br />
In generale per l’arrotatura si usano mole abrasive a grana grossa (da 60 e oltre) allo<br />
scopo di livellare eventuali asperità fra lastre adiacenti e ottenere un piano perfetto. Il fango<br />
di risulta viene asportato e il pavimento viene lavato affinché non rimanga alcuna traccia di<br />
melma. Al termine dell’arrotatura la superficie pavimentata si presenta rigata a causa della<br />
grana grossa delle mole, va levigata con passaggi successivi usando abrasivi lucidanti a<br />
grana fine (1200) e a base di ossidi.<br />
Nelle zone in cui la macchina, dotata di 4 settori rotanti, non può accedere si utilizzano<br />
rullini manuali. Si consiglia l’uso di abrasivi del tipo compatibile con la resina poliestere<br />
e a base di polveri magnesiache di grana 60-120-220-400-800-1000-1200.<br />
Durante la levigatura-lucidatura si utilizza una buona quantità di acqua, la scarsità di questa<br />
e la cattiva regolamentazione della pressione della macchina può creare bruciature sulla<br />
superficie del pavimento.Il pavimento viene infine lavato con acqua pulita e segatura di pioppo<br />
evitando accuratamente di usare segatura di legno duro o contenente tannino.<br />
Stendere sul pavimento pulito e perfettamente asciutto, un manto di cera di buona qualità<br />
incolore ed esente da grassi (cera d’api, cere vegetali), indicata per la ceratura di marmi<br />
e pietre. Sottoporre quindi il pavimento ad un programma di pulizia e manutenzione.<br />
Istruzioni per la manutenzione e la pulizia<br />
Per la pulizia giornaliera si consiglia di rimuovere lo sporco secco mediante scopa<br />
o aspirapolvere. Lavare l’intera superficie pavimentata con un detergente neutro in soluzione<br />
acquosa, provvedere alla raccolta della soluzione con uno straccio o aspiraliquidi. Quindi<br />
risciacquare abbondantemente con acqua pulita senza detergenti e lasciare asciugare.<br />
Periodicamente, dopo il lavaggio diluire in soluzione acquosa una cera neutra rilucidabile<br />
specifica per pavimenti lapidei, stenderla sulla superficie in modo uniforme con uno straccio<br />
morbido e pulito o con apposito attrezzo (map spandi-cera). Lasciare asciugare evitando<br />
di camminare sul pavimento appena trattato, successivamente eseguire la lucidatura a<br />
mano con uno straccio di lana pulito e asciutto o con una lucidatrice dotata di spazzole,<br />
feltri o pelli d’agnello.<br />
Si raccomanda di non usare per il lavaggio di lastre e marmette della Cottostone, prodotti<br />
contenenti acidi, pulitori per bagni, prodotti per smalti, abrasivi, diluenti molto forti<br />
o svernicianti.<br />
Immagazzinamento e protezione<br />
Si raccomanda di non lasciare il nostro materiale in esterno perché il danneggiamento degli<br />
imballi e la presenza di acque meteoriche acide e con depositi calcarei possono intaccare la<br />
superficie e far perdere la iniziale lucidatura, creando macchie di non facile asportazione o<br />
anche deformazioni della planarità.<br />
Der Zustand und die richtige Vorbereitung<br />
sind wichtige Voraussetzungen zur korrekten<br />
Verlegung unserer Platten und Fliesen.<br />
Untergrund und Träger müssen qualitativ gut,<br />
fehlerfrei und korrekt ausgeführt worden sein.<br />
S i e m ü s s e n t r o c k e n , s t a b i l , f e s t ,<br />
widerstandsfähig, eben und staub- bzw, fettfrei<br />
scin und dürfen keine Wachs- oder Lackreste,<br />
oder andere Elemente enthalten, die eine<br />
korrekte Haftung beeinträchtigen.<br />
Betonoberflächen müssen trocken sein, die<br />
Anhydrit-Unterlagen oder Gipswände müssen<br />
vor der Verlegung mit geeignetem Primer<br />
behandelt worden sein. Die Trocknung der<br />
tragenden Unterlage dauert 6 - 8 Tage pro<br />
cm Stärke, es sei denn, daß schnellhärtende<br />
Spezial - Zementgemische verwendet wurden.<br />
Eventuell - bereits existierende - Unterlagen aus<br />
Beton, Keramik oder Marmor müssen fest sein,<br />
dürfen keine Risse aufweisen und müssen gut<br />
im Boden verankert sein; sie müssen den zu<br />
erwartenden Belastungen widerstehen und<br />
geeignete, strukturierte Fugen haben.<br />
Korrekte Verlegung der Platten und Fliesen.<br />
Die Temperatur sollte zwischen +5° und +30°C<br />
liegen; die Restfeuchtigkeit der Unterlage darf<br />
nicht mehr als 3 - 5% betragen.<br />
Unregelmäßigkeiten des Untergrundes<br />
dürfen maximal 3 mm/ml aufweisen. Für das<br />
Schneiden der Fliesen ist eine Diamantscheibe,<br />
L’état et la bonne préparation de la chape sont<br />
les conditions fondamentales pour la correcte<br />
application de nos planchers et dalles. Les<br />
supports ou les chapes doivent être absolument<br />
de bonne qualité, sans défauts et préparés<br />
selon les règles de l’art: secs, stables, résistants<br />
à la compression, suffisamment plats et sans<br />
poussière, graisses et cires, vernis et agents qui<br />
désarment et tout ce qui peut nuire à une bonne<br />
adhésion. Les surfaces en béton doivent être<br />
suffisament mûres, le support d’anhydrite ou les<br />
parois en plâtre doivent être traitées avec des<br />
Primers appropriés avant d’entamer la pose.<br />
La maturation du support est évaluée entre 6<br />
- 8 jours par centimètre d’épaisseur, sauf pour<br />
l’emploi de mélanges de ciments spéciaux à<br />
durcissement rapide.<br />
D’éventuels supports préexistants composés de<br />
béton, planchers, dalles, céramique ou marbre<br />
doivent être très solides, sans fissures, bien<br />
ancrés au sol, résistants aux charges prévues<br />
et pourvus de joints structurels appropriés.<br />
Quand et comment poser correctement<br />
planchers et dalles<br />
La température ambiante doit être entre +5°<br />
et +30° C: l’humidité doit être inférieure ou<br />
égale à 3 - 5% environ; la différence de la<br />
planéité du support doit être de 3 mm/m.<br />
La coupe des dalles requiert l’emploi du<br />
disque diamanté ou bien un coupoir à eau,<br />
193
grooves using specially made nylon spacers.<br />
Closed groove laying is absolutely forbidden<br />
except under specific conditions and only for<br />
small areas. The width of the groove depends<br />
on the size of the tiles and must conform with<br />
European regulations (with minimum values<br />
from 2 to 5 mm); and also consider the size<br />
and thermal strains.<br />
In any case pre-existing and expansion joints<br />
and necessary distribution joints must be<br />
respected, dividing up the flooring area in<br />
4x4 or 6x6 ml squares <strong>by</strong> inserting a special<br />
5-10 mm PVC batten. It is advisable to leave<br />
joints wide enough to allow filling with<br />
one-component silicone sealant around the<br />
perimeter and at walls, pillars and steps etc.<br />
The grooves to seal must be thoroughly cleaned<br />
, all traces of adhesive must be removed and<br />
they should then be filled with sealant <strong>by</strong><br />
pressing with a smooth spatula.<br />
Excess sealant should be removed immediately<br />
with a damp sponge. Sealing of spaces may<br />
be carried out using special pre-packaged<br />
powders available in various colours and<br />
different granulometries, depending on the<br />
width of the grooves.<br />
These can contain latex additives to improve<br />
ease of cleaning, resistance, waterproofing<br />
and elasticity.<br />
Notes and suggestions on care after laying.<br />
Once laid and the adhesive has begun to take<br />
effect do not move the slabs again.<br />
Should it be necessary to reposition them<br />
it is advisable to completely remove the<br />
adhesive from the foundations and from<br />
the back of the slab with a spatula and<br />
then to reapply the adhesive as explained<br />
previously. Any excess adhesive which should<br />
subsequently surface during laying should be<br />
removed immediately with a damp sponge<br />
to avoid possible damage to the surface<br />
of the slabs. Any building work carried out<br />
should bear in mind that the tiles are supplied<br />
prepolished and that they are therefore prone<br />
to damage. When further work is required, tiles<br />
already laid should be protected with strong<br />
polythene sheeting or special protective sheets<br />
which allow free transpiration. In areas most<br />
exposed to passage or the moving of loads<br />
and/or scaffolding, or where heavy work is to<br />
be carried out it is recommended to cover the<br />
flooring surface with wooden boards.<br />
In areas which are exposed to direct sunlight<br />
or temperatures exceeding 30°C it is advisable<br />
to protect the floor with damp cloths for at least<br />
24 hours after laying.<br />
Incorrect laying or restoration of used flooring:<br />
advice on rehoning and repolishing.<br />
If Cottostone tiles need to be rehoned and<br />
repolished for accidental reasons (defects in<br />
plane due to bad laying, damage or for other<br />
reasons) or after some time for restoration,<br />
we recommend contacting <strong>Sannini</strong> Impruneta<br />
to agree the stages and methods to be<br />
adopted.<br />
For all types of Cottostone slabs and tiles,<br />
before proceeding with the work it is advisable<br />
to try out the honing and polishing procedures<br />
on a limited area of the flooring to ascertain the<br />
final result. (The honing and polishing methods<br />
adopted for the Cottostone product are as a<br />
rule similar to those commonly used for granite<br />
and hard materials).<br />
In general large grain (from 60 upwards)<br />
abrasive grinding wheels are used for grinding<br />
in order to level any unevenness between<br />
eine Wasserschneidemaschine oder eine<br />
Diamantfräse zu verwenden. Platten und<br />
Fliesen mit größeren Abmessungen sollten<br />
mit einem Saugheber in Position gebracht<br />
werden. Um die Bodenhaftung zu garantieren<br />
und die Bildung von Luftblasen und Kammern<br />
zu vermeiden, sollte ein Gummihammer<br />
verwendet werden. Für korrekte Fugen wird<br />
die Verwendung von Nylonzwischenkeilen<br />
zum Distanzieren empfohlen. Die Verlegung<br />
ohne Fugen ist nicht ratsam, außer unter<br />
besonderen Umständen und auch dann<br />
nur für begrenzte Flächen. Die Breite der<br />
Fugen ändert sich je nach Format und muß<br />
den europäischen Normen entsprechen (mit<br />
Mindestwerten von ca. 2 - 5 Millimetern), je<br />
nach Format und thermischen Anforderungen.<br />
Die bereits existierenden Dehnungsfugen<br />
müssen respektiert werden, die vorgesehenen<br />
Teilzwischenräume ergeben sich durch<br />
Unterteilung der Böden in Quadrate von 4x4 m<br />
bzw. 6x6 m, mit Einlage eines speziellen PVC-<br />
Profils von 5 - 10 mm. Entlang der Außenseite<br />
und an Mauern, Säulen und Stufen etc. ist es<br />
ratsam, geeignete Zwischenräume zu lassen,<br />
die mit Einfach-Komponenten Silikon versiegelt<br />
werden. Die zu versiegelnden Fugen müssen<br />
vorher gründlich gereinigt werden, eventuelle<br />
Klebereste sind zu entfernen, danach wird das<br />
Silikon mit einer glatten Spachtel angedrückt.<br />
Silikonreste sollten mit einem feuchten<br />
Schwamm entfernt werden. Das Verfugen kann<br />
auch mittels spezieller vorgefertigter Pulver in<br />
verschiedenen Farben und Granulometrien<br />
erfolgen. Zur Erleichterung der Reinigung<br />
sowie zur Erhöhung der Widerstandsfähigkeit,<br />
Wasserdichte und Elastizität kann, je nach<br />
Fugenbreite, ein Latexzusatz verwendet<br />
werden.<br />
Anmerkungen und Ratschläge nach der<br />
Verlegung<br />
Nach der Verlegung - wenn der Kleber bindet<br />
- dürfen die Platten nicht mehr entfernt werden.<br />
Falls es dennoch notwendig sein sollte, wird<br />
empfohlen, den Kleber mit einer Spachtel von<br />
der Unterlage sowie der Rückseite der Platten<br />
zu entfernen, und dann den Kleber, wie zuvor<br />
erwähnt, erneut aufzutragen. Überschüssiger<br />
Kleber, der während der Verlegung hervorquellen<br />
könnte, muß sofort mit einem nassen Schwamm<br />
entfernt werden, um eine Beschädigung der<br />
Oberfläche zu vermeiden. Bei allen Arbeiten<br />
sollte darauf geachtet werden, daß die<br />
Fliesen bereits poliert geliefert werden<br />
und somit vor Beschädigungen geschützt<br />
werden müssen. Falls weitere Arbeiten<br />
ausstehen, sollten die verlegten Fliesen auf<br />
jeden Fall mit Polyöthylenplastiklagen oder<br />
speziellen luftdurchlässigen Schutzhüllen<br />
bedeckt werden. An vielbegangenen oder<br />
-befahrenen Orten oder dort, wo schwere<br />
Arbeiten vorgesehen sind, z.B. das Entladen<br />
von Lasten mit Hubstaplern, ist es ratsam, die<br />
verlegte Fläche zu bedecken.<br />
An Stellen, die der Sonneneinstrahlung<br />
ausgesetzt sind und bei Temperaturen über<br />
30° C, sollten die Böden für mindestens<br />
24 Stunden nach der Verlegung mit feuchten<br />
Tüchern geschützt werden.<br />
Fehlerhafte Verlegung und Instandsetzung<br />
bei auftretendem Verschleiß: Ratschläge zur<br />
Neuschleifung und Neupolierung.<br />
Falls aufgrund verschiedener Ursachen<br />
(Unebenheiten, die durch fehlerhafte Verlegung<br />
bedingt sind, Beschädigungen, usw.) oder<br />
aufgrund von Verschleißerscheinungen, die sich<br />
fraise toujours diamantée. On conseille de<br />
poser les dalles et les planchers de grande<br />
dimension à l’aide d’une ventouse. Pour<br />
assurer le contact avec le support, il convient<br />
de frapper les dalles avec un marteau en<br />
caoutchouc afin d’éviter les bulles d’air et le<br />
vide. La bonne pose et l’alignement correct<br />
des dalles requièrent l’emploi de joints ouverts<br />
et uniformes en utilisant des entretoises<br />
spéciales en nylon. La pose à joints unis<br />
est rigoureusement défendue sauf dans des<br />
conditions particulières et de toute façon pour<br />
des petites surfaces. La largeur des joints varie<br />
selon le format, mais elle doit se conformer aux<br />
normes européennes (valeur maximale 2/5 et<br />
selon la fonction des formats et des contraintes<br />
thermiques). En outre on doit respecter les<br />
joints de dilatation déjà existants et prévoir<br />
des joints de morcellement en sectionnant les<br />
surfaces à daller en carrés de 4x4 m 2 ou<br />
6x6 m 2 , au moyen de l’insertion d’un profilé<br />
spécial en P.V.C. de 5-10 mm. Le long des<br />
bords périmétraux et à proximité des murs, des<br />
piliers et des marches, etc., il convient de poser<br />
des joints de grandeur appropriée de façon<br />
à permettre le remplissage avec du silicone<br />
mono-composant. Les fentes à encoller doivent<br />
être d’abord nettoyées sur toute l’épaisseur; les<br />
traces de colle doivent être effacées; ensuite<br />
on remplit les fentes avec du silicone qu’on<br />
comprime avec une spatule lisse, en veillant<br />
à enlever rapidement l’excédent avec une<br />
éponge humide. L’encollage des fentes peutêtre<br />
obtenu à l’aide de poudres appropriées<br />
et pré-mélangées, de différentes couleurs<br />
et types de granit variés, en fonction de la<br />
largeur des fentes. Ces dernières peuvent<br />
être remplis d’additifs composés de latex<br />
afin d’améliorer le polissage, la résistance,<br />
l’étanchéité et l’élasticité.<br />
Notes et suggestions pour l’après pose.<br />
Une fois la pose terminée, dès que la substance<br />
adhésive a entamé la phase de prise, il est<br />
défendu de déplacer les planchers. En cas de<br />
nécessité, pour mieux positionner les dalles, il<br />
est opportun d’enlever totalement la substance<br />
adhésive du support et du revers de la plaque<br />
avec une spatule, et remettre ensuite l’adhésif<br />
selon le mode d’emploi sus-indiqué. L’excès<br />
d’adhésif, qui pourrait effleurer pendant la<br />
pose, sera ôté rapidement avec una éponge<br />
humide afin d’éviter des dommages éventuels<br />
sur la surface des planchers.<br />
Pour chaque travail exécuté sur le chantier, il<br />
faut considérer que les dalles sont fournies prépolies<br />
et pour cela soumises à une dégradation<br />
éventuelle. En cas de travaux ultérieurs, les<br />
dalles posées, doivent être protégés avec des<br />
bâches en polyétylène ou avec des gaines<br />
spéciales de protection qui permettent la libre<br />
transpiration.<br />
Dans les zones plus exposées au passage<br />
ou si l’on prévoit des travaux lourds et le<br />
déplacement de chargements et/ou ballots,<br />
mieux vaut recouvrir la surface dallée avec<br />
des panneaux en bois.<br />
Dans les zones exposées au soleil battant et<br />
aux températures supérieures à 30° C, on<br />
conseille de protéger le sol avec des chiffons<br />
humides pendant au moins 24 h après la<br />
pose.<br />
Pose malréussie et restauration suite à l’usure:<br />
conseils pour le radoucissage<br />
et le repolissage<br />
Si pour des raisons imprévues (défauts de<br />
planéité dûs à une mauvaise pose, dégâts<br />
adjacent slabs and to obtain a perfectly flat<br />
surface.<br />
The resulting mud is removed and the flooring<br />
is washed so that there are no traces of slime.<br />
Once grinding is terminated the flooring<br />
surface will be scratched due to the large<br />
grain of the grinding wheels so it is then<br />
honed in successive phases using fine grain<br />
(1200) and oxide-based polishing abrasives.<br />
In areas which the machine, which has 4<br />
rotating sectors, cannot reach manual rollers<br />
are used. We recommend the use of abrasives<br />
of the type compatible with polyester resin<br />
and based on 60-120-220-400-800-1000-<br />
1200 grain magnesian powders.<br />
During the honing/polishing a substantial<br />
quantity of water is required and insufficient<br />
water or incorrect regulation of the machine<br />
pressure may create burn marks on the surface<br />
of the flooring. Finally the flooring is washed<br />
with clean water and poplar sawdust, carefully<br />
avoiding the use of sawdust from hard or tannincontaining<br />
wood.<br />
Spread a thin coat of good quality uncoloured<br />
wax which is free of grease, (beeswax,<br />
vegetable waxes) and suitable for the waxing<br />
of marble and stone, onto the perfectly clean<br />
and dry flooring. Then subject the flooring to a<br />
maintenance and cleaning programme.<br />
Maintenance and cleaning instructions<br />
For daily cleaning we recommend the removal<br />
of dry dirt using a broom or vacuum cleaner.<br />
Wash the whole floor surface with a neutral<br />
detergent in a water solution and then recover<br />
the solution using a cloth or liquid vacuum<br />
cleaner. Then rinse thoroughly with clean water<br />
without detergent and leave to dry.<br />
Periodically after washing, dilute a neutral<br />
repolishing wax designed specifically for stone<br />
products in water and spread it uniformly onto<br />
the surface with a soft, clean cloth or with a<br />
specially designed tool (map wax-spreader).<br />
Leave to dry and avoid walking on the treated<br />
flooring, then polish <strong>by</strong> hand with a clean, dry<br />
wool rag or with a polishing machine supplied<br />
with felt or sheepskin brushes.<br />
We recommend that products containing acids,<br />
cleaning products for bathrooms and enamel<br />
ware, abrasive, thinning and paint removing<br />
products are not used to wash Cottostone<br />
slabs and tiles.<br />
Storing and protection<br />
Our material should not be left outside, as<br />
damage to packaging may result in the<br />
presence of acid rainwater with calcareous<br />
deposits eating into the finished surfaces,<br />
leading to a loss of the initial polish , to stains<br />
which are not easy to remove and also to a<br />
deformation of planarity.<br />
nach einer gewissen Zeit einstellen, sich eine<br />
Neuschleifung oder Polierung als notwendig<br />
erweist, empfehlen wir Ihnen, sich mit <strong>Sannini</strong><br />
Impruneta in Verbindung zu setzen, um die<br />
Phasen und die Art der Instandsetzung zu<br />
besprechen. Für alle Platten- und Fliesentypen<br />
von Cottostone ist es ratsam, vor Beginn<br />
der Arbeiten den Ablauf der Schleif- und<br />
Polierarbeiten auf einer kleinen Bodenfläche<br />
auszuprobieren, um sicherzugehen, daß<br />
das gewünschte Resultat erreicht wird. (Die<br />
Vorgehensweise beim Schleifen und Polieren<br />
der Cottostone-Platten ist der bei Granit und<br />
anderen harten Materialien anzuwendenden<br />
Prozedur ähnlich). Im allgemeinen werden<br />
zum Schleifvorgang grobe Schleifscheiben<br />
(60 und darüber) verwendet, um eventuelle<br />
Unebenheiten zwischen nebeneinander<br />
liegenden Platten zu ebnen und eine perfekte,<br />
glatte Fläche zu erreichen. Der entstehende<br />
Schlamm muß entfernt und der Boden<br />
nachgewaschen werden.<br />
Nach dem Schleifen muß die Oberfläche<br />
- die durch die grobe Schleifscheibe abkörnt<br />
- in mehreren Arbeitsgängen mit feinkörnigen<br />
Poliermitteln auf Oxidbasis poliert werden.<br />
An den Stellen, die nicht mit der Maschine<br />
erreichbar sind, sollten Handroller benützt<br />
werden. Es wird die Verwendung von<br />
Schleifmitteln auf Magnesiumpulverbasis,<br />
Körnung 60-120-220-400-800-1000-<br />
1200 empfohlen, die mit Polyesterharz<br />
kompatibel sind. Sowohl beim Schleifen<br />
als auch beim Polieren wird eine große<br />
Menge Wasser benötigt; eine unzureichende<br />
Wassermenge und schlechte Regulierung des<br />
Maschinendrucks kann zu Verbrennungen auf<br />
der Oberfläche des Bodens führen. Danach<br />
sollte der Boden mit warmem Wasser und<br />
Pappelspänen gesäubert werden. Harte oder<br />
harzhaltige Holzspäne sollten vermieden<br />
werden. Danach wachsen Sie den sauberen<br />
und trockenen Boden mit gutem, fettfreien<br />
Qualitätswachs (Bienenwachs, pflanzliche<br />
Wachse) für Marmor und Steinböden, reinigen<br />
und pflegen ihn.<br />
E m p f e h l u n g e n u n d R a t s c h l ä g e z u r<br />
Instandhaltung und Reinigung<br />
Zur täglichen Reinigung wird empfohlen,<br />
trockenen Schmutz oder Staub mit einem<br />
Besen oder Staubsauger zu entfernen.<br />
Zum wischen sollte ein neutrales Putzmittel<br />
verwendet werden. Putzmittelreste sollten mit<br />
einem Tuch entfernen werden, danach mit<br />
reichlich klarem Wasser - ohne Reinigungsmittel<br />
- nachspülen und trocknen lassen. Nach der<br />
Reinigung mit Wasser sollte - von Zeit zu<br />
Zeit - ein neutrales Wachs für Steinböden,<br />
in Wasser verdünnt, mit einem sauberen,<br />
weichen Tuch (oder mit einer speziellen<br />
Bohnermaschine) gleichmäßig verteilt werden.<br />
Während des Trocknes sollte der Boden nicht<br />
betreten werden; danach wird empfohlen,<br />
mit einem sauberen, trockenen Wolltuch oder<br />
einer Poliermaschine (mit Bürsten, Filz oder<br />
Schafsfellen) nachzupolieren.<br />
Lagerung und Schutz vor Beschädigung<br />
Es wird empfohlen, unsere Produkte nicht im<br />
Freien zu lagern, da die Beschädigung des<br />
Verpackungsmaterials das Eindringen von<br />
Wasser - mit anschließenden Kalkablagerungen<br />
- zur Folge haben kann, die das Finish der<br />
Oberfläche angreifen, die ursprüngliche<br />
Polierung beschädigen und sowohl schwer<br />
entfernbare Flecken als auch Verformungen<br />
der Planarität verursachen können.<br />
ou autres) et au bout d’un certain temps pour<br />
restauration suite à usure, les dalles Cottostone<br />
demandent à être radoucies et repolies, on<br />
conseille de consulter la société <strong>Sannini</strong><br />
Impruneta pour les phases et les modalités<br />
des opérations. Il est opportun, pour tous<br />
les types de planchers et dalles Cottostone,<br />
avant d’entamer le travail, procéder à un essai<br />
d’adoucissage et polissage sur une portion<br />
limitée du sol et s’assurer du résultat final.<br />
(Les procédés d’adouccissage et polissage<br />
suivis pour le produit Cottostone sont en règle<br />
générale similaires aux procédés suivis pour le<br />
granit et les matériaux durs). En général pour le<br />
meulage on utilise des meules abrasives à gros<br />
grain (60 et plus) afin d’égaliser les éventuelles<br />
aspérités entre les plaques adjacentes et<br />
obtenir ainsi un plan parfait. La boue qui se<br />
forme doit être balayée et le sol bien lavé<br />
afin d’éliminer toute trace de détritus. Une<br />
fois le meulage terminé, la surface dallée qui<br />
se présente rayée à cause du gros grain des<br />
meules, doit être radoucie par un va-et-vient<br />
successif en utilisant des abrasifs polissant à<br />
grain fin (1200) et à base d’oxydes. Dans les<br />
zones où la machine pourvue de 4 secteurs<br />
pivotants, ne peut pas accéder, on utilise des<br />
molettes à main. On conseille l’emploi des<br />
abrasifs compatibles avec la résine polyester<br />
et à base de poudres magnésiennes de grain<br />
60-120-220-400-800-1000-1200.<br />
Pendant l’adoucissage-polissage, on utilise<br />
une bonne quantité d’eau; le manque de<br />
celle-ci et le mauvais réglage de la pression<br />
de la machine peut créer des brûlures sur la<br />
surface du sol. Le sol est enfin lavé avec de<br />
l’eau propre et de la sciure de peuplier en<br />
évitant soigneusement l’emploi de sciures de<br />
bois dur ou riche en tanin.<br />
Etaler sur le sol propre et parfaitement sec une<br />
couche de cire de bonne qualité, incolore et<br />
sans graisse (cire d’abeilles, cires végétales)<br />
indiquée pour le cirage de marbres et pierres.<br />
Ensuite suivre un programme de nettoyage et<br />
entretien.<br />
Instructions pour l’entretien et le nettoyage<br />
Pour le nettoyage journalier, on conseille<br />
d’enlever la saleté sèche avec un balai ou<br />
l’aspirateur.<br />
Laver entièrement la surface dallée avec<br />
un détergent neutre en solution aqueuse,<br />
ramasser ensuite la solution avec une<br />
serpillière ou un aspirateur de liquides. Puis<br />
rincer abondamment avec l’eau propre, sans<br />
détergent et laisser sècher. Périodiquement,<br />
après le lavage, diluer en solution aqueuse<br />
une cire neutre à briller spécifique pour sol<br />
en pierre, l’étaler sur la surface de façon<br />
uniforme avec un chiffon doux et propre<br />
ou avec un outil approprié (cireuse). Laisser<br />
sécher, éviter de marcher sur la surface traitée<br />
et ensuite effectuer la polissage à la main,<br />
avec un chiffon propre et sec, en laine, ou<br />
avec une cireuse à brosses, feutres ou peaux<br />
d’agneau.<br />
Entreposage et protection<br />
Il est recommandé de ne pas laisser<br />
notre matériel à l’extérieur, parce que la<br />
dégradation des emballages et la présence<br />
d’eau météorologique à dépôt calcaire,<br />
peuvent attaquer la surface et lui faire perdre<br />
le polissage d‘origine, fiare apparaitre<br />
des taches difficilement effacables ou des<br />
déformations du planairité.<br />
195
197
Rivestimenti orizzontali tecnologici Pavimenti sopraelevati per interni<br />
Raised paving<br />
Raised modular flooring resolves most problems<br />
with the location of system <strong>by</strong> an installation<br />
space created under the walking surface.<br />
The advantages of this type of technical flooring<br />
are indisputable as they are quick to install,<br />
make access to installations easy and practical<br />
and they are in the long run more economical<br />
than traditional flooring set into the structure of<br />
the building. Indeed the installation networks are<br />
put in place with the minimum disturbance, open<br />
and without any need of building assistance.<br />
Raised flooring has revolutionised the<br />
management of building sites <strong>by</strong> drastically<br />
reducing working time and costs. Technical<br />
flooring is made up of Cottostone panels and<br />
a supporting structure.<br />
Technical flooring is made up of Cottostone<br />
panels and a supporting structure or,<br />
alternatively, of traditional floor tiles installed<br />
on special supports.<br />
Doppelböden<br />
Innenräume, insbesondere Arbeitsstätten,<br />
benötigen immer flexiblere Strukturen, um<br />
Veränderungen und Umbauten zu erleichtern.<br />
Modulare Doppelböden lösen viele Probleme<br />
der Verkabelung, da sie einen hohlen Raum<br />
unter der begehbaren Oberfläche schaffen.<br />
Die Vorteile dieser Art von Boden liegen auf<br />
der Hand: Sie sind leicht zu verlegen und<br />
erleichtern den Zugang zu den Anlagen.<br />
Im Vergleich zu der traditionellen Art der<br />
Verkabelung im Mauerwerk, erweist sich daher<br />
die Verwendung eines Doppelbodens mit der<br />
Zeit als rationeller.<br />
Die Vernetzung kann mit minimalem<br />
Platzaufwand freigelegt werden.<br />
Doppelböden haben die Arbeiten auf der<br />
Baustelle revolutioniert, sie bieten eine<br />
enorme Erparnis von Zeit und Kosten bei der<br />
Ausführung der Arbeiten. Ein Doppelboden<br />
besteht aus den Cottostone Platten und einer<br />
Trägerstruktur.<br />
Ein Doppelboden besteht aus Cottostone<br />
Platten und einer Trägerstruktur oder aus einer<br />
mit traditionellen Bodenplatten vormontierten<br />
Struktur.<br />
I pavimenti modulari sopraelevati risolvono molti problemi<br />
di localizzazione impiantistica in quanto creano un volume<br />
impianti al di sotto della superficie di calpestio. I vantaggi<br />
di questo genere di pavimenti tecnici è indiscusso, sono<br />
veloci da installare, rendono facile e pratico l’accesso<br />
agli impianti, costituiscono un tipo di intervento che nel<br />
tempo risulta economico rispetto a tradizionali opere di<br />
incasso in muratura. Le reti impiantistiche vengono infatti<br />
installate secondo percorsi minimi a cielo aperto senza<br />
necessità di assistenza muraria. I pavimenti sopraelevati<br />
hanno rivoluzionato la gestione del cantiere riducendo<br />
drasticamente tempi e costi di esecuzione dei lavori.<br />
Il pavimento tecnico è costituito da pannelli Cottostone e<br />
da una struttura di sopraelevazione, oppure da piastrelle<br />
tradizionali montate su appositi elementi strutturali.<br />
Plancher technique<br />
Les planchers techniques modulaires résolvent<br />
beaucoup de problèmes de localisation,<br />
d’installation parce qu’ils créent un volume<br />
d’installation en dessous de la surface de<br />
passage. Les avantages de ce genre de<br />
plancher techniques sont indiscutables; ils sont<br />
facile à installer, l’accès aux installations est<br />
facile et pratique; chaque type d’intervention<br />
se réalise dans un temps assez économique par<br />
rapport aux poses traditionnelles.<br />
Les résaux d’installation sont en effet placés<br />
selon parcours minimaux, en plein air, sans<br />
aucune nécéssité d’assistance en maçonnerie.<br />
Les planchers techniques ont bouleversé la<br />
gestion des chantiers en réduisant de façon<br />
draconienne les temps et les coûts d’exécution<br />
de travaux.<br />
Le plancher technique est formé de panneaux<br />
Cottostone et d’une structure de surélévation.<br />
Le plancher technique est formé de panneaux<br />
Cottostone e d’une structure de surélévation<br />
où de carrelages traditionelles montés sur une<br />
structure spéciale.<br />
Raised pavings, interior application<br />
Doppelböden, Innenanwendungen<br />
Plancher technique, utilisations à l’intérieur<br />
STC<br />
Per carichi elevatissimi<br />
For very heavy duty<br />
Besonders hohe Lasten<br />
Pour charges très élevées<br />
STO<br />
Per carichi elevati<br />
For heavy duty<br />
Hohe Lasten<br />
Pour charges élevées<br />
Gli elementi del sistema<br />
La caratteristiche dei pavimenti sopraelevati in cotto dipendono fortemente dalla<br />
composizione e dallo spessore dei Pannelli. Prodotti nella misura standard di 60x60 cm, i<br />
pannelli sono realizzati con supporti di vari materiali.<br />
The system’s elements<br />
The characteristics of the raised floor in cotto depends strongly on the composition and thickness of the<br />
panels. The panels are realized with supports in different materials in a standard size of 60x60 cm.<br />
Die Elemente des Systems<br />
Die Merkmale des Doppelboden in Cotto hängen sehr von der Stärke und Zusammensetzung der<br />
Paneele ab. Die Paneele, deren Träger aus verschiedenen Materialen hergestellt werden können,<br />
haben ein Standardmaß von 60x60 cm.<br />
Les élements du système<br />
Les caractéristiques des planchers techniques en cotto dépendent fortement de la composition et de<br />
l’épaisseur des planchers. Les planchers sont produits avec des supports en materiaux variés avec un<br />
format standard de 60x60 cm.<br />
La struttura, di esclusiva concezione Intec, grazie all’innovativa testa realizzata in un pezzo unico garantisce altezze variabili da<br />
3,5cm dal solaio fino a 100cm, con cinque soluzioni diversificate in funzione delle richieste prestazionali.<br />
The structures, an Intec concept, guarantees, due to the innovative monolithic head, a height adjustment range from 3,5 cm up to 100 cm and offer<br />
five different solutions, according to the load requirements.<br />
Die Struktur, ein Konzept der Intec, garantiert, dank des innovativen monolithischen Kopfes, regulierbare Höhen von 3,5 cm bis zu 100 cm in fünf<br />
verschiedenen Lösungen.<br />
La structure, une idée exclusive de Intec, est, grâce à sa tête innovative monolithique, réglables à partir de 3,5 cm jusqu’à 100 cm, dans cinq<br />
typologies différentes, selon les exigences demandées.<br />
STR<br />
Per carichi medio-alti<br />
For medium-heavy duty<br />
Mittel bis hohe Lasten<br />
Pour charges moyen-élevées<br />
STS<br />
Per carichi medi<br />
For medium duty<br />
Mittlere Lasten<br />
Pour charges moyennes<br />
SAS<br />
Senza traverse<br />
Without stringers<br />
Ohne Stützbalken<br />
Sans traverses<br />
199
Pavimenti sopraelevati per esterni<br />
Raised pavings, exterior application<br />
Doppelböden, Aussenanwendungen<br />
Plancher technique, utilisations à l’extérieur<br />
supporti regolabili 100-150 mm<br />
supporto fisso ventosa di<br />
sollevamento<br />
70-100 mm<br />
50-70 mm<br />
disco livellatore<br />
Le immagini relative alla pavimentazione sopraelevata sono state gentilmente concesse dalla Intec spa Produzione Pavimenti Sopraelevati con cui <strong>Sannini</strong> Impruneta<br />
collabora per la realizzazione dei rivestimenti tecnologici.<br />
- Pavimenti Sopraelevati - Località Grangia - 12048 Sommariva Bosco (CN) Italia - telefono (+39) 0172 561311<br />
Commerciale Italia: fax (+39) 0172 53277 - Commerciale Estero: fax (+39) 0172 54854 - www.intecsopraelevati.com - info@intecsopraelevati.com<br />
TAVOLA TECNICA<br />
technical drawings<br />
Legenda:<br />
1. lastra in cottostone 60x60x1,3 cm<br />
2. distanziatori<br />
3. rivestimento in gamma<br />
4. profilo traverso in acciaio zincato<br />
5. piedini di sostegno in acciaio zincato<br />
6. intercapedine<br />
7. solaio<br />
8. giunti<br />
9. regolazione altezza<br />
Pannelli modulari in cottostone per pavimenti galleggianti<br />
201
curtain walls<br />
vorgehangene fassaden<br />
parois ventilées<br />
Designers can apply to the company for a manual-catalogue and CD-<br />
Rom on constructing Impruneta cotto - terracotta curtain walls.<br />
Fachliteratur mit CD Rom zum Thema Fassadenverkleidung in Cotto<br />
<strong>Sannini</strong> kann im Werk angefordert werden.<br />
Un manuel-catalogue, intitulé “Involucri in cotto” et dédié aux<br />
réalisations des parois ventilées en cotto de l’Impruneta, est à la<br />
disposition des professionnels, qui pourront le demander à la société.<br />
Per i progettisti che ne faranno richiesta presso<br />
l’azienda, è disponibile un manuale-catalogo dal<br />
titolo “Involucri in cotto”, dedicato alle realizzazioni<br />
delle pareti ventilate in cotto d’Impruneta.<br />
pareti ventilate<br />
Tutta la gamma in lastra della <strong>Sannini</strong>,<br />
per le sue caratteristiche di resistenza al<br />
gelo e di resistenza meccanica, può essere<br />
impiegata per realizzare rivestimenti di pareti<br />
con il tradizionale sistema dell’incollaggio<br />
a malta o con adesivi specifici. <strong>Sannini</strong><br />
è da tempo impegnata nello sviluppo di<br />
elementi di rivestimento per pareti ventilate<br />
che garantiscono, velocità e precisione di<br />
montaggio, oltre ad un benessere abitativo<br />
e di risparmio nei consumi energetici.<br />
Negli ultimi anni un numero sempre<br />
maggiore di progettisti, e di imprese,<br />
chiedono alla parete ventilata di rispondere<br />
non solo ad esigenze tecnologiche, ma<br />
anche estetiche e di contenuti architettonici<br />
connessi con l’uso di materiali di eccezionale<br />
modernità e contemporaneamente ricchi di<br />
sapore e densi di storia. I migliori architetti<br />
del mondo hanno iniziato solo in questi ultimi<br />
anni ad impiegare il cotto nel rivestimento<br />
delle proprie architetture scoprendo una<br />
materialità ed una duttilità di utilizzo che ha<br />
reso nuovamente attuale l’uso del mattone.<br />
A Berlino, a Parigi, a Barcellona ed oggi<br />
anche in Italia molti progettisti ritrovano,<br />
attraverso l’uso del cotto, l’espressività della<br />
cultura classica attraverso la sperimentazione<br />
tecnologica che solo i più moderni sistemi di<br />
montaggio e di aggancio rendono possibili.<br />
Non vi sono limitazioni di utilizzo e <strong>Sannini</strong>,<br />
per edifici di una certa dimensione,<br />
è disponibile per studiare elementi specifici<br />
e dal disegno originale progettati insieme<br />
all’architetto nella ricerca della texture<br />
e dell’effetto desiderati. Esistono a questo<br />
proposito grandi novità come il Cottostone<br />
e tutta la linea Externa che risultano<br />
particolarmente indicati per quest’impiego.<br />
203
curtain walls<br />
vorgehangene fassaden<br />
parois ventilées<br />
<strong>Sannini</strong>’s range in tile forms, owing to its characteristics of frost and<br />
mechanical resistance, can be used for cladding walls using the<br />
traditional system of fixing with mortar or special adhesives.<br />
<strong>Sannini</strong> is continuously developing elements for cladding curtain<br />
walls, which guarantee fast, precise mounting as well as comfortable<br />
living and low energy consumption according to the principles of bioarchitecture.<br />
In recent years, an increasing number of designers and<br />
companies require that the curtain walls not only satisfy technological<br />
requirements, but also aesthetic and architectural ones, linked to the<br />
use of exceptionally modern materials, at the same time, imbued with<br />
style and history. The best architects in the world have only recently<br />
started to use terracotta for cladding their own architecture, discovering<br />
a materiality and flexibility of use that has given new life to brick.<br />
In Berlin, Paris, Barcelona and currently also in Italy, with the use of<br />
terracotta many designers rediscover the expressiveness of the classical<br />
culture through technological experimentation which only the most<br />
modern systems of mounting and joining make conceivable.<br />
The possibilities are unlimited and for buildings of a certain size,<br />
<strong>Sannini</strong> is prepared to study specific elements, designed together with<br />
the architect in their pursuit of the desired texture and effect.<br />
Great novelties like Cottostone and the entire Externa range are<br />
particularly indicated for this use.<br />
Pareti Ventilate, vorgehangene Fassaden, sind der aktuelle Schwerpunkt<br />
der Innovation, den <strong>Sannini</strong> auf Anregung renommierter Architekten<br />
aufgenommen hat und weiterentwickelt. Daß die Produkte aufgrund<br />
ihrer Frostsicherheit und mechanischen Belastbarkeit auch weiterhin<br />
für Wandverkleidungen im traditionellen Mörtelverfahren eingesetzt<br />
werden, versteht sich von selbst. Doch gerade mit Blick auf ökologische<br />
Interessen und sorgfältigen Umgang mit Energieresourcen und -<br />
verbrauch wächst das Interesse an hinterlüfteten Fassaden beständig.<br />
Mit ihrer Fassadengestaltung knüpfen die besten Architekten der<br />
Welt an klassische Werte an und bedienen sich dabei der High-Tech-<br />
Montagesysteme von heute. Man denke nur an die Renommé-Bauten in<br />
Berlin, Paris oder Barcelona. <strong>Sannini</strong> versteht es, Cotto-Elemente<br />
zu fertigen, die es schwer machen, historisches Original und moderne<br />
Replik zu unterscheiden. Als Materialien besonders geeignet sind dabei<br />
Externa, das Cotto-Modul-System, und die Novität Cottostone.<br />
Toute la gamme en plaques <strong>Sannini</strong>, de par ses caractéristiques<br />
de résistance au gel et mécaniques, peut être utilisée pour réaliser<br />
des revêtements par le système traditionnel du collage par mortier<br />
ou adhésifs spécifiques. <strong>Sannini</strong> est désormais engagée dans le<br />
développement d’éléments de revêtement pour parois ventilées<br />
qui garantissent vitesse et précision de montage, outre à offrir le bien<br />
être de l’habitat et l’économie des consommations d’énergie.<br />
Ces dernières années, un nombre toujours plus important de<br />
concepteurs et de sociétés exigent des parois ventilées qui possèdent<br />
des caractéristiques avancées bien sûr technologiques mais également<br />
esthétiques et de haute valeur architectonique, liées à l’utilisation<br />
de matériaux d’une modernité exceptionnelle et en même temps<br />
riches de saveurs et de poids historique. Les plus grands noms de<br />
l’architecture mondiale ont commencé ces dernières années seulement<br />
à utiliser le cotto dans les revêtements de leurs créations, découvrant<br />
dans ce matériau une malléabilité et une souplesse d’utilisation qui ont<br />
réactualisé la brique dans les projets. A Berlin, Paris, Barcelone, et<br />
aujourd’hui dans les grandes villes d’Italie, de nombreux concepteurs<br />
retrouvent, par l’utilisation du cotto, l’expressivité de la culture classique<br />
au travers de l’expérience technologique que seuls les systèmes les plus<br />
modernes de montage et d’accrochage rendent possibles. Aucune limite<br />
d’utilisation. <strong>Sannini</strong>, pour les constructions d’une certaine dimension,<br />
est prête à étudier les éléments spécifiques et les dessins originaux<br />
conçus de pair avec l’architecte, dans la recherche de textures et<br />
d’effets recherchés. Il existe à ce propos de grandes nouveautés<br />
comme le Cottostone et toute la ligne Externa qui se démontrent<br />
particulièrement indiquées.<br />
205
Leeum, Samsung Museum of Art a Seoul<br />
ESEMPIO DI REALIZZAZIONE<br />
project realization<br />
Arch. Mario Botta<br />
progettista<br />
Arch. Mario Botta<br />
<strong>Sannini</strong> Project srl<br />
project manager<br />
Arch. Guido Giacomo Bondielli<br />
progetto tecnico<br />
Ing. Domenico Spirito<br />
G.S. Engineering srl<br />
progetto<br />
Leeum, Samsung Museum of Art<br />
committente<br />
Samsung Fondazione per la cultura<br />
località<br />
Seoul, Corea<br />
parametri dell’intervento<br />
superficie di rivestimento<br />
con elementi in cotto<br />
mq 1.800<br />
cronologia<br />
2002 - 2004<br />
207
Showroom B.P. Studio a Firenze<br />
ESEMPIO DI REALIZZAZIONE<br />
project realization<br />
Studio Claudio Nardi Architetto<br />
progettista<br />
Arch.Claudio Nardi<br />
Studio Claudio Nardi Architetto<br />
collaboratori<br />
Arch. Beatrice Pierallini<br />
<strong>Sannini</strong> Impruneta spa<br />
project manager<br />
Arch. Guido Giacomo Bondielli<br />
progetto tecnico<br />
Ing. Ennio Grassi<br />
G.S. Engineering srl<br />
fornitura sottostruttura<br />
DO. CI. PA. srl<br />
posa in opera<br />
Euro Edil <strong>Group</strong> srl<br />
foto<br />
Alessandro Ciampi<br />
progetto<br />
Showroom BP Studio<br />
committente<br />
BP Studio<br />
Compagnia della Lana e del Cotone<br />
località<br />
Osmannoro (Firenze)<br />
parametri dell’intervento<br />
superficie di rivestimento<br />
con elementi in cotto<br />
mq 2200<br />
cronologia<br />
1997 - 2001<br />
209
Showroom B.P. Studio a Firenze<br />
FASE DI MONTAGGIO DEL RIVESTIMENTO IN COTTO<br />
traduzione in inglese<br />
Studio Claudio Nardi Architetto<br />
01. stoccaggio degli elementi di cotto<br />
in cantiere / unloading of cotto material<br />
at the buildingsite<br />
02. montaggio della struttura primaria<br />
verticale / assembling of the primary<br />
vertical structure<br />
03. staffe di ancoraggio della struttura<br />
orizzontale secondaria / anchorage<br />
brackets for the secondary horizontal<br />
structure<br />
01.<br />
04. 05. montaggio delle barre che<br />
compongono la struttura orizzontale<br />
secondaria / assembling of bars<br />
making up the secondary horizontal<br />
structure<br />
06. controllo e verifica della planarità<br />
della struttura secondaria e misurazione<br />
degli interassi / planarity control test<br />
for the secondary structure and C/C<br />
measurement<br />
07. rifilo degli elementi secondo il<br />
casellario predisposto dai tecnici<br />
<strong>Sannini</strong> / component edging based on<br />
indexes prepared <strong>by</strong> the <strong>Sannini</strong> technicians<br />
08. montaggio degli elementi in cotto<br />
sulle barre in acciaio / mounting of the<br />
cotto elements onto the steel bars<br />
02. 03. 04.<br />
05. 06. 07. 08.<br />
09. accoppiamento degli elementi a<br />
comporre filari / coupling of elements<br />
to form rows<br />
10. montaggio di “silent block” in<br />
gomma / mounting of rubber ‘silent<br />
blocks’<br />
09.<br />
11. battitura dei vari elementi in cotto<br />
con martello di gomma / positioning of<br />
various cotto elements <strong>by</strong> means of a<br />
rubber hammer<br />
12. controllo di posizionamento dei<br />
pezzi / control of measurement precision<br />
13. 14. 15. inizio di montaggio della<br />
campata successiva / initial assembling<br />
phase of the next bay<br />
16. aspetto delle facciate finita /<br />
appearance of the finished facade<br />
10. 11. 12.<br />
13. 14. 15. 16.<br />
211
Palazzina per Uffici a Treviso<br />
ESEMPIO DI REALIZZAZIONE<br />
project realization<br />
Studio Casetta e partners<br />
progettista<br />
Studio Casetta e partners<br />
Ing. Giancarlo Casetta<br />
Arch. Claudia Col<br />
<strong>Sannini</strong> Project srl<br />
project manager<br />
Arch. Guido Giacomo Bondielli<br />
progetto tecnico<br />
Ing. Ennio Grassi<br />
G.S. Engineering srl<br />
fornitura sottostruttura e posa in opera<br />
Edilmontaggi srl<br />
foto<br />
Pietro Savorelli<br />
progetto<br />
Palazzina per uffici<br />
committente<br />
Legnox<br />
località<br />
Gorgo al Monticano (Treviso), Italia<br />
parametri dell’intervento<br />
superficie di rivestimento<br />
con elementi in cotto<br />
mq 600<br />
cronologia<br />
2002<br />
213
Edificio per uffici a Oderzo (Tv)<br />
ESEMPIO DI REALIZZAZIONE<br />
project realization<br />
Studio Casetta e partners<br />
progettista<br />
Studio Casetta e partners<br />
Ing. Giancarlo Casetta<br />
Arch. Claudia Col<br />
collaboratori<br />
Arch. Alessandro Re<br />
<strong>Sannini</strong> Project srl<br />
project manager<br />
Arch. Guido Giacomo Bondielli<br />
progetto tecnico e posa in opera<br />
A. S. Casagrande<br />
foto<br />
Pietro Savorelli<br />
progetto<br />
Edificio per uffici<br />
committente<br />
Skema srl<br />
località<br />
Oderzo (Tv)<br />
parametri dell’intervento<br />
superficie di rivestimento<br />
con elementi in cotto<br />
mq 800<br />
cronologia<br />
2004<br />
215
Multisala cinematografica a Firenze<br />
ESEMPIO DI REALIZZAZIONE<br />
project realization<br />
Studio Claudio Nardi Architetto<br />
progettista<br />
Arch. Claudio Nardi<br />
Studio Claudio Nardi Architetto<br />
collaboratori<br />
Arch. Beatrice Pierallini<br />
<strong>Sannini</strong> Project srl<br />
project manager<br />
Arch. Guido Giacomo Bondielli<br />
progetto tecnico<br />
Ing. Ennio Grassi<br />
G.S. Engineering srl<br />
fornitura sottostruttura e posa in opera<br />
Edilmontaggi srl<br />
foto<br />
Pietro Savorelli<br />
progetto<br />
Multisala Cinematografica<br />
committente<br />
Società Silea Sud srl<br />
località<br />
Campi Bisenzio (Firenze)<br />
parametri dell’intervento<br />
superficie di rivestimento<br />
con elementi in cotto<br />
mq 1.500<br />
cronologia<br />
2002<br />
217
Abaco Colori<br />
colour abbaco<br />
Colori Naturali<br />
.1 Arrotato<br />
Cotto estruso con superficie rustica, ottenuta attraverso la lavorazione del materiale crudo<br />
con spazzole d’acciaio. Il tono di colore più intenso è dovuto all’asportazione superficiale<br />
dei sali attraverso l’arrotatura.<br />
.2 Litos<br />
Terra estrusa e semplicemente cotta senza interventi o trattamenti superficiali. Finitura striata<br />
ottenuta attraverso la naturale colorazione dei sali portati in superficie prima della cottura<br />
nella fase dell’essiccazione.<br />
Colori con sali di superficie<br />
.3 .4 Sali<br />
Cotto estruso con superficie rustica. La colorazione si ottiene con sali al manganese, per reazione<br />
chimica in fase di cottura. Il procedimento consiste nell’applicazione di sali applicati<br />
con disco meccanico nella fase successiva all’essiccamento del prodotto.<br />
Colori in pasta<br />
.5 Litos Tabacco<br />
Cotto estruso con superficie Litos in pasta marrone. La colorazione è ottenuta attraverso la<br />
miscelazione di una composizione di ossidi, ferro 303 T e biossido di manganese nell’impasto<br />
dell’argilla, per permettere una penetrazione uniformemente distribuita. Questo sistema<br />
non altera le caratteristiche fisico-meccaniche del cotto.<br />
.6 Litos Champagne<br />
Cotto estruso con superficie Litos in pasta gialla. La colorazione è ottenuta attraverso la<br />
miscelazione dell’ossido di titanio nell’impasto dell’argilla, per permettere una penetrazione<br />
uniformemente distribuita. Questo sistema non altera le caratteristiche fisico-meccaniche del<br />
cotto.<br />
.1 arrotato .2 litos<br />
.3 arrotato tabacco .4 arrotato champagne<br />
.5 litos tabacco .6 litos champagne<br />
Natural colours<br />
.1 Arrotato: Extruded terracotta with rustic<br />
surface, obtained through working the<br />
element’s surface with steel brushes prior to<br />
firing. The more intense colour of this tile is<br />
due to the removal of surface salts during the<br />
brushing process.<br />
.2 Litos: Extruded terracotta fired without any<br />
working processes on its surface. Slightly<br />
striped finish obtained through the natural<br />
coloration of the salts moving towards the<br />
surface during the drying process, prior to<br />
firing.<br />
Surface coloured elements<br />
.3 .4 Salts: Extruded terracotta with rustic<br />
surface “arrotato”. The coloration is being<br />
obtained during firing through a chemical<br />
reaction of manganese salts, which have<br />
been applied to the elements with a mechanical<br />
disc after the drying process.<br />
Full body elements<br />
.5 Litos Tobacco: Terracotta elements with<br />
“litos” surface, extruded with brown clay. The<br />
coloration is obtained <strong>by</strong> mixing a composition<br />
of oxides, iron 303T and manganese<br />
dioxide into the clay, which allows a uniform<br />
colour penetration and distribution. All physical<br />
and mechanical characteristics remain<br />
unaltered.<br />
.6 Litos Champagne: Terracotta elements<br />
with “litos” surface, extruded with yellow<br />
clay. The coloration is obtained <strong>by</strong> mixing<br />
titanium oxides into the clay, which allows a<br />
uniform colour penetration and distribution.<br />
All physical and mechanical characteristics<br />
remain unaltered.<br />
Natural colours<br />
Arrotato: Extruded terracotta with rustic surface,<br />
obtained through working the element’s<br />
surface with steel brushes prior to firing. The<br />
more intense colour of this tile is due to the<br />
removal of surface salts during the brushing<br />
process.<br />
Litos: Extruded terracotta fired without any<br />
working processes on its surface. Slightly<br />
striped finish obtained through the natural<br />
coloration of the salts moving towards the<br />
surface during the drying process, prior to<br />
firing.<br />
Surface coloured elements<br />
Salts: Extruded terracotta with rustic surface<br />
“arrotato”. The coloration is being obtained<br />
during firing through a chemical reaction of<br />
manganese salts, which have been applied<br />
to the elements with a mechanical disc after<br />
the drying process.<br />
Full body elements<br />
Litos Tobacco: Terracotta elements with “litos”<br />
surface, extruded with brown clay. The coloration<br />
is obtained <strong>by</strong> mixing a composition of<br />
oxides, iron 303T and manganese dioxide<br />
into the clay, which allows a uniform colour<br />
penetration and distribution. All physical and<br />
mechanical characteristics remain unaltered.<br />
Litos Champagne: Terracotta elements with<br />
“litos” surface, extruded with yellow clay.<br />
The coloration is obtained <strong>by</strong> mixing titanium<br />
oxides into the clay, which allows a uniform<br />
colour penetration and distribution. All physical<br />
and mechanical characteristics remain<br />
unaltered.<br />
219
prefabbricare con elementi in cotto<br />
prefabrication in cotto<br />
fertigbauelemente in cotto<br />
préfabriqués en cotto<br />
The new Moretti cellars designed <strong>by</strong> Ticinese architect Mario Botta<br />
bear witness to the importance of the research and tests that <strong>Sannini</strong><br />
have conducted for years in tandem with some of the most significant<br />
international design projects. In such partnerships, <strong>Sannini</strong> provide<br />
their own technical staff and advanced production technologies to assure<br />
the attainment of performance levels and results that comply with<br />
all aspects of design specifications. In the case of the Suvereto cellar,<br />
the exchange of know-how with one of Italy’s leading prefabrication<br />
companies led to the production of a special cement panel/plate, a<br />
type of structural tray, featuring remarkable terracotta inserts - from the<br />
“external” series produced in the special 15 x 40 cm size - applied<br />
directly at the workshop. The prefabricated panels were positioned on<br />
a bed of sand and gravel to ensure a natural, damp foundation for<br />
the wood casks, while allowing movement <strong>by</strong> personnel and visitors<br />
between them along terracotta paths. In this way maximum integration<br />
was achieved between the natural ground beneath the wine conservation<br />
and aging zones and the terracotta covering the intermediate,<br />
high-traffic areas. The most stringent tests demonstrated that, thanks to<br />
the exceptional resistance of <strong>Sannini</strong> products, even the transit of lift<br />
trucks did not damage or wear floor surfaces. The final results indeed<br />
suggested that this system could be potentially extended to road and<br />
pavements coverings, particularly when rapid installation and resistance<br />
are priority considerations. The cement panels with terracotta<br />
inserts make up macro tiles (up to 2.5 m on each side) that are easily<br />
positioned, therefore promptly removable in the event that underlying<br />
utility lines require servicing. By this project, <strong>Sannini</strong> has further<br />
deepened the integration between artisan craftwork and industrialised<br />
building methods <strong>by</strong> showing how traditional materials can be used to<br />
remarkable effect in the incessant pursuit of innovation in architecture.<br />
Die neuen Weinkeller “Moretti”, geplant von dem Tessiner Architekten<br />
Mario Botta, stellen ein bedeutendes Zeugnis der Forschungs- und<br />
Experimentierarbeit dar, die <strong>Sannini</strong> seit vielen Jahren gemeinsam mit<br />
weltweit bedeutenden Planungsbüros führt. Mittels eigener Techniker<br />
und moderner Produktionstechnologien sollen Ergebnisse erzielt werden,<br />
die den jeweiligen objektspezifischen Ansprüchen entsprechen.<br />
In dem Objekt “Suvereto Weinkeller” wurde, dank des Know-How-Austausch<br />
mit einem führenden italienischen Produzenten von Fertigbauteilen,<br />
ein spezielles Paneel konzepiert: auf eine eigens angefertigte<br />
Zementplatte wurden, ähnlich einem strukturierten Tablett, werkseitig<br />
Cottoelemente im Format 15x40 cm inseriert. Diese vorgefertigten<br />
Module werden auf Sand und Kies verlegt, so daß der Unterbau auf<br />
natürlichem und feuchtem Grund aufliegt. Gleichzeitig können sowohl<br />
das Personal als auch Besucher die Cottobeläge beschreiten. Somit<br />
wurde eine optimale Verbindung zwischen dem natürlichen Erdboden<br />
unter den Räumlichkeiten zur Aufbewahrung und Reifung des Weines<br />
und dem Terracottabelag in stark benutzten Bereichen geschaffen.<br />
Die besondere Resistenz der <strong>Sannini</strong> Produkte zeigen die Prüfungsergebnisse,<br />
die bestätigen, daß auch die Benutzung von Gabelstaplern<br />
die Cottooberfläche weder beschädigt noch angreift. Dieses Objekt<br />
deutet also auf einen großen potenziellen Einsatzbereich eines Systems<br />
hin, das für Straßen, Plätze und andere Objekte, die eine schnelle<br />
Verlegung benötigen, in Betracht gezogen werden kann. Die mit Cotto<br />
belegten Zementplatten sind in Wirklichkeit Macrofliesen, die bis zu<br />
2,5 m Seitenlänge erreichen können, leicht zu montieren sind und<br />
ebenso problemlos bei eventuellen Instandsetzungen abmontiert werden<br />
können. Deutlich unterstrichen wird hier die Verbindung zwischen<br />
Tradition und Industrie in der Baubranche sowie der Beweis, daß<br />
herkömmliche Materialien auch in der innovativen Architektur ihren<br />
Platz finden.<br />
Le nuove cantine Moretti realizzate dall’architetto<br />
Ticinese Mario Botta costituiscono un’importante<br />
testimonianza del lavoro di ricerca e<br />
sperimentazione che <strong>Sannini</strong> conduce da molti<br />
anni a fianco di alcuni tra i più importanti studi<br />
di progettazione a livello internazionale. In tali<br />
collaborazioni l’azienda mette a disposizione il<br />
proprio staff tecnico, le proprie avanzate tecnologie<br />
produttive per il raggiungimento di risultati e<br />
prestazioni che rispondano nel modo migliore alle<br />
specifiche esigenze progettuali. Nel progetto della<br />
cantina di Suvereto, attraverso lo scambio di Know<br />
how con una delle principali aziende italiane di<br />
prefabbricazione, è stato messo in produzione uno<br />
speciale pannello - piastra in cemento, concepito<br />
come una sorta di vassoio strutturale, in cui sono stati<br />
inseriti direttamente in officina i bellissimi elementi in<br />
terracotta della serie “externa” nel formato 15 x 40<br />
cm. prodotti appositamente. I moduli prefabbricati<br />
sono stati appoggiati su un letto di sabbia e ghiaia<br />
in modo da tenere le barriques in legno su un<br />
terreno naturale e umido, consentendo allo stesso<br />
tempo il movimento del personale e dei visitatori<br />
su corsie rivestite in cotto. In questo modo si è<br />
ottenuta la massima integrazione tra la terra naturale<br />
sottostante le zone di conservazione e maturazione<br />
del vino e la terracotta che riveste le aree intermedie<br />
ad altro transito. I test più severi hanno dimostrato<br />
che anche la percorrenza di eventuali muletti<br />
non scalfisce e non usura le superfici data l’alta<br />
resistenza dei materiali prodotti da <strong>Sannini</strong>. Tale<br />
applicazione mostra inoltre un potenziale utilizzo<br />
del sistema impiegato che potrebbe essere esteso<br />
anche al rivestimento di strade e piazze laddove<br />
sia richiesta, oltre alla resistenza, una eccezionale<br />
rapidità di montaggio. Infatti i pannelli in cemento<br />
con inseriti elementi in cotto costituiscono delle macro<br />
piastrelle, che possono arrivare anche a dimensioni<br />
di 2,5 metri di lato, facilmente posizionabili a<br />
secco e quindi rapidamente asportabili in caso<br />
di manutenzione dei sotto servizi. Con questa<br />
esperienza inoltre <strong>Sannini</strong> rafforza l’integrazione tra<br />
le tecnologie artigianali e l’edilizia industrializzata<br />
dimostrando che i materiali tradizionali possono<br />
essere utilizzati con grande efficacia nella incessante<br />
ricerca di innovazione in architettura.<br />
221
Les nouvelles caves Moretti sur plans d‘architecte Mario Botta sont le fruit de<br />
l’immense travail de recherche et d’essais que <strong>Sannini</strong> conduit depuis des<br />
années avec la collaboration de l’un des plus grands cabinets d’architecture<br />
internationaux. Cette collaboration voit la société mettre en jeu son staff technique,<br />
ses technologies les plus avancées dans le but d’atteindre les résultats<br />
et les performances qui répondent le mieux aux exigences des projets. Pour<br />
la cave de Suvereto, l’échange de savoir-faire avec un grand fabricant italien<br />
des préfabriqués a abouti au panneau en placociment spécial, conçu comme<br />
un plateau structurel qui s’est vu monter d’usine les magnifiques éléments en<br />
terre cuite de la série “externe” dans le format 15 x 40 cm. produits spécialement<br />
à cet effet. Les modules préfabriqués sont appuyés sur un lit de sablegravier<br />
pour maintenir les barriques en bois sur un terrain naturel humide, en<br />
permettant en même temps le déplacement du personnel et des visiteurs dans<br />
les couloirs revêtus en terre cuite. De cette façon on obtient une intégration<br />
parfaite entre la terre naturelle sous-jacente des zones de conservation et de<br />
vieillissement du vin et la terre cuite qui revêt les zones intermédiaires à haut<br />
transit. Les tests les plus sévères ont démontré que le passage de chariots<br />
n’entame pas et n’use pas les surfaces étant donné la haute résistance des<br />
matériaux produits par <strong>Sannini</strong>. Cette application démontre en outre une<br />
utilisation potentielle du produit appliqué aux revêtements routiers et de places<br />
là où on demande, outre la résistante, une vitesse de montage exceptionnelle.<br />
En effet les panneaux en ciment avec les éléments en terre cuite forment<br />
des macroplaques qui peuvent atteindre 2,5 mètres de côté, facilement<br />
positionnables à sec et rapidement retirées en cas d’entretien des services<br />
sous-jacents. Avec cette expérience, en outre, <strong>Sannini</strong> renforce l’intégration<br />
entre les technologies artisanales et la construction industrielle en démontrant<br />
que les matériaux traditionnels peuvent être utilisés très efficacement dans la<br />
recherche d’innovations en architecture.<br />
Nuove cantine di Sovereto, arch. Mario Botta<br />
prodotto utilizzato: elementi prefabbricati realizzati con pannello strutturale in cemento rivestito con elementi in cotto della serie externa<br />
223
systems of laying and textures<br />
verlegesysteme und tessierungen<br />
systèmes de montage et textures<br />
Metraltech terracotta, born with a collaboration between Metra and<br />
<strong>Sannini</strong> Impruneta, offers a system of window frames integrating the<br />
precision of aluminum extrusions with the historic tradition of materials<br />
for contemporary architecture.<br />
Produced in collaboration Metra-<strong>Sannini</strong> and commercialized <strong>by</strong> Metra<br />
SpA<br />
Der Cotto Metraltech, ein Resultat der Zusammenarbeit von Metra<br />
und <strong>Sannini</strong>, umfasst ein Fenster- und Türensystem, das die hohen<br />
Qualitätsansprüche der Aluminiumprofile mit den traditionellen<br />
Vorzügen der historischen Baumaterialien zu vereinen vermag.<br />
Produziert von Metra-<strong>Sannini</strong> und über Metra SpA im Handel<br />
Cotto Metraltech, issu de la collaboration entre Metra et <strong>Sannini</strong><br />
Impruneta, propose un système de menuiseries en mesure d’intégrer les<br />
performances des profilés en aluminium et la tradition des matériaux<br />
historiques pour le bâtiment.<br />
La production découle de la collaboration Metra-<strong>Sannini</strong>, tandis que la<br />
commercialisation est assurée par Metra SpA.<br />
finestra in cotto-alluminio<br />
Il cotto Metraltech, nato dalla collaborazione<br />
tra la Metra e la <strong>Sannini</strong> Impruneta, propone<br />
un sistema di serramenti capace di integrare<br />
le prestazioni dei profilati d’alluminio con la<br />
tradizione dei materiali storici per l‘edilizia.<br />
Prodotto in collaborazione Metra-<strong>Sannini</strong> e<br />
commercializzato dalla Metra SpA<br />
225
Finestra in Cotto-Alluminio<br />
cotto sannini impruneta<br />
nc 68 sth - linea a scomparsa<br />
metraltech - linea sannini impruneta<br />
Metra spa - via Stacca, 1<br />
25050 Rodengo Saiano, Brescia<br />
tel. ++39 030 68191<br />
fax ++39 030 6810363<br />
e-mail: metra@metra.it<br />
http://www.metra.it<br />
simulazione edificio con finestra in cotto-alluminio<br />
227
systems of laying<br />
verlegesysteme<br />
systèmes de montage<br />
sistemi di montaggio<br />
posa con malta<br />
Ricerca a cura di<br />
Alfonso Acocella<br />
Research <strong>by</strong><br />
Alfonso Acocella<br />
229
Pavimentazione in cotto per interni<br />
Problematiche generali e tecniche di posa<br />
Gli accorgimenti di carattere generale da tenere presente nel progetto pavimentale<br />
per interni appaiono meno impegnativi di quelli in esterno investendo unicamente la<br />
problematica dei giunti tecnici in tutti quei casi in cui -- in funzione dell’estensione<br />
dimensionale notevole della superficie da pavimentare e/o delle condizioni particolari<br />
di esercizio del pavimento stesso -- è consigliabile prevedere giunti di dilatazione in<br />
grado di assorbire le variazioni del pavimento stesso causate dagli sbalzi termici.<br />
I giunti lasciati aperti fra gli elementi di cotto (in corrispondenza dei giunti tecnici<br />
di dilatazione realizzati nel sottofondo) non vanno fugati a mezzo di malta o di<br />
stucco sintetico bensì chiusi utilizzando appositi profili in gomma o, meglio, materiali<br />
sigillanti speciali capaci di assecondare le eventuali deformazioni. In presenza di<br />
stesure pavimentali di rilevanti dimensioni è consigliabile prevedere giunti tecnici<br />
ogni 6-8 metri, sia in direzione longitudinale che trasversale. Nelle pavimentazioni di<br />
interni di medie dimensioni è sufficiente predisporre un giunto aperto al perimetro del<br />
campo pavimentale in prossimità delle pareti verticali, assorbibile visivamente nello<br />
spessore dello zoccolino adottato.<br />
In linea generale è importante evidenziare come il processo complessivo che porta<br />
ad avere una pavimentazione in cotto per interni completamente fruibile e godibile si<br />
struttura su una serie di fasi di operazioni che possono essere così schematizzate:<br />
-- posa in opera degli elementi in cotto;<br />
-- sigillatura dei giunti;<br />
-- lavaggio del campo pavimentale;<br />
-- trattamento del pavimento.<br />
Indoor<br />
Terracotta Flooring<br />
General problems and laying techniques<br />
The general techniques that must be taken<br />
into consideration for indoor flooring projects<br />
are less demanding than the ones for outdoor<br />
flooring and they only involve the problems<br />
related to technical joints in special cases<br />
in which – depending on the considerable<br />
size of the surface to be floored and/or the<br />
particular working conditions of the floor itself<br />
– it is advisable to use expansion joints that<br />
can absorb variations in the flooring caused<br />
<strong>by</strong> temperature swings. The joints that are<br />
left open between the terracotta elements (in<br />
correspondence with the technical expansion<br />
joints made in the sub-floor) should not be<br />
grouted with mortar or synthetic grout, but<br />
closed using specially-designed rubber strips<br />
or, better yet, with special sealing materials<br />
that can handle any deformation. For averagesized<br />
indoor flooring, it will be sufficient to<br />
prepare an open joint around the edge of<br />
the floor field near the vertical walls, which<br />
can be absorbed visually <strong>by</strong> the thickness of<br />
the skirting that is used. When particularly<br />
large floors are being laid, it is advisable<br />
to have technical joints every 6 to 8 meters,<br />
both lengthwise and crosswise. In general, it<br />
is important to note that the overall process<br />
involved in completing an indoor terracotta<br />
floor that can be utilised and enjoyed fully is<br />
Cottoverlegung<br />
Im Innenbereich<br />
Allgemeine und technische Anleitung zur<br />
Verlegung<br />
Die allgemeinen Maßnahmen, die bei<br />
der Planung eines Innenbelages aus Cotto zu<br />
beachten sind, sind unkomplizierter als bei<br />
Aussenbereichen, da nur die Problematik von<br />
technischen Fugen bei großen, zu belegenden<br />
Flächen beachtet werden muß. Sie sollen<br />
thermisch bedingte Ausdehnungen oder<br />
Schrumpfungen ausgleichen.<br />
Die oben genannten technischen Fugen<br />
werden nicht mit Mörtel oder synthetischem<br />
Stuck verfugt, sondern mit entsprechenden<br />
Gummiprofilen geschlossen oder vorzugsweise<br />
mit speziellen, versiegelnden und elastischen<br />
Materialien, die sich eventuellen Deformationen<br />
anpassen. Sind beträchtliche Flächen zu<br />
verlegen, ist es ratsam, alle 6-8 Meter in<br />
Längs-und Transversalrichtung technische<br />
Fugen vorzusehen. Bei Böden mittlerer<br />
Größe ist es ausreichend, eine offene Fuge<br />
am Fußbodenrand an den Längswänden<br />
vorzusehen, die von der Stärke des<br />
verwendeten Sockels verdeckt wird.<br />
Der vollständige Prozeß für einen problemlos<br />
nutzbaren Fußboden in Cotto für den<br />
Innenbereich läßt sich in verschiedene<br />
Arbeitsgänge aufteilen, die man wie folgt<br />
schematisieren kann:<br />
- Verlegen der Cottoelemente<br />
Interno della chiesa WinterKirche a<br />
Diessen Ammersee, Baviera,<br />
Pavimentata in cotto <strong>Sannini</strong> fatto a mano<br />
classico 40x40, posa a malta.<br />
Foto archivio <strong>Sannini</strong>.<br />
Internal view of the church Winterkirche<br />
in Diesen, Ammersee, Bavaria.<br />
Floor laid in mortar with handmade cotto<br />
tiles from <strong>Sannini</strong>, 40x40 cm.<br />
Photo : <strong>Sannini</strong> archive<br />
Carrelage<br />
En Cotto D’interieur<br />
Problèmatique générale et tecniques<br />
de pose<br />
Les procédures générales à appliquer<br />
dans les projets pour intérieur sont moins<br />
contraignantes que pour les extérieurs.<br />
Elles concernent les joints de dilatation dans<br />
tous les cas pour lesquels - en fonction de<br />
l’extension dimensionnelle importante de<br />
la surface à recouvrir et/ou des conditions<br />
particulières d’exercice du carrelage lui-même<br />
-- il est conseillé de compenser les variations<br />
du carrelage causées par les sauts thermiques.<br />
Les joints laissés ouverts entre les éléments<br />
de cotto (au niveau des joints techniques<br />
de dilatation réalisés au niveau du fond de<br />
pose) ne doivent pas être remplis de mortier<br />
au ciment ou synthétique, mais comblés de<br />
profils spéciaux en caoutchouc ou, mieux,<br />
des matériaux scellants spéciaux capables<br />
de compenser les déformations éventuelles.<br />
En présence de carrelages de dimensions<br />
importantes, il est conseillé de prévoir des<br />
joints techniques tous les 6-8 mètres, en<br />
direction longitudinale et transversale.<br />
Pour les carrelages intérieurs de dimensions<br />
moyennes, il suffit de prévoir un joint ouvert<br />
sur le périmètre du champ de carrelage à<br />
proximité des parois verticales, qui pourra<br />
être camouflé facilement dans l’épaisseur de<br />
la plinthe.<br />
231
Dettaglio del fronte del complesso<br />
di San Michele in Borgo a Pisa.<br />
Progetto Massimo Carmassi.<br />
Foto Mario Ciampi.<br />
Detailed view of the façade of San Michele in<br />
Borgo, Pisa.<br />
Project: Massimo Carmassi<br />
Photo: Mario Ciampi<br />
based on a series of work phases that can be<br />
summarised as follows:<br />
- laying the terracotta elements<br />
- sealing the joints<br />
- washing the floor field<br />
- treating the flooring<br />
Laying the terracotta elements<br />
The phase involved in laying the terracotta<br />
elements generally begins once the masonry<br />
work and painting have been completed (with<br />
the exception of completing the finishing coat<br />
if necessary). With <strong>Sannini</strong> products, the first<br />
operation<br />
- if required based on the type of elements<br />
being used - consists of splitting the pieces:<br />
- thinner elements are split with a crosswise<br />
blow along the edge<br />
- pieces with a traditional thickness can be split<br />
<strong>by</strong> light hammering along the splitting lines.<br />
With all types of laying, the elements must be<br />
laid in the direction of the groove.<br />
In modern execution procedures, there are<br />
basically three alternative criteria related to the<br />
laying techniques used for terracotta elements:<br />
1. classic (promptly-laid wet mortar)<br />
2. modern (semi-wet mortar laid as a screed)<br />
3. contemporary (using synthetic adhesives)<br />
Classic<br />
(with wet mortar laid immediately when the<br />
individual terracotta elements are put in place)<br />
Posa in opera degli elementi di cotto<br />
Ad ultimazione dei lavori di muratura ed imbiancatura (salvo, eventualmente, da<br />
effettuare l’ultima ”mano”) inizia - in genere - la fase di posa degli elementi in cotto.<br />
Nel caso dei prodotti <strong>Sannini</strong> la prima operazione, se necessaria, a seconda della<br />
tipologia di elementi adottati -- consiste nella divisione dei pezzi:<br />
-- il basso spessore si divide con un colpo trasversale sulla costola;<br />
-- lo spessore tradizionale si divide con leggeri colpi di martelletta lungo le linee di<br />
divisione.<br />
In ogni tipo di posa, tutti gli elementi devono essere posati nel senso della canalatura.<br />
Fondamentalmente nella prassi esecutiva odierna coesistono, per quanto attiene alle<br />
tecniche di posa di elementi in cotto per pavimentazioni, tre criteri alternativi:<br />
1. classico (a malta umida posata in forma puntuale);<br />
2. moderno (a malta semiumida posata in massetto);<br />
3. contemporaneo (a colla cementizia sintetica).<br />
Classico<br />
(a malta umida posata in forma puntuale contestualmente all’allettamento dei singoli<br />
elementi in cotto)<br />
Il primo sistema prevede la formazione, attraverso un’unica operazione, del massetto e<br />
del supporto di presa degli elementi di cotto. Si procede sostanzialmente a realizzare<br />
il massetto livellante e il supporto utile alla presa contestualmente, non in grandi<br />
campiture, bensì in modo puntuale facendo corrispondere l’operazione di allettamento<br />
di malta abbastanza umida alla posa di un singolo elemento in cotto. In sostanza<br />
si procede similmente alla realizzazione di una muratura in mattoni faccia a vista<br />
”caricando” la malta, posando l’elemento di cotto e rasando poi con la cazzuola la<br />
malta eccedente. Tale criterio, chiaramente, è indicato per la posa di elementi di cotto<br />
di formati ragguardevoli (superiori al 30x30 cm) e soprattutto nei casi di utilizzo di<br />
cotto fatto a mano dove le maggiori e più evidenti tolleranze morfologico-dimensionali<br />
- Versiegeln der Fugen<br />
- Absäuren des Fußbodenbereichs<br />
- Behandlung der Oberfläche<br />
Verlegen der Cottoelemente<br />
Die Verlegung der Cottoelemente beginnt<br />
normalerweise nach Beendigung der<br />
Maurer-, Maler- und eventuell Estricharbeiten<br />
(vorbehaltlich eines eventuellen letzten<br />
“Anstrichs”). Die Produkte <strong>Sannini</strong> müssen<br />
eventuell zuerst gespalten werden:<br />
- die Exportstärke wird mit einem Schlag quer<br />
auf die Rippe gespalten.<br />
- die traditionelle Stärke wird mit leichten<br />
Hammerschlägen entlang der Trennungslinie<br />
gespalten. Bei jeder Verlegungsart müssen alle<br />
Elemente in Strangrichtung verlegt werden. In<br />
der Praxis gibt es heutzutage drei alternative<br />
Verlegetechniken:<br />
1. Klassisch (mit feuchtem Mörtel in punktueller<br />
Form verlegt)<br />
2. Modern (mit halbfeuchtem Mörtel auf<br />
Estrich verlegt)<br />
3. Zeitgenössisch (mit synthetischem<br />
Zementkleber)<br />
Klassisch<br />
(punktuelle Verlegung der einzelnen<br />
Cottoelemente mit feuchtem Mörtel)<br />
Als erstes muß der Estrich beziehungsweise<br />
der Unterbau eingebracht werden.<br />
Das Aufbringen des feuchten Mörtels auf<br />
Le processus complexe qui aboutira à<br />
un carrelage en cotto pour intérieurs<br />
complètement disponible et correctement<br />
réalisé se décompose comme suit :<br />
-- pose des éléments en cotto;<br />
-- jointoiement;<br />
-- lavage;<br />
-- traitement.<br />
Pose des éléments en cotto<br />
Une fois les travaux terminés (maçonnerie et<br />
peinture), exception faite éventuellement, de<br />
la dernière couche, la phase de pose des<br />
éléments en cotto, en général, commence.<br />
Pour les produits <strong>Sannini</strong> la première<br />
opération, si nécessaire, selon la typologie<br />
d’éléments adoptés consiste à séparer<br />
les éléments:<br />
-- les faibles épaisseurs se divisent par<br />
un coup transversal sur la tranche;<br />
-- les épaisseurs traditionnelles se divisent par<br />
de légers coups de marteau le long des lignes<br />
prétracées.<br />
Quel que soit le type de pose, tous les<br />
éléments doivent être posés dans le sens de<br />
la gorge. Fondamentalement dans la pratique<br />
moderne on assiste simultanément à 3 critères<br />
qui déterminent le type de pose d’éléments en<br />
cotto pour carrelages:<br />
1. classique (mortier humide posé par points);<br />
2. moderne (mortier semi-humide en chape);<br />
3. contemporain (colle au ciment synthétique).<br />
233
dei diversi pezzi prodotti artigianalmente consigliano di utilizzare un criterio di posa<br />
maggiormente flessibile ad assecondare le specificità geometriche di ogni singolo<br />
elemento. Il non avere un massetto già tirato completamente in piano su una superficie<br />
estesa consente al posatore di poter predisporre spessori del supporto di allettamento<br />
(unitamente agli allineamenti e al distanziamento dei giunti) corrispondenti alle<br />
esigenze di ogni singolo elemento in cotto. L’uso di malta bastarda (in alternativa<br />
alla malta cementizia) consente di avvicinarsi alle modalità di posa e quindi anche al<br />
risultato estetico dei pavimenti in cotto della gloriosa storia italiana.<br />
In questo tipo di posa è da prevedersi la predisposizione di giunti ”aperti” come<br />
da progetto, comunque, in genere, non inferiori ai 5-6 mm, usando eventualmente<br />
appositi distanziatori.<br />
Moderno<br />
(a malta semiumida posata in massetto)<br />
Il secondo sistema di posa, indubbiamente il più usato nella prassi esecutiva odierna,<br />
prevede la stesura di malta di allettamento su tutta la superficie da pavimentare<br />
(o, più convenientemente per la buona conduzione del cantiere, su ampie zone di<br />
quest’ultima) in forma di massetto semiumido ben costipato e livellato.<br />
Le fasi esecutive principali, più in dettaglio, riguardano:<br />
1. Realizzazione del massetto di allettamento per ampie campiture della superficie<br />
pavimentale (battuto e livellato con il ”regolo” in perfetto piano) che si presenta, alle<br />
fasi successive di posa degli elementi in cotto, in consistenza semiumida e spessore di<br />
almeno 3-4 cm.<br />
2. Spolvero, sul massetto, di una quantità adeguata di cemento asciutto (polvere di<br />
cemento).<br />
3. Posa degli elementi in cotto preventivamente inumiditi in acqua per facilitare la<br />
solidarizzazione rispetto al massetto sfruttando l’azione di presa del cemento in<br />
polvere.<br />
4. Predisposizione di giunti ”aperti” come da progetto (in genere 4-6 mm) fra i vari<br />
The first system involves forming the screed<br />
and setting surface for the terracotta elements.<br />
This is done in a single operation.<br />
In essence, the leveling screed and the<br />
support surface used for setting the elements<br />
are completed at the same time. This is done<br />
immediately rather than working over a large<br />
area, so that the bedding operation of the<br />
rather wet mortar coincides with the process of<br />
laying the individual terracotta elements.<br />
In effect, the process is similar to the masonry<br />
technique used for fair-faced brickwork: the<br />
mortar is “loaded”, the terracotta element is<br />
laid and then the excess mortar is scraped<br />
away with a trowel. Obviously, this criterion is<br />
suitable when laying large terracotta elements<br />
(over 30x30 cm) and above all when using<br />
handmade terracotta where, due to the greater<br />
and more evident shape/size tolerance of<br />
the different pieces produced using hand<br />
workmanship methods, it is advisable to use<br />
more flexible laying criteria that can adapt<br />
to the specific geometric aspects of each<br />
individual element. The fact that the screed<br />
has not been spread completely flat over an<br />
extended surface area allows the layer to<br />
prepare a bedding thickness (together with<br />
alignments and joint spacing) that can adapt<br />
to the needs of each terracotta element. The<br />
use of cement lime mortar (instead of cement<br />
mortar) makes it possible to copy the laying<br />
methods and thus the appearance of the<br />
terracotta flooring that has been part of the<br />
den nivellierten Estrich erfolgt nicht auf<br />
einer größeren Fläche, sondern für jede<br />
Platte einzeln. Im großen und ganzen<br />
verfährt man ähnlich wie bei einem<br />
Sichtmauerwerk, indem man den Mörtel<br />
aufträgt, die Cottoelemente verlegt und dann<br />
den überflüssigen Mörtel mit einer Kelle<br />
abschabt. Diese Methode ist besonders für<br />
das Verlegen von großformatigem Cotto (über<br />
30x30 cm) angezeigt und vor allem bei der<br />
Verwendung von handgeformten Cotto, wo die<br />
größeren und augenfälligeren morphologischdimensionalen<br />
Toleranzen der verschiedenen<br />
Elemente eine flexiblere Verlegungsart ratsam<br />
erscheinen lassen, um sich den jeweiligen<br />
Unterschieden anzupassen. Bei einem nicht<br />
vollständig planen Estrich hat der Fliesenleger<br />
die Möglichkeit, die Ausrichtung und Breite<br />
der Fugen auf das einzelne Cottoelement<br />
abzustimmen. Die Verwendung von Kalk-<br />
Zement-Mörtel (alternativ zum Zementmörtel)<br />
ermöglicht eine Verlegeart, die der<br />
traditionellen, römisch antiken Verlegeart<br />
vom äusserlichen Erscheinungsbild sehr nahe<br />
kommt. Bei dieser Verlegeart müssen “offene”<br />
Fugen angelegt werden, im allgemeinen nicht<br />
unter 5-6 mm, wobei geeignete Distanzstücke<br />
verwendet werden können.<br />
Modern<br />
(mit halbfeuchtem Mörtel auf Estrich verlegt)<br />
Die zweite Verlegeart wird gegenwärtig<br />
in der Praxis zweifellos am meisten angewandt<br />
Classique<br />
(mortier humide posé par points simultanément<br />
à la pose des éléments en cotto)<br />
Le premier système prévoit la formation, en<br />
une seule opération, de la chape et du support<br />
de prise des éléments en cotto. On procède en<br />
gros à la réalisation de la chape autolissante<br />
et du support utile à la prise simultanément,<br />
pas sous forme de grandes masses mais par<br />
points, en faisant correspondre le coulage<br />
du mortier assez humide et la pose d’un seul<br />
élément en cotto. En résumé, on procède<br />
comme pour l’élévation d’un mur en briques<br />
apparentes en ”chargeant” le mortier, en<br />
posant l’élément de cotto et en ragréant à la<br />
truelle le mortier en excédent. Ce procédé est<br />
indiqué pour la pose d’éléments en cotto de<br />
formats importants (supérieurs à 30x30 cm) et<br />
surtout pour les cas d’utilisation du cotto fait à<br />
la main où les tolérances les plus importantes<br />
morphologiques et dimensionnelles des<br />
différentes pièces produites de façon<br />
artisanale conseillent d’utiliser une technique<br />
de pose flexible pour tenir compte des<br />
spécificités géométriques de chaque élément.<br />
Le fait de ne pas avoir une chape tirée<br />
complètement sur une surface importante<br />
permet au poseur d’installer des épaisseurs<br />
dans le support de pose (en parallèle avec<br />
les alignements et l’espacement des joints) en<br />
fonction des particularités de chaque élément<br />
en cotto. L’utilisation de mortier bâtard (au lieu<br />
du mortier au ciment) permet de se rapprocher<br />
glorious historical Italian tradition. This type<br />
of laying involves preparing “open” joints,<br />
according to design specifications, that must<br />
generally be at least 5-6 mm in width, using<br />
spacers if necessary.<br />
Modern<br />
(semi-wet mortar laid as a screed)<br />
The second laying system, which is<br />
undoubtedly the most widely-used one in<br />
modern execution procedures, involves<br />
spreading bedding mortar over the entire<br />
surface to be floored (or, to facilitate optimum<br />
building-site management, over larger areas)<br />
in the form of a well-compacted and leveled<br />
semi-wet screed. More specifically, the main<br />
execution phases are as follows:<br />
1. Making the bedding screed for large areas<br />
of the flooring surface (thwacked and leveled<br />
with a “straightedge” so it is perfectly flat) that<br />
will have a tacky consistency and a thickness<br />
of at least 3-4 cm for the subsequent laying<br />
phases of the terracotta elements.<br />
2. Dusting an adequate amount of dry cement<br />
(cement powder) over the screed.<br />
3. Laying the terracotta elements after wetting<br />
them with water to facilitate consolidation with<br />
the screed, taking advantage of the setting<br />
action of the cement powder.<br />
4. Preparing the “open” joints between the<br />
various elements in terracotta according to<br />
design specifications (generally 4-6 mm), using<br />
special spacers if necessary.<br />
elementi in cotto, usando eventualmente gli appositi distanziatori.<br />
5. Compattazione mediante vibratore a rulli (al fine di assicurarsi la completa presa<br />
e solidarizzazione degli elementi in cotto rispetto al supporto di allettamento) e<br />
bagnatura del pavimento posato.<br />
Contemporaneo<br />
(a colla cementizia sintetica)<br />
Terzo sistema di posa è quello che adotta la tecnica dell’incollaggio (a mezzo di<br />
prodotti industriali di recente introduzione nella prassi costruttiva) utilizzabile sia su<br />
pavimenti preesistenti che su massetti appositamente predisposti e completamente<br />
asciutti. Particolarmente indicato per interventi di ristrutturazione e restauro questo<br />
sistema ha il vantaggio di utilizzare collanti a basso contenuto di umidità che<br />
consentono di effettuare i trattamenti finali in tempi più ravvicinati rispetto a quelli<br />
necessari per le tecniche di posa precedentemente descritte. Esistono in commercio<br />
vari tipi di colle cementizie che possono essere utilizzate avendo, comunque,<br />
l’accortezza di seguire sempre le specifiche istruzioni impartite dalle industrie<br />
produttrici. Le fasi esecutive principali riguardano:<br />
1. Predisposizione del sottofondo (massetto) perfettamente in piano al fine di<br />
poter facilmente conseguire il risultato di complanarità fra gli elementi in cotto in<br />
conseguenza dell’esiguo spessore (3-5 mm) del collante (che consente scarsissimi<br />
adattamenti e tolleranze di posa).<br />
2. Pulizia del piano di posa (con asportazione accurata di detriti, residui oleosi o di<br />
qualsiasi altra natura) a massetto completamente asciutto, prima di dare avvio alla<br />
vera e propria fase di incollaggio degli elementi in cotto.<br />
3. Predisposizione di uno strato uniforme di collante steso in spessori di 3-5 mm<br />
utilizzando le apposite spatole dentate.<br />
4. Posa degli elementi in cotto in tempi correlati alla rapida presa dei collanti<br />
impiegati evitando che questi ”filmino” superficialmente a contatto prolungato<br />
con l’aria. Gli elementi in cotto vanno ”battuti” in modo uniforme sul collante -<br />
und sieht das Auftragen des Verlegemörtels<br />
auf die gesamte Fläche vor, die aus<br />
einem halbfeuchten, gut verdichteten und<br />
nivellierten Estrich besteht. Die wichtigsten<br />
Arbeitsvorgänge sind im einzelnen:<br />
1. Auftragen des Estrichs auf große Bereiche<br />
der Fußbodenfläche (gestampft und planiert,<br />
so daß die “Richtlatte” vollkommen eben<br />
aufliegt); er muß für die anschließende<br />
Verlegung der Cottoelemente in einem<br />
halbfeuchten Zustand sein und soll eine Stärke<br />
von mindestens 3-4 cm haben.<br />
2. Aufstreuen von Zementpulver in<br />
angemessener Menge auf den Estrich.<br />
3. Die Cottoelemente sind vor dem Verlegen<br />
mit Wasser anzufeuchten. Dadurch verbinden<br />
sich die Cottoelemente durch das zuvor<br />
aufgebrachte Zementpulver optimal mit dem<br />
Estrich.<br />
4. Anlegen der “offenen” Fugen zwischen den<br />
Cottoelementen entsprechend dem Entwurf<br />
(im allgemeinen 4-6 mm), eventuell mit Hilfe<br />
geeigneter Distanzstücke.<br />
5. Verdichten durch Walzrüttler (um ein<br />
vollkommenes Abbinden und Verbinden<br />
der Cottoelemente mit der Verlegungsunterlage<br />
zu gewährleisten), dann das Befeuchten des<br />
verlegten Bodens.<br />
Zeitgenössisch<br />
(mit synthetischem Zementkleber)<br />
Die dritte Methode ist eine Klebetechnik mit<br />
modernen, industriellen Produkten, die bei<br />
des modalités de pose et du résultat esthétique<br />
des carrelages en cotto de la glorieuse histoire<br />
italienne. Pour ce type de pose prévoir des<br />
joints ”ouverts” comme indiqué dans le projet,<br />
et dans tous les cas, en général, non inférieurs<br />
à 5-6 mm, en utilisant le cas échéant des<br />
entretoises.<br />
Moderne<br />
(mortier semi-humide en chape)<br />
Le second système de pose, sans doute le<br />
plus utilisé aujourd’hui, prévoit le coulage du<br />
mortier sur toute la surface à recouvrir (ou,<br />
pour une gestion de chantier correcte, sur de<br />
vastes zones de cette surface) en chape semihumide<br />
bien compacte et ragréée. Les phases<br />
principales peuvent être classées comme suit:<br />
1. Réalisation de la chape sur de larges<br />
portions de la surface totale (battue et ragréée<br />
avec la ”règle” parfaitement plate) qui se<br />
présente lors des phases suivantes de pose des<br />
éléments en cotto, sous une forme semi-humide<br />
et épaisseur d’aumoins 3-4 cm.<br />
2. Saupoudrage, sur le lit, d’une quantité<br />
adéquate de ciment sec (poudres de ciment).<br />
3. Pose des éléments en cotto prémouillés à<br />
l’eau pour faciliter la prise sur la chape en<br />
mettant à profit l’action de prise du ciment en<br />
poudre.<br />
4. Préparation de joints ”ouverts” comme<br />
indiqué dans le projet (en général 4-6 mm)<br />
entre les différents éléments en cotto, en<br />
utilisant des entretoises.<br />
235
singolarmente con martello di gomma, o a zone pavimentali più ampie a mezzo di<br />
macchina vibratrice a rulli - affinché le superfici intradossali di tutti gli elementi di cotto<br />
siano a contatto e facciano presa con la colla stessa.<br />
5. Predisposizione di giunti ”aperti” come da progetto (almeno 3 mm) fra i vari<br />
elementi in cotto, usando eventualmente gli appositi distanziatori.<br />
Sigillatura dei giunti<br />
Prima di procedere è necessario attendere - qualunque sia stato il tipo di posa<br />
adottato - un minimo di 24 ore dalle ultime fasi di allettamento degli elementi in cotto.<br />
Attraverso l’operazione di ”fugatura” si effettua il completamento al ”grezzo” della<br />
stesura pavimentale che rimarrà in vista; tale operazione, come già anticipato, si<br />
sviluppa attraverso il riempimento e il costipamento dei giunti lasciati aperti nella fase<br />
di posa del cotto medesimo. La sigillatura dei giunti può essere effettuata attraverso<br />
l’uso di due diversi tipi di preparati specifici:<br />
- impasti a base cementizia;<br />
- stucchi sintetici preconfezionati industrialmente.<br />
Fugatura a base cementizia<br />
L’utilizzo di miscele a base cementizia consente l’esecuzione della fugatura dei giunti<br />
con spessori ricorrenti (3-6 mm), che possono assumere comunque - su indicazione<br />
progettuale - dimensioni anche maggiori. Possiamo, in via generale, suddividere i<br />
giunti in tre fasce dimensionali: fino a 5 mm, da 6 a 10 mm, superiori ai 10 mm.<br />
Giunti fino a 5 mm. Per questa categoria di giunti si procede alla preparazione di<br />
una boiacca di cemento abbastanza fluida (composta unicamente da cemento grigio<br />
325 e acqua) che viene rovesciata sulla superficie pavimentale indirizzandola, in<br />
particolare, lungo le linee di fugatura a mezzo di spatole gommate fino a riempire<br />
completamente i giunti. In fasi sequenziali si procede a ripulire il pavimento dagli<br />
5. Compacting using a roller vibrator (in order<br />
to ensure complete setting and consolidation<br />
of the terracotta elements with respect to the<br />
bedding support) and wetting the laid floor.<br />
Contemporary<br />
(using synthetic adhesives)<br />
The third laying system is the one involving<br />
a gluing technique (using industrial products<br />
that have recently been introduced in building<br />
practices). This technique can be used on<br />
existent floors as well as on screeds that have<br />
been prepared especially for this purpose<br />
and have dried completely. This system,<br />
which is particularly suited for restructuring<br />
and restoration work, offers the advantage<br />
of working with adhesives that have a low<br />
moisture content, thus making it possible to<br />
carry out final floor treatment after a much<br />
shorter amount of time than the other laying<br />
techniques described above. There are various<br />
types of adhesives available on the market,<br />
but it is essential to follow all the detailed<br />
instructions given <strong>by</strong> the manufacturer.<br />
The main execution phases involve:<br />
1. Preparing a sub-floor (screed) that is<br />
perfectly flat to make it easy to keep the<br />
terracotta elements level with each other, since<br />
only a thin (3-5 mm) layer of adhesive is used<br />
(thus offering very little laying adaptability and<br />
tolerance).<br />
2. Cleaning the laying surface (thoroughly<br />
removing debris, dust, oil or other types<br />
bereits vorhandenen Fußböden sowie auf<br />
eigens angelegtem und vollkommen trockenem<br />
Estrich angewandt werden kann. Sie ist<br />
besonders bei Restaurierungen geeignet und<br />
hat den Vorteil, daß Kleber mit niedrigem<br />
Feuchtigkeitsgehalt benutzt werden, die eine,<br />
im Vergleich zu den vorher beschriebenen<br />
Verlegearten, kurzfristigere Endbehandlung<br />
ermöglichen. Es gibt im Handel verschiedene<br />
Arten von Zementklebern, die verwendet<br />
werden können, wobei die spezifischen, von<br />
den Herstellern angegebenen Instruktionen<br />
sorgfältig zu beachten sind.<br />
Die wichtigsten Arbeitsvorgänge sind:<br />
1. Schaffen einer vollkommen ebenen<br />
Unterlage (Estrich), um aufgrund der<br />
niedrigen Stärke der Klebeschicht (3-5 mm),<br />
die nur geringfügige Anpassungen und<br />
Toleranzen bei der Verlegung ermöglicht,<br />
ohne Schwierigkeiten eine ebene Fläche<br />
zu erreichen;<br />
2. Reinigung des vollkommen trockenen<br />
Estrichs (Abtragen von Staub, Zement,<br />
Ölrückständen oder Ablagerugen anderer Art).<br />
3. Auftragen einer einheitlichen Klebeschicht<br />
mit einer Stärke von 3-5 m, wobei spezifische<br />
Zahnspachteln benutzt werden;<br />
4. Rasches Verlegen der Cottoelemente, da<br />
die benutzten Kleber schnell abbinden.<br />
Dabei ist zu vermeiden, daß diese<br />
aufgrund eines verlängerten Lufteinflusses<br />
auf der Oberfläche einen “Film” bilden.<br />
Die Cottoelemente werden einheitlich auf<br />
Casa a Fontanellato, Parma.<br />
Progetto Aurelio Cortesi.<br />
Private villa in Fontanellato, Parma<br />
Project: Aurelio Cortesi<br />
5. Compactage par vibrateurs à rouleaux<br />
(pour garantir la prise complète et la<br />
solidarisation des éléments en cotto par<br />
rapport au support de pose) et mouillage<br />
du carrelage posé.<br />
Contemporain<br />
(colle au ciment synthétique)<br />
Le troisième système de pose adopte la<br />
technique du collage (grâce aux produits<br />
industriels récents) utilisable sur carrelages<br />
préexistants et sur lits préparés complètement<br />
secs. Particulièrement indiqué pour les<br />
interventions de restructuration et de<br />
restauration, ce système possède l’avantage<br />
d’utiliser des colles à bas contenu d’humidité<br />
qui permettent d’effectuer les traitements finaux<br />
dans des délais rapprochés en comparaison<br />
aux délais nécessaires pour les techniques de<br />
pose précédentes. Il existe dans le commerce<br />
plusieurs types de colles qui peuvent être<br />
utilisées en ayant dans tous les cas le soin<br />
de suivre toujours les spécifications données<br />
par les industries productrices. Les phases<br />
d’exécution principales peuvent être résumées<br />
comme suit:<br />
1. Prédisposition du fond (chape) mise en plan<br />
pour obtenir la coplanéité des éléments en<br />
cotto suite à l’épaisseur réduite (3-5 mm) de<br />
la colle (qui permet peu de réajustages et de<br />
tolérances de pose).<br />
2. Nettoyage du plan de pose (avec<br />
élimination minutieuse des déchets, des résidus<br />
237
eccessi di cemento a mezzo di una spugna umida e - prima che la boiacca indurisca<br />
- si cosparge il pavimento di sabbia di fiume (fine, asciutta e pulita) avendo cura<br />
di strofinarla sul campo pavimentale utilizzando scope di media durezza (ideali le<br />
scope di saggina). Quest’ultima operazione a mezzo di sabbia assume una duplice<br />
finalità: la prima è quella di effettuare una ripulitura dei residui cementizi con azione<br />
abrasiva, la seconda è di andare a costituire (una volta fissatasi sugli strati superficiali<br />
dei giunti) una sorta di ”ossatura” alla fugatura dei giunti attutendo anche i ritiri<br />
dell’impasto di partenza formato unicamente da cemento e acqua.<br />
Giunti da 6 a 10 mm. In presenza di tali giunti (che possiamo considerare di media<br />
dimensione) si procede direttamente alla mescola di sabbia silicia pulita (100 lt)<br />
cemento grigio 325 (80 kg) e acqua; la miscela viene, poi, cosparsa sul pavimento e,<br />
successivamente, sempre mediante l’ausilio di spatole gommate, viene accuratamente<br />
fatta rifluire e compattata all’interno dei giunti. Prima che il materiale di fugatura sia<br />
indurito viene distesa una successiva miscela secca formata di solo cemento e sabbia,<br />
energicamente strofinata sul campo pavimentale al fine di ottenere un consolidamento<br />
della struttura superficiale dei giunti di malta e una prima pulizia di fondo del campo<br />
pavimentale. Si completa l’operazione provvedendo all’eliminazione della malta in<br />
eccesso, alla pulizia mediante spugna umida e alla stilatura finale di ogni singolo<br />
giunto.<br />
Giunti maggiori di 10 mm. Per questa tipologia di giunti (di utilizzo, comunque, non<br />
frequente nelle stesure pavimentali da interno) si segue la stessa procedura descritta<br />
precedentemente variando unicamente la percentuale del cemento 325 (che viene<br />
ridotto a 50-60 Kg ogni 100 lt di sabbia) al fine di contenere il fenomeno di ritiro del<br />
cemento stesso all’interno delle fughe di maggiore spessore.<br />
Fugatura con stucchi sintetici<br />
Per la realizzazione dei giunti effettuata con miscele preconfezionate bisogna avere<br />
l’accortezza, innanzitutto, di verificare alcune caratteristiche d’uso dei prodotti<br />
aquisibili sul mercato; in particolare:<br />
of residue) once the screed is completely<br />
dry, before starting the actual gluing of the<br />
terracotta elements.<br />
3. Preparing a uniform layer of adhesive,<br />
using a special notche trowel to spread<br />
it in a layer that is 3-5 mm thick.<br />
4. Laying the terracotta elements so the<br />
timing corresponds to the quick-setting of the<br />
adhesives being used, without letting<br />
the glue create a “film” due to prolonged<br />
exposure to air. The terracotta elements must<br />
be ”thwacked” evenly on the adhesive - either<br />
individually with a rubber hammer or using<br />
a roller-vibrator machine over larger flooring<br />
areas - so that the gather surfaces of all the<br />
terracotta elements are in contact and set with<br />
the glue.<br />
5. Preparing the “open” joints between the<br />
various terracotta elements according to<br />
design specifications (generally 4-5 mm), using<br />
special spacers if necessary.<br />
Sealing the joints<br />
Regardless of the type of laying technique<br />
being used, before proceeding you must wait<br />
at least 24 hours after the last phases involved<br />
in bedding the terracotta elements have<br />
been completed. The “grouting” operation<br />
completes the “rough” laying of the flooring<br />
that will remain visible. As we mentioned<br />
above, this is carried out <strong>by</strong> filling and<br />
compacting the joints that were left open when<br />
den Kleber “geklopft” - jedes einzeln mit<br />
einem Gummihammer oder, auf größeren<br />
Fußbodenbereichen mit einer Walzrüttelmaschine,<br />
so daß die Unterseite des gesamten<br />
Cottobelages mit dem Kleber abbindet.<br />
5. Anlegen der “offenen” Fugen zwischen<br />
den verschiedenen Cottoelementen laut<br />
Entwurf (mindestens 3 mm), wobei geeignete<br />
Distanzstücke verwendet werden.<br />
Versiegeln der Fugen<br />
Bevor man mit dem Verfugen beginnt, sollten<br />
mindestens 24 Stunden vergangen sein.<br />
Durch das ”Verfugen” erfolgt die “grobe”<br />
Fertigstellung der sichtbar bleibenden<br />
Fußbodenfläche. Wie schon vorausgeschickt,<br />
werden in diesem Arbeitsgang die bei der<br />
Verlegung des Cotto offengelassenen Fugen<br />
gefüllt und verdichtet.<br />
Das Versiegeln der Fugen kann mit zwei<br />
unterschiedlichen Produktarten durchgeführt<br />
werden:<br />
- Mischung auf Zementbasis;<br />
- industriell vorgefertigter synthetischer Stuck.<br />
Verfugen auf Zementbasis<br />
Das Verwenden einer Mischung auf<br />
Zementbasis ermöglicht eine Ausführung von<br />
Fugen mit regelmäßigen Breiten (3-6 mm), die<br />
jedoch auch größere Ausmaße haben können.<br />
Im allgemeinen können die Fugen in drei<br />
Dimensionsbereiche unterteilt werden: Fugen<br />
huileux ou de toute autre nature) une fois la<br />
chape complètement sèche, avant de démarrer<br />
la phase de collage des éléments en cotto.<br />
3. Prédisposition d’une couche uniforme de<br />
collant en épaisseur de 3-5 mm en utilisant les<br />
brosses dentées.<br />
4. Pose des éléments en cotto dans des temps<br />
liés à la prise rapide des colles utilisées en<br />
évitant la formation de films superficiels,<br />
conséquence d’un contact prolongé avec<br />
l’air. Les éléments en cotto doivent être<br />
”battus” d’une façon uniforme sur la colle<br />
- individuellement avec un marteau en<br />
caoutchouc, ou sur des zones plus vastes à<br />
l’aide de machines vibrantes à rouleaux - afin<br />
que les surfaces intrados de tous les éléments<br />
en cotto soient en contact et fassent prise avec<br />
la colle elle-même.<br />
5. Préparation des joints ouverts comme<br />
indiqué dans le projet (au moins 3 mm) entre<br />
les différents éléments en cotto, en utilisant<br />
éventuellement les entretoises prévues à cet<br />
effet.<br />
Jointoiement<br />
Avant de procéder au jointoiement, il est<br />
nécessaire d’attendre - quelque soit le type<br />
de pose -- un minimum de 24 heures après<br />
la pose des derniers éléments en cotto.<br />
Par l’opération de jointoiement on finira<br />
grossièrement la surface apparente du<br />
carrelage; cette opération, comme indiqué,<br />
the terracotta tiles were laid.<br />
The joints can be sealed using two different<br />
kinds of specific preparations<br />
- cement-based mixtures<br />
- industrially-prepared synthetic grout.<br />
Cement-based grouting<br />
The use of cement-based mixes makes it<br />
possible to grout joints with a repetitive<br />
thickness (3-6 mm) that can also be larger<br />
based on design indications. In general,<br />
we can subdivide these joints into three size<br />
ranges: up to 5 mm, from 6 to 10 mm,<br />
and over 10 mm.<br />
Joints up to 5 mm. For this type of joint, you<br />
must prepare a rather fluid cement grouting<br />
(composed solely of “325” gray cement<br />
and water) that is then poured over the<br />
flooring surface and spread particularly along<br />
the grouting lines using rubber-ended trowels<br />
until all the joints have been filled.<br />
During subsequent phases, the excess cement<br />
is cleared from the floor using a damp sponge<br />
and before the grouting has a chance to<br />
harden, river sand (fine, dry, clean sand) is<br />
rubbed carefully over the floor field using a<br />
medium-hard broom (broomcorn types are<br />
ideal). This operation using sand serves two<br />
purposes: the first one is to clean off any<br />
cement residue through abrasive action, while<br />
the second one is to create a sort of “frame”<br />
for the joints (once the sand has adhered to<br />
- adozione di sigillanti la cui composizione sia priva di resine sintetiche o polimeri<br />
che potrebbero determinare, ad esecuzione effettuata, lungo il perimetro a vista<br />
degli elementi di cotto, delle antiestetiche alonature capaci di compromettere la<br />
”omogeneità” e la bellezza materica del campo pavimentale in cotto;<br />
- adozione di sigillanti non caratterizzati da un assetto cromatico finale<br />
eccessivamente contrastante rispetto al cotto, sia per motivi di congruenza tonale fra i<br />
giunti e gli elementi di laterizio che per rendere più semplice ed efficace la pulitura di<br />
residui sulle superfici del cotto.<br />
Lavaggio del campo pavimentale<br />
Prima di procedere alla pulizia finale della superficie di calpestio in cotto è necessario<br />
attendere che sia perfettamente asciutto tutto il ”pacchetto” pavimentale che deve<br />
liberarsi di ogni umidità relativa indotta dalle fasi di posa. In via generale, si<br />
consigliano:<br />
-- 15 giorni, circa, di attesa se il pavimento è stato posato con sigillanti sintetici<br />
preparati industrialmente;<br />
-- 30 giorni, circa, se invece si è adottata la posa con malta cementizia (in genere una<br />
settimana per ogni centimetro di spessore del massetto).<br />
Durante questo periodo di attesa le eventuali protezioni superficiali del pavimento<br />
(utili a favorire il proseguimento delle attività di cantiere) non dovranno contrastare<br />
la traspirabilità del materiale necessaria all’espulsione dell’umidità immagazzinata;<br />
si consiglia, di conseguenza, l’uso di carta, cartoni o altri tipi di supporto<br />
necessariamente traspiranti. Finalità del lavaggio è di intervenire efficacemente (e in<br />
forma definitiva) sul campo pavimentale per rimuovere tutti quegli elementi estranei<br />
che ne pregiudicherebbero sotto il profilo estetico la piena godibilità; fra questi:<br />
-- tracce e residui cementizi rimasti sugli elementi in cotto a seguito della fugatura dei<br />
giunti;<br />
-- depositi calcarei e salnitrazioni dovute alla risalita in superficie di sali di calcio<br />
contenuti nella malta di allettamento o nella boiacca di fugatura dei giunti;<br />
bis zu 5 mm, Fugen von 6 bis 10 mm und<br />
Fugen über 10 mm.<br />
Fugen bis zu 5 mm. Für diese Fugenkategorie<br />
wird eine ziemlich flüssige Zementmasse<br />
hergestellt (lediglich aus grauem Zement<br />
325 und Wasser zusammengesetzt), die<br />
auf die Fußbodenfläche geschüttet und<br />
insbesondere der Fugenlinien entlang mit<br />
einer Gummispachtel so verteilt wird, daß die<br />
Fugen vollkommen gefüllt werden. Daraufhin<br />
wird der Fußboden mit einem feuchten<br />
Schwamm von den Zementresten gereinigt<br />
und - bevor sich der Zementbrei erhärtet - mit<br />
feinem, trockenem und sauberem Flußsand<br />
bestreut. Dieser wird mit einem mittelharten<br />
Besen (ideal sind Reisigbesen) auf dem<br />
Fußbodenbereich verrieben. Das Abreiben<br />
mit Sand hat eine doppelte Funktion: erstens<br />
erfolgt durch das Scheuern ein Abtragen der<br />
Zementreste und zweitens wird in den Fugen<br />
eine Art “Gerippe” gebildet, wobei auch<br />
das Schwinden der lediglich aus Zement<br />
und Wasser zubereiteten Ausgangsmischung<br />
ausgeglichen wird.<br />
Fugen von 6 bis 10 mm. Entsprechen dem<br />
Großteil der Fugen. Hier bereitet man sofort<br />
die Mischung aus sauberem Siliziumsand<br />
(100 l), grauem Zement 325 (80 kg) und<br />
Wasser zu. Die Mischung wird dann auf den<br />
Fußboden gegossen und danach wiederum<br />
mit Hilfe von Gummispachteln sorgfältig in<br />
das Innere der Fugen gegeben und verdichtet.<br />
consiste au remplissage et au compactage<br />
des joints laissés ouverts lors de la phase de<br />
pose du cotto. Le remplissage des joints peut<br />
être fait en utilisant deux types de produits<br />
spécifiques:<br />
- mortier au ciment;<br />
- mortiers synthétiques industriels.<br />
Jointoiement au ciment<br />
L’utilisation de mortiers au ciment permet de<br />
réaliser des joints d’épaisseurs standards<br />
(3-6 mm), qui peuvent prendre dans tous<br />
les cas - sur indication du concepteur - des<br />
dimensions plus importantes. Nous pouvons<br />
en gros classer les types de joints en 3<br />
catégories: jusqu’à 5 mm, de 6 à 10 mm,<br />
supérieurs à 10 mm.<br />
Joints jusqu’à 5 mm. Pour cette catégorie<br />
de joints, on prépare un gâchage au ciment<br />
assez fluide (composé uniquement de ciment<br />
gris 325 et d’eau) qui sera versé sur le<br />
carrelage en insistant en particulier sur les<br />
lignes de fuite avec une spatule caoutchoutée<br />
jusqu’à remplir complètement les joints. On<br />
nettoie ensuite le carrelage des excédents de<br />
ciment avec une éponge humide et - avant<br />
durcissement du mortier - on épand du sable<br />
de rivière (fin, sec et propre) en frottant avec<br />
un balai moyenne dureté (balais de ronces).<br />
Cette opération de sablage joue un double<br />
rôle: d’abord, nettoyage des résidus de ciment<br />
par abrasion, ensuite, servir (une fois collé sur<br />
239
Pagina successiva/next page<br />
Dettagli di pavimentazioni<br />
in coccio pesto con decorazioni<br />
in marmo a Pompei.<br />
Foto archivio Acocella.<br />
Detailed view of coccio pesto flooring with<br />
marble ornaments, Pompeii.<br />
Photo: archive Acocella<br />
the surface layer of the joints), thus mitigating<br />
any shrinkage in the initial mixture composed<br />
solely of water and cement.<br />
Joints from 6 to 10 mm. With this type of joint<br />
(which we can consider average in size), you<br />
can proceed directly to mixing clean silica<br />
sand (100 lt), “325” gray cement (80 kg) and<br />
water. The mixture is then spread over the<br />
floor and at this point, again using a rubberended<br />
trowel, it is carefully allowed to flow<br />
into the joints and is tamped down. Before the<br />
grouting material has hardened, a dry mixture<br />
of cement and sand is spread over the top<br />
and is rubbed vigorously over the floor field to<br />
consolidate the surface structure of the mortar<br />
joints and carry out an initial basic cleaning<br />
of the field. This operation is completed <strong>by</strong><br />
removing the excess mortar, cleaning the<br />
surface with a damp sponge and completing<br />
each individual joint.<br />
Joints of over 10 mm. The same procedure<br />
described above is used for this type of joint<br />
(not generally used in laying indoor floors).<br />
The only change is in the percentage of “325”<br />
cement (which is decreased to 50-60 kg for<br />
every 100 kg of sand) in order to minimize<br />
shrinkage of the cement inside thicker<br />
grouting.<br />
Synthetic grouting<br />
In order to complete the joints with pre-<br />
-- macchie di smalto e di vernici sintetiche.<br />
L’eliminazione dei residui cementizi richiede l’utilizzazione di soluzioni pulenti di<br />
natura acida; il comune acido muriatico (miscelato con acqua in modo da ottenere<br />
una soluzione acidulata con concentrazione del 6%) o prodotti similari rappresentano<br />
soluzioni efficaci di intervento. L’eliminazione contestuale dei residui cementizi, di<br />
quelli calcarei e di salnitro passa, in genere, attraverso l’uso di:<br />
-- acido tamponato appositamente preparato per lavaggi più o meno intensi sul<br />
cantiere;<br />
-- acido muriatico diluito in acqua (come sopra).<br />
L’eliminazione delle macchie di smalto e vernici sintetiche si effettua mediante l’uso di<br />
solventi specifici. L’operazione di lavaggio è la più importante per ottenere una buona<br />
riuscita della successiva (e ultima fase) legata al trattamento del cotto; il lavaggio può<br />
essere eseguito sia con comuni spazzoloni che con macchine professionali di pulizia,<br />
quali la monospazzola e l’aspiraliquidi, capaci di esercitare un’azione più incisiva<br />
sulla stesura pavimentale e soprattutto effettuare una rapida evacuazione dei liquidi di<br />
risulta rendendo, così, tutta l’operazione più velocizzata ed efficace. In dettaglio, la<br />
sequenza operativa può essere così schematizzata:<br />
-- lavaggio del pavimento con le soluzioni acide ed attesa massima di 3-4 minuti<br />
(una permanenza temporale maggiore delle soluzioni acide sulla superficie potrebbe<br />
indebolire la malta cementizia di fugatura dei giunti) per consentire una efficace<br />
azione di disgregamento dei residui di malta; (se i risultati ottenuti con un primo<br />
lavaggio non sono soddisfacenti si può ripetere l’operazione aumentando leggermente<br />
la percentuale acida della soluzione);<br />
-- ”strofinio” contestuale a mezzo di spazzole al fine di amplificare l’azione pulente<br />
della soluzione acida;<br />
-- raccolta (aspirazione) ed evacuazione delle soluzioni acide utilizzate<br />
-- risciacquatura ripetuta, con acqua abbondante e pulita, effettuata a pavimento<br />
completamente asciutto.<br />
Bevor das Verfugungsmaterial hart ist, wird<br />
eine nur aus Zement und Sand hergestellte<br />
Trocken-Mischung verstreut und der Fußboden<br />
energisch gescheuert, um eine Konsolidierung<br />
der Oberflächenstruktur der Mörtelfugen<br />
und eine erste, gründliche Reinigung des<br />
Fußbodens zu erzielen. Zuletzt wird der<br />
überflüssige Mörtel entfernt und jede einzelne<br />
Fuge mit einem feuchten Schwamm gereinigt.<br />
Fugen über 10 mm. Für diese Art von Fugen<br />
(bei Verlegung in Innenbereichen jedoch<br />
nicht häufig verwendet) erfolgt derselbe oben<br />
beschriebene Arbeitsgang, wobei lediglich der<br />
Anteil des Zements 325 vermindert wird ( auf<br />
50-60 kg je 100 l Sand), um das Schwinden<br />
des Zements im Inneren der breiten Fugen zu<br />
verlangsamen.<br />
Verfugen mit Fertigfuge<br />
Für die Bearbeitung der Fugen mit<br />
vorkonfektionierter Mischung ist vor allem<br />
die Zusammensetzung der auf dem Markt<br />
erhältlichen Produkte zu beachten und<br />
insbesondere:<br />
- Verwendung von Dichtungsmassen, deren<br />
Zusammensetzung keine synthetischen Harze<br />
oder Polymere aufweist, da diese nach<br />
Ausführung an den Rändern der Cottoelemente<br />
unästhetische Feuchtigkeitsflecken verursachen<br />
können, die die “Homogenität” und die<br />
materielle Schönheit des Cotto beeinträchtigen<br />
können;<br />
les joints) d’”ossature” du joint en minimisant<br />
les effets de retrait du mortier original formé<br />
exclusivement de ciment et d’eau.<br />
Joints de 6 à 10 mm. En présence de tels<br />
joints (que nous considérons de moyenne<br />
dimension) on procède directement au<br />
mélange de sable silice propre (100 l) ciment<br />
gris 325 (80 kg) et eau; le mélange est<br />
ensuite versé sur le carrelage et, avec une<br />
spatule caoutchoutée, introduit et compacté<br />
à l’intérieur des joints. Avant durcissement,<br />
verser un mélange sec sable-ciment en<br />
brossant énergiquement pour consolider la<br />
structure superficielle des joints au mortier et<br />
procéder ainsi à un premier lavage de fond<br />
du champ carrelé. Eliminer le mortier excédent<br />
avec une éponge humide et repasser finement<br />
chaque joint.<br />
Joints de plus de 10 mm. Pour ce type<br />
de joints (en général non fréquents sur<br />
les carrelages internes) suivre la même<br />
procédure que ci-dessus en modifiant<br />
uniquement le pourcentage de ciment 325<br />
(qui passe à 50-60 Kg pour 100 l de sable)<br />
afin de minimiser le phénomène de retrait<br />
du ciment dans les joints d’épaisseur plus<br />
importante.<br />
Joints avec mortiers sinthétiques<br />
Pour réaliser les joints avec un mortier préparé<br />
industriellement, consulter tout d’abord les<br />
241
Trattamento del pavimento<br />
Quando il pavimento risulta accuratamente pulito e completamente asciutto (si<br />
consiglia di lasciare circolare l’aria nell’ambiente anche in inverno per facilitare<br />
l’evaporazione dell’umidità) può iniziare l’ultima fase del trattamento (ovvero la<br />
finitura superficiale) realizzabile attraverso due diversi tipi di procedure e sostanze:<br />
1. ceratura (con cere cremose in pasta) che fungono esse stesse da sostanze<br />
impermeabilizzanti;<br />
2. impermeabilizzazione e ceratura (con cere liquide).<br />
Il trattamento con cere cremose in pasta utilizza prodotti di tipo tradizionale;<br />
questi ultimi, unitamente alla personalizzazione estetica delle superfici, effettuano<br />
l’impermeabilizzazione in profondità del cotto. Prima di stendere la cera in pasta è<br />
consigliabile trattare, eventualmente, il pavimento unicamente con un prodotto di base<br />
avente funzioni di livellante e di antirisalita rispetto all’umidità ascendente. Sul mercato<br />
sono disponibili vari tipi di cere (neutre, chiare, scure) capaci di influenzare, in via<br />
definitiva, la tonalità del pavimento. E’ importante, conseguentemente, prima di dare<br />
esecuzione al trattamento definitivo, di effettuare una prova fuori opera su qualche<br />
elemento di cotto della stessa partita utilizzata per la realizzazione del pavimento per<br />
valutare in anticipo i diversi risultati conseguibili.<br />
In genere, a secondo del tipo di cera, si hanno:<br />
-- risultati vicini alla cromaticità di partenza del cotto impiegato (cere neutre);<br />
-- toni tenui e naturali di colore (cere chiare);<br />
-- intonazioni marcate tendenti al moro (cere scure).<br />
L’operazione di ceratura, da effettuarsi sul pavimento asciutto, consiste nella stesura<br />
omogenea del prodotto cremoso prescelto a mezzo di spugne o spazzole su tutto il<br />
campo pavimentale, compresa la rete dei giunti.<br />
Nel caso di sospensione del lavoro di ceratura si raccomanda di terminare lungo le<br />
linee di fuga evitando di lasciare gli elementi in cotto trattati solo in parte. Per ottenere<br />
una più marcata protezione si procede -- dopo 24 ore dal primo trattamento -- a<br />
stendere una seconda mano di cera a finire. Lasciati trascorrere ancora 2 giorni si<br />
procede alla finitura mediante una mano di cera liquida di manutenzione. Il risultato<br />
d’aspetto derivante dall’uso di cere cremose in pasta -- soprattutto se confrontato con<br />
packaged mixtures, first of all it is essential<br />
to check the type of use that applies to the<br />
products available on the market. More<br />
specifically:<br />
- the use of sealants free of synthetic resins or<br />
polymers that, once the work is completed,<br />
could create unsightly rings around the visible<br />
edge of the terracotta elements, ruining the<br />
evenness and beauty of the terracotta material<br />
used for the floor field;<br />
- the use of sealants that are not characterized<br />
<strong>by</strong> an excessive contrast in the final color<br />
arrangement with respect to the terracotta,<br />
both in terms of the maintaining a consistent<br />
shade of color between the joints and the<br />
tiling as well as to make cleaning the residue<br />
from the surface of the terracotta simpler and<br />
more effective.<br />
Cleaning the floor field<br />
Before proceeding with final cleaning of<br />
the terracotta floor, you must wait for the entire<br />
flooring “package” to dry completely and<br />
release all the relative humidity created <strong>by</strong> the<br />
laying phase. In general, we recommend:<br />
- waiting about 15 days if the floor was laid<br />
with industrially-prepared synthetic sealants;<br />
- waiting about 30 days if the floor was laid<br />
with cement mortar (in general, one week for<br />
every centimeter of thickness of the screed).<br />
During this waiting period, any surface<br />
protection on the floor (used in order to<br />
- Verwendung von möglichst farbneutralen<br />
Dichtungsmassen; dies ist aus Gründen der<br />
farblichen Übereinstimmung zwischen Fugen<br />
und Cottoelementen sowie für eine einfache<br />
und gründliche Reinigung der Rückstände auf<br />
der Oberfläche des Cotto erforderlich.<br />
Reinigung des Fußbodens<br />
Vor der Endreinigung der Cottofläche muß das<br />
ganze Fußboden-”Paket” vollkommen trocken<br />
sein. Es darf keine, während der Verlegung<br />
eingedrungene Feuchtigkeit mehr enthalten.<br />
Im allgemeinen wird empfohlen:<br />
- Eine Wartezeit von zirka 15 Tagen, wenn<br />
der Fußboden mit industriell hergestellten<br />
synthetischen Dichtungsmassen verlegt wurde.<br />
- Eine Wartezeit von zirka 30 Tagen,<br />
wenn mit Zementmörtel verlegt wurde (im<br />
allgemeinen eine Woche pro Zentimeter<br />
der Estrichstärke).<br />
Während dieser Wartezeit darf der eventuelle<br />
Oberflächenschutz des Fußbodens (für das<br />
Fortschreiten der Arbeiten an der Baustelle<br />
notwendig) die Abtrocknung des Materials<br />
nicht beeinträchtigen. Es wird folglich der<br />
Gebrauch von Papier, Karton oder anderen<br />
feuchtigskeitsdurchlässigen Materialien<br />
empfohlen.Zweck der Reinigung ist es, den<br />
Fußboden gründlich von allen Fremdkörpern<br />
zu befreien, die die Ästhetik beeinträchtigen<br />
können:<br />
- Zementspuren und -reste, die nach der<br />
instructions pour chaque produit spécifique; à<br />
savoir:<br />
- choisir des mortiers sans résines synthétiques<br />
ou polymères qui risquent de provoquer, après<br />
coup, le long du périmètre à vue des éléments<br />
en cotto, des halos antiesthétiques capables<br />
de compromettre l’”homogénéité” et la beauté<br />
plastique du carrelage en cotto;<br />
- choisir des scellants sans caractéristique<br />
chromatique finale trop en contraste avec celle<br />
du cotto, pour des raisons de cohérence entre<br />
les teintes des joints et celles des éléments en<br />
cotto, et pour rendre plus simple et efficace le<br />
nettoyage des résidus sur les surfaces du cotto.<br />
Lavage du champ carrelé<br />
Avant nettoyage final de la surface en cotto,<br />
attendre que l’ensemble soit parfaitement sec<br />
de toute humidité due aux différentes phases<br />
de pose. En général, nous conseillons:<br />
- 15 jours, environ, pour les carrelages posés<br />
avec des produits synthétiques préparés<br />
industriellement;<br />
- 30 jours, environ, si on adopte la pose avec<br />
mortier au ciment (en général une semaine par<br />
centimètre d’épaisseur du lit). Pendant cette<br />
période, les produits de protection superficielle<br />
du carrelage (utiles pour favoriser les<br />
activités de chantier) ne devront pas entraver<br />
la transpiration du matériau nécessaire à<br />
l’expulsion de l’humidité accumulée; nous<br />
conseillons d’utiliser du papier, des cartons<br />
proceed with other building-yard activities)<br />
must allow the material to breathe in order<br />
to get rid of any moisture it has taken in.<br />
Therefore, we recommend using paper,<br />
cardboard or other types of material that allow<br />
transpiration. The goal of the washing phase<br />
is to intervene effectively (and permanently) on<br />
the floor field in order to remove all foreign<br />
matter that could compromise full enjoyment<br />
of the flooring as far as appearance is<br />
concerned. This includes:<br />
- traces of cement and residue left on the<br />
terracotta elements after the joints have been<br />
grouted;<br />
- calcium and saltpeter deposits caused <strong>by</strong><br />
efflorescence of calcium salts contained in the<br />
bedding mortar or the grouting used for the<br />
joints;<br />
- enamel and synthetic paint stains.<br />
Acid cleaning solutions must be used to<br />
remove cement residue. Ordinary hydrochloric<br />
acid (mixed with water to make a 6% acid<br />
solution) or similar products are effective<br />
solutions to use. Simultaneous removal of<br />
cement, calcium and saltpeter residues is<br />
generally done using:<br />
- buffered acid prepared especially for more<br />
or less concentrated washing at the building<br />
site;<br />
- hydrochloric acid diluted with water<br />
(as described above).<br />
Enamel and synthetic paint stains can<br />
be removed using specific solvents.<br />
quello ottenibile a mezzo delle idromulsioni sintetiche come si specificherà in seguito<br />
-- appare legato ad un assetto superficiale del campo pavimentale più naturale e<br />
morbido, leggermente risplendente.<br />
La seconda tipologia di trattamento, alternativa a quella descritta, è strutturata su due<br />
fasi:<br />
-- impermeabilizzazione vera e propria del pavimento (a mezzo<br />
di soluzioni liquide);<br />
-- ceratura superficiale (anch’essa effettuata con cere liquide).<br />
L’impermeabilizzazione si ottiene con l’applicazione di soluzioni<br />
-- in genere monomeri disciolti in acqua -- stese sul campo pavimentale<br />
in cotto tramite stracci, spugne, pennellesse.<br />
Ad asciugatura avvenuta tali soluzioni producono una polimerizzazione dei monomeri<br />
che vanno a chiudere i vuoti della caratteristica struttura materica vaculare del cotto<br />
andando a costituire uno strato superficiale protetto dalla penetrazione di sostanze<br />
macchianti durante le fasi di uso del pavimento stesso. Contestualmente, questa<br />
impermeabilizzazione, funge da barriera alla risalita, dal basso, di sali portatori di<br />
fenomeni antiestetici in superficie; infine svolge un ruolo di sostanza livellante della<br />
superficie a vista degli elementi in cotto. Indicazioni puntuali di applicazione sono, in<br />
genere, fornite dalle aziende produttrici che di norma specificano le corrette modalità<br />
d’uso.<br />
Nel dare esecuzione a questo secondo tipo di trattamento si consiglia:<br />
1. effettuare un ricoprimento uniforme delle superfici da trattare al fine di evitare --<br />
nella fase successiva di finitura -- un differenziato assorbimento dei prodotti lucidanti e,<br />
conseguentemente, una resa d’aspetto differenziata all’interno del campo pavimentale;<br />
2. dare avvio all’impermeabilizzazione dagli ambiti spaziali più lontani rispetto<br />
alle vie di uscita in modo da non calpestare il campo pavimentale prima che sia<br />
perfettamente asciutto.<br />
Come ultima operazione si effettua la stesura della cera liquida lucidante mediante<br />
pennellessa o stracci. Il pavimento dopo 48 ore dalla stesura delle emulsioni lucidanti<br />
può essere definitivamente vissuto. Non è necessario procedere a lucidare il campo<br />
pavimentale in quanto le idromulsioni, asciugando, polimerizzano restituendo<br />
Verfugung auf den Cottoelementen verblieben<br />
sind.<br />
- Kalkablagerungen und Ausblühungen, die<br />
durch die an die Oberfläche steigenden<br />
Kalziumsalze verursacht werden, die im<br />
Verlegungsmörtel oder in der Dichtungsmasse<br />
der Verfugung enthalten sind,<br />
- Lack-oder synthetische Farbflecken.<br />
Die Entfernung von Zementresten erfordert<br />
den Gebrauch von sauren Reinigungsmitteln;<br />
Salzsäure (mit Wasser so verdünnt, daß<br />
eine reinigende Säurelösung mit einer<br />
Konzentration von 6% entsteht) oder ähnliche<br />
Produkte sind hierzu geeignete Lösungen.<br />
Die gründliche Beseitigung von kalkartigen<br />
Rückständen oder Ausblühungen erfolgt im<br />
allgemeinen durch den Gebrauch von:<br />
- speziell zubereiteter milder Säure für eine<br />
mehr oder weniger intensive Reinigung auf der<br />
Baustelle;<br />
- mit Wasser verdünnter Salzsäure<br />
(wie oben).<br />
Lack- oder synthetische Farbflecken werden mit<br />
spezifischen Lösungsmitteln beseitigt.<br />
Für ein gutes Ergebnis der darauffolgenden<br />
und abschließenden Behandlung des Cotto<br />
ist die Reinigung am wichtigsten. Sie kann<br />
mittels normaler Bürsten oder auch mit<br />
professionellen Reinigungsmaschinen, z.B.<br />
Einscheibenmaschinen, und Flüssigkeitssaugern<br />
erfolgen, die stärker auf den Fußboden<br />
einwirken und vor allem eine schnellere<br />
Beseitigung der vorhandenen Flüssigkeiten<br />
ou autres types de support nécessairement<br />
transpirants. La finalité du lavage est<br />
d’intervenir efficacement (définitivement) sur<br />
le carrelage pour retirer tous les éléments<br />
étrangers qui porteraient préjudice esthétique<br />
au résultat final; parmi ces éléments à<br />
éliminer:<br />
-- traces et résidus de ciment restés sur les<br />
éléments en cotto suite aux opérations de<br />
jointoiement;<br />
-- dépôts calcaires et laitages de remontée des<br />
sels calcaires contenus dans les mortiers du lit<br />
ou des joints;<br />
-- taches d’émail ou de peintures synthétiques.<br />
L’élimination des résidus au ciment exige<br />
l’utilisation de solutions de lavage de nature<br />
acide; l’acide chlorhydrique standard<br />
(mélangé à l’eau de façon à obtenir une<br />
solution acidulée concentrée à 6%) ou<br />
produits similaires sont des solutions efficaces<br />
d’intervention. L’élimination des résidus de<br />
ciment, calcaires et salins se fait en général,<br />
en utilisant:<br />
-- acide tamponé préparé spécifiquement<br />
pour les lavages plus ou moins intenses sur le<br />
chantier;<br />
- acide chlorhydrique dilué à l’eau (comme<br />
indiqué ci-dessus).<br />
L’élimination des taches d’émail et de peintures<br />
synthétiques se fait en utilisant des solvants<br />
spécifiques. L’opération de lavage est la plus<br />
importante pour réussir la phase suivante (qui<br />
est la dernière) liée au traitement du cotto;<br />
243
autonomamente lucentezza al pavimento che, allo stesso tempo, assume caratteristiche<br />
di idro-oleo resistenza. La resa finale sarà uniforme, di tonalità neutra, con un<br />
effetto di bagnato-lucido, maggiormente risplendente del trattamento a cera e con<br />
un’intonazione generale del campo pavimentale di maggiore uniformità ed artificialità.<br />
A chiusura di questa illustrazione sintetica sulle modalità di posa e di trattamento<br />
necessari per tutti i prodotti in cotto privi di qualsiasi procedimento di finitura, è bene<br />
evidenziare -- per chi desiderasse accelerare i tempi complessivi di realizzazione --<br />
come oggi sul mercato esistano sia cotti pretrattati parzialmente (nella formula di ”cotti<br />
precerati” o ”cotti protetti grezzi”) e cotti protetti finiti.<br />
Rappresentativo di quest’ultima categoria è il Cotto Flash prodotto dalla <strong>Sannini</strong> che<br />
assomma in se il più alto e completo livello di trattamento preventivo; infatti unitamente<br />
alla protezione di profondità, il Cotto Flash possiede già la protezione e la finitura<br />
lucidante di superficie per cui non è più bisognoso di alcun trattamento di finitura in<br />
opera. In funzione di tali caratteristiche il Cotto Flash chiaramente necessita di una<br />
certa attenzione nella fase esecutiva. Quell’attenzione che normalmente si riserva ad<br />
ogni prodotto finito e che riguarda sostanzialmente la fase della posa in opera (che<br />
risulta, indifferentemente, effettuabile a malta o a collante) avendo cura, in particolare,<br />
di asportare di continuo, con una spugna inumidita, le tracce di malta o di collante<br />
prima che secchino al fine di non sporcare irrimediabilmente gli elementi<br />
in cotto già rifiniti e pretrattati.<br />
The cleaning operation is the most important<br />
one in order to ensure optimum results during<br />
the subsequent (and final) phase involved in<br />
treating the terracotta. Cleaning can be done<br />
either with ordinary scrub brushes or with<br />
professional cleaning machines, such as single<br />
scrubbers or wet-vacs that can exert more<br />
penetrating action on the laid floor and above<br />
all, can quickly remove waste liquids, there<strong>by</strong><br />
making the entire operation faster and more<br />
efficient.<br />
More specifically, the operating sequence can<br />
be summarized as follows:<br />
- washing the floor with an acid solution and<br />
waiting for a maximum of 3-4 minutes (leaving<br />
the acid solution on the surface any longer<br />
than this could weaken the cement grouting<br />
mortar in the joints) in order to dissolve grout<br />
residue effectively (if the outcome after the first<br />
washing is not satisfactory, this operation can<br />
be repeated, slightly increasing the percentage<br />
of acid in the solution);<br />
- simultaneous scrubbing using brushes in<br />
order to enhance the cleaning action of the<br />
acid solution;<br />
- collecting (vacuuming) and removing the acid<br />
solution that has been used;<br />
- repeated rinsing with plenty of clean water<br />
once the floor is completely dry.<br />
Floor treatment<br />
Once the floor has been cleaned thoroughly<br />
and is completely dry (we recommend letting<br />
ermöglichen und dadurch den gesamten<br />
Arbeitsgang beschleunigen und verbessern.<br />
Der Arbeitsablauf kann folgendermaßen<br />
aufgegliedert werden:<br />
- Reinigung des Fußbodenbelages mit<br />
Säurelösungen, dabei maximal 3-4<br />
Minuten warten (ein längerer Verbleib der<br />
Säurelösungen auf der Oberfläche könnte den<br />
Zementmörtel der Verfugung beeinträchtigen).<br />
Sollte das Ergebnis der ersten Reinigung nicht<br />
zufriedenstellend sein, kann der Vorgang<br />
wiederholt und der Säuregehalt der Lösung<br />
leicht erhöht werden.<br />
- Scheuern des Bodens mit einer Bürste,<br />
um die reinigende Wirkung der Säurelösung<br />
zu erhöhen;<br />
- Absaugen und Beseitigung der verwendeten<br />
Säurelösungen;<br />
- wiederholtes Nachspülen mit sauberem<br />
Wasser.<br />
Behandlung des Fußbodens<br />
Ist der Fußboden sorgfältig gereinigt und<br />
vollkommen trocken (es ist - auch im Winter<br />
-empfehlenswert, im Raum Luft zirkulieren zu<br />
lassen, um das Verdampfen der Feuchtigkeit<br />
zu erleichtern) kann mit der letzten<br />
Behandlungsphase (oder Endbehandlung<br />
der Fläche) begonnen werden, die in zwei<br />
verschiedenen Arbeitsgängen und mit zwei<br />
verschiedenen Substanzen erfolgen kann:<br />
1. Wachsen mit Hartwachsen, die gleichzeitig<br />
imprägnierend wirken;<br />
le lavage peut être effectué avec des brosses<br />
standard ou des laveuses professionnelles,<br />
telles que monobrosse et aspirateur liquide,<br />
capables d’exercer une action plus accentuée<br />
sur le carrelage et surtout d’effectuer une<br />
évacuation rapide des liquides usés, en<br />
accélérant l’opération et en la rendant plus<br />
efficace. Dans le détail, la procédure peut être<br />
schématisée comme suit:<br />
- lavage du carrelage avec des solutions<br />
acides et attente maximum de 3-4 minutes (une<br />
permanence plus longue des solutions acides<br />
sur la surface pourrait affaiblir le mortier au<br />
ciment des joints) pour obtenir une bonne<br />
efficacité de désagrégation des résidus de<br />
mortier; (si les résultats obtenus par un premier<br />
lavage ne sont pas satisfaisants, recommencer<br />
l’opération en augmentant légèrement la<br />
concentration acide de la solution);<br />
- ”frottement” par brosses pour augmenter<br />
l’action de la solution acide;<br />
- récupération (aspiration) et évacuation des<br />
solutions acides utilisées;<br />
-- rinçage répété à l’eau abondante et propre,<br />
effectué sur un carrelage parfaitement sec.<br />
Traitement du carrelage<br />
Quand le carrelage est parfaitement propre et<br />
sec (prévoir une circulation d’air dans la pièce<br />
même en hiver pour faciliter l’évaporation de<br />
l’humidité) la dernière phase du traitement<br />
peut commencer (la finition de surface) et fait<br />
appel à 2 types de procédures et de produits:<br />
245
air circulate in the room even during the winter<br />
in order to allow the moisture to evaporate),<br />
you can carry out the final treatment phase<br />
(i.e. surface finish), which can be done<br />
using two different types of procedures and<br />
substances:<br />
1. waxing (with creamy paste wax) that acts<br />
as a waterproofing agent;<br />
2. waterproofing and waxing (with liquid<br />
wax).<br />
Treatment with creamy paste wax uses<br />
traditional types of products that, in addition to<br />
giving the floor a custom look, also waterproof<br />
the terracotta in depth.<br />
Before spreading the paste wax, it is advisable<br />
eventually to treat the floor with only one basic<br />
product that can level the floor and prevent<br />
moisture from rising through the tiles. Various<br />
types of wax are available on the market<br />
(clear, light, dark) and they can permanently<br />
affect the color tones of the floor. As a result,<br />
before actually treating the floor permanently,<br />
it is important to test the wax separately on<br />
a terracotta tile from the same lot as the one<br />
used to lay the floor. This will allow you to<br />
assess the different potential results ahead of<br />
time.<br />
In general, depending on the type of wax that<br />
is used, the results can range from:<br />
- shades that are close to the original color of<br />
the terracotta tiles that have been laid (clear<br />
wax);<br />
- soft and natural color tones (light wax);<br />
- marked shades tending towards deep brown<br />
(dark wax).<br />
The waxing operation, which must be done<br />
on dry floors, involves spreading the creamy<br />
product evenly over the entire floor field,<br />
including the network of joints, using sponges<br />
or brushes. If you need to stop the waxing<br />
process, be sure to end along the grouting<br />
lines and avoid leaving any of the terracotta<br />
elements only partially treated.<br />
In order to achieve even greater protection,<br />
24 hours after the first treatment spread a<br />
second layer of wax to finish.<br />
After an additional two-day period, proceed<br />
with the finishing coat <strong>by</strong> spreading a layer of<br />
liquid maintenance wax.<br />
The look created <strong>by</strong> using creamy paste wax<br />
- especially as compared to the results that can<br />
be achieved using synthetic<br />
water-based emulsions, as we will discuss<br />
further ahead - seems to be connected with<br />
a more natural, softer and somewhat shiny<br />
surface structure of the floor field.<br />
The second type of treatment that can be used<br />
as an alternative to the one described above<br />
is carried out in two phases:<br />
- actual waterproofing of the floor (using liquid<br />
solutions);<br />
- surface waxing (done likewise using liquid<br />
wax).<br />
Waterproofing is done <strong>by</strong> applying solutions<br />
- generally monomers dissolved in water - that<br />
are spread over the terracotta flooring using a<br />
cloth, sponge or flat brush.<br />
When these solutions dry, this generates<br />
polymerization of the monomers, sealing<br />
the holes in the characteristic porous structure<br />
2. Imprägnieren und Wachsen mit flüssigem<br />
Wachs.<br />
Bei der Behandlung mit Hartwachsen werden<br />
traditionelle Produkte verwendet,<br />
die zum einen die Oberfläche natürlich<br />
aussehen lassen und zum anderen den Cotto<br />
tief imprägnieren.<br />
Vor dem Auftragen des Wachses ist<br />
es ratsam, den Fußboden eventuell mit<br />
einem Basisprodukt zu behandeln, das<br />
eine nivellierende und vor aufsteigender<br />
Feuchtigkeit schützende Wirkung hat.<br />
Auf dem Markt sind verschiedene Wachsarten<br />
erhältlich (neutrale, helle, dunkle), die<br />
den Farbton des Fußbodens definitiv<br />
beeinflussen können. Es ist folglich wichtig,<br />
vor der endgültigen Behandlung auf einigen<br />
Cottoelementen Proben vorzunehmen, um<br />
im voraus die verschiedenen erreichbaren<br />
Ergebnisse zu beurteilen.<br />
Im allgemeinen erzielt man je nach Wachsart:<br />
- Ergebnisse, die sich dem ursprünglichen<br />
Farbton des Cotto anpassen (neutrales<br />
Wachs);<br />
- dezente und natürliche Farbtöne (helles<br />
Wachs);<br />
- ausgeprägte, zu einem Dunkelbraun<br />
neigende Tönungen (dunkles Wachs).<br />
Das auf dem trockenen Fußboden<br />
auszuführende Einwachsen erfolgt durch<br />
ein mit Schwamm oder Bürste gleichmäßiges<br />
Verteilen des ausgewählten Produktes<br />
auf dem gesamten Fußboden, inklusive<br />
des Fugennetzes. Falls das Einwachsen<br />
unterbrochen wird, ist der Vorgang den<br />
Fugenlinien entlang zu beenden, um zu<br />
vermeiden, daß nur teilweise behandelte<br />
Cottoelemente hinterlassen werden.<br />
Um einen stärkeren Schutz zu erzielen, wird<br />
- 24 Stunden nach der ersten Behandlung<br />
- eine zweite, abschließende Wachsschicht<br />
aufgetragen.<br />
Nach weiteren zwei Tagen erfolgt die<br />
Endbehandlung mit dem Auftragen einer<br />
flüssigen Pflegewachsschicht.<br />
Durch den Gebrauch von Hartwachsen<br />
erhält die Fußbodenfläche - vor allem im<br />
Vergleich zum Gebrauch von synthetischen<br />
Hydroemulsionen, wie nachstehend spezifiziert<br />
- ein natürlicheres, weicheres<br />
und leicht glänzendes Aussehen.<br />
Die zweite, alternativ zur eben beschriebenen<br />
Behandlungsart ist in zwei Arbeitsgänge<br />
unterteilt:<br />
- eine echte Imprägnierung des Fußbodens mit<br />
Flüssigimprägnierung<br />
- Einlassen der Fläche mit Flüssigwachs<br />
Das Imprägnieren wird durch das Auftragen<br />
von Lösungen erreicht - im allgemeinen<br />
in Wasser gelöste Monomere -, die mit<br />
Tüchern, Schwämmen oder Pinseln auf<br />
den Cotto aufgetragen werden. Nach dem<br />
Trocknen verursachen die Lösungen eine<br />
Polymerisation der Monomere, die die Poren<br />
des Cotto schließt und auf der Oberfläche eine<br />
Schutzschicht bildet, die bei Benutzung des<br />
Fußbodens das Eindringen von fleckbildenden<br />
Substanzen verhindert.<br />
Diese Imprägnierung verhindert gleichzeitig<br />
das Aufsteigen von Salzen, die auf der<br />
1. cirage avec des cires crémeuses en pâte<br />
qui jouent le rôle d’imperméabilisant;<br />
2. imperméabilisation et cirage (cires liquides).<br />
Le traitement avec des cires crémeuses en pâte<br />
utilise des produits de type traditionnel; ces<br />
derniers, simultanément à la personnalisation<br />
esthétique des surfaces, effectuent une<br />
imperméabilisation en profondeur du cotto.<br />
Avant de passer la cire en pâte, traiter le cas<br />
échéant le carrelage avec un produit lissant<br />
de base qui empêchera la remontée de<br />
l’humidité.<br />
Le marché propose plusieurs types de cires<br />
(neutres, claires, sombres) capables<br />
d’influencer d’une façon définitive la tonalité<br />
du carrelage. Il est important par conséquent<br />
avant de procéder au traitement définitif,<br />
d’effectuer un essai à part sur quelques<br />
éléments de cotto du lot utilisé pour le<br />
carrelage pour évaluer au préalable les<br />
différents résultats obtensibles.<br />
En général, selon le type de cire, on obtient:<br />
- résultats proches du chromatisme de départ<br />
du cotto utilisé (cires neutres);<br />
- tons subtils et naturels colorés (cires claires);<br />
- tons marqués tendant au sombre (cires<br />
sombres).<br />
Le cirage, à effectuer sur le carrelage sec,<br />
consiste à étendre d’une façon homogène le<br />
produit crémeux à l’éponge ou à la brosse sur<br />
toute la surface y compris les joints.<br />
En cas d’interruption du cirage, terminer<br />
le long des joints en évitant de laisser des<br />
parties de cotto traitées partiellement. Pour<br />
obtenir une protection plus marquée, passer<br />
- 24 heures après le premier traitement -<br />
une seconde couche de cire de finition.<br />
Après 2 jours, finir le travail en passant une<br />
couche de cire liquide de maintien.<br />
L’aspect obtenu par l’utilisation des cires<br />
crémeuses en pâte - surtout si l’on fait la<br />
comparaison avec les émulsions synthétiques<br />
comme on verra plus bas - ressemble à une<br />
continuité de surface naturelle et souple,<br />
légèrement réfléchissante. Le second type de<br />
traitement, se décompose comme suit:<br />
- imperméabilisation proprement dite du<br />
carrelage (solutions liquides);<br />
- cirage de surface (cires liquides).<br />
L’imperméabilisation s’obtient par l’application<br />
de solutions - en général monomères dissous<br />
à l’eau - passées sur le carrelage en cotto<br />
par chiffons, éponges, pinceaux. Une fois le<br />
séchage terminé, ces solutions provoquent une<br />
polymérisation des monomères qui rempliront<br />
les vides de la structure caractéristique poreuse<br />
du cotto en formant une couche superficielle<br />
de protection contre les substances<br />
tachantes par la suite. Simultanément, cette<br />
imperméabilisation empêche la remontée par<br />
le bas de sels responsables de phénomènes<br />
antiesthétiques de surface. Enfin, ce procédé<br />
joue le rôle de substance lissante de la face<br />
à vue des éléments en cotto. Les instructions<br />
d’application sont, en général, fournies par le<br />
fabricant du produit qui en indique le mode<br />
d’emploi correct.<br />
Si l’on applique cette procédure, veiller à:<br />
1. effectuer une couverture uniforme des<br />
surfaces à traiter afin d’éviter - dans les<br />
of terracotta and creating a surface layer that<br />
is protected against penetration <strong>by</strong> substances<br />
that could stain the floor once it is in use. At<br />
the same time, this waterproofing acts as a<br />
barrier against the efflorescence of salts that<br />
can cause unsightly surface phenomena.<br />
Lastly, it also helps level the visible surface of<br />
the terracotta elements.Instructions on exact<br />
application are usually furnished <strong>by</strong> the<br />
manufacturer, who will generally specify the<br />
correct way to use the product.<br />
In any case, when doing this second type<br />
of treatment, you are advised to:<br />
1. evenly cover the surface to be treated<br />
in order to avoid differentiated absorption of<br />
polish after the treatment phase and thus an<br />
uneven appearance over the floor field;<br />
2. start waterproofing from the point farthest<br />
away from the exit in order to avoid walking<br />
on the floor field before it is perfectly dry.<br />
Spreading the liquid wax using a flat brush<br />
or cloth is the last operation that needs to<br />
be carried out. Forty-eight hours after the<br />
polishing emulsion has been spread, the floor<br />
is finally ready to be used. The floor field does<br />
not need to be polished since these waterbased<br />
emulsions polymerize as they dry, thus<br />
giving the floor a shine that is also water- and<br />
oil-resistant. The final result will be even and<br />
neutral in tone, with a wet/polished effect that<br />
is shinier than wax treatment. The overall color<br />
tone of the floor field will be more uniform.<br />
In ending this brief illustration on the laying<br />
and treatment procedures required for all<br />
terracotta products without any kind of finish<br />
process, it is important to point out to those<br />
of you who prefer to speed up the total<br />
completion time that both partially pre-treated<br />
terracotta (“pre-waxed terracotta” or “rough<br />
protected terracotta”) as well as finished<br />
protected terracotta are now available on the<br />
market. The latter category includes Cottoflash<br />
produced <strong>by</strong> <strong>Sannini</strong>, which represents<br />
the highest and most complete level<br />
of preventive treatment. In fact, together<br />
with in-depth protection, Cottoflash also<br />
features surface protection and a glossy finish<br />
so that no expensive or special treatment is<br />
needed to finish the floor after it has been<br />
laid.<br />
Because of these features, Cottoflash naturally<br />
needs a certain amount of care during<br />
execution, i.e. the kind of care that would be<br />
used with any finished product and that mainly<br />
involves the laying phase (which can be done<br />
with either mortar or adhesives). Special care<br />
must be taken continuously to remove traces<br />
of mortar or adhesive with a damp sponge<br />
before they can dry and irremediably dirty<br />
the already finished and pre-treated terracotta<br />
elements.<br />
Cottooberfläche unästhetische Flecken bilden<br />
und dient auch als nivellierende Substanz.<br />
Detaillierte Gebrauchsanweisungen werden<br />
von den Herstellern geliefert. Bei Anwendung<br />
der zweiten Behandlungstechnik ist es auf<br />
jeden Fall ratsam:<br />
1. die zu behandelnde Fläche einheitlich<br />
einzulassen, um bei der darauffolgenden<br />
Endbehandlung ein unterschiedliches<br />
Absorbieren der Wachsprodukte und folglich<br />
ein uneinheitliches Erscheinungsbild auf dem<br />
Fußboden zu vermeiden;<br />
2. mit der Imprägnierung an Stellen<br />
zu beginnen, die vom Ausgang weiter entfernt<br />
sind, um den Fußboden nicht<br />
zu betreten, bevor er absolut trocken ist.<br />
Zuletzt wird das flüssige Wachs mit einem<br />
Pinsel oder Lappen verteilt.<br />
Der Fußboden kann 48 Stunden nach<br />
dem Auftragen der Glanzemulsion<br />
endgültig benutzt werden. Es ist nicht<br />
nötig, den Fußboden zu bohnern, da<br />
die Hydroemulsionen beim Trocknen<br />
polymerisieren und dem Fußboden dadurch<br />
von selbst Glanz verleihen und ihn gleichzeitig<br />
gegen Wasser- und Ölflecken schützen.<br />
Das Endergebnis ist einheitlich, hat<br />
einen neutralen Farbton und einen<br />
”feuchtglänzenden Effekt“, der im Vergleich<br />
zur Behandlung mit Wachs glänzender ist und<br />
dem Fußboden Farbgleichheit verleiht.<br />
Zum Abschluß dieser synthetischen Darstellung<br />
der Verlegungs- und Behandlungsarten,<br />
die vor jeglicher Endbehandlung bei allen<br />
Cottoprodukten notwendig sind, ist - für<br />
alle, die die Ausführungszeiten insgesamt<br />
beschleunigen möchten - hervorzuheben,<br />
daß heutzutage auf dem Markt teilweise<br />
vorbehandelter (“vorgewachster” oder<br />
“geschützter Cotto”) und endbehandelter<br />
Cotto erhältlich ist. Für diese letzte Kategorie,<br />
endbehandelter Cotto, ist der von <strong>Sannini</strong><br />
produzierte Cottoflash repräsentativ, der<br />
in sich den höchsten und vollständigsten<br />
Standard der Vorbehandlung vereint:<br />
zusammen mit dem Tiefenschutz hat der<br />
Cottoflash bereits einen ausreichenden<br />
Oberflächenschutz, so daß jegliche Art von<br />
traditioneller, mühevoller Endbehandlung<br />
entfällt. Aufgrund seiner werkseitigen<br />
Oberflächenbehandlung muß der Cottoflash<br />
beim Verlegen vorsichtiger behandelt<br />
werden, um oben genannte Schutzschicht<br />
nicht zu beschädigen. Diese Vorsicht sollte<br />
man sowohl beim Mörtel- als auch beim<br />
Klebeverfahren walten lassen. Aufgrund dieser<br />
Merkmale erfordert der Cottoflash bei der<br />
Ausführungsphase eindeutig eine gewisse<br />
Sorgfalt. Diese Sorgfalt, die normalerweise<br />
bei allen Endprodukten angewandt wird,<br />
bezieht sich hauptsächlich auf das Verlegen.<br />
Besonders ist darauf zu achten, die Mörtel<br />
- oder Kleberspuren mit einem feuchten Lappen<br />
zu entfernen bevor diese antrocknen, um zu<br />
vermeiden, daß die bereits endbehandelten<br />
Cottoelemente nicht bleibend verschmutzt<br />
werden.<br />
phases suivantes - une absorption différenciée<br />
des produits polissants qui provoquera une<br />
disparité esthétique sur le carrelage;<br />
2. démarrer les opérations<br />
d’imperméabilisation loin des zones de sortie<br />
pour éviter de piétiner les zones traitées avant<br />
séchage complet.<br />
Pour terminer, passer la cire liquide avec<br />
un pinceau ou des chiffons. Le carrelage, peut<br />
être utilisé normalement, 48 heures après le<br />
traitement aux émulsions de polissage. Il n’est<br />
pas nécessaire de polir le champ traité car<br />
les émulsions, en séchant, polymérisent en<br />
rendant le carrelage brillant et imperméable<br />
à l’eau et aux huiles. Le résultat final sera<br />
uniforme, de tonalités neutres, avec un effet<br />
mouillé-brillant, plus brillant qu’après traitement<br />
à la cire ou une teinte générale du carrelage<br />
plus uniforme et recherchée.<br />
Pour terminer ce bref aperçu des techniques<br />
de pose et de traitement nécessaires pour<br />
tous les produits en cotto exempts de tout<br />
procédé de finition, il faut noter - pour ceux<br />
qui désirent accélérer les temps de réalisation<br />
- qu’aujourd’hui sur le marché il existe des<br />
cottos prétraités partiellement (dans la formule<br />
de ”cottos précirés” ou de ”cottos protégés<br />
bruts”) et de cottos protégés finis.<br />
Cette dernière catégorie est représentée par<br />
le Cotto Flash <strong>Sannini</strong> qui offre le plus haut<br />
niveau de traitement préventif; en effet, avec<br />
la protection en profondeur, le Cotto Flash<br />
possède la protection et la finition brillante de<br />
surface telles à éliminer la nécessité d’autres<br />
traitements de finition.<br />
Ces caractéristiques font que Cotto Flash<br />
nécessite clairement une certaine attention<br />
lors de l’exécution. Ce soin qui est d’habitude<br />
apporté à chaque produit fini et qui regarde<br />
la phase de la pose (effectuée indifféremment<br />
par mortier ou collant) consiste à éliminer<br />
continuellement avec une éponge humide les<br />
traces de mortier ou de colle avant séchage<br />
afin de ne pas salir irrémédiablement les<br />
éléments en cotto déjà terminés et traités.<br />
247
Pavimentazione in cotto per esterni<br />
Problematiche generali e tecniche di posa in opera<br />
Prima di procedere nell’analisi delle differenziate tecniche di posa delle<br />
pavimentazioni in cotto ci sembra utile evidenziare, sia pur in via sintetica, quelli<br />
che sono i criteri progettuali o, meglio, le problematiche e gli accorgimenti di ordine<br />
generale da tenere presente e da risolvere efficacemente nel progetto pavimentale in<br />
esterno.<br />
Realizzazione del supporto di posa<br />
Il supporto di posa -- inteso come insieme di strati specializzati e differenziati sia<br />
matericamente che negli stessi spessori funzionali quali possono intendersi il piano di<br />
fondazione, l’eventuale strato drenante o impermeabilizzante, il piano di posa vero<br />
e proprio (ovvero il massetto), lo stato di allettamento -- è, indubbiamente, il primo<br />
elemento che influisce sulla qualità finale della pavimentazione svolgendo più funzioni:<br />
da quelle statiche a quelle di difesa dello strato superficiale in cotto impedendo,<br />
ad esempio, la risalita di umidità che inevitabilmente veicolerebbe in superficie<br />
sali contenuti nel terreno o addirittura negli stessi strati del pacchetto pavimentale.<br />
La definizione tecnologica di quest’ultimo deve essere pertanto molto accurata e<br />
approfondita in direzione delle specifiche tipologie d’uso (pavimentazione privata<br />
o collettiva, spazio solo pedonale o carrabile) in modo da tener conto - di volta in<br />
volta - delle particolari condizioni di esercizio (carichi). In esterno, soprattutto nella<br />
definizione del supporto di posa alla pavimentazione in cotto, deve essere previsto<br />
un efficiente drenaggio per evitare ristagni di umidità che altrimenti provocherebbero<br />
Outdoor Terracotta Flooring<br />
General problems and laying techniques<br />
Before we begin analyzing the different laying<br />
techniques used for terracotta flooring, we feel<br />
it would be helpful to take a brief look at the<br />
design criteria used, or more specifically, at<br />
the problems and general aspects that should<br />
be taken into consideration and resolved<br />
effectively in outdoor flooring plans.<br />
Completing the laying supporta<br />
The laying support - understood as a set<br />
of layers that are specialized and<br />
differentiated both materially as well as<br />
in terms of the functional layers such as<br />
the foundation surface, any drainage or<br />
waterproofing layer, the actual laying surface<br />
(i.e. the screed) and the bedding layer - is<br />
undoubtedly the first element to influence the<br />
end quality of the flooring. This is because<br />
it carries out a number of functions ranging<br />
from static functions to protecting the<br />
surface layer of the terracotta <strong>by</strong> preventing<br />
occurrences such as rising humidity, which<br />
would inevitably bring the salts contained in<br />
the soil or in the flooring layers to the surface.<br />
The technological definition of this latter<br />
aspect must therefore be extremely precise<br />
and entails close examination with regard<br />
to the specific types that are being used<br />
(private or public flooring, areas designed<br />
for pedestrians only or for vehicular traffic)<br />
Cottoverlegung Im Aussenbereich<br />
Allgemeine und technische Anleitung zur<br />
Verlegung<br />
Vor der Beschreibung der verschiedenen<br />
Verlegetechniken im Außenbereich ist es<br />
notwendig, erst die allgemeinen Probleme der<br />
Planung eines Aussenbelages hervorzuheben.<br />
Herstellung des Verlegeunterbaus<br />
Der Verlegeunterbau - insbesonders die<br />
einzelnen unterschiedlichen Schichten,<br />
die als Unterbau bezeichnet werden - ist<br />
die Grundlage für die endgültige Qualität<br />
des Bodens. Besonders eventuelle<br />
Drainage- bzw. Imprägnierungsschichten,<br />
die das Aufsteigen von Feuchtigkeit (die<br />
die im Boden und in den Schichten des<br />
Fußbodenpaketes selbst befindlichen Salze<br />
unweigerlich an die Oberfläche tragen<br />
würde) verhindern sollen, müssen mehrere<br />
Funktionen statischer und schützender Natur<br />
erfüllen. Vor der Auswahl des Belages muß<br />
der Ort und die für den Ort spezifischen<br />
Belastungen exakt bestimmt werden, um die<br />
einzelenen Belastungsbedingungen (Privat-<br />
Öffentlich/Fahrbahn-Fußgängerzone etc.)<br />
zu berücksichtigen. Im Außenbereich muß<br />
vor allem beim Unterbau eine wirkungsvolle<br />
Drainage vorgesehen werden, um<br />
Feuchtigkeitsstauungen zu vermeiden,<br />
die andernfalls unweigerlich zu Ausblühungen<br />
oder Feuchtigkeitsflecken führen würden und<br />
Complesso Fontivegge a Perugia.<br />
Progetto Aldo Rossi.<br />
Foto archivio Acocella.<br />
Construction complex Fontivegge, Perugia.<br />
Project: Aldo Rossi<br />
Photo: archive Acocella<br />
Carrelages En Cotto Pour Exterieurs<br />
Problèmes généraux et techniques de pose<br />
Avant de procéder à l’analyse des différentes<br />
techniques de pose du carrelage en cotto,<br />
il est important de mettre en évidence les<br />
paramètres ou, plus précisément les problèmes<br />
dont il faudra tenir compte et les précautions<br />
générales à prendre pour obtenir un bon<br />
résultat.<br />
Réalisation du support de pose<br />
Le support de pose - entendu comme ensemble<br />
de couches spéciales et différenciées en<br />
produits et en épaisseurs comme par exemple<br />
le support de base, la couche drainante<br />
ou imperméabilisante, la couche support<br />
proprement dit (ou la chape), le lit de pose<br />
- est, sans doute, le premier élément qui<br />
influence la qualité finale du carrelage en<br />
jouant plusieurs fonctions: des fonctions<br />
statiques aux fonctions de défense de la<br />
couche de surface en cotto, en empêchant<br />
par exemple la remontée d’humidité qui<br />
véhiculerait sans doute les sels contenus<br />
dans le terrain ou les couches sous-jacentes.<br />
L’étude technologique de ces couches doit par<br />
conséquent être très soignée et approfondie<br />
en vue des différentes utilisations prévues<br />
(carrelage privé ou collectif, espace piéton<br />
ou routier) de façon à tenir compte - cas par<br />
cas - des conditions particulières d’exercice<br />
(charges). En extérieur, surtout lors de la<br />
249
inevitabilmente in superficie efflorescenze e/o alonature e, nei casi di un prolungato<br />
persistere di tale fenomeno, addirittura sfaldamenti/esfoliazioni del materiale laterizio<br />
in concomitanza con fenomeni di gelo. Ulteriore condizione da rispettare -- questa di<br />
ordine geometrico-esecutiva, ma sempre collegata alla necessità di non offrire ristagni<br />
di acqua e di umidità sulla superficie della stesura del campo pavimentale (sia pur,<br />
in questo caso, provenienti dall’ambiente esterno) -- è di assicurare la planarità e le<br />
pendenze adeguate della superficie estradossale<br />
del supporto di posa.<br />
Pendenze<br />
Prescindendo dal tipo di posa adottata, per le pavimentazioni esterne in cotto è<br />
necessario riporre una particolare attenzione progettuale nel dare adeguata risposta<br />
al deflusso superficiale delle acque meteoriche, frazionando eventualmente il campo<br />
pavimentale in diverse superfici di scarico e assegnando loro efficaci pendenze e<br />
una perfetta planarità (assenza di avvallamenti) in modo da evitare il ristagno di<br />
acqua e di umidità sulla superficie pavimentale in quanto portatrici di indesiderati ed<br />
antiestetici effetti legati ad alonature, salnitrazioni, accumulo di sporco.<br />
Inoltre il ristagno dell’acqua è particolarmente pericoloso nelle aree geografiche a<br />
clima rigido (soprattutto i Paesi del centro e nord Europa) dove il frequente gelo può<br />
causare un’azione tensionale dannosa nella struttura poros a dei prodotti in cotto.<br />
Si consiglia le seguenti pendenze di sicurezza:<br />
-- superfici pavimentali di piccola estensione: pendenze trasversali > 1%<br />
-- superfici pavimentali di grande estensione: pendenze trasversali > 2%<br />
Giunti di dilatazione<br />
Soprattutto in presenza di superfici molto estese (o in presenza di condizioni<br />
in order to take the particular operating<br />
conditions (loads) into consideration on an<br />
individual basis. Particularly when defining<br />
the terracotta floor laying support, in outdoor<br />
applications it is essential to plan for efficient<br />
drainage in order to avoid trapping moisture<br />
that would otherwise inevitably provoke<br />
surface efflorescence and/or rings. If these<br />
phenomena persist over a long period of time,<br />
they can even cause scaling/chipping of the<br />
tiling material when freezing occurs.<br />
A further condition that must be observed<br />
- and this involves geometric and technical<br />
aspects that are nevertheless connected with<br />
the need to prevent water and moisture from<br />
getting trapped on the laying surface of the<br />
floor field (even though they come from the<br />
outside environment in this case) - is to ensure<br />
levelness and suitable slope of the back<br />
surface of the laying support.<br />
Slope<br />
Apart from the type of laying technique that is<br />
utilized, when dealing with outdoor terracotta<br />
flooring special attention must be paid during<br />
planning in order to respond adequately to<br />
rainwater run-off. This is done <strong>by</strong> dividing the<br />
floor field into different drainage surfaces if<br />
necessary and giving them an effective slope<br />
and perfect levelness (without any settling).<br />
This will avoid trapping water and moisture on<br />
the floor surface since they cause undesirable<br />
and unsightly effects due to rings, saltpeter<br />
bei einem verlängertem Anhalten dieses<br />
Phänomens sogar ein Abblättern des Materials<br />
bei Einwirkung von Frost zur Folge hätten.<br />
Ein weiter zu beachtender Gesichtspunkt ist,<br />
daß der Unterbau ein ausreichendes Gefälle<br />
aufweisen muß, um einen Wasser - oder<br />
Feuchtigkeitsstau auf der Oberfläche zu<br />
vermeiden.<br />
Gefälle<br />
Unabhängig von der angewandten Verlegeart<br />
von Cotto in Außenbereichen<br />
ist es notwendig, bei der Planung den Abfluß<br />
von Niederschlägen besonders<br />
zu berücksichtigen. Eine adäquate Lösung<br />
wäre, die Verlegefläche in verschiedene<br />
Abflussbereiche zu unterteilen und dabei<br />
ein wirkungsvolles Gefälle mit ebener<br />
Oberfläche ohne Mulden etc. zu schaffen.<br />
So wird eine Wasseransammlung auf der<br />
Oberfläche vermieden, dic zu unerwünschten<br />
Feuchtigkeitsflecken, Ausblühungen und<br />
Schmutzbildungen führen kann. Die<br />
Wasseransammlung ist besonders in<br />
geographischen Gegenden mit rauhem<br />
Klima gefährlich (vor allem in Mittel- und<br />
Nordeuropa), wo das häufige Auftreten von<br />
Frost schädliche Spannungen in der porösen<br />
Struktur des Cottos verursachen kann.<br />
Es werden folgende Sicherheitsgefälle<br />
empfohlen:<br />
- Verlegeflächen mit kleiner Ausdehnung:<br />
Transversalgefälle >1%<br />
définition du support du carrelage en cotto,<br />
prévoir un drainage efficace pour éviter<br />
les stagnations humides qui, dans le cas<br />
contraire, provoqueraient inévitablement des<br />
efflorescences en surface et/ou halos et,<br />
en cas de persistance de ces phénomènes,<br />
un décollage/écaillage des matériaux lors<br />
des périodes de gel. Une autre condition à<br />
respecter - d’ordre géométrique - concernant la<br />
pose mais toujours liée aux nécessités d’éviter<br />
les stagnations d’eau et d’humidité sur la<br />
surface du carrelage (provenant, dans ce cas<br />
de l’environnement extérieur) - est d’assurer<br />
la planéité et les pentes appropriées sur les<br />
extrados du support de pose.<br />
Pentes<br />
Mis à part le type de pose adopté, pour<br />
les carrelages extérieurs en cotto, il est<br />
nécessaire d’apporter une attention et<br />
une solution particulières au flux superficiel<br />
des eaux, en fractionnant éventuellement<br />
le carrelage en plusieurs surfaces de drainage<br />
et en leur donnant des pentes efficaces et une<br />
planéité parfaite (absence de dévers) de façon<br />
à éviter la stagnation d’eau et d’humidité<br />
sur la surface du carrelage, pour éviter les<br />
inconvénients liés aux halos, aux sels, aux<br />
saletés. En outre la stagnation d’eau est<br />
particulièrement dangereuse dans les zones à<br />
climat rigide (surtout pays du nord et Europe<br />
centrale) où le gel fréquent peut causer une<br />
tension des films de surface en portant atteinte<br />
efflorescence and dirt build-up. Moreover,<br />
trapped water is particularly dangerous<br />
in cold climates (especially in central and<br />
northern Europe), where frequent frost can<br />
cause harmful tension in the porous structure of<br />
terracotta products. The following slopes are<br />
recommended for safety:<br />
- small flooring surfaces: gradient > 1%<br />
- large flooring surfaces: gradient > 2%<br />
Expansion joints<br />
Particularly when working with extensive<br />
surface areas (or when particular work<br />
environments are involved, such as extreme<br />
temperature swings), when steps are being<br />
taken for effective removal of rainwater, it is<br />
also essential to divide the overall floor field<br />
into compartments <strong>by</strong> preparing technical<br />
expansion joints in a crosswise and/or<br />
longitudinal direction (minimum 5-mm joints<br />
every five meters). This is done using topquality<br />
rubber strips or special grouting<br />
materials that can adapt to deformations in the<br />
floor field.<br />
Treatment<br />
For outdoor applications, we advise against<br />
doing any type of surface treatment on the<br />
terracotta. This is true above all for areas<br />
designed for intensive public use (such as<br />
squares, public pathways, landscaping,<br />
etc.) in which the considerable thickness<br />
of the terracotta elements will also ensure<br />
ambientali di esercizio particolari quali, ad esempio, forti escursioni termiche)<br />
è necessario procedere, contestualmente alla evacuazione efficace delle acque<br />
piovane, alla compartimentazione del campo pavimentale generale attraverso<br />
la predisposizione di giunti tecnici di dilatazione in direzione trasversale e/o<br />
longitudinale (giunti di almeno 5 mm ogni 5 metri) risolti mediante l’utilizzo di profili<br />
di gomma di ottima qualità o materiali speciali di fugatura capaci di assecondare le<br />
deformazioni del campo pavimentale.<br />
Trattamenti<br />
In esterno è sconsigliato qualsiasi tipo di trattamento superficiale da effettuarsi<br />
sul cotto. Ciò vale soprattutto per spazi destinati ad un uso intenso e collettivo<br />
(quali piazze, percorsi pubblici, sistemazioni paesaggistiche ecc.) dove, tralaltro,<br />
lo stesso notevole spessore degli elementi in cotto impiegati assicura una elevata<br />
qualità tecnologica. In generale gli agenti atmosferici inquinanti e/o la ineliminabile<br />
trasmissione al campo pavimentale in laterizio di sostanze contenute nei materiali<br />
utilizzati per la realizzazione del sottofondo potranno causare - inizialmente a<br />
pavimento appena ultimato - qualche effetto di ”alonatura” o macchiatura superficiale<br />
che comunque con il tempo, a causa delle caratteristiche di traspirabilità che<br />
contraddistinguono il cotto, progressivamente si attenuerà fino a scomparire.<br />
È buona regola procedere, ogni anno, ad un lavaggio con acqua in modo da<br />
eliminare l’accumulo di sporco e di depositi derivanti da fenomeni di inquinamento<br />
ambientale, restituendo al contempo traspirabilità e buon aspetto al pavimento di<br />
cotto. Per pavimentazioni intese come prolungamento in esterno di spazi abitativi o<br />
di edifici collettivi (quali porticati, terrazze coperte, superfici protette da volumi in<br />
aggetto, da sporti di copertura ecc.) è buona norma proteggere in modo più efficace<br />
la pavimentazione in cotto dall’umidità di risalita dal suolo attraverso un adeguato<br />
drenaggio ed eventualmente -- se necessario -- mediante l’impermeabilizzazione del<br />
massetto a mezzo di guaine o altro.<br />
Su questi pavimenti (limitati estensivamente e in qualche modo protetti) è possibile<br />
- Verlegeflächen mit großer Ausdehnung:<br />
Transversalgefälle >2%<br />
Dilatationsfugen<br />
Vor allem bei sehr großen Flächen (oder<br />
bei besonderen Umweltbedingungen wie z.B.<br />
starken thermischen Schwankungen) muß im<br />
Hinblick auf eine wirkungsvollen Beseitigung<br />
des Regenwassers durch die Einplanung von<br />
technischen Dilatationsfugen in Transversal-<br />
und/oder Längsrichtung (Fugen von<br />
mindestens 5 mm pro 5 m) eine Unterteilung<br />
der Verlegeflächen erfolgen, wobei<br />
Gummiprofile von optimaler Qualität oder<br />
spezielle Verfugungsmaterialien verwendet<br />
werden, die sich eventuellen Setzungen der<br />
Verlegeflächen anpassen.<br />
Behandlungen<br />
Auf keinen Fall sollte auf dem Cotto irgendeine<br />
Art von Oberflächenbehandlung durchgeführt<br />
werden.Dies gilt besonders für Bereiche mit<br />
besonders intensiver öffentlicher Nutzung<br />
(wie Plätze, Gehwege, Fußgängerzonen<br />
etc.), wo übrigens bereits eine beachtliche<br />
Stärke der verwendeten Cottoelemente selbst<br />
eine gehobene technologische Qualität<br />
gewährleistet. Im allgemeinen können<br />
atmosphärische Einflüsse und das Eindringen<br />
von Substanzen in den Cotto, die in den<br />
zur Herstellung der Unterlage verwendeten<br />
Materialien enthalten sind, anfänglich bei<br />
einem soeben fertiggestellten Fußboden<br />
à la structure poreuse des produits en cotto.<br />
Nous conseillons les pentes de sécurité<br />
suivantes:<br />
- surfaces de petites dimensions: pentes<br />
transversales > 1%<br />
- surfaces de grandes dimensions: pentes<br />
transversales > 2%<br />
Joints de dilatation<br />
En présence de surfaces très importantes<br />
(ou de conditions difficiles telles par exemple<br />
les fortes excursions thermiques), il est<br />
fondamental de procéder simultanément à<br />
une évacuation efficace des eaux de pluie,<br />
à la segmentation du carrelage par joints de<br />
dilatation transversaux et/ou longitudinaux<br />
(joints d’au moins 5 mm tous les 5 mètres) par<br />
profils caoutchoucs d’excellente qualité<br />
ou des matériaux spéciaux de jointoiement<br />
capables de compenser les déformations<br />
du carrelage.<br />
Traitements<br />
En extérieur, il est déconseillé d’appliquer un<br />
quelconque traitement de surface sur le cotto.<br />
Cette recommandation est valable surtout<br />
pour les espaces destinés à une utilisation<br />
intense et collective (telle que places, parcours<br />
publics, agencements d’espaces verts etc...)<br />
où, entre autres, l’importance de l’épaisseur<br />
de la couche en cotto assure une grande<br />
qualité technologique. En général, les agents<br />
atmosphériques polluants et/ou l’osmose<br />
251
intervenire con lavaggi saltuari a base di prodotti acidi o alcalini che saranno<br />
sufficienti per il mantenimento nel tempo di una buona resa estetica del cotto.<br />
Tipi di posa<br />
Gli odierni criteri di posa delle pavimentazioni in cotto per esterni sono frutto di una<br />
esperienza ampiamente consolidata (con radici storiche che affondano nei pavimenti<br />
romani in opus spicatum) e che solo recentemente, in relazione all’immissione sul<br />
mercato di nuovi prodotti di posa, hanno registrato un sensibile aggiornamento e<br />
perfezionamento esecutivo.<br />
In linea generale si hanno tre tecniche di posa che investono le modalità di<br />
esecuzione del pacchetto pavimentale nel suo complesso: dalla realizzazione del<br />
sottofondo allo strato di allettamento degli elementi in cotto, fino alla modalità di<br />
esecuzione dei giunti. Tali tecniche di posa, in particolare, prevedono:<br />
1. stesura pavimentale degli elementi di cotto su piano di allettamento di malta (e<br />
relativo completamento dei giunti ancora con malta);<br />
2. stesura pavimentale degli elementi su un piano di allettamento di sabbia (e<br />
successiva sigillatura dei giunti effettuata ancora a mezzo di sabbia);<br />
3. stesura pavimentale degli elementi di cotto sempre con tecnica di posa a sabbia<br />
che però prevede giunti sufficientemente ampi per sigillarli, alla fine, non con sabbia<br />
ma con malta fluida in modo da assicurare in un certo qual modo i giunti stessi al<br />
passaggio di acqua. Delle tre, in elenco, la terza, com’è evidente, altro non é che una<br />
soluzione di ibridazione delle prime due; conseguentemente, nei paragrafi successivi,<br />
ci soffermeremo analiticamente unicamente sulle prime due.<br />
Posa su letto di malta<br />
La soluzione più praticata è quella che utilizza un massetto di malta cementizia per<br />
a high technological quality level. When<br />
the floor is initially finished, air pollution<br />
and/or the inevitable transmission to the<br />
tile flooring field of substances contained<br />
in the materials used to complete the subfloor<br />
can generally cause a “ring” effect or<br />
surface staining that will gradually fade until<br />
they disappear, thanks to the characteristic<br />
transpiring nature of terracotta. Every year, it<br />
is a good idea to wash the flooring with water<br />
in order to remove any build-up of dirt and<br />
deposits caused <strong>by</strong> environmental pollution.<br />
At the same time, this will also restore the<br />
terracotta floor’s “breathability” and beautiful<br />
appearance. For flooring intended to be used<br />
as an outdoor extension of living areas or<br />
public buildings (such as porticoes, covered<br />
terraces, surfaces protected <strong>by</strong> projections<br />
or roof overhangs, etc.), it is a good idea to<br />
protect the terracotta flooring as effectively<br />
as possible from moisture rising up from the<br />
ground <strong>by</strong> using adequate drainage and, if<br />
necessary, <strong>by</strong> waterproofing the screed with<br />
a damp-proof membrane or other materials.<br />
These floors (which are limited in extension<br />
and are protected to some extent) can also be<br />
washed every so often with acid or alkaline<br />
products, which will be sufficient to maintain<br />
the beautiful look of the terracotta.<br />
Types of laying technique<br />
Current laying techniques used for outdoor<br />
terracotta flooring are the outcome of well-<br />
Feuchtigkeitsflecken hervorrufen (Flecken<br />
auf der Oberfläche, die jedoch aufgrund der<br />
Diffusionsfähigkeit, die den Cotto auszeichnet,<br />
nach und nach schwächer werden und<br />
schließlich verschwinden.) Einmal im Jahr sollte<br />
mit Wasser gereinigt werden, um Schmutz und<br />
umweltbedingte Ablagerungen zu beseitigen<br />
und gleichzeitig die Transpirationsfähigkeit des<br />
Cottos und sein gutes Aussehen zu erhalten.<br />
In Fällen, in denen der Cotto an Innenbereiche<br />
anschließt (Eingänge, überdachte Terrassen,<br />
Überdachungen etc.), wird der Belag<br />
besonders wirksam gegen die von unten<br />
aufsteigende Feuchtigkeit durch eine geeignete<br />
Dränage, durch ein Kiesbett oder eventuell<br />
- wenn nötig - durch eine Dampfsperre auf dem<br />
Estrich geschützt.<br />
Diese Pflasterungen können in Abständen mit<br />
Säure- oder Alkaliprodukten gereinigt werden,<br />
die für dauerhafte Pflege und zu Erhaltung<br />
der äußeren Ästhetik des Belages prädestiniert<br />
sind.<br />
Verlegemethoden<br />
Die heutigen Verlegemethoden für<br />
Cottopflasterungen im Außenbereich sind das<br />
Ergebnis einer langen und umfangreichen<br />
Erfahrung (mit römischen Ursprung: opus<br />
spicatum), die erst in jüngster Zeit mit der<br />
Einführung von neuen Verlegungsprodukten<br />
eine spürhafte Erneuerung und Perfektionierung<br />
in der Ausführung erfahren haben.Generell<br />
gibt es drei Verlegemethoden, die alles von<br />
inévitable des différents produits utilisés<br />
pour réaliser le fond de pose pourront<br />
causer - au départ sur les carrelages à<br />
peine terminés - quelques effets de halos<br />
ou taches de surface qui avec le temps, à<br />
cause des caractéristiques de transpiration<br />
du cotto, s’atténuent progressivement jusqu’à<br />
disparaître. Il est important de procéder tous<br />
les ans à un lavage à l’eau pour éliminer<br />
les saletés et les dépôts dérivant de pollution<br />
atmosphérique, en restituant en même<br />
temps les caractéristiques de transpirabilité<br />
et l’aspect du carrelage en cotto. Pour les<br />
carrelages entendus comme prolongement<br />
extérieur d’espaces d’habitation ou de<br />
bâtiments collectifs (portails, terrasses<br />
couvertes, surfaces protégées par des volumes<br />
en saillie, contrevents etc...), protéger de façon<br />
efficace le carrelage en cotto contre l’humidité<br />
de remontée du carrelage par un drainage<br />
adéquat et éventuellement - si nécessaire - par<br />
l’imperméabilisation de la chape de pose par<br />
gaines ou autres procédés. Sur ces carrelages<br />
(limités en dimensions et d’une certaine façon<br />
protégés), il est possible d’intervenir par un<br />
lavage épisodique à base de produits acides<br />
ou alcalins qui suffiront pour maintenir dans le<br />
temps un bon rendu esthétique du cotto.<br />
Types de pose<br />
Les critères de pose des carrelages en cotto<br />
pour extérieurs sont fruits d’une expérience<br />
consolidée (avec des racines historiques qui<br />
253<br />
253
formare il supporto di presa a contatto con gli elementi di cotto in modo da pervenire<br />
ad un pacchetto pavimentale compatto e resistente, capace di impedire ogni processo<br />
di assestamento o di schiacciamento soprattutto in condizioni di esercizio impegnative.<br />
Le fasi principali sono sintetizzate qui di seguito.<br />
Realizzazione del massetto di posa<br />
Per la posa degli elementi in cotto su malta si predispone - a partire da un vespaio<br />
(o, più di rado, direttamente sul terreno a seconda delle caratteristiche del suolo) - un<br />
massetto, di spessore adeguato ai carichi di esercizio, ben compattato e livellato di<br />
malta cementizia (cemento 325 e sabbia silicea di granulometria 0,3; in misura di<br />
1,5 quintali di cemento per ogni metro cubo di sabbia). Nella realizzazione di tale<br />
massetto (che può essere - nei casi richiesti - anche armato a mezzo di rete metallica<br />
elettrosaldata) è buona norma - come già evidenziato - prevedere adeguati giunti<br />
tecnici di dilatazione utili ad assorbire (soprattutto in presenza di grandi stesure<br />
pavimentali) le variazioni dimensionali che il pavimento, nel suo complesso, può<br />
registrare in conseguenza soprattutto delle forti escursioni termiche. Tali giunti tecnici<br />
vanno rispettati e riproposti nello strato di finitura costituito dagli elementi in cotto.<br />
Allettamento degli elementi di cotto<br />
Una volta realizzato il massetto di posa, ai fini di una efficace esecuzione della fase<br />
di allettamento, si procede, a impasto semiumido, attraverso la fase dello ”spolvero”<br />
(cospargimento di cemento in polvere sulla superficie del massetto stesso) a cui segue<br />
la posa in opera vera e propria degli elementi in cotto che vengono adeguatamente<br />
bagnati e posizionati secondo le tessiture di progetto sullo strato di allettamento a<br />
giunti aperti. Ultimato il posizionamento degli elementi si procede all’operazione<br />
di ”compattazione” della stesura pavimentale mediante l’azione di ”battitura”<br />
finalizzata ad assicurare una efficace solidarizzazione fra i diversi strati funzionali del<br />
pacchetto pavimentale (ma soprattutto fra massetto ed elementi di cotto). Chiaramente<br />
questa operazione è da effettuarsi con molta attenzione avendo cura di non<br />
compromettere la planarità e le pendenze di progetto del campo pavimentale nel suo<br />
complesso, come pure il distanziamento dei vari elementi in cotto che, in questa fase,<br />
presentano ancora i giunti aperti.<br />
established experience (whose historic roots<br />
go back to the Roman floors done in opus<br />
spicatum) and it has not been until just<br />
recently, with the introduction of new laying<br />
products to the market, that they have shown<br />
any significant updating and improvement<br />
as far as execution is concerned. In general,<br />
there are three laying techniques involved in<br />
the process of executing the floor as a whole,<br />
ranging from completing the sub-floor to<br />
preparing the bedding layer of the terracotta<br />
elements to how the joints are implemented.<br />
More specifically, these laying techniques<br />
envision:<br />
1. laying the terracotta elements on a mortar<br />
bedding layer (with completion of the joints<br />
using mortar);<br />
2. laying the terracotta elements on a sand<br />
bedding layer (with subsequent sealing of the<br />
joints, again using sand);<br />
3. laying the terracotta elements, again with<br />
a sand laying technique, but using joints that<br />
are large enough to be sealed during the final<br />
phase with liquid mortar rather than sand in<br />
order to protect the joints to some extent from<br />
water flowing through them. It is clear that of<br />
the three techniques listed above, the third one<br />
is simply a cross between the first two. As a<br />
result, below we will analyze only the first two<br />
techniques.<br />
Laying on mortar bedding<br />
The most widely-practiced solution is the one<br />
der Vorbereitung des Unterbaues bishin zur<br />
Ausführung der Fugen berücksichtigen. Diese<br />
Verlegemethoden sind im Einzelnen:<br />
1. Verlegen der Cottoelemente im Mörtelbett<br />
und Verfugung mit Mörtel.<br />
2. Verlegen der Cottoelemente im Sandbett<br />
und Verfugung mit Sand.<br />
3. Verlegen der Cottoelemente im Sandbett mit<br />
Verfugung mit flüssigem Mörtel in ausreichend<br />
breiten Fugen. Dadurch werden die Fugen<br />
gegen das Eindringen von Wasser geschützt.<br />
In den folgenden Abschnitten werden nur die<br />
Mörtel- und Sandbettverlegungen analysiert, da<br />
die dritte Technik ein Mischverfahren aus den<br />
beiden vorherbeschriebenen ist.<br />
Verlegen auf Mörtelbett<br />
Am häufigsten wird der Unterbau aus einem<br />
Estrich aus Zementmörtel geschaffen. Es entsteht<br />
ein kompakter, resistenter Belag, der auch<br />
bei stärkster Beanspruchung eventuellen<br />
Senkungen oder Abplatten standhält.<br />
Die wesentlichen Arbeitsvorgänge sind<br />
nachstehend aufgeführt.<br />
Herstellung des Estrichs<br />
Beim Verlegen der Cottoelemente auf Mörtel<br />
ist ein kompaktes und gut nivelliertes Bett<br />
aus Zementmörtel mit ausreichender Stärke<br />
die Grundlage. (Zement 325 und Siliziumsand<br />
mit einer Granulometrie von 0,3 im Verhältnis<br />
1,5 dz Zement pro Kubikmeter Sand,). Bei<br />
der Herstellung dieses Estrichs, der auch mit<br />
Piazzetta retrostante l’abside di S. Domenico<br />
a Bologna.<br />
Progetto di Enzo Zacchiroli<br />
Courtyard behind the apse of S. Domenico,<br />
Bologna.<br />
Project: Enzo Zacchiroli<br />
remontent aux carrelages romains, les opus<br />
spicatum) et qui récemment grâce à l’arrivée<br />
sur le marché de nouveaux produits, ont<br />
enregistré un renouveau sensible et un progrès<br />
remarquable des techniques. En général<br />
trois grandes techniques de pose recouvrent<br />
l’ensemble des procédés actuels de réaliser<br />
le carrelage: chape, lit de pose, pose, et<br />
exécution des joints. Ces techniques prévoient:<br />
1. pose des éléments en cotto sur le lit de<br />
mortier (et réalisation des joints au mortier);<br />
2. pose des éléments sur un lit de sable (et<br />
jointoiement au sable);<br />
3. pose des éléments en cotto toujours avec<br />
la technique de pose sur sable qui prévoit<br />
des joints suffisamment amples pour obtenir le<br />
scellement, à la fin, sans sable mais avec du<br />
mortier fluide de façon à protéger en quelque<br />
sorte les joints contre le passage de l’eau. Des<br />
trois techniques énoncées, la troisième n’est<br />
autre qu’une solution hybride des 2 premières<br />
techniques; dans les paragraphes suivants,<br />
nous insisterons donc sur les deux premières<br />
techniques.<br />
Pose sur lit de mortier<br />
La solution la plus pratiquée consiste en<br />
l’utilisation d’une chape de mortier au ciment<br />
pour former le support de prise en contact<br />
avec les éléments de cotto de façon à obtenir<br />
un ensemble compact et résistant, capable<br />
d’empêcher tout mouvement de stabilisation<br />
ou d’écrasement surtout en conditions<br />
255
Realizzazione dei giunti<br />
La fase della sigillatura dei giunti - ovvero l’esecuzione della maglia tessiturale di<br />
avvolgimento lungo le superfici perpendicolari alla faccia di posa degli elementi<br />
in cotto - viene generalmente effettuata a mezzo di malta cementizia (composta da<br />
tre parti di cemento per ogni parte di sabbia silicea di granolumetria 0,3) o malte<br />
bastarde di calce abbastanza fluide. La fluidità delle malte impiegate è indispensabile<br />
a poter effettuare, con facilità ed efficacia l’azione di costipamento all’interno della<br />
rete dei giunti riempiendone completamente, senza soluzione di continuità, tutti i<br />
vuoti.Tale operazione può essere eseguita attraverso diverse procedure:<br />
-- applicazione con cazzuola;<br />
-- colaggio mediante caraffa e imbuto;<br />
-- applicazione mediante sacca ”tipo pasticcere” con beccuccio metallico.<br />
Le ultime due modalità consentono una sequenzialità operativa più controllabile<br />
in quanto a pulizia di esecuzione a fronte, però, di una meno efficace azione di<br />
costipamento del materiale di fugatura per cui richiedono successivamente una finale<br />
operazione di rifinitura dei giunti stessi.<br />
Pulizia e rifinitura dei giunti<br />
È inevitabile, anche a fronte di una esecuzione a regola d’arte della sigillatura dei<br />
giunti, che la malta, costipata all’interno dei vuoti, debordi dai ”canali” di fugatura<br />
sporcando in qualche modo il campo pavimentale.<br />
Per effettuare la rimozione del materiale cementizio superfluo si utilizza una miscela a<br />
secco - formata da sabbia fine rigorosamente pulita mischiata a piccole quantità (4-5<br />
%) di cemento 325 - che viene cosparsa (a fugatura appena avvenuta) sulla stesura<br />
pavimentale per essere poi strofinata con forza a mezzo di scope di media durezza<br />
(ottime le scope di saggina) che, attraverso l’azione energica di abrasione, asportano<br />
il materiale di fugatura in eccedenza sul piano pavimentale di cotto, pulendo<br />
contestualmente quest’ultimo.<br />
utilizing a screed made of cement mortar<br />
to form the setting support in contact with<br />
the terracotta elements. This is done in order<br />
to achieve a compact and resistant finished<br />
floor that can prevent any settling or buckling<br />
processes, particularly in demanding work<br />
conditions.The main phases are summarized<br />
below:<br />
Making the laying screed<br />
In order to lay the terracotta elements over<br />
mortar, a screed is prepared starting with<br />
a loose stone foundation (or more rarely,<br />
it is laid directly on the ground, depending on<br />
soil characteristics).<br />
The screed, which must be thick enough for<br />
the working loads, must be well compacted<br />
and level, and it is made of cement mortar<br />
(325 cement and silica sand with a particle<br />
size of 0.3, in a proportion of 150 kg of<br />
cement for every cubic meter of sand).<br />
When making this screed (which can also<br />
be reinforced with electrowelded metal<br />
netting if necessary), as we indicated above,<br />
it is a good idea to prepare adequately-sized<br />
technical expansion joints that can absorb<br />
any dimensional variations to which the overall<br />
flooring may be subjected, particularly as<br />
a result of broad fluctuations in temperature<br />
(especially when large floors are involved).<br />
These technical joints must be respected and<br />
reproduced in the finishing layer comprising<br />
the terracotta elements.<br />
einem Metallgitter armiert werden kann, ist<br />
es besonders bei großen Flächen üblich,<br />
Dilatationsfugen vorzusehen, um thermisch<br />
bedingte Ausdehnungen und Schrumpfungen<br />
auszugleichen.<br />
Verlegen der Cottoelemente<br />
Ist der Estrich hergestellt, folgt das<br />
“Pudern” (auf die Estrichfläche wird<br />
Zementpuder gestreut) der halbfeuchten<br />
Mischung. Ausreichend angefeuchtet und in<br />
Übereinstimmung mit dem Entwurf und der<br />
Verlegeart wird der Cotto mit entsprechenden<br />
offenen Fugen verlegt.<br />
Nach dem Verlegen der Cottoelemente erfolgt<br />
mittels “Klopfens” das “Zusammenpressen”<br />
des Cottos mit dem Unterbau, um eine<br />
wirkungsvolle Bindung zwischen den<br />
funktionellen Schichten des Fußbodenaufbaus<br />
(vor allem zwischen dem Estrich und den<br />
Cottoelementen) zu gewährleisten. Dieser<br />
Vorgang muß mit großer Sorgfalt ausgeführt<br />
werden, damit eine ebene Oberfläche im<br />
Gefälle und ein gleicher Plattenabstand<br />
gewährleistet werden kann, da der Belag<br />
noch unverfugt ist.<br />
Verfugung<br />
Das Versiegeln der Fugen erfolgt<br />
im allgemeinen mit Zementmörtel<br />
(zusammengesetzt aus drei Teilen Zement und<br />
einem Teil Siliziumsand mit einer Körnigkeit<br />
von 0,3) oder mit flüssigem, ziemlich dünnen<br />
Dettagli di pavimentazioni<br />
in coccio pesto con decorazioni<br />
in marmo a Pompei.<br />
Foto archivio Acocella.<br />
Detailed view of coccio pesto flooring<br />
with marble ornaments, Pompeii.<br />
Photo: archive Acocella.<br />
contraignantes. Les phases<br />
principales sont résumées ci-dessous.<br />
Réalisation de la chape<br />
Pour la pose des éléments en cotto sur<br />
mortier, on prédispose - à partir d’un treillis<br />
(ou, plus rarement, directement sur le terrain<br />
selon les caractéristiques du terrain) - une<br />
chape d’épaisseur suffisante pour les charges<br />
prévues, bien compacte et lissée de mortier<br />
au ciment (ciment 325 et sable silice de grain<br />
0,3; en proportion 1,5 q de ciment par mètre<br />
cube de sable). En réalisant cette chape (qui<br />
peut être - selon les charges - armée par grille<br />
électrosoudée), il convient - comme indiqué<br />
ci-dessus - de prévoir des joints de dilatation<br />
suffisants pour absorber (surtout en présence<br />
de grandes surfaces) les variations que le<br />
carrelage dans son ensemble subira suite<br />
aux écarts thermiques importants. Ces joints<br />
de dilatation sont fondamentaux et doivent<br />
être continués jusqu’au niveau de finition des<br />
éléments en cotto.<br />
Lit de pose des éléments en cotto<br />
Une fois la chape réalisée, pour une exécution<br />
efficace de la phase suivante on procède, le<br />
gâchage encore humide, au saupoudrage<br />
(saupoudrage du ciment en poudre sur la<br />
surface de la chape elle même) suivi par la<br />
pose proprement dite des éléments en cotto<br />
mouillés au préalable et positionnés selon<br />
le plan prévu sur le lit à joints ouverts. Une<br />
257
Barberino Designer Outlet<br />
a Berberino del Mugello.<br />
Bedding the terracotta elements<br />
Once the laying screed has been completed,<br />
in order to ensure effective execution of the<br />
bedding phase, when the mixture is semi-moist,<br />
the “dusting” phase is carried out (sprinkling<br />
cement powder over the surface of the screed).<br />
This is followed <strong>by</strong> the actual laying of<br />
the terracotta elements, which must be wetted<br />
adequately and positioned according to the<br />
design pattern along the open-joint bedding<br />
layer. Once the terracotta elements have been<br />
put into position, the laid floor is compacted<br />
<strong>by</strong> “thwacking” it. The objective is to ensure<br />
effective consolidation among the various<br />
functional layers of the overall floor (but above<br />
all, between the screed and the terracotta<br />
elements). This operation must obviously be<br />
carried out very carefully, being sure not to<br />
alter either the levelness and design slope<br />
of the floor field as a whole or the spacing<br />
between the different terracotta elements that,<br />
during this phase, still have open joints.<br />
Completion of the joints<br />
The phase in which the joints are sealed - or<br />
in other words, the completion of the enclosing<br />
network structure along the perpendicular<br />
surfaces of the laying faces of the terracotta<br />
elements - is generally carried out using<br />
cement mortar (composed of three parts<br />
cement to one part silica sand with a particle<br />
size of 0.3) or cement lime mortar that must<br />
be quite fluid. The fluidity of the mortar being<br />
Posa su letto di sabbia<br />
Soluzione alternativa all’allettamento su malta è quella che prevede la posa degli<br />
elementi in cotto su un fondo di sabbia adeguatamente preparato, direttamente sul<br />
terreno o su un piano di posa più stabilizzato.<br />
Realizzazione del fondo di sabbia<br />
In questa tecnica di posa la sabbia viene ”pilonata”, spianata e livellata, fino a<br />
formare uno strato omogeneo dell’ordine di 5 cm (che poi, a seguito delle operazioni<br />
finali di compattazione, si riduce all’incirca a 4 cm) e i mattoni vengono posati<br />
direttamente sullo strato sabbioso. È evidente, soprattutto in questa modalità di posa,<br />
come la qualità complessiva della pavimentazione non dipenda unicamente dalle<br />
caratteristiche degli elementi in cotto ma, in buona parte, dalla stessa natura della<br />
sabbia e dal modo di esecuzione del letto che funge da elemento-filtro fra laterizio<br />
e terreno o fra laterizio e massetto di calcestruzzo sottostante.Fondamentale è la<br />
composizione della sabbia. Innanzitutto è da evidenziare come le sabbie troppo fini<br />
divengano eccessivamente pastose sotto l’influenza dell’umidità, mentre - al contrario<br />
- sabbie eccessivamente grosse presentino una scarsa coesione fra i diversi granuli<br />
costituenti.<br />
Per le dimensioni granulometriche ottimali è opportuno rispettare il pìù possibile la<br />
curva di Füller. Inoltre, come già evidenziato, un’importanza particolare assume<br />
anche il tipo di costipamento dello strato sabbioso da cui dipende la maggiore o<br />
minore coesione del fondo stradale; è fondamentale che tale operazione sia effettuata<br />
progressivamente per strati in modo da ottenere un addensamento stabile e compatto.<br />
Posa degli elementi di cotto<br />
In genere gli elementi in laterizio vanno posati e poi battuti con un martello di gomma<br />
avendo cura di lasciare dei giunti aperti fra i vari elementi dell’ordine di 2-4 millimetri.<br />
Realizzazione dei giunti<br />
La sigillatura dei giunti va effettuata poi con sabbia fine pulita<br />
(di granulometria non superiore ai 2mm) fino al loro completo costipamento.<br />
Kalkzementmörteln. Um den Vorgang des<br />
Verdichtens im Innern des Fugennetzes<br />
problemlos und wirkungsvoll durchführen<br />
zu können und alle Leerstellen lückenlos zu<br />
schließen, muß der verwendete Mörtel flüssig<br />
sein. Das Verfüllen der Fugen kann auf drei<br />
Arten erfolgen:<br />
- Auftragen mit der Gummitraufel<br />
- Gießen aus einem Gefäß mit Ausguß oder<br />
Trichter<br />
- Auftragen mit der Fugenpistole Die beiden<br />
letzten Arten ermöglichen aufgrund der<br />
sauberen Ausführung eine rationellere<br />
Ausführung, erfordern aber aufgrund der<br />
schwächeren Verdichtung eine abschliessende<br />
Endbehandlung der Fugen.<br />
Reinigung und Endbehandlung der Fugen<br />
Es läßt sich nicht vermeiden, daß auch<br />
bei einer vorschriftsmäßigen Ausführung<br />
der Verfugung, der Mörtel ausläuft und<br />
den Fußbodenbereich beschmutzt. Um<br />
den übergelaufenen Zement zu entfernen,<br />
verwendet man eine trockene Mischung<br />
aus feinem, absolut sauberem Sand mit einer<br />
kleinen Menge (4-5%) Zement 325, die nach<br />
soeben erfolgter Verfugung auf den Cotto<br />
gestreut und dann mit einem mittelharten<br />
Besen (am besten Reisigbesen) kräftig<br />
gescheuert wird.<br />
Durch die starke Reibung wird das überflüssige<br />
Verfugungsmaterial von der Cottofläche<br />
entfernt und letztere gleichzeitig gereinigt.<br />
fois le positionnement des éléments effectué,<br />
on procède à l’opération de compactage<br />
du carrelage par battage qui assurera la<br />
tenue générale de l’ensemble des différentes<br />
couches qui composent le carrelage (mais<br />
surtout entre chape et éléments en cotto). Bien<br />
sûr cette opération doit être effectuée très<br />
soigneusement afin de ne pas porter préjudice<br />
à la planéité et aux pentes prévues dans le<br />
projet ainsi que les espacements des différents<br />
éléments en cotto qui, à ce stade, présentent<br />
encore des joints ouverts.<br />
Réalisation des joints<br />
La phase de scellement des joints - exécution<br />
du réseau structurel le long des surfaces<br />
perpendiculaires à la face de pose des<br />
éléments en cotto - est en général effectuée<br />
avec du mortier au ciment (composé de 3<br />
parties de ciment pour une partie de sable<br />
silice de grain 0,3) ou de mortier bâtard<br />
de chaux assez fluide.La fluidité des mortiers<br />
utilisés est indispensable pour effectuer<br />
facilement et efficacement l’action de<br />
remplissage, dans les joints, sans solution<br />
de continuité, de tous les vides. Cette<br />
opération peut être effectuée de plusieurs<br />
façons:<br />
- application à la truelle;<br />
- coulage par récipient et entonnoir;<br />
- application par chinois type pâtissier avec<br />
bec métallique.<br />
Les deux dernières modalités permettent<br />
259
Quest’ultima operazione, che si effettua stendendo la sabbia sugli elementi in<br />
cotto facendola penetrare nei giunti con l’aiuto di scope al fine di effettuarne la<br />
loro sigillatura, va ripetuta più volte in periodi successivi al completamento della<br />
pavimentazione, distanziati fra loro di qualche settimana. Questi giunti impediscono<br />
i movimenti tra gli elementi in cotto assicurando, al contempo, una adeguata<br />
permeabilità alle acque superficiali. Nel caso di pavimentazioni con pendenze di<br />
qualche significatività (maggiori del 15%) si può utilizzare del cemento secco<br />
(5% in volume) miscelato alla sabbia al fine di ottenere una maggiore stabilizzazione<br />
e omogeneizzazione del materiale di fugatura. A conclusione della fase di sigillatura<br />
dei giunti la pavimentazione deve essere compattata; tale operazione si effettua a<br />
mezzo di macchina dotata di piastra vibrante in acciaio (con protezione gommata<br />
sottostante) mediante un passaggio sulle superfici pavimentali che viene ripetuto<br />
almeno due volte. I prodotti della linea Externa per pavimenti all’aperto della <strong>Sannini</strong><br />
con il loro trattamento bisellato dei bordi offrono angoli resistenti e ottimali per non<br />
far registrare alcun danneggiamento degli spigoli conseguentemente alle vibrazioni<br />
della macchina compattatrice. Come ultima fase si procede a bagnare il pavimento<br />
attraverso un getto di acqua a pioggia (evitando così, attraverso questa precauzione,<br />
il ”dilavamento” della sabbia dai giunti) al fine di solidarizzare l’insieme. Per<br />
pavimentazioni a cui sono richieste condizioni d’uso più impegnative sotto il profilo<br />
dei carichi di esercizio è indispensabile prevedere la realizzazione di un massetto di<br />
spessore adeguato al carico di esercizio previsto che viene interposto fra il terreno<br />
e la sabbia in modo che quest’ultima si attesti su un fondo già consolidato. Per<br />
pavimentazioni in cotto che si intendono posare direttamente su terreno naturale<br />
vanno, chiaramente, predisposte idonee soluzioni del ”pacchetto pavimentale” con<br />
dispositivi di drenaggio efficaci. Il sottofondo a contatto col terreno va realizzato<br />
con ciottoli grossi completandolo negli strati superiori con inerti più fini utili anche a<br />
realizzare le pendenze di progetto del campo pavimentale. Al fine di impedire che<br />
la sabbia impiegata per il letto di posa possa essere, nel tempo, dispersa dall’acqua<br />
piovana creando cavità (e quindi possibili avvallamenti nella stesura pavimentale)<br />
possono essere utilizzati dei teli geotessili predisponendone la posa fra il sottofondo<br />
e il letto di sabbia. Tessiture a spina di pesce (e, in genere, tutte quelle a fughe<br />
contrastate) risultano particolarmente efficaci per la posa a secco in quanto,<br />
used is essential in order to tamp it down<br />
easily and effectively inside the network of<br />
joints, completely filling in the empty spaces<br />
without any breaks. This operation can be<br />
carried out through various procedures:<br />
- application with a trowel<br />
- casting using a jug and funnel<br />
- application using a “pastry bag” fitted with<br />
a metal tip. The last two methods make it<br />
easier to control the work sequence as far<br />
as clean workmanship is concerned, but the<br />
compacting action on the grouting material is<br />
less effective and therefore, a final operation is<br />
subsequently required to finish the joints.<br />
Cleaning and finishing the joints<br />
Even when the joint-sealing operation has<br />
been done in an expert fashion, the mortar<br />
inevitably overflow from the grouting “channels”,<br />
dirtying the floor field to some extent.<br />
A dry mixture composed of thoroughly clean<br />
fine sand mixed with a small amount (4-5%)<br />
of “325” cement is used to remove the excess<br />
cement. As soon as the grouting is done, this<br />
mixture is spread over the laid floor and is then<br />
rubbed vigorously with a medium-hard broom<br />
(broomcorn is ideal). This vigorous abrasive<br />
action removes the excess grouting on the<br />
terracotta flooring surface, while cleaning it at<br />
the same time.<br />
Laying on sand bedding<br />
An alternative solution to mortar bedding<br />
Verlegung auf Sandbett<br />
Als alternative Lösung zur Verlegung<br />
im Mörtelbett kann die Verlegung der<br />
Cottoelemente auf einer entsprechend<br />
vorbereiteten Sandunterlage direkt auf dem<br />
Boden oder auf einer stärker stabilisierten<br />
Verlegungsebene erfolgen.<br />
Herstellung des Sandbetts<br />
Bei dieser Verlegungstechnik wird der Sand<br />
“planiert” und nivelliert, bis er eine einheitliche<br />
Ebene von ca. 5 cm bildet (die sich während<br />
der weiteren Arbeitsgängen auf ca. 4 cm<br />
reduziert) und die Platten werden direkt auf<br />
die Sandschicht gelegt. Es ist offensichtlich,<br />
daß die Qualität des gesamten Belages<br />
besonders bei dieser Verlegetechnik nicht nur<br />
von der Qualität des Cottos, sondern zum<br />
Großteil vom Sand selbst und der Herstellung<br />
des Bettes abhängt, das als Filterelement<br />
zwischen Stein und Boden oder zwischen<br />
Stein und dem darunterliegenden Betonestrich<br />
fungiert. Wesentlich ist die Zusammensetzung<br />
des Sandes. Ein zu feiner Sand wird unter<br />
dem Einfluß der Feuchtigkeit übermäßig<br />
breiig, während ein zu grober Sand zu<br />
einer geringen Kohäsion zwischen den<br />
Körnern führt. Um optimale granulometrische<br />
Dimensionen zu erzielen, ist es angebracht,<br />
weitgehend die Füller-Kurve zu beachten.<br />
Wie bereits hervorgehoben, ist außerdem<br />
die Art des Verdichtens der Sandschicht von<br />
besonderer Bedeutung, von der die Kohäsion<br />
une suite d’opérations plus contrôlable pour<br />
ce qui est de la netteté de la pose, en perdant<br />
cependant en efficacité de compactage du<br />
matériau de jointoiement qui rendra nécessaire<br />
une finition des joints.<br />
Nettoyage et finition des joints<br />
Il est inévitable, même si les opérations ont<br />
été effectuées correctement, que le mortier<br />
introduit dans les vides déborde des canaux<br />
de jointoiement en salissant le champ<br />
de pose. Pour éliminer ce mortier débordé<br />
utiliser un mélange sec - de sable<br />
rigoureusement propre mélangé à de petites<br />
quantités (4-5 %) de ciment 325 - qui sera<br />
saupoudré (le joint à peine effectué) sur le<br />
carrelage pour être ensuite frotté énergiquement<br />
avec un balai moyenne dureté (les balais<br />
de ronces sont idéaux) ce qui permet, par<br />
action abrasive, de retirer le matériau en<br />
excédent de la surface de cotto et nettoie<br />
en même temps ce dernier.<br />
Pose sur un lit de sable<br />
En alternative à la pose sur mortier, on peut<br />
poser les éléments en cotto sur un fond<br />
de sable bien préparé, directement sur<br />
le terrain ou sur un lit de pose stabilisé.<br />
Réalisation du fond de sable<br />
Dans cette technique le sable est ”pilonné”,<br />
aplani et nivelé, jusqu’à former une couche<br />
homogène de 5 cm environ (réduite à 4<br />
involves laying the terracotta elements on a<br />
suitably prepared sand bed laid directly over<br />
the ground or on a more stabilized laying<br />
surface.<br />
Making the sand bed<br />
In this laying technique, the sand is<br />
“compacted”, smoothed and leveled to form<br />
an even layer that is about 5 cm thick (after<br />
final compacting, the thickness will decrease<br />
to about 4 cm). The tiles are then laid directly<br />
onto the sandy layer. Particularly when this type<br />
of laying technique is involved, it is obvious<br />
that the overall quality of the flooring will not<br />
depend solely on the characteristics of the<br />
terracotta elements, but to a great extent also<br />
on the sand and on the procedure used to<br />
make the bed that is going to act as a filter<br />
element between the tiling and the soil or<br />
between the tiling and the concrete screed<br />
beneath it. The composition of the sand is<br />
fundamental. First of all, it is important to point<br />
out that if the sand is too fine, it will take on<br />
a pasty consistency when it is damp. Instead,<br />
if it is too coarse, there will not be enough<br />
cohesion among the grains of sand. For optimum<br />
particle size, Fuller’s curve should be respected<br />
as closely as possible. In addition, as pointed<br />
out previously, the type of compacting<br />
done on the sandy layer is also particularly<br />
important since the degree of cohesion of the<br />
roadbed is dependent on this operation. It is<br />
essential to do this operation progressively in<br />
attraverso la compartimentazione dei giunti, offrono una protezione più efficace<br />
alla sabbia in essi costipata. In questa tecnica di posa risulta di notevole efficacia<br />
il prevedere adeguate bordature laterali utili a contrastare le pressioni prodotte dal<br />
pavimento quando è sottoposto ai carichi. Per tale funzione si possono predisporre<br />
nel sottofondo cordoli in conglomerato cementizio e, in superficie, un cambio<br />
dell’orientamento di posa degli elementi in cotto mediante un diverso disegno della<br />
texture pavimentale.<br />
der Pflasterunterlage abhängt.<br />
Es ist äußerst wichtig, daß dieser Vorgang<br />
Schicht für Schicht durchgeführt wird, so daß<br />
ein stabiler und kompakter Unterbau entsteht.<br />
Verlegen der Cottoelemente<br />
Gewöhnlich werden die Cottoelemente verlegt<br />
und dann mit einem Gummihammer geklopft,<br />
wobei darauf zu achten ist, zwischen den<br />
einzelnen Elementen offene Fugen mit einer<br />
Breite von 2-4 Millimeter zu lassen.<br />
Verfugung<br />
Die Fugen werden wie unten beschrieben<br />
mit feinem, sauberem Sand (Korngröße<br />
nicht über 2 mm) bis zur vollkommenen<br />
Verdichtung verfugt. Der letzte Vorgang, bei<br />
dem Sand auf den Cottoelementen verteilt und<br />
mit Besen in die Fugen gegeben wird, wird<br />
nach beendeter Verlegung mehrere Male in<br />
Abständen von einigen Wochen wiederholt.<br />
Diese Fugen verhindern Bewegungen zwischen<br />
den Cottoelementen und gewährleisten<br />
zugleich eine adäquate Durchlässigkeit für<br />
das Oberflächenwasser. Bei Pflasterungen<br />
mit stärkerem Gefälle (größer als 15%) kann<br />
mit Sand vermischter trockener Zement (Anteil<br />
von 5%) verwendet werden, um eine bessere<br />
Stabilisierung und Homogenisierung des<br />
Verfugungsmaterials zu erzielen.<br />
Nach der Versiegelung der Fugen muß<br />
die Pflasterung verdichtet werden. Dieser<br />
Vorgang wird mittels einer Rüttelplatte auf<br />
cm après compactage) et les briques sont<br />
directement posées sur la couche de sable.<br />
Il est évident dans ce cas que la qualité du<br />
résultat final ne dépend pas uniquement des<br />
caractéristiques des éléments en cotto mais<br />
surtout de la nature même du sable et du<br />
mode d’exécution du lit qui sert de filtre entre<br />
cotto et terrain ou cotto et chape sous-jacente.<br />
La composition du sable est fondamentale.<br />
D’abord, le sable trop fin devient trop pâteux<br />
sous l’influence de l’humidité, et le sable de<br />
grain trop épais<br />
- au contraire - présente un manque de<br />
cohésion entre les différents grains.<br />
Pour un grain optimal, respecter le plus<br />
possible la courbe de Füller. En outre comme<br />
indiqué ci-dessus, le type de compactage de<br />
la couche sableuse conditionne la cohésion<br />
plus ou moins importante du terrain. Cette<br />
opération doit être effectuée progressivement<br />
par couches de façon à obtenir une densité<br />
stable et homogène.<br />
Pose des éléments en cotto<br />
En général, les éléments en briques doivent<br />
être posés et battus au marteau caoutchouc<br />
en ayant soin de laisser des joints ouverts de<br />
l’ordre de 2-4 millimètres.<br />
Réalisation des joints<br />
Le scellement des joints doit être effectué avec<br />
du sable fin propre (grain non supérieur à<br />
2 mm) jusqu’au compactage complet. Cette<br />
261
layers in order to achieve stable and dense<br />
compacting.<br />
Laying the terracotta elements<br />
As a rule, the tiling elements should be laid<br />
and then thwacked with a rubber hammer,<br />
being careful to leave open joints of about 2-4<br />
millimeters between the various elements.<br />
Completing the joints<br />
The joints are then sealed using clean fine<br />
sand (with a maximum particle size of 2mm)<br />
until they have been fully compacted.This<br />
operation is performed <strong>by</strong> spreading the<br />
sand over the terracotta elements, making<br />
it penetrate into the joints with a broom in<br />
order to seal them. After the flooring has<br />
been completed, this operation must be<br />
repeated several times, a few weeks apart.<br />
These joints prevent any movement between<br />
the terracotta elements while also ensuring<br />
adequate waterproofing against surface<br />
water. When working with flooring that has a<br />
considerable slope (more than 15%), you can<br />
use dry cement (5% <strong>by</strong> volume) mixed with<br />
the sand in order to improve consolidation and<br />
evenness in the grouting material. At the end<br />
of the joint-sealing phase, the flooring must<br />
be compacted. This operation is done using a<br />
machine fitted with a steel vibrating plate (with<br />
a rubber bumper underneath), going over<br />
the flooring surface at least two times. The<br />
products that are part of <strong>Sannini</strong>’s “Externa” line<br />
for outdoor flooring, which feature chamfered<br />
edges, offer excellent highly-resistant corners<br />
to prevent any kind of damage to them caused<br />
<strong>by</strong> the vibrating action of the compacting<br />
machine. The last phase involves wetting<br />
down the flooring <strong>by</strong> sprinkling water over<br />
it (sprinkling the water acts as a precaution<br />
against “washing” the sand out of the joints) in<br />
order to consolidate the floor as a whole.<br />
For flooring that entails more demanding<br />
conditions of use as far as working load is<br />
concerned, it is essential to make a screed<br />
that is thick enough for the planned working<br />
load. The screed is placed between the<br />
ground and the sand so the sand will abut<br />
with an already consolidated bed. For terracotta<br />
flooring that is to be placed directly on<br />
natural ground, suitable “finished flooring”<br />
arrangements must obviously be prepared<br />
with effective drainage devices. The sub-floor<br />
in contact with the ground must be made with<br />
large stones, completing the upper layers<br />
with finer aggregates that will also help<br />
achieve the design slope of the floor field.<br />
In order to prevent the sand being used for<br />
the laying bed from gradually being washed<br />
away <strong>by</strong> rainwater and thus creating cavities<br />
(potentially causing buckling of the laid floor),<br />
a geo-fabric underlay can be placed between<br />
the sub-floor and the sand bed. Herringbone<br />
textures (and in general, all patterns with<br />
crisscrossed grouting) are particularly effective<br />
for dry laying, since separating the joints<br />
into compartments affords better protection of<br />
the sand compacted into the joints. With this<br />
laying technique, it is extremely effective to<br />
plan adequate lateral edging, which helps resist<br />
against the pressure produced <strong>by</strong> the flooring<br />
when it is loaded. To achieve this function,<br />
concrete rolls can be set up in the subfloor,<br />
changing the laying orientation of the<br />
terracotta elements on the surface <strong>by</strong> means of<br />
a different floor texture pattern.<br />
der Oberfläche durchgeführt und mindestens<br />
zweimal wiederholt. Die Produkte der Linie<br />
Externa für Pflasterungen in Außenbereichen<br />
von der Firma <strong>Sannini</strong> bieten mit ihren<br />
angephasten Rändern widerstandsfähige und<br />
optimale Winkel, so daß die Vibration der<br />
Rüttelplatte zu keinen Schäden führt.<br />
Zuletzt wird der Belag durch einen Sprühnebel<br />
(der Sprühnebel kann die Fugen nicht<br />
auswaschen) befeuchtet, um eine stabile<br />
Verbindung herzustellen. Bei sehr stark<br />
belasteten Pflasterungen muß zwischen<br />
Kiesbett und Sand ein Estrich hergestellt<br />
werden, der in seiner Stärke der Belastung<br />
entspricht, und so eingebracht wird, daß er<br />
sich optimal an das Kiesbett anlegt und somit<br />
Setzungen verhindert werden.<br />
Bei Cottobelägen, die direkt auf einem<br />
natürlichen Untergrund verlegt werden<br />
sollen, müssen selbstverständlich wirksame<br />
Dränagevorrichtungen geschaffen werden.<br />
Die Dränage wird mit großen Kieseln<br />
und in den oberen Schichten mit feineren<br />
Gemischen ausgeführt, die auch dazu<br />
geeignet sind, ein ebenes Gefälle im<br />
Fußbodenbereich zu schaffen.<br />
Um zu vermeiden, daß der für das Verlegebett<br />
verwendete Sand mit der Zeit durch das<br />
Regenwasser ausgewaschen wird und<br />
somit Hohlräume entstehen (und folglich<br />
mögliche Senkungen des Belages) können<br />
Betumenbahnen benutzt und zwischen<br />
der Dränage und dem Sandbett angeordnet<br />
werden. Fischgrätentessierungen (und<br />
im allgemeinen alle Verlegungen mit<br />
entgegengesetztem Fugenverlauf) sind für die<br />
Trockenverlegung besonders geeignet, da<br />
sie durch die Unterteilung der Fugen einen<br />
besseren Schutz verleihen.<br />
Bei dieser Verlegetechnik ist es außerdem sehr<br />
nützlich, geeignete, seitliche Einfassungen<br />
durch Leistensteine vorzusehen, die dem vom<br />
belasteten Fußboden ausgehenden Druck<br />
entgegenwirken können. Zu diesem Zweck<br />
kann man in der Unterlage Bordsteine aus<br />
Zementkonglomerat anordnen und auf<br />
der Oberfläche durch ein andersartiges<br />
Design der Tessierung die Verlegungsrichtung<br />
der Cottoelemente ändern.<br />
dernière opération qui consiste à introduire<br />
le sable dans les joints avec un balai après<br />
avoir saupoudré les éléments de sable pour en<br />
effectuer le scellement, doit être recommencée<br />
à plusieurs reprises pendant des périodes<br />
successives jusqu’à la fin du carrelage, en<br />
laissant passer quelques semaines entre<br />
chaque intervention. Ces joints empêchent<br />
les mouvements entre les éléments en cotto<br />
en assurant en même temps une perméabilité<br />
adéquate aux eaux de surface. En présence<br />
de carrelage présentant des pentes<br />
importantes (plus de 15%), on peut utiliser<br />
du ciment sec (5% en volume) mélangé au<br />
sable pour obtenir une stabilisation et une<br />
homogénéité meilleures du matériau de<br />
jointoiement. A la fin des opérations de<br />
scellement des joints, le carrelage doit être<br />
compacté; cette opération s’effectue avec une<br />
machine équipée d’une plaque vibrante en<br />
acier (avec protection caoutchoutée<br />
sous-jacente) et en deux passages sur<br />
le carrelage. Les produits de la ligne Externa<br />
pour carrelages extérieurs <strong>Sannini</strong> avec<br />
traitement en biseau des bords offrent des<br />
angles résistants et idéaux pour ne pas subir<br />
de dommages au niveau des arêtes suite aux<br />
vibrations de la machine de compactage.<br />
Pour terminer, mouiller le carrelage avec<br />
un jet d’eau en pluie (en évitant ainsi de<br />
délaver le sable mis en place) pour solidariser<br />
l’ensemble. Pour les carrelages exigeant des<br />
conditions plus sévères du point de vue des<br />
charges supportées, il est indispensable de<br />
prévoir la réalisation d’une chape d’épaisseur<br />
adaptée à la charge prévue qui sera<br />
interposée entre le terrain et le sable de façon<br />
à ce que ce dernier se mette en place sur un<br />
support déjà consolidé. Pour les carrelages<br />
en cotto que l’on désire poser directement<br />
sur un terrain naturel, on prévoira bien sûr<br />
des solutions de pose adaptées avec des<br />
dispositifs de drainage efficaces. La couche<br />
de fond en contact avec le terrain doit être<br />
réalisée avec de gros blocs sur lesquels on<br />
posera des agrégats plus petits qui seront<br />
utiles pour obtenir les pentes prévues. Pour<br />
empêcher que le sable utilisé pour réaliser<br />
le lit de pose puisse être, dans le temps,<br />
dispersé par l’eau de pluie en créant<br />
des cavités (et des glissements possibles<br />
du carrelage), on peut utiliser des toiles<br />
géotextiles entre la couche de fond et le lit<br />
de sable. Les textures en écailles de poisson<br />
(et en général tous les joints en quinconce)<br />
sont particulièrement indiqués pour la pose à<br />
sec car la segmentation des joints offre une<br />
protection efficace du sable compacté.<br />
En adoptant cette technique de pose, il est<br />
utile de prévoir des bords latéraux pour<br />
compenser les pressions produites par le<br />
carrelage quand celui-ci subit des charges.<br />
Pour ce faire, on peut disposer dans la couche<br />
de fond des cordons en conglomérat de<br />
ciment et, en surface, un changement de sens<br />
de pose des éléments en cotto en modifiant la<br />
texture du carrelage.<br />
texture<br />
introduzione di Alfonso Acocella<br />
grafica Giuliano Ciocchetti<br />
introduction <strong>by</strong> Alfonso Acocella<br />
design <strong>by</strong> Giuliano Ciocchetti<br />
263
Texture<br />
Origini<br />
Agli inizi del I secolo d. C., quando il laterizio cotto iniziò la sua grande<br />
diffusione nell’edilizia imperiale romana, molti ambienti dell’edilizia domestica<br />
insieme a spazi a destinazione pubblica furono pavimentati a mezzo di elementi<br />
laterizi di diversa dimensione e morfologia. Con grandi mattoni quadrati (pedali,<br />
bipedali, sesquipedali) o rettangolari si pavimentarono ambienti di botteghe e<br />
grandi magazzini, ma anche spazi di servizio di terme e anfiteatri. Con piccoli<br />
mattoncini (all’incirca 2x10 - 12x5cm) posati secondo il disegno ad opus spicatum<br />
si pavimentarono invece porticati, anditi, cortili e spazi pubblici per tutto il periodo<br />
imperiale. Con formati più particolari come rettangoli, rombi, piccole tessere cubiche,<br />
elementi a forma mandorlata, esagoni (di cui alcuni, addirittura, caratterizzati<br />
centralmente da inserti in forma di tessere marmoree), ottagoni, si diede vita<br />
a disegni pavimentali di più spiccata ed elaborata caratterizzazione geometrica.<br />
Il meccanismo combinatorio che porta, già nell’esperienza romana, dagli elementi<br />
di base alla formazione delle tessiture pavimentali (ovvero alle ”texture”, come<br />
titola questa sezione del Catalogo) è chiaramente immediato, diretto, anche se non<br />
univoco nei risultati di disegno conseguibili. Gli inizi della pavimentazione in cotto<br />
di tradizione romana fanno registrare - negli esempi fino ad oggi rinvenuti e rilevati<br />
nei siti archeologici - a fronte di un numero significativo di elementi geometrici di<br />
base (il quadrato, nelle più diverse dimensioni, il rettangolo, l’esagono, il rombo<br />
ecc.) un repertorio di texture attestato su stesure omogenee, regolari, ripetitive che<br />
danno vita a superfici pavimentali a campo geometrico uniforme e, in genere,<br />
monocromatico. L’effetto di omogeneità è dato dall’abbinamento, in combinazione<br />
costante, di elementi ad unico formato morfologico e dimensionale.<br />
Ordine, semplicità, disegni regolari sono le componenti compositive d’avvio<br />
delle texture pavimentali romane. Più articolate ed inedite ricerche di scrittura<br />
pavimentale indirizzate verso la combinabilità di elementi in cotto a formati<br />
geometrico-dimensionali diversificati, l’accostamento di paste argillose a cromie<br />
differenziate, il trattamento dei campi con motivi geometrici complessi o addirittura<br />
figurati, la maturazione di una visione articolata e gerarchizzata dello stesso<br />
progetto pavimentale (indirizzato verso la specializzazione di sottotemi compositivi<br />
quali centri, texture più elaborate, cornici, fasce al perimetro) ecc. rappresentano<br />
tutte tematiche che le fasi storiche successive - attraverso specifiche e peculiari culture<br />
figurative - esploreranno adeguatamente ed approfonditamente arricchendo, alla<br />
fine, il repertorio più limitato delle texture impiegate dai romani, comunque<br />
di per se già significative in origine e in grado di ”garantire il proseguimento”<br />
di quella che, in oltre due millenni di storia, si è costituita come la tradizione<br />
(nobile e popolare allo stesso tempo) tipicamente italiana dei pavimenti in cotto.<br />
TEXTURE:<br />
origins<br />
At the beginning of the first century AD,<br />
when terracotta tiling started to be used<br />
on a widespread basis in the buildings of<br />
Imperial Rome, many rooms in residential<br />
buildings as well as in public areas were<br />
floored with tiling elements in different<br />
shapes and sizes. Large square (pedal,<br />
bipedal and sesquipedal) or rectangular<br />
tiles were used not only for flooring rooms<br />
in shops and large warehouses, but also for<br />
service areas in baths and amphitheaters.<br />
Instead, small tiles (about 2x10 / 12x5<br />
cm) laid according to an opus spicatum<br />
design were used for flooring in porticoes,<br />
vestibules, courtyards and public areas<br />
throughout the Imperial Age. More unusual<br />
shapes such as rectangles, rhombuses, small<br />
cubic tesserae, almond-shaped elements,<br />
hexagons (some of which even had marble<br />
tessera insets in the middle) and octagons<br />
were used to create highly distinctive and<br />
elaborate geometric floor patterns. The<br />
combining mechanism that, as early as<br />
Roman times, started with basic elements to<br />
culminate in the creation of floor patterns<br />
(i.e. the “textures” referred to in the title<br />
of this section of the catalogue) is clearly<br />
immediate and direct, although it is not<br />
always unique in terms of the design<br />
results that could be achieved. Based on<br />
the examples found to date and unearthed<br />
at archeological sites – in contrast with<br />
a significant number of basic geometric<br />
elements (the square in various sizes, the<br />
rectangle, the hexagon, the rhombus and<br />
so on) – early terracotta flooring in the<br />
Roman tradition has revealed a range<br />
of textures based on even, regular and<br />
repetitive laid floors that created flooring<br />
surfaces with a uniform and generally<br />
monochromatic geometric field. This<br />
homogeneous effect is the result of the<br />
consistent combination of elements with a<br />
single shape and size. Order, simplicity<br />
and regular designs are the components<br />
that constituted the rise of Roman flooring<br />
textures. More detailed and unique research<br />
into flooring interpretations examined the<br />
combination of terracotta elements with<br />
different geometric and size formats, the use<br />
of clayey paste in different shades of color,<br />
the treatment of the fields with complex<br />
geometric or even figurative motifs, the<br />
development of a flowing and hierarchical<br />
view of the flooring project itself (with a<br />
focus on specializing in compositional subthemes<br />
such as centers, more elaborate<br />
textures, frames, fasciae around the edge),<br />
and so on. These were subjects that later<br />
historical periods would explore properly<br />
and extensively through specific and unique<br />
figurative cultures, there<strong>by</strong> enriching the<br />
more limited repertoire of the textures used<br />
<strong>by</strong> the Romans. Nevertheless, this repertoire,<br />
in and of itself, was already important from<br />
its very origins and was able to “guarantee<br />
the continuation” of the repertoire that, over<br />
the course of more than two thousand years<br />
of history, came to represent the typically<br />
Italian tradition – noble yet plebeian at the<br />
same time – of terracotta floors.<br />
TESSIERUNGEN:<br />
Ursprünge<br />
Anfang des 1. Jahrhunderts n. Chr., als<br />
sich Terracotta im kaiserlichen römischen<br />
Bauwesen zu verbreiten begann, wurden<br />
in vielen Wohngebäuden und öffentlichen<br />
Bauten die Fußböden mit Steinelementen<br />
verschiedener Dimension und Morphologie<br />
verlegt. Mit großen quadratischen<br />
oder rechteckigen Cottosteinen wurden<br />
Werkstätten und Lagerräume, aber auch<br />
Kurbäder und Amphitheater ausgelegt. Mit<br />
kleinen Cottosteinchen (zirka 2X10 -<br />
12x5 cm) wurden dagegen während der<br />
gesamten kaiserlichen Epoche die Böden<br />
von Portalvorbauten, Gängen, Höfen und<br />
öffentlichen Plätzen nach dem Design des<br />
opus spicatum verlegt. Mit ausgefalleneren<br />
Formaten, wie Rechtecken, Rauten, kleinen<br />
kubischen Fliesen, mandelförmigen<br />
Elementen, sechseckigen (einige sogar mit<br />
Marmoreinlagen in der Mitte) und mit<br />
achteckigen Formaten wurden besonders<br />
ausgearbeitete, geometrische<br />
Bodenentwürfe verwirklicht.<br />
Der Kombinationsmechanismus, der bereits<br />
bei den Römern von den Basiselementen<br />
wie Bausteinen bis zur Gestaltung der<br />
Fußbodenverlegung führte (oder zur<br />
Tessierung, wie dieser Abschnitt im Katalog<br />
betitelt ist) ist eindeutig unmittelbar und<br />
direkt, wenn auch in den erreichbaren<br />
Gestaltungsergebnissen nicht einheitlich. Die<br />
Anfänge der Verlegung von Cottofußböden<br />
in der römischen Tradition lassen -<br />
anhand der bis heute überlieferten und<br />
in archäologischen Gebieten entdeckten<br />
Beispielen - bei einer bedeutenden Anzahl<br />
von geometrischen Basiselementen (das<br />
Quadrat in verschiedensten Dimensionen,<br />
das Rechteck, das Sechseck, die Raute<br />
etc.) ein Repertoire von Tessierungen<br />
auf homogenen, gleichmäßigen, sich<br />
wiederholenden Ausdehnungen erkennen,<br />
die einen geometrisch einheitlichen,<br />
im allgemeinen einfarbigen Fußboden<br />
schaffen.Die Einheitlichkeit ergibt sich<br />
aus der Verbindung, in konstanter<br />
Kombination, von Elementen mit einem<br />
einzigen Format und Größe. Ordnung,<br />
Einfachheit, gleichmäßiges Design sind die<br />
kompositorischen Ausgangskomponenten<br />
der römischen Tessierung von<br />
Fußböden.Artikuliertere und neuere Studien<br />
der Fußbodengestaltung in Bezug auf<br />
die Kombination von Cottoelementen mit<br />
unterschiedlichen geometrisch-dimensionalen<br />
Formaten, auf die Anpassung der Tonmasse<br />
an differenzierte Farbtöne, die Gestaltung<br />
der Fläche mit komplexen geometrischen<br />
oder sogar figürlichen Motiven, das<br />
Entstehen einer artikulierten und hierarchisch<br />
geordneten Vision des Entwurfs (auf die<br />
Spezialisierung von kompositorischen<br />
Unterthemen wie Mittelfelder, stärker<br />
ausgearbeitete Tessierungen, Farbtöne,<br />
Randbänder etc. ausgerichtet) stellen alle<br />
Themen dar, welche in den darauffolgenden<br />
historischen Perioden - mit spezifischen<br />
und eigenenen, figurativen Stilen adäquat<br />
und eingehend erforscht werden, so<br />
daß schließlich das von den Römern<br />
begrenztere, von sich aus jedoch bereits in<br />
den Ursprüngen bedeutende Repertoire der<br />
angewandten Tessierungen bereichert wurde,<br />
welches in der Lage ist, das Fortbestehen einer<br />
Tradition zu gewährleisten, die sich in mehr<br />
als zweitausend Jahren Geschichte als<br />
die typisch italienische Tradition (zugleich<br />
herrschaftlich und volkstümlich) für Fußböden<br />
aus Cotto gebildet hat.<br />
TEXTURE:<br />
origines<br />
Au début du Ier siècle ap. JC, quand le<br />
cotto commence sa grande diffusion à<br />
travers l’empire romain, de nombreuses<br />
demeures domestiques et espaces publics<br />
furent pavés par des éléments de différentes<br />
dimensions et morphologie. Avec de<br />
grandes briques carrées (marches, doublemarches,<br />
dimensions hors normes) ou<br />
rectangulaires, on carrela des boutiques et<br />
des grands magasins, mais aussi d’autres<br />
espaces publics comme thermes ou<br />
amphithéâtres.<br />
Avec de petites briques (environ 2x10-<br />
12x5cm) posées selon le schéma opus<br />
spicatum, on carrela les portiques, les<br />
vestibules, les cours et espaces publics<br />
pendant tout l’empire. Avec des formats<br />
plus particuliers comme les rectangles, les<br />
losanges, les petits cabochons cubiques,<br />
les éléments en forme d’amandes, les<br />
hexagones (dont certains possèdent<br />
au centre des insertions de mosaïques<br />
marmoréennes), des octogones, on vit naître<br />
des propositions de carrelages nouveaux<br />
de formes géométriques intéressantes et<br />
caractéristiques. Le mécanisme combinatoire<br />
qui démarre, avec l’expérience romaine,<br />
des éléments de base à la formation des<br />
textures carrelageales (ou aux ”textures”,<br />
comme l’indique le titre de ce paragraphe<br />
du Catalogue) est immédiat et direct,<br />
même si les résultats de dessins obtensibles<br />
ne sont pas univoques. Les débuts du<br />
carrelage en cotto de la tradition romaine<br />
marquent l’émergence - dans les exemples<br />
jusqu’ici retrouvés et relevés sur les sites<br />
archéologiques - vu le nombre grandissant<br />
d’éléments géométriques de base (le carré<br />
dans les dimensions les plus diverses, le<br />
rectangle, l’hexagone, le losange etc...),<br />
d’un répertoire de textures imbriquées en<br />
solutions homogènes, régulières, répétitives,<br />
qui donnent vie à des surfaces géométriques<br />
uniformes et en général monochromatiques.<br />
L’effet d’homogénéité est obtenu par la<br />
combinaison constante d’éléments de format<br />
unique tant en morphologie qu’en dimensions.<br />
Ordre, simplicité, dessins réguliers sont les<br />
composantes de composition de démarrage<br />
des textures des carrelages romains.<br />
Plus articulées et inédites, les recherches<br />
d’écriture de carrelage vers la combinaison<br />
d’éléments en cotto de formats<br />
géométriques-dimensionnels diversifiés,<br />
la combinaison de pâtes argileuses de<br />
chromies différenciées, le traitement de<br />
champs aux motifs géométriques complexes<br />
voire figuratifs, la maturation d’une vision<br />
articulée et hiérarchisée du projet de<br />
carrelage (orienté vers la spécialisation<br />
de thèmes composites tels que centres,<br />
textures élaborées, cadres, bandes<br />
périmétrales) etc... représentent les thèmes<br />
que le futur explorera - au travers du<br />
développement des différentes cultures<br />
spécifiques - en les enrichissant et les<br />
approfondissant pour développer le répertoire<br />
alors limité des solutions romaines, dans<br />
tous les cas déjà significatifs à l’origine et<br />
en mesure de donner le départ de ce qui<br />
au cours des 2000 ans d’histoire à venir,<br />
se transformera en tradition (nobiliaire et<br />
populaire en même temps) typiquement<br />
italienne des carrelages en cotto.<br />
265
1. Giunti paralleli 7x30 cm.<br />
4. Giunti alterni 1/3 elemento 7x30 cm<br />
7. Spina di pesce 45° 7x30 cm.<br />
8. Spina di pesce doppia 7x30 cm. 5. Giunti alterni 1/3 elemento 45° 7x30 cm. 2. Giunti sfalsati metà elemento 7x30 cm.<br />
9. Blocchi orizzontali da 4 elementi e verticale interposto 7x30 cm. 6. Spina di pesce 7x30 cm. 3. Giunti alterni metà elemento 45° 7x30 cm.<br />
10. Blocchi orizzontali con interposti elementi verticali 7x30 cm.<br />
13. Blocchi alternati 7x30 cm.<br />
16. Giunti paralleli 15x30 cm.<br />
17. Giunti alterni 1/2 elemento 15x30 cm. 14. Blocchi alternati con ricorso doppio 7x30 cm. 11. Blocchi orizzontali doppi alternati con blocchi verticali quadrupli 7x30 cm.<br />
18. Giunti alterni 1/2 elemento 45° 15x30 cm. 15. Blocchi alternati con ricorso quadruplo 7x30 cm. 12. Blocchi verticali con interposta una fila orizzontale 7x30 cm.
19. Giunti alterni 1/3 elemento 15x30 cm.<br />
22. Spina di pesce 45° 15x30 cm.<br />
25. Blocchi accoppiati orizzontali alterni verticali orizzontali 15x30 cm.<br />
26. Blocchi alternati doppi 15x30 cm. 23. Blocchi alterni orizzontali verticali 15x30 cm. 20. Giunti alterni 1/3 elemento 45° 15x30 cm.<br />
27. Blocchi alterni con ricorso verticale 15x30 cm. 24. Blocchi doppi orizzontali singolo verticale 15x30 cm. 21. Spina di pesce 15x30 cm.<br />
28. Verticali con ricorso orizzontale 15x30 cm.<br />
31. Giunti alterni 1/2 elemento 30x30 cm.<br />
34. Giunti alterni 1/3 elemento 45° 30x30 cm.<br />
35. Giunti alterni orizzontali 30x30 cm + 15x30 cm 0.70 mq 30x30 cm 0.30 mq 15x30 cm. 32. Giunti alterni 1/2 elemento 30x30 cm. 29. Giunti paralleli 30x30 cm.<br />
36. Giunti alterni orizzontali doppi 30x30 cm + 15x30 cm 0.50 mq 30x30 cm 0.50 mq 15x30 cm 33. Giunti alterni 1/3 elemento 30x30 cm. 30. Giunti paralleli 45° 30x30 cm.
credits<br />
Direzione artistica<br />
Prof. Arch. Marco Casamonti<br />
Progetto grafico<br />
Studio Tre, Rocco Ricciardi<br />
Fotolito<br />
Art and Pixel, Firenze<br />
Stampa<br />
Tap Grafiche, Poggibonsi<br />
<strong>Sannini</strong> Impruneta spa<br />
Provinciale Chiantigiana, 135<br />
I - 50023 Ferrone - Impruneta (Fi)<br />
telefono +39 055 207076<br />
fax +39 055 207021<br />
www.sannini.it - info@sannini.it<br />
271
Fonti iconografiche<br />
Le foto storiche sono dell’Archivio <strong>Sannini</strong>.<br />
Le foto degli interni degli stabilimenti di produzione <strong>Sannini</strong><br />
sono di Pietro Savorelli.<br />
Le foto dei particolari materici sono di Alessandro Ciampi<br />
e Pietro Savorelli.<br />
Le referenze fotografiche sono dell’Archivio <strong>Sannini</strong>, Alessandro<br />
Ciampi, Mario Ciampi, Massimo Listri, Pietro Savorelli, Stefano<br />
Topuntoli e Mirko Giorgetti.<br />
Cotto arrotato<br />
Palazzo Gambacorti, Pisa, arch. R. Pasqualetti<br />
Superficie <strong>Sannini</strong><br />
Abitazione privata a Pisa, arch. M. Carmassi<br />
Chiesa, Parma, arch. A. Cortesi<br />
Cotto Levigato<br />
Abitazione privata a Pisa, arch. M. Carmassi<br />
Litos<br />
Piazza del Duomo, Spoleto (Perugia)<br />
“La Mattonata”, S. Maria degli Angeli, Assisi (Perugia)<br />
Tecno<br />
Showroom Ferragamo, Firenze<br />
Fornace <strong>Sannini</strong><br />
Abitazione privata, Lugano arch. Dolinski<br />
Flash System<br />
Abitazione privata, Lugano arch. Dolinski<br />
Il Borghetto, San Gimignano (Siena)<br />
Abitazione privata Sidney<br />
Convento di San Cerbone, Lucca, Studio Associato Luigi Puccetti<br />
e Massimo Rocco Architetti<br />
Cotto fatto a mano classico<br />
Portici Basilica San Francesco, Assisi (Perugia), Studio Leonelli<br />
e Struzzi<br />
Abitazione privata<br />
Villa Gonnelli, Firenze<br />
Argille cromatiche<br />
Abitazione privata, Pisa, arch. M. Carmassi<br />
Terre invetriate<br />
Abitazione privata<br />
Poggio <strong>Sannini</strong><br />
Convento di San Cerbone, Lucca, Studio Associato Luigi Puccetti<br />
e Massimo Rocco Architetti<br />
Il Borghetto, San Gimignano (Siena)<br />
Poggio al sole<br />
Il Borghetto, San Gimignano (Siena)<br />
Formati speciali, complementi e listelli<br />
Piazza del Municipio, Ferrara<br />
Teatro Clitunno, piazza del teatro, Trevi (Perugia)<br />
Passeggiata a mare, Nervi (Genova)<br />
Shopping Hall, Olanda, arch. B. Van Der Goes<br />
Mosaici e decori<br />
Abitazione privata<br />
Teatro Verdi, Pisa, restauro arch. M. Carmassi<br />
Vasi-Terrecotte artistiche<br />
Abitazione privata, arch. A. Rossi<br />
Castello di Mugnana, Greve in Chianti (Firenze)<br />
Externa<br />
Designer Outlet, Barberino del Mugello (Firenze) arch. G. Bolignano,<br />
ing. P. Giustiniani<br />
Centro Storico, Assisi (Perugia)<br />
Portici Basilica San Francesco, Assisi (Perugia), Studio Leonelli<br />
e Struzzi<br />
Arredo urbano<br />
Centro Storico, Assisi (Perugia)<br />
Complesso di Blixembosch a Eindhoven, Haagdijk b.v.,<br />
Architectengroep b.v.<br />
“La Mattonata”, Assisi (Perugia)<br />
Cottostone<br />
Clinica Ospedaliera , Neumunster, Studio Wuttke & Kekeritz<br />
Pareti ventilate<br />
Leeum, Samsung Museum of Art, Seoul, arch. M. Botta<br />
Showroom B.P. Studio, Firenze, arch. C. Nardi<br />
Legnox, Gorgo al Monticano (Treviso), Studio Casetta e partners<br />
Skema, Oderzo (Treviso) , Studio Casetta e partners<br />
Multisala Cinematografica, Firenze, arch. C. Nardi<br />
Prefabbricare con elementi in cotto<br />
Cantina Petra, Suvereto (Livorno), arch. M. Botta<br />
Finestra in cotto-alluminio<br />
Parcheggio multipiano, Rosenheim, Ing. Gemeinschft, Thieltges<br />
Sell+Partner<br />
Il catalogo è disponibile su richiesta.<br />
Il cotto trafilato ha come riferimento le norme UNI EN 186/2<br />
e può variare nel colore e nelle misure. Unità di misura in cm.<br />
L’azienda si riserva il diritto di apportare,qualora lo ritenga<br />
opportuno, eventuali modifiche tecniche e formali rispetto a quanto<br />
riportato nelle pagine precedenti.<br />
The company reserves the right to make, whenever it considers<br />
appropriate, any technical or formal modifications of the information<br />
in these pages<br />
Unsere Produkte unterliegen der ständigen technischen<br />
Weiterentwicklung. Die hier veröffentlichten Angaben entsprechen<br />
dem Stand der Drucklegung des Kataloges.<br />
L’usine se réserve le droit d’apporter, lorsqu’elle le considère<br />
nécessaire, d’éventuelles modifications par rapport au contenu des<br />
pages précédentes.<br />
maggio 2006
<strong>Sannini</strong> Impruneta Spa<br />
via Provinciale Chiantigiana, 135 - I - 50023 - Impruneta (Fi)<br />
telefono +39 055 207076 - fax +39 055 207021<br />
www.sannini.it - info@sannini.it