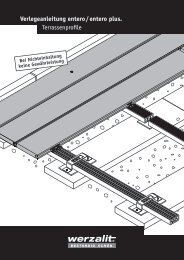
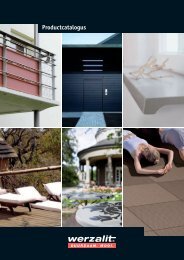
Plaque de revêtement Notice pour la pose de square. - Werzalit
Plaque de revêtement Notice pour la pose de square. - Werzalit
Plaque de revêtement Notice pour la pose de square. - Werzalit

Create successful ePaper yourself
Turn your PDF publications into a flip-book with our unique Google optimized e-Paper software.
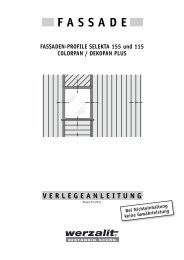
<strong>square</strong> Détails <strong>de</strong> raccor<strong>de</strong>ment<br />
32.<br />
Détails <strong>de</strong><br />
raccor<strong>de</strong>ment<br />
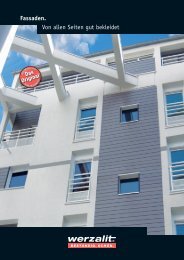
1<br />
Coins extérieurs<br />
2<br />
Coins intérieurs<br />
3<br />
Joint horizontal<br />
4<br />
Joints <strong>de</strong><br />
raccor<strong>de</strong>ment<br />
au mur<br />
Vous trouverez les profils <strong>de</strong> jonction qu‘il vous faut auprès <strong>de</strong>s entreprises indiquées à <strong>la</strong> page 22. Ci-après, nous avons représenté<br />
quelques exemples d‘application.<br />
1<br />
2<br />
4<br />
5<br />
Schéma 1<br />
Schéma 5<br />
Schéma 2<br />
Schéma 6<br />
Schéma 3<br />
Schéma 7<br />
Schéma 1 Schéma 2<br />
3<br />
6<br />
Schéma 4<br />
1 Coin extérieur, bord à bord, avec ban<strong>de</strong> d‘étanchéité <strong>de</strong> 100 mm,<br />
rectangu<strong>la</strong>ire, fixation visible.<br />
2 Coin extérieur, assemb<strong>la</strong>ge en onglet sur profil d‘aluminium,<br />
fixation invisible, <strong>pour</strong> p<strong>la</strong>que <strong>de</strong> 10 mm d‘épaisseur.<br />
3 Coins extérieurs segmentés avec profil intermédiaire enroulé<br />
métallique.<br />
4 Coin intérieur, fixation visible sur ossature en bois ou en alu<br />
avec ban<strong>de</strong> d’étanchéité <strong>de</strong> 100 mm, rectangu<strong>la</strong>ire.<br />
5 Coin intérieur, fixation visible, sur profil d’angle rentrant.<br />
6 Coin intérieur segmenté avec profil intermédiaire enroulé métallique.<br />
• Une étanchéification (apprêt) <strong>de</strong> l‘arête <strong>de</strong> coupe n‘est pas nécessaire.<br />
• Joint horizontal contre les eaux <strong>de</strong> pluie <strong>pour</strong> sous-constructions<br />
en bois avec profil en PVC ou en alu.<br />
Attention : Veillez à prévoir un jeu nécessaire <strong>pour</strong> <strong>la</strong> di<strong>la</strong>tation !<br />
(Schéma 1)<br />
• Joint horizontal <strong>pour</strong> <strong>la</strong> protection contre les eaux <strong>de</strong> pluie avec<br />
profil alu non chevauchant (Schéma 2).<br />
• Joint <strong>de</strong> fermeture horizontal – par ex. sous les appuis <strong>de</strong> fenêtre –<br />
avec profil hydrofuge <strong>pour</strong> les sous-constructions en bois (Schéma 3).<br />
• Couvre-joint posé sur l‘arrière avec profil mouluré (Schéma 4).<br />
• Conception d‘un joint horizontal <strong>de</strong> protection contre les eaux <strong>de</strong><br />
pluies par repliure à mi-panneau.<br />
Attention : Veillez à prévoir un jeu <strong>de</strong> 5 mm <strong>pour</strong> <strong>la</strong> di<strong>la</strong>tation !<br />
(Schéma 5)<br />
• Joint <strong>de</strong> p<strong>la</strong>que ouvert ! Admis <strong>pour</strong> sous-construction en aluminium<br />
avec venti<strong>la</strong>tion arrière opérationnelle (Schéma 6).<br />
• Conception <strong>de</strong> joint à <strong>la</strong>nguette et rainure sur p<strong>la</strong>que <strong>de</strong> <strong>revêtement</strong><br />
<strong>square</strong> <strong>de</strong> 10 mm (Schéma 7).<br />
• Clôture au droit <strong>de</strong> fenêtre avec profil en U en alu ou en PVC : peu<br />
<strong>de</strong> travail d‘ajustement, faible encombrement (Schéma 1)<br />
• Joint <strong>de</strong> raccor<strong>de</strong>ment avec équerre en alu (Schéma 2)<br />
21