4497 -Micro Star 700 - DE - EN - FR - CMC-Versand
4497 -Micro Star 700 - DE - EN - FR - CMC-Versand
4497 -Micro Star 700 - DE - EN - FR - CMC-Versand

Create successful ePaper yourself
Turn your PDF publications into a flip-book with our unique Google optimized e-Paper software.
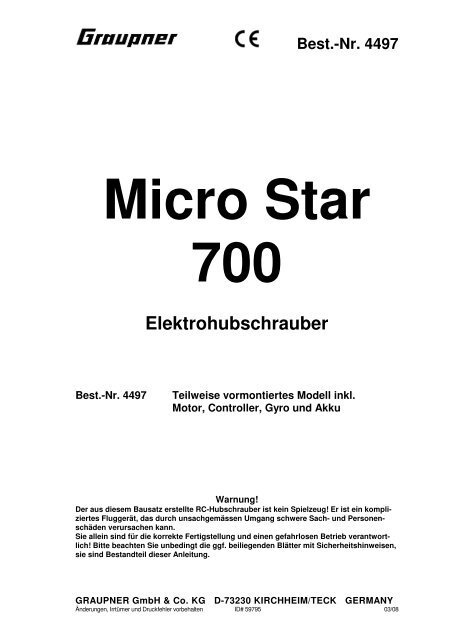
Best.-Nr. <strong>4497</strong><br />
<strong>Micro</strong> <strong>Star</strong><br />
<strong>700</strong><br />
Elektrohubschrauber<br />
Best.-Nr. <strong>4497</strong> Teilweise vormontiertes Modell inkl.<br />
Motor, Controller, Gyro und Akku<br />
Warnung!<br />
Der aus diesem Bausatz erstellte RC-Hubschrauber ist kein Spielzeug! Er ist ein kompliziertes<br />
Fluggerät, das durch unsachgemässen Umgang schwere Sach- und Personenschäden<br />
verursachen kann.<br />
Sie allein sind für die korrekte Fertigstellung und einen gefahrlosen Betrieb verantwortlich!<br />
Bitte beachten Sie unbedingt die ggf. beiliegenden Blätter mit Sicherheitshinweisen,<br />
sie sind Bestandteil dieser Anleitung.<br />
GRAUPNER GmbH & Co. KG D-73230 KIRCHHEIM/TECK GERMANY<br />
Änderungen, Irrtümer und Druckfehler vorbehalten ID# 59795 03/08
2<br />
<strong>Micro</strong> <strong>Star</strong> <strong>700</strong><br />
Vorwort<br />
„<strong>Micro</strong> <strong>Star</strong> <strong>700</strong>“ ist ein voll kunstflugtauglicher Elektrohubschrauber mit hohem Leistungsüber-<br />
schuss, geeignet für Anfänger, Fortgeschrittene und Experten und weist die folgenden Merk-<br />
male auf:<br />
• Weitgehend vormontiert<br />
• Antrieb durch Brushless-Motor<br />
• Motor, Controller, Gyro und Akku im Lieferumfang<br />
• Hauptrotor rechtsdrehend<br />
• Heckrotorantrieb über Zahnriemen<br />
• Autorotationsfreilauf<br />
• Betrieb mit 3-zelligem LiPo-Akku<br />
Die erreichbaren Flugzeiten pro Akkuladung hängen naturgemäss von der Justage des Modells<br />
und vom Flugstil ab; im normalen Betrieb werden erfahrungsgemäss ca. 11 min erreicht bei Ver-<br />
wendung des empfohlenen LiPo-Akkus.<br />
Die Steuerfunktionen Rollen, Nicken und Kollektivpitch werden elektronisch gemischt, so dass<br />
der Betrieb des Modells eine entsprechend ausgestattete Fernsteuerung mit speziellen Hub-<br />
schrauberoptionen voraussetzt.<br />
Das leichte, stabile Chassis des Modells besteht aus einer Kombination von glasfaservstärkten<br />
Kunststoffplatten und gefrästen Aluminiumteilen. Der Motor treibt den Hauptrotor über ein<br />
einstufiges Getriebe an, wobei auch ein Autorotationsfreilauf schon serienmässig eingebaut ist.<br />
Technische Daten<br />
Länge ohne Rotor ca. 650 mm<br />
Höhe ca. 245 mm<br />
Breite o.Rotor ca. 120 mm<br />
Hauptrotor- Ø <strong>700</strong> mm<br />
Heckrotor- Ø 140 mm<br />
Fluggewicht ab ca. 710 g
Warnhinweise<br />
3<br />
<strong>Micro</strong> <strong>Star</strong> <strong>700</strong><br />
• Das aus diesem Bausatz betriebsfertig aufgebaute Modell ist kein harmloses Spiel-<br />
zeug! Es kann durch mangelhaften Aufbau und/oder unsachgemässe oder fahrlässige<br />
Handhabung beim Betrieb zu schweren Sach- und Personenschäden führen.<br />
• Ein Hubschrauber hat zwei im Betrieb schnell drehende Rotoren mit hoher Drehener-<br />
gie. Alles, was dabei in die Drehebene der Rotoren gelangt, wird zerstört oder zumin-<br />
dest stark beschädigt - also auch Gliedmaßen! Bitte extreme Vorsicht walten lassen!<br />
• Gelangt ein Gegenstand in die Drehebene der laufenden Rotoren, so wird nicht nur<br />
dieser, sondern auch die Rotorblätter beschädigt. Teile davon können sich lösen, was<br />
zu einer extremen Unwucht führt, wodurch der gesamte Hubschrauber in Mitleiden-<br />
schaft gezogen und unberechenbar wird.<br />
• Störungen der Fernsteuerungsanlage, hervorgerufen beispielsweise durch Fremdstö-<br />
rungen, Ausfall eines Bauteils oder durch leere bzw. defekte Stromquellen, lassen ei-<br />
nen Modellhubschrauber ebenfalls unberechenbar werden: Er kann sich ohne Vor-<br />
warnung in jede beliebige Richtung bewegen.<br />
• Ein Hubschrauber besitzt eine große Anzahl von Teilen, die einem Verschleiss unter-<br />
worfen sind, beispielsweise Getriebeteile, Motor, Kugelgelenke usw. Eine ständige<br />
Wartung und Kontrolle des Modells ist daher unbedingt erforderlich. Wie bei den<br />
„grossen“ Vorbildern üblich, muss auch am Modell vor jedem <strong>Star</strong>t eine<br />
"Vorflugkontrolle" durchgeführt werden, bei der evtl. entstandene Mängel erkannt und<br />
rechtzeitig beseitigt werden können, bevor sie zu einem Absturz führen.<br />
• Diesem Bausatz liegen ggf. weitere Einlegeblätter mit Sicherheitshinweisen und War-<br />
nungen bei: Bitte unbedingt lesen und beachten, sie sind Teil dieser Anleitung!<br />
• Dieser Modellhubschrauber darf nur von Erwachsenen oder Jugendlichen ab 16 Jah-<br />
ren unter Anleitung und Aufsicht von sachkundigen Erwachsenen gebaut und betrie-<br />
ben werden.<br />
• Es besteht Verletzungsgefahr durch scharfe Spitzen und Kanten.<br />
• Gesetzliche Auflagen, insbesondere bezüglich einer ggf. erforderlichen Aufstiegser-<br />
laubnis, sowie die fernmelderechtlichen Bestimmungen für den Betrieb der Fernsteu-<br />
erungsanlage müssen unbedingt beachtet werden. Der Abschluss einer Haftpflichtver-<br />
sicherung für den Modellflug ist gesetzlich vorgeschrieben.<br />
• Ein Hubschraubermodell muss so transportiert werden (z.B. zum Fluggelände), dass<br />
daran keine Beschädigungen entstehen können. Besonders gefährdet sind dabei die<br />
Steuergestänge am Hauptrotor und der gesamte Heckrotor.<br />
• Einen Modellhubschrauber zu steuern ist nicht einfach; zum Erlernen dieser Fähigkeit<br />
ist Ausdauer und ein gutes optisches Wahrnehmungsvermögen erforderlich.<br />
• Vor der Inbetriebnahme des Modells ist es unerlässlich, sich intensiv mit der Materie<br />
"Modellhubschrauber" auseinanderzusetzen. Dies sollte sowohl durch Fachliteratur<br />
erfolgen, als auch praktisch, z.B. durch Zuschauen auf Modellflugplätzen mit Helikop-
4<br />
<strong>Micro</strong> <strong>Star</strong> <strong>700</strong><br />
terbetrieb, in Gesprächen mit anderen Modellhelikopterpiloten oder durch den Besuch<br />
einer Modellflugschule. Auch der Fachhandel hilft Ihnen gern weiter.<br />
• Diese Anleitung unbedingt vor dem Zusammenbau vollständig lesen. Erst mit dem<br />
Bau beginnen, wenn die einzelnen Baustufen und deren Reihenfolge klar verstanden<br />
worden sind!<br />
• Änderungen des Aufbaus bei Verwendung anderer als in der Anleitung empfohlener<br />
Teile dürfen nicht vorgenommen werden, es sei denn, Sie haben sich von Qualität,<br />
Funktionstüchtigkeit und Eignung dieser anderen Zubehörteile überzeugt.<br />
• Da Hersteller und Verkäufer keinen Einfluss auf einen sachgerechten Aufbau und ord-<br />
nungsgemässen Betrieb des Modells haben, wird ausdrücklich auf diese Gefahren<br />
hingewiesen und jegliche Haftung abgelehnt.<br />
Haftungsausschluss / Schadenersatz<br />
Weder die Einhaltung der Montage- und Betriebsanleitung in Zusammenhang mit dem<br />
Modell, noch die Bedienung und Methoden bei Installation, Betrieb, Verwendung und<br />
Wartung der Fernsteuerungsanlagen können von der Firma Graupner überwacht werden.<br />
Daher übernimmt die Fa. Graupner keinerlei Haftung für Verluste, Schäden oder Kosten,<br />
die sich aus der fehlerhaften Verwendung und dem Betrieb ergeben oder in irgendeiner<br />
Weise damit zusammenhängen.<br />
Soweit vom Gesetzgeber nicht zwingend anders vorgeschrieben, ist die Verpflichtung<br />
der Fa. Graupner zur Leistung von Schadenersatz, gleich aus welchem Rechtsgrund, be-<br />
grenzt auf den Rechnungswert der an dem schadenstiftenden Ereignis unmittelbar betei-<br />
ligten Warenmenge der Fa. Graupner. Dies gilt nicht, soweit die Fa. Graupner nach zwin-<br />
genden gesetzlichen Vorschriften wegen Vorsatz oder grober Fahrlässigkeit unbe-<br />
schränkt haftet.
Anleitung und Warnhinweise zur Benutzung von LiPo - Akkus<br />
5<br />
<strong>Micro</strong> <strong>Star</strong> <strong>700</strong><br />
Allgemeine Hinweise<br />
Lithium-Polymer-Akkus (Kurzform: LiPo-Akkus) bedürfen besonders aufmerksamer Behandlung. Dies gilt sowohl<br />
bei Ladung und Entladung als auch bei Lagerung und sonstiger Handhabung. Hierbei sind die folgenden<br />
besonderen Spezifikationen einzuhalten:<br />
Fehlbehandlung kann zu Explosionen, Feuer, Rauchentwicklung und Vergiftungsgefahr führen. Daneben führt die<br />
Nichtbeachtung der Anleitungs- und Warnhinweise zu Leistungseinbußen und sonstigen Defekten.<br />
Die Kapazität des Akkus verringert sich mit jeder Ladung/Entladung. Auch bei der Lagerung bei zu hohen oder zu niedrigen<br />
Temperaturen kann diese eine allmähliche Verringerung der Kapazität zur Folge haben. Im Modellbau erreichen<br />
die Akkus wegen der hohen Entladeströme und der Induktionsströme des Motors bei Beachtung aller Lade- und Entladevorschriften<br />
nach 50 Zyklen noch etwa 50-80% der Kapazität eines neuen Akkus.<br />
Akkupacks dürfen nur in Ausnahmefällen in Reihe oder parallel geschaltet werden, da die Zellenkapazitäten und der<br />
Ladezustand zu unterschiedlich sein können. Von uns gelieferte Akkupacks sind deshalb selektiert.<br />
Diese Anleitung ist sicher aufzubewahren und im Falle einer Weitergabe dem nachfolgendem Benutzer unbedingt mit<br />
auszuhändigen.<br />
Besondere Hinweise zur Ladung von Graupner-LiPo-Akkus<br />
Da die Firma Graupner GmbH & Co. KG die richtige Ladung und Entladung der Zellen nicht überwachen kann, wird<br />
jegliche Garantie bei fehlerhafter Ladung oder Entladung ausgeschlossen.<br />
Für die Ladung von Li-Po Akkus dürfen nur die zugelassenen Ladegeräte mit den dazugehörigen Ladekabeln verwendet<br />
werden. Jede Manipulation am Ladegerät bzw. Ladekabel kann zu schwerwiegenden Schäden führen.<br />
Die max. Ladekapazität muss auf das 1,05-fache der Akkukapazität begrenzt werden.<br />
Beispiel: <strong>700</strong>mAh Akku = 735mAh max. Ladekapazität<br />
Verwenden Sie für die Ladung und Entladung von LiPo-Akkus nur speziell dafür ausgelegte Lade-/ Entladegeräte<br />
von Graupner, z. B. Graupner Best.-Nr. 6437 LiPo charger 4, Best.-Nr. 6438 LiPomat 4 Plus, Best.-Nr. 6410<br />
Ultramat 10, Best.-Nr. 6412 Ultramat 12, Best.-Nr. 6416 ULTRA DUO PLUS 30 (im Li-Ionen oder Li-Mn oder Li-<br />
Po Modus (neu)) oder Best.-Nr. 94401 GMVIS – Commander ab Softwareversion V2003.<br />
Je nach Akku kann für den Anschluss ein separat lieferbares Adapterkabel erforderlich sein.<br />
Stellen Sie sicher, dass die Zellenzahl, bzw. die Ladeschlussspannung sowie die Entladeschlussspannung<br />
richtig eingestellt sind. Beachten Sie dazu die Bedienungsanleitung Ihres Lade-/Entladegerätes.<br />
Der mehrpolige weiße Stecker (Zellenzahl + 1 Pole) ist für den Anschluss des Ladegerätes Best.-Nr. 6438 oder<br />
für den Anschluss des LiPo-balancers Best.-Nr. 6491, sowie für eine mögliche Einzelzellenladung zur manuellen<br />
Zellenangleichung vorgesehen. Auch hier kann, je nach Akku, für den Anschluss ein separat lieferbares<br />
Adapterkabel erforderlich sein.<br />
Weitere Hinweise zur Handhabung<br />
Der zu ladende Akku muss sich während des Ladevorgangs auf einer nicht brennbaren, hitzebeständigen und<br />
nicht leitenden Unterlage befinden! Auch sind brennbare oder leicht entzündliche Gegenstände von der Ladeanordnung<br />
fernzuhalten. Akkus dürfen nur unter Aufsicht geladen werden.<br />
Grundsätzlich dürfen in Reihe geschaltete LiPo-Akkus im Pack gemeinsam nur geladen werden, wenn die Spannung<br />
der einzelnen Zellen nicht mehr als 0,05V abweicht. Sollte die Abweichung der Spannung der einzelnen Zellen mehr<br />
als 0,05V aufweisen, so muss die Zellenspannung durch Einzelzellenladung oder Einzelzellenentladung möglichst genau<br />
angeglichen werden.<br />
Unter diesen Vorraussetzungen können Graupner-LiPo-Akkus mit max. 2C (der Wert von 1C entspricht der Zellenkapazität)<br />
Ladestrom geladen werden. Ab einer Spannung von max. 4,2V<br />
pro Zelle muss mit einer konstanten Spannung von 4,2V pro Zelle weitergeladen werden, bis der Ladestrom 0,1-0,2A<br />
unterschreitet.<br />
Eine Spannung von über 4,25V pro Zelle muss auf jeden Fall vermieden werden, da die Zelle sonst dauerhaft<br />
beschädigt wird und Feuer verursachen kann. Um eine Überladung von einzelnen Zellen im Pack zu vermeiden,<br />
sollte für eine höhere Lebensdauer die Abschaltspannung zwischen 4,1V – 4,15V pro Zelle eingestellt<br />
werden.<br />
Nach jedem Ladevorgang ist zu prüfen, ob eine der Zellen im Pack eine Spannung von über 4,2V aufweist. Alle Zellen<br />
müssen die gleiche Spannung aufweisen. Sollte die Spannung der einzelnen Zellen mehr als 0,05V abweichen, so<br />
muss die Zellenspannung durch Einzelzellenladung oder Einzelzellenentladung angeglichen werden. Um ein Überladen<br />
der Zellen nach längerem Gebrauch in Packs zu vermeiden, sollten diese regelmäßig einzeln geladen werden.<br />
Laden Sie niemals die Akkuzellen mit falscher Polarität. Wenn die Akkus verpolt geladen werden, gibt es unnormale<br />
chemische Reaktionen und der Akku wird unbrauchbar. Brüche, Rauch und Flammen können dadurch erzeugt werden.<br />
Der zulässige Temperaturbereich beim Laden und lagern von LiPo - Akkus beträgt 0-50°C.<br />
Lagerung: LiPo Zellen sollen mit einer eingeladenen Kapazität von 10-20% gelagert werden. Sinkt die Spannung der<br />
Zellen unter 3V, so sind diese unbedingt nachzuladen (10-20%). Tiefentladung und Lagerung im entladenen Zustand<br />
(Zellenspannung < 3V) machen den Akku unbrauchbar.
6<br />
<strong>Micro</strong> <strong>Star</strong> <strong>700</strong><br />
Besondere Hinweise zur Entladung von Graupner-LiPo-Akkus:<br />
Ein Dauerstrom von ca. 6C stellen für die Graupner-LiPo-Akkus kein größeres Problem dar. Bei größeren Strömen beachten<br />
Sie bitte die Katalogangaben.<br />
Eine Entladung von unter 2,5V pro Zelle schädigt die Zellen dauerhaft und ist daher unbedingt zu vermeiden.<br />
Deshalb müssen Sie den Motor abstellen, sobald Sie einen starken Leistungsabfall bemerken. Sollten die einzelnen<br />
Zellen verschieden voll geladen sein, käme die Unterspannungsabschaltung des Reglers eventuell zu<br />
spät, so dass einzelne Zellen zu sehr entladen werden könnten.<br />
Kurzschlüsse sind unbedingt zu vermeiden. Permanente Kurzschlüsse führen zur Zerstörung des Akkus, hohe<br />
Temperaturen und ggf. Selbstentzündung können die Folge sein.<br />
Die Akkutemperatur beim Entladen darf in keinem Fall über 70°C ansteigen. Ansonsten ist für eine bessere<br />
Kühlung oder für eine geringere Entladung zu sorgen. Die Temperatur lässt sich leicht mit dem Infrarotthermometer<br />
Best.-Nr. 1963 prüfen.<br />
Weitere Hinweise zur Handhabung<br />
Vermeiden Sie einen Kurzschluss.<br />
Schließen Sie die Akkus niemals kurz. Ein Kurzschluss lässt einen sehr hohen Strom fließen, der die Zellen aufheizt.<br />
Dies führt zu einem Elektrolytverlust, Gasen oder gar zu Explosionen. Vermeiden Sie die Nähe oder den Umgang der<br />
Graupner-LiPo-Akkus mit leitenden Oberflächen wegen der Gefahr eines Kurzschlusses.<br />
Stabilität der Gehäusefolie:<br />
Die Aluminium Laminate Film Folie kann leicht durch scharfe Gegenstände wie Nadeln, Messer, Nägel, Motoranschlüsse<br />
oder ähnliches beschädigt werden. Beschädigungen der Folie machen den Akku unbrauchbar. Der Akku<br />
muss deshalb so in das Modell eingebaut werden, dass auch bei einem Absturz oder Crash der Akku nicht verformt<br />
werden kann. Bei einem Kurzschluss könnte der Akku brennen.<br />
Ebenso können Temperaturen über 70°C das Gehäuse beschädigen, so dass dieses undicht wird. Dies hat einen<br />
Elektrolytverlust zur Folge, der Akku wird unbrauchbar und ist zu entsorgen.<br />
Mechanischer Schock:<br />
Die LiPo - Akkus sind mechanisch nicht so stabil wie Akkus in Metallgehäusen. Vermeiden Sie daher mechanische<br />
Schocks durch Herunterfallen, Schlagen, Verbiegen usw. Schneiden, reißen, deformieren oder bohren Sie niemals an<br />
der Laminate-Film-Folie. Verbiegen oder verdrehen Sie niemals den LiPo-Akku. Üben Sie keinen Druck auf den Akku<br />
oder die Anschlüsse aus.<br />
Handhabung der Anschlüsse:<br />
Die Anschlüsse sind nicht so robust wie bei anderen Akkus. Dies gilt insbesondere für den Aluminium+ Anschluss. Die<br />
Anschlüsse können leicht abbrechen. Wegen der Wärmeübertragung dürfen die Anschlussfahnen nicht direkt gelötet<br />
werden.<br />
Zellenverbindung:<br />
Direktes Löten an den Akkuzellen ist unzulässig.<br />
Direktes löten können Komponenten der Akkus wie Separator oder Isolator durch die Hitze beschädigen.<br />
Akkuanschlüsse können nur industriell durch Punktschweißung erfolgen. Bei fehlendem oder abgerissenem Kabel ist<br />
eine professionelle Reparatur durch den Hersteller oder Vertreiber erforderlich.<br />
Ersatz von einzelnen Akkuzellen:<br />
Der Austausch von Akkuzellen darf nur durch den Hersteller oder den Vertrieb erfolgen und darf niemals vom Benutzer<br />
selbst vorgenommen werden.<br />
Keine Nutzung von beschädigten Zellen:<br />
Beschädigte Zellen dürfen in keinem Fall mehr in Benutzung genommen werden.<br />
Kennzeichen beschädigter Zellen sind u.a. beschädigte Gehäuseverpackung, Verformung der Akkuzellen, Geruch von<br />
Elektrolyte oder auslaufende Elektrolyte. In diesen Fällen ist eine weitere Verwendung der Akkus nicht mehr zulässig.<br />
Beschädigte oder unbrauchbare Zellen sind Sondermüll und müssen entsprechend entsorgt werden.<br />
Allgemeine Warnhinweise<br />
Die Akkus dürfen nicht in Feuer gelangen oder eingeäschert werden.<br />
Ebenso dürfen die Zellen nicht in Flüssigkeiten wie Wasser, Meerwasser oder Getränke eingetaucht werden. Jeder<br />
Kontakt mit Flüssigkeit gleich welcher Art ist zu vermeiden.<br />
Einzelne Zellen und Akkus sind kein Spielzeug und dürfen deshalb nicht in die Hände von Kindern gelangen. Akkus/Zellen<br />
außerhalb der Reichweite von Kindern aufbewahren.<br />
Akkus dürfen nicht in die Nähe von Babys oder Kleinkinder gelangen. Sollten Akkus verschluckt worden sein, so ist<br />
sofort ein Arzt oder Notarzt aufzusuchen.<br />
Akkus dürfen nicht in eine Mikrowelle oder unter Druck geraten. Rauch und Feuer etc. können die Folgen sein.<br />
Zerlegen Sie niemals einen LiPo-Akku. Das Zerlegen eines Akkus kann interne Kurzschlüsse verursachen. Gasentwicklung,<br />
Feuer und Explosionen oder andere Probleme können die Folge sein.<br />
Die in den LiPo-Akkus enthaltenen Elektrolyte und Elektrolytdämpfe sind gesundheitsschädlich. Vermeiden Sie in jedem<br />
Fall direkten Kontakt mit Elektrolyte. Bei Kontakt von Elektrolyte mit Haut, Augen oder anderen Körperteilen muss<br />
ein sofortiges Aus- oder Abspülen mit ausreichend frischem Wasser vorgenommen werden, anschließend muss ein<br />
Arzt konsultiert werden.<br />
Im Gerät eingebaute Akkus immer aus den Geräten entnehmen, wenn das Gerät gerade nicht verwendet wird. Geräte<br />
nach dem Gebrauch immer ausschalten um Tiefentladungen zu vermeiden. Akkus immer rechtzeitig aufladen. Akkus<br />
auf einer nicht brennbaren, hitzebeständigen und nicht leitenden Unterlage lagern! Tiefentladene Li-Po Akkus sind defekt<br />
und dürfen nicht mehr verwendet werden!
Inhaltsübersicht<br />
7<br />
<strong>Micro</strong> <strong>Star</strong> <strong>700</strong><br />
• Vorwort .......................................... S.2<br />
• Warnhinweise ..................................... S.3<br />
• Zubehör, zusätzlich benötigte Artikel .................... S.8<br />
• 1. Montage, Einbau der Fernlenkanlage ................... S.9<br />
• 2. Einstellarbeiten .................................. S.22<br />
• 3. Endkontrolle vor dem Erstflug ...................... S.24<br />
• 4. Einstellungen beim Erstflug, Spurlauf-Einstellung ........ S.25<br />
• 5. Wartung, Montage des Modells aus Einzelteilen ........... S.26<br />
• 6. Allgemeine Vorsichtsmaßnahmen ................... S.26<br />
• 7. Einige Grundbegriffe des Hubschrauberfliegens ........... S.26<br />
Hinweise zu dieser Anleitung<br />
Damit das Helikoptermodell später einwandfrei und sicher geflogen werden kann, wurde diese<br />
Anleitung mit hohem Aufwand erstellt. Es wird nicht nur vom Anfänger, sondern in gleichem<br />
Maße vom Experten unbedingt erwartet, die Fertigstellung Schritt für Schritt exakt so vorzunehmen,<br />
wie es nachfolgend beschrieben wird.<br />
• Die Fertigstellung erfolgt anhand von Abbildungen, die mit erklärenden Texten versehen<br />
sind.<br />
• Sämtliche Zahnräder und Lager sowie die Gelenke sind sorgfältig zu fetten bzw. zu ölen.<br />
• Die Ersatzteilzusammenstellung befindet sich am Ende der Anleitung.
Zubehör<br />
Empfohlenes Zubehör für <strong>Micro</strong> <strong>Star</strong> <strong>700</strong><br />
8<br />
<strong>Micro</strong> <strong>Star</strong> <strong>700</strong><br />
Fernlenkanlage siehe Graupner-Hauptkatalog<br />
Es ist eine mit speziellen Hubschrauberoptionen ausgestattete Fernlenkanlage erforderlich oder<br />
eine <strong>Micro</strong>computer-Fernlenkanlage wie z. B. mx-16, mc-19, mc/mx-22 oder mc/mx-24.<br />
Servos: (z.B.):<br />
C 261, Best.-Nr. 5125.LOSE (Taumelscheibe)<br />
C 231, Best.-Nr. 5109.LOSE (Heckrotor)<br />
Gyrosystem: (im Lieferumfang)<br />
Vox 300, Best.-Nr. 5962<br />
Antriebsakku: (im Lieferumfang), alternativ:<br />
LiPo 3/2100, Best.-Nr. 7642.3<br />
oder<br />
LiPo 3/2100, Best.-Nr. 7643.3
9<br />
<strong>Micro</strong> <strong>Star</strong> <strong>700</strong><br />
1. Montage<br />
Da das Modell vormontiert geliefert wird, vereinfacht sich die Fertigstellung gegenüber der folgenden<br />
Aufbauanleitung entsprechend.<br />
Dennoch wird der Aufbau aus Einzelteilen dargestellt, damit auch ggf. umfangreiche Reparaturen<br />
durchgeführt werden können und der Aufbau des Modells vollständig klar wird.<br />
In jedem Fall ist die korrekte Montage des Modells anhand der Anleitung zu überprüfen; auch<br />
die exakte Justage des Getriebes und der Anlenkungen ist vom Modellflieger selbst vorzunehmen.<br />
1.1 Montage des Landegestells
1.2 Montage des Heckrotors<br />
1.3 Anbringen der Heckstreben<br />
10<br />
<strong>Micro</strong> <strong>Star</strong> <strong>700</strong>
1.4 Anbringen des Heckauslegers<br />
1.5 Heckausleger komplettieren<br />
11<br />
<strong>Micro</strong> <strong>Star</strong> <strong>700</strong>
1.6 Justieren der Gestänge am Rotorkopf<br />
12<br />
<strong>Micro</strong> <strong>Star</strong> <strong>700</strong>
Montage von Rotorkopf und Getriebe<br />
13<br />
<strong>Micro</strong> <strong>Star</strong> <strong>700</strong><br />
Darauf achten, dass der Zahnriemen korrekt ausgerichtet läuft. Die Riemenspannung wird so<br />
eingestellt, dass, wenn man zwischen vorderer Riemenscheibe und Führungsrollen seitlich mit<br />
mässigem Kraftaufwand gegen den Riemen drückt, dieser nicht über die Mittellinie des Chassis<br />
hinaus bewegt werden kann.
Einbau der Fernsteuerungskomponenten<br />
Die Anordnung der Fernsteuerungskomponenten geht aus der Abbildung hervor:<br />
Die Servos werden mit passenden Schrauben im Chassis befestigt wie abgebildet.<br />
Wichtig:<br />
Vor dem Aufsetzen der Servohebel müssen die Servos in Neutralposition stehen!<br />
14<br />
<strong>Micro</strong> <strong>Star</strong> <strong>700</strong><br />
Servos gemäss Anleitung der Fernsteuerung an den Empfänger anschliessen, Empfänger mit<br />
Strom versorgen, Sender und Empfänger einschalten und alle Steuerknüppel und Trimmungen<br />
in Mittelstellung bringen.<br />
Taumelscheibenmixer im Sender aktivieren. Einstellung:<br />
Symmetrische Dreipunktanlenkung, 2 Rollservos, 1 Nickservo vorn.<br />
Servohebel jetzt so aufstecken und befestigen, dass sie wie in den nachfolgenden Abbildungen<br />
gezeigt stehen.
15<br />
<strong>Micro</strong> <strong>Star</strong> <strong>700</strong><br />
Die Anlenkgestänge werden gemäss Abbildungen in die Steuerhebel der Servos eingehängt.
16<br />
<strong>Micro</strong> <strong>Star</strong> <strong>700</strong><br />
Das Heckrotorservo ist so zu verschieben, dass bei Neutralposition des Servos der Heckrotor-<br />
Steuerhebel genau rechtwinklig zum Heckausleger steht.<br />
Der Motorcontroller wird gemäss der nachfolgenden bzw ihm beiliegenden Anleitung mit dem<br />
Motor verbunden; dabei sind die Kabel möglichst kurz zu halten.<br />
Die Verbindung zum Antriebsakku, der auch die Empfangsanlage über das BEC-System im<br />
Motorcontroller versorgt, erfolgt über eine Steckverbindung, die so anzuordnen ist, dass sie gut<br />
zugänglich ist, weil sie den EIN- und AUS-Schalter für die Empfangsanlage ersetzt und als<br />
Ladebuchse für den Akku dient.<br />
Der Antriebsakku wird vorn/unten im Chassis befestigt; dabei ist er so zu verschieben, dass sich<br />
mit aufgesetzter Kabinenhaube die korrekte Schwerpunktlage (direkt unter der Hauptrotorwelle)<br />
ergibt. Abschliessend alle Kabel so zusammenfassen, dass die Kabinenhaube aufgesetzt<br />
werden kann.
17<br />
<strong>Micro</strong> <strong>Star</strong> <strong>700</strong><br />
Der Brushless Motor Controller<br />
ist optimal abgestimmt auf die Verwendung mit dem Aussenläufermotor, der mit dem Modell<br />
<strong>Micro</strong><strong>Star</strong> <strong>700</strong> geliefert wird.<br />
Eigenschaften:<br />
• Niedriger Ausgangswiderstand, hohe Strombelastbarkeit<br />
• Schutzeinrichtungen: Unterspannungsabschaltung, Übertemperaturschutz, Abschaltung bei<br />
Verlust des Eingangssignals.<br />
• 3 Anlauf-Modi: normal / sanft / super-sanft<br />
• Einstellbarer Steuerweg für die Kompatibilität mit allen aktuellen Sendern<br />
• Kontinuierliche, lineare und präzise Steuerkennlinie<br />
• Separate Spannungsregelung für den <strong>Micro</strong>prozessor sorgt für stabilen Betrieb<br />
• Unterstützte Motordrehzahlen:<br />
Max. 210.000 Upm (2-pol.), 70.000 Upm (6-pol.), 35.000 Upm (12-pol)<br />
Technische Daten:<br />
Dauerstrom: 30A<br />
Spitzenstrom (
Inbetriebnahme:<br />
18<br />
<strong>Micro</strong> <strong>Star</strong> <strong>700</strong><br />
1. Motor-Steuerknüppel an den unteren Anschlag bringen (Motor-AUS-Position), dann den<br />
Sender einschalten.<br />
2. Antriebsakku mit dem Motor-Controller verbinden. Der Controller führt einen Selbsttest<br />
durch. Ein spezieller Signalton (♪123) wird ausgegeben, was bedeutet, dass die Spannung<br />
des Akkus im normalen Bereich liegt, gefolgt von einer Anzahl Signaltöne entsprechend der<br />
Anzahl der angeschlossenen Lithiumzellen. Zu Abschluss wird ein langer Signalton<br />
ausgegeben als Bestätigung, dass der Selbsttest erfolgreich war und das Modell in Betrieb<br />
genommen werden kann.<br />
- Wenn der Controller überhaupt nicht reagiert, Anschlüsse überprüfen.<br />
- Wenn ein Signalton (♪56712) ausgegeben wird nach zwei Signaltönen bedeutet das, dass<br />
sich der Motorcontroller im Programmiermodus befindet, weil die Motorsteuerung des<br />
Senders auf „Maximum“ steht.<br />
- Schnell aufeinanderfolgende Signaltöne bedeuten eine Akkuspannung ausserhalb des<br />
zulässigen Bereiches (zu hoch oder zu tief).<br />
Wichtig: Weil unterschiedliche Sender unterschiedliche Steuerwege aufweisen wird dringend<br />
geraten, die nachfolgend beschriebene Funktion zur Kalibrierung des Steuerweges auszuführen.<br />
Kalibrieren des Steuerweges der Motorsteuerung<br />
1. Sender einschalten und Motorsteuerung auf „Vollgas“ stellen.<br />
2. Den Motorcontroller mit dem Antriebsakku verbinden und 2s warten; ein Doppelton (♪♪) sollte<br />
ausgegeben werden als Meldung, dass der „Vollgas“-Punkt korrekt erkannt wurde.<br />
3. Die Motorsteuerung in „Motor-Aus“-Position bringen. Eine Anzahl Signaltöne entsprechend<br />
der Anzahl der angeschlossenen Lithiumzellen werden ausgegeben.<br />
4. Zum Abschluss wird ein langer Signalton ausgegeben als Bestätigung, dass der unterste<br />
Punkt des Motorsteuerweges korrekt gespeichert wurde.<br />
Akustische Alarmmeldungen<br />
1. Eingangsspannung ausserhalb des zulässigen Bereiches:<br />
Es werden Doppeltöne ausgegeben, die im Abstand von 1s auf einander folgen<br />
2. Motor-Steuersignal ausserhalb des normalen Bereiches.<br />
Wenn der Controller kein normales Steuersignal am Eingang erkennt, werden Einzeltöne in<br />
Abstand von ca. 2s ausgegeben.<br />
3. Motor-Steuerknüppel steht beim Einschalten nicht auf „Motor aus“ .<br />
Wenn der Steuerknüppel beim Einschalten der Empfangsanlage nicht in „Motor Aus“-<br />
Position steht, werden schnell auf einander folgende Einzeltöne im Abstand von 0,25s<br />
ausgegeben.<br />
Schutzfunktionen<br />
1. Anlaufschutz: Wenn der Motor nicht innerhalb von 2s nach Bewegen des Motor-<br />
Steuerknüppels angelaufen ist (z.B. wenn er blockiert ist), trennt der Controller die<br />
Leistungszufuhr vollständig. Zum Reaktivieren muss der Steuerknüppel kurz vollständig in<br />
„Motor Aus“-Position gebracht werden.<br />
2. Übertemperaturschutz: Bei einer Temperatur von mehr als 110°C reduziert der Controller<br />
automatisch die Ausgangsleistung.<br />
3. Schutzfunktion bei Verlust des Steuersignals: Der Controller reduziert zunächst die<br />
Ausgangsleistung, wenn das Steuersignal vom Empfänger 1s lang ausfällt. Bleibt das Signal<br />
weitere 2s aus, wird der Motor vollständig abgeschaltet.
Programmieren des Controllers<br />
19<br />
<strong>Micro</strong> <strong>Star</strong> <strong>700</strong><br />
1. Programmiermodus aufrufen:<br />
Sender einschalten und Motorsteuerung auf „Vollgas“ stellen. Den Motorcontroller mit dem<br />
Antriebsakku verbinden und 2s warten; ein Doppelton (♪♪) sollte ausgegeben werden.<br />
Weitere 5s abwarten, und eine spezielle Tonfolge (♪56712) zeigt an, dass sich der Controller<br />
jetzt im Programmiermodus befindet.<br />
2. Zu programmierenden Parameter auswählen:<br />
Für jeden Parameter werden Tonfolgen in einer Schleife ausgegeben. Die Auswahl erfolgt,<br />
indem die Motorsteuerung am Sender unmittelbar nach Ertönen der zugehörigen Tonfolge<br />
(innerhalb 3s) an den unteren Anschlag (Motor-Aus-Position) gebracht wird.<br />
Tonfolge Parameter<br />
(♪) (1 x kurz) Bremse<br />
(♪♪) (2 x kurz) Akkutyp<br />
(♪♪♪) (3 x kurz) Abschaltmodus<br />
(♪♪♪♪) (4 x kurz) Abschaltschwelle<br />
(♪---) (1 x lang) Anlaufmodus<br />
(♪---♪) (1 x lang, 1 x kurz) Motortiming<br />
(♪---♪♪) (1 x lang, 2 x kurz) Alle Parameter auf Defaultwerte stellen)<br />
(♪---♪---) (2 x lang) Programmiemodus abbrechen<br />
3. Parameter einstellen:<br />
Für jeden möglichen Einstellwert des gewählten Parameters wird ein Tonsignal in einer<br />
Schleife ausgegeben ♪ – (3s Pause) – ♪♪ – (3s Pause) – ♪♪♪ . Die Einstellung erfolgt<br />
dadurch, dass man nach Ertönen des zum gewünschten Einstellwert gehörenden Signals die<br />
Motorsteuerung auf „Vollgas“ stellt, worauf hin ein Bestätigungston (♪1515) ausgegeben wird.<br />
♪ ♪♪ ♪♪♪<br />
Bremse EIN AUS ./.<br />
Akkutyp LiIon/LiPo NiMH/NiCd ./.<br />
Abschaltmodus weich Hart ./.<br />
Abschaltschwelle niedrig mittel hoch<br />
Anlaufmodus normal weich super-weich<br />
Motortiming niedrig mittel hoch<br />
4. Programmiermodus beenden<br />
Entweder nach dem Bestätigungston für die Parametereinstellung die Motorsteuerung am<br />
Sender innerhalb von 2s in „Motor-Aus“-Position bringen, oder innerhalb von 3s nach dem<br />
Ertönen von zwei langen Signaltönen in der Parameterauswahl.
Gyrosystem VOX 300<br />
Bitte unbedingt eine ggf. dem Gyrosystem beiliegende Anleitung beachten.<br />
20<br />
<strong>Micro</strong> <strong>Star</strong> <strong>700</strong><br />
Das Gyro-System VOX 300 wird bei Hubschraubermodellen vor das Heckrotorservo geschaltet<br />
und stabilisiert die Bewegungen um die Hauptrotorwelle (Gierachse) gegen ungewollte Drehungen<br />
aufgrund von äusseren Einflüssen, Drehmomentschwankungen des Hauptrotorantriebes<br />
oder Wind und sorgt dafür, dass die Drehgeschwindigkeit um die Gierachse proportional zum<br />
Steuerknüppelausschlag ist.<br />
Montage:<br />
Das Gyrosystem wird aufrecht stehend, wie abgebildet, mit doppelseitig selbstklebendem<br />
Dämpfungsschaumstoff von min. 3mm Stärke auf einer festen Unterlage montiert, normalerweise<br />
auf der hinteren Plattform auf dem Heckauslegerflansch.<br />
Anschluss:<br />
Das Heckrotorservo wird an der dreipoligen Stiftleiste des Gyros angeschlossen, und zwar so,<br />
dass die Impulsleitung (orange Litze) oben liegt, der (-)-Pol (braune Litze) unten.<br />
Das vieradrige Kabel, das vom Gyrosystem zum Empfänger führt, endet in einem dreipoligen<br />
und einem einpoligen Stecker (gelbe Ader). Der dreipolige Stecker wird am Empfänger in den<br />
Heckrotorkanal gesteckt, der einpolige Stecker kann in einen Zusatzkanal (normalerweise Kanal<br />
7) gesteckt werden (Impulsleitung). Mit diesem Zusatzkanal kann dann einerseits die Gyrowirkung<br />
eingestellt, andererseits zwischen den Betriebsarten „normal“ und „Heading Lock“ umgeschaltet<br />
werden.<br />
Wird der einpolige Stecker nicht in einen Zusatzkanal gesteckt, bleibt das Gyrosystem ständig in<br />
der Betriebsart „Heading Lock“, und die Gyrowirkung kann am Gyro mit dem Einstellpoti verändert<br />
werden.<br />
Die Umschaltung zwischen „Normal-“ und „Heading-Lock-“Betrieb erfolgt über den selben Kanal,<br />
über den die Gyrowirkung eingestellt wird, und zwar ungefähr in der Mitte des Verstellweges.<br />
Steuert man diesen Kanal in die eine Richtung, so erhöht man die Wirkung im „Normal“-Betrieb,<br />
steuert man von der Mitte aus in die andere Richtung, so erhöht man die Wirkung im „Heading-<br />
Lock“-Betrieb.
Inbetriebnahme<br />
21<br />
<strong>Micro</strong> <strong>Star</strong> <strong>700</strong><br />
1. Wenn alle Verbindungen zwischen Gyro und Empfangsanlage hergestellt sind, wird am<br />
Sender der Servoweg für den Heckrotor beidseitig auf 100% eingestellt.<br />
2. Servoweg-Mittenverstellung auf Null setzen.<br />
3. Trimmhebel auf Mitte setzen, bei mc-24 Trimmspeicher für Heckrotor löschen.<br />
4. Mischer für statischen Drehmomentausgleich zunächst ausschalten, um sicherzustellen,<br />
dass das Servo mittig steht. Ein eventuell vorhandener Mischer für dynamischen Drehmomentausgleich<br />
bleibt generell ausgeschaltet.<br />
5. Mischer für die Ausblendung des Gyro-Systems in Abhängigkeit von der Heckrotorsteuerung<br />
(„Gyro-Control“, „Kreiselausblendung“) unbedingt deaktivieren!<br />
6. Gyrosystem in die Betriebsart "normal" bringen über den Zusatzkanal (Gyrowirkung).<br />
7. Zuerst den Sender, dann die Empfangsanlage einschalten und das Modell so lange (ca. drei<br />
Sekunden) nicht bewegen, bis die LED am Gyro aufleuchtet, damit sich das Gyrosystem<br />
kalibrieren kann.<br />
8. Am Sender den Steuerknüppel für die Heckrotorsteuerung betätigen und auf Seitenrichtigkeit<br />
kontrollieren.<br />
9. Der Heckrotor-Servohebel muss genau rechtwinklig (90°) zum Heckrotor-Steuergestänge<br />
stehen. Gegebenenfalls Servohebel abschrauben, in der Feinverzahnung gedreht aufstecken<br />
und wieder festschrauben.<br />
10. Die Seitenrichtigkeit der Gyrowirkung wird jetzt kontrolliert, indem man den Hubschrauber<br />
etwas um seine Hochachse dreht und dabei die Reaktion des Heckservos, hervorgerufen<br />
durch den Gyro, beobachtet. Der Heckrotorausschlag muss eine zu der Drehung des Modells<br />
entgegengesetzte Drehung bewirken! Ist dies nicht der Fall, muss der Reverse-Schalter<br />
"Reverse" am Gyrosystem in die andere Stellung gebracht werden.<br />
11. Die Einstellungen "hoch" bzw. "niedrig" der Gyrowirkungseinstellung werden jetzt kontrolliert.<br />
Den entsprechenden Geber am Sender (Kanalschalter bzw. Proportionalgeber) abwechselnd<br />
auf minimale und maximale Gyrowirkung stellen. Dabei prüfen, ob sich die Gyrowirkung<br />
tatsächlich sinngemäss ändert (grösserer oder kleinerer Servoausschlag beim Hin- und<br />
Herdrehen des Modells).<br />
Beachten Sie bitte, dass es für einen ungeübten Modellhubschrauberpiloten gefährlich<br />
sein kann, im „Normalmodus“ mit vollständig (auf 0%) reduzierter Gyrowirkung zu<br />
fliegen; im „Heading-Lock-Modus“ wird das Modell bei auf 0% reduzierter Wirkung<br />
sogar unsteuerbar!<br />
12. Eine zu kräftige Heckrotor-Steuerreaktion kann durch Vergrössern des Exponentialanteils<br />
beliebig „weich“ eingestellt werden
22<br />
<strong>Micro</strong> <strong>Star</strong> <strong>700</strong><br />
2. Einstellarbeiten<br />
2.1 Einstellen der zyklischen Steuerung<br />
Die Grundeinstellung von Roll-und Nicksteuerung sollte bereits korrekt sein, wenn die Gestänge<br />
gemäß Anleitung montiert wurden. Da die Einhängepunkte der Gestänge an den Servohebeln<br />
vorgegeben sind, werden die Einstellungen der Servowege später über die elektronischen Einstelloptionen<br />
am Sender vorgenommen.<br />
2.2 Hauptrotor-Pitcheinstellung<br />
Die Pitcheinstellwerte werden mit der Einstellwinkellehre (nicht im Bausatz enthalten)<br />
gemessen. Die folgenden Tabelle enthält Anhaltswerte; die tatsächlich erforderlichen Werte<br />
hängen von den verwendeten Rotorblättern und vom Modell ab.<br />
Minimum Schwebeflug Maximum<br />
Schwebeflug und Training -2° 5° 10°<br />
Kunstflug -10° 0° 10°<br />
Autorotation -3° 6° 11°<br />
Die Pitcheinstellungen werden am besten im Sender vorgenommen wie folgt:<br />
1. Schwebeflug-Pitch messen und korrekt einstellen<br />
2. Pitch-Maximum und -Minimum messen und über die Pitchkurveneinstellung des Senders<br />
justieren gemäß den nachfolgenden Diagrammen<br />
2.3 Einstellen Motorsteuerung<br />
Die Drehzahl sollte für den Schwebeflug bei ca. 1600 Upm liegen, für den Kunstflug zwischen<br />
2100 und 2200 Upm.<br />
Die nachfolgenden Diagramme zeigen mögliche Motor-Steuerkurven:
23<br />
<strong>Micro</strong> <strong>Star</strong> <strong>700</strong><br />
• Die Leistungskurve „normal“ eignet sich sowohl für den Schwebeflug als auch für Rundflüge.<br />
• Da bei der Leistungskurve „Kunstflug“ der Motor in keiner Stellung des Pitchsteuerknüppels<br />
zum Stillstand kommt, darf auf diese Kurve nur im Fluge umgeschaltet werden.<br />
• Die oben angegebenen Werte hängen stark ab vom verwendeten Motor; sie müssen daher<br />
durch praktische Versuche angepaßt werden.<br />
2.4 Weitere Einstellungen<br />
Wenn alle Gestängeverbindungen gemäß den vorausgegangenen Bauabschnitten hergestellt<br />
worden sind, können die nachfolgenden Einstellungen am Sender vorgenommen werden:<br />
1. Servolaufrichtungen<br />
Den Drehsinn aller Servos entsprechend den Angaben in der Anleitung einstellen. Besondere<br />
Aufmerksamkeit dabei auf den Motorcontroller richten!<br />
2. Dual-Rate<br />
Für Roll-, Nick- und Heckrotorsteuerung können umschaltbare Ausschlaggrößen eingestellt<br />
werden. Als Grundeinstellung hierfür wird die Umschaltung jeweils von 100% auf 75%<br />
empfohlen.<br />
3. Exponentialfunktion<br />
In der Grundeinstellung auf linearer Steuerkennlinie belassen.<br />
4. Servoweg-Mittenverstellung<br />
Keine Einstellungen zu diesem Zeitpunkt vornehmen. Kleinere Korrekturen können damit<br />
später durchgeführt werden.<br />
5. Servoweg-Einstellung<br />
Hiermit können die maximalen Servowege eingestellt werden, wobei darauf zu achten ist,<br />
daß die Einstellungen nach beiden Richtungen auf die gleichen Werte eingestellt werden;<br />
andernfalls ergibt sich eine unerwünschte Differenzierung der Ausschläge:<br />
Die Pitchsteuerung sollte einen Blattteinstellwinkelbereich von -11° bis +11° ansteuern<br />
können bei symmetrischen Ausschlägen; ggf. müssen Servo-Steuerhebel gelöst und um<br />
einen Zahn versetzt wieder festgeschraubt werden. Bei der Grundeinstellung ergibt sich für<br />
die Mittelstellung des Pitchsteuerknüppels (Schwebeflugpunkt) ein Pitchwert von ca. 5°,<br />
wobei der Motorsteller halb geöffnet ist.<br />
Hinweis:<br />
Pitch- und Leistungkurven werden später entsprechend den praktischen Anforderungen eingestellt.<br />
Wenn jedoch schon in der Grundeinstellung differenzierte Ausschläge, wie in<br />
Abb.“B“ oben gezeigt, eingestellt werden, erschwert das diese späteren Abstimmungen!<br />
6. Pitch- und Leistungskurve<br />
Diese Einstellungen sind von elementarer Wichtigkeit für die Flugleistung eines Hubschraubers.<br />
Ziel dieser Abstimmung ist es, daß sowohl im Steig- als auch im Sinkflug die Rotordrehzahl<br />
konstant bleibt, unabhängig von der Belastung. Das stellt dann eine stabile Basis<br />
dar für die weiteren Abstimmungen, z.B. des Drehmomentausgleichs usw. (siehe auch<br />
„Pitch- und Gaskurven“).
24<br />
<strong>Micro</strong> <strong>Star</strong> <strong>700</strong><br />
7. Statischer Drehmomentausgleich (nicht bei Heading-Lock-Betrieb des Gyrosystems)<br />
Zum Ausgleich der Drehmomentänderungen bei Betätigung der Pitchsteuerung wird das<br />
Heckrotorservo über einen Mischer im Sender mit der Pitchfunktion gekoppelt. Der Mischanteil<br />
kann bei den meisten Sendern für Steig- und Sinkflug separat eingestellt werden.<br />
Empfohlenen Werte für die Grundeinstellung: Steigflug: 35%, Sinkflug: 15%<br />
8. Gyroeinstellung<br />
Gyrosysteme dämpfen unerwünschte Drehungen um die senkrechte (Hoch-) Achse, indem<br />
sie diese selbständig erkennen und entsprechend in die Heckrotorsteuerung eingreifen. Dazu<br />
wird die Gyroelektronik zwischen Heckrotorservo und Empfänger geschaltet.<br />
Das beim <strong>Micro</strong> <strong>Star</strong> <strong>700</strong> empfohlene Gyrosystem besitzt für den Fall, dass die Wirkung nicht<br />
über einen Zusatzkanal am Sender eingestellt wird, einen Einstellregler für die Wirkungsstärke;<br />
anfangs wird dieser Einstellregler zunächst auf 50% Wirkung eingestellt.<br />
Darauf achten, dass die Wirkungsrichtung des Gyros korrekt ist, er also auf eine Bewegung<br />
des Heckauslegers mit einem Heckrotor-Steuerausschlag in die entgegengesetzte Richtung<br />
reagiert. Ist das nicht der Fall, so wird jede Drehung des Modells durch den Gyro noch verstärkt!<br />
In diesem Fall muss die Gyrowirkung invertiert werden, indem das Gyrosystem auf<br />
dem Kopf stehend montiert wird..<br />
Bei allen Gyrosystemen kann die optimale Einstellung erst im Flug ermittelt werden, da hierauf<br />
unterschiedliche Faktoren einwirken.<br />
Ziel der Einstellung ist es, eine möglichst hohe Stabilisierung durch den Gyro zu erreichen,<br />
ohne dass es durch eine zu hohe Einstellung der Gyrowirkung zu einem Aufschwingen (Pendelbewegungen<br />
des Heckauslegers) des Modells kommt.<br />
3. Endkontrolle vor dem Erstflug<br />
Wenn der Zusammenbau des Modells abgeschlossen ist, sollten die folgenden Überprüfungen<br />
vor dem Erstflug durchgeführt werden:<br />
• Gehen Sie dieses Handbuch noch einmal durch und stellen Sie sicher, daß alle<br />
Aufbauschritte korrekt durchgeführt wurden.<br />
• Stellen Sie sicher, daß alle Schrauben in den Kugelgelenken und den Lagerböcken nach<br />
Einstellen des Getriebe-Zahnflankenspiels richtig festgezogen sind.<br />
• Können sich alle Servos frei bewegen, ohne mechanisch anzulaufen? Stimmen alle<br />
Drehrichtungen? Sind die Befestigungsschrauben der Servo-Steuerhebel festgezogen?<br />
• Überprüfen Sie die Wirkungsrichtung des Kreiselsystems<br />
• Stellen Sie sicher, daß Sender- und Flugakkus voll geladen sind.<br />
Erst wenn alles, wie oben beschrieben, überprüft wurde, kann der erste <strong>Star</strong>tversuch<br />
durchgeführt werden.
25<br />
<strong>Micro</strong> <strong>Star</strong> <strong>700</strong><br />
4. Einstellungen beim Erstflug<br />
Spurlaufeinstellung<br />
„Spurlaufeinstellung“ beschreibt einen Einstellvorgang, bei dem die Einstellwinkel der Hauptrotorblätter<br />
auf genau die gleichen Werte gebracht werden, so daß die Blätter im Betrieb exakt in<br />
der selben Ebene laufen.<br />
Ein nicht korrekter Spurlauf, bei dem die Blätter in unterschiedlichen Ebenen laufen, hat<br />
starke Vibrationen des Modells im Fluge zur Folge.<br />
Bei der Spurlaufeinstellung mindestens 5 Meter Sicherheitsabstand zum Modell halten!<br />
Bei der Spurlaufeinstellung muß erkannt werden, welches Blatt höher und welches tiefer läuft.<br />
Dazu werden die Blätter mit farbigem Klebeband markiert:<br />
Hierbei gibt es zwei Möglichkeiten. Abb.“A“ zeigt die Verwendung von unterschiedlichen Farben<br />
an den beiden Blättern; in Abb.“B“ wird die gleiche Farbe verwendet, doch wird das Klebeband<br />
in unterschiedlichem Abstand vom Blattende angebracht.<br />
Vorgehensweise bei der Spurlaufeinstellung:<br />
1. Wenn der Hubschrauber kurz vor dem Abheben ist, genau seitlich in die Rotorebene sehen.<br />
2. Wenn die Rotorblätter in der selben Ebene laufen, ist keine Einstellung erforderlich; wenn<br />
jedoch ein Blatt höher als das andere läuft, muß die Einstellung korrigiert werden.<br />
3. Die Einstellung erfolgt durch Verdrehen der Kugelgelenke der Gestänge zwischen<br />
Paddelstange und Blatthaltern: Gelenke herausdrehen, um das Blatt tiefer laufen zu lassen,<br />
hineindrehen, um es höher einzustellen.
26<br />
<strong>Micro</strong> <strong>Star</strong> <strong>700</strong><br />
5. Wartung<br />
Hubschrauber, ob groß oder klein, stellen hohe Ansprüche an die Wartung. Auftretende Vibrationen<br />
schnellstmöglich beseitigen oder verringern! Rotierende Teile, wichtige Schraubverbindungen,<br />
Gestänge, Anlenkungspunkte sind vor jedem Flug zu überprüfen. Falls Reparaturen<br />
erforderlich werden, sind nur Original-Ersatzteile zu verwenden. Beschädigte Rotorblätter keinesfalls<br />
reparieren, sondern durch neue ersetzen.<br />
6. Allgemeine Vorsichtsmaßnahmen<br />
• Eine Haftpflichtversicherung abschließen.<br />
• Nach Möglichkeit Mitglied in einem Modellflugverein und -verband werden.<br />
Auf dem Flugfeld:<br />
• Mit Modellen keine Zuschauer überfliegen.<br />
• Modelle nicht in der Nähe von Gebäuden oder Fahrzeugen betreiben.<br />
• Mit Modellen keine Landarbeiter im Gelände überfliegen.<br />
• Modelle nicht in der Nähe von Eisenbahnlinien, Hauptverkehrsstraßen oder Freileitungen<br />
betreiben.<br />
Vor- und während der Flüge:<br />
• Vor Einschalten des Senders sicherstellen, dass nicht bereits ein anderer Modellflieger die<br />
selbe Frequenz benutzt.<br />
• Reichweitentest mit der Fernsteuerung durchführen.<br />
• Prüfen, ob Sender- und Flugakku voll geladen sind.<br />
• Modell nicht ausser Sichtweite geraten lassen.<br />
Kontrollen nach dem Flugbetrieb<br />
• Das Modell reinigen. Dabei auf festen Sitz aller Schrauben achten, ggf. nachziehen.<br />
• Verschlissene und beschädigte Teile rechtzeitig ersetzen.<br />
• Sicherstellen, dass die Elektronikkomponenten wie Akku, Empfänger, Kreisel usw. noch<br />
sicher befestigt sind (Befestigungsgummiringe altern und reißen dann!).<br />
• Empfangsantenne überprüfen. Kabelbrüche im Inneren der Litze sind oft von aussen nicht<br />
direkt sichtbar!<br />
• Nach Bodenberührung des laufenden Hauptrotors Rotorblätter austauschen, da Brüche im<br />
Inneren oft von aussen nicht erkennbar sind.<br />
• Modell nicht am Heckausleger tragen: Beim festen Zugreifen wird leicht das Heckrotor-<br />
Steuergestänge verbogen.<br />
7. Einige Grundbegriffe des Hubschrauberfliegens<br />
Die Bezeichnung Drehflügler sagt bereits, dass die auftriebserzeugenden Tragflächen sich beim<br />
Hubschrauber drehen; daraus ergibt sich unter anderem, dass beim Hubschrauber keine<br />
Mindestgeschwindigkeit erforderlich ist, er also in der Luft stehen kann.<br />
Zyklische Rotorblattverstellung<br />
Die zyklische Blattverstellung dient der Richtungssteuerung um die Quer- und Längsachse. Ein<br />
Steuerkommando bewirkt an jedem Umlaufkreispunkt eine andere Blatteinstellung. Die Neigung<br />
der Taumelscheibe ergibt bei dem vorliegenden System die Flugrichtung.<br />
Kollektive Rotorblattverstellung (Pitch)<br />
Sie dient der Steuerung in Richtung der Hochachse, also zum Heben und Senken. Beide<br />
Rotorblätter werden gleichzeitig um den gleichen Betrag in ihrer Anstellung verändert.
27<br />
<strong>Micro</strong> <strong>Star</strong> <strong>700</strong><br />
Drehmomentausgleich<br />
Der drehende Rotor erzeugt ein Moment, das versucht, den ganzen Hubschrauber in<br />
entgegengesetzter Richtung zu drehen. Dies muss genau ausgeglichen werden, was durch<br />
Blattverstellung des Heckrotors geschieht. Mit dem Heckrotor wird gleichzeitig die Richtung um<br />
die Hochachse gesteuert.<br />
Schwebeflug<br />
Dies ist der Zustand, in dem der Helikopter, ohne sich nach einer Richtung zu bewegen, an<br />
einer Stelle verharrend fliegt.<br />
Bodeneffekt<br />
Dieser tritt vom Boden aus abnehmend bis in eine Höhe auf, die etwa 1 - 1 1/2<br />
Rotordurchmesser entspricht. Er kommt dadurch zustande, dass der sich drehende,<br />
normalerweise frei abfließende Rotorluftstrahl auf ein Hindernis (dem Boden) auftrifft und ein<br />
"Luftpolster" bildet. Im Bodeneffekt kann ein Hubschrauber mehr Gewicht hochheben, dagegen<br />
nimmt die Lagestabilität ab, so dass er um so mehr nach irgendeiner Seite "ausbrechen"<br />
möchte.<br />
Steigflug<br />
Die überschüssige Kraft, die nicht zum Schwebeflug benötigt wird, kann zum Steigflug<br />
ausgenutzt werden. Dabei benötigt der senkrechte Steigflug mehr Energie, als der schräge mit<br />
Vorwärtsbewegung. Aus diesem Grund ist bei gleicher Motorleistung beim schrägen Steigflug<br />
schnelleres Steigen möglich.<br />
Horizontalflug<br />
Beim Horizontalflug mit etwa halber Höchstgeschwindigkeit benötigt ein Hubschrauber seine<br />
geringste Antriebsleistung. Wurde er beim Schwebeflug exakt ausgetrimmt, dann ergibt sich<br />
beim Vorwärtsflug eine Kurve. Dies ergibt sich aus folgender Tatsache: Auf der nach vorn<br />
drehenden Rotorseite ergibt sich durch die zusätzliche Windanströmgeschwindigkeit ein höherer<br />
Auftrieb, als er auf der nach hinten drehenden Rotorseite, wo diese Anströmgeschwindigkeit<br />
abgezogen werden muss. Somit ergibt sich eine Seitenneigung des Hubschraubers.<br />
Sinkflug<br />
Ist die Rotordrehzahl des Hubschraubers relativ gering und erfolgt der senkrechte Abstieg eines<br />
Hubschraubers zu schnell, dann strömt nicht mehr genügend Luft durch den Rotor, es bildet<br />
sich das sogenannte "Wirbelringstadium" und die Strömung am Blattprofil reißt ab. Dieser<br />
unkontrollierte Zustand kann zum Absturz führen. Ein schnelles Sinken ist deshalb nur mit<br />
entsprechender Vorwärtsbewegung oder schnell drehendem Rotor möglich. Aus demselben<br />
Grund ist beim Wenden des Hubschraubers vom Flug gegen den Wind zum Flug mit dem Wind<br />
Vorsicht geboten.<br />
Schlagbewegung der Rotorblätter<br />
Damit sich die Rotorebene beim Vorwärtsflug nicht so stark neigt, baut man in den Rotorkopf<br />
das sogenannte Schlaggelenk ein. Das schneller angeströmte Blatt kann nach oben, das<br />
langsamer angeströmte geringfügig nach unten ausweichen, um so den Auftriebsunterschied zu<br />
mindern. Bei Modellen hat sich das für beide Blätter gemeinsame Gelenk bewährt.<br />
Autorotation<br />
Unter Autorotation versteht man den motorlosen Flugzustand, bei dem der Hauptrotor mit<br />
negativer Blatteinstellung durch die beim Sinkflug anströmende Luft auf hoher Drehzahl<br />
gehalten wird. Die so gespeicherte Drehenergie läßt sich beim Abfangen des Hubschraubers<br />
durch Blattverstellung (positiv) in Auftrieb umsetzen. Dies ist natürlich nur einmal möglich.<br />
Dadurch ist sowohl ein Original wie auch ein Modellhubschrauber fähig, beim Motorausfall<br />
sicher zu landen.<br />
Diese Autorotationslandung stellt jedoch an den Piloten sehr hohe Anforderungen in Bezug auf<br />
Schätz- und Reaktionsvermögen; er kann nur einmal den Sinkflug abfangen, und dies darf<br />
weder zu früh, noch zu spät erfolgen. Deshalb ist dazu viel Übung erforderlich.
Best.-Nr. <strong>4497</strong><br />
<strong>Micro</strong> <strong>Star</strong><br />
<strong>700</strong><br />
Ersatzteil-<br />
Übersicht<br />
Stand 3/2008<br />
GRAUPNER GmbH & Co. KG D-73230 KIRCHHEIM/TECK GERMANY<br />
Änderungen, Irrtümer und Druckfehler vorbehalten ID# 59795 03/08
Ersatzteile<br />
2<br />
<strong>Micro</strong> <strong>Star</strong> <strong>700</strong>
3<br />
<strong>Micro</strong> <strong>Star</strong> <strong>700</strong><br />
Graupner<br />
Bezeichnung Abmessung<br />
Best.-Nr.<br />
[mm]<br />
<strong>4497</strong>.01 Hauptrotorblätter, CFK 1<br />
02 Heckrotorblätter 1<br />
03 Hauptrotorwelle 1<br />
04 Heckrotorwelle 1<br />
05 Blattlagerwelle 1<br />
06 Heckausleger 1<br />
07 Heckrotor-Steuergestänge 1<br />
08 Paddelstange 1<br />
09 Hillerpaddel 1<br />
10 Kufenlandegestell 1<br />
11 Kabine mit Verglasung 1<br />
12 Zahnriemen 1<br />
13 Heckstreben 1<br />
14 Hauptzahnrad 1<br />
15 Motorritzel 1<br />
16 Riemenscheibe vorn 1<br />
17 Riemenscheibe hinten 1<br />
18 Platinensatz Hauptchassis 2<br />
19 Satz Distanzbolzen 1<br />
20 Kabinenhalter 2<br />
21 Heckrotor-Servohalter 1<br />
22 Domlager 1<br />
23 Untere Lagerplatte 2<br />
24 Heckauslegerhalter 1<br />
Stück
4<br />
<strong>Micro</strong> <strong>Star</strong> <strong>700</strong>
5<br />
<strong>Micro</strong> <strong>Star</strong> <strong>700</strong><br />
Graupner<br />
Bezeichnung Abmessung<br />
Best.-Nr.<br />
[mm]<br />
<strong>4497</strong>.25 Satz Auflagescheiben, Alu 1<br />
26 Schraubensatz 1<br />
27 Motorträger 1<br />
28 Umlenkhebelsatz 1<br />
29 Kufenhalter, Alu 2<br />
30 Taumelscheibe 1<br />
31 Rotorkopf-Zentralstück 1<br />
32 Wippe mit Mischhebeln 1<br />
33 Steuerhebel 1<br />
34 Hauptrotor-Blatthalter 1<br />
35 Mitnehmer 1<br />
36 Bremsteller 1<br />
37 Pitchkompensator 1<br />
38 Gelenkarme 1<br />
39 Satz Gelenkkugeln und Schrauben 1<br />
40 Satz Steuergestänge 1<br />
41 Satz Kugelgelenke o. Kugel 1<br />
42 Heckrotorgehäuse 1<br />
43 Heckrotor-Steuerbrücke 1<br />
44 Heckrotorkopf 1<br />
45 Heckrotor-Umlenkhebel 1<br />
46 Satz Antislipmuffen 1<br />
<strong>4497</strong>.70 Antriebsmotor, brushless 1<br />
<strong>4497</strong>.71 Brushless Motor Controller 30A/BEC 1<br />
5962 VOX 300 Heading Lock Gyro 1<br />
Stück
Order No. <strong>4497</strong><br />
<strong>Micro</strong> <strong>Star</strong><br />
<strong>700</strong><br />
Electric helicopter<br />
Order No. <strong>4497</strong> Part-assembled model incl. motor,<br />
speed controller, gyro and flight battery<br />
Warning!<br />
The contents of this kit can be assembled to produce a working helicopter, but the model<br />
is by no means a harmless plaything. If assembled incorrectly or handled incompetently<br />
or carelessly it can cause serious injury to persons and damage to property.<br />
You alone are responsible for completing the model correctly and operating it safely.<br />
Please be sure to read any information sheets containing safety notes included in the kit.<br />
They are an essential part of these instructions.<br />
GRAUPNER GmbH & Co. KG D-73230 KIRCHHEIM/TECK GERMANY<br />
Modifications, errors and printing errors reserved. ID# 59795 03/08
2<br />
<strong>Micro</strong> <strong>Star</strong> <strong>700</strong><br />
Foreword<br />
The “<strong>Micro</strong> <strong>Star</strong> <strong>700</strong>” is a fully aerobatic electric-powered helicopter with a high excess of<br />
performance. It is suitable for beginners, more advanced pilots and experts alike, and offers the<br />
following outstanding features:<br />
• Largely factory-assembled<br />
• Brushless electric motor<br />
• Set includes motor, speed controller, gyro and flight battery<br />
• Right-hand rotation main rotor<br />
• Toothed belt tail rotor drive system<br />
• Auto-rotation freewheel<br />
• Three-cell LiPo flight battery<br />
The potential flight time per battery charge naturally varies according to the model’s set-up and<br />
the pilot’s flying style; our experience shows that a duration of around 11 minutes is possible<br />
under normal conditions if the recommended LiPo battery is used.<br />
The control functions roll, pitch (elevator) and collective pitch are mixed electronically, which<br />
means that the model can only be flown with a suitably featured radio control system which has<br />
special helicopter options.<br />
The model’s strong, lightweight chassis consists of a combination of glass fibre reinforced<br />
plastic sheet parts and machined aluminium components. The motor drives the main rotor by<br />
means of a single-stage gearbox with an integral auto-rotation freewheel.<br />
Specification<br />
Length excl. rotor approx. 650 mm<br />
Height approx. 245 mm<br />
Width excl. rotor approx. 120 mm<br />
Main rotor Ø <strong>700</strong> mm<br />
Tail rotor Ø 140 mm<br />
All-up weight min. approx. 710 g
Warning notes<br />
3<br />
<strong>Micro</strong> <strong>Star</strong> <strong>700</strong><br />
• The contents of this kit can be assembled to produce a working helicopter, but the<br />
model is by no means a harmless plaything. If assembled incorrectly or handled<br />
incompetently or carelessly it can cause serious injury to persons and damage to<br />
property.<br />
• When the model helicopter’s motor is running, the two rotors are spinning at high<br />
speed and contain an enormous quantity of rotational energy. Anything and<br />
everything that gets into the rotational plane of the rotors is either destroyed or<br />
seriously damaged - and that includes parts of your body. Please take extreme care<br />
at all times with this machine.<br />
• If any object impedes the rotational plane of the revolving rotors, severe damage will<br />
probably be caused to the rotor blades as well as the object. Broken parts may fly off<br />
and cause enormous imbalance; the whole helicopter then falls into sympathetic<br />
vibration, you lose control and have no way of predicting what the model will do<br />
next.<br />
• You may also lose control if a problem arises in the radio control system, perhaps as<br />
a result of outside interference, component failure or flat or faulty batteries, but in<br />
any case the result is the same: the model helicopter’s response is entirely<br />
unpredictable. Without prior warning it may move off in any direction.<br />
• Helicopters contain many parts which are naturally subject to wear, including<br />
gearbox components, motor, ball-links etc., and as a result it is absolutely essential<br />
to check and maintain the model regularly. It is standard practice with full-size<br />
aircraft to give the machine a thorough “pre-flight check” before every flight, and<br />
this is equally important with your model helicopter. Constant checking gives you<br />
the opportunity to detect and correct any faults which may develop before they are<br />
serious enough to cause a crash.<br />
• The kit may also include additional information sheets which contain safety notes<br />
and warnings. Please be sure to read them and keep to our recommendations; these<br />
sheets are an essential part of the instructions.<br />
• This helicopter is designed to be constructed and operated by adults, although<br />
young people of sixteen years or more may do so under the instruction and<br />
supervision of competent adults.<br />
• The model features sharp points and edges which are capable of causing injury.<br />
• The flying of model aircraft is subject to certain legal restrictions, and these must be<br />
observed at all times. For example, it is essential to obtain permission to use the<br />
flying site, and you may have to obtain a licence to use your radio control system<br />
(regulations vary from country to country). It is now a legal requirement to take out<br />
third party insurance to cover the risks inherent in model flying.
4<br />
<strong>Micro</strong> <strong>Star</strong> <strong>700</strong><br />
• It is important to transport your model helicopter (e.g. to the flying site) in such a<br />
way that there is no danger of damaging the machine. Particularly vulnerable areas<br />
are the rotor head linkages and the tail rotor generally.<br />
• Controlling a model helicopter successfully is not a simple skill; you will need<br />
persistence and determination to learn the art, and good hand - eye co-ordination is<br />
a basic requirement.<br />
• Before you attempt to fly the model you should study the subject of helicopters in<br />
depth, so that you have a basic understanding of how the machines work. Read<br />
everything you can on the theory of helicopters, and spend as much time as you can<br />
watching other model helicopter pilots flying. Talk to chopper pilots, ask their<br />
advice, and enrol at a specialist model flying school if you need to. Many model<br />
shops will also be prepared to help you.<br />
• Please be sure to read right through these instructions before you start work on the<br />
model. It is important that you clearly understand each individual stage of assembly<br />
and the correct sequence of events before you begin building.<br />
• Don’t make modifications to the model’s construction by using parts other than<br />
those specifically recommended, unless you are certain of the quality and suitability<br />
of these other parts for the task.<br />
• We have made every effort to point out to you the dangers inherent in operating this<br />
model helicopter. Since neither we, the manufacturer, nor the model shop that sold<br />
you the kit have any means of ensuring that you build and operate your model<br />
correctly and competently, we are obliged to disclaim any liability in connection with<br />
it.<br />
Liability exclusion / Compensation<br />
As manufacturers, we at GRAUPNER are not in a position to influence the way you build<br />
and set up the model, nor how you install, operate and maintain the radio control system<br />
components. For this reason we are obliged to deny all liability for loss, damage or costs<br />
which are incurred due to the incompetent or incorrect use and operation of our<br />
products, or which are connected with such operation in any way.<br />
Unless otherwise prescribed by binding law, the obligation of the GRAUPNER company<br />
to pay compensation, regardless of the legal argument employed, is limited to the invoice<br />
value of that quantity of GRAUPNER products which was immediately and directly<br />
involved in the event which caused the damage. This does not apply if GRAUPNER is<br />
found to be subject to unlimited liability according to binding legal regulation on account<br />
of deliberate or gross negligence.
Instructions and warnings relating to the use of LiPo batteries:<br />
5<br />
<strong>Micro</strong> <strong>Star</strong> <strong>700</strong><br />
General information<br />
Lithium-Polymer (abbreviation: LiPo) batteries require particularly careful handling. This applies to charging<br />
and discharging techniques, and also to storage and other aspects of general handling. Special measures<br />
must be observed, and these are outlined below.<br />
Mishandling these batteries may lead to explosions, fire, smoke and a risk of poisoning. In addition to these hazards<br />
ignoring our instructions and warnings will result in loss of battery performance and other problems.<br />
The capacity of a LiPo battery declines every time you charge or discharge it. Storing these batteries at excessively<br />
high or low temperatures may also cause a gradual reduction in capacity. In typical modelling usage these batteries will<br />
be subject to high discharge currents and motor induction currents, with the result that their capacity will fall to around<br />
50 - 80% of the capacity of a new battery after 50 charge / discharge cycles even if you observe all the charge and<br />
discharge requirements.<br />
Don't series- or parallel connect battery packs since the cell capacities and the charging condition may be too different.<br />
Therefore, battery packs we supply, are selected.<br />
Store these instructions in a safe place, and if you ever sell this unit be sure to pass the instructions on to the new<br />
owner.<br />
Special notes regarding the charging of Graupner LiPo batteries<br />
For the charging of LiPo battery packs use only the licensed chargers with their corresponding connecting leads. Any<br />
manipulation of the charger or of the charging lead may cause serious damages. By means of the charger you have the<br />
full and absolutely imperative control of each single cell of the battery pack.<br />
The battery to be charged must be placed on a non-flammable, heat resistant and non-conductive surface.<br />
Keep inflammable and volatile materials well away from the charging area. Batteries must not be left on charge<br />
unsupervised.<br />
LiPo batteries should only be charged and discharged using Graupner chargers / dischargers specially designed<br />
to cope with them, e.g. the Graupner LiPo charger 4 (Order No. 6437), LiPomat 4 Plus (Order No. 6438),<br />
Ultramat 10 (Order No. 6410), Ultramat 12 (Order No. 6412), ULTRA DUO PLUS 30 (Order No. 6416) (in Li-Io or<br />
Li-Mn or Li-Po mode (new)) or GMVIS Commander with software version V2003 or later (Order No. 94401).<br />
Take care to set the correct cell count, final charge voltage and final discharge voltage. Be sure to read the operating<br />
instructions supplied with your charger / discharger before using it with LiPo batteries.<br />
The white plug with more as two poles (number of cells + 1) is used for the charger Order No. 6438 or for the<br />
LiPo-balancer Order No. 6491 and also for single cell charging to balance the cells manual.<br />
An adaptor cable (sold separately) may be necessary for some batteries to be connected to some chargers /<br />
balancers.<br />
The basic rule is that LiPo batteries consisting of multiple cells wired in series may only be charged as a pack if the<br />
voltage of the individual cells does not differ by more than 0.05 V. If the difference in voltage between individual cells is<br />
more than 0.05 V the cells must be charged or discharged individually until the voltage of the cells is as nearly as<br />
possible identical.<br />
Provided that these conditions are met, Graupner LiPo batteries can be charged at a rate of max. 2C (1C corresponds<br />
to the cell capacity). When the pack reaches a voltage of max. 4.2 V per cell, charging must continue at a constant<br />
voltage of 4.2 V per cell until the charge current falls below 0.1 - 0.2 A.<br />
It is essential to avoid cell voltages above 4.25 V, as higher voltages cause permanent damage to the cells and<br />
cause fire.<br />
The maximum charge capacity must be limited to 1,05x of the battery capacity. Example: <strong>700</strong>mAh battery = 735mAh<br />
max. charge capacity.<br />
At the end of each charge process you should check the voltage of the cells in the pack to establish whether any one of<br />
them is higher than 4.2 V. Ideally all cells should exhibit the same voltage. If the voltage of the individual cells differs by<br />
more than 0.05 V, charge or discharge the cells individually to balance cell voltages. After a long period of usage<br />
individual cells may exhibit greater differences, and these should then be charged singly to avoid overcharging the cells<br />
in the pack.<br />
Take great care never to charge these batteries with reversed polarity. If batteries are charged with reversed polarity<br />
abnormal chemical reactions take place, causing cell ruptures, smoke and flames, and the battery gets useless.<br />
The permissible range of temperature during the charging and storing of LiPo batteries is from 0 – 50° C.<br />
Storing: LiPo cells should be stored with a charged capacity of 10 – 20 %. If the voltage of the cells go down under 3<br />
V, it is absolutely imperative to recharge them (10-20 %). Deep-discharging and storing in a discharged condition (cell<br />
voltage under 3 V) render the battery useless.<br />
Special notes regarding the discharging of Graupner LiPo batteries:<br />
Graupner LiPo batteries can safely be discharged at continuous currents of around 6C without major problems. If you<br />
wish to use higher currents please read the information stated in the catalogue.<br />
Discharging these batteries to a point below 2.5 V per cell causes permanent damage to the cells, and this<br />
must therefore be avoided at all costs. You can avoid this by switching off the motor as soon as you detect a<br />
noticeable power loss. Be aware of the danger of packs consisting of cells which have been charged to<br />
different levels, as the speed controller’s low voltage cut-off may then be triggered too late, with the result that<br />
individual cells might be discharged too deeply and suffer permanent damage.<br />
Do absolutely avoid short-circuits. Permanent short-circuits cause a destruction of the battery, high<br />
temperatures and self-inflammation may be the consequence.<br />
The battery temperature during the discharging should in no case exceed 70° C.
Additional notes on handling LiPo batteries<br />
6<br />
<strong>Micro</strong> <strong>Star</strong> <strong>700</strong><br />
Avoid short-circuits.<br />
Never short-circuit these batteries. Shorting the terminals allows a very high current to flow, and this heats up the cells.<br />
This in turn may lead to a loss of electrolyte, gassing (venting of gas) or even an explosion. When handling Graupner<br />
LiPo batteries keep them well away from conductive objects and surfaces to avoid the danger of a short-circuit.<br />
Mechanical strength of the case film:<br />
The aluminium laminate film which encloses the cells is easily damaged by sharp objects such as pins, knives, nails,<br />
motor terminals or similar: If the film is damaged, the battery is useless, and for this reason the battery must be<br />
installed in the model in a position where it cannot be distorted or damaged even in a bad landing or crash. If the pack<br />
were to be short-circuited, it could burst into flames.<br />
Temperatures above 70°C may also damage the case and cause leaks; this will result in loss of electrolyte, the battery<br />
gets useless and must be disposed of.<br />
Mechanical shock:<br />
LiPo batteries are not as mechanically robust as metal-cased cells, and for this reason you must avoid subjecting them<br />
to mechanical shocks such as dropping, hitting, bending, cutting, scoring, deforming or drilling into the laminate film.<br />
Never bend or twist a LiPo battery, and do not exert pressure on the battery or its connections.<br />
Handling the battery terminals:<br />
The terminals of LiPo cells are not as robust as those of other batteries; this applies in particular to the aluminium +<br />
terminal.. Please note that the terminals can easily break off. Due to the heat transfer it is not possible to solder to the<br />
aluminium terminals. The terminals should be fitted with a suitable strain relief.<br />
Cell connections:<br />
It is not possible or permissible to solder directly to the battery cells.<br />
Attempts at direct soldering may cause damage to cell components such as the separator or insulator. Battery<br />
connections can only be attached by the industrial process of spot welding. If a cable is missing or gets torn off, a<br />
professional repair by the manufacturer or distributor is required.<br />
Replacing individual battery cells:<br />
Individual battery cells may only be replaced by the manufacturer or distributor. This work must never be carried out by<br />
the user.<br />
Re-using damaged cells:<br />
Damaged cells must never be re-used.<br />
Indications of damage include broken housings, distortion of battery cells, escaping electrolyte or a smell of electrolyte.<br />
If your LiPo battery exhibits any of these problems it must not be used again.<br />
Damaged or exhausted cells constitute toxic waste and must be disposed of in the appropriate manner.<br />
General warning notes<br />
LiPo batteries must not be thrown in a fire or incinerated.<br />
LiPo cells must not be allowed to come into contact with fluids such as water, salt water or drinks, even for a very short<br />
period. Avoid all contact with liquids of any type.<br />
Individual cells and packs made up of cells are not playthings, and must not be allowed into hands of children. Store<br />
batteries and cells well out of the reach of children.<br />
Batteries must be kept out of the reach of babies and small children at all times. If a battery should be swallowed, seek<br />
emergency medical attention immediately.<br />
Batteries must not be placed in a microwave oven or subjected to pressure. This may result in smoke and fire or even<br />
worse.<br />
Never dismantle a LiPo battery. Dismantling a pack may cause internal short-circuits, with the possible results of<br />
gassing, fire, explosion and other problems.<br />
LiPo batteries contain toxic electrolytes and electrolyte vapours which are damaging to health. Take great care to avoid<br />
direct contact with electrolyte. If electrolyte contacts your skin, eyes or any other body part, immediately wash it off<br />
using plenty of clean water, then consult a doctor.<br />
Batteries which are build in a device should always be removed if the device is not to be used immediately. Always<br />
switch equipment off after use n order to avoid the cells becoming deep-discharged. Recharge batteries in good time.<br />
Do not use deep-discharged batteries again.<br />
The company of Graupner GmbH & Co. KG is unable to ensure that you use the correct methods to charge and<br />
discharge these cells, and for this reason we are obliged to refute any claim under guarantee if the cells have been<br />
charged or discharged incorrectly.
Contents<br />
7<br />
<strong>Micro</strong> <strong>Star</strong> <strong>700</strong><br />
• Foreword ......................................... P.2<br />
• Warnings ......................................... P.3<br />
• Accessories, extra items required ........................ P.8<br />
• 1. Assembling the model, installing the RC system ........... P.9<br />
• 2. Setting up ....................................... P.22<br />
• 3. Final checks before the first flight ...................... P.24<br />
• 4. Adjustments during the first flight, blade tracking ........... P.25<br />
• 5. Maintenance, assembling the model from components ...... P.26<br />
• 6. General safety measures ............................ P.26<br />
• 7. Basic helicopter terminology ......................... P.26<br />
Notes on the instructions<br />
We have invested considerable effort in producing these instructions, with the aim of ensuring<br />
that your model helicopter will fly reliably and safely. Please take the trouble to follow the<br />
instructions step by step, exactly as described, as this guarantees a successful outcome. This<br />
applies to you whether you are a relative beginner or an experienced expert.<br />
• The comprehensive illustrations show how the model is constructed; be sure to read the<br />
instructions which accompany the drawings.<br />
• All gears, bearings and moving joints must be greased or oiled carefully.<br />
• You will find a list of replacement parts at the end of these instructions.
Accessories<br />
Recommended items for the <strong>Micro</strong> <strong>Star</strong> <strong>700</strong><br />
8<br />
<strong>Micro</strong> <strong>Star</strong> <strong>700</strong><br />
Radio control system: see the main Graupner catalogue<br />
You will need a radio control system equipped with special helicopter options, or a microcomputer<br />
radio control system such as the mx-16, mc-19, mc / mx-22 or mc / mx-24.<br />
Servos (typically):<br />
C 261, Order No. 5125.LOSE (swashplate)<br />
C 231, Order No. 5109.LOSE (tail rotor)<br />
Gyro system: (included)<br />
Vox 300, Order No. 5962<br />
Flight battery: (included); alternatives:<br />
LiPo 3/2100, Order No. 7642.3<br />
or<br />
LiPo 3/2100, Order No. 7643.3
9<br />
<strong>Micro</strong> <strong>Star</strong> <strong>700</strong><br />
1. Assembling the model<br />
Since the model is supplied partly factory-built, final assembly is actually much simpler than the<br />
procedure described in the following instructions.<br />
Nevertheless the text and illustrations cover construction from the basic component parts. This<br />
is intended to make it easier for you to carry out even comprehensive repairs, and at the same<br />
time it explains the model’s construction in full detail.<br />
In any case please note that it is up to you to check that all the parts have been assembled<br />
correctly by comparing them with the instructions; the final adjustment of the gearbox and<br />
linkages must also be carried out by the modeller himself.<br />
1.1 Fitting the landing gear
1.2 Completing the tail rotor<br />
1.3 Attaching the tail boom braces<br />
10<br />
<strong>Micro</strong> <strong>Star</strong> <strong>700</strong>
1.4 Installing the tail boom<br />
1.5 Fitting out the tail boom<br />
11<br />
<strong>Micro</strong> <strong>Star</strong> <strong>700</strong>
1.6 Adjusting the main rotor head pushrods<br />
12<br />
<strong>Micro</strong> <strong>Star</strong> <strong>700</strong>
Installing the rotor head and tail rotor drive belt<br />
13<br />
<strong>Micro</strong> <strong>Star</strong> <strong>700</strong><br />
Ensure that the toothed belt is installed correctly, i.e. twisted in the direction as shown The belt<br />
tension should be adjusted in such a way that the belt cannot be moved past the centreline of<br />
the chassis when you press against it sideways with moderate force at a point between the front<br />
belt pulley and the guide pulleys.
14<br />
<strong>Micro</strong> <strong>Star</strong> <strong>700</strong><br />
Installing the radio control system components<br />
The arrangement of the radio control system components is shown in the illustration.<br />
The servos should be installed in the chassis exactly as shown in the drawing, using the screws<br />
supplied with them.<br />
Important:<br />
Check that the servos are exactly at neutral (centre) before fitting the output arms on the output<br />
shafts!<br />
Connect the servos to the receiver in the sequence specified in the instructions supplied with<br />
your RC system. Connect the receiver power supply, switch the transmitter and receiver on, and<br />
move all the transmitter sticks and trims to centre.<br />
Activate the swashplate mixer at your transmitter. The correct setting:<br />
Symmetrical three-point swashplate linkage, two roll servos, one pitch (elevator) servo at the<br />
front.<br />
Now fit the output arms on the servos and tighten the retaining screws. The output levers must<br />
be orientated as shown in the drawings.
Connect the pushrods to the servo output arms as shown in the drawings.<br />
15<br />
<strong>Micro</strong> <strong>Star</strong> <strong>700</strong>
16<br />
<strong>Micro</strong> <strong>Star</strong> <strong>700</strong><br />
Adjust the fore-and-aft position of the tail rotor servo so that the tail rotor control lever is exactly<br />
at right-angles to the tail boom when the servo is in the neutral position.<br />
Connect the speed controller to the motor as described in the following instructions (or those<br />
supplied with the controller itself). Keep the cables as short as possible.<br />
The flight battery, which also provides power to the receiving system via the BEC circuit<br />
incorporated in the speed controller, is connected to the system by a plug and socket. This<br />
connection should be positioned for easy access even when the cabin is in place, because it<br />
serves as the ON / OFF switch for the receiving system, as well as the flight battery charge<br />
socket.<br />
The flight battery is installed at the bottom of the chassis at the front, as shown in the drawing;<br />
ensure that it is pushed fully into place; this will ensure that the Centre of Gravity (directly below<br />
the main rotor shaft) is correct when the cabin is fitted. When you are satisfied, group the cables<br />
together so that the cabin can be fitted without fouling or obstructing any component.
17<br />
<strong>Micro</strong> <strong>Star</strong> <strong>700</strong><br />
The brushless motor controller<br />
is a perfect match for use with the out-runner motor which is supplied in the <strong>Micro</strong> <strong>Star</strong> <strong>700</strong> set.<br />
Features:<br />
• Low output resistance, high current handling capacity<br />
• Protective features: low-voltage cut-off, over-temperature guard, lost input signal cut-off<br />
• Three start-up modes: normal / soft / ultra-soft<br />
• Variable control travel for compatibility with all current transmitters<br />
• Continuous, linear and accurate control curve<br />
• Separate voltage regulation for the micro-processor, ensuring stable operation<br />
• Supported motor speeds:<br />
Max. 210,000 rpm (2-pole), 70,000 rpm (6-pole), 35,000 rpm (12-pole)<br />
Specification:<br />
Continuous current 30 A<br />
Peak current (< 10 s) 40 A<br />
BEC controller type linear<br />
BEC output 5 V / 2 A<br />
Permissible battery cell counts 2 … 4 LiIon / LiPo, 5 … 12 NiMH / NiCd<br />
Weight 25 g<br />
Dimensions 45 x 24 x 11 mm<br />
Description of variable parameters:<br />
1. Brake On / Off - default: Off<br />
2. Battery type Lixx (LiIon or LiPo) / Nixx (NiCd or NiMH) - default: Li-xx<br />
3. Low-voltage guard Soft cut-off: output power is slowly reduced<br />
mode Immediate cut-off: output power is abruptly reduced<br />
Default: soft cut-off<br />
4. Low-voltage guard low / medium / high - default: medium<br />
threshold value The controller monitors the voltage of the whole battery pack - not<br />
individual cells!<br />
If a Lithium battery is used, the controller automatically calculates<br />
the cell count.<br />
Low / medium / high means: 2.6 V / 2.85 V / 3.1 V. For example, if<br />
you use a three-cell Lithium battery and select the “medium”<br />
setting, the motor will be switched off when the voltage falls below<br />
8.55 V (2.85 x 3).<br />
If a Nickel battery is used, low / medium / high means: 0% / 45% /<br />
60% of the initial voltage. For example, if you use a fully charged<br />
ten-cell NiMH battery (14.4 V) and select the “medium” setting, the<br />
motor will be switched off at 6.5 V (14.4 x 45%).<br />
5. <strong>Star</strong>t-up mode normal / soft / ultra-soft - default: normal<br />
6. Timing low / medium / high - default: low<br />
The “low” setting can be used with most motors. However, in the<br />
interests of good efficiency, the “low” setting is only recommended<br />
for 2-pole motors, and “medium” for motors with six or more poles.<br />
The “high” setting can be used in some cases, particularly where<br />
high rotational speeds can be expected.<br />
Connections:<br />
• Connect the two-core lead to the flight battery; the pre-fitted connectors ensure that polarity<br />
will automatically be correct.<br />
• Connect the three-core lead to the receiver socket which controls motor speed (throttle<br />
channel).<br />
• The three individual wires for the motor can now be connected to the corresponding wires<br />
attached to the motor.<br />
Initially it does not matter which wire is connected to which. If you subsequently find that the<br />
motor rotates in the wrong direction, simply swap over any two of the connections between<br />
controller and motor.<br />
Caution: never reverse the polarity of the battery connections, as this would immediately<br />
ruin the battery and the speed controller! Fire / explosion hazard!
Using the system for the first time:<br />
18<br />
<strong>Micro</strong> <strong>Star</strong> <strong>700</strong><br />
1. Move the throttle stick on the transmitter to the bottom end-point (motor OFF position), then<br />
switch the transmitter on.<br />
2. Connect the flight battery to the speed controller; the controller now carries out a self-test<br />
procedure. It should emit a special sequence of beeps (♪123) which indicates that the<br />
voltage of the flight battery is in the normal range, followed by a number of beeps<br />
corresponding to the number of Lithium cells connected to it. Finally it emits a long beep to<br />
confirm that the self-test was successful, and the model can be flown.<br />
- If the controller does not respond in any way, check the connections.<br />
- If the controller emits a double-beep followed by a sequence of beeps (♪56712), this<br />
means that the unit is in programming mode because the transmitter throttle control was at<br />
“Maximum” when the system was switched on.<br />
- A rapid sequence of beeps means that the battery voltage is outside the permissible range<br />
(too high or too low).<br />
Important: different transmitters generate different control travels. For this reason we urgently<br />
advise you to carry out the following procedure to calibrate the control travel.<br />
Calibrating the throttle channel control travel<br />
1. Switch the transmitter on, and move the throttle stick to the “full throttle” position.<br />
2. Connect the speed controller to the flight battery and wait two seconds: the controller<br />
should now emit a double beep (♪♪) to confirm that it has correctly detected the “full-throttle”<br />
point.<br />
3. Move the throttle stick to the “motor off” position: the controller now emits a number of<br />
beeps corresponding to the number of Lithium cells connected to it.<br />
4. Finally the controller emits a long beep to confirm that it has correctly detected and stored<br />
the lowest point of the throttle channel travel.<br />
Audible alarms<br />
1. Input voltage outside the permissible range:<br />
The controller emits double beeps at intervals of one second.<br />
2. Throttle control signal outside the normal range:<br />
If the controller detects no normal control signal at the input, it emits single beeps at<br />
intervals of about two seconds.<br />
3. Throttle stick is not at “motor off” position when the system is switched on.<br />
If the throttle stick is not at the “motor off” position when the receiving system is switched<br />
on, the controller emits a rapid sequence of single beeps at intervals of 0.25 sec.<br />
Protective functions<br />
1. <strong>Star</strong>t-up guard: if the motor has not started running within two seconds of the pilot<br />
advancing the throttle stick (e.g. stalled motor), the controller completely switches off the<br />
power supply. To re-activate the system you must then move the throttle stick briefly to the<br />
full “motor off” position before trying again.<br />
2. Over-temperature guard: if the temperature rises above 110°C, the controller automatically<br />
reduces the motor’s output power.<br />
3. Protective function if control signal is lost: the controller initially reduces the output power if<br />
the control signal from the receiver is absent for a period of one second. If the signal is not<br />
restored after a further two seconds, the motor is switched off completely.
Programming the speed controller<br />
19<br />
<strong>Micro</strong> <strong>Star</strong> <strong>700</strong><br />
1. Call up programming mode:<br />
Switch the transmitter on and move the throttle stick to the “full throttle” position. Connect<br />
the speed controller to the flight battery and wait for two seconds; you should now hear a<br />
double beep (♪♪).<br />
Wait a further five seconds, and a special sequence of beeps (♪56712) indicates that the<br />
controller has now switched to programming mode.<br />
2. Select the parameter to be programmed:<br />
The controller emits a looped sequence of beeps equating to the various parameters. You<br />
select the appropriate parameter by waiting until you hear the corresponding beep<br />
sequence and moving the transmitter throttle stick to the bottom end-point (motor OFF<br />
position) within three seconds.<br />
Beep sequence Parameter<br />
(♪) (1 x short) Brake<br />
(♪♪) (2 x short) Battery type<br />
(♪♪♪) (3 x short) Cut-off mode<br />
(♪♪♪♪) (4 x short) Cut-off threshold<br />
(♪---) (1 x long) <strong>Star</strong>t-up mode<br />
(♪---♪) (1 x long, 1 x short) Motor timing<br />
(♪---♪♪) (1 x long, 2 x short) Reset all parameters to default values<br />
(♪---♪---) (2 x long) Quit programming mode<br />
3. Adjust the parameter:<br />
The controller emits a looped sequence of beeps equating to the various set-up values: ♪ -<br />
(3 sec. pause) - ♪♪ - (3 sec. pause) - ♪♪♪. To select the desired set-up value, wait until you<br />
hear the corresponding beep sequence, then move the throttle stick to “full throttle”; you will<br />
then hear a confirmation signal (♪1515).<br />
♪ ♪♪ ♪♪♪<br />
Brake ON OFF ./.<br />
Battery type LiIon / LiPo NiMH / NiCd ./.<br />
Cut-off mode soft hard ./.<br />
Cut-off threshold low medium high<br />
<strong>Star</strong>t-up mode normal soft ultra-soft<br />
Motor timing low medium high<br />
4. Quit programming mode<br />
Either move the transmitter throttle stick to the “motor off” position within two seconds of<br />
hearing the confirmation signal for the parameter setting, or within three seconds of hearing<br />
two long beeps at the parameter selection stage.
20<br />
<strong>Micro</strong> <strong>Star</strong> <strong>700</strong><br />
VOX 300 gyro system<br />
Please be sure to read any supplementary instructions which may be included with the gyro system.<br />
The VOX 300 gyro system for model helicopters is looped into the tail rotor servo circuit, and<br />
stabilises the machine’s movements around the axis of the main rotor shaft (yaw axis) to<br />
counteract unwanted rotational movements caused by gusts, external influences or torque<br />
fluctuations in the main rotor transmission; it also ensures that the helicopter’s rate of rotation<br />
around the vertical axis is proportional to the deflection of the tail rotor stick.<br />
Installation:<br />
The gyro system must be installed upright - as shown in the photo - using self-adhesive doublesided<br />
shock-absorbing foam tape at least 3 mm thick. It should be mounted on a firmly secured<br />
surface; normally on the rear platform of the tail boom support flange.<br />
Connections:<br />
Connect the tail rotor servo to the three-pin socket on the gyro: the signal wire (orange wire)<br />
must be at the top, the negative terminal (brown wire) at the bottom.<br />
The four-core lead, which runs from the gyro system to the receiver, terminates in one three-pin<br />
plug and one single-pin plug (yellow wire). Connect the three-pin plug to the tail rotor servo<br />
socket on the receiver. The single-pin plug (signal wire) can be connected to an auxiliary<br />
channel (normally channel 7). This auxiliary channel can then be used for two purposes: for<br />
adjusting gyro gain, and for switching between the operating modes “normal” and “heading lock”.<br />
If the single-pin plug is not connected to an auxiliary channel, the gyro system remains<br />
permanently in “heading lock” mode. In this case you can still adjust gyro gain using the<br />
potentiometer mounted on the gyro itself.<br />
The channel which is used for adjusting gyro gain is also employed for switching between<br />
“normal” and “heading lock” modes; the switching occurs approximately in the centre of the<br />
range of travel. If you move this channel in one direction, gyro gain is increased in “normal”<br />
mode; if you move it in the other direction from centre, gyro gain is increased in “heading lock”<br />
mode.
Using the system for the first time<br />
21<br />
<strong>Micro</strong> <strong>Star</strong> <strong>700</strong><br />
1. When you have completed all the connections between the gyro and the receiving system,<br />
select servo travel adjustment at the transmitter, and set the value for the tail rotor to 100%<br />
on both sides of centre.<br />
2. Set the servo travel centre offset to zero.<br />
3. Set the tail rotor trim to centre. If you are using an mc-24 transmitter, erase the tail rotor<br />
trim memory.<br />
4. The static torque compensation mixer should initially be switched off in order to ensure that<br />
the servo is at true centre. Any existing mixer for dynamic torque compensation should be<br />
switched off permanently when using this gyro.<br />
5. It is essential to disable any mixer (“gyro control”, “gyro suppression”) designed to<br />
suppress the gyro system proportionally to the tail rotor command system.<br />
6. Set the gyro system to the “normal” operating mode using the auxiliary channel (gyro gain).<br />
7. First switch the transmitter on, followed by the receiving system. Allow the model to stand<br />
motionless for about three seconds until the LED on the gyro lights up; the gyro needs this<br />
time to calibrate itself.<br />
8. Operate the tail rotor stick on the transmitter, and check carefully that the tail rotor pitch<br />
changes in the correct “sense” (direction).<br />
9. The tail rotor servo arm should now be at right-angles (90°) to the tail rotor pushrod (see<br />
diagram). If this is not the case, unscrew the servo output arm, rotate it on the splines, and<br />
re-fit it in the correct position.<br />
10. You can now check the direction of gyro effect by rotating the helicopter slightly around its<br />
vertical axis whilst observing the response of the tail rotor servo caused by the gyro: the tail<br />
rotor deflection must be in the direction which would cause the model to rotate back to its<br />
original position! If this is not the case, operate the reverse switch marked “Reverse” on the<br />
gyro system.<br />
11. The settings for “high” and “low” gyro gain can now be checked: move the corresponding<br />
transmitter control (channel switch or proportional control) alternately to minimum and<br />
maximum gyro gain, checking that the gain value actually changes in the correct sense<br />
(greater or smaller servo deflection when you rotate the model to and fro).<br />
Please note that it can be very dangerous for an inexperienced model helicopter pilot<br />
to fly a model in “normal” mode with gyro gain reduced completely (to 0%); in<br />
“heading lock” mode the model could even be uncontrollable if you reduce gyro gain<br />
to 0%!<br />
12. If you find the tail rotor response too powerful, you can “soften” it to any extent you like by<br />
increasing the Exponential (“expo”) setting for that channel.
22<br />
<strong>Micro</strong> <strong>Star</strong> <strong>700</strong><br />
2. Setting up<br />
2.1 Setting up the cyclic control system<br />
The basic settings for the roll-axis and pitch-axis control systems should already be correct if<br />
you have installed the linkages exactly as described in the instructions. Since the lever lengths<br />
are pre-defined, the final set-up is carried out using the electronic facilities provided by your<br />
transmitter.<br />
2.2 Main rotor pitch settings<br />
The main rotor pitch is measured using the pitch gauge (not included in the kit). The following<br />
table shows the recommended basic settings, but the optimum values may well vary slightly<br />
according to your particular model and the rotor blades you are using.<br />
Minimum Hover Maximum<br />
Hovering and practice -2° 5° 10°<br />
Aerobatics -10° 0° 10°<br />
Auto-rotation -3° 6° 11°<br />
The best way of setting the correct blade pitch on the transmitter is as follows:<br />
1. Measure the hovering pitch and set it to the correct value.<br />
2. Measure collective pitch maximum and minimum and adjust the values according to the<br />
following diagrams, using your transmitter's collective pitch curve facility.<br />
2.3 Setting up the motor control system<br />
The main rotor speed should be around 1600 rpm for hovering. For aerobatics the ideal speed is<br />
between 2100 and 2200 rpm.<br />
The following diagrams show two alternative motor control curves:
23<br />
<strong>Micro</strong> <strong>Star</strong> <strong>700</strong><br />
• The “normal” power curve is suitable for hovering and circuits.<br />
• The “aerobatic” power curve is set up in such a way that the motor does not stop at any<br />
position of the collective pitch stick. This means that this curve must only ever be selected<br />
when the model is already flying.<br />
• The values stated above can only be a guideline as they vary greatly according to the motor<br />
in use. For this reason there is no alternative but to fine-tune them during the test-flying<br />
programme.<br />
2.4 Further adjustments<br />
If you have made up all the linkages exactly as described in the previous sections, no changes<br />
to the mechanical arrangements will be necessary. The following adjustments can all be carried<br />
out at the transmitter:<br />
1. Servo direction<br />
Set the “sense” (direction of rotation) of all servos as stated in the instructions. Check the<br />
speed controller in particular!<br />
2. Dual Rates<br />
You can set switchable travels for roll-axis, pitch-axis and tail rotor. As a starting point we<br />
recommend 100% and 75% as the two Dual Rate settings.<br />
3. Exponential<br />
For the basic set-up you should leave all control systems set to “linear”.<br />
4. Servo travel centre offset<br />
Do not make any adjustments to this point. At a later stage you may wish to make minor<br />
corrections here.<br />
5. Adjusting servo travel<br />
This is where you can adjust the maximum servo travel. Note that the travels should always<br />
be the same on both sides of neutral, otherwise you will end up with unwanted differential<br />
effects:<br />
The collective pitch servo should produce a range of blade pitch angles covering -11° to<br />
+11°, with symmetrical travels; you may find it necessary to remove the servo output arm,<br />
move it round by one spline and fit the retaining screw again. When the collective stick is at<br />
centre (hover point), collective pitch should be about 5°, and the speed controller should be<br />
at the “half-throttle” position.<br />
Note:<br />
The collective pitch and power curves can be adjusted later to meet your exact personal<br />
requirements. However, if you have already set differential travels in the basic set-up<br />
procedure, as shown in diagram “B” above, any fine adjustments required subsequently will<br />
be more difficult!
24<br />
<strong>Micro</strong> <strong>Star</strong> <strong>700</strong><br />
6. Collective pitch and power curves<br />
These adjustments are of fundamental importance to the flight performance of any model<br />
helicopter. The aim of the procedure is to maintain a constant rotor speed when the model<br />
is climbing and descending, i.e. regardless of load. This then represents a stable basis for<br />
further fine-tuning, e.g. of the torque compensation system etc. (see also “Collective pitch<br />
and throttle curves”).<br />
7. Static torque compensation (not if the gyro system is set to heading-lock mode)<br />
The tail rotor servo is coupled to the collective pitch function via a mixer in the transmitter in<br />
order to compensate for changes in torque when you operate the collective pitch control.<br />
On most transmitters the mixer input can be set separately for climb and descent.<br />
Recommended values for the basic settings are: climb: 35%, descent: 15%.<br />
8. Gyro adjustment<br />
Gyro systems damp out unwanted rotational movements around the vertical (yaw) axis of<br />
the model helicopter. They do this by detecting the unwanted motion and injecting a<br />
compensatory signal into the tail rotor control system, and in order to achieve this effect the<br />
gyro electronics are connected between the tail rotor servo and the receiver.<br />
The gyro system recommended for the <strong>Micro</strong> <strong>Star</strong> <strong>700</strong> features a gain adjustor which can<br />
be used if gyro gain is not variable via an auxiliary transmitter channel. In this case it should<br />
initially be set to 50% gain.<br />
It is important to check that the direction of the gyro’s compensatory action is correct, i.e.<br />
that it responds to a movement of the tail boom with a tail rotor deflection in the opposite<br />
direction. If this is not the case, any yaw movement of the model would be amplified by the<br />
gyro! If it works the wrong way round, the solution is to mount the gyro inverted.<br />
One factor which is common to all gyro systems is that flight testing is necessary in order to<br />
establish the optimum settings, as so many different factors influence them.<br />
The aim of the gyro adjustment process is to achieve as high a level of stabilisation as<br />
possible without the gyro causing the tail boom to oscillate.<br />
3. Final checks before the first flight<br />
When you have completed the model, please run through the final checks listed below before<br />
the first flight:<br />
• Study the manual again and ensure that all the stages of assembly have been completed<br />
correctly.<br />
• Check that all the screws in the ball-links and brackets are tightened fully after you have<br />
adjusted gear meshing clearance.<br />
• Can all the servos move freely, without mechanical obstruction at any point? Do they all<br />
rotate in the correct direction relative to the stick movements? Are the servo output arm<br />
retaining screws in place and tight?<br />
• Check the direction of effect of the gyro system.<br />
• Ensure that the transmitter and flight batteries are fully charged.<br />
Don’t attempt to fly the helicopter until you have successfully checked everything as described<br />
above.
25<br />
<strong>Micro</strong> <strong>Star</strong> <strong>700</strong><br />
4. Adjustments during the first flight<br />
Blade tracking<br />
The term “blade tracking” refers to the height of the two rotor blades when they are spinning.<br />
The adjustment procedure aims at fine-tuning the pitch of the main rotor blades to exactly the<br />
same value, so that the blades rotate at the same level.<br />
Incorrectly set blade tracking, with the blades revolving at different heights, will cause<br />
the helicopter to develop serious vibration in flight.<br />
When you are adjusting the blade tracking, please keep at least 5 metres away from the<br />
model in the interests of safety.<br />
You can only check blade tracking if you are able to see clearly which blade is higher and which<br />
is lower. The best method is to mark the blades with coloured tape as follows:<br />
There are two alternative methods: figure “A” shows the use of different colours on the blade<br />
tips; fig. “B” shows the use of the same colour, but applied at different distances from the blade<br />
tip.<br />
Procedure for adjusting blade tracking<br />
1. Set the helicopter to the point where it is almost lifting off, then sight directly along the rotor<br />
plane.<br />
2. If you can see that the rotor blades are running in the same plane, no adjustment is<br />
required; however, if one blade is running higher than the other, the settings must be<br />
corrected.<br />
3. Locate the pushrods between the flybar and the blade holders; the adjustment is made at<br />
the ball-links on both ends of these pushrods: unscrew the links to raise the blade, screw<br />
them in to lower it.
26<br />
<strong>Micro</strong> <strong>Star</strong> <strong>700</strong><br />
5. Maintenance<br />
Helicopters, whether large or small, place considerable demands on maintenance. Whenever<br />
you notice vibration in your model, take immediate steps to reduce or eliminate it. Rotating parts,<br />
important screwed joints, control linkages and linkage junctions should be checked before every<br />
flight. If repairs become necessary, be sure to use original replacement parts exclusively. Never<br />
attempt to repair damaged rotor blades; replace them with new ones.<br />
6. General safety measures<br />
• Take out adequate third-party insurance cover.<br />
• Wherever possible join the local model flying club.<br />
At the flying site:<br />
• Never fly your model above spectators.<br />
• Do not fly models close to buildings or vehicles.<br />
• Avoid flying over agricultural workers in neighbouring fields.<br />
• Do not fly your model in the vicinity of railway lines, major roads or overhead cables.<br />
Pre-flight checks, flying safety:<br />
• Before you switch on the transmitter, check carefully that no other model flyer is using the<br />
same frequency.<br />
• Carry out a range check with your RC system.<br />
• Check that the transmitter and flight batteries are fully charged.<br />
• Do not let the model fly out of safe visual range.<br />
Post-flight checks:<br />
• Clean the model and check that all screws etc. are still tight.<br />
• Examine the helicopter carefully for wear and damage, and replace worn parts in good<br />
time.<br />
• Ensure that the electronic components such as battery, receiver, gyro etc. are still securely<br />
fixed. Remember that rubber bands deteriorate with age and may fail.<br />
• Check the receiver aerial. Conductor fractures inside the insulation are often not directly<br />
visible from the outside.<br />
• If the main rotor should touch the ground when spinning, be sure to replace the blades.<br />
Internal blade damage may not be visible from the outside.<br />
• Never carry the model by the tail boom: too firm a grip will easily deform the tail rotor<br />
pushrod.<br />
7. Some basic terms used in model helicopter flying<br />
The term “rotary wing machine” indicates that the helicopter’s lift is derived from rotating “wings”<br />
which take the form of rotor blades. As a result, a helicopter does not require a minimum forward<br />
speed in order to fly, i.e. it can hover.<br />
Cyclic pitch<br />
Cyclic pitch variation is used to steer the machine around the roll and pitch axes. Changing<br />
cyclic pitch has the effect of altering blade pitch depending on its position in the circle. The effect<br />
is caused by tilting the swashplate, and in the case of this model this effectively tilts the<br />
helicopter in the required direction.<br />
Collective pitch<br />
Collective pitch provides control over vertical movement, i.e. for climb and descent. The pitch of<br />
both rotor blades is altered simultaneously and by the same amount.
27<br />
<strong>Micro</strong> <strong>Star</strong> <strong>700</strong><br />
Torque compensation<br />
The spinning rotor produces a moment which tends to turn the whole helicopter in the opposite<br />
direction. This effect must be accurately neutralised, and this is the task of the tail rotor. Tail<br />
rotor blade pitch is altered to vary torque compensation. The tail rotor is also used to control the<br />
model around the vertical (yaw) axis.<br />
Hovering<br />
This is the state in which the helicopter flies in a fixed position in the air, without moving in any<br />
direction.<br />
Ground effect<br />
This occurs only when the machine is close to the ground, and it falls off as altitude rises. At an<br />
altitude of about 1 - 1½ times the rotor diameter ground effect is completely absent. Normally the<br />
revolving airflow from the main rotor is able to flow away freely, but in ground effect the air<br />
strikes an obstacle (the ground) and forms an “air cushion”. In ground effect a helicopter can lift<br />
a greater weight, but its positional stability is reduced, with the result that it tends to “drift off” in<br />
an unpredictable direction.<br />
Climb<br />
Any excess power above that required for hovering can be exploited to make the helicopter<br />
climb. Note that a vertical climb requires more energy than an angled climb which includes<br />
forward motion. For this reason a model with a given amount of motor power will climb more<br />
rapidly at an angle than vertically.<br />
Level flight<br />
A helicopter absorbs least power when flying straight and level at about half-throttle. If you have<br />
trimmed the machine carefully for a steady hover, it will tend to turn to one side when flown<br />
forward. The reason for this phenomenon is that the rotor blade which is moving forward<br />
encounters an increased airflow caused by the wind, and this increases its upthrust compared to<br />
the blade which is moving downwind, where the same airflow has to be subtracted. The net<br />
result is a lateral inclination of the helicopter.<br />
Descent<br />
If the helicopter’s rotor speed is relatively low and you place the helicopter in a fast vertical<br />
descent, the result can be that insufficient air flows through the rotor. This can cause what is<br />
known as a “turbulent ring stage”, when the airflow over the blade airfoil breaks away. The<br />
helicopter is then uncontrollable and will usually crash. A high-speed descent is therefore only<br />
possible if the helicopter is moving forward, or if the rotor is spinning at high speed. For the<br />
same reason care should be exercised when turning the model helicopter downwind after flying<br />
into wind.<br />
Flapping motion of the rotor blades<br />
As we have already seen, the forward-moving blade produces greater upthrust than the trailing<br />
blade. This effect can be minimised by allowing the leading blade to rise and the trailing blade to<br />
fall. The rotor head is fitted with what is known as a flapping hinge to allow this movement, and<br />
this prevents the rotor plane tilting excessively in forward flight. In model helicopters a single<br />
hinge shared by both blades has proved an effective solution to the problem.<br />
Auto-rotation<br />
This term refers to a helicopter flying without motor power. The rotational speed of the main rotor<br />
can be kept high by setting both blades to negative pitch, and the airflow through the rotor as it<br />
descends then keeps the blades turning. The rotational energy stored in the rotor by this means<br />
can be converted into upthrust if the pilot applies positive collective pitch when the helicopter is<br />
close to the ground. Of course, this can only be done once, and it has to be done at the correct<br />
moment. Auto-rotation allows a model helicopter to land safely when the motor fails, just like a<br />
full-size machine.<br />
However, auto-rotation places considerable demands on the pilot’s judgement and reflexes; you<br />
can only halt the machine’s descent once, and you must not “flare” too early or too late. Plenty of<br />
practice is required to get it right.
Order No. <strong>4497</strong><br />
<strong>Micro</strong> <strong>Star</strong><br />
<strong>700</strong><br />
Summary of<br />
replacement parts<br />
Date of issue 3/2008<br />
GRAUPNER GmbH & Co. KG D-73230 KIRCHHEIM/TECK GERMANY<br />
Modifications, errors and printing errors reserved. ID# 59795 03/08
Replacement parts<br />
2<br />
<strong>Micro</strong> <strong>Star</strong> <strong>700</strong>
3<br />
<strong>Micro</strong> <strong>Star</strong> <strong>700</strong><br />
Graupner<br />
Description Dimensions No. off<br />
Order No.<br />
[mm]<br />
<strong>4497</strong>.01 Main rotor blades, C<strong>FR</strong>P 1<br />
02 Tail rotor blades 1<br />
03 Main rotor shaft 1<br />
04 Tail rotor shaft 1<br />
05 Blade pivot shaft 1<br />
06 Tail boom 1<br />
07 Tail rotor pushrod 1<br />
08 Flybar 1<br />
09 Hiller paddles 1<br />
10 Skid landing gear 1<br />
11 Cabin and glazing 1<br />
12 Toothed belt 1<br />
13 Tail boom braces 1<br />
14 Main gear 1<br />
15 Motor pinion 1<br />
16 Front belt pulley 1<br />
17 Rear belt pulley 1<br />
18 Main chassis frame set 2<br />
19 Stand-off pillar set 1<br />
20 Cabin retainers 2<br />
21 Tail rotor servo mount 1<br />
22 Dome bearing 1<br />
23 Bottom bearing plate 2<br />
24 Tail boom support 1
4<br />
<strong>Micro</strong> <strong>Star</strong> <strong>700</strong>
5<br />
<strong>Micro</strong> <strong>Star</strong> <strong>700</strong><br />
Graupner<br />
Description Dimensions No. off<br />
Order No.<br />
[mm]<br />
<strong>4497</strong>.25 Flanged washer set, aluminium 1<br />
26 Screw set 1<br />
27 Motor mount 1<br />
28 Bellcrank set 1<br />
29 Skid holder, aluminium 2<br />
30 Swashplate 1<br />
31 Rotor head hub 1<br />
32 Rocker and mixer levers 1<br />
33 Control lever 1<br />
34 Main rotor blade holders 1<br />
35 Driver 1<br />
36 Brake disc 1<br />
37 Collective pitch compensator 1<br />
38 Hinged arms 1<br />
39 Linkage ball / screw set 1<br />
40 Pushrod set 1<br />
41 Ball-link set, excl. balls 1<br />
42 Tail rotor housing 1<br />
43 Tail rotor control bridge 1<br />
44 Tail rotor head 1<br />
45 Tail rotor bellcranks 1<br />
46 Set of anti-slip sleeves 1<br />
<strong>4497</strong>.70 Brushless electric motor 1<br />
<strong>4497</strong>.71 Brushless speed controller, 30 A / BEC 1<br />
5962 VOX 300 heading lock gyro 1
Réf. N° <strong>4497</strong><br />
<strong>Micro</strong> <strong>Star</strong><br />
<strong>700</strong><br />
Hélicoptère électrique<br />
Réf. N° <strong>4497</strong> Modèle partiellement monté incluant le moteur,<br />
le contrôleur, le gyroscope et l’accu de<br />
propulsion<br />
Avertissement!<br />
Le modèle d’hélicoptère R/C réalisé avec ce kit de montage n’est pas un jouet! C’est un<br />
appareil volant complexe qui par suite d’une mauvaise manipulation peut causer de<br />
sérieux dégâts matériels et personnels.<br />
Vous êtes seul responsable de son montage correct et de la sécurité de son utilisation.<br />
Veuillez impérativement observer les conseils de sécurité donnés sur les feuilles<br />
additives jointes qui font partie de ces instructions.<br />
GRAUPNER GmbH & Co. KG D-73230 KIRCHHEIM/TECK GERMANY<br />
Sous réserve de modifications! ID# 59795 03/08
2<br />
<strong>Micro</strong> <strong>Star</strong> <strong>700</strong><br />
Avant-propos<br />
Le ‘’<strong>Micro</strong> <strong>Star</strong> <strong>700</strong>’’ est un hélicoptère électrique totalement apte à la voltige avec une haute<br />
puissance adapté pour le débutang, les confirmés etr les experts et qui présente les<br />
particularités suivantes:<br />
Modèle largement prémonté<br />
Propulsion par un moteur Brushless<br />
Moteur, contrôleur, gyroscope et accu de propulsion inclus dans la livraison<br />
Rotor principal à sens de rotation à droite<br />
Transmission au rotor de queue par une courroie crantée<br />
Roue libre d’autorotation<br />
Alimentation par un accu LiPo à 3 éléments<br />
L’autonomie de vol permise par charge d’accu dépend naturellement du réglage du modèle et<br />
du style de pilotage; l’expérience a démontré qu’en utilisation normale, une autonomie d’environ<br />
11 minutes peut être atteinte avec l’utilisation de l’accu LiPo conseillé.<br />
Le châssis léger et solide du modèle comprend une combinaison de plaques en plastique<br />
renforcé fibre de verre et de pièces en aluminium fraisé. Le moteur entraîne le rotor principal par<br />
l’intermédiaire d’un réducteur à un étage, une roue libre d’autorotation est également incorporée.<br />
Caractéristiques techniques<br />
Longueur sans le rotor, env. 650mm<br />
Hauteur, env. 245mm<br />
Largeur sans le rotor, env. 120mm<br />
φ du rotor principal <strong>700</strong>mm<br />
φ du rotor de queue 140mm<br />
Poids en ordre de vol, à partir d’env. 710 g.
Avertissements<br />
3<br />
<strong>Micro</strong> <strong>Star</strong> <strong>700</strong><br />
• Le modèle réalisé avec ce kit de montage n’est pas un jouet inoffensif! Un mauvais<br />
montage et/ou une utilisation incorrecte ou irresponsable peuvent causer de sérieux<br />
dégâts matériels et personnels.<br />
• Un hélicoptère possède deux rotors tournant à haut régime qui développent une forte<br />
énergie centrifuge. Tout ce qui pénètre dans le champ de rotation des rotors sera<br />
détruit ou pour le moins fortement endommagé, de même que les membres du corps<br />
humain! De grandes précautions doivent ainsi être prises!<br />
• Tout objet entrant dans le champ de rotation des rotors sera non seulement détérioré,<br />
mais aussi les pales du rotor. Des pièces peuvent ainsi se détacher et être projetées<br />
avec une extrême violence en mettant l’hélicoptère en péril avec des conséquences<br />
incalculables.<br />
• Une perturbation de l’installation R/C, provenant par exemple d’un parasitage<br />
extérieur, la panne d’un élément R/C ou due à une source d’alimentation vide ou<br />
défectueuse peuvent aussi avoir de graves conséquences pour un hélicoptère; il peut<br />
partir soudainement dans n’importe quelle direction sans prévenir!<br />
• Un hélicoptère comprend un grand nombre de pièces soumises à l’usure, comme par<br />
ex. les pignons du réducteur, le moteur, les connexions à rotule, etc… Un entretien<br />
permanent et un contrôle régulier du modèle sont ainsi absolument nécessaires.<br />
Comme pour les véritables hélicoptères, une « Check-List » devra être effectuée avant<br />
chaque vol pour détecter une éventuelle défectuosité et pouvoir y remédier à temps<br />
avant qu’elle ne conduise à un crash!<br />
• Ce kit de montage contient deux feuilles additives SHW3 et SHW7 donnant des<br />
conseils de sécurité et des avertissements; veuillez impérativement les lire et les<br />
observer, car elles font partie de ces instructions!<br />
• Ce modèle d’hélicoptère devra être monté et utilisé uniquement par des adultes ou par<br />
des adolescents à partir de 16 ans sous les instructions et la surveillance d’une<br />
personne compétente.<br />
• Les pièces métalliques pointues et les bords vifs présentent un danger de blessure.<br />
• Comme pour un véritable aéronef, toutes les dispositions légales doivent être prises.<br />
La possession d’une assurance est obligatoire.<br />
• Un modèle d’hélicoptère doit être transporté (Par ex. vers le terrain de vol) de façon à<br />
ce qu’il ne subisse aucune détérioration. Les tringleries de commande du rotor<br />
principal et l’ensemble du rotor de queue sont des parties particulièrement fragiles.<br />
• Le pilotage d’un modèle d’hélicoptère n’est pas simple; son apprentissage nécessite<br />
de l’entraînement et une bonne perception optique.<br />
• Avant la mise en service du modèle, il sera indispensable de se familiariser en matière<br />
de « Modèles d’hélicoptères ». Ceci pourra se faire aussi bien en consultant les<br />
ouvrages spécialisés sur le sujet, que par la pratique en assistant à des
4<br />
<strong>Micro</strong> <strong>Star</strong> <strong>700</strong><br />
démonstrations sur les terrains de vol, en parlant avec d’autres pilotes de modèles<br />
d’hélicoptères ou en s’inscrivant dans une école de pilotage. Votre revendeur vous<br />
aidera aussi volontiers.<br />
• Lire entièrement ces instructions avant de commencer les assemblages afin d’en<br />
assimiler parfaitement les différents stades et leur succession!<br />
• Des modifications avec l’emploi d’autres pièces que celles conseillées dans ces<br />
instructions ne devront pas être effectuées, leur qualité de fabrication et leur sécurité<br />
de fonctionnement ne pouvant être remplacées par d’autres pièces accessoires.<br />
• Comme le fabricant et le revendeur n’ont aucune influence sur le respect des<br />
instructions de montage et d’utilisation du modèle, ils ne peuvent qu’avertir des<br />
dangers présentés en déclinant toute responsabilité.<br />
Exclusion de responsabilité / Dédommagements<br />
Le respect des instructions de montage et d'utilisation ainsi que les conditions<br />
d'installation dans le modèle, de même que l'utilisation et l'entretien de l'installation de<br />
radiocommande ne peuvent pas être surveillés par la Firme Graupner.<br />
En conséquence, nous déclinons toute responsabilité concernant la perte, les dommages<br />
et les frais résultants d'une utilisation incorrecte ainsi que notre participation aux<br />
dédommagements d'une façon quelconque.<br />
Tant qu'elle n'est pas impérativement contrainte par le législateur, la responsabilité de la<br />
Firme Graupner pour le dédommagement, quelque soit la raison de droit, se limite à la<br />
valeur marchande d'origine Graupner impliquée dans l'accident. Ceci n'est pas valable<br />
dans la mesure ou la Firme Graupner serait contrainte par la législation en vigueur pour<br />
une raison de grande négligence.
Instructions et avertissements pour l’utilisation des accus LiPo:<br />
Conseils généraux:<br />
5<br />
<strong>Micro</strong> <strong>Star</strong> <strong>700</strong><br />
Les accus au Lithium-Polymer (Abréviation : Accus LiPo) nécessitent un traitement particulièrement<br />
attentionné. Ceci vaut aussi bien pour la charge et la décharge que pour le stockage et les autres<br />
manipulations. Voici les spécifications particulières à respecter impérativement :<br />
Une mauvaise manipulation peut conduire à des explosions, des incendies, des dégagements de fumée et à un danger<br />
d’intoxication. Outre cela, la non observation des instructions et des avertissements influencera les performances et<br />
provoquera d’autres défectuosités.<br />
La capacité de l’accu se réduit avec chaque charge/décharge. De même que leur stockage sous de trop fortes ou de<br />
trop faibles températures peut avoir comme suite une diminution graduelle de leur capacité. En raison de leur fort<br />
courant de décharge et du courant d’induction des moteurs électriques, ces accus utilisés en modélisme en observant<br />
toutes les prescriptions de charge et de décharge, atteignent encore à peu près 50-80% de la capacité d’un accu neuf<br />
après 50 cycles.<br />
Les packs d'accus ne doivent pas être branchés ni en série et ni en parallèle, car les capacités des éléments et leur<br />
charge peuvent être différentes. C'est pourquoi, les packs d'accus, que nous livrons, sont sélectionnés.<br />
Ces instructions devront être soigneusement conservées et impérativement remises à un éventuel utilisateur suivant.<br />
Conseils particuliers pour la charge des accus LiPo Graupner:<br />
Pour charger les packs d’accus LiPo, seuls les chargeurs autorisés avec un cordon de charge approprié peuvent être<br />
utilisés. Chaque manipulation au niveau du chargeur, voire le cordon de charge, peut entraîner de graves dégâts. Le<br />
chargeur contrôle impérativement, nécessairement et entièrement chaque élément du pack d’accu.<br />
Durant le processus de charge, placer la batterie à recharger sur une surface non inflammable, résistante à la<br />
chaleur et non conductrice! Eloigner également les objets combustibles ou facilement inflammables de<br />
l’installation de charge. La batterie ne devra pas être laissée sans surveillance durant la charge.<br />
Comme la Firme Graupner GmbH & Co. KG ne peut pas surveiller la charge et la décharge correctes des<br />
éléments, la garantie est exclue en cas de mauvaise exécution de ces processus. Pour la charge et la décharge<br />
des accus LiPo, utiliser uniquement les GRAUPNER chargeurs spécialement adaptés pour cela, par ex.<br />
Graupner Réf. N° 6437 LiPo charger 4, Réf. N° 6438 LiPomat 4 Plus, Réf. N° Ultramat 10, Réf. N° 6412 Ultramat<br />
12, Réf. N°6416 ULTRA DUO PLUS 30 (en Li-Io ou Li-Mn ou Li-Po mode) ou Réf. N°94401 GMVIS – Commander<br />
à partir de la version du logiciel V2003.<br />
S’assurer que le nombre d’éléments, la tension de fin de charge ainsi que la tension de fin de décharge sont<br />
correctement réglés. Observer pour cela les instructions d’utilisation du chargeur.<br />
La prise multiple blanche (Nombre d'éléments + 1 Pôle) est prévue pour le raccordement du chargeur, Réf.<br />
N°6438 ou pour celui de l'équilibreur LiPo, Réf. N°6491, ainsi que pour une possibilité de charge d'éléments<br />
seuls pour un rajustement manuel.<br />
En principe, les accus LiPo commutés en série en packs devront être rechargés seulement lorsque la tension des<br />
différents éléments n’est pas supérieure à 0,05 V. Si la chute de tension n’a pas atteint 0,05 V , la tension des<br />
éléments devra alors être adaptée le plus exactement possible par une charge ou une décharge individuelle.<br />
Dans ces conditions, les accus LiPo Graupner pourront être rechargés avec un courant de charge max. 2C (la valeur<br />
1C correspond à la capacité des éléments) . A partir d’une tension max. de 4,2 V par élément, ils pourront continuer à<br />
être rechargés avec une tension constante de 4,2 V par élément, jusqu’à ce que le courant de charge ne dépasse pas<br />
0,1 – 0,2 A.<br />
Une tension supérieure à 4,25 V par élément devra dans chaque cas être évitée, car autrement la durabilité des<br />
éléments sera détériorée.<br />
Max. charge capacité = 1,05 x accu capacité!<br />
Après chaque processus de charge, il conviendra de vérifier si l’un des éléments du pack n’a pas atteint une tension<br />
supérieure à 4,2 V; tous les éléments doivent avoir la même tension. Si la tension des différents éléments n’est pas<br />
supérieure à 0,05 V, elle devra être accordée par une charge ou une décharge individuelle. Pour éviter une surcharge<br />
des éléments du pack après une longue utilisation, ceux-ci devront être chargés régulièrement individuellement.<br />
Ne jamais charger les éléments de l’accu avec les polarités inversées. Lorsqu’un accu est chargé dans ces conditions,<br />
il se produit des réactions chimiques anormales pouvant générer rupture, fumée et flammes! L’accu n’est alors plus<br />
utilisable.<br />
La plage de température à respecter pendant la charge et la décharge pour les accus LiPo va de 0 à 50°C.<br />
Entreposage: les accus doivent être entreposés avec une capacité de charge de 10 à 20%. Si la tension des éléments<br />
descend sous 3V, il faut alors absolument les recharger à 10-20 %. Si l’accu est entreposé avec une charge très faible<br />
(tension d’élément < 3V), voire complètement déchargé, il est alors inutilisable.
Conseils particuliers pour la décharge des accus LiPo Graupner:<br />
6<br />
<strong>Micro</strong> <strong>Star</strong> <strong>700</strong><br />
Un courant permanent d’environ 6C ne pose pas de gros problème pour les accus LiPo Graupner . Pour le plus forts<br />
courants, prière de se référer aux indications du catalogne.<br />
Une décharge en dessous de 2,5 V par élément détériore leur durabilité et doit absolument être évitée. C’est<br />
pourquoi le moteur devra être arrêté dès qu’une forte chute de puissance est remarquée. Si les différents<br />
éléments ont été totalement chargés différemment, la coupure en sous-tension du régulateur peut intervenir<br />
trop tard de sorte qu’ils pourront être trop profondément déchargés. Les court-circuits devront impérativement<br />
être évités. Des court-circuits permanents conduisent à la destruction de l’accu avec pour conséquence une<br />
très forte température et l’accu s’enflamme lui-même.<br />
La température de l'accu pendant la décharge ne doit surtout pas dépasser les 70°C.<br />
Autres conseils pour le traitement:<br />
Eviter un court-circuit :<br />
Ne jamais mettre un accu en court-circuit. Un court-circuit fait s’écouler un très fort courant qui échauffe les éléments.<br />
Ceci conduit à une perte d’électrolyse, un dégagement de gaz et même à une explosion! Eviter la proximité ou<br />
l’environnement des accus LiPo Graupner avec des surfaces conductrices en raison du danger d’un court-circuit.<br />
Solidité du corps des éléments:<br />
Le corps des éléments en feuille d’aluminium laminé peut être endommagé par des objets pointus tels qu’épingles,<br />
couteau, clous, raccordements moteur ou similaires. Si cette feuille d’aluminium est endommagée, l’accu devient<br />
inutilisable. Pour cette raison, l’accu devra être installé dans le modèle de façon à ce qu’il ne puisse pas être détérioré,<br />
même en cas de crash. L’accu peut prendre feu par un court-circuit.<br />
Des températures de plus de 70° C peuvent de même détériorer le corps de sorte que celui-ci n’est plus étanche; ceci<br />
à pour conséquence une perte d’électrolyse, l’accu n’est alors plus utilisable.<br />
Chocs mécaniques:<br />
Les accus LiPo ne sont pas mécaniquement aussi solides que les accus avec un corps métallique. Eviter pour cette<br />
raison les chocs mécaniques par des chutes, des coups, des déformations, etc.… Ne jamais couper, fissurer ou percer<br />
le corps d’un élément! Ne jamais distordre ou déformer les accus LiPo. N’exercer aucune pression sur les accus ou sur<br />
leur raccordement.<br />
Traitement du raccordement<br />
Le raccordement n’est pas aussi robuste que sur les autres accus ; ceci vaut particulièrement pour le raccordement +<br />
en aluminium. Le raccordement peut facilement casser. En raison de la transmission de chaleur, les fiches de<br />
raccordement ne doit pas être directement soudées. Les raccordements sont pourvus d’une connexion<br />
correspondante.<br />
Liaison des éléments<br />
Une soudure directe sur les éléments est inadmissible.<br />
Les soudures directes peuvent détériorer par la chaleur les composants de l’accu, comme le séparateur ou l’isolateur.<br />
Les raccordements de l’accu peuvent se faire seulement par des soudures industrielles par points. Pour un fil<br />
défectueux ou cassé, une réparation professionnelle par le fabricant ou son revendeur est nécessaire.<br />
Echange des éléments seuls<br />
L’échange des éléments d’accu doit se faire uniquement par le fabricant ou son revendeur et jamais par l’utilisateur luimême.<br />
Aucune utilisation d’éléments détériorés<br />
Les éléments détériorés ne devront en aucun cas être remis en utilisation.<br />
Les éléments détériorés se remarquent par un corps endommagé, une déformation, une odeur ou une fuite<br />
d’électrolyse. Dans ces cas, une utilisation ultérieure de l’accu n’est plus admissible.<br />
Les élément détériorés ou inutilisables sont bons pour la poubelle et devront être déposés dans un container<br />
spécialement réservé à cet usage.<br />
Avertissements généraux<br />
Les accus ne devront pas être jetés au feu!<br />
Les éléments ne devront pas être plongés dans un liquide comme l’eau, l’eau de mer, ou une boisson. Tout contact<br />
avec un liquide du même genre est à éviter.<br />
Les accus ne devront pas être laissés à la portée des bébés ou des petits enfants. S’il arrive qu’un accu soit avalé,<br />
consulter immédiatement un médecin.<br />
Les accus ne devront pas être mis dans un four à micro-ondes ou sous pression. La suite peut être de la fumée,<br />
du feu et encore davantage!<br />
Ne jamais démonter un accu LiPo. Le démontage d’un accu peut provoquer un court-circuit interne avec comme suite<br />
un dégagement de gaz, le feu et une explosion ou encore un autre problème!<br />
L’électrolyse contenue dans les accus LiPo et les vapeurs d’électrolyse sont nocives pour la santé. Eviter dans chaque<br />
cas un contact direct avec l’électrolyse. En cas de contact avec la peau, les yeux ou autres parties du corps, se rincer<br />
abondamment avec de l’eau fraîche et consulter ensuite un médecin.<br />
Les batteries incorporées dans un appareil devront toujours être retirées de celui-ci lorsqu’il n’est pas utilisé. Couper<br />
toujours l’interrupteur de l’appareil après son utilisation pour éviter les décharges profondes. Recharger toujours les<br />
batteries on temps opportun.
Sommaire<br />
7<br />
<strong>Micro</strong> <strong>Star</strong> <strong>700</strong><br />
• Avant-propos ...................................... P.2<br />
• Avertissements ..................................... P.3<br />
• Accessoires et articles supplémentaires nécessaires ......... P.8<br />
• 1. Montage, installation R/C ............................ P.9<br />
• 2. Travaux de réglage ................................ P.22<br />
• 3. Contrôle final avant le premier vol ...................... P.24<br />
• 4. Réglages durant le premier vol, réglage du plan de rotation ... P.25<br />
• 5. Entretien, montage du modèle avec les différentes pièces .... P.26<br />
• 6. Mesures de précaution générales ..................... P.26<br />
• 7. Quelques principes de base sur le vol d’un hélicoptère ...... P.26<br />
Conseils pour ces instructions<br />
Ces instructions ont été rédigées avec le plus grand soin afin que ce modèle d’hélicoptère<br />
puisse voler impeccablement après son assemblage. Elles ne s’adressent pas uniquement au<br />
débutant, mais dans la même mesure aux experts qui devront effectuer les montages Pas à<br />
Pas, exactement comme il va être décrit à la suite.<br />
• Le montage sera effectué conformément aux illustrations qui sont accompagnées de textes<br />
clairs.<br />
• L’ensemble des pignons et des paliers, ainsi que les articulations seront soigneusement<br />
graissés ou huilés.<br />
• La liste des pièces de rechange se trouve à la fin de ces instructions.
Accessoires<br />
Accessoires conseillés pour le <strong>Micro</strong> <strong>Star</strong> <strong>700</strong>:<br />
Ensemble R/C; voir dans le catalogue général Graupner<br />
8<br />
<strong>Micro</strong> <strong>Star</strong> <strong>700</strong><br />
Un ensemble R/C équipé des options spéciales pour hélicoptère, ou un ensemble à microordinateur<br />
comme par ex. mx-16, mc-19, mc/mx-22 ou mc/mx-24 sont conseillés.<br />
Servos (Par ex.) :<br />
C 261, Réf. N°5125.LOSE (Plateau cyclique)<br />
C 231, Réf. N°5109.LOSE (Rotor de queue)<br />
Système de gyroscope : (Inclus dans la livraison)<br />
Vox 300, Réf. N°5962<br />
Accu de propulsion : (Inclus dans la livraison), ou alternativement:<br />
LiPo 3/2100, Réf. N°7642.3<br />
ou<br />
LiPo 3/2100, Réf. N°7643.3
9<br />
<strong>Micro</strong> <strong>Star</strong> <strong>700</strong><br />
1. Montage<br />
Comme le modèle est livré prémonté, la finition est simplifiée vis à vus des instructions de<br />
montage correspondantes à suivre.<br />
Cependant, le montage des différentes pièces est néanmoins représenté afin que de<br />
nombreuses réparations puissent aussi être effectuées et que la structure du modèle soit<br />
totalement claire.<br />
Dans chaque cas, le montage correct du modèle sera à vérifier conformément aux instructions,<br />
le réglage exact du réducteur et des connexions est aussi à effectuer par le modéliste lui-même.<br />
1.1 Montage du train d’atterrissage à patins
1.2 Montage du rotor de queue<br />
1.1 Montage des haubans<br />
10<br />
<strong>Micro</strong> <strong>Star</strong> <strong>700</strong>
1.4 Montage de la poutre arrière<br />
1.5 Finition de la poutre arrière<br />
11<br />
<strong>Micro</strong> <strong>Star</strong> <strong>700</strong>
1.6 Réglage des tringleries sur la tête du rotor<br />
12<br />
<strong>Micro</strong> <strong>Star</strong> <strong>700</strong>
Montage de la tête du rotor et du réducteur<br />
13<br />
<strong>Micro</strong> <strong>Star</strong> <strong>700</strong><br />
Veiller à ce que la courroie crantée tourne en étant correctement alignée. Le tendeur devra être<br />
réglé de façon à ce qu’en exerçant une pression avec une force modérée latéralement contre la<br />
courroie, entre la poulie avant et les guides, celle-ci ne puisse pas se déplacer vers l’extérieur<br />
sur la ligne centrale du châssis.
14<br />
<strong>Micro</strong> <strong>Star</strong> <strong>700</strong><br />
Montage des éléments R/C<br />
La disposition des éléments R/C est représentée sur l’illustration:<br />
Les servos seront fixés sur le châssis avec les vis fournies parmi leurs accessoires, comme<br />
représenté.<br />
Important:<br />
Les servos devront être mis en position neutre avant le montage du palonnier.<br />
Relier les servos au récepteur conformément aux instructions de l’ensemble R/C, alimenter le<br />
récepteur, mettre en contact l’émetteur et la réception et placer tous les manches de commande<br />
et les trims en position milieu.<br />
Activer le mixeur de plateau cyclique dans l’émetteur. Réglages:<br />
Connexion symétrique sur trois points, 2 servos de Latéral, 1 servo avant de Longitudinal.<br />
Monter maintenant les palonniers sur les servos et les fixer comme montré sur les illustrations<br />
suivantes.
15<br />
<strong>Micro</strong> <strong>Star</strong> <strong>700</strong><br />
Les tringleries seront connectée sur le palonnier des servos conformément aux illustrations.
16<br />
<strong>Micro</strong> <strong>Star</strong> <strong>700</strong><br />
Le servo du rotor de queue sera déplacé de façon à ce que son palonnier soit exactement<br />
perpendiculaire à la poutre arrière lorsqu’il est en position neutre.<br />
Le contrôleur sera relié au moteur conformément aux instructions suivantes et à celles jointes<br />
avec celui-ci; les fils seront maintenus aussi courts que possible.<br />
La liaison pour l’accu de propulsion, qui alimente aussi la réception par le système BEC dans le<br />
contrôleur du moteur, se fait par une connexion qui est disposée de façon à ce qu’elle soit bien<br />
accessible, parce que l’interrupteur de la réception est remplace et sert de prise de charge pour<br />
l’accu de propulsion.<br />
L’accu de propulsion est fixé à l’avant et en dessous du châssis; il peut ainsi être déplacé afin<br />
d’établir le centre de gravité correct (directement sous l’arbre du rotor principal) avec la verrière<br />
de cabine en place. Réunir finalement tous les cordons en faisceau de façon à ce que la verrière<br />
de cabine puisse être mise en place.
17<br />
<strong>Micro</strong> <strong>Star</strong> <strong>700</strong><br />
Le contrôleur du moteur Brushless<br />
Il est optimalement accordé pour une utilisation avec le moteur à cage tournante qui est livré<br />
avec le modèle <strong>Micro</strong> <strong>Star</strong> <strong>700</strong>.<br />
Particularités:<br />
Faible résistance de sortie, haute charge admissible.<br />
Dispositifs de protection: coupure en sous tension, protection en sur température, coupure<br />
en cas de perte du signal d’entrée.<br />
3 Modes de démarrage: normal / souple / super souple.<br />
Course de servo réglable pour la compatibilité avec tous les émetteurs.<br />
Ligne de référence de commande continue, linéaire et précise.<br />
Régulation de tension séparée pour le micro processeur assurant un fonctionnement stable.<br />
Régimes du moteur soutenus:<br />
Max 210.000 t/m (2 pôles), 70.000 t/m (6 pôles), 35.000 t/m (12 pôles).<br />
Caractéristiques techniques :<br />
Courant permanent 30 A<br />
Courant de pointe (< 10s) 40 A<br />
Type de régulation BEC Linéaire<br />
Sortie BEC 5 V/2 A<br />
Nombre d’éléments d’accu admissible 2…4 Li-Ion/LiPo, 5…12 NiMH/NiCd<br />
Poids 25 g.<br />
Dimensions 45x24x11mm<br />
Description des paramètres réglables:<br />
1. Frein Contact/Coupé – par défait Coupé<br />
2. Types d’accus Li-XX (LiIon ou LiPo) / NIXX (NiCd ou NiMH) – par défaut LI-XX<br />
3. Modes protection en Coupure souple: la puissance de sortie sera lentement réduite<br />
sous tension Coupure immédiate: la puissance de sortie sera brutalement<br />
réduite<br />
par défaut Coupure souple.<br />
4. Seuil de protection Faible / moyen / haut – par défaut moyen<br />
en sous tension Le contrôleur surveille la tension de l’ensemble des packs<br />
d’accus, pas les éléments séparément!<br />
Avec les accus au Lithium le nombre d’éléments sera<br />
automatiquement calculé.<br />
Faible / moyen / haut signifient 2,6 V / 2,85 V / 3,1 V . Ainsi, à titre<br />
d’exemple, un accu à 3 éléments sera coupé avec un réglage<br />
„moyen’’ lorsque la tension 8,55 V (2,85*3) sera sous dépassée.<br />
Avec les accus au Nickel faible / moyen / haut signifient 0% / 45% /<br />
60% de la tension au départ. Ainsi, à titre d’exemple, un accu NiMH<br />
à 10 éléments entièrement chargé (14,4 V) sera coupé avec un<br />
réglage ‘’moyen’’ à 6,5 V (14,4+45%).<br />
5. Modes de démarrage Normal / souple / super souple – par défaut Normal<br />
6. Timing Faible / moyen / haut – par défaut Faible.<br />
Le réglage ‘’faible’’ pourra être utilisé avec la plupart des moteurs<br />
Au profit d’un degré de rendement optimal, ‘’faible’’ sera cependan<br />
conseillé seulement pour les moteurs à 2 pôles et ‘’moyen’’ pour les<br />
moteurs à 6 pôles et davantage. Pour les hauts régimes, le réglage<br />
‘’haut’’ pourra le cas échéant être utilisé.<br />
Raccordement:<br />
Relier le cordon à deux fils à l’accu de propulsion; la polarité correcte est donnée par le<br />
connecteur déjà soudé.<br />
Relier le cordon de raccordement à trois fils à la sortie de voie du récepteur pour le moteur.<br />
Relier les trois fils uniques pour le moteur aux conducteurs correspondants de ce dernier; si<br />
le moteur tourne dans le sens inverse, deux conducteurs quelconques devront simplement<br />
être permutés.<br />
Attention: Ne jamais inverser les polarités du raccordement à l’accu, cela conduira<br />
immédiatement à la destruction de l’accu et du contrôleur du moteur! Danger d’incendie<br />
et d’explosion!
Mise en service:<br />
18<br />
<strong>Micro</strong> <strong>Star</strong> <strong>700</strong><br />
1. Placer le manche de commande du moteur sur sa butée inférieure (Position COUPE du<br />
moteur) et mettre ensuite l’émetteur en contact<br />
2. Relier l’accu de propulsion au moteur. Le contrôleur effectue un auto test. Un ton de signal<br />
spécial (♪123) sera émis, ce qui signifie que la tension de l’accu se trouve dans la plage<br />
normale et suivi d’un nombre de tons de signal correspondant à celui des éléments au<br />
Lithium connectés. Un long ton de signal sera finalement émis comme confirmation que<br />
l’auto test a réussi et que le modèle pourra être mis en service.<br />
- Lorsque le contrôleur ne réagit pas du tout, vérifier le raccordement.<br />
- Lorsqu’un ton de signal (♪56712) sera émis après deux tons de signal, cela signifie que le<br />
contrôleur du moteur se trouve dans le Mode programmation, parce que la commande du<br />
moteur de l’émetteur est sur ‘’Maximum’’.<br />
- Des tons de signal rapidement émis l’un après l’autre signifient que la tension de l’accu se<br />
trouve en dehors de la plage admissible (trop haute ou trop basse).<br />
Important: Parce que différents émetteurs présentent différentes courses de commande, il est<br />
formellement conseillé d’effectuer les fonctions décrites à la suite pour la calibration de la<br />
course de commande.<br />
Calibration de la course de commande du moteur<br />
1. Mettre l’émetteur en contact et placer la commande du moteur sue ‘’Plein gaz’’.<br />
2. Relier le contrôleur du moteur à l’accu de propulsion et attendre 2 sec.; un double ton (♪♪)<br />
devra être émis comme avertissement que le point ‘’Plein gaz’’ a été correctement reconnu.<br />
3. Placer la commande du moteur sur la position ‘’Moteur Coupé’’. Un nombre de tons de<br />
signal correspondant à celui des éléments au Lithium connectés sera émis.<br />
4. Un long ton de signal sera finalement émis comme confirmation que le point le plus bas de<br />
la course de commande du moteur a été correctement mémorisé.<br />
Alarme d’avertissement acoustique<br />
1. Tension d’entrée en dehors de la plage admissible:<br />
Un double ton sera émis, suivi d’autres espacés de 1 sec.<br />
2. Signal de commande du moteur en dehors le la plage normale:<br />
Lorsque le contrôleur ne reconnaît aucun signal de commande normal, un ton unique<br />
espacé d’env. 2 sec. sera émis.<br />
3. Le manche de commande du moteur n’est pas sur ‘’Moteur coupé’’ à la mise en contact:<br />
Lorsque le manche de commande n’est pas sur la position ‘’Moteur coupé’’ à la mise en<br />
contact de la réception, des tons de signal uniques espacés de 0 ,25 sec. seront émis l’un<br />
après l’autre.<br />
Fonctions de protection<br />
1. Protection au démarrage: Lorsque le moteur ne démarre pas dans l’espace de 2 sec. après<br />
avoir déplacé le manche de commande (Par ex. s’il est bloqué), le contrôleur coupe<br />
totalement la tension d’alimentation. Pour la réactiver, le manche de commande devra être<br />
ramené un court instant totalement sur la position ‘’Moteur coupé’’.<br />
2. Protection en sur température: Avec une température supérieure à 110° C, le contrôleur<br />
réduit automatiquement la puissance de sortie.<br />
3. Fonction de protection avec la perte du signal de commande: Le contrôleur réduit tout<br />
d’abord la puissance de sortie lorsque le signal de commande du récepteur manque durant<br />
1 sec. Si le signal reste manquant durant 2 autres sec., le moteur sera totalement dé<br />
commuté.
Programmation du contrôleur<br />
19<br />
<strong>Micro</strong> <strong>Star</strong> <strong>700</strong><br />
1. Appel du Mode programmation:<br />
Mettre l’émetteur en contact et placer la commande du moteur sur ‘’Plein gaz’’. Relier le<br />
contrôleur du moteur à l’accu de propulsion et attendre 2 sec.: un double ton (♪♪) devra être<br />
émis.<br />
Attendre 5 autres sec. et un ton spécial (♪56712) indiquera que le contrôleur se trouve<br />
maintenant dans le Mode programmation.<br />
2. Pour sélectionner les paramètres à programmer:<br />
Des suites de tons seront émises en boucle pour chaque paramètre. La sélection se fait tandis<br />
que la commande du moteur sur l’émetteur est ramenée sur la butée inférieure (Position moteur<br />
coupé) immédiatement après l’émission de la suite de tons correspondante (dans l’espace de 3<br />
sec.<br />
Suite de tons Paramètre<br />
( ♪ ) (1 x court) Frein<br />
(♪♪) (2 x courts) Type d’accu<br />
(♪♪♪) (3 x courts) Mode de coupure<br />
(♪♪♪♪) (4 x courts) Seuil de coupure<br />
(♪---) (1 x long) Mode de démarrage<br />
(♪---♪) (1 x long, 1 x court) Timing moteur<br />
(♪---♪♪) (1 x long, 2 courts) Place tous les paramètres sue la valeur par défaut<br />
(♪--- ♪---) (2 x longs) Interruption du Mode programmation<br />
3. Réglage des paramètres<br />
Un ton de signal sera émis en boucle pour chaque valeur de réglage possible des paramètres<br />
sélectionnés ♪ – (Pause 3 sec.) - ♪♪ – (Pause 3 sec.) - ♪♪♪. Le réglage se fait après l’émission<br />
du signal correspondant pour la valeur de réglage désirée et la commande du moteur placée sur<br />
‘’Plein gaz’’, suivis d’un ton de confirmation (♪1515).<br />
♪ ♪♪ ♪♪♪<br />
Frein CONTACT COUPE ./.<br />
Type d’accu LiIon/LiPo NiMH/NiCd ./.<br />
Mode de coupure Souple Dure ./.<br />
Seuil de coupure Faible Moyen Haut<br />
Mode de démarrage Normal Souple Super souple<br />
Timing moteur Faible Moyen Haut<br />
4. Terminaison du Mode programmation<br />
Soit après le ton de confirmation pour le paramètre réglages, placer la commande sur l’émetteur<br />
du moteur dans l’espace de 2 sec. sur la position ‘’Moteur coupé’’, ou bien l’espace des 3 sec.<br />
après l’émission de deux longs tons de signal dans le paramètre sélection.
20<br />
<strong>Micro</strong> <strong>Star</strong> <strong>700</strong><br />
Système de gyroscope VOX 300<br />
Veuillez absolument observer les instructions jointes au système de gyroscope.<br />
Le système de gyroscope VOX 300 sera commuté avant le servo du rotor de queue dans les<br />
modèles d’hélicoptères et stabilisera les mouvements sur l’axe vertical (Axe de lacet) contre des<br />
pivotements involontaires dus aux influences extérieures, aux variations du couple de la<br />
transmission du rotor principal ou du vent et assurera que la vitesse de pivotement sur l’axe de<br />
lacet soit proportionnelle au déplacement du manche de commande.<br />
Montage:<br />
Le système de gyroscope sera fixé debout avec de la bande adhésive double face, comme<br />
illustré et monté avec du caoutchouc mousse d’une épaisseur minimum de 3mm sur une base<br />
solide, normalement sur la plate forme de la bride de la poutre arrière.<br />
Raccordement:<br />
Le servo du rotor de queue sera relié à la prise à trois broches du gyroscope de façon à ce que<br />
le fil orange (impulsions) soit en haut et le fil brun (Pôle -) en bas.<br />
Le cordon à quatre fils qui relie le système de gyroscope au récepteur se termine par une prise<br />
à trois pôles et une prise à un seul pôle (Fil jaune). La prise à trois pôles. La prise à trois pôles<br />
sera connectée sur la sortie de voie du récepteur pour le rotor de queue, la prise à un seul pôle<br />
pourra être connectée sur une voie supplémentaire (normalement, la voie 7). Avec cette voie<br />
supplémentaire, l’effet du gyroscope pourra être réglé et le mode de fonctionnement entre<br />
‘’Normal’’ et ‘’Conservateur de cap’’ pourra être commuté.<br />
Si la prise à un seul pôle n’est pas connectée sur une voie supplémentaire, le système de<br />
gyroscope restera en permanence dans le mode de fonctionnement ‘’Conservateur de cap’’ et<br />
l’effet du gyroscope pourra être modifié avec le potentiomètre de réglage sur celui-ci.<br />
La commutation entre les fonctionnements ‘’Normal’ et ‘’Conservateur de cap’’ se fait sur la<br />
même voie sur laquelle l’effet du gyroscope sera réglé et à peu près dans le milieu de la course<br />
de commande.<br />
Si l’on commande cette voie dans une direction, l’effet est augmenté dans le fonctionnement<br />
‘’Normal’’ et si on la commande à partir du milieu dans l’autre direction, l’effet est augmenté<br />
dans le fonctionnement ‘’Conservateur de cap’’.
Mise en service<br />
21<br />
<strong>Micro</strong> <strong>Star</strong> <strong>700</strong><br />
1. Lorsque toutes les liaisons entre le gyroscope et la réception sont établies, la course du<br />
servo du rotor de queue sera réglée sur 100% dans les deux sens dans l’émetteur.<br />
2. Placer le milieu de la course du servo sur zéro.<br />
3. Placer le levier de trim en position milieu, effacer la mémoire de trim pour le rotor de queue<br />
sur l’émetteur mc-24.<br />
4. Décommuter ensuite le mixeur pour la compensation statique du couple pour s’assurer que<br />
le servo est au milieu de la course. Un autre mixeur éventuellement présent pour la<br />
compensation dynamique du couple restera généralement décommuté.<br />
5. Désactiver absolument le mixeur pour l’annulation du système de gyroscope en<br />
dépendance de la commande du rotor de queue (‘’Gyro-Control’’, ‘’Annulation du<br />
gyroscope’’)!<br />
6. Commuter le gyroscope sur le mode de fonctionnement ‘’Normal’’ par la voie<br />
supplémentaire (Effet du gyroscope)<br />
7. Mettre en contact d’abord l’émetteur, ensuite la réception et ne pas bouger le modèle durant<br />
trois secondes afin que le système de gyroscope puisse se calibrer.<br />
8. Actionner le manche de commande du rotor de queue sur l’émetteur et vérifier si le sens de<br />
déplacement est correct.<br />
9. Le palonnier du servo du rotor de queue doit se trouver exactement à 90° de la tringlerie de<br />
commande. Le cas échéant, démonter le palonnier, le tourner sur une cannelure et le<br />
remonter sur le servo.<br />
10. Le sens correct de l’effet du gyroscope sera maintenant contrôlé en tournant un peu<br />
l’hélicoptère sur son axe de lacet et en observant la réaction du servo du rotor de queue<br />
sous l’effet du gyroscope. Le débattement du rotor de queue doit être en sens contraire à<br />
celui du pivotement du modèle! Si ce n’est pas le cas, le commutateur d’inversion<br />
‘’Reverse’’ sur le système de gyroscope devra être placé sur l’autre position.<br />
11. Les réglages ‘’haut’’’ et ‘’faible’’ de l’effet du gyroscope seront maintenant contrôlés.<br />
Déplacer l’organe correspondant sur l’émetteur (Interrupteur ou organe proportionnel) sur<br />
minimal et maximal. Vérifier alors si l’effet du gyroscope change réellement en<br />
synchronisation (Plus grand ou plus faible débattements du servo, en tournant le modèle<br />
dans un sens et dans l’autre)<br />
Veuillez noter que voler avec un effet du gyroscope totalement réduit (sur 0%) dans<br />
le ‘’Mode ‘’Normal’’ peut être dangereux pour les pilotes d’hélicoptère débutants; le<br />
modèle sera même incontrôlable avec un effet réduit sur 0% dans le ‘’Mode<br />
Conservateur de cap’’!<br />
12. Une réaction trop forte du rotor de queue pourra être réglée plus ‘’souple’’ par une<br />
augmentation de la proportion d’exponentiel.
22<br />
<strong>Micro</strong> <strong>Star</strong> <strong>700</strong><br />
2. Travaux de réglage<br />
2.1 Réglage de la commande cyclique<br />
Le réglage de base des commandes de Latéral et de Longitudinal doit déjà être correct lorsque<br />
les tringleries ont été montées conformément aux instructions. Comme le point de connexion<br />
des tringleries sur le palonnier des servos est indiqué, le réglage de la course des servos sera<br />
effectué ultérieurement par les options électroniques dans l’émetteur.<br />
2.2 Réglage du Pas du rotor principal<br />
La valeur de réglage du Pas sera mesurée avec le calibreur de pales (Non fourni dans le kit de<br />
montage). Le tableau ci-dessous indique des valeurs de départ; les valeurs réellement<br />
nécessaires dépendront des pales de rotor utilisée et du modèle.<br />
Minimum Vol stationnaire Maximum<br />
Vol stationnaire et entraînement -2° 5° 10°<br />
Voltige -10° 0° 10°<br />
Autorotation -3° 6° 11°<br />
Les réglages du Pas seront effectués de préférence dans l’émetteur, comme suit :<br />
1. Mesurer le Pas pour le vol stationnaire et le régler correctement.<br />
2. Mesurer les Pas Maximum et Minimum et les régler par le réglage de la courbe de Pas<br />
dans l’émetteur, conformément aux diagrammes suivants:<br />
2.3 Réglage de la commande du moteur<br />
Le régime pour le vol stationnaire doit se situer à env. 1600 t/m et pour la voltige entre 2100 et<br />
2200 t/m.<br />
Les diagrammes suivants montrent les courbes de commande du moteur possibles:
23<br />
<strong>Micro</strong> <strong>Star</strong> <strong>700</strong><br />
• La courbe de puissance ‘’Normal’’ convient aussi bien pour le vol stationnaire que pour le vol<br />
en cercles.<br />
• Comme avec la courbe de puissance ‘’Voltige’’ le moteur ne vient à l’arrêt dans aucune<br />
position du manche de commande de Pas, cette courbe devra être commutée uniquement<br />
en vol.<br />
• Les valeurs indiquées ci-dessus dépendent fortement du moteur utilisé; c’est pourquoi elles<br />
devront être adaptées par des essais pratiques.<br />
2.4 Autres réglages<br />
Lorsque toutes les liaisons de tringlerie ont été établies conformément aux paragraphes<br />
précédents, les réglages suivants pourront être effectués dans l’émetteur:<br />
1. Sens de la course des servos:<br />
Régler le sens de la course de tous les servos conformément aux indications données dans les<br />
instructions. Apporter une attention particulière sur le contrôleur du moteur!<br />
2. Dual-rate:<br />
Des amplitudes de course commutables pourront être réglées pour les commandes<br />
Longitudinal, Latéral et Anti-couple. Une commutation entre 100% et 75% est conseillée comme<br />
réglage de base.<br />
3. Fonction exponentielle:<br />
Laisser le réglage de base sur la courbe de commande linéaire.<br />
4. Réglage du neutre de la course des servos:<br />
N’effectuer aucun réglage pour le moment; de petites corrections pourront être effectuées<br />
ultérieurement.<br />
5. Réglage de la course des servos:<br />
La course maximale des servos pourra être réglée en veillant toutefois à ce que la même valeur<br />
de réglage soit établie dans les deux sens; autrement, il se produira une différence de<br />
débattement indésirable:<br />
Le servo de Pas doit pouvoir commander une plage de réglage de l’incidence des pales de –11°<br />
jusqu’à +11°, avec des débattements symétriques ; le cas échéant, le palonnier du servo sera<br />
démonté, puis remonté en le déplaçant d’une cannelure sur l’axe de sortie. Avec le réglage de<br />
base, la position milieu du manche de commande de Pas (Point du vol stationnaire) donne une<br />
valeur de Pas d’env. 5° avec laquelle le contrôleur du moteur est à demi puissance.<br />
Note:<br />
Les courbes de Pas et de puissance seront réglées ultérieurement en correspondance des<br />
exigences pratiques. Cependant, lorsque des débattements différenciés ont été déjà été réglés<br />
dans le réglage de base, comme indiqué sur la figure B ci-dessus, ils compliquent ces<br />
synchronisations ultérieures!
24<br />
<strong>Micro</strong> <strong>Star</strong> <strong>700</strong><br />
6. Courbes de Pas et de puissance:<br />
Ces réglages sont d’une importance capitale pour les performances de vol d’un hélicoptère. Le<br />
but de cette synchronisation est qu’aussi bien en vol ascendant qu’en vol descendant, le régime<br />
du rotor reste constant, indépendamment de la charge. Ceci assure une base stable pour les<br />
autres synchronisations, comme par ex. la compensation du couple, etc… (Voir aussi ‘Courbes<br />
de Pas et de gaz’’).<br />
7. Compensation statique du couple (Pas avec le fonctionnement en Conservateur de<br />
cap du système de gyroscope)<br />
Pour compenser les variations du couple avec l’actionnement de la commande du Pas, le servo<br />
du rotor de queue est couplé avec la fonction du Pas par un mixeur dans l’émetteur. La<br />
proportion de mixage pour le vol ascendant et descendant pourra être réglée séparément avec<br />
la plupart des émetteurs. Valeurs conseillées pour le réglage de base: Vol ascendant: 35%, vol<br />
descendant: 15%.<br />
8. Réglage du gyroscope:<br />
Le gyroscope amorti les pivotements indésirables de l’hélicoptère sur son axe vertical (Axe de<br />
lacet) qu’il détecte lui-même et il intervient en correspondance sur la commande du rotor de<br />
queue. Pour cela, l’électronique du gyroscope est commutée entre le servo du rotor de queue et<br />
le récepteur<br />
Le système de gyroscope conseillé pour le <strong>Micro</strong> <strong>Star</strong> <strong>700</strong> comprend un réglage pour la force de<br />
l’effet au cas ou il ne pourrait pas être réglé par une voie supplémentaire dans l’émetteur; au<br />
début ce réglage sera d’abord réglé sur 50% d’effet.<br />
Veiller à ce que le sens de l’effet du gyroscope soit correct; sur un pivotement dans un sens de<br />
la poutre arrière, il doit réagir par un débattement de la commande du rotor de queue dans le<br />
sens opposé. Si ce n’est pas le cas, chaque pivotement du modèle sera encore amplifié par le<br />
gyroscop! Dans ce cas, le système de gyroscope devra être monté en position inversée..<br />
Avec tous les systèmes de gyroscope, le réglage optimal devra être effectué en vol, car<br />
différents facteurs interviennent dans cette condition.<br />
Le but du réglage est d’obtenir la plus grande stabilisation possible par le gyroscope sans que le<br />
modèle entre en oscillations (Balancements de la poutre arrière) par un réglage trop fort de<br />
l’effet.<br />
3. Contrôle final avant le premier vol<br />
Lorsque l’assemblage du modèle est terminé, les vérifications suivantes devront être effectuées<br />
avant le premier vol:<br />
Parcourir ce manuel encore une fois pour s’assurer que tous les stades de montage ont été<br />
correctement exécutés.<br />
S’assurer que toutes les vis dans les connexions à rotule et dans les paliers ont été<br />
définitivement bloquées après le réglage de l’engrènement du réducteur.<br />
Tous les servos peuvent-ils se mouvoir librement, sans blocage mécanique? Les sens de<br />
course correspondent-ils? Les vis de fixation des palonniers de servo sont-elles bien<br />
bloquées?<br />
Vérifier le sens de l’effet du gyroscope.<br />
S’assurer que les batteries d’émission et de réception sont bien chargées.<br />
Ce n’est qu’après avoir effectué toutes ces vérifications que le premier essai en vol pourra être<br />
effectué.
25<br />
<strong>Micro</strong> <strong>Star</strong> <strong>700</strong><br />
4. Réglages au cours du premier vol<br />
Réglage du plan de rotation<br />
Ce réglage consiste à régler l’angle d’incidence des pales du rotor précisément sur la même<br />
valeur afin qu’elles tournent exactement sur le même niveau.<br />
Un plan de rotation incorrectement réglé avec les pales tournant sur un niveau différent à<br />
pour effet de provoquer de fortes vibrations au modèle en vol.<br />
Pour le réglage du plan de rotation, se tenir à une distance de sécurité d’au moins 5<br />
mètres du modèle!<br />
Pour effectuer le réglage, il faut déterminer quelle pale tourne le plus haut et quelle pale tourne<br />
le plus bas. Pour cela, les pales seront repérées avec du ruban adhésif de couleur:<br />
Il y a deux possibilités pour cela; la Fig. A montre l’utilisation de couleurs différentes sur les deux<br />
pales, la Fig. B montre l’utilisation de la même couleur, mais les bandes adhésives sont placées<br />
à une distance différente de l’extrémité de la pale.<br />
Façon de procéder pour le réglage du plan de rotation:<br />
1. Lorsque l’hélicoptère est juste prêt à décoller, observer le plan de rotation du rotor<br />
exactement latéralement.<br />
2. Lorsque les pales tournent sur le même niveau, aucun réglage n’est nécessaire, mais<br />
lorsqu’une pale tourne plus haut que l’autre, le réglage devra être corrigé.<br />
3. Le réglage s’effectue en tournant la chape à rotule sur les deux extrémités de la tringlerie<br />
entre le compensateur de Pas et le levier de mixage: dévisser les chapes pour faire tourner<br />
la pale plus haut, ou les visser pour la faire tourner plus bas.
26<br />
<strong>Micro</strong> <strong>Star</strong> <strong>700</strong><br />
5. Entretien<br />
Qu’il soit grandeur réelle ou modèle réduit, un hélicoptère exige un entretien permanent.<br />
Supprimer les vibrations qui se produisent le plus rapidement possible, ou les atténuer! Les<br />
pièces en rotation, la boulonnerie importante, les tringleries et les points de connexion sont à<br />
vérifier avant chaque vol. Lorsque des réparations seront nécessaires, utiliser uniquement des<br />
pièces d’origine. Ne tenter en aucun cas de réparer des pales de rotor détériorées, mais les<br />
remplacer par des neuves.<br />
6. Mesures de précaution générales<br />
Contracter une assurance.<br />
Selon possibilité, s’inscrire dans un club d’aéromodélisme, ou une école de pilotage.<br />
Sur le terrain de vol:<br />
Ne survoler aucun spectateur avec le modèle.<br />
Ne pas faire voler le modèle à proximité d’habitations ou de véhicules.<br />
Ne pas survoler d’ouvriers agricoles dans les champs avec le modèle.<br />
Ne pas faire voler le modèle à proximité des lignes de chemin de fer, des routes à grande<br />
circulation ou des lignes électriques.<br />
Avant et pendant le vol:<br />
Avant de mettre l’émetteur en contact, s’assurer que la même fréquence n’est pas déjà<br />
utilisée par un autre modéliste.<br />
Faire un essai de portée de l’installation R/C.<br />
Vérifier si la batterie de l’émetteur et l’accu de propulsion sont entièrement chargés.<br />
Ne pas laisser le modèle s’éloigner hors de vue.<br />
Contrôle après chaque séance de vols:<br />
Nettoyer entièrement le modèle. En profiter pour vérifier le serrage de toutes les vis; les rebloquer<br />
si nécessaire.<br />
Remplacer à temps les pièces usées ou détériorées.<br />
S’assurer que les éléments électroniques comme l’accu de réception, le récepteur, le<br />
gyroscope, etc…sont encore solidement fixés (Les bandes élastiques vieillissent et<br />
deviennent cassantes!).<br />
Vérifier le fil d’antenne de réception; une rupture intérieure du fil n’est pas toujours visible<br />
extérieurement!<br />
Après un contact avec le sol des pales du rotor principal en rotation, une rupture n’est pas<br />
souvent directement visible extérieurement!<br />
Ne pas transporter le modèle en le tenant par la poutre arrière; une trop forte pression sur<br />
celle-ci peut facilement déformer la tringlerie de commande du rotor de queue!<br />
7. Quelques principes de base sur le vol d’un hélicoptère<br />
La désignation « Voilure tournante » signifie déjà que les surfaces portantes d’un hélicoptère<br />
tournent et qu’il peut se sustenter dans l’air sans qu’une vitesse de déplacement soit nécessaire<br />
et qu’il peut ainsi rester immobilisé sur place.<br />
Réglage cyclique des pales du rotor:<br />
Le réglage cyclique des pales sert à orienter le vol sur les axes transversal (axe de roulis) et<br />
longitudinal (axe de tangage). Un autre réglage de pale est commandé sur chaque point de leur<br />
de rotation. L’inclinaison du plateau cyclique détermine la direction du vol.<br />
Réglage collectif des pales (Pas):<br />
Il sert à la commande dans le sens de l’axe vertical (axe de lacet) pour la montée et le descente<br />
de l’hélicoptère. Le réglage des deux pales du rotor est modifié simultanément sur la même<br />
valeur.
27<br />
<strong>Micro</strong> <strong>Star</strong> <strong>700</strong><br />
Compensation du couple:<br />
Le rotor en rotation engendre un couple qui à tendance à faire tourner l’hélicoptère dans le sens<br />
opposé. Ceci doit être exactement compensé par un réglage des pales du rotor de queue. Celuici<br />
commande en même temps la direction du vol sur l’axe vertical (axe de lacet).<br />
Vol stationnaire:<br />
C’est la condition de vol dans laquelle l’hélicoptère ne se déplace dans aucune direction et reste<br />
immobilisé sur place.<br />
Effet de sol:<br />
Cet effet se produit après le décollage du sol jusqu’à une hauteur correspondant à 1 – 1 ½ fois<br />
au diamètre du rotor de l’hélicoptère. Il est dû à ce que le souffle du rotor normalement libre<br />
rencontre ici un obstacle (Le sol) et forme ainsi un coussin d’air. En effet de sol, un hélicoptère<br />
peut soulever davantage de poids, mais au détriment de sa stabilité latérale, car il peut ainsi<br />
basculer plus ou moins fortement d’un côté ou de l’autre.<br />
Vol ascendant:<br />
La puissance excédentaire qui n’est pas nécessaire pour le vol stationnaire pourra être utilisée<br />
pour le vol ascendant. Un vol ascendant à la verticale nécessite plus d’énergie qu’une montée<br />
en translation avant. Pour cette raison, une montée en translation avant est plus rapide avec la<br />
même puissance moteur.<br />
Vol horizontal:<br />
Sur à peu près la moitié de sa vitesse maximum en vol horizontal, un hélicoptère nécessite la<br />
plus faible puissance de sa propulsion. Lorsqu’il a été exactement trimmé en vol stationnaire,<br />
l’hélicoptère décrit alors une courbe en translation avant. Ceci est dû à la cause suivante: sur le<br />
côté du rotor où les pales tournent vers l’avant, il se produit une plus forte portance par la plus<br />
grande vitesse d’écoulement des filets d’air que sur le côté où les pales tournent vers l’arrière et<br />
il en résulte une inclinaison latérale de l’hélicoptère.<br />
Vol descendant:<br />
Si le régime du rotor de l’hélicoptère est relativement faible et qu’il descend ainsi à la verticale<br />
trop rapidement, les pales du rotor ne brassent plus suffisamment d’air, il se forme alors ce qui<br />
est appelé un état « tourbillonnaire » ou l’écoulement d’air décroche du profil des pales. Cet état<br />
incontrôlé peut conduire à un crash. C’est pourquoi une descente rapide n’est possible qu’en<br />
translation avant ou avec le rotor tournant à haut régime. Pour cette même raison, l’hélicoptère<br />
sera tourné par prudence d’un vol contre le vent vers un vol dans le vent.<br />
Battement des pales du rotor:<br />
Afin que le plan de rotation du rotor ne s’incline pas trop fortement en vol en translation avant,<br />
une articulation de battement est incluse dans la tête du rotor. La pale la plus rapidement<br />
soufflée peut se soulever et la plus faiblement soufflée peut s’abaisser pour atténuer ainsi une<br />
différence de portance. Sur les modèles réduits, l’articulation est commune pour les deux pales.<br />
Autorotation:<br />
L’autorotation est une condition de vol avec le moteur coupé et dans laquelle le rotor principal<br />
est maintenu à haut régime par la mise des pales en Pas négatif durant le vol descendant.<br />
L’énergie ainsi emmagasinée permet de rétablir la portance au cours de la descente de<br />
l’hélicoptère par la remise des pales en Pas positif. Cette manœuvre est naturellement possible<br />
qu’une seule fois. Un hélicoptère réel aussi bien qu’un modèle réduit peuvent ainsi atterrir en<br />
toute sécurité en cas de panne du moteur.<br />
Cet atterrissage en autorotation exige cependant du pilote de grandes facultés d’estimation et<br />
de réaction; il peut l’entreprendre seulement une fois le vol descendant commencé, en<br />
intervenant ni trop tôt, ni trop tard, c’est la raison pour laquelle cette manœuvre demande<br />
beaucoup d’entraînement.
Réf. N° <strong>4497</strong><br />
<strong>Micro</strong> <strong>Star</strong><br />
<strong>700</strong><br />
Liste des pièces<br />
détachées<br />
Etat 3/2008<br />
GRAUPNER GmbH & Co. KG D-73230 KIRCHHEIM/TECK GERMANY<br />
Sous réserve de modifications! ID# 59795 03/08
Pièces détachées<br />
2<br />
<strong>Micro</strong> <strong>Star</strong> <strong>700</strong>
3<br />
<strong>Micro</strong> <strong>Star</strong> <strong>700</strong><br />
Graupner<br />
Désignation Dimensions<br />
Réf. N°<br />
[mm]<br />
<strong>4497</strong>.01 Pales de rotor principal, fibre de carbone 1<br />
02 Pales de rotor de queue 1<br />
03 Arbre de rotor principal 1<br />
04 Arbre de rotor de queue 1<br />
05 Arbre porte pales 1<br />
06 Poutre arrière 1<br />
07 Tringlerie de commande de rotor de queue 1<br />
08 Barre de palettes 1<br />
09 Palettes Hiller 1<br />
10 Train d’atterrissage à patins 1<br />
11 Cabine avec vitrage 1<br />
12 Courroie crantée 1<br />
13 Haubans de poutre de queue 1<br />
14 Couronne principale 1<br />
15 Pignon moteur 1<br />
16 Poulie de courroie avant 1<br />
17 Poulie de courroie arrière 1<br />
18 Jeux de platines de châssis principal 2<br />
19 Jeu de boulons d’écartement 1<br />
20 Supports de cabine 2<br />
21 Support de servo de rotor de queue 1<br />
22 Palier supérieur 1<br />
23 Plaques de palier inférieur 2<br />
24 Support de poutre arrière 1<br />
Qté
4<br />
<strong>Micro</strong> <strong>Star</strong> <strong>700</strong>
5<br />
<strong>Micro</strong> <strong>Star</strong> <strong>700</strong><br />
Graupner<br />
Désignation Dimensions<br />
Réf. N°<br />
[mm]<br />
<strong>4497</strong>.25 Jeu de rondelles d’appui, aluminium 1<br />
26 Jeu de vis 1<br />
27 Support moteur 1<br />
28 Jeu de palonnier de renvoi 1<br />
29 Supports de patin, aluminium 2<br />
30 Plateau cyclique 1<br />
31 Pièce centrale de tête de rotor 1<br />
32 Basculeur avec leviers de mixage 1<br />
33 Levier de commande 1<br />
34 Porte pales de rotor de queue 1<br />
35 Moyeu 1<br />
36 Freinage 1<br />
37 Compensateur de Pas 1<br />
38 Bras articulé 1<br />
39 Jeu de chapes à rotule et vis 1<br />
40 Jeu de tringleries 1<br />
41 Jeu de chapes à rotule, sans rotules 1<br />
42 Carter de rotor de queue 1<br />
43 Pont de commande de rotor de queue 1<br />
44 Tête de rotor de queue 1<br />
45 Palonnier de renvoi de rotor de queue 1<br />
46 Jeu d’accessoires 1<br />
<strong>4497</strong>.70 Moteur de propulsion, Brushless 1<br />
<strong>4497</strong>.71 Contrôleur de moteur Brushless 30 A/BEC 1<br />
5962 Gyroscope conservateur de capo VOX 300 1<br />
Qté