
You also want an ePaper? Increase the reach of your titles
YUMPU automatically turns print PDFs into web optimized ePapers that Google loves.
BEDIENUNGSANLEITUNG<br />
OPERATING MANUAL<br />
INSTRUCTIONS D´UTILISATION<br />
Best.-Nr. 3064<br />
Order-No.3064<br />
Rèf. No. 3064<br />
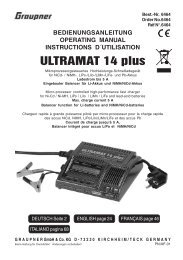
<strong>LiPo</strong> <strong>Balancer</strong> 5 <strong>Plus</strong><br />
Die Ultra-Präzise Microcontroller gesteuerte SMD Elektronik sorgt<br />
für minimalste Spannungsdifferenzen und bietet das Maximum an Sicherheit!<br />
The ultra precious microcontroller supervised SMD electronic provides<br />
minimal voltage differences and offer maximal safety.<br />
Le micro-contrôleur ultra-précis qui pilote l’électronique SMD assure des différences de<br />
tension minimales et offre un maximum de sécurité<br />
Seite 2 page 8 page 14<br />
G R A U P N E R GmbH & Co. KG D - 7 3 2 3 0 K I R C H H E I M / T E C K G E R M A N Y<br />
Keine Haftung für Druckfehler! Änderungen vorbehalten!<br />
PN.LA-02
Allgemeine Sicherheitshinweise<br />
Allgemeines<br />
Um alle Eigenschaften Ihres neuen <strong>Balancer</strong>s<br />
voll nutzen zu können, lesen Sie vor Inbetriebnahme,<br />
die nachfolgende Beschreibung vollständig<br />
und sorgfältig durch. Beachten Sie vor allem<br />
die Warn- und Sicherheitshinweise. Diese Anleitung<br />
ist an einem sicheren Ort aufzubewahren<br />
und einem nachfolgenden Benutzer des Geräts<br />
unbedingt mit auszuhändigen.<br />
Mit dem <strong>LiPo</strong> <strong>Balancer</strong> 5 <strong>Plus</strong> haben Sie ein<br />
ausgereiftes Produkt mit überragenden Eigenschaften<br />
erworben. Durch den Einsatz modernster<br />
Halbleitertechnologie, gesteuert durch<br />
einen leistungsfähigen RISC-Microprozessor<br />
werden überragende Sicherheitseigenschaften,<br />
einfache Bedienbarkeit und optimale Zuverlässigkeit,<br />
erreicht.<br />
Mit dem <strong>LiPo</strong> <strong>Balancer</strong>5 plus lassen sich 2-5<br />
Lithium Zellen ausgleichen. Bei einer Reihenschaltung<br />
zweier <strong>Balancer</strong> (siehe S. 7) ist es<br />
möglich bis zu 10 Zellen auszugleichen.<br />
Hinweis<br />
Es sind stets die Ladehinweise der Akkuhersteller<br />
zu beachten, sowie die Ladeströme und<br />
Ladezeiten einzuhalten. Es dürfen nur Akkus<br />
schnellgeladen werden, welche ausdrücklich für<br />
diesen hohen Ladestrom geeignet sind!<br />
Lithium-Polymer Zellen sind sehr empfindlich.<br />
Daher dürfen diese nur unter Aufsicht während<br />
des gesamten Ladevorgangs geladen werden.<br />
Warn- und Sicherheitshinweise<br />
• Das Gerät vor Staub, Feuchtigkeit, Regen,<br />
Hitze (z. B. direkte Sonneneinstrahlung) und<br />
Vibration schützen. Nur zur Verwendung im<br />
Trockenen!<br />
• Die Schlitze im Gehäuse dienen der Kühlung<br />
des Geräts und dürfen nicht abgedeckt oder<br />
verschlossen werden. Das Gerät muss<br />
während des Ladevorgangs frei aufgestellt<br />
sein, damit die Luft ungehindert zirkulieren<br />
kann.<br />
• Das Gerät ist für den Anschluss an ein für<br />
Lithium-Polymer Zellen geeignetes Ladegerät<br />
anzuschließen. Verwenden Sie nur Original<br />
kabel. Aus Sicherheitsgründen sind Umbau-<br />
2 Sicherheitshinweise<br />
maßnahmen am Ein- und Ausgang zu unter<br />
lassen.<br />
• Das Ladegerät, der <strong>LiPo</strong> <strong>Balancer</strong> 5 <strong>Plus</strong> und<br />
die zu ladende Batterie muss während<br />
des Betriebs auf einer nicht brennbaren,<br />
hitzebeständigen und elektrisch nicht leiten-<br />
den Unterlage stehen! Niemals direkt auf<br />
den Autositzen, Teppiche o. ä. abstellen!<br />
Auch sind brennbare oder leicht entzündliche<br />
Gegenstände von der Ladeanordnung fernzu-<br />
halten. Auf gute Belüftung achten!<br />
• Verbinden Sie das Gerät nur direkt mit den<br />
Original-Anschlussleitungen mit dem Ladege-<br />
rät und Akku.<br />
• Die Ladeausgänge und die Anschlusskabel<br />
dürfen nicht verändert oder untereinander<br />
in irgendeiner Weise verbunden werden.<br />
Anschlusskabel dürfen während des Betriebs<br />
nicht aufgewickelt sein! Vermeiden Sie Kurzschlüsse<br />
mit dem Ladeeingang / Ladeaus-<br />
gang bzw. dem Akku und der Autokarosserie.<br />
Stellen Sie deshalb das Gerät niemals direkt<br />
auf die Fahrzeugkarosserie.<br />
• Lassen Sie den Ladevorgang niemals unbe-<br />
aufsichtigt.<br />
• Es darf nur ein zu ladender Akku an den<br />
Ladeanschluss angeschlossen werden.<br />
• Es dürfen nur Lithium-Polymer Zellen mit bis<br />
zu 5 Zellen angeschlossen werden.<br />
• Um Kurzschlüsse am <strong>Balancer</strong> zu vermeiden,<br />
verbinden Sie immer zuerst das GRAUPNER<br />
Messkabel für die Einzelzellen mit Ihrem<br />
<strong>Balancer</strong>, anschließend eines der normalen<br />
Ladekabel Ihres <strong>Balancer</strong>s, bevor die Eingangskabel<br />
mit dem zu verwendeten Ladegerät<br />
verbunden werden. Achten Sie darauf,<br />
dass die beiden Eingangskabel nicht kurzgeschlossen<br />
werden, während der <strong>LiPo</strong><br />
<strong>Balancer</strong> <strong>Plus</strong> aktiviert ist, da sonst das Gerät<br />
beschädigt werden kann bzw. die Sicherung<br />
unterbricht.<br />
Haftungsausschluss<br />
Die Einhaltung der Betriebsanleitung sowie die<br />
Bedingungen und Methoden bei Installation,<br />
Betrieb, Verwendung und Wartung des Ladegerätes<br />
können von der Fa. GRAUPNER nicht<br />
überwacht werden. Daher übernimmt die
Allgemeine Betriebshinweise<br />
Fa. GRAUPNER keinerlei Haftung für Verluste,<br />
Schäden oder Kosten, die sich aus fehlerhafter<br />
Verwendung und Betrieb ergeben oder in irgendeiner<br />
Weise damit zusammenhängen.<br />
1. Auflage, Printed in Korea PN.LA-02<br />
Dieses Handbuch dient ausschließlich Informationszwecken,<br />
kann ohne Vorankündigung<br />
geändert werden und ist nicht als Verpflichtung<br />
der Firma GRAUPNER anzusehen. Die Firma<br />
GRAUPNER übernimmt keine Verantwortung<br />
oder Haftung für Fehler bzw. Ungenauigkeiten,<br />
die im Informationsteil dieses Handbuches auftreten<br />
können.<br />
Vor dem Laden prüfen<br />
Sind alle Verbindungen einwandfrei, gibt es Wackelkontakte?<br />
Bitte bedenken Sie, dass das Schnellladen von<br />
Batterien gefährlich sein kann. Eine, wenn auch<br />
nur kurze Unterbrechung aufgrund eines Wackelkontakts<br />
führt unweigerlich zu Fehlfunktionen,<br />
kann zu einem erneuten Ladestart führen.<br />
Laden von Akkus<br />
• Akkus dürfen nur unter Aufsicht geladen<br />
werden!<br />
• Akkus NUR auf einem feuerfesten Unter-<br />
grund laden!<br />
(<strong>Graupner</strong> <strong>LiPo</strong> Sicherheitskoffer Best.-Nr.<br />
8370 (klein) oder Best.-Nr. 8371 (groß)<br />
• Defekte oder aufgeblähte Lithium Zellen<br />
dürfen auf keinen Fall erneut geladen werden!<br />
• Der zu ladende Akku wird über die beiden<br />
originalen Stecker für GRAUPNER Lithium-<br />
Polymer Zellen angeschlossen<br />
• Achten Sie auf sicheren und guten Kontakt<br />
aller Steck- und Klemmverbindungen. Eine<br />
auch nur kurzzeitige Unterbrechung aufgrund<br />
eines Wackelkontakts kann einen erneuten<br />
Ladestart auslösen und den angeschlossenen<br />
Akku u. U. total überladen.<br />
Lithium-Polymer Zellen<br />
Der <strong>LiPo</strong>-<strong>Balancer</strong> plus ist nur zum ausbalancieren<br />
von Lithium-Polymer-Akkus mit einer Zellen<br />
Nennspannung von 3,7 V/Zelle oder von Li-Ionen<br />
Akkus mit einer Nennspannung von<br />
3,6V/Zelle geeignet.<br />
Lithium-Akkus zeichnen sich vor allem durch<br />
ihre, im Vergleich zu anderen Akkutypen,<br />
wesentlich höheren Energiedichte aus.<br />
Dieser wesentliche Vorteil auf der einen Seite<br />
erfordert jedoch andere Behandlungsmethoden<br />
in Bezug auf die Ladung / Entladung sowie für<br />
einen gefahrlosen Betrieb.<br />
Die hier grundlegenden Vorschriften müssen<br />
auf alle Fälle beachtet werden. Weitere entsprechende<br />
Angaben und Sicherheitshinweise entnehmen<br />
sie bitte den technischen Angaben des<br />
Akkuherstellers.<br />
Prinzipiell können Akkus auf Lithiumbasis NUR<br />
mit speziellen Ladegeräten geladen werden, die<br />
auf den jeweiligen Akkutyp (Ladeschlussspannung,<br />
Kapazität) eingestellt sind.<br />
Die Aufladung erfolgt anders als bei NiCd- oder<br />
NiMH-Akkus durch eine sog. Konstantstrom/<br />
Konstantspannungs-Methode. Der <strong>LiPo</strong> <strong>Balancer</strong><br />
wird zwischen das Ladegerät und den zu<br />
ladenden Akku geschaltet und balanciert sobald<br />
angeschlossen, den Akku aus.<br />
<strong>LiPo</strong>-<strong>Balancer</strong> 5 plus mit Lade-/Entladeschutz<br />
für 2-5 Zellen<br />
Der <strong>LiPo</strong>-<strong>Balancer</strong> 5 plus mit Überladeschutz<br />
und Tiefentladeschutz ist die optimale Schaltung<br />
für jeden Modellbauer. Für eine maximale<br />
Sicherheit und maximale Lebensdauer ist diese<br />
Schaltung zwingend erforderlich, denn sie verhindert<br />
das Überladen einzelner Zellen zuverlässig.<br />
Zusammen mit dem Tiefentladeschutz im<br />
Modell Best.-Nr. 6495 erreichen Sie einen deutlich<br />
sichereren Betrieb und höhere Zyklenzahlen<br />
Ihrer wertvollen Akkupacks!<br />
Der <strong>LiPo</strong>-<strong>Balancer</strong> 5 plus bringt alle in Reihe geschalteten<br />
Zellen eines <strong>LiPo</strong>-Akkus auf das gleiche<br />
Spannungsniveau. Dies ist erforderlich, weil<br />
durch Alterung oder Entladung unterschiedliche<br />
Ladezustände bzw. Spannungslagen erreicht<br />
werden. Das Angleichen der Zellen startet sofort<br />
nach dem Anstecken des Akkupacks und wird<br />
über den gesamten Ladevorgang fortgesetzt.<br />
Allgemeine Betriebshinweise 3
Inbetriebnahme<br />
Überladeschutz durch Überspannungsabschaltung<br />
Wenn eine Zelle die Spannung von 4,26V erreicht,<br />
wird der Ladevorgang sofort unterbrochen,<br />
um diese Zelle sicher vor einer schädlichen<br />
Überladung zu schützen. Dies kann der Fall sein,<br />
wenn am Ladegerät die falsche Zellenzahl oder<br />
der falsche Akkutyp gewählt wurde bzw. wenn<br />
eine Zelle einen Defekt aufweist.<br />
Die Sicherheit wird dadurch um ein Vielfaches<br />
erhöht. Der <strong>LiPo</strong>-<strong>Balancer</strong> 5 plus wird sowohl<br />
über den weißen, mehrpoligen Stecker, wie auch<br />
über den Hochstromstecker des Akkus angeschlossen.<br />
Dadurch wird eine Verfälschung des<br />
Messergebnisses durch den Ladestrom vermieden,<br />
so dass die einzelnen Zellen perfekt ausgeglichen<br />
werden.<br />
Überprüfung der Lithiumakkus<br />
!Achtung! Bevor Sie Ihren <strong>LiPo</strong> <strong>Balancer</strong> 5 plus<br />
in Betrieb nehmen, überprüfen Sie unbedingt die<br />
korrekte Pin-Belegung des mehrpoligen weißen<br />
Steckers Ihres <strong>LiPo</strong> Akkus wie folgt.<br />
Am besten dazu eignet sich ein Voltmeter, wie<br />
z.B. Best.-Nr. 1955 Zangen-Ampere/Multimeter.<br />
Bei falscher Pin-Belegung wird das Ladegerät<br />
und der Akku zerstört. Explosionsgefahr!<br />
Pin 1: Masse (schwarzes Kabel)<br />
Pin 2: 3,7V (Zelle 1)<br />
Pin 3: 7,4V (Zelle 2)<br />
Pin 4: 11,1V (Zelle 3)<br />
Pin 5: 14,8V (Zelle 4)<br />
Pin 6: 18,5V (Zelle 5)<br />
Beispiel: 3-zelliger Akkupack<br />
4 Inbetriebnahme<br />
Inbetriebnahme<br />
Schließen Sie Ihren <strong>LiPo</strong> <strong>Balancer</strong> 5 plus zwischen<br />
Ihrem Ladegerät und dem zu ladenden<br />
<strong>LiPo</strong> Akku an.<br />
Generell sollten Sie zuerst den Akku mit dem<br />
mehrpoligen, weißen Stecker an den <strong>Balancer</strong><br />
anschließen, bevor Sie den Hochstromstecker<br />
mit dem <strong>Balancer</strong> verbinden.<br />
Bereits ab diesem Zeitpunkt beginnt das Gerät<br />
die <strong>LiPo</strong> Zellen auszubalancieren, ohne das ein<br />
Ladegerät angeschlossen wird.<br />
Zum Laden bzw- Entladen des Akkus verbinden<br />
Sie das zum Ladegerät passende Eingangkabel<br />
mit Ihrem <strong>LiPo</strong> Ladegerät, siehe nachfolgende<br />
Abbildung.<br />
Lademodus<br />
Schließen Sie nun einen geeigneten original<br />
GRAUPNER Lithium-Polymer Akkupack bis maximal<br />
5 Zellen wie beschrieben an.<br />
Entnehmen Sie die Ladeeinstellungen der Bedienungsanleitung<br />
Ihres Ladegerätes.<br />
Verbinden Sie den <strong>LiPo</strong> <strong>Balancer</strong> plus wie zuvor<br />
beschrieben.<br />
Der <strong>Balancer</strong> unterscheidet zwischen zwei Betriebsmodes,<br />
den „Connect Modus“ (verbunden)<br />
und den „Disconnect Modus“ (nicht verbunden)<br />
Disconnect Modus (nicht verbunden)<br />
Dieser Modus wird benötigt, wenn der <strong>Balancer</strong><br />
nur mit einem Akku verbunden ist, diesen ausbalanciert,<br />
aber kein Ladegerät angeschlossen ist.<br />
Dadurch ist der Eingang auch Kurzschlussgeschützt.<br />
Um in den „Disconnect Modus“ zu gelangen,<br />
drücken Sie die MODE/RESET-Taste, wenn die<br />
STATUS LED langsam oder gar nicht blinkt.<br />
Der Disconnect Modus wird durch konstantes<br />
leuchten der STATUS LED signalisiert.
Inbetriebnahme<br />
Connect Modus (verbunden)<br />
Um einen Akku zu laden bzw. zu entladen, muss<br />
sich der <strong>Balancer</strong> im „Connect Modus“ befinden,<br />
da ansonsten der Eingang deaktiviert ist.<br />
Dieser Modus wird durch ein konstantes,<br />
langsames blinken signalisiert.<br />
Um in den „Connect Modus“ zu gelangen, drücken<br />
Sie die MODE-Taste, während die Status<br />
LED dauerhaft leuchtet.<br />
Leuchtet und blinkt STATUS LED nicht, dann<br />
befindet sich der <strong>Balancer</strong> im Engergiesparmodus.<br />
Drücken Sie die MODE-Taste so oft<br />
und so lange, bis die STATUS LED blinkt.<br />
Laden / Entladen eines Akkus<br />
Um einen Akku laden bzw. entladen zu können,<br />
muss sich der <strong>LiPo</strong> <strong>Balancer</strong> 5 plus im<br />
„Connect Modus“ befinden. Zwischen dem<br />
„Connect- und Disconnect Modus“ wechseln Sie<br />
mit der MODE Taste. Die STATUS LED blinkt nun<br />
langsam im „Connect Modus“. Starten Sie nun<br />
den Ladevorgang an Ihrem Ladegerät.<br />
Der <strong>LiPo</strong> <strong>Balancer</strong> plus überwacht jede Zelle einzeln,<br />
gleicht diese während des Ladevorgangs<br />
aus und schützt vor Überladung Ihres Akkupacks<br />
durch sofortigen Abbruch des Ladevorgangs bei<br />
zu hoher Spannung der Zellen.<br />
Hinweis:<br />
- Der Anschlussstecker zum Ladegerät darf nur<br />
im „Disconnect Modus“ abgezogen werden.<br />
- Der Lithium Akku darf so lange der Akku ge-<br />
laden wird, nicht abgesteckt werden.<br />
Zum Abstecken muss sich der <strong>Balancer</strong> im<br />
„Disconnect Modus“ befinden.<br />
Zellenzähler LEDs<br />
Für jede angeschlossene <strong>LiPo</strong><br />
Zelle, ist der <strong>LiPo</strong> <strong>Balancer</strong> 5 <strong>Plus</strong><br />
mit einer LED ausgestattet.<br />
Die entsprechende LED signalisiert<br />
durch blinken, sobald<br />
ausbalanciert wird.<br />
Die Zellen 1, 3, 5 besitzen eine<br />
rote LED, Zellen 2, 4 verfügen<br />
über eine grüne LED.<br />
Blinksequenz Spannungsdifferenz<br />
1x blinken, Pause, 1x blinken < 0,02V<br />
2x blinken, Pause, 2x blinken < 0,2V<br />
3x blinken, Pause, 3x blinken > 0,2V<br />
(In diesem Fall muss der <strong>LiPo</strong>-Akku zuerst im<br />
„Disconnect Modus“ ausbalanciert werden,<br />
bevor der Akku im „Connect Modus“ geladen<br />
werden darf!)<br />
kein blinken, Zellen sind ausbaalle<br />
LEDs aus lanciert der Balan-<br />
cer befindet sich im<br />
Energiesparmodus.<br />
Fehler Modus<br />
Die Status LED signalisiert neben dem „Connect“<br />
und „Disconnect“ Modus auch den Fehlermodus.<br />
Der Fehlermodus wird 10 Sekunden lang angezeigt,<br />
bevor das Gerät in den Energiesparmodus<br />
übergeht. Durch Drücken der Mode/Reset-Taste,<br />
können Sie den Fehlermodus bestätigen, sodass<br />
dieser gelöscht wird.<br />
Folgende Fehler-Modi werden unterschieden:<br />
Status LED Funktion<br />
2x blinken/sekunde Überspannung des<br />
(xx xx xx) Akkus<br />
3x blinken/sekunde Kurzschluss am Ein-<br />
(xxx xxx xxx) oder Ausgang<br />
4x blinken/sekunde Verbindungsfehler<br />
(xxxx xxxx xxxx)<br />
Energiesparmodus<br />
Das Gerät schaltet sich automatisch in den Energiesparmodus,<br />
sobald der Akkupack ausbalanciert<br />
ist um die Entladung des <strong>LiPo</strong> Akkus zu<br />
verhindern.<br />
Sobald Sie die MODE/RESET-Taste drücken,<br />
verlassen Sie den Energiesparmodus.<br />
Komponenten und Zubehör<br />
Die Firma GRAUPNER GmbH & Co. KG als Hersteller<br />
empfiehlt, Komponenten und<br />
Inbetriebnahme 5
Technische Daten, Konformität<br />
Zubehörprodukte zu verwenden, die von<br />
GRAUPNER auf Tauglichkeit, Funktion und Sicherheit<br />
geprüft, freigegeben sind. GRAUPNER<br />
übernimmt für Sie die Produktverantwortung.<br />
Die Fa. GRAUPNER übernimmt für nicht freigegebene<br />
Teile oder Zubehörprodukte von anderen<br />
Herstellern keine Haftung und kann nicht jedes<br />
einzelne Fremdprodukt beurteilen, ob es ohne<br />
Sicherheitsrisiko eingesetzt werden kann.<br />
Technische Daten<br />
Eingangsspannung: max. 55 V<br />
Ausgangsspannung: 6,0 ~ 30 V<br />
Akkutyp: <strong>LiPo</strong> 3,7V/Zelle<br />
LiIo 3,6V/Zelle<br />
Zellenzahl: 2 ~ 5 Zellen<br />
Max. Ladestrom: 10 A<br />
Spannungsauflösung: +/- 5 mV<br />
Eingang: Goldkontaktstecker<br />
Ausgang: <strong>Graupner</strong> <strong>LiPo</strong><br />
Stecker mehrpolig<br />
<strong>Graupner</strong> BEC und<br />
G4 Stecker<br />
Temperaturbereich: 0°C ... 35°C<br />
Abmessungen (L/B/H): ca. 85x45x18mm<br />
(ohne Anschlusskabel)<br />
Gewicht: ca. 70 g.<br />
Hinweise zum Umweltschutz<br />
Das Symbol auf dem Produkt, der<br />
Gebrauchsanleitung oder der Verpackung<br />
weist darauf hin, dass<br />
dieses Produkt bzw. elektronische<br />
Teile davon am Ende seiner Lebensdauer<br />
nicht über den normalen<br />
Haushaltsabfall entsorgt werden dürfen. Es<br />
muss an einem Sammelpunkt für das Recycling<br />
von elektrischen und elektronischen Geräten abgegeben<br />
werden.<br />
Die Werkstoffe sind gemäß ihrer Kennzeichnung<br />
wiederverwertbar. Mit der Wiederverwendung,<br />
der stofflichen Verwertung oder anderen Formen<br />
der Verwertung von Altgeräten leisten Sie einen<br />
wichtigen Beitrag zum Umweltschutz.<br />
6 Technische Daten, Konformität<br />
Batterien und Akkus müssen aus dem Gerät<br />
entfernt werden und bei einer entsprechenden<br />
Sammelstelle getrennt entsorgt werden.<br />
Bei RC-Modellen müssen Elektronikteile, wie<br />
z.B. Servos, Empfänger oder Fahrtenregler<br />
aus dem Produkt ausgebaut und getrennt bei<br />
einer entsprechenden Sammelstelle als Elektro-<br />
Schrott entsorgt werden.<br />
Bitte erkundigen Sie sich bei der Gemeindeverwaltung<br />
nach der zuständigen Entsorgungsstelle.<br />
EG-Konformitätserklärung<br />
Für das folgend bezeichnete Erzeugnis<br />
<strong>LiPo</strong> <strong>Balancer</strong> 5 plus Best.-Nr. 3064<br />
wird hiermit bestätigt, dass es den wesentlichen<br />
Schutzanforderungen entspricht, die in der<br />
Richtlinie des Rates zur Angleichung der Rechtsvorschriften<br />
der Mitgliedstaaten über die elektromagnetische<br />
Verträglichkeit (89/336/EWG)<br />
festgelegt sind.<br />
Zur Beurteilung des Erzeugnisses hinsichtlich<br />
elektromagnetischer Verträglichkeit wurden folgende<br />
Normen herangezogen:<br />
EN 50081-1<br />
EN 50082-1<br />
Diese Erklärung wird verantwortlich für den<br />
Hersteller/Importeur<br />
<strong>Graupner</strong> GmbH & Co. KG<br />
Henriettenstr. 94-96<br />
73230 Kirchheim/Teck<br />
abgegeben durch<br />
73230 Kirchheim/Teck, den 29.11.05<br />
Hans <strong>Graupner</strong><br />
Geschäftsführer
<strong>LiPo</strong> <strong>Balancer</strong> 5 plus im Überblick<br />
<strong>LiPo</strong> <strong>Balancer</strong> plus im Überblick<br />
10A Sicherung<br />
STATUS LED<br />
MODE/RESET<br />
Reihenschaltung von 2 <strong>Balancer</strong>n<br />
Anschluss Ladegerät<br />
für bis zu 10 Zellen<br />
2 x 4 mm Goldbuchsen<br />
verlötet + verschrumpft<br />
<strong>LiPo</strong> <strong>Balancer</strong> 5 plus<br />
<strong>LiPo</strong> <strong>Balancer</strong> 5 plus<br />
EINGANG Ladegerät<br />
!! Es darf nur einer der<br />
beiden Anschlüsse mit<br />
dem Ladegerät verbunden<br />
werden!!<br />
Einzelzellen AUSGANG<br />
Für den Anschluss des<br />
mehrpoligen GRAUPNER<br />
<strong>LiPo</strong> Messkabel<br />
AUSGANG<br />
Für den Anschluss des<br />
Hochstromsteckers Ihres<br />
<strong>LiPo</strong> Akkus.<br />
!! Es darf nur einer dieser<br />
beiden Anschlüsse verwendet<br />
werden !!<br />
<strong>LiPo</strong>/Lilo<br />
Akku 1<br />
2-5 Zellen<br />
<strong>LiPo</strong>/Lilo<br />
Akku 2<br />
2-5 Zellen<br />
<strong>LiPo</strong> <strong>Balancer</strong> 5 plus im Überblick 7
General Safety Notes<br />
Introduction<br />
Please be sure to read right through these operating<br />
instructions attentively before you attempt<br />
to use your new balancer, as this will ensure that<br />
you can make full use of all of its capabilities.<br />
Take particular note of the warnings and safety<br />
notes. These instructions should be kept in a<br />
safe place; if you ever dispose of the charger, be<br />
sure to pass them on to the new owner.<br />
The <strong>LiPo</strong> <strong>Balancer</strong> 5 <strong>Plus</strong> is a sophisticated product<br />
offering a number of outstanding features.<br />
The use of the latest semi-conductor technology,<br />
controlled by a high-performance RISC microprocessor,<br />
provides outstanding safety characteristics,<br />
simplicity of operation and optimum<br />
reliability.<br />
The <strong>LiPo</strong> <strong>Balancer</strong> can be used to balance the<br />
state of two to five Lithium cells. Up to ten cells<br />
can be balanced if two <strong>Balancer</strong>s are connected<br />
together in series (see page 13).<br />
Note<br />
Always read and observe the charging instructions<br />
supplied by the battery manufacturer, and<br />
keep to the charge currents and charge times<br />
stated in them. It is not safe to fast-charge Lithium<br />
batteries unless they are expressly stated to<br />
be suitable for high charge currents.<br />
Lithium-Polymer cells are very sensitive.<br />
For this reason they should only ever be charged<br />
in conditions where the entire charging process<br />
can be supervised constantly.<br />
Warnings and safety notes<br />
• Protect the balancer from dust, damp, rain,<br />
heat (e.g. direct sunshine) and vibration. It<br />
should only be operated in dry indoor conditi<br />
ons.<br />
• The case slots serve to cool the charger, and<br />
must not be covered or enclosed; set up the<br />
charger with space all around it, so that<br />
cooling air can circulate unhindered.<br />
• The device must be connected to a charger<br />
designed for Lithium-Polymer cells, using<br />
the original cables only. For safety reasons it<br />
is important not to modify the inputs and<br />
outputs of the device in any way.<br />
8 Safety Notes<br />
• The charger and the battery to be charged<br />
should be set up on a heat-resistant, noninflammable<br />
and non-conductive surface<br />
before use. Never place the charger directly<br />
on a car seat, carpet or similar surface. Keep<br />
all inflammable and volatile materials well<br />
away from the charging area, and provide<br />
good ventilation.<br />
• Connect the balancer directly to the charger<br />
and the model battery only, using the original<br />
cables and connectors supplied.<br />
• The charge output sockets and connecting<br />
leads must not be modified, and must not be<br />
inter-connected in any way. The charge leads<br />
and connecting leads must not be coiled up<br />
when a charge process is in progress. Avoid<br />
short-circuiting the charge input or output with<br />
the model battery or the car bodywork. For<br />
this reason the unit must never be placed<br />
directly on the vehicle’s bodywork.<br />
• Never leave the charging system operating<br />
without supervision.<br />
• Only one battery may be connected to the<br />
charge output for charging at any one time.<br />
• The charger is only suitable for use with<br />
Lithium-Polymer batteries consisting of up to<br />
five cells.<br />
• To avoid short-circuiting the balancer, please<br />
keep to this sequence of connections: always<br />
connect the GRAUPNER measuring lead for<br />
the individual cells to your balancer first, then<br />
one of your balancer’s standard charge leads,<br />
and only then connect the input cables to<br />
the charger you intend to use. Take care<br />
not to short-circuit the two input cables while<br />
the <strong>LiPo</strong> <strong>Balancer</strong> plus is active, as this could<br />
damage the unit or cause the fuse to blow.<br />
Liability Exclusion<br />
As manufacturers, we at GRAUPNER are not in<br />
a position to ensure that you observe the correct<br />
methods of operation when installing, using and<br />
maintaining the balancer. For this reason we are<br />
obliged to deny all liability for loss, damage or<br />
costs which are incurred due to the incompetent<br />
or incorrect use and operation of our products,<br />
or which are connected with such operation in<br />
any way.
General Operating Information<br />
1st edition, printed in Korea PN.LA-02<br />
The purpose of this manual is exclusively to provide<br />
information. It is subject to modification without<br />
prior notification, and must not be considered<br />
to constitute an obligation on the part of the<br />
GRAUPNER company. GRAUPNER accepts no<br />
responsibility or liability for errors or inaccuracies<br />
which may be found in the information section<br />
of this manual.<br />
Check before using the charging system<br />
Are all connections firm, or is there an intermittent<br />
contact at any point in the circuit?<br />
Please bear in mind that it can be dangerous to<br />
fast-charge batteries. For example, if there is a<br />
brief interruption due to an intermittent contact,<br />
the result is inevitably a malfunction, and this<br />
could cause the charge process to restart.<br />
Charging batteries<br />
• Batteries must be supervised constantly when<br />
on charge.<br />
• Batteries must ALWAYS be placed on a<br />
fire-proof surface for charging. (<strong>Graupner</strong><br />
<strong>LiPo</strong> Safety Case, Order No. 8370 (small) or<br />
Order No. 8371 (large)).<br />
• Faulty or swollen Lithium cells must never be<br />
recharged again.<br />
• The battery to be charged must be connected<br />
using the two original connectors for<br />
GRAUPNER Lithium-Polymer cells.<br />
• Ensure that there are no intermittent contacts<br />
at any point in the charge circuit. If there is a<br />
brief interruption due to an intermittent contact,<br />
the result could be a restart of the charge<br />
process, which would result in the pack being<br />
massively overcharged.<br />
Lithium-Polymer cells<br />
The <strong>LiPo</strong> <strong>Balancer</strong> 5 plus is designed solely for<br />
balancing Lithium-Polymer batteries with a nominal<br />
cell voltage of 3.7 V per cell, or Lithium-<br />
Ion batteries with a nominal voltage of 3.6 V per<br />
cell.<br />
Compared to other battery types, the outstanding<br />
feature of Lithium batteries is their much higher<br />
energy density.<br />
However, this important advantage is balanced<br />
by increased risks, and it is necessary to adopt<br />
different charging and discharging methods in<br />
order to reduce the risk to a minimum.<br />
It is essential at all times to observe the basic instructions<br />
provided here. Please be sure to read<br />
the information and safety notes provided by the<br />
battery manufacturer, and keep within the stated<br />
technical limits.<br />
The basic rule is that Lithium-based batteries can<br />
ONLY be charged using special chargers designed<br />
and adjusted to suit the specific battery type<br />
(final charge voltage and capacity).<br />
In contrast to NiCd and NiMH batteries, Lithium<br />
batteries have to be charged using what is known<br />
as a constant current / constant voltage method.<br />
The <strong>LiPo</strong> <strong>Balancer</strong> is connected between the<br />
charger and the battery to be charged, and starts<br />
to balance the voltages of the individual cells as<br />
soon as it is connected.<br />
<strong>LiPo</strong> <strong>Balancer</strong> 5 plus with charge / discharge<br />
protection for 2 to 5 cells<br />
The <strong>LiPo</strong> <strong>Balancer</strong> plus features protection<br />
against overcharging and deep-discharging, and<br />
represents the ideal circuit for every modeller.<br />
The unit is absolutely essential for maximum<br />
safety and effective useful life with these batteries,<br />
because it reliably eliminates the problem<br />
of overcharging individual cells. Used together<br />
with the deep-discharge guard, Order No. 6495,<br />
which is fitted in the model, you can be sure of<br />
much safer operation and higher cycle counts<br />
from your valuable battery packs.<br />
The <strong>LiPo</strong> <strong>Balancer</strong> 5 plus brings all the seriesconnected<br />
cells in a <strong>LiPo</strong> battery to the same<br />
voltage level. This is necessary, because ageing<br />
effects and discharge processes can produce<br />
differences in states of charge, i.e. cell voltage.<br />
The balancing of the cells starts immediately<br />
when the pack is connected to the balancer, and<br />
this process continues for the full duration of the<br />
charge.<br />
General Operating Information 9
Using the balancer for the first time<br />
Overcharging protection: over-voltage cutoff<br />
If a cell reaches the voltage of 4.26 V, the charge<br />
process is immediately broken off in order to protect<br />
this cell from damage due to overcharging.<br />
This may occur if the wrong cell count or battery<br />
type has been selected on the charger, or if one<br />
cell develops a fault. This single feature makes<br />
the whole charging process many times safer.<br />
The <strong>LiPo</strong> <strong>Balancer</strong> plus is connected to the battery<br />
both by the white multi-pin plug and also by the<br />
standard high-current connector attached to the<br />
pack. This arrangement avoids a falsification of<br />
the measured results due to the influence of the<br />
charge current, with the net result that individual<br />
cells are perfectly balanced.<br />
Checking the Lithium battery<br />
! Caution ! Before you use your <strong>LiPo</strong> <strong>Balancer</strong><br />
plus for the first time, it is essential to check that<br />
the pin assignment of the white multi-pin connector<br />
attached to your Li-Po battery is correct. The<br />
best method is to use a voltmeter, e.g. Order No.<br />
1955: clamp ammeter / multimeter.<br />
If the pin assignment is incorrect, the charger<br />
and the battery will be ruined. Explosion<br />
hazard!<br />
Pin 1: Earth (black wire)<br />
Pin 2: 3,7V (cell 1)<br />
Pin 3: 7,4V (cell 2)<br />
Pin 4: 11,1V (cell 3)<br />
Pin 5: 14,8V (cell 4)<br />
Pin 6: 18,5V (cell 5)<br />
Example: 3-cell battery pack<br />
10 Using the balancer for the first time<br />
Using the balancer for the first time<br />
Connect your <strong>LiPo</strong> <strong>Balancer</strong> 5 plus between the<br />
battery charger and the <strong>LiPo</strong> pack you wish to<br />
charge.<br />
As a general rule you should first connect the<br />
battery to the balancer using the white multi-pin<br />
connector, before connecting the high-current<br />
connectors to the balancer.<br />
From this moment the device starts to balance<br />
the voltage of the <strong>LiPo</strong> cells, even without being<br />
connected to a charger.<br />
To charge or discharge the battery, connect the<br />
input cable matching your charger to your <strong>LiPo</strong><br />
battery charger; see picture below.<br />
Charge mode<br />
Connect a suitable genuine GRAUPNER Lithium-Polymer<br />
battery (max. five cells) as described<br />
above.<br />
Refer to the operating instructions supplied with<br />
your battery charger for the correct charge settings.<br />
Connect the <strong>LiPo</strong> <strong>Balancer</strong> plus as described<br />
above.<br />
The balancer differentiates between two operating<br />
modes: “Connect Mode” (connected) and<br />
“Disconnect Mode” (not connected).<br />
Disconnect Mode (not connected)<br />
This mode is required when the balancer is connected<br />
to a battery in order to balance the cells’<br />
voltages, but no charger is connected. In this<br />
mode the input is short-circuit protected.<br />
To select “Disconnect Mode”, press the MODE /<br />
RESET button when the STATUS LED is flashing<br />
slowly or not flashing at all.<br />
The Status LED will now glow constantly to confirm<br />
Disconnect Mode.
Using the balancer for the first time<br />
Connect mode (connected)<br />
To charge or discharge a battery the balancer<br />
must be in “Connect Mode”, otherwise the input<br />
is disabled.<br />
The LED flashes constantly at a slow rate to confirm<br />
Connect Mode.<br />
To select “Connect Mode”, press the MODE button<br />
while the Status LED is glowing constantly.<br />
If the STATUS LED does not flash or glow constantly,<br />
the balancer is in the Energy save mode.<br />
Press the MODE button as long and as often,<br />
until the STATUS LED will flash constantly.<br />
Charging / discharging a battery<br />
To be able to charge or discharge a battery, the<br />
<strong>LiPo</strong> <strong>Balancer</strong> must be set to “Connect Mode”.<br />
You can switch between “Connect Mode” and<br />
“Disconnect Mode” by pressing the MODE button.<br />
The Status LED flashes at a slow rate when<br />
the balancer is set to “Connect Mode”. Now start<br />
the charge process on your battery charger.<br />
The <strong>LiPo</strong> <strong>Balancer</strong> 5 plus monitors each cell individually,<br />
balances the voltage of each cell during<br />
the charge process, and protects your battery<br />
pack from overcharging by immediately breaking<br />
off the charge process if the voltage of any one<br />
cell rises to an excessive value.<br />
Note:<br />
- The connector to the battery charger must not<br />
be disconnected unless the balancer is set to<br />
“Disconnect Mode”.<br />
- The Lithium battery must not be disconnected<br />
while it is being charged.<br />
Before you disconnect the battery you must<br />
set the balancer to “Disconnect Mode”.<br />
Cell-count LEDs<br />
The <strong>LiPo</strong> <strong>Balancer</strong> 5 <strong>Plus</strong> is fitted<br />
with an LED corresponding to<br />
each <strong>LiPo</strong> cell connected to the<br />
unit. The appropriate LED<br />
flashes to indicate that the<br />
balancing process is in<br />
progress. Cells 1, 3 and 5<br />
feature red LEDs,<br />
cells 2 and 4 green LEDs.<br />
Flashing sequence Voltage difference<br />
1x flash, pause, 1x flash < 0,02V<br />
2x flash, pause, 2x flash < 0,2V<br />
3x flash, pause, 3x flash > 0,2V<br />
(in the latter case the Li-Po battery must first be<br />
balanced in “Disconnect Mode”, before it is safe<br />
to recharge it with the balancer set to “Connect<br />
Mode”.)<br />
No flashing, Cells are properly<br />
all LEDs off balanced; the<br />
balancer is in ener-<br />
gy save mode<br />
Error Mode<br />
The primary purpose of the Status LED is to indicate<br />
“Connect” and “Disconnect” modes, but it<br />
also indicates Error mode.<br />
Error mode is displayed for ten seconds before<br />
the unit switches to energy save mode. Pressing<br />
the Mode / Reset button confirms the error mode,<br />
then erases it.<br />
The balancer differentiates between the following<br />
errors:<br />
Status LED Function<br />
2x flash/second Excessive battery-<br />
(xx xx xx) voltage<br />
3x flash/second Short-circuit at input<br />
(xxx xxx xxx) or output<br />
4x flash/second Connection error<br />
(xxxx xxxx xxxx)<br />
Energy save mode<br />
The balancer switches automatically into energy<br />
save mode as soon as the battery is properly<br />
balanced; this is to avoid discharging the <strong>LiPo</strong><br />
pack.<br />
Press the MODE / RESET button to quit energy<br />
save mode.<br />
Components and accessories<br />
As manufacturer of this unit, GRAUPNER GmbH<br />
& Co. KG recommends that you use<br />
Using the balancer for the first time 11
Specifications, Conformity<br />
accessories which have been tested and approved<br />
by <strong>Graupner</strong>, as they are known to be compatible,<br />
and work correctly and reliably. In this<br />
case GRAUPNER assumes responsibility for the<br />
product. GRAUPNER will not accept liability for<br />
components not approved for this use, or accessories<br />
made by other manufacturers, as it is not<br />
possible to assess whether every non-<strong>Graupner</strong><br />
product is suitable for this use without incurring<br />
a safety risk.<br />
Specification<br />
Input voltage: max. 55 V<br />
Output voltage: 6,0 ~ 30 V<br />
Battery type: <strong>LiPo</strong> 3,7V/cell<br />
LiIo 3,6V/cell<br />
Cell count: 2 ~ 5 cells<br />
Max. charge current: 10 A<br />
Voltage resolution: +/- 5 mV<br />
Input: Gold-contact connec-<br />
tors<br />
Output: <strong>Graupner</strong> multi-pin<br />
gold-contact <strong>LiPo</strong><br />
connectors<br />
Temperature range: 0°C ... 35°C<br />
Dimensions (L x B x H): approx. 85x45x18mm<br />
(excl. cables)<br />
Weight: approx. 70 g<br />
Environmental Protection Notes<br />
Whenever you see this symbol on a<br />
product, in the user instructions or<br />
the packaging, it means that you<br />
must not dispose of that item, or the<br />
electronic components in it, in the<br />
ordinary domestic waste when it<br />
comes to the end of its useful life. The correct<br />
method of disposal is to take it to your local collection<br />
point for recycling electrical and electronic<br />
equipment.<br />
Individual markings indicate which materials<br />
can be recycled and re-used. You can make an<br />
important contribution to the protection of our<br />
shared environment by re-using the product,<br />
recycling the basic materials or recycling redundant<br />
equipment in other ways.<br />
12 Specification, Conformity<br />
Dry cells and rechargeable batteries must be removed<br />
from the device and taken separately to a<br />
suitable battery disposal centre.<br />
In the case of RC models, the electronic components<br />
- such as servos, receivers and speed<br />
controllers - must be removed from the model,<br />
and taken to an appropriate collection centre for<br />
electrical waste.<br />
If you don’t know the location of your nearest disposal<br />
centre, please enquire at your local council<br />
office.<br />
EU Conformity Declaration<br />
We hereby declare that the following product:<br />
<strong>LiPo</strong> <strong>Balancer</strong> 5 plus, Order No. 3064<br />
conforms with the essential protective requirements<br />
as laid down in the directive for harmonising<br />
the statutory directives of the member<br />
states concerning electro-magnetic interference<br />
(89/336/EWG).<br />
This product has been tested for electro-magnetic<br />
interference in accordance with the following<br />
norms:<br />
EN 50081-1<br />
EN 50082-1<br />
This declaration was produced by:<br />
<strong>Graupner</strong> GmbH & Co. KG<br />
Henriettenstr. 94-96<br />
73230 Kirchheim/Teck<br />
and is valid for the manufacturer / importer of<br />
the product<br />
73230 Kirchheim/Teck, Germany, on 29.11.05,<br />
Hans <strong>Graupner</strong><br />
Managing Director
A brief summary of the <strong>LiPo</strong> 5 <strong>Balancer</strong> plus<br />
A brief summary of the <strong>LiPo</strong> <strong>Balancer</strong> plus<br />
10A fuse<br />
STATUS LED<br />
MODE/RESET<br />
Series connection of two balancers<br />
Connections to charger,<br />
for up to 10 cells<br />
2 x 4 mm gold-contact<br />
sockets, soldered / shrink sleeved<br />
<strong>LiPo</strong> <strong>Balancer</strong> 5 plus<br />
<strong>LiPo</strong> <strong>Balancer</strong> 5 plus<br />
Charger INPUT: only one<br />
of the two connector sets<br />
may be connected to the<br />
charger!<br />
Individual cell OUTPUT:<br />
for connection to the<br />
GRAUPNER multi-pin <strong>LiPo</strong><br />
measuring lead.<br />
OUTPUT: for connection to<br />
the high-current connectors<br />
of your <strong>LiPo</strong> battery.<br />
!! Only one of the two<br />
connector sets may be<br />
used !!<br />
<strong>LiPo</strong>/Lilo<br />
battery 1<br />
2-5 cells<br />
<strong>LiPo</strong>/Lilo<br />
battery 2<br />
2-5 cells<br />
<strong>LiPo</strong> <strong>Balancer</strong> 5 plus summary 13
Généralités<br />
Généralités<br />
Avant la mise en service de votre nouveau<br />
<strong>LiPo</strong> <strong>Balancer</strong> <strong>Plus</strong>, veuillez lire attentivement<br />
et entièrement les descriptions qui vont suivre<br />
pour pouvoir connaître toutes ses particularités.<br />
Observez surtout les avertissements et les<br />
conseils de sécurité. Conservez soigneusement<br />
ces instructions afin de pouvoir les remettre à un<br />
éventuel utilisateur suivant.<br />
Avec le Li-Po <strong>Balancer</strong> 5 <strong>Plus</strong>, vous avez fait<br />
l’acquisition d’un produit aux remarquables propriétés.<br />
Grâce à l’utilisation d’une technologie<br />
moderne en semi-conducteurs avec un puissant<br />
micro-processeur RISC, une remarquable sécurité<br />
de charge, une utilisation simple et une fiabilité<br />
optimale ont été obtenues.<br />
2 à 5 éléments au Lithium pourront être équilibrés<br />
avec le <strong>LiPo</strong> <strong>Balancer</strong> 5 <strong>Plus</strong>. Avec la commutation<br />
en série de deux <strong>LiPo</strong> <strong>Balancer</strong> 5 <strong>Plus</strong><br />
(19 page), il est possible d’équilibrer jusqu’à 10<br />
éléments.<br />
Note :<br />
Les conseils de charge donnés par le fabricant<br />
des accus devront être observés, ainsi que le<br />
courant et le temps de charge prescrits. Seuls<br />
les accus à charge rapide adaptés pour ces forts<br />
courants de charge devront être connectés sur<br />
cet appareil.<br />
Les éléments au Lithium-Polymer sont très sensibles<br />
et ils devront ainsi être surveillés durant la<br />
totalité du processus de charge.<br />
Avertissements et conseils de sécurité<br />
• Protéger l’appareil de la poussière, de<br />
l’humidité, de la pluie, de la chaleur (Par ex.<br />
du rayonnement solaire direct) et des vibra<br />
tions ; il doit être utilisé uniquement dans un<br />
endroit sec !<br />
• Les ouies percées dans le boîtier servent au<br />
refroidissement de l’appareil et ne devront en<br />
aucun cas être obturées. Durant le processus<br />
de charge, placer l’appareil à un endroit dégagé<br />
afin de lui assurer une circulation d’air.<br />
• L’appareil est conçu pour être raccordé à un<br />
chargeur adapté pour les éléments au<br />
Lithium-Polymer. Utiliser uniquement le<br />
cordon original pour le connecter.<br />
14 Avertissements et conseils de sécurité<br />
• Durant le processus de charge, le chargeur, le<br />
<strong>LiPo</strong> <strong>Balancer</strong> 5 <strong>Plus</strong> et la batterie à charger<br />
devront être placés sur une surface non<br />
inflammable, résistance à la chaleur et non<br />
conductrice de l’électricité! Ne jamais les<br />
poser sur les sièges d’une voiture, sur les<br />
tapis, etc… Eloigner également les objets<br />
facilement inflammables de l’installation de<br />
charge et veiller à assurer une bonne aérati<br />
on.<br />
• Relier l’appareil au chargeur et à l’accu<br />
directement et uniquement avec les cordons<br />
de raccordement originaux.<br />
• Les cordons de sortie de charge et de raccor<br />
dement ne devront pas être modifiés ni reliés<br />
entre-eux d’une façon quelconque. Le cordon<br />
de raccordement ne devra pas être enroulé<br />
durant l’utilisation. Eviter les court-circuits<br />
avec les entrées/sorties de charge, ainsi<br />
qu’avec l’accu et la carrosserie de la voiture;<br />
pour cette raison, ne jamais poser l’appareil<br />
directement sur la carrosserie de la voiture.<br />
• Ne jamais laisser le processus de charge<br />
sans surveillance.<br />
• Un seul pack d’accus à charger devra être<br />
connecté sur la sortie de charge.<br />
• Des packs de jusqu’à seulement 5 éléments<br />
au Lithium-Polymer pourront être raccordés.<br />
• Pour éviter un court-circuit au <strong>LiPo</strong> <strong>Balancer</strong><br />
<strong>Plus</strong>, relier toujours à celui-ci d’abord le cor<br />
don de mesure GRAUPNER pour les<br />
différents éléments et ensuite un cordon de<br />
charge normal avant de relier son cordon de<br />
raccordement au chargeur utilisé. Veiller à<br />
ce que les deux cordons d’entrée ne soient<br />
pas court-circuités pendant que le <strong>LiPo</strong> Ba<br />
lancer <strong>Plus</strong> est activé, car autrement l’appareil<br />
pourra être détérioré ou le fusible sera grillé.<br />
Exclusion de responsabilité<br />
Le respect des instructions d’utilisation ainsi que<br />
les conditions et les méthodes d’installation,<br />
d’utilisation et d’entretien de l’appareil ne peuvent<br />
pas être surveillées par la Firme GRAUPNER.
Conseils généraux d‘ utilisation<br />
C’est pourquoi celle-ci décline toute responsabilité<br />
et sa participation d’une façon quelconque<br />
pour les pertes, les détériorations ou les coûts<br />
résultant d’une mauvaise utilisation du <strong>LiPo</strong> <strong>Balancer</strong><br />
5 <strong>Plus</strong>.<br />
1. Imprimé, Printed in Korea PN.LA-02<br />
Ce manuel sert qu’à titre d‘Informations. Son<br />
contenu ne peut être changé sans préavis. La<br />
SOCIETE GRAUPNER ne peut être tenue responsable<br />
d’erreurs ou des inexactitudes qui<br />
peuvent se trouver dans la partie d‘information<br />
de ce manuel.<br />
Vérifier avant la charge :<br />
Si toutes les liaisons sont correctement établies<br />
et s’il n’y a pas de contacts intermittents ?<br />
Noter que le charge rapide des batteries peut<br />
être dangereuse, car même une courte interruption<br />
en raison d’un contact intermittent conduit<br />
inévitablement à un mauvais fonctionnement<br />
provoquant un nouveau départ de la charge.<br />
Charge des accus<br />
• Les accus ne devront pas être chargés sans<br />
surveillance !<br />
• Les accus devront être chargés UNIQUE<br />
MENT sur une base non inflammable.<br />
(Coffrets de sécurité <strong>LiPo</strong> <strong>Graupner</strong>, Réf.<br />
N°5370 (Petit) ou Réf. N°5371 (Grand).<br />
• Les éléments au Lithium défectueux ou<br />
usagés ne devront en aucun cas être rechar<br />
gés !<br />
• Les accus à charger devront être reliés uni<br />
quement avec les connecteurs originaux pour<br />
les éléments au Lithium-Polymer<br />
GRAUPNER.<br />
• Veiller à la sécurité de contact de toutes les<br />
connexions, car même une courte interruption<br />
en raison d’un contact intermittent<br />
peut déclencher un nouveau départ de charge<br />
et surcharger totalement l’accu connecté.<br />
Eléments au Lithium-Polymer<br />
Le Li-Po <strong>Balancer</strong> 5 <strong>Plus</strong> est uniquement adapté<br />
pour la charge d’accus au Lithium-Polymer d’une<br />
tension nominale de 3,7 V/Elément<br />
ou pour les accus Li-Ion d’une tension nominale<br />
de 3,6 V/Elément.<br />
Les accus au Lithium se distinguent surtout par<br />
leur capacité beaucoup plus élevée par comparaison<br />
aux autre types d’accus.<br />
Ce gros avantage exige cependant un traitement<br />
différent en ce qui concerne la charge et<br />
la décharge, ainsi que pour une utilisation sans<br />
danger.<br />
Les prescriptions exposées ici devront être observées<br />
dans tous les cas. Les autres indications<br />
correspondantes et les conseils de sécurité sont<br />
à relever dans les données techniques du fabricant<br />
des accus.<br />
Par principe, les accus à base de Lithium devront<br />
être chargés UNIQUEMENT avec les chargeurs<br />
spéciaux qui sont réglés sur chaque type d’accu<br />
(Tension de fin de charge, capacité).<br />
La charge se fait différemment qu’avec les accus<br />
NiCd ou NiMH par une méthode dite courant<br />
constant/tension constante. Le <strong>LiPo</strong> <strong>Balancer</strong><br />
<strong>Plus</strong> connecté entre le chargeur et l’accu à charger<br />
commute et équilibre celui-ci dès qu’il est<br />
relié.<br />
Le <strong>LiPo</strong> <strong>Balancer</strong> 5 <strong>Plus</strong> avec protection de<br />
charge/décharge pour 2 à 5 éléments<br />
Le <strong>LiPo</strong> <strong>Balancer</strong> <strong>Plus</strong> avec protections en<br />
surcharge et en décharge profonde est l’appareil<br />
idéal pour chaque modéliste. Cet appareil est<br />
impérativement nécessaire pour une sécurité<br />
et une durée de vie maximales des accus, car<br />
il empêche la surcharge des différents éléments.<br />
Avec en même temps la protection en décharge<br />
profonde dans le modèle, Réf. N°6495 une utilisation<br />
beaucoup plus sûre et le parfait cyclage<br />
de vos précieux packs d’accus seront obtenus !<br />
Le <strong>LiPo</strong> <strong>Balancer</strong> 5 <strong>Plus</strong> apporte un niveau de<br />
tension égal aux éléments commutés en série<br />
d’un pack d’accus <strong>LiPo</strong>. Ceci est nécessaire<br />
parce que des états de charge et de tension<br />
différents se produirent avec le vieillissement<br />
et les décharges successives. L’équilibrage des<br />
éléments démarre immédiatement après la connexion<br />
du pack d’accus et sera poursuivi durant<br />
la totalité du processus de charge.<br />
Conseils généraux d‘ utilisation 15
Mise en service<br />
Protection en surcharge par coupure de surtension<br />
Lorsqu’un élément atteint une tension de 4,26 V,<br />
le processus de charge sera interrompu immédiatement<br />
avant une surcharge pour le protéger<br />
d’une détérioration. Ceci peut être le cas lorsque<br />
le chargeur a sélectionné un faux nombre<br />
d’éléments ou un faux type d’accu, quand un<br />
élément présente une défectuosité.<br />
La sécurité avertira alors par un signal acoustique<br />
répété. Le <strong>LiPo</strong> <strong>Balancer</strong> 5 <strong>Plus</strong> sera relié<br />
aussi bien au connecteur blanc à plusieurs pôles<br />
qu’à la prise haute intensité de l’accu. Une falsification<br />
de la mesure du courant de charge sera<br />
ainsi évitée de sorte que les différents éléments<br />
seront parfaitement équilibrés.<br />
Vérification des accus au Lithium<br />
Attention ! Avant de mettre le <strong>LiPo</strong> <strong>Balancer</strong> 5<br />
<strong>Plus</strong> en service, vérifier absolument l’occupation<br />
correcte des broches du connecteur blanc à multipôles<br />
de l’accu <strong>LiPo</strong> comme indiqué ci-dessous.<br />
Pour cela, le mieux est d’utiliser un voltmètre,<br />
comme par ex. l’Ampèremètre à pince Digital,<br />
Réf. N°1955. Une fausse occupation des<br />
broches provoquera la destruction du chargeur<br />
et de l‘accu avec un danger d’explosion<br />
!<br />
Broche 1: Masse (Fil noir)<br />
Broche 2: 3,7V (1 élément)<br />
Broche 3: 7,4V (2 éléments)<br />
Broche 4: 11,1V (3 éléments)<br />
Broche 5: 14,8V (4 éléments)<br />
Broche 6: 18,5V (5 éléments)<br />
Exemple: Pack d‘accu à 3 éléments (Voir<br />
l‘illustration)<br />
16 Mise en service<br />
Mise en service<br />
Connecter le <strong>LiPo</strong> <strong>Balancer</strong> 5 <strong>Plus</strong> entre le chargeur<br />
et l’accu à charger.<br />
En général, le <strong>LiPo</strong> <strong>Balancer</strong> 5 <strong>Plus</strong> sera d’abord<br />
connecté sur le connecteur blanc multipôles de<br />
l’accu avant de le relier à sa prise haute intensité.<br />
A ce moment, l’appareil commence déjà à équilibrer<br />
les éléments <strong>LiPo</strong>, sans que le chargeur<br />
soit connecté.<br />
Pour charger ou décharger l’accu, le relier au<br />
chargeur par un cordon adapté ; voir l’illustration<br />
suivante.<br />
Mode de charge<br />
Connecter maintenant un pack d’accus au Lithium-Polymer<br />
original <strong>Graupner</strong> avec un maximum<br />
de 5 éléments, comme déjà décrit .<br />
Relever les réglages de charge à effectuer dans<br />
les instructions d’utilisation du chargeur.<br />
Relier le <strong>LiPo</strong> <strong>Balancer</strong> 5 <strong>Plus</strong> comme déjà décrit.<br />
L’appareil différencie entre deux Modes de fonctionnement<br />
; le ‘’Mode Connect’’ (Relié) et le<br />
‘’Mode Disconnect’’ (Non relié).<br />
Mode Disconnect (Non relié)<br />
Ce Mode sera nécessaire lorsque le <strong>LiPo</strong> <strong>Balancer</strong><br />
5 <strong>Plus</strong> sera relié seulement à un accu pour<br />
l’équilibrer, mais non connecté sur un chargeur.<br />
L’entrée est ainsi protégée contre les court-circuits.<br />
Pour accéder au ‘’Mode Disconnect’’, presser<br />
la touche MODE/RESET lorsque le
Mise en service<br />
LED STATUS clignote lentement ou plus du tout.<br />
Le ‘’Mode Disconnect’’ est signalé par l’allumage<br />
constant du LED STATUS.<br />
Pour accéder au ‘’Mode Connect’’, presser la<br />
touche MODE pendant que le LED Status est<br />
allumé en permanence.<br />
Mode Connect (Relié)<br />
Pour pouvoir charger ou décharger un accu,<br />
le <strong>LiPo</strong> <strong>Balancer</strong> 5 <strong>Plus</strong> doit se trouver dans le<br />
‘’Mode Connect’’, car autrement l’entrée est désactivée.<br />
Ce Mode est signalé par des clignotements lents<br />
et constants.<br />
Pour accéder au ‘’Mode Connect’’, presser la<br />
touche MODE pendant que le LED Status est<br />
allumé en permanence.<br />
Charge/Décharge d’un accu<br />
Pour pouvoir charger ou décharger un accu, le<br />
<strong>LiPo</strong> <strong>Balancer</strong> <strong>Plus</strong> doit se trouver dans le ‘’Mode<br />
Connect’’. Changer entre les ‘’Modes Connect<br />
et Disconnect’’ avec la touche MODE. Le LED<br />
STATUS clignote alors lentement dans le ‘’Mode<br />
Connect’’. Démarrer maintenant le processus de<br />
charge avec le chargeur.<br />
Le <strong>LiPo</strong> <strong>Balancer</strong> <strong>Plus</strong> surveille chaque élément<br />
séparément, l’égalise durant le processus de<br />
charge et protège le pack d’accus d’une surcharge<br />
par une interruption immédiate de la charge<br />
en cas d’une trop haute tension des éléments.<br />
Notes :<br />
- Le connecteur de raccordement au chargeur<br />
devra être débranché seulement dans le<br />
‘’Mode Disconnect’’.<br />
- L’accu au Lithium ne devra pas être déconnec<br />
té tant qu’il est en charge. Pour le déconnecter,<br />
le <strong>LiPo</strong> <strong>Balancer</strong> 5 <strong>Plus</strong> devra se trouver<br />
dans le ‘’Mode Disconnect’’.<br />
LED pour le nombre d’éléments<br />
Le <strong>LiPo</strong> <strong>Balancer</strong> 5 <strong>Plus</strong> est<br />
équipé d’un LED pour chaque<br />
élément <strong>LiPo</strong> connecté. Le LED<br />
correspondant signalera en<br />
clignotant dès qu’il sera équilibré.<br />
Les éléments 1, 3, 5<br />
comprennent un LED rouge,<br />
les éléments 2, 4 disposent d’un LED vert.<br />
Séquences de clignotement Différence de tension<br />
1x Clignotement, Pause, 1x Clignotement < 0,02V<br />
2x Clignotement, Pause, 2x Clignotement < 0,2V<br />
3x Clignotement, Pause, 3x Clignotement > 0,2V<br />
Dans ce cas, l’accu <strong>LiPo</strong> devra d’abord être équilibré<br />
dans le ‘’Mode Disconnect’’ avant qu’il puisse<br />
être chargé dans le ‘’Mode Connect’’.<br />
Aucun clignotement, Les éléments sont<br />
tous les LED sont équilibrés,le <strong>LiPo</strong> Ba<br />
éteints lancer 5 <strong>Plus</strong> se<br />
trouve en Mode éco<br />
nomie d’énergie.<br />
Mode Erreur<br />
En plus des Modes ‘’Connect’’ et ‘’Disconnect’’,<br />
le LED Status signale aussi le Mode erreur.<br />
Le Mode Erreur sera indiqué durant 10 secondes<br />
avant que l’appareil passe dans le Mode économie<br />
d’énergie. En pressant la touche Mode/Reset,<br />
le Mode Erreur pourra être confirmé de sorte<br />
que celui-ci sera effacé.<br />
Les Modes Erreur suivants pourront être différenciés<br />
comme suit :<br />
LED Status Fonction<br />
2x Clignotement/seconde Surtension de l’accu<br />
(xx xx xx)<br />
3x Clignotement/seconde Court-circuit à l’entr-<br />
(xxx xxx xxx) ée ou à la sortie<br />
4x Clignotement/seconde Erreur de branche-<br />
(xxxx xxxx xxxx) ment<br />
Mode économie d’énergie<br />
L’appareil se commute automatiquement dans<br />
le Mode économie d’énergie dès que le pack<br />
d’accus est équilibré pour empêcher la décharge<br />
de celui-ci.<br />
Dès que la touche MODE/RESET sera pressée,<br />
le Mode économie d’énergie sera quitté.<br />
Composants et accessoires<br />
En tant que fabricant, la Firme GRAUPNER<br />
GmbH & Co. KG conseille d’utiliser des composants<br />
Mise en service 17
Caractéristiques techniques,<br />
Déclaration de conformité<br />
et des accessoires dont la compatibilité, la fonctionnalité<br />
et la sécurité à été vérifiée pas ses<br />
soins. La Firme GRAUPNER assure la responsabilité<br />
de ses productions, mais comme elle<br />
ne peut pas juger la qualité des pièces ou des<br />
accessoires produits par d’autres fabricants, elle<br />
décline toute responsabilité<br />
pour les fabrications étrangères, même si elles<br />
semblent ne présenter aucun risque pour la sécurité.<br />
Caractéristiques techniques<br />
Tension d’entrée: max. 55 V<br />
Tensions de sortie: 6,0 ~ 30 V<br />
Types d’accus: <strong>LiPo</strong> 3,7V/Elément<br />
LiIo 3,6V/Elément<br />
Nombre d’éléments: 2 ~ 5 Eléments<br />
Courant de charge max.: 10 A<br />
Variation de tension: +/- 5 mV<br />
Entrée: Connecteurs à<br />
contacts dorés<br />
Sortie: Prise multipôles<br />
<strong>LiPo</strong> <strong>Graupner</strong><br />
Connecteurs BEC et<br />
G4 <strong>Graupner</strong><br />
Plage de températures: 0°C ... 35°C<br />
Dimensions (Lxlxh): env. 85x45x18mm<br />
(sans les cordons de<br />
raccordement)<br />
Poids: env. 70 g.<br />
Protection de l’environnement<br />
Le symbole figurant sur l’appareil,<br />
dans les instructions d’utilisation ou<br />
sur l’emballage indique que ce<br />
produit ne devra pas être jeté dans<br />
une poubelle domestique normale à<br />
la fin de sa durée de vie. Il devra être déposé<br />
dans un container spécial pour le recyclage des<br />
appareils électriques et électroniques.<br />
La matière est re-valorisable conformément à sa<br />
désignation. Avec la réutilisation, l’exploitation<br />
des matières ou pour d’autres formes<br />
d’utilisation des vieux appareils, vous apportez<br />
une importante contribution à la protection de<br />
l’environnement.<br />
18 Caractéristiques techniques, Déclaration de conformité<br />
Les batteries et les accus devront être retirées<br />
des appareils et jetés dans un container séparé<br />
correspondant.<br />
Pour le débarras des modèles R/C, les éléments<br />
électroniques comme par ex. les servos, le récepteur<br />
ou le régulateur de vitesse devront être<br />
démontés du modèle et déposés séparément<br />
dans un container correspondant.<br />
Renseignez-vous sur la présence de ces containers<br />
à l’administration de votre commune.<br />
Déclaration de conformité EG :<br />
Pour le produits suivant<br />
<strong>LiPo</strong> <strong>Balancer</strong> 5 <strong>Plus</strong>, Réf. N°3064<br />
Nous confirmons que la compatibilité électronique<br />
correspond aux directives 89/336/EWG.<br />
Normes appliquées :<br />
EN 50081-1<br />
EN 50082-1<br />
Cette déclaration est sous la responsabilité du<br />
Fabricant/Importateur<br />
<strong>Graupner</strong> GmbH & Co. KG<br />
Henriettenstr. 94-96<br />
73230 Kirchheim/Teck<br />
Fait à<br />
73230 Kirchheim/Teck, le 29.11.05<br />
Hans <strong>Graupner</strong><br />
Le Directeur d’Entreprise
Vue d’ensemble du <strong>LiPo</strong> <strong>Balancer</strong> <strong>Plus</strong><br />
Vue d’ensemble du <strong>LiPo</strong> <strong>Balancer</strong> 5 <strong>Plus</strong><br />
ENTREE du chargeur<br />
Un seul des deux raccordementsdevra<br />
être relié au<br />
chargeur !<br />
Fusible 10 A SORTIE des différents<br />
éléments Pour le raccordement<br />
de la prise multipôles<br />
du cordon de mesure <strong>LiPo</strong><br />
GRAUPNER.<br />
LED STATUS<br />
MODE/RESET<br />
Commutation en série de deux <strong>LiPo</strong> <strong>Balancer</strong> 5 <strong>Plus</strong><br />
Raccordement du chargeur<br />
pour jusqu'à 10 éléments<br />
<strong>LiPo</strong> <strong>Balancer</strong> 5 plus<br />
2 x Connecteurs à contacts dorés de 4mm<br />
soudés + isolés<br />
<strong>LiPo</strong> <strong>Balancer</strong> 5 plus<br />
SORTIE Pour le raccordement<br />
de la prise haute<br />
tension des accus <strong>LiPo</strong>.<br />
Un seul de ces deux<br />
raccordements devra être<br />
utilisé !<br />
<strong>LiPo</strong>/Lilo<br />
Accu 1<br />
2-5 Eléments<br />
<strong>LiPo</strong>/Lilo<br />
Accu 2<br />
2-5 Eléments<br />
Vue d’ensemble du <strong>LiPo</strong> <strong>Balancer</strong> <strong>Plus</strong> 19
Wir gewähren auf dieses Erzeugnis eine / This product is / Sur ce produit nous accordons<br />
Garantie von<br />
warrantied for<br />
garantie de 2 4<br />
Die Fa. <strong>Graupner</strong> GmbH & Co. KG, Henriettenstraße<br />
94-96. 73230 Kirchheim/Teck gewährt ab<br />
dem Kaufdatum auf dieses Produkt eine Garantie<br />
von 24 Monaten.<br />
Die Garantie gilt nur für die bereits beim Kauf des<br />
Produktes vorhandenen Material- oder Funktionsmängel.<br />
Schäden die auf Abnützung, Überlastung,<br />
falsches Zubehör oder unsachgemäße<br />
Behandlung zurückzuführen sind, sind von der<br />
Garantie ausgeschlossen.<br />
Die gesetzlichen Rechte und Gewährleistungsansprüche<br />
des Verbrauchers werden durch diese<br />
Garantie nicht berührt.<br />
Bitte überprüfen Sie vor einer Reklamation oder<br />
Rücksendung das Produkt genau auf Mängel, da<br />
wir Ihnen bei Mängelfreiheit die entstandenen<br />
Unkosten in Rechnung stellen müssen.<br />
Monaten<br />
month<br />
mois<br />
<strong>Graupner</strong> GmbH & Co. KG, Henriettenstraße 94-<br />
96, 73230 Kirchheim/Teck, Germany guarantees<br />
this product for a period of 24 months from date<br />
of purchase.<br />
The guarantee applies only to such material or<br />
operational defects witch are present at the time<br />
of purchase of the product.<br />
Damage due to wear, overloading, incompetent<br />
handling or the use of incorrect accessories is<br />
not covered by the guarantee.<br />
The user´s legal rights and claims under garantee<br />
are not affected by this guarantee.<br />
Please check the product carefully for defects<br />
before you are make a claim or send the item to<br />
us, since we are obliged to make a charge for our<br />
cost if the product is found to be free of faults.<br />
La société <strong>Graupner</strong> GmbH & Co. KG, Henriettenstraße<br />
94-96, 73230 Kirchheim/Teck, Allemagne,<br />
accorde sur ce produit une garantie de 24<br />
mois à partir de la date d´achat.<br />
La garantie prend effet uniquement sur les vices<br />
de fonctionnement et de matériel du produit<br />
acheté. Les dommages dûs à de l´usure, à de la<br />
surcharge, à de mauvais accessoires ou à d´une<br />
application inadaptée, sont exclus de la garantie.<br />
Cette garantie ne remet pas en cause les droits<br />
et prétentions légaux du consommateur.<br />
Avant toute réclamation et tout retour du prouit,<br />
veuillez s.v.p. cotrôler et noter exactement les<br />
défauts ou vices du produit, car tout autre frais<br />
relatif au produit vous sera facturé.<br />
Servicestellen / Service / Service après-vente<br />
<strong>Graupner</strong>-Zentralservice<br />
<strong>Graupner</strong> GmbH & Co. KG<br />
Postfach 1242<br />
D-73220 Kirchheim<br />
Schweiz<br />
<strong>Graupner</strong> Service<br />
Postfach 92<br />
CH 8423 Embrach-Embraport<br />
(+41) 43 26 66 58 3<br />
Italia<br />
GiMax<br />
Via Manzoni, no. 8<br />
I 25064 Gussago<br />
(+39) 3 0 25 22 73 2<br />
Espana<br />
FA - Sol S.A.<br />
C. Avinyo 4<br />
E 8240 Maneresa<br />
(+34) 93 87 34 23 4<br />
UK<br />
GLIDERS<br />
Brunel Drive<br />
Newark, Nottinghamshire<br />
NG24 2EG<br />
(+44) 16 36 61 05 39<br />
Belgie/Nederland<br />
Jan van Mouwerik<br />
Slot de Houvelaan 30<br />
NL 3155 Maasland VT<br />
(+31)10 59 13 59 4<br />
Servicehotline<br />
(+49)(01805) 472876<br />
Montag - Freitag 9:30 -11:30<br />
und 13:00 -15:00 Uhr<br />
France<br />
<strong>Graupner</strong> France<br />
Gérard Altmayer<br />
86, rue ST. Antoine<br />
F 57601 Forbach-Oeting<br />
(+33) 3 87 85 62 12<br />
Sverige<br />
Baltechno Electronics<br />
Box 5307<br />
S 40227 Göteborg<br />
(+46) 31 70 73 00 0<br />
Luxembourg<br />
Kit Flammang<br />
129, route d’Arlon<br />
8009 Strassen<br />
(+35) 23 12 23 2<br />
Ceská Republika/Slovenská<br />
Republika<br />
RC Service Z. Hnizdil<br />
Letecka 666/22<br />
CZ-16100 Praha 6 - Ruzyne<br />
(+42) 2 33 31 30 95<br />
Garantie-Urkunde<br />
Warranty certificate / Certificat de garantie<br />
Li-Po <strong>Balancer</strong> 5 <strong>Plus</strong>, Best.-Nr. 3064<br />
Übergabedatum, Date of purchase/delivery, Date de remise<br />
Name des Käufers, Owner´s name, Nom de l´acheteur<br />
Strasse, Wohnort, Complete adress, Domicie et rue<br />
Firmenstempel und Unterschrift des Einzelhändlers, Stamp and signature of dealer,<br />
Cachet de la firme et signature du detailant