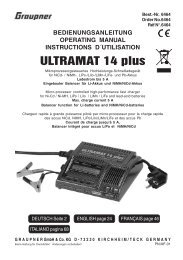
MULTILADER 3 - Graupner
MULTILADER 3 - Graupner
MULTILADER 3 - Graupner

Create successful ePaper yourself
Turn your PDF publications into a flip-book with our unique Google optimized e-Paper software.
Wir gewähren auf dieses Erzeugnis eine / This product is / Sur ce produit nous accordons une<br />
Garantie von<br />
warrantied for<br />
garantie de<br />
Die Garantiefrist beginnt mit der Übergabe des Gerätes durch den<br />
Einzelhändler, sie verlängert sich durch eine Garantiereparatur<br />
nicht. Die Garantie besteht darin, dass während der Garantiezeit<br />
nachgewiesene Fabrikations- oder Materialfehler kostenlos behoben<br />
werden. Weitergehende Ansprüche sind ausgeschlossen.<br />
Transport-, Verpackungs- und Frachtkosten gehen zu Lasten des<br />
Käufers. Für Transportschäden wird keine Haftung übernommen.<br />
Das Gerät ist an die für das jeweilige Land zuständige Servicestelle<br />
einzuschic-ken.<br />
Die Garantie hat nur Gültigkeit, wenn folgende Bedingungen erfüllt<br />
sind:<br />
1. Die Urkunde muss mit dem Übergabedatum, dem Firmenstempel<br />
und der Unterschrift des Einzelhändlers versehen sein.<br />
2. Am Gerät dürfen keine Eingriffe vorgenommen sein.<br />
3. Es muss gemäss unserer Betriebsanleitung verfahren worden<br />
sein.<br />
4. Nur von uns empfohlene Stromquellen und sonstige Zusatzeinheiten<br />
und -teile dürfen verwendet worden sein.<br />
5. Der Einsendung müssen die Garantieurkunde und sachdienliche<br />
Hinweise beigelegt sein.<br />
The warranty period begins from the date of delivery by a dealer to<br />
the first owner/user. A repair performed within the warrantied period<br />
does not extend the latter beyond 24 months.<br />
The warranty shall apply to the repacement and/or repair - free charge<br />
- of any part or parts which needs or need replacement or repair<br />
by reason of defective workmanship or defective material. Every form<br />
of liability other than this is hereby expressly excluded.<br />
This guarantee shall not apply to transport, packing and handling<br />
charges which must be paid by the customer.<br />
Any liability of the manufacturer for parts damaged during transport<br />
is hereby expressely excluded.<br />
Please send your unit to the service competent for the respective<br />
country. No claim for exchange or repair can be considered hereunder<br />
unless the person claiming<br />
1. supplies this warranty certificate giving the date of purchase, the<br />
dealer’s stamp and signature.<br />
2. has not in any way tinkered with the unit.<br />
3. has operated the unit as per operating instructions.<br />
4. has recommended power supplies, recommended ancillary equipment<br />
and/or parts only.<br />
5. encloses the properly filled warranty certification in his letter and<br />
provides all relevant information available.<br />
La période de garantie commence avec la remise de l’appareil par<br />
le détaillant; elle n’est pas prolongée par une réparation effectuée<br />
sous garantie.<br />
Pendant la durée de la garantie, des vices de fabrication ou de matières<br />
sont réparés gratuitement. Toutes autres formes de prétention<br />
à la garantie sont exclues.<br />
Les frais de transport, d’emballage et de voyage sont à la charge de<br />
l’acheteur. Nous déclinons toute responsabilité pour des dommageges<br />
surveneus en cours de transport.<br />
L’ensemble est à adresser au service après-vente compétent pour<br />
le pays respectif. La garantie n’est valable que sous les conditions<br />
suivantes.<br />
1. Le certificat doit comporter la date de remise, le cachet de la firme<br />
et la signature du détaillant.<br />
2. L’appareil ne doit subir aucune intervention.<br />
3. Notre mode d’emploi doit être rigoureusement respecté.<br />
4. Seules des sources de courant et autres unités et pièces complémentaires<br />
recommandées par nous doivent être utilisées.<br />
5. L’appareil doit être retourné accompagné du certificat de garantie<br />
et d’une note explictive succincte.<br />
2 4<br />
Übergabedatum<br />
Date of purchase/delivery<br />
Date de remise<br />
Name des Käufers<br />
Owner´s name<br />
Nom de l´acheteur<br />
Strasse, Wohnort<br />
Complete adress<br />
Domicie et rue<br />
Monaten<br />
month<br />
mois<br />
Servicestellen / Service / Service après-vente<br />
<strong>Graupner</strong>-Zentralservice<br />
<strong>Graupner</strong> GmbH & Co. KG<br />
Postfach 1242<br />
D-73220 Kirchheim<br />
Schweiz<br />
<strong>Graupner</strong> Service<br />
Wehntalerstrasse 37<br />
CH 8181 Höri<br />
(+41) 4 32 66 65 83<br />
Fax: (+41) 4 32 66 65 83<br />
Email: hb9ail@bluewin.ch<br />
Italia<br />
GiMax s.n.c.<br />
Via Manzoni, no. 8<br />
I 25064 Gussago<br />
(+39) 30 25 22 732<br />
Email: gimax1@virgilio.it<br />
Espana<br />
FA - Sol S.A.<br />
C. Avinyo 4<br />
E 8240 Manresa<br />
(+34) 93 87 34 23 4<br />
Email: fasol@olivet.com<br />
Belgie/Nederland<br />
Jan van Mouwerik<br />
Slot de Houvelaan 30<br />
NL 3155 Maasland VT<br />
(+31)10 59 13 59 4<br />
Email: van_mouwerik@planet.nl<br />
Ceská Republika/Slovenská<br />
Republika<br />
RC Servis Z. Hnizdil<br />
Leteckà 666/22<br />
CZ-16100 Praha 6 - Ruzynè<br />
(+42) 2 33 31 30 95<br />
Email: info@rcservis.cz<br />
Servicehotline<br />
(+49)(01805) 472876<br />
Montag - Freitag 9:30 -11:30<br />
und 13:00 -15:00 Uhr<br />
France<br />
<strong>Graupner</strong> Service France<br />
Gérard Altmayer<br />
86, rue ST. Antoine<br />
F 57601 Forbach-Oeting<br />
(+33) 3 87 85 62 12<br />
Email: GERALD.ALTMAYER@wanadoo.fr<br />
Sverige<br />
Baltechno Electronics<br />
Box 5307<br />
S 40227 Göteborg<br />
(+46) 31 70 73 00 0<br />
Email: balte@salgonet.se<br />
Luxembourg<br />
Kit Flammang<br />
129, route d’Arlon<br />
8009 Strassen<br />
(+35) 23 12 23 2<br />
Email: kitflam@pt.lu<br />
UK<br />
GLIDERS<br />
Brunel Drive<br />
Newark, Nottinghamshire<br />
NG24 2EG<br />
(+44) 16 36 61 05 39<br />
Email: sales@gliders.uk.com<br />
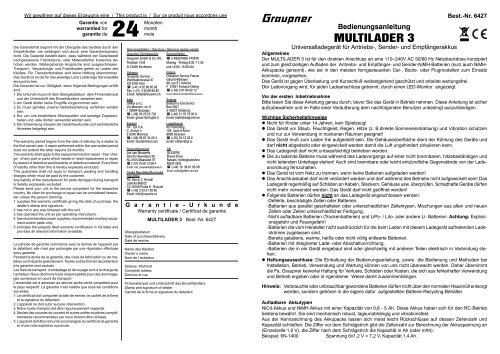
G a r a n t i e - U r k u n d e<br />
Warranty certificate / Certificat de garantie<br />
<strong>MULTILADER</strong> 3 Best.-Nr. 6427<br />
Firmenstempel und Unterschrift des Einzelhändlers<br />
Stamp and signature of dealer<br />
Cachet de la firme et signature du detailant<br />
Bedienungsanleitung<br />
<strong>MULTILADER</strong> 3<br />
Universalladegerät für Antriebs-, Sender- und Empfängerakkus<br />
Best.-Nr. 6427<br />
Allgemeines<br />
Der <strong>MULTILADER</strong> 3 ist für den direkten Anschluss an eine 110~240V AC 50/60 Hz Netzsteckdose konzipiert<br />
und zum gleichzeitigen Aufladen der Antriebs- und Empfänger- und Sender-NiMH-Batterien (kurz auch NiMH-<br />
Akkupacks genannt), wie sie in den meisten ferngesteuerten Car-, Boots- oder Flugmodellen zum Einsatz<br />
kommen, vorgesehen.<br />
Das Gerät ist gegen Überlastung und Kurzschluß weitestgehend geschützt und arbeitet wartungsfrei.<br />
Der Ladevorgang wird, für jeden Ladeanschluss getrennt, durch einen LED-Monitor angezeigt.<br />
Vor der ersten Inbetriebnahme<br />
Bitte lesen Sie diese Anleitung genau durch, bevor Sie das Gerät in Betrieb nehmen. Diese Anleitung ist sicher<br />
aufzubewahren und im Falle einer Veräußerung dem nachfolgenden Benutzer unbedingt auszuhändigen.<br />
Wichtige Sicherheitshinweise<br />
Nicht für Kinder unter 14 Jahren, kein Spielzeug!<br />
Das Gerät vor Staub, Feuchtigkeit, Regen, Hitze (z. B.direkte Sonneneinstrahlung) und Vibration schützen<br />
und nur zur Verwendung in trockenen Räumen geeignet!<br />
Das Gerät muß zum Laden frei aufgestellt sein. Die Gehäuseoberfläche dient der Kühlung des Geräts und<br />
darf nicht abgedeckt oder eingewickelt werden damit die Luft ungehindert zirkulieren kann.<br />
Das Ladegerät darf nicht unbeaufsichtigt betrieben werden.<br />
Die zu ladende Batterie muss während des Ladevorgangs auf einer nicht brennbaren, hitzebeständigen und<br />
nicht leitenden Unterlage stehen! Auch sind brennbare oder leicht entzündliche Gegenstände von der Ladeanordnung<br />
fernzuhalten.<br />
Das Gerät ist vom Netz zu trennen, wenn keine Batterien aufgeladen werden!<br />
Das Anschlusskabel darf nicht verändert werden und darf während des Betriebs nicht aufgewickelt sein! Das<br />
Ladegerät regelmäßig auf Schäden an Kabeln, Steckern, Gehäuse usw. überprüfen. Schadhafte Geräte dürfen<br />
nicht mehr verwendet werden. Das Gerät darf nicht geöffnet werden!<br />
Folgende Batterien dürfen nicht an das Ladegerät angeschlossen werden:<br />
-Defekte, beschädigte Zellen oder Batterien.<br />
-Batterien aus parallel geschalteten oder unterschiedlichen Zellentypen, Mischungen aus alten und neuen<br />
Zellen oder Zellen unterschiedlicher Fertigung.<br />
-Nicht aufladbare Batterien (Trockenbatterien) und LiPo- / LiIo- oder andere Li- Batterien. Achtung: Explosionsgefahr<br />
und Feuergefahr!<br />
-Batterien die vom Hersteller nicht ausdrücklich für die beim Laden mit diesem Ladegerät auftretenden Ladeströmen<br />
zugelassen sind.<br />
-Bereits geladene, warme, heiße oder nicht völlig entleerte Batterien.<br />
-Batterien mit integrierter Lade- oder Abschaltvorrichtung.<br />
-Batterien die in ein Gerät eingebaut sind oder gleichzeitig mit anderen Teilen elektrisch in Verbindung stehen.<br />
Haftungsausschluss: Die Einhaltung der Bedienungsanleitung, sowie die Bedienung und Methoden bei<br />
Installation, Betrieb, Verwendung und Wartung können von uns nicht überwacht werden. Daher übernimmt<br />
die Fa. <strong>Graupner</strong> keinerlei Haftung für Verluste, Schäden oder Kosten, die sich aus fehlerhafter Verwendung<br />
und Betrieb ergeben oder in irgendeiner Weise damit zusammenhängen.<br />
Hinweis: Verbrauchte oder unbrauchbar gewordene Batterien dürfen nicht über den normalen Hausmüll entsorgt<br />
werden, sondern gehören in die eigens dafür aufgestellten Batterie-Recycling-Behälter.<br />
Aufladbare Akkutypen<br />
NiCd-Akkus und NiMH-Akkus mit einer Kapazität von 0,6 - 5 Ah. Diese Akkus haben sich für den RC-Betrieb<br />
bestens bewährt. Sie sind mechanisch robust, lageunabhängig und vibrationsfest.<br />
Aus der Kennzeichnung des Akkupacks lassen sich meist leicht Rückschlüsse auf dessen Zellenzahl und<br />
Kapazität schließen. Die Ziffer vor dem Schrägstrich gibt die Zellenzahl zur Berechnung der Akkuspannung an<br />
(Einzelzelle 1,2 V), die Ziffer nach dem Schrägstrich die Kapazität in Ah (oder mAh).<br />
Beispiel: 6N-1400 Spannung 6x1,2 V = 7,2 V, Kapazität 1,4 Ah.
Laden von NiCd/NiMH-Akkus<br />
Beim Laden wird dem Akku eine bestimmte Strommenge zugeführt, welche sich aus dem Produkt aus Ladestrom<br />
x Ladezeit ergibt. Der maximal zulässige Ladestrom ist vom jeweiligen Akku-Typ abhängig und ist<br />
den Datenangaben des Akkuherstellers zu entnehmen. Nur ausdrücklich als schnelladefähig bezeichneten<br />
Akkus dürfen mit diesem Ladegerät geladen werden. Alle drei Ausgänge verfügen über eine Delta-Peak<br />
Abschaltung.<br />
1. Das folgende Bild 1 zeigt den Spannungszustand während des Ladevorgangs.<br />
(Senkrecht: voltage = Spannung [V], waagrecht charge period = Ladedauer)<br />
Bild1/Figure 1:<br />
Betrieb<br />
1 Vergewissern Sie sich zuerst, dass die Akkukabel und die Ladekabel richtig angeschlossen sind – siehe<br />
Bild 2 (POWER = offenes Ladekabel, Transmitter = Sender, Receiver = Empfänger).<br />
2 Schließen Sie den entladenen Akkupack mit dem passenden Ladekabel an den Lader an.<br />
3 Das Ladegerät wird am Eingang 110-240V AC an eine leicht zugängliche Steckdose in der Nähe des<br />
Ladegerätes angeschlossen. Die entsprechende LED muss jetzt ROT leuchten, um zu zeigen, dass der<br />
Ladevorgang begonnen hat.<br />
Achtung: Der Lader kann zwei oder drei Akkupacks gleichzeitig laden, und der Ladevorgang kann jederzeit<br />
gestartet werden. Beispiel: Wenn ein (oder zwei) Akkupacks geladen werden, können Sie jederzeit zwei<br />
(bzw. ein) weiteres Akkupack zur Ladung anschließen.<br />
4 Wenn die ROTE LED grün wird, zeigt dies das Ende des Ladens an..<br />
5 Trennen Sie das Akkupack vom Ladekabel, sobald es vollständig geladen ist.<br />
VORSICHT:<br />
1 Achten Sie unbedingt auf richtige Polarität (s. Bild 2).<br />
2 Benützen Sie den Lader nicht unbeaufsichtigt.<br />
3 Wenn Sie den Lader ans AC-Netz anschließen und das Akkupack gleichzeitig schon mit dem Ladekabel<br />
verbunden ist, muss die entsprechende LED leuchten. Wenn dies nicht der Fall ist, ziehen Sie den Netzstecker<br />
des Laders vom Netz ab und trennen Sie sofort die Verbindung zwischen Lader und Akkupack,<br />
sonst kann eine unnötige Beschädigung des Laders oder des Akkupacks eintreten.<br />
Bei Übertemperatur (rechte LED RX blinkt) wird lediglich der Empfängerakkuausgang auf einen Erhaltungsstrom<br />
reduziert, damit sich das Geräte nicht weiter erwärmt. Es empfielt sich nach längerem Ausstecken<br />
des Gerätes den Empfängerakku erneut zu laden, bis die grüne LED leuchtet, damit dieser sicher voll<br />
ist.<br />
Mögliche Fehlerquellen:<br />
- Falsche Polarität von Akkukabel oder Ladekabel, oder Akkus im Pack falsch gepolt.<br />
- Schadhafte Akkus, unterbrochene Kontakte, Kurzschluss, gebrochene Leitungsdrähte etc.<br />
- AC-Netzanschluss stromlos oder schadhaft.<br />
- Lader beschädigt.<br />
4 Schützen Sie den Lader vor direkter Sonneneinstrahlung, vor Staub, Feuchtigkeit und Regen.<br />
5 Lader nicht zerlegen! Bei falschem Zusammenbau droht elektrischer Stromschlag.<br />
6 Nur zur Verwendung in Innenräumen.<br />
2. Das folgende Bild 2 zeigt die Polarität der drei Ladekabel am Lader und die entsprechenden LEDs.<br />
Achten Sie bitte darauf, dass die Polarität stimmt!<br />
Power<br />
Power<br />
Puissance<br />
Sender<br />
transmitter<br />
emeteur<br />
Empfänger<br />
receiver<br />
récepteur<br />
Polarität der Ladeanschlusskabel<br />
Nachfolgend sind die Polaritäten der einzelnen Ladeanschlusskabel des<br />
<strong>MULTILADER</strong> 3 dargestellt. Bitte vergewissern Sie sich von der richtigen<br />
Polarität der Senderladebuchse und der zu ladendenden Akkus.<br />
Achtung: Das Senderladekabel ist für <strong>Graupner</strong>/JR-Fernsteuersysteme<br />
konzipiert. An anderen Fernsteuersystemen kann die Polarität umgekehrt<br />
sein!<br />
Reinigung<br />
Das Gerät nur mit einem angefeuchteten Lappen (keine Reinigungsmittel verwenden!) leicht abreiben.<br />
Technische Daten / Specification / Caractéristique techniques :<br />
Netzanschluss / Mains / Courant secteur 110~240V AC/ 50/60 Hz / max. 30W<br />
Abmessungen / Dimensions / Dimensions ≈ 136 x 72 x 39 mm<br />
Gewicht / Weight / Poids ≈ 340 g<br />
Betriebstemperaturbereich -0...+40°C<br />
Operating temperature / Plage de températures<br />
Ladeausgänge / Charge output / Sorti de charge:<br />
Power / Propulsion 6 - 8 NiCd/NiMH (7,2-9,6V) / 0,6 ... 5Ah<br />
Ladestrom/Charge current / Courant de charge ≈ 1...2A gepulst/pulsed<br />
Sender / Transmitter / Emission 8 NiCd/NiMH (9,6V) / 0,8 ... 5Ah<br />
Ladestrom/Charge current / Courant de charge ≈ 1...1.5A gepulst/pulsed<br />
Empfänger / Receiver / Réception 4 - 5 NiCd/NiMH (4,8V) / 0,8 ... 5Ah<br />
Ladestrom/Charge current / Courant de charge ≈ 1...1,5A gepulst/pulsed<br />
LED: rot/red/rouge: charging/laden/charge<br />
LED RX: rot blinkend/red flashing: Ladegerät zu warm, Charger too warm, unplug<br />
grün/green/vert: fully charged/fertig laden/totalement chargé<br />
GRAUPNER GmbH & Co. KG D-73230 KIRCHHEIM/TECK GERMANY MA-01<br />
Keine Haftung für Druckfehler. Änderungen vorbehalten !<br />
Any liability for printing errors excluded. We reserve the right ti introduce modifications !<br />
Nous ne sommer nullement responsables d’éventuelles erreursd’impression. Sous réverse de modifications
Charge des accus:<br />
Pour sa recharge, un accu doit emmagasiner une certaine quantité de courant, laquelle est donnés par le<br />
produit: courant de charge x temps de charge. Le courant de charge maximal admissible dépend de chaque<br />
type d’accu et doit être relevé dans les caractéristiques indiquées par le fabricant de l’accu. Le courant de<br />
charge normal ne devra être dépassé que pour les accus expressément désignés pour supporter une charge<br />
rapide.<br />
Les trois sorties de charge dispose d’une coupure de charge par Delta Peak.<br />
Veuillez lire entièrement les informations suivantes avant d’utiliser le chargeur pour la première fois.<br />
1. La Figure ci-dessous (Fig. 1) montre les conditions du voltage durant la charge.<br />
2. La Figure ci-dessous (Fig. 2) montre la polarité des trois cordons de charge reliés au chargeur et leur<br />
LED correspondant. Veuillez vous assurer que les polarités sont correctes.<br />
UTILISATION :<br />
1. Assurez vous d’abord que le connecteur de la batterie et celui du cordon de charge sont correctement<br />
reliés, comme montré sur la Fig.2.<br />
2. Connectez le pack de batterie déchargé au chargeur en utilisant le cordon de charge adapté.<br />
3. Connectez le chargeur sur une prise de courant secteur. La secteur 110~240V AC devra être installée<br />
près de l‘appareil et être facilement accessible. Le LED correspondant doit maintenant s’allumer<br />
(ROUGE) indiquant que la charge est commencée.<br />
Note : Le chargeur peut charger deux ou trois packs simultanément et la charge peut être démarrée à tout<br />
moment.<br />
Lorsque un (deux) packs de batterie sont en charge, vous pouvez charger deux (un) packs de plus à tout<br />
moment.<br />
4. Lorsque le LED ROUGE tourne au vert, ceci indique que le pack de batterie est totalement chargé.<br />
5. Déconnectez le pack de batterie du cordon de charge lorsqu’il a été totalement chargé.<br />
PRECAUTIONS :<br />
1. Veillez attentivement au respect des polarités (Voir la Fig. 2).<br />
2. Ne laissez pas le chargeur fonctionner sans surveillance.<br />
3. Lorsque vous connectez le chargeur sur la prise de courant secteur et que le pack de batterie a aussi<br />
été connecté au cordon de charge, le LED correspondant doit s’allumer. S’il ne s’allume pas, vous<br />
devrez déconnecter immédiatement le chargeur du courant secteur et le pack de batterie du cordon<br />
de charge. Autrement, le chargeur ou le pack de batterie pourraient être inutilement endommagés.<br />
Les fautes possibles sont les suivantes :<br />
- Connexion incorrecte du connecteur de la batterie ou de celui du cordon de charge, ou des éléments<br />
dans le pack.<br />
- Batterie défectueuse, contact intermittent, court circuit, fil coupé, etc…<br />
- Prise de courant secteur coupée ou défectueuse.<br />
- Protégez le chargeur su rayonnement solaire direct, de la poussière, de l’humidité et de la pluie.<br />
- Ne démontez pas le chargeur. Un remontage incorrect peut provoquer un choc électrique.<br />
- Pour une utilisation uniquement à l’intérieur.<br />
Operating instructions<br />
MULTICHARGER 3<br />
Order No. 6427<br />
Universal charger for drive batteries and RC system batteries<br />
Introduction<br />
The MULTICHARGER 3 is designed to charge NiCd or NiMH batteries as used for drive, transmitter and<br />
receiver batteries in most radio-controlled model cars, boats and aircraft. It can charge up to three batteries<br />
simultaneously, and is designed for direct connection to a 110~240V AC/ 50/60 Hz mains power socket.<br />
The unit is comprehensively protected against overload and short-circuit, and is maintenance-free in operation.<br />
Separate charge indicator LEDs are provided for each charge output.<br />
Before using the charger for the first time<br />
Please read right through these instructions before you use the charger for the first time. Keep these instructions<br />
in a safe place, and if you ever dispose of the equipment be sure to pass them on to the new owner.<br />
Important safety notes<br />
This product isn’t designed by children under the age fo 14, it isn’t a toy!<br />
Protect the charger from dust, damp, rain, heat (e.g. direct sunshine) and vibration. The charger should<br />
only be used in a dry environment.<br />
The charger must be set up free-standing for charging. The top surface of the case is the charger’s cooling<br />
area, and must not be covered or wrapped in any way. Air must be able to circulate freely.<br />
The charger must never be left unsupervised when in use.<br />
· The battery to be charged should be placed on a heat-resistant, non-inflammable surface before use. Keep<br />
all inflammable and volatile materials well clear of the charging area.<br />
The charger must be disconnected from the main power socket, if no battery is connected.<br />
The cables attached to the charger must not be modified, and should not be coiled up when the charger<br />
is in use. Check the charger at regular intervals for damage to cables, connectors, case etc. If you find a<br />
fault or damage, do not use the charger again. The charger must not be opened.<br />
The following types of battery must not be connected to the charger:<br />
- Faulty or damaged cells or packs;<br />
- Batteries consisting of parallel-wired cells, mixtures of different cell types, mixtures of old and new<br />
cells, or cells of different makes.<br />
- Non-rechargeable batteries (dry cells), LiIo- or LiPo- batteries. Caution: explosion hazard or fire!<br />
- Batteries which are not expressly stated by the manufacturer as suitable for the currents which this charger<br />
will produce during the charge process.<br />
- Packs which are already fully charged, warm or hot, or not fully discharged.<br />
- Batteries fitted with an integral charging or charge termination circuit.<br />
- Batteries installed in a device, or which are electrically connected to other components when on charge.<br />
Liability exclusion: we at GRAUPNER have no control over the way you install, use and maintain this<br />
battery charger, nor whether you keep to the operating instructions. For this reason the company accepts no<br />
liability whatever for injury, damage to property or financial loss which result from the incorrect or improper<br />
use of this charger, or are connected with it in any way.<br />
Note: exhausted and defective batteries must not be disposed of in the normal household waste. Take them<br />
to your local battery recycling centre.<br />
The charger is suitable for charging the following types of battery:<br />
NiMH or NiCd packs with a capacity of 0,6 - 5Ah. These batteries have proved excellent for all uses in RC<br />
modelling. They are mechanically robust, can be used in any attitude and are not damaged by vibration.<br />
You can usually tell the number of cells and capacity of a pack by its designation: the number before the<br />
slash (/) or (-) indicates the number of cells, and allows you to calculate the pack’s voltage (single cell = 1.2<br />
V); the number after the slash indicates the capacity in Ah (or mAh).<br />
For example: 6N-1400: Voltage = 6 x 1.2 V = 7.2 V, capacity 1.4 Ah.
Charging batteries<br />
During the charging process a particular quantity of energy is fed into the battery, which can be calculated<br />
by multiplying charge current by charge time. The maximum permissible charge current varies according to<br />
the type of cells in the pack; the figure can be found in the data sheets supplied by the battery manufacturer.<br />
The standard (slow) charge current should only be exceeded with batteries which are marked expressly as<br />
rapid-charge types. All three output include a delta-peak cut-off detection and does finish charging.<br />
1. Figure (Fig.1) below shows the voltage conditions during charging.<br />
2. Figure (Fig.2) below shows the polarity of the three charge leads attached to the charger and it correspondent<br />
LED. Please ensure that the polarity is correct.<br />
OPERATION:<br />
1 Firstly, ensure that the battery connectors and the charge lead connectors is correct as shown on Fig. 2.<br />
2 Connect the discharged battery pack to the charger using the matching charge lead.<br />
3 Connect the charger to a easily accessible AC mains socket near to the charger. The correspondent LED<br />
should now light up (RED) to indicate that the charging is in progress.<br />
Note: The charger can charge two or three packs simultaneously and charging can be started at any time.<br />
eg. When one (two) battery pack is being charging, you can charge two (one) more packs at any time.<br />
4 When the RED LED turns to green, this indicates that the battery pack is fully charged.<br />
5 Disconnect the battery pack from the charge lead when it has been fully charged.<br />
CAUTION:<br />
1 Take great care of the polarity (see Fig.2).<br />
2 Do not leave the charger running unsupervised.<br />
3 When you plug the charger to AC Main socket and the battery pack has also connected to the charge lead;<br />
the corresponding LED should light up. If it does not light up, then you should disconnect the charger from<br />
the AC Main and discount the battery pack from the charging lead immediately. Otherwise, it may cause<br />
unnecessary damage to the charger or battery packs.<br />
If the right red LED RX does flash, the charger does have a too high temperature inside and the receiver pack<br />
will be only trickle charged very slowly. The other two OUTPUTs will charge normal.<br />
In this case, the charger should be unpluged for a while and the receiver pack should be charged later again,<br />
until the green LED does show a full receiver pack.<br />
Possible faults are as follows:<br />
- Incorrect polarity of the battery connector or charge lead or the cells in the pack.<br />
- Faulty battery, intermittent contact, short circuit, broken wire etc.<br />
- AC Main socket not “live”, or defective.<br />
- Defective Charger.<br />
4 Protect the charger from direct sunshine, dust, damp and rain.<br />
5 Do not disassemble charger. Incorrect reassemble may result in electric shock.<br />
6 For indoor use only.<br />
Réf. N°6427<br />
Instructions d’utilisation<br />
MULTICHARGER 3<br />
Chargeur universel pour batteries de propulsion, d’émission et de réception<br />
Généralités:<br />
Le MULTICHARGER 3 est conçu pour un branchement direct sur une prise de courant secteur de 110~240<br />
V AC / 50/60 Hz et pour la recharge simultanée des batteries de propulsion et réception et d’émission au<br />
NiCd ou NiMH, comme celles utilisées dans la plupart des voitures, des bateaux ou des modèles volants<br />
radiocommandés.<br />
L’appareil est efficacement protégé contre les surcharges et les court-citcuits et ne nécessite pas d’entretien.<br />
Le fonctionnement du processus de charge est indiqué par un témoin LED pour chaque sortie de charge.<br />
Avant la première mise en service:<br />
Veuillez lire attentivement ces instructions avant de mettre l’appareil en service. Ces instructions devront être<br />
soigneusement conservées et impérativement remises à l’utilisateur suivant en cas de vente de l’appareil.<br />
Conseils de sécurité importants:<br />
Ce chargeur ne convient pas aux enfants en dessous de 14 ans, ce n‘est pas un jouet!<br />
Protéger l’appreil de la poussière, de l’humidité, de la pluie, de la chaleur (Par ex. d’un rayonnement solaire<br />
direct) et ne l’utiliser que dans un endroit sec.<br />
L’appareil doit être disposé librement pour la charge. Le dessus du boitier sert à son refroidissement et ne<br />
devra pas être recouvert ou enrobé afin que l’air puisse circuler librement.<br />
Le chargeur ne devra pas être utilisé sans surveillance.<br />
Durant le processus de charge, placer la batterie à recharger une sur une surface non inflammable, résistance<br />
à la chaleur et non conductrice! Eloigner de même tout objet combustible ou facilement inflammable<br />
de l’installation de charge.<br />
L’appareil devra être débranché du courant secteur avant de connecter ou de déconnecter les batteries à<br />
recharger!<br />
Les cordons de connexion ne devront pas être modifiés ni être enroulés durant le fonctionnement du<br />
chargeur! Vérifier périodiquement l’état des cordons, des prises, du boitier, etc...Un chargeur défectueux<br />
ne devra plus être utilisé. L’appareil ne devra pas être ouvert!<br />
Les batteries suivantes ne devront pas être connectées sur le chargeur:<br />
- Eléments ou batteries défectueux et détériorés.<br />
- Batteries commutées en parallèle ou composées de types d’éléments différents, ou d’un mélange<br />
d’éléments vieux et neufs ou encore d’éléments de fabrication différente.<br />
- Batteries non rechargeables (Piles sèches) ou Batteries LiIo ou LiPo . Attention: Danger d’explosion!<br />
- Batteries dont le fabricant n’indique pas expressément que leur recharge est admissible par les courants<br />
débités par ce chargeur.<br />
- Batteries déjà chargées, échauffées ou non entièrement vides.<br />
- Batteries avec dispositif de charge ou de coupure intégré.<br />
- Batteries incorporées dans un appareil ou simultanément en liaison électrique avec d’autres éléments.<br />
Exclusion de responsabilité:<br />
Le respect des instructions d’utilisation ainsi que les conditions et les méthodes d’installation, l’utilisation et<br />
l’entretien du chargeur ne peuvent pas être contrôlés par la firme <strong>Graupner</strong>. Par conséquent, nous déclinons<br />
toute responsabilité concernant la perte, les dommages et les frais résultants d’une utilisation incorrecte<br />
ainsi que notre participation aux dédommagements d’une façon quelconque.<br />
Avertissement: Les batteries usagées ou devenues inutilisables contiennent des métaux toxiques et ne<br />
devront pas être jetées dans une poubelle domestique, mais dans un container spécialement réservé au<br />
recyclage des batteries.<br />
Types d’accus rechargeables:<br />
Accus NiCd ou NiMH d’une capacité de 0,6 à 5 Ah. Ces accus réputés pour l’utilisation en radiocommande.<br />
Ils sont mécaniquement robustes, indifféremment positionnables et résistants aux vibrations.<br />
La désignation inscrite sur les packs d’accus permet d’identifier facilement leur nombre d’éléments et leur<br />
capacité:
Hinweise zum Umweltschutz / Environmental<br />
Protection Notes / Protection de I‘ environnement<br />
Hinweise zum Umweltschutz<br />
Das Symbol auf dem Produkt, der Gebrauchsanleitung oder der Verpackung weist darauf hin,<br />
dass dieses Produkt bzw. elektronische Teile davon am Ende seiner Lebensdauer nicht über den<br />
normalen Haushaltsabfall entsorgt werden dürfen. Es muss an einem Sammelpunkt für das Recycling von<br />
elektrischen und elektronischen Geräten abgegeben werden.<br />
Die Werkstoffe sind gemäß ihrer Kennzeichnung wiederverwertbar. Mit der Wiederverwendung, der stofflichen<br />
Verwertung oder anderen Formen der Verwertung von Altgeräten leisten Sie einen wichtigen Beitrag<br />
zum Umweltschutz.<br />
Batterien und Akkus müssen aus dem Gerät entfernt werden und bei einer entsprechenden Sammelstelle<br />
getrennt entsorgt werden.<br />
Bei RC-Modellen müssen Elektronikteile, wie z.B. Servos, Empfänger oder Fahrtenregler aus dem Produkt<br />
ausgebaut und getrennt bei einer entsprechenden Sammelstelle als Elektro-Schrott entsorgt werden.<br />
Bitte erkundigen Sie sich bei der Gemeindeverwaltung die zuständige Entsorgungsstelle.<br />
Environnemental Protection Notes<br />
When this product comes to the end of its useful life, you must not dispose of it in the ordinary domestic<br />
waste. The correct method of disposal is to take it to your local collection point for recycling electrical and<br />
electronic equipment. The symbol shown here, which may be found on the product itself, in the operating<br />
instructions or on the packaging, indicates that this is the case.<br />
Individual markings indicate which materials can be recycled and re-used. You can make an important<br />
contribution to the protection of our common environment by re-using the product, recycling the basic<br />
materials or recycling redundant equipment in other ways.<br />
Remove batteries from your device and dispose of them at your local collection point for batteries.<br />
In case of R/C models, you have to remove electronic parts like servos, receiver, or speed controller from<br />
the product in question, and these parts must be disposed of with a corresponding collection point for<br />
electrical scrap.<br />
If you don’t know the location of your nearest disposal centre, please enquire at your local council office.<br />
Indications quant à la protection de l’environnement<br />
Ce produit à la fin de sa durée de vie ne doit pas être mis à la poubelle, mais être remis à une collecte<br />
pour le recycle ment d’appareils électriques et électroniques. Le symbole inscrit sur le produit, dans la<br />
notice d’instructions et sur son emballage l’indique.<br />
Les matériaux selon leurs reconnaissances sont réutilisables. Avec le recyclage de matériaux et autres<br />
formes d’appareils, vous contribuez à la protection de l’environnement.<br />
Les batteries et accus doivent être retirés de l’appareil et doivent être remis à un dépôt homologué pour ce<br />
type de produits.<br />
Pour les modèles radiocommandés, les pièces électroniques, comme par exemple les servos, récepteur<br />
ou variateur de vitesse, doivent être démontés et retirés du produit et être remis à une collecte spécialisée<br />
pour produits électroniques.<br />
Konformitätserklärung / Conformity Declaration /<br />
Déclaration de conformitè<br />
EG-Konformitätserklärung<br />
Für das folgend bezeichnete Erzeugnis<br />
<strong>MULTILADER</strong> 3; Best.-Nr. 6427<br />
wird hiermit bestätigt, dass es den wesentlichen<br />
Schutzanforderungen entspricht, die in<br />
der Richtlinie des Rates zur Angleichung der<br />
Rechtsvorschriften der Mitgliedstaaten über die<br />
elektromagnetische Verträglichkeit (2004/108/<br />
CE) bzw. die elektrische Sicherheit LVD (2006/95/<br />
CE) festgelegt sind.<br />
Zur Beurteilung des Erzeugnisses hinsichtlich<br />
elektromagnetischer Verträglichkeit wurden folgende<br />
Normen herangezogen:<br />
EN 60335-1<br />
EN 60335-2-29<br />
EN 50366<br />
Diese Erklärung wird verantwortlich für den<br />
Hersteller/Importeur<br />
<strong>Graupner</strong> GmbH & Co. KG<br />
Henriettenstr. 94-96<br />
73230 Kirchheim/Teck<br />
abgegeben durch<br />
73230 Kirchheim/Teck, den 14.03.08<br />
Hans <strong>Graupner</strong><br />
Geschäftsführer<br />
EU Conformity Declaration<br />
We hereby declare that the following product:<br />
<strong>MULTILADER</strong> 3; Order No. 6427<br />
conforms with the essential protective requirements<br />
as laid down in the directive for harmonising<br />
the statutory directives of the member states<br />
concerning electro-magnetic interference<br />
(2004/108/CE) and LVD (2006/95/CE).<br />
This product has been tested for electro-magnetic<br />
interference in accordance with the following<br />
norms:<br />
EN 60335-1<br />
EN 60335-2-29<br />
EN 50366<br />
This declaration was produced by:<br />
<strong>Graupner</strong> GmbH & Co. KG<br />
Henriettenstr. 94-96<br />
73230 Kirchheim/Teck<br />
and is valid for the manufacturer / importer of<br />
the product<br />
73230 Kirchheim/Teck, Germany, on 14.03.08<br />
Hans <strong>Graupner</strong><br />
Managing Director<br />
Déclaration de conformité EG :<br />
Pour le produits suivant<br />
<strong>MULTILADER</strong> 3; Réf. N°6427<br />
Nous confirmons que la compatibilité électronique<br />
correspond aux directives<br />
(2004/108/CE) et LVD (2006/95/CE).<br />
Normes appliquées :<br />
EN 60335-1<br />
EN 60335-2-29<br />
EN 50366<br />
Cette déclaration est sous la responsabilité du<br />
Fabricant/Importateur<br />
<strong>Graupner</strong> GmbH & Co. KG<br />
Henriettenstr. 94-96<br />
73230 Kirchheim/Teck<br />
Fait à<br />
73230 Kirchheim/Teck, le 14.03.08<br />
Hans <strong>Graupner</strong><br />
Le Directeur d’Entreprise