RAVIOLI MAKER ATTACHMENT ACCESSOIRE ... - KitchenAid
RAVIOLI MAKER ATTACHMENT ACCESSOIRE ... - KitchenAid
RAVIOLI MAKER ATTACHMENT ACCESSOIRE ... - KitchenAid

Create successful ePaper yourself
Turn your PDF publications into a flip-book with our unique Google optimized e-Paper software.
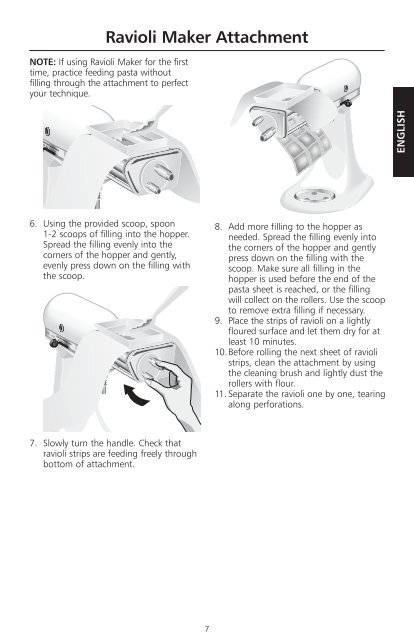
Ravioli Maker Attachment<br />
NOTE: If using Ravioli Maker for the first<br />
time, practice feeding pasta without<br />
filling through the attachment to perfect<br />
your technique.<br />
6. Using the provided scoop, spoon<br />
1-2 scoops of filling into the hopper.<br />
Spread the filling evenly into the<br />
corners of the hopper and gently,<br />
evenly press down on the filling with<br />
the scoop.<br />
7. Slowly turn the handle. Check that<br />
ravioli strips are feeding freely through<br />
bottom of attachment.<br />
7<br />
8. Add more filling to the hopper as<br />
needed. Spread the filling evenly into<br />
the corners of the hopper and gently<br />
press down on the filling with the<br />
scoop. Make sure all filling in the<br />
hopper is used before the end of the<br />
pasta sheet is reached, or the filling<br />
will collect on the rollers. Use the scoop<br />
to remove extra filling if necessary.<br />
9. Place the strips of ravioli on a lightly<br />
floured surface and let them dry for at<br />
least 10 minutes.<br />
10. Before rolling the next sheet of ravioli<br />
strips, clean the attachment by using<br />
the cleaning brush and lightly dust the<br />
rollers with flour.<br />
11. Separate the ravioli one by one, tearing<br />
along perforations.<br />
ENGLISH