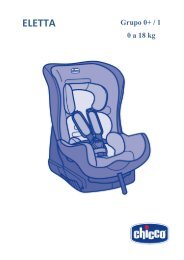
manual de instruções carrinho cortina - Chicco
manual de instruções carrinho cortina - Chicco
manual de instruções carrinho cortina - Chicco

Create successful ePaper yourself
Turn your PDF publications into a flip-book with our unique Google optimized e-Paper software.
IM9008.A.INT<br />
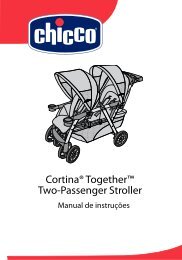
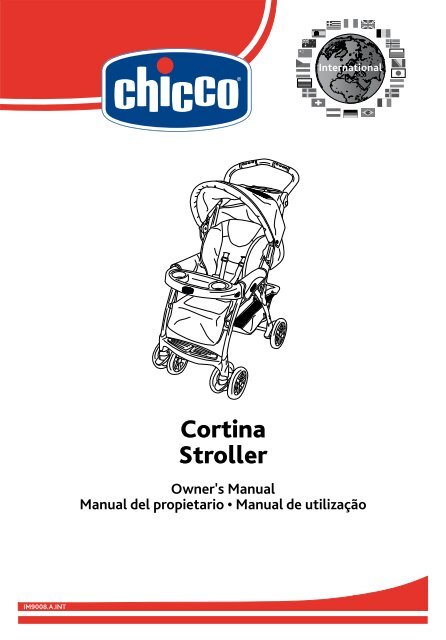
Cortina<br />
Stroller<br />
International<br />
Owner's Manual<br />
Manual <strong>de</strong>l propietario • Manual <strong>de</strong> utilização
2<br />
• PLEASE SAVE OWNER’S MANUAL FOR FUTURE<br />
USE.<br />
• Adult assembly required.<br />
• Never leave child unatten<strong>de</strong>d. Always keep<br />
child in view while in stroller.<br />
• Avoid serious injury from falling or sliding out.<br />
Always use seat belt. After fastening buckles,<br />
adjust belts to get a snug fit around your child.<br />
• Child may slip into leg openings and strangle.<br />
Never use seat in a reclined carriage position unless<br />
the straps are fastened to close<br />
off the leg opening.<br />
• AVOID FINGER ENTRAPMENT: Use care when<br />
folding and unfolding the stroller. Be certain the<br />
stroller is fully erected and latched before allowing<br />
your child near the stroller.<br />
• never use stroller on stairs or escalators. You may<br />
sud<strong>de</strong>nly lose control of the stroller or your child<br />
may fall out. Also, use extra care when going up or<br />
down a step or curb.<br />
• Avoid strangulation. DO NOT place items with a<br />
string around your child’s neck, suspend strings<br />
from this product, or attach strings to toys.<br />
• Use of the stroller with a child weighing more than<br />
50 lbs (22.7 kg) will cause excessive wear and<br />
stress on the stroller. Use the stroller with only one<br />
child at a time.<br />
• To prevent tipping, do not place more than 3 lbs (1.4<br />
kg) on the parent’s tray.<br />
• To avoid burns, never put hot liquids in the parent’s<br />
tray.<br />
• To prevent a hazardous, UNSTABLE condition, never<br />
place purses, shopping bags, parcels or accessory<br />
items on the handle or canopy.<br />
• To prevent a hazardous, UNSTABLE condition, do<br />
not place more than 10 lbs (4.5 kg) in the storage<br />
basket.<br />
WARNING<br />
Failure to follow these warnings and the<br />
assembly instructions could result in serious injury or <strong>de</strong>ath.<br />
• DO NOT use storage basket as a child carrier.<br />
• DO NOT allow your child to stand on the basket. It<br />
may collapse and cause injury.<br />
• never place child in the stroller with head toward<br />
front of stroller.<br />
• Never allow your stroller to be used as a toy.<br />
• Stroller to be used only at walking speed. Product<br />
not inten<strong>de</strong>d for use while jogging, skating, etc.<br />
• Discontinue using your stroller should it become<br />
damaged or broken.<br />
Using Infant Carrier with Stroller:<br />
• Use only Keyfit carrier with this travel system.<br />
• Read the <strong>manual</strong> provi<strong>de</strong>d with your carrier before<br />
using it with your stroller.<br />
• Always secure your child with the carrier harness<br />
when using the carrier in the stroller. If your child<br />
is already in the carrier, check that the child is<br />
secured with the harness.
AVISO<br />
O não cumprimento <strong>de</strong>stes avisos e <strong>instruções</strong> <strong>de</strong> montagem po<strong>de</strong> resultar<br />
em lesões graves ou morte.<br />
• CONSERVE ESTE MANUAL DE INSTRUÇÕES PARA<br />
CONSULTAS FUTURAS.<br />
• A MONTAGEM DEVE SER EFETUADA POR UM<br />
ADULTO.<br />
• NUNCA DEIXE A CRIANÇA SEM VIGILÂNCIA.<br />
Mantenha sempre a criança sob vigilância<br />
enquanto estiver no <strong>carrinho</strong> <strong>de</strong> passeio.<br />
• EVITE LESÕES GRAVES provocadas por quedas ou<br />
por escorregar. Utilize sempre o cinto <strong>de</strong> segurança.<br />
Depois <strong>de</strong> apertar as fivelas, ajuste os cintos <strong>de</strong><br />
forma que fiquem bem presos à volta da criança.<br />
• A CRIANÇA PODE ESCORREGAR PELA ABERTURA<br />
DE PERNAS E SUFOCAR. Nunca utilize a ca<strong>de</strong>ira na<br />
posição reclinada a não ser que tenha a abertura <strong>de</strong><br />
pernas fechada com as presilhas.<br />
• EVITE FICAR COM OS DEDOS PRESOS: tenha<br />
cuidado quando estiver a abrir e a fechar o <strong>carrinho</strong><br />
<strong>de</strong> passeio. Certifique-se <strong>de</strong> este está totalmente<br />
direito e bloqueado antes <strong>de</strong> <strong>de</strong>ixar a criança<br />
aproximar-se do <strong>carrinho</strong> <strong>de</strong> passeio.<br />
• NUNCA UTILIZE O CARRINHO DE PASSEIO EM<br />
ESCADAS ou escadas rolantes. Po<strong>de</strong>rá per<strong>de</strong>r<br />
subitamente o controleo do mesmo e a criança<br />
po<strong>de</strong> cair. Tome muito cuidado quando subir um<br />
<strong>de</strong>grau ou uma guia.<br />
• EVITE O ESTRANGULAMENTO. NÃO coloque<br />
objetos com fios à volta do pescoço da criança<br />
nem cordões suspensos no <strong>carrinho</strong> <strong>de</strong> passeio ou<br />
atados aos brinquedos.<br />
• ESTE CARRINHO DE PASSEIO é a<strong>de</strong>quado para<br />
o transporte <strong>de</strong> crianças até um peso máximo<br />
<strong>de</strong> 22.7 kg. O peso em excesso po<strong>de</strong>rá provocar<br />
<strong>de</strong>sgaste e tensão no <strong>carrinho</strong> <strong>de</strong> passeio. Utilize<br />
o <strong>carrinho</strong> <strong>de</strong> passeio apenas com uma criança <strong>de</strong><br />
cada vez.<br />
• PARA NÃO DESEQUILIBRAR O CARRINHO DE<br />
PASSEIO, não coloque mais <strong>de</strong> 1.4 kg na ban<strong>de</strong>ja<br />
dos pais.<br />
• PARA EVITAR QUEIMADURAS, nunca coloque<br />
líquidos quentes no ban<strong>de</strong>ja dos pais.<br />
• PARA EVITAR SITUAÇÕES PERIGOSAS E<br />
INSTABILIDADE, nunca coloque malas, sacos <strong>de</strong><br />
compras, embrulhos ou acessórios nos punhos ou<br />
na capota.<br />
• PARA EVITAR SITUAÇÕES PERIGOSAS E<br />
INSTABILIDADE, não coloque mais <strong>de</strong> 4.5 kg no<br />
cesto porta-objetos.<br />
• NãO utilize o cesto porta-objetos para transportar<br />
a criança.<br />
• NÃO PERMITA que a criança pé no cesto portaobjetos.<br />
Este po<strong>de</strong> ir abaixo e provocar lesões.<br />
• NUNCA COLOQUE a criança no <strong>carrinho</strong> <strong>de</strong> passeio<br />
com a cabeça virada para a frente do <strong>carrinho</strong>.<br />
• NUNCA PERMITA QUE O CARRINHO DE PASSEIO<br />
seja utilizado como um brinquedo.<br />
• O CARRINHO DE PASSEIO DEVE ser utilizado<br />
apenas para caminhadas r. O produto não foi<br />
concebido para ser utilizado enquanto corre , anda<br />
<strong>de</strong> patins, etc.<br />
• NÃO UTILIZE o <strong>carrinho</strong> <strong>de</strong> passeio se este estiver<br />
danificado ou partido.<br />
Utilização da Ca<strong>de</strong>ira auto <strong>Chicco</strong> com o <strong>carrinho</strong><br />
<strong>de</strong> passeio: utilize apenas uma ca<strong>de</strong>ira auto KeyFit<br />
<strong>Chicco</strong> com este sistema <strong>de</strong> passeio:<br />
• Leia o <strong>manual</strong> <strong>de</strong> <strong>instruções</strong> fornecido com a<br />
Ca<strong>de</strong>ira auto <strong>Chicco</strong> antes <strong>de</strong> a utilizar com o<br />
<strong>carrinho</strong> <strong>de</strong> passeio.<br />
• PRENDA SEMRE o bebéê com o cinto <strong>de</strong> segurança<br />
no <strong>carrinho</strong> <strong>de</strong> passeio. Se a criança já estiver no<br />
<strong>carrinho</strong>, verifique se está presa com os cintos.<br />
3
4<br />
• VEUILLER GARDER LE MANUEL D’UTILISATEUR<br />
POUR USAGE ULTÉRIEUR.<br />
• Assemblage par un adulte requis.<br />
• Ne laissez jamais votre enfant sans surveillance.<br />
Ayez toujours l’enfant en vue.<br />
• Évitez <strong>de</strong> sérieuses blessures. Utilisez toujours<br />
la ceinture <strong>de</strong> sécurité. Après avoir attaché les<br />
boucles, ajustez les ceintures pour obtenir un<br />
ajustement confortable autour <strong>de</strong> votre enfant.<br />
• L'enfant peut glisser dans les ouvertures pour les<br />
jambes et risquer la strangulation. Ne jamais<br />
utiliser le siège lorsque la poussette est en position<br />
<strong>de</strong> landau incliné sans que les courroies qui<br />
referment les ouvertures pour les jambes<br />
ne soient attachées.<br />
• EVITER DE COINÇER LES DOIGTS: Plier ou déplier<br />
la poussette avec soin. Soyez assuré(e) que la<br />
poussette est bien droite et que les loquets sont<br />
bien enclenchés avant <strong>de</strong> laisser votre enfant près<br />
<strong>de</strong> la poussette.<br />
• NE JAMAIS utiliser la<br />
poussette sur les escaliers ou les escaliers roulants.<br />
L’enfant pourrait tomber ou vous pourriez perdre le<br />
contrôle <strong>de</strong> la poussette. Aussi, soyez très pru<strong>de</strong>nt<br />
lorsque que vous montez et <strong>de</strong>scen<strong>de</strong>z une marche<br />
ou le bord du trottoir.<br />
• Évitez d’Étranglement. NE JAMAIS accrocher <strong>de</strong>s<br />
objects avec ficelles autour du cou <strong>de</strong> votre enfant,<br />
suspendre <strong>de</strong>s ficelles au-<strong>de</strong>ssus <strong>de</strong> ce produit, ou<br />
attacher <strong>de</strong>s jouets à <strong>de</strong>s ficelles.<br />
• l’usage <strong>de</strong> la poussette avec un enfant pesant plus<br />
<strong>de</strong> 50 livres (22,7kg) occasionnera une usure et<br />
une tension excessive à la poussette. Utilisez la<br />
poussette avec seulement un enfant à la fois.<br />
• Pour ne pas déséquilibrer la poussette, ne pas<br />
charger le plateau pour adulte et plateau à<br />
accessoire à plus <strong>de</strong> 3 livres(1,4 kg).<br />
MISE EN GARDE<br />
Manquer <strong>de</strong> suivre ces avertissements et les instructions<br />
d'assemblage peut entraîner <strong>de</strong> sérieuses blessures ou un décès.<br />
• Pour éviter les brûlures, ne jamais mettre <strong>de</strong> liqui<strong>de</strong>s<br />
brûlants dans ce plateau.<br />
• POUR ÉVITER DES CONDITIONS HASARDEUSES<br />
et instable, ne jamais placer <strong>de</strong> sacs à main, sacs<br />
à provisions ou accessoires sur le guidon ou le<br />
baldaquin.<br />
• POUR ÉVITER DES CONDITIONS HASARDEUSES,<br />
ne placez jamais plus <strong>de</strong> 10 livres (4,5 kg) dans le<br />
panier.<br />
• NE PAS utiliser le panier comme porte-bébé.<br />
• Ne laissez pas votre enfant <strong>de</strong>bout sur le panier. Il<br />
pourrait s’écrouler et causer <strong>de</strong>s blessures.<br />
• Ne jamais placer l’enfant dans la poussette avec la<br />
tête vers l’avant <strong>de</strong> la poussette.<br />
• Ne jamais utiliser la poussette comme un jouet.<br />
• La poussette doit Être utilisÉe pour la marche<br />
seulement. Ce produit n’est pas conçu pour usage<br />
pendant la course à pied, pour patiner, etc.<br />
• cessez l’usage <strong>de</strong> votre poussette si elle <strong>de</strong>vient<br />
endommagée ou brisée.<br />
Utilisation du porte-bébé avec la poussette :<br />
• Utiliser uniquement un porte-bébé Keyfit <strong>de</strong> avec ce<br />
système <strong>de</strong> voyage.<br />
• Lire le manuel <strong>de</strong> l'utilisateur fourni avec le portebébé<br />
avant <strong>de</strong> l'utiliser avec cette poussette.<br />
• Toujours attacher votre enfant avec le harnais du<br />
porte-bébé quand vous utilisez le porte-bébé avec<br />
la poussette. Si votre enfant est déjà dans le portebébé,<br />
assurez-vous que l'enfant est attaché avec<br />
le harnais.
WARNING<br />
Check that you have all the<br />
parts for this mo<strong>de</strong>l BEFORE<br />
assembling your product. If<br />
any parts are missing, call<br />
Customer Service.<br />
No tools required.<br />
2X<br />
Parts List<br />
Lista <strong>de</strong> las piezas<br />
Lista <strong>de</strong> componentes<br />
AVISO<br />
Verifique se tem todas as<br />
peças para este mo<strong>de</strong>lo<br />
ANTES <strong>de</strong> montar o <strong>carrinho</strong>.<br />
Se faltarem componentes,<br />
contacte o Serviço <strong>de</strong> Apoio<br />
Atendimento ao Consumidor.<br />
Não são necessárias ferramentas.<br />
2X 2X 2X<br />
MISE EN GARDE<br />
Vérifiez que vous avez toutes<br />
les pièces pour ce modèle<br />
AVANT d'assembler votre<br />
produit. S'il vous manque <strong>de</strong>s<br />
pièces, communiquez avec<br />
notre service à la clientèle.<br />
Aucun outil requis.<br />
2X<br />
5
6<br />
1<br />
2<br />
SNap!<br />
CLIQuE!<br />
¡RuIDO!<br />
Tab<br />
ENCaIXES<br />
LaNguETTE<br />
Parents Tray<br />
Plateau pour adulte<br />
Ban<strong>de</strong>ja dos Pais<br />
The Parents tray contains the mechanism to unfold<br />
the stroller.<br />
Parents tray MUST be attached as shown in or<strong>de</strong>r<br />
to open the stroller. The tabs on both ends<br />
of the parents tray secure the tray to the stroller<br />
handle.<br />
Make sure the fold cable does not interfere when<br />
attaching the tray to the stroller.<br />
Le plateau pour parent renferme le mécanisme qui<br />
permet d’ouvrir la poussette.<br />
Le plateau pour parent DOIT être fixé comme le<br />
montre l’illustration pour que la poussette<br />
puisse s’ouvrir. Les languettes situées aux <strong>de</strong>ux<br />
extrémités du plateau pour parent fixent le<br />
plateau à la poignée <strong>de</strong> la poussette.<br />
S'assurer que le câble <strong>de</strong> pliage ne nuit pas à<br />
l'installation du plateau sur la poussette.<br />
A ban<strong>de</strong>ja dos pais contém o mecanismo que<br />
permite abrir o <strong>carrinho</strong> <strong>de</strong> passeio.<br />
A ban<strong>de</strong>ja dos pais DEVE estar montado como<br />
ilustrado na imagem, <strong>de</strong> forma a po<strong>de</strong>r abrir o <strong>carrinho</strong><br />
<strong>de</strong> passeio. As linguetas nas extremida<strong>de</strong>s da<br />
ban<strong>de</strong>ja dos pais pren<strong>de</strong>m o tabuleiro às pegas do<br />
<strong>carrinho</strong> <strong>de</strong> passeio.<br />
Certifique-se <strong>de</strong> que a dobra do cabo não interfira<br />
quando estiver a pren<strong>de</strong>r o tabuleiro ao <strong>carrinho</strong> <strong>de</strong><br />
passeio.
3<br />
4<br />
To Open Stroller<br />
Ouverture <strong>de</strong> la poussette<br />
Abertura do <strong>carrinho</strong><br />
Once the tray is attached pull up on handle<br />
to open stroller.<br />
Une fois le plateau fixé, tirer sur la poignée<br />
pour ouvrir la poussette.<br />
Quando estiver montada a ban<strong>de</strong>ja puxe a<br />
pega para abrir o <strong>carrinho</strong> <strong>de</strong> passeio<br />
CHECK that stroller is completely open<br />
before continuing.<br />
VÉRIFIER que la poussette est complètement<br />
ouverte avant <strong>de</strong> continuer.<br />
VERIFIQUE se o <strong>carrinho</strong> está completamente<br />
aberto antes <strong>de</strong> continuar.<br />
7
8<br />
5<br />
6<br />
To Adjust Handle<br />
Pour ajuster le guidon<br />
Ajuste da pega<br />
SNap!<br />
ENCLENCHEZ!<br />
CLIQuE!
7<br />
8<br />
To Attach Basket Stand<br />
Fixation du support <strong>de</strong> porte-bagages<br />
Fixação do cesto porta-objetos<br />
Insert stand into basket exactly as shown.<br />
Stand should sli<strong>de</strong> in between fabric on<br />
basket exactly as shown. Stand should<br />
snap onto basket tube and rear crosstube.<br />
Stand must be used in or<strong>de</strong>r to use basket.<br />
Insérer le support dans le porte-bagages,<br />
exactement comme sur l'illustration.<br />
Le support doit s'insérer dans le tissu du<br />
porte-bagages, exactement comme sur<br />
l'illustration. Le support doit s'enclencher<br />
sur le tube du porte-bagages et le tube<br />
transversal <strong>de</strong> l'arrière. Il est nécessaire<br />
d'utiliser le support afin d'utiliser le portebagages.<br />
Introduza o suporte no cesto portaobjetos,<br />
fazendo-o <strong>de</strong>slizar entre o tecido<br />
no cesto porta-objetos, como ilustrado. O<br />
suporte <strong>de</strong>ve encaixar no tubo do cesto e<br />
no tubo transversal <strong>de</strong> trás.<br />
O suporte <strong>de</strong>ve ser usado para permitir a<br />
utilização do cesto porta-objetos.<br />
9
10<br />
WARNING<br />
Always secure your child with<br />
the seat belt. The tray is not<br />
a restraint <strong>de</strong>vice. Do not lift<br />
the stroller by the child’s tray.<br />
9<br />
10<br />
Child’s Tray<br />
Le plateau pour enfant<br />
Ban<strong>de</strong>ja da criança<br />
AVISO<br />
Prenda sempre a criança com<br />
o cinto <strong>de</strong> segurança. Esta<br />
ban<strong>de</strong>ja não é um dispositivo<br />
<strong>de</strong> retenção. Não pegue<br />
no <strong>carrinho</strong> <strong>de</strong> passeio pela<br />
ban<strong>de</strong>ja da criança.<br />
MISE EN GARDE<br />
Siempre sujete a su niño con<br />
el cinturón <strong>de</strong> seguridad. La<br />
ban<strong>de</strong>ja no es un dispositivo<br />
<strong>de</strong> seguridad. No levante el<br />
cochecito por la ban<strong>de</strong>ja <strong>de</strong>l<br />
niño.<br />
Sli<strong>de</strong> childs tray on exactly as shown. You can open<br />
tray with the buttons on either si<strong>de</strong> of the tray.<br />
Faire glisser le plateau pour enfant, exactement<br />
tel qu'illustré. Il est possible d'ouvrir le plateau en<br />
utilisant les boutons <strong>de</strong> chaque côté du plateau.<br />
Deslize o tabuleiro da criança conforme ilustrado.<br />
Po<strong>de</strong>-se abrir o tabuleiro com os botões que estão<br />
<strong>de</strong> cada lado do tabuleiro.<br />
To open the tray.<br />
Ouvrir le plateau.<br />
Para abrir o tabuleiro.
11<br />
CLIQuE!<br />
ENCLENCHEZ!<br />
¡RuIDO!<br />
Tray Insert<br />
Intérieur du plateau<br />
Acessório da ban<strong>de</strong>ja<br />
Snap tray insert into child's tray as shown.<br />
Remove tray insert by pulling up on one<br />
corner.<br />
Verrouiller l'intérieur du plateau en<br />
l'enclenchant au plateau pour enfant tel<br />
qu'illustré. Retirer l'intérieur du plateau en<br />
tirant sur un coin.<br />
Encaixe o acessório na ban<strong>de</strong>ja da criança,<br />
conforme ilustrado.<br />
Para retirar o acessório da ban<strong>de</strong>ja puxe por<br />
um dos cantos.<br />
11
12<br />
12<br />
CLIQuE!<br />
ENCLENCHEZ!<br />
¡RuIDO!<br />
Front Wheels<br />
Les roues avant<br />
Rodas dianteiras<br />
Check that wheels are securely attached by<br />
pulling on wheel assemblies.<br />
Assurez-vous que les roues sont attachées<br />
soli<strong>de</strong>ment en tirant sur les assemblages <strong>de</strong><br />
roue.<br />
VERIFIQUE se as rodas dianteiras estão corretamente<br />
montadas puxando os encaixes<br />
<strong>de</strong> montagem das mesmas.
13<br />
Remove and discard plastic end caps on<br />
the rear axle.<br />
Enlevez et jetez les embouts <strong>de</strong> plastique<br />
sur l'essieu arrière.<br />
Remova e <strong>de</strong>scarte as tampas <strong>de</strong> plástico<br />
do eixo traseiro.<br />
Rear Axle<br />
L’essieu arrière<br />
Eixo traseiro<br />
CLIQuE!<br />
ENCLENCHEZ!<br />
¡RuIDO!<br />
13
14<br />
14<br />
15<br />
Rear Wheels<br />
Les roues arrières<br />
Rodas<br />
Place wheel and washer on axle.<br />
Placez la roue et la ron<strong>de</strong>lle sur l'essieu.<br />
Coloque a roda e a anilha no eixo.<br />
Push straight si<strong>de</strong> of pin through axle<br />
hole. Pin will separate around the axle.<br />
Curved end of pin MUST face up as<br />
shown.<br />
Pousser le côté droit <strong>de</strong> la tige dans<br />
l'orifice <strong>de</strong> l'essieu. La tige va se séparer<br />
autour <strong>de</strong> l'essieu. La partie recourbée<br />
<strong>de</strong> la tige DOIT pointer vers le haut, tel<br />
qu'illustré.<br />
Empurre a haste reta do pino através do<br />
orifício do eixo. O pino vai abrir em torno<br />
do eixo. A haste curva do pino DEVE ficar<br />
voltada para cima, conforme ilustrado.
16<br />
Rear Wheels<br />
Les roues arrières<br />
Rodas<br />
Snap hubcap over pin as shown.<br />
Repeat on other wheel.<br />
Enclenchez l'enjoliveur <strong>de</strong> roue sur la cheville tel<br />
qu'illustré.<br />
Répétez sur l'autre roue.<br />
Encaixe a proteção por cima do<br />
pino, conforme ilustrado Repita para a outra<br />
roda.<br />
15
16<br />
17<br />
18<br />
To Attach Canopy<br />
Installation du baldaquin<br />
Instalação da capota<br />
CLIQuE!<br />
ENCLENCHEZ!<br />
¡RuIDO!<br />
CLIQuE!<br />
ENCLENCHEZ!<br />
¡RuIDO!<br />
Sli<strong>de</strong> canopy down frame over the connectors<br />
as shown.<br />
Faire glisser le baldaquin vers le bas sur<br />
le cadre, par-<strong>de</strong>ssus les connecteurs, tel<br />
qu'illustré.<br />
Deslize a capota para baixo ao longo da estrutura,<br />
por cima dos conectores, conforme<br />
ilustrado.<br />
Fasten front canopy over the top of the rear<br />
canopy panel as shown.<br />
Attacher l'avant du baldaquin par-<strong>de</strong>ssus<br />
l'arrière du panneau du baldaquin, tel<br />
qu'illustré.<br />
Prenda a frente da capota por cima do painel<br />
da capota traseira, conforme ilustrado.
19<br />
To Attach Canopy<br />
Installation du baldaquin<br />
Instalação da capota<br />
To open canopy.<br />
Pour ouvrir le baldaquin.<br />
Abertura da capota<br />
17
18<br />
20<br />
21<br />
To Secure Child<br />
Attacher l’enfant<br />
Retenção da criança<br />
5 POINT HARNESS<br />
Squeeze buckle on both si<strong>de</strong>s to release to<br />
undo harness.<br />
HARNAIS À 5 POINT<br />
Serrer les boucles situées<br />
<strong>de</strong> chaque côté pour libérer le harnais.<br />
CINTO DE SEGURANçA DE 5 PONTOS<br />
Aperte a fivela <strong>de</strong> ambos lados para abrir o<br />
cinto <strong>de</strong> segurança.
WARNING<br />
Fabric caught in the<br />
latches may prevent<br />
them from locking. When<br />
returning seat to upright<br />
position, do not allow<br />
fabric to be pinched in the<br />
latch.<br />
Child may slip into leg<br />
openings and strangle.<br />
Never use seat in a<br />
reclined carriage position<br />
unless the straps are fastened<br />
to close off the leg<br />
opening.<br />
To Recline Seat<br />
Pour incliner le siège<br />
Para reclinar o assento<br />
ADVERTENCIA<br />
Se o tecido ficar preso<br />
nos fechos, estes po<strong>de</strong>m<br />
não funcionar. Quando<br />
voltar a colocar a ca<strong>de</strong>ira<br />
na posição vertical, evite<br />
pren<strong>de</strong>r o tecido nos<br />
fechos.<br />
A criança po<strong>de</strong> <strong>de</strong>slizar<br />
pela abertura <strong>de</strong> pernas e<br />
estrangular. Nunca utilize<br />
a ca<strong>de</strong>ira na posição<br />
reclinada sem que as correias<br />
estejam apertadas <strong>de</strong><br />
modo a fechar a abertura<br />
<strong>de</strong> pernas.<br />
MISE EN GARDE<br />
Du tissu coincé dans les<br />
loquets peut empêcher<br />
ceux-ci <strong>de</strong> barrer. Lorsque<br />
vous remettez le siège en<br />
position verticale, évitez<br />
<strong>de</strong> coincer le tissu dans<br />
les loquets.<br />
L'enfant peut glisser<br />
dans les ouvertures pour<br />
les jambes et risquer la<br />
strangulation. Ne jamais<br />
utiliser le siège lorsque<br />
la poussette est en position<br />
<strong>de</strong> landau incliné<br />
sans que les courroies qui<br />
referment les ouvertures<br />
pour les jambes ne soient<br />
attachées.<br />
19
20<br />
22<br />
23<br />
To Recline Seat<br />
Pour incliner le siège<br />
Apoio <strong>de</strong> pernas ajustável<br />
To recline: lift back of canopy, and squeeze<br />
recline handle on back of seat.<br />
Pour incliner: soulevez l'arrière du baldaquin et<br />
inclinez, serrer la poignée à l'arrière <strong>de</strong> la<br />
poussette, tel qu'illustré.<br />
Para reclinar o assento: Aperte a alça na parte <strong>de</strong><br />
trás do <strong>carrinho</strong> e abaixe, como ilustrado.<br />
To raise push backrest up.<br />
Soulever le dossier en poussant pour redresser.<br />
Para levantar o assento para a posição sentado,<br />
empurre o encosto para cima..
WARNING<br />
Child may slip into leg<br />
openings and strangle.<br />
Never use seat in a<br />
reclined carriage position<br />
unless the straps are fastened<br />
to close off the leg<br />
opening.<br />
24<br />
Reclined Carriage Position<br />
Poussette en position inclinée<br />
Posição reclinada da ca<strong>de</strong>ira<br />
AVISO<br />
A criança po<strong>de</strong> <strong>de</strong>slizar<br />
pela abertura <strong>de</strong> pernas e<br />
estrangular. Nunca utilize<br />
a ca<strong>de</strong>ira na posição<br />
reclinada sem que as correias<br />
estejam apertadas <strong>de</strong><br />
modo a fechar a abertura<br />
<strong>de</strong> pernas.<br />
MISE EN GARDE<br />
L'enfant peut glisser<br />
dans les ouvertures pour<br />
les jambes et risquer la<br />
strangulation. Ne jamais<br />
utiliser le siège lorsque<br />
la poussette est en position<br />
<strong>de</strong> landau incliné<br />
sans que les courroies qui<br />
referment les ouvertures<br />
pour les jambes ne soient<br />
attachées.<br />
Recline seat to full recline<br />
position. Release straps from un<strong>de</strong>r footrest as<br />
shown.<br />
Incliner entièrement la poussette. Détacher les<br />
courroies sous le repose-pied, tel qu'illustré.<br />
Recline completamente a ca<strong>de</strong>ira. Abra as presi<br />
lhas que se encontram por baixo do apoio <strong>de</strong> pés,<br />
conforme ilustrado.<br />
21
22<br />
25<br />
26<br />
Reclined Carriage Position<br />
Poussette en position inclinée<br />
Posição reclinada da ca<strong>de</strong>ira<br />
Lift leg rest, and thread straps through button<br />
holes on each si<strong>de</strong> of seat cover. To lower<br />
the footrest again, pull up and then rotate<br />
downwards.<br />
Levez le appuie-jambes, et insérez les courroies<br />
à travers les fentes du coussin <strong>de</strong> siège,<br />
tel qu'illustré, et attacher les courroies. Pour<br />
abaisser <strong>de</strong> nouveau le repose-pied, le soulever<br />
et le faire pivoter vers le bas.<br />
Levante o apoio <strong>de</strong> pernas e passe as correias<br />
através das aberturas <strong>de</strong> cada um dos lados do<br />
forro do assento.<br />
Fasten hook and loop straps together.<br />
Attachez les courroies ensemble.<br />
Feche as presilhas.
WARNING<br />
Check that brakes are<br />
on by trying to<br />
push stroller.<br />
27<br />
28<br />
Brakes<br />
Les freins<br />
Travões<br />
AVISO<br />
Verifique se os travões<br />
estão funcionando,<br />
tentando empurrar o <strong>carrinho</strong><br />
<strong>de</strong> passeio<br />
MISE EN GARDE<br />
Vérifiez que les freins<br />
fonctionnent en essayant<br />
<strong>de</strong> pousser la poussette.<br />
23
24<br />
29<br />
Swivel Wheels<br />
Les roues pivotantes<br />
Rodas direcionáveis<br />
Front swivel wheels lock for use on uneven<br />
surfaces such as grass, stones or gravel.<br />
Les roues pivotantes avant se barrent pour un<br />
usage sur les surfaces irrégulières tel que le<br />
gazon, les cailloux ou le gravier.<br />
As rodas direcionáveis dianteiras são bloqueadas<br />
para utilização do <strong>carrinho</strong> <strong>de</strong> passeio<br />
em superfícies irregulares como paralelepípedo,<br />
pedras ou cascalho.
30<br />
31<br />
To Fold Stroller<br />
Plier la poussette<br />
Fechamento do <strong>carrinho</strong> <strong>de</strong> passeio<br />
To fold , apply brakes, unfasten straps for<br />
reclined carriage position if in use and<br />
lift up handle on tray as shown. Push<br />
forward to close.<br />
Pour replier, serrer les freins, détacher les<br />
courroies <strong>de</strong> la position inclinée si elles<br />
sont utilisées, et soulever la poignée du<br />
plateau, tel illustré. Pousser vers l'avant<br />
pour fermer.<br />
Para fechar, acione os travões, <strong>de</strong>sa<br />
perte as correias da posição reclinada se<br />
estiverem em uso e levante pela pega na<br />
ban<strong>de</strong>ja, conforme ilustrado. Empurre<br />
para a frente para fechar.<br />
Stroller will automatically latch and stand on its<br />
own.<br />
Le loquet <strong>de</strong> la poussette s'enclenchera automatiquement<br />
et tiendra <strong>de</strong>bout.<br />
O <strong>carrinho</strong> <strong>de</strong> passeio engata automaticamente e<br />
fica na posição vertical.<br />
25
26<br />
To Attach Infant Carrier<br />
Attacher le porte-bébé<br />
Instalação da ca<strong>de</strong>ira <strong>de</strong> segurança auto<br />
WARNING<br />
Use only Keyfit carrier with<br />
this travel system. Improper<br />
use of this stroller with a carrier<br />
may result in serious injury<br />
or <strong>de</strong>ath. Read the <strong>manual</strong><br />
provi<strong>de</strong>d with your carrier<br />
before using it with your<br />
stroller. Child must be secured<br />
in carrier with<br />
harness at all times.<br />
• Always secure your child with<br />
the carrier harness when using<br />
the carrier in the stroller.<br />
If your child is already in the<br />
carrier, check that the child is<br />
secured with the harness.<br />
AVISO<br />
Utilize apenas a ca<strong>de</strong>ira <strong>Chicco</strong><br />
Keyfit com este sistema <strong>de</strong><br />
passeio. A utilização incorreta<br />
<strong>de</strong>ste <strong>carrinho</strong> <strong>de</strong> passeio<br />
com uma ca<strong>de</strong>ira auto po<strong>de</strong>rá<br />
resultar em lesões graves.<br />
Leia o <strong>manual</strong> <strong>de</strong> <strong>instruções</strong><br />
fornecido com a ca<strong>de</strong>ira auto<br />
<strong>Chicco</strong> antes <strong>de</strong> utilizá-la com<br />
o <strong>carrinho</strong> <strong>de</strong> passeio.<br />
• Coloque sempre o cinto <strong>de</strong><br />
segurança na criança, quando<br />
utilizar a ca<strong>de</strong>ira auto no <strong>carrinho</strong><br />
<strong>de</strong> passeio. Se a criança<br />
já estiver na ca<strong>de</strong>ira auto,<br />
verifique se tem o cinto <strong>de</strong><br />
segurança colocado.<br />
MISE EN GARDE<br />
Utiliser uniquement un portebébé<br />
Keyfit <strong>de</strong> avec ce système<br />
<strong>de</strong> voyage. Tout mauvais<br />
usage <strong>de</strong> cette<br />
poussette avec un porte-bébé<br />
peut occasionner <strong>de</strong>s blessures<br />
sérieuses ou mortelles. Lire le<br />
manuel <strong>de</strong> l'utilisateur fourni<br />
avec le porte-bébé avant <strong>de</strong><br />
l'utiliser avec cette poussette.<br />
Lorsqu'il se trouve dans le<br />
porte-bébé, l'enfant doit être<br />
attaché en tout temps avec le<br />
harnais.<br />
• Toujours attacher votre enfant<br />
avec le harnais du portebébé<br />
quand vous utilisez le<br />
porte-bébé avec la poussette.<br />
Si votre enfant est déjà dans<br />
le porte-bébé, assurez-vous<br />
que l'enfant est attaché avec<br />
le harnais.<br />
For mo<strong>de</strong>ls that do not come with an infant carrier one may be purchased separately.<br />
Pour les modèles qui n'ont pas un porte-bébé, vous pouvez en acheter un séparément.<br />
Para os mo<strong>de</strong>los que não incluem a ca<strong>de</strong>ira <strong>de</strong> segurança auto, esta <strong>de</strong>verá ser adquirida em<br />
separado.
32<br />
To Attach Infant Carrier<br />
Attacher le porte-bébé<br />
Instalação da ca<strong>de</strong>ira <strong>de</strong> segurança auto<br />
The KeyFit Carseat attachment points/<br />
anchors are located behind the flaps in<br />
the seat as shown.<br />
Les dispositifs <strong>de</strong> fixation/points<br />
d'ancrage du dispositif <strong>de</strong> retenue pour<br />
enfant KeyFit sont situés <strong>de</strong>rrière les<br />
rabats du siège, tel qu'illustré.<br />
Os dispositivos <strong>de</strong> fixação e pontos <strong>de</strong><br />
engate da ca<strong>de</strong>ira auto KeyFit estão<br />
situados por trás das abas da ca<strong>de</strong>ira,<br />
conforme ilustrado.<br />
27
28<br />
33<br />
To Attach Infant Carrier<br />
Attacher le porte-bébé<br />
Instalação da ca<strong>de</strong>ira <strong>de</strong> segurança auto<br />
CLIQuE!<br />
ENCLENCHEZ!<br />
¡RuIDO!<br />
Recline the stroller seat back to its lowest<br />
position. To attach carseat unsnap flaps insi<strong>de</strong><br />
the seat. Insert KeyFit carseat into stroller.<br />
Car seat will snap into the attachment points.<br />
Pull up on carseat to make sure carseat is attached.<br />
Stroller tray must be attached when<br />
using as a travel system.<br />
Incliner le siège <strong>de</strong> la poussette en position<br />
la plus basse. Détacher les rabats à l'intérieur<br />
du siège tel qu'illustré afin <strong>de</strong> fixer le dispositif<br />
<strong>de</strong> retenue pour enfant. Insérer le dispositif<br />
<strong>de</strong> retenue pour enfant KeyFit dans la poussette.<br />
Le dispositif <strong>de</strong> retenue pour enfant va<br />
s'enclencher sur les points d'encrage. Tirer<br />
sur le dispositif <strong>de</strong> retenue pour enfant pour<br />
s'assurer qu'il est soli<strong>de</strong>ment fixé. Le plateau<br />
doit être fixé lorsque la poussette est utilisée<br />
comme système <strong>de</strong> voyage.<br />
Recline completamente o assento do <strong>carrinho</strong><br />
<strong>de</strong> passeio. Para colocar a ca<strong>de</strong>ira<br />
auto, <strong>de</strong>strave as abas no interior da ca<strong>de</strong>ira.<br />
Coloque a ca<strong>de</strong>ira auto no <strong>carrinho</strong> <strong>de</strong> passeio.<br />
A ca<strong>de</strong>ira se pren<strong>de</strong>rá nos pontos <strong>de</strong><br />
encaixe. Puxe-a para verificar se está segura.
34<br />
To Attach Infant Carrier<br />
Attacher le porte-bébé<br />
Instalação da ca<strong>de</strong>ira <strong>de</strong> segurança auto<br />
TO REMOVE INFANT CARRIER<br />
Squeeze release handle at back of<br />
infant carrier, and lift carrier out of<br />
the stroller.<br />
POUR ENLEVER LE PORTE-BÉBÉ<br />
Pressez la poignée <strong>de</strong> déclenchement<br />
<strong>de</strong>rrière le porte-bébé, et<br />
soulevez le<br />
porte-bébé hors <strong>de</strong> la poussette.<br />
PARA RETIRAR A CADEIRA AUTO<br />
Aperte a pega na parte traseira da<br />
mesma e levante-a do <strong>carrinho</strong> <strong>de</strong><br />
passeio.<br />
29
30<br />
Cleaning and Maintenance<br />
The cleaning and maintenance of this product must be carried out on a regular basis by the user.<br />
The cleaning and maintenance of the stroller must only be carried out by an adult.<br />
• REMOVABLE SEAT PAD may be machine washed in cold water on <strong>de</strong>licate cycle and drip-dried. NO BLEACH.<br />
• TO CLEAN STROLLER FRAME, use only household soap and warm water. NO BLEACH or <strong>de</strong>tergent.<br />
• FROM TIME TO TIME CHECK YOUR STROLLER for loose screws, worn parts, torn material or stitching. Replace or<br />
repair the parts as nee<strong>de</strong>d. Use only manufacturer replacement parts.<br />
• EXCESSIVE EXPOSURE TO SUN OR HEAT could cause fading or warping of parts.<br />
• IF STROLLER BECOMES WET, open canopy and allow to dry thoroughly before storing.<br />
• IF WHEEL SQUEAKS, use a light oil (e.g., WD-40, 3-in-1, or sewing machine oil). It is important to get the oil into<br />
the axle and wheel assembly as illustrated.<br />
• WHEN USING YOUR STROLLER AT THE BEACH completely clean your stroller afterward to remove sand<br />
and salt from mechanisms and wheel assemblies.
Cuidados e Manutenção<br />
O usuário <strong>de</strong>ve realizar a limpeza e a manutenção <strong>de</strong>ste produto regularmente. A limpeza e a manutenção <strong>de</strong>vem<br />
ser feitas por um adulto.<br />
• O REVESTIMENTO REMOVÍVEL DA CADEIRA po<strong>de</strong> ser lavado na máquina, em água fria, no programa <strong>de</strong> roupa<br />
<strong>de</strong>licada e secar ao ar . NÃO CENTRIFUGAR.<br />
• PARA LIMPAR A ESTRUTURA DO CARRINHO, utilize apenas sabão comum e água morna.<br />
NÃO CENTRIFUGUE nem utilize <strong>de</strong>tergente.<br />
• INSPECIONE PERIODICAMENTE O CARRINHO DE PASSEIO para verificar se existem parafusos soltos, partes<br />
gastas, material rasgado ou pontos soltos. Substitua ou repare as peças, se necessário. Utilize apenas peças <strong>de</strong><br />
substituição <strong>Chicco</strong>.<br />
• A EXPOSIÇÃO EXCESSIVA AO SOL OU AO CALOR po<strong>de</strong> provocar <strong>de</strong>scoloração do tecido e dos plásticos.<br />
• SE O CARRINHO DE PASSEIO MOLHAR , abra a capota e <strong>de</strong>ixe secar por completo antes <strong>de</strong> guardar.<br />
• SE AS RODAS COMEÇAREM A CHIAR, utilize um óleo leve (por exemplo WD-40, 3-em-1 ou óleo <strong>de</strong> máquina <strong>de</strong><br />
costura). É importante que coloque o óleo no eixo e no encaixe da roda, conforme ilustrado.<br />
• APÓS A UTILIZAÇÃO DO CARRINHO DE PASSEIO NA PRAIA tenha o cuidado <strong>de</strong> limpá-lo cuidadosamente,<br />
para remover por completo os vestígios <strong>de</strong> areia e sal dos mecanismos e do encaixe<br />
das rodas .<br />
31
32<br />
Entretien et nettoyage<br />
L’utilisateur doit effectuer le nettoyage et l’entretien <strong>de</strong> ce produit régulièrement.<br />
Le nettoyage et l’entretien <strong>de</strong> cette poussette doit être effectué par un adulte.<br />
• LE COUSSIN DE SIÈGE AMOVIBLE est lavable à la machine à l’eau froi<strong>de</strong> et au cycle délicat. Étendre pour sécher.<br />
PAS D’EAU DE JAVEL.<br />
• POUR NETTOYER L’ARMATURE DE LA POUSSETTE, utilisez un savon <strong>de</strong> ménage et <strong>de</strong> l’eau tiè<strong>de</strong>.<br />
PAS D’EAU DE JAVEL ou détergent.<br />
• DE TEMPS EN TEMPS, VÉRIFIEZ VOTRE POUSSETTE pour <strong>de</strong>s vis <strong>de</strong>sserrées, pièces usagées, tissu ou couture déchiré.<br />
Remplacez ou réparez ces pièces si nécessaire. Utilisez seulement les pièces <strong>de</strong> remplacement fabricant.<br />
• UNE EXPOSITION PROLONGÉE AU SOLEIL peut provoquer une décoloration prématurée du tissu et du plastique.<br />
• SI LA POUSSETTE EST MOUILLÉE, ouvrez le baldaquin et laissez sécher complètement avant l’entreposage.<br />
• SI LES ROUES GRINCENT, utilisez une huile légère (i.e. WD-40, 3 dans 1, ou bien une huile pour machine à coudre).<br />
Il est important <strong>de</strong> déposer l’huile dans l’essieu <strong>de</strong> la roue.<br />
• LORSQUE VOUS UTILISEZ VOTRE POUSSETTE À LA PLAGE, prenez soin <strong>de</strong> bien la nettoyer après l’usage afin<br />
d’enlever le sable et le sel du mécanisme et <strong>de</strong>s roues.
NOTES<br />
33
34<br />
NOTES
NOTES<br />
35
International<br />
Artsana do Brasil Ltda.<br />
Rua Vigário Taques Bittencourt, 74<br />
Jd. Abrantes - Santo Amaro - SP<br />
cep. 04755-060 - fone (11) 2246-2100<br />
fax (11) 2246-2121 - CNPJ 02.340.424/0001-20<br />
92581.L.1 00 079048 000 090