

Manuel de montage
Manuel de montage
Manuel de montage

Create successful ePaper yourself
Turn your PDF publications into a flip-book with our unique Google optimized e-Paper software.
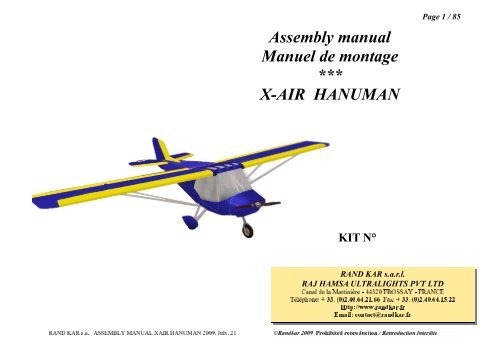
Assembly manual<br />
<strong>Manuel</strong> <strong>de</strong> <strong>montage</strong><br />
***<br />
X-AIR HANUMAN<br />
KIT N°<br />
Page 1 / 85<br />
RAND KAR s.a.r.l.<br />
RAJ HAMSA ULTRALIGHTS PVT LTD <strong>de</strong> la Martinière - 44320 FROSSAY - FRANCE Canal<br />
Téléphone: + 33. (0)2.40.64.21.66 Fax: + 33. (0)2.40.64.15.22<br />
21 ©Randkar 2009 Prohibited reproduction / Reproduction interdite Http://www.randkar.fr Email: contact@randkar.fr July, 2009, HANUMAN XAIR MANUAL ASSEMBLY s.a. KAR RAND
IMPORTANT ADVICE<br />
FOR THE ASSEMBLY OF YOUR X-AIR HANUMAN ULTRALIGHT.<br />
X-AIR HANUMAN is <strong>de</strong>livered in kit form with many pre-assembled units. Hence, assembly in consi<strong>de</strong>rably simplified; however, a few elements remain to assemble with utmost care. Your<br />
urge you to read the following carefully and thoroughly before you start work on your ultralight. We insist that follow the assembly schedule of this manual, which is based on our own, consi<strong>de</strong>rable experience and makes best use of it. Please return your warranty sheet (see general maintenance and flight manual) to us We<br />
bearing the stamp of your <strong>de</strong>aler, and send us the address of any subsequent buyer so that we may keep him posted on the latest, often vital information about the X- promptly,<br />
HANUMAN. Make a complete inventory of the kit, checking for any missing part. When in doubt during assembly, before any damage is done, call: Air<br />
favorite <strong>de</strong>aler who will be happy to help -our company at the following numbers: tel. +33 (0)2 40 64 21 66 fax. +33 (0)2 40 64 15 22 e.mail: xair-info@randkar.fr -your<br />
site: http://www.randkar.fr Web<br />
We wish you a pleasant, easy assembly,<br />
and many enjoyable flights<br />
can too join the e-group <strong>de</strong>dicated to X-AIR on the internet: http://www.egroups.com/group/X-Air_Ultralight_Aircraft you<br />
A few tips from a friend:<br />
We welcome any criticism or suggestions sent by mail: they help us improve the quality of our product and service. Thank you for writing. Nylon-tipped hammer Pop rivet tool Drill with 4/5/6mm bits Torque wrench (advisable, but not strictly necessary) Products nee<strong>de</strong>d Blue Loctite Silicone grease Lubricant silicon spray<br />
interdite Reproduction / reproduction Prohibited 2009 ©Randkar 21 July, 2009, HANUMAN XAIR MANUAL ASSEMBLY s.a. KAR RAND<br />
Page 2 / 85<br />
from the nuts securing the rubber silent blocks and the screws fitted into the nutserts, Loctite thread Locker normal 243 or equivalent should be applied Apart<br />
screws and nuts before tightening. This kind of nut with nylon ring must be used only once and have to be replaced if taken out. Torqueing norms for the airframe are: -6mm diameter: 1kgm all on<br />
diameter:<br />
<br />
Excepted screws going through tubes, in this cases, just torque to apply surfaces in contact and take care to never put the tubes out of shape. For the engine, refer to the manufacturer’s manual. -8mm 2,5kgm<br />
the parts are of two kinds: with three digits, they refer to a pre assembled unit ex: 301 leading edge assembly to References<br />
<br />
they refer to a sub-unit ex: 301086 leading edge tube screws and clevis pins standing vertically are installed with their heads up those fitted horizontally, parallel to the keel axis are installed from front to back with six digits,<br />
forward). (head<br />
refer<br />
Paragraph A 11 Drawing A11 the stages of assembly. visualize to sheets drawing the to<br />
Paragraph C 3 Drawing C3<br />
nee<strong>de</strong>d: Open-, ring- or socket-wrenches: 7 / 10 / 13 / 14 / 17 / 19 Allen wrenches: 3 / 4 / 5 / 6 / 8 Tools
IMPORTANTES RECOMMANDATIONS<br />
POUR L'ASSEMBLAGE DE VOTRE U.L.M. X-AIR HANUMAN<br />
X-AIR HANUMAN est livré en kit très avancé: <strong>de</strong> nombreux sousensembles sont déjà assemblés. Le <strong>montage</strong> est très simplifié; cependant, il <strong>de</strong>meure que certains assemblages (peu Votre<br />
doivent être abordés avec précaution. Veuillez donc lire attentivement et complètement ce qui suit avant d'entamer la construction. Il est vivement recommandé <strong>de</strong> suivre la chronologie <strong>de</strong> ce manuel <strong>de</strong> mon- nombreux)<br />
Il est basé sur notre expérience et les difficultés rencontrées. Nous insistons pour que vous nous retourniez rapi<strong>de</strong>ment votre garantie (voir matage. général d’utilisation et d’entretien) dûment visée par votre reven<strong>de</strong>ur et vous prions <strong>de</strong> nous communiquer les coordonnées du nouveau propriétaire en cas <strong>de</strong> vente afin <strong>de</strong> faire suivre les informations parfois vitales sur l’évolution <strong>de</strong> l’X AIR HANUMAN nuel<br />
l’inventaire du kit et vérifiez qu’il ne manque rien. ( vous avez 15 jours pour signifier à votre reven<strong>de</strong>ur tout manque <strong>de</strong> pièces ) En cas <strong>de</strong> doute, lors du <strong>montage</strong> , n'hésitez pas à contacter avant <strong>de</strong> faire <strong>de</strong>s dé- Effectuez<br />
-Votre reven<strong>de</strong>ur préféré qui se fera un plaisir <strong>de</strong> vous ai<strong>de</strong>r -Notre société RAND KAR sa gâts<br />
N’hésitez pas à nous faire part <strong>de</strong> vos critiques et suggestions par http://www.egroups.com/group/X-Air_Ultralight_Aircraft anglais): (en<br />
courrier postal ou électronique.<br />
Nous vous souhaitons un bon travail<br />
suivi <strong>de</strong> nombreux vols...<br />
<strong>de</strong> la Martinière 44320 Frossay - France Tél. : +33 (0) 240 642 166 Fax : +33 (0) 240 641 522 Canal<br />
Conseils d’ami :<br />
http://www.randkar.fr E-mail : xair-info@randkar.fr Vous pouvez egalement vous inscrire au groupe <strong>de</strong> discussion dédié à l’X-AIR sur internet Clé mâle <strong>de</strong> 3 / 4 / 5 / 6 Marteau à bout Nylon Pince à rivet Perceuse avec forêt <strong>de</strong> 4 / 5 / 6 / 8 Clé dynamométrique ( conseillé mais non indispensable ) Produits nécessaires Loctite Bleu Spray Silicone ou équivalent Graisse au silicone<br />
interdite Reproduction / reproduction Prohibited 2009 ©Randkar 21 July, 2009, HANUMAN XAIR MANUAL ASSEMBLY s.a. KAR RAND<br />
Page 3 / 85<br />
ceux qui fixent <strong>de</strong>s Silentblocs caoutchouc et les vis montées dans les inserts, tous les filetages <strong>de</strong>s vis et écrous doivent être enduits <strong>de</strong> Loctite frein Excepté<br />
243(ou produit équivalent) avant serrage. Ces écrous ne doivent être utilisés qu’une fois et seront donc remplacés en cas <strong>de</strong> dé<strong>montage</strong>. Serrage : Diamètre 6: 1mkg normal filet<br />
<br />
2,4 mkg L’assemblage <strong>de</strong> tube / tube ou tube / pièces acier se fait serrage à « contre » sans déformation <strong>de</strong>s tubes. Pour le moteur, se référer au manuel du constructeur Diamètre 8:<br />
<strong>de</strong> pièces se présentent sous <strong>de</strong>ux formes différentes : -à trois chiffres, ils désignent un assemblage déjà pré monté références Les<br />
<br />
bord d’attaque d’aile assemblé -à six chiffres, ils désignent un élément <strong>de</strong> ces assemblages ex 301086 tube <strong>de</strong> bord d’attaque ex<br />
<br />
:301<br />
et broches dont l’axe est vertical se montent la tête en haut. Celles dont l’axe est horizontal et parallèle à l’axe <strong>de</strong> la quille se montent <strong>de</strong> l’avant vers l’arrière (sauf impossibilité). vis Les<br />
<br />
aux plans pour visualiser les différentes étapes du <strong>montage</strong> Par exemple :Paragraphe A 11 Plan A 11 Paragraphe C 3 Plan C 3 référer Se<br />
nécessaire : Clé plate ou à pipe <strong>de</strong> 7 / 10 / 13 / 14 / 17 / 19 Outillage
A/ COCKPIT ASSEMBLY ——————— Page 5<br />
B/ INSTALLING FUSELAGE ———— Page 24<br />
C/ EMPENNAGE ————————– Page 40<br />
D/ FAIRING / CANOPY /<br />
WINDSHIELD ASSEMBLY ——–———-— Page 44<br />
E/ ENGINE ——————————–—— Page 54<br />
F/ WINGS ASSEMBLY ———————— Page 60<br />
G/ FLAPS AND AILERONS ASSEMBLY -Page 70<br />
H/ DOORS AND WHEEL SPATS ———— Page 72<br />
I/ FINAL TUNING —————————-- Page 74<br />
ANNEX<br />
-TRANSPORT ——————–—-—- Page 78<br />
-ELECTRIC WIRING —————-—– Page 80<br />
-RADIO CONNECTION ———–—-—- Page 83<br />
-GARANTEE FORM TO RETURN —— Page 84<br />
A/ MONTAGE DE LA CELLULE —————————— Page 5<br />
B/ FUSELAGE —————–——————————-— Page 24<br />
C/ EMPENNAGE —————————————— Page 40<br />
D/ TOIT / CARENAGE / PARE-BRISE ——————— Page 44<br />
E/ MOTEUR ————————————–———-——— Page 54<br />
F/ MONTAGE DES AILES ——————————–— Page 60<br />
G/ VOLETS ET AILERONS ————————–———— Page 70<br />
H/ PORTES ET CARENAGES DE ROUES ————— Page 72<br />
I/ REGLAGES FINAUX —————————————- Page 76<br />
ANNEXE<br />
-TRANSPORT ——————————–—--———- Page 79<br />
-CIRCUIT ELECTRIQUE ——————–——–—– Page 80<br />
-BRANCHEMENT RADIO ——————————-- Page 83<br />
-FORMULAIRE DE GARANTIE A RETOURNER - Page 85<br />
RAND KAR s.a. ASSEMBLY MANUAL XAIR HANUMAN 2009, July, 21 ©Randkar 2009 Prohibited reproduction / Reproduction interdite<br />
Page 4 / 85
A/ AIRFRAME ASSEMBLY A/ MONTAGE DE LA CELLULE<br />
A1) sub-assembly 365 on the ground. -Install 364R and 364L on 365. Put<br />
Do not glue or tighten bolts yet. This operation will be ma<strong>de</strong> in the end of chapter B.<br />
A1<br />
KAR s.a. ASSEMBLY MANUAL XAIR HANUMAN 2009, July, 21 ©Randkar 2009 Prohibited reproduction / Reproduction interdite A1A RAND<br />
Page 5 / 85<br />
A1) l’ensemble365 au sol, ainsi que les éléments 364R (droit) et 364L (gauche) <strong>de</strong> chaque coté. Poser<br />
A<br />
364 sur 365. Sauf indication contraire,ne coller ni serrer aucun boulon pour l’instant. Le serrage <strong>de</strong> la boulonnerie <strong>de</strong> la cellule et du fuselage s’effectuera à la fin du chapitre B. -Fixer
A2) A2) support 345 and fit it on tubes 364. engine Position<br />
A<br />
A<br />
A2 - Jabiru<br />
A2 - Rotax 912 XAIR HANUMAN 2009, July, 21 ©Randkar 2009 Prohibited reproduction / Reproduction interdite MANUAL ASSEMBLY s.a. KAR RAND<br />
Page 6 / 85<br />
le support moteur/fourche 345 à l’avant et le fixer sur les tubes latéraux 364. Positionner<br />
A<br />
A2 - Rotax 582<br />
A2A
A3) the rear cockpit si<strong>de</strong> tubes 341 on main axle 365. (The longer straight part of the tubes marked « top »up) Mount<br />
A4) cockpit upper rear tube 369 on tubes 341. A3 Install<br />
TOP TOP<br />
A<br />
A3) les tubes arrière <strong>de</strong> cabine 341 sur l’axe principal 365 ( la partie droite la plus longue marquée « top » en haut). Monter<br />
KAR s.a. ASSEMBLY MANUAL XAIR HANUMAN 2009, July, 21 ©Randkar 2009 Prohibited reproduction / Reproduction interdite A4 A4 A<br />
RAND<br />
A<br />
Page 7 / 85<br />
A4) le tube supérieur transversal <strong>de</strong> cabine arrière 369 sur les tubes 341. A3A Poser
A5) front cockpit si<strong>de</strong> tubes 342, chamfer down and backwards. Install<br />
A6) front tube 340. Install<br />
A<br />
A5<br />
A5) les tubes verticaux <strong>de</strong> cabine avant 342, le chanfrein en bas et vers l’arrière. Poser<br />
KAR s.a. ASSEMBLY MANUAL XAIR HANUMAN 2009, July, 21 ©Randkar 2009 Prohibited reproduction / Reproduction interdite A6<br />
RAND<br />
A6) Poser<br />
le tube frontal 340.<br />
A5A<br />
Page 8 / 85
A7) cockpit front horizontal tube 367 on tubes 342. Check that the bolt VH08069 is torqued (A7A). Install<br />
B<br />
A<br />
A7B<br />
RAND KAR s.a. ASSEMBLY MANUAL XAIR HANUMAN 2009, July, 21 ©Randkar 2009 Prohibited reproduction / Reproduction interdite<br />
Page 9 / 85<br />
A7) le tube supérieur horizontal <strong>de</strong> cabine avant 367 sur les tubes 342. Vérifier que le boulon VH08069 est serré (A7A) Poser<br />
A7 A7 A
A8) A8) horizontal upper si<strong>de</strong> tubes 370L and 370R. cockpit Install<br />
B<br />
A9) A9) 370A and diagonal tubes 370B. A8 crosstube Install<br />
B<br />
A<br />
A<br />
A9B<br />
s.a. ASSEMBLY MANUAL XAIR HANUMAN 2009, July, 21 ©Randkar 2009 Prohibited reproduction / Reproduction interdite A9 A9A KAR RAND<br />
Page 10 / 85<br />
les tubes supérieurs latéraux <strong>de</strong> cabine 370L (gauche) et 370R (droit). Poser<br />
A8A<br />
le tube 370A transversal et les 2 tubes 370B diagonaux. A8B<br />
Poser
A10) rear un<strong>de</strong>r floor tube 362. Part 111401 is used to fasten the throttle cable for Install<br />
2 stroke engines. Rotax<br />
A<br />
A11) sub-assembly 363, remove the U pulleys support and the nylon pedal bearings. B A10 On<br />
Install 363.<br />
A10) le tube sous plancher arrière 362. La pièce nylon 111401 sert à l’accrochage du câble d’accélérateur dans Poser<br />
le cas <strong>de</strong>s moteurs Rotax 2 temps.<br />
A11C A B A11A<br />
XAIR HANUMAN 2009, July, 21 ©Randkar 2009 Prohibited reproduction / Reproduction interdite<br />
C A11 MANUAL ASSEMBLY s.a. KAR RAND<br />
Page 11 / 85<br />
A11) l’araignée <strong>de</strong> tubes sous plancher avant 363, déposer le support <strong>de</strong> poulies en U ainsi que les paliers nylon <strong>de</strong>s palonniers. A10 A A10B<br />
Sur<br />
Monter l’ensemble 363 sur la structure.<br />
A11 B
A12) pulley supports from tubes 364. Install floorboard 378. Caution, the floor is not symmetrical, the holes in the floor for Remove<br />
handles must be located on the left si<strong>de</strong>. Drill the missing holes in the floor through the holes in the tubes. Install pulley supports on tubes 364. throttle<br />
A13) the U pulleys support on the floor. Install rud<strong>de</strong>r pedals. Install<br />
Lubricate nylon housings with silicone grease.<br />
A13) le support <strong>de</strong> poulies. Poser les paliers <strong>de</strong> palonniers et les palonniers 351. Reposer<br />
Lubrifier les paliers a l’ai<strong>de</strong> <strong>de</strong> graisse silicone.<br />
KAR s.a. ASSEMBLY MANUAL XAIR HANUMAN 2009, July, 21 ©Randkar 2009 Prohibited reproduction / Reproduction interdite A A13 A13A<br />
RAND<br />
Page 12 / 85<br />
A12) les supports <strong>de</strong> poulies <strong>de</strong>s tubes 364. Poser le plancher 378. Attention, il y a un sens <strong>de</strong> pose, les lumières <strong>de</strong> passage <strong>de</strong>s manet- Déposer<br />
<strong>de</strong> gaz dans le plancher doivent se trouver coté gauche. Contrepercer les trous manquant dans le plancher à travers les tubes sous plancher. Reposer les supports <strong>de</strong> poulies sur les tubes 364. tes<br />
A12
A14) nylon housings with silicon grease. Install control stick base 332 with one screw. Lubricate<br />
bore the holes in the floor through the nylon housings and fit Counter<br />
A15) airframe on trestles. Lubricate all the moving components. Install<br />
fork mobile part 346 on the engine support. Insert spring in the fork tube 350. Insert fork tube in the engine support and fit it with the bolt through mobile part 346. Position<br />
not forget the nylon whasher at the upper tip of the spring insi<strong>de</strong> the engine support). (do<br />
A A14A A14<br />
KAR s.a. ASSEMBLY MANUAL XAIR HANUMAN 2009, July, 21 ©Randkar 2009 Prohibited reproduction / Reproduction interdite A15<br />
RAND<br />
Page 13 / 85<br />
A14) les paliers à la graisse silicone. Positionner l’embase <strong>de</strong>s manches 332 en la fixant avec Lubrifier<br />
seule vis. Contrepercer les autres trous dans le plancher a travers les paliers et fixer le tout. une<br />
A15) la cellule sur <strong>de</strong>s tréteaux. Lubrifier tous les axes <strong>de</strong> pivot <strong>de</strong>s composants du train à Poser<br />
<strong>de</strong> graisse silicone. Positionner le guignol <strong>de</strong> direction 346 sur le support moteur. Positionner le ressort dans le tube <strong>de</strong> fourche 350. Insérer le tube <strong>de</strong> fourche dans le support moteur jusqu'à ce l’ai<strong>de</strong><br />
le ressort vienne légèrement en contrainte (ne pas oublier sa bague nylon d’appui dans le support moteur). Boulonner a travers la guignol <strong>de</strong> direction 346. que
A16) A16) gear 347 right and left. Grease all moving parts including the sliding suspension tube. main Install<br />
A17) A17)<br />
A B<br />
Drill through the outsi<strong>de</strong> rails the two holes in the floor that will receive pins AX06035. A16 A16A<br />
348. railing seat Install<br />
KAR s.a. ASSEMBLY MANUAL XAIR HANUMAN 2009, July, 21 ©Randkar 2009 Prohibited reproduction / Reproduction interdite A17A AA17 RAND<br />
Page 14 / 85<br />
le train principal 347 gauche et droit sur la structure. Graisser toutes les parties pivotantes et le tube <strong>de</strong> suspension coulissant. Monter<br />
les glissières <strong>de</strong>s sièges 348. Contrepercer le plancher à travers les trous avant <strong>de</strong>s 2 glissières extérieures. A16B Fixer<br />
trous reçoivent les axes AX06035 qui servent <strong>de</strong> butée <strong>de</strong> coulissement <strong>de</strong> siège. Ces
A18 ) the plate 336 on the ground behind the cockpit and place the rud<strong>de</strong>r cables in their pulleys (A18B) so that the cables are crossed when the support Put<br />
will be installed in the fuselage (see B3 page 26). Install the horizontal tube 339A and the two diagonal tubes 339B. Do not torque the 2 bolts in A18A. 336<br />
A19)<br />
AB<br />
entry cockpit tubes 343 by fitting them first forward, then backwards. A18 upper Install<br />
A19) entry cockpit tubes 344 by fitting them first forward, then backwards (the one with the two nylon stoppers is the left one). lower Install<br />
A B<br />
ASSEMBLY MANUAL XAIR HANUMAN 2009, July, 21 ©Randkar 2009 Prohibited reproduction / Reproduction interdite A19A A19 C s.a. KAR RAND<br />
Page 15 / 85<br />
A18 ) la platine 336 sur le sol <strong>de</strong>rrière la cellule et dérouler les câbles <strong>de</strong> dérive en les faisant passer dans leurs poulies (A18B) en les po- Poser<br />
<strong>de</strong> façon à ce qu’ils soient croisés lorsque le support 336 sera monté dans le fuselage (voir B3 page 26). Poser les tubes <strong>de</strong>rrière le siège, un tube horizontal 339A et <strong>de</strong>ux tubes diagonaux 339B. Ne pas serrer les 2 écrous en A18A sitionnant<br />
les tubes d’entrée <strong>de</strong> cabine inférieurs 344 en les fixant d’abord a l’avant puis a l’arrière (celui qui comporte les butées nylon se monte à gauche). A18B A18APoser<br />
les tubes d’entrée <strong>de</strong> cabine supérieurs 343 en les fixant d’abord a l’avant puis a l’arrière. Poser<br />
A19B<br />
A19C
A20) tubes 353, the longer tube up (nut insert on the exterior si<strong>de</strong>) and the smaller tube down. Install<br />
Do not glue the screws yet.<br />
A21) A21)<br />
A<br />
control tube 313. Lubricate nylon parts with silicon grease A20 A20A flap the Install<br />
B<br />
le tube <strong>de</strong> comman<strong>de</strong> <strong>de</strong> volets 313. Lubrifier les paliers nylon à la graisse silicone A20B Poser<br />
KAR s.a. ASSEMBLY MANUAL XAIR HANUMAN 2009, July, 21 ©Randkar 2009 Prohibited reproduction / Reproduction interdite A21 A21A<br />
RAND<br />
Page 16 / 85<br />
A20) leur raidisseurs 353, les grands en haut (insert coté extérieur) et les petits en bas. Poser<br />
pas coller les vis maintenant, elles seront redémontées pour la fixation <strong>de</strong>s flancs <strong>de</strong> cabine. Ne<br />
A
A22) A22) aileron control system 352. the Install<br />
A<br />
A22<br />
KAR s.a. ASSEMBLY MANUAL XAIR HANUMAN 2009, July, 21 ©Randkar 2009 Prohibited reproduction / Reproduction interdite A22A<br />
RAND<br />
Monter<br />
la comman<strong>de</strong> d’ailerons 352.<br />
Page 17 / 85
A23) flap control tube on flap handle (see drawing 368 in the spare parts document). Install<br />
A23) flaps handle + control tube 368 on airframe.<br />
C<br />
the Install<br />
A<br />
A23<br />
B<br />
le tube <strong>de</strong> comman<strong>de</strong> <strong>de</strong> volets sur la manette (voir <strong>de</strong>ssin 368 dans le document pièces détachées). Monter<br />
Installer l’ensemble 368 sur la cellule.<br />
KAR s.a. ASSEMBLY MANUAL XAIR HANUMAN 2009, July, 21 ©Randkar 2009 Prohibited reproduction / Reproduction interdite A23 B A23 C RAND<br />
A23A<br />
Page 18 / 85
A24) the frame one si<strong>de</strong> on the floor. Install suspension bungees on the main landing gear (one front, one rear Install<br />
on each si<strong>de</strong>, 4,5 laps for each bungee).<br />
RAND KAR s.a. ASSEMBLY MANUAL XAIR HANUMAN 2009, July, 21 ©Randkar 2009 Prohibited reproduction / Reproduction interdite<br />
Page 19 / 85<br />
A24) la cellule sur le coté. Poser l’élastique <strong>de</strong> suspension sur le train principal (un <strong>de</strong>vant et un Basculer<br />
<strong>de</strong>rrière <strong>de</strong> chaque coté, quatre tours et <strong>de</strong>mi par élastique).
A25) fuel tank 381 with fuel, then install it. Fit the tank belts, two up and two below the tank. Rince<br />
the water trap to the tank with hoses 360298 (A25B). Connect the fuel line 135257 to the water trap (A25B). Connect the venting hose 135298 to the tank (A25A). To avoid collapsing the hoses, it is better to sleeve them internally (with a smaller and har<strong>de</strong>r fuel hose for example). Connect<br />
the tank to test it. Note: the fuel tank straps are stored in the fuselage fabric Fill<br />
A<br />
A25<br />
B<br />
A25) le réservoir 381 à l’essence et l’installer. -Fixer les sangles <strong>de</strong> réservoirs, <strong>de</strong>ux en <strong>de</strong>ssous et <strong>de</strong>ux au <strong>de</strong>ssus. Rincer<br />
KAR s.a. ASSEMBLY MANUAL XAIR HANUMAN 2009, July, 21 ©Randkar 2009 Prohibited reproduction / Reproduction interdite A25B<br />
RAND<br />
Page 20 / 85<br />
les <strong>de</strong>mi-parties <strong>de</strong> réservoir inférieures au décanteur avec la durite 360298 (A25B). -Connecter la durite d’alimentation 135257 au décanteur (A25B). -Poser la durite <strong>de</strong> mise à l’air 135298 (A25A). Afin d’éviter le pincement <strong>de</strong> ces durits, -Connecter<br />
est conseillé <strong>de</strong> les manchonner intérieurement (par exemple avec une durit essence plus rigi<strong>de</strong> ou une gaine annelée <strong>de</strong> type électrique. -Remplir le réservoir afin <strong>de</strong> contrôler l’étanchéité avant <strong>de</strong> poser la jupe <strong>de</strong> fuselage. Note: les sangles <strong>de</strong> réservoirs sont stockées dans la toile <strong>de</strong> fuselage il<br />
22 cm 7 cm<br />
A25A
A26) A26) handles 337. throttle Install<br />
A<br />
A26<br />
les comman<strong>de</strong>s <strong>de</strong> gaz 337. Poser<br />
RAND KAR s.a. ASSEMBLY MANUAL XAIR HANUMAN 2009, July, 21 ©Randkar 2009 Prohibited reproduction / Reproduction interdite<br />
Page 21 / 85
A27) A27) support tubes 361 right and left. Do not torque the screws on engine support yet. engine Install<br />
B<br />
C<br />
Note that the pulley turn free without touching nut EC06F. If necessary, add two washers RM0816. Check<br />
A<br />
A27<br />
les tubes support moteur 361 droit et gauche. Ne pas serrer les vis sur le support moteur maintenant. Poser<br />
A27B A27A<br />
A27C<br />
KAR s.a. ASSEMBLY MANUAL XAIR HANUMAN 2009, July, 21 ©Randkar 2009 Prohibited reproduction / Reproduction interdite A27A RAND<br />
Page 22 / 85<br />
Note: que la poulie tourne librement sans frotter sur l’ecrou EC06F. Si besoin, rajouter <strong>de</strong>ux ron<strong>de</strong>lles RM0816 Verifier
A28) the wheel axels and install front wheel 354 and main landing gear wheels 355. Grease<br />
Install brake cables 366 and connect them to the pedals. A28)<br />
A<br />
A28<br />
B<br />
la roue avant 354 et les roues du train principal 355 après avoir graissé les axes <strong>de</strong> roues. Poser<br />
les gaines et câbles <strong>de</strong> frein 366 et les connecter aux pédales. Poser<br />
KAR s.a. ASSEMBLY MANUAL XAIR HANUMAN 2009, July, 21 ©Randkar 2009 Prohibited reproduction / Reproduction interdite A28B RAND<br />
A28A<br />
Page 23 / 85
B1) fuselage upper tubes 318R and L and lower tubes 317R and L on the airframe. Fit<br />
B1) fin leading edge 321 on one of tubes 318, then on the second and then on tubes 317. NOTE:Do not apply loctite on the screws fitted in the nutserts. the Fit<br />
D<br />
A<br />
B1<br />
B/ FUSELAGE<br />
B C<br />
KAR s.a. ASSEMBLY MANUAL XAIR HANUMAN 2009, July, 21 ©Randkar 2009 Prohibited reproduction / Reproduction interdite B1C B1D<br />
RAND<br />
Page 24 / 85<br />
les tubes <strong>de</strong> fuselage arrière supérieurs 318 (droit et gauche) et inférieurs 317 (droite et gauche) sur la cellule. Fixer<br />
le bord <strong>de</strong> fuite 321 sur un <strong>de</strong>s tubes 318, puis sur l’autre, puis sur les tubes 317. NOTE:Les vis fixées dans les inserts ne doivent pas être collées. Fixer<br />
B1A<br />
B1B
B2) frame 336 that bear the rud<strong>de</strong>r cables and the rear elevator control tube. Install<br />
B2<br />
A<br />
B2) le cadre 336 qui supporte les câbles <strong>de</strong> direction et la comman<strong>de</strong> <strong>de</strong> profon<strong>de</strong>ur. Poser<br />
B2A<br />
RAND KAR s.a. ASSEMBLY MANUAL XAIR HANUMAN 2009, July, 21 ©Randkar 2009 Prohibited reproduction / Reproduction interdite<br />
Page 25 / 85
A<br />
B3) the rud<strong>de</strong>r cables to the cockpit and position them in their pulleys. Unroll<br />
not fit <strong>de</strong>finitely to the rud<strong>de</strong>r pedals yet. Attention: the cables are crossed (B3C) Do<br />
B<br />
C<br />
B3<br />
D<br />
KAR s.a. ASSEMBLY MANUAL XAIR HANUMAN 2009, July, 21 ©Randkar 2009 Prohibited reproduction / Reproduction interdite B3B B3C B3D RAND<br />
Page 26 / 85<br />
les câbles <strong>de</strong> dérive et les ramener au cockpit en les passant dans leurs poulies. Fixer les aux palonniers sans coller les écrous. Attention: les câbles sont croisés (B3C)<br />
B3)Dérouler<br />
B3A
B4) the stabilizer leading edge support 331 and the shoul<strong>de</strong>r harness cables. B4)Poser le tube support <strong>de</strong> bord d’attaque d’empennage arrière 331 (avec attache harnais d’épaule). Install<br />
B5) vertical si<strong>de</strong> fuselage stiffeners 325 (4 on right si<strong>de</strong> and 4 on left si<strong>de</strong>). Install<br />
Glue and torque the bolts.<br />
A<br />
B4A B4<br />
B5) les tubes raidisseurs <strong>de</strong> fuselage latéraux verticaux 325. Poser<br />
Coller et serrer la boulonnerie.<br />
Page 27 / 85<br />
A B<br />
CB5 B5A<br />
XAIR HANUMAN 2009, July, 21 ©Randkar 2009 Prohibited reproduction / Reproduction interdite B5B B5C MANUAL ASSEMBLY s.a. KAR RAND
B6) si<strong>de</strong> diagonal stiffeners 329 from forward to backward and gluing-torquing <strong>de</strong>finitly their bolts when Install<br />
B6) all fitted. Torque the bolts that fit tuibes 325. they are<br />
D C<br />
A B<br />
B6<br />
tous les raidisseurs diagonaux latéraux 329 en allant <strong>de</strong> l’avant vers l’arrière sans serrer la boulonnerie, puis col- Poser<br />
la boulonnerie quand tous sont posés. Serrer les boulons fixant les tubes 325. ler-serrer<br />
KAR s.a. ASSEMBLY MANUAL XAIR HANUMAN 2009, July, 21 ©Randkar 2009 Prohibited reproduction / Reproduction interdite B6C RAND<br />
B6A<br />
B6B<br />
B6D<br />
Page 28 / 85
B7) longitudinal fuselage stiffeners 326 and triangular plates (B7C) (stored in bag Install<br />
325)<br />
A<br />
B<br />
C<br />
B7<br />
B<br />
B<br />
les tubes raidisseurs <strong>de</strong> fuselage latéraux longitudinaux 326 et les plaques triangulaires (B7C) (stockées dans le sachet 325)<br />
B7)Poser<br />
B7A B7B<br />
B7D<br />
s.a. ASSEMBLY MANUAL XAIR HANUMAN 2009, July, 21 ©Randkar 2009 Prohibited reproduction / Reproduction interdite B7C<br />
KAR RAND<br />
D<br />
Page 29 / 85
B8) cross stiffeners 327. Torque the bolts. B8)Poser les tubes raidisseurs transversaux 327. Install<br />
A<br />
B C D<br />
B8<br />
B8D<br />
s.a. ASSEMBLY MANUAL XAIR HANUMAN 2009, July, 21 ©Randkar 2009 Prohibited reproduction / Reproduction interdite B8C B8B KAR RAND<br />
B8A<br />
Page 30 / 85
B9) longitudinal fuselage battens 328 (one on top, two on bottom). Install<br />
Do not torque the screws in B9A and B9C.<br />
B C A<br />
D E<br />
F<br />
D<br />
B9<br />
B9) les nervures longitudinales 328 (une au <strong>de</strong>ssus Poser<br />
Ne pas serrer les vis du <strong>de</strong>ssus en B9A et B9C. <strong>de</strong>ssous). en <strong>de</strong>ux et<br />
KAR s.a. ASSEMBLY MANUAL XAIR HANUMAN 2009, July, 21 ©Randkar 2009 Prohibited reproduction / Reproduction interdite B9D B9E B9F RAND<br />
B9C<br />
B9A<br />
Page 31 / 85<br />
B9B
B10) the two upper hinges from the fib trailing edge 321. Position tube 322 on fin trailing edge 321 (B10D). Remove<br />
the fin sail on trailing edge 321. Put leading edge 320 in the sail and position it B10A). Fit leading edge 320 on trailing edge 321 (B10C). Sli<strong>de</strong> tube 323 insi<strong>de</strong> the sail. Tighten the sail and sli<strong>de</strong> tube 323 un<strong>de</strong>r the metallic knot (B10D). Sli<strong>de</strong><br />
and screw 323 on the font si<strong>de</strong> (B10A). Rotate tube 322 to position its front part opposite the hole on the leading edge 320. Fit tube 322 on leading edge 320 (B10B) Fit the two hinges on 321 using tool 333326 for the upper hinge. Tighten<br />
3 hinges must be lined up. Check that point and if necessary set them by putting diameter 6 washers between hinges and trailing edge The<br />
321.<br />
AB C<br />
D<br />
KAR s.a. ASSEMBLY MANUAL XAIR HANUMAN 2009, July, 21 ©Randkar 2009 Prohibited reproduction / Reproduction interdite B10C B10D B10<br />
RAND<br />
Page 32 / 85<br />
B10) le bord <strong>de</strong> fuite <strong>de</strong> dérive 321, déposer les <strong>de</strong>ux charnières supérieures. Positionner le tube 322 sur le bord <strong>de</strong> fuite <strong>de</strong> dérive 321 (B10D). Sur<br />
la toile <strong>de</strong> dérive sur le bord <strong>de</strong> fuite 321. Enfiler le bord d’attaque 320 dans la toile et le positionner en B10A. Fixer le bord d’attaque 320 sur le bord <strong>de</strong> fuite 321 (B10C). Glisser le tube 323 dans la toile. Tendre la toile et glisser le tube 323 sous le nœud <strong>de</strong> liaison <strong>de</strong> queue (B10D). Glisser<br />
et visser 323 sur l’avant (B10A). Faire pivoter le tube 322 vers le haut pour amener sa partie avant en face du trou dans le bord d’attaque 320 Fixer 322 a l’avant(B10B). Reposer les <strong>de</strong>ux charnières supérieures <strong>de</strong> dérive en utilisant l’outil spécial Tendre<br />
pour celle du haut. Vérifier la rectitu<strong>de</strong> du bord <strong>de</strong> fuite <strong>de</strong> dérive 321 et si besoin aligner les char- 333326<br />
en intercalant <strong>de</strong>s ron<strong>de</strong>lles <strong>de</strong> diamètre 6 entre les charnières et le bord <strong>de</strong> fuite. nières<br />
B10A<br />
B10B
B11) the two plates from the tip of elevator control tube 316. Remove<br />
the tube 316 and re-fit the plates. Fit the stopper cable (B11B). Apply silicon grease on the tube in the nylon housing backwards and between the plastic saddles and aluminium plates forwards. Install<br />
A<br />
B11<br />
KAR s.a. ASSEMBLY MANUAL XAIR HANUMAN 2009, July, 21 ©Randkar 2009 Prohibited reproduction / Reproduction interdite B11B RAND<br />
B<br />
Page 33 / 85<br />
B11) les <strong>de</strong>ux platines à l’extrémité du tube <strong>de</strong> comman<strong>de</strong> <strong>de</strong> profon<strong>de</strong>ur partie arrière 316. Déposer<br />
le tube 316 et remonter les platines. Fixer le câble <strong>de</strong> limitation <strong>de</strong> débattement (B11B). Lubrifier le tube a la graisse silicone au niveau du palier nylon a l’arrière et entre les coupelles et les platines aluminium a l’avant. Installer<br />
B11A
B12) front part elevator control tube 314. Apply silicon grease on the moving parts for lubricate Install<br />
Do not torque the front screw yet (B12B). B12)<br />
B<br />
A<br />
B12<br />
le tube <strong>de</strong> comman<strong>de</strong> <strong>de</strong> profon<strong>de</strong>ur partie avant 314 dans le cockpit. Poser<br />
au niveau <strong>de</strong>s coupelles. Ne pas bloquer la vis avant maintenant (B12B) Lubrifier<br />
KAR s.a. ASSEMBLY MANUAL XAIR HANUMAN 2009, July, 21 ©Randkar 2009 Prohibited reproduction / Reproduction interdite B12B<br />
RAND<br />
B12A<br />
Page 34 / 85
B13) B13) fork 319. Apply silicon grease on the moving parts for lubricate elevator Install<br />
B13<br />
la fourche <strong>de</strong> comman<strong>de</strong> <strong>de</strong> profon<strong>de</strong>ur 319. Lubrifier l’articulation. Poser<br />
KAR s.a. ASSEMBLY MANUAL XAIR HANUMAN 2009, July, 21 ©Randkar 2009 Prohibited reproduction / Reproduction interdite B13A<br />
RAND<br />
A<br />
Page 35 / 85
B14) trim sleeves and cables 357. Position the metallic sleeve end on the cable sleeves and sli<strong>de</strong> Install<br />
into the sleeves. Position the sleeves on the airframe. Fit the metallic sleeve end so that the cables are lined up with the pulley Sleeves must be enough long at the tubes junction to permit cable<br />
movement. The cable goes two and a half laps around the pulley and is stopped by a parker screw. free<br />
A<br />
B14 s.a. ASSEMBLY MANUAL XAIR HANUMAN 2009, July, 21 ©Randkar 2009 Prohibited reproduction / Reproduction interdite<br />
KAR RAND<br />
Page 36 / 85<br />
B14) gaines et câbles <strong>de</strong> trim 357. Positionner la butée <strong>de</strong> gaine sur les gaines et introduire le câble dans les Poser<br />
Positionner les gaines sur la cellule. Positionner la butée <strong>de</strong> gaine sur le tube 370 <strong>de</strong> façon à ce que les câbles soient dans l’axe <strong>de</strong>s gorges <strong>de</strong> la poulie. Fixer la butée <strong>de</strong> gaine sur le tube avec les rivets. gaines.<br />
suffisamment <strong>de</strong> mou dans la gaine au niveau <strong>de</strong>s articulations <strong>de</strong>s tubes pour permettre le débattement. Le câble fait <strong>de</strong>ux tours et <strong>de</strong>mi autour <strong>de</strong> la poulie et est bloqué par une vis parker. Laisser<br />
22 cm
C<br />
B15) and torque all the bolts already installed, except upper front fork bolt (A). Glue<br />
B15) harness cables in the fuselage(B15D).<br />
D<br />
shoul<strong>de</strong>r Fit<br />
A<br />
B<br />
B15<br />
et serrer toute la boulonnerie déjà installée sauf le boulon <strong>de</strong> fourche avant (A), Fixer les câbles <strong>de</strong>s harnais Coller<br />
d’épaule dans le fuselage (B15D).<br />
RAND KAR s.a. ASSEMBLY MANUAL XAIR HANUMAN 2009, July, 21 ©Randkar 2009 Prohibited reproduction / Reproduction interdite<br />
Page 37 / 85
B16) fabric on fuselage and fit backwards with velcro. Pull the rud<strong>de</strong>r cables and the elevator fork out of the fabric. Position<br />
nylon battens 334392 insi<strong>de</strong> their housing un<strong>de</strong>r the fuselage fabric. Position battens 330307A, 330307B and 330307D in the fabric. Fuselage lacing must be done with the small diameter string, the bigger will be used for wing fabric tension. Sli<strong>de</strong><br />
the lacing on the un<strong>de</strong>r face of the fuselage (not too much tight)length of the strin:5,50m. Make the lacing on the si<strong>de</strong>s of the cabin (not too much tight)-length 3,00m. Make the lacing on the top of the cabin (not too much tight)-length Make<br />
Make the lacing on the bottom of the cabin (not too much tight). 2,50m.<br />
KAR s.a. ASSEMBLY MANUAL XAIR HANUMAN 2009, July, 21 ©Randkar 2009 Prohibited reproduction / Reproduction interdite B16A B16 RAND<br />
Page 38 / 85<br />
B16) la toile sur le fuselage et la fixer a l’arrière sur le bord <strong>de</strong> fuite <strong>de</strong> dérive avec son velcro (sortir les câbles <strong>de</strong> direction et la Positionner<br />
<strong>de</strong> profon<strong>de</strong>ur). Glisser les joncs 334392 dans les ourlets <strong>de</strong> chaque coté du <strong>de</strong>ssous <strong>de</strong> la toile. Introduire les lattes latérales 330307A dans la toile <strong>de</strong> chaque coté, ainsi que la latte supérieure 330307B et les lattes inferieures330307D en fourche<br />
(coté avec la fente à l’extérieur). Le laçage <strong>de</strong> la toile <strong>de</strong> fuselage est réalisé avec la cor<strong>de</strong>lette <strong>de</strong> plus petit diamètre, la plus grosse étant <strong>de</strong>stinée a la tension <strong>de</strong>s ailes. Réaliser un pré-laçage en <strong>de</strong>ssous (longueur <strong>de</strong> cor<strong>de</strong>lette:5,50m). Pré lacer les cotés <strong>de</strong> la toile sur les tubes <strong>de</strong> cabine (3,00m) <strong>de</strong>ssous<br />
lacer la partie supérieure (2,50m) Pré lacer les <strong>de</strong>ux <strong>de</strong>mi-parties inférieures. (2x2m) Pré<br />
the velcro on the back of the fuselage with small plastic ties. Tight the lacing on the cabin Sli<strong>de</strong> batten 330307C in the fabric. Install tube 324 Sécuriser le velcro a l’arrière (B16B) Tendre le laçage inférieur <strong>de</strong> façon a amener les <strong>de</strong>ux parties <strong>de</strong> toile bord a bord. Terminer <strong>de</strong> tendre coté cabine. Glisser la latte 330307C dans son fourreau (B16C) Secure<br />
le tube 324. Installer<br />
B D A<br />
C
B17) sail 334377 with luggage rack behind the seats. Install<br />
RAND KAR s.a. ASSEMBLY MANUAL XAIR HANUMAN 2009, July, 21 ©Randkar 2009 Prohibited reproduction / Reproduction interdite<br />
B17<br />
Page 39 / 85<br />
B17) le panneau <strong>de</strong> toile intégrant le coffre à bagages 334377 <strong>de</strong>rrière les sièges. Poser
C1) stabilizer 349 (right and left), checking that the leading and trailing edge are well in position on the nylon cone. Install<br />
screw the fitting screw of upper cables 321107 (C1A)and position upper cables Install horizontal stabilizer 349 (right and left) (C1B and C1D). Fit lower cables (C1C) (if nessary, pull lightly on the stabilizer downward). Completely<br />
the safety rings on lower cables. Unscrew the tension screw 321107 (C1A) until cables are tight and secure this screw. Fit<br />
A<br />
C1<br />
B C D<br />
C / EMPENNAGE<br />
KAR s.a. ASSEMBLY MANUAL XAIR HANUMAN 2009, July, 21 ©Randkar 2009 Prohibited reproduction / Reproduction interdite C1C C1D RAND<br />
Page 40 / 85<br />
C1) les plans fixes 349 en vérifiant que les bord d’attaque et bord <strong>de</strong> fuite sont bien en place sur les cônes nylon. Installer<br />
la vis <strong>de</strong> tension 321107(C1A) complètement. Fixer les câbles supérieurs (C1A). Positionner le plan fixe horizontal 349 (droit et gauche) (C1B et C1D). Fixer les câbles inférieurs (C1C)(si nécessaire, appuyer légèrement sur les plans fixes pour avoir suffisamment <strong>de</strong> débattement). Visser<br />
les anneaux brisé <strong>de</strong> sécurité <strong>de</strong>s câbles inférieurs (C1C). Tendre les câbles en dévissant la vis <strong>de</strong> tension 321107 (C1A) et la sécuriser ensuite. Poser<br />
C1A C1B
C2) rud<strong>de</strong>r horn on rud<strong>de</strong>r (see drawing 308 on spare parts document). Mount<br />
that 3 rud<strong>de</strong>r hinges are lined up.if not, it’s possible to move the position of the wrong hinges by inserting washer(s) or plastic saddle betwen hinge and rud<strong>de</strong>r leading edge Install rud<strong>de</strong>r 308. Connect rud<strong>de</strong>r cables to the rud<strong>de</strong>r. Check<br />
<br />
the<br />
ends to the fork mobile part First of all, and once again, because this needs to be repeated, make sure that the rud<strong>de</strong>r cables are crossed! rod Connect<br />
cables will be un<strong>de</strong>r slight tension when the rud<strong>de</strong>r is centered; slack in all other positions is normal. The<br />
the pedals are lined up, the rud<strong>de</strong>r should be in line with the longitudinal axis of the aircraft: the easiest way to get this is to clamp the When<br />
<br />
<br />
and set the adjustable links so that: - the nose wheel is in line with the longitudinal axis - the pedals are lined up - the cables are slightly taut cleats two between rud<strong>de</strong>r<br />
BA C<br />
C2A<br />
s.a. ASSEMBLY MANUAL XAIR HANUMAN 2009, July, 21 ©Randkar 2009 Prohibited reproduction / Reproduction interdite C2C C2 KAR RAND<br />
Page 41 / 85<br />
C2) le guignol sur la direction (voir <strong>de</strong>ssin 308 dans la documentation <strong>de</strong>s pièces détachées) Installer<br />
la 308. Vérifier que les 3 charnières <strong>de</strong> la direction sont alignées, si ce n’est pas le cas, les aligner en utilisant une ou <strong>de</strong>s ron<strong>de</strong>lles <strong>de</strong> 6 ou coupelle nylon entre la charnière et le bord d’attaque <strong>de</strong> direction Connecter les câbles à la direction Poser<br />
<br />
direction<br />
biellettes <strong>de</strong> direction a la fourche. Tout d'abord, on ne le répétera jamais assez, soyez sûr que: Les câbles <strong>de</strong> direction sont croisés! les Connecter<br />
et palonniers <strong>de</strong> façon que: Les câbles seront légèrement tendus lorsque le gouvernail est dans l'axe <strong>de</strong> l'avion; le mou dans les autres positions est normal. biellettes Régler<br />
les palonniers sont en ligne, le gouvernail sera dans l'axe <strong>de</strong> l'avion: le plus simple est <strong>de</strong> bloquer le gouvernail entre 2 taquets et ajus- Lorsque<br />
les connections réglables <strong>de</strong> fourches <strong>de</strong> façon à ce que: - la roue <strong>de</strong> nez soit dans l'axe longitudinal - les palonniers soient en ligne ter<br />
les câbles soient légèrement tendus -<br />
C2B
C3) elevator 307 (right and left) and connect them to the control fork. Install<br />
Connect trim cables to the trim C3)<br />
C3<br />
A B<br />
les gouvernes <strong>de</strong> profon<strong>de</strong>ur 307 droite et gauche Et les connecter a la fourche <strong>de</strong> comman<strong>de</strong>. Poser<br />
Connecter les câbles <strong>de</strong> trim au trim<br />
KAR s.a. ASSEMBLY MANUAL XAIR HANUMAN 2009, July, 21 ©Randkar 2009 Prohibited reproduction / Reproduction interdite C3B<br />
RAND<br />
C3A<br />
Page 42 / 85
C4) C4) if the aircraft must be equipped with a Jabiru engine Battery Install<br />
A<br />
C4<br />
la batterie si l’appareil doit être équipé d’un moteur Jabiru Installer<br />
C4A<br />
RAND KAR s.a. ASSEMBLY MANUAL XAIR HANUMAN 2009, July, 21 ©Randkar 2009 Prohibited reproduction / Reproduction interdite<br />
Page 43 / 85
D / POD - CANOPY - WINDSHIELD D / CARENAGE - TOIT - PARE BRISE<br />
D1) the airframe on the tail. Remove front fork. Put<br />
the pod on the frame and fit it (D2A) Mount the front fork. On the top of the pod, machine the holes for the engine support tubes corresponding to the choosen engine (D2B) Position<br />
B<br />
A<br />
D1) la machine sur la queue. Déposer la fourche. Poser<br />
RAND KAR s.a. ASSEMBLY MANUAL XAIR HANUMAN 2009, July, 21 ©Randkar 2009 Prohibited reproduction / Reproduction interdite<br />
D1<br />
Page 44 / 85<br />
le carénage sur la cellule en le fixant en D2A . Reposer la fourche. Détourer les lumières <strong>de</strong> passage <strong>de</strong>s tubes support moteur correspondant au moteur choisi dans le <strong>de</strong>ssus du carénage (D2B). Positionner
D2) Position<br />
firewall 384 in front pod 373 (foam on the cabin si<strong>de</strong>). Drill firewall fitting holes on the pod. la cloison pare-feu 384 dans le carénage 373 (mousse coté cabine). Percer les trous <strong>de</strong> fixation <strong>de</strong> la cloison dans le carénage.<br />
interdite Reproduction / reproduction Prohibited 2009 ©Randkar 21 July, 2009, HANUMAN XAIR MANUAL ASSEMBLY s.a. KAR RAND<br />
D2) Positionner<br />
Page 45 / 85
A<br />
B<br />
D<br />
D3) D3) 388. canopy Install<br />
C<br />
D3<br />
D3C<br />
le toit. 388. Poser<br />
RAND KAR s.a. ASSEMBLY MANUAL XAIR HANUMAN 2009, July, 21 ©Randkar 2009 Prohibited reproduction / Reproduction interdite<br />
Page 46 / 85
BC<br />
A<br />
D4) a stripe of 3cm wi<strong>de</strong> of the windscreen protection all around the windscreen. remove<br />
windscreen on the airframe, install all the upper screws that fit the windscreen on the canopy without torquing. Drill the lower central hole for fitting on the pod and install the screw. Drill the other holes alternatly on each si<strong>de</strong> and install the screws. Drill the holes in the windscreen on each si<strong>de</strong>, opposite of the nutserts in Position<br />
342. Torque all the windscreen fitting screws. Position firewall with pop rivets and washers, the foam on the cabin si<strong>de</strong>, Big upper part first and the 2 lower part then. Firewall is positionned insi<strong>de</strong> the pod (engine si<strong>de</strong>). tubes<br />
Do not use loctite on the windscreen screws. To avoid any damage of the lexan, use only water for cleaning the wind- CAUTION:<br />
Fuel or cooling liquid may also damage the lexan. shield.<br />
D4<br />
RAND KAR s.a. ASSEMBLY MANUAL XAIR HANUMAN 2009, July, 21 ©Randkar 2009 Prohibited reproduction / Reproduction interdite<br />
Page 47 / 85<br />
D4 et découper la protection <strong>de</strong> pare-brise sur la périphérie sur une largeur <strong>de</strong> 3cm. Décoller<br />
le pare-brise 374, Poser toutes les vis qui fixent le parebrise sur le toit sans les serrer. Percer le trou central <strong>de</strong> fixation du pare-brise sur le carénage. Poser la vis. Percer les autres trous alternativement <strong>de</strong> chaque coté et poser les vis Positionner<br />
fur et a mesure. Percer les trous dans le pare-brise <strong>de</strong> chaque coté en face <strong>de</strong>s inserts <strong>de</strong>s tubes 342. Serrer toutes les vis <strong>de</strong> fixation du pare-brise. Poser la cloison pare-feu (rivets pop + ron<strong>de</strong>lles <strong>de</strong>rrière), la mousse au<br />
cabine. Poser d’abord la partie supérieure puis les <strong>de</strong>ux <strong>de</strong>miparties inférieures. La cloison est positionnée a l’intérieur du caré- coté<br />
(coté moteur). IMPORTANT: Ne pas utiliser <strong>de</strong> loctite sur les vis <strong>de</strong> fixation du pare-brise nettoyer le pare-brise exclusivement a l'eau, tout autre produit risque d'endommager le lexan (qui se détériore également au contact <strong>de</strong> l’essence ou du liqui<strong>de</strong> <strong>de</strong> refroidissement). nage
A B<br />
D5) D5) support tubes 335. engine Install<br />
D5-Rotax 912<br />
les tubes support moteur 335 Poser<br />
KAR s.a. ASSEMBLY MANUAL XAIR HANUMAN 2009, July, 21 ©Randkar 2009 Prohibited reproduction / Reproduction interdite D5B-912<br />
RAND<br />
Page 48 / 85<br />
D5A-912
B<br />
A<br />
D5-Jabiru<br />
RAND KAR s.a. ASSEMBLY MANUAL XAIR HANUMAN 2009, July, 21 ©Randkar 2009 Prohibited reproduction / Reproduction interdite<br />
Page 49 / 85<br />
D5B
D6) D6) (For Rotax 582 engine) battery Install<br />
D7) and adjust dashboard 382. Drill the fitting holes. Install<br />
the panel and fit instruments on it. Install electric wiring. Fit the dashboard in the cockpit. Connect <strong>de</strong>finitly the rud<strong>de</strong>r cables to the rud<strong>de</strong>r pedals and install the compensation springs. Remove<br />
la batterie (Pour moteur Rotax 582) Installer<br />
D7) et ajuster le tableau <strong>de</strong> bord 382. Percer les trous <strong>de</strong> fixation. Positionner<br />
AB<br />
s.a. ASSEMBLY MANUAL XAIR HANUMAN 2009, July, 21 ©Randkar 2009 Prohibited reproduction / Reproduction interdite D7B D7 KAR RAND<br />
Page 50 / 85<br />
le tableau <strong>de</strong> bord et monter les instruments <strong>de</strong>ssus. Installer le faisceau électrique. Reposer le tableau <strong>de</strong> bord. Connecter les câbles <strong>de</strong> dérive aux palonniers définitivement et installer les ressorts <strong>de</strong> compensation. Déposer
D8) D8) in its housing 386 Install compass housing . compass Fit<br />
A<br />
s.a. ASSEMBLY MANUAL XAIR HANUMAN 2009, July, 21 ©Randkar 2009 Prohibited reproduction / Reproduction interdite D8 KAR RAND<br />
Page 51 / 85<br />
le compas dans son support 386. Poser le support compas. Monter
D10) Install<br />
D9) D9) control cables. ailerons Install<br />
les cables <strong>de</strong> comman<strong>de</strong> d’ailerons. Installer<br />
KAR s.a. ASSEMBLY MANUAL XAIR HANUMAN 2009, July, 21 ©Randkar 2009 Prohibited reproduction / Reproduction interdite D10A D10 A<br />
RAND<br />
Page 52 / 85<br />
lower cockpit si<strong>de</strong>s 376 right and left. D10) Poser les flancs <strong>de</strong> cockpit inférieurs 376 droit et gauche.<br />
D9 A D9 B
D11) seats 380 in their railings. Secure with the 6 diameter pin at the end of the rails. Install<br />
D11) les sièges 380 dans leurs glissières. Poser l’axe <strong>de</strong> 6 anti-déraillement en bout <strong>de</strong> glissière. Installer<br />
D11<br />
RAND KAR s.a. ASSEMBLY MANUAL XAIR HANUMAN 2009, July, 21 ©Randkar 2009 Prohibited reproduction / Reproduction interdite<br />
Page 53 / 85
E1) the fuel pump and the fuel line on the firewall. Install regulator and starter relay (and eventually the bracket of the oil Install<br />
bottle for Jabiru engine) on the firewall. Install the engine (see buil<strong>de</strong>r notice) venting<br />
E / ENGINE E / MOTEUR<br />
E1) la pompe a essence et le circuit d’alimentation sur le cloison pare-feu. Installer<br />
RAND KAR s.a. ASSEMBLY MANUAL XAIR HANUMAN 2009, July, 21 ©Randkar 2009 Prohibited reproduction / Reproduction interdite<br />
Page 54 / 85<br />
le régulateur et le relais <strong>de</strong> démarreur (et éventuellement le support <strong>de</strong> la bonbonne <strong>de</strong> reniflard d’huile pour moteur Jabiru sur la cloison pare-feu Installer<br />
le moteur (voir notice constructeur)<br />
Poser
ROTAX 582<br />
RAND KAR s.a. ASSEMBLY MANUAL XAIR HANUMAN 2009, July, 21 ©Randkar 2009 Prohibited reproduction / Reproduction interdite<br />
Page 55 / 85
JABIRU 2200<br />
aluminium washers that fit the engine on its support are drilled at 6,35mm diameter . drill them at 8mm diameter. Les ron<strong>de</strong>lles aluminium <strong>de</strong> fixation moteur sont per- The<br />
cées à diamètre 6,35. Les repercer à diamètre 8.<br />
©Randkar 2009 Prohibited reproduction / Reproduction interdite 21 July, 2009, HANUMAN XAIR MANUAL ASSEMBLY s.a. KAR RAND<br />
Page 56 / 85
E3) Install<br />
E2) the choke handle and cable and connect it to the carb(s). Install<br />
E2) la manette et le câble <strong>de</strong> starter et le connecter au(x) carburateur(s) Poser<br />
RAND KAR s.a. ASSEMBLY MANUAL XAIR HANUMAN 2009, July, 21 ©Randkar 2009 Prohibited reproduction / Reproduction interdite<br />
Page 57 / 85<br />
ROTAX 582 JABIRU 2200<br />
it to the handle and the carb(s). E3)Poser les câbles <strong>de</strong> gaz et les connecter à la manette et au(x) carburateur(s) connect and cable throttle the
E4) Connect<br />
E4)<br />
E5)<br />
the fuel line to the engine.<br />
hood electric wiring. Connect<br />
screws on each si<strong>de</strong> following drawing E5-1). together(2 372335 engine lower and 372334 hood engine upper the Assembly<br />
the hoods on the aircraft (E5-2), drill central hole n°1, then drill 3 holes on each si<strong>de</strong> alternately. In case of Rotax 912 engine, it may be necessary to enlarge the hole for the propeller support in the upper hood (E5-3). Position<br />
E5-3<br />
280<br />
E5-1 60<br />
KAR s.a. ASSEMBLY MANUAL XAIR HANUMAN 2009, July, 21 ©Randkar 2009 Prohibited reproduction / Reproduction interdite E5-2 RAND<br />
Connecter<br />
Page 58 / 85<br />
E5)<br />
la durite d’alimentation au moteur.<br />
inférieur le circuit électrique au niveau du moteur. Connecter<br />
suivant E5-1). coté chaque <strong>de</strong> vis (2 ensemble 372335 et 372334 supérieur moteur capots les Assembler<br />
positionner sur la machine (E5-2), percer le trou central N°1, puis les 3 trous latéraux alternativement <strong>de</strong> chaque coté. Dans le cas d’une motorisation 912, il peut être nécessaire <strong>de</strong> retoucher le capot supérieur au niveau <strong>de</strong> la sortie d’hélice (E5-3). Les<br />
1<br />
30<br />
130 130
A<br />
E6) E6) floor cover 377. un<strong>de</strong>r Fit<br />
E6<br />
l’habillage composite sous plancher 377.<br />
Poser<br />
RAND KAR s.a. ASSEMBLY MANUAL XAIR HANUMAN 2009, July, 21 ©Randkar 2009 Prohibited reproduction / Reproduction interdite<br />
Page 59 / 85
301262<br />
A<br />
F / WINGS ASSEMBLY F / ASSEMBLAGE DES AILES<br />
F1) the two leading edge parts 301 and trailing edge 302. Install tip tube 309(1 right and 1 left) without drilling or fitting its pin now. Assembly<br />
compression tubes 311 A and B, tube 311387 and cables. Note: On the above drawing F1, the wing is positionned upsi<strong>de</strong>-down. In this position, cables 301261 and 301263 must route un<strong>de</strong>r the other cables. Mount<br />
301264<br />
B<br />
301261<br />
C<br />
D<br />
I<br />
E<br />
F<br />
301263<br />
F1<br />
KAR s.a. ASSEMBLY MANUAL XAIR HANUMAN 2009, July, 21 ©Randkar 2009 Prohibited reproduction / Reproduction interdite F1B<br />
RAND<br />
G<br />
Page 60 / 85<br />
F1) les <strong>de</strong>ux parties <strong>de</strong> bord d’attaque 301 et <strong>de</strong> bord <strong>de</strong> fuite 302. Les relier par le saumon 309 (attention, 1 droit et un gauche)sans percer ni Assembler<br />
sa goupille pour l’instant, les tubes <strong>de</strong> compression 311 A et B , le tube 311387et les câbles. Note: Sur le <strong>de</strong>ssin F1 ci-<strong>de</strong>ssous, l’aile est positionnée intrados vers le haut. Dans cette position, les câbles 301261 et 301263 doivent passer en <strong>de</strong>ssous <strong>de</strong>s autres câbles. introduire<br />
H<br />
F1 A
F1C<br />
KAR s.a. ASSEMBLY MANUAL XAIR HANUMAN 2009, July, 21 ©Randkar 2009 Prohibited reproduction / Reproduction interdite F1G RAND<br />
F1D<br />
Page 61 / 85<br />
F1F F1E<br />
F1I<br />
F1H
F2A F2C<br />
ASSEMBLY MANUAL XAIR HANUMAN 2009, July, 21 ©Randkar 2009 Prohibited reproduction / Reproduction interdite F2D F2E s.a. KAR RAND<br />
F2B<br />
F2) that the fitting holes of part 312314 on wing root 312 are well drilled at 10 diameter (F2-1), if not, drill them. Check<br />
part 312314 on wing root without torquing bolts. Position wing root 312 on the airframe (F2-2). If the leading edge pins, trailing edge pins and strut base does not completely go in their housing, just push them as far as possible without forcing, drilling will be ma<strong>de</strong> after twist check. Fit<br />
wing on the airframe (F2-3). Position the wing root on the wing and place the fitting screws on leading and trailing edges without torquing. It can be possible that the shape of the root opposite to leading and trailing edge is not right. In this case, mark with a pen (F2-4), remove the wing Position<br />
wing root and machine the wing root following the mark. and<br />
F2-1<br />
Page 62 / 85<br />
F2) que les trous <strong>de</strong> fixation <strong>de</strong> la pièce 312314 dans l’emplanture d’aile sont percés a diamètre 10 (F2-1). Si ce n’est pas le Vérifier<br />
les repercer. Reposer le pièce 312314 sur l’emplanture sans bloquer les boulons. Positionner l’emplanture d’aile 312 sur la cellule (F2-2). Installer l’aile sur l’appareil (F2-3). Les broches <strong>de</strong> fixation <strong>de</strong> bord d’attaque, <strong>de</strong> bord <strong>de</strong> fuite et d’embase cas,<br />
hauban peuvent ne pas s’enfoncer correctement dans leur logement. Ne pas les enfoncer a force., le contreperçage sera réalisé après réglage du vrillage. Positionner l’emplanture sur l’aile et mettre en place les vis <strong>de</strong> fixation sur bord d’attaque et bord <strong>de</strong> fuite sans les serrer. <strong>de</strong><br />
peut être possible que les découpes dans l’emplanture au niveau du bord d’attaque et du bord <strong>de</strong> fuite soient mal adaptées. Si c’est Note:Il<br />
cas, tracer la découpe (F2-4), déposer aile et emplanture et usiner l’emplanture suivant le tracé. le<br />
E<br />
F2-2 F2-3<br />
A B C D
F3) that the wing twist is similar on the two wings as follow: Check<br />
aircraft being on a flat and horizontal surface, position on each wing a ruler with a level gauge. The rulers must be located a the same place on each wing. Then put wedges between the leading edge and the rulers to make them horizontal. If the value of the wedges are the same on The<br />
two wings, the twist are similar, if not, you have to increase the twist of the wing that have the smallest twist. The twist can be increased by shortening by torquing one or two laps of the cables 301261 and 301263 . When twist are similar, remove one by one the pins of leading the<br />
trailing edge and strut base that were not completly in place and counterbore (8 diameter for leading and trailing edge,<br />
and 10 for strut base). When all pins in good place, counterbore the wing tip tube through the leading edge tip and fit the pin (F4A). Torque the screws that fit the wing root on leading and trailing edge. edge<br />
the screws of part 312314 (F2-1) Remove the wings from the airframe. Torque<br />
301264<br />
301263<br />
301262<br />
301261<br />
F3A<br />
A<br />
ASSEMBLY MANUAL XAIR HANUMAN 2009, July, 21 ©Randkar 2009 Prohibited reproduction / Reproduction interdite F3 s.a. KAR RAND<br />
Page 63 / 85<br />
F3) que le vrillage est i<strong>de</strong>ntique sur les <strong>de</strong>ux ailes <strong>de</strong> la manière suivante: Vérifier<br />
machine étant sur un sol horizontal et plan, poser sur chaque aile une règle avec un niveau. Les <strong>de</strong>ux règles doivent être située au même endroit par rapport a l’emplanture <strong>de</strong> l’aile, puis caler entre les règles et le bord d’attaque <strong>de</strong> manière a les amener a l’horizontale. Si les valeurs <strong>de</strong> calage sont La<br />
les vrillages sont i<strong>de</strong>ntiques. Si ce n’est pas le cas, il faut augmenter le vrillage <strong>de</strong> l’aile la moins vrillée. le vrillage peut être augmenté en raccourcissant les câbles <strong>de</strong> triangulation d’ailes 301261 et 301263 par torsion <strong>de</strong> un ou <strong>de</strong>ux tours. i<strong>de</strong>ntiques,<br />
les vrillages sont i<strong>de</strong>ntiques, enlever une par une les broches <strong>de</strong> bord d’attaque, bord <strong>de</strong> fuite et d’embase <strong>de</strong> hauban qui n’étaient Quand<br />
pas rentrées correctement dans leur logement et contrepercer (diamètre 8 pour les bord d’attaque et bord <strong>de</strong> fuite, et 10 pour l’embase <strong>de</strong> hauban). Quand toutes les broches sont en place, contrepercer le trou a l’extrémité du bord d’attaque a travers le saumon et introduire la goupille (F4A) éventuellement<br />
les vis <strong>de</strong> fixation <strong>de</strong> l’emplanture d’aile sur le bord d’attaque et le bord <strong>de</strong> fuite. serrer les vis du palier nylon d’emplanture Déposer les ailes. Serrer
F4) aileron control tube 338B and connect it to its horn (F4C). Lubricate tube with silicon grease opposite the nylon gui<strong>de</strong>s. Install<br />
F4) screws excepted the ailerons and flaps hinges screws. Note: the wing is shown here upper surface up. all Torque<br />
A<br />
B<br />
C<br />
KAR s.a. ASSEMBLY MANUAL XAIR HANUMAN 2009, July, 21 ©Randkar 2009 Prohibited reproduction / Reproduction interdite F4B F4C<br />
RAND<br />
Page 64 / 85<br />
le tube <strong>de</strong> comman<strong>de</strong> d’aileron 338B et le connecter a son guignol (F4C). Installer<br />
le tube 338B au niveau du passage dans les gui<strong>de</strong>s nylon. Serrer toutes les vis sauf celles <strong>de</strong>s charnières <strong>de</strong> volet et d’aileron Note: l’aile est ici représentée extrados vers le haut.. Lubrifier<br />
F4 F4A
F5) you have clean hands. Position the wing fabric on a clean floor as shown on drawing F5. Check<br />
Sli<strong>de</strong> the foam 375 into the wing sail leading edge. F5)<br />
F5<br />
RAND KAR s.a. ASSEMBLY MANUAL XAIR HANUMAN 2009, July, 21 ©Randkar 2009 Prohibited reproduction / Reproduction interdite<br />
Page 65 / 85<br />
que vous avez les mains propres. Positionner la toile d’aile sur un sol propre comme sur <strong>de</strong>ssin F5. Vérifier<br />
Enfiler la mousse 375 dans le bord d’attaque <strong>de</strong> la toile d’aile.
F6) wing on a clean floor, upsi<strong>de</strong> down Remove ailerons and flaps hinges except the one at the wing tip end and Position<br />
one located at the wing root. Sli<strong>de</strong> the wing fabric on the wing frame taking care of not scraping any part . When the fabric comes at the wing root, put the wing vertical on the trailing edge and use tool 333393 (F6A)to help the fabric to step the the<br />
then replace the wing flat on the floor and keep on pulling on the fabric. Regarding of the well adjustment of the fabric, this operation required patience and precision, especially for the final part at the wing root. Using latex gloves and talcum pow<strong>de</strong>r or unmarking silicon spray on the root,<br />
and wing root may make this operation easier. Don’t forget to ensure placing the aileron control tube in its hole through tubes<br />
the sail.<br />
F6<br />
F6) l’aile sur un sol propre, intrados vers le haut. Vérifier que toute la boulonnerie est serrée. Positionner<br />
RAND KAR s.a. ASSEMBLY MANUAL XAIR HANUMAN 2009, July, 21 ©Randkar 2009 Prohibited reproduction / Reproduction interdite<br />
Page 66 / 85<br />
les charnières <strong>de</strong> volet et d’ailerons sauf celle située à l’extrémité d’aile au niveau du saumon et celle <strong>de</strong> l’emplanture d’aile. Enfiler la structure d’aile dans la toile en prenant soin que rien n’accroche au passage. Quand la toile arrive au niveau <strong>de</strong> l’emplanture, positionner l’aile sur le Déposer<br />
<strong>de</strong> fuite et utiliser l’outil 333393 (F6A) pour amorcer la toile sur l’emplanture, puis reposer l’aile a plat et continuer jusqu'à ce que les œillets dépassent <strong>de</strong> l’emplanture. La toile étant particulièrement ajustée, cette opération <strong>de</strong>man<strong>de</strong> patience et précision, principalement pour le positionnement au niveau <strong>de</strong> l’em- bord<br />
d’aile. L’utilisation <strong>de</strong> gants en caoutchouc qui adhèrent à la toile ainsi que <strong>de</strong> talc planture<br />
<strong>de</strong> spray silicone non tachant sur le bord d’attaque et bord <strong>de</strong> fuite et l’emplanture peuvent faciliter l’opération. Penser à faire sortir le tube <strong>de</strong> comman<strong>de</strong> d’aileron. ou
F7) F7) sail tension at the wing root. Reinstall ailerons and flaps hinges (use tool 333236). the Tighten<br />
F8) upper surface battens 305237, then lower surface battens 305238 in the wing by introducing them reverse and making position<br />
rotate 180° when they are in their sheaths. Then use tool 333235 for final phase (F8A). Mount the second wing the same way. them<br />
KAR s.a. ASSEMBLY MANUAL XAIR HANUMAN 2009, July, 21 ©Randkar 2009 Prohibited reproduction / Reproduction interdite F8<br />
RAND<br />
Page 67 / 85<br />
la tension <strong>de</strong> la toile a l’ai<strong>de</strong> <strong>de</strong>s cor<strong>de</strong>lettes à l’emplanture. Plusieurs passes sont nécessaires. Effectuer<br />
Reposer les charnières d’ailerons et <strong>de</strong> volets (utiliser l’outil-clef 333236).<br />
F8) les lattes d’extrados 305237, puis les lattes d’intrados 305238 dans l’aile en les introduisant à l’envers, puis en les faisant positionner<br />
<strong>de</strong> 180° quand elle sont dans leur fourreau. utiliser l’outil 333235 pour la phase finale (F8A). Monter la secon<strong>de</strong> aile en procédant <strong>de</strong> la même façon. pivoter
F9) wings on the aircraft. Fit the safety rings pins of the trailing edge with plastic ties Install<br />
(F9A)<br />
A<br />
F10) F10) struts 310 jury Install<br />
F9<br />
F9) les ailes sur l’appareil. Fixer les anneaux brisés <strong>de</strong>s goupilles <strong>de</strong> bord <strong>de</strong> fuite avec <strong>de</strong>s Monter<br />
liens plastique (F9A)<br />
les contrefiches 310. F9A Installer<br />
KAR s.a. ASSEMBLY MANUAL XAIR HANUMAN 2009, July, 21 ©Randkar 2009 Prohibited reproduction / Reproduction interdite F10<br />
RAND<br />
Page 68 / 85
F11) F11) cockpit si<strong>de</strong>s 383 right and left. upper Install<br />
A<br />
F12) F12) Pitot (or Venturi) tube. Install F11<br />
les flancs <strong>de</strong> cockpit supérieurs 383 droit et gauche.. Poser<br />
le tube Pitot (ou Venturi).. Installer<br />
A<br />
s.a. ASSEMBLY MANUAL XAIR HANUMAN 2009, July, 21 ©Randkar 2009 Prohibited reproduction / Reproduction interdite F12 KAR RAND<br />
F11A<br />
Page 69 / 85
G / FLAPS AND AILERONS<br />
G1) flaps 371. the rod ends are set so that the profile axle of the flaps are Install<br />
to the axle of fuselage upper tube. parallel<br />
B B B A<br />
G2)<br />
G2) flaps to their control tubes. G1 the Connect<br />
G / VOLETS ET AILERONS<br />
G1) les volets 371. Les rotules sont pré-reglées <strong>de</strong> façon à ce que la cor<strong>de</strong> Poser<br />
A<br />
G2<br />
ASSEMBLY MANUAL XAIR HANUMAN 2009, July, 21 ©Randkar 2009 Prohibited reproduction / Reproduction interdite<br />
s.a. KAR RAND<br />
Page 70 / 85<br />
profil <strong>de</strong> volet soit parallèle à l’axe du tube supérieur <strong>de</strong> fuselage du<br />
G1B<br />
G1A<br />
tubes <strong>de</strong> comman<strong>de</strong> aux volets. les Connecter<br />
G2 A
B<br />
G3) ailerons 306. Ailerons being lined up with flaps, check that the control sticks Install<br />
vertical. If necessary, set the stick by adjusting theaieron cable turnbuckles on the top of cockpit. Secure turnbuckles with brass wires. are<br />
G4) G4) tubes on the ailerons and in the cockpit. B Connect control G3<br />
A<br />
A<br />
G3) les ailerons 306. Les ailerons étant alignés avec les volets, vérifier que les Poser<br />
sont verticaux, si ce n’est pas le cas, ajuster les avec les ridoirs <strong>de</strong> câbles d’aileron dans le plafond <strong>de</strong> cabine. Sécuriser les ridoirs a l’ai<strong>de</strong> <strong>de</strong> fil laiton. manches<br />
G4<br />
s.a. ASSEMBLY MANUAL XAIR HANUMAN 2009, July, 21 ©Randkar 2009 Prohibited reproduction / Reproduction interdite G4B KAR RAND<br />
G4 A<br />
Page 71 / 85<br />
G3B Connecter les tubes <strong>de</strong> comman<strong>de</strong>s sur les ailerons et dans le cockpit. G3A
H / DOORS AND WHEEL FAIRINGS H / PORTES ET CARENAGES DE ROUES<br />
H1) doors 389. The hinge is positionned insi<strong>de</strong> the cabin, behind Install<br />
A<br />
windscreen.<br />
H1<br />
B<br />
B<br />
H1) les Portes 389. La charnière se glisse <strong>de</strong>rrière le pare-brise. Poser<br />
la porte <strong>de</strong> façon a avoir assez <strong>de</strong> jeu entre les tubes <strong>de</strong> structure <strong>de</strong> porte et les entrées <strong>de</strong> cabine en composite et en respectant l’entraxe <strong>de</strong> 23mm (H1A). Percer le pare-brise en face <strong>de</strong>s trous <strong>de</strong> charnière correspondant. Positionner<br />
avec <strong>de</strong>s vis <strong>de</strong> 4. Fixer<br />
RAND KAR s.a. ASSEMBLY MANUAL XAIR HANUMAN 2009, July, 21 ©Randkar 2009 Prohibited reproduction / Reproduction interdite<br />
Page 72 / 85
H2) H2) spats 379 wheel Install<br />
H3) Some pleats of the fabric can be removed by<br />
using a hot air gun (take care not burning the fabric).<br />
H2<br />
les carénages <strong>de</strong> roues 379 Poser<br />
RAND KAR s.a. ASSEMBLY MANUAL XAIR HANUMAN 2009, July, 21 ©Randkar 2009 Prohibited reproduction / Reproduction interdite<br />
Page 73 / 85<br />
H3) Certains plis <strong>de</strong> l'entoilage peuvent être éliminés à<br />
l'ai<strong>de</strong> d'un pistolet chauffant (en prenant gar<strong>de</strong> <strong>de</strong> ne pas brûler<br />
la toile).
I/ FINAL TUNING OF CONTROLS AND CONTROL SUR-<br />
FACES.<br />
<br />
is all too often neglected. Yet, these adjustments make all the difference between an aircraft that gives smooth, coherent response, and a cantankerous, even dangerous beast. 1) The elevator: This stage<br />
the pivot bolts are not too tight against the washers. .Elevator trim tab: first of all, check it responds in the right direction! Push the trim sure Make<br />
the tab should move up (so as to push the elevator down, for a nose down response). Second, adjust the cables so that the trim tab is in line with the elevator when the lever is vertical. The trim cables must be tight, but not in excess; forward: lever<br />
of wrapped on the pulley: 2 and half. Do not apply any lubricant: here, the more friction, the better! You also need a small screw to stop the cable from slipping. 2) The ailerons: number<br />
<br />
turns<br />
straight tubes or rulers, about 2m (6ft) long. Two helpers will make things easier. -The turnbuckles must be adjusted so that: The aileron tips are in contact with the two rulers held tight against the lead- -Get two<br />
ing<br />
<br />
trailing edge, lying parallel to the keel, level with the inboard, wi<strong>de</strong>r ends of the ailerons. (Caution: if you place the rulers elsewhere along the wing, aileron angle will be set differently due to wing twist). edge and<br />
sticks in vertical position. control Both<br />
It is not a good i<strong>de</strong>a to have the cables too tight; a reasonable amount of NOTE:<br />
When<br />
Also<br />
play is preferable, so that the ailerons are not too « stiff », due to excessive friction. you are satisfied, do not forget to safety wire the turnbuckles and to torque the nuts of the rod ends. check that the sticks do not bind on the pitch axis: the bolts must be free. I4<br />
interdite Reproduction / reproduction Prohibited 2009 ©Randkar 21 July, 2009, HANUMAN XAIR MANUAL ASSEMBLY s.a. KAR RAND<br />
First<br />
Page 74 / 85<br />
THE RUDDER CABLES ARE CROSSED!! once again, because this bears repeating, make sure that: and all, of rud<strong>de</strong>r: The 3)<br />
cables will be un<strong>de</strong>r slight tension when the rud<strong>de</strong>r is centered; slack in all other positions is normal. To eliminate any possibility of the cables jamming over the bolt The<br />
<br />
the two rear support tubes, next to the stainless plate, it is a good i<strong>de</strong>a to make two simple leads using plastic ties and pieces of gas hose, tied to the leading edge of the stabilizer. (D7A) that ties<br />
pedals are lined up, the rud<strong>de</strong>r should be in line with the longitudinal axis of the aircraft: the easiest way to get this is to clamp the rud<strong>de</strong>r between two cleats the When<br />
<br />
the adjustable links so that: - the nose wheel is in line with the longitudinal axis - the pedals are lined up - the cables are slightly taut and set<br />
those pulleys! The pulleys at the after end of the keel must be installed so that they cannot move off of their bearings: the red mark must be visible from out- out Watch<br />
(only this way will the bearing keep the pulley in place). 4) Rud<strong>de</strong>r tab (N°146) it corrects engine torque effects. Mount it on the rud<strong>de</strong>r after the first trial flights if necessary. si<strong>de</strong>,
alance Weighing operation must be done with 3 similar weighing machines on an horizontal surface. The aircraft must be weighed with its complete equipment (instrument, radio and eventually parachute) without pilot and passenger and without fuel in the tank. 5)Weight WEIGHT FRONT WHEEL A RIGHT REAR WHEEL B LEFT REAR WHEEL C<br />
CG=150xA/A+B+C<br />
result must be located between 22 and 40,5 6) Lubrication: The i<strong>de</strong>al lubricant is a silicone spray (if unavailable, you can use a WD-40 equivalent, but it is not so clean); apply to all points likely to create un- The<br />
friction: control tube washers and pivots, elevator and rud<strong>de</strong>r hinges, aileron and pedal bearings, all pivot bolts of sticks and parallelogram, as well<br />
as the fork main axle during assembly. In short, to obtain smooth, precise controls, you need: barely taut cables, barely tight bolts, and regular lubrication. 7) Preflight checks: wanted<br />
you are all done, sit in the cockpit, and make sure the control-to-control surfaces system works perfectly, and gives the right responses; this is<br />
nothing but vital common sense: it is no fun to find out during your first fly-around that the rud<strong>de</strong>r cables have not been crossed. Some pilots never get over<br />
the surprise. When<br />
it’s imperative to make all the following controls: So - Stick back => elevator up<br />
- Stick forward => elevator down<br />
- Stick left => left aileron up and right aileron down<br />
- Stick right => right aileron up and left aileron down<br />
- Push right foot => rud<strong>de</strong>r right<br />
- Push left foot => rud<strong>de</strong>r left<br />
HAPPY FLYING ...<br />
Notice: during the first 10 minutes of engine run-in, some unburnt oil can be blown out by the exhaust muffler. To avoid the stain of the wing<br />
fabric, it is recommen<strong>de</strong>d to cover parts of the aircraft risking to be touched. Only use sweet soap and fresh water to clean the fabric.<br />
interdite Reproduction / reproduction Prohibited 2009 ©Randkar 21 July, 2009, HANUMAN XAIR MANUAL ASSEMBLY s.a. KAR RAND<br />
Page 75 / 85
I/ REGLAGE FINAL DES CONTROLES ET GOUVERNES une partie qui est couramment négligée, bien malheureusement car ce sont ces Voici<br />
<br />
feront la différence entre, d'une part un avion confortable et homogène au pilotage, et d'autre part un veau épouvantable, voire dangereux. 1) La profon<strong>de</strong>ur: réglages qui<br />
que les boulons <strong>de</strong> liaison ne soient pas trop serrés <strong>de</strong> façon a permettre les frottements <strong>de</strong> coupelles. vous Assurez<br />
trim <strong>de</strong> profon<strong>de</strong>ur: tout d'abord, vérifiez qu'il fonctionne dans le bon sens! Pousser le levier <strong>de</strong> trim vers l'avant => plaque <strong>de</strong> trim se lève vers le haut (<strong>de</strong> façon à repousser l'élé- Le<br />
le bas et engendrer un moment piqueur). Ajustez les câbles <strong>de</strong> sorte que lorsque le levier est en position verticale, la gouverne <strong>de</strong> trim se trouve dans le plan <strong>de</strong> l'élévateur. vers vateur<br />
câbles trim doivent être bien tendus, sans excès. Nombre <strong>de</strong> tours sur la poulie = 2 et <strong>de</strong>mi. Ici, on ne lubrifie rien: plus il y a <strong>de</strong> frottements et mieux ça marche! Plus une petite vis Parker pour bloquer le câble. Les<br />
<br />
<strong>de</strong><br />
ailerons: Se munir <strong>de</strong> 2 tubes ou règles bien droites d'environ 2 m <strong>de</strong> long. Deux ai<strong>de</strong>s faciliteront la tâche. Les 2)<br />
Il<br />
régler les ridoirs <strong>de</strong> façon à ce que: a. Vos ailerons effleurent les 2 règles lorsqu'elles sont pressées contre le bord d'attaque et le bord <strong>de</strong> fuite sous l’intrados tout en étant parallèles à la quille, et ceci à l'extrémité interne <strong>de</strong> faut<br />
là où il est le plus large. (Attention: si vous vous positionnez ailleurs, vous donnerez un calage différent du fait du vrillage l'aileron<br />
Quand<br />
Vérifiez<br />
<strong>de</strong> l'aile). b. Vos <strong>de</strong>ux manches sont en position verticale. REMARQUE: Il est néfaste d'avoir <strong>de</strong>s câbles tendus; un jeu raisonnable est souhaitable pour éviter d'avoir <strong>de</strong>s ailerons durs à la comman<strong>de</strong> (friction excessive). tout est au point, n'oubliez pas <strong>de</strong> bri<strong>de</strong>r vos ridoirs et <strong>de</strong> les sécuriser ainsi que <strong>de</strong> serrer les écrous <strong>de</strong> blocages <strong>de</strong>s rotules. aussi que les manches ne sont pas coincés au niveau <strong>de</strong> l'axe <strong>de</strong> rotation sur la colonne <strong>de</strong> profon<strong>de</strong>ur: les boulons d'axe doivent être libres. I4<br />
interdite Reproduction / reproduction Prohibited 2009 ©Randkar 21 July, 2009, HANUMAN XAIR MANUAL ASSEMBLY s.a. KAR RAND<br />
Page 76 / 85<br />
gouvernail: Tout d'abord, on ne le répétera jamais assez, soyez sûr que: Le 3)<br />
Les CABLES <strong>de</strong> DIRECTION sont CROISES!!<br />
câbles seront légèrement tendus lorsque le gouvernail est dans l'axe <strong>de</strong> l'avion; le mou dans les autres positions est normal. Les<br />
les palonniers sont en ligne, le gouvernail sera dans l'axe <strong>de</strong> l'avion: le plus simple est <strong>de</strong> bloquer le gouvernail entre 2 taquets et Lorsque<br />
les réglables <strong>de</strong> fourches <strong>de</strong> façon à ce que: - la roue <strong>de</strong> nez soit dans l'axe longitudinal - les palonniers soient en ligne ajuster<br />
<br />
connections<br />
câbles soient légèrement tendus Attention aux poulies! Les poulies doivent être fixées <strong>de</strong> façon à ce qu'elles ne puissent s'échapper <strong>de</strong> leur roulement: la marque rouge les -<br />
être visible à l'extérieur, comme nous les livrons (<strong>de</strong> cette façon seulement le roulement maintiendra la poulie en place). 4) Fletner (N°146) <strong>de</strong>stiné à compenser d’éventuels effets <strong>de</strong> couple, il se doit<br />
sur la dérive après les premiers vols d’essai si nécessaire. pose
Page 77 / 85<br />
Centrage L’appareil doit être pesé avec tous ses équipements (instruments, radio et éventuellement parachute) sans pilote ni passager ni essence dans les réservoirs, avec trois balances<br />
i<strong>de</strong>ntiques positionnées sous chaque roue et sur un plan horizontal 5) POIDS ROUE AVANT A ROUE ARRIERE DROITE B ROUE ARRIERE GAUCHE C<br />
CG=150xA/A+B+C<br />
valeur obtenue doit être comprise entre 22 et 40,5 6) Lubrification: L'idéal est un spray silicone (à défaut, vous pouvez utiliser un équivalent WD-40, mais c'est moins propre) que vous appliquerez sur tous les points susceptibles <strong>de</strong> générer La<br />
frictions parasites: coupelles et jonctions <strong>de</strong> timonerie, charnières d'élévateur et <strong>de</strong> gouvernail, paliers d'ailerons et <strong>de</strong> pédalier, axes <strong>de</strong> rotation <strong>de</strong>s manches ainsi que les<br />
axes du parallélogramme, sans oublier le tube principal <strong>de</strong> fourche au <strong>montage</strong>. En résumé, les conditions pour <strong>de</strong>s comman<strong>de</strong>s douces et précises sont les suivantes: <strong>de</strong>s câbles à peine tendus, <strong>de</strong>s boulons à peine serrés(mais collés), une lubrification régulière.<br />
<strong>de</strong>s<br />
Les actions vitales: Quand tout est fini, s'asseoir dans le cockpit et vérifier physiquement que l'interface comman<strong>de</strong>-gouvernes fonctionne parfaitement et dans le bon sens est primordial:<br />
7)<br />
- Manche arrière => élévateur en haut que les câbles <strong>de</strong> gouvernail n'ont pas été croisés n'est certes pas une expérience plaisante; certains n'en sont pas revenus…<br />
Il est donc indispensable d’effectuer tous les contrôles suivants : piste <strong>de</strong> tour premier du cours au s'apercevoir<br />
- Manche avant => élévateur en bas<br />
- Manche à gauche => aileron gauche en haut et aileron droit en bas<br />
- Manche à droite => aileron droit en haut et aileron gauche en bas<br />
- Pied à droite => gouvernail à droite<br />
-Pied à gauche => gouvernail à gauche<br />
Note 1: Durant les premières minutes <strong>de</strong> fonctionnement du moteur, il arrive que certains résidus provenant <strong>de</strong> l’huile <strong>de</strong> stockage du moteur soient projetés par l’échappement.<br />
Pour éviter qu’il ne souillent l’entoilage, il est recommandé <strong>de</strong> protéger les parties <strong>de</strong> l’appareil pouvant être touchées par ces projections.Le nettoyage <strong>de</strong> l’entoilage se realise<br />
avec un savon doux et <strong>de</strong> l’eau douce. Prohiber tout produit agressif. interdite Reproduction / reproduction Prohibited 2009 ©Randkar 21 July, 2009, HANUMAN XAIR MANUAL ASSEMBLY s.a. KAR RAND
TAKING DOWN AND TRANSPORT<br />
the aircraft for transport on a trailer or for off airport storage is a simple operation that needs two people and about 1/2 an hour. It’s recommen<strong>de</strong>d to proceed as follows: To avoid losing the parts removed, re-fit immediately the screws, nuts, pins Preparing<br />
rings back into their own parts immediately on removal. -Disconnect ailerons control tubes in the cockpit. -Disconnect flaps control tubes from their horns. and<br />
wing strut and jury strut has its own place, so mark them for easy as- -Each<br />
-Remove the jury struts from the wings struts. In case of a ventimeter sen<strong>de</strong>r on the wing strut, disconnect the ventimeter sembly.<br />
from the instrument and roll it on the wing strut. -One person hold up the wing at its tip. It will help if they lightly move or twist the wing, following the suggestions of his partner to make the pins removal easier. hose<br />
the rear wing strut from the trailing edge and put it on the ground. Disconnect<br />
the front wing strut from the leading edge and put it on the ground. Disconnect the leading edge. Disconnect the trailing edge. Remove the wing. Disconnect<br />
Disconnect the wing struts from the cockpit base. -Proceed the same way for the second wing.<br />
interdite Reproduction / reproduction Prohibited 2009 ©Randkar 21 July, 2009, HANUMAN XAIR MANUAL ASSEMBLY s.a. KAR RAND<br />
Page 78 / 85<br />
some countries, it’s necessary to remove the stabiliser, to reduce the width, according to the road regulations: -Disconnect the tips of the elevator fork from their control levers on the elevator assembly. In<br />
the rings that secure the lower stab cables un<strong>de</strong>r the fuselage. -Screw the bolt that fit the upper stabiliser cables in the fin leading edge to have enough lack in these cables to remove them. -Remove<br />
the two half-stabiliser. -Remove<br />
the case of transport on a trailer, it is very important to protect with foam all the parts of the aircraft that are in contact with other parts of the aircraft or in contact with the trailer, most damage to aircraft is done on due to travelling vibrations and acci<strong>de</strong>nts. Fit the cables to avoid loss. Immobilize the rud<strong>de</strong>r. In<br />
forget to check the load a last time before leaving. To assemble, proceed in the reverse or<strong>de</strong>r, use new nuts, control the path of the cables in their pulleys and don’t forget to make the check list before flying. Don’t<br />
example of a well-suited trailer...<br />
An
DÉMONTAGE ET TRANSPORT<br />
préparation <strong>de</strong> la machine en vue d’un transport sur remorque ou d’un stockage dans un local réduit est une opération simple nécessitant <strong>de</strong>ux personnes et une petite heure. Il est recommandé <strong>de</strong> procé<strong>de</strong>r <strong>de</strong> la manière suivante: La<br />
le but d‘éviter <strong>de</strong>s recherches fastidieuses dans les fonds <strong>de</strong> poches lors du re<strong>montage</strong>, il est conseillé <strong>de</strong> reposer tout <strong>de</strong> suite les vis, écrous, axes et goupilles fendues sur leurs pièces respectives. -Déconnecter les tubes <strong>de</strong> comman<strong>de</strong> d’ailerons dans le haut du cockpit. Dans<br />
les tubes <strong>de</strong> comman<strong>de</strong>s <strong>de</strong>s volets. -Déconnecter<br />
les haubans en fonction <strong>de</strong> leur position. -Repérer les contrefiches d’ailes et les démonter. -Dans le cas d’un ventimètre avec prise d’air sur le hauban, déconnecter le -Repérer<br />
<strong>de</strong> l’ins trument, le sortir <strong>de</strong> la cellule et le fixer sur le hauban. -Une personne soutient l’aile à son extrémité, elle pourra légèrement déplacer ou vriller l‘aile suivant les conseils <strong>de</strong> son acolyte pour faciliter l‘extraction <strong>de</strong>s axes <strong>de</strong> fixa tion <strong>de</strong> haubans, bord d‘attaque et bord <strong>de</strong> fuite. tube<br />
le hauban arrière du bord <strong>de</strong> fuite, le poser à terre. Déconnecter le hauban avant du bord d‘attaque, le poser à terre. Déconnecter<br />
l’axe <strong>de</strong> fixation <strong>de</strong> bord d’attaque. Retirer l’axe <strong>de</strong> fixation du bord <strong>de</strong> fuite. Déposer l’aile. -Déconnecter les haubans <strong>de</strong> leur fixation basse. Retirer<br />
<strong>de</strong> la même manière pour l’autre aile. -Procé<strong>de</strong>r<br />
RAND KAR s.a. ASSEMBLY MANUAL XAIR HANUMAN 2009, July, 21 ©Randkar 2009 Prohibited reproduction / Reproduction interdite<br />
Page 79 / 85<br />
est également nécessaire d’intervenir sur l’empennage arrière afin <strong>de</strong> rester dans les limites <strong>de</strong> gabarit routier: -Enlever les anneaux brisés qui sécurisent les câbles <strong>de</strong> haubanage inférieurs <strong>de</strong> plan fixe. il<br />
la fourche <strong>de</strong> comman<strong>de</strong> <strong>de</strong> profon<strong>de</strong>ur -Visser le ten<strong>de</strong>ur <strong>de</strong> fixation <strong>de</strong>s câbles <strong>de</strong> haubanage supérieurs du plan fixe horizontal dans le bord d’attaque <strong>de</strong> dérive jusqu'à ce que les câbles aient assez <strong>de</strong> jeu pour sortir. -Déconnecter<br />
les <strong>de</strong>ux <strong>de</strong>mi-plans fixes. -Déposer<br />
le cas d’un transport sur remorque, il faut attacher une importance toute particulière à la protection <strong>de</strong>s parties <strong>de</strong> toiles ou <strong>de</strong> tubes entrant en contact avec d’autres parties <strong>de</strong> la machine ou <strong>de</strong> la remorque. Tous ces endroits soumis aux frottement générés par les vibrations du transport <strong>de</strong>vront être soigneusement protégés par <strong>de</strong>s pièces <strong>de</strong> mousse. Penser également à fixer le mou <strong>de</strong>s câbles et à immobiliser la dérive. Dans<br />
le départ, n’oubliez pas la visite pré-roule Procé<strong>de</strong>r dans l’ordre inverse pour le re<strong>montage</strong>. Penser à remplacer les écrous nylstop et à vérifier le bon passage <strong>de</strong>s câbles dans leurs poulies respectives. . Avant<br />
un exemple <strong>de</strong> remorque bien adaptée...<br />
Ci-<strong>de</strong>ssous,
RAND KAR s.a. ASSEMBLY MANUAL XAIR HANUMAN 2009, July, 21 ©Randkar 2009 Prohibited reproduction / Reproduction interdite<br />
Page 80 / 85
RAND KAR s.a. ASSEMBLY MANUAL XAIR HANUMAN 2009, July, 21 ©Randkar 2009 Prohibited reproduction / Reproduction interdite<br />
Page 81 / 85
RAND KAR s.a. ASSEMBLY MANUAL XAIR HANUMAN 2009, July, 21 ©Randkar 2009 Prohibited reproduction / Reproduction interdite<br />
Page 82 / 85
RAND KAR s.a. ASSEMBLY MANUAL XAIR HANUMAN 2009, July, 21 ©Randkar 2009 Prohibited reproduction / Reproduction interdite<br />
Page 83 / 85
TO MAKE WARRANTY EFFICIENT, THIS FORM HAVE TO BE<br />
RETURNED TO<br />
RAND KAR sa Canal <strong>de</strong> la Martinière<br />
F - 44320 FROSSAY - FRANCE<br />
WARNING in the best of conditions, ultralight flying may be hazardous. The user of this Even<br />
acknowledges the existence of such hazards. Before his first flight, the user must pledge to read this manual. He shall follow exactly the instructions given. He should be advised that the weight of any additional equipment increases the empty weight of the aircraft and <strong>de</strong>creases its useful load accordingly -- since maxi- ultralight<br />
weight cannot be excee<strong>de</strong>d. The user pledges to carry out all the mandatory alterations specified in Rand Kar's regular newsletters. Any alterations or repair other than those specified by the manufacturer, or carried out without the manufacturer's agreement shall void the warranty. mum<br />
user must be a licensed Ultralight pilot. Rand Kar Sa cannot be held responsible for any inci<strong>de</strong>nts or acci<strong>de</strong>nts caused by im- The<br />
assembly, or reckless use of the ultralight, particularly when flying in bad weather, performing aerobatics maneuvers, or maneuvers exceeding the flight envelope of the aircraft; at ............................................................................., Date proper<br />
Name and address : ........................................................................................................ .......................................................................................................................................... Signed<br />
..........................................................................................................................................<br />
................................<br />
Aircraft type : X-AIR HANUMAN Serial N°: ..................................................................... Engine : ……………………………………………….. EngineN° : ……………………………… Max. empty weight :<br />
Gearbox : ……………………….Gearbox ratio : ………………… Propeller : ……………………………….. Owner : Signature :<br />
Instruments : ………………………….. Other equipments : ……………………… interdite Reproduction / reproduction Prohibited 2009 ©Randkar 21 July, 2009, HANUMAN XAIR MANUAL ASSEMBLY s.a. KAR RAND<br />
Page 84 / 85<br />
TO MAKE WARRANTY EFFICIENT, THIS FORM HAVE TO BE<br />
FILLED AND RETURN AFTER WEIGHING OPERATION OF EMPTY<br />
FINISHED AIRCRAFT<br />
RAND KAR sa Canal <strong>de</strong> la Martinière<br />
F - 44320 FROSSAY - FRANCE<br />
operation must be done with 3 similar weighing machines on an horizontal surface. Weighing WEIGHT FRONT WHEEL A RIGHT REAR WHEEL B LEFT REAR WHEEL C<br />
CG=150xA/A+B+C<br />
result must be located between 22 and 40,5 Date: The<br />
Type of aircraft : X-AIR HANUMAN Serial Number Place:<br />
I<strong>de</strong>ntification sheet:
FORMULAIRE DE GARANTIE A RETOURNER à<br />
RAND KAR sa Canal <strong>de</strong> la Martinière<br />
F - 44320 FROSSAY - FRANCE<br />
AVERTISSEMENT vol en U.L.M, même entrepris dans les meilleures conditions comporte certains risques Le<br />
l'utilisateur <strong>de</strong> cet appareil déclare connaître. L'utilisateur s'engage à prendre connaissance du présent manuel ( <strong>Manuel</strong> d’utilisation et d'entretien ) avant son premier vol sur l'appareil. Il suivra scrupuleusement les consignes qui y sont indiquées. Il est bien conscient que l'installation d'équipements optionnels augmente la masse à vi<strong>de</strong> que<br />
réduit d'autant la charge utile, la masse maximale ne changeant pas. Il s'engage formellement à effectuer les modifications obligatoires communiquées par RAND KAR Sarl par le biais <strong>de</strong>s bulletins <strong>de</strong> liaison périodiques. Il s'interdit toute autre modification ou réparation effectuées sans l'autorisation écrite du constructeur, sous peine d'annuler la garantie. et<br />
reconnaît être en possession d'une licence d'U.L.M La Société RAND KAR ne pourra être tenue pour responsable d'inci<strong>de</strong>nts ou d'acci<strong>de</strong>nts Il<br />
d'un mauvais <strong>montage</strong> ou d'une utilisation dangereuse <strong>de</strong> l'appareil, notamment vol par mauvaises conditions météo, manœuvres acrobatiques, dépassement du domaine <strong>de</strong> vol. Fait à ............................................................................., le résultant<br />
signature ..............................................................<br />
et adresse du propriétaire : ........................................................................................................ Nom<br />
..................................................................................................................................................<br />
FICHE DE PESEE<br />
................ Type d'appareil : X-AIR HANUMAN N° <strong>de</strong> série : ..................................................................... Moteur : ……………………………………………….. N° <strong>de</strong> série :<br />
N° moteur : ……………………………… Réducteur : ……………………….Taux <strong>de</strong> réduction : ………………… Fiche d’i<strong>de</strong>ntification :<br />
Hélice : ……………………………….. Instrumentation : ………………………….. Masse à vi<strong>de</strong> maximale :<br />
Autres équipements : ……………………… Propriétaire : Signature :<br />
interdite Reproduction / reproduction Prohibited 2009 ©Randkar 21 July, 2009, HANUMAN XAIR MANUAL ASSEMBLY s.a. KAR RAND<br />
Page 85 / 85<br />
A remplir et a retourner après pesée <strong>de</strong> l’appareil terminé à vi<strong>de</strong><br />
pesée doit être effectuée avec trois balances i<strong>de</strong>ntiques positionnées sous chaque roue et sur un plan horizontal La<br />
ROUE AVANT A ROUE ARRIERE DROITE B POIDS<br />
ARRIERE GAUCHE C<br />
ROUE<br />
La valeur obtenue doit être comprise entre 22 et 40,5 CG=150xA/A+B+C<br />
Lieu <strong>de</strong> pesée: Type d’ULM : X-AIR HANUMAN Date: