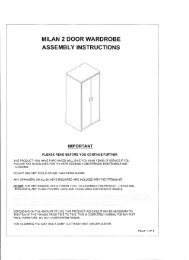
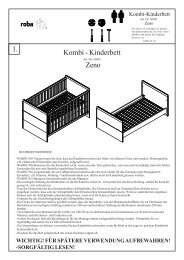
Instruction Manual Instrucciones Directives
Instruction Manual Instrucciones Directives
Instruction Manual Instrucciones Directives

Create successful ePaper yourself
Turn your PDF publications into a flip-book with our unique Google optimized e-Paper software.
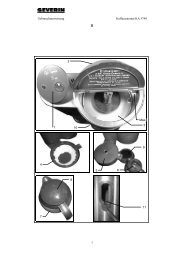
INSTALLING OR REPLACING THE BULBS<br />
Note: Disconnect power and allow fixture to cool before removing burned-out bulbs.<br />
Note: Your fixture is supplied with a 15 Watt, 6 Volt G4 bi-pin halogen bulb.<br />
Always replace with the same or lower wattage bulb. Replacing with a higher<br />
wattage bulb will reduce battery life.<br />
Note: Never touch bulb with bare hands as oil from your skin<br />
can cause premature failure (Fig. 2).<br />
CAUTION: When replacing bulb in fixture, always<br />
replace with the same wattage bulb or a lower wattage<br />
bulb. DO NOT replace with a bulb of greater wattage<br />
than specified on the fixture. To do so could create a<br />
fire hazard and / or shorten the life of the bulb.<br />
Fig. 2<br />
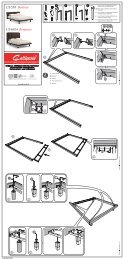
1. Before replacing bulb, turn fixture to the OFF position.<br />
2. Insert flat head screwdriver in slot at end of lamp<br />
compartment and carefully pry lens out (Fig. 3).<br />
3. Bulb will be extremely hot if touched while bulb is burning<br />
4.<br />
or immediately after bulb is off.<br />
Allow bulb to cool before touching. DO NOT touch bulb<br />
with bare hands.<br />
Fig. 3<br />
5. Grasp bulb and gently pull out of socket.<br />
6. Replace bulb by lining up the pins of the bulb to the holes in the socket and<br />
gently pressing down.<br />
7. Replace lens by lining up the notches at the bottom of the lens with the notches<br />
on the bottom of the lamp compartment and then gently pressing in at the top<br />
until it snaps into place.<br />
8. Turn fixture back to the ON position.<br />
INSTALLATION INSTRUCTIONS<br />
Note: Your fixture is supplied with a 15 watt halogen bulb, which is shipped in the<br />
lamp compartment of the fixture. The lamp must be installed before use. Please<br />
see “Installing or Replacing the Bulbs”<br />
section of the instruction sheet for installation instructions.<br />
1. Locate area in which you would like to install your light fixture.<br />
Note: For fixture to operate properly, the solar panel must be<br />
located in an area that will receive the maximum amount of sunlight<br />
and is free from obstructions.<br />
OFF ON<br />
2. Using two of the mounting screws provided, mount fixture to a<br />
solid surface 8-12 feet above the ground, by placing the<br />
screws through the holes on either side of the fixture (Fig. 4).<br />
Adjust sensor head so that control switches are facing the<br />
ground. Remove label from the front of the sensor head.<br />
Fig. 4<br />
3. Using three of the mounting screws provided, mount solar<br />
panel to a solid surface (Fig. 5). Adjust the angle of the solar<br />
panel so that it will receive the maximum amount of direct<br />
sunlight possible during the daylight hours.<br />
Fig. 5<br />
4