Bedienhinweis Prüfgerät, Batterie CrankPrint - Krautli
Bedienhinweis Prüfgerät, Batterie CrankPrint - Krautli
Bedienhinweis Prüfgerät, Batterie CrankPrint - Krautli
You also want an ePaper? Increase the reach of your titles
YUMPU automatically turns print PDFs into web optimized ePapers that Google loves.
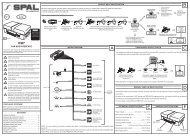
Operating Instruction 95972079<br />
Preparing to test<br />
1. Be sure area around battery is well ventilated<br />
while battery is being tested.<br />
2. Clean battery terminals. Be careful to<br />
keep corrosion from coming in contact<br />
with eyes.<br />
3. Inspect the battery for cracked or broken<br />
case or cover. If battery is damaged, do<br />
not use tester.<br />
4. If the battery is not sealed maintenance<br />
free, add distilled water in each cell until<br />
battery acid reaches level specified by the<br />
manufacturer. This helps purge excessive<br />
gas from cells. Do not overfill.<br />
5. If necessary to remove battery from vehicle<br />
to test, always remove ground terminal<br />
from battery first. Make sure all accessories<br />
in the vehicle are off to ensure<br />
you do not cause any arcing.<br />
Insertion or replacement of lead wire<br />
1. Remove the cover in the backside bottom<br />
of the battery tester.<br />
2. Insert the connectors which contain<br />
black-yellow pair and yellow-red pair in<br />
one end of the lead wire into the sockets<br />
which can be found when you remove the<br />
cover as above. Be sure to make colors<br />
matched between the connectors and sockets<br />
as shown below.<br />
www.herthundbuss.com 20


