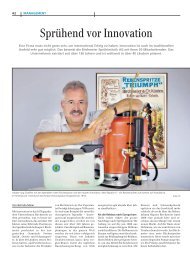
AR 252 Benzin / Elektro - Birchmeier Sprühtechnik AG
AR 252 Benzin / Elektro - Birchmeier Sprühtechnik AG
AR 252 Benzin / Elektro - Birchmeier Sprühtechnik AG

Create successful ePaper yourself
Turn your PDF publications into a flip-book with our unique Google optimized e-Paper software.
Important!<br />
Make sure to read the user‟s manual prior to taking the sprayer into service for the first time.<br />
The manufacturer shall not be held liable for damages resulting from neglect to observe these instructions.<br />
Warning!<br />
� The sprayer may only be used by well-instructed persons. When the sprayer is passed on to others, it must<br />
definitely be accompanied by the user‟s manual.<br />
� The user has the responsibility for maintaining an adequate distance away from third parties, in particular from<br />
children and domestic animals. The user carries the liability for both direct and indirect damages.<br />
� In the handling of chemicals and plant-care agents it is essential to ensure that contact with the eyes and skin is<br />
avoided. The wearing of suitable protective clothing, a breathing mask, safety glasses and rubber gloves is<br />
therefore imperative.<br />
� Never blow out clogged valves and nozzles with the mouth (toxication hazard!)<br />
� Chemicals and plant-care agents may not be filled into other containers (bottles, cans etc.), and must be stored<br />
out of reach of children.<br />
� Never spray against the wind or under excessively windy conditions. Do not apply more spraying medium to the<br />
surface to be treated than necessary.<br />
� Never use the sprayer in closed rooms. Exhaust gases can be lethal!<br />
Notes of safety<br />
� Before each use of the sprayer, make sure that it is correctly assembled, in an undamaged condition and<br />
operational. The use of parts which have been damaged is prohibited.<br />
� It is expressly noted that any and all alterations to the sprayer are not allowed. In the event of such alterations,<br />
BIRCHMEIER <strong>Sprühtechnik</strong> <strong>AG</strong> disclaims any and all warranties and liabilities.<br />
� Maintenance and repair work may performed only be well-instructed personnel, or by your <strong>Birchmeier</strong> dealer.<br />
Use exclusively original BIRCHMEIER parts.<br />
� In the event of unusual vibrations, the sprayer is to be shut down immediately. Consult your dealer.<br />
� The sprayer may not be tipped.<br />
� Do not let the sprayer stand exposed to the sun. It can be damaged by the effects of heat and frost.<br />
� After each use empty the sprayer and clean it thoroughly with water. Make sure that no pollution of the<br />
environment is caused.<br />
� The chemicals or plant-care agents and their residues remaining in the tank must be disposed in accordance<br />
with the appertaining safety regulations. For this purpose, follow the chemical manufacturer‟s instructions.<br />
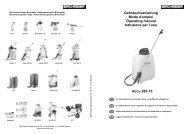
Preparing the sprayer<br />
Filling the tank<br />
1. Inform yourself of the chemical or pesticide manufacturer‟s instructions on the correct dosages.<br />
2. Make sure that you are wearing appropriate protective apparel (protective glasses, breathing mask, gloves etc.).<br />
3. Mix the medium in a separate tank according to the manufacturer‟s instructions.<br />
4. Fill the medium tank, making sure not to spill any medium.<br />
5. Close the cover tightly.<br />
Preparation of the sprayer<br />
Make sure that the safety relief valve is released.<br />
Check to ensure that all connections have been tightly fitted.<br />
Operation of the gasoline engine<br />
Definitely make sure to read the gasoline engine operating manual which contains all information relating to<br />
operation, service and maintenance of the engine.<br />
Operation of the electric motor<br />
Plug the power connector into a grounded power outlet equipped with a fault current protection switch. Turn the<br />
motor on with by switching the main switch.<br />
Adjusting the spraying pressure<br />
Once the engine is running and you are about to start work, the desired spraying pressure must be adjusted. First<br />
wait until all the air has been discharged out of the pump system. Then bring the clip of the safety relief valve into<br />
the desired position (steps 1 - 4) and operate the compression lever such that the spraying pressure takes effect.<br />
Check the adjusted value on the pressure gauge. Finally, open the ball valve to start working.<br />
Use of the pulsation damper<br />
The pulsation damper has to be filled or preloaded with approx. 8 bar twice a year.<br />
Released safety-relief valve at step 1<br />
Pressure gauge<br />
Checking the delivery accuracy<br />
Adjust the safety relief valve to a pressure of 10 bar and allow the sprayer to run for one minute. Catch the liquid in<br />
a measuring cup.<br />
Plate nozzle<br />
Bore Ø 1.5mm 2.8 – 3.2 l/min<br />
Bore Ø 2.0mm 6.3 – 6.7 l/min<br />
Draining and cleaning<br />
Drain and clean the sprayer according to the following instructions.<br />
Compression lever<br />
max. pressure at stepp 4<br />
Cleaning and servicing<br />
1. Drain the sprayer after each use. Never use the sprayer to store spraying fluid.<br />
2. Open the drain valve and drain the tank into a container and dispose of the remaining fluid according to the<br />
chemical manufacturer‟s instructions.<br />
3. Clean the sprayer with an appropriate agent.<br />
4. Fill the tank with clean water and flush out the sprayer, including hose and spray lance.<br />
5. Drain out the remaining water.<br />
6. Clean the nozzle and filter. The nozzle may not be cleaned with a hard object, or blown through with the mouth.<br />
It is best to use a hand brush or a toothbrush.<br />
7. Change defective nozzles, filters, gaskets and seals.<br />
8. Allow the sprayer to dry out in the open condition.<br />
Storage<br />
If you not planning to use your sprayer for a prolonged time, follow these instructions:<br />
1. Clean the sprayer as per “Cleaning and Service”.<br />
2. Follow the instructions according to the accompanying gasoline engine operating manual.<br />
3. Store the sprayer in a place protected against frost and heat (temperatures below 0° C and above 30° C can<br />
destroy the sprayer).<br />
Clip<br />
Steps 1 - 4<br />
Ball valve