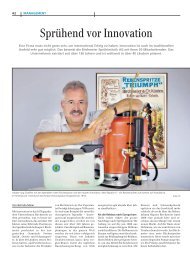
AR 252 Benzin / Elektro - Birchmeier Sprühtechnik AG
AR 252 Benzin / Elektro - Birchmeier Sprühtechnik AG
AR 252 Benzin / Elektro - Birchmeier Sprühtechnik AG

You also want an ePaper? Increase the reach of your titles
YUMPU automatically turns print PDFs into web optimized ePapers that Google loves.
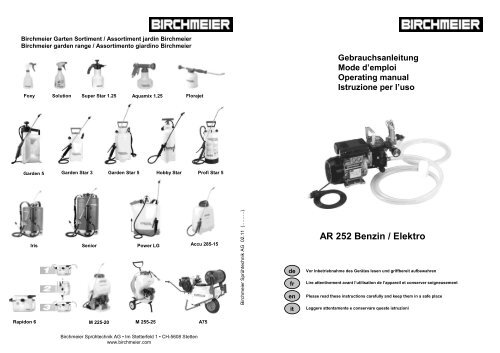
<strong>Birchmeier</strong> Garten Sortiment / Assortiment jardin <strong>Birchmeier</strong><br />
<strong>Birchmeier</strong> garden range / Assortimento giardino <strong>Birchmeier</strong><br />
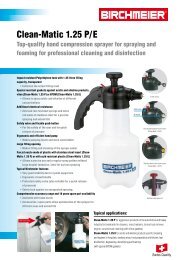
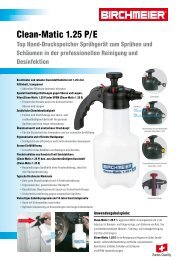
Foxy<br />
Solution Super Star 1.25<br />
Aquamix 1.25<br />
Florajet<br />
Garden 5 Garden Star 3 Garden Star 5 Hobby Star Profi Star 5<br />
Iris Senior Power LG Accu 285-15<br />
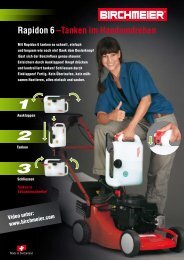
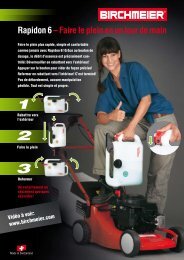
Rapidon 6 M 255-25 A75<br />
M 225-20<br />
<strong>Birchmeier</strong> <strong>Sprühtechnik</strong> <strong>AG</strong> • Im Stetterfeld 1 • CH-5608 Stetten<br />
www.birchmeier.com<br />
<strong>Birchmeier</strong> <strong>Sprühtechnik</strong> <strong>AG</strong> 02.11 (………)<br />
de<br />
fr<br />
en<br />
it<br />
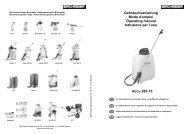
Gebrauchsanleitung<br />
Mode d’emploi<br />
Operating manual<br />
Istruzione per l’uso<br />
<strong>AR</strong> <strong>252</strong> <strong>Benzin</strong> / <strong>Elektro</strong><br />
Vor Inbetriebnahme des Gerätes lesen und griffbereit aufbewahren<br />
Lire attentivement avant l’utilisation de l’appareil et conserver soigneusement<br />
Please read these instructions carefully and keep them in a safe place<br />
Leggere attentamente e conservare queste istruzioni
Wichtig!<br />
Lesen sie die Gebrauchsanleitung vor der ersten Inbetriebnahme vollständig durch.<br />
Der Anwender haftet für Schäden, die durch Nichteinhaltung dieser Vorschriften entstehen.<br />
Warnung!<br />
� Das Gerät darf nur von gut instruierten Personen bedient werden. Bei Weitergabe an Dritte muss die<br />
Gebrauchsanleitung unbedingt mitgegeben werden.<br />
� Der Bediener ist gegenüber Dritten, insbesondere Kindern und Haustieren dafür verantwortlich, dass diese<br />
genügend Abstand von ihm haben. Für direkten oder indirekten Schaden haftet der Bediener.<br />
� Im Umgang mit Chemikalien und Pflanzenschutzmittel ist der Kontakt mit den Augen und der Haut zu<br />
vermeiden. Deshalb ist es notwendig, geeignete Schutzkleider, Schutzmaske, Schutzbrille und<br />
Gummihandschuhe zu tragen.<br />
� Verstopfte Ventile und Düsen nie mit dem Mund durchblasen (Vergiftungsgefahr!).<br />
� Chemikalien und Pflanzenschutzmittel dürfen nicht in andere Behälter (Flaschen, Dosen, etc.) abgefüllt werden<br />
und sind für Kinder unerreichbar aufzubewahren.<br />
� Nie gegen den Wind oder bei zu starkem Wind sprühen. Nicht mehr Sprühmedium ausbringen, als für die zu<br />
behandelnde Fläche notwendig ist.<br />
� Verwenden Sie das Gerät nie in geschlossenen Räumen. Auspuffgase können Ihr Leben gefährden!<br />
Sicherheitshinweise<br />
� Vor jedem Gebrauch ist sicherzustellen, dass das Gerät ordnungsgemäss zusammengebaut, nicht beschädigt<br />
und funktionstüchtig ist. Beschädigte Teile dürfen nicht weiter verwendet werden.<br />
� Es wird ausdrücklich darauf hingewiesen, dass jegliche Manipulation am Gerät unzulässig ist. In diesem Fall<br />
erlöschen jegliche Garantie- und Haftungsansprüche gegenüber der BIRCHMEIER <strong>Sprühtechnik</strong> <strong>AG</strong>.<br />
� Wartungs- und Reparaturarbeiten dürfen nur durch gut instruiertes Personal oder durch den Fachhändler<br />
ausgeführt werden. Es sind ausschliesslich BIRCHMEIER-Originalteile zu verwenden.<br />
� Bei ungewöhnlichen Vibrationen ist das Gerät abzuschalten. Wenden Sie sich an Ihren Fachhändler.<br />
� Das Gerät darf nicht gekippt werden.<br />
� Das Gerät nicht an der Sonne stehen lassen. Hitze- und Frosteinwirkung können das Gerät beschädigen.<br />
� Das Gerät ist nach jedem Gebrauch zu entleeren und gründlich mit Wasser zu reinigen. Dabei ist zu beachten,<br />
dass die Gewässer nicht verschmutzt werden.<br />
� Die Entsorgung der im Flüssigkeitstank verbliebenen Chemikalien oder Pflanzenschutzmittel und deren Satz<br />
muss den entsprechend, gültigen Sicherheitsregeln erfolgen. Wenden Sie hierfür die gültigen Regeln des<br />
Chemikalienherstellers an.<br />
Handhabung des Gerätes<br />
Füllen des Behälters<br />
1. Informieren Sie sich beim Chemikalien- oder Pflanzenschutzmittel-Hersteller über die richtige Dosierung.<br />
2. Beachten Sie, dass Sie eine geeignete Schutzausrüstung (Schutzbrille, Atmungsmaske, Handschuhe, etc.)<br />
tragen.<br />
3. Mischen Sie das Präparat in einem separaten Behälter gemäss den Angaben der Herstellerfirma.<br />
4. Füllen Sie den Flüssigkeitsbehälter immer durch das Einfüllsieb und achten Sie darauf, dass nichts überläuft.<br />
5. Schliessen Sie den Deckel fest zu.<br />
Vorbereiten des Gerätes<br />
Überprüfen Sie, ob das Sicherheitsventil entlastet ist.<br />
Stellen Sie sicher, dass alle Anschlüsse fest montiert sind.<br />
Handhabung des <strong>Benzin</strong>motors<br />
Lesen Sie unbedingt die beigelegte Bedienungsanleitung des <strong>Benzin</strong>motors durch. Dort finden Sie alle Angaben<br />
über Handhabung, Wartung und Unterhalt.<br />
Handhabung des <strong>Elektro</strong>motors<br />
Stecken Sie den Netzstecker in eine geerdete, mit einem Fehlerstrom-Schutzschalter ausgerüstete Steckdose.<br />
Schalten Sie den Motor am Hauptschalter ein.<br />
Ersatzteilliste <strong>AR</strong> <strong>252</strong>/ Liste des pièces de rechange <strong>AR</strong> <strong>252</strong> /<br />
Spare parts list <strong>AR</strong> <strong>252</strong> / Elenco delle parti di ricambio <strong>AR</strong> <strong>252</strong><br />
Pos. Bezeichnung / Désignation / Description / Designazione Artikel-Nr.<br />
1<br />
2<br />
Schlauchanschlüsse kpl. / Connecteurs de tuyau compl. / Hose connectors compl. /<br />
Connettori del tubo flessibile compl. (1 Stk. 1a - 1b, 2 Stk. 1c)<br />
Ölschauglas kpl. / Verre de vue d„huile compl. / Oil sight glass compl. / Vetro di vista<br />
dell„olio compl. (1 Stk. 2a - 2c)<br />
116 936 01<br />
116 937 01<br />
3 Kalotte NBR / Calotte NBR / Calotte NBR / Calotta NBR (1 Stk.) 116 938 01<br />
4<br />
4<br />
Membranen kpl. NBR / Membranes compl. NBR / Diaphragms compl. NBR / Membrane<br />
compl. NBR Set à 2 Stk.<br />
Membranen kpl. Viton / Membranes compl. Viton / Diaphragms compl. Viton /<br />
Membrane compl. Viton 2 Stk. pro Pumpe benötigt.<br />
116 938 02<br />
116 938 03<br />
5 Ventile kpl. / Soupapes compl. / Valves compl. / Valvole compl. (4 Stk. 5a - 5b) 116 940 01<br />
6 Ventilgehäuse / Boîtier de soupape / Valve housing / Alloggiamento di valvola (1 Stk.) 116 941 01<br />
7 Deckel / Couvercle / Cover / Coperchio / (1 Stk.) 116 942 01<br />
8<br />
9<br />
10<br />
11<br />
Pneuventil / Soupape d„air comprimé / Compressed air valve / Valvola di pressione<br />
(1 Stk.)<br />
Getriebegehäuse kpl. für <strong>Elektro</strong>motor / Carter de boîte vitesses compl. pour moteur<br />
d„électrique / Gear case compl. for electric engine / Scatola del cambio compl. per il<br />
motore della elettrico (1 Stk. 9a - 9d, 2 Stk. 9e - 9f, 3 Stk. 9g, 4 Stk. 9h)<br />
Getriebegehäuse kpl. für <strong>Benzin</strong>motor / Carter de boîte vitesses compl. pour moteur<br />
d„essence / Gear case compl. for gasoline engine / Scatola del cambio compl. per il<br />
motore della benzina (1 Stk. 10a - 10d, 2 Stk. 10e - 10f, 2 Stk. 10g - 10i)<br />
Überdruckventil kpl. / Soupape de surpression compl. / Pressure relief valve compl. /<br />
Valvola di sicurezza (1 Stk.)<br />
116 943 01<br />
116 944 01<br />
116 945 01<br />
116 946 01<br />
12 Manometer kpl. / Manomètre compl. / Pressure gauge compl. / Manometro compl. 116 947 01<br />
13<br />
14<br />
14<br />
15<br />
<strong>Elektro</strong>motor kpl. / Moteur électrique compl. / Electro engine compl. /<br />
Elettromotore compl. (1 Stk.)<br />
Pumpe kpl. (für Anschluss an <strong>Elektro</strong>motor) / Pompe compl. (pour le raccordement<br />
électrique) / Pompa compl. ( per collegamento elettrico) / Pump compl. ( for connection<br />
electrical)<br />
Pumpe kpl. (für Anschluss an <strong>Benzin</strong>motor) / Pompe compl. (pour le moteur d„essence)<br />
/ Pump compl. (for gasoline engine) / Pompa compl. (per il motore della benzina)<br />
Dichtungssatz / Jeu de joints / Sealing kit / Completo di guarnizione (2 Stk. 1c,<br />
1 Stk. 2c, 4 Stk. 5b, 2 Stk. 9e (10e), 1 Stk. 12b, 2 Stk. 15a, 2 Stk. 15b)<br />
116 948 01<br />
118 096 01<br />
118 096 02<br />
116 939 01<br />
16 Dichtung rot / Joint rouge / Packing red / Guarnizione rosso 118 551 01<br />
17 O-Ring / Joint torique / O-Ring / O-ring 501 170 48<br />
18 Schlauch / Tuyau / Hose / Tubo Ø19 x 3,5 L = 2.5m 502 520 19<br />
19 Saugsieb / Filtre d„aspiration / Screen / Filtro di aspirazione 107 523 01<br />
20 Schlauch / Tuyau / Tubo / Hose Ø15 x 3 L = 2.5m 502 521 02<br />
Ersatzteile für den <strong>Benzin</strong>motor siehe separate Anleitung.<br />
Les pièces de rechange pour le moteur d„essence voir le manuel séparé.<br />
Spare parts for the gasoline engine see separate manual.<br />
I pezzi di ricambio per il motore della benzina si riferiscono al manuale separato.
19<br />
20<br />
18<br />
Einstellen des Arbeitsdruckes<br />
Wenn der Motor läuft und Sie mit der Arbeit beginnen wollen, müssen Sie den gewünschten Arbeitsdruck<br />
einstellen. Warten Sie zuerst, bis keine Luft mehr im Pumpsystem vorhanden ist. Danach bringen Sie den Bügel<br />
am Sicherheitsventil in die gewünschte Stellung (Stufe 1 - 4) und betätigen Sie den Spannhebel, so dass der<br />
Arbeitsdruck wirksam wird. Am Manometer kann der eingestellte Wert überprüft werden. Zuletzt öffnen Sie den<br />
Kugelhahn, um mit der Arbeit zu beginnen.<br />
Handhabung Pulsationsdämpfer<br />
Pulsationsdämpfer 2x pro Jahr auf ca. 8 bar auffüllen bzw. vorspannen.<br />
Entlastetes Sicherheitsventil auf Stufe 1<br />
Manometer<br />
Überprüfung der Dosiergenauigkeit<br />
Stellen Sie am Sicherheitsventil den Druck auf 10 bar ein und lassen Sie das Gerät während einer Minute laufen.<br />
Die Flüssigkeit sammeln Sie in einem Messbecher.<br />
Plattendüse<br />
Bohrung Ø 1.5mm 2.8 – 3.2 l/min<br />
Bohrung Ø 2.0mm 6.3 – 6.7 l/min<br />
Spannhebel<br />
Bügel<br />
Stufe 1 - 4<br />
Kugelhahn<br />
Entleerung und Reinigung<br />
Entleeren und reinigen Sie das Gerät nach den nachfolgenden Anweisungen.<br />
Max. Druck auf Stufe 4<br />
Reinigung und Pflege<br />
1. Nach jedem Gebrauch ist das Gerät zu entleeren. Niemals das Sprühmedium im Gerät aufbewahren.<br />
2. Öffnen Sie das Ablassventil und entleeren Sie den Behälter. Fangen Sie das Restmittel auf und entsorgen Sie<br />
es nach den Angaben des Chemikalienherstellers.<br />
3. Reinigen Sie das Gerät mit einem geeigneten Mittel.<br />
4. Füllen Sie den Behälter mit sauberem Wasser und spülen Sie das Gerät inkl. Schlauch und Sprührohr durch.<br />
5. Lassen Sie das Restwasser abfliessen.<br />
6. Reinigen Sie die Düse und den Filter. Die Düse darf nicht mit einem harten Gegenstand gereinigt oder mit dem<br />
Mund durchgeblasen werden. Am besten eignet sich dafür eine Hand– oder Zahnbürste.<br />
7. Ersetzen Sie defekte Düsen, Filter und Dichtungen.<br />
8. Lassen Sie das Gerät zum Trocknen offen stehen.<br />
Aufbewahrung<br />
Wenn Sie Ihr Gerät für eine längere Zeit nicht benutzen, befolgen Sie folgende Anweisungen:<br />
1. Reinigen Sie das Gerät gemäss „Reinigung und Pflege“.<br />
2. Befolgen Sie die Anweisungen gemäss der beigelegten Bedienungsanleitung des <strong>Benzin</strong>motors.<br />
3. Bewahren Sie das Gerät an einem frost– und hitzesicheren Ort auf. (Das Gerät kann bei Temperaturen unter<br />
0°C und über 30°C zerstört werden.)
Garantie<br />
Wir gewähren Ihnen eine Garantie von 12 Monaten ab dem Verkaufsdatum. Während dieser Garantiedauer<br />
beheben wir kostenlos Mängel des Gerätes, die auf Material- oder Fabrikationsfehler beruhen, entweder durch<br />
Reparatur oder Austausch von Teilen oder des ganzen Gerätes.<br />
Von der Garantie ausgeschlossen sind Schäden, die auf unsachgemässen Gebrauch, mangelhaften Unterhalt oder<br />
normalen Verschleiss (z.B. Dichtungen) zurückzuführen sind.<br />
Die Garantie erlischt, wenn der Besitzer oder Drittpersonen Änderungen oder unsachgemässe Reparaturen am<br />
Gerät vornehmen.<br />
Die Garantie schliesst Rechtsansprüche aus, welche über die oben genannten Verpflichtungen hinausgehen. Es<br />
wird jede Haftpflicht, soweit gesetzlich zulässig, weg bedungen.<br />
Gerichtsstand: Baden, Schweiz<br />
Anwendbares Recht: Schweizerisches Recht<br />
Für weitere Auskünfte über Handhabung oder Unterhalt des Gerätes wenden Sie sich an Ihren Fachhändler.<br />
Technische Daten<br />
<strong>Elektro</strong>motor: 1,1 kW 230 V / 50 Hz<br />
<strong>Benzin</strong>motor: (siehe beigelegte Anleitung)<br />
Fördermenge: max. 25 l/min<br />
Betriebsdruck: max. 25 bar<br />
Sprühhöhe: ca. 10 m<br />
Gewicht: 4 kg<br />
Pumpen-Öl: SAE 30<br />
Massnahmen bei Störungen<br />
Die folgende Checkliste soll Ihnen bei der Behebung von kleineren Störungen behilflich sein. Sollten Sie das<br />
Problem trotzdem nicht lösen können, gehen Sie zu Ihrem Fachhändler.<br />
Die Pumpe saugt nicht an.<br />
Ist der Saugfilter sauber?<br />
Reinigen Sie den Saugfilter.<br />
Hat es eine undichte Stelle?<br />
Kontrollieren Sie alle Verschraubungen der Saugleitung.<br />
Sind alle Teile richtig montiert?<br />
Überprüfen Sie die Saug- und Druckventile auf deren richtige Montage.<br />
Flüssigkeit tritt ruckweise aus.<br />
Wie hoch ist der Arbeitsdruck?<br />
Stellen Sie den Arbeitsdruck auf min. 5 bar ein. Erhöhen Sie ihn bei Bedarf.<br />
Ist ein Fremdkörper im Saugsystem?<br />
Untersuchen Sie alle Elemente des Saugsystems auf Fremdkörper.<br />
Fördermenge nimmt ab - Pumpe verursacht Lärm.<br />
Hat die Pumpe genügend Öl?<br />
Kontrollieren Sie den Ölstand im Ölschauglas. Füllen sie gegebenenfalls Öl (SAE 30) nach.<br />
Verfärbt sich das Öl oder überläuft das Ölschauglas?<br />
Die Membranen sind beschädigt. Demontieren Sie den Pumpendeckel und ersetzen Sie die Membranen.<br />
Nehmen Sie einen Ölwechsel vor!<br />
Bei Problemen mit dem Motor sehen Sie bitte in der beiliegenden Gebrauchsanweisung nach.<br />
Dichiarazione di conformità CE<br />
Noi <strong>Birchmeier</strong> <strong>Sprühtechnik</strong> <strong>AG</strong><br />
Im Stetterfeld 1<br />
CH-5608 Stetten<br />
Con la presente dichiariamo, che lo spruzzatore motorizzato<br />
Modello: Pumpe kpl., <strong>AR</strong> <strong>252</strong> EL Art. Nr.: 116 390 01<br />
Pumpe kpl., <strong>AR</strong> <strong>252</strong> <strong>Benzin</strong> Honda 116 390 03<br />
Per la sua progettazione ed il tipo di costruzione come anche per il modello da noi introdotto sul<br />
mercato è conforme a tutti i requisiti in materia di sicurezza e sanità e delle rispettive direttive CEE.<br />
Disposizioni CE in materia:<br />
DIRETTIVA MACCHINE 2006/42/CEE<br />
Norme armonizzate inerenti:<br />
EN ISO 12100-1<br />
EN ISO 12100-2<br />
Tramite misure interne viene garantito che gli attrezzi di serie corrispondono sempre a tutti i<br />
requisiti delle attuali direttive CEE e alle norme applicate.<br />
Il sottoscritto agisce per incarico e con pieni poteri conferitogli dalla Direzione.<br />
Stetten, Gennaio 2011<br />
M. Zuber<br />
Responsabile Sviluppo & Costruzione
Garanzia<br />
� Il prodotto è corredato di garanzia di 12 mesi a partire dalla data di acquisto. Durante il periodo di garanzia<br />
elimineremo gratuitamente tutti i guasti dell„apparecchio riconducibili a difetti di materiale o di fabbricazione,<br />
mediante riparazione o sostituzione di pezzi o dell„intero apparecchio.<br />
� Restano esclusi dalla garanzia i danni causati da uso non conforme, mancata manutenzione o normale usura<br />
(ad es. delle guarnizioni).<br />
� La garanzia si estingue se il proprietario o terze persone apportano modifiche all„apparecchio o eseguono<br />
riparazioni non appropriate.<br />
� Sono escluse dalla garanzia altre rivendicazioni legali oltre gli obblighi summenzionati. Si nega qualsiasi<br />
responsabilità civile, escluse quelle espressamente previste dalla legge.<br />
�<br />
� Foro competente: Baden, Svizzera<br />
� Diritto applicabile: Diritto svizzero<br />
�<br />
� Per ulteriori informazioni in merito all„uso o alla manutenzione dell„apparecchio, rivolgersi al proprio rivenditore<br />
specializzato.<br />
Dati tecnici<br />
Motore elettrico: 1,1 kW 230 V / 50 Hz<br />
Motore a benzina: (vedi istruzioni allegate)<br />
Portata: 25 l/min.<br />
Pressione d‟esercizio: 25 bar<br />
Altezza di nebulizzazione: a. 10 m<br />
Peso: 4 kg<br />
Olio pompe: SAE 30<br />
Ricerca e soluzione guasti<br />
La seguente lista di controllo potrà esservi di aiuto nell„eliminazione di piccoli guasti. Se tuttavia non fosse possibile<br />
risolvere il problema, rivolgersi al proprio rivenditore specializzato.<br />
La pompa non aspira<br />
Il filtro di aspirazione è pulito?<br />
Pulire il filtro di aspirazione.<br />
C‟è un punto non ermetico?<br />
Controllare tutti i collegamenti a vite della conduttura di aspirazione.<br />
Tutte le parti sono state montate correttamente?<br />
Verificare il corretto montaggio delle valvole di aspirazione e di regolazione di pressione.<br />
Il liquido fuoriesce a intermittenza.<br />
Qual è la pressione di lavoro?<br />
Impostate la pressione di lavoro su min. 5 bar. Aumentatela all’occorrenza.<br />
C‟è un corpo estraneo nel sistema di aspirazione?<br />
Verificate che siano liberi tutti gli elementi del sistema di aspirazione.<br />
La portata diminuisce – la pompa è eccessivamente rumorosa<br />
C‟è sufficiente olio nella pompa?<br />
Verificate il livello dell’olio mediante il tubo di livello. eventualmente rabboccate l’olio (SAE 30).<br />
L‟olio si colora o trabocca dal tubo di livello?<br />
Le membrane sono danneggiate. Smontate il coperchio pompe e sostituite le membrane. Effettuate un cambio<br />
dell’olio!<br />
In caso di problemi con il motore consultate le istruzioni d‟uso allegate.<br />
EG Konformitätserklärung<br />
Wir <strong>Birchmeier</strong> <strong>Sprühtechnik</strong> <strong>AG</strong><br />
Im Stetterfeld 1<br />
CH-5608 Stetten<br />
erklären hiermit, dass die Motorpumpen<br />
Modell: Pumpe kpl., <strong>AR</strong> <strong>252</strong> EL Art. Nr.: 116 390 01<br />
Pumpe kpl., <strong>AR</strong> <strong>252</strong> <strong>Benzin</strong> Honda 116 390 03<br />
aufgrund der Konzipierung und Bauart sowie in der von uns in Verkehr gebrachten Ausführung den<br />
einschlägigen grundlegenden Sicherheits- und Gesundheitsanforderungen der EG- Richtlinien<br />
entspricht.<br />
Einschlägige EG-Richtlinien:<br />
Maschinenrichtlinie 2006/42/EG<br />
Angewandte harmonisierte Normen:<br />
EN ISO 12100-1<br />
EN ISO 12100-2<br />
Es ist durch interne Massnahmen sichergestellt, dass die Seriegeräte immer den Anforderungen<br />
der aktuellen EG-Richtlinien und den angewandten Normen entsprechen.<br />
Der Unterzeichnende handelt im Auftrag und mit Vollmacht der Geschäftsleitung.<br />
Stetten, Januar 2011<br />
M. Zuber<br />
Leiter Entwicklung & Konstruktion
Important!<br />
Lire intégralement le mode d'emploi avant la première mise en service.<br />
L'utilisateur assumera la responsabilité des dommages qui résultent du non-respect de ces prescriptions.<br />
Mise en garde!<br />
� L'appareil doit uniquement être utilisé par des personnes adéquatement formées. En cas de cession à des tiers,<br />
il faudra obligatoirement leur remettre en même temps le mode d'emploi.<br />
� L'opérateur doit faire attention à la présence de tiers, en particulier d'enfants et d'animaux domestiques, et<br />
respecter une distance suffisante par rapport à eux. Il assumera la responsabilité des dommages directs ou<br />
indirects qu'il occasionne.<br />
� Durant toute manipulation de produits chimiques et de produits phytosanitaires, il faudra éviter tout contact avec<br />
les yeux et la peau. C'est pourquoi il est indispensable de porter des vêtements de protection appropriés, un<br />
masque de protection, des lunettes de sécurité et des gants en caoutchouc.<br />
� Ne jamais essayer de déboucher des vannes et des buses colmatées en soufflant dedans (risque<br />
d'intoxication!).<br />
� Les produits chimiques et les produits phytosanitaires ne doivent pas être transférés dans d'autres récipients<br />
(bouteilles, boîtes, etc.) et doivent être entreposés hors de portée des enfants.<br />
� Ne jamais pulvériser contre la direction du vent ou quand le vent souffle trop fort. Ne pas verser davantage de<br />
produit de pulvérisation que ce qui est nécessaire pour la surface à traiter.<br />
� Ne jamais utiliser l'appareil dans des locaux fermés. Les gaz d'échappement peuvent vous faire courir un risque<br />
mortel!<br />
Consignes de sécurité<br />
� Avant toute utilisation, il faut s'assurer que l'appareil a été correctement monté, n'est pas endommagé et est<br />
apte au fonctionnement. Les pièces défectueuses ne doivent plus être réutilisées.<br />
� Nous attirons expressément votre attention sur le fait que toute intervention de votre part sur l'appareil est<br />
interdite. Dans ce cas, vous perdez tous vos droits à la garantie et BIRCHMEIER <strong>Sprühtechnik</strong> <strong>AG</strong> sera<br />
dégagée de toute responsabilité.<br />
� Les travaux d'entretien et de réparation ne doivent être effectués que par un personnel adéquatement qualifié ou<br />
par le distributeur spécialisé. Il faudra exclusivement utiliser des pièces de rechange BIRCHMEIER d'origine.<br />
� En cas de vibration inhabituelles, l'appareil devra être immédiatement arrêté. S'adresser au distributeur<br />
spécialisé compétent.<br />
� L'appareil ne doit pas être basculé.<br />
� L'appareil ne doit pas être exposé au rayonnement du soleil. Les effets de la chaleur et du gel peuvent<br />
endommager l'appareil.<br />
� L'appareil doit être vidé après chaque usage et nettoyé à fond avec de l'eau. Il faudra veiller à ce moment-là à<br />
ne pas polluer les cours d'eau.<br />
� L'évacuation des produits chimiques ou des produits phytosanitaires qui sont restés dans le réservoir de liquide<br />
et de leur dépôt doit se faire selon les règles de sécurité en vigueur. Appliquer à cette fin les règles prescrites<br />
par le fabricant du produit chimique.<br />
Maniement de l'appareil<br />
Remplissage du récipient<br />
1. Se renseigner auprès du fabricant de produits chimiques ou de produits phytosanitaires quant au dosage<br />
adéquat.<br />
2. Veiller à porter l'équipement de protection approprié (lunettes de sécurité, masque respiratoire, gants, etc.).<br />
3. Mélanger la préparation dans un récipient séparé conformément aux instructions du fabricant.<br />
4. Remplir le réservoir de liquide et faire attention qu'il ne déborde pas.<br />
5. Fermer solidement le couvercle.<br />
Préparation de l’appareil<br />
Contrôlez que la soupape de sécurité soit déchargée.<br />
Assurez-vous que tous les raccords soient bien fixés.<br />
Maniement du moteur à essence<br />
Lisez absolument le mode d‟emploi pour le moteur à essence annexé. Vous y trouverez toutes les indications sur<br />
le maniement, la maintenance et l‟entretien.<br />
Impostare la pressione di lavoro<br />
Una volta avviato il motore, prima di iniziare il lavoro, dovete impostare la pressione di lavoro desiderata. Attendete<br />
dapprima che non sia più presente aria nel sistema di pompaggio. Portate la staffa della valvola di sicurezza nella<br />
posizione desiderata (livello 1 – 4) ed azionate la leva di bloccaggio al fine di attivare la pressione di lavoro. Il<br />
manometro consente di verificare il valore impostato. Aprite infine il rubinetto a sfera per poter iniziare il lavoro.<br />
Movimentazione ammortizzatore ad impulsi<br />
Riempire a circa 8 bar l‟ammortizzatore ad impulsi due volte all‟anno ed eventualmente precaricare.<br />
Valvola di sicurezza scarica su livello 1<br />
Manometro<br />
Verifica della precisione di dosaggio<br />
Impostate sulla valvola di sicurezza la pressione a 10 bar e lasciate funzionare l‟apparecchiatura per un minuto.<br />
Raccogliete il liquido in un bicchiere graduato.<br />
Ugello a sede piana<br />
Alesaggio Ø 1.5mm 2.8 – 3.2 l/min<br />
Alesaggio Ø 2.0mm 6.3 – 6.7 l/min<br />
Leva di bloccaggio<br />
Staffa<br />
Livello 1 - 4<br />
Rubinetto a sfera<br />
Pressione max. su livello 4<br />
Pulizia e manutenzione<br />
1. L‟apparecchiatura va svuotata dopo ogni utilizzo. Non conservare in alcun caso la sostanza di nebulizzazione<br />
all‟interno dell‟apparecchiatura.<br />
2. Aprite la valvola di scarico e svuotate il contenitore. Raccogliete la sostanza residua e provvedete allo<br />
smaltimento secondo le indicazioni del produttore della sostanza chimica.<br />
3. Pulite l‟apparecchiatura con un prodotto adatto.<br />
4. Riempite il contenitore con acqua pulita e sciacquate accuratamente l‟apparecchiatura incluso il tubo flessibile e<br />
il tubo di nebulizzazione.<br />
5. Fate defluire l‟acqua residua.<br />
6. Pulite l‟ugello ed il filtro. L‟ugello non deve essere pulito con un oggetto rigido e non soffiarci attraverso con la<br />
bocca. Consigliamo di utilizzare una piccola spazzola o uno spazzolino per denti.<br />
7. Sostituite gli ugelli, i filtri e le guarnizioni difettosi.<br />
8. Fate asciugare l‟apparecchiatura.<br />
Magazzinaggio<br />
Se non si utilizza l„apparecchio per lungo tempo, seguire le seguenti indicazioni:<br />
1. Pulire l„apparecchio come spiegato nel paragrafo “Pulizia e manutenzione”.<br />
2. Attenetevi alle indicazioni riportate nelle istruzioni d‟uso allegate relative al motore a benzina.<br />
3. Conservate l‟apparecchiatura in un luogo al riparo dal gelo e dal calore. (L‟apparecchiatura può subire<br />
danneggiamenti a temperature inferiori a 0°C e superiori a 30°C.)
Importante!<br />
Prima di mettere in funzione l„apparecchio leggere per intero queste istruzioni per l„uso.<br />
L„utilizzatore è responsabile di eventuali danni causati dalla mancata osservanza delle presenti disposizioni.<br />
Avvertenza!<br />
� L„apparecchio può essere utilizzato solo da persone appositamente addestrate. In caso di cessione a terzi, il<br />
nebulizzatore deve essere consegnato insieme alle presenti istruzioni.<br />
� È responsabilità dell„utilizzatore nei confronti di terzi, in particolare di bambini e animali domestici, mantenersi ad<br />
una distanza sufficiente. L„utilizzatore è responsabile di eventuali danni diretti o indiretti.<br />
� Se si utilizzano prodotti chimici e fitofarmaci, evitare il contatto con gli occhi e la pelle. Pertanto è necessario<br />
indossare un abbigliamento idoneo, maschera e occhiali di protezione e guanti in gomma.<br />
� Non cercare di liberare valvole e bocchettoni otturati soffiando con la bocca (pericolo di intossicazione!)<br />
� I prodotti chimici e i fitofarmaci non devono travasati in altri contenitori (bottiglie, scatole di metallo, ecc.) e<br />
devono essere conservati lontani dalla portata dei bambini.<br />
� Non utilizzare mai il nebulizzatore controvento o in presenza di forte vento. Non spruzzare più liquido di quanto<br />
sia necessario per la superficie da trattare.<br />
� Non utilizzare mai l„apparecchio in ambienti chiusi. I gas di scarico possono essere letali!<br />
Indicazioni sulla sicurezza<br />
� Prima di ogni utilizzo assicurarsi che l„apparecchio sia stato montato correttamente, non sia danneggiato e sia<br />
pronto per l„uso. Non utilizzare mai componenti danneggiati.<br />
� Si ricorda espressamente che è vietato qualsiasi intervento di modifica dell„apparecchio. In caso contrario<br />
BIRCHMEIER <strong>Sprühtechnik</strong> <strong>AG</strong> non riconosce più alcuna garanzia e responsabilità.<br />
� Gli interventi di manutenzione e riparazione devono essere eseguiti esclusivamente da tecnici competenti o dai<br />
rivenditori autorizzati. Utilizzare esclusivamente ricambi originali BIRCHMEIER.<br />
� In caso di vibrazioni insolite, spegnere l„apparecchio e rivolgersi al proprio rivenditore di fiducia.<br />
� Non capovolgere l„apparecchio.<br />
� Non lasciare l„apparecchio al sole. L„effetto del calore e del gelo può danneggiare l„apparecchio.<br />
� Dopo l„uso svuotare sempre l„apparecchio e pulirlo a fondo con acqua. Durante questa operazione assicurarsi di<br />
non versare sostanze inquinanti nelle acque di scarico.<br />
� Provvedere allo smaltimento delle sostanze chimiche o dei fitofarmaci rimasti nel serbatoio e del relativo<br />
sedimento nel rispetto delle norme di sicurezza vigenti. A questo proposito attenersi alle norme vigenti indicate<br />
dal produttore delle sostanze chimiche.<br />
Uso dell‘apparecchio<br />
Riempimento del contenitore<br />
1. Informarsi presso il produttore dei prodotti chimici o dei fitofarmaci in merito al dosaggio corretto.<br />
2. Assicurarsi di indossare un idoneo abbigliamento di protezione (occhiali, maschera, guanti, ecc.).<br />
3. Mescolare il preparato in un contenitore separato secondo le indicazioni dell„azienda produttrice.<br />
4. Riempire il serbatoio del liquido e assicurarsi che il liquido non fuoriesca.<br />
5. Chiudere bene il coperchio.<br />
Preparazione dell‘apparecchiatura<br />
Verificate che la valvola di sicurezza sia effettivamente scarica.<br />
Verificate l‟adeguato montaggio di tutte le connessioni.<br />
Utilizzo del motore a benzina<br />
Leggete attentamente le istruzioni allegate per l‟uso del motore a benzina, che riportano tutte le informazioni<br />
necessarie relative ad uso, manutenzione e assistenza.<br />
Utilizzo del motore elettrico<br />
Inserite la spina di rete in una presa dotata di interruttore di protezione corrente di guasto collegata a terra. Avviate<br />
il motore mediante l‟interruttore principale.<br />
Maniement du moteur électrique<br />
Placer la fiche dans une prise avec conducteur de terre, équipée d‟un disjoncteur à courant de défaut.<br />
Enclenchez le moteur à l‟aide de l‟interrupteur principal.<br />
Réglage de la pression de service<br />
Après mise en route du moteur, lorsque vous désirez débuter le travail, il est indispensable de régler la pression de<br />
service souhaitée. Attendez tout d‟abord qu‟il n‟y ait plus d‟air dans le système de pompe. Ensuite, amenez la<br />
boucle de la soupape de sécurité à la position souhaitée (position 1 - 4) et actionnez le levier de tension de<br />
manière à ce que la pression de service devienne effective. La valeur réglée peut alors être contrôlée sur le<br />
manomètre. Enfin ouvrez la vanne sphérique afin de commencer le travail.<br />
Maniement de l’amortisseur de pulsations<br />
Remplir 2x par année l‟amortisseur de pulsations à env. 8 bar, respectivement le gonfler.<br />
Soupape de sécurité déchargée sur position 1<br />
Manomètre<br />
Contrôle de la précision du dosage<br />
Réglez la pression sur la soupape de sécurité à 10 bars et laissez fonctionner l‟appareil pendant une minute.<br />
Collectez le liquide dans un récipient calibré.<br />
Busa à clapet<br />
Alésage Ø 1.5mm 2.8 – 3.2 l/min<br />
Alésage Ø 2.0mm 6.3 – 6.7 l/min<br />
Levier de tension<br />
Course<br />
Marche 1 - 4<br />
Robinet à boule<br />
Pression max. pour position 4<br />
Nettoyage et soins<br />
1. Après chaque utilisation l‟appareil doit être vidangé. Ne jamais conserver le liquide d‟aspersion dans l‟appareil.<br />
2. Ouvrez la soupape de vidange et videz le récipient. Collectez le produit résiduel et éliminez-le selon les<br />
indications du fabricant de produits chimiques.<br />
3. Nettoyez l‟appareil avec un produit adéquat.<br />
4. Remplissez le réservoir avec de l‟eau propre et rincez de part en part l‟appareil ainsi que le tuyau et la buse<br />
d‟aspersion.<br />
5. Laissez couler l‟eau résiduelle.<br />
6. Nettoyez la buse et le filtre. La buse ne doit pas être nettoyée avec un objet rigide ou soufflée avec la bouche.<br />
Le moyen le plus approprié est une brosse ou une brosse à dents.<br />
7. Remplacez les buses, filtres et joints défectueux<br />
8. Laissez l‟appareil ouvert pour le séchage.<br />
Entreposage<br />
Si votre appareil n'est pas utilisé pendant une période prolongée, il faudra suivre les instructions suivantes:<br />
1. Nettoyer l'appareil conformément à “Soin et entretien”.<br />
2. Veuillez observer les instructions selon le mode d‟emploi annexé du moteur à essence.<br />
3. Conservez l‟appareil à l‟abri du gel et de la chaleur. (L‟appareil peut être endommagé lors de températures<br />
inférieures à 0°C et supérieures à 30 °C.)
Garantie<br />
Nous vous apportons une garantie de 12 mois à partir de la date d'achat. Pendant cette période de garantie, nous<br />
remédierons gratuitement aux défaillances de l'appareil qui sont imputables à des défauts de matière ou des vices<br />
de fabrication, que ce soit par réparation ou par échange de pièces ou de l'ensemble de l'appareil.<br />
Sont exclus de la garantie les dommages qui résultent d'une utilisation non appropriée, d'un défaut d'entretien ou<br />
de l'usure normale (par exemple les joints d'étanchéité).<br />
La garantie expire si le propriétaire ou des tiers apporte des modifications ou fait des réparations non appropriées<br />
sur l'appareil.<br />
La garantie exclut les prétentions à un droit qui vont au-delà des obligations susmentionnées. Nous excluons toute<br />
responsabilité légale dans la mesure où la loi le permet.<br />
Juridiction de compétence: Baden, Suisse.<br />
Droit applicable: le droit suisse.<br />
Pour plus de renseignements sur le maniement ou l'entretien de l'appareil, nous vous conseillons de vous adresser<br />
à votre distributeur spécialisé.<br />
Données techniques<br />
Moteur électrique: 1,1 kW 230 V / 50 Hz<br />
Moteur à essence: (Voir mode d‟emploi approprié)<br />
Débit: 25 l/min max.<br />
Pression de service: 25 bar max.<br />
Hauteur d‟aspersion: env. 10 m<br />
Poids: 4 kg<br />
Huile de pompe: SAE 30<br />
Mesures à prendre en cas de défauts de fonctionnement<br />
La liste de contrôle ci-après vous sera utile pour remédier aux perturbations mineures. Si malgré tout elle ne vous<br />
permet pas de résoudre le problème, veuillez consulter votre distributeur spécialisé.<br />
La pompe ne s‟amorce pas<br />
Le filtre d‟aspiration est-il propre?<br />
Nettoyez le filtre d’aspiration.<br />
Y a t‟il un endroit non étanche?<br />
Contrôlez tous les raccords de la ligne d’aspiration.<br />
Toutes les parties sont-elles montées correctement?<br />
Contrôlez le montage correct des soupapes d’aspiration et de pression.<br />
Le liquide est éjecté par saccades<br />
Quelle est la pression de service?<br />
Réglez la pression de service au minimum à 5 bars. Augmentez en cas de besoin.<br />
Un corps étranger est-il présent dans le système d‟aspiration?<br />
Recherchez un corps étranger dans tous les éléments du système d’aspiration.<br />
Le débit décroît et la pompe émet du bruit<br />
La pompe a-t-elle suffisamment d‟huile?<br />
Contrôlez le niveau d’huile dans le regard d’huile. Remplissez d’huile le cas échéant (SAE 30).<br />
L‟huile change-elle de couleur ou le regard d‟huile déborde-t‟il?<br />
Les membranes sont endommagées. Démontez le couvercle de pompe et remplacez les membranes.<br />
Effectuez une vidange!<br />
Lors de problèmes avec le moteur veuillez observer le mode d‟emploi correspondant.<br />
EU Declaration of Conformity<br />
We <strong>Birchmeier</strong> <strong>Sprühtechnik</strong> <strong>AG</strong><br />
Im Stetterfeld 1<br />
CH-5608 Stetten<br />
hereby declare that the motor pumps<br />
Model: Pumpe kpl., <strong>AR</strong> <strong>252</strong> EL Art. No.: 116 390 01<br />
Pumpe kpl., <strong>AR</strong> <strong>252</strong> <strong>Benzin</strong> Honda 116 390 03<br />
described below conforms to the relevant fundamental safety and health requirements of the<br />
appropriate EU Directives both in its basic design and construction as well as in the version<br />
marketed by us.<br />
Relevant EU Directives:<br />
EU Machinery Directive 2006/42/CE<br />
Harmonised standards applied:<br />
EN ISO 12100-1<br />
EN ISO 12100-2<br />
Appropriate internal measures have been taken to ensure that series-production units conform at<br />
all times to the requirements of current EU Directives and relevant standards.<br />
The signatory is empowered to represent and act on behalf of the company management.<br />
Stetten, January 2011<br />
M. Zuber<br />
Head of Development & Construction
Warranty<br />
We hereby warrant that for a period of 12 months from the date of sale we will rectify free of charge defects which<br />
are due to deficiencies in materials or manufacture, either by repair or replacement of parts, or of the entire sprayer.<br />
Excluded from the warranty are damages due to improper use, inadequate maintenance or normal wear (e.g.<br />
seals).<br />
The warranty becomes null and void if the user or third persons makes alterations to or inexpert repairs on the<br />
sprayer.<br />
Excluded from the warranty are all legal claims over and beyond the aforementioned obligations. Any and all<br />
liability is disclaimed, except as prescribed by law.<br />
Legal venue: Baden, Switzerland.<br />
Governing law: Swiss law.<br />
For further information on the handling or maintenance of the sprayer, please consult your dealer.<br />
Specifications<br />
Electric motor: 1.1 kW 230 V / 50 Hz<br />
Gasoline engine: (see accompanying manual)<br />
Delivery rate: max. 25 l/min<br />
Spraying pressure: max. 25 bar<br />
Spraying height: Approx. 10 m<br />
Weight: 4 kg<br />
Pump oil: SAE 30<br />
Troubleshooting<br />
The purpose of this checklist is to assist you in rectifying minor malfunctions. If despite these efforts the problem<br />
still cannot be solved, please consult your dealer.<br />
The pump does not prime:<br />
Is the intake filter clean?<br />
Clean the intake filter.<br />
Does the sprayer have a leak?<br />
Check all unions of the intake line.<br />
Have all parts been correctly fitted?<br />
Check the intake and discharge valves for correct fitting.<br />
Fluid emits erratically:<br />
What is the spraying pressure?<br />
Adjust the spraying pressure to 5 bar. Increase the pressure as required.<br />
Is there a foreign object in the intake system?<br />
Examine all intake system elements for foreign objects.<br />
Delivery rate decays - pump noisy:<br />
Does the pump get enough oil?<br />
Check the oil level in the oil gauge glass. Add oil if necessary (SAE 30).<br />
Does the oil discolor, or does the oil gauge glass overflow?<br />
The diaphragms are damaged. Remove the pump cover and replace the diaphragms. Change the oil!<br />
In the case of problems with the engine please refer to the accompanying operating instructions.<br />
Déclaration de conformité européenne<br />
Nous <strong>Birchmeier</strong> <strong>Sprühtechnik</strong> <strong>AG</strong><br />
Im Stetterfeld 1<br />
CH-5608 Stetten<br />
par la présente, nous déclarons que les pompes à moteur<br />
Produit: Pumpe kpl., <strong>AR</strong> <strong>252</strong> EL Type : 116 390 01<br />
Pumpe kpl., <strong>AR</strong> <strong>252</strong> <strong>Benzin</strong> Honda 116 390 03<br />
ci-après répond, suite à sa conception et sa construction ainsi que de par le modèle que nous<br />
avons mis sur le marché, aux exigences de sécurité et d‟hygiène en vigueur de la directive<br />
européenne.<br />
En cas de modification de la machine effectuée sans notre accord, cette déclaration sera caduque.<br />
Directives européennes en vigueur:<br />
Directive européenne sur les machines (2006/42/CE)<br />
Normes harmonisées appliquées:<br />
EN ISO 12100-1<br />
EN ISO 12100-2<br />
La conformité permanente des appareils de série avec les exigences consignées dans les<br />
directives actuelles de la CE et avec les normes appliquées, est garantie par des mesures<br />
internes.<br />
Le soussigné agissent par ordre et avec les pleins pouvoirs de la Direction commerciale.<br />
Stetten, Janvier 2011<br />
M. Zuber<br />
Responsable Département Construction
Important!<br />
Make sure to read the user‟s manual prior to taking the sprayer into service for the first time.<br />
The manufacturer shall not be held liable for damages resulting from neglect to observe these instructions.<br />
Warning!<br />
� The sprayer may only be used by well-instructed persons. When the sprayer is passed on to others, it must<br />
definitely be accompanied by the user‟s manual.<br />
� The user has the responsibility for maintaining an adequate distance away from third parties, in particular from<br />
children and domestic animals. The user carries the liability for both direct and indirect damages.<br />
� In the handling of chemicals and plant-care agents it is essential to ensure that contact with the eyes and skin is<br />
avoided. The wearing of suitable protective clothing, a breathing mask, safety glasses and rubber gloves is<br />
therefore imperative.<br />
� Never blow out clogged valves and nozzles with the mouth (toxication hazard!)<br />
� Chemicals and plant-care agents may not be filled into other containers (bottles, cans etc.), and must be stored<br />
out of reach of children.<br />
� Never spray against the wind or under excessively windy conditions. Do not apply more spraying medium to the<br />
surface to be treated than necessary.<br />
� Never use the sprayer in closed rooms. Exhaust gases can be lethal!<br />
Notes of safety<br />
� Before each use of the sprayer, make sure that it is correctly assembled, in an undamaged condition and<br />
operational. The use of parts which have been damaged is prohibited.<br />
� It is expressly noted that any and all alterations to the sprayer are not allowed. In the event of such alterations,<br />
BIRCHMEIER <strong>Sprühtechnik</strong> <strong>AG</strong> disclaims any and all warranties and liabilities.<br />
� Maintenance and repair work may performed only be well-instructed personnel, or by your <strong>Birchmeier</strong> dealer.<br />
Use exclusively original BIRCHMEIER parts.<br />
� In the event of unusual vibrations, the sprayer is to be shut down immediately. Consult your dealer.<br />
� The sprayer may not be tipped.<br />
� Do not let the sprayer stand exposed to the sun. It can be damaged by the effects of heat and frost.<br />
� After each use empty the sprayer and clean it thoroughly with water. Make sure that no pollution of the<br />
environment is caused.<br />
� The chemicals or plant-care agents and their residues remaining in the tank must be disposed in accordance<br />
with the appertaining safety regulations. For this purpose, follow the chemical manufacturer‟s instructions.<br />
Preparing the sprayer<br />
Filling the tank<br />
1. Inform yourself of the chemical or pesticide manufacturer‟s instructions on the correct dosages.<br />
2. Make sure that you are wearing appropriate protective apparel (protective glasses, breathing mask, gloves etc.).<br />
3. Mix the medium in a separate tank according to the manufacturer‟s instructions.<br />
4. Fill the medium tank, making sure not to spill any medium.<br />
5. Close the cover tightly.<br />
Preparation of the sprayer<br />
Make sure that the safety relief valve is released.<br />
Check to ensure that all connections have been tightly fitted.<br />
Operation of the gasoline engine<br />
Definitely make sure to read the gasoline engine operating manual which contains all information relating to<br />
operation, service and maintenance of the engine.<br />
Operation of the electric motor<br />
Plug the power connector into a grounded power outlet equipped with a fault current protection switch. Turn the<br />
motor on with by switching the main switch.<br />
Adjusting the spraying pressure<br />
Once the engine is running and you are about to start work, the desired spraying pressure must be adjusted. First<br />
wait until all the air has been discharged out of the pump system. Then bring the clip of the safety relief valve into<br />
the desired position (steps 1 - 4) and operate the compression lever such that the spraying pressure takes effect.<br />
Check the adjusted value on the pressure gauge. Finally, open the ball valve to start working.<br />
Use of the pulsation damper<br />
The pulsation damper has to be filled or preloaded with approx. 8 bar twice a year.<br />
Released safety-relief valve at step 1<br />
Pressure gauge<br />
Checking the delivery accuracy<br />
Adjust the safety relief valve to a pressure of 10 bar and allow the sprayer to run for one minute. Catch the liquid in<br />
a measuring cup.<br />
Plate nozzle<br />
Bore Ø 1.5mm 2.8 – 3.2 l/min<br />
Bore Ø 2.0mm 6.3 – 6.7 l/min<br />
Draining and cleaning<br />
Drain and clean the sprayer according to the following instructions.<br />
Compression lever<br />
max. pressure at stepp 4<br />
Cleaning and servicing<br />
1. Drain the sprayer after each use. Never use the sprayer to store spraying fluid.<br />
2. Open the drain valve and drain the tank into a container and dispose of the remaining fluid according to the<br />
chemical manufacturer‟s instructions.<br />
3. Clean the sprayer with an appropriate agent.<br />
4. Fill the tank with clean water and flush out the sprayer, including hose and spray lance.<br />
5. Drain out the remaining water.<br />
6. Clean the nozzle and filter. The nozzle may not be cleaned with a hard object, or blown through with the mouth.<br />
It is best to use a hand brush or a toothbrush.<br />
7. Change defective nozzles, filters, gaskets and seals.<br />
8. Allow the sprayer to dry out in the open condition.<br />
Storage<br />
If you not planning to use your sprayer for a prolonged time, follow these instructions:<br />
1. Clean the sprayer as per “Cleaning and Service”.<br />
2. Follow the instructions according to the accompanying gasoline engine operating manual.<br />
3. Store the sprayer in a place protected against frost and heat (temperatures below 0° C and above 30° C can<br />
destroy the sprayer).<br />
Clip<br />
Steps 1 - 4<br />
Ball valve