CARSON Specter Two Brushless 50 040 9000
CARSON Specter Two Brushless 50 040 9000
CARSON Specter Two Brushless 50 040 9000

Create successful ePaper yourself
Turn your PDF publications into a flip-book with our unique Google optimized e-Paper software.
Instruction Manual Page 2 - 11<br />
Betriebsanleitung Seite 12 - 21<br />
Mode d’emploie Page 22 - 31<br />
Instrucciones Página 32 - 41<br />
Istruzioni d’uso Pagina 42 - 51<br />
<strong>CARSON</strong> <strong>Specter</strong> <strong>Two</strong> <strong>Brushless</strong> <strong>50</strong> <strong>040</strong> <strong>9000</strong>
GB<br />
Dear Customer<br />
We congratulate you for buying this <strong>CARSON</strong> RC model car,<br />
which is designed using state of the art technology.<br />
According to our policy of steady development and product<br />
improvement we reserve the right to make changes in<br />
specifications concerning equipment, material and design at<br />
any time without notice.<br />
Specifications or designs of the actual product may vary from<br />
those shown in this manual or on the box.<br />
The manual forms part of this product. Should you ignore the<br />
operating and safety instructions, the warranty will be void.<br />
Keep this guide for future reference.<br />
Limited Warranty<br />
This product is warranted by <strong>CARSON</strong> against manufacturing<br />
defects in materials and workmanship under normal use for 24<br />
months from the date of purchase from authorised franchisees<br />
and dealers. In the event of a product defect during the<br />
warranty period, return the product along with your receipt as<br />
proof of purchase to any <strong>CARSON</strong> store. <strong>CARSON</strong> will, at its<br />
option, unless otherwise provided by law:<br />
(a) Correct the defect by repairing the product without charging<br />
for parts and labour<br />
(b) Replace the product with one of the same or similar design;<br />
or<br />
(c) Refund the purchase price.<br />
All replacement parts and products, and products on which<br />
a refund is made, become the property of <strong>CARSON</strong>. New<br />
or reconditioned parts and products may be used in the<br />
performance of warranty services. Repaired or replaced parts<br />
and products are warranted for the remainder of the original<br />
warranty period. You will be charged for repair or replacement<br />
of the product made after the expiration of the warranty period.<br />
The Warranty does not cover:<br />
• Damage or failure caused by or attributable to acts of God,<br />
abuse, accident, misuse, improper or abnormal usage,<br />
failure to follow instructions, improper installation or<br />
maintenance, alteration, lightning or other incidence of<br />
excess voltage or current;<br />
• Damage caused by losing control of your car;<br />
• Any repairs other than those provided by a <strong>CARSON</strong><br />
Authorised Service Facility;<br />
• Consumables such as fuses or batteries;<br />
• Cosmetic damage;<br />
• Transportation, shipping or insurance costs; or<br />
• Costs of product removal, installation, set-up service<br />
adjustment or reinstallation<br />
This warranty gives you specific legal rights, and you may also<br />
have other rights which may vary according to the country of<br />
purchase.<br />
Declaration of conformity<br />
Dickie-Tamiya GmbH & Co. KG hereby declares that this model<br />
kit with radio, motor, battery and charger is in accordance with<br />
the basic requirements of the following European directives:<br />
98/37 EG and 89/336/EWG and other relevant regulations of<br />
guideline 1999/5/EG (R&TTE).<br />
The original declaration of conformity can be obtained from the<br />
following address:<br />
Dickie-Tamiya GmbH & Co. KG • Werkstraße 1 • D-90765 Fürth<br />
• Germany<br />
The explanation of the symbol on the product,<br />
packaging or instructions:<br />
Electronic devices are valuable products and<br />
should not be disposed of with the household<br />
waste when they reach the end of their<br />
running time! Help us to protect the<br />
environment and respect our resources by<br />
handing this appliance over at the relevant<br />
recycling points.<br />
We wish you good luck and a lot of fun driving with your<br />
<strong>CARSON</strong> model car<br />
Before driving your new model carefully read these instructions!<br />
2<br />
<strong>CARSON</strong> <strong>Specter</strong> <strong>Two</strong> <strong>Brushless</strong> <strong>50</strong> <strong>040</strong> <strong>9000</strong>
Contents<br />
Preface .......................................................................................... 2<br />
Included Items .............................................................................. 3<br />
Safety Precautions ....................................................................... 4<br />
Additional Items Needed for Starting the Model ........................ 5<br />
Tools Needed for the Assembly ................................................... 6<br />
a. Chassis ..................................................................................... 6<br />
b. Removing Body ........................................................................ 7<br />
c. Installation of Antenna ............................................................. 7<br />
d. Loading Battery ....................................................................... 8<br />
e. Insert Battery ............................................................................ 8<br />
f. Turn the Power Switch on ....................................................... 8<br />
g. How to Control Your Model ................................................... 10<br />
h. How to Change Frequencies ................................................. 11<br />
i. Troubleshooting ..................................................................... 11<br />
Assembly ................................................................................... 52<br />
Screws ........................................................................................ 68<br />
Spare parts ................................................................................. 69<br />
Tuning parts ................................................................................ 73<br />
GB<br />
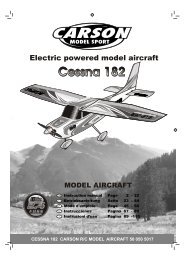
Included<br />
Items<br />
Transmitter<br />
(only for RTR version)<br />
Model<br />
<strong>CARSON</strong> <strong>Specter</strong> <strong>Two</strong> <strong>Brushless</strong> <strong>50</strong> <strong>040</strong> <strong>9000</strong><br />
3
GB<br />
Safety precautions<br />
Radio controlled models are not toys,<br />
operating them has to be learned step by<br />
step.<br />
• Children less than 14 years of age should drive the model<br />
only together with a supervising adult.<br />
Driving a radio controlled car is a fascinating hobby which has<br />
to be practised with the necessary caution and respect.<br />
A radio controlled model car can cause damage and injuries in<br />
case of uncontrolled driving conditions and the user is liable for<br />
this.<br />
• Make sure that you have sufficient insurance coverage in<br />
practising your hobby.<br />
Only a well maintained model will<br />
function in a correct manner.<br />
• Only use approved spare parts and never fit any unsuitable<br />
items.<br />
It is the user’s responsibility to ensure that the model is<br />
functioning correctly and that all nuts, bolts and screws are<br />
properly tightened.<br />
Never start driving before you have made<br />
sure the following points:<br />
• Batteries for transmitter and receiver are well charged and of<br />
the correct voltage.<br />
• Always check the radio operation before starting the car.<br />
• Make sure that all Servos respond correctly to the signals of<br />
the transmitter.<br />
• All operable parts are in good condition and you have tested<br />
their operation.<br />
• You have made sure that all screws are tightened.<br />
• There is no other RC or similar transmitter nearby which<br />
could cause interference.<br />
Any further radio signal on the same frequency can cause<br />
the loss of control for your model.<br />
Always switch on the transmitter first to<br />
avoid any uncontrolled reaction of the<br />
receiver to a foreign radio impulse.<br />
• Fully extend the transmitter antenna and make sure that<br />
nobody in your environment controls a model with the same<br />
frequency (number on the crystal) and that there is no<br />
discernable interference.<br />
To end the operation switch off the<br />
receiver first, then the transmitter.<br />
• Keep your car away from high voltage cables or radio masts.<br />
Never use the model when lightning is present.<br />
• Atmospheric disturbances can affect the signals of your<br />
remote controlling transmitter.<br />
• Do not use the model in wet areas. The electrical connection<br />
of the model is not waterproof. Therefore do not drive while<br />
raining, snowing, in puddles or wet grass.<br />
Always avoid running radio control models in restricted,<br />
confined or populated areas.<br />
• Keep away from roads, highways, people and animals!<br />
Choose a sufficiently open & large area; it should be free of<br />
obstacles.<br />
Do not drive, if you are overtired or your reactivity is impaired in<br />
another way.<br />
• Watch your model constantly and do not become distracted.<br />
The body shell should be correctly attached to the vehicle<br />
before driving.<br />
• Allow cooling time for the engine components before<br />
removing the body shell.<br />
These parts become extremely hot during operation and<br />
could cause serious injury.<br />
Pay attention to charge announcement of your transmitter.<br />
• Ensure that the batteries for the radio and receiver are fully<br />
charged and of the correct voltage. When the batteries are<br />
running low you might loose control of your model.<br />
Never use fully loaded batteries and batteries which have<br />
already run low, or batteries of a different capacity at the same<br />
time.<br />
• Never load batteries which are not rechargeable<br />
If not using the model for a longer time,<br />
the rechargeable battery for driving has<br />
to be removed absolutely.<br />
4<br />
<strong>CARSON</strong> <strong>Specter</strong> <strong>Two</strong> <strong>Brushless</strong> <strong>50</strong> <strong>040</strong> <strong>9000</strong>
Finally<br />
Please read the instructions before operating your model.<br />
Each time you have finished driving the model, always check<br />
the correct operation of the components. A single loose screw<br />
can result in a dangerous situation for your model. Maintain<br />
your model regularly and replace damaged or worn out parts by<br />
genuine spare parts.<br />
We wish you great fun with your <strong>CARSON</strong><br />
model car!<br />
GB<br />
Additional Items Needed for Starting the Model:<br />
This is a selection and recommendation of the accessory<br />
articles from the firm of <strong>CARSON</strong> Model Sport.<br />
To operate the RC car you require:<br />
• 1x 7.2 V drive battery or 7,4 V/ 11,1 V LiPo battery<br />
• 8x mignon batteries or rechargeable batteries for the<br />
transmitter<br />
• 1x plug-in charger or tabletop charger for the drive battery<br />
For the transmitter:<br />
N o <strong>50</strong> 060 9002 x2<br />
8 mignon batteries<br />
1600 mAh or<br />
N o <strong>50</strong> 060 <strong>9000</strong> x2<br />
8 mignon batteries<br />
2300 mAh<br />
Drive battery: racing pack 7.4 V<br />
e.g.<br />
N o <strong>50</strong> 060 8088<br />
Power pack<br />
7.4 V/ 3600 mAh<br />
Drive battery: racing pack 11.1 V<br />
e.g.<br />
N o <strong>50</strong> 060 8091<br />
Power pack<br />
11.1 V/ 3200 mAh<br />
Drive battery: racing pack 7.4 V<br />
e.g.<br />
N o <strong>50</strong> 060 8089<br />
Power pack<br />
7.4 V/ 4000 mAh<br />
Drive battery: racing pack 7.4 V<br />
e.g.<br />
N o <strong>50</strong> 060 8090<br />
Power pack<br />
7.4 V/ 4600 mAh<br />
Charger unit:<br />
e.g.<br />
N o <strong>50</strong> 060 6<strong>040</strong><br />
Expert<br />
Charger<br />
Sport<br />
Charger unit: e.g.<br />
N o <strong>50</strong> 060 6041<br />
Expert Charger<br />
Pro<br />
Charger unit: e.g.<br />
N o <strong>50</strong> 060 6042<br />
Expert Charger<br />
Master<br />
<strong>CARSON</strong> <strong>Specter</strong> <strong>Two</strong> <strong>Brushless</strong> <strong>50</strong> <strong>040</strong> <strong>9000</strong><br />
5
GB<br />
Tools Needed for the Assembly<br />
Modelling knife 74053<br />
Instant adhesive 53339<br />
Needle nose pliers 74034<br />
Scissors 13305<br />
Philips screwdriver<br />
(small and big)<br />
1,5 / 2 / 2,5 mm 74023<br />
Hexagonal wrench 13118<br />
Tweezers 74003<br />
Side cutter 74035<br />
a. Chassis<br />
Spoiler<br />
On-/Off switch<br />
Receiver<br />
Speed controller<br />
Rear shock<br />
unit<br />
Front tyre<br />
Steering servo<br />
Rear tyre<br />
Drive battery<br />
<strong>Brushless</strong> Motor<br />
Suspension arm<br />
Front shock unit<br />
6<br />
<strong>CARSON</strong> <strong>Specter</strong> <strong>Two</strong> <strong>Brushless</strong> <strong>50</strong> <strong>040</strong> <strong>9000</strong>
. Removing Body<br />
• Remove hook pin and<br />
• Take body off<br />
GB<br />
c. Installation of Antenna<br />
• Thread the antenna cord through the antenna pipe and<br />
• Put the antenna pipe into the antenna foot on the chassis<br />
Antenna pipe<br />
Antenna cord<br />
<strong>CARSON</strong> <strong>Specter</strong> <strong>Two</strong> <strong>Brushless</strong> <strong>50</strong> <strong>040</strong> <strong>9000</strong><br />
7
GB<br />
d. Loading Battery<br />
Beware:<br />
Only use the specially provided charger units to charge the<br />
batteries.<br />
Otherwise your drive battery could be damaged. We<br />
recommend the <strong>CARSON</strong> Expert charger N o <strong>50</strong> 060 6<strong>040</strong>,<br />
<strong>50</strong> 060 6041 and <strong>50</strong> 060 6042.<br />
The charging time will vary according to the charger unit and<br />
battery type.<br />
e. Insert Battery<br />
• Legen Sie den Akku ein.<br />
• Put the battery holder on it and<br />
• Fix it with the hook pins.<br />
Advice<br />
• Non-rechargeable batteries are not to be recharged.<br />
• Rechargeable batteries are to be removed from the toy<br />
before being charged.<br />
• Rechargeable batteries are only to be charged under adult<br />
supervision.<br />
• Batteries are to be inserted with the correct polarity.<br />
• Exhausted batteries are to be removed from the toy.<br />
• The supply terminals are not to be short-circuited.<br />
• Regular examination of transformer or battery charger for<br />
any damage to their cord, plug, enclosure and other parts.<br />
f. Turn the Power Switch on<br />
• Pull the transmitter antenna out completely.<br />
The range of the remote control is reduced if the antenna is<br />
not pulled out completely.<br />
8<br />
<strong>CARSON</strong> <strong>Specter</strong> <strong>Two</strong> <strong>Brushless</strong> <strong>50</strong> <strong>040</strong> <strong>9000</strong>
CAUTION!<br />
Always turn the transmitter’s power<br />
switch ON first!<br />
GB<br />
ON<br />
1 Connect the rechargeable battery for the driving.<br />
2 Switch on the receiver.<br />
3 Put the body on and fix it with the body split pins.<br />
1<br />
2<br />
on<br />
3<br />
<strong>CARSON</strong> <strong>Specter</strong> <strong>Two</strong> <strong>Brushless</strong> <strong>50</strong> <strong>040</strong> <strong>9000</strong><br />
9
GB<br />
g. How to Control Your Model<br />
• Raise the tyres off the ground.<br />
• Turn the steering wheel to the right and left as far as it will<br />
go. The wheels are to follow the steering direction.<br />
• If the wheels operate in the opposite direction, operate the<br />
servo Reverse switch (ST in position REV).<br />
Neutral<br />
Left<br />
Left Right<br />
Right<br />
• For regulating the driving speed operate the gas/brake<br />
- lever to the rear (driving forward, to give speed)<br />
- and/or forward (braking, reverse movement)<br />
driving forward,<br />
to give speed<br />
braking, reverse<br />
movement<br />
10<br />
<strong>CARSON</strong> <strong>Specter</strong> <strong>Two</strong> <strong>Brushless</strong> <strong>50</strong> <strong>040</strong> <strong>9000</strong>
h. How to Change Frequencies<br />
Transmitter<br />
A rapid change of frequencies is possible simply by unplugging<br />
an interchangeable plug in crystal on the back of the<br />
transmitter and then<br />
plugging in another one Crystal<br />
of a different frequency.<br />
Crystals for both the<br />
transmitter and receiver<br />
must be matched with<br />
each other.<br />
Make sure that the<br />
crystal is fully inserted<br />
in the transmitter and<br />
receiver, not partially.<br />
T X<br />
B A N D<br />
2<br />
27<br />
FM<br />
Receiver<br />
Plug in an interchangeable crystal into the receiver for a rapid<br />
change of frequencies.<br />
Crystal<br />
GB<br />
i. Troubleshooting<br />
Problem Cause Correction<br />
Model doesn´t move Transmitter or chassis power switch is not „ON“ Switch power on<br />
Polarity or battery type is wrong<br />
Check polarity and type<br />
Batteries have run down<br />
Change batteries or charge them<br />
Loss of control Batteries have run down Change batteries or charge them<br />
Antenna is missing or not attached properly Attach antenna and extend transmitter<br />
antenna to full length<br />
R/C model using same band (frequency) is Run model in different area or change crystal<br />
nearby<br />
Doesn´t run straight Steering trim is not adjusted correctly Make adjustment<br />
Front and rear wheel nuts are too lose<br />
Tighten wheel nuts<br />
Doesn´t stop Throttle trim is not adjusted correctly Make adjustment<br />
Doesn´t reverse Throttle trim is not adjusted correctly Make adjustment<br />
Wrong action<br />
Control properly<br />
Running too slowly Batteries have run down Change batteries or charge them<br />
Motor has lost power<br />
Change to spare motor<br />
Rear wheel nuts are too loose<br />
Tighten wheel nuts<br />
Dust or foreign objects are inside gears<br />
Turn the power switch „OFF“ and clean out<br />
gears<br />
<strong>CARSON</strong> <strong>Specter</strong> <strong>Two</strong> <strong>Brushless</strong> <strong>50</strong> <strong>040</strong> <strong>9000</strong><br />
11
D<br />
Sehr geehrter Kunde<br />
Wir beglückwünschen Sie zum Kauf Ihres <strong>CARSON</strong> RC-Modellautos,<br />
das nach dem heutigen Stand der Technik gefertigt<br />
wurde.<br />
Da wir stets um Weiterentwicklung und Verbesserung unserer<br />
Produkte bemüht sind, behalten wir uns eine Änderung in technischer<br />
Hinsicht und in Bezug auf Ausstattung, Materialien und<br />
Design jederzeit und ohne Ankündigung vor.<br />
Aus geringfügigen Abweichungen des Ihnen vorliegenden<br />
Produktes gegenüber Daten und Abbildungen dieser Anleitung<br />
können daher keinerlei Ansprüche abgeleitet werden.<br />
Diese Bedienungs- und Montageanleitung ist Bestandteil des<br />
Produkts. Bei Nichtbeachtung der Bedienungsanleitung und<br />
der enthaltenen Sicherheitsanweisungen erlischt der Garantieanspruch.<br />
Bewahren Sie diese Anleitung zum Nachlesen und<br />
für die even tuelle Weitergabe des Modells an Dritte auf.<br />
Garantiebedingungen<br />
Für dieses Produkt leistet <strong>CARSON</strong> eine Garantie von 24<br />
Monaten betreffend Fehler bei der Herstellung in Bezug auf<br />
Material und Fertigung bei normalem Gebrauch ab dem Kauf<br />
beim autorisierten Fachhändler. Im Falle eines Defekts während<br />
der Garantiezeit bringen Sie das Modell zusammen mit dem<br />
Kaufbeleg zu Ihrem Fachhändler.<br />
<strong>CARSON</strong> wird nach eigener Entscheidung, falls nicht anders im<br />
Gesetz vorgesehen:<br />
(a) Den Defekt durch Reparatur kostenlos in Bezug auf Material<br />
und Arbeit beheben;<br />
(b) Das Produkt durch ein gleichartiges oder im Aufbau<br />
ähnliches ersetzen; oder<br />
(c) Den Kaufpreis erstatten.<br />
Alle ersetzten Teile und Produkte, für die Ersatz geleistet wird,<br />
werden zum Eigentum von <strong>CARSON</strong>. Im Rahmen der Garantieleistungen<br />
dürfen neue oder wiederaufbereitete Teile verwendet<br />
werden.<br />
Auf reparierte oder ersetzte Teile gilt eine Garantie für die<br />
Restlaufzeit der ursprünglichen Garantiefrist. Nach Ablauf<br />
der Garantiefrist vorgenommene Reparaturen oder gelieferte<br />
Ersatzteile werden in Rechnung gestellt.<br />
Von der Garantie ausgeschlossen sind:<br />
• Beschädigung oder Ausfall durch Nichtbeachten der Sicherheitsanweisungen<br />
oder der Bedienungsanleitung, höhere<br />
Gewalt, Unfall, fehlerhafte oder außergewöhnliche<br />
Beanspruchung, fehlerhafte Handhabung, eigenmächtige<br />
Veränderungen, Blitzschlag oder anderer Einfluss von<br />
Hochspannung oder Strom.<br />
• Schäden, die durch den Verlust der Kontrolle über Ihr<br />
Fahrzeug entstehen.<br />
• Reparaturen, die nicht durch einen autorisierten <strong>CARSON</strong><br />
Service durchgeführt wurden<br />
• Verschleißteile wie etwa Sicherungen und Batterien<br />
• rein optische Beeinträchtigungen<br />
• Transport-, Versand- oder Versicherungskosten<br />
• Kosten für die Entsorgung des Produkts sowie Einrichten<br />
und vom Service vorgenommene Einstell- und Wiedereinrichtungsarbeiten.<br />
Durch diese Garantie erhalten Sie spezielle Rechte, darüber<br />
hinaus ist auch eine von Land zu Land verschiedene Geltendmachung<br />
anderer Ansprüche denkbar.<br />
Konformitätserklärung<br />
Hiermit erklärt <strong>CARSON</strong> Modelsport, dass sich dieses Modell<br />
einschließlich Fernsteueranlage in Übereinstimmung mit den<br />
grund legenden Anforderungen folgender EG-Richtlinien:<br />
98/37EG für Maschinen und 89/336/EWG über die elektromagnetische<br />
Verträglichkeit und den anderen relevanten<br />
Vorschriften der Richtlinie 1999/5/EG (R&TTE) befindet.<br />
Die Original-Konformitätserklärung kann angefordert werden.<br />
Bedeutung des Symbols auf dem Produkt,<br />
der Verpackung oder Gebrauchsanleitung:<br />
Elektrogeräte sind Wertstoffe und gehören<br />
am Ende der Laufzeit nicht in den Hausmüll!<br />
Helfen Sie uns bei Umweltschutz und Recourcenschonung<br />
und geben Sie dieses Gerät bei<br />
den entsprechenden Rücknahmestellen ab.<br />
Fragen dazu beanwortet Ihnen die für Abfallbeseitigung<br />
zuständige Organisation oder Ihr Fachhändler.<br />
Wir wünschen Ihnen viel Spaß mit Ihrem <strong>CARSON</strong><br />
Modellauto und jederzeit gute Fahrt!<br />
Vor dem Gebrauch Ihres neuen Modells lesen Sie bitte dieses Handbuch<br />
sorgfältig durch!<br />
12<br />
<strong>CARSON</strong> <strong>Specter</strong> <strong>Two</strong> <strong>Brushless</strong> <strong>50</strong> <strong>040</strong> <strong>9000</strong>
Inhalt<br />
Vorwort ........................................................................................ 12<br />
Lieferumfang ............................................................................... 13<br />
Sicherheitsanweisungen ............................................................ 14<br />
Zum Betreiben des Fahrzeugs erforderliches Zubehör ............ 15<br />
Für den Zusammenbau erforderliches Werkzeug ..................... 16<br />
a. Chassis ................................................................................... 16<br />
b. Abnehmen der Karosserie ..................................................... 17<br />
c. Einbau der Antenne ............................................................... 17<br />
d. Laden des Fahrakkus ............................................................ 18<br />
e. Einbau des Fahrakkus ........................................................... 18<br />
f. Einschalten der RC-Anlage ................................................... 18<br />
g. Steuern des Modells .............................................................. 20<br />
h. Wechseln der Sendefrequenz ............................................... 21<br />
i. Fehlersuchtabelle ................................................................... 21<br />
Montageanleitung ....................................................................... 52<br />
Schrauben ................................................................................... 68<br />
Ersatzteile ................................................................................... 69<br />
Tuningteile ................................................................................... 73<br />
D<br />
Lieferumfang<br />
Sender<br />
(nur bei RTR-Version)<br />
Modell<br />
<strong>CARSON</strong> <strong>Specter</strong> <strong>Two</strong> <strong>Brushless</strong> <strong>50</strong> <strong>040</strong> <strong>9000</strong><br />
13
D<br />
Sicherheitsanweisungen<br />
Funkferngesteuerte Modelle sind kein<br />
Spielzeug, ihre Bedienung muss schrittweise<br />
erlernt werden.<br />
• Kinder unter 14 Jahren sollten das Modell nur unter Aufsicht<br />
von Erwachsenen in Betrieb nehmen.<br />
Das Fahren von ferngesteuerten Modellautos ist ein<br />
faszinierendes Hobby, das jedoch mit der nötigen Vorsicht und<br />
Rücksichtnahme betrieben werden muss. Ein ferngesteuertes<br />
Modellauto kann in einem unkontrollierten Fahrzustand<br />
erhebliche Beschädigungen und Verletzungen verursachen, für<br />
die Sie als Betreiber haftbar sind.<br />
• Vergewissern Sie sich bei Ihrer Versicherung, ob Sie beim<br />
Ausüben Ihres Hobbys versichert sind.<br />
Nur ein einwandfrei zusammengebautes<br />
Modell wird erwartungsgemäß<br />
funktionieren und reagieren.<br />
• Improvisieren Sie niemals mit untauglichen Hilfsmitteln,<br />
sondern verwenden Sie im Bedarfsfall nur Originalersatzteile.<br />
Auch bei einem vormontierten Modell sollten Sie alle Verbindungen<br />
auf exakten und festen Sitz kontrollieren.<br />
Fahren Sie niemals, ohne sich von den<br />
folgenden Punkten überzeugt zu haben:<br />
• Fahrakku und Senderakku müssen vollständig geladen sein.<br />
• Überprüfen Sie vor dem Start die Funkreichweite.<br />
• Überprüfen Sie das ordnungsgemäße Ansprechen der<br />
Servos auf die Steuersignale.<br />
• Alle Funktionsteile des Fahrzeugs sind in einwandfreiem<br />
Zustand und überprüft.<br />
• Sämtliche Schrauben sind auf festen Sitz überprüft.<br />
• Es ist kein RC- oder anderer Sender in der Nähe in Betrieb,<br />
der Funkstörungen verursachen könnte.<br />
Störsignale auf gleicher Frequenz können bewirken, dass Sie<br />
die Kontrolle über Ihr Modell verlieren.<br />
Schalten Sie immer zuerst den Sender<br />
ein, um zu vermeiden, dass der<br />
Empfänger unkontrolliert auf ein fremdes<br />
Funksignal reagiert.<br />
• Bei gleichzeitigem Betrieb mehrerer Fahrzeuge darf das<br />
Modell nur auf einer freien Frequenz betrieben werden.<br />
Schalten Sie nach Beendigung des Fahrbetriebes<br />
zuerst den Empfänger, dann<br />
den Sender aus.<br />
• Fahren Sie auch nicht unter Hochspannungsleitungen oder<br />
Funkmasten oder bei Gewitter!<br />
• Atmosphärische Störungen können die Signale Ihres Fernsteuersenders<br />
beeinflussen.<br />
• Die Elektrik des Modells ist nicht wasserdicht. Fahren Sie<br />
deshalb nicht bei Regen, Schnee,durch Pfützen oder nasses<br />
Gras.<br />
Das ferngesteuerte Modell darf nur auf geeignetem Gelände<br />
und nicht auf öffentlichen Vekehrsflächen betrieben werden.<br />
• Nicht in der Nähe von Personen und Tieren fahren!<br />
Fahren Sie nicht, wenn sie übermüdet oder anderweitig in Ihrer<br />
Reaktionsfähigkeit beeinträchtigt sind.<br />
• Halten Sie immer direkten Sichtkontakt zum Modell.<br />
Fahren sie das Modell nur mit ordnungsgemäß angebrachter<br />
Karosserie.<br />
• Das Modell hat Teile, die sich im Betrieb erhitzen, z. B. der<br />
Motor.<br />
Die Berührung dieser Teile während des Betriebs kann zu<br />
Verletzungen führen.<br />
Achten Sie auf Ladezustandsanzeige Ihres Senders.<br />
• Mit halbleeren Akkus können sie die Kontrolle über das<br />
Modell verlieren.<br />
Mischen Sie im Sender niemals volle Akkus / Batterien mit<br />
halbleeren oder Akkus unterschiedlicher Kapazität.<br />
• Versuchen Sie nie, Trockenbatterien zu laden.<br />
Bei längerem Nichtgebrauch ist der Fahr-<br />
Akku unbedingt zu entfernen.<br />
14<br />
<strong>CARSON</strong> <strong>Specter</strong> <strong>Two</strong> <strong>Brushless</strong> <strong>50</strong> <strong>040</strong> <strong>9000</strong>
Zum Schluss<br />
Bitte lesen Sie diese Betriebsanleitung sorgfältig durch, bevor<br />
Sie irgendwelche Arbeiten beginnen.<br />
Nach jeder Fahrt sollten Sie die wichtigsten Bauteile und Verbindungen<br />
überprüfen. Eine einzige gelockerte Schraube kann<br />
ausreichen, um Ihr Modell in eine gefährliche Situation geraten<br />
zu lassen! Warten Sie Ihr Modell regelmäßig und wechseln Sie<br />
defekte oder abgenutzte Bauteile gegen Original-Ersatzteile<br />
aus.<br />
Wir wünschen Ihnen viel Spaß mit Ihrem<br />
<strong>CARSON</strong>-Modellauto und jederzeit gute<br />
Fahrt!<br />
D<br />
Zum Betreiben des Fahrzeugs erforderliches<br />
Zubehör:<br />
Dies ist eine Auswahl und Empfehlung der Zubehörartikel der<br />
Firma <strong>CARSON</strong>-Modelsport.<br />
Zum Betrieb des RC-Cars benötigen Sie:<br />
Für den Sender: N o <strong>50</strong> 060 9002 x2<br />
8 Stück Mignonakkus<br />
1600 mAh<br />
oder<br />
• 1x 7,2 V Fahrakku oder 7,4 V/ 11,1 V LiPo-Akku<br />
• 8x Mignon Batterien oder Akkus für den Sender<br />
• 1x Steckerlader oder Tischladegerät für den Fahrakku<br />
N o <strong>50</strong> 060 <strong>9000</strong> x2<br />
8 Stück Mignonakkus<br />
2300 mAh<br />
Fahrakku: Racing Pack 7,4 V<br />
z.B.<br />
N o <strong>50</strong> 060 8088<br />
Powerpack<br />
7,4 V/ 3600 mAh<br />
Fahrakku: Racing Pack 11,1 V<br />
z.B.<br />
N o <strong>50</strong> 060 8091<br />
Powerpack<br />
11,1 V/ 3200 mAh<br />
Fahrakku: Racing Pack 7,4 V<br />
z.B.<br />
N o <strong>50</strong> 060 8089<br />
Powerpack<br />
7,4 V/ 4000 mAh<br />
Fahrakku: Racing Pack 7,4 V<br />
z.B.<br />
N o <strong>50</strong> 060 8090<br />
Powerpack<br />
7,4 V/ 4600 mAh<br />
Ladegerät: z.B.<br />
N o <strong>50</strong> 060 6<strong>040</strong><br />
Expert Charger<br />
Sport<br />
Ladegerät: z.B.<br />
N o <strong>50</strong> 060 6041<br />
Expert Charger<br />
Pro<br />
Ladegerät: z.B.<br />
N o <strong>50</strong> 060 6042<br />
Expert Charger<br />
Master<br />
<strong>CARSON</strong> <strong>Specter</strong> <strong>Two</strong> <strong>Brushless</strong> <strong>50</strong> <strong>040</strong> <strong>9000</strong><br />
15
Für den Zusammenbau erforderliches Werkzeug<br />
Modellbaumesser 74053<br />
Sekundenkleber 53339<br />
Spitzzange 74034<br />
Schere 13305<br />
D<br />
Kreuzschlitz-Schraubendreher<br />
(klein und groß)<br />
und Inbusschlüssel<br />
1,5 / 2 / 2,5 mm 74023<br />
Kreuzschlüssel 13118<br />
Pinzette 74003<br />
Seitenschneider 74035<br />
a. Chassis<br />
Spoiler<br />
Ein-/Aus-Schalter<br />
Empfänger<br />
Regler<br />
Hinterer<br />
Stoßdämpfer<br />
Vorderreifen<br />
Lenkservo<br />
Fahrakku<br />
Hinterreifen<br />
<strong>Brushless</strong> Motor<br />
Querlenker<br />
Vorderer Stoßdämpfer<br />
16<br />
<strong>CARSON</strong> <strong>Specter</strong> <strong>Two</strong> <strong>Brushless</strong> <strong>50</strong> <strong>040</strong> <strong>9000</strong>
. Abnehmen der Karosserie<br />
• Ziehen Sie die Karosseriesplinte heraus und<br />
• Nehmen Sie die Karosserie ab.<br />
D<br />
c. Einbau der Antenne<br />
• Fädeln Sie den Antennendraht durch das Antennenrohr und<br />
• Stecken Sie das Antennenrohr in den Antennenfuß auf dem<br />
Chassis.<br />
Antennenrohr<br />
Antennendraht<br />
<strong>CARSON</strong> <strong>Specter</strong> <strong>Two</strong> <strong>Brushless</strong> <strong>50</strong> <strong>040</strong> <strong>9000</strong><br />
17
D<br />
d. Laden des Fahrakkus<br />
Achtung:<br />
Verwenden Sie zum Laden der Akkus nur dafür speziell vorgesehene<br />
Ladegeräte.<br />
Ansonsten kann Ihr Fahrakku beschädigt werden. Wir<br />
empfehlen die <strong>CARSON</strong> Expert-Ladegeräte N o <strong>50</strong> 060 6<strong>040</strong>,<br />
<strong>50</strong> 060 6041 und <strong>50</strong> 060 6042.<br />
Die Ladezeit ist je nach Ladegerät und Akkutyp unterschiedlich.<br />
e. Einbau des Fahrakkus<br />
• Legen Sie den Akku ein.<br />
• Setzen Sie die Akkuhalterung auf und<br />
• Fixieren Sie mit den Splinten.<br />
Hinweis<br />
• Trocken-Batterien sind nicht wiederaufladbar.<br />
• Wiederaufladbare Akkus müssen vor dem Aufladen aus<br />
dem Modell genommen werden.<br />
• Laden nur unter Aufsicht eines Erwachsenen.<br />
• Beim einlegen der Akkus/ Batterien auf die richtige Polarität<br />
achten.<br />
• Leere Batterien/ Akkus immer nach Gebrauch aus dem<br />
Modell entfernen.<br />
• Die Anschlusskabel dürfen nicht kurzgeschlossen werden.<br />
• Bitte überprüfen Sie regelmäßig die Elektronik oder Akkus,<br />
Ladegerät, Anschlussstecker, Kabel, Gehäuse und andere<br />
Teile auf Schäden.<br />
f. Einschalten der RC-Anlage<br />
• Ziehen Sie die Senderantenne ganz heraus<br />
Bei nicht vollständig herausgezogener Antenne verringert<br />
sich die Reichweite der Fernsteuerung.<br />
18<br />
<strong>CARSON</strong> <strong>Specter</strong> <strong>Two</strong> <strong>Brushless</strong> <strong>50</strong> <strong>040</strong> <strong>9000</strong>
ACHTUNG!<br />
Immer zuerst den Sender einschalten!<br />
ON<br />
D<br />
1 Schließen Sie den Fahrakku an.<br />
2 Schalten Sie den Empfänger ein.<br />
3 Setzen Sie die Karosserie auf und sichern Sie mit den<br />
Karosseriesplinten.<br />
1<br />
2<br />
on<br />
3<br />
<strong>CARSON</strong> <strong>Specter</strong> <strong>Two</strong> <strong>Brushless</strong> <strong>50</strong> <strong>040</strong> <strong>9000</strong><br />
19
D<br />
g. Steuern des Modells<br />
• Stellen Sie das Modell so ab, dass die Räder frei in der Luft<br />
hängen.<br />
• Drehen Sie das Steuerrad bis zum Anschlag nach rechts und<br />
links. Die Räder sollen dem Lenkausschlag folgen.<br />
• Schlagen die Räder entgegengesetzt ein, betätigen sie den<br />
Servo-Reverse Schalter (ST in Position REV).<br />
Neutral<br />
Links<br />
Links Rechts<br />
Rechts<br />
• Zum Regeln der Fahrgeschwindigkeit betätigen Sie den<br />
Gas/Bremshebel<br />
- nach hinten (Vorwärtsfahrt, Gas geben) bzw.<br />
- nach vorne (Bremsen, Rückwärtsfahrt).<br />
Vorwärtsfahrt/<br />
Gas geben<br />
Bremsen/<br />
Rückwärtsfahrt<br />
20<br />
<strong>CARSON</strong> <strong>Specter</strong> <strong>Two</strong> <strong>Brushless</strong> <strong>50</strong> <strong>040</strong> <strong>9000</strong>
h. Wechseln der Sendefrequenz<br />
Sender<br />
Ein schneller Wechsel der Sendefrequenz ist möglich durch<br />
Austauschen des Steckquarzes auf der Senderrückseite.<br />
Sender- und<br />
Empfänger quarz müssen<br />
exakt aufeinander<br />
Senderquarz<br />
abgestimmt sein.<br />
Stellen Sie sicher, dass<br />
der Quarz vollständig<br />
eingesteckt ist und fest<br />
sitzt.<br />
Empfänger<br />
Stecken Sie einen Empfängerquarz in den Empfänger.<br />
Empfängerquarz<br />
D<br />
T X<br />
B A N D<br />
2<br />
27<br />
FM<br />
i. Fehlersuchtabelle<br />
Fehler Ursache Behebung<br />
Das Modell fährt nicht Sender oder Empfänger sind nicht eingeschaltet Schalten sie den Sender oder Empfänger ein<br />
Polarität der Akkus oder Akkutyp sind falsch Prüfen Sie die Polarität und den Akkutyp<br />
Kontrollverlust<br />
Modell fährt nicht<br />
geradeaus<br />
Modell bleibt nicht stehen<br />
Modell fährt nicht rückwärts<br />
Batterien / Akkus sind schwach oder ganz<br />
entleert<br />
Batterien / Akkus sind schwach oder ganz<br />
entleert<br />
Antenne fehlt oder ist nicht richtig befestigt<br />
In der Nähe wird ein anderes Modell auf der<br />
gleichen Frequenz betrieben.<br />
Lenkungstrim ist nicht korrekt eingestellt<br />
Radmuttern sind lose<br />
Trimmung für den Gas/Bremshebel ist nicht<br />
korrekt eingestellt<br />
Trimmung für den Gas/Bremshebel ist nicht<br />
korrekt eingestellt<br />
Falsche Bedienung<br />
Tauschen Sie die Batterien aus bzw. tauschen<br />
Sie die Akkus oder laden sie die Akkus neu<br />
Tauschen Sie die Batterien aus bzw. tauschen<br />
Sie die Akkus oder laden sie die Akkus neu<br />
Befestigen sie die Empfängerantenne und/<br />
oder schrauben Sie die Senderantenne fest<br />
Fahren Sie woanders oder wechseln Sie die<br />
Frequenz<br />
Justieren Sie die Trimmung am Drehknopf<br />
Ziehen Sie die Radmuttern fest an<br />
Justieren Sie die Trimmung<br />
Justieren Sie die Trimmung<br />
Steuern sie richtig<br />
Modell fährt zu langsam Batterien / Akkus sind schwach Tauschen Sie die Batterien aus bzw. tauschen<br />
Sie die Akkus oder laden sie die Akkus neu<br />
Motor hat an Leistung verloren<br />
Tauschen Sie den Motor aus<br />
Die hinteren Radmuttern sind lose<br />
Ziehen Sie die Radmuttern fest an<br />
Staub / Fremdkörper ist in das Getriebe gelangt Schalten Sie das Modell aus und reinigen Sie<br />
das Getriebe<br />
<strong>CARSON</strong> <strong>Specter</strong> <strong>Two</strong> <strong>Brushless</strong> <strong>50</strong> <strong>040</strong> <strong>9000</strong><br />
21
Cher client<br />
Toutes nos félicitations pour l’acquisition de votre voiture<br />
en modèle réduit <strong>CARSON</strong> RC, un modèle dernier cri. En<br />
vertu de notre engagement pour un développement et une<br />
amélioration continus de nos produits, nous nous réservons le<br />
droit d’effectuer des modifications dans les spécifications de<br />
nos équipements, nos matériaux et de notre conception à tout<br />
moment et sans avertissement préalable. Les spécifications ou<br />
les versions du produit acheté peuvent différer de celles<br />
affichées dans le manuel ou sur l’emballage. Le présent manuel<br />
fait partie du produit. Tout non-respect des instructions et des<br />
consignes de sécurité qui y sont incluses dispense le fabricant<br />
de toute garantie. Conserver le présent manuel comme<br />
document de référence, et également pour pouvoir le<br />
transmettre par la suite à un tiers avec la voiture.<br />
F<br />
Conditions de garantie<br />
<strong>CARSON</strong> vous garantit pour 24 mois à partir de la date d’achat<br />
(pièces justificatives à l’appui) que la voiture est exempte de<br />
tout défaut. L’utilisation inappropriée, l’usure des éléments au<br />
cours de l’utilisation, les transformations de votre propre chef,<br />
l’application ou l’utilisation incorrecte, l’endommagement des<br />
batteries ou d’autres équipements au cours de l’utilisation ou<br />
l’emploi abusif un l’endommagement causé par le transport,<br />
n’est pas couvert par la responsabilité civile. Notre garantie se<br />
limite à la réparation ou à l’échange des appareils dans l’état<br />
original et à la hauteur du prix d’achat. L’utilisateur de la voiture<br />
assume tous les risques en rapport avec l’utilisation de la<br />
voiture. Nous nous réservons le droit de modifier ces<br />
conditions de garantie à tout moment et sans préavis. En cas<br />
de réclamation veuillez contacter votre revendeur spécialisé.<br />
La garantie ne couvre pas:<br />
• Tout dommage ou défaillance causé par force majeure,<br />
abus, accident, utilisation abusive, erronée ou anormale, non<br />
respect des instructions, mauvaise mise en route ou<br />
maintenance insuffisante, altération, éclair ou tout autre<br />
conséquence d’une surtension ou d’un courant excessif ;<br />
• Tout dommage provoqué par la perte de contrôle de la<br />
voiture ;<br />
• Toute réparation autre que celles réalisées par un organisme<br />
agrée par <strong>CARSON</strong> ;<br />
• Les consommables tels que les fusibles et les batteries ;<br />
• Des dommages esthétiques ;<br />
• Le transport, l’expédition et les frais d’assurance ; et<br />
• Les frais de retour, d’installation, de mise au point et de<br />
remise en route du produit<br />
Cette garantie vous attribue des droits spécifiques, vous<br />
pouvez par ailleurs également prétendre à d’autres droits en<br />
fonction du pays d’achat.<br />
Déclaration de conformité<br />
Dickie-Tamiya GmbH & Co. KG déclare par la présente que ce<br />
kit de modélisme, avec émetteur, moteur, batterie et chargeur<br />
respecte les exigences de base des directives européennes<br />
suivantes : 98/37 EG et 89/336/EWG ainsi que les autres<br />
régulations de la directive 1999/5/EG (R&TTE).<br />
La déclaration de conformité originale peut être demandée à<br />
l’adresse suivante :<br />
Dickie-Tamiya GmbH & Co. KG • Werkstraße 1 • D-90765 Fürth<br />
• ALLEMAGNE<br />
Signification du symbole se trouvant sur le produit, l’emballage<br />
et le mode d’emploi :<br />
Les appareils électroniques sont des produits<br />
de valeur et ne doivent pas être éliminés avec<br />
les autres déchets ménagers une fois<br />
parvenus à la fin de leur cycle de vie. Aideznous<br />
à préserver l’environnement et à<br />
respecter nos ressources en remettant cet<br />
appareil aux points de recyclage concernés.<br />
Nous vous souhaitons beaucoup de plaisir avec la conduite de<br />
votre modèle réduit <strong>CARSON</strong>.<br />
Lire attentivement ces instructions avant d’utiliser ce nouveau modèle réduit.<br />
22<br />
<strong>CARSON</strong> <strong>Specter</strong> <strong>Two</strong> <strong>Brushless</strong> <strong>50</strong> <strong>040</strong> <strong>9000</strong>
Contenu<br />
Préface ........................................................................................ 22<br />
Périmètre de livraison ................................................................ 23<br />
Consignes de sécurité ............................................................... 24<br />
Articles nécessaires au démarrage du modèle ......................... 25<br />
Outils nécessaires au montage de la voiture ............................ 26<br />
a. Châssis ................................................................................... 26<br />
b. Retrait de la carrosserie ........................................................ 27<br />
c. Montage de l’antenne ............................................................ 27<br />
d. Charger l’accu moteur ........................................................... 28<br />
e. Montage de l’accu moteur .................................................... 28<br />
f. Allumer l’émetteur .................................................................. 28<br />
g. Conduite de la voiture ........................................................... 30<br />
h. Changer les fréquences ......................................................... 31<br />
i. Tableau de recherche des erreurs ......................................... 31<br />
Assemblage ................................................................................ 52<br />
Vis ................................................................................................ 68<br />
Pièces détachées ....................................................................... 69<br />
Tuning parts ................................................................................ 73<br />
F<br />
Périmètre de<br />
livraison<br />
Emetteur<br />
(uniquement pour la<br />
version RTR)<br />
Modèle<br />
<strong>CARSON</strong> <strong>Specter</strong> <strong>Two</strong> <strong>Brushless</strong> <strong>50</strong> <strong>040</strong> <strong>9000</strong><br />
23
Consignes de sécurité<br />
Les maquettes télécommandées par radio<br />
ne sont pas des jouets et leur utilisation<br />
doit être apprise pas à pas.<br />
• Les enfants de moins de 14 ans ne doivent utiliser la<br />
maquette que sous la surveillance d’adultes.<br />
Les maquettes télécommandées sont un fascinant passetemps,<br />
mais qui exige une certaine prudence et retenue. Une<br />
maquette télécommandée utilisée de manière incontrôlée peut<br />
entraîner des dégradations et des blessures considérables<br />
engageant votre responsabilité en tant qu’utilisateur.<br />
• Assurez-vous auprès de votre assurance que vous êtes<br />
couvert lorsque vous vous adonnez à ce passe-temps.<br />
F<br />
Seules les maquettes bien montées<br />
fonctionnent et réagissent correctement.<br />
• N’improvisez jamais en utilisant des accessoires<br />
inadéquats ; en cas de besoin, utilisez toujours<br />
exclusivement des pièces détachées originales.<br />
Même lorsque vous utilisez une maquette déjà montée,<br />
assurez-vous préalablement que toutes les liaisons sont bien<br />
fixées.<br />
Ne mettez jamais la maquette en route<br />
sans avoir vérifié les points suivants :<br />
• L’accu moteur et l’accu de l’émetteur doivent être<br />
complètement chargés.<br />
• Avant de démarrer, vérifiez la portée de la liaison radio.<br />
• Vérifiez que les servos réagissent correctement aux signaux<br />
de commande.<br />
• Toutes les pièces fonctionnelles du véhicule doivent être en<br />
parfait état et contrôlées.<br />
• Vérifiez que toutes les vis sont bien serrées.<br />
• Il ne doit pas y avoir d’émetteur RC ou autre à proximité, car<br />
cela pourrait entraîner des perturbations de la commande<br />
radio.<br />
Les signaux perturbateurs de même fréquence peuvent vous<br />
faire perdre le contrôle de votre maquette.<br />
Commencez toujours par allumer<br />
l’émetteur pour empêcher que le<br />
récepteur ne réagisse de manière<br />
incontrôlée à un signal radio étranger.<br />
• En cas d’utilisation de plusieurs véhicules, sélectionnez une<br />
fréquence libre pour la commande de la maquette.<br />
Après utilisation, éteignez toujours le<br />
récepteur avant d’éteindre l’émetteur.<br />
• N’utilisez pas la maquette sous des lignes haute tension, des<br />
mâts radio ou pendant des orages !<br />
• Les perturbations atmosphériques peuvent influer sur les<br />
signaux de votre émetteur de commande à distance.<br />
• Le système électrique de la maquette n’est pas étanche. Ne<br />
l’utilisez donc pas par temps de pluie ou de neige, dans des<br />
flaques ou dans de l’herbe mouillée.<br />
La maquette télécommandée ne doit être utilisée que sur un<br />
terrain adapté et non sur des voies de circulation publiques.<br />
• Ne pas utiliser la maquette à proximité de personnes et<br />
d’animaux !<br />
N’utilisez pas la maquette si vous êtes très fatigué ou si vos<br />
capacités de réaction sont restreintes pour une quelconque<br />
raison.<br />
• Gardez toujours le contact visuel avec la maquette.<br />
N’utilisez la maquette que si la carrosserie est correctement<br />
montée.<br />
• Certaines parties de la maquette chauffent en cours<br />
d’utilisation, par exemple le moteur.<br />
Leur contact peut entraîner des blessures.<br />
Faites attention à l’affichage de l’état de charge de votre<br />
émetteur.<br />
• Si les accus sont à moitié déchargés, vous pouvez perdre le<br />
contrôle de la maquette.<br />
Ne mélangez jamais dans l’émetteur des piles pleines et à<br />
moitié vides ou bien des accus de capacité différente.<br />
• N’essayez jamais de charger des piles sèches.<br />
En cas de non-utilisation prolongée,<br />
l’accu moteur doit impérativement être<br />
retiré.<br />
24<br />
<strong>CARSON</strong> <strong>Specter</strong> <strong>Two</strong> <strong>Brushless</strong> <strong>50</strong> <strong>040</strong> <strong>9000</strong>
Derniers conseils :<br />
Lire attentivement les conseils suivants avant de commencer<br />
quelqu’un travail.<br />
Après chaque utilisation, les parties importantes et les<br />
connecteurs de la voiture doivent être inspectés. Une pièce<br />
défectueuse peut provoquer à elle seule un accident. Vérifier<br />
régulièrement la voiture et remplacer si nécessaire les pièces<br />
défectueuses avec des pièces de rechange d’origine.<br />
Nous vous souhaitons beaucoup de plaisir<br />
avec votre modèle réduit <strong>CARSON</strong> !<br />
Articles nécessaires au démarrage du modèle :<br />
Il s’agit là d’une sélection et recommandation pour les<br />
accessoires de la société <strong>CARSON</strong>-Modelsport.<br />
Pour faire fonctionner la voiture RC, vous avez besoin de :<br />
• 1 x accu moteur 7,2 V où 7,4 V / 11,1 V LiPo accu<br />
• 8 x piles Mignon ou accus pour l’émetteur<br />
• 1 x chargeur à fiche ou chargeur sur table pour l’accu<br />
moteur<br />
F<br />
Pour l’émetteur : N o <strong>50</strong> 060 9002 x2<br />
8 accus Mignon<br />
1600 mAh<br />
ou<br />
N o <strong>50</strong> 060 <strong>9000</strong> x2<br />
8 accus Mignon<br />
2300 mAh<br />
Accu moteur : Racing Pack 7,4 V<br />
p. ex.<br />
N o <strong>50</strong> 060 8088<br />
Powerpack<br />
7,4 V/ 3600 mAh<br />
Accu moteur : Racing Pack 11,1 V<br />
p. ex.<br />
N o <strong>50</strong> 060 8091<br />
Powerpack<br />
11,1 V/ 3200 mAh<br />
Accu moteur : Racing Pack 7,4 V<br />
p. ex.<br />
N o <strong>50</strong> 060 8089<br />
Powerpack<br />
7,4 V/ 4000 mAh<br />
Accu moteur : Racing Pack 7,4 V<br />
p. ex.<br />
N o <strong>50</strong> 060 8090<br />
Powerpack<br />
7,4 V/ 4600 mAh<br />
Chargeur : p. ex.<br />
N o <strong>50</strong> 060 6<strong>040</strong><br />
Expert Charger<br />
Sport<br />
Chargeur : p. ex.<br />
N o <strong>50</strong> 060 6041<br />
Expert Charger<br />
Pro<br />
Chargeur : p. ex.<br />
N o <strong>50</strong> 060 6042<br />
Expert Charger<br />
Master<br />
<strong>CARSON</strong> <strong>Specter</strong> <strong>Two</strong> <strong>Brushless</strong> <strong>50</strong> <strong>040</strong> <strong>9000</strong><br />
25
Outils nécessaires au montage de la voiture<br />
Couteau de bricolage 74053<br />
Colle à prise rapide 53339<br />
Pinces pointues 74034<br />
Ciseaux 13305<br />
F<br />
Tournevis (petit et grand)<br />
et clé à six pas<br />
1,5 / 2 / 2,5 mm 74023<br />
Clé hexagonale (Allen) 13118<br />
Pincette 74003<br />
Pinces coupantes 74035<br />
a. Châssis<br />
Becquet<br />
Interupteur<br />
Récepteur<br />
Régulateur<br />
Pare-chocs<br />
arrière<br />
Pneu avant<br />
Servo de direction<br />
Pneu arrière<br />
Accu moteur<br />
Moteur <strong>Brushless</strong><br />
Bras de suspension<br />
Pare-choc avant<br />
26<br />
<strong>CARSON</strong> <strong>Specter</strong> <strong>Two</strong> <strong>Brushless</strong> <strong>50</strong> <strong>040</strong> <strong>9000</strong>
. Retrait de la carrosserie<br />
• Retirez les goupilles de la carrosserie et<br />
• défaites la carrosserie.<br />
F<br />
c. Montage de l’antenne<br />
• Faites passer le fil d’antenne par le tube d’antenne et<br />
• insérez le tube de l’antenne dans le pied de l’antenne sur le<br />
châssis.<br />
Tube d’antenne<br />
Fil d’antenne<br />
<strong>CARSON</strong> <strong>Specter</strong> <strong>Two</strong> <strong>Brushless</strong> <strong>50</strong> <strong>040</strong> <strong>9000</strong><br />
27
d. Charger l’accu moteur<br />
Attention :<br />
Pour charger les accus, utiliser exclusivement les chargeurs<br />
prévus à cet effet.<br />
Cela risquerait sinon d’abîmer votre accu moteur. Nous<br />
recommandons les chargeurs <strong>CARSON</strong> Expert N o <strong>50</strong> 060 6<strong>040</strong>,<br />
<strong>50</strong> 060 6041 et <strong>50</strong> 060 6042.<br />
La durée de recharge varie selon le chargeur et le type d’accu.<br />
F<br />
e. Montage de l’accu<br />
moteur<br />
• Insérez l’accu.<br />
• Placez la fixation pour accu et<br />
• Fixez-le avec les goupilles.<br />
Remarque<br />
• Les piles sèches ne sont pas rechargeables.<br />
• Les accus rechargeables doivent être retirés de la maquette<br />
avant d’être rechargés.<br />
• Recharge uniquement sous la surveillance d’un adulte.<br />
• Faire attention à la polarité en insérant les accus/ les piles.<br />
• Après utilisation, retirer les piles/ accus vides de la<br />
maquette.<br />
• Les câbles utilisés pour le raccordement ne doivent pas être<br />
court-circuités.<br />
• Veuillez vérifier régulièrement le système électronique,<br />
les accus, le chargeur, les fiches, les câbles, le boîtier et<br />
les autres pièces pour vous assurer qu’ils ne sont pas<br />
endommagés.<br />
f. Allumer l’émetteur<br />
• Sortir complètement l’antenne de l ’émetteur.<br />
La portée de la radiocommande est diminuée lorsque<br />
l’antenne n’est pas sortie complètement.<br />
28<br />
<strong>CARSON</strong> <strong>Specter</strong> <strong>Two</strong> <strong>Brushless</strong> <strong>50</strong> <strong>040</strong> <strong>9000</strong>
ATTENTION !<br />
Toujours allumer l’émetteur teur<br />
en premier !<br />
ON<br />
MARCHE<br />
F<br />
1 Raccordez l’accu moteur.<br />
2 Allumez le récepteur.<br />
3 Montez la carrosserie et fixez-la avec les goupilles.<br />
1<br />
2<br />
on<br />
3<br />
<strong>CARSON</strong> <strong>Specter</strong> <strong>Two</strong> <strong>Brushless</strong> <strong>50</strong> <strong>040</strong> <strong>9000</strong><br />
29
g. Conduite de la voiture<br />
• Soulever les pneus du sol.<br />
• Tourner le volant à droite et à gauche jusqu’en butée.<br />
Les roues doivent suivre le sens de rotation du volant.<br />
• Si les roues tournent dans l’autre sens, actionner le<br />
commutateur d’inversion (ST en position REV).<br />
Au centre<br />
F<br />
Gauche<br />
Gauche Droite<br />
Droite<br />
• Pour régler la vitesse, actionnez le levier des gaz/du frein<br />
- vers l’arrière (marche avant, accélération) et<br />
- vers l’avant (frein, marche arrière).<br />
marche avant,<br />
accélération<br />
frein,<br />
marche arrière<br />
30<br />
<strong>CARSON</strong> <strong>Specter</strong> <strong>Two</strong> <strong>Brushless</strong> <strong>50</strong> <strong>040</strong> <strong>9000</strong>
h. Changer les fréquences<br />
Emetteur<br />
Un changement rapide des fréquences est possible en<br />
débranchant tout simplement le quartz à l’arrière de l’émetteur<br />
et en en branchant un<br />
autre.<br />
Quartz de l’émetteur<br />
Les quartz de<br />
l’émetteur et du<br />
récepteur doivent être<br />
en correspondance.<br />
Bien vérifier que<br />
les quartz sont bien<br />
entièrement enfoncés<br />
dans leurs logements<br />
respectifs.<br />
T X<br />
B A N D<br />
2<br />
27<br />
FM<br />
Récepteur<br />
Rebrancher un quartz interchangeable dans le récepteur pour<br />
un changement rapide de la fréquence.<br />
Quartz du récepteur<br />
F<br />
i. Tableau de recherche des erreurs<br />
Erreur Cause Réparation<br />
La maquette ne roule pas L’émetteur ou le récepteur ne sont pas allumés Allumez l’émetteur ou le récepteur<br />
La polarité des accus ou le type d’accu sont Vérifiez la polarité et le type d’accu<br />
incorrects<br />
Perte de contrôle<br />
La maquette ne va pas droit<br />
La maquette ne reste pas à<br />
l’arrêt<br />
La maquette ne va pas en<br />
marche arrière<br />
La maquette va trop<br />
lentement<br />
Les piles / accus sont déchargés ou<br />
complètement vides<br />
Les piles / accus sont déchargés ou<br />
complètement vides<br />
L’antenne n’est pas montée ou elle est mal fixée<br />
Une autre maquette utilise la même fréquence à<br />
proximité<br />
Le trim (compensation automatique) de direction<br />
n’est pas bien réglé<br />
Les écrous des roues sont mal serrés<br />
La compensation du levier des gaz/du frein n’est<br />
pas bien réglée<br />
La compensation du levier des gaz/du frein n’est<br />
pas bien réglée<br />
Mauvaise utilisation<br />
Remplacez les piles, remplacez les accus ou<br />
rechargez-les<br />
Remplacez les piles, remplacez les accus ou<br />
rechargez-les<br />
Fixez l’antenne du récepteur et/ou vissez bien<br />
l’antenne de l’émetteur<br />
Installez-vous ailleurs ou changez la<br />
fréquence<br />
Ajustez la compensation à l’aide du bouton<br />
rotatif<br />
Resserrez les écrous des roues<br />
Ajustez la compensation<br />
Ajustez la compensation<br />
Guidez bien la maquette<br />
Les piles / accus sont déchargés<br />
Remplacez les piles, remplacez les accus ou<br />
rechargez-les<br />
Le moteur est moins puissant qu’avant<br />
Remplacez le moteur<br />
Les écrous arrière des roues ne sont pas bien Resserrez les écrous des roues<br />
serrés<br />
De la poussière / des corps étrangers ont pénétré Éteignez la maquette et nettoyez l’engrenage<br />
dans l’engrenage<br />
<strong>CARSON</strong> <strong>Specter</strong> <strong>Two</strong> <strong>Brushless</strong> <strong>50</strong> <strong>040</strong> <strong>9000</strong><br />
31
Estimado cliente<br />
Le felicitamos por la adquisición de su coche radio controlado<br />
<strong>CARSON</strong>, que ha sido fabricado con tecnología de actualidad.<br />
De acuerdo con nuestra política de constante desarrollo y<br />
mejora de nuestros productos, nos reservamos el derecho de<br />
efectuar cambios en las especificaciones relativas a equipo,<br />
material y diseño de este producto en cualquier momento sin<br />
noticia previa.<br />
Las especificaciones o diseños del producto real podrían variar<br />
de los mostrados en el manual o envase.<br />
Este manual es componente del producto. No cumplir las<br />
instrucciones operativas y de seguridad incluidas invalidará la<br />
garantía. Conserve esta guía como recordatorio o para caso de<br />
pasar el modelo a una tercera persona.<br />
E<br />
Condiciones de la garantía<br />
Este producto está garantizado por <strong>CARSON</strong> contra defectos<br />
de fabricación en materiales o mano de obra bajo utilización<br />
normal por un período de 24 meses desde la fecha de<br />
adquisición en comercios autorizados.<br />
En caso de defecto del producto durante el período de<br />
garantía, lleve el producto y el ticket o recibo de venta como<br />
prueba de adquisición a cualquier tienda autorizada <strong>CARSON</strong>.<br />
<strong>CARSON</strong> podrá a su elección y salvo que las leyes dispongan<br />
otra cosa:<br />
(a) Corregir el defecto mediante la reparación del producto sin<br />
cargo de piezas o mano de obra;<br />
(b) Reemplazar el producto por otro del mismo o similar<br />
diseño; o<br />
(c) Devolver el importe de adquisición del producto.<br />
Todas las piezas y productos reemplazados, así como los<br />
productos cuyo importe haya sido devuelto, pasan a ser<br />
propiedad de <strong>CARSON</strong>. Se podrán utilizar piezas nuevas o<br />
reacondicionadas para la prestación del servicio de garantía.<br />
Las piezas y productos reparados o reemplazados estarán<br />
garantizados por el período restante al vencimiento de la<br />
garantía. Cualquier reparación o sustitución del producto tras<br />
vencer el período de garantía será abonada por usted.<br />
Esta garantía no cubre:<br />
• Daños o fallos causados o atribuibles a fuerzas de la<br />
naturaleza, abuso, accidente, uso incorrecto, impropio o<br />
anormal, falta de seguimiento de las instrucciones,<br />
mantenimiento o instalaciones inadecuadas, alteraciones,<br />
tormentas eléctricas u otros incidentes causados por exceso<br />
de voltaje o corriente;<br />
• Cualquier reparación no efectuada por un servicio de<br />
reparaciones autorizado <strong>CARSON</strong>;<br />
• Consumibles como fusibles o baterías;<br />
• Daños estéticos;<br />
• Transportes, embarques y / o costos de seguros; o<br />
Costos de retirada del producto, instalaciones, servicio de<br />
ajuste o reinstalación. Esta garantía le da a usted derechos<br />
legales específicos, y usted también podría tener otros<br />
derechos que variarían de estado en estado.<br />
Declaración de conformidad<br />
Dickie-Tamiya GmbH & Co. KG por la presente declara que<br />
este kit de modelo con radio, motor, batería y cargador está<br />
en concordancia con los requerimientos básicos 98/37EG y<br />
89/336/EWG y otras normas pertinentes de la directiva 1999/5/<br />
EG (R&TTE).<br />
El producto que ha adquirido está propulsado por una batería<br />
recargable Ni-MH. La batería es reciclable. Al final de su vida<br />
útil, bajo varias leyes nacionales / estatales y locales, puede<br />
ser ilegal tirar esta batería en los contenedores de basura<br />
normal. Pregunte a las autoridades locales responsables sobre<br />
las opciones adecuadas de reciclado o deshecho.<br />
Significado del símbolo en el producto, el<br />
embalaje o las instrucciones de uso. ¡Los<br />
electrodomésticos son objetos de valor y,<br />
al final de su vida útil, no deben tirarse a la<br />
basura doméstica! Contribuya a proteger<br />
el medioambiente y los recursos entregando<br />
este aparato en los puntos de reciclaje<br />
correspondientes. La organización<br />
responsable de la recogida de basura o su establecimiento<br />
especializado podrán responder a sus preguntas.<br />
Le deseamos buena suerte y mucha diversión conduciendo su<br />
coche radio controlado <strong>CARSON</strong>!<br />
Antes de utilizar su nuevo modelo lea estas instrucciones<br />
cuidadosamente!<br />
32<br />
<strong>CARSON</strong> <strong>Specter</strong> <strong>Two</strong> <strong>Brushless</strong> <strong>50</strong> <strong>040</strong> <strong>9000</strong>
Indice de<br />
contenidos<br />
Prólogo ....................................................................................... 32<br />
Contenido del kit ........................................................................ 33<br />
Precauciones de seguridad ....................................................... 34<br />
Artículos adicionales necesarios para el arranque<br />
del modelo .................................................................................. 35<br />
Herramientas necesarias para el montaje ................................. 36<br />
a. Chasis ..................................................................................... 36<br />
b. Cuitar la carrocería ................................................................ 37<br />
c. Instalación de la antena ......................................................... 37<br />
d. Cargar acumuladores de marcha .......................................... 38<br />
e. Colocación de la batería ........................................................ 38<br />
f. Connecte el emisora .............................................................. 38<br />
g. Volante de dirección (Controles básicos) ............................. 40<br />
h. Cómo cambiar frecuencias ................................................... 41<br />
i. Tabla de búsqueda de fallos ................................................. 41<br />
Montaje ....................................................................................... 52<br />
Tornillos ....................................................................................... 68<br />
Recambios .................................................................................. 69<br />
Tuning parts ................................................................................ 73<br />
E<br />
Contenido<br />
del kit<br />
Emisora<br />
(sólo en versión RTR)<br />
Modelo<br />
<strong>CARSON</strong> <strong>Specter</strong> <strong>Two</strong> <strong>Brushless</strong> <strong>50</strong> <strong>040</strong> <strong>9000</strong><br />
33
Precauciones de seguridad<br />
Los modelos radio controlados no son<br />
juguetes, su manejo debe ser aprendido<br />
paso a paso.<br />
• Los niños menores de 14 años sólo deberían manejar este<br />
modelo bajo supervisión adulta.<br />
La conducción de coches radio controlados es un fascinante<br />
hobby que debe ser practicado con la necesaria precaución y<br />
respeto. Un coche radio-controlado que tiene un peso<br />
considerable y capaz de desarrollar velocidades muy altas<br />
puede causar daños y lesiones en caso de conducción<br />
incontrolada, siendo el usuario legalmente responsable de ello.<br />
• Compruebe que dispone de un seguro con la suficiente<br />
cobertura contra los daños que pueda causar cuando<br />
practique su hobby.<br />
Sólo un vehículo montado correctamente<br />
funcionará y reaccionará de la manera<br />
esperada.<br />
• Nunca improvise en las reparaciones y utilice únicamente los<br />
recambios originales si fuese necesario.<br />
Igualmente y ante un modelo premontado, deberá repasar<br />
todas las conexiones y tortillería para asegurarse que están<br />
correctamente apretados oajustados.<br />
E<br />
Nunca comience a conducir sin haberse<br />
asegurado de los siguientes puntos:<br />
• Las baterías de la emisora y del receptor dan buen voltaje y<br />
no están deterioradas o desgastadas.<br />
• Todos los componentes operativos están en buenas<br />
condiciones y se ha comprobado su correcto<br />
funcionamiento.<br />
• Verificado que todos los tornillos estén correctamente<br />
apretados.<br />
• Compruebe siempre el funcionamiento del sistema de radio<br />
antes de utilizar el coche<br />
• No hay ninguna otra emisora R/C o similar cercana que<br />
pueda causar interferencias.<br />
• La emisora y el receptor están conectados, y se ha<br />
comprobado el buen funcionamiento de todas sus<br />
funciones.<br />
Primero conecte la emisora, luego el<br />
receptor. Invierta el procedimiento para la<br />
desconexión.<br />
• Asegúrese que nadie más está operando en la misma<br />
frecuencia que su radio y que no se aprecian interferencias.<br />
• Cualquier otra señal de radio en la misma frecuencia puede<br />
causar la pérdida de control de su modelo.<br />
Siempre apague el motor y desconecte el<br />
coche antes de desconectar la emisora.<br />
• ¡No conduzca bajo líneas de alta tensión, radio mástiles o<br />
durante tormentas eléctricas!<br />
• Las perturbaciones atmosféricas pueden afectar las señales<br />
de su emisora de radio<br />
• Las conexiones eléctricas de su modelo no son estancas.<br />
En consecuencia, no lo maneje en lluvia, nieve, charcos o<br />
hierba húmeda.<br />
El terreno en el que se pretende operar el modelo no está<br />
abierto al tráfico y no es usado por personas o animales.<br />
No conduzca si está muy cansado o su poder de reacción está<br />
limitado de algún modo.<br />
• Mantenga siempre contacto visual con el<br />
modelo.<br />
La carrocería debería estar correctamente fijada al chasis antes<br />
de conducirlo.<br />
• Permita cierto tiempo para que el escape y el motor se<br />
enfríen antes de quitar la carrocería.<br />
Estas piezas están extremadamente calientes durante el uso<br />
y podrían causar heridas serias.<br />
Preste atención a las instrucciones de carga de su emisora.<br />
• Asegúrese que las baterías de la emisora y el receptor están<br />
completamente cargadas y tienen el voltaje correcto.<br />
Con baterías medio gastadas podría perder el control de su<br />
modelo.<br />
• Nunca utilice baterías recargables o de diferente capacidad.<br />
Nunca intente recargar las baterías.<br />
Si no utiliza el modelo por algún tiempo,<br />
la batería recargable debe ser retirada.<br />
34<br />
<strong>CARSON</strong> <strong>Specter</strong> <strong>Two</strong> <strong>Brushless</strong> <strong>50</strong> <strong>040</strong> <strong>9000</strong>
Por fin<br />
Después de cada uso, todas las piezas importantes así como<br />
los conectores deberían ser comprobados. Un simple tornillo<br />
suelto puede ser suficiente para dejar al modelo en situación<br />
peligrosa! Verifique el coche periódicamente y cambie las<br />
piezas defectuosas o gastadas por recambio original.<br />
Le deseamos buena suerte y mucha<br />
diversión conduciendo su coche radio<br />
controlado <strong>CARSON</strong>!<br />
Artículos adicionales necesarios para el arranque<br />
del modelo:<br />
Esto es una selección y una recomendación de accesorios de<br />
la empresa <strong>CARSON</strong>-Modelsport.<br />
Para el funcionamiento del RC-Car necesitará lo siguiente:<br />
• 1x 7,2 V acumulador o 7,4 V/ 11,1 V acumulador LiPo<br />
• 8 baterías Mignon o acumuladores para el emisor<br />
• 1 cargador de enchufe o cargador de mesa para el<br />
acumulador<br />
Para el emisor: N o <strong>50</strong> 060 9002 x2<br />
8 unidades de<br />
acumuladores Mignon<br />
1600 mAh<br />
o<br />
N o <strong>50</strong> 060 <strong>9000</strong> x2<br />
8 unidades de<br />
acumuladores Mignon n<br />
2300 mAh<br />
E<br />
Acumuladores de marcha: Racing Pack 7,4 V<br />
por ej.<br />
N o <strong>50</strong> 060 8088<br />
Powerpack<br />
7,4 V/ 3600 mAh<br />
Acumuladores de marcha: Racing Pack 11,1 V<br />
por ej.<br />
N o <strong>50</strong> 060 8091<br />
Powerpack<br />
11,1 V/ 3200 mAh<br />
Acumuladores de marcha: Racing Pack 7,4 V<br />
por ej.<br />
N o <strong>50</strong> 060 8089<br />
Powerpack<br />
7,4 V/ 4000 mAh<br />
Acumuladores de marcha: Racing Pack 7,4 V<br />
por ej.<br />
N o <strong>50</strong> 060 8090<br />
Powerpack<br />
7,4 V/ 4600 mAh<br />
Cargador: por ej.<br />
N o <strong>50</strong> 060 6<strong>040</strong><br />
Expert Charger<br />
Sport<br />
Cargador: por ej.<br />
N o <strong>50</strong> 060 6041<br />
Expert Charger<br />
Pro<br />
Cargador: por ej.<br />
N o <strong>50</strong> 060 6042<br />
Expert Charger<br />
Master<br />
<strong>CARSON</strong> <strong>Specter</strong> <strong>Two</strong> <strong>Brushless</strong> <strong>50</strong> <strong>040</strong> <strong>9000</strong><br />
35
Herramientas necesarias para el montaje<br />
Cutter de modelismo 74053<br />
Adhesivo instantáneo 53339<br />
Alicates de punta fina 74034<br />
Tijeras 13305<br />
Destornillador Phillips<br />
(pequeño y grande) y Llaves<br />
allen<br />
1,5 / 2 / 2,5 mm 74023<br />
Llave de cruceta 13118<br />
Pinzas 74003<br />
Tenacillas 74035<br />
E<br />
a. Chasis<br />
Spoiler<br />
Interruptor<br />
Receptor<br />
Regulador<br />
Amortiguador<br />
trasero<br />
Neumático delantero<br />
Servo de dirección<br />
Neumático trasero<br />
Acumuladores de marcha<br />
Motor <strong>Brushless</strong><br />
Brazo transversal<br />
Amortiguador delantero<br />
36<br />
<strong>CARSON</strong> <strong>Specter</strong> <strong>Two</strong> <strong>Brushless</strong> <strong>50</strong> <strong>040</strong> <strong>9000</strong>
. Cuitar la carrocería<br />
• Quite los clips de carrocería y<br />
• Levántela.<br />
E<br />
c. Instalación de la antena<br />
• Inserte el cable de antena a través del tubo de antena y<br />
• Ponga el tubo de antena en el soporte de antena del chasis.<br />
Tubo de antena<br />
Cable de antena<br />
<strong>CARSON</strong> <strong>Specter</strong> <strong>Two</strong> <strong>Brushless</strong> <strong>50</strong> <strong>040</strong> <strong>9000</strong><br />
37
d. Cargar acumuladores de marcha<br />
Atención:<br />
para cargar acumuladores utilice únicamente los cargadores<br />
previstos para ello.<br />
De lo contrario se puede dañar el acumulador. Recomendamos<br />
Los cargadores <strong>CARSON</strong> Expert N o <strong>50</strong> 060 6<strong>040</strong>, <strong>50</strong> 060 6041 y<br />
<strong>50</strong> 060 6042.<br />
El tiempo de carga puede variar según el cargador y el tipo de<br />
acumulador.<br />
E<br />
e. Colocación de la<br />
batería<br />
• Coloque la batería y<br />
• Ponga el soporte del acumulador auf und<br />
• Sobre ella.<br />
Sugerencia<br />
• Las baterías secas no se pueden volver a cargar.<br />
• Las baterías recargables deben retirarse del modelo antes<br />
de efectuarse el proceso de carga.<br />
• La carga se debe efectuar sólo bajo la inspección de un<br />
adulto.<br />
• Al insertar las baterías/ pilas preste atención a la polaridad<br />
correcta.<br />
• Las baterías/ pilas vacías siempre deben retirarse del<br />
modelo una vez usadas.<br />
• Los cables de conexión no deben cortocircuitarse.<br />
• Verifique, por favor, periódicamente si el sistema<br />
electrónico o las baterías, clavijas de conexión, cables, caja<br />
y otros componentes presentan ciertos daños.<br />
f. Connecte el emisora<br />
• Extienda completamente la antena de la emisora.<br />
El radio de acción de la emisora se reducirá si la antena no<br />
está completamente desplegada.<br />
38<br />
<strong>CARSON</strong> <strong>Specter</strong> <strong>Two</strong> <strong>Brushless</strong> <strong>50</strong> <strong>040</strong> <strong>9000</strong>
PRECAUCION<br />
¡Conecte siempre primero ro la emisora!<br />
ON<br />
1 Conecte la batería recargable para conducir.<br />
2 Conecte el receptor.<br />
3 Coloque la carrocería y fíjela con los clips de carrocería.<br />
1<br />
E<br />
2<br />
on<br />
3<br />
<strong>CARSON</strong> <strong>Specter</strong> <strong>Two</strong> <strong>Brushless</strong> <strong>50</strong> <strong>040</strong> <strong>9000</strong><br />
39
g. Volante de dirección (Controles básicos)<br />
• Levante las ruedas del suelo y compruebe que todos los<br />
controles responden.<br />
• Gire el volante de dirección a derecha e izquierda a su<br />
máximo recorrido. Las ruedas deberían seguir el giro del<br />
volante.<br />
• Si las ruedas giran en sentido contrario, utilice el interruptor<br />
inversor de servo (ST en posición REV)<br />
Neutro<br />
Izquierda<br />
Izquierda Derecha<br />
E<br />
Derecha<br />
• Para regular la velocidad presione el gatillo<br />
- conduciendo hacia delante, para ganar velocidad o<br />
- empújelo (frenos, marcha atrás).<br />
Marcha adelante,<br />
ganar velocidad<br />
frenos,<br />
marcha atrás<br />
40<br />
<strong>CARSON</strong> <strong>Specter</strong> <strong>Two</strong> <strong>Brushless</strong> <strong>50</strong> <strong>040</strong> <strong>9000</strong>
h. Cómo cambiar frecuencias<br />
Emisora<br />
Es posible efectuar un cambio rápido de frecuencias<br />
simplemente desenchufando el cristal intercambiable<br />
de la parte trasera de la<br />
emisora y enchufando Cristal de cuarzo emisor<br />
otro.<br />
Los cristales de la<br />
emisora y el receptor<br />
deben coincidir uno<br />
con el otro.<br />
Asegúrese que el<br />
cristal está<br />
completamente<br />
introducido en la<br />
emisora y el receptor,<br />
no parcialmente.<br />
T X<br />
B A N D<br />
2<br />
27<br />
FM<br />
Receptor<br />
Enchufe un cristal intercambiable en el receptor para un<br />
cambio rápido de frecuencias.<br />
Cristal de cuarzo receptor<br />
i. Tabla de búsqueda de fallos<br />
E<br />
Problema Causa Corrección<br />
El modelo no se mueve El interruptor de la emisora o del coche no está Conecte el interruptor<br />
conectado.<br />
La polardad o el tipo de batería es incorrecto. Compruebe la polaridad y el tipo.<br />
Las baterías están gastadas.<br />
Cambie o recargue las baterías.<br />
Pérdida de control Las baterías están gastadas. Cambie o recargue las baterías.<br />
No va recto<br />
No para<br />
No va marcha atrás<br />
La antena no está o está montada<br />
incorrectamente.<br />
Hay cercano un modelo RC usando la misma<br />
frecuencia.<br />
El trim de dirección no está correctamente<br />
ajustado.<br />
Las tuercas de rueda delanteras y trasera están<br />
muy sueltas<br />
El trim de acelerador no está correctamente<br />
ajustado.<br />
El trim de acelerador no está correctamente<br />
ajustado.<br />
Acción equivocada.<br />
Sujete la antena y extienda la antena de la<br />
emisora completamente.<br />
Utilice el modelo en un sitio distinto, o cambie<br />
los cristales por una frecuencia distinta.<br />
Efectúe el ajuste<br />
Apriete las tuercas de rueda.<br />
Efectúe el ajuste<br />
Efectúe el ajuste<br />
Controle adecuadamente.<br />
Funciona muy lento Las baterías están gastadas. Cambie o recargue las baterías.<br />
El motor ha perdido potencia.<br />
Sustituya por un motor de recambio.<br />
Las ruedas están muy sueltas.<br />
Apriete las tuercas de rueda.<br />
Han entrado en los engranajes polvo u otros<br />
objetos.<br />
Desconecte el interruptor y limpie los<br />
engranajes.<br />
<strong>CARSON</strong> <strong>Specter</strong> <strong>Two</strong> <strong>Brushless</strong> <strong>50</strong> <strong>040</strong> <strong>9000</strong><br />
41
Caro Cliente<br />
Ci congratuliamo con lei per l’acquisto di questo modello<br />
radio comandato <strong>CARSON</strong>,che è stato progettato secondo gli<br />
ultimi ritrovati della tecnica. Per mantenere sempre aggiornati<br />
i nostri prodotti ci riserviamo il diritto di effettuare qualsiasi<br />
aggiornamento tecnico atto a migliorarne le qualità senza alcun<br />
preavviso. Alcune caratteristiche tecniche di questo prodotto<br />
possono perciò essere diverse da quelle illustrate in questo<br />
manuale o sulla scatola.<br />
I<br />
Condizioni di Garanzia<br />
Questo prodotto è garantito da <strong>CARSON</strong>, da difetti di<br />
fabbricazione nei materiali e lavorazioni, riscontrati nel normale<br />
utilizzo del modello, per 24 mesi dalla data di acquisto presso<br />
un rivenditore autorizzato.<br />
In caso di prodotto difettoso durante il periodo di garanzia,<br />
recarsi con il prodotto e lo scontrino o ricevuta presso qualsiasi<br />
rivenditore <strong>CARSON</strong>. <strong>CARSON</strong> a sua discrezione, provvederà<br />
in accordo alle normative vigenti:<br />
(a) Riparare il prodotto senza addebitare nulla;<br />
(b) Sostituire il prodotto con un altro uguale o di simili<br />
caratteristiche, o<br />
(c) Rimborsare il prezzo di acquisto.<br />
Tutte le parti sostituite o rimborsate diventano di proprietà della<br />
<strong>CARSON</strong>. Le parti nuove sostituite o riparate possono essere<br />
utilizzate per il servizio di garanzia. Le parti riparate o sostituite<br />
in garanzia sono a loro volta coperti da garanzia.<br />
Dalla garanzia sono esclusi:<br />
Danni o guasti causati da eventi naturali, normale usura, abusi,<br />
incidenti, utilizzo non corretto, inosservanza delle istruzioni,<br />
montaggio non corretto, imperizia dell’utilizzatore, mancanza<br />
di manutenzione, fulmini o altri incidenti causati da eccesso di<br />
voltaggio;<br />
Tutte le riparazioni non effettuate da personale autorizzato<br />
<strong>CARSON</strong>.<br />
Le parti di consumo e le batterie danni estetici non funzionali<br />
trasporto, spedizione o costi assicurativi costi di ritiro del<br />
prodotto, installazioni, regolazioni e reinstallazioni. La garanzia<br />
in ogni caso è applicata in conformità alle vigenti norme nello<br />
stato dove il prodotto è stato acquistato.<br />
Dichiarazione di conformità<br />
Dickie-Tamiya GmbH & Co. KG dichiara che questo modello<br />
in tutte le sue parti, radio, motore, batteria, caricabatteria, è<br />
in regola con le SEGUENTI DIRETTIVE EUROPEE: 98/37EG<br />
e 89/336/EWG Inoltre è conforme alle direttive 1999/5/EG<br />
(R&TTE).<br />
La dichiarazione originale di conformità può essere richiesta<br />
al seguente indirizzo:<br />
Dickie-Tamiya GmbH & Co. KG • Werkstraße 1 • D-90765 Fürth<br />
Il prodotto che avete acquistato è alimentato da batteria<br />
ricaricabile al Ni-MH. La batteria è riciclabile.<br />
Alla fine del suo ciclo, in diverse nazioni e/o leggi locali,<br />
potrebbe essere illegale introdurla nei cassonetti della<br />
immondizia. Assicuratevi come procedure per lo smaltimento,<br />
con il vostro locale ufficio smaltimento rifiuti.<br />
Significato del simbolo sul prodotto, sulla<br />
confezione o nelle istruzioni per l’uso. Gli<br />
apparecchi elettrici sono prodotti riciclabili<br />
e quindi, al termine del loro ciclo di vita, non<br />
devono essere gettati tra i rifiuti domestici!<br />
Aiutateci a tutelare l’ambiente e a preservare<br />
le risorse, conferendo questo apparecchio<br />
presso i relativi centri di raccolta. Se avete<br />
domande a questo proposito, vi consigliamo di rivolgervi<br />
all’ente responsabile dello smaltimento dei rifiuti o al vostro<br />
rivenditore specializzato.<br />
Vi auguriamo buona fortuna e buon divertimento alla guida del<br />
vostro modello Carson.<br />
Prima di utilizzare il vostro nuovo modello leggete attentamente queste istruzioni!<br />
42<br />
<strong>CARSON</strong> <strong>Specter</strong> <strong>Two</strong> <strong>Brushless</strong> <strong>50</strong> <strong>040</strong> <strong>9000</strong>
Contenuto<br />
Prefazione ................................................................................... 42<br />
Contenuti del kit ......................................................................... 43<br />
Misure di Sicurezza .................................................................... 44<br />
Articoli necessari non compresi per la messa in moto<br />
del modello ................................................................................. 45<br />
Utensili necessari al montaggio del modello ............................ 46<br />
a. Telaio ...................................................................................... 46<br />
b. Rimuovere la carrozzeria ....................................................... 47<br />
c. Montaggio dell’antenna ......................................................... 47<br />
d. Come caricare la batteria ricaricabile ................................... 48<br />
e. Montare la batteria ................................................................. 48<br />
f. Accendere trasmettitore ........................................................ 48<br />
g. Come controllare il vostro modello ....................................... <strong>50</strong><br />
h. Come cambiare la frequenza ................................................ 51<br />
i. Tabella ricerca errore ............................................................. 51<br />
Montaggio ................................................................................... 52<br />
Viti ............................................................................................... 68<br />
Ricambi ....................................................................................... 69<br />
Tuning parts ................................................................................ 73<br />
Contenuti<br />
del kit<br />
I<br />
Trasmettitore<br />
(solo nella versione<br />
RTR)<br />
Modello<br />
<strong>CARSON</strong> <strong>Specter</strong> <strong>Two</strong> <strong>Brushless</strong> <strong>50</strong> <strong>040</strong> <strong>9000</strong><br />
43
Misure di sicurezza<br />
I modelli radiocomandati non sono<br />
giocattoli, l’utilizzo di essi deve essere<br />
imparato passo passo.<br />
• I bambini sotto i 14 anni possono guidare il modello solo<br />
sotto la supervisione di un adulto.<br />
Guidare un modello radiocomandato è un affascinante hobby<br />
che deve essere praticato con la necessaria cautela e rispetto.<br />
Un modello radiocomandato può causare danni e ferite in caso<br />
di perdita di controllo di cui l’utilizzatore è responsabile.<br />
• Cautelatevi con una sufficiente copertura assicurativa, che vi<br />
consenta di praticare il vostro hobby in assoluta sicurezza.<br />
Il vostro modello funzionerà bene solo se<br />
sarà tenuto in perfetta efficienza.<br />
• Utilizzare solo ricambi originali e non montare mai parti non<br />
adatte.<br />
La responsabilità del modello è direttamente di chi lo guida,<br />
per cui assicurarsi prima dell’utilizzo che tutto funzioni<br />
correttamente e che tutta la viteria sia ben stretta.<br />
I<br />
Non iniziare a guidare prima di avere<br />
osservato I seguenti punti:<br />
• Le batterie del trasmettitore e della ricevente siano ben<br />
carcariche e del corretto voltaggio<br />
• Controllare sempre le operazioni radio prima di far partire il<br />
modello<br />
• Assicuratevi che tutti servocomandi rispondano<br />
correttamente al segnale del trasmettitore<br />
• Tutte le parti del modello siano in buone condizioni ed<br />
assicuratevi della loro funzionalità<br />
• Dovete essere sicuri che tutele viti siano ben strette.<br />
• Che non ci siano altri modelli o trasmettitori nelle vicinanze<br />
che possano causare interferenze.<br />
Accendere sempre prima il trasmettitore<br />
per evitare reazioni incontrollate della<br />
ricevente o percezione di segnali<br />
estranei.<br />
• Estraete completamente l’antenna ed assicuratevi che<br />
nessuno intorno a voi utilizzi la stessa frequenza (numero<br />
marcato sul quarzo) e che non ci siano interferenze.<br />
Spegnere sempre prima la ricevente e<br />
quindi il trasmettitore.<br />
• Tenete il vostro modello lontano da cavi di alta tensione o<br />
antenne radio.<br />
• Non usare mai il modello durante temporali con fulmini.<br />
Potrebbero causare malfunzionamenti elettrici<br />
• Non usare il modello in zone umide. Non guidare in presenza<br />
di forte vento, pioggia o temporali.<br />
Evitate sempre di guidare il modello in zone ristrette e limitate o<br />
in aree popolate.<br />
• State lontani da strade, autostrade,persone e animali.<br />
Scegliete un’area sufficientemente aperta e libera di ostacoli.<br />
• Guardare continuamente il modello e non distrasi.<br />
La carrozzeria deve essere fissata correttamente al modello<br />
prima dell’utilizzo.<br />
• Fare raffreddare tutte le componenti del motore prima di<br />
rimuovere la carrozzeria.<br />
Queste parti durante l’uso diventano estremamente calde e<br />
possono causare gravi ustioni.<br />
Assicurarsi che le batterie siano ben cariche e del corretto<br />
voltaggio.<br />
• Quando le batterie si stanno scaricando potreste perdere il<br />
controllo del modello.<br />
Dopo l’utilizzo rimuovere le batterie dal<br />
modello.<br />
44<br />
<strong>CARSON</strong> <strong>Specter</strong> <strong>Two</strong> <strong>Brushless</strong> <strong>50</strong> <strong>040</strong> <strong>9000</strong>
A Fine Utilizzo<br />
Dopo ogni utilizzo, verificate sempre che tutte le parti siano<br />
in perfetta efficienza, e ricordatevi che un solo particolare<br />
difettoso può causare gravi danni alle persone.<br />
Controllate periodicamente il vostro modello e sostituite le<br />
eventuali parti danneggiate solo con ricambi originali del<br />
modello.<br />
Vi auguriamo buona fortuna e buon<br />
divertimento con il vostro modello<br />
<strong>CARSON</strong>.<br />
Articoli necessari non compresi per la messa in<br />
moto del modello:<br />
Di seguito presentiamo una selezione degli accessori<br />
consigliati da <strong>CARSON</strong>-Modelsport.<br />
Per utilizzare il modello RC-Car sono necessari:<br />
• 1x 7,2 V batterie motore o 7,4 V/ 11,1 V batterie LiPo<br />
• 8x batterie stilo o batterie ricaricabili per il trasmettitore<br />
• 1x caricabatterie a spina o caricabatterie da tavolo per la<br />
batteria motore<br />
Per il trasmettitore: N o <strong>50</strong> 060 9002 x2<br />
8 batterie stilo<br />
1600 mAh<br />
oppure<br />
N o <strong>50</strong> 060 <strong>9000</strong> x2<br />
8 batterie stilo<br />
2300 mAh<br />
Batterie motore: Racing Pack 7,4 V<br />
per es.<br />
N o <strong>50</strong> 060 8088<br />
Powerpack<br />
7,4 V/ 3600 mAh<br />
Batterie motore: Racing Pack 11,1 V<br />
per es.<br />
N o <strong>50</strong> 060 8091<br />
Powerpack<br />
11,1 V/ 3200 mAh<br />
I<br />
Batterie motore: Racing Pack 7,4 V<br />
per es.<br />
N o <strong>50</strong> 060 8089<br />
Powerpack<br />
7,4 V/ 4000 mAh<br />
Batterie motore: Racing Pack 7,4 V<br />
per es.<br />
N o <strong>50</strong> 060 8090<br />
Powerpack<br />
7,4 V/ 4600 mAh<br />
Caricabatterie:<br />
per es.<br />
N o <strong>50</strong> 060 6<strong>040</strong><br />
Expert Charger<br />
Sport<br />
Caricabatterie:<br />
per es.<br />
N o <strong>50</strong> 060 6041<br />
Expert Charger<br />
Pro<br />
Caricabatterie:<br />
per es.<br />
N o <strong>50</strong> 060 6042<br />
Expert Charger<br />
Master<br />
<strong>CARSON</strong> <strong>Specter</strong> <strong>Two</strong> <strong>Brushless</strong> <strong>50</strong> <strong>040</strong> <strong>9000</strong><br />
45
Utensili necessari al montaggio del modello<br />
Cutter 74053<br />
Colla istantanea 53339<br />
Pinze 74034<br />
Forbici 13305<br />
Cacciaviti esagonali mm.<br />
1,5 / 2 / 2,5 mm 74023<br />
Chiave candela 13118<br />
Pinzetta 74003<br />
Tronchesine 74035<br />
a. Telaio<br />
Spoiler<br />
Interruttore<br />
I<br />
Ricevete<br />
Regolatore<br />
Ammortizzatori<br />
posteriori<br />
Gomme anteriori<br />
Servo sterzo<br />
Batterie motore<br />
Gomme posteriore<br />
Motore <strong>Brushless</strong><br />
Bracci trasversali<br />
Ammortizzatori anteriori<br />
46<br />
<strong>CARSON</strong> <strong>Specter</strong> <strong>Two</strong> <strong>Brushless</strong> <strong>50</strong> <strong>040</strong> <strong>9000</strong>
. Rimuovere la carrozzeria<br />
• Sfilare le clips di fissaggio e<br />
• Rimuovere la carrozzeria.<br />
I<br />
c. Montaggio dell’antenna<br />
• Inserire il filo antenna della ricevente nel tubetto antenna<br />
• Fissare il tubetto antenna sullo chassis.<br />
Tubetto antenna<br />
Filo antenna<br />
<strong>CARSON</strong> <strong>Specter</strong> <strong>Two</strong> <strong>Brushless</strong> <strong>50</strong> <strong>040</strong> <strong>9000</strong><br />
47
d. Come caricare la batteria ricaricabile<br />
Attenzione:<br />
Per caricare le batterie utilizzare solo gli appositi caricabatterie,<br />
altrimenti la batteria motore potrebbe subire dei danni.<br />
Consigliamo i caricabatterie <strong>CARSON</strong> Expert N o <strong>50</strong> 060 6<strong>040</strong>,<br />
<strong>50</strong> 060 6041 e <strong>50</strong> 060 6042.<br />
Il tempo di carica varia in base all’apparecchio e al tipo di<br />
batterie.<br />
e. Montare la batteria<br />
• Inserire la batteria.<br />
• Posizionare l’alloggiamento per batterie e<br />
• Fissarlo con le clips.<br />
I<br />
Nota<br />
• Le batterie a secco non sono ricaricabili.<br />
• Le batterie ricaricabili devono essere tolte dal modellino<br />
prima di essere ricaricate.<br />
• Effettuare la carica solamente sotto la supervisione di un<br />
adulto.<br />
• Prestare attenzione alla corretta polarità durante<br />
l’inserimento delle batterie.<br />
• Le batterie esauste devono sempre essere tolte dal<br />
modellino dopo l’uso.<br />
• Non mettere in cortocircuito i cavi di collegamento.<br />
• Controllare regolarmente il sistema elettronico, le batterie,<br />
il caricabatterie, le spine di collegamento, i cavi,<br />
l’alloggiamento e altri componenti per verificare che non<br />
siano danneggiati.<br />
f. Accendere trasmettitore<br />
• Estrarre l’antenna del trasmettitore completamente.<br />
La gittata del radiocomando si riduce notevolmente se non<br />
estraete completamente l’antenna.<br />
48<br />
<strong>CARSON</strong> <strong>Specter</strong> <strong>Two</strong> <strong>Brushless</strong> <strong>50</strong> <strong>040</strong> <strong>9000</strong>
ATTENZIONE!<br />
Accendere sempre prima il<br />
trasmettitore!<br />
ON<br />
1 Collegare le batterie ricaricabili per iniziare a guidare.<br />
2 Accendere la ricevente.<br />
3 Montate la carrozzeria e fissatela con le clips in dotazione.<br />
1<br />
I<br />
2<br />
on<br />
3<br />
<strong>CARSON</strong> <strong>Specter</strong> <strong>Two</strong> <strong>Brushless</strong> <strong>50</strong> <strong>040</strong> <strong>9000</strong><br />
49
g. Come controllare il vostro modello<br />
• Alzare le gomme da terra e controllare che i comandi<br />
rispondano.<br />
• Girate il volantino dello sterzo a destra e a sinistra . Le ruote<br />
devono sterzare seguendo i comandi.<br />
• Se le ruote girano in modo inverso, invertite i Reverse del<br />
servo (ST in posizione REV).<br />
Posizione<br />
neutra<br />
Sinistra<br />
Sinistra Destra<br />
I<br />
Destra<br />
• Per regolare la velocità agire sulla leva del gas/freno<br />
- indietro (per andare avanti ed accelerare) e/o<br />
- in avanti (per frenare o andare in retromarcia)<br />
per andare<br />
avanti ed<br />
accelerare<br />
per frenare<br />
o andare in<br />
retromarcia<br />
<strong>50</strong><br />
<strong>CARSON</strong> <strong>Specter</strong> <strong>Two</strong> <strong>Brushless</strong> <strong>50</strong> <strong>040</strong> <strong>9000</strong>
h. Come cambiare la frequenza<br />
Trasmettitore<br />
E’ possible sostituire il quarzo semplicemente sfilandolo dal<br />
suo alloggiamento nel retro del trasmettitore e inserendone un<br />
altro.<br />
Assicurarsi che i quarzi Quarzo trasmettitore<br />
del trasmettitore e della<br />
ricevente siano della<br />
stessa frequenza.<br />
Ricevente<br />
Per un rapido cambio di frequenza sfilare il quarzo ricevente<br />
e sostituirlo conun altro, avendo cura che sia della stessa<br />
frequenza del trasmettitore.<br />
Quarzo ricevitore<br />
T X<br />
B A N D<br />
2<br />
27<br />
FM<br />
i. Tabella ricerca errore<br />
Problema Causa Rimedi<br />
Il modello non si muove Il trasmettitore o l’interruttore del modello non è Accendere l’interruttore portandolo su ON<br />
acceso<br />
Errata polarità o batteria sbagliata<br />
Controllare la polarità ed il tipo di batterie<br />
Le batterie sono esaurite<br />
Sostituire le batterie<br />
Perdita di controllo Le batterie sono esaurite Sostituire le batterie<br />
L’antenna è mancante o non collegata<br />
perfettamente<br />
Fissare l’antenna ed estrarla completamente<br />
Nelle vicinanze qualche modello sta usando la<br />
stessa frequenza.<br />
Portarsi in un area diversa, o sostituirere la<br />
frequenza dei quarzi<br />
Non va dritto Il trim dello sterzo non è regolato bene Effettuare le regolazioni<br />
I dadi bloccaggio ruote anteriori e posteriori sono Stringete i dadi ruota<br />
troppo lenti<br />
Non si ferma Il trim dell’ acceleratore non è regolato bene Il trim dell’ acceleratore non è regolato bene<br />
Non va in retromarcia Il trim dell’ acceleratore non è regolato bene Il trim dell’ acceleratore non è regolato bene<br />
Comportamento sbagliato<br />
Controllare bene<br />
Scarsa velocità Le batterie sono esaurite Sostituire le batterie<br />
Il motore ha perso potenza<br />
Sostituire il motore<br />
I dadi bloccaggio ruote posteriori sono troppo Stringere con decisione i dadi<br />
lenti.<br />
C’è sporco o corpi estranei negli ingranaggi Spegnere il modello (posizione OFF) e<br />
rimuovere lo sporco nel pignone<br />
I<br />
<strong>CARSON</strong> <strong>Specter</strong> <strong>Two</strong> <strong>Brushless</strong> <strong>50</strong> <strong>040</strong> <strong>9000</strong><br />
51
Assembly • Montageanleitung •<br />
Assemblage • Montaje • Montaggio<br />
<strong>50</strong> 000 2158 2x<br />
<strong>50</strong> 020 5431 4x<br />
1<br />
Assembly slipper clutch • Montage Slipper-Kupplung<br />
• Montage de l’embrayage slipper • Montaje del acoplamiento<br />
• Montaggio frizione slipper<br />
<strong>50</strong> 020 5463 2x<br />
<strong>50</strong> 020 5463<br />
<strong>50</strong> 020 5437 2x<br />
<strong>50</strong> 020 5468<br />
<strong>50</strong> 020 5437 2x<br />
<strong>50</strong> 020 5437<br />
<strong>50</strong> 020 5467<br />
<strong>50</strong> 020 5437<br />
<strong>50</strong> 020 5437<br />
<strong>50</strong> 020 5464 1x<br />
<strong>50</strong> 020 5437<br />
Montage<br />
<strong>50</strong> 020 5463 2x<br />
<strong>50</strong> 020 5437<br />
<strong>50</strong> 020 5466<br />
<strong>50</strong> 020 5467 1x<br />
<strong>50</strong> 020 5464<br />
<strong>50</strong> 020 5463<br />
<strong>50</strong> 020 5437 2x<br />
<strong>50</strong> 000 2158<br />
<strong>50</strong> 020 5463<br />
<strong>50</strong> 020 5437 2x<br />
<strong>50</strong> 020 5437 2x<br />
<strong>50</strong> 020 5431<br />
52 <strong>CARSON</strong> <strong>Specter</strong> <strong>Two</strong> <strong>Brushless</strong> <strong>50</strong> <strong>040</strong> <strong>9000</strong>
<strong>50</strong> 000 2158 4x<br />
2 Gear box assembly • Montage des<br />
Getriebes • Montage de l’engrenage<br />
• Montaje del mecanismo • Montaggio<br />
della trasmissione<br />
<strong>50</strong> 020 5431 8x<br />
<strong>50</strong> 020 5469 4x<br />
<strong>50</strong> 020 5468<br />
<strong>50</strong> 020 5437 4x<br />
<strong>50</strong> 020 5437<br />
<strong>50</strong> 020 5437 4x<br />
<strong>50</strong> 020 5437<br />
<strong>50</strong> 020 5467 <strong>50</strong> 020 5437<br />
<strong>50</strong> 020 5437<br />
<strong>50</strong> 020 5465 2x<br />
<strong>50</strong> 020 5437<br />
<strong>50</strong> 020 5466<br />
<strong>50</strong> 020 5469 4x<br />
<strong>50</strong> 020 5465<br />
Montage<br />
<strong>50</strong> 000 2158<br />
<strong>50</strong> 020 5467 2x<br />
<strong>50</strong> 020 5469<br />
<strong>50</strong> 020 5437 4x<br />
<strong>50</strong> 020 5469<br />
<strong>50</strong> 020 5431<br />
<strong>50</strong> 020 5437 4x<br />
Liquid screw lock • Schraubensicherungslack • Frein filet •<br />
Líquido fijatornillos • Frenafiletti<br />
<strong>50</strong> 020 5437 4x<br />
Grease • Fett • Graisse<br />
Grasa • Grease<br />
Silicon Oil • Silikonöl • Huile silcone • Aceite de silicona • Silicon Oil<br />
<strong>CARSON</strong> <strong>Specter</strong> <strong>Two</strong> <strong>Brushless</strong> <strong>50</strong> <strong>040</strong> <strong>9000</strong><br />
53
<strong>50</strong> 000 2158 4x<br />
8x16x5<br />
3<br />
Front transmission • Vorderes Getriebe • Transmission avant<br />
• Transmisión delantera • Trasmissione anteriore<br />
<strong>50</strong> 020 5456<br />
<strong>50</strong> 020 5456<br />
<strong>50</strong> 020 5431<br />
<strong>50</strong> 020 5459<br />
<strong>50</strong> 020 5457 2x<br />
<strong>50</strong> 020 5455<br />
<strong>50</strong> 020 5457<br />
<strong>50</strong> 020 5455<br />
<strong>50</strong> 020 5459 2x<br />
<strong>50</strong> 000 2158<br />
<strong>50</strong> 020 5432 4x<br />
<strong>50</strong> 020 5459 2x<br />
<strong>50</strong> 020 5432<br />
If there are excess play between the gears, please use the provided<br />
(14.5 x 16 x 0.2) shim and shim accordingly.<br />
Wenn ein Spiel zwischen den Zahnrädern ist, benutzen Sie die<br />
angebotenen (14.5 x 16 x 0.2) Distanzscheiben.<br />
En cas de jeu excessif entre les pignons, utiliser la plaque d’entretoise<br />
fournie (14.5 x 16 x 0.2).<br />
Si existiese un exceso de juego entre los engranajes, por favor utilice<br />
las arandelas (14.5 x 16 x 0.2) suministradas.<br />
In caso di eccesivo gioca tra gli ingranaggi, applicare le rondelle<br />
(14.5 x 16 x 0.2) fornite.<br />
<strong>50</strong> 020 5431 4x<br />
4<br />
Rear transmission • Hinteres Getriebe • Transmission arrière<br />
• Transmisión trasera • Trasmissione posteriore<br />
Montage<br />
<strong>50</strong> 020 5456<br />
<strong>50</strong> 020 5456<br />
<strong>50</strong> 020 5432<br />
Tuning Tipp<br />
<strong>50</strong> 000 2158<br />
Kit:<br />
Oil<br />
Öl<br />
<strong>50</strong> 020 5459<br />
Tuning: Silicon Oil<br />
Silikonöl<br />
<strong>50</strong> 020 5459<br />
<strong>50</strong> 020 5457<br />
<strong>50</strong> 020 5472<br />
<strong>50</strong> 020 5459<br />
<strong>50</strong> 020 5432<br />
<strong>50</strong> 020 5472<br />
908048 Silicon Oil <strong>50</strong> ml 300<br />
908049 Silicon Oil <strong>50</strong> ml 400<br />
9080<strong>50</strong> Silicon Oil <strong>50</strong> ml <strong>50</strong>0<br />
908051 Silicon Oil <strong>50</strong> ml 600<br />
54 <strong>CARSON</strong> <strong>Specter</strong> <strong>Two</strong> <strong>Brushless</strong> <strong>50</strong> <strong>040</strong> <strong>9000</strong>
<strong>50</strong> <strong>040</strong> 5110 2x<br />
5<br />
Assembly central drive • Montage Mittelantrieb • Montage de<br />
l’entraînement central • Montaje del<br />
accionamiento central<br />
<strong>50</strong> 020 5520<br />
• Montaggio trazione<br />
centrale<br />
<strong>50</strong> <strong>040</strong> 5113 1x<br />
<strong>50</strong> <strong>040</strong> 5111<br />
<strong>50</strong> <strong>040</strong> 5113<br />
<strong>50</strong> 020 5520 4x<br />
<strong>50</strong> <strong>040</strong> 5116<br />
<strong>50</strong> 020 5483 2x<br />
<strong>50</strong> <strong>040</strong> 5111 2x<br />
<strong>50</strong> <strong>040</strong> 5110 1x<br />
<strong>50</strong> <strong>040</strong> 5111<br />
<strong>50</strong> <strong>040</strong> 5117<br />
<strong>50</strong> <strong>040</strong> 5110 1x<br />
<strong>50</strong> <strong>040</strong> 5111<br />
Montage<br />
<strong>Brushless</strong> Motor<br />
<strong>50</strong> 020 5520<br />
<strong>50</strong> <strong>040</strong> 5110<br />
<strong>50</strong> <strong>040</strong> 5117<br />
<strong>50</strong> <strong>040</strong> 5110<br />
<strong>50</strong> <strong>040</strong> 5110<br />
<strong>50</strong> 020 5483<br />
<strong>50</strong> <strong>040</strong> 5111 1x<br />
<strong>CARSON</strong> <strong>Specter</strong> <strong>Two</strong> <strong>Brushless</strong> <strong>50</strong> <strong>040</strong> <strong>9000</strong><br />
55
<strong>50</strong> 020 5432 6x<br />
6<br />
Assembly spoiler mount • Montage Spoilerhalterung • Montage<br />
de la fixation du becquet • Montaje del soporte del spoiler<br />
• Montaggio supporto per spoiler<br />
<strong>50</strong> 020 5432 2x<br />
<strong>50</strong> 020 5432<br />
<strong>50</strong> 020 5432 4x<br />
<strong>50</strong> <strong>040</strong> 5119<br />
<strong>50</strong> <strong>040</strong> 5119<br />
<strong>50</strong> <strong>040</strong> 5119<br />
<strong>50</strong> 020 5448<br />
<strong>50</strong> 020 5432<br />
<strong>50</strong> 020 5432<br />
<strong>50</strong> 020 5442<br />
<strong>50</strong> 020 5432<br />
<strong>50</strong> 020 5432<br />
Montage<br />
56 <strong>CARSON</strong> <strong>Specter</strong> <strong>Two</strong> <strong>Brushless</strong> <strong>50</strong> <strong>040</strong> <strong>9000</strong>
M3<br />
4x<br />
7<br />
Assembly body mount • Montage Karosseriehalter • Montage du<br />
support à carrosserie • Montaje del soporte de la carrocería<br />
• Montaggio supporto per carrozzeria<br />
<strong>50</strong> 020 5432 3x<br />
<strong>50</strong> <strong>040</strong> 5118<br />
<strong>50</strong> 020 5432<br />
<strong>50</strong> 020 5432 3x<br />
<strong>50</strong> 020 5432<br />
<strong>50</strong> 020 5431 1x<br />
<strong>50</strong> 020 5432<br />
<strong>50</strong> 000 2158 4x<br />
<strong>50</strong> <strong>040</strong> 5113<br />
<strong>50</strong> 020 5432<br />
<strong>50</strong> 020 5682<br />
<strong>50</strong> 020 5431<br />
<strong>50</strong> 020 5608<br />
<strong>50</strong> 020 5431 1x<br />
<strong>50</strong> 020 5431<br />
<strong>50</strong> 020 5520<br />
<strong>50</strong> 020 5432 1x<br />
<strong>50</strong> 020 5520<br />
<strong>50</strong> 020 5680<br />
BA1001B011<br />
1x<br />
<strong>50</strong> 020 5431<br />
<strong>50</strong> 020 5705<br />
<strong>50</strong> 020 5431 1x<br />
Montage<br />
<strong>50</strong> 020 5439 2x<br />
8 Assembly steering arm • Montage Lenkhebel<br />
• Montage du levier de commande • Montaje de la palanca<br />
de dirección • Montaggio leva di sterzo<br />
<strong>50</strong> 020 5431<br />
<strong>50</strong> 020 5445 2x<br />
<strong>50</strong> 020 5707<br />
<strong>50</strong> 020 5707 4x<br />
<strong>50</strong> 020 5445<br />
<strong>50</strong> 000 2158<br />
<strong>50</strong> 020 5439<br />
<strong>50</strong> 020 5439 2x<br />
<strong>50</strong> 020 5701<br />
<strong>50</strong> 020 5439 2x<br />
<strong>50</strong> 020 5431<br />
<strong>50</strong> 020 5439<br />
<strong>50</strong> 020 5707<br />
<strong>50</strong> 020 5439<br />
<strong>CARSON</strong> <strong>Specter</strong> <strong>Two</strong> <strong>Brushless</strong> <strong>50</strong> <strong>040</strong> <strong>9000</strong><br />
57
2x<br />
<strong>50</strong> 020 5687 2x<br />
9<br />
Front suspension assembly • Montage Vorderachse •<br />
Assemblage essieu avant • Montaje eje<br />
delantero • Montaggio assale anteriore<br />
<strong>50</strong> 020 5687 2x<br />
<strong>50</strong> 020 7704<br />
<strong>50</strong> 020 5687 8x<br />
<strong>50</strong> 020 5687<br />
<strong>50</strong> 020 5687<br />
<strong>50</strong> 020 5687<br />
2.5 mm<br />
<strong>50</strong> 020 5704 2x<br />
<strong>50</strong> 020 5705<br />
<strong>50</strong> 020 5687 2x<br />
<strong>50</strong> 020 5702<br />
7.5 mm<br />
<strong>50</strong> 020 5706<br />
<strong>50</strong> 020 5705<br />
Montage<br />
<strong>50</strong> 020 5707 2x<br />
<strong>50</strong> 020 5702 2x<br />
<strong>50</strong> 020 5707 2x<br />
<strong>50</strong> 020 5705<br />
2x<br />
<strong>50</strong> 020 5707<br />
<strong>50</strong> 020 5705 2x<br />
<strong>50</strong> 020 5687<br />
58 <strong>CARSON</strong> <strong>Specter</strong> <strong>Two</strong> <strong>Brushless</strong> <strong>50</strong> <strong>040</strong> <strong>9000</strong>
<strong>50</strong> 020 5445 2x<br />
<strong>50</strong> 020 5439 2x<br />
<strong>50</strong> 20 5443 2x<br />
10<br />
Rear suspension assembly •<br />
Montage Hinterachse •<br />
Assemblage essieu<br />
arrière • Montaje eje<br />
trasero •<br />
Montaggio<br />
assale<br />
postriore<br />
<strong>50</strong> 020 5444 2x<br />
<strong>50</strong> 020 5432 2x<br />
<strong>50</strong> 020 5443<br />
<strong>50</strong> 020 5443<br />
<strong>50</strong> 020 5432 2x<br />
1 mm<br />
12 x 3.9 x 2 2x<br />
<strong>50</strong> 020 5441<br />
<strong>50</strong> 020 5458<br />
<strong>50</strong> 000 2158 4x<br />
<strong>50</strong> 020 5445<br />
<strong>50</strong> 020 5438<br />
<strong>50</strong> 020 5439<br />
<strong>50</strong> 020 5443 2x<br />
<strong>50</strong> 000 2158<br />
<strong>50</strong> 020 5439<br />
<strong>50</strong> 020 5458 2x<br />
<strong>50</strong> 020 5444<br />
<strong>50</strong> 020 5439<br />
Montage<br />
<strong>50</strong> 020 5444<br />
<strong>50</strong> 020 5439 2x<br />
<strong>50</strong> 20 5443 8x<br />
<strong>50</strong> 020 5432<br />
M3<br />
4x<br />
11 x 4 x 0.2 4x<br />
<strong>50</strong> 020 5432<br />
<strong>50</strong> 020 5443<br />
<strong>50</strong> 020 5444 4x<br />
<strong>50</strong> 020 5449 2x<br />
<strong>50</strong> 020 5443<br />
<strong>CARSON</strong> <strong>Specter</strong> <strong>Two</strong> <strong>Brushless</strong> <strong>50</strong> <strong>040</strong> <strong>9000</strong><br />
59
<strong>50</strong> 000 2146 4x<br />
<strong>50</strong> 020 5431 4x<br />
11<br />
Assembly onto the chassis • Montage der Baugruppen auf das<br />
Chassis • Montage des groupes sur le châssis • Montaje de los<br />
módulos sobre el chasis • Montaggio dei gruppi sullo chasis<br />
<strong>50</strong> 020 5690<br />
<strong>50</strong> 020 5431<br />
<strong>50</strong> 020 5691<br />
<strong>50</strong> 020 5520 4x<br />
<strong>50</strong> 020 5520 2x<br />
<strong>50</strong> 020 5471<br />
26.5mm<br />
<strong>50</strong> 020 5697<br />
<strong>50</strong> 020 5473<br />
<strong>50</strong> 020 5439<br />
<strong>50</strong> 020 5475 2x<br />
<strong>50</strong> 020 5473<br />
<strong>50</strong> 020 5691 1x<br />
<strong>50</strong> 020 5439<br />
<strong>50</strong> 020 5473<br />
<strong>50</strong> 020 5690<br />
<strong>50</strong> 020 5691<br />
<strong>50</strong> 020 5697 1x<br />
<strong>50</strong> 20 5691<br />
<strong>50</strong> 020 5705<br />
<strong>50</strong> 020 5690 2x<br />
<strong>50</strong> 020 5690<br />
<strong>50</strong> 020 5434 2x<br />
<strong>50</strong> 020 5471<br />
<strong>50</strong> 000 2146<br />
<strong>50</strong> 020 5691 1x<br />
Montage<br />
<strong>50</strong> 020 5691 1x<br />
<strong>50</strong> 020 5520 2x<br />
<strong>50</strong> 020 5475<br />
<strong>50</strong> 020 5431 2x<br />
<strong>50</strong> 020 5471 4x<br />
<strong>50</strong> 020 5690 2x<br />
<strong>50</strong> <strong>040</strong> 5109<br />
<strong>50</strong> 020 5705 2x<br />
<strong>50</strong> 020 5520<br />
<strong>50</strong> 020 5434 2x<br />
<strong>50</strong> 020 5520<br />
60 <strong>CARSON</strong> <strong>Specter</strong> <strong>Two</strong> <strong>Brushless</strong> <strong>50</strong> <strong>040</strong> <strong>9000</strong>
<strong>50</strong> 020 5686 4x<br />
12<br />
Shocks • Stoßdämpfer • Amortisseur • Amortiguadores •<br />
Ammortizzatori<br />
<strong>50</strong> 020 5686 4x<br />
<strong>50</strong> 020 5684 2x<br />
<strong>50</strong> 020 5681 2x<br />
<strong>50</strong> 020 5686 8x<br />
<br />
<strong>50</strong> 020 5686 4x<br />
20'<br />
leave 3 mm<br />
<strong>50</strong> 020 5530 2x<br />
<strong>50</strong> 020 5527 2x<br />
Montage<br />
<strong>50</strong> 020 5684 4x<br />
Front damper<br />
Stoßdämpfer vorn<br />
Pare chocs avant<br />
Amortiguadores delantero<br />
Ammortizzatori anteriori<br />
<strong>50</strong> 020 5686 2x<br />
2x<br />
<strong>50</strong> 020 5686 2x<br />
2x<br />
Rear damper<br />
Stoßdämpfer hinten<br />
Pare-chocs arrière<br />
Amortiguadores trasero<br />
Ammortizzatori posteriori<br />
<strong>CARSON</strong> <strong>Specter</strong> <strong>Two</strong> <strong>Brushless</strong> <strong>50</strong> <strong>040</strong> <strong>9000</strong><br />
61
<strong>50</strong> 020 5471 4x<br />
13<br />
Assembly shocks • Stoßdämpfer Montage •<br />
Montage amortiseurs • Montaje de los antiguadores • Montaggio<br />
ammortizzatori<br />
<strong>50</strong> 020 5685 2x<br />
<strong>50</strong> 020 5685<br />
<strong>50</strong> 020 5431<br />
<strong>50</strong> 020 5471<br />
<strong>50</strong> 020 5686 2x<br />
<strong>50</strong> 020 5698<br />
<strong>50</strong> 020 5698 4x<br />
<strong>50</strong> 020 5705<br />
<strong>50</strong> 020 5705 4x<br />
<strong>50</strong> 020 5431 4x<br />
<strong>50</strong> 020 5708<br />
<strong>50</strong> 020 5431 2x<br />
<strong>50</strong> 020 5431<br />
<strong>50</strong> 020 5432 2x<br />
Montage<br />
<strong>50</strong> 020 5471<br />
<strong>50</strong> 020 5686<br />
<strong>50</strong> 020 5432<br />
<strong>50</strong> 020 5705<br />
<strong>50</strong> 020 5698<br />
<strong>50</strong> 020 5709<br />
<strong>50</strong> 020 5432<br />
62 <strong>CARSON</strong> <strong>Specter</strong> <strong>Two</strong> <strong>Brushless</strong> <strong>50</strong> <strong>040</strong> <strong>9000</strong>
<strong>50</strong> 020 5431 8x<br />
14<br />
Rear spoiler • Heckspoiler • Aileron arrière • Spoiler trasero<br />
• Spoiler posteriore<br />
<strong>50</strong> 020 5431 x3<br />
<strong>50</strong> 005 2132<br />
<strong>50</strong> 005 2132 2x<br />
<strong>50</strong> 020 5599<br />
<strong>50</strong> 020 5431 2x<br />
<strong>50</strong> 020 5520 2x<br />
<strong>50</strong> 020 5690 2x<br />
<strong>50</strong> 020 5431<br />
M3<br />
1x<br />
<strong>50</strong> 020 5690<br />
<strong>50</strong> 020 5520<br />
<strong>50</strong> 020 5705<br />
Montage<br />
<strong>50</strong> 020 5432<br />
<strong>50</strong> <strong>040</strong> 5114<br />
<strong>50</strong> 020 5435<br />
<strong>50</strong> 020 5431<br />
<strong>50</strong> 020 5431<br />
<strong>50</strong> 020 5431<br />
<strong>CARSON</strong> <strong>Specter</strong> <strong>Two</strong> <strong>Brushless</strong> <strong>50</strong> <strong>040</strong> <strong>9000</strong><br />
63
<strong>50</strong> 020 5520 4x<br />
15<br />
Assembly battery holder • Montage Akkuhalterung<br />
• Montage fixation pour accu • Montaje soporte del acumulador<br />
• Montaggio alloggiamento per batterie<br />
<strong>50</strong> <strong>040</strong> 5116 4x<br />
<strong>50</strong> <strong>040</strong> 5116<br />
<strong>50</strong> <strong>040</strong> 5116<br />
<strong>50</strong> <strong>040</strong> 5116<br />
Montage<br />
<strong>50</strong> 020 5520<br />
64 <strong>CARSON</strong> <strong>Specter</strong> <strong>Two</strong> <strong>Brushless</strong> <strong>50</strong> <strong>040</strong> <strong>9000</strong>
<strong>50</strong> <strong>040</strong> 5113 1x<br />
16<br />
Assembly steering servo/ RC box • Montage Lenkservo/ RC-Box<br />
• Montage du servo de direction/ boîtier RC • Montaje de la<br />
servodirección/ caja RC • Montaggio servosterzo/ box RC<br />
<strong>50</strong> 020 5431 4x<br />
<strong>50</strong> <strong>040</strong> 5113<br />
<strong>50</strong> 020 5432<br />
<strong>50</strong> 020 5431<br />
<strong>50</strong> <strong>040</strong> 5113<br />
<strong>50</strong> 020 5432 4x<br />
<strong>50</strong> <strong>040</strong> 5113<br />
<strong>50</strong> 020 5431<br />
<strong>50</strong> 020 5432<br />
<strong>50</strong> 020 5433 4x<br />
<strong>50</strong> <strong>040</strong> 5113<br />
<strong>50</strong> 020 5432<br />
<strong>50</strong> 020 5433<br />
<strong>50</strong> <strong>040</strong> 5115<br />
Montage<br />
<strong>CARSON</strong> <strong>Specter</strong> <strong>Two</strong> <strong>Brushless</strong> <strong>50</strong> <strong>040</strong> <strong>9000</strong><br />
65
<strong>50</strong> 020 5690 1x<br />
17<br />
Steering linkage • Lenkgestänge • Barre de direction • Varillaje<br />
de dirección • Collegamenti sterzo<br />
<strong>50</strong> 020 5471 2x<br />
<strong>50</strong> 020 5690<br />
M3<br />
2x<br />
<strong>50</strong> 020 5471<br />
<strong>50</strong> 020 5690<br />
1x<br />
<strong>50</strong> 020 5431 2x<br />
<strong>50</strong> 020 5690 1x<br />
<strong>50</strong> 020 5431<br />
<strong>50</strong> 020 5520<br />
<strong>50</strong> 020 5690<br />
<strong>50</strong> 020 5685<br />
<strong>50</strong> 020 5482<br />
Montage<br />
66 <strong>CARSON</strong> <strong>Specter</strong> <strong>Two</strong> <strong>Brushless</strong> <strong>50</strong> <strong>040</strong> <strong>9000</strong>
<strong>50</strong> 020 5689 4x<br />
18<br />
Mounting of the complete tires • Montage der Reifen<br />
• Montage des pneumatiques • Montaje de los pneumáticos<br />
• Montaggio dei pneumatici<br />
Instant glue<br />
Schnellkleber<br />
<strong>50</strong> 020 5604<br />
Montage<br />
<strong>50</strong> 020 5689<br />
<strong>CARSON</strong> <strong>Specter</strong> <strong>Two</strong> <strong>Brushless</strong> <strong>50</strong> <strong>040</strong> <strong>9000</strong><br />
67
Screws • Schrauben • Vis • Tornillos • Viti<br />
<strong>50</strong> 020 5431 Set 1<br />
Srews for front suspension • Schrauben für vordere Aufhängung<br />
und Getriebe gehäuse • Vis pour la suspension avant et le carter<br />
transmission • Tornillos de suspensión delantera<br />
• Viti sospensioni anteriori<br />
<strong>50</strong> 020 5432 Set 2<br />
Screws for rear suspension • Schrauben für hintere<br />
Aufhängung und Getriebegehäuse • Vis pour la suspension<br />
arrière et le carter transmission • Tornillos de suspensión<br />
trasera • Viti sospensioni posteriori<br />
3.0 x 20.0 KM 2x<br />
3.5 x 16.0 PB 4x<br />
3.0 x 10.0 KM 4x<br />
3.5 x 20.0 KB 2x<br />
3.0 x 10.0 PM 2x<br />
3.0 x 16.0 NPD 4x<br />
3.0 x 15.0 PBD 6x<br />
3.5 x 16.0 PB 4x<br />
3.0 x 10.0 KM 6x<br />
3.0 x 25.0 NMD 2x<br />
3.0 x 22.0 KM 2x<br />
3.0 x 16.0 NMD 2x<br />
3.5 x 20.0 KB 2x<br />
3.0 x 16.0 NMD 2x<br />
3.5 x 45.0 KB 2x<br />
3.0 x 10.0 PB 1x<br />
3.5 x 45.0 KB 2x<br />
3.5 x 30.0 PB 2x<br />
4.0 x 16.0 KM 4x<br />
3.0 x 10.0 PB 4x<br />
4.0 x 16.0 KM 4x<br />
3.0 x 30.0 NMD 5x<br />
3.0 x 30.0 PM 2x<br />
3.0 x 16.0 PM 2x<br />
3.0 x 16.0 KM 1x<br />
3.0 x 16.0 KM 1x<br />
Montage<br />
<strong>50</strong> 020 5433 Set 3<br />
Screws for radio and chassisplate • Schrauben für Empfängerbox<br />
und Chassisplatte • Vis pour le boîtier récepteur et la<br />
plaque châssis • Tornillos para la bandeja de radio y chasis<br />
• Viti per radio e Pianale<br />
<strong>50</strong> 020 5520 Set 4<br />
Screws for centerdiff • Schrauben für Mitteldifferenzial<br />
• Vis pour le différentiel central • Tornillos para el diferencial<br />
central • Viti differenziale centrale<br />
2.9 x 12.0 PBD 8x<br />
2.5 x 16.0 PM 1x<br />
3.0 x 10.0 KM 4x<br />
3.0 x 16.0 NMD 4x<br />
3.0 x 10.0 PB 2x<br />
2.0 x 10.0 PM 1x<br />
3.0 x 10.0 PB 1x<br />
4.0 x 10.0 KM 4x<br />
2.0 x 8.0 PB 4x<br />
2.0 x 6.0 PM 2x<br />
3.0 x 12.0 NMD 4x<br />
3.0 x 13.0 KB 2x<br />
3.0 x 13.0 KB 7x<br />
3.0 x x16.0 KM 1x<br />
3.0 x 8.0 NMD 1x<br />
2.9 x 13.0 PBD 2x<br />
3.0 x x8.0 KB 6x<br />
3.0 x 10.0 PM 4x<br />
4.0 x 16.0 KM 1x<br />
68 <strong>CARSON</strong> <strong>Specter</strong> <strong>Two</strong> <strong>Brushless</strong> <strong>50</strong> <strong>040</strong> <strong>9000</strong>
Spare Parts<br />
• Ersatzteile<br />
• Pièces détachées<br />
• Recambios<br />
• Ricambi<br />
<strong>50</strong> <strong>040</strong> 5114 Driveshaft-kit<br />
Antriebswellen-Set<br />
<strong>50</strong> 020 5443 4x Pin<br />
4x Befestigung<br />
<strong>50</strong> <strong>040</strong> 5109 Chassisplate<br />
Chassisplatte<br />
<strong>50</strong> <strong>040</strong> 5115 2x Servomount stay<br />
2x Distanzbolzen/ Servo<br />
<strong>50</strong> 020 5458 2x Rear drive shaft<br />
2x Antriebswelle hinten<br />
<strong>50</strong> <strong>040</strong> 5110 Piniongear 14 T.<br />
Antriebsritzel 14 Z.<br />
<strong>50</strong> <strong>040</strong> 5116 Batteryholder kit<br />
Akkuhalter Set<br />
<strong>50</strong> 020 5459 Joint cup<br />
Mitnehmer<br />
3 x 6 x 0.5 2x<br />
1x<br />
1x<br />
1x<br />
4x<br />
<strong>50</strong> <strong>040</strong> 5111 Motor mount kit<br />
Motorbock-Set<br />
2x<br />
<strong>50</strong> 020 5704 2x Front drive shaft<br />
2x Antriebswelle vorne<br />
1x<br />
1x<br />
2x<br />
2x<br />
<strong>50</strong> <strong>040</strong> 5113 Radiobox kit<br />
Radiobox-Set<br />
<strong>50</strong> <strong>040</strong> 5117 Central-gear mount<br />
Zentralantriebsbock<br />
1x<br />
2x<br />
<strong>50</strong> <strong>040</strong> 5118 Bodyholder<br />
Karosseriehalter<br />
1x<br />
1x<br />
<strong>50</strong> <strong>040</strong> 5119 Spoilerholder<br />
Spoilerhalter<br />
Ersatzteile<br />
3x<br />
2x<br />
1x<br />
1x<br />
1x<br />
1x<br />
<strong>50</strong> 000 2158 Ball bearing<br />
Kugellager<br />
8 x 16 x 5<br />
<strong>CARSON</strong> <strong>Specter</strong> <strong>Two</strong> <strong>Brushless</strong> <strong>50</strong> <strong>040</strong> <strong>9000</strong><br />
69
Spare Parts • Ersatzteile • Pièces détachées • Recambios • Ricambi<br />
<strong>50</strong> 020 5434 Steering rack spacer<br />
Abstandshalter<br />
<strong>50</strong> 020 5445 2x Wheel axle<br />
2x Radachse<br />
<strong>50</strong> 020 5465 Steel diff ring gear<br />
Diff Zahnrad Stahl<br />
0.7 x 3 x 8 mm<br />
0.2 x 14.5 x 16<br />
4x<br />
1x<br />
<strong>50</strong> 020 5435 Front Bumper<br />
Frontrammer<br />
<strong>50</strong> 020 5449 Front upper suspension mount<br />
Querlenkerhalterung vorne oben<br />
<strong>50</strong> 020 5466 Diff seal<br />
Diff Dichtung<br />
0.5 mm<br />
4x<br />
<strong>50</strong> 020 5437 Diff gears<br />
Differenzialzahnräder<br />
<strong>50</strong> 020 5451 Front chassis brace<br />
Querversteifung vorne<br />
<strong>50</strong> 020 5467 6x Diff gear shafts<br />
6x Diffgetriebestifte<br />
2x<br />
4x<br />
2x<br />
2x<br />
2x<br />
2 x 9 mm<br />
<strong>50</strong> 020 5438 2x Rear hub carrier<br />
2x Lager hinten<br />
<strong>50</strong> 020 5455 Front lower suspension mounts<br />
Querlenkerhalterung vorne unten<br />
<strong>50</strong> 020 5468 2x Diff case<br />
2x Diff Gehäuse<br />
<strong>50</strong> 020 5439 4x Hex hub 17 mm<br />
4x Radmitnehmer 17 mm<br />
<strong>50</strong> 020 5456 Gear box<br />
Getriebebox<br />
<strong>50</strong> 020 5469 2x Diff outdrives<br />
2x Diff Antriebsmitnehmer<br />
7 x 17 mm<br />
5 x 5<br />
<strong>50</strong> 020 5441 2x Rear lower Arms<br />
2x Hintere Arme unten<br />
<strong>50</strong> 020 5457 Steel diff pinion gear<br />
Differenzialteile<br />
<strong>50</strong> 020 5470 4x Tie rod ends<br />
4x Kugelpfanne<br />
Ersatzteile<br />
<strong>50</strong> 020 5442 Rear Brace Holder<br />
Bremshalterung hinten<br />
2x<br />
<strong>50</strong> 020 5463 2x Wheel axle<br />
2x Radmitnehmer<br />
0.5 x 8.1 x 12.7<br />
4x<br />
<strong>50</strong> 020 5471 4x Ball stud<br />
4x Gelenkkugeln<br />
<strong>50</strong> 020 5444 Upper rear tie<br />
Querlenker hinten oben<br />
<strong>50</strong> 020 5464 Steel spur gear 46T<br />
Zahnrad 46 Z<br />
<strong>50</strong> 020 5472 Rear lower suspension mounts<br />
Querlenkerhalterung hinten unten<br />
4x 2x 4x<br />
70 <strong>CARSON</strong> <strong>Specter</strong> <strong>Two</strong> <strong>Brushless</strong> <strong>50</strong> <strong>040</strong> <strong>9000</strong>
Spare Parts • Ersatzteile • Pièces détachées • Recambios • Ricambi<br />
<strong>50</strong> 020 5473 Steering Bell cranks<br />
Servosaver<br />
<strong>50</strong> 020 5595 Rear wing, yellow<br />
Spoiler hinten, gelb<br />
<strong>50</strong> 020 8681 2x Rear shock body<br />
2x Dämpfergehäuse hinten<br />
1x<br />
2x<br />
1x<br />
<strong>50</strong> 020 5475 2x Bell Crank Shafts<br />
2x Lenkhebelstift<br />
<strong>50</strong> 020 5598 Rear wing, orange<br />
Spoiler hinten, orange<br />
<strong>50</strong> 020 5682 Front shock tower<br />
Dämpferbrücke vorn<br />
1x<br />
2x<br />
1x<br />
<strong>50</strong> 020 5482 Servo Horns<br />
Servo Anlenkhebel<br />
<strong>50</strong> 020 5599 Rear wing, white<br />
Spoiler hinten, weiß<br />
<strong>50</strong> 020 5683 Rear shock tower<br />
Dämpferbrücke hinten<br />
1x<br />
2x<br />
2x<br />
1x<br />
1x<br />
<strong>50</strong> 020 5483 4x Center bulkhead inserts<br />
4x Mitteldiffpfosten<br />
<strong>50</strong> 020 5601 2x Rim with pin tires, green<br />
2x Felge mit Reifen, grün<br />
<strong>50</strong> 020 5684 2x Front shock body<br />
2x Dämpfergehäuse vorne<br />
<strong>50</strong> 020 5526 2x Rear shock spring<br />
2x Dämpferfeder hinten<br />
<strong>50</strong> 20 5602 2x Rim with pin tires, blue<br />
2x Felge mit Reifen, blau<br />
<strong>50</strong> 020 5685 Shock parts<br />
Dämpferteile<br />
2x<br />
2x<br />
<strong>50</strong> 020 5527 2x Rear shock shaft<br />
2x Dämpferschaft hinten<br />
<strong>50</strong> 020 5603 2x Rim with pin tires, orange<br />
2x Felge mit Reifen, orange<br />
2x<br />
0.4 x 2.6 x 6.5<br />
2x<br />
M2.5<br />
4x<br />
Ø 0.6 x 6.6 x 2<br />
2x 2x 2x<br />
<strong>50</strong> 020 5529 2x Front shock spring<br />
2x Dämpferfeder vorne<br />
<strong>50</strong> 020 5604 2x Rim with pin tires, white<br />
2x Felge mit Reifen, weiß<br />
2x<br />
2x<br />
Ø 6.3 x 2.5 mm<br />
<strong>50</strong> 020 5686 Shock parts<br />
Dämpferteile<br />
2x<br />
Ersatzteile<br />
2x<br />
2x<br />
2x<br />
0.4 x 2.6 x 6.5<br />
2x<br />
M2.5<br />
4x<br />
Ø 0.6 x 6.6 x 2<br />
<strong>50</strong> 020 5530 2x Front shock shaft<br />
2x Dämpferschaft vorne<br />
<strong>50</strong> 020 5680 Front brace<br />
Chassisversteifung vorne<br />
2x 2x 2x<br />
2x<br />
2x<br />
Ø 6.3 x 2.5 mm<br />
2x<br />
<strong>CARSON</strong> <strong>Specter</strong> <strong>Two</strong> <strong>Brushless</strong> <strong>50</strong> <strong>040</strong> <strong>9000</strong><br />
71
Spare Parts • Ersatzteile • Pièces détachées • Recambios • Ricambi<br />
<strong>50</strong> 020 5687 Hing pins and clips<br />
Kleinteile<br />
<strong>50</strong> 020 5701 Steering arms<br />
Lenkungshebel<br />
<strong>50</strong> 090 0063 2x Buggy tires<br />
2x Buggyreifen<br />
20x<br />
0.6 x 3 x 7<br />
4x<br />
2x<br />
4x<br />
<strong>50</strong> 020 5690 Steering tie-rod<br />
Lenkteile<br />
<strong>50</strong> 020 5702 2x Upper front tie rod<br />
2x Gestänge oben vorne<br />
<strong>50</strong> 090 8062 10x Body pins 1.5 mm<br />
10x Karosserieclips 1,5 mm<br />
2x<br />
1x<br />
2x<br />
M4 x <strong>50</strong><br />
2x<br />
1x<br />
1x<br />
M4 x 40<br />
2x<br />
<strong>50</strong> 020 5691 Steering spring set<br />
Lenkungsfeder-Set<br />
<strong>50</strong> 020 5705 Ballhead/ connector<br />
Kugelkopf/ Pfannen<br />
2x<br />
2x<br />
2x<br />
2x<br />
<strong>50</strong> 020 5697 Steering rack<br />
Lenkstange<br />
<strong>50</strong> 020 5706 2x Front arm<br />
2x Querlenker vorne<br />
1x<br />
2x<br />
2x<br />
0.7 x 3 x 8<br />
2x<br />
2x<br />
<strong>50</strong> 020 5698 4x Hex wheel nut<br />
4x Radmutter<br />
<strong>50</strong> 020 5707 C-Hub front<br />
Achsschenkelhalter vorne<br />
1x<br />
4x<br />
4x<br />
1x<br />
<strong>50</strong> 020 5698 10x Washers<br />
10x Unterlegscheiben<br />
<strong>50</strong> 020 5708 2x Front shocks (plastic)<br />
2x Stoßdämpfer vorne (Plastik)<br />
8 x x3.25 x 0.4 5.3 x 3.15 x 0.3<br />
<strong>50</strong> 020 5709 2x Rear shocks (plastic)<br />
2x Stoßdämpfer hinten (Plastik)<br />
72 <strong>CARSON</strong> <strong>Specter</strong> <strong>Two</strong> <strong>Brushless</strong> <strong>50</strong> <strong>040</strong> <strong>9000</strong>
Tuning parts<br />
<strong>50</strong> 020 5<strong>50</strong>8 Rear lower suspension mounts alu<br />
Querlenkerhalterung hinten unten<br />
<strong>50</strong> 020 5518 2x2 Tuning spring soft<br />
2x2 Tuning Federn weich<br />
1x<br />
<strong>50</strong> 020 5<strong>50</strong>1 Fiber Front Brace<br />
Frontversteifung Carbon<br />
1x<br />
<strong>50</strong> 020 5519 2x2 Tuning spring hard<br />
2x2 Tuning Federn hart<br />
3.5 x 16.0 PB<br />
2x<br />
<strong>50</strong> 020 5<strong>50</strong>2 Front chassis brace<br />
Chassisversteifung vorne<br />
<strong>50</strong> 020 5<strong>50</strong>9 Alu upper suspension mount<br />
Alu Querlenker oben<br />
<strong>50</strong> 020 5531 2x Front shocks aluminium<br />
2x Stoßdämpfer vorn Aluminium<br />
3.0 x 10.0 KM 3.0 x 10.0 PM<br />
1x<br />
2x<br />
3.0 x 10.0 NMD<br />
<strong>50</strong> 020 5<strong>50</strong>4 Carbon fiber rear shock tower<br />
Carbon Dämpferbrücke hinten<br />
<strong>50</strong> 020 5512 Anti-roll-bar rear<br />
Stabi hinten<br />
<strong>50</strong> 020 5532 2x rear shocks aluminium<br />
2x Stoßdämpfer hinten Aluminium<br />
2x<br />
3.0 x 16.0 NMD<br />
2x<br />
2x<br />
<strong>50</strong> 020 5<strong>50</strong>5 Carbon fiber front shock tower<br />
Carbon Dämpferbrücke vorne<br />
2x<br />
4.2 x 15.0 PB<br />
2x<br />
3.0 x 12.0<br />
<strong>50</strong> 020 5716 Front lower suspension mount alu<br />
Querlenkerhalterung vorne unten<br />
4x<br />
1x<br />
2x<br />
3 x 3<br />
<strong>50</strong> 020 5<strong>50</strong>6 Fiber steering rack<br />
Carbon Lenkstange<br />
<strong>50</strong> 020 5512 Anti-roll-bar front<br />
Stabi vorne<br />
2x<br />
0.7 x 3 x 8<br />
1x<br />
<strong>50</strong> 020 5<strong>50</strong>7 Rear lower suspension mounts alu<br />
Querlenkerhalterung hinten unten<br />
2x<br />
2x<br />
3.0 x 16.0 NMD<br />
2x<br />
4.2 x 15.0 PB<br />
2x<br />
2x<br />
2x<br />
3.0 x 12.0<br />
4x<br />
1x<br />
1x<br />
1x<br />
<strong>50</strong> 020 5516 4x Dust cover set<br />
4x Staubschutz Set<br />
2x<br />
3 x 3<br />
Tuningteile<br />
2x<br />
<strong>CARSON</strong> <strong>Specter</strong> <strong>Two</strong> <strong>Brushless</strong> <strong>50</strong> <strong>040</strong> <strong>9000</strong><br />
73
Notizen<br />
74 <strong>CARSON</strong> <strong>Specter</strong> <strong>Two</strong> <strong>Brushless</strong> <strong>50</strong> <strong>040</strong> <strong>9000</strong>
Notizen<br />
<strong>CARSON</strong> <strong>Specter</strong> <strong>Two</strong> <strong>Brushless</strong> <strong>50</strong> <strong>040</strong> <strong>9000</strong><br />
75
For Germany:<br />
Service-Hotline:<br />
Mo - Do<br />
Fr<br />
8.00 – 17.00 Uhr<br />
8.00 – 14.30 Uhr<br />
01805–73 33 00<br />
12 ct/min<br />
<strong>CARSON</strong>-Model Sport<br />
Abt. Service<br />
Mittlere Motsch 9<br />
96515 Sonneberg<br />
<strong>CARSON</strong>-Model Sport<br />
Werkstraße 1 • D-90765 Fürth / Germany<br />
www.carson-modelsport.de