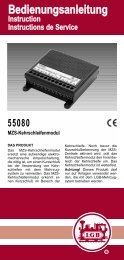
§ 70255 230 Volt · 72255 110 Volt Mzs-Digital-Starter-Set · MTS ...
§ 70255 230 Volt · 72255 110 Volt Mzs-Digital-Starter-Set · MTS ...
§ 70255 230 Volt · 72255 110 Volt Mzs-Digital-Starter-Set · MTS ...

You also want an ePaper? Increase the reach of your titles
YUMPU automatically turns print PDFs into web optimized ePapers that Google loves.
12 13<br />
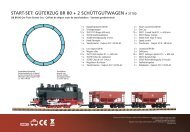
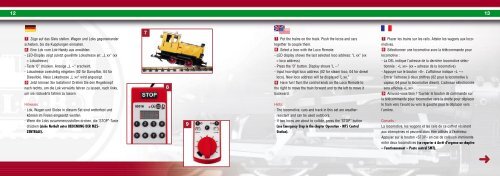
7 Züge auf das Gleis stellen. Wagen und Loks gegeneinander<br />
schieben, bis die Kupplungen einrasten.<br />
8 Eine Lok vom Lok-Handy aus anwählen:<br />
- LED-Display zeigt zuletzt gewählte Lokadresse an: „L xx“ (xx<br />
= Lokadresse)<br />
- Taste "0” drücken. Anzeige „L --“ erscheint.<br />
- Lokadresse zweistellig eingeben (02 für Dampflok, 04 für<br />
Diesellok). Neue Lokadresse „L xx“ wird angezeigt.<br />
9 Jetzt können Sie losfahren! Drehen Sie den Regelknopf<br />
nach rechts, um die Lok vorwärts fahren zu lassen, nach links,<br />
um sie rückwärts fahren zu lassen.<br />
Hinweise:<br />
- Lok, Wagen und Gleise in diesem <strong>Set</strong> sind wetterfest und<br />
können im Freien eingesetzt werden.<br />
- Wenn die Loks zusammenzustoßen drohen, die "STOP”-Taste<br />
drücken (siehe Nothalt unter BEDIENUNG DER MZS-<br />
ZENTRALE).<br />
7<br />
8<br />
9<br />
© DiskArt 1988<br />
7 Put the trains on the track. Push the locos and cars<br />
together to couple them.<br />
8 Select a loco with the Loco Remote:<br />
- LED display shows the last selected loco address: "L xx” (xx<br />
= loco address)<br />
- Press the "0” button. Display shows "L --”<br />
- Input two-digit loco address (02 for steam loco, 04 for diesel<br />
loco). New loco address will be displayed "L xx.”<br />
9 Have fun! Turn the control knob on the Loco Remote to<br />
the right to move the train forward and to the left to move it<br />
backward.<br />
Hints:<br />
- The locomotive, cars and track in this set are weatherresistant<br />
and can be used outdoors.<br />
- If two locos are about to collide, press the "STOP” button<br />
(see Emergency Stop in the chapter Operation - <strong>MTS</strong> Central<br />
Station).<br />
7 Placer les trains sur les rails. Atteler les wagons aux locomotives.<br />
8 Sélectionner une locomotive avec la télécommande pour<br />
locomotive :<br />
- La DEL indique l’adresse de la dernière locomotive sélectionnée<br />
: «L xx» (xx = adresse de la locomotive)<br />
- Appuyer sur le bouton «0». L’afficheur indique «L --»<br />
- Entrer l’adresse à deux chiffres (02 pour la locomotive à<br />
vapeur, 04 pour la locomotive diesel). L’adresse sélectionnée<br />
sera affichée «L xx».<br />
9 Amusez-vous bien ! Tourner le bouton de commande sur<br />
la télécommande pour locomotive vers la droite pour déplacer<br />
le train vers l’avant ou vers la gauche pour le déplacer vers<br />
l’arrière.<br />
Conseils :<br />
La locomotive, les wagons et les rails de ce coffret résistent<br />
aux intempéries et peuvent donc être utilisés à l’extérieur.<br />
Appuyer sur le bouton «STOP» en cas de collision imminente<br />
entre deux locomotives (se reporter à Arrêt d’urgence au chapitre<br />
– Fonctionnement – Poste central SMT).<br />
➜