Wichtiger Hinweis zum Mehrzugsystem: Die meisten zur ... - Massoth
Wichtiger Hinweis zum Mehrzugsystem: Die meisten zur ... - Massoth
Wichtiger Hinweis zum Mehrzugsystem: Die meisten zur ... - Massoth

Create successful ePaper yourself
Turn your PDF publications into a flip-book with our unique Google optimized e-Paper software.
SERVICE<br />
Do-It-Yourself Service Levels<br />
Level - Beginner<br />
Level - Intermediate<br />
Level - Advanced<br />
Attention! Improper service will void<br />
your warranty. For quality service,<br />
contact your authorized retailer or an<br />
LGB factory service station (see<br />
Authorized Service).<br />
Hint: Additional expert instructions<br />
for many LGB products are available<br />
at www.lgb.com.<br />
Lubrication <br />
The axle bearings and the side rod<br />
ends should be lubricated occasionally<br />
with a small amount of LGB<br />
Maintenance Oil (50019).<br />
Cleaning <br />
This model can be cleaned externally<br />
using a mild detergent and gentle<br />
stream of water. Do not immerse this<br />
model.<br />
Attention! This model is equipped<br />
with sound electronics. Do not<br />
expose the speaker directly to water.<br />
Replacing the light bulbs <br />
Front light: Pull the number plate off<br />
the lantern. Remove the screw holding<br />
the lantern. Pull the lantern housing<br />
away from the model. Remove<br />
and replace the bulb. Reassemble.<br />
Rear light: Pull the lantern housing<br />
away from the model. Remove and<br />
replace the bulb. Reassemble.<br />
Cab light: Using tweezers, remove<br />
and replace the bulb.<br />
Replacing the smoke generator <br />
- Pull the smokebox front from the<br />
model (Fig. 5).<br />
- Pull the safety cover out of the<br />
smoke stack (Fig. 7).<br />
- Turn the smoke stack clockwise<br />
and remove it (Fig. 8).<br />
- Remove three screws inside the<br />
smoke box and remove the cover<br />
plate.<br />
- Carefully pull out the circuit board<br />
about an inch.<br />
- Remove the wires for the smoke<br />
generator from the circuit board.<br />
- Use pliers or tweezers to pull the<br />
old smoke generator out of the<br />
stack (Fig. 9).<br />
- Push the replacement generator<br />
into the stack.<br />
- Plug the wires for the smoke generator<br />
onto the pins on the circuit<br />
board.<br />
- Reassemble.<br />
Replacing the traction tire <br />
- Remove the hex head screw on the<br />
wheel with the traction tire.<br />
- Remove the side rods from the<br />
wheel with the traction tire.<br />
- Use a small, straight-blade screwdriver<br />
to replace the traction tire:<br />
- Pry the old traction tire out of the<br />
wheel groove.<br />
- Gently insert the new traction tire<br />
into the wheel groove.<br />
- Make sure that the traction tire is<br />
seated properly in the wheel<br />
groove.<br />
- Reassemble.<br />
Hint: The model is equipped with two<br />
traction tires.<br />
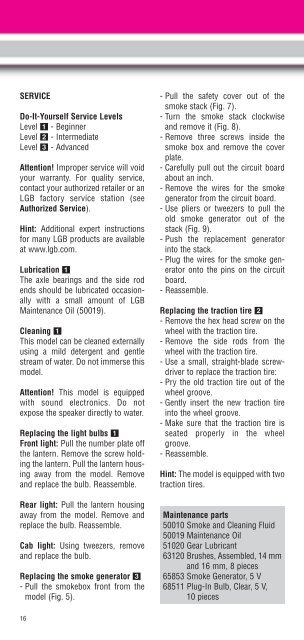
Maintenance parts<br />
50010 Smoke and Cleaning Fluid<br />
50019 Maintenance Oil<br />
51020 Gear Lubricant<br />
63120 Brushes, Assembled, 14 mm<br />
and 16 mm, 8 pieces<br />
65853 Smoke Generator, 5 V<br />
68511 Plug-In Bulb, Clear, 5 V,<br />
10 pieces<br />
INSTRUCTIONS FOR ADVANCED<br />
USERS<br />
MTS Onboard Decoder<br />
Programming functions<br />
You can program numerous functions<br />
of the onboard decoder to suit<br />
your requirements. If you want to do<br />
this, program the "function values" in<br />
"registers" (CVs) using a PC and the<br />
55045 MTS PC Decoder Programming<br />
Module. You can also program<br />
the function values using a 55015<br />
Universal Remote.<br />
Hints:<br />
- For normal operation, it is not necessary<br />
to change the function values.<br />
- If programming results in unsatisfactory<br />
operation, you can reprogram<br />
the factory pre-set values of<br />
most important CVs: Program register<br />
CV55 to function value 55.<br />
This also reprograms the loco<br />
address to the factory pre-set<br />
value.<br />
To reprogram the factory pre-set<br />
function values with the 55015 (displays<br />
shows "P --") input 6, 5, and 5<br />
and press the right arrow button. The<br />
display shows "P --" again: Input 5, 5,<br />
and 5 and press the right arrow button<br />
again.<br />
You can program the following registers:<br />
16 17