Erfolgreiche ePaper selbst erstellen
Machen Sie aus Ihren PDF Publikationen ein blätterbares Flipbook mit unserer einzigartigen Google optimierten e-Paper Software.
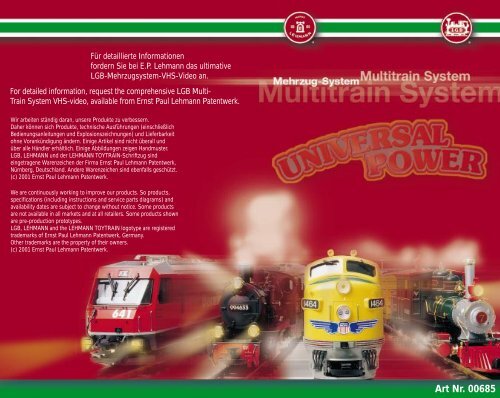
Für detaillierte Informationen<br />
fordern Sie bei E.P. Lehmann das ultimative<br />
LGB-Mehrzugsystem-VHS-Video an.<br />
For detailed information, request the comprehensive LGB Multi-<br />
Train System VHS-video, available from Ernst Paul Lehmann Patentwerk.<br />
Wir arbeiten ständig daran, unsere Produkte zu verbessern.<br />
Daher können sich Produkte, technische Ausführungen (einschließlich<br />
Bedienungsanleitungen und Explosionszeichnungen) und Lieferbarkeit<br />
ohne Vorankündigung ändern. Einige <strong>Art</strong>ikel sind nicht überall und<br />
über alle Händler erhältlich. Einige Abbildungen zeigen Handmuster.<br />
LGB, LEHMANN und der LEHMANN TOYTRAIN-Schriftzug sind<br />
eingetragene Warenzeichen der Firma Ernst Paul Lehmann Patentwerk,<br />
Nürnberg, Deutschland. Andere Warenzeichen sind ebenfalls geschützt.<br />
(c) 2001 Ernst Paul Lehmann Patentwerk.<br />
We are continuously working to improve our products. So products,<br />
specifications (including instructions and service parts diagrams) and<br />
availability dates are subject to change without notice. Some products<br />
are not available in all markets and at all retailers. Some products shown<br />
are pre-production prototypes.<br />
LGB, LEHMANN and the LEHMANN TOYTRAIN logotype are registered<br />
trademarks of Ernst Paul Lehmann Patentwerk, Germany.<br />
Other trademarks are the property of their owners.<br />
(c) 2001 Ernst Paul Lehmann Patentwerk.<br />
<strong>Art</strong> <strong>Nr</strong>. <strong>00685</strong>
2<br />
3<br />
LGB Universal Power – das System mit den unbegrenzten Möglichkeiten<br />
LGB Universal Power - The system with unlimited possibilities<br />
LGB Universal Power ist ein in sich geschlossenes<br />
System von LGB-Stromversorgungen und Fahrreglern.<br />
Ein durchdachtes Konzept, bei dem alles<br />
untereinander kompatibel ist.<br />
Bei LGB Universal Power erhalten Sie die gesamte<br />
Palette an Stromversorgungen, Fahrreglern und<br />
Steuerungskomponenten. Ob Sie eine analoge Anlage<br />
betreiben oder mit dem Mehrzugssystem fahren,<br />
LGB Universal Power bietet die optimalen<br />
Komponenten – alles aus einer Hand!<br />
LGB Universal Power is a integrated system of<br />
LGB power supplies and controls. The components<br />
are engineered to work together instead of making<br />
you work!<br />
With LGB Universal Power, you get a complete choice<br />
of power supplies, throttles, controls and accessories.<br />
Whether you prefer analog operation or the digital<br />
Multi-Train System, LGB Universal Power offers you<br />
the ultimate components – all from one source!
4<br />
5<br />
Wie funktioniert nun eigentlich das LGB-Mehrzugssystem?<br />
How does the Multi-Train System work?<br />
Beim herkömmlichen Analogbetrieb wird<br />
der Motor direkt über die Gleise mit<br />
Gleisspannung versorgt. Bei Betätigung<br />
des Fahrreglers wird die Gleisspannung<br />
erhöht und die Lok fährt vorwärts und<br />
rückwärts. Befinden sich nun zwei Züge<br />
bzw. Loks auf dem selben Gleis, fahren<br />
diese gleichzeitig an und in die selbe<br />
Richtung.<br />
Um im Analogbetrieb mehrere Loks auf<br />
einer Anlage unabhängig voneinander<br />
fahren zu lassen, müssen Sie die Anlage<br />
in getrennte Fahrstrombereiche<br />
unterteilen.<br />
Beim Digitalbetrieb mit dem LGB-<br />
Mehrzugssystem stellt sich die Situation<br />
völlig anders dar:<br />
Am Gleis liegt immer die maximale<br />
Spannung an. Dadurch werden alle Fahrund<br />
Signalbefehle an die Lok übertragen.<br />
Ein in der Lok eingebauter Dekoder,<br />
steuert den Motor und andere Funktionen<br />
der Lok. Wie zum Beispiel, das Ein- und<br />
Ausschalten der Lampen, das Betätigen<br />
der Signale bis hin zum Abrufen von<br />
Bahnhofsdurchsagen.<br />
Selbstverständlich können mit Dekodern<br />
ausgerüstete Loks auch auf analogen<br />
Anlagen betrieben werden. So tun sich<br />
nicht vorstellbare Möglichkeiten beim<br />
Eisenbahnspiel für Sie auf. Jetzt kann die<br />
ganze Familie mitmachen.<br />
Dem Spielspaß sind durch unabhängig<br />
voneinander fahrende Loks und Züge auf<br />
einem Gleis keine Grenzen mehr gesetzt.<br />
With traditional operation on an analog<br />
layout, the loco motor receives power<br />
directly from the tracks. When you turn<br />
the throttle knob, the track voltage<br />
increases, and the locomotive moves<br />
forward or backwards.<br />
If there are two locos or trains on the<br />
same track, both will move at the same<br />
time and in the same direction. To<br />
operate several locos independently on<br />
an analog layout, you must divide the<br />
layout into separately powered track<br />
sections.<br />
But it’s very different with digital<br />
operation on a Multi-Train System<br />
layout: The tracks always carry the full<br />
voltage. Digital commands – for speed,<br />
direction and more – are transmitted<br />
through the tracks. A decoder installed<br />
inside a loco listens to the commands<br />
and then controls the motor and special<br />
functions. For example, the decoder<br />
may turn lights on and off, blow<br />
the whistle or play an announcement<br />
from the conductor.<br />
So, with the Multi-Train System, locos<br />
and trains can operate independently<br />
on the same tracks … and that means<br />
unlimited fun with your model railroad.<br />
Now, the whole family can participate.<br />
Plus, you can operate locos equipped<br />
with Multi-Train System decoders on<br />
analog layouts. It’s automatic.<br />
So you can enjoy your trains anywhere.<br />
With the LGB Multi-Train System,<br />
the possibilities are unlimited!
6<br />
7<br />
Schritt/ Step 1<br />
1<br />
3<br />
2<br />
Starter-Set · 70302<br />
Connect the track sections.<br />
(The tracks form a circle.)<br />
Connect the tracks with the track<br />
clips, to make sure the tracks<br />
cannot pull apart.<br />
Connect the track power cable<br />
to the power pack and plug<br />
the power pack into a house<br />
current outlet.<br />
Verbinden Sie die Gleise miteinander.<br />
(Die Gleise bilden einen Kreis.)<br />
Verbinden Sie die Gleise mit den Gleisklammern,<br />
die einen festen Halt der Gleise garantieren.<br />
Schließen Sie das Anschlußkabel an den Fahrregler<br />
an und stecken den Netzstecker in die Steckdose.
8<br />
9<br />
Schritt/ Step 2<br />
1 2 3<br />
4<br />
5<br />
6<br />
19902 Bahnhofs-Gleis-Set<br />
19902 Station Track Set<br />
7<br />
8<br />
9<br />
19901 Prellbock-Gleis-Set<br />
19901 Siding Track Set<br />
50110<br />
55100<br />
Erweitern Sie Ihre Anlage zusätzlich mit<br />
dem LGB-Bahnhofs-Gleis-Set 19902 und<br />
Prellbock-Gleis-Set 19901.<br />
Schließen Sie die Zentraleinheit der<br />
Mehrzugsteuerung 55100 an die Gleise<br />
an. Stecken Sie das Kabel der Lok-<br />
Maus in die dafür vorgesehene Buchse<br />
und verbinden Sie die Zentraleinheit<br />
mit dem 5-A-Trafo 50110 (siehe Grafik).<br />
Enlarge your layout with LGB track<br />
expansion sets: 19902 Station Track<br />
Set and 19901 Siding Track Set.<br />
Connect the Central Station (from the<br />
55100 Multi-Train System Starter Pack)<br />
to the track. Plug the cable of the Train<br />
Mouse into the Central Station socket,<br />
and connect the Central Station to the<br />
50110 AC Transformer (see figure).
10<br />
11<br />
Schritt/ Step 3<br />
Anstatt das Kabel der Lok-Maus, stecken Sie<br />
das dem Lok-Handy 55016 beiliegende Y-Kabel<br />
in die Buchse.<br />
Das Lok-Handy und die Lok-Maus werden jetzt<br />
mit den freien Anschlüssen des Y-Kabels<br />
verbunden.<br />
1<br />
Unplug the cable of the Train Mouse, and plug<br />
in the Y-cable included with the 55016 Loco<br />
Remote. Now connect the Loco Remote and<br />
the Train Mouse to the ends of the Y-cable.<br />
19902 Bahnhofs-Gleis-Set<br />
19902 Station Track Set<br />
19901 Prellbock-Gleis-Set<br />
19901 Siding Track Set<br />
55016<br />
50110<br />
55100
12<br />
13<br />
Schritt/ Step 4<br />
19902 Bahnhofs-Gleis-Set<br />
19902 Station Track Set<br />
Verbinden Sie anstelle des Lok-Handys 55016 den<br />
Adapterverteiler 55110 (AV) mit dem Y-Kabel.<br />
Verbinden Sie in die dafür vorhergesehenen Buchsen<br />
des Adapterverteilers 55110 (AV) den Trafo 50080 und<br />
die Anschlußkabel der Handys 55015, 55016.<br />
19901 Prellbock-Gleis-Set<br />
19901 Siding Track Set<br />
50110<br />
55110<br />
55015<br />
55100<br />
50080<br />
55016<br />
1 2 3<br />
Unplug the 55016 Loco Remote and<br />
connect the 55110 MTS Remote<br />
Adapter with the Y cable.<br />
Connect the 50080 DC Power Pack<br />
and the cables from the 55015 and<br />
55016 remotes to the appropriate<br />
terminals on the 55110 MTS Remote<br />
Adapter.
14<br />
15<br />
Schritt/ Step 5<br />
1<br />
2<br />
3<br />
Nach dem Programmieren des Weichendecoders<br />
55025 (WD) wechseln Sie<br />
die Handantriebe der Weichen gegen<br />
elektrische Antriebe 12010 aus.<br />
After programming the 55025 MTS Switch<br />
Decoder, replace the hand-operated switch<br />
drives with 12010 EPL Switch Drives.<br />
50080<br />
55100 50110<br />
55016<br />
55110<br />
55015 55016<br />
55015<br />
50080<br />
55100<br />
55110<br />
55025<br />
50110
16<br />
17<br />
Schritt/ Step 5<br />
4<br />
5<br />
55100 50110<br />
55025<br />
55110<br />
55015 55016<br />
50080<br />
55025<br />
Nun schließen Sie den Weichendecoder<br />
an: Blau/rot mittels Gleisanschlußklemmen<br />
50161 an das Gleis;<br />
orange/weiß an den Weichen- bzw.<br />
Signalantrieb - Kabelendhülsen 50131<br />
erleichtern die Arbeit.<br />
Connect the switch decoder:<br />
Blue/red via track power terminals<br />
to the track, orange/white to the<br />
switch or signal drive. 50131 Wire<br />
Terminals make this easy.<br />
6
18<br />
19<br />
Schritt/ Step 6<br />
1 2<br />
Verbinden Sie das Rückmeldemodul<br />
55070 (RM) mit den<br />
Gleiskontakten 17100 und<br />
befestigen diese am Gleiskörper.<br />
Connect the 55070 MTS Feedback<br />
Interface with the 17100 Track<br />
Contacts, and install the contacts<br />
in the track.<br />
55025<br />
50080<br />
55100 50110<br />
55025<br />
55110<br />
55025<br />
55016<br />
55015 55016<br />
55015<br />
55070<br />
50080<br />
55100<br />
55110<br />
50110
20<br />
21<br />
Schritt/ Step 6<br />
3<br />
4<br />
55025<br />
55100 50110<br />
55070<br />
55025<br />
55110<br />
55015 55016<br />
55070<br />
50080<br />
Nun erkennt die Zentrale, wann eine Lok mit unter dem<br />
Fahrwerk befestigten Magnet 17010 einen Gleiskontakt<br />
passiert hat und kann entsprechend vorprogrammierte<br />
Aktionen einleiten.<br />
Now the Central Station knows when a loco (equipped<br />
with a 17010 EPL Loco Magnet) passes the track contact,<br />
and it will trigger a pre-programmed command.
22<br />
23<br />
Schritt/ Step 7<br />
55025<br />
55025 55070<br />
50080<br />
55100 50110<br />
55025<br />
55016<br />
55110<br />
55075 10260<br />
55015 55016<br />
55015<br />
55070<br />
50080<br />
55100<br />
55110<br />
50110<br />
Montieren Sie die Isolierschienenverbinder<br />
10260 an die vorgesehenen Stellen.<br />
(siehe Grafik Gleiskörper).<br />
1 2<br />
Install 10260 Insulated Rail Joiners in<br />
the locations shown (see figure of tracks).
24<br />
25<br />
Schritt/ Step 7<br />
3<br />
4<br />
Verbinden Sie den Belegtmelder 55075 (BM) mit dem Rückmeldemodul<br />
55070 (RM) und den Gleiskontakten mit grauem Kabel 50220. Jetzt erkennt<br />
die Zentrale, wann ein bestimmter Gleisabschnitt belegt ist und verhindert<br />
z.B. die Einfahrt eines weiteren Zugs in diesen Abschnitt.<br />
5<br />
55025<br />
55100 50110<br />
55025<br />
55110<br />
55015 55016<br />
55070<br />
50080<br />
55075<br />
10260<br />
Connect the 55075 MTS Train Detection Module<br />
to the 55070 MTS Feedback Interface and to the<br />
track contacts using 50220 Grey Wire. Now the<br />
Central Station knows when a specific track section<br />
is occupied and can, for example, prevent another<br />
train from entering this track section.
26<br />
27<br />
Schritt/ Step 8<br />
55025<br />
50080<br />
55100 50110<br />
55025<br />
55110<br />
10260<br />
55077<br />
55016<br />
55070<br />
55015 55016<br />
50080<br />
55025<br />
55100<br />
55070 55075<br />
55015<br />
55110<br />
55075<br />
50110<br />
Schließen Sie die Anzeigemodule<br />
55077 (AM) 1 + 2 an den Adapterverteiler<br />
55110 (AV) und den Trafo<br />
50080 an. Am Ausgang der Anzeigemodule<br />
können z.B. Glühlämpchen<br />
68502 eines selbstgebauten<br />
Gleisbildstellwerks o.Ä. angeschlossen<br />
werden.<br />
1 2<br />
Connect the 55077 Display<br />
Modules 1 and 2 to the 55110<br />
MTS Remote Adapter and the<br />
55080 transformer. The terminals<br />
of the display modules can be<br />
connected, for example, to lights<br />
in a control panel or similar<br />
device.
28<br />
29<br />
Schritt/ Step 9<br />
1 2<br />
Wechseln Sie den Kabeleinsatz<br />
des Lok- oder Universal-Handys<br />
gegen den RC-Sender 55050 aus.<br />
Bestücken Sie Ihr Handy mit<br />
Batterien. Verbinden Sie<br />
den RC-Empfänger 55055 mit<br />
dem Adapterverteiler 55110 (AV).<br />
55025<br />
55100 50110<br />
Replace the cable insert of the Loco and<br />
Universal Remotes with the 55050/55051<br />
Wireless Transmitter. Install batteries in the<br />
remote. Connect the 55055/55056 Wireless<br />
Receiver with the 55110 MTS Remote<br />
Adapter.<br />
50080<br />
55025<br />
55077<br />
55110<br />
10260<br />
55077<br />
55016<br />
55070<br />
55015 55016<br />
50080<br />
55025<br />
55100<br />
55070 55075<br />
55015<br />
55110<br />
55075<br />
Funkempfänger<br />
Wireless Receiver<br />
50110
30<br />
31<br />
Schritt/ Step 10<br />
1 2<br />
Um die LGB-Anlage auch über einen<br />
PC steuern zu können, verbinden<br />
Sie das LGB-Interface 55060 mit<br />
dem Adapterverteiler 55110 (AV)<br />
und Ihrem PC oder Laptop.<br />
(Entsprechende Anschlußkabel<br />
werden beim Interface 55060<br />
mitgeliefert.)<br />
55025<br />
55100 50110<br />
To operate your LGB layout<br />
from your PC, connect the<br />
55060 MTS Computer<br />
Interface to the 55110 MTS<br />
Remote Adapter and to your<br />
PC or laptop computer. (The<br />
connecting cables are included<br />
with the 55060 interface.)<br />
50080<br />
55025<br />
55077<br />
55110<br />
10260<br />
55077<br />
55016<br />
55070<br />
55075<br />
55015 55016<br />
50080<br />
55025<br />
55100<br />
55070<br />
55075<br />
55015<br />
55110<br />
50110


