

Manual del usuario para filtros de arena - Pentair
Manual del usuario para filtros de arena - Pentair
Manual del usuario para filtros de arena - Pentair

You also want an ePaper? Increase the reach of your titles
YUMPU automatically turns print PDFs into web optimized ePapers that Google loves.
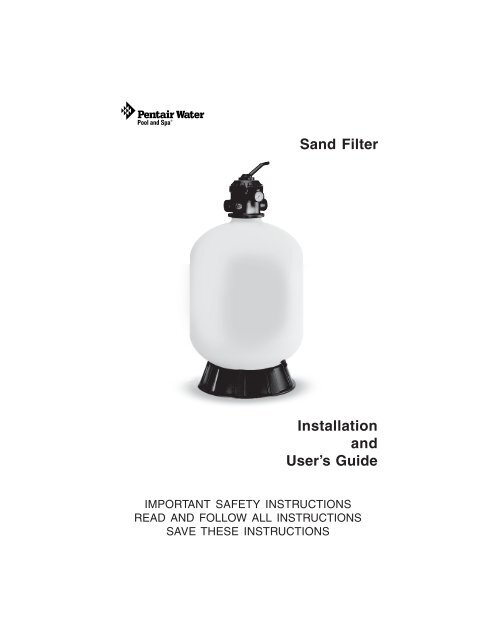
Sand Filter<br />
Installation<br />
and<br />
User’s Gui<strong>de</strong><br />
IMPORTANT SAFETY INSTRUCTIONS<br />
READ AND FOLLOW ALL INSTRUCTIONS<br />
SAVE THESE INSTRUCTIONS<br />
Sand Filter Installation and User’s Gui<strong>de</strong>
Technical Support<br />
Sanford, North Carolina (8 A.M. to 5 P.M. ET)<br />
Moorpark, California (8 A.M. to 5 P.M. PT)<br />
Phone: (800) 831-7133<br />
Fax (800) 284-4151<br />
Web sites: visit www.pentairpool.com and staritepool.com<br />
Contents<br />
Warnings and Important Safety Precautions................................................. i<br />
Section 1: Filter Overview .............................................................................1<br />
Section 2: Installation .................................................................................... 2<br />
Section 3: Operation and Maintenance ..................................................... 6<br />
Initial Start-Up .................................................................................................6<br />
Maintenance....................................................................................................8<br />
Cleaning ..........................................................................................................8<br />
Filter and Control Valve Functions ..............................................................9<br />
Filter Backwash Procedure ..........................................................................10<br />
Chemical Cleaning ....................................................................................... 11<br />
Winterizing the System ................................................................................. 12<br />
Technical Data and Replacement Parts .................................................... 12<br />
Troubleshooting ............................................................................................ 13<br />
© 2009 <strong>Pentair</strong> Water Pool and Spa, Inc. All rights reserved<br />
This document is subject to change without notice<br />
1620 Hawkins Ave., Sanford, NC 27330 • (919) 566-8000<br />
10951 West Los Angeles Ave., Moorpark, CA 93021 • (805) 553-5000<br />
<strong>Pentair</strong> Water Pool and Spa ® is a registered tra<strong>de</strong>mark of <strong>Pentair</strong> Water<br />
Pool and Spa, Inc. and/or its affiliated companies in the United States and/<br />
or other countries. Filter-Cleanse is a tra<strong>de</strong>mark of Advantis Technologies<br />
Inc. and Klean It® is a registered tra<strong>de</strong>mark of BioLab, Inc. Unless noted,<br />
names and brands of others that may be used in this document are not<br />
used to indicate an affiliation or endorsement between the proprietors of<br />
these names and brands and <strong>Pentair</strong> Water Pool and Spa, Inc. Those<br />
names and brands may be the tra<strong>de</strong>marks or registered tra<strong>de</strong>marks of<br />
those parties or others.<br />
P/N 152006 Rev A - 12/09/09<br />
Sand Filter Installation and User’s Gui<strong>de</strong>
WARNINGS AND IMPORTANT SAFETY PRECAUTIONS<br />
SERIOUS BODILY INJURY OR DEATH CAN RESULT IF THIS<br />
SAND FILTER IS NOT INSTALLED AND USED CORRECTLY.<br />
INSTALLERS, POOL OPERATORS AND POOL OWNERS<br />
MUST READ THESE WARNINGS AND ALL INSTRUCTIONS<br />
BEFORE USING THIS SAND FILTER.<br />
This sand filter is inten<strong>de</strong>d for use in swimming pool applications.<br />
Most states and local co<strong>de</strong>s regulate the construction, installation, and<br />
operation of public pools and spas, and the construction of resi<strong>de</strong>ntial<br />
pools and spas. It is important to comply with these co<strong>de</strong>s, many of which directly<br />
regulate the installation and use of this product. Consult your local building and health<br />
co<strong>de</strong>s for more information.<br />
IMPORTANT NOTICE - Attention Installer: This Installation and<br />
User’s Gui<strong>de</strong> (“Gui<strong>de</strong>”) contains important information about the installation,<br />
operation and safe use of this sand filter. This Gui<strong>de</strong> should be given to the<br />
owner and/or operator of this equipment.<br />
Before installing this product, read and follow all warning notices<br />
and instructions in this Gui<strong>de</strong>. Failure to follow warnings and<br />
instructions can result in severe injury, <strong>de</strong>ath, or property damage. Call (800) 831-7133<br />
for additional free copies of these instructions. Please refer to www.pentair.com for<br />
more information related to this product.<br />
Water temperature in excess of 100° F (37.7° C) may be hazardous to<br />
your health. Prolonged immersion in hot water may induce<br />
hyperthermia. Hyperthermia occurs when the internal temperature of<br />
the body reaches a level several <strong>de</strong>grees above normal body<br />
temperature of 98.6° F. (37° C.). Effects of hyperthermia inclu<strong>de</strong>: (1)<br />
Unawareness of impending danger. (2) Failure to perceive heat. (3)<br />
Failure to recognize the need to leave the spa. (4) Physical inability to<br />
exit the spa. (5) Fetal damage in pregnant women. (6) Unconsciousness<br />
resulting in danger of drowning. The use of alcohol, drugs, or<br />
medication can greatly increase the risk of fatal hyperthermia in hot<br />
tubs and spas.<br />
To reduce the risk of injury, do not permit children to use or operate<br />
this sand filter.<br />
When setting up pool water turnovers or flow rates the operator must<br />
consi<strong>de</strong>r local co<strong>de</strong>s governing turnover as well as disinfectant feed<br />
ratios.<br />
DO NOT increase pump size; this will increase the flow rate through<br />
the system and may exceed the maximum flow rate stated on the drain<br />
cover.<br />
For filters inten<strong>de</strong>d for use in other than single-family dwellings, a<br />
clearly labeled emergency switch shall be provi<strong>de</strong>d as part of the<br />
installation. The switch shall be readily accessible to the occupants<br />
and shall be installed at least 5 feet (1.52 m) away, adjacent to, and<br />
within sight of, the filter.<br />
Sand Filter Installation and User’s Gui<strong>de</strong><br />
i
ii<br />
WARNINGS AND IMPORTANT SAFETY PRECAUTIONS<br />
High Pressure from the Sand Filter can cause severe<br />
injury or major property damage due to tank se<strong>para</strong>tion.<br />
Release all pressure and read instructions before<br />
working on the sand filter.<br />
If the filter clamp is adjusted un<strong>de</strong>r pressure, the tank<br />
can se<strong>para</strong>te, causing serious injury or major property<br />
damage.<br />
BEFORE WORKING ON FILTER!<br />
(1) Stop pump.<br />
(2) Open air release valve.<br />
(3) Release all pressure from system.<br />
RISK OF ELECTRICAL SHOCK OR ELECTROCUTION:<br />
PUMPS REQUIRE HIGH VOLTAGE WHICH CAN<br />
SHOCK, BURN, OR CAUSE DEATH.<br />
BEFORE WORKING ON PUMP!<br />
Always disconnect power to the pool pump at the<br />
circuit breaker from the pump before servicing the<br />
pump. Failure to do so could result in <strong>de</strong>ath or<br />
serious injury to service person, pool users or<br />
others due to electric shock.<br />
A pool or spa pump must be installed by a qualified pool and spa<br />
service professional in accordance with the National Electrical Co<strong>de</strong><br />
and all applicable local co<strong>de</strong>s and ordinances. Improper installation may create an<br />
electrical hazard which could result in <strong>de</strong>ath or serious injury to pool users, installers, or<br />
others due to electrical shock, and may also cause damage to property.<br />
Pumps are not a substitute for properly installed and secured pool<br />
drain covers. An ANSI/ASME A112.19.8 approved anti-entrapment<br />
drain cover must be used for each drain. Pools and spas should utilize a minimum of two<br />
drains per pump. If a drain cover becomes loose, broken or is missing, close the pool or<br />
spa immediately and shut off the pump until an approved anti-entrapment drain cover is<br />
properly installed with the manufacturer's supplied screws.<br />
For information about the Virginia Graeme Baker Pool and Spa Safety<br />
Act, contact the Consumer Product Safety Commission at (301) 504-<br />
7908 or visit www.cpsc.gov.<br />
Important Note: Always turn off all power to the pool pump before<br />
installing the cover or working on any suction outlet.<br />
Sand Filter Installation and User’s Gui<strong>de</strong>
Section 1<br />
Filter Overview<br />
Your high rate sand filter is <strong>de</strong>signed to produce clear, sparkling water<br />
and operate for years with a minimum of maintenance when installed,<br />
operated and maintained in accordance with these instructions. Your filter<br />
uses special filter sand to remove dirt particles from the water. Dirt is<br />
collected in the filter by the sand bed as water flows through the filter.<br />
Water enters the filter through the valve on top of the filter and is<br />
distributed evenly downward across the sand bed. The dirt is removed by<br />
the sand and the clean water flows through the piping (laterals) at the<br />
bottom of the filter, up through the stand pipe, back to the valve on top of<br />
the filter, where the clean water is returned to the pool through the piping<br />
or hoses.<br />
1<br />
This filter operates un<strong>de</strong>r high pressure. When any part of the circulating<br />
system (e.g., clamp, pump, filter, valves, etc.) is serviced, air can enter the<br />
system and become pressurized. Pressurized air can cause the lid or control<br />
valve to se<strong>para</strong>te which may result in serious injury, <strong>de</strong>ath, or property<br />
damage. To avoid this potential hazard, follow these instructions.<br />
1. Before repositioning valves and before beginning the assembly,<br />
disassembly, or adjustment of the clamp or any other service of the<br />
circulating system:<br />
(a) Turn the pump off and shut off any automatic controls to ensure the system<br />
is not inadvertently started during the servicing;<br />
(b) Open manual air relief valve;<br />
(c) Wait until all pressure is relieved, pressure gauge must read zero (0).<br />
2. Whenever installing the filter clamp, follow the filter valve and clamp<br />
installation instructions exactly.<br />
3. Once service on the circulating system is complete, follow system restart<br />
instructions exactly.<br />
4. Maintain circulation system properly. Replace worn or damaged parts<br />
immediately (e.g., clamp, pressure gauge, relief valve, o-rings, etc.).<br />
5. Be sure that the filter is properly mounted and positioned according to<br />
instructions provi<strong>de</strong>d.<br />
After a period of time, dirt will accumulate in the filter causing a<br />
resistance to the flow of water through the filter. This resistance results<br />
in a diminished flow of water and a rise in the pressure of the filter.<br />
Eventually the filter sand will have removed so much dirt and the filter<br />
pressure risen to such a point that it will be necessary to clean<br />
(backwash) your filter.<br />
Sand Filter Installation and User’s Gui<strong>de</strong>
2<br />
By setting the valve on top of the filter to the “Backwash” position, the<br />
flow of water is automatically reversed through the filter so that the flow<br />
of water is directed to the bottom of the filter, up through the sand bed,<br />
flushing the dirt and <strong>de</strong>bris out through the waste line. Once the<br />
backwash procedure is complete, the valve is manually returned to its<br />
“Filter” position to resume normal filtration. The filter’s function is to<br />
remove suspen<strong>de</strong>d matter from the water. It does not sanitize the water.<br />
For sparkling clear water, the water must be sanitized as well as<br />
balanced. Pool chemistry is a specialized area, and you should consult<br />
your local pool service specialist for specific <strong>de</strong>tails. In general, proper<br />
pool sanitation requires a free chlorine level of 1 to 2 PPM and a pH<br />
range of 7.2 to 7.6. Your filtration system should be <strong>de</strong>signed to meet your<br />
local health co<strong>de</strong>s. As a minimum, you must be sure that your system will<br />
turnover the total volume of water in your pool at least twice in a twentyfour<br />
hour period.<br />
Failure to operate your filter system or ina<strong>de</strong>quate<br />
filtration can cause poor water clarity obstructing visibility<br />
in your pool. Poor water clarity may obscure objects in the water which<br />
while swimming and diving could cause serious personal injury or <strong>de</strong>ath.<br />
Never swim in a pool with poor water clarity.<br />
Section 2<br />
Installation<br />
1. Read and un<strong>de</strong>rstand all instructions before attempting to<br />
install, operate or maintain your pump and sand filter system.<br />
2. Provi<strong>de</strong> space and lighting for routine maintenance access. Locate<br />
the system close to the pool. Install electrical controls (e.g., on/off<br />
switches, timers, control systems, etc.) at least five (5) feet from the<br />
filter. This will allow you enough room to stand clear of the filter<br />
during system start up.<br />
3. Remove all individual components from carton and inspect for any<br />
visible damage. If carton or parts are damaged contact seller or<br />
freight company.<br />
Sand Filter Installation and User’s Gui<strong>de</strong>
3<br />
Blockage of suction fittings can cause serious or fatal<br />
injury due to drowning. To reduce the risk of injury, do<br />
not permit children to use this product.<br />
Never work on the pump while it is running or power is<br />
still connected. High voltage can cause serious or fatal<br />
injury. A suitable ground fault interrupter (GFCI) should always be<br />
installed at the power supply source of this unit. Be sure to ground the<br />
motor before connecting to electrical AC power supply. Failure to<br />
ground the motor can cause serious or fatal electrical shock hazard. DO<br />
NOT ground to a gas supply pipe line.<br />
4. The filter is ready to be moved into its final position. The system<br />
must be placed on level solid earth. When the filter is filled with<br />
sand and water it can weigh several hundred pounds.<br />
5. Be certain to install the precise amount of filter sand listed on<br />
your filter name plate. You must use only No. 20 standard silica<br />
sand having a uniformity coefficient of 1.75 or less. No. 20 silica<br />
sand has a particle size of .018-.022 inches (.45 to .55 mm).<br />
Before pouring the sand into the filter, look insi<strong>de</strong> and check the<br />
lower un<strong>de</strong>r drain for broken or loose laterals (or fingers), which<br />
may have been acci<strong>de</strong>ntally damaged by rough handling during<br />
shipment. Replace any broken parts if necessary.<br />
6. Install the sand gui<strong>de</strong> in the top of the filter and fill the tank<br />
about half full of water. Pour the sand into the top of the filter at<br />
a slow rate so that the weight of the sand does not damage the<br />
laterals. After the required amount of sand has been installed,<br />
remove and discard the sand gui<strong>de</strong>. Wash away all sand around<br />
the opening at the top of the tank.<br />
TYPICAL CLAMP<br />
HALF<br />
VALVE FLANGE<br />
TANK FLANGE<br />
Figure 1.<br />
Sand Filter Installation and User’s Gui<strong>de</strong>
4<br />
7. Be sure top of filter is free of any sand or <strong>de</strong>bris and valve o-ring<br />
is in place on valve body. Install valve so that the port locations<br />
are in the <strong>de</strong>sired final position. Valve ports are labeled with the<br />
location of where they should be connected i.e. pump port must go<br />
to pump discharge, waste port must go to the waste line and<br />
return port must go to the pool return.<br />
Figure 2.<br />
8. Insure that the valve is firmly pushed into the top of the tank and<br />
that the flange of the tank and the flange of the valve are<br />
contacting each other. See Figure 1.<br />
9. The plastic clamp can now be installed. Place the clamp half over<br />
the valve flange and the tank flange as shown in Figure 1. Insert<br />
the clamp screws and nuts into the clamp making sure that the nuts<br />
are located in the special hexagonal retainer slots on the clamps.<br />
See Figure 2.<br />
10. Tighten clamp screws firmly and visually check the valve tank and<br />
clamp assembly to insure that the joint is correctly assembled.<br />
High Pressure:<br />
Improper tank valve<br />
assembly could cause the<br />
valve to se<strong>para</strong>te and cause<br />
serious injury and/or major<br />
property damage.<br />
11. The filter unit has a maximum operating pressure listed on the<br />
filter name plate. DO NOT OPERATE this unit above the<br />
maximum operating pressure of the valve or the filter. Never<br />
connect the filter and valve unit to a pump which can generate a<br />
pressure that exceeds the operating pressure of the filter or valve.<br />
Sand Filter Installation and User’s Gui<strong>de</strong>
5<br />
12. Use sealant on all tapered male connections of pipes and fittings.<br />
Use only sealant compounds suited for plastic pipe. Support pipe<br />
to prevent strains on filter, pump or valve. DO NOT USE<br />
PETROLEUM BASED PRODUCTS. NOTICE: All valve<br />
internal threads are tapered except the air blee<strong>de</strong>r connection. Do<br />
not over tighten tapered thread connections.<br />
13. Install pressure gauge in 1/4”NPT port directly across from the<br />
pump port of the valve.<br />
14. Never store pool chemicals within ten (10) feet of your pool filter,<br />
pump or valve. Pool chemicals should always be stored in a cool,<br />
dry, well ventilated area.<br />
Chemical fumes and/or spills can cause serious<br />
corrosion to the filter and pump structural components. Structurally<br />
weakened components can cause filter, pump or valve attachments to<br />
se<strong>para</strong>te and could cause serious bodily injury or property damage.<br />
The system’s centrifugal pump operates with electrical<br />
voltage, and can generate both vacuum and pressure in the water<br />
system. When properly wired and plumbed, this pump will operate in a<br />
safe manner.<br />
High voltage can cause serious or fatal injury. Always<br />
install a suitable GFCI at the power source of this unit as an ad<strong>de</strong>d<br />
safety precaution. Article 681-31 of the NEC requires that a GFCI be<br />
used if this pump is used with a storable pool.<br />
15. Avoid over tightening the pipe threads when connecting fittings to<br />
the pump or valve. Proper procedure is to apply a pipe sealant to<br />
the thread and then install hand tight plus one turn. DO NOT<br />
OVER TIGHTEN.<br />
Sand Filter Installation and User’s Gui<strong>de</strong>
6<br />
Section 3<br />
Operation and Maintenance<br />
Initial Start-Up<br />
1. Be sure the correct amount of silica filter sand is in the tank<br />
and that all connections have been ma<strong>de</strong> and are secure.<br />
2. Verify that the backwash is open so that water is free to flow<br />
from the pool and out the backwash line. Set the control valve<br />
to “Backwash” position.<br />
This filter operates un<strong>de</strong>r pressure. With the valve<br />
clamped properly and operated without air in the<br />
system, this filter will operate in a safe manner. Air<br />
entering the filter and the valve not clamped<br />
correctly can cause the valve to se<strong>para</strong>te, which<br />
could cause serious personal injury and/or property<br />
damage.<br />
Always turn pump off before changing valve<br />
positions. Changing valve positions while the pump<br />
is running can damage the control valve, which<br />
may cause serious injury or property damage.<br />
3. Check the valve clamp on the filter for proper installation. For<br />
valve clamp installation instructions, see Section 2:<br />
“Installation” on page 2.<br />
4. Open the manual air blee<strong>de</strong>r. (See Figure 3 for air blee<strong>de</strong>r<br />
location). STAND CLEAR OF THE FILTER. Prime and<br />
start the pump according to the pump instructions allowing the<br />
filter tank to fill with water. Close the air blee<strong>de</strong>r on the filter<br />
when a steady stream of water emerges.<br />
5. Once the water flow is steady out the waste line, run the pump<br />
for at least two minutes. This initial backwashing of the filter is<br />
recommen<strong>de</strong>d to remove any impurities of fine sand particles in<br />
the silica sand media.<br />
6. Turn the pump off and set valve to "Rinse" position. Ensure that<br />
all pool suction and return lines are open so that the water is<br />
free to flow from the pool to waste. STAND CLEAR OF<br />
FILTER and start the pump.<br />
7. Run the pump for at least two minutes.<br />
Sand Filter Installation and User’s Gui<strong>de</strong>
8. Turn the pump off and set valve to "Filter" position. Be<br />
sure that all pool suction and return lines are open so that<br />
water is free to flow from and to the pool.<br />
9. Open the manual air blee<strong>de</strong>r on the filter. STAND<br />
CLEAR OF FILTER and start the pump.<br />
10. Close the air blee<strong>de</strong>r on the filter when a steady stream of<br />
water emerges.<br />
11. The filter has now started its filtering cycle. Verify that<br />
water is returning to the pool and take note of the operating<br />
pressure. The original starting pressure is<br />
___________psi with the filter clean.<br />
12. Check the system for water leaks. If a leak is found, shut<br />
the pump off before correcting the leak.<br />
13. As the filter removes dirt and impurities from the pool<br />
water, the accumulation will cause the filter pressure to rise<br />
and flow to diminish. When the pressure gauge reading is<br />
10 psi higher than the clean filter reading noted above, it is<br />
time to backwash the filter.<br />
7<br />
<strong>Manual</strong> air blee<strong>de</strong>r<br />
Figure 3.<br />
Sand Filter Installation and User’s Gui<strong>de</strong>
8<br />
Maintenance<br />
Proper care and maintenance of the pump and sand filter system will<br />
add many years of enjoyment to the pool. Follow these suggestions for<br />
long trouble free operation.<br />
1. To clean the exterior of the pump and sand filter system of<br />
dust and dirt, wash with mild <strong>de</strong>tergent and water and then<br />
hose off. Do not use solvents.<br />
2. If internal filter maintenance is required, sand may be<br />
removed by removing the entire drain spigot from the<br />
bottom of the filter and flushing with a gar<strong>de</strong>n hose.<br />
3. The filter is a pressure vessel and should never be serviced<br />
while un<strong>de</strong>r pressure. Always relieve tank pressure and<br />
open air blee<strong>de</strong>r on filter before attempting to service the<br />
filter.<br />
4. When restarting the filter always open the manual air<br />
blee<strong>de</strong>r on the filter and STAND CLEAR OF FILTER.<br />
5. The strainer basket in the pump should be inspected and<br />
cleaned twice each week. Remove the clear lid and the<br />
basket, and clean <strong>de</strong>bis from basket. Inspect the lid o-ring;<br />
if damaged, replace. The pump seal requires no<br />
lubrication. The pump motor should only be serviced by a<br />
motor service center.<br />
Cleaning<br />
1. The filter on a new pool should be backwashed, and<br />
cleaned after the first 48 hours of operation to clean out<br />
construction <strong>de</strong>bris. There are three different ways to<br />
i<strong>de</strong>ntify when the filter needs backwashing:<br />
a) The most accurate indicator on pool systems with a flow<br />
meter is to backwash when the flow <strong>de</strong>creases 30% from<br />
original (clean filter) flow. For example, if the original flow<br />
was 60 GPM, the filter should be backwashed when the<br />
flow is reduced by about 20 GPM (or 30%) to 40 GPM.<br />
b) A more subjective and less accurate indicator is to observe<br />
the amount of water flowing from the flow directionals<br />
located in the wall of the pool. The filter should be<br />
backwashed once it is <strong>de</strong>tected that the flow has been<br />
reduced.<br />
Sand Filter Installation and User’s Gui<strong>de</strong>
9<br />
Cleaning (continued)<br />
c) The most commonly used, but least accurate indicator is to<br />
backwash when the filter gauge reading increases 10 psi<br />
over the initial (clean filter) reading.<br />
2. It is important not to backwash the filter solely on a timed<br />
basis such as every three (3) days. It is also important to<br />
note that backwashing too frequently actually causes poor<br />
filtration. Factors like weather conditions, heavy rains, dust<br />
or pollen, and water temperatures all affect the frequency<br />
of backwashing. As you use your pool, you will become<br />
aware of these influences.<br />
Filter and Control Valve Functions<br />
FILTER: From pump, through valve, downward through filter sand<br />
bed, up through center pipe to valve return port, and back to the pool<br />
for normal filter action and vacuuming pool through filter.<br />
BACKWASH: From pump, through valve, down through center pipe,<br />
up through filter sand to valve, and out waste port. This position is<br />
used for cleaning filter by reversing flow.<br />
RINSE: From pump, through valve, downward through filter sand, up<br />
through center pipe to valve and out waste port. This position is used<br />
for start up cleaning and resettling filter bed after backwashing.<br />
WASTE: From pump, through valve, bypasses filter and goes to waste<br />
port. This position is for vacuuming directly to waste, lowering pool<br />
level, or draining pool.<br />
CLOSED: NO FLOW IN THIS POSITION - DO NOT USE<br />
THIS SETTING WHILE PUMP IS OPERATING.<br />
RECIRCULATE: From pump, through valve, bypasses filter and goes<br />
to return port and back to pool. This position is for circulating water<br />
without going through filter.<br />
WINTERIZING: Valve position for a winterized filter, see page 12.<br />
Sand Filter Installation and User’s Gui<strong>de</strong>
10<br />
Filter Backwash Procedure<br />
Failure to operate your filter system or ina<strong>de</strong>quate<br />
filtration can cause poor water clarity obstructing<br />
visibility in your pool. Poor water clarity may obscure<br />
objects in the water which while swimming and diving<br />
could cause serious injury or <strong>de</strong>ath. Never swim in a<br />
pool with poor water clarity.<br />
To prevent equipment damage and possible injury,<br />
always turn pump off before changing valve position.<br />
1. Stop pump.<br />
2. Ensure that the suction and backwash lines are open so<br />
that water is free to come from the pool and flow out the<br />
backwash line. Set control valve to "Backwash" position.<br />
3. STAND CLEAR OF FILTER and start pump.<br />
4. Backwash filter for approximately three (3) minutes or until<br />
backwash water is clean.<br />
5. Stop pump and set valve to "Rinse" position.<br />
6. STAND CLEAR OF FILTER and start pump..<br />
7. Rinse filter for approximately 30 seconds.<br />
8. Stop pump and set valve to "Filter" position.<br />
9. Ensure the pool return line is open so that water may flow<br />
freely from the filter back to the pool.<br />
10. Open manual air blee<strong>de</strong>r on filter. STAND CLEAR OF<br />
FILTER and start pump.<br />
11. Close manual air blee<strong>de</strong>r on filter when a steady stream of<br />
water emerges from the blee<strong>de</strong>r.<br />
12. The filter has now started its filtering cycle. Verify the<br />
water is returning to the pool and take note of the filter<br />
pressure.<br />
13. The filter pressure in Step 12 above should not exceed the<br />
pressure originally observed on the filter when it was<br />
initially started. If after backwashing, the pressure is 4 to 6<br />
psi above the start condition it will be necessary to<br />
chemically clean the sand bed.<br />
Sand Filter Installation and User’s Gui<strong>de</strong>
Chemical Cleaning<br />
11<br />
1. It is recommen<strong>de</strong>d that one of the following cleaners be<br />
used: FILTER-CLEANSE - Advantis Technologies, Inc.<br />
KLEEN IT® - BioLab, Inc. These cleaners will remove<br />
oils, scale and rust from the sand bed in one cleaning<br />
operation.<br />
2. Mix the solution following the manufacturer's instructions<br />
on the label.<br />
3. Backwash the filter with the valve as <strong>de</strong>scribed above.<br />
4. If the filter is below pool level, switch pump off and close<br />
the appropriate valves to prevent draining the pool.<br />
5. Switch off pump, open filter drain and allow filter to empty.<br />
Place valve in "Backwash" position.<br />
6. After the filter has drained, close the filter drain and<br />
remove the pump strainer pot lid.<br />
7. Be sure the backwash lines are open.<br />
8. Switch the pump on and slowly pour the cleaning solution<br />
into the pump strainer with the pump running. If filter is<br />
below pool, open shut off valve slightly to allow pump to<br />
run.<br />
9. Continue adding solution until the sand bed is saturated with<br />
cleaning solution.<br />
10. Switch off the pump and leave filter in "Backwash"<br />
position. Allow the filter to stand overnight (12 hours).<br />
11. Replace the pump lid and follow backwash procedure as<br />
<strong>de</strong>scribed above.<br />
12. Do not allow cleaning solution to get into the pool.<br />
Sand Filter Installation and User’s Gui<strong>de</strong>
12<br />
Winterizing the System<br />
Allowing water to freeze in the system will damage<br />
the system and cause potential water damage/<br />
flooding and potential property damage.<br />
1. In areas that have freezing winter temperatures, the pool<br />
equipment must be winterized to protect it from damage.<br />
2. Backwash the filter. Switch off the pump and set the<br />
control valve to the “Winterize” position.<br />
3. Remove the drain port cap at the bottom of the filter.<br />
IMPORTANT NOTE: Remove drain port cap only for<br />
draining water from filter. Removing the entire fitting<br />
will allow sand to drain also. The filter will drain<br />
slowly. Leave the drain port cap off and store it during<br />
the time the system is shut down.<br />
The Multiport Valve should be left in the<br />
“Winterize” position during the shutdown season<br />
so that the rubber seal of the valve diverter has no<br />
pressure on it. Failure to do so can damage the<br />
valve diverter seal which can cause property<br />
damage from leaking water.<br />
4. Drain all appropriate system piping.<br />
5. It is recommen<strong>de</strong>d that the pump and filter be covered with<br />
a tarpaulin or plastic sheet to inhibit <strong>de</strong>terioration from the<br />
weather. DO NOT wrap the pump motor with plastic.<br />
6. In installations where the pump cannot be drained a 40%<br />
Propylene Glycol 60% water solution will protect to -50° F<br />
(-45.5° C)<br />
Note: Do not use anti-freeze solutions except<br />
Propylene Glycol; as other anti-freeze are highly toxic<br />
and will damage the pump.<br />
Technical Data and Replacement Parts<br />
Note<br />
Please see the provi<strong>de</strong>d insert sheet for<br />
Technical Data and Replacement Parts information specific to your<br />
Filter.<br />
Sand Filter Installation and User’s Gui<strong>de</strong>
Sand Filter Installation and User’s Gui<strong>de</strong><br />
Troubleshooting<br />
roblem<br />
P e<br />
aus<br />
C n<br />
Actio<br />
not<br />
water<br />
Pool<br />
clean.<br />
sufficiently<br />
inhibit<br />
to<br />
a<strong>de</strong>quate<br />
not<br />
chemistry<br />
Pool<br />
1.<br />
growth.<br />
algae<br />
cycle.<br />
backwash<br />
a<br />
frequent<br />
Too<br />
2.<br />
size.<br />
sand<br />
wrong<br />
or<br />
amount<br />
Improper<br />
3.<br />
rate.<br />
turnover<br />
Ina<strong>de</strong>quate<br />
4.<br />
service<br />
consult<br />
or<br />
chemistry<br />
pool<br />
Maintain<br />
technician.<br />
filter<br />
clean<br />
above<br />
10PSI<br />
to<br />
build<br />
to<br />
Allow pressure<br />
backwashing.<br />
before<br />
condition<br />
pool<br />
consult<br />
or<br />
size<br />
sand<br />
and<br />
<strong>de</strong>pth<br />
bed<br />
sand<br />
Check<br />
technician.<br />
service<br />
pool<br />
or<br />
<strong>de</strong>aler<br />
consult<br />
or<br />
time<br />
longer<br />
system for<br />
Run<br />
technician.<br />
service<br />
pressure.<br />
filter<br />
igher<br />
H .<br />
backwashing<br />
Insufficient<br />
1.<br />
<strong>de</strong>posits.<br />
mineral<br />
with<br />
plugging<br />
bed<br />
Sand<br />
2.<br />
restriction.<br />
or<br />
valve<br />
closed<br />
Partially<br />
3.<br />
clear.<br />
runs<br />
effluent<br />
until<br />
Backwash<br />
filter.<br />
clean<br />
Chemically<br />
line.<br />
return<br />
in<br />
obstruction<br />
remove<br />
or<br />
valve<br />
Open<br />
cycles.<br />
filter<br />
hort<br />
S .<br />
backwashing<br />
Improper<br />
1.<br />
inhabit<br />
to<br />
a<strong>de</strong>quate<br />
not<br />
chemistry<br />
Pool<br />
2.<br />
growth.<br />
algae<br />
bed.<br />
sand<br />
Plugged<br />
3.<br />
high.<br />
too<br />
Flow rate<br />
4.<br />
clear.<br />
runs<br />
effluent<br />
until<br />
Backwash<br />
service<br />
pool<br />
consult<br />
or<br />
chemistry<br />
pool<br />
Maintain<br />
technician.<br />
and<br />
bed<br />
sand<br />
of<br />
surface<br />
1"<br />
top<br />
remove<br />
<strong>Manual</strong>ly<br />
required.<br />
as<br />
clean<br />
chemically<br />
filter.<br />
of<br />
capacity<br />
flow to<br />
Restrict<br />
pool<br />
flow to<br />
Return<br />
low filter<br />
diminished,<br />
pressure.<br />
pot.<br />
lint<br />
and<br />
hair<br />
pump<br />
the<br />
in<br />
Obstruction<br />
1.<br />
pump.<br />
in<br />
Obstruction<br />
2.<br />
pump.<br />
to<br />
line<br />
suction<br />
in<br />
Obstruction<br />
3.<br />
strainer.<br />
in<br />
basket<br />
Clean<br />
pump.<br />
clean<br />
and<br />
Disassemble<br />
lines.<br />
in<br />
obstruction<br />
Remove<br />
basket.<br />
skimmer<br />
Clean<br />
line.<br />
suction<br />
in<br />
valves<br />
Open<br />
pool.<br />
to<br />
returning<br />
and<br />
S .<br />
lateral<br />
un<strong>de</strong>rdrain<br />
Broken<br />
1.<br />
high.<br />
too<br />
rate<br />
Backwash<br />
2.<br />
laterals.<br />
damaged<br />
or<br />
broken<br />
Replace<br />
flow rate.<br />
backwash<br />
Reduce<br />
13
14<br />
NOTES<br />
Sand Filter Installation and User’s Gui<strong>de</strong>
NOTES<br />
15<br />
Sand Filter Installation and User’s Gui<strong>de</strong>
*152006*<br />
P/N 152006 Rev A<br />
Sand Filter Installation and User’s Gui<strong>de</strong>
Filtro <strong>de</strong> Arena<br />
Guía <strong><strong>de</strong>l</strong> Usuario<br />
Y <strong>de</strong> Instalación<br />
IMPORTANTES INSTRUCIONES DE<br />
SEGURIDADLEA Y SIGA TODAS LAS<br />
INSTRUCCIONES PROTEJA ESTAS<br />
INSTRUCIONES<br />
Filtro <strong>de</strong> Arena, Guía <strong><strong>de</strong>l</strong> Usuario y <strong>de</strong> Instalación
Soporte Técnico<br />
Sanford, North Carolina (8 A.M. a las 5 P.M. Horario <strong><strong>de</strong>l</strong> Este y Pacifico)<br />
Moorpark, California (8 A.M. a las 5 P.M. Horario <strong><strong>de</strong>l</strong> Este y Pacifico)<br />
Telefono: (800) 831-7133<br />
Fax (800) 284-4151<br />
Pagina <strong>de</strong> internet: visite www.pentairpool.com y staritepool.com<br />
Índice<br />
Advertencias y Importante Precauciones <strong>de</strong> Seguridad........................... i<br />
Sección 1: Información acerca <strong><strong>de</strong>l</strong> Filtro....................................................... 1<br />
Sección 2: Instalación .................................................................................... 2<br />
Sección 3: Operación y Mantenimiento ….....................................................6<br />
Inicio………… .................................................................................................6<br />
Mantenimiento ............................................................................................... 8<br />
Limpieza <strong><strong>de</strong>l</strong> Filtro.......................................................................................... 8<br />
Funciones <strong>de</strong> la válvula <strong>de</strong> control y el Filtro............................................ 9<br />
Procedimiento <strong>de</strong> limpieza Retrolavador( "Backwash")......................... 10<br />
Limpieza Quimica .......................................................................................... 11<br />
Prepare su Filtro <strong>para</strong> el invierno................................................................ 12<br />
Información técnica y partes <strong>de</strong> Repuesto.................................................... 12<br />
Guía <strong>para</strong> la i<strong>de</strong>ntificación <strong>de</strong> problemas...................................................... 13<br />
© 2009 <strong>Pentair</strong> Water Pool and Spa, Inc. Todos los <strong>de</strong>rechos reservados.<br />
1620 Hawkins Ave., Sanford, NC 27330 - (919) 566-8000<br />
10951 West Los Angeles Ave., Moorpark, CA 93021 - (805) 553-5000<br />
<strong>Pentair</strong> Water Pool and Spa® es marca comercial y/o marcas registradas <strong>de</strong><br />
<strong>Pentair</strong> Water Pool and Spa, Inc. y/o <strong>de</strong> sus compañías afiliadas en Los<br />
Estados Unidos y/o en otros países. Filter-Cleanse es una marca <strong>de</strong><br />
Advantis Technologies Inc. y Klean It® es una marca registrada <strong>de</strong> BioLab,<br />
Inc. A menos que sea indicado, los nombres y marcas <strong>de</strong> otros que puedan<br />
ser utilizados en este documento no son utilizados <strong>para</strong> indicar una<br />
afiliación o endorse entre los propietarios <strong>de</strong> estos nombres y marcas y<br />
<strong>Pentair</strong> Water Pool and Spa, Inc. Esos nombres y marcas pue<strong>de</strong>n ser las<br />
marcas comerciales o registradas <strong>de</strong> esas entida<strong>de</strong>s u otros.<br />
Numero <strong>de</strong> parte 152006 Rev A - 12/09/09<br />
Filtro <strong>de</strong> Arena, Guía <strong><strong>de</strong>l</strong> Usuario y <strong>de</strong> Instalación
ADVERTENCIA E IMPORTANTES PRECAUCIONES DE SEGURIDAD<br />
LESIONES SEVERAS O MUERTE PUEDE SER CAUSADO SI EL<br />
PELIGRO<br />
FILTRO DE ARENA SINO ES INSTALADO Y USADO<br />
CORRECTAMENTE.<br />
INSTALADORES, OPERADORES DE PISCINAS Y DUEÑOS TIENEN<br />
PELIGRO<br />
QUE LEER ESTAS ADVERTENCIAS Y TODOS LAS INSTRUCCIONES<br />
ANTES DE USAR ESTE FILTRO DE ARENA.<br />
ADVERTENCIA Este Filtro <strong>de</strong> Arena esta diseñado solamente <strong>para</strong> uso en una<br />
piscina.<br />
Casi todos los Estados <strong>de</strong> Los Estados Unidos y códigos locales<br />
ADVERTENCIA regulan la construcción, instalación, y operación <strong>de</strong> piscinas<br />
públicas y balnearios, y la construcción <strong>de</strong> piscinas y balnearios. Es muy<br />
importante seguir estos códigos, la mayoría afectan directamente a la regulación<br />
<strong>de</strong> instalación y el uso <strong>de</strong> este producto. Consulte con su código local <strong>de</strong><br />
construccion <strong>para</strong> más información.<br />
NOTA IMPORTANTE – Atención instalador: Esta Guía <strong><strong>de</strong>l</strong><br />
Usuario y <strong>de</strong> Instalacion (“Guía”) contiene información importante<br />
acerca <strong>de</strong> la instalación, operación y uso seguro <strong>de</strong> esta Bomba y<br />
Filtro <strong>de</strong> Arena. Esta guía <strong>de</strong>be ser entregada al dueño <strong>de</strong> la<br />
piscina y/o al operador <strong>de</strong> este equipo <strong>de</strong> sistema.<br />
ADVERTENCIA Antes <strong>de</strong> instalar este producto, lea y siga todas las notas <strong>de</strong><br />
advertencia e instrucciones en esta guía. En caso <strong>de</strong> no seguir las advertencias e<br />
instrucciones <strong>de</strong> seguridad pue<strong>de</strong> resultar en lesiones severas, muerte o daño <strong>de</strong><br />
propiedad. Llame al (800) 831-7133 <strong>para</strong> obtener copias adicionales gratuitas <strong>de</strong><br />
estas instrucciones. Por favor refiérase a www.pentairwater.com <strong>para</strong> más<br />
información acerca <strong>de</strong> este producto.<br />
La temperatura <strong>de</strong> agua a más <strong>de</strong> 100 °F (37.7 °C) pue<strong>de</strong><br />
PELIGRO ser peligroso <strong>para</strong> su salud. Sumersiones largas en agua<br />
caliente pue<strong>de</strong>n inducir hipotermia. La hipotermia pue<strong>de</strong><br />
ser causada cuando la temperatura interna <strong><strong>de</strong>l</strong> cuerpo llega<br />
a un nivel o más grados sobre la temperatura normal <strong><strong>de</strong>l</strong><br />
cuerpo que es 98.6 °F. (37 °C). Los efectos <strong>de</strong> la hipotermia<br />
son: (1) Ignorar el inminente peligro. (2) No sentir o percibir<br />
calor. (3) No reconocer la necesidad <strong>de</strong> salirse <strong><strong>de</strong>l</strong><br />
balneario. (4) Inhabilidad física <strong>de</strong> salirse <strong><strong>de</strong>l</strong> balneario. (5)<br />
daño al feto <strong>para</strong> mujeres embarazadas. (6) Per<strong>de</strong>r el conocimiento<br />
resultando un peligro <strong>para</strong> ahogarse. El uso <strong>de</strong> alcohol, drogas, o<br />
medicación pue<strong>de</strong> incrementar el riesgo <strong>de</strong> hipotermia fatal en balnearios<br />
calientes.<br />
ADVERTENCIA Para reducir el riesgo <strong>de</strong> lesiones, no permita que los niños<br />
usen u operen esta Bomba y Filtro <strong>de</strong> Arena.<br />
ADVERTENCIA Cuando se establece el volumen y la corriente <strong>de</strong> agua que<br />
entra en la piscina, el operador tiene que consi<strong>de</strong>rar los códigos locales que<br />
rigen los volumes <strong>de</strong> agua y también las reglas <strong>para</strong> las raciones <strong>de</strong><br />
<strong>de</strong>sinfectación.<br />
ADVERTENCIA No aumentar el tamaño <strong>de</strong> la bomba; esto pue<strong>de</strong> causar que el<br />
volumen <strong>de</strong> agua que pase por el sistema pueda exedir el volumen maximo<br />
<strong>de</strong> agua que esta indicado en el cubierta <strong>de</strong> el drenaje.<br />
Filtro <strong>de</strong> Arena, Guía <strong><strong>de</strong>l</strong> Usuario y <strong>de</strong> Instalación<br />
i
ii<br />
ADVERTENCIA E IMPORTANTES PRECAUCIONES DE SEGURIDAD<br />
PELIGRO<br />
ADVERTENCIA<br />
Si la abraza<strong>de</strong>ra <strong><strong>de</strong>l</strong> Filtro a sido ajustada con baja presión,<br />
el tanque pue<strong>de</strong> se<strong>para</strong>rse causando lesiones graves y<br />
daños <strong>de</strong> propiedad. Elimine la presion <strong><strong>de</strong>l</strong> filtro y lea las<br />
instrucciones antes a trabajar en el filtro <strong>de</strong> <strong>arena</strong>.Si la<br />
abraza<strong>de</strong>ra <strong>de</strong> el filtro a sido ajustada bajo , el tanque podria<br />
se<strong>para</strong>rse causando lesiones serias y gran daño a<br />
propiedad.<br />
Antes <strong>de</strong> trabajar en el Filtro!<br />
(1) Apague la bomba.<br />
(2) Abrir la válvula <strong>para</strong> sacar el aire<br />
(3) Sacar toda la presión <strong><strong>de</strong>l</strong> sistema<br />
RIESGO DE UN CHOQUE ELECTRICO O ELECTROCUCION:<br />
PELIGRO<br />
LA BOMBA NECESITA ALTO VOLTAGE Y ESO PUEDE<br />
CAUSAR UN CHOQUE ELECTRICO, QUEMADURA, O<br />
MUERTE.<br />
ANTES DE USAR LA BOMBA!<br />
SIEMPRE DESCONECTE LA ENERGIA DE LA BOMBA<br />
DESDE EL INTERRUPTOR AUTOMATICO ANTES DE<br />
TRABAJAR Y DAR SERVICIO A LA BOMBA. SI NO HACE<br />
ESTO, PUEDE SER CAUSA DE MUERTE O SERIAS<br />
LESIONES A LA PERSONA QUE TRABAJE DANDO SERVICIO<br />
A LA BOMBA, LOS QUE ESTÉN USANDO LA PISCINA, U<br />
OTROS DEVIDO A UN CHOQUE ELÉCTRICO.<br />
ADVERTENCIA Una bomba <strong>de</strong> piscina o balneario <strong>de</strong>be <strong>de</strong> ser instalada por una<br />
persona calificada <strong>para</strong> servicio <strong>de</strong> piscina y balnearios profesional por reglas<br />
establecidas por el código nacional <strong>de</strong> electricistas y todos los códigos locales y<br />
leyes. Instalación inapropiada pue<strong>de</strong> causar peligro <strong>de</strong> choque eléctrico que<br />
pue<strong>de</strong> causar muerte o daño serio <strong>para</strong> los que usen la piscina, instaladores, u<br />
otros, y también pue<strong>de</strong> dañar la propiedad.<br />
ADVERTENCIA Bombas no son substitutos <strong>para</strong> cubiertas <strong>de</strong> drenaje que estén<br />
instalados correctamente y que estén seguros. Una cubierta <strong>de</strong> drenaje aprobado<br />
por el ANSI/ASME A112.19.8 tiene que ser usado <strong>para</strong> cada drenaje. Piscinas y<br />
balnearios <strong>de</strong>berian <strong>de</strong> utilizar por lo menos dos drenajes por bomba. Si una<br />
cubierta <strong>de</strong> drenaje se afloja, se quiebra o se pier<strong>de</strong>, cierre la piscina o balneario<br />
inmediatamente y apague la bomba hasta que una cubierta <strong>de</strong> drenaje antientrampamiento<br />
haya sido instalada correctamente con los tornillos <strong>de</strong> el<br />
fabricante.<br />
Para información acerca <strong>de</strong> Virginia Graemer Baker Pool and Spa Safety<br />
Act, contacte el Consumer Product Safety Comisión a (310)504-7908 o<br />
refierase a www.spsc.gov.<br />
Nota Importante: Siempre apague toda la energía electrica <strong>de</strong> la bomba<br />
<strong>de</strong> la piscina antes <strong>de</strong> instalar la tapa<strong>de</strong>ra o trabajar on cualquier salida<br />
<strong><strong>de</strong>l</strong> <strong>de</strong>sagüe.<br />
Filtro <strong>de</strong> Arena, Guía <strong><strong>de</strong>l</strong> Usuario y <strong>de</strong> Instalación
Sección 1<br />
Resumen <strong><strong>de</strong>l</strong> Filtro<br />
Su Filtro <strong>de</strong> Arena <strong>de</strong> alto flujo esta diseñado <strong>para</strong> producir agua clara, limpia<br />
y cristalina y <strong>para</strong> el funcionamiento <strong>de</strong> muchos años con poco mantenimiento<br />
cuando se instala y se opera siguiendo esta guía <strong>de</strong> instrucciones. Su filtro<br />
utiliza <strong>arena</strong> especial <strong>para</strong> remover particulares <strong>de</strong> tierra <strong><strong>de</strong>l</strong> agua. Suciedad<br />
es atrapada en el filtro por la cama <strong>de</strong> <strong>arena</strong> cuando el agua pasa por el filtro.<br />
El agua entra el filtro por la válvula <strong>de</strong> arriba <strong>de</strong> el filtro y es distribuida<br />
igualmente <strong>para</strong> abajo <strong>de</strong> la cama <strong>de</strong> <strong>arena</strong>. La suciedad es removida por la<br />
<strong>arena</strong> y el agua limpia corre por la tubería (laterales) en la parte <strong>de</strong> abajo <strong><strong>de</strong>l</strong><br />
filtro, <strong>para</strong> arriba <strong>de</strong> la tuberia central, y <strong>de</strong> regreso <strong>para</strong> la válvula <strong>de</strong> arriba<br />
<strong><strong>de</strong>l</strong> filtro, don<strong>de</strong> el agua limpia es regresada a la piscina por la plomeria<br />
mangueras.<br />
ADVERTENCIA<br />
Este filtro funciona con presión alta. Cuando cualquier parte <strong><strong>de</strong>l</strong><br />
sistema <strong>de</strong> circulación (abrazadora, bomba, filtro, válvulas, etc.) se le<br />
da servicio, aire pue<strong>de</strong> entrar al sistema y pue<strong>de</strong> ser presionado. Aire<br />
con presión pue<strong>de</strong> causar la tapa<strong>de</strong>ra <strong><strong>de</strong>l</strong> filtro o la válvula <strong>de</strong> control<br />
que se separe, y esto pue<strong>de</strong> causar lesiones graves, muerte, o daños<br />
<strong>de</strong> propiedad. Para evadir estos problemas, siga estas instrucciones.<br />
1.Antes <strong>de</strong> reposicionar las válvulas y antes <strong>de</strong> empezar el ensamble,<br />
<strong>de</strong>sensamble, ajuste <strong>de</strong> la abraza<strong>de</strong>ra o cualquier otro servicio <strong><strong>de</strong>l</strong><br />
sistema <strong>de</strong> circulación: (a) Apague la Bomba y todos los controles<br />
automáticos <strong>para</strong> asegurarse que el sistema: no empieza a arrancar o<br />
trabajar por error cuando la estén arreglando; (b) Abra la valvúla <strong>de</strong> aire<br />
manualmente;<br />
(c)Esperar a que toda la presión se relaje, el medidor <strong>de</strong> presión tiene<br />
que indicar cero (0).<br />
2.Cuando se instala la abraza<strong>de</strong>ra <strong>para</strong> el filtro, siga las instrucciones<br />
exactas <strong>para</strong> la tapa<strong>de</strong>ra <strong><strong>de</strong>l</strong> filtro y <strong>de</strong> la abraza<strong>de</strong>ra.<br />
3.Cuando el servicio a el sistema <strong>de</strong> circulación este completo, sigua<br />
las instrucciones exactas <strong><strong>de</strong>l</strong> sistema <strong>para</strong> arrancar el filtro.<br />
4.Mantenga el sistema <strong>de</strong> circulación apropiadamente. Reemplaze las<br />
partes que estén dañadas y <strong>de</strong>sgastadas inmediatamente (Ejemplo:<br />
abrazadora, indicador <strong>de</strong> presión, válvula, empaque, etc.).<br />
5.Asegúrese que el filtro este instalado apropiadamente y colocado <strong>de</strong><br />
acuerdo a las condiciones <strong>de</strong> las instrucciones.<br />
Después <strong>de</strong> un periodo <strong>de</strong> tiempo, suciedad se va a acumular en el filtro<br />
causando una resistencia <strong>para</strong> la corriente <strong>de</strong> agua que pasa por el filtro.<br />
Esta resistencia da como resultado una disminucion en el flujo <strong>de</strong> agua y un<br />
incremento en la presión <strong>de</strong>ntro <strong>de</strong> el filtro. Eventualmente el filtro <strong>de</strong> <strong>arena</strong><br />
va a remover tanta suciedad que la presión <strong>de</strong>ntro <strong><strong>de</strong>l</strong> filtro va a subir a un<br />
punto que será necesario lavar el filtro con retrolavado.<br />
Filtro <strong>de</strong> Arena, Guía <strong><strong>de</strong>l</strong> Usuario y <strong>de</strong> Instalación<br />
1
2<br />
Cuando la válvula superior <strong><strong>de</strong>l</strong> filtro se ajusta a la posición "Backwash"<br />
(retrolavado), el flujo <strong>de</strong> <strong>de</strong> agua es automáticamente revertida a traves <strong>de</strong><br />
manera que el flujo <strong>de</strong> agua es dirigida hacia el fondo <strong>de</strong> el filtro, y hacia a<br />
traves <strong>de</strong> la cama <strong>de</strong> <strong>arena</strong>, evacuando la tierra y particulas hacia afuera por<br />
medio <strong>de</strong> la línea <strong>de</strong> basura. Cuando el "Backwash" (retrolavado) esta<br />
finalizado, la válvula tiene que ser ajustada <strong>de</strong> regreso a la posición "Filter"<br />
("Filtro") <strong>para</strong> que sigua el filtro funcionando normalmente. La función <strong><strong>de</strong>l</strong><br />
filtro es <strong>de</strong> remover material suspendida <strong>de</strong> el agua. El filtro no sanitiza el<br />
agua. Para obtener agua brillantemente limpia, el agua tiene que ser<br />
sanitizada y también balanceada quimicamente. La química <strong>de</strong> la piscina es<br />
algo que requiere especialidad, y tiene que consultar con un especialista en<br />
esta área. Generalmente, <strong>para</strong> sanitizar la piscina apropiadamente se necesita<br />
el cloro a un nivel <strong>de</strong> 1 a 2 PPM y un pH <strong>de</strong> 7.2 a 7.6. Su sistema <strong>de</strong><br />
filtración <strong>de</strong>be <strong>de</strong> ser diseñado <strong>de</strong> acuerdo al código local <strong>de</strong> salud. Por lo<br />
menos, tiene que estar seguro que su sistema va a mover todo el volumen <strong>de</strong><br />
agua en la piscina por lo menos 2 veces en 24 horas.<br />
Si el sistema <strong><strong>de</strong>l</strong> filtro no esta operando o no se utiliza<br />
ADVERTENCIA<br />
correctamente pue<strong>de</strong> ocacionar que el agua tenga<br />
poca visibilidad en la piscina. Cuando el agua tenga poca visibilidad en<br />
la piscina pue<strong>de</strong> ocacionar que objetos que esten en el agua no sean<br />
<strong>de</strong>tectados y si alguien nada o se tira al agua pue<strong>de</strong> causar lesiones<br />
serias o muerte. Nunca na<strong>de</strong> en una piscina con agua con poca<br />
visibilidad.<br />
Sección 2<br />
Instalación<br />
1. Lea y comprenda todas las instrucciones antes <strong>de</strong> tratar <strong>de</strong><br />
instalar, operar o mantener su bomba y su sistema <strong>de</strong> filtro <strong>de</strong><br />
<strong>arena</strong>.<br />
2. Proveer espacio y luz <strong>para</strong> el mantenimiento <strong>de</strong> rutina. Ponga el<br />
sistema cerca <strong>de</strong> la piscina. No ponga controles eléctricos sobre<br />
el filtro. Instale los controles electricos (e.g., prendido/apagado,<br />
reloj automatico, control <strong><strong>de</strong>l</strong> systema, etc.) por lo menos 5 pies<br />
<strong>de</strong> distancia <strong><strong>de</strong>l</strong> filtro. Esto le dara suficiente area libre <strong><strong>de</strong>l</strong> filtro<br />
cuando el systema sea encendido.<br />
3. Remueva todos los componentes individuales <strong>de</strong> la caja e<br />
inspeccione por cualquier daño visible.<br />
Filtro <strong>de</strong> Arena, Guía <strong><strong>de</strong>l</strong> Usuario y <strong>de</strong> Instalación
3<br />
ADVERTENCIA Cuando los cubiertas <strong>de</strong> drenaje (Succión Fittings) están<br />
obstruidas esto pue<strong>de</strong> causar lesiones serias o fatales como ahogamiento.<br />
Para reducir el riesgo, no <strong>de</strong>je que los niños usen este producto.<br />
ADVERTENCIA Nunca trabaje en la bomba cuando esta este trabajando o con<br />
energia electrica conectada. Alto voltaje pue<strong>de</strong> causar lesiones serias o<br />
fatales. Una conexión a tierra <strong>de</strong> interrupción "Ground Fault Interrupter<br />
(GFCI)" o " interruptor <strong>de</strong> tierra automatico tiene que siempre estar instalado<br />
en la unidad <strong>de</strong> po<strong>de</strong>r. Asegúrese que el motor este conectado a el po<strong>de</strong>r<br />
eléctrico (AC) con una conexión a la tierra. Si el motor no tiene paso a tierra<br />
esto pue<strong>de</strong> causar lesiones serias o fatales por electrocución. Nunca conecte<br />
la coneccion <strong>de</strong> tierra a una tuberia <strong>de</strong> gas.<br />
4. El filtro esta listo <strong>para</strong> moverse a su posición final. El sistema<br />
<strong>de</strong>be instalarse en un lugar con piso nivelado. Cuando el filtro<br />
esta lleno <strong>de</strong> <strong>arena</strong> y agua pue<strong>de</strong> pesar varias libras.<br />
5. Asegúrese <strong>de</strong> instalar la cantidad <strong>de</strong> <strong>arena</strong> <strong>para</strong> el filtro la<br />
cual esta sugerida en la etiqueta <strong><strong>de</strong>l</strong> filtro. Tiene que usar<br />
solamente <strong>arena</strong> No. 20 <strong>de</strong> silica que tiene un coeficiente <strong>de</strong><br />
uniformidad <strong>de</strong> 1.75 o menos. Arena No. 20 <strong>de</strong> silica tiene un<br />
tamaño <strong>de</strong> particulares <strong>de</strong> .018-.022 pulgadas (.45 a .55 mm).<br />
Antes <strong>de</strong> poner <strong>arena</strong> en el filtro, mire a<strong>de</strong>ntro <strong><strong>de</strong>l</strong> filtro y mire<br />
o inspeccione por laterales <strong><strong>de</strong>l</strong> drenaje <strong>de</strong> abajo por<br />
quebraduras, daño, o sueltas, que talvez han sido<br />
acci<strong>de</strong>ntalmente dañadas por el correo. Cambie todas las<br />
partes que estén quebradas si es necesario.<br />
6. Instale la guía <strong>de</strong> <strong>arena</strong> arriba <strong><strong>de</strong>l</strong> filtro y llene el filtro hasta la<br />
mitad con agua. Ponga <strong>arena</strong> a<strong>de</strong>ntro <strong>de</strong> la parte <strong>de</strong> arriba <strong><strong>de</strong>l</strong><br />
filtro <strong>de</strong>spacio <strong>para</strong> que el peso <strong>de</strong> la <strong>arena</strong> no haga daño a las<br />
laterales. Después <strong>de</strong> llenar el filtro hasta el nivel indicado,<br />
remueva y tire la guía <strong>de</strong> árena. Limpie toda la <strong>arena</strong><br />
alre<strong>de</strong>dor <strong>de</strong> la entrada en la parte <strong>de</strong> arriba <strong><strong>de</strong>l</strong> tanque.<br />
MEDIA ABRAZADERA<br />
TÍPICA<br />
PESTAÑA DE LA<br />
VÁLVULA<br />
PESTAÑA DEL<br />
TANQUE<br />
Figure 1<br />
Filtro <strong>de</strong> Arena, Guía <strong><strong>de</strong>l</strong> Usuario y <strong>de</strong> Instalación
4<br />
7. Asegúrese que la parte <strong>de</strong> arriba <strong><strong>de</strong>l</strong> filtro este libre <strong>de</strong> <strong>arena</strong><br />
o escombros, y que el empaque <strong>de</strong> la válvula esta en el lugar<br />
a<strong>de</strong>cuado en el cuerpo <strong>de</strong> la válvula. Instale la válvula <strong>para</strong><br />
que la posición <strong>de</strong> las aperturas estén en la posición que se<br />
necesitan. Las aperturas <strong>de</strong> la válvula están indicadas con la<br />
posicion don<strong>de</strong> tienen que estar conectadas. Por ejemplo: la<br />
conexion <strong>de</strong> la bomba <strong>de</strong>be <strong>de</strong> estar conectada al lado <strong>de</strong><br />
don<strong>de</strong> la bomba <strong>de</strong>scarga el agua, la conexion <strong>de</strong> apertura <strong>de</strong><br />
<strong>de</strong>shecho tiene que estar conectada a la línea <strong>de</strong> <strong>de</strong>shecho y<br />
la conexion <strong>de</strong> retorno tiene que estar conectada al retorno <strong>de</strong><br />
la piscina.<br />
Figure 2.<br />
8. Asegúrese que la válvula este firmemente empujada en la<br />
parte superior <strong>de</strong> el tanque y que el bor<strong>de</strong> <strong><strong>de</strong>l</strong> tanque y el<br />
bor<strong>de</strong> <strong>de</strong> la válvula estén en contacto con si mismas.<br />
Observe la Figura 1.<br />
9. La abraza<strong>de</strong>ra <strong>de</strong> plástico ahora pue<strong>de</strong> ser instalada. Ponga<br />
la mitad <strong>de</strong> la abraza<strong>de</strong>ra sobre la conexión <strong>de</strong> la válvula y la<br />
conexión <strong><strong>de</strong>l</strong> tanque como esta mostrado en Figura 1. Ponga<br />
los tornillos <strong>de</strong> la abraza<strong>de</strong>ra y tuercas, también asegúrese<br />
que las tuercas esten posicionadas en la parte hexagonal <strong>de</strong><br />
la abraza<strong>de</strong>ra.<br />
10. Apriete los tornillos firmemente e inspeccioné visualmente la<br />
válvula <strong><strong>de</strong>l</strong> tanque y el ensamblaje <strong>de</strong> la abraza<strong>de</strong>ra <strong>para</strong><br />
asegurarse que el enchufe este correctamente ensamblado.<br />
ADVERTENCIA<br />
Presión alta:<br />
Inapropiada ensambladura <strong>de</strong> la válvula <strong><strong>de</strong>l</strong> tanque<br />
pue<strong>de</strong> causar que la valvúla se separe y cause graves<br />
lesiones y/o mayores daños a la propiedad.<br />
11. La unidad <strong><strong>de</strong>l</strong> filtro tiene una presión máxima <strong>para</strong> operar que<br />
esta indicada en la placa <strong>de</strong> i<strong>de</strong>ntificacion. NO HAGA<br />
FUNCIONAR esta unidad con la presion mas alta <strong>de</strong> la<br />
maxima presion <strong>de</strong> la valvula o el filtro. Nunca conecté el<br />
filtro y la válvula a una bomba que pueda producir una presión<br />
que sea más alta que la presión <strong>de</strong> operación <strong><strong>de</strong>l</strong> filtro o la<br />
válvula.<br />
Filtro <strong>de</strong> Arena, Guía <strong><strong>de</strong>l</strong> Usuario y <strong>de</strong> Instalación
12. Utilicé material <strong>de</strong> sellamiento en todas las conexiones que<br />
tengan tubería que tengan cambios <strong>de</strong> diámetro y conexiones.<br />
Solo use material <strong>de</strong> sellamiento que sea apropiado <strong>para</strong><br />
tuberias <strong>de</strong> plástico . Fije la tubería <strong>para</strong> prevenir tension con<br />
el filtro, la bomba o la válvula. NO USE PRODUCTOS QUE<br />
ESTEN HECHOS CON BASE DE PETROLEO. NOTA:<br />
Todas las roscas <strong>de</strong> las valvulas internas estan disminuidas<br />
gradualmente excepto la conexión <strong>de</strong> la valvula <strong><strong>de</strong>l</strong> aire. No<br />
sobreapriete las conexiones disminuidas.<br />
13. Instale el medidor <strong>de</strong> presión en la apertura con rosca ¼" NPT<br />
directamente enfrente <strong>de</strong> la apertura <strong>de</strong> la bomba <strong>para</strong> la<br />
válvula.<br />
14. Nunca guar<strong>de</strong> químicos <strong>de</strong> la piscina cerca <strong>de</strong> diez (10) pies<br />
<strong><strong>de</strong>l</strong> filtro <strong>de</strong> la piscina, bomba o válvula. Químicos tienen que<br />
siempre estar guardados en áreas frescas, secas, y bien<br />
ventiladas.<br />
5<br />
ADVERTENCIA Gases <strong>de</strong> sustancias químicas o <strong>de</strong>rramados en el suelo<br />
pue<strong>de</strong>n causar corrosión <strong>para</strong> la estructura <strong>de</strong> los componentes <strong><strong>de</strong>l</strong><br />
filtro y bomba. Componentes con estructuras débiles pue<strong>de</strong>n causar<br />
partes <strong><strong>de</strong>l</strong> filtro, bomba o válvula que se separen y pue<strong>de</strong>n causar<br />
graves lesiones o daños <strong>de</strong> propiedad.<br />
ADVERTENCIA El sistema centrífugo <strong>de</strong> la bomba opera con alto voltaje<br />
eléctrico, y pue<strong>de</strong> crear aspirar o drenar y presión en el sistema <strong>de</strong><br />
agua. Cuando la bomba esta conectada apropiadamente a su<br />
plomeria, esta bomba funcionara <strong>de</strong> un modo seguro.<br />
ADVERTENCIA Alto voltaje eléctrico pue<strong>de</strong> causar graves lesiones o<br />
lesiones fatales. Siempre instale un interruptor <strong>de</strong> tierra GFCI<br />
"Ground Fault Interrupted" en el origen o raiz <strong>de</strong> la fuerza electrica <strong>de</strong><br />
esta unidad como una regla <strong>de</strong> precaución. El Artículo 681-31<strong><strong>de</strong>l</strong><br />
NEC requiere que un GFCI sea usado si esta bomba es usada con una<br />
piscina portatil que se pue<strong>de</strong> guardar.<br />
15. Evite sobreapretar las roscas <strong>de</strong> las tuberias cuando conecte la<br />
valvula o la bomba. El procedimiento apropiado requiere que el<br />
material <strong>de</strong> sellamiento sea aplicado a las roscas y <strong>de</strong>spués<br />
apretarlas con las manos y un vuelta. No sobre apriete las<br />
roscas.<br />
Filtro <strong>de</strong> Arena, Guía <strong><strong>de</strong>l</strong> Usuario y <strong>de</strong> Instalación
6<br />
Sección 3<br />
Operación y Mantenimiento<br />
1. Asegúrese que se use la cantidad a<strong>de</strong>cuada <strong>de</strong> <strong>arena</strong> silica<br />
<strong>para</strong> el filtro en el tanque y que todas las conexiones han sido<br />
hechas y estén seguras.<br />
2. Inspeccione que la salida <strong>de</strong> conexion don<strong>de</strong> sale el flujo este<br />
abierto <strong>para</strong> que el agua salga libremente <strong>de</strong> la piscina y que<br />
salga por la línea <strong>de</strong> corriente ("Backwash")(Retrolavador).<br />
Seleccione la válvula <strong>de</strong> control a la posición <strong>de</strong> "Backwash".<br />
(Retrolavado)<br />
PELIGRO<br />
Este filtro funciona bajo presión. Con la válvula<br />
conectada apropiadamente y operada sin aire en el<br />
sistema, este filtro pue<strong>de</strong> funcionar <strong>de</strong> un modo<br />
seguro. Aire que entra el filtro y a la válvula<br />
cuando no esta conectada correctamente pue<strong>de</strong><br />
causar que la válvula se separe, esto pue<strong>de</strong><br />
causar graves lesiones personales y/o daños a la<br />
propiedad.<br />
ADVERTENCIA<br />
Siempre apague la bomba antes <strong>de</strong> cambiar posiciones <strong>de</strong> válvula.<br />
Cambiar posiciones <strong>de</strong> válvula cuando la bomba esta funcionando pue<strong>de</strong><br />
dañar la válvula <strong>de</strong> control, esto pue<strong>de</strong> causar graves lesiones o daños a<br />
la propiedad.<br />
3. Inspeccione que la abraza<strong>de</strong>ra <strong>de</strong> la valvula sobre el filtro este<br />
apropiadamente ensamblada. Nota: Verifique las<br />
instrucciones bajo "Instalación" sección <strong>de</strong> este manual <strong>para</strong><br />
asegurarse.<br />
4. Abra la válvula manual. Referirse a la figura 3 <strong>para</strong> localizar<br />
la válvula) Párese a una distancia segura <strong><strong>de</strong>l</strong> filtro. Prepare y<br />
arranque la bomba <strong>de</strong> acuerdo a las instrucciones <strong>de</strong> la bomba<br />
<strong>de</strong>jando que el tanque <strong><strong>de</strong>l</strong> filtro se llene <strong>de</strong> agua. Cierre la<br />
válvula <strong>de</strong> aire sobre el filtro cuando una corriente <strong>de</strong> agua<br />
aparezca y sea constante.<br />
5. Una vez que la corriente <strong>de</strong> agua sea constante hacia afuera<br />
<strong>de</strong> la tuberia <strong>de</strong> basura, <strong>de</strong>je trabajar la bomba por lo menos 2<br />
minutos. Esta limpieza <strong>de</strong> regreso inicial <strong><strong>de</strong>l</strong> filtro esta<br />
recomendada <strong>para</strong> remover cualquier impureza o particulas <strong>de</strong><br />
<strong>arena</strong> fina que se encuentran en la <strong>arena</strong> silica.<br />
Filtro <strong>de</strong> Arena, Guía <strong><strong>de</strong>l</strong> Usuario y <strong>de</strong> Instalación
6. Apague la bomba y ponga la válvula <strong>para</strong> la posición<br />
"Rinse"(enjuague). Asegúrese que todos los drenajes <strong>de</strong><br />
succión y las líneas <strong>de</strong> regreso estén abiertas <strong>para</strong> que el agua<br />
pueda correr libre <strong>de</strong>s<strong>de</strong> la pisicina hacia waste (basura).<br />
Párese a una distancia segura <strong><strong>de</strong>l</strong> filtro y empiece a trabajar la<br />
bomba.<br />
7. Haga funcionar la bomba por lo menos dos minutos.<br />
8. Apague la bomba y ponga la válvula en la posición<br />
"Filter"(filtrar). Asegúrese que todos los drenajes <strong>de</strong> succión y<br />
las líneas <strong>de</strong> regreso estén abiertas <strong>para</strong> que el agua pueda<br />
correr libre <strong>de</strong>s<strong>de</strong> y hacia la piscina.<br />
9. Abra la válvula manual <strong>de</strong> aire <strong><strong>de</strong>l</strong> filtro . Párese a una<br />
distancia segura <strong><strong>de</strong>l</strong> filtro y empiece a trabajar la bomba.<br />
10. Cierre la salida <strong>de</strong> la válvula <strong><strong>de</strong>l</strong> filtro cuando un chorro <strong>de</strong><br />
agua aparezca y sea constante.<br />
11. Ahora el filtro a empezado el ciclo <strong>de</strong> filtraje. Verifique que el<br />
agua esta regresando a la piscina y tome nota <strong>de</strong> la presón <strong>de</strong><br />
operación. La presión original es ___________ PSI con el<br />
filtro limpio.<br />
12. Inspeccione el sistema por escapes por don<strong>de</strong> el agua pue<strong>de</strong><br />
salir. Si encuentra un agujero en el sistema, apague la bomba<br />
antes <strong>de</strong> corregir o arreglar el agujero.<br />
13. Cuando el filtro este removiendo la tierra y impurezas <strong><strong>de</strong>l</strong> agua<br />
<strong>de</strong> la piscina, la acumulación causara la presión <strong><strong>de</strong>l</strong> filtro que<br />
suba y la corriente <strong><strong>de</strong>l</strong> agua disminuya. Cuando el indicador <strong>de</strong><br />
presión mi<strong>de</strong> 10 PSI más alto <strong>de</strong> la medida <strong>de</strong> el filtro limpio,<br />
es tiempo <strong>para</strong> limpiar el filtro ("Backwash").(retrolavado).<br />
7<br />
Válvula manual<br />
Figure 3.<br />
Filtro <strong>de</strong> Arena, Guía <strong><strong>de</strong>l</strong> Usuario y <strong>de</strong> Instalación
8<br />
Mantenimiento<br />
Con el cuidado y mantenimiento apropiado <strong><strong>de</strong>l</strong> systema <strong>de</strong> la bomba y el<br />
filtro <strong>de</strong> <strong>arena</strong> le añadira muchos años <strong>para</strong> disfrutar su piscina. Siga las<br />
siguientes instruciones <strong>para</strong> asegurar un periodo largo <strong>de</strong> no problemas en<br />
su sistema.<br />
1. Para limpiar el exterior <strong><strong>de</strong>l</strong> sistema <strong>de</strong> la bomba y el filtro <strong>de</strong><br />
basura y polvo, lavelos con agua y un <strong>de</strong>tergente suave y<br />
<strong>de</strong>spues enjuaguelos con una manguera <strong>de</strong> agua. No use<br />
solventes.<br />
2. Si el interior <strong><strong>de</strong>l</strong> filtro necesita mantenimiento, la <strong>arena</strong> <strong>de</strong>bera<br />
ser removida <strong>para</strong> remover el entero sistema <strong>de</strong> drenaje <strong>de</strong>s<strong>de</strong><br />
abajo <strong><strong>de</strong>l</strong> filtro y enjuagarlo con uma manguera <strong>de</strong> agua <strong><strong>de</strong>l</strong><br />
jardin.<br />
3. El filtro es un recipiente <strong>de</strong> presión y nunca <strong>de</strong>bera <strong>de</strong> darsele<br />
mantenimiento cuando este bajo presión. Siempre disminuya la<br />
presión <strong><strong>de</strong>l</strong> tanque y abra la válvula <strong><strong>de</strong>l</strong> filtro antes <strong>de</strong> empezar<br />
a dar mantenimiento alk filtro.<br />
4. Cuando empieze <strong>de</strong> nuevo el filtro siempre abra la válvula <strong><strong>de</strong>l</strong><br />
aire manual <strong><strong>de</strong>l</strong> filtro y RETIRESE DEL FILTRO.<br />
5. La canasta <strong><strong>de</strong>l</strong> colador en la bomba tiene que ser revisada y<br />
limpiada dos veces a la semana. Remueva y limpie la tapa<strong>de</strong>ra<br />
<strong>de</strong> la canasta, y limpie la basura <strong>de</strong>positada en la canasta.<br />
Inspeccione el anillo <strong>de</strong> la tapa<strong>de</strong>ra si esta danado,<br />
reemplazelo. El sello <strong>de</strong> la bomba no requiere lubricación. El<br />
motor <strong>de</strong> la bomba tiene que recibir mantenimiento solamente<br />
por un centro <strong>de</strong> servicio <strong>de</strong> mantenimiento.<br />
Limpieza <strong><strong>de</strong>l</strong> Filtro<br />
1. El filtro <strong>de</strong> una piscina nueva <strong>de</strong>be <strong>de</strong> ser limpiado <strong>de</strong> reversa,<br />
y limpiado <strong>de</strong>spues <strong>de</strong> 48 horas <strong>de</strong> funcionamiento <strong>para</strong> limpiar<br />
todos los escombros <strong>de</strong> la construcción. Existen tres<br />
diferentes maneras <strong>de</strong> i<strong>de</strong>ntificar cuando un filtro necesita<br />
limpieza <strong>de</strong> reversa.<br />
a) El indicador más exacto en el sistema <strong>de</strong> piscinas con un<br />
medidor <strong>de</strong> corriente es una limpieza <strong>de</strong> reversa cuando la<br />
corriente disminuye un 30% <strong>de</strong> la corriente original (en un filtro<br />
limpio). Por ejemplo, si la corriente original es <strong>de</strong> 60 GPM, el<br />
filtro tiene que ser lavado <strong>de</strong> reversa cuando la corriente es<br />
reducida por alre<strong>de</strong>dor <strong>de</strong> 20 GPM (o un 30%) to 40 GPM.<br />
b) Un más subjetivo y menos preciso indicador es <strong>de</strong> observar el<br />
contenido <strong>de</strong> agua corriendo <strong>de</strong>s<strong>de</strong> las corrientes direccionales<br />
Filtro <strong>de</strong> Arena, Guía <strong><strong>de</strong>l</strong> Usuario y <strong>de</strong> Instalación
9<br />
Limpieza <strong><strong>de</strong>l</strong> Filtro<br />
c) El más comulmente usado, pero el menos exacto es el lavado<br />
<strong>de</strong> regreso cuando la medida <strong><strong>de</strong>l</strong> indicador aumenta 10 PSI<br />
sobre la medida inicial (con un filtro limpio).<br />
2. Es importante no limpiar el filtro unicamente en bases<br />
regulares semejante a cada tres días. También es importante<br />
notar que limpiar <strong>de</strong> reversa muy frecuentemente en realidad<br />
pue<strong>de</strong> causar una mediocre filtración.<br />
Funciones <strong>de</strong> la válvula <strong>de</strong> control y el Filtro<br />
Filtro "FILTER": De la bomba, por la válvula, por abajo por la cama <strong><strong>de</strong>l</strong><br />
filtro, por arriba <strong>de</strong> la tuberia central hacia la válvula <strong>de</strong> regreso, y <strong>de</strong><br />
regreso <strong>para</strong> la piscina <strong>para</strong> acción normal <strong><strong>de</strong>l</strong> filtro y aspirando la piscina<br />
por el filtro.<br />
Limpieza "BACKWASH": De la bomba, por la válvula, por abajo por la<br />
tuberia central, por arriba por la <strong>arena</strong> <strong><strong>de</strong>l</strong> filtro <strong>para</strong> la válvula, y <strong>para</strong><br />
fuera por la apertura <strong>de</strong> basura. Esta posición es usada <strong>para</strong> limpiar el<br />
filtro y correr la corriente en reverso.<br />
Enjuague"RINSE": De la bomba, por la válvula, por abajo por la <strong>arena</strong><br />
<strong><strong>de</strong>l</strong> filtro, por arriba por la tuberia central <strong>para</strong> la válvula y <strong>para</strong> afuera por<br />
la apertura <strong>de</strong> basura. Esta posición es usada <strong>para</strong> limpieza inicial y<br />
reposición <strong>de</strong> la cama <strong><strong>de</strong>l</strong> filtro <strong>de</strong>spués <strong>de</strong> limpieza "Backwash".<br />
Basura "WASTE": De la bomba, por la válvula, no pasa por el filtro y<br />
sigue <strong>para</strong> la apertura <strong>para</strong> la basura. Esta posición es <strong>para</strong> aspirando<br />
directamente <strong>de</strong> la suciedad, bajando el nivel <strong>de</strong> la piscina, o sacar toda el<br />
agua <strong>de</strong> la piscina.<br />
Cerrado "CLOSED": NO HAY CORRIENTE DE AGUA EN ESTA<br />
POSISION - NO USE ESTA FUNCIÓN CUANDO LA BOMBA ESTE<br />
FUNCIONANDO.<br />
Recircular "RECIRCULATE": De la bomba, por la válvula, no pasa<br />
por el filtro y sigue <strong>para</strong> la apertura <strong>de</strong> regreso y <strong>de</strong> regreso <strong>para</strong> la<br />
piscina. Esta posición es <strong>para</strong> circular el agua pero no pasar por el filtro.<br />
Pre<strong>para</strong>ción <strong>para</strong> el clima "WINTERIZING": posición <strong>de</strong> válvula <strong>para</strong><br />
uso <strong><strong>de</strong>l</strong> filtro <strong>para</strong> el clima, lea pagina 12.<br />
.<br />
Filtro <strong>de</strong> Arena, Guía <strong><strong>de</strong>l</strong> Usuario y <strong>de</strong> Instalación
10<br />
Procedimiento <strong>de</strong> limpieza Retrolavador( "Backwash")<br />
Perdida <strong>de</strong> uso u operación <strong>de</strong> su filtro o filtración<br />
ADVERTENCIA<br />
inadécualmente pue<strong>de</strong> causar poca claridad <strong>de</strong> agua<br />
obstruyendo visibilidad en su piscina. Poca claridad en su piscina pue<strong>de</strong><br />
ocultar objetos en la piscina, causando lesiones bravees o muerte cuando<br />
nadando o tirándose a la piscina. Nunca na<strong>de</strong> en una piscina con poca<br />
claridad <strong>de</strong> agua.<br />
ADVERTENCIA<br />
Para preveenir daños al equipo y posibles lesiones,<br />
siempre apague la bomba antes <strong>de</strong> cambiar la posición<br />
<strong>de</strong> la válvula.<br />
1. Apague la bomba.<br />
2. Asegúrese que la succión y línea <strong>de</strong> limpieza estén abiertas <strong>para</strong> que el<br />
agua pueda moverse libremente <strong>de</strong>s<strong>de</strong> la piscina y fluir hacia afuera<br />
por la linea <strong>de</strong> limpieza <strong>de</strong> regreso ("Backwash"). Coloque la válvula<br />
<strong>de</strong> control en la posición <strong>de</strong> limpieza <strong>de</strong> reversa s"Backwash".<br />
3. COLOQUESE A UNA DISTANCIA SEGURA DEL FILTRO y haga<br />
funcionar la bomba.<br />
4. Limpie <strong>de</strong> reversa el filtro por aproximadamente tres (3) minutos o<br />
hasta que el agua <strong>de</strong> la limpieza <strong>de</strong> reversa salga limpia.<br />
5. Apague la bomba y coloque la valvula en la posición <strong>de</strong> enjuague<br />
"Rinse".<br />
6. COLOQUESE A UNA DISTANCIA SEGURA DEL FILTRO y haga<br />
funcionar la bomba.<br />
7. Enjuague el filtro por aproximadamente 30 segundos.<br />
8. Apague la bomba y coloque la válvula en la posición "Filter" (filtro).<br />
9. Asegúrese que la línea <strong>de</strong> regreso <strong><strong>de</strong>l</strong> agua <strong>para</strong> la piscina este abierto<br />
<strong>para</strong> que el agua pueda fluir libremente <strong>de</strong>s<strong>de</strong> el filtro hacia el regreso<br />
a la piscina.<br />
10. Abra la válvula manual <strong>de</strong> aire en el filtro. COLOQUESE A UNA<br />
DISTANCIA SEGURA DEL FILTRO y prenda la bomba.<br />
11. Cierre la valvula manual <strong>de</strong> aire <strong><strong>de</strong>l</strong> filtro cuando un chorro <strong>de</strong> agua<br />
salga constante salga por la válvula misma.<br />
12. El filtro esta ahora empezando el ciclo <strong>de</strong> filtracion. Verifique que el<br />
agua este regresando a la piscina y tome nota <strong>de</strong> la presión <strong><strong>de</strong>l</strong> filtro.<br />
13. La presión <strong><strong>de</strong>l</strong> filtro en paso 12 no tiene que pasar la presión original<br />
observada cuando el filtro fue inicialmente encendido. Si <strong>de</strong>spués <strong>de</strong><br />
limpieza "Backwash", la presión es 4 a 6 PSI arriba <strong>de</strong> la condición <strong>de</strong><br />
empezar, será necesario limpiar la cama <strong>de</strong> <strong>arena</strong> químicamente.<br />
Filtro <strong>de</strong> Arena, Guía <strong><strong>de</strong>l</strong> Usuario y <strong>de</strong> Instalación
Limpieza Quimica<br />
11<br />
1. Es recomendable que se use uno <strong>de</strong> los dos siguientes limpiadores:<br />
FILTER - CLEANSE - Advantis Technologies, Inc.<br />
KLEEN IT - BioLab, Inc.<br />
Estos limpiadores remueven aceite, sarro, corrosión y oxidación <strong>de</strong> la<br />
cama <strong>de</strong> <strong>arena</strong> en un servicio <strong>de</strong> limpieza.<br />
2. Combine la solucion siguiendo las instruciones en las etiquetas <strong>de</strong> los<br />
manufactureros.<br />
3. Limpie <strong>de</strong> reversa el filtro y la válvula como se <strong>de</strong>scribe arriba.<br />
4. Si el filtro esta <strong>de</strong>bajo <strong><strong>de</strong>l</strong> nível <strong>de</strong> la piscina, apague la bomba y cierre<br />
las válvulas apropiadas <strong>para</strong> preveenir el <strong>de</strong>sague <strong>de</strong> la piscina.<br />
5. Apague la bomba, abra el drenaje <strong><strong>de</strong>l</strong> filtro y <strong>de</strong>je que el filtro se<br />
vacie. Coloque la válvula en la posición <strong>de</strong> limpieza <strong>de</strong> reversa<br />
"Backwash".<br />
6. Despues <strong>de</strong> que el filtro se haya vaciado, cierre el drenaje <strong><strong>de</strong>l</strong> filtro y<br />
remueva la tapa<strong>de</strong>ra <strong><strong>de</strong>l</strong> colador <strong>de</strong> la bomba.<br />
7. Asegurese <strong>de</strong> que las lineas <strong>de</strong> limpieza <strong>de</strong> reversa "Backwash" esten<br />
abiertas.<br />
8. Prenda la bomba y suavemente eche la solución <strong>de</strong> limpieza en el<br />
colador <strong>de</strong> la bomba cuando la bomba este funcionando. Si el filtro<br />
esta <strong>de</strong>bajo <strong>de</strong> la piscina, abra la válvula ligeramente <strong>para</strong> permitir que<br />
la bomba funcione.<br />
9. Continue echando la solución hasta que la cama <strong>de</strong> <strong>arena</strong> este<br />
saturada con la solución <strong>de</strong> limpieza.<br />
10. Apague la bomba y <strong>de</strong>je el filtro en la posición <strong>de</strong> limpieza <strong>de</strong> reversa<br />
"Backwash". Deje el filtro en esa posición durante la noche (12<br />
horas).<br />
11. Reemplaze la tapa<strong>de</strong>ra <strong>de</strong> la bomba y siga las instruciones <strong>de</strong> limpieza<br />
<strong>de</strong> reversa "Backwash" como se <strong>de</strong>scribe arriba.<br />
12. No permita que la solucion <strong>de</strong> limpieza caiga sobre la piscina.<br />
Filtro <strong>de</strong> Arena, Guía <strong><strong>de</strong>l</strong> Usuario y <strong>de</strong> Instalación
12<br />
Prepare su Filtro <strong>para</strong> el invierno<br />
ADVERTENCIA<br />
Dejar que agua se convierta a hielo en el sistema,<br />
dañara el sistema y causara daño <strong>de</strong> agua/flooding y<br />
daño a propiedad causada por agua.<br />
1. En áreas don<strong>de</strong> el agua se pue<strong>de</strong> convertir en hielo durante el invierto,<br />
la piscina tiene que estar pre<strong>para</strong>da <strong>para</strong> el invierno <strong>para</strong> proteger el<br />
sistema.<br />
2. Limpie el filtro "Backwash"(retrolavado). Apague la bomba y ponga<br />
la posición <strong>de</strong> la válvula en la posición "Winterize"(pre<strong>para</strong>r <strong>para</strong> el<br />
invierno).<br />
3. Remueva el tapon <strong>de</strong> la apertura <strong><strong>de</strong>l</strong> drenaje inferior <strong><strong>de</strong>l</strong> filtro. NOTA<br />
IMPORTANTE: Remueva la tapa<strong>de</strong>ra <strong><strong>de</strong>l</strong> drenaje solo <strong>para</strong><br />
sacar agua <strong><strong>de</strong>l</strong> filtro. Remover toda la conexión <strong>de</strong>jara que<br />
también se salga la <strong>arena</strong>. El filtro vaciara el agua el solo.<br />
Deje el taponr <strong>de</strong> la apertura <strong><strong>de</strong>l</strong> drenaje en un lugar seguro<br />
durante el tiempo que el sistema este apagado.<br />
La válvula multipuertos <strong>de</strong>be <strong>de</strong> ser <strong>de</strong>jado en la posición<br />
ADVERTENCIA<br />
<strong>de</strong> "Winterize" (climatizado) durante la temporada que el<br />
sistema este apagado <strong>para</strong> que el empaque <strong>de</strong> la válvula diversificadora no<br />
tenga presión. Si esto no se hace esto pue<strong>de</strong> causar daño a el empaque <strong>de</strong><br />
la válvula diversificadora, y esto podría causar daño <strong>de</strong> propiedad.<br />
4. Saque toda el agua <strong><strong>de</strong>l</strong> sistema <strong>de</strong> la tuberia.<br />
5. Es recomendado que la bomba y filtro sean cubiertos con un lona o<br />
cubierta <strong>de</strong> plástico <strong>para</strong> que no se <strong>de</strong>terioren por el clima. NO<br />
envuelva o cubra el motor <strong>de</strong> la bomba con plástico.<br />
6. En instalaciones don<strong>de</strong> el agua no se pue<strong>de</strong> sacar <strong>de</strong> la bomba una<br />
solución <strong>de</strong> 40% Propylene Glycol y 60% solución <strong>de</strong> agua protegerá<br />
hasta -50 F<br />
(-45.5 C). Nota:No use solución <strong>para</strong> prevenir que el agua se<br />
congele "anti-freeze"(anti-congelamiento), solo use Propylene<br />
Glycol; otras soluciones <strong>de</strong> "anti-freeze" (anticongelamiento)son<br />
toxicas y van a dañar la bomba.<br />
Información técnica y partes <strong>de</strong> Repuesto<br />
Nota<br />
Por favor mire la información técnica y lista <strong>de</strong> partes<br />
<strong>de</strong> replazo específicamente <strong>para</strong> su filtro.<br />
Filtro <strong>de</strong> Arena, Guía <strong><strong>de</strong>l</strong> Usuario y <strong>de</strong> Instalación
Filtro <strong>de</strong> Arena, Guía <strong><strong>de</strong>l</strong> Usuario y <strong>de</strong> Instalación<br />
Guía <strong>para</strong> la i<strong>de</strong>ntificación <strong>de</strong> problemas<br />
13<br />
ROBLEMA<br />
P A<br />
AUS<br />
C N<br />
SOLUCIO<br />
no<br />
piscina<br />
la<br />
<strong>de</strong><br />
agua<br />
El<br />
suficientemente<br />
lo<br />
esta<br />
limpia.<br />
a<strong>de</strong>cuada<br />
es<br />
no<br />
piscina<br />
la<br />
<strong>de</strong><br />
química<br />
La<br />
1.<br />
algas.<br />
<strong>de</strong><br />
crecimiento<br />
el<br />
impedir<br />
o<br />
inhibir<br />
<strong>para</strong><br />
muy<br />
("Backwash")<br />
reversa<br />
<strong>de</strong><br />
Limpieza<br />
2.<br />
frecuente.<br />
tamaño<br />
o<br />
<strong>arena</strong><br />
<strong>de</strong><br />
cantidad<br />
Incorrecta<br />
3.<br />
equivocado.<br />
<strong><strong>de</strong>l</strong><br />
ciclo<br />
<strong><strong>de</strong>l</strong><br />
ina<strong>de</strong>cuado<br />
velocidad<br />
<strong>de</strong><br />
Giro<br />
4.<br />
piscina.<br />
la<br />
<strong>de</strong><br />
agua<br />
sustancias<br />
con<br />
piscina<br />
la<br />
a<br />
mantenimiento<br />
Darle<br />
servicio.<br />
<strong>de</strong><br />
técnico<br />
un<br />
a<br />
consulte<br />
o<br />
químicas<br />
la<br />
sobre<br />
psi<br />
10<br />
a<br />
acumule<br />
se<br />
presión<br />
la<br />
que<br />
Permita<br />
limpieza<br />
una<br />
hacer<br />
<strong>de</strong><br />
antes<br />
limpio<br />
filtro<br />
<strong><strong>de</strong>l</strong><br />
condición<br />
("Backwash").<br />
reversa<br />
<strong>de</strong><br />
el<br />
y<br />
<strong>arena</strong><br />
<strong>de</strong><br />
cama<br />
la<br />
<strong>de</strong><br />
profundidad<br />
la<br />
Inspeccione<br />
<strong>de</strong><br />
técnico<br />
el<br />
con<br />
consulte<br />
o<br />
<strong>arena</strong><br />
la<br />
<strong>de</strong><br />
tamaño<br />
piscina.<br />
la<br />
<strong>de</strong><br />
servicio<br />
o<br />
largo<br />
más<br />
tiempo<br />
un<br />
por<br />
sistema<br />
el<br />
funcionar<br />
Haga<br />
<strong>de</strong><br />
técnico<br />
el<br />
con<br />
o<br />
distribuidor<br />
el<br />
con<br />
consulte<br />
piscina.<br />
la<br />
<strong>de</strong><br />
servicio<br />
filtro.<br />
<strong><strong>de</strong>l</strong><br />
presión<br />
lta<br />
A a<br />
revers<br />
<strong>de</strong><br />
Limpieza<br />
Insuficiente<br />
1.<br />
("Backwash").<br />
<strong>de</strong>pósitos<br />
con<br />
tapada<br />
<strong>arena</strong><br />
<strong>de</strong><br />
cama<br />
La<br />
2.<br />
minerales.<br />
restringida.<br />
o<br />
cerrada<br />
parcialmente<br />
Válvula<br />
3.<br />
("Backwash")<br />
reversa<br />
<strong>de</strong><br />
limpieza<br />
una<br />
realize<br />
o<br />
Haga<br />
transparente.<br />
salga<br />
agua<br />
<strong>de</strong><br />
chorro<br />
el<br />
que<br />
hasta<br />
químicas.<br />
sustancias<br />
con<br />
filtro<br />
el<br />
Limpie<br />
tuberia<br />
la<br />
en<br />
obstucción<br />
la<br />
remuera<br />
o<br />
válvula<br />
la<br />
Abra<br />
retorno.<br />
<strong>de</strong><br />
filtro.<br />
<strong><strong>de</strong>l</strong><br />
cortos<br />
iclos<br />
C a<br />
revers<br />
<strong>de</strong><br />
Limpieza<br />
Incorrecta<br />
1.<br />
("Backwashing").<br />
a<strong>de</strong>cuada<br />
es<br />
no<br />
piscina<br />
la<br />
<strong>de</strong><br />
química<br />
La<br />
2.<br />
algas.<br />
<strong>de</strong><br />
crecimiento<br />
el<br />
impedir<br />
o<br />
inhibir<br />
<strong>para</strong><br />
atascada.<br />
o<br />
tapada<br />
esta<br />
<strong>arena</strong><br />
<strong>de</strong><br />
cama<br />
La<br />
3.<br />
<strong>de</strong>masiado<br />
es<br />
corriente<br />
la<br />
<strong>de</strong><br />
velocidad<br />
La<br />
4.<br />
alta.<br />
salga<br />
agua<br />
<strong>de</strong><br />
chorro<br />
el<br />
que<br />
hasta<br />
corriente<br />
por<br />
Lave<br />
transparente.<br />
sustancias<br />
con<br />
piscina<br />
la<br />
a<br />
mantenimiento<br />
Darle<br />
la<br />
<strong>de</strong><br />
servicio<br />
<strong>de</strong><br />
técnico<br />
el<br />
con<br />
consulte<br />
o<br />
química<br />
piscina.<br />
superficie<br />
la<br />
<strong>de</strong><br />
in.<br />
1<br />
una<br />
quite<br />
<strong>Manual</strong>mente<br />
limpieza<br />
una<br />
haga<br />
y<br />
<strong>arena</strong><br />
<strong>de</strong><br />
cama<br />
la<br />
<strong>de</strong><br />
superior<br />
necesario.<br />
sea<br />
según<br />
químicas<br />
sustancias<br />
<strong>de</strong><br />
filtro.<br />
<strong><strong>de</strong>l</strong><br />
capacidad<br />
la<br />
<strong>de</strong><br />
corriente<br />
la<br />
limita<br />
o<br />
Restrinja<br />
regreso<br />
<strong>de</strong><br />
corriente<br />
La<br />
disminuida,<br />
piscina<br />
la<br />
a<br />
filtro.<br />
<strong><strong>de</strong>l</strong><br />
presión<br />
baja<br />
<strong>de</strong><br />
bomba<br />
la<br />
<strong>de</strong><br />
colador<br />
el<br />
en<br />
Obstrucción<br />
1.<br />
cabello.<br />
y<br />
pelusa<br />
bomba.<br />
la<br />
<strong>de</strong><br />
Obstrucción<br />
2.<br />
la<br />
a<br />
succión<br />
<strong>de</strong><br />
tubería<br />
la<br />
en<br />
Obstrucción<br />
3.<br />
bomba.<br />
colador.<br />
el<br />
en<br />
canasto<br />
el<br />
Limpie<br />
bomba.<br />
la<br />
limpie<br />
y<br />
<strong>de</strong>sarme<br />
o<br />
Desmonte<br />
("Skimmer").<br />
espumadora<br />
la<br />
<strong>de</strong><br />
canasta<br />
la<br />
Limpie<br />
tuberías.<br />
las<br />
en<br />
obstrucción<br />
la<br />
Remueva<br />
succión.<br />
<strong>de</strong><br />
tubería<br />
la<br />
en<br />
válvulas<br />
las<br />
Abra<br />
la<br />
a<br />
regreso<br />
<strong>de</strong><br />
Arena<br />
piscina.<br />
quebrado.<br />
drenaje<br />
<strong><strong>de</strong>l</strong><br />
<strong>de</strong>bajo<br />
Lateral<br />
1.<br />
reverso<br />
<strong>de</strong><br />
limpieza<br />
<strong>de</strong><br />
Velocidad<br />
2.<br />
alta.<br />
<strong>de</strong>masiado<br />
("Backwash")<br />
roto.<br />
o<br />
dañado<br />
lateral<br />
el<br />
sustituya<br />
o<br />
Reponga<br />
<strong>de</strong><br />
limpieza<br />
<strong>de</strong><br />
corriente<br />
la<br />
<strong>de</strong><br />
velocidad<br />
la<br />
Reduzca<br />
("Backwash").<br />
reversa
14<br />
NOTAS<br />
Filtro <strong>de</strong> Arena, Guía <strong><strong>de</strong>l</strong> Usuario y <strong>de</strong> Instalación
15<br />
NOTAS<br />
Filtro <strong>de</strong> Arena, Guía <strong><strong>de</strong>l</strong> Usuario y <strong>de</strong> Instalación
*152006*<br />
P/N 152006 Rev A<br />
Filtro <strong>de</strong> Arena, Guía <strong><strong>de</strong>l</strong> Usuario y <strong>de</strong> Instalación
Filtre à sable<br />
Gui<strong>de</strong> d'installation<br />
et d'utilisation<br />
ICONSIGNES DE SÉCURITÉ IMPORTANTES<br />
VEUILLEZ LIRE ET SUIVRE ATTENTIVEMENT<br />
TOUTES LES CONSIGNES<br />
VEUILLEZ CONSERVER CES CONSIGNES<br />
Filtre à sable Gui<strong>de</strong> d'installation et d'utilisation
Soutien technique<br />
Sanford, Caroline du Nord (8 h à 17 h HNE)<br />
Moorpark, Californie (8 h à 17 h HNP)<br />
Tél. : 1-800-831-7133<br />
Téléc. : 1-800-284-4151<br />
Visitez www.pentairpool.com et staritepool.com<br />
Table <strong>de</strong>s matières<br />
Mises en gar<strong>de</strong> et consignes <strong>de</strong> sécurité...................................................... i<br />
Section 1 : Vue d'ensemble du filtre............................................................. 1<br />
Section 2: Installation .................................................................................... 2<br />
Section 3: Fonctionnement et Entretien ...................................................6<br />
Entretien .......................................................................................................... 8<br />
Nettoyage.........................................................................................................8<br />
Fonctions <strong>de</strong>s positions <strong>de</strong> la vanne <strong>de</strong> régularisation du filtre.............. 10<br />
Procédure <strong>de</strong> lavage à contre courant........................................................ 10<br />
Procédure <strong>de</strong> nettoyage chimique.............................................................. 12<br />
Hivernage du système <strong>de</strong> filtration...............................................................11<br />
Fiche technique et pièces <strong>de</strong> rechange ..................................................... 13<br />
Dépannage ......................................................................................................14<br />
© 2009 <strong>Pentair</strong> Water Pool and Spa, Inc. Tous droits réservés.<br />
1620 Hawkins Ave., Sanford, NC 27330 • (919) 566-8000<br />
10951 West Los Angeles Ave., Moorpark, CA 93021 • (805) 553-5000<br />
<strong>Pentair</strong> Water Pool and Spa® est une marque <strong>de</strong> commerce enregistrée <strong>de</strong><br />
<strong>Pentair</strong> Water Pool and Spa, Inc. et/ou <strong>de</strong> ses filiales aux États Unis et/ou dans<br />
d'autres pays. À moins que se soit indiqué autrement, l'utilisation <strong>de</strong>s noms et<br />
<strong>de</strong>s marques <strong>de</strong>s produits autres que les siens dans ce document ne<br />
présuppose nullement l'affiliation entre les propriétaires <strong>de</strong> ces noms et<br />
marques <strong>de</strong> commerce et <strong>Pentair</strong> Water Pool and Spa, Inc. ou leur<br />
cautionnement.<br />
P/N 152006 Rév A - 12/09/09<br />
Filtre à sable Gui<strong>de</strong> d'installation et d'utilisation
i<br />
MISES EN GARDE ET CONSIGNES DE SÉCURITÉ<br />
UNE INSTALLATION INCORRECTE DU FILTRE À SABLE PEUT<br />
ENTRAÎNER DES BLESSURES GRAVES OU LA MORT.<br />
LES INSTALLATEURS, UTILISATEURS ET PROPRIÉTAIRES DE LA<br />
PISCINE DOIVENT LIRE TOUTES LES MISES EN GARDE ET LES<br />
INSTRUCTIONS AVANT D'UTILISER LE FILTRE À SABLE.<br />
Le filtre à sable est conçu pour les piscines.<br />
La plupart <strong>de</strong>s instances municipales règlementent la construction,<br />
l'installation et le fonctionnement <strong>de</strong>s piscines et <strong>de</strong>s spas publics et<br />
privés. Il est important <strong>de</strong> se conformer à ses règlements, dont plusieurs régissent<br />
l'installation et l'utilisation <strong>de</strong> ce produit. Vérifier auprès <strong>de</strong>s autorités locales pour plus<br />
d'information sur les exigences concernant le Co<strong>de</strong> du bâtiment.<br />
AVIS IMPORTANT - À l'intention <strong>de</strong> l'installateur : Ce gui<strong>de</strong> contient<br />
d'importantes informations sur l'installation, le fonctionnement et les<br />
mesures <strong>de</strong> sécurité <strong>de</strong> ce produit. Ce gui<strong>de</strong> doit être remis au propriétaire<br />
et/ou à l'opérateur <strong>de</strong> cet équipement après l'installation.<br />
Avant d'installer ce produit, veuillez lire et suivre toutes les mises en gar<strong>de</strong><br />
et les consignes du gui<strong>de</strong>. Le non-respect <strong>de</strong>s mises en gar<strong>de</strong> et <strong>de</strong>s consignes peut<br />
entraîner d'importantes blessures, la mort ou <strong>de</strong>s dommages matériels. Pour <strong>de</strong>s copies<br />
supplémentaires gratuites <strong>de</strong> ce gui<strong>de</strong>, veuillez appeler au 1-800 831-7133. Pour plus <strong>de</strong><br />
renseignements sur ces produits, veuillez consulter le site Web www.pentair.com.<br />
Il peut être dangereux pour la santé <strong>de</strong> se plonger dans <strong>de</strong> l'eau à plus <strong>de</strong><br />
37,7 °C (100 °F). L'immersion prolongée en eau chau<strong>de</strong> peut causer<br />
l'hyperthermie. L'hyperthermie a lieu lorsque la température corporelle<br />
interne atteint plusieurs <strong>de</strong>grés au <strong>de</strong>ssus <strong>de</strong> la température normale <strong>de</strong> 37<br />
°C (98,6 °F). Les effets <strong>de</strong> l'hyperthermie incluent : (1) L'incapacité <strong>de</strong><br />
prendre conscience du danger; (2) L'insensibilité à la chaleur; (3)<br />
L'incapacité <strong>de</strong> reconnaître le besoin <strong>de</strong> sortir du spa; (4) L'incapacité<br />
physique <strong>de</strong> sortir du spa; (5) Le risque élevé <strong>de</strong> dommages pour le fœtus<br />
chez les femmes enceintes; (6) La perte <strong>de</strong> conscience et le risque <strong>de</strong><br />
noya<strong>de</strong>. La consommation d'alcool ou <strong>de</strong> drogue augmente<br />
considérablement les risques d'hyperthermie mortelle dans les cuves.<br />
Afin <strong>de</strong> réduire le risque <strong>de</strong> blessures, ne pas permettre aux enfants <strong>de</strong><br />
faire fonctionner le filtre à sable.<br />
Lors du réglage du taux <strong>de</strong> renouvellement ou du débit <strong>de</strong> l'eau, l'opérateur<br />
doit prendre en compte les règlements municipaux concernant le taux <strong>de</strong><br />
renouvellement ainsi que le cœfficient <strong>de</strong> répartition <strong>de</strong> désinfectant.<br />
NE PAS augmenter la puissance <strong>de</strong> la pompe, car cela pourrait avoir<br />
comme effet d'augmenter le débit <strong>de</strong> l'eau circulé par le système et<br />
dépasser le débit maximum recommandé indiqué sur le couvercle <strong>de</strong> drain.<br />
Si le filtre à sable doit être utilisé dans un contexte autre que pour une<br />
habitation unifamiliale, un interrupteur d'urgence bien i<strong>de</strong>ntifié doit être<br />
installé. L'interrupteur doit être facilement accessible et doit être à<br />
proximité et visible du filtre, tout en étant à au moins 1,52 m (5 pi).<br />
Filtre à sable Gui<strong>de</strong> d'installation et d'utilisation
ii<br />
MISES EN GARDE ET CONSIGNES DE SÉCURITÉ<br />
L'air sous pression du filtre peut occasionner une sé<strong>para</strong>tion du<br />
couvercle supérieur pouvant entrainer <strong>de</strong>s blessures sérieuses ou<br />
<strong>de</strong>s dommages matériels.<br />
Release all pressure and read instructions before working on the<br />
sand filter.<br />
If the filter clamp is adjusted un<strong>de</strong>r pressure, the tank can<br />
se<strong>para</strong>te, causing serious injury or major property damage.<br />
AVANT D'INTERVENIR SUR LE FILTRE.<br />
(1) Arrêtez la pompe.<br />
(2) Ouvrez la soupape <strong>de</strong> surpression.<br />
(3) Libérez toute la pression à l'intérieur du<br />
système.<br />
RISQUE DE DÉCHARGE ÉLECTRIQUE OU<br />
D'ÉLECTROCUTION :<br />
POUR FONCTIONNER, LA POMPE REQUIERT UNE<br />
TENSION ÉLEVÉE QUI POURRAIT CAUSER DES CHOCS<br />
ÉLECTRIQUE, DES BRÛLURES OU LA MORT<br />
AVANT D'INTERVENIR SUR LE FILTRE.<br />
AVANT DE COMMENCER L'ENTRETIEN DE LA POMPE,<br />
COUPEZ TOUJOURS LE COURANT ÉLECTRIQUE DE LA<br />
POMPE AU NIVEAU DU DISJONCTEUR. LE NON-RESPECT<br />
DE CETTE CONSIGNE PEUT ENTRAÎNER LA MORT OU<br />
DES BLESSURES GRAVES PAR DÉCHARGE ÉLECTRIQUE<br />
POUR LE TECHNICIEN, LES UTILISATEURS OU DES TIERS.<br />
Une pompe pour piscine ou pour spa doit être installé par un<br />
technicien spécialisé, conformément au Co<strong>de</strong> national<br />
d'électricité et à tous les co<strong>de</strong>s et règlements locaux en vigueur. Toute mauvaise<br />
installation crée un danger électrique pouvant causer la mort par décharge<br />
électrique ou <strong>de</strong>s blessures graves aux utilisateurs, aux installateurs ou à <strong>de</strong>s tiers,<br />
et pouvant également provoquer <strong>de</strong>s dégâts matériels.<br />
Il n'y a pas <strong>de</strong> substitut possible pour un couvercle <strong>de</strong> drain<br />
adéquatement installé. Un couvercle anti-aspiration conforme à la plus<br />
récente version <strong>de</strong> la norme A112.19.8 <strong>de</strong> ANSI/ASME doit être utilisé sur chaque drain. Les<br />
piscines et les spas doivent avoir un minimum <strong>de</strong> <strong>de</strong>ux drains par pompe. Si le couvercle <strong>de</strong><br />
drain <strong>de</strong>vient lâche, endommagé ou manquant, bloquez l'accès à la piscine ou au spa, fermez la<br />
pompe jusqu'à ce qu'un couvercle <strong>de</strong> drain conforme soit adéquatement installé à l'ai<strong>de</strong> <strong>de</strong>s vis<br />
fournies par le fabricant.<br />
Pour <strong>de</strong> plus amples renseignements sur la U.S. Virginia Graeme Baker Pool<br />
and Spa Safety Act, contactez la Consumer Product Safety Commission au<br />
301-504-7908 ou visitez le site Web www.cpsc.gov.<br />
Remarque : Toujours couper l'alimentation électrique du circuit <strong>de</strong> circulation<br />
<strong>de</strong> la piscine au niveau du disjoncteur avant <strong>de</strong> procé<strong>de</strong>r à l'installation du<br />
couvercle du drain ou sur tout orifice d'aspiration.<br />
Filtre à sable Gui<strong>de</strong> d'installation et d'utilisation
Section 1<br />
Vue d'ensemble du filtre<br />
Ce filtre à sable à grand débit est conçu afin <strong>de</strong> produire une eau claire et<br />
cristalline avec un minimum d'entretien et, lorsqu'il est installé, utilisé et<br />
entretenu conformément aux présentes instructions, fonctionnera pendant <strong>de</strong><br />
nombreuses années sans problèmes. Le filtre utilise un sable spécial afin <strong>de</strong><br />
retirer les impuretés <strong>de</strong> l'eau. Les impuretés sont recueillies dans le filtre par<br />
le lit <strong>de</strong> sable lorsque l'eau traverse le filtre. L'eau entre dans le filtre par la<br />
vanne <strong>de</strong> régulation sur le haut <strong>de</strong> celui-ci, puis est dirigée vers la surface du<br />
lit <strong>de</strong> sable. Les impuretés sont recueillies dans le lit <strong>de</strong> sable et l'eau propre<br />
traverse les éléments latéraux et le tuyau inférieur qui se trouve au bas du<br />
filtre, puis remonte pour pénétrer dans la vanne <strong>de</strong> régulation située dans le<br />
haut du filtre, d'où l'eau propre retourne ensuite à la piscine par la tuyauterie.<br />
1<br />
CE FILTRE EST SOUMIS À UNE HAUTE PRESSION. Lorsque l'on intervient sur l'un<br />
ou l'autre <strong>de</strong>s composants du circuit <strong>de</strong> circulation (p. ex. : bouchon, couvercle,<br />
pompe, filtre, robinet(s) etc.), l'air peut pénétrer n'importe où dans le circuit et <strong>de</strong>venir<br />
pressurisé. L'air sous pression peut occasionner une sé<strong>para</strong>tion du couvercle<br />
supérieur pouvant entrainer <strong>de</strong>s blessures sérieuses, la mort ou l'endommagement du<br />
bien. Pour éviter ce danger potentiel, respectez ces instructions :<br />
1. Avant <strong>de</strong> remettre la (les) vanne(s) en position et avant <strong>de</strong> commencer le montage,<br />
démontage, ou toute autre intervention sur le circuit :<br />
(a) Mettre la pompe sur ARRÊT et mettre HORS SERVICE tout automatisme pour<br />
garantir que le système ne soit PAS démarré par inadvertance pendant l'opération<br />
d'entretien;<br />
(B) ouvrir le robinet manuel <strong>de</strong> purge d'air;<br />
(C) attendre jusqu'à ce que toute pression soit évacuée, le manomètre doit lire zéro<br />
(0).<br />
2. Lors du montage du couvercle <strong>de</strong> filtre, RESPECTEZ EXACTEMENT LES<br />
INSTRUCTIONS RELATIVES AU COUVERCLE DE FILTRE.<br />
3. Une fois l'intervention sur le circuit terminée, RESPECTER EXACTEMENT LES<br />
INSTRUCTIONS DE MISE EN SERVICE.<br />
4. Maintenir le circuit <strong>de</strong> circulation correctement. Remplacer les pièces usées ou<br />
endommagées immédiatement (par exemple : couvercle, manomètre, vanne(s), joints<br />
toriques, etc.)<br />
5. S'assurer que le filtre est correctement monté et positionné suivant les instructions<br />
fournies.<br />
Après un certain temps, les impuretés s'accumuleront dans le filtre et<br />
obstrueront le flux <strong>de</strong> l'eau à travers le filtre, entraînant une augmentation <strong>de</strong><br />
la pression du filtre et une diminution du débit <strong>de</strong> l'eau, il sera alors nécessaire<br />
<strong>de</strong> procé<strong>de</strong>r à un lavage à contre-courant (Backwash).<br />
Filtre à sable Gui<strong>de</strong> d'installation et d'utilisation
2<br />
En réglant la vanne <strong>de</strong> régulation sur le haut du filtre à la position " Backwash<br />
", le flux <strong>de</strong> l'eau est automatiquement inversé dans le filtre afin qu'il soit<br />
dirigé vers le bas du filtre, remonte par le lit <strong>de</strong> sable en éliminant les<br />
impuretés et les débris du sable, puis ressorte par le tuyau d'égout. Une fois le<br />
lavage à contre-courant terminé, replacez la vanne <strong>de</strong> régulation sur la<br />
position " Filter " afin <strong>de</strong> continuer la filtration normale. La filtration permet<br />
d'éliminer les particules en suspension <strong>de</strong> l'eau, mais elle n'épure pas l'eau <strong>de</strong><br />
la piscine. L'eau doit être épurée et sa composition doit être équilibrée pour<br />
qu'elle soit très claire et cristalline. Le traitement chimique d'une piscine est<br />
l'affaire <strong>de</strong> spécialistes et il convient <strong>de</strong> consulter un spécialiste local <strong>de</strong><br />
l'entretien <strong>de</strong>s piscines pour <strong>de</strong> plus amples informations. En règle générale,<br />
pour que l'eau d'une piscine soit correctement épurée, elle doit présenter un<br />
niveau <strong>de</strong> chloration <strong>de</strong> 1 à 2 ppm et un pH compris entre 7,2 et 7,6. Le<br />
système <strong>de</strong> filtration doit être conçu pour respecter la réglementation sanitaire<br />
locale applicable. Au minimum, le système doit renouveler la totalité <strong>de</strong> l'eau<br />
<strong>de</strong> la piscine au moins <strong>de</strong>ux fois par pério<strong>de</strong> <strong>de</strong> vingt-quatre (24) heures.<br />
Une non-utilisation <strong>de</strong> votre système <strong>de</strong> filtrage ou un<br />
filtrage insuffisant peut provoquer un manque <strong>de</strong><br />
clarté <strong>de</strong> l'eau gênant la visibilité dans votre piscine. Quelqu'un peut ainsi<br />
plonger sur <strong>de</strong>s objets qu'il ne peut voir, risquant <strong>de</strong> se blesser gravement,<br />
voire <strong>de</strong> se noyer. Ne jamais se baigner dans une piscine si l'eau trouble la<br />
visibilité.<br />
Section 2<br />
Gui<strong>de</strong> d'installation et d'utilisation<br />
1. Veuillez lire et respecter toutes les instructions avant <strong>de</strong><br />
procé<strong>de</strong>r à l'installation, au fonctionnement ou à l'entretien du<br />
système <strong>de</strong> filtration à sable.<br />
2. Prévoyez un accès suffisamment spacieux et bien éclairé pour<br />
l'entretien. Positionnez le système <strong>de</strong> filtration près <strong>de</strong> la<br />
piscine. Ne montez pas <strong>de</strong> comman<strong>de</strong>s électriques au-<strong>de</strong>ssus<br />
du filtre. Vous <strong>de</strong>vez pouvoir vous écarter <strong>de</strong> celui-ci lors <strong>de</strong> la<br />
mise en marche <strong>de</strong> la pompe.<br />
3. Retirez tous les éléments du système <strong>de</strong>s cartons et examinezles<br />
au cas où ils seraient endommagés. Si le carton ou tout<br />
élément du filtre est endommagé, avisez-en le transporteur<br />
immédiatement.<br />
Filtre à sable Gui<strong>de</strong> d'installation et d'utilisation
3<br />
L'obstruction <strong>de</strong>s raccords d'aspiration peut provoquer<br />
<strong>de</strong>s blessures graves, voire mortelles par noya<strong>de</strong>. Afin <strong>de</strong><br />
réduire les risques <strong>de</strong> blessures, ne pas permettre aux enfants <strong>de</strong> faire<br />
fonctionner ce système.<br />
Ne travaillez jamais sur la pompe lorsqu'elle est en marche<br />
ou lorsqu'elle est encore sous tension. Une tension<br />
dangereuse peut provoquer <strong>de</strong> graves blessures, voire la mort. Installez un<br />
disjoncteur <strong>de</strong> fuite à la terre au point <strong>de</strong> raccor<strong>de</strong>ment <strong>de</strong> cet appareil.<br />
Assurez-vous <strong>de</strong> mettre le moteur à la terre avant <strong>de</strong> le raccor<strong>de</strong>r à une prise<br />
secteur. Sinon, il y a un risque d'électrocution grave, voire mortel. NE VOUS<br />
SERVEZ PAS d'une canalisation d'alimentation en gaz pour le mettre à terre.<br />
4. Déplacez maintenant le système à sa position ultime. Le<br />
système doit être placé sur une surface dure et au niveau.<br />
Une fois rempli <strong>de</strong> sable et d'eau, le filtre peut peser plusieurs<br />
centaines <strong>de</strong> livres.<br />
5. Assurez-vous <strong>de</strong> mettre la quantité <strong>de</strong> sable recommandé sur<br />
la plaque signalétique du filtre. Seulement un sable siliceux Nº<br />
20 standard à coefficient d'uniformité maximum <strong>de</strong>1,75 doit<br />
être utilisé. Le sable siliceux nº 20 a <strong>de</strong>s particules <strong>de</strong> 0,45 à<br />
0,55 mm (0,018 à 0,022 po) <strong>de</strong> grosseur. Avant <strong>de</strong> verser le<br />
sable dans le filtre, regar<strong>de</strong>z bien à l'intérieur <strong>de</strong> celui-ci et<br />
vérifiez le ponceau inférieur pour rechercher tout élément<br />
latéral (ou doigt) cassé ou <strong>de</strong>sserré, susceptible d'avoir été<br />
endommagé acci<strong>de</strong>ntellement par une manutention brutale lors<br />
du transport. Remplacez toute pièce cassée si nécessaire.<br />
6. Installez le gui<strong>de</strong>-sable à la partie supérieure du filtre et vi<strong>de</strong>z<br />
<strong>de</strong> l'eau dans le réservoir pour le remplir environ à moitié.<br />
Versez doucement le sable dans le filtre <strong>de</strong> façon à ce que le<br />
poids du sable n'endommage pas les éléments latéraux. Une<br />
fois le filtre rempli au niveau approprié, retirez le gui<strong>de</strong>-sable<br />
et jetez-le. Enlevez le sable qui s'est déposé autour <strong>de</strong><br />
l'ouverture supérieure du réservoir.<br />
DEMI COLLIER<br />
STANDARD<br />
BRIDE<br />
DE LA VANNE<br />
Figure 1.<br />
BRIDE DU RÉSERVOIR<br />
Filtre à sable Gui<strong>de</strong> d'installation et d'utilisation
4<br />
7. Assurez-vous qu'il n'y a pas <strong>de</strong> sable ni <strong>de</strong> débris sur le <strong>de</strong>ssus<br />
du filtre et que le joint torique est en place sur le corps <strong>de</strong><br />
vanne. Installez la vanne <strong>de</strong> manière à ce que les orifices<br />
soient dans la position finale désirée. Les orifices <strong>de</strong> la vanne<br />
sont étiquetés avec leur emplacement, par exemple, l'orifice <strong>de</strong><br />
la pompe doit être raccordé à l'orifice <strong>de</strong> sortie <strong>de</strong> la pompe,<br />
l'orifice <strong>de</strong> vidange doit être raccordé au tuyau d'évacuation et<br />
l'orifice <strong>de</strong> retour doit être raccordé au tuyau <strong>de</strong> retour à la<br />
piscine.<br />
Figure 2.<br />
8. Assurez-vous que la vanne est fermement enfoncée dans le<br />
couvercle et que la bri<strong>de</strong> du réservoir et la bri<strong>de</strong> <strong>de</strong> la vanne<br />
se touchent. Reportez-vous à la figure 1.<br />
9. Le collier en plastique peut maintenant être posé. Placez le<br />
<strong>de</strong>mi-collier sur la bri<strong>de</strong> <strong>de</strong> vanne et sur la bri<strong>de</strong> du réservoir<br />
comme indiqué à la figure 1. Insérez les vis et écrous dans le<br />
<strong>de</strong>mi-collier en vous assurant que les écrous soient situés dans<br />
l'emplacement <strong>de</strong> retenue hexagonal sur les colliers.<br />
Reportez-vous à la figure 2.<br />
10. Serrez les vis du collier fermement et vérifiez bien que la<br />
vanne du réservoir et le collier sont correctement assemblés.<br />
Haute pression :<br />
Un assemblage incorrect <strong>de</strong> la vanne<br />
<strong>de</strong> réservoir peut entraîner une<br />
sé<strong>para</strong>tion du couvercle supérieur<br />
pouvant entrainer <strong>de</strong>s blessures<br />
sérieuses ou <strong>de</strong>s dommages<br />
matériels.<br />
11. La pression maximale recommandée du filtre est inscrite sur la<br />
plaque signalétique du filtre. NE JAMAIS FAIRE fonctionner<br />
cet appareil à une pression supérieure à la pression maximale<br />
recommandée <strong>de</strong> la vanne ou du filtre. Ne jamais brancher le<br />
filtre à une pompe pouvant dépasser la pression maximale<br />
recommandée <strong>de</strong> la vanne ou du filtre.<br />
Filtre à sable Gui<strong>de</strong> d'installation et d'utilisation
12. Utilisez du mastic d'étanchéité sur tous les accouplements<br />
mâles <strong>de</strong> la tuyauterie et <strong>de</strong>s raccords. N'utilisez que <strong>de</strong>s<br />
mastics d'étanchéité adaptés à la tuyauterie en plastique.<br />
Soutenez la tuyauterie pour éviter toute contrainte exercée sur<br />
le filtre, la pompe ou la vanne. N'UTILISEZ PAS DE<br />
PRODUIT À BASE DE PÉTROLE. REMARQUE : Tous les<br />
embouts internes sont filetés à l'exception <strong>de</strong> ceux <strong>de</strong>s tuyaux<br />
<strong>de</strong> la purge d'air. Ne serrez pas les raccords filetés outre<br />
mesure.<br />
13. Installez le manomètre sur le raccord NPT <strong>de</strong> ¼ po face à<br />
l'orifice <strong>de</strong> la pompe.<br />
14. N'entreposez jamais les produits chimiques <strong>de</strong>stinés à la<br />
piscine à moins <strong>de</strong> 3 mètres (10 pieds) du filtre, <strong>de</strong> la pompe<br />
ou <strong>de</strong> la vanne. Ces produits doivent toujours être entreposés<br />
dans un endroit frais, sec et bien aéré.<br />
5<br />
Les vapeurs <strong>de</strong> produits chimiques et/ou renversements<br />
<strong>de</strong> ceux-ci peuvent corro<strong>de</strong>r gravement les éléments<br />
essentiels du filtre et <strong>de</strong> la pompe. L'affaiblissement structurel <strong>de</strong> ces<br />
éléments peut provoquer un éclatement <strong>de</strong> la vanne ou <strong>de</strong>s<br />
accessoires du filtre et occasionner <strong>de</strong>s blessures graves et/ou<br />
dégâts matériels importants.<br />
La pompe centrifuge du système fonctionne sous tension<br />
électrique et crée aussi bien une dépression qu'une<br />
pression dans le système. Lorsqu'elle est correctement câblée et<br />
raccordée, cette pompe fonction en toute sécurité.<br />
Une tension dangereuse peut provoquer <strong>de</strong> graves<br />
blessures, voire la mort. Installez un disjoncteur <strong>de</strong> fuite à<br />
la terre au point <strong>de</strong> raccor<strong>de</strong>ment <strong>de</strong> cet appareil comme protection<br />
supplémentaire. L'article 681-31 du Co<strong>de</strong> national <strong>de</strong> l'électricité<br />
exige qu'un disjoncteur <strong>de</strong> fuite à la terre soit installé si cette pompe<br />
est utilisée avec une piscine démontable.<br />
15. Évitez <strong>de</strong> trop serrer les extrémités filetées <strong>de</strong> la tuyauterie<br />
lorsque vous branchez <strong>de</strong>s raccords à la pompe. La façon<br />
correcte <strong>de</strong> procé<strong>de</strong>r consiste à appliquer un mastic<br />
d'étanchéité pour tuyau au filetage et <strong>de</strong> serrer à la main, plus<br />
un (1) tour. NE SERREZ PAS OUTRE MESURE.<br />
Filtre à sable Gui<strong>de</strong> d'installation et d'utilisation
6<br />
Section 3<br />
Fonctionnement et entretien<br />
Mise en route initiale<br />
1. Assurez-vous que la quantité <strong>de</strong> sable siliceux correspond à<br />
celle recommandée et que tous les raccor<strong>de</strong>ments sont faits.<br />
2. Vérifiez que le tuyau <strong>de</strong> lavage à contre-courant n'est pas<br />
obstrué, <strong>de</strong> façon à ce que l'eau puisse librement venir <strong>de</strong> la<br />
piscine et s'écouler par ce tuyau. Placez la vanne <strong>de</strong> régulation<br />
en position <strong>de</strong> lavage à contre-courant (Backwash).<br />
Ce filtre est soumis à une haute pression. Lorsque la<br />
vanne est correctement raccordée et qu'il n'y a pas<br />
d'air dans le système, ce filtre fonctionnera en toute<br />
sécurité. Lorsque <strong>de</strong> l'air entre dans le filtre et que le<br />
collier est mal installé, cela peut entraîner une<br />
sé<strong>para</strong>tion du couvercle supérieur pouvant entrainer<br />
<strong>de</strong>s blessures sérieuses ou <strong>de</strong>s dommages matériels.<br />
Afin d'éviter d'endommager l'équipement ou <strong>de</strong><br />
prévenir <strong>de</strong> graves blessures, arrêtez toujours la<br />
pompe avant <strong>de</strong> changer la position <strong>de</strong> la vanne <strong>de</strong><br />
régulation.<br />
3. Assurez vous que le collier <strong>de</strong> la vanne sur le filtre est<br />
correctement installé. Pour les instructions concernant<br />
l'installation du collier <strong>de</strong> serrage <strong>de</strong> la vanne, reportez vous à<br />
la section 2 " Installation " <strong>de</strong> la page 2.<br />
4. Ouvrez la purge d'air manuelle. (Reportez-vous à la Figure 3.)<br />
ÉCARTEZ-VOUS DU FILTRE. Amorcez et mettez la pompe<br />
en marche en suivant les instructions concernant la pompe et<br />
laissez le filtre se remplir d'eau. Refermez la purge d'air<br />
lorsque l'eau s'écoule en un jet continu.<br />
5. Écartez-vous du filtre. Amorcez et mettez la pompe en marche<br />
en suivant les instructions accompagnant la pompe et laissez le<br />
filtre se remplir d'eau. Une fois que l'eau s'écoule en un jet<br />
continu du tuyau d'évacuation, laissez fonctionner la pompe au<br />
moins <strong>de</strong>ux minutes. Le lavage à contre-courant du filtre est<br />
recommandé lors <strong>de</strong> la mise en service initiale afin d'éliminer<br />
<strong>de</strong> petites impuretés dans les particules du sable siliceux.<br />
Filtre à sable Gui<strong>de</strong> d'installation et d'utilisation
6. Arrêtez la pompe et placez la vanne <strong>de</strong> régulation à la position<br />
<strong>de</strong> rinçage (Rinse). Vérifiez que tous les tuyaux d'aspiration et<br />
<strong>de</strong> retour à la piscine ne sont pas obstrués, pour que l'eau<br />
puisse librement venir <strong>de</strong> la piscine et y retourner. ÉCARTEZ-<br />
VOUS DU FILTRE et mettez la pompe en marche.<br />
7. Laissez fonctionner la pompe au moins <strong>de</strong>ux minutes.<br />
8. Arrêtez la pompe et placez la vanne <strong>de</strong> régulation en position<br />
<strong>de</strong> filtration (Filter). Vérifiez que tous les tuyaux d'aspiration et<br />
<strong>de</strong> retour ne soient pas obstrués afin que l'eau puisse librement<br />
venir <strong>de</strong> la piscine et y retourner.<br />
9. Ouvrir la purge d'air manuelle du filtre. ÉCARTEZ-VOUS DU<br />
FILTRE et mettez la pompe en marche.<br />
10. Refermez la purge d'air lorsque l'eau s'écoule en un jet<br />
continu.<br />
11. Le filtre a alors entamé son cycle <strong>de</strong> filtrage. Vous <strong>de</strong>vez<br />
vérifier que l'eau retourne à la piscine et noter la pression du<br />
filtre. La pression nominale est <strong>de</strong> ____________PSI lorsque<br />
le filtre est propre.<br />
12. Vérifiez le système pour toute fuite d'eau. Si vous trouvez une<br />
fuite, arrêtez la pompe avant <strong>de</strong> réparer.<br />
13. Au fur et à mesure que le filtre retire les impuretés <strong>de</strong> l'eau <strong>de</strong><br />
la piscine, l'accumulation cause à la pression du filtre <strong>de</strong><br />
s'élever et au débit <strong>de</strong> s'abaisser. Lorsque la lecture du<br />
manomètre indique une augmentation <strong>de</strong> 68,9 kPa (10 psi) par<br />
rapport à la valeur initiale, il est nécessaire <strong>de</strong> procé<strong>de</strong>r au<br />
lavage à contre-courant du filtre.<br />
7<br />
PURGE D'AIR<br />
MANUELLE<br />
Figure 3.<br />
Filtre à sable Gui<strong>de</strong> d'installation et d'utilisation
8<br />
Entretien<br />
Avec une utilisation et un entretien adéquat, la durée <strong>de</strong> service du<br />
système sera prolongée <strong>de</strong> nombreuses années. Respectez les suggestions<br />
qui suivent afin que le système fonctionne pendant longtemps sans<br />
problème.<br />
1. Pour débarrasser l'extérieur <strong>de</strong> la pompe et du filtre <strong>de</strong>s impuretés et<br />
<strong>de</strong> la poussière, lavez-le avec une solution <strong>de</strong> détergent doux et d'eau<br />
et rincez-le au jet. N'utilisez pas <strong>de</strong> solvants.<br />
2. Si un entretien <strong>de</strong> l'intérieur du filtre s'avère nécessaire, vous pouvez<br />
vi<strong>de</strong>r le sable en enlevant l'ensemble du robinet <strong>de</strong> vidange du bas du<br />
filtre et en rinçant celui-ci au jet.<br />
3. Votre filtre est un réservoir sous pression et vous ne <strong>de</strong>vez jamais en<br />
effectuer l'entretien lorsqu'il est pressurisé. Vous <strong>de</strong>vez toujours<br />
délester la pression dans le réservoir et ouvrir le purgeur d'air qui se<br />
trouve sur le couvercle du filtre avant <strong>de</strong> procé<strong>de</strong>r à l'entretien du<br />
filtre.<br />
4. ÉCARTEZ-VOUS DU FILTRE - Lorsque vous remettez le filtre en<br />
marche, ouvrez toujours le purgeur d'air qui se trouve sur le couvercle<br />
du filtre et écartez-vous <strong>de</strong> celui-ci.<br />
5. Le panier <strong>de</strong> la cuve <strong>de</strong> la pompe doit être nettoyé et inspecter <strong>de</strong>ux<br />
fois par semaine. Retirez le couvercle transparent et le panier, puis<br />
retirez tous les débris du panier. Vérifiez l'étanchéité du joint torique et<br />
le remplacez-le s'il est endommagé. Le joint torique ne requiert pas <strong>de</strong><br />
lubrifiant. Le moteur <strong>de</strong> la pompe ne doit être ouvert que par un<br />
technicien qualifié.<br />
Filtre à sable Gui<strong>de</strong> d'installation et d'utilisation
Nettoyage<br />
1. Le filtre d'une piscine neuve doit être lavé à contre-courant et<br />
nettoyé au bout <strong>de</strong>s 48 premières heures <strong>de</strong> fonctionnement<br />
pour en éliminer les débris résultant <strong>de</strong> la construction. Il y trois<br />
façons <strong>de</strong> savoir quand le filtrage doit être lavé à contrecourant<br />
:<br />
a) L'indication la plus précise qu'un lavage à contre-courant est<br />
nécessaire est, sur les systèmes équipés d'un débitmètre, que le<br />
débit diminue <strong>de</strong> 30 % par rapport au débit initial (filtre propre).<br />
Si, par exemple, le débit initial était <strong>de</strong> 227 l/min (60 gal/min), il<br />
convient <strong>de</strong> laver le filtre à contre-courant lorsque le débit<br />
diminue <strong>de</strong> 75,7 l/min (20 gal/min) pour atteindre 151,3 l/min<br />
(40 gal/min).<br />
b) Une indication plus subjective et moins précise est donnée par<br />
l'observation du débit <strong>de</strong>s sorties d'eau directionnelles qui se<br />
trouvent dans la paroi <strong>de</strong> la piscine. Le filtre doit être lavé à<br />
contre-courant lorsque vous constatez que le débit s'est réduit.<br />
c) L'indication la plus communément utilisée et la moins précise<br />
<strong>de</strong> <strong>de</strong>voir laver à contre-courant est l'augmentation <strong>de</strong> 68,9 kPa<br />
(10 psi) par rapport à la valeur initiale (filtre propre) <strong>de</strong> la<br />
pression indiquée par le manomètre du filtre.<br />
9<br />
2. Il est important <strong>de</strong> ne pas laver le filtre à contre-courant<br />
uniquement à <strong>de</strong>s intervalles <strong>de</strong> temps, par exemple tous les<br />
trois jours. Il est également important <strong>de</strong> noter qu'un lavage à<br />
contre-courant trop fréquent provoque en fait un mauvais<br />
filtrage. Des facteurs tels que les conditions atmosphériques,<br />
<strong>de</strong> fortes pluies, <strong>de</strong> fortes concentrations <strong>de</strong> poussière ou <strong>de</strong><br />
pollen et les températures <strong>de</strong> l'eau affectent tous la fréquence<br />
du lavage à contre-courant. Vous <strong>de</strong>viendrez conscient <strong>de</strong> ces<br />
influences lorsque vous serez familiarisé avec l'utilisation <strong>de</strong><br />
votre piscine.<br />
Filtre à sable Gui<strong>de</strong> d'installation et d'utilisation
10<br />
Fonctions <strong>de</strong>s positions <strong>de</strong> la vanne <strong>de</strong> régularisation du filtre<br />
FILTER (FILTRE) : L'eau entre dans la pompe, par la vanne, <strong>de</strong>scend<br />
dans le bas du filtre, puis remonte par le tuyau du centre au tuyau <strong>de</strong> retour<br />
<strong>de</strong> vanne, puis est à nouveau dans la piscine; pour une filtration normale ou<br />
pour le balayage par le filtre.<br />
BACKWASH (LAVAGE À CONTRE-COURANT) : L'eau passe dans<br />
la pompe, par la vanne, <strong>de</strong>scend le tuyau du centre, remonte par le filtre<br />
jusqu'à la vanne et sort par le tuyau d'égout. Cette position sert à nettoyer<br />
le filtre en inversant la circulation <strong>de</strong> l'eau.<br />
RINSE (RINÇAGE) : L'eau passe dans la pompe, par la vanne, <strong>de</strong>scend<br />
dans le bas du filtre, remonte le tuyau du centre, jusqu'à la vanne et sort<br />
par le tuyau d'égout. Cette position sert au nettoyage initial et pour<br />
décanter le sable du filtre après le lavage à contre-courant.<br />
WASTE (ÉGOUTS) : L'eau passe dans la pompe, par la vanne, contourne<br />
le filtre et sort par le tuyau d'égout. Cette position sert au balayage afin <strong>de</strong><br />
vi<strong>de</strong>r directement aux déchets, <strong>de</strong> baisser le niveau <strong>de</strong> l'eau ou <strong>de</strong> vi<strong>de</strong>r la<br />
piscine.<br />
CLOSED (FERMÉ) : AUCUNE CIRCULATION - NE PAS<br />
UTILISER CE RÉGLAGE LORSQUE LA POMPE DOIT ÊTRE<br />
UTILISÉE.<br />
RECIRCULATE (RECIRCULATION) : L'eau passe dans la pompe, par la<br />
vanne, contourne le filtre, puis remonte le tuyau et retourne vers la piscine.<br />
Cette position sert à faire recirculer l'eau en contournant le filtre.<br />
WINTERIZING (HIVERNAGE) : Cette position sert à l'hivernage du<br />
filtre, reportez-vous à la page 13.<br />
Procédure <strong>de</strong> lavage à contre courant<br />
Une non-utilisation <strong>de</strong> votre système <strong>de</strong> filtrage ou un<br />
filtrage insuffisant peut provoquer un manque <strong>de</strong> clarté<br />
<strong>de</strong> l'eau gênant la visibilité dans votre piscine. Quelqu'un peut ainsi<br />
plonger sur <strong>de</strong>s objets qu'il ne peut voir, risquant <strong>de</strong> se blesser<br />
gravement, voire <strong>de</strong> se noyer. Ne jamais se baigner dans une<br />
piscine si l'eau trouble la visibilité.<br />
Filtre à sable Gui<strong>de</strong> d'installation et d'utilisation
11<br />
Afin d'éviter d'endommager l'équipement ou <strong>de</strong> prévenir<br />
<strong>de</strong> graves blessures, arrêtez toujours la pompe avant<br />
<strong>de</strong> changer la position <strong>de</strong> la vanne <strong>de</strong> régulation<br />
1. Arrêtez la pompe.<br />
2. Assurez-vous que le tuyau <strong>de</strong> lavage à contre-courant n'est<br />
pas obstrué, <strong>de</strong> façon à ce que l'eau puisse librement venir <strong>de</strong><br />
la piscine et s'écouler par ce tuyau. Placez la vanne <strong>de</strong><br />
régulation en position <strong>de</strong> lavage à contre-courant (Backwash).<br />
3. ÉCARTEZ-VOUS DU FILTRE et mettez la pompe en<br />
marche.<br />
4. Lavez le filtre à contre-courant pendant trois (3) minutes<br />
environ ou jusqu'à ce que l'eau <strong>de</strong> lavage à contre-courant soit<br />
propre.<br />
5. Arrêtez la pompe et placez la vanne <strong>de</strong> régulation à la position<br />
<strong>de</strong> rinçage (Rinse).<br />
6. ÉCARTEZ-VOUS DU FILTRE et mettez la pompe en<br />
marche.<br />
7. Rincez le filtre pendant environ 30 secon<strong>de</strong>s.<br />
8. Arrêtez la pompe et placez la vanne <strong>de</strong> régulation à la position<br />
<strong>de</strong> filtration (Filter).<br />
9. Vérifiez que le tuyau <strong>de</strong> retour à la piscine n'est pas obstrué,<br />
pour que l'eau puisse librement venir <strong>de</strong> la piscine et y<br />
retourner.<br />
10. Ouvrez la purge d'air manuelle qui se trouve sur le filtre.<br />
ÉCARTEZ-VOUS DU FILTRE et mettez la pompe en<br />
marche.<br />
11. Refermez la purge d'air qui se trouve sur le filtre lorsque l'eau<br />
s'écoule <strong>de</strong> la purge en un jet continu.<br />
12. Le filtre a alors entamé son cycle <strong>de</strong> filtrage. Vous <strong>de</strong>vez<br />
vérifier que l'eau retourne à la piscine et noter la pression du<br />
filtre.<br />
13. La pression du filtre relevée à l'étape 12 ci-<strong>de</strong>ssus ne doit pas<br />
dépasser celle qui a été observée à l'origine lors <strong>de</strong> la mise en<br />
route initiale du filtre. Si, à l'issue du lavage à contre-courant, la<br />
pression est supérieure <strong>de</strong> 27,5 à 41,4 kPa (4 à 6 psi) à la<br />
pression relevée lors <strong>de</strong> la mise en route, il sera nécessaire <strong>de</strong><br />
nettoyer chimiquement le lit <strong>de</strong> sable.<br />
Filtre à sable Gui<strong>de</strong> d'installation et d'utilisation
12<br />
Procédure <strong>de</strong> nettoyage chimique<br />
1. Il est recommandé d'utiliser un produit <strong>de</strong> nettoyage ci-<strong>de</strong>ssous<br />
: FILTER-CLEANSE - Great Lakes Biochemical, KLEEN-<br />
IT® - BioLab, Inc Ces produits nettoyants élimineront l'huile, le<br />
tartre et la rouille du lit <strong>de</strong> sable en une seule opération <strong>de</strong><br />
nettoyage.<br />
2. Préparez une solution en suivant les instructions données par le<br />
fabricant sur l'étiquette.<br />
3. Nettoyez le filtre à contre-courant comme indiqué plus haut.<br />
4. Si le filtre est au-<strong>de</strong>ssous du niveau <strong>de</strong> la piscine, arrêtez la<br />
pompe et fermez les vannes appropriées pour éviter <strong>de</strong> vi<strong>de</strong>r la<br />
piscine.<br />
5. Arrêtez la pompe, ouvrez le robinet <strong>de</strong> vidange du filtre et<br />
laissez celui-ci se vi<strong>de</strong>r. Placez la vanne <strong>de</strong> régulation en<br />
position <strong>de</strong> lavage à contre-courant (Backwash).<br />
6. Une fois que le filtre s'est vidé, refermez son robinet <strong>de</strong><br />
vidange et enlevez le couvercle <strong>de</strong> la crépine <strong>de</strong> la pompe.<br />
7. Vérifiez que les tuyaux <strong>de</strong> lavage à contre-courant ne sont pas<br />
obstrués.<br />
8. Mettez la pompe en marche et vi<strong>de</strong>z lentement la solution <strong>de</strong><br />
nettoyage dans la crépine <strong>de</strong> la pompe alors que celle-ci<br />
tourne. Si le filtre est en <strong>de</strong>ssous du niveau <strong>de</strong> la piscine,<br />
ouvrez les vannes fermées appropriées afin <strong>de</strong> permettre à la<br />
pompe <strong>de</strong> fonctionner.<br />
9. Continuez à ajouter <strong>de</strong> la solution <strong>de</strong> nettoyage jusqu'à ce que<br />
le lit <strong>de</strong> sable en soit saturé.<br />
10. Arrêtez la pompe et laissez la vanne <strong>de</strong> régulation en position<br />
<strong>de</strong> lavage à contre-courant (Backwash). Laissez le filtre<br />
reposer pendant la nuit (12 heures).<br />
11. Remettez le couvercle <strong>de</strong> la pompe en place et procé<strong>de</strong>z à un<br />
lavage à contre-courant comme indiqué plus haut.<br />
12. Empêchez la solution <strong>de</strong> nettoyage <strong>de</strong> pénétrer dans la piscine.<br />
Filtre à sable Gui<strong>de</strong> d'installation et d'utilisation
Hivernage du système <strong>de</strong> filtration<br />
13<br />
Si <strong>de</strong> l'eau restant dans le système gèle, la pompe<br />
et la plomberie pourraient être endommagées et<br />
entraîner une inondation et <strong>de</strong>s dommages matériels.<br />
1. Dans les régions dans lesquelles les températures hivernales<br />
<strong>de</strong>scen<strong>de</strong>nt sous zéro, vous <strong>de</strong>vez procé<strong>de</strong>r à l'hivernage <strong>de</strong><br />
l'équipement <strong>de</strong> la piscine afin <strong>de</strong> le protéger.<br />
2. Procé<strong>de</strong>z au lavage à contre-courant. Arrêtez la pompe et<br />
placez la vanne <strong>de</strong> régulation en position d'hivernage<br />
(Winterize).<br />
3. Retirez le bouchon <strong>de</strong> vidange du bas du filtre.<br />
REMARQUE : Retirez le bouchon <strong>de</strong> vidange du bas du filtre.<br />
Ne retirez pas tout le raccord afin d'éviter que tout le sable<br />
s'écoule. Le filtre se vi<strong>de</strong>ra très lentement. Il est recommandé<br />
<strong>de</strong> laisser le bouchon <strong>de</strong> vidange retiré pendant l'hiver.<br />
La vanne <strong>de</strong> régulation doit être laissée en<br />
position d'hivernage (Winterize) durant l'hiver<br />
<strong>de</strong> façon à ce que la soupape <strong>de</strong> dérivation n'exerce aucune<br />
pression sur le joint torique. Le non-respect <strong>de</strong> cette<br />
consigne peut endommager la soupape <strong>de</strong> dérivation,<br />
causant une fuite et <strong>de</strong>s dommages matériels.<br />
4. Vidangez toute la tuyauterie du système.<br />
5. Nous recommandons <strong>de</strong> recouvrir l'équipement avec une toile<br />
goudronnée ou une feuille plastique pour éviter toute<br />
détérioration due aux intempéries. N'ENVELOPPEZ PAS le<br />
moteur <strong>de</strong> la pompe avec du plastique.<br />
6. Dans <strong>de</strong>s installations où la pompe ne peut être vidangée, une<br />
solution à 60 % d'eau et <strong>de</strong> 40 % propylène-glycol permettra<br />
<strong>de</strong> protéger jusqu'à une température <strong>de</strong> -45,5 °C ( 50 °F).<br />
Remarque : N'utilisez pas <strong>de</strong> solutions antigels autres que le<br />
propylène-glycol, car les antigels sont hautement toxiques et<br />
endommageraient la pompe.<br />
Fiche technique et pièces <strong>de</strong> rechange<br />
REMARQUE<br />
Veuillez consulter la fiche technique et les pièces <strong>de</strong> rechange<br />
pour <strong>de</strong> plus amples renseignements propres à votre système.<br />
Filtre à sable Gui<strong>de</strong> d'installation et d'utilisation
Filtre à sable Gui<strong>de</strong> d'installation et d'utilisation<br />
14<br />
Dépannage<br />
ROBLÈME<br />
P E<br />
AUS<br />
C N<br />
SOLUTIO<br />
piscine<br />
la<br />
<strong>de</strong><br />
Eau<br />
propre<br />
insuffisamment<br />
piscine<br />
la<br />
<strong>de</strong><br />
l'eau<br />
<strong>de</strong><br />
chimique<br />
Composition<br />
<strong>de</strong>s<br />
croissance<br />
la<br />
empêcher<br />
pour<br />
inadéquate<br />
algues.<br />
fréquent.<br />
trop<br />
contre-courant<br />
à<br />
Lavage<br />
1.<br />
sable.<br />
<strong>de</strong><br />
incorrect<br />
calibre<br />
ou<br />
Quantité<br />
2.<br />
inadéquate.<br />
renouvellement<br />
<strong>de</strong><br />
Ca<strong>de</strong>nce<br />
3.<br />
l'eau<br />
<strong>de</strong><br />
correcte<br />
chimique<br />
composition<br />
la<br />
Maintenez<br />
d'entretien<br />
technicien<br />
un<br />
consultez<br />
ou<br />
piscine<br />
la<br />
<strong>de</strong><br />
spécialisé.<br />
(10<br />
kPa<br />
68,9<br />
jusqu'à<br />
augmenter<br />
pression<br />
la<br />
Laissez<br />
avant<br />
propre<br />
filtre<br />
avec<br />
pression<br />
la<br />
<strong>de</strong><br />
au-<strong>de</strong>ssus<br />
psi)<br />
courant.<br />
contre<br />
à<br />
laver<br />
<strong>de</strong><br />
ce<br />
<strong>de</strong><br />
calibre<br />
le<br />
et<br />
sable<br />
<strong>de</strong><br />
lit<br />
du<br />
l'épaisseur<br />
Vérifiez<br />
d'entretien<br />
technicien<br />
un<br />
consultez<br />
ou<br />
<strong>de</strong>rnier<br />
spécialisé.<br />
ce<br />
<strong>de</strong><br />
calibre<br />
le<br />
et<br />
sable<br />
<strong>de</strong><br />
lit<br />
du<br />
l'épaisseur<br />
Vérifiez<br />
d'entretien<br />
technicien<br />
un<br />
consultez<br />
ou<br />
<strong>de</strong>rnier<br />
spécialisé.<br />
élevée<br />
trop<br />
Pression<br />
filtre<br />
le<br />
dans<br />
insuffisant.<br />
contre-courant<br />
à<br />
Lavage<br />
1.<br />
minéraux.<br />
dépôts<br />
<strong>de</strong><br />
encombré<br />
sable<br />
<strong>de</strong><br />
Lit<br />
2.<br />
fermée.<br />
partiellement<br />
Vanne<br />
3.<br />
<strong>de</strong><br />
l'eau<br />
que<br />
ce<br />
jusqu'à<br />
contre-courant<br />
à<br />
Lavez<br />
claire.<br />
soit<br />
lavage<br />
filtre.<br />
le<br />
chimiquement<br />
Nettoyez<br />
retour.<br />
<strong>de</strong><br />
tuyau<br />
le<br />
débouchez<br />
ou<br />
vanne<br />
la<br />
Ouvrez<br />
courts<br />
trop<br />
ycles<br />
C .<br />
incorrect<br />
contre-courant<br />
à<br />
Lavage<br />
1.<br />
piscine<br />
la<br />
<strong>de</strong><br />
l'eau<br />
<strong>de</strong><br />
chimique<br />
Composition<br />
2.<br />
<strong>de</strong>s<br />
croissance<br />
la<br />
empêcher<br />
pour<br />
inadéquate<br />
algues.<br />
sale.<br />
sable<br />
<strong>de</strong><br />
Lit<br />
3.<br />
élevé.<br />
trop<br />
Débit<br />
4.<br />
<strong>de</strong><br />
l'eau<br />
que<br />
ce<br />
jusqu'à<br />
contre-courant<br />
à<br />
Lavez<br />
claire.<br />
soit<br />
lavage<br />
l'eau<br />
<strong>de</strong><br />
correcte<br />
chimique<br />
composition<br />
la<br />
Maintenez<br />
d'entretien<br />
technicien<br />
un<br />
consultez<br />
ou<br />
piscine<br />
la<br />
<strong>de</strong><br />
spécialisé.<br />
sur<br />
po)<br />
mm (1<br />
25<br />
<strong>de</strong><br />
épaisseur<br />
une<br />
main<br />
la<br />
à<br />
Retirez<br />
chimiquement<br />
nettoyez<br />
et<br />
sable<br />
<strong>de</strong><br />
lit<br />
du<br />
<strong>de</strong>ssus<br />
le<br />
la<br />
dans<br />
indiqué<br />
comme<br />
sable<br />
<strong>de</strong><br />
lit<br />
du<br />
l'ensemble<br />
G.<br />
Section<br />
filtre.<br />
du<br />
capacité<br />
la<br />
à<br />
débit<br />
le<br />
Ramenez<br />
<strong>de</strong><br />
débit<br />
du<br />
Réduction<br />
la<br />
vers<br />
d'eau<br />
retour<br />
trop<br />
Pression<br />
piscine.<br />
filtre.<br />
le<br />
dans<br />
basse<br />
peluches<br />
et<br />
cheveux<br />
à<br />
filtre<br />
du<br />
Colmatage<br />
1.<br />
pompe.<br />
la<br />
<strong>de</strong><br />
pompe.<br />
la<br />
dans<br />
Obstruction<br />
2.<br />
obstrué<br />
pompe<br />
la<br />
<strong>de</strong><br />
d'aspiration<br />
Tuyau<br />
3.<br />
filtre.<br />
le<br />
Nettoyez<br />
pompe.<br />
la<br />
nettoyez<br />
et<br />
Démontez<br />
les<br />
Débouchez<br />
collecteur.<br />
du<br />
panier<br />
le<br />
Nettoyez<br />
tuyaux.<br />
d'aspiration.<br />
tuyau<br />
du<br />
vannes<br />
les<br />
Ouvrez<br />
la<br />
dans<br />
sable<br />
du<br />
Retour<br />
piscine.<br />
bas<br />
le<br />
par<br />
vidange<br />
<strong>de</strong><br />
latéral<br />
Élément<br />
1.<br />
cassé.<br />
élevé.<br />
trop<br />
contre-courant<br />
à<br />
lavage<br />
<strong>de</strong><br />
Débit<br />
2.<br />
ou<br />
cassés<br />
latéraux<br />
éléments<br />
les<br />
Remplacez<br />
endommagés.<br />
contre-courant.<br />
à<br />
lavage<br />
du<br />
débit<br />
le<br />
Réduisez
15<br />
REMARQUE<br />
Filtre à sable Gui<strong>de</strong> d'installation et d'utilisation
*152006*<br />
P/N 152006 Rév A<br />
Filtre à sable Gui<strong>de</strong> d'installation et d'utilisation


