*Voir et Entendre n'a jamais eu autant de sens - Pioneer
*Voir et Entendre n'a jamais eu autant de sens - Pioneer
*Voir et Entendre n'a jamais eu autant de sens - Pioneer

Create successful ePaper yourself
Turn your PDF publications into a flip-book with our unique Google optimized e-Paper software.
<strong>*Voir</strong> <strong>et</strong> <strong>Entendre</strong> n’a <strong>jamais</strong> <strong>eu</strong> <strong>autant</strong> <strong>de</strong> <strong>sens</strong>
IMPORTANT<br />
The lightning flash with arrowhead symbol, within an<br />
equilateral triangle, is inten<strong>de</strong>d to alert the user to the<br />
presence of uninsulated "dangerous voltage" within the<br />
product's enclosure that may be of sufficient magnitu<strong>de</strong><br />
to constitute a risk of electric shock to persons.<br />
CAUTION<br />
RISK OF ELECTRIC SHOCK<br />
DO NOT OPEN<br />
CAUTION:<br />
TO PREVENT THE RISK OF ELECTRIC SHOCK, DO<br />
NOT REMOVE COVER (OR BACK). NO USER-<br />
SERVICEABLE PARTS INSIDE. REFER SERVICING<br />
TO QUALIFIED SERVICE PERSONNEL.<br />
The exclamation point within an equilateral<br />
triangle is inten<strong>de</strong>d to alert the user to the<br />
presence of important operating and<br />
maintenance (servicing) instructions in the<br />
literature accompanying the appliance.<br />
D3-4-2-1-1_En-A<br />
1)<br />
2)<br />
3)<br />
4)<br />
5)<br />
6)<br />
7)<br />
8)<br />
9)<br />
10)<br />
Read these instructions.<br />
Keep these instructions.<br />
Heed all warnings.<br />
Follow all instructions.<br />
Do not use this apparatus near water.<br />
Clean only with dry cloth.<br />
Do not block any ventilation openings. Install in<br />
accordance with the manufacturer’s instructions.<br />
Do not install near any heat sources such as<br />
radiators, heat registers, stoves, or other apparatus<br />
(including amplifiers) that produce heat.<br />
Do not <strong>de</strong>feat the saf<strong>et</strong>y purpose of the polarized or<br />
grounding-type plug. A polarized plug has two<br />
bla<strong>de</strong>s with one wi<strong>de</strong>r than the other. A grounding<br />
type plug has two bla<strong>de</strong>s and a third grounding<br />
prong. The wi<strong>de</strong> bla<strong>de</strong> or the third prong are<br />
provi<strong>de</strong>d for your saf<strong>et</strong>y. If the provi<strong>de</strong>d plug does<br />
not fit into your outl<strong>et</strong>, consult an electrician for<br />
replacement of the obsol<strong>et</strong>e outl<strong>et</strong>.<br />
Protect the power cord from being walked on or<br />
pinched particularly at plugs, convenience<br />
receptacles, and the point where they exit from the<br />
apparatus.<br />
11)<br />
12)<br />
13)<br />
14)<br />
Only use attachments/accessories specified by the<br />
manufacturer.<br />
Use only with the cart, stand, tripod, brack<strong>et</strong>, or<br />
table specified by the manufacturer, or sold with the<br />
apparatus. When a cart is used, use caution when<br />
moving the cart/apparatus combination to avoid<br />
injury from tip-over.<br />
Unplug this apparatus during lightning storms or<br />
when unused for long periods of time.<br />
Refer all servicing to qualified service personnel.<br />
Servicing is required when the apparatus has been<br />
damaged in any way, such as power-supply cord or<br />
plug is damaged, liquid has been spilled or objects<br />
have fallen into the apparatus, the apparatus has<br />
been exposed to rain or moisture, does not operate<br />
normally, or has been dropped.<br />
P1-4-2-2_En<br />
IMPORTANT NOTICE –<br />
THE SERIAL NUMBER FOR THIS EQUIPMENT IS LOCATED IN THE REAR. PLEASE<br />
WRITE THIS SERIAL NUMBER ON YOUR ENCLOSED WARRANTY CARD AND KEEP IN<br />
A SECURE AREA. THIS IS FOR YOUR SECURITY.<br />
D1-4-2-6-1_En<br />
WARNING: Handling the cord on this product or cords<br />
associated with accessories sold with the product will<br />
expose you to chemicals listed on proposition 65 known<br />
to the State of California and other governmental<br />
entities to cause cancer and birth <strong>de</strong>fect or other<br />
reproductive harm.<br />
Wash hands after handling<br />
D36-P4-A_En
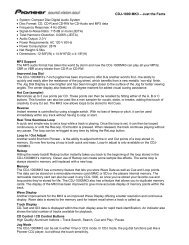
TABLE OF CONTENTS<br />
Congratulations on your purchase of a <strong>Pioneer</strong> KURO flat panel television.<br />
KURO is the future of <strong>Pioneer</strong> flat-panel displays. It’s a world without boundaries. A place where the <strong>sens</strong>es evolve, colors<br />
are felt and sounds can be tasted. An experience that changes not only the way you look at television, but the way you<br />
look at the world.<br />
English<br />
We are proud to incorporate this philosophy of exceptional quality, state-of-the-art <strong>de</strong>sign and m<strong>et</strong>iculous engineering to<br />
make the KURO un<strong>de</strong>niably unique and bring you one of the best entertainment experiences possible.<br />
Please take some time to read through this owner’s gui<strong>de</strong> and manual to learn about the many features and benefits that<br />
s<strong>et</strong> the KURO apart. We hope you enjoy the experience of owning the KURO and invite you to enter a new world of seeing<br />
and hearing like never before.<br />
TABLE OF CONTENTS<br />
1 Introduction to the 20FD Series Flat Panel TVs .....................................................................................6<br />
1.1 Flat Panel TV Shipment Checklist ................................................................................................................................... 6<br />
1.2 Control Options: G<strong>et</strong> to Know Your Flat Panel TV .......................................................................................................... 8<br />
1.2.1 Control Buttons and More on the Flat Panel TV .................................................................................................... 8<br />
1.2.2 Operating the Remote Control .............................................................................................................................. 10<br />
1.2.3 Buttons on the Remote Control ............................................................................................................................ 12<br />
2 Install Your Flat Panel TV ......................................................................................................................14<br />
2.1 Choose a Location and the Mounting M<strong>et</strong>hod............................................................................................................. 14<br />
2.1.1 Check the Location for Suitability ......................................................................................................................... 15<br />
2.1.2 Lift and/or Move Your Panel (the How To’s)......................................................................................................... 15<br />
2.2 Install the Panel Using a Stand ..................................................................................................................................... 16<br />
2.2.1 Use or Remove the Inclu<strong>de</strong>d Stand ...................................................................................................................... 16<br />
2.2.2 Connect the Speaker Cables ................................................................................................................................. 20<br />
2.3 Wall/Ceiling Mounting.................................................................................................................................................... 22<br />
2.4 Mount the Flat Panel TV ................................................................................................................................................. 24<br />
2.5 Connect to Broadcast TV & Other Devices (DVR, Receiver, BDR, <strong>et</strong>c.) ..................................................................... 26<br />
2.5.1 Add Analog (conventional) and Digital TV Channels .......................................................................................... 26<br />
2.5.2 Connect Your Other <strong>Pioneer</strong> Equipment.............................................................................................................. 26<br />
2.5.3 Connect the Power Cord to the Panel .................................................................................................................. 29<br />
2.6 Route then Bundle the Power Cord and Cables .......................................................................................................... 29<br />
3 Basic Operations For Television Viewing .............................................................................................31<br />
3.1 Turn the Flat Panel TV ON/OFF...................................................................................................................................... 31<br />
3.2 Program the Flat Panel TV for Television Viewing........................................................................................................ 32<br />
3.2.1 Choose Analog or Digital TV Channels ................................................................................................................ 32<br />
3.2.2 Explore the Home Menu ........................................................................................................................................ 32<br />
3.2.3 Assign a Language................................................................................................................................................. 34<br />
3.2.4 S<strong>et</strong> the Clock........................................................................................................................................................... 35<br />
3.2.5 Create the List of Channels ................................................................................................................................... 35<br />
3.2.6 Skip or Del<strong>et</strong>e Unwanted Channels...................................................................................................................... 38<br />
3.2.7 Channel List ............................................................................................................................................................ 39<br />
3.3 Quick Start for Watching Television.............................................................................................................................. 41<br />
3.3.1 Change the Channel/Sub-Channel....................................................................................................................... 41<br />
3.3.2 Adjust the Volume/Sound...................................................................................................................................... 41<br />
3.3.3 Turn On the Sleep Timer........................................................................................................................................ 41<br />
3.4 Adjust the Picture and Sound Quality .......................................................................................................................... 42<br />
3.4.1 Adjust the Picture for Your Room Lighting .......................................................................................................... 42<br />
3.4.2 General Picture (Vi<strong>de</strong>o) Adjustment for an AV Source ....................................................................................... 43<br />
3.4.3 Compare Images When Adjusting the Picture.................................................................................................... 44<br />
3.4.4 Display a Graphical Picture/Sound Adjustment Screen..................................................................................... 45<br />
3.4.5 Sound Control......................................................................................................................................................... 46<br />
3.4.6 General Sound (Audio) Adjustment...................................................................................................................... 46<br />
3<br />
En
TABLE OF CONTENTS<br />
4<br />
En<br />
3.5 Block Programs, Channels, or Content.........................................................................................................................47<br />
3.5.1 Assign a Parental Control (Block) Password .......................................................................................................47<br />
3.5.2 Activate Parental Control .......................................................................................................................................48<br />
3.5.3 Assign a Rating System to Create Blocks ............................................................................................................48<br />
3.5.4 Temporarily Remove a Block .................................................................................................................................51<br />
3.6 Smart Starts for New Owners ........................................................................................................................................52<br />
3.6.1 Use the TOOLS Menu.............................................................................................................................................52<br />
3.6.2 Extend Your Panel Life............................................................................................................................................52<br />
3.6.3 Turn On the Image Orbiter.....................................................................................................................................53<br />
3.6.4 Trigger the Screen-Saving Vi<strong>de</strong>o Pattern Periodically.........................................................................................53<br />
3.6.5 Activate Energy Save to Reduce Power Usage ....................................................................................................53<br />
4 Additional Picture and Sound Adjustment Options ........................................................................... 54<br />
4.1 Choose an AV Option (Vi<strong>de</strong>o, Game, <strong>et</strong>c.).....................................................................................................................54<br />
4.1.1 AV Source through the Remote Control...............................................................................................................54<br />
4.1.2 Choose an AV Source through the Home Menu .................................................................................................55<br />
4.1.3 Choose a PC Source...............................................................................................................................................55<br />
4.1.4 S<strong>et</strong> the Panel to Recognize a Game Console.......................................................................................................56<br />
4.2 Adjust Specific Picture Elements ..................................................................................................................................56<br />
4.2.1 Choose a Screen Size (Automatically or Manually).............................................................................................56<br />
4.2.2 Correct the Picture for an AV or PC Source.........................................................................................................58<br />
4.3 Assign Advanced Picture Functions .............................................................................................................................59<br />
4.3.1 Adjust for Screen Masking (black bars on si<strong>de</strong>s) ................................................................................................59<br />
4.3.2 Select a PureCinema Level for High Quality Image.............................................................................................60<br />
4.4 View in Multi-Screen .......................................................................................................................................................61<br />
4.4.1 Split/Swap/Shift the Screen...................................................................................................................................61<br />
4.5 Freeze the Picture ...........................................................................................................................................................62<br />
4.6 Use the Banner Feature..................................................................................................................................................63<br />
4.7 Select Alternatives for/to Sound ....................................................................................................................................64<br />
4.7.1 Activate Closed Captioning (CC) ...........................................................................................................................64<br />
4.7.2 Switch Languages Using MTS...............................................................................................................................66<br />
4.7.3 Select SAP...............................................................................................................................................................66<br />
4.7.4 Apply Sound Effect S<strong>et</strong>tings ..................................................................................................................................67<br />
4.7.5 Use Auto Volume Control (AVC)............................................................................................................................67<br />
4.8 Manage the Power ..........................................................................................................................................................67<br />
5 Use Other Equipment With Your Flat Panel TV ................................................................................... 69<br />
5.1 Program the Remote Control to Operate Other Equipment........................................................................................69<br />
5.1.1 Assign a Manufacturing Co<strong>de</strong> to the Remote Control ........................................................................................69<br />
5.1.2 Issue a Library Search for a Manufacturer Co<strong>de</strong>.................................................................................................69<br />
5.1.3 Clear Ad<strong>de</strong>d Manufacturer Co<strong>de</strong>s from the Remote Control .............................................................................70<br />
5.1.4 Control a <strong>Pioneer</strong> Receiver ....................................................................................................................................70<br />
5.1.5 Control a Cable (CBL) or Satellite (SAT) System..................................................................................................71<br />
5.1.6 Control a Vi<strong>de</strong>o Cass<strong>et</strong>te Recor<strong>de</strong>r (VCR) ............................................................................................................72<br />
5.1.7 Control a DVD Player/DVR Recor<strong>de</strong>r/BD Player..................................................................................................73<br />
5.2 Use HDMI Inputs.............................................................................................................................................................74<br />
5.2.1 Specify the HDMI Input Type .................................................................................................................................74<br />
5.2.2 Specify a Digital HDMI Signal Type ......................................................................................................................75<br />
5.2.3 Specify an Audio HDMI Signal Type .....................................................................................................................75<br />
5.3 Control Equipment with the Panel’s Remote Through HDMI .....................................................................................76<br />
5.3.1 Control an AV System.............................................................................................................................................78<br />
5.3.2 Control a Recor<strong>de</strong>r .................................................................................................................................................79<br />
5.3.3 Control a Player.......................................................................................................................................................79<br />
5.3.4 Add an AV Amp or a BD Player.............................................................................................................................80<br />
5.4 Specific HDMI Control Commands ...............................................................................................................................81<br />
5.4.1 Play Source Sound Using an HDMI Command...................................................................................................81<br />
5.4.2 Turn OFF the Power With an HDMI Command ...................................................................................................81<br />
5.4.3 Turn ON the Power With an HDMI Command.....................................................................................................81<br />
5.4.4 Test the Power Control (On/Off) ............................................................................................................................82
TABLE OF CONTENTS<br />
5.5 Connect a Game Console or Camcor<strong>de</strong>r ...................................................................................................................... 82<br />
5.6 Operate the Home Media Gallery .................................................................................................................................. 83<br />
5.6.1 N<strong>et</strong>work Connections............................................................................................................................................. 84<br />
5.6.2 Connect a USB Device........................................................................................................................................... 86<br />
5.7 Run the Home Media Gallery......................................................................................................................................... 88<br />
5.7.1 Show Your Movie Files on the Flat Panel TV ........................................................................................................ 91<br />
5.7.2 Play Your Music Files on the Flat Panel TV .......................................................................................................... 93<br />
5.7.3 Show Your Photo File on the Flat Panel TV .......................................................................................................... 94<br />
5.8 Use the TOOLS Menu ..................................................................................................................................................... 96<br />
5.9 HMG S<strong>et</strong>up .................................................................................................................................................................... 108<br />
5.10 Other useful functions................................................................................................................................................ 109<br />
5.11 Add Other Audio Equipment...................................................................................................................................... 111<br />
5.12 Add a Computer (PC) ................................................................................................................................................. 112<br />
5.12.1 Automatic Image Position and Clock Adjustments ........................................................................................ 112<br />
5.12.2 Manual Image Position and Clock Adjustments............................................................................................. 112<br />
6 Helpful Information .............................................................................................................................113<br />
6.1 Frequently Asked Questions (FAQs) ........................................................................................................................... 113<br />
6.2 Check Your Software/Hardware Version..................................................................................................................... 114<br />
6.3 Cleaning M<strong>et</strong>hods......................................................................................................................................................... 114<br />
6.4 Troubleshooting & Service Information....................................................................................................................... 115<br />
6.4.1 Check the Signal Strength................................................................................................................................... 120<br />
7 Cautions and Warnings........................................................................................................................121<br />
7.1 Installation D<strong>et</strong>ails ........................................................................................................................................................ 121<br />
7.2 Physical Location & Temperature Consi<strong>de</strong>rations ..................................................................................................... 121<br />
7.3 Usage Gui<strong>de</strong>lines.......................................................................................................................................................... 121<br />
7.4 Signal Interference or Noise ........................................................................................................................................ 122<br />
7.5 Phosphor Properties..................................................................................................................................................... 122<br />
7.6 Image Information Including R<strong>et</strong>ention & After-Image Lag ...................................................................................... 122<br />
7.7 Saf<strong>et</strong>y Precautions........................................................................................................................................................ 124<br />
7.8 Legal Notices................................................................................................................................................................. 124<br />
7.8.1 Saf<strong>et</strong>y..................................................................................................................................................................... 124<br />
7.8.2 Radio Interference................................................................................................................................................ 125<br />
8 Appendix ..............................................................................................................................................126<br />
8.1 Ratings Charts (for Various Audience Classifications) ............................................................................................. 126<br />
8.1.1 TV Ratings (age-based) ........................................................................................................................................ 126<br />
8.1.2 U.S. TV Parental Gui<strong>de</strong>line Ratings (age/category-based)................................................................................ 126<br />
8.1.3 MPAA Movie Ratings (age-based) ...................................................................................................................... 126<br />
8.1.4 Canadian - English Ratings (age-based) ............................................................................................................ 127<br />
8.1.5 Canadian - French Ratings (age-based)............................................................................................................. 127<br />
8.2 Manufacturer Co<strong>de</strong>s to Program into the Remote Control....................................................................................... 128<br />
8.2.1 Cable...................................................................................................................................................................... 128<br />
8.2.2 Satellite.................................................................................................................................................................. 128<br />
8.2.3 VCR (Brands A - F)................................................................................................................................................ 129<br />
8.2.4 VCR (Brands G - O)............................................................................................................................................... 130<br />
8.2.5 VCR (Brands P - V) ............................................................................................................................................... 131<br />
8.2.6 VCR (Brands W - Z) .............................................................................................................................................. 131<br />
8.2.7 PVR ........................................................................................................................................................................ 132<br />
8.2.8 BD (HD-DVD)........................................................................................................................................................ 132<br />
8.2.9 DVD-R.................................................................................................................................................................... 132<br />
8.2.10 DVD (Brands A - N) ............................................................................................................................................ 133<br />
8.2.11 DVD (Brands O - Z)............................................................................................................................................. 134<br />
8.2.12 LD......................................................................................................................................................................... 134<br />
8.3 Specifications................................................................................................................................................................ 135<br />
8.4 Glossary ......................................................................................................................................................................... 152<br />
8.5 In<strong>de</strong>x............................................................................................................................................................................... 154<br />
8.6 Tra<strong>de</strong>marks, Licenses, & Patent Information ............................................................................................................. 155<br />
English<br />
5<br />
En
01 Introduction to the 20FD Series Flat Panel TVs<br />
1 Introduction to the 20FD Series Flat Panel<br />
TVs<br />
The <strong>Pioneer</strong> 20FD Series Flat Panel TV mo<strong>de</strong>ls inclu<strong>de</strong> the 60-inch PDP-6020FD and the 50-inch PDP-5020FD<br />
(screen sizes measured diagonally). Below is a list of all accessories shipped with your panel. If an item is<br />
missing, please contact your <strong>de</strong>aler or our Service organization immediately. Service contact information is listed<br />
on the back of this manual.<br />
1.1 Flat Panel TV Shipment Checklist<br />
In addition to the flat panel TV, there are several accessories inclu<strong>de</strong>d to make installation quick and easy. Please<br />
check for contents before discarding or allowing your installer to discard any packing material.<br />
The PDP-6020FD and PDP-5020FD shipments have slightly different pieces. I<strong>de</strong>ntify the accessories from the<br />
appropriate list below.<br />
You will need a Philips screwdriver when mounting the speaker and attaching the stand.<br />
Shipped with both mo<strong>de</strong>ls<br />
Remote Control Batteries for Remote (2) Cleaning Cloth<br />
Power Cord (2 m/6.6 fe<strong>et</strong>) Cable Clamps (4) Operating Instructions<br />
Warranty Card<br />
Also shipped with the PDP-6020FD (60” panel)<br />
Stand kit<br />
Base Cover Stand Pipes (2)<br />
Silver Screws (4) (4×10 mm) Black Screws (4) (M6×20 mm)<br />
6<br />
En
Introduction to the 20FD Series Flat Panel TVs<br />
01<br />
Also shipped with the PDP-6020FD (60” panel)<br />
Falling Prevention<br />
M<strong>et</strong>al Fittings (2)<br />
Screws to M<strong>et</strong>al Fittings (4)<br />
(M4×35 mm)<br />
English<br />
Speaker accessories<br />
Speaker Cables (2)<br />
Speaker<br />
Speaker Mounting Screws (9) (M5×10 mm)<br />
Speaker Brack<strong>et</strong> (Center) Speaker Brack<strong>et</strong>s (Left & Right)<br />
Stand kit<br />
Falling Prevention<br />
M<strong>et</strong>al Fittings (2)<br />
Also shipped with the PDP-5020FD (50” panel)<br />
Screws to M<strong>et</strong>al Fittings (2)<br />
(M4×35 mm)<br />
Speaker accessories<br />
Speaker Cables (2) Speaker Brack<strong>et</strong>s (Si<strong>de</strong>) (2) Speaker<br />
Speaker Mounting Screws (9)<br />
(M5×10 mm)<br />
Speaker Brack<strong>et</strong> (Center)<br />
7<br />
En
01 Introduction to the 20FD Series Flat Panel TVs<br />
1.2 Control Options: G<strong>et</strong> to Know Your Flat Panel TV<br />
You can operate your flat panel TV from the panel buttons or with the remote control. The following sections<br />
provi<strong>de</strong> button locations/operations for the panel and the remote control.<br />
1.2.1 Control Buttons and More on the Flat Panel TV<br />
Your flat panel TV has buttons, indicators, and <strong>sens</strong>ors on the lower front bezel with more buttons, toggles, and<br />
ports on the panel si<strong>de</strong>s. Refer to the drawings below for specific locations and functions. Or, for the back ports<br />
and terminals only, check the terminal position she<strong>et</strong> located near the panel’s terminal compartment to i<strong>de</strong>ntify<br />
the various options.<br />
20FD Series Mo<strong>de</strong>ls: Face of Panel<br />
(PDP-5020FD)<br />
1 2 3 4 5 6<br />
1 -Power ON indicator<br />
2 -STANDBY indicator<br />
3 -SLEEP indicator<br />
4 -Room Light <strong>sens</strong>or<br />
5 -Remote Control <strong>sens</strong>or<br />
6 -Bezel (some call it the front frame)<br />
Command Si<strong>de</strong> of the Panel (left si<strong>de</strong>)<br />
7<br />
8<br />
12<br />
13<br />
14<br />
7 -USB terminal<br />
8 -INPUT 7 terminal (HDMI)<br />
9 -PHONES terminal<br />
10 -INPUT 3 terminal (Vi<strong>de</strong>o)<br />
11 -INPUT 3 terminals (Audio)<br />
12 -STANDBY/ON button<br />
13 -INPUT button<br />
14 -VOLUME Up/Down buttons<br />
15 -CHANNEL Up/Down buttons<br />
9<br />
10<br />
15<br />
11<br />
8<br />
En
Introduction to the 20FD Series Flat Panel TVs<br />
01<br />
1 -ANT terminal<br />
2 -PC Input terminal (Analog RGB)<br />
3 -AC In terminal<br />
(upper bank)<br />
Back of the Panel<br />
English<br />
1 2 3<br />
(middle bank)<br />
4 11 12 13 14 15 16 17 18 19 20 21<br />
4 -Ethern<strong>et</strong> cable port<br />
5 -INPUT 4 terminal (HDMI)<br />
6 -INPUT 5 terminal (HDMI)<br />
7 -INPUT 6 terminal (HDMI)<br />
8 -RC-232C terminal (for factory use)<br />
9 -INPUT 4 terminals (Audio)<br />
10 -INPUT 5 terminals (Audio)<br />
11 -SUB WOOFER OUT terminal<br />
12 -AUDIO OUT terminals (Audio)<br />
13 -INPUT 1 terminal (S-Vi<strong>de</strong>o)<br />
5<br />
6 7 8<br />
9 10 22<br />
14 -INPUT 1 terminal (Vi<strong>de</strong>o)<br />
15 -INPUT 1 terminals (Audio)<br />
16 -INPUT 2 terminal (Vi<strong>de</strong>o)<br />
17 -INPUT 2 terminals (Audio)<br />
18 -INPUT 2 terminals (Component, Y, P B , P R )<br />
19 -PC INPUT terminal (Audio)<br />
20 -CONTROL OUT terminal<br />
21 -DIGITAL OUT terminal (Optical)<br />
22 -SPEAKERS (right/left) terminal<br />
(PDP-6020FD)<br />
(lower bank)<br />
23 -Speakers (R) terminal (speaker si<strong>de</strong>)<br />
24 -Speakers (L) terminal (speaker si<strong>de</strong>)<br />
23 24 25<br />
25 -Power On button<br />
Terminals on si<strong>de</strong> and rear panels are common to both 20FD mo<strong>de</strong>ls.<br />
9<br />
En
01 Introduction to the 20FD Series Flat Panel TVs<br />
1.2.2 Operating the Remote Control<br />
The remote control for the 20FD Series panels is a powerful tool. This section provi<strong>de</strong>s a brief introduction to your<br />
remote control while later sections explore more advanced operations.<br />
Insert the Batteries into the Remote Control<br />
To open push and sli<strong>de</strong> the battery cover in the direction of the arrows.<br />
Load the supplied two AA size batteries by the negative polarity (–) ends first.<br />
The batteries supplied with this product may have a shorter life expectancy due to storage conditions. If the<br />
remote control seems to be failing or is weak, replace the provi<strong>de</strong>d batteries with new alkaline batteries.<br />
Never mix old and new batteries. Mixing old and new batteries can shorten the life of new batteries or cause<br />
chemical leaks in old batteries. Also, mixing different types or brands of batteries can cause issues as batteries<br />
brands have slightly different characteristics.<br />
Note: If the flat panel TV’s remote control is not nee<strong>de</strong>d for an exten<strong>de</strong>d length of time, remove the batteries.<br />
When disposing of used batteries, please comply with<br />
governmental regulations or environmental public institution’s<br />
rules that apply in your country/area.<br />
Remote Control Issues<br />
There are several issues that can affect your remote control but the most common problem is weak batteries.<br />
Weak batteries in the remote control can cause communication to fail or only operate sporadically. In this<br />
situation, try moving closer to the panel and attempt to control the panel with the remote. If the panel responds<br />
then change the batteries. If moving closer has no effect on the panel, check the surroundings for objects that<br />
might be blocking the signal. Also consi<strong>de</strong>r other equipment with remote controls that are in the area around the<br />
panel. Objects and other IR signals can disrupt the remote. For more help with your remote control, refer to “6.1<br />
Frequently Asked Questions (FAQs)”.<br />
10<br />
En
Introduction to the 20FD Series Flat Panel TVs<br />
01<br />
Operating Range for the Remote Control<br />
To control the flat panel TV, point the remote towards the <strong>sens</strong>or on the panel’s bottom right corner. For easy<br />
operation, keep the distance b<strong>et</strong>ween the remote control and the <strong>sens</strong>or less than 7m (23 fe<strong>et</strong>) and at an angle of<br />
less than 30 <strong>de</strong>grees.<br />
English<br />
30º<br />
7 m<br />
(23 fe<strong>et</strong>)<br />
30º<br />
Sensor<br />
The remote control may not work properly if the <strong>sens</strong>or is in direct sunlight or very bright lighting. If your viewing<br />
room is naturally bright, change the position of the panel or physically use the remote control closer to the panel’s<br />
<strong>sens</strong>or.<br />
Note: If the remote control is left sitting in direct sunlight or un<strong>de</strong>r a very strong light, the case could warp or<br />
<strong>de</strong>form.<br />
11<br />
En
01 Introduction to the 20FD Series Flat Panel TVs<br />
1.2.3 Buttons on the Remote Control<br />
Except for a few options, commands available through the buttons on the flat panel TV are duplicated on the<br />
remote control. The remote control can be programmed to control other equipment such as a DVD Player,<br />
Surround Sound system, <strong>et</strong>c. A later section entitled “5 Use Other Equipment With Your Flat Panel TV” explains<br />
how to use the remote to control other equipment.<br />
This section i<strong>de</strong>ntifies and <strong>de</strong>scribes the buttons on the remote control.<br />
Remote: Left si<strong>de</strong> buttons (top to bottom, left to right)<br />
TV :<br />
Turn On or place panel in Standby<br />
INPUT:<br />
Select a source (INPUT 1 thru INPUT 7)<br />
PC:<br />
Select the PC terminal as an input source<br />
AV SELECTION:<br />
Select audio/vi<strong>de</strong>o s<strong>et</strong>tings<br />
AV Source: OPTIMUM, PERFORMANCE, DYNAMIC,<br />
MOVIE, GAME, SPORT, Standard<br />
PC Source: STANDARD, USER<br />
SPLIT:<br />
Cycle view thru single-screen, 2-screen,<br />
picture-in-picture<br />
FREEZE:<br />
Freeze a frame from a moving image then<br />
press again to cancel the freeze function<br />
Number buttons 0 thru 9:<br />
Select a channel<br />
•(dot):<br />
Enter a dot for selecting a sub-channel<br />
VOL +/–:<br />
S<strong>et</strong> the volume<br />
EXIT:<br />
Exit the menu to r<strong>et</strong>urn to the normal screen<br />
Arrow buttons:<br />
Navigate the menu screens<br />
HOME MENU:<br />
Display the HOME MENU<br />
Color buttons (Red, Green, Blue, Yellow):<br />
Control a BD player for HDMI Control functions only<br />
HDMI CONTROL:<br />
Select the HDMI Control functions<br />
SELECT:<br />
Select for TV/RCV, CBL/SAT, VCR, or DVD/DVR<br />
1<br />
2<br />
3<br />
4<br />
5<br />
6<br />
7<br />
8<br />
9<br />
10<br />
11<br />
12<br />
13<br />
14<br />
15<br />
1<br />
3 4<br />
5 6<br />
8<br />
9<br />
10<br />
12<br />
14<br />
15<br />
2<br />
7<br />
13<br />
11<br />
12<br />
En
Introduction to the 20FD Series Flat Panel TVs<br />
01<br />
English<br />
Remote: Right si<strong>de</strong> buttons (top to bottom, left to right)<br />
16<br />
17 18<br />
19 20<br />
21<br />
22<br />
23 24<br />
26<br />
25<br />
27<br />
28<br />
29<br />
16 TV/DTV:<br />
Select analog or digital TV channels<br />
17 DISPLAY:<br />
Display the channel information<br />
18 SCREEN SIZE:<br />
Select the screen size<br />
19 SWAP:<br />
Switch b<strong>et</strong>ween the two screens when<br />
viewing as 2-screen or picture-in-picture<br />
20 SHIFT:<br />
Move the location of the small screen when<br />
viewing as picture-in-picture<br />
21 CH ENTER:<br />
Change the channel<br />
22 CH RETURN:<br />
R<strong>et</strong>urn to the previous channel<br />
23 MUTING:<br />
Turn off the sound while the vi<strong>de</strong>o continues to play<br />
24 CH +/–:<br />
Cycle through channels<br />
25 TOOLS:<br />
Display the TOOLS Menu - refer to “3.6 Smart Starts for New<br />
Owners”<br />
26 ENTER:<br />
Execute a command<br />
27 RETURN:<br />
R<strong>et</strong>urn to the previous menu screen<br />
28 Player/Recor<strong>de</strong>r Control:<br />
Use buttons for control of connected equipment<br />
29 HMG (Home Media Gallery):<br />
Display the Home Media Gallery menu<br />
Use this button to start recording (for VCR/DVD recor<strong>de</strong>r only)<br />
13<br />
En
02 Install Your Flat Panel TV<br />
2 Install Your Flat Panel TV<br />
There are several installation options for your flat panel TV. This chapter walks you through how to choose an<br />
installation site, the best mounting m<strong>et</strong>hods, and how to install your panel.<br />
2.1 Choose a Location and the Mounting M<strong>et</strong>hod<br />
Your flat panel TV is very thin. The panel needs a solid surface and some sort of support structure (a stand, table,<br />
<strong>et</strong>c.) to protect it from being tipped over or knocked down. Use installation accessories and parts inclu<strong>de</strong>d with<br />
the shipment. <strong>Pioneer</strong> recommends working with a qualified installer whenever possible.<br />
Regardless of the mounting m<strong>et</strong>hod, anchor or secure your flat panel TV using a combination of the mounting<br />
holes and/or supplied bolts.<br />
Rear view (PDP-6020FD)<br />
Mounting hole<br />
Mounting hole<br />
Si<strong>de</strong> view<br />
Mounting surface<br />
Mounting<br />
brack<strong>et</strong> (or<br />
equivalent item)<br />
M8 screw<br />
12 mm to 18 mm<br />
(0.5 inches to<br />
0.7 inches)<br />
Rear view (PDP-5020FD)<br />
W<br />
W<br />
Mounting hole<br />
Mounting hole<br />
W<br />
W<br />
T<br />
W<br />
T<br />
W<br />
Note: Some installation options require a different type of bolt. Check with your installer or <strong>de</strong>aler to purchase the<br />
appropriate bolt(s).<br />
14<br />
En
Install Your Flat Panel TV<br />
02<br />
2.1.1 Check the Location for Suitability<br />
When choosing the location for your panel, there are several factors you need to keep in mind. The installation<br />
site should be out of direct sunlight and have sufficient ventilation around the flat panel TV to allow cooling. The<br />
diagram below is an example of a stand-mounted panel with proper ventilation.<br />
English<br />
Over 50 cm<br />
(19 11/16 inches)<br />
Over<br />
10 cm<br />
(3 15/16<br />
inches)<br />
The distance behind and above the panel<br />
changes <strong>de</strong>pending on your choice of mount.<br />
Consult with your <strong>de</strong>aler or professional<br />
installer for proper ventilation.<br />
Use the checklist below to judge possible installation sites.<br />
Sufficient ventilation<br />
Safe from excessive vibrations<br />
Away from air conditioners<br />
Free of moisture or dampness<br />
No danger of splashing water<br />
Route cords and cables safely<br />
No danger of power overloads<br />
Separate from other IR equipment<br />
Protected from hits or shocks<br />
Distance from heat sources<br />
Out of direct sunlight<br />
Away from strong lighting sources<br />
For specific cautions and saf<strong>et</strong>y information, refer to “7.2 Physical Location & Temperature Consi<strong>de</strong>rations” and<br />
“7.7 Saf<strong>et</strong>y Precautions.”<br />
2.1.2 Lift and/or Move Your Panel (the How To’s)<br />
This flat panel TV is built for endurance but because of the technology, the panel must be handled with care. Use<br />
the handles attached to the rear of the flat panel TV to lift the unit. To avoid flexing or twisting the unit, you need<br />
at least two people to lift and move the panel. Do not move the flat panel TV by holding only a single handle or by<br />
dragging the panel by its handles.<br />
Use the handles to move the panel.<br />
Do not move the panel by holding the<br />
speaker or speaker brack<strong>et</strong>s.<br />
Note: Do not use the handles to hang the flat panel TV or as anchors to prevent the panel from slipping or tipping<br />
after it is mounted.<br />
15<br />
En
02 Install Your Flat Panel TV<br />
2.2 Install the Panel Using a Stand<br />
2.2.1 Use or Remove the Inclu<strong>de</strong>d Stand<br />
The PDP-5020FD ships with the <strong>Pioneer</strong> table top stand (stand) attached. Attach the inclu<strong>de</strong>d stand to the panel<br />
for the PDP-6020FD. For PDP-5020FD, attach the falling prevention m<strong>et</strong>al fittings after placing the panel to stand<br />
upright.<br />
(PDP-5020FD)<br />
Installation screws<br />
(M4 × 35 mm: black)<br />
Attach the Stand to the Panel<br />
Falling prevention<br />
m<strong>et</strong>al fitting<br />
Do not handle the flat panel TV on a wagon or pall<strong>et</strong> that is<br />
smaller than its stand. The stand will bend.<br />
1 ) D<strong>et</strong>ach the speaker if it has already been ad<strong>de</strong>d.<br />
Refer to “Attach/D<strong>et</strong>ach the Speaker” on page 18 for assistance.<br />
2 ) Lay the flat panel TV down on a raised surface with the stand base hanging over the edge.<br />
3 ) Place all stand parts on a soft cloth to avoid scratching.<br />
If you are mounting the PDP-6020FD continue with Steps 4 and 5. If you are mounting the PDP-5020FD skip<br />
to Step 7.<br />
4 ) Turn the base cover over so that the bottom is facing up.<br />
5 ) Insert the stand supports (legs) into the base cover.<br />
Please carefully install the supports (left and right) so that they are in the correct positions. Misaligned supports<br />
can damage the base and/or the supports.<br />
6 ) Tighten the base screws to lock the supports in to place.<br />
Screws<br />
(4 x 10 mm: silver)<br />
Screws<br />
(4 x 10 mm: silver)<br />
Rear<br />
Front<br />
Compl<strong>et</strong>ed<br />
stand<br />
She<strong>et</strong><br />
Base cover<br />
16<br />
En<br />
Note: Assemble the stand with a soft she<strong>et</strong> placed un<strong>de</strong>r the base cover. If a she<strong>et</strong> is not laid before assembly,<br />
the front surface of the base cover may be scratched.
Install Your Flat Panel TV<br />
02<br />
7 ) After assembling the stand, attach the falling prevention m<strong>et</strong>al fittings using the installation screws.<br />
Installation screws<br />
(M4 x 35 mm: black)<br />
(PDP-6020FD)<br />
English<br />
Falling prevention<br />
m<strong>et</strong>al fitting<br />
8 ) With the flat panel TV still face down, insert the stand’s supports into the bottom of the panel then tighten<br />
the screws.<br />
Line up the column supports with the<br />
bottom of the flat panel TV.<br />
Installation bolts<br />
(M6 x 20 mm)<br />
Installation bolts<br />
(M6 x 20 mm)<br />
Insert the stand supports into the flat panel<br />
TV so that the arrow marked “FRONT/FACE<br />
AVANT” on the bottom of the stand<br />
points down.<br />
9 ) With the assistance of at least one other person, lift the panel upright then move it in to position.<br />
17<br />
En
02 Install Your Flat Panel TV<br />
Attach/D<strong>et</strong>ach the Speaker<br />
The flat panel TV’s speaker <strong>de</strong>livers high-quality, clear sound. The left/right balance is enclosed in a single unit for<br />
ease of installation and compactness. Although other <strong>de</strong>vices can be ad<strong>de</strong>d or removed from the mounted panel,<br />
physically attach the speaker last. Disconnect the cables from the Speaker and REMOVE THE SPEAKER before<br />
mounting or moving the panel.<br />
Before attaching the speaker to your mounted panel, review the information below.<br />
• Lay the panel face down on a stable surface when attaching speaker brack<strong>et</strong>s.<br />
• Use only the supplied screws and tighten securely before stepping away.<br />
• The speaker is wi<strong>de</strong> and requires more than a single person to manage.<br />
• Handle the speaker carefully to protect the cabin<strong>et</strong> and grille n<strong>et</strong> from scratches and other damage.<br />
• Placing a CRT monitor near the speaker can cause a blur on the flat panel TV. Keep the distance b<strong>et</strong>ween the<br />
speaker and the monitor.<br />
• Connecting this speaker to another panel or <strong>de</strong>vice can<br />
damage the unit or cause a fire.<br />
• When using tone control to increase treble, avoid overamplifying<br />
the volume.<br />
Note: Use the foam packing materials to protect the equipment from scratches or other damage during<br />
mounting.<br />
Stand-Mounted Panel<br />
It is possible to attach the speaker brack<strong>et</strong>s to the flat panel TV while it is standing upright though it is easier to<br />
mount the brack<strong>et</strong>s while the panel is laying flat. Once the brack<strong>et</strong>s are attached, stand the panel upright then<br />
move it into the final position before mounting the speaker.<br />
1 ) Attach the si<strong>de</strong> speaker brack<strong>et</strong>s (left and right) to the back of the panel using the supplied screws.<br />
(PDP-6020FD)<br />
(PDP-5020FD)<br />
Speaker mounting<br />
screw (M5 x 10 mm)<br />
➁<br />
➀<br />
1 ) Tighten the screw in the<br />
upper screw hole first.<br />
2 ) Then, tighten the screw in<br />
the screw hole right un<strong>de</strong>r<br />
the upper hole.<br />
➁<br />
➀<br />
Speaker brack<strong>et</strong> (si<strong>de</strong>)<br />
When looking at the back of the<br />
flat panel TV, si<strong>de</strong>s are reversed.<br />
Tighten screws in the or<strong>de</strong>r<br />
shown above.<br />
18<br />
En
Install Your Flat Panel TV<br />
02<br />
2 ) Attach the center speaker brack<strong>et</strong> using the supplied screws.<br />
When fitting the screws, place screws 1 and 2 through the holes in the center brack<strong>et</strong>.<br />
(PDP-6020FD)<br />
(PDP-5020FD)<br />
English<br />
➁<br />
Speaker brack<strong>et</strong><br />
for center<br />
➀<br />
Speaker mounting screw<br />
(M5 x 10 mm)<br />
➁<br />
➀<br />
Tighten screws in the or<strong>de</strong>r<br />
shown above.<br />
3 ) Position the speaker by the brack<strong>et</strong>s.<br />
It is very easy to mount the speaker upsi<strong>de</strong>-down so confirm that the speaker is aligned properly before<br />
continuing.<br />
4 ) Insert the speaker brack<strong>et</strong> into the grooves at the rear of the speaker.<br />
If the speaker fails to mount easily, adjust the angle of the brack<strong>et</strong>s.<br />
•Insert the speaker from the<br />
bottom in an angle.<br />
•Straighten it when it touches<br />
the speaker brack<strong>et</strong>.<br />
Note: Reverse procedure to<br />
remove the speaker.<br />
Protective<br />
wrapping<br />
Front si<strong>de</strong> of the<br />
speaker<br />
The si<strong>de</strong> with the padding<br />
strip is face-up.<br />
For illustrative purposes,<br />
the stand is not shown.<br />
Insert the speaker brack<strong>et</strong>s into the<br />
grooves at the rear of the speaker.<br />
5 ) Attach the speaker to the center brack<strong>et</strong> using the supplied screws.<br />
The drawing in the next Step shows the proper or<strong>de</strong>r for tightening screws.<br />
19<br />
En
02 Install Your Flat Panel TV<br />
6 ) Attach the speaker to the si<strong>de</strong> brack<strong>et</strong>s using the supplied screws.<br />
.<br />
➂<br />
➀<br />
The bottom screw hole on each<br />
speaker brack<strong>et</strong> is not used when<br />
the panel remains on the stand.<br />
Speaker mounting<br />
screw (M5 x 10 mm)<br />
➁<br />
Note: If the speaker needs to be repositioned (horizontally or vertically) after it is attached, loosen the speaker<br />
mounting screws first. Adjust the position then r<strong>et</strong>ighten the screws.<br />
2.2.2 Connect the Speaker Cables<br />
1 ) Press down on the tab.<br />
2 ) Insert the appropriately colored wire into the opening.<br />
3 ) Allow a small percentage of the cable’s bare wire to remain visible.<br />
4 ) Release the tab to clamp the wire.<br />
If the bare wire is hid<strong>de</strong>n when the tab is released, repeat Steps 1<br />
through 4 until the proper amount of cable is showing.<br />
5 ) Repeat this process for each cable, matching the color of the wire to the<br />
appropriate terminal.<br />
6 ) Connect the speaker cables to the speaker.<br />
7 ) Bundle the speaker cables, power cord and other cables in the cable<br />
clamp then insert the clamp into an appropriate hole on the rear of the<br />
flat panel TV.<br />
Refer to “2.6 Route then Bundle the Power Cord and Cables.”<br />
Use the clamps as necessary (see page 30).<br />
tab<br />
Gray<br />
Black<br />
Gray<br />
Speaker terminal<br />
Red<br />
Black<br />
Red<br />
(PDP-6020FD)<br />
20<br />
En<br />
Speaker cable
Install Your Flat Panel TV<br />
02<br />
PDP-6020FD with the speaker installed<br />
Black<br />
Gray<br />
English<br />
Black<br />
Red<br />
Speaker mounting<br />
screw (M5 x 10 mm)<br />
Speaker<br />
mounting screw<br />
(M5 x 10 mm)<br />
Speaker<br />
mounting screw<br />
(M5 x 10 mm)<br />
Speaker brack<strong>et</strong> (right)<br />
Speaker cable<br />
Speaker<br />
Speaker brack<strong>et</strong> (left)<br />
Speaker brack<strong>et</strong> (center)<br />
Cable clamp<br />
(PDP-5020FD)<br />
• Before connecting the speaker to the flat panel TV, unplug<br />
the panel from the power outl<strong>et</strong>. Connecting the speaker<br />
cable with the power cord plugged in can cause malfunction<br />
or damage to the panel if the cable’s bare wire touches other<br />
equipment. Plug in the power cord after connecting the<br />
speaker.<br />
• Do not leave speaker cable wires bare and exposed at the<br />
terminals. Exposed wires can result in an electrical short<br />
causing malfunction or damage to the system.<br />
• Do not connect any <strong>de</strong>vices to the speaker terminals other<br />
than the speakers specified.<br />
21<br />
En
02 Install Your Flat Panel TV<br />
2.3 Wall/Ceiling Mounting<br />
Lay the 50” panel down on a raised surface then remove the stand.<br />
Installation bolts (1)<br />
Installation bolts (2)<br />
(PDP-5020FD)<br />
A common flat panel TV mounting option is to hang the panel on a sturdy wall or from a reinforced ceiling. When<br />
mounting in this way, some preparations must be compl<strong>et</strong>ed first. Follow the steps below to prepare the panel for<br />
mounting.<br />
1 ) Attach the speaker brack<strong>et</strong>s but not the Speaker.<br />
Refer to “Attach/D<strong>et</strong>ach the Speaker” for instructions.<br />
2 ) Connect the speaker cables to the panel if they are not already attached.<br />
Connect the cables ONLY to the panel, not to the speaker.<br />
(PDP-5020FD)<br />
3 ) Connect cables for any other <strong>de</strong>vices to the panel.<br />
When <strong>de</strong>ciding on a location for your flat panel TV, consi<strong>de</strong>r other equipment in the room. Equipment such<br />
as a DVR, Receiver, VCR, <strong>et</strong>c. requires some way to communicate with the panel, either directly or through<br />
another <strong>de</strong>vice. Review the instructions that came with the other equipment for available ports and<br />
terminals.<br />
After <strong>de</strong>ciding which ports and terminals are nee<strong>de</strong>d, mark the connections on the flat panel TV for easier<br />
i<strong>de</strong>ntification once the panel is mounted.<br />
4 ) Temporarily bundle loose cables with rubber bands (not inclu<strong>de</strong>d).<br />
5 ) Plug the flat panel TV’s power cord in to the panel but do NOT plug in to the power outl<strong>et</strong>.<br />
6 ) Follow installation directions provi<strong>de</strong>d with your selected wall/ceiling mount.<br />
22<br />
En<br />
Note: When attaching the speaker, refer to diagram in the following section regarding specific screw holes to use<br />
for wall or ceiling mounting.
Install Your Flat Panel TV<br />
02<br />
Once your flat panel TV is mounted on the wall or suspen<strong>de</strong>d from the ceiling, follow the steps below to attach<br />
the speaker.<br />
1 ) Confirm that the speaker brack<strong>et</strong>s are ready to support the speaker.<br />
It is possible to jar the brack<strong>et</strong>s out of alignment while installing the panel.<br />
2 ) Connect the loose ends of the speaker cables to the speaker.<br />
If the cables were bundled with rubber bands during installation, remove them before continuing.<br />
3 ) Align the speaker with the brack<strong>et</strong>s.<br />
It is very easy to mount the speaker upsi<strong>de</strong>-down so confirm that the speaker is aligned properly before<br />
continuing.<br />
4 ) Insert the speaker brack<strong>et</strong>s into the grooves at the rear of the speaker.<br />
If the speaker fails to attach easily, adjust the angle of the brack<strong>et</strong>s<br />
English<br />
•Insert the speaker from the bottom in an angle.<br />
•Straighten it when it touches the speaker<br />
brack<strong>et</strong>.<br />
Note: Reverse procedure to remove the speaker.<br />
Do NOT use these holes when<br />
mounting on a wall or ceiling<br />
Speaker<br />
mounting<br />
screw ➂<br />
(M5 x 10 mm)<br />
➀<br />
Speaker<br />
mounting screw<br />
(M5 x 10 mm)<br />
➁<br />
Speaker<br />
mounting<br />
screw (M5 x 10 mm)<br />
5 ) Tighten the center screw then the si<strong>de</strong> screws in the or<strong>de</strong>r shown above.<br />
When installing the panel on a wall or ceiling, use the bottom screw holes on each speaker brack<strong>et</strong>.<br />
Note: If the speaker needs to be repositioned (horizontally) after it is attached, loosen the speaker mounting<br />
screws first. Adjust the position then r<strong>et</strong>ighten the screws.<br />
23<br />
En
02 Install Your Flat Panel TV<br />
2.4 Mount the Flat Panel TV<br />
Because your flat panel TV is slim but heavy, have at least two people mount and/or position the panel. The<br />
following sections provi<strong>de</strong> instructions for the different mounting and anchoring options.<br />
Anchor the Panel When Using a Stand<br />
When using a stand, stabilize the panel to keep it from tipping over. Please use the supplied m<strong>et</strong>al fittings and<br />
screws to anchor the panel to a wall or other solid support structure.<br />
Another option is to purchase hooks, cords, and fittings through your installer or from your local hardware store.<br />
The hardware size and strength <strong>de</strong>pends on the composition and thickness of the anchoring surface.<br />
Recommen<strong>de</strong>d hook: Nominal diam<strong>et</strong>er 8 mm (3/8 inch), length 12 mm to 18 mm (0.5 inches to 0.7 inches)<br />
To anchor the panel when using the provi<strong>de</strong>d stand, follow the steps below.<br />
1 ) Attach the hooks to the mounting holes on the<br />
back of the panel.<br />
2 ) Sink the fittings into the wall or support structure.<br />
3 ) Run cords b<strong>et</strong>ween the hooks and the fittings.<br />
4 ) Tighten the cords until the panel is anchored but<br />
not pulled off balance.<br />
Fitting<br />
1. Hook<br />
2. Cord<br />
M8<br />
12 mm to 18 mm<br />
(0.5 inches to 0.7 inches)<br />
To stabilize the flat panel TV on a table or platform, use the supplied m<strong>et</strong>al fittings and screws as well as<br />
commercially available wood screws. The wood screws are to anchor the m<strong>et</strong>al fittings when mounting on a<br />
woo<strong>de</strong>n surface. These screws should have a nominal diam<strong>et</strong>er of 4 mm (5/32 inch) and are at least 20 mm (13/<br />
16 inch) long.<br />
Notes: Avoid moving the table after the panel is attached.<br />
Do not use bare wires for the cord. If any part of the wire is introduced into the ventilation port on the back<br />
of the display panel, fire or electrical shock could result.<br />
24<br />
En
Install Your Flat Panel TV<br />
02<br />
Follow the steps below to secure your flat panel TV.<br />
1 ) Mark locations for m<strong>et</strong>al fittings and screws on the back edge of the table using the panel stand to d<strong>et</strong>ermine<br />
placement.<br />
8 mm to 15 mm<br />
(3/8 inch to 5/8 inch)<br />
4 mm (5/32 inch)<br />
(PDP-6020FD)<br />
(PDP-5020FD)<br />
English<br />
20 mm<br />
(13/16 inch)<br />
min.<br />
Wood screw<br />
(commercially<br />
available, 4 mm x<br />
20 mm (5/32 inch x<br />
13/16 inch) min.)<br />
Wood screw<br />
(commercially<br />
available,<br />
4 mm x 20 mm<br />
(5/32 inch x 13/<br />
16 inch) min.)<br />
2 ) Drill holes in the table or platform edge at the marked locations.<br />
3 ) Lift panel into place with the assistance with at least one other person.<br />
4 ) Use wood screws (not inclu<strong>de</strong>d) to secure the m<strong>et</strong>al fittings to the table.<br />
25<br />
En
02 Install Your Flat Panel TV<br />
2.5 Connect to Broadcast TV & Other Devices (DVR, Receiver, BDR, <strong>et</strong>c.)<br />
The type of equipment attached to your flat panel TV d<strong>et</strong>ermines which panel ports are used. The following<br />
sections explain how to connect broadcast TV and playback equipment such as a DVD player, Surround Sound<br />
system, vi<strong>de</strong>o recor<strong>de</strong>r, <strong>et</strong>c. to the panel. If your equipment is not listed, please refer to the operating instructions<br />
that came with the <strong>de</strong>vice(s) for connection assistance.<br />
2.5.1 Add Analog (conventional) and Digital TV Channels<br />
Wh<strong>et</strong>her a TV station broadcasts in Analog or Digital, your flat panel TV shows the programs as long as the panel<br />
is programmed to accept the signal. To program your panel for broadcast TV, select terminal ANT.<br />
The ANT terminal accepts both analog and digital<br />
T<br />
T<br />
W<br />
W<br />
broadcasts. Connect a VHF/UHF antenna and/or cable<br />
TV to the panel’s rear ANT terminal, then press TV/DTV<br />
on the remote control to toggle b<strong>et</strong>ween analog and<br />
digital broadcasts. When watching analog TV<br />
Rear view<br />
channels, you can also use an outdoor antenna for the<br />
clearest analog picture.<br />
If your outdoor antenna uses a 75-ohm coaxial cable<br />
with an F-type connector, plug it into the panel’s<br />
antenna terminal on the back.<br />
2.5.2 Connect Your Other <strong>Pioneer</strong> Equipment<br />
This section provi<strong>de</strong>s cabling information for your other <strong>Pioneer</strong> equipment when combined with the panel. Each<br />
diagram can also be used as a reference tool for non-<strong>Pioneer</strong> <strong>de</strong>vices but port locations may differ or be unavailable.<br />
Connect cable or Satellite using STB (S<strong>et</strong> Top Box):<br />
In or<strong>de</strong>r to watch both analog and<br />
digital broadcasts through your<br />
terrestrial antenna or cable<br />
connection, you must first connect the<br />
antenna cable to a splitter.<br />
T<br />
W<br />
T<br />
W<br />
Satellite antenna<br />
Rear view<br />
SAT IN<br />
Cable STB/Satellite STB<br />
Cable STB/Satellite STB<br />
AUDIO<br />
OUT<br />
COMPONENT<br />
VIDEO OUTPUT<br />
AUDIO<br />
OUT<br />
COMPONENT<br />
VIDEO OUTPUT<br />
HDMI OUT<br />
Y<br />
IN<br />
HDMI OUT<br />
Y<br />
IN<br />
PB<br />
OUT<br />
PB<br />
OUT<br />
PR<br />
PR<br />
26<br />
En<br />
When using a cable STB or Satellite STB, plug in to the antenna/cable TV wall outl<strong>et</strong> using the STB cable provi<strong>de</strong>d<br />
with your STB. If your STB has an HDMI terminal, use any of INPUT 4 through INPUT 6 (HDMI terminal) on the<br />
rear or INPUT 7 (HDMI terminal) on the si<strong>de</strong> of the flat panel TV instead of making vi<strong>de</strong>o connections. If you<br />
connect an antenna cable directly to TV, you must first connect the cable to a splitter. For d<strong>et</strong>ails, refer to the<br />
operating manual that came with the STB.
Install Your Flat Panel TV<br />
02<br />
Connect HDMI equipment (INPUT 4 through INPUT 6): Connect HDMI equipment (INPUT 7):<br />
T<br />
W<br />
T<br />
W<br />
Left si<strong>de</strong> view<br />
English<br />
Rear view<br />
HDMI compliant<br />
cable (HDMI cable<br />
having the HDMI<br />
mark)<br />
Audio cable<br />
(commercially<br />
available)<br />
Make this<br />
connection when<br />
inputting analog<br />
audio signals.<br />
HDMI compliant<br />
cable (HDMI cable<br />
having the HDMI<br />
mark)<br />
HDMI equipment<br />
INPUT 4 through INPUT 6 are HDMI terminals. Use<br />
INPUT 4 or INPUT 5 (HDMI) terminal when you also input<br />
analog audio signals. For d<strong>et</strong>ails, refer to “5.2 Use HDMI<br />
Inputs.”<br />
Connect a DVD player:<br />
HDMI equipment<br />
Also use INPUT 7 (HDMI terminal) on the si<strong>de</strong> of the<br />
panel when connecting HDMI equipment. For d<strong>et</strong>ails,<br />
refer to “5.2 Use HDMI Inputs.”<br />
Connect an AV receiver:<br />
T<br />
T<br />
T<br />
T<br />
W<br />
W<br />
W<br />
W<br />
Rear view<br />
Rear view<br />
AV cable<br />
(commercially available)<br />
Component<br />
vi<strong>de</strong>o cable<br />
(commercially<br />
available)<br />
This connection is<br />
not required when<br />
connecting an AV<br />
amp equipped with<br />
the surround<br />
function to a<br />
subwoofer.<br />
AV cable<br />
(commercially<br />
available)<br />
Optical digital<br />
cable<br />
(commercially<br />
available)<br />
DVD player<br />
Use INPUT 2 terminals when connecting a DVD player<br />
or other audiovisual equipment. If your DVD player has<br />
an HDMI terminal, use this connection instead of<br />
making vi<strong>de</strong>o connections. For d<strong>et</strong>ails, refer to the<br />
operation manual that came with the DVD player.<br />
Subwoofer<br />
AV receiver<br />
Use an optical digital cable to connect an AV receiver to<br />
DIGITAL OUT terminal (optical). If your AV receiver does<br />
not have a DIGITAL IN terminal (optical), you may<br />
connect the panel’s AUDIO OUT terminal (audio) to the<br />
audio input terminal on the AV receiver. For d<strong>et</strong>ails, refer<br />
to the operation manual that came with the AV receiver.<br />
27<br />
En
02 Install Your Flat Panel TV<br />
Connect a VCR:<br />
Connect a game console or camcor<strong>de</strong>r:<br />
T<br />
W<br />
T<br />
W<br />
Left si<strong>de</strong> view<br />
Rear view<br />
AV cable<br />
(commercially<br />
available)<br />
S-Vi<strong>de</strong>o cable<br />
(commercially<br />
available)<br />
AV cable<br />
(commercially<br />
available)<br />
VCR<br />
Use INPUT 1 terminals when connecting a VCR or other<br />
equipment. For d<strong>et</strong>ails, refer to the operation manual<br />
that came with the VCR.<br />
Connect control cords:<br />
Camcor<strong>de</strong>r/Game console<br />
Use INPUT 3 terminals when connecting a game<br />
console, camcor<strong>de</strong>r or other audiovisual equipment.<br />
For d<strong>et</strong>ails, refer to the operation manual that came<br />
with the game console or camcor<strong>de</strong>r.<br />
Connect a PC:<br />
T<br />
W<br />
T<br />
W<br />
T<br />
W<br />
T<br />
W<br />
Rear view<br />
Rear view<br />
CONTROL<br />
IN<br />
OUT<br />
RGB cable<br />
(commercially<br />
available)<br />
Stereo sound cable with<br />
a mini plug<br />
(commercially available)<br />
(When PC audio is<br />
connected)<br />
Personal computer<br />
28<br />
En<br />
Connect control cords b<strong>et</strong>ween the panel’s<br />
CONTROL (OUT) terminal and other <strong>Pioneer</strong><br />
equipment having the SR logo. Use a mono sound<br />
cable with a mini plug (not provi<strong>de</strong>d).<br />
Use the PC INPUT terminal (Analog RGB) when<br />
connecting a PC. If you also connect PC audio, use PC<br />
INPUT (Audio) with a stereo sound cable with a mini<br />
plug (not provi<strong>de</strong>d). For d<strong>et</strong>ails, refer to the operation<br />
manual that came with the PC.
T<br />
W<br />
T<br />
W<br />
T<br />
W<br />
T<br />
W<br />
Install Your Flat Panel TV<br />
02<br />
2.5.3 Connect the Power Cord to the Panel<br />
The final connection is the power cord. Always connect the panel’s power cord to a three-pronged outl<strong>et</strong>, verifying<br />
that the cord is properly groun<strong>de</strong>d. The cord inclu<strong>de</strong>s a noise filter that reduces electrical interference from the<br />
wall outl<strong>et</strong>.<br />
As long as the flat panel TV is plugged in to an outl<strong>et</strong>, some power is drawn through the panel. When the flat panel<br />
TV is not going to be used for a long period, unplug the panel from the power outl<strong>et</strong>. Unplugging the panel extends<br />
the life of the plasma as well as saves energy.<br />
Plug the cord in to the panel but do NOT plug it in to a power outl<strong>et</strong> y<strong>et</strong>.<br />
English<br />
2.6 Route then Bundle the Power Cord and Cables<br />
Once the flat panel TV is mounted and the speaker is attached, place additional equipment in the final position(s).<br />
Lay out the power cord, panel cables and any other <strong>de</strong>vice cables in a logical pattern that works for the location.<br />
Please consi<strong>de</strong>r the following points when routing cables:<br />
• Access to a 3-prong (groun<strong>de</strong>d) power outl<strong>et</strong><br />
• Space for the noise filter b<strong>et</strong>ween the panel and outl<strong>et</strong><br />
• Placement of cables un<strong>de</strong>r carp<strong>et</strong>s or across walking paths<br />
Usually the cord/cables have slack or are too long. Although rubber bands are a good temporary solution to<br />
bundle cables, they tend to break down too quickly. To keep cables organized and neat, use the inclu<strong>de</strong>d cable<br />
clamps to bundle cables. The diagram below shows a bundled speaker cable.<br />
PDP-6020FD<br />
Speaker cable<br />
Bundle cables in small<br />
groups when possible for<br />
easier separation later,<br />
if necessary.<br />
PDP-5020FD<br />
Speaker cable<br />
Cable clamp<br />
Cable clamp<br />
A r<strong>eu</strong>sable cable clamp is <strong>de</strong>signed to lock the bundled cables in place. Your flat panel TV has a total of four holes<br />
to attach cable clamps to the back of the panel. Use the cable clamps as necessary.<br />
PDP-6020FD<br />
PDP-5020FD<br />
29<br />
En
02 Install Your Flat Panel TV<br />
Follow the steps below to attach a cable clamp.<br />
1 ) Thread the clamp band through the hol<strong>de</strong>r and bundle the cable(s) in the cable clamp.<br />
2 ) Push and hold the levers then insert the hook into an appropriate hole on the rear of the flat panel TV.<br />
3 ) Pull up the clamp band to lock.<br />
1<br />
2 Cable clamp<br />
4 ) Confirm that the cable clamp is seated firmly in the panel.<br />
Note: Avoid pinching or creating pressure points when routing or bundling cables.<br />
To remove the clamp band, pull and hold the latch to release.<br />
To remove the cable clamp, push and hold the levers then pull it out from the hole.<br />
Latch<br />
Lever<br />
Lever<br />
Note: The longer a clamp is in place, the b<strong>et</strong>ter chance of d<strong>et</strong>erioration. An ol<strong>de</strong>r clamp is more easily damaged<br />
while being removed and may not be r<strong>eu</strong>sable.<br />
30<br />
En
Basic Operations For Television Viewing 03<br />
3 Basic Operations For Television Viewing<br />
This chapter explores day-to-day operations such as powering on your flat panel TV, using the Home Menu, and<br />
adjusting the panel for the viewing area/room. The final section in this chapter provi<strong>de</strong>s hints and suggestions for<br />
those new to flat panel TV features.<br />
English<br />
3.1 Turn the Flat Panel TV ON/OFF<br />
Your flat panel TV has three activity levels: Power On, Standby, and Power Off. Standby saves energy but allows<br />
the remote control to turn on the panel.<br />
The following instructions use the remote control. To operate the flat panel TV through the si<strong>de</strong> panel buttons,<br />
refer to “1.2.1 Control Buttons and More on the Flat Panel TV” for button locations.<br />
Turn ON the Flat Panel TV<br />
To turn on the panel, follow the steps below.<br />
1 ) Plug the flat panel TV’s power cord in to a properly groun<strong>de</strong>d outl<strong>et</strong>.<br />
2 ) Press any of the following buttons to turn the flat panel TV On.<br />
• Power On button (a) on the panel’s back lower-left section (see page 9)<br />
• STANDBY/ON button on the si<strong>de</strong> of the panel (see page 8)<br />
• Remote control’s TV (a) button located in the upper left corner (see page 12).<br />
Images appear on the panel screen.<br />
Note: Use the remote control’s MUTING button to reduce any excessive static noise.<br />
3 ) Confirm that the Power On indicator lights blue.<br />
Sleep indicator<br />
Standby indicator<br />
Power On indicator<br />
Note: While in Standby, pressing the remote control’s TV ( a) button causes the flat panel TV to turn On.<br />
Turn OFF the Flat Panel TV<br />
Turning off the flat panel TV can mean entering Standby so features such as Sleep are still functional or it can<br />
mean cutting power to the panel. Unless the flat panel TV is to sit idle for long periods, leave the panel in Standby.<br />
Note: While in Standby or when powered off, the flat panel TV continues to draw some power as long as the panel<br />
is plugged in to an outl<strong>et</strong>.<br />
Follow the steps below to place the panel in Standby.<br />
1 ) Press the remote control’s TV ( a ) button or<br />
panel’s STANDBY/ON button.<br />
2 ) Confirm that the Standby indicator lights red.<br />
The table to the right provi<strong>de</strong>s samples of how the<br />
indicators light. Monitor the indicators on the<br />
front of the panel to check the power status.<br />
Power On<br />
Indicator<br />
Standby<br />
Flat Panel TV Status<br />
Indicator<br />
Panel’s power cord is disconnected or<br />
the power cord is connected but the<br />
flat panel TV’s Power On button ( a )<br />
is off<br />
Power is on but waiting for activation<br />
Panel is in Standby<br />
31<br />
En
03 Basic Operations For Television Viewing<br />
3.2 Program the Flat Panel TV for Television Viewing<br />
To watch TV and take advantage of some built-in features, choose the channel type or types (Analog, Digital),<br />
select a language, s<strong>et</strong> your time zone, and program the channels. The sections below inclu<strong>de</strong> how to s<strong>et</strong> your<br />
channel type and how to use the Home Menu for each programming option.<br />
3.2.1 Choose Analog or Digital TV Channels<br />
To choose a channel s<strong>et</strong>ting, note the antenna input terminal connected to the back of the panel. Follow the<br />
directions below to select analog or digital TV channels.<br />
1) Confirm that the remote control is s<strong>et</strong> to TV.<br />
Located at the bottom of the remote control.<br />
2) Press TV/DTV on the remote control.<br />
Located at the top of the remote control.<br />
3) Select a channel option, analog or digital.<br />
During operation, press TV/DTV to toggle b<strong>et</strong>ween<br />
TV signals.<br />
Note: See “2.5.1 Add Analog (conventional) and Digital<br />
TV Channels” for more information about<br />
channel s<strong>et</strong>ting options.<br />
Note: When watching TV and separate vi<strong>de</strong>o image (multi-screen), pressing the remote control’s TV/DTV button<br />
changes only the TV signal appearing on the left si<strong>de</strong> of the panel.<br />
3.2.2 Explore the Home Menu<br />
The Home Menu is the main menu for the flat panel TV. Most commands and s<strong>et</strong>tings are programmed through<br />
this menu. The following section <strong>de</strong>scribes a typical m<strong>et</strong>hod for working with the panel’s menus. For actual<br />
procedures, see the appropriate page(s) that <strong>de</strong>scribe a function.<br />
1) Press HOME MENU on the remote Remote control<br />
Home Menu screen<br />
to access the main menu.<br />
Channel<br />
2) Use the Up/Down arrows ( / ) to<br />
highlight a menu item.<br />
Favorites<br />
Input<br />
3) Use the Left/Right arrows ( / ) to<br />
Home Media Gallery<br />
scroll through options for that menu<br />
item.<br />
HDMI Control<br />
S<strong>et</strong>up<br />
4) Highlight the selected menu option.<br />
5) Press ENTER to lock in the change.<br />
6) Press RETURN to move back to a previous menu/submenu page when changing more than a single option.<br />
7) Press HOME MENU again to exit the menu screen.<br />
32<br />
En
Basic Operations For Television Viewing 03<br />
This chart provi<strong>de</strong>s a breakdown of the Home Menu for both AV and PC sources.<br />
AV Source Pg Option<br />
Channel 39 —<br />
Favorites 39 —<br />
Input 39 —<br />
Home Media Gallery 83 —<br />
HDMI Control 76 —<br />
S<strong>et</strong>up Picture 54 AV Selection<br />
58 Contrast*<br />
58 Brightness*<br />
58 Color*<br />
58 Tint*<br />
58 Sharpness*<br />
60 PureCinema<br />
46 Sound Control**<br />
45 OPTIMUM<br />
Performance**<br />
58 Res<strong>et</strong><br />
Sound 46 Treble<br />
46 Bass<br />
46 Balance<br />
67 Sound Effect<br />
46 Res<strong>et</strong><br />
67 AVC<br />
Power Control 53 Energy Save<br />
68 No Signal off<br />
68 No Operation off<br />
Sleep Timer 41 —<br />
Option 44 Position<br />
56 Auto Size<br />
59 Si<strong>de</strong> Mask<br />
74 HDMI Input<br />
81 HDMI Control S<strong>et</strong>ting<br />
53 Orbiter<br />
53 Vi<strong>de</strong>o Pattern<br />
56 Game Control Pref<br />
42 Room Light Sensor<br />
52 Screen Protection<br />
40 Label Input<br />
System S<strong>et</strong>up 35 Auto Installation<br />
36 Analog TV S<strong>et</strong>up<br />
38 Digital Tuner S<strong>et</strong>up<br />
47 Parental Control<br />
64 Closed Captions<br />
111 Digital Audio Output<br />
47 Change Password<br />
34 Language<br />
114 Technical Info<br />
Favorites S<strong>et</strong>up 39 Channel Mo<strong>de</strong><br />
40 Sort Favorites<br />
* Available when any option other than<br />
OPTIMUM is selected from the AV Selection<br />
menu.<br />
** Available only when OPTIMUM is selected<br />
from the AV Selection menu<br />
PC Source Pg Option<br />
Channel 39 —<br />
Favorites 39 —<br />
Input 39 —<br />
Home Media Gallery 83 —<br />
HDMI Control 76 —<br />
S<strong>et</strong>up Picture 54 AV Selection<br />
58 Contrast<br />
58 Brightness<br />
58 Red<br />
58 Green<br />
58 Blue<br />
58 Res<strong>et</strong><br />
Sound 46 Treble<br />
46 Bass<br />
46 Balance<br />
67 Sound Effect<br />
46 Res<strong>et</strong><br />
67 AVC<br />
Power Control 53 Energy Save<br />
68 Power Management<br />
Sleep Timer 41 —<br />
Option 112 Auto S<strong>et</strong>up<br />
112 Manual S<strong>et</strong>up<br />
74 HDMI Input<br />
81 HDMI Control S<strong>et</strong>ting<br />
53 Orbiter<br />
40 Label Input<br />
Favorites S<strong>et</strong>up 39 Channel Mo<strong>de</strong><br />
40 Sort Favorites<br />
English<br />
33<br />
En
03 Basic Operations For Television Viewing<br />
TV Screen Components<br />
Your flat panel TV has easy-to-read menus and graphic symbols that provi<strong>de</strong> quick access to the <strong>de</strong>sired options.<br />
Menus appearing in this manual may differ slightly from the actual menus but the functionality remains the<br />
same.<br />
1<br />
2 3<br />
Exit<br />
Sound<br />
TELEVISION<br />
Treble : 0<br />
Bass : 0<br />
4<br />
Res<strong>et</strong><br />
Balance : 0<br />
Sound Effect :<br />
8<br />
AVC : Off<br />
xxxxxxxxxxxxxxxxxxxx<br />
xxxxxxxxxxxxxxxxxxxxxx<br />
HOME MENU<br />
R<strong>et</strong>urn<br />
1 - Exit button: Close the menu to r<strong>et</strong>urn to TV<br />
viewing<br />
2 - Menu title: Display the selected menu title<br />
3 - TOOLS button: Display the TOOLS Menu<br />
4 - Menu: Select an option<br />
5 - HOME MENU button: Close the menu to r<strong>et</strong>urn<br />
to TV viewing<br />
3.2.3 Assign a Language<br />
The <strong>de</strong>fault menu language is English. To assign a different language for menus and on-screen information,<br />
follow the steps below.<br />
1 ) Press HOME MENU.<br />
2 ) Select S<strong>et</strong>up from the main menu.<br />
Use the arrow buttons to highlight an option then press ENTER.<br />
3 ) Select System S<strong>et</strong>up from the S<strong>et</strong>up menu.<br />
4 ) Select Language from the System S<strong>et</strong>up menu.<br />
5 ) Select a language from the submenu.<br />
5 6 7<br />
Menu : English<br />
6 - Operation Gui<strong>de</strong> area: Display the operational<br />
gui<strong>de</strong>lines for the selected option(s)<br />
7 - R<strong>et</strong>urn button: R<strong>et</strong>urn to the previous menu<br />
screen<br />
8 - Picture preview (in reduced size)<br />
6 ) Press HOME MENU again to exit the menu.<br />
34<br />
En
Basic Operations For Television Viewing 03<br />
3.2.4 S<strong>et</strong> the Clock<br />
S<strong>et</strong> the flat panel TV’s clock to take advantage of many built-in features such as Time Zone and D.S.T. (Daylight<br />
Saving Time) activation for digital TV broadcast.<br />
Note: If the panel’s power cord is unplugged or there is a power outage, the time must be res<strong>et</strong>.<br />
English<br />
Follow the steps below to s<strong>et</strong> the clock.<br />
1 ) Access the System S<strong>et</strong>up through the S<strong>et</strong>up.<br />
2 ) Select Digital Tuner S<strong>et</strong>up from the System S<strong>et</strong>up menu.<br />
3 ) Select Clock from the Digital Tuner S<strong>et</strong>up menu.<br />
4 ) Select Time Zone from the options.<br />
5 ) Select the time zone for your area.<br />
Time Zone : Atlantic<br />
D.S.T. : On<br />
6 ) Select the menu option D.S.T. to activate/<strong>de</strong>activate Daylight Saving Time.<br />
7 ) Select the proper option for your location.<br />
8 ) Press HOME MENU to close the menu and exit.<br />
3.2.5 Create the List of Channels<br />
This section <strong>de</strong>scribes how to search for and s<strong>et</strong> up TV channels. There are two ways to add channels to your flat<br />
panel TV, Auto Installation for automatic channel selection or manual channel assignments. The Auto Installation<br />
adds all available channels from your selected TV provi<strong>de</strong>r. Once all channels are ad<strong>de</strong>d to the list, simply <strong>de</strong>l<strong>et</strong>e<br />
any unwanted channels. This section provi<strong>de</strong>s steps to add/remove channels.<br />
Auto Installation<br />
Auto Installation searches for and adds TV channels to your list of viewable channels. Using the remote control,<br />
follow the steps below to automatically select all available channels.<br />
1 ) Access the System S<strong>et</strong>up through the S<strong>et</strong>up.<br />
2 ) Select Auto Installation from the System S<strong>et</strong>up menu.<br />
3 ) Select Air/Cable, Language, or Time Zone from the Auto Installation menu.<br />
4 ) Select an option.<br />
• Signal Type: Air or Cable<br />
• Language: English, Français or Español<br />
• Time Zone: Atlantic, Eastern, Central, Mountain, Pacific, Alaska, or Hawaii<br />
35<br />
En
03 Basic Operations For Television Viewing<br />
5 ) Select Start.<br />
The panel automatically begins creating your list of channels.<br />
Language : English<br />
Air/Cable : Cable<br />
Time Zone : Atlantic<br />
Start<br />
Note: To quit Auto Installation before it is compl<strong>et</strong>e, press RETURN to recall the Auto Installation screen then<br />
EXIT.<br />
Manual Channel Selection<br />
To add channels without using the Auto Installation option, follow the directions below. Also, if a channel is<br />
skipped in error, use this m<strong>et</strong>hod to add the channel to your list.<br />
1 ) Access the System S<strong>et</strong>up through the S<strong>et</strong>up.<br />
2 ) Select Analog TV S<strong>et</strong>up from the System S<strong>et</strong>up menu.<br />
3 ) Select Manual Adjust from the Analog TV S<strong>et</strong>up menu.<br />
4 ) Select Program Entry.<br />
5 ) Select a channel number to be ad<strong>de</strong>d.<br />
Use the arrow buttons (/) to enter a channel number.<br />
6 ) Select Store from the Manual Adjust menu.<br />
7 ) Select Yes from the submenu.<br />
Program Entry : 1<br />
Store : Yes<br />
Tuner NR : On<br />
8 ) Press HOME MENU to exit the menu after all wanted channels have been ad<strong>de</strong>d.<br />
Note: Analog channels can be ad<strong>de</strong>d manually but digital channels can only be ad<strong>de</strong>d using the Add New<br />
Channels button on the Digital Tuner S<strong>et</strong>up menu.<br />
Add New Channels<br />
To add new channels, follow the steps below.<br />
1 ) Access the System S<strong>et</strong>up through the S<strong>et</strong>up.<br />
2 ) Select Digital Tuner S<strong>et</strong>up from the System S<strong>et</strong>up menu.<br />
36<br />
En
Basic Operations For Television Viewing 03<br />
3 ) Select Installation from the Digital Tuner S<strong>et</strong>up menu.<br />
Installation<br />
Channel management<br />
Clock<br />
English<br />
4 ) Select Add New Channels.<br />
Channel search starts automatically. If a new channel is found, it is stored automatically in the flat panel<br />
TV.<br />
To cancel channel search before it finishes, press RETURN.<br />
Software Keyboard<br />
This on-screen keyboard allows labeling manually ad<strong>de</strong>d TV channels. Channel labels can be up to eight<br />
characters long to help channel i<strong>de</strong>ntification.<br />
To use the Software Keyboard for labeling TV channels, follow the steps below.<br />
1 ) Access the System S<strong>et</strong>up through the S<strong>et</strong>up.<br />
2 ) Select Analog TV S<strong>et</strong>up from the System S<strong>et</strong>up menu.<br />
3 ) Select Label from the Analog TV S<strong>et</strong>up menu.<br />
4 ) Select Program Entry from the submenu.<br />
5 ) Select a program number.<br />
• Cable: 1 through 135<br />
• Air: 2 through 69<br />
6 ) Select Label.<br />
The Software Keyboard screen appears.<br />
Label<br />
I N P U<br />
1 2 3 4 5 6 7 8 9 0<br />
A B C D E F G H I J Del<strong>et</strong>e<br />
K L M N O P Q R S T Space<br />
U V W X Y Z , . : ; Caps<br />
& ' ( ) + - * / _ @ OK Cancel<br />
7 ) Select the first character.<br />
The cursor moves to the next character space.<br />
8 ) Repeat the previous step to enter up to eight characters.<br />
• To change a character, use or to highlight the character then press ENTER. The cursor moves to the<br />
previous or next character.<br />
• To <strong>de</strong>l<strong>et</strong>e the entered character, highlight the character, select Del<strong>et</strong>e then press ENTER.<br />
• To put a space after the entered character, highlight the space, select Space then press ENTER.<br />
• To toggle b<strong>et</strong>ween upper case and lower case, highlight the character, select Caps then press ENTER.<br />
9 ) Select OK then press ENTER.<br />
The entry is compl<strong>et</strong>e.<br />
10 ) Press HOME MENU to exit the menu.<br />
37<br />
En
03 Basic Operations For Television Viewing<br />
3.2.6 Skip or Del<strong>et</strong>e Unwanted Channels<br />
The Auto Installation process adds all channels available from your TV service provi<strong>de</strong>r. However, there may be<br />
some channels that are unwanted or are not age-appropriate for your home. This section explains how to bypass<br />
or <strong>de</strong>l<strong>et</strong>e unwanted channels when moving up/down one channel at a time and what programs are available for<br />
viewing.<br />
To skip or <strong>de</strong>l<strong>et</strong>e unwanted channels, use the remote’s CH+/CH– buttons to res<strong>et</strong> the status for those channels.<br />
Follow the steps below to change a channel’s status.<br />
1 ) Access the System S<strong>et</strong>up through the S<strong>et</strong>up.<br />
2 ) Select Digital Tuner S<strong>et</strong>up or Analog TV S<strong>et</strong>up from the System S<strong>et</strong>up menu.<br />
• Digital TV channels: Channel management > Channel Options > (Channel Del<strong>et</strong>e) > (On)<br />
XXXX 00001.000<br />
XXXX 00002.000<br />
XXXX 00003.000<br />
XXXX 00004.000<br />
XXXX 00005.000<br />
XXXX 00006.000<br />
XXXX 00007.000<br />
XXXX 00008.000<br />
XXXX 00009.000<br />
3 ) Scroll to or highlight an unwanted channel number.<br />
4 ) Press ENTER to reverse the status for that channel.<br />
When there is a check mark next to the channel, it disappears.<br />
5 ) Press RETURN.<br />
A confirmation screen appears.<br />
6 ) Select Yes then press ENTER.<br />
The Channel Del<strong>et</strong>e s<strong>et</strong>ting is compl<strong>et</strong>e.<br />
7 ) Press HOME MENU to exit the menu.<br />
If you select the (Channel Skip) option in Step 3, the s<strong>et</strong>ting is compl<strong>et</strong>e when exiting the Channel<br />
Options menu (no confirmation screen appears). Skip Steps 5 and 6.<br />
The instructions for restoring a skipped channel are the same as above. In Step 4 a check mark appears next to<br />
the ad<strong>de</strong>d/restored channel.<br />
To skip an analog channel, follow the steps below.<br />
• Analog TV channels: Manual Adjust > Store > No<br />
Radio Skip<br />
This function allows skipping of radio channels at a time. To s<strong>et</strong> this option, follow the steps below.<br />
1 ) Access the System S<strong>et</strong>up through the S<strong>et</strong>up.<br />
2 ) Select Digital Tuner S<strong>et</strong>up from the System S<strong>et</strong>up menu.<br />
3 ) Select Channel management from the Digital Tuner S<strong>et</strong>up menu.<br />
4 ) Select Radio Skip from the Channel management menu.<br />
5 ) Select On.<br />
6 ) Press HOME MENU to exit the menu.<br />
38<br />
En
Basic Operations For Television Viewing 03<br />
3.2.7 Channel List<br />
Your flat panel TV offers three channel lists for quick access to a <strong>de</strong>sired channel: Favorites List, Channel List and<br />
Input List.<br />
Favorites List: Display your favorite channel numbers/names up to 20 channels (analog channels, Input 1 through<br />
7, PC), 20 digital channels, and 1 Home Media Gallery<br />
Store your most frequently viewed channels in the Favorites List.<br />
To display the Favorites List, press ENTER while showing a TV channel. For another m<strong>et</strong>hod to access the Favorites<br />
List, follow the directions below.<br />
1 ) Press HOME MENU.<br />
2 ) Select Favorites from the main menu.<br />
Pressing the / button while showing the Channel List or Input List also causes the Favorites List to<br />
appear.<br />
English<br />
Channel List: Display all analog/digital TV channels in each broadcast n<strong>et</strong>work group<br />
To display the Channel List, follow the directions below.<br />
1 ) Press HOME MENU.<br />
2 ) Select Channel from the main menu.<br />
Pressing the / button while showing the Favorites List or Input List also causes the Channel List to<br />
appear.<br />
Input List: Display external input source names from INPUT 1 through INPUT 7 and PC<br />
To display the Input List, follow the directions below.<br />
1 ) Press HOME MENU.<br />
2 ) Select Input from the main menu.<br />
Pressing the / button while showing the Favorites List or Channel List also causes the Input List to<br />
appear.<br />
Note: After selecting the <strong>de</strong>sired channel, pressing ENTER causes the Channel List to close and the selected<br />
screen appears. Pressing RETURN or EXIT causes the Channel List to close and the screen before<br />
selection r<strong>et</strong>urns.<br />
Press an arrow button to cycle through the lists when viewing any of the lists.<br />
Favorites<br />
INPUT 6<br />
XXXXXX 00001.000<br />
XXXXXX 00004.000<br />
XXXXXX 00007.000<br />
XXXXXX 00009.000<br />
PC<br />
XXXXXX<br />
XXXXXX 00013.002<br />
XXXXXX 00015.000<br />
XXXXXX 00024.000<br />
1/2<br />
S<strong>et</strong> Favorite Channels<br />
Select up to ten (10) channels per list page, up to five pages for a total of 41 favorite channels. To assign channels<br />
to your Favorites or All, follow the steps below.<br />
1 ) Access the Favorites S<strong>et</strong>up through the S<strong>et</strong>up.<br />
2 ) Select Channel Mo<strong>de</strong> from the Favorites S<strong>et</strong>up menu.<br />
3 ) Select All or Favorites from the Channel Mo<strong>de</strong> menu.<br />
• To assign all channels, select All. To assign the registered channels, select Favorites.<br />
39<br />
En
03 Basic Operations For Television Viewing<br />
4 ) Select a TV channel to store.<br />
If the screen fails to fit in the window, a scroll bar appears.<br />
Pressing ENTER while watching a TV program also causes the favorite channel list to appear. If the<br />
Favorites List is empty, “No Favorites List.” appears.<br />
5 ) Press HOME MENU to exit the menu.<br />
Alternate M<strong>et</strong>hod to Store Your Favorite Channels<br />
Use the TOOLS Menu to store TV channels, external input sources including PC, and Home Media Gallery<br />
contents. To store channels, follow the steps below.<br />
1 ) Press TOOLS.<br />
The TOOLS Menu appears on screen.<br />
2 ) Select Favorites Entry.<br />
Use the arrow buttons to highlight an option.<br />
3 ) Select On ( / ).<br />
The channel you are watching is stored in the favorite list.<br />
To cancel, use the arrow button to select Off.<br />
Notes:<br />
• Pressing EXIT, RETURN, or TOOLS again causes the TOOLS Menu to disappear.<br />
• Once the maximum number of channels are stored, a warning screen appears.<br />
• To quit the procedure before it finishes, press EXIT or RETURN on the remote control.<br />
Sort Favorite Channels<br />
To sort through the stored channels, follow the steps below.<br />
1 ) Access the Favorites S<strong>et</strong>up through the S<strong>et</strong>up.<br />
2 ) Select Sort Favorites from the Favorites S<strong>et</strong>up menu.<br />
3 ) Select a channel to move.<br />
4 ) Select a new location then press ENTER.<br />
The selected channel is moved to the new location. To sort another channel(s), repeat Steps 3 and 4.<br />
5 ) Press HOME MENU to exit the menu.<br />
Edit the Input List<br />
To change name of an Input, follow the steps below.<br />
1 ) Access the Option through the S<strong>et</strong>up.<br />
2 ) Select Label Input from the Option menu.<br />
3 ) Select an input or PC.<br />
The software keyboard appears.<br />
4 ) Enter the new name.<br />
Label<br />
K I D S<br />
1 2 3 4 5 6 7 8 9 0<br />
A B C D E F G H I J Del<strong>et</strong>e<br />
K L M N O P Q R S T Space<br />
U V W X Y Z , . : ; Caps<br />
& ' ( ) + - * / _ @ OK Cancel<br />
40<br />
En<br />
5 ) Select OK to save the name and exit the menu.<br />
To cancel, press HOME MENU.
Basic Operations For Television Viewing 03<br />
3.3 Quick Start for Watching Television<br />
Your flat panel TV has many functions and features, some of which you may simply lack the time to s<strong>et</strong> when first<br />
installing the panel. To begin watching TV quickly, refer to the basic information within this section. However, when<br />
it is convenient, we strongly suggest going through the rest of this manual and learning all that your flat panel TV<br />
can do.<br />
English<br />
3.3.1 Change the Channel/Sub-Channel<br />
With the remote control pointed at the panel’s remote<br />
<strong>sens</strong>or, press the CH + button to sequentially change to the<br />
next highest available channel. The CH – button<br />
sequentially changes down to the next lowest available<br />
channel. Each press of CH + or CH – causes the channel to<br />
change sequentially from station to station. To r<strong>et</strong>urn to the<br />
previous channel, press CH RETURN. To toggle b<strong>et</strong>ween<br />
the two channels, press CH RETURN again. Each press of<br />
this button switches the channel b<strong>et</strong>ween these two<br />
stations.<br />
Another option for changing the channel is to use the number buttons (0 through 9). Simply press the number<br />
buttons in the or<strong>de</strong>r nee<strong>de</strong>d for that channel. For example, enter Channel 231 as 2 - 3 - 1 or Channel 4 as the single<br />
number, 4.<br />
A recent addition to TV viewing is the Sub-channel. A digital channel can be split in to multiple signals. Each<br />
signal, called a sub-channel, can carry a different program. To watch a sub-channel, use a combination of number<br />
buttons and the dot (.) button. For example, if Channel 5 is digital and has three active sub-channels, enter 5 . 2<br />
to reach the second sub-channel.<br />
Note: To tune in a program more quickly, enter the channel or sub-channel then press CH ENTER.<br />
3.3.2 Adjust the Volume/Sound<br />
With the remote control pointed at the panel’s remote <strong>sens</strong>or, press and hold VOL+ to increase the sound volume<br />
gradually. Holding down VOL– <strong>de</strong>creases the volume at the same rate. A single press of VOL+ or VOL– causes<br />
the volume to adjust by minor increments.<br />
To silence all sound, press MUTING. The muting symbol ( e ) appears on screen. To r<strong>et</strong>urn the volume to the<br />
previous level, press MUTING again. Pressing VOL+ once also increases the volume one step higher than the<br />
current level and cancels the muting mo<strong>de</strong>.<br />
If the panel’s <strong>de</strong>fault sound level is too loud or too soft, refer to “3.4.6 General Sound (Audio) Adjustment.”<br />
3.3.3 Turn On the Sleep Timer<br />
To save energy and to maximize the life of your flat panel TV, try using the Sleep Timer for occasions when the<br />
panel may be left on by acci<strong>de</strong>nt. The Sleep Timer places the panel in Standby when the selected time elapses.<br />
The Sleep Timer provi<strong>de</strong>s time periods of 30, 60, 90, or 120 minutes. When the Timer is down to five minutes, a<br />
remin<strong>de</strong>r appears on screen each minute until the time has elapsed.<br />
To s<strong>et</strong> the Sleep Timer, follow the steps below.<br />
1 ) Access the Sleep Timer through the S<strong>et</strong>up.<br />
2 ) Select the <strong>de</strong>sired time period.<br />
Select b<strong>et</strong>ween 30 minutes and 2 hours (120 minutes).<br />
3 ) Press HOME MENU to exit the menu.<br />
41<br />
En
03 Basic Operations For Television Viewing<br />
The SLEEP indicator on the front of the flat panel TV lights orange when the Sleep Timer is s<strong>et</strong>. To check the<br />
remaining time, press TOOLS then select Sleep. “Remain ---min” appears at the top of the menu screen. After<br />
checking the time, press EXIT to r<strong>et</strong>urn to your program without losing the Sleep Timer s<strong>et</strong>ting.<br />
Note: When the sleep timer has been s<strong>et</strong>, “Remain ---min” appears at the top of the menu. However, the Vi<strong>de</strong>o<br />
Pattern timer has priority over the sleep timer. When the Vi<strong>de</strong>o Pattern timer is on, the sleep timer is<br />
<strong>de</strong>activated. Vi<strong>de</strong>o Pattern is explained fully later in this manual.<br />
3.4 Adjust the Picture and Sound Quality<br />
Your flat panel TV has many adjustment options for the picture and the sound to make it just right for you. This<br />
section provi<strong>de</strong>s basic adjustments but for d<strong>et</strong>ailed vi<strong>de</strong>o/audio modifications, refer to “4 Additional Picture and<br />
Sound Adjustment Options” and “4.7 Select Alternatives for/to Sound.”<br />
3.4.1 Adjust the Picture for Your Room Lighting<br />
The flat panel TV <strong>sens</strong>es the amount of light in your room and automatically adjusts the screen brightness for the<br />
best picture. Bright rooms require stronger coloring so images appear crisp while dimly lit rooms allow the<br />
picture to use more subtle coloring.<br />
The panel ships with the Room Light Sensor turned Off. The sections below provi<strong>de</strong> directions to turn the room<br />
lighting <strong>sens</strong>or On/Off.<br />
Room Lighting Sensor<br />
To <strong>de</strong>activate/reactivate the room lighting <strong>sens</strong>or, follow the steps below.<br />
1 ) Access the Option through the S<strong>et</strong>up.<br />
2 ) Select Room Light Sensor from the Option menu.<br />
3 ) Select On (or Off ) from the submenu.<br />
Game Control Pref : Off<br />
Room Light Sensor : Off<br />
Screen Protection<br />
Label Input<br />
4 ) Press HOME MENU to exit the menu.<br />
42<br />
En
Basic Operations For Television Viewing 03<br />
3.4.2 General Picture (Vi<strong>de</strong>o) Adjustment for an AV Source<br />
The directions below apply to all AV sources except OPTIMUM and DYNAMIC. If the viewing option is OPTIMUM,<br />
your flat panel TV automatically adjusts the picture to the best possible level. If the preferred viewing option is<br />
DYNAMIC, please refer to “4.1 Choose an AV Option (Vi<strong>de</strong>o, Game, <strong>et</strong>c.).” For standard picture adjustments, follow<br />
the steps below.<br />
1 ) Access the Picture through the S<strong>et</strong>up.<br />
2 ) Select an item to be adjusted.<br />
Contrast is used in the example below.<br />
English<br />
Picture<br />
AV Selection : PERFORMANCE<br />
Contrast : 40<br />
Brightness : 0<br />
Color : 0<br />
Tint : 0<br />
Sharpness : 0<br />
PureCinema<br />
Res<strong>et</strong><br />
3 ) Use the arrow buttons (/) to adjust to the <strong>de</strong>sired level.<br />
Contrast 32<br />
4 ) Press HOME MENU to exit the menu.<br />
Reduce Noise from Analog TV<br />
Som<strong>et</strong>imes electronic signal static can cause imperfections in the picture. This static is called Vi<strong>de</strong>o Noise. Your<br />
flat panel TV can reduce vi<strong>de</strong>o noise from an analog TV channel, <strong>de</strong>pending on the broadcast signal level.<br />
Som<strong>et</strong>imes the broadcast signal has higher interference levels so that some vi<strong>de</strong>o noise is noticeable.<br />
This function is only selectable for signals from an antenna. Follow the steps below to reduce noise on an analog<br />
TV channel.<br />
1 ) Access the System S<strong>et</strong>up through the S<strong>et</strong>up.<br />
2 ) Select Analog TV S<strong>et</strong>up from the System S<strong>et</strong>up menu.<br />
3 ) Select Manual Adjust from the submenu.<br />
Only analog channels s<strong>et</strong> using Auto Installation are manually adjustable.<br />
4 ) Select Program Entry.<br />
5 ) Select a channel number to be ad<strong>de</strong>d.<br />
Use the arrow buttons (/) to enter a channel number.<br />
6 ) Select Tuner NR.<br />
7 ) Select On.<br />
The <strong>de</strong>fault s<strong>et</strong>ting is On.<br />
8 ) Press HOME MENU to exit the menu.<br />
43<br />
En
03 Basic Operations For Television Viewing<br />
Picture Image Position<br />
Each input source stores the picture adjustment s<strong>et</strong>tings for that view. Although repositioning is available in most<br />
screen views, when the screen is s<strong>et</strong> to Dot-by-Dot, the Position menu is unavailable. Also, <strong>de</strong>pending on the<br />
displayed vi<strong>de</strong>o, the image position may not change after an adjustment.<br />
To adjust the picture’s horizontal and vertical position, follow the steps below.<br />
1 ) Access the Option through the S<strong>et</strong>up.<br />
2 ) Select Position from the Option menu.<br />
Position<br />
Auto Size : Off<br />
Si<strong>de</strong> Mask<br />
HDMI Input<br />
HDMI Control S<strong>et</strong>ting<br />
Orbiter : Off<br />
Vi<strong>de</strong>o Pattern<br />
3 ) Select H/V Position Adjust from the submenu.<br />
4 ) Adjust the vertical and/or horizontal positioning using the arrow buttons.<br />
5 ) Press HOME MENU to exit the menu.<br />
Restore Default Picture<br />
After making multiple adjustments, it may be difficult to reverse improper s<strong>et</strong>tings. To restore the factory <strong>de</strong>fault<br />
vi<strong>de</strong>o s<strong>et</strong>tings, follow the directions below.<br />
1 ) Highlight Res<strong>et</strong> from the Picture menu.<br />
2 ) Press ENTER to continue with the picture res<strong>et</strong>.<br />
A confirmation screen appears asking if s<strong>et</strong>tings should be r<strong>et</strong>urned to the factory <strong>de</strong>faults.<br />
3 ) Use the arrow buttons to highlight Yes.<br />
4 ) Press ENTER.<br />
All vi<strong>de</strong>o s<strong>et</strong>tings r<strong>et</strong>urn to the original <strong>de</strong>fault values when selecting options other than OPTIMUM or PC.<br />
When OPTIMUM is selected, vi<strong>de</strong>o s<strong>et</strong>tings for OPTIMUM, AV Selection menus, and Sound Control<br />
s<strong>et</strong>tings r<strong>et</strong>urn to the original <strong>de</strong>fault values.<br />
3.4.3 Compare Images When Adjusting the Picture<br />
When adjusting the picture, look for an overall improvement by adjusting each param<strong>et</strong>er or option one at a time.<br />
Many small adjustments lead to the best picture for your viewing area. As each option changes, refer back to the<br />
previously s<strong>et</strong> image for comparison. This section inclu<strong>de</strong>s adjustment notes and steps to adjust the flat panel<br />
TV’s picture.<br />
Each param<strong>et</strong>er/option must be adjusted separately. For example, if two options un<strong>de</strong>r AV Selection,<br />
PERFORMANCE and MOVIE need adjustment, change/compare one option then save the preferred s<strong>et</strong>ting<br />
before moving on to the other option. Below are other gui<strong>de</strong>lines to follow when adjusting the picture.<br />
44<br />
En<br />
• Adjustments are available while on the After screen. Trying to make adjustments while on the Before causes<br />
a warning message to appear.<br />
• Switch to another param<strong>et</strong>er/option only from the After screen. If viewing the Before screen when selecting<br />
another option, the Before data is lost.<br />
• Exiting an option from the Before screen stores that previous entry in memory and <strong>de</strong>activates the TOOLS<br />
button.<br />
• Exiting an option from the After screen stores the new entry in memory and <strong>de</strong>activates the button.
Basic Operations For Television Viewing 03<br />
• Moving/changing the AV Selection param<strong>et</strong>er/option stores the option s<strong>et</strong>ting in memory (button continues<br />
to work).<br />
Follow the steps below to adjust options for the preferred picture quality.<br />
1 ) Access the Picture through the S<strong>et</strong>up.<br />
2 ) Select an option.<br />
3 ) Use the TOOLS button to toggle b<strong>et</strong>ween the previous and adjusted images.<br />
4 ) Repeat Steps 2 and 3 to continue adjusting the option as nee<strong>de</strong>d.<br />
5 ) Repeat Steps 2 through 4 to adjust other picture options.<br />
6 ) Press HOME MENU to exit the menu.<br />
English<br />
Note: if no selections are ma<strong>de</strong> within 60 seconds, the menu closes automatically and the current s<strong>et</strong>tings are<br />
saved to memory.<br />
To exit the menu without saving the changes, switch to the Before screen then press HOME MENU.<br />
3.4.4 Display a Graphical Picture/Sound Adjustment Screen<br />
Selecting OPTIMUM from the AV Selection menu causes the Picture menu to display different AV source<br />
submenus. Select On for the Sound Control option to automatically adjust the sound quality, and OPTIMUM<br />
Performance provi<strong>de</strong>s an on-screen graphic monitor for multiple picture and sound adjustments.<br />
OPTIMUM Performance<br />
OPTIMUM Performance displays on-going picture and sound adjustments using graphical data when selecting<br />
OPTIMUM from the AV Selection menu. OPTIMUM Performance provi<strong>de</strong>s the following bar graph data:<br />
• Analyzer: Histogram, RGB, Room Light<br />
• Picture: Contrast, Brightness, Color, Sharpness, Color Temp., Gamma<br />
• Sound: Level<br />
OPTIMUM Performance<br />
[OPTIMUM] On<br />
OPTIMUM On/Off<br />
[Analyzer]<br />
Histogram<br />
RGB<br />
Room Light<br />
[Picture]<br />
Contrast<br />
Brightness<br />
Color<br />
Sharpness<br />
Color Temp<br />
Gamma<br />
[Sound]<br />
60 1k 12k(Hz)<br />
To display OPTIMUM Performance, follow the procedure below.<br />
1 ) Access the Picture through the S<strong>et</strong>up.<br />
2 ) Select AV Selection from the Picture menu.<br />
3 ) Select OPTIMUM from the AV Selection menu.<br />
4 ) Select OPTIMUM Performance from the Picture menu.<br />
The OPTIMUM Performance appears. To cancel the OPTIMUM Performance option, press EXIT.<br />
Note: When OPTIMUM is selected, press and hold DISPLAY on the remote control to show OPTIMUM<br />
Performance.<br />
OPTIMUM Performance compares the picture and sound quality b<strong>et</strong>ween “Off” (unadjusted) and “On”<br />
(adjusted using the TOOLS button).<br />
45<br />
En
03 Basic Operations For Television Viewing<br />
3.4.5 Sound Control<br />
S<strong>et</strong>ting the Sound Control option to On automatically adjusts to the highest sound quality possible for the<br />
selected image and viewing environment. This option is also available when OPTIMUM is selected in the AV<br />
Selection menu. To activate Sound Control, follow the procedure below.<br />
1 ) Access the Picture through the S<strong>et</strong>up.<br />
2 ) Select AV Selection from the Picture menu.<br />
3 ) Select OPTIMUM from the AV Selection menu.<br />
4 ) Select Sound Control from the Picture menu.<br />
5 ) Select On.<br />
6 ) Press HOME MENU to exit the menu.<br />
Note: When Sound Control from the Picture menu is selected, the only Sound menu option available is AVC (Auto<br />
Volume Control).<br />
3.4.6 General Sound (Audio) Adjustment<br />
Many prefer a heavier base when watching movies or music vi<strong>de</strong>os from an AV source or on TV. Others like a more<br />
balanced sound. To adjust the sound to your preference, follow the directions below.<br />
1 ) Access the Sound through the S<strong>et</strong>up.<br />
2 ) Select an option for adjustment.<br />
Treble : 0<br />
Bass : 0<br />
Balance : 0<br />
Sound Effect<br />
Res<strong>et</strong><br />
AVC : Off<br />
3 ) Use the left/right arrow buttons ( / ) to adjust the option.<br />
Option Left Button Right Button<br />
Treble weakens tone strengthens tone<br />
Base weakens tone strengthens tone<br />
Balance shifts audio balance to the left shifts audio balance to the right<br />
4 ) Press HOME MENU to exit the menu.<br />
Restore Default Sound S<strong>et</strong>tings<br />
To restore the factory <strong>de</strong>fault sound s<strong>et</strong>tings, follow the directions below.<br />
1 ) Highlight Res<strong>et</strong> from the Sound menu.<br />
2 ) Press ENTER to continue with the sound res<strong>et</strong>.<br />
A confirmation screen appears asking if s<strong>et</strong>tings should be r<strong>et</strong>urned to the factory <strong>de</strong>faults.<br />
3 ) Use the arrow buttons to highlight Yes.<br />
4 ) Press ENTER to restore all sound s<strong>et</strong>tings to the original <strong>de</strong>fault values.<br />
Note: The Auto Volume Control (AVC) s<strong>et</strong>ting cannot be restored to the factory <strong>de</strong>fault.<br />
46<br />
En
Basic Operations For Television Viewing 03<br />
3.5 Block Programs, Channels, or Content<br />
Although blocking programs, channels, or content is optional, some images may be inappropriate for all family<br />
members. Your flat panel TV supports a blocking function known as Parental Control. With Parental Control<br />
activated, certain material fails to appear on screen if it is beyond your select viewing level. Parental Control uses<br />
recognized rating systems but also allows blocks placed at your discr<strong>et</strong>ion. This section explains the different<br />
blocking functions and how to assign each type.<br />
English<br />
Note: When watching a TV program, you may see an emergency alert message scrolling at the top of the screen.<br />
The television station is broadcasting the emergency message as a test or an alert in a real emergency. The<br />
flat panel TV ships with this function active. For information about emergency messages, refer to “3.5.3<br />
Assign a Rating System to Create Blocks.”<br />
3.5.1 Assign a Parental Control (Block) Password<br />
With Parental Control, inappropriate TV programs, VCR recordings, and DVD content can be blocked. When<br />
someone attempts to watch a blocked program or content, the flat panel TV displays the password window.<br />
Parental Control applies to both analog and digital material.<br />
To ensure that your blocks are not removed in error, the flat panel TV requires a password to change access to<br />
blocked programs, channels, or content. The <strong>de</strong>fault password for your panel is 1234. We strongly recommend<br />
changing the password to a four-digit co<strong>de</strong> that is meaningful to you.<br />
Follow the steps below to change the password.<br />
1 ) Access the System S<strong>et</strong>up through the S<strong>et</strong>up.<br />
2 ) Select Change Password from the System S<strong>et</strong>up menu.<br />
Please Input Your Password.<br />
3 ) Enter the current four-digit co<strong>de</strong> using the 0 through 9 buttons.<br />
A confirmation message appears on screen.<br />
4 ) Enter your new password.<br />
5 ) Enter your new password a second time when prompted.<br />
6 ) Press HOME MENU to exit the menu.<br />
Write your new password:<br />
If you forg<strong>et</strong> your password:<br />
When “Enter your Password”<br />
appears at Step 4, press and hold<br />
the ENTER button for three or<br />
more seconds.<br />
The password reverts to the<br />
<strong>de</strong>fault password, 1234.<br />
47<br />
En
03 Basic Operations For Television Viewing<br />
3.5.2 Activate Parental Control<br />
The Parental Control function must be active for the panel to block content. If this option is turned Off, blocked<br />
programs appear on screen. To activate Parental Control blocking, follow the steps below.<br />
1 ) Access the System S<strong>et</strong>up through the S<strong>et</strong>up.<br />
2 ) Select Parental Control.<br />
The password entry screen appears.<br />
3 ) Enter your four-digit co<strong>de</strong> using the 0 through 9 buttons.<br />
4 ) Select Status.<br />
5 ) Select On to activate Parental Control.<br />
6 ) Press HOME MENU to exit the menu.<br />
Status : Off<br />
MPAA Ratings<br />
TV Parental Gui<strong>de</strong>lines<br />
Canadian English Ratings<br />
Canadian French Ratings<br />
Unavailable Ratings : View<br />
Digital Regional Ratings<br />
When a program is blocked, a (B) appears next to the channel number. If a channel is blocked but the Parental<br />
Control system is turned off, the symbol is a (V) and the channel/program is viewable.<br />
The lock symbol here marks<br />
blocked TV ratings.<br />
B<br />
B<br />
B<br />
V<br />
FV<br />
B<br />
D<br />
3.5.3 Assign a Rating System to Create Blocks<br />
Besi<strong>de</strong>s choosing to block certain channels, you may use one of the recognized rating systems to block programs<br />
and/or content. Your panel recognizes the following rating systems:<br />
• TV ratings<br />
• TV Parental Gui<strong>de</strong>lines including unrated programming<br />
• Motion Picture Association of America (MPAA for movies)<br />
• Canadian English/French rating systems<br />
Note: Your flat panel TV ships with all ratings unblocked.<br />
To block TV or other content using a rating system, follow the steps below.<br />
1 ) Access the System S<strong>et</strong>up through the S<strong>et</strong>up.<br />
2 ) Select Parental Control from the System S<strong>et</strong>up menu.<br />
3 ) Select one of the rating systems from the submenu.<br />
48<br />
En
Basic Operations For Television Viewing 03<br />
MPAA Ratings menu<br />
TV Parental Gui<strong>de</strong>lines menu<br />
N/A : View<br />
G : View<br />
PG : View<br />
PG-13 : View<br />
R : View<br />
NC-17 : View<br />
NR : View<br />
TV-None<br />
TV-Y<br />
TV-Y7<br />
TV-G<br />
TV-PG<br />
TV-14<br />
TV-MA<br />
B<br />
B<br />
B<br />
V<br />
V<br />
V<br />
V<br />
FV D L S V<br />
B<br />
V<br />
V<br />
V<br />
V<br />
V<br />
V<br />
V<br />
V<br />
V<br />
V<br />
V<br />
English<br />
Canadian English Ratings menu<br />
E : View<br />
C : View<br />
C8+ : View<br />
G : Block<br />
PG : Block<br />
14+ : Block<br />
18+ : Block<br />
Unavailable Ratings menu<br />
Status : Off<br />
MPAA Ratings<br />
TV Parental Gui<strong>de</strong>lines<br />
Canadian English Ratings<br />
Canadian French Ratings<br />
Unavailable Ratings : View<br />
Digital Regional Ratings<br />
Canadian French Ratings menu<br />
E : View<br />
G : View<br />
8 ans+ : View<br />
13 ans+ : View<br />
16 ans+ : View<br />
18 ans+ : View<br />
Digital Regional Ratings menu<br />
Status : Off<br />
MPAA Ratings<br />
TV Parental Gui<strong>de</strong>lines<br />
Canadian English Ratings<br />
Canadian French Ratings<br />
Unavailable Ratings : View<br />
Digital Regional Ratings<br />
4 ) Use the arrow buttons to highlight a block level for that rating system.<br />
5 ) Press ENTER to reverse the blocked status for the highlighted TV Parental Gui<strong>de</strong>line option.<br />
A block (B) or view (V) symbol appears in appropriate rating boxes. For other rating options, press / to<br />
toggle b<strong>et</strong>ween block and view.<br />
6 ) Press HOME MENU to exit the menu.<br />
When a rating is blocked, all more severe ratings are blocked as well. For example, blocking TV rating TV-PG<br />
(Parental guidance suggested) automatically blocks TV-14 (Parents strongly cautioned) and TV-MA (Mature<br />
audiences only). In turn, unblocking a rating causes less severe ratings to become automatically available.<br />
Program Rating of “None”<br />
The flat panel TV also provi<strong>de</strong>s a rating s<strong>et</strong>ting that blocks programs with a rating of None. The US TV Parental<br />
Gui<strong>de</strong>lines Rating system i<strong>de</strong>ntifies programs with a None rating level. Examples of programs with a rating of<br />
None are as follows:<br />
• Emergency Bull<strong>et</strong>ins (such as EAS messages, weather warning and others)<br />
• Locally originated programming<br />
• Public Service Announcements<br />
• News<br />
• Politics<br />
• Religion<br />
• Sports<br />
49<br />
En
03 Basic Operations For Television Viewing<br />
To block a program with a rating of None, follow the steps below.<br />
1 ) Access the System S<strong>et</strong>up through the S<strong>et</strong>up.<br />
2 ) Select Parental Control from the System S<strong>et</strong>up menu.<br />
3 ) Select TV Parental Gui<strong>de</strong>lines from the Parental Control menu.<br />
4 ) Select TV-None from the submenu.<br />
5 ) Select an option (View or Block ).<br />
6 ) Press HOME MENU to exit the menu.<br />
Refer to “8.1 Ratings Charts (for Various Audience Classifications)” for d<strong>et</strong>ailed information about the different<br />
rating systems.<br />
Block Not Rated Programs<br />
With some TV programs, the rating information is unavailable. To block these programs, follow the steps below.<br />
1 ) Access the System S<strong>et</strong>up through the S<strong>et</strong>up.<br />
2 ) Select Parental Control from the System S<strong>et</strong>up menu.<br />
3 ) Select Unavailable Ratings from the Parental Control menu.<br />
4 ) Select an option (View or Block ).<br />
5 ) Press HOME MENU to exit the menu.<br />
Note: Your flat panel TV ships with this option s<strong>et</strong> to View.<br />
New Ratings System for Digital Broadcasts<br />
Some Digital broadcasts carry new ratings that are not compatible with the panel’s original Parental Control<br />
s<strong>et</strong>tings. When first tuning to one of these broadcasts, the Digital Regional Ratings menu appears on screen.<br />
Change the Parental Control s<strong>et</strong>tings to handle the new ratings. Otherwise, previous blocked ratings may become<br />
unblocked.<br />
Note: Adding the new rating does not cause programs with this rating system to be blocked automatically.<br />
To add the new rating system to your panel, follow the directions below.<br />
1 ) Access the System S<strong>et</strong>up through the S<strong>et</strong>up.<br />
2 ) Select Parental Control from the System S<strong>et</strong>up menu.<br />
3 ) Select Digital Regional Ratings from the submenu.<br />
A list of available ratings appears.<br />
4 ) Select from the available ratings.<br />
5 ) Select a level from the available ratings.<br />
6 ) Select View or Block.<br />
7 ) Press HOME MENU to exit the menu.<br />
50<br />
En
Basic Operations For Television Viewing 03<br />
Del<strong>et</strong>e a New Ratings System<br />
If an ad<strong>de</strong>d ratings system is no longer nee<strong>de</strong>d, <strong>de</strong>l<strong>et</strong>e the ratings system from your flat panel TV. It is unnecessary<br />
to remove blocks from individual channels or programs. Del<strong>et</strong>ing the ratings line removes any/all blocks initiated<br />
with that system.<br />
1 ) Access the System S<strong>et</strong>up through the S<strong>et</strong>up.<br />
2 ) Select Parental Control from the System S<strong>et</strong>up menu.<br />
3 ) Select Digital Regional Ratings from the submenu.<br />
4 ) Select RRT Rese to <strong>de</strong>l<strong>et</strong>e the new ratings system from the flat panel TV.<br />
The message “Res<strong>et</strong> digital regional ratings?” appears.<br />
5 ) Select OK.<br />
6 ) Press HOME MENU to exit the menu.<br />
English<br />
While the Parental Control menu is open, the status display remains unchanged even if the system receives<br />
broadcasts carrying new ratings.<br />
3.5.4 Temporarily Remove a Block<br />
The password entry screen appears when d<strong>et</strong>ecting the blocked rating signals (with the picture and sound turned<br />
off). Entering your four-digit password allows you to view the program until your flat panel TV is placed into<br />
Standby or turned Off. To temporarily remove a block, follow the steps below.<br />
1 ) Tune the flat panel TV to the blocked channel.<br />
2 ) Wait for the Block message to appear on screen.<br />
3 ) Enter the four-digit password.<br />
The password window appears. When a four-digit password is entered, or no operation is performed within<br />
60 seconds, the window disappears. To recall the window after it disappears, change the channel or input<br />
source then r<strong>et</strong>urn before repeating the above steps.<br />
Please Input Your Password.<br />
For INPUT 2 (except 480i signals) and INPUT 4 through INPUT 7, the password entry screen appears when Block<br />
is selected from the Unavailable Ratings menu.<br />
51<br />
En
03 Basic Operations For Television Viewing<br />
3.6 Smart Starts for New Owners<br />
Many of the flat panel TV features make it easy to use but also environmentally friendlier. This section explains<br />
how to extend the life of your panel while being energy efficient. We suggest applying all of the following functions<br />
below for the simplest usage, best quality, and longest life span.<br />
3.6.1 Use the TOOLS Menu<br />
To change the current menu to another option, the on-screen TOOLS Menu provi<strong>de</strong>s short-cuts to the available<br />
selections even while watching a program. To display the menu, press TOOLS on the remote control. The menus<br />
shown in this section differ, <strong>de</strong>pending upon the menu.<br />
TELEVISION<br />
TOOLS<br />
Sound<br />
Random<br />
All Play Mo<strong>de</strong> : Single<br />
A-B Repeat<br />
Time Search<br />
Repeat<br />
The TOOLS Menu provi<strong>de</strong>s short-cuts to the selectable menu options<br />
while watching a program.<br />
Use the arrow buttons to toggle b<strong>et</strong>ween options. The s<strong>et</strong>ting is compl<strong>et</strong>e as soon as the selected option appears<br />
in the center of the screeen. When showing two screens, the TOOLS Menu appears on the main screen.<br />
3.6.2 Extend Your Panel Life<br />
This function provi<strong>de</strong>s short-cuts to your panel’s longer service life. Your flat panel TV inclu<strong>de</strong>s the Screen<br />
Protection option. Activating this option causes the panel to automatically select the several different features<br />
that can prolong the life of your panel and help alleviate after-image ghosts or burn-in. To s<strong>et</strong> this option, follow<br />
the steps below.<br />
1 ) Access the Option through the S<strong>et</strong>up.<br />
2 ) Select Screen Protection from the Option menu.<br />
A confirmation screen appears.<br />
3 ) Select Yes from the submenu.<br />
The following s<strong>et</strong>tings are automatically entered:<br />
•Auto Size: Wi<strong>de</strong>-Zoom<br />
•Si<strong>de</strong> Mask - D<strong>et</strong>ection: Mo<strong>de</strong> 1<br />
•Orbiter (AV source): Mo<strong>de</strong> 1<br />
•Orbiter (PC source): Mo<strong>de</strong> 1<br />
•Energy Save: Mo<strong>de</strong> 1<br />
•AV Selection: OPTIMUM (when DYNAMIC is selected for AV Selection)<br />
4 ) Press HOME MENU to exit the menu.<br />
52<br />
En
Basic Operations For Television Viewing 03<br />
3.6.3 Turn On the Image Orbiter<br />
A built-in feature to protect against burn-in is the Orbiter function. Orbiter automatically changes the position of<br />
the picture imperceptibly while the image is on screen. To activate the Orbiter, follow the steps below. To cancel<br />
this function, select Off in Step 3.<br />
1 ) Access the Option through the S<strong>et</strong>up.<br />
2 ) Select Orbiter from the Option menu.<br />
3 ) Select Mo<strong>de</strong> 1 or Mo<strong>de</strong> 2.<br />
• AV source Mo<strong>de</strong> 1: for any screen mo<strong>de</strong> except Dot by Dot<br />
• AV source Mo<strong>de</strong> 2: for all available screen mo<strong>de</strong>s<br />
• PC source Mo<strong>de</strong> 1: to enable Orbiter<br />
• PC source Mo<strong>de</strong> 2: to smooth the text/character appearance<br />
4 ) Press HOME MENU to exit the menu.<br />
English<br />
Note: The farthest edges of an image may be hid<strong>de</strong>n at times as the picture position shifts. Also, when the Orbiter<br />
function is s<strong>et</strong> to Mo<strong>de</strong> 1 or Mo<strong>de</strong> 2, the image may appear to drop slightly on the screen.<br />
3.6.4 Trigger the Screen-Saving Vi<strong>de</strong>o Pattern Periodically<br />
The Vi<strong>de</strong>o Pattern function causes the screen to appear white, which helps to alleviate after-image ghosts or burnin.<br />
While the Vi<strong>de</strong>o Pattern screen is on, only the remote’s TV ( a ) button and the panel’s STANDBY/ON button<br />
are available. The panel automatically switches to Standby one hour after running the Vi<strong>de</strong>o Pattern screen. To<br />
cancel the Vi<strong>de</strong>o Pattern screen, press the remote’s TV ( a ) or press the panel’s STANDBY/ON.<br />
To activate the Vi<strong>de</strong>o Pattern screen, follow the steps below.<br />
1 ) Access the Option through the S<strong>et</strong>up.<br />
2 ) Select Vi<strong>de</strong>o Pattern from the Option menu.<br />
A confirmation screen appears.<br />
3 ) Select Start from the submenu.<br />
The Vi<strong>de</strong>o Pattern screen appears.<br />
4 ) Leave the panel alone for a minimum of one hour.<br />
Note: The Vi<strong>de</strong>o Pattern timer has priority over Sleep Timer, No Signal off, and No Power off (Power Management )<br />
s<strong>et</strong>tings.<br />
3.6.5 Activate Energy Save to Reduce Power Usage<br />
The Energy Save option <strong>de</strong>creases picture brightness and lowers power consumption. The recommen<strong>de</strong>d s<strong>et</strong>ting,<br />
Energy Save Mo<strong>de</strong> 1, extends the life of your panel while keeping power usage at a minimum.<br />
Follow the steps below to activate an Energy Save option.<br />
1 ) Access the Power Control through the S<strong>et</strong>up.<br />
2 ) Select Energy Save from the menu.<br />
3 ) Select an option from the Energy Save submenu.<br />
Option<br />
Description<br />
Off<br />
No effect<br />
Mo<strong>de</strong> 1<br />
consumes less power than Off<br />
Mo<strong>de</strong> 2 consumes less power than Mo<strong>de</strong> 1<br />
4 ) Press HOME MENU to exit the menu.<br />
53<br />
En
04 Additional Picture and Sound Adjustment Options<br />
4 Additional Picture and Sound Adjustment<br />
Options<br />
To take advantage of all that your flat panel TV offers, browse this chapter for features and functions that enhance<br />
your viewing experience. Most sections <strong>de</strong>al with adjusting the picture and arranging screen/menu items while<br />
the remaining sections provi<strong>de</strong> sound and power management options. Apply as many or as few of these changes<br />
as <strong>de</strong>sired.<br />
4.1 Choose an AV Option (Vi<strong>de</strong>o, Game, <strong>et</strong>c.)<br />
Similar to the purpose for the room light <strong>sens</strong>or, the AV Option or Selection <strong>de</strong>pends upon the brightness of the<br />
environment and the program or movie on screen. Images can be from either an AV Source or from a PC. Both<br />
sources are discussed below.<br />
Choose from among the seven AV Selections for the best image from an external AV Source. Use either the<br />
remote control or the Home Menu to select the AV source. For a PC, skip down to “4.1.3 Choose a PC Source.”<br />
If the AV source is a Game Control, select GAME and refer to “4.1.4 S<strong>et</strong> the Panel to Recognize a Game Console”<br />
for more information.<br />
4.1.1 AV Source through the Remote Control<br />
Follow the directions below to s<strong>et</strong> an AV Selection for an external AV Source using the remote control.<br />
1 ) Press AV SELECTION on the remote control.<br />
The current AV selection appears.<br />
2 ) Press AV SELECTION again before the displayed mo<strong>de</strong> disappears.<br />
Each press cycles the options in the or<strong>de</strong>r shown below.<br />
AV Selection<br />
OPTIMUM<br />
PERFORMANCE<br />
DYNAMIC<br />
MOVIE<br />
SPORT<br />
GAME<br />
Standard<br />
Description<br />
automatically adjusts the image quality for the<br />
brightness level of the viewing area (shared by<br />
external input and TV input sources)<br />
for a highly <strong>de</strong>fined image in a normally bright<br />
room (shared by external input and TV input<br />
sources)<br />
for a very sharp image with maximum contrast but<br />
manual image quality adjustment unavailable<br />
(shared by external input and TV input sources)<br />
for movies (shared by external input and TV input<br />
sources)<br />
for sports programs (shared by external input and<br />
TV input sources)<br />
lowers image brightness for easier viewing (shared<br />
by external input and TV input sources)<br />
allows customizing s<strong>et</strong>tings as <strong>de</strong>sired (s<strong>et</strong> the<br />
mo<strong>de</strong> for each input source)<br />
3 ) Allow the AV Selection screen to disappear.<br />
When the screen disappears, the panel locks in last viewed option and the menu closes.<br />
54<br />
En
Additional Picture and Sound Adjustment Options<br />
04<br />
4.1.2 Choose an AV Source through the Home Menu<br />
The other m<strong>et</strong>hod for choosing an AV Selection uses the Home Menu. Follow the directions below to s<strong>et</strong> an AV<br />
Selection for an external AV Source.<br />
The AV Selection, OPTIMUM, automatically adjusts to the highest image quality possible for the selected source<br />
and viewing environment. Your flat panel TV employs advanced sound reproduction technologies, such as SRS<br />
WOW HD TM , OPTIMUM also automatically adjusts to the optimum sound for the selected scene. This process is<br />
gradual so changes to the tint and brightness may be visible. This is normal and is not a malfunction.<br />
DYNAMIC locks out manual adjustments for specific options. The DYNAMIC s<strong>et</strong>ting blocks Contrast, Brightness,<br />
Color, Tint, Sharpness, and Res<strong>et</strong>. Unavailable options are dimmed on the menu.<br />
English<br />
To choose an AV source through the Home Menu, follow the steps below.<br />
1 ) Access the Picture through the S<strong>et</strong>up.<br />
2 ) Select AV Selection from the Picture menu.<br />
3 ) Select an option from the submenu.<br />
AV Selection<br />
OPTIMUM<br />
PERFORMANCE<br />
DYNAMIC<br />
MOVIE<br />
SPORT<br />
GAME<br />
Standard<br />
When OPTIMUM is selected,<br />
images are reproduced based on<br />
the information collected at the<br />
Room Light Sensor.<br />
Picture<br />
AV Selection : OPTIMUM<br />
PureCinema<br />
Sound Control : Off<br />
OPTIMUM Performance<br />
Res<strong>et</strong><br />
(Submenu when OPTIMUM is selected for AV Selection)<br />
4 ) Press HOME MENU to close and exit the menu.<br />
4.1.3 Choose a PC Source<br />
From a PC, choose b<strong>et</strong>ween the two AV Selections for the best image. The options are as follows:<br />
• STANDARD: for a highly <strong>de</strong>fined image in a normally bright room<br />
• USER: allows customizing s<strong>et</strong>tings as <strong>de</strong>sired for each input source<br />
55<br />
En
04 Additional Picture and Sound Adjustment Options<br />
4.1.4 S<strong>et</strong> the Panel to Recognize a Game Console<br />
When adding a game console to your flat panel TV, use the Game function to establish a preference for image<br />
quality or for operability.<br />
To have the panel store your Game preference, follow the steps below.<br />
1 ) Access the Option through the S<strong>et</strong>up.<br />
2 ) Select Game Control Pref from the menu.<br />
3 ) Select On (operability preferred) or Off (image quality preferred).<br />
4 ) Press HOME MENU to exit the menu.<br />
To activate the Game Control Pref option, s<strong>et</strong> the AV Selection to GAME and use an external input (unless the<br />
source is coming from a PC). When a PC source menu is on screen, the Game Control Pref option is ignored.<br />
Also, the Game Control Pref option for operability (on) is ignored during multi-screen viewing (refer to “4.4 View<br />
in Multi-Screen”) or image freezing (refer to “4.5 Freeze the Picture”).<br />
4.2 Adjust Specific Picture Elements<br />
Plasma technology <strong>de</strong>livers one of the best images available today. However, the viewing area/environment and<br />
personal preferences affect how the picture appears. This section provi<strong>de</strong>s m<strong>et</strong>hods to adjust the picture and sound<br />
for your best viewing experience.<br />
4.2.1 Choose a Screen Size (Automatically or Manually)<br />
Automatic Screen Sizing<br />
The flat panel TV can automatically select an appropriate screen size for the incoming vi<strong>de</strong>o signal from a<br />
connected HDMI <strong>de</strong>vice. To allow automatic screen sizing, follow the steps below.<br />
1 ) Access the Option through the S<strong>et</strong>up.<br />
2 ) Select Auto Size from the Option menu.<br />
3 ) Select Natural or Wi<strong>de</strong>-Zoom from the submenu.<br />
Option<br />
Off<br />
Natural<br />
Wi<strong>de</strong>-Zoom<br />
Description<br />
<strong>de</strong>activates the Auto Size function<br />
adjusts the image to the screen size<br />
enlarges and displays only the 4:3 aspect ratio<br />
portion in full and wi<strong>de</strong> screen<br />
4 ) Press HOME MENU to exit the menu.<br />
Note: When a vi<strong>de</strong>o signal contains no aspect ratio information, the Automatic Screen Size function is<br />
unavailable.<br />
56<br />
En
Additional Picture and Sound Adjustment Options<br />
04<br />
Manual Screen Sizing<br />
Manually select an appropriate screen size if an image fails to appear in the correct format. Browse the menu for<br />
the correct screen size for a specific program.<br />
The selectable screen sizes differ <strong>de</strong>pending on the types of input signals. While watching a TV broadcast, press<br />
SCREEN SIZE on the remote control to cycle the picture through Auto, FULL, Dot by Dot, ZOOM, CINEMA, 4:3,<br />
WIDE, WIDE 1 and WIDE 2. Freely change the screen size during broadcasts or vi<strong>de</strong>o from other input sources.<br />
Auto is available when receiving HD broadcasts.<br />
The following chart provi<strong>de</strong>s information about how the screen appears for each option.<br />
English<br />
Auto<br />
FULL<br />
Dot by Dot<br />
ZOOM<br />
CINEMA<br />
AV Option<br />
With WIDE 1 or WIDE 2 selected, a High Definition (HD) TV broadcast may crop part of an image or menu. If an<br />
image or menu appears cut or runs off the screen, change the option to FULL.<br />
Avoid showing signals that fill only part of the screen. Images that fail to fill the screen may cause temporary or<br />
permanent image r<strong>et</strong>ention <strong>de</strong>pending on the frequency and duration. For example, an HD broadcast with si<strong>de</strong><br />
masks (4:3 content) causes uneven wear of the plasma cells. If si<strong>de</strong> masks appear around a broadcast, after that<br />
program or movie is over, switch to a full screen motion vi<strong>de</strong>o. This action helps the panel balance wear for the<br />
plasma cells and guard against after-image issues. For more information about Masks, refer to “4.3.1 Adjust for<br />
Screen Masking (black bars on si<strong>de</strong>s).”<br />
Note: Not all broadcast programs carry alternative screen sizes.<br />
Description<br />
adds si<strong>de</strong> masks or displays the image in full<br />
screen when d<strong>et</strong>ecting HD pictures containing si<strong>de</strong><br />
masks. See D<strong>et</strong>ect Masks on page 59.<br />
squeezes 16:9 images<br />
matches input signal to the same number of screen<br />
pixels (available for 1080i or 1080p signals only)<br />
bars may appear on the top and bottom on some<br />
programs that are 16:9 l<strong>et</strong>terbox<br />
bars may appear on the top and bottom on some<br />
programs that are 14:9 l<strong>et</strong>terbox (available for SD<br />
signals only)<br />
4:3 si<strong>de</strong> bars appear on each si<strong>de</strong><br />
WIDE<br />
WIDE 1<br />
WIDE 2<br />
PC Option<br />
pictures progressively str<strong>et</strong>ch toward each si<strong>de</strong><br />
(available for SD signals only)<br />
pictures progressively str<strong>et</strong>ch toward each si<strong>de</strong><br />
(available for HD signals only)<br />
pictures evenly str<strong>et</strong>ch toward each si<strong>de</strong> (available<br />
for HD signals only)<br />
Description<br />
4:3 fills without altering the input signal aspect ratio<br />
FULL<br />
shows 16:9 screen display<br />
57<br />
En
04 Additional Picture and Sound Adjustment Options<br />
4.2.2 Correct the Picture for an AV or PC Source<br />
Although picture adjustments are to your personal preferences, often the source causes unanticipated image<br />
changes. Your flat panel TV offers several adjustment options.<br />
AV Source<br />
PC Source<br />
Option Left Arrow Right Arrow<br />
Contrast less contrast more contrast<br />
Brightness dimmer brighter<br />
Color <strong>de</strong>creased intensity increased intensity<br />
Tint purplish skin tones greenish skin tones<br />
Sharpness softer <strong>de</strong>finition crisper <strong>de</strong>finition<br />
Option Left Arrow Right Arrow<br />
Contrast less contrast more contrast<br />
Brightness dimmer brighter<br />
Red weaker color stronger color<br />
Green weaker color stronger color<br />
Blue weaker color stronger color<br />
To correct the picture for an AV or a PC source, follow the steps below.<br />
1 ) Access the Picture through the S<strong>et</strong>up.<br />
2 ) Select an option to adjust.<br />
AV Source<br />
PC Source<br />
Picture<br />
AV Selection : PERFORMANCE<br />
Contrast : 40<br />
Brightness : 0<br />
Color : 0<br />
Tint : 0<br />
Sharpness : 0<br />
PureCinema<br />
Res<strong>et</strong><br />
Picture<br />
AV Selection : STANDARD<br />
Contrast : 40<br />
Brightness : 0<br />
Red : 0<br />
Green : 0<br />
Blue : 0<br />
Res<strong>et</strong><br />
3 ) Select the <strong>de</strong>sired level for that option using the left/right arrows (/).<br />
Contrast 32<br />
4 ) Repeat the process for any additional adjustments.<br />
5 ) Press HOME MENU to exit the menu after all adjustments are compl<strong>et</strong>e.<br />
Note: Res<strong>et</strong> r<strong>et</strong>urns all s<strong>et</strong>tings to the factory <strong>de</strong>faults.<br />
58<br />
En
Additional Picture and Sound Adjustment Options<br />
04<br />
4.3 Assign Advanced Picture Functions<br />
Your flat panel TV provi<strong>de</strong>s various advanced functions for optimizing the picture quality that go beyond the basic<br />
adjustments explained earlier in this manual. This section explores the value offered through <strong>Pioneer</strong>’s<br />
PureCinema High Definition (HD) support, top quality blacks, b<strong>et</strong>ter balanced whites, and overall color<br />
improvements.<br />
English<br />
4.3.1 Adjust for Screen Masking (black bars on si<strong>de</strong>s)<br />
Screen Masks fill areas on both si<strong>de</strong>s of a picture. Some content fails to fill the screen so bars appear on each<br />
si<strong>de</strong> of the picture. This section explains how to adjust screen masking.<br />
D<strong>et</strong>ect Masks<br />
Some HD broadcasts transmit in 4:3 content with si<strong>de</strong> masks. Si<strong>de</strong> masks are black bars that appear on the<br />
picture’s left and right si<strong>de</strong>s. If the flat panel TV’s Screen Size is s<strong>et</strong> to Natural during the Auto Size process, gray<br />
bars replace the black bars. When the panel is s<strong>et</strong> to Wi<strong>de</strong>-Zoom, the bars are hid<strong>de</strong>n. These responses reduce<br />
after-image concerns.<br />
To allow the panel to d<strong>et</strong>ect si<strong>de</strong> masks, follow the steps below.<br />
1 ) Access the Option through the S<strong>et</strong>up.<br />
2 ) Select Si<strong>de</strong> Mask from the Option menu.<br />
3 ) Select D<strong>et</strong>ection from the submenu.<br />
4 ) Select Mo<strong>de</strong> 1 or Mo<strong>de</strong> 2 to activate Si<strong>de</strong> Mask D<strong>et</strong>ection.<br />
Mo<strong>de</strong> 1 d<strong>et</strong>ects only black si<strong>de</strong> masks and Mo<strong>de</strong> 2 d<strong>et</strong>ects both black and illustrated si<strong>de</strong> masks. Select Off<br />
to <strong>de</strong>activate this function.<br />
5 ) Press HOME MENU to exit the menu.<br />
6 ) Confirm that the word “AUTO” appears in the InfoBanner.<br />
Vi<strong>de</strong>o signals can affect the Si<strong>de</strong> Mask D<strong>et</strong>ection function differently. For High Definition broadcasts, if Si<strong>de</strong> Mask<br />
D<strong>et</strong>ection is on, the panel automatically d<strong>et</strong>ects images containing si<strong>de</strong> masks and shows the picture in full<br />
screen. Cycle the screen size to select Auto for vi<strong>de</strong>o signals without aspect ratio information.<br />
Vi<strong>de</strong>o content also can affect the Si<strong>de</strong> Mask D<strong>et</strong>ection function. If a d<strong>et</strong>ection error occurs when trying to watch<br />
HD content, manually change the screen size to the proper s<strong>et</strong>ting for the content.<br />
HD Wi<strong>de</strong> Mo<strong>de</strong><br />
The HD Wi<strong>de</strong> Mo<strong>de</strong> allows selecting the display mo<strong>de</strong> (WIDE 1 or WIDE 2) when d<strong>et</strong>ecting si<strong>de</strong> masks that appear<br />
in a 4:3 image. This option is available when the Auto Size menu is s<strong>et</strong> to Wi<strong>de</strong>-Zoom and Si<strong>de</strong> Mask D<strong>et</strong>ection to<br />
Mo<strong>de</strong> 1 or Mo<strong>de</strong> 2. To allow the HD Wi<strong>de</strong> Mo<strong>de</strong>, follow the steps below.<br />
1 ) Access the Option through the S<strong>et</strong>up.<br />
2 ) Select Si<strong>de</strong> Mask from the Option menu.<br />
3 ) Select HD Wi<strong>de</strong> Mo<strong>de</strong> from the submenu.<br />
4 ) Select Mo<strong>de</strong> 1 or Mo<strong>de</strong> 2 to activate HD Wi<strong>de</strong> Mo<strong>de</strong>.<br />
• Mo<strong>de</strong> 1: screen mo<strong>de</strong> s<strong>et</strong>s to WIDE 1 when d<strong>et</strong>ecting si<strong>de</strong> masks.<br />
• Mo<strong>de</strong> 2: screen mo<strong>de</strong> s<strong>et</strong>s to WIDE 2 when d<strong>et</strong>ecting si<strong>de</strong> masks.<br />
5 ) Press HOME MENU to exit the menu.<br />
59<br />
En
04 Additional Picture and Sound Adjustment Options<br />
Lighten Si<strong>de</strong> Masks<br />
If content appears with bars (si<strong>de</strong> masks) on each si<strong>de</strong> of a picture when the screen size is 4:3 and Si<strong>de</strong> Mask<br />
D<strong>et</strong>ection is s<strong>et</strong> to Mo<strong>de</strong> 1 or Mo<strong>de</strong> 2, the bars automatically change from black to gray. However, the gray is fairly<br />
dark. To change the bars to a lighter sha<strong>de</strong> of gray, follow the steps below.<br />
1 ) Access the Option through the S<strong>et</strong>up.<br />
2 ) Select Si<strong>de</strong> Mask from the Option menu.<br />
3 ) Select Brightness Sync. from the submenu.<br />
4 ) Select the <strong>de</strong>sired param<strong>et</strong>er.<br />
Fixed<br />
Auto<br />
Param<strong>et</strong>er<br />
Description<br />
s<strong>et</strong>s the same brightness for gray si<strong>de</strong> masks<br />
adjusts the si<strong>de</strong> mask brightness according to the<br />
brightness of screen images<br />
5 ) Press HOME MENU to exit the menu.<br />
4.3.2 Select a PureCinema Level for High Quality Image<br />
<strong>Pioneer</strong>’s PureCinema automatically d<strong>et</strong>ects and analyses a film-based source (originally enco<strong>de</strong>d at 24 frames/<br />
second) then recreates each still film frame for HD picture quality. The function supports both film and text<br />
material.<br />
To s<strong>et</strong> the PureCinema level for your HD material, follow the steps below.<br />
1 ) Access the Picture through the S<strong>et</strong>up.<br />
2 ) Select PureCinema from the submenu.<br />
3 ) Select Film Mo<strong>de</strong> or Text Optimization <strong>de</strong>pending on the material.<br />
4 ) Select the <strong>de</strong>sired param<strong>et</strong>er.<br />
Mo<strong>de</strong> Param<strong>et</strong>er Description<br />
Film Mo<strong>de</strong> Off <strong>de</strong>activates PureCinema<br />
Standard (not available for<br />
input signals 480p, 720p @60<br />
Hz, or 1080p @60 Hz)<br />
Smooth (not available for input<br />
signals 1080p @60 Hz)<br />
Advance (not available for input<br />
signals 1080p @60 Hz)<br />
automatically d<strong>et</strong>ects recor<strong>de</strong>d<br />
image data when displaying<br />
DVD or high-<strong>de</strong>finition images<br />
(e.g., movies) having 24 frames<br />
per second for smooth and vivid<br />
playback<br />
produces smoother and more<br />
vivid moving images<br />
converts theatre-quality images<br />
to 72 Hz when displaying DVD<br />
images (e.g., movies) having 24<br />
frames per second for smooth<br />
and vivid playback<br />
Text Off <strong>de</strong>activates text optimization<br />
Optimization On<br />
improves subtitle display<br />
quality<br />
5 ) Press HOME MENU to exit the menu.<br />
60<br />
En<br />
Note: Activating the Game Control Pref s<strong>et</strong>ting un<strong>de</strong>r the Option menu disables the PureCinema s<strong>et</strong>ting.
Additional Picture and Sound Adjustment Options<br />
04<br />
4.4 View in Multi-Screen<br />
The flat panel TV can show multiple screens at the same time; two-screen or picture-in-picture. The pictures may<br />
be reversed (in 2-screen and P-in-P) or moved to various locations on the screen (P-in-P).<br />
2-Screen<br />
Picture-in-Picture (P-in-P)<br />
English<br />
4.4.1 Split/Swap/Shift the Screen<br />
To split the screen so that two channels appear, press the SPLIT button on the remote control. Each press of the<br />
button cycles the screen through two-screen, picture-in-picture, and single-screen views.<br />
To switch the images b<strong>et</strong>ween screen si<strong>de</strong>s/locations, press the SWAP button.<br />
To move the Picture-In-Picture (P-in-P) small image counter-clockwise, press the SHIFT button.<br />
61<br />
En
04 Additional Picture and Sound Adjustment Options<br />
.<br />
Press SPLIT to cycle through the<br />
different multi-screen views.<br />
Press SWAP to switch the position<br />
of the two screens.<br />
Press SHIFT to move the position of<br />
the small screen counter-clockwise.<br />
The multi-screen function is unavailable when viewing source from a single input or from two external input<br />
sources.<br />
Warning: Displaying pictures in multi-screen mo<strong>de</strong><br />
for an exten<strong>de</strong>d period may cause an after-image.<br />
To r<strong>et</strong>urn to a single picture, press EXIT.<br />
Another option is to select a multi-screen mo<strong>de</strong> from the TOOLS Menu. To select a multi-screen mo<strong>de</strong>, follow the<br />
steps below.<br />
1 ) Press TOOLS.<br />
The TOOLS Menu screen appears.<br />
2 ) Select Split, Swap or Shift from the menu.<br />
Use the arrow buttons to highlight an option (then press ENTER if you select Swap).<br />
3 ) Select a mo<strong>de</strong>.<br />
Select Off, 2-screen or P-in-P for the Split mo<strong>de</strong>. The selected mo<strong>de</strong> is displayed in the center of the TOOLS<br />
Menu.<br />
4.5 Freeze the Picture<br />
During fast-action sequences or d<strong>et</strong>ailed pictures, try capturing the image with the FREEZE option. FREEZE<br />
allows you to b<strong>et</strong>ter un<strong>de</strong>rstand the action or picture d<strong>et</strong>ails if <strong>de</strong>sired. To freeze a picture from a TV broadcast or<br />
movie, follow the steps below.<br />
1 ) Press FREEZE to create a still image picture (copy)<br />
of the currently showing image.<br />
The copy appears to the right of the still-moving<br />
vi<strong>de</strong>o sequence thus splitting the screen.<br />
2 ) Press FREEZE again to release the image.<br />
The frozen image disappears, r<strong>et</strong>urning the picture<br />
to a single screen with the vi<strong>de</strong>o sequence still in<br />
progress.<br />
• With the screen split, an image cannot be frozen.<br />
A warning message appears if you attempt to use this function when there is already a frozen image on<br />
screen. If an image is left frozen on the screen, the panel automatically releases the image after five minutes.<br />
Note: Using FREEZE for an exten<strong>de</strong>d period may cause an after-image.<br />
62<br />
En
Additional Picture and Sound Adjustment Options<br />
04<br />
4.6 Use the Banner Feature<br />
When tuning in a TV channel or an input signal<br />
changes, any available information appears on<br />
the screen if the signal carries information<br />
about the program (See InfoBanner below).<br />
Pressing DISPLAY causes the InfoBanner<br />
(additional) to appear. Press EXIT or DISPLAY<br />
again to hi<strong>de</strong> the banner.<br />
English<br />
InfoBanner<br />
D00001.000 ABCDEFGH XXXXXXXXXXXXXXXXXXXXXXXXXXXXXX STEREO 9:30AM<br />
1 2 3<br />
4 5 6<br />
InfoBanner (additional)<br />
D00001.000 ABCDE XXXXXXXXXXXXXXXXXXXXXXXXXXXXX STEREO<br />
7:07PM-8:08PM<br />
PRT_10<br />
TV<br />
PG<br />
9:30AM<br />
V HD<br />
7 8 9 1011<br />
12<br />
1 -Broadcast signal (Digital/Analog)<br />
2 -Channel number<br />
3 -Station name<br />
4 -Program title<br />
5 -Sound multiplex information<br />
6 -Current time<br />
7 -Program time schedule<br />
8 -Parental Control information<br />
9 -Parental icon<br />
10 -Parental name<br />
11 -Signal information (HD/SD)<br />
12 -Favorite icon<br />
A separate banner also appears at the bottom of the screen showing the AV Selection mo<strong>de</strong> (bottom left) and<br />
screen size (bottom right).<br />
The above information is only appears if it is inclu<strong>de</strong>d in the broadcast signal. During multi-screen mo<strong>de</strong>, the<br />
banner appears in both main and sub screens.<br />
63<br />
En
04 Additional Picture and Sound Adjustment Options<br />
4.7 Select Alternatives for/to Sound<br />
There are four sound alternatives for your flat panel TV; CC, MTS, SAP, and Sound Effect. This section <strong>de</strong>fines each<br />
of these alternatives then explains how/when to use.<br />
4.7.1 Activate Closed Captioning (CC)<br />
Your flat panel TV is equipped with an internal closed caption (CC) <strong>de</strong>co<strong>de</strong>r. CC allows conversations, narration,<br />
and sound effects in TV programs and home vi<strong>de</strong>os to appear as subtitles on the screen. For digital channels,<br />
some param<strong>et</strong>ers can be changed such as the text font and color. However, not all programs/vi<strong>de</strong>os offer closed<br />
caption. Please look for the “ “ symbol to confirm that the channel or program provi<strong>de</strong>s closed captioning.<br />
To activate closed captioning when available, follow the steps below.<br />
1 ) Access the System S<strong>et</strong>up through the S<strong>et</strong>up.<br />
2 ) Select Closed Captions from the System S<strong>et</strong>up menu.<br />
3 ) Select Status from the submenu.<br />
4 ) Select an option.<br />
Param<strong>et</strong>er<br />
Off<br />
On<br />
On If Mute<br />
Description<br />
does not show closed captioning (<strong>de</strong>fault)<br />
shows closed captioning when available<br />
shows closed captions only while sound is muted<br />
5 ) Press HOME MENU to exit the menu.<br />
Types of Closed Caption<br />
Broadcast TV offers different types of closed captioning. Your flat panel TV provi<strong>de</strong>s support for the recognized<br />
types on Analog programming as well as Digital signals that carry analog closed captions.<br />
• CC 1, CC 2, CC 3, or CC 4: provi<strong>de</strong>s subtitles with a full view of the picture<br />
• Text 1, Text 2, Text 3, or Text 4: superimposes other information (e.g. weather) that is in<strong>de</strong>pen<strong>de</strong>nt of the TV<br />
program in progress<br />
To change the closed caption type from the <strong>de</strong>fault CC 1, follow the steps below.<br />
1 ) Access the System S<strong>et</strong>up through the S<strong>et</strong>up.<br />
2 ) Select Closed Captions from the System S<strong>et</strong>up menu.<br />
3 ) Select Analog S<strong>et</strong>tings from the submenu.<br />
4 ) Select the <strong>de</strong>sired closed caption.<br />
Status : Off<br />
Analog S<strong>et</strong>tings : CC 1<br />
Digital S<strong>et</strong>tings<br />
5 ) Press HOME MENU to exit the menu.<br />
64<br />
En
Additional Picture and Sound Adjustment Options<br />
04<br />
Closed Caption for Digital Programs<br />
There are six different closed caption options for digital programming, called Service levels. The Primary Caption<br />
Service is on Service 1 and the Secondary Language Service is on Service 2. More information about these<br />
offerings is found later in this chapter.<br />
To change the digital closed caption from the <strong>de</strong>fault Service 1, follow the steps below.<br />
1 ) Access the System S<strong>et</strong>up through the S<strong>et</strong>up.<br />
2 ) Select Closed Captions from the System S<strong>et</strong>up menu.<br />
3 ) Select Digital S<strong>et</strong>tings from the submenu.<br />
4 ) Select Digital Service.<br />
5 ) Select the <strong>de</strong>sired closed caption service level (/).<br />
English<br />
Digital S<strong>et</strong>tings<br />
Digital Service : Service 1<br />
Font Size : Auto<br />
Font : Auto<br />
Font Color : Auto<br />
Font Opacity : Auto<br />
Background Color : Auto<br />
Background Opacity : Auto<br />
6 ) Press HOME MENU to exit the menu.<br />
To change the appearance of closed captioning on a digital program, follow the steps below.<br />
1 ) Access the System S<strong>et</strong>up through the S<strong>et</strong>up.<br />
2 ) Select Closed Captions from the System S<strong>et</strong>up menu.<br />
3 ) Select Digital S<strong>et</strong>tings from the submenu.<br />
4 ) Select an option to change.<br />
5 ) Select the <strong>de</strong>sired param<strong>et</strong>er for that option.<br />
The <strong>de</strong>fault param<strong>et</strong>er for each option is Auto.<br />
Option<br />
Description<br />
Font Size<br />
Auto, Large, Standard, Small<br />
Font 1 Auto, Font 1, Font 2, Font 3, Font 4, Font 5, Font 6,<br />
Font 7<br />
Font Color<br />
Font Opacity<br />
Background Color<br />
Background Opacity<br />
Auto, Black, White, Red, Green, Blue, Yellow,<br />
Magenta, Cyan<br />
Auto, Solid, Transparent, Translucent, Flashing<br />
Auto, Black, White, Red, Green, Blue, Yellow,<br />
Magenta, Cyan<br />
Auto, Solid, Transparent, Translucent<br />
1 Font 1 (monospaced with serifs)/ Font 2 (proportionally spaced with serifs)/ Font 3<br />
(monospaced without serifs)/ Font 4 (proportionally spaced without serifs)/ Font 5 (casual<br />
font)/ Font 6 (cursive font)/ Font 7 (small capitals font)<br />
6 ) Press HOME MENU to exit the menu.<br />
65<br />
En
04 Additional Picture and Sound Adjustment Options<br />
4.7.2 Switch Languages Using MTS<br />
Multi-channel Television Sound (MTS) allows switching the audible<br />
language if it is available for that program. Available languages differ<br />
<strong>de</strong>pending on the current broadcast.<br />
When watching a digital TV program that provi<strong>de</strong>s multi language<br />
services, follow the steps below.<br />
1 ) Press TOOLS on the remote control.<br />
2 ) Select MTS from the TOOLS Menu.<br />
3 ) Select English, Français or Español.<br />
A digital TV program without sound or language information causes “N/A” to appear on the screen. For languages<br />
other than English, French, or Spanish, the word “Others” appears instead. If the selected language is available<br />
when the channel or program is changed, that language is heard.<br />
4.7.3 Select SAP<br />
When watching TV programs on the VHF/UHF frequencies or from analog cable TV channels, the TOOLS button<br />
can activate Stereo Sound and/or Secondary Audio Programs (SAP) if available.<br />
To select Stereo/SAP options, follow the steps below.<br />
1 ) Press TOOLS.<br />
2 ) Select MTS from the TOOLS Menu.<br />
3 ) Select STEREO, SAP or MONO.<br />
The chart below breaks down the Stereo/SAP options.<br />
STEREO mo<strong>de</strong> SAP mo<strong>de</strong> MONO mo<strong>de</strong><br />
STEREO SAP MONO<br />
STEREO mo<strong>de</strong> SAP mo<strong>de</strong> MONO mo<strong>de</strong><br />
STEREO SAP MONO<br />
STEREO 9:30AM STEREO (SAP) 9:30AM MONO (SAP) 9:30AM MONO 9:30AM<br />
In STEREO mo<strong>de</strong> In STEREO mo<strong>de</strong> In STEREO mo<strong>de</strong> In STEREO mo<strong>de</strong><br />
STEREO 9:30AM SAP (STEREO) 9:30AM SAP (MAIN) 9:30AM MAIN 9:30AM<br />
In SAP mo<strong>de</strong> In SAP mo<strong>de</strong> In SAP mo<strong>de</strong> In SAP mo<strong>de</strong><br />
MONO 9:30AM MONO (SAP) 9:30AM MONO (SAP) 9:30AM MONO 9:30AM<br />
In MONO mo<strong>de</strong> In MONO mo<strong>de</strong> In MONO mo<strong>de</strong> In MONO mo<strong>de</strong><br />
STEREO signals STEREO + SAP MONO + SAP MONO signals<br />
66<br />
En
Additional Picture and Sound Adjustment Options<br />
04<br />
When stereo sound is difficult to hear, manually switch to MONO for clearer sound. The panel’s sound remains<br />
in mono even if the system receives a stereo broadcast. Reselect STEREO to hear broadcasts in stereo where<br />
available.<br />
Selecting MTS while the input source is INPUT 1 to INPUT 7 or a PC does not change the type of sound. In this<br />
case, the vi<strong>de</strong>o source d<strong>et</strong>ermines the sound.<br />
English<br />
4.7.4 Apply Sound Effect S<strong>et</strong>tings<br />
Your flat panel TV offers four sound effects: SRS FOCUS, SRS, SRS TruBass and SRS Definition.<br />
• SRS FOCUS TM moves sound source direction vertically and makes sound and voice clearly audible<br />
• SRS ® effortlessly produces a three-dimensional sound field<br />
• SRS TruBass ® produces a clear, rich bass tone<br />
• SRS Definition ® improves midrange quality and clarifies voice and instrument sound<br />
To activate one or more of the sound effects, follow the directions below.<br />
1 ) Access the Sound through the S<strong>et</strong>up.<br />
2 ) Select Sound Effect from the Sound menu.<br />
3 ) Select a sound effect option.<br />
(SRS FOCUS, SRS, SRS TruBass, SRS Definition)<br />
4 ) Select Low (mo<strong>de</strong>rate), Mid (standard), High (enhanced) or Off for that option.<br />
5 ) Press HOME MENU to exit the menu.<br />
Note: How a Sound Effect changes the Audio <strong>de</strong>pends on the signal.<br />
(SRS WOW HD TM ) indicates that SRS FOCUS, SRS, SRS TruBass and SRS Definition are on.<br />
4.7.5 Use Auto Volume Control (AVC)<br />
Auto Volume Control, or AVC, reduces sud<strong>de</strong>n volume change and compensates source sound level.<br />
To select this option, follow the procedure below.<br />
1 ) Access the Sound through the S<strong>et</strong>up.<br />
2 ) Select AVC from the Sound menu.<br />
3 ) Select On (or Off ).<br />
4 ) Press HOME MENU to exit the menu.<br />
4.8 Manage the Power<br />
Your flat panel TV is energy efficient but inclu<strong>de</strong>s functions to save additional power. In an earlier section entitled<br />
“3.6 Smart Starts for New Owners”, you were told how to activate the Energy Save feature. This section provi<strong>de</strong>s<br />
more advanced functions to save power and to extend the panel life.<br />
AV/PC Source - Picture Off<br />
To save energy and extend the life of your flat panel TV, have the screen turn Off. To <strong>de</strong>activate the screen, follow<br />
the steps below.<br />
1 ) Press TOOLS on the remote control.<br />
2 ) Select Picture Off from the TOOLS Menu.<br />
3 ) Press ENTER.<br />
The screen display turns Off.<br />
To restore the screen display, press any buttons other than VOL +/– and MUTING.<br />
Note: The Picture Off s<strong>et</strong>ting is not memorized by the system.<br />
67<br />
En
04 Additional Picture and Sound Adjustment Options<br />
AV Source - No Signal<br />
To save energy and extend the life of your flat panel TV, the panel can enter Standby automatically if the AV source<br />
signal fails for 15 consecutive minutes. At five minutes before and at every minute after that, a warning message<br />
appears on the screen. When the final minute elapses, the panel switches to Standby.<br />
To have the panel switch to Standby when an AV source signal fails, follow the steps below.<br />
1 ) Access the Power Control through the S<strong>et</strong>up.<br />
2 ) Select No Signal off from the Power Control menu.<br />
3 ) Select Enable to activate the AV Signal off power function.<br />
4 ) Press HOME MENU to exit the menu.<br />
Note: The flat panel TV may switch to Standby when there is noise (signal interference) at the end of a broadcast<br />
schedule (channel goes off-air).<br />
AV Source - Non-Operational<br />
To save energy and extend the life of your flat panel TV, the panel can enter Standby automatically if there are no<br />
commands from the AV source for three consecutive hours. At five minutes before and at every minute after that,<br />
a warning message appears on the screen. When the final minute elapses, the panel switches to Standby.<br />
For the panel to enter Standby automatically when there are no commands from the AV source, follow the steps<br />
below.<br />
1 ) Access the Power Control through the S<strong>et</strong>up.<br />
2 ) Select No Operation off from the Power Control menu.<br />
3 ) Select Enable from the No Operation off menu.<br />
4 ) Press HOME MENU to exit the menu.<br />
PC Source -Power Management<br />
When receiving signals from a PC, the panel can enter Standby automatically if the signal fails. Follow the steps<br />
below to activate this function.<br />
1 ) Access the Power Control through the S<strong>et</strong>up.<br />
2 ) Select Power Management from the Power Control menu.<br />
3 ) Select an option from the submenu.<br />
Off<br />
On<br />
Option<br />
Description<br />
no power management (<strong>de</strong>fault)<br />
panel enters Standby when no signal is received<br />
from the PC for eight minutes; using the PC has<br />
no effect on the panel<br />
Note: Pressing the remote’s TV a or the panel’s STANDBY/ON reactivates the flat panel TV.<br />
4 ) Press HOME MENU to exit the menu.<br />
These power management options are unavailable when a PC is connected to the panel through the HDMI port/<br />
terminal.<br />
68<br />
En
Use Other Equipment With Your Flat Panel TV 05<br />
5 Use Other Equipment With Your Flat Panel<br />
TV<br />
English<br />
Although earlier sections have mentioned other equipment for playing back vi<strong>de</strong>o, this section provi<strong>de</strong>s control<br />
and operation information for specific types of equipment.<br />
5.1 Program the Remote Control to Operate Other Equipment<br />
To operate other equipment or <strong>de</strong>vices through your flat panel TV, program the panel’s remote control with the<br />
equipment’s manufacturing co<strong>de</strong>. A manufacturing co<strong>de</strong> is a series of numbers that i<strong>de</strong>ntify the type of <strong>de</strong>vice<br />
and the brand. These co<strong>de</strong>s are available in the section entitled “8.2 Manufacturer Co<strong>de</strong>s to Program into the<br />
Remote Control” in Appendix 8.2 of this manual.<br />
5.1.1 Assign a Manufacturing Co<strong>de</strong> to the Remote Control<br />
To assign a pres<strong>et</strong> Manufacturing co<strong>de</strong> to the panel’s remote control,<br />
follow the directions below. (For Manufacturing co<strong>de</strong>s, refer to “8.2<br />
Manufacturer Co<strong>de</strong>s to Program into the Remote Control”)<br />
1 ) Press SELECT to choose the <strong>de</strong>vice to program.<br />
2 ) Press EDIT and 1 at the same time.<br />
The selected mo<strong>de</strong> indicator flashes when the remote control is<br />
ready to be programmed.<br />
3 ) Use the number buttons to enter a manufacturer co<strong>de</strong>.<br />
When the indicator turns off, the co<strong>de</strong> has been programmed into<br />
the remote control.<br />
5.1.2 Issue a Library Search for a Manufacturer Co<strong>de</strong><br />
If the co<strong>de</strong> for a particular <strong>de</strong>vice is unknown, cycle through the available<br />
co<strong>de</strong>s for a similar unit then sample some functions for that co<strong>de</strong>.<br />
To find the co<strong>de</strong> that properly operates the unit, follow the steps below<br />
using different co<strong>de</strong>s to find the best match.<br />
1 ) Press SELECT to choose the <strong>de</strong>vice to program.<br />
2 ) Press EDIT and 3 at the same time.<br />
The selected mo<strong>de</strong> indicator flashes when the remote control is<br />
ready to search the co<strong>de</strong> library.<br />
3 ) Sample the co<strong>de</strong> using a SOURCE POWER, PLAY, 1 or CH+<br />
command.<br />
4 ) Use the up/down arrow (/) buttons to advance to the next co<strong>de</strong><br />
if the co<strong>de</strong> fails to control the <strong>de</strong>vice.<br />
Another option is to r<strong>et</strong>urn to the previous co<strong>de</strong> and repeat Step 3.<br />
5 ) Press ENTER to lock in the co<strong>de</strong> that properly operates the <strong>de</strong>vice.<br />
All the available buttons for the selected mo<strong>de</strong> are ad<strong>de</strong>d when the<br />
mo<strong>de</strong> indicator flashes on for one second. The remote control then<br />
r<strong>et</strong>urns to normal operation.<br />
69<br />
En
05 Use Other Equipment With Your Flat Panel TV<br />
5.1.3 Clear Ad<strong>de</strong>d Manufacturer Co<strong>de</strong>s from the Remote Control<br />
To r<strong>et</strong>urn all learned and pres<strong>et</strong> co<strong>de</strong>s to the <strong>de</strong>faults (PIONEER), follow the steps below.<br />
1 ) Press EDIT and TV at the same time.<br />
Selection can be in any mo<strong>de</strong>.<br />
2 ) Press the Yellow button.<br />
Confirm that the selected mo<strong>de</strong> indicator flashes.<br />
The remote control enters the Manufacturing Res<strong>et</strong> mo<strong>de</strong>. The res<strong>et</strong> is<br />
compl<strong>et</strong>e when the mo<strong>de</strong> indicator flashes on for one second. The<br />
remote control then r<strong>et</strong>urns to normal operation.<br />
Note: The panel’s remote control may not control or have compl<strong>et</strong>e control<br />
of some equipment listed in the tables.<br />
To exit before the res<strong>et</strong> is compl<strong>et</strong>e, press the EDIT button again. The res<strong>et</strong> is cancelled if no action is taken within<br />
60 seconds. Also, switching the Mo<strong>de</strong> during this procedure cancels the res<strong>et</strong>.<br />
5.1.4 Control a <strong>Pioneer</strong> Receiver<br />
The flat panel TV’s remote control has a bank of buttons specifically for controlling a <strong>Pioneer</strong> receiver. The active<br />
buttons, left to right, are as follows:<br />
• RECEIVER STANDBY/ON<br />
(turns the <strong>Pioneer</strong> Receiver On/Off)<br />
• RECEIVER INPUT<br />
(cycles through/selects an input)<br />
• RECEIVER VOL –<br />
(adjusts the volume lower)<br />
• RECEIVER VOL +<br />
(adjusts the volume higher)<br />
70<br />
En
Use Other Equipment With Your Flat Panel TV 05<br />
5.1.5 Control a Cable (CBL) or Satellite (SAT) System<br />
When Mo<strong>de</strong> is s<strong>et</strong> to CBL/SAT, a cable converter uses the buttons 1, 6, 7, 8, and 9 while satellite tuners use the<br />
buttons 1 to 8. However, the panel only recognizes a single system (cable or satellite) at a time.<br />
• 1 Number buttons<br />
(press to enter a channel number)<br />
• 2 SAT GUIDE<br />
(displays the satellite broadcasting gui<strong>de</strong> screen)<br />
• 3 ENTER<br />
(Enter activates the selected function)<br />
(arrows to select from SAT GUIDE or MENU<br />
screens)<br />
• 4 SAT MENU<br />
(displays the satellite broadcasting menu screen)<br />
• 5 SOURCE<br />
(turns the equipment power on and off)<br />
• 6 CH ENTER*<br />
(enters the selected channel with the direct<br />
channel selection buttons)<br />
• 7 CH RETURN*<br />
(press buttons that correspond to a channel)<br />
• 8 CH +/–<br />
(selects a higher or lower channel)<br />
• 9 RETURN<br />
(restores the immediately previous screen)<br />
1<br />
6<br />
7<br />
8<br />
English<br />
* Some cable converter manufacturers do not pres<strong>et</strong><br />
CH ENTER and CH RETURN.<br />
2<br />
3<br />
4<br />
9<br />
5<br />
71<br />
En
05 Use Other Equipment With Your Flat Panel TV<br />
5.1.6 Control a Vi<strong>de</strong>o Cass<strong>et</strong>te Recor<strong>de</strong>r (VCR)<br />
When Mo<strong>de</strong> is s<strong>et</strong> to VCR, verify that the proper Input is selected (INPUT 1 to INPUT 7) then use 1 to 8 to control<br />
the <strong>de</strong>vice.<br />
• 1 REWind<br />
(rewinds the VCR tape and allows searches)<br />
• 2 PAUSE/STILL<br />
(pauses playback and displays still images)<br />
• 3 SOURCE<br />
(turns the VCR’s power on and off)<br />
• 4 CH +/–<br />
(selects a higher or lower channel)<br />
• 5 PLAY<br />
(selects playback)<br />
• 6 FF<br />
(advances the VCR tape and allows searches)<br />
• 7 STOP<br />
(halts VCR tape transport)<br />
• 8 RECord<br />
(begins recording)<br />
1<br />
2<br />
3<br />
4<br />
5<br />
6<br />
7<br />
8<br />
72<br />
En
Use Other Equipment With Your Flat Panel TV 05<br />
5.1.7 Control a DVD Player/DVR Recor<strong>de</strong>r/BD Player<br />
When Mo<strong>de</strong> is s<strong>et</strong> to DVD/DVR, the remote control can operate DVD players, DVD recor<strong>de</strong>rs or BD players<br />
connected to the flat panel TV. Verify that the proper Input is selected for the <strong>de</strong>vice then use 1 to 14 to control it.<br />
Note: Equipment from other manufacturers (DVD players, DVD recor<strong>de</strong>rs, BD players, and HD-DVD players) can<br />
also be operated using the remote control if the remote is pres<strong>et</strong> for the <strong>de</strong>vice(s).<br />
English<br />
• 1 DVD TOP MENU<br />
(displays the top menu on the DVD)<br />
• 2 ENTER<br />
(Enter activates the selected function)<br />
(arrows to select from SAT GUIDE or MENU<br />
screens)<br />
• 3 DVD MENU<br />
(displays the DVD menu)<br />
• 4 Red/Green/Blue/Yellow (BD only)<br />
(Controls a BD-J application)<br />
• 5 REVERSE SCAN/CHAPTER SEARCH<br />
(press once quickly to go to beginning of current<br />
chapter; press again to go back to the beginning of<br />
the previous chapter; continue pressing to go<br />
backward)<br />
• 6 PAUSE/STILL<br />
(Pauses playback and displays still image)<br />
• 7 SOURCE<br />
(turns the equipment power on or off)<br />
• 8 CH +/– (DVD Recor<strong>de</strong>r only)<br />
(selects a higher or lower channel)<br />
• 9 TOOLS<br />
(assigns the co<strong>de</strong> for a <strong>Pioneer</strong> BD player)<br />
• 10 RETURN<br />
(restores the immediately previous screen)<br />
• 11 PLAY<br />
(selects playback)<br />
• 12 FORWARD SCAN/CHAPTER SEARCH<br />
(press once quickly to go to beginning of next<br />
chapter; press again to advance to beginning of<br />
next chapter; continue pressing for fast forward)<br />
• 13 STOP<br />
(halts DVD playback, some DVD players/recor<strong>de</strong>rs<br />
open the disc tray if this button is pressed twice)<br />
• 14 RECord (DVD Recor<strong>de</strong>r only)<br />
(begins recording)<br />
13 & 14 STOP RECord (DVD Recor<strong>de</strong>r only)<br />
(press and hold then press to stop recording -<br />
applies to <strong>Pioneer</strong> DVD recor<strong>de</strong>rs only)<br />
1<br />
2<br />
3<br />
4<br />
5<br />
6<br />
7<br />
8<br />
9<br />
10<br />
11<br />
12<br />
13<br />
14<br />
73<br />
En
05 Use Other Equipment With Your Flat Panel TV<br />
5.2 Use HDMI Inputs<br />
High Definition Multimedia Interface (HDMI) is a communication m<strong>et</strong>hod commonly used by digital and/or<br />
high <strong>de</strong>finition equipment. Your flat panel TV’s INPUT 4, INPUT 5, INPUT 6, INPUT 7 are HDMI terminals for<br />
incoming digital vi<strong>de</strong>o and audio signals. The flat panel TV supports HDMI Control functions so that when a piece<br />
of equipment is connected to the panel, it can control the equipment. To use an HDMI terminal, specify the types<br />
of vi<strong>de</strong>o and audio signals being sent from the connected equipment. For the signal types, see the operating<br />
manual(s) that came with the equipment.<br />
One of the benefits of using your flat panel TV to control other equipment is the support of Deep Color. Deep Color<br />
is the color <strong>de</strong>pth that <strong>de</strong>scribes the number of bits used to represent the color of a single pixel in a bitmapped<br />
image. Besi<strong>de</strong>s the conventional RGB/YCbCr16bit/20bit/24bit signals, the flat panel TV also supports RGB/<br />
YCbCr30bit/36bit signals. This enables finer color reproduction when a <strong>de</strong>vice that supports Deep Color signals<br />
(HDMI1.3 Deep Color) is connected to the panel. The color <strong>de</strong>pth appears on the InfoBanner if a program<br />
supports Deep Color.<br />
The flat panel TV supports the following Vi<strong>de</strong>o signals:<br />
Supported Vi<strong>de</strong>o Signals<br />
• 1920 x 1080p@60 Hz<br />
• 1920 x 1080p@24 Hz<br />
• 1920 x 1080i@59.94 Hz/60 Hz<br />
• 1280 x 720p@59.94 Hz/60 Hz<br />
• 720 x 480p@59.94 Hz/60 Hz<br />
• 720 (1440) x 480i@59.94 Hz/60 Hz<br />
Supported PC Signals<br />
• 1280 x 1024 (SXGA) 60 Hz<br />
• 1360 x 768 (Wi<strong>de</strong> - XGA) 60 Hz<br />
• 1024 x 768 (XGA) 60 Hz<br />
• 800 x 600 (SVGA) 60 Hz<br />
• 640 x 480 (VGA) 60 Hz<br />
Note: It may take a short period for the image to appear on the other equipment, <strong>de</strong>pending on the type of <strong>de</strong>vice.<br />
The flat panel TV supports the following Audio signals:<br />
• Linear PCM (STEREO 2ch)<br />
• Sampling frequency: 32 kHz, 44.1 kHz, 48 kHz<br />
When connecting a PC to one of the panel’s HDMI inputs, use an HDMI-compliant PC or vi<strong>de</strong>o card. Using DVI<br />
output from the PC to the flat panel TV may cause the sound or picture to fail or seem distorted. If a DVI output is<br />
your only option then contact the PC manufacturer for assistance.<br />
5.2.1 Specify the HDMI Input Type<br />
To select a signal type, follow the steps below.<br />
1 ) Select the Input for the connected equipment.<br />
Press the INPUT button (remote control or panel) until the correct input is showing (INPUT 4, INPUT 5,<br />
INPUT 6, or INPUT 7).<br />
Note: For INPUT 4 and INPUT 5, add Audio cables to support analog signals.<br />
2 ) Access the Option through the S<strong>et</strong>up.<br />
3 ) Select HDMI Input from the Option menu.<br />
4 ) Select Signal Type from the submenu.<br />
5 ) Select the appropriate option.<br />
Vi<strong>de</strong>o<br />
PC<br />
Option<br />
Description<br />
use except when a PC is connected (<strong>de</strong>fault)<br />
when a PC is connected to HDMI input terminal<br />
74<br />
En<br />
6 ) Press HOME MENU to exit the menu.
Use Other Equipment With Your Flat Panel TV 05<br />
In Vi<strong>de</strong>o mo<strong>de</strong>, the image is over-scanned (enlarged) but the panel automatically switches to PC when receiving<br />
computer signals. In PC mo<strong>de</strong>, the image displays in full size for optimum image quality.<br />
Vi<strong>de</strong>o (over-scan)<br />
PC (un<strong>de</strong>r-scan)<br />
English<br />
5.2.2 Specify a Digital HDMI Signal Type<br />
For the necessary digital vi<strong>de</strong>o signal type, check the operating manual that came with the other equipment.<br />
To assign the type of digital signal, follow the steps below.<br />
1 ) Access the Option through the S<strong>et</strong>up.<br />
2 ) Select HDMI Input from the Option menu.<br />
3 ) Select Vi<strong>de</strong>o from the submenu.<br />
4 ) Select the type of digital vi<strong>de</strong>o signal recommen<strong>de</strong>d for the attached <strong>de</strong>vice.<br />
Auto<br />
Color-1<br />
Color-2<br />
Color-3<br />
Color-4<br />
Type<br />
Description<br />
automatically i<strong>de</strong>ntifies input digital signals<br />
(<strong>de</strong>fault)<br />
Digital Component Vi<strong>de</strong>o signals (4:2:2) locked<br />
Digital Component Vi<strong>de</strong>o signals (4:4:4) locked<br />
Digital RGB signals (16 to 235) locked<br />
Digital RGB signals (0 to 255) locked<br />
5 ) Press HOME MENU to exit the menu.<br />
If an image fails to appear, specify another digital vi<strong>de</strong>o signal type. Type param<strong>et</strong>ers other than Auto need to be<br />
checked for natural colorings.<br />
5.2.3 Specify an Audio HDMI Signal Type<br />
For the necessary audio signal type, check the operating manual that came with the other equipment. When<br />
using INPUT 4 or INPUT 5 for HDMI, select the terminal for the <strong>de</strong>sired input source.<br />
To specify the audio type, follow the steps below.<br />
1 ) Access the Option through the S<strong>et</strong>up.<br />
2 ) Select HDMI Input from the Option menu.<br />
3 ) Select Audio from the submenu.<br />
4 ) Select the type of audio signal recommen<strong>de</strong>d for the attached <strong>de</strong>vice.<br />
Auto<br />
Digital<br />
Analog<br />
Type<br />
Description<br />
automatically i<strong>de</strong>ntifies input audio signals (<strong>de</strong>fault)<br />
accepts digital audio signals<br />
accepts analog audio signals<br />
5 ) Press HOME MENU to exit the menu.<br />
75<br />
En
05 Use Other Equipment With Your Flat Panel TV<br />
If there is no sound, specify another audio signal type. Depending on the type of equipment, sound output may<br />
require analog audio cables in addition to the HDMI connection(s).<br />
Note: When signals come through the HDMI terminals, no signals are output from the DIGITAL OUT terminal if<br />
they are copy guar<strong>de</strong>d.<br />
5.3 Control Equipment with the Panel’s Remote Through HDMI<br />
Your flat panel TV’s remote can control other equipment such as a recor<strong>de</strong>r, player, or AV system through the HDMI<br />
Control functions. The HDMI Control functions inclu<strong>de</strong> playback of content using an on-screen control panel.<br />
However, not all <strong>de</strong>vice operations may be available through HDMI control. For d<strong>et</strong>ails, see the charts below.<br />
Control Function<br />
Playback of<br />
content<br />
Controlled<br />
Equipment<br />
Recor<strong>de</strong>r<br />
Player<br />
On-screen control Recor<strong>de</strong>r<br />
Player<br />
Display Language<br />
S<strong>et</strong>up<br />
Recor<strong>de</strong>r<br />
Player<br />
AV system control AV system<br />
Power ON<br />
Power OFF<br />
Recor<strong>de</strong>r<br />
Player<br />
Recor<strong>de</strong>r<br />
Player<br />
AV system<br />
Function Description<br />
Pressing PLAY on a connected <strong>de</strong>vice<br />
automatically selects the source and<br />
begins playback.<br />
Recor<strong>de</strong>r/player operation can be<br />
controlled on-screen or with the<br />
panel’s remote (play, stop, fast<br />
forward/reverse, <strong>et</strong>c.).<br />
Information on the display menu<br />
language transfers to the recor<strong>de</strong>r or<br />
player connected to the flat panel TV.<br />
For d<strong>et</strong>ails, see the operation manual<br />
that came with the recor<strong>de</strong>r or player.<br />
Receiver/amplifier operation can also<br />
be controlled with the panel’s remote,<br />
(volume, surround mo<strong>de</strong> and input<br />
selection of the HDMI terminal).<br />
The flat panel TV can be turned On<br />
when a connected recor<strong>de</strong>r(s) or<br />
player(s) is turned On and images are<br />
input to the flat panel TV.<br />
The connected <strong>de</strong>vice(s) can be<br />
turned Off when the flat panel TV is<br />
turned Off.<br />
Notes: The KURO LINK function name used on the web and in catalogs is referred to as HDMI Control in the<br />
operating instructions and on the product.<br />
Except for Power Off and Display Language S<strong>et</strong>up functions, only a single HDMI terminal may be active at<br />
a time.<br />
76<br />
En
Use Other Equipment With Your Flat Panel TV 05<br />
The flat panel TV’s remote can control a maximum of two (2) recor<strong>de</strong>rs, two (2) playback <strong>de</strong>vices, and one (1) AV<br />
system at a time.<br />
To select and use the various HDMI Control functions for a connected <strong>Pioneer</strong> AV system, recor<strong>de</strong>r, or player, use<br />
the panel’s HDMI Control menu.<br />
English<br />
To access the menu, follow the steps below.<br />
1 ) Press HOME MENU.<br />
2 ) Select HDMI Control from the main menu.<br />
Use the arrow buttons to highlight an option then press ENTER.<br />
Disc Navigator<br />
CTRL Panel(AV-SYS)<br />
Playback CTRL Panel<br />
Switch to AV Sound<br />
Note: Pressing HDMI CTRL on the remote also causes the HDMI Control menu to open.<br />
Option<br />
Disc Navigator<br />
CTRL Panel (AV-SYS)<br />
Playback CTRL Panel<br />
Switch to AV Sound/<br />
(Switch to TV Sound)<br />
Description<br />
displays a title list of connected recor<strong>de</strong>r or player<br />
displays the control panel for connected AV system<br />
displays the control panel for connected recor<strong>de</strong>r<br />
or player<br />
switches b<strong>et</strong>ween the flat panel TV screen and the<br />
connected AV system for sound output<br />
1<br />
2<br />
3<br />
4<br />
5<br />
6<br />
7<br />
Use the following buttons to control functions such as the disc<br />
navigator on a recor<strong>de</strong>r or player.<br />
• 1 VOL +/–<br />
(adjusts the volume for an AV system)<br />
• 2 MUTING<br />
(turns off the sound while the vi<strong>de</strong>o continues to play)<br />
• 3 Arrow buttons<br />
(navigates the menu screen)<br />
• 4 Color buttons (Red, Green, Blue, Yellow)<br />
(controls a BD player)<br />
• 5 TOOLS<br />
(assigns the co<strong>de</strong> for a <strong>Pioneer</strong> BD player)<br />
• 6 ENTER<br />
(activates the selected function)<br />
• 7 RETURN<br />
(r<strong>et</strong>urns to the previous menu screen)<br />
77<br />
En
05 Use Other Equipment With Your Flat Panel TV<br />
To connect a <strong>de</strong>vice for HDMI Control, follow the steps below.<br />
1 ) Turn on the flat panel TV and all other equipment.<br />
2 ) Confirm that the panel’s Input S<strong>et</strong>ting for HDMI Control S<strong>et</strong>ting options comply with directions in the<br />
operating instructions for the other <strong>de</strong>vice(s).<br />
3 ) Confirm that the other equipment is s<strong>et</strong> for HDMI Control.<br />
4 ) Check that the audio and vi<strong>de</strong>o are playing back properly from the equipment connected to the HDMI<br />
terminal(s).<br />
5 ) Turn Off the flat panel TV.<br />
6 ) Pause for a few seconds before turning the power back on.<br />
7 ) Verify that all equipment is functioning properly.<br />
To select the <strong>de</strong>vice to control via HDMI Control, follow the steps below.<br />
1 ) Access the Option through the S<strong>et</strong>up.<br />
2 ) Select HDMI Control S<strong>et</strong>ting from the Option menu.<br />
3 ) Select Input S<strong>et</strong>ting from the submenu.<br />
Input S<strong>et</strong>ting : INPUT 4<br />
Power Off Control : On<br />
Power-On Ready : On<br />
Hold Sound Status : Off<br />
Power On Test<br />
Power Off Test<br />
4 ) Select the <strong>de</strong>sired Input (INPUT 4, INPUT 5, INPUT 6, or INPUT 7).<br />
5 ) Press HOME MENU to exit the menu.<br />
If operating an HDMI supported <strong>de</strong>vice using an HDMI port other than the terminal selected in Input S<strong>et</strong>ting, the<br />
system malfunctions. When connecting to an HDMI terminal other than that selected in Input S<strong>et</strong>ting, the<br />
equipment s<strong>et</strong>tings should block HDMI Control functions. The HDMI Control menu is not selectable when the<br />
option Input S<strong>et</strong>ting un<strong>de</strong>r the HDMI Control S<strong>et</strong>ting menu is s<strong>et</strong> to Off.<br />
The control menu changes to suit the type of HDMI-compatible equipment. When adding, changing, or removing<br />
equipment from HDMI Control, refer to the sections below for installation notes and the supported commands.<br />
5.3.1 Control an AV System<br />
When adding an AV System, connect the unit b<strong>et</strong>ween the panel and any recor<strong>de</strong>rs and/or players. To function<br />
properly, an Audio/Vi<strong>de</strong>o system should support the HDMI Control functions b<strong>et</strong>ween the panel and any other<br />
connected equipment.<br />
If the AV system does not support HDMI Control but the other equipment (player/recor<strong>de</strong>r) accepts this type of<br />
control than connect the AV System through the panel’s DIGITAL OUT using an optical digital cable and AUDIO<br />
OUT using an AV cable (commercially available). The other equipment connects to the HDMI port using an HDMI<br />
compliant cable. Signals input from the HDMI are not output from DIGITAL OUT.<br />
78<br />
En
Use Other Equipment With Your Flat Panel TV 05<br />
During playback, use the remote control’s up/down arrows (/) to cycle through the surround sound options.<br />
Use the left/right arrows (/) to change the input. To resume playback, r<strong>et</strong>urn to the HDMI Control menu then<br />
select the function again.<br />
AV Systems<br />
1 Cycles the surround mo<strong>de</strong> in sequence<br />
2 Switches the input source in reverse or<strong>de</strong>r<br />
3 Switches the surround mo<strong>de</strong> in reverse or<strong>de</strong>r<br />
4 Closes the screen to r<strong>et</strong>urn to HDMI Control<br />
menu<br />
5 Lists the connected equipment<br />
(mo<strong>de</strong>l number)<br />
6 Switches the input source in sequence<br />
7 Reserved/Void<br />
1<br />
2<br />
3<br />
4<br />
HDMI Control<br />
Exit<br />
****<br />
SURROUND+<br />
INPUT-<br />
SURROUND-<br />
INPUT+<br />
5<br />
6<br />
7<br />
English<br />
5.3.2 Control a Recor<strong>de</strong>r<br />
Press ENTER to start playback or press HDMI CONTROL to r<strong>et</strong>urn to the menu. This process also applies to<br />
Players. Refer to the chart below for available commands.<br />
Recor<strong>de</strong>rs<br />
1 Skips commercials<br />
2 Fast reverse<br />
3 Stops playback<br />
4 Closes the screen to r<strong>et</strong>urn to HDMI Control<br />
menu<br />
5 Lists the connected equipment<br />
(mo<strong>de</strong>l number)<br />
6 Fast forward<br />
7 Starts playback<br />
1<br />
2<br />
3<br />
4<br />
HDMI Control<br />
Exit<br />
****<br />
5<br />
6<br />
7<br />
Note: You can also use (Play), (Stop), (Pause), (Fast Forward) and (Fast Reverse) on the remote<br />
control to conduct the same operations as the control menu buttons.<br />
5.3.3 Control a Player<br />
Press ENTER to start playback or press HDMI CONTROL to r<strong>et</strong>urn to the menu. This process also applies to<br />
Recor<strong>de</strong>rs. Refer to the chart below for available commands.<br />
Players<br />
1 Displays the DVD/Blu-ray disc menu on the<br />
player<br />
2 Fast reverse<br />
3 Stops playback<br />
4 Closes the screen to r<strong>et</strong>urn to HDMI Control<br />
menu<br />
5 Lists the connected equipment<br />
(mo<strong>de</strong>l number)<br />
6 Fast forward<br />
7 Starts playback<br />
1<br />
2<br />
3<br />
4<br />
HDMI Control<br />
****<br />
MENU<br />
Exit<br />
5<br />
6<br />
7<br />
Note: You can also use (Play), (Stop), (Pause), (Fast Forward) and (Fast Reverse) on the remote<br />
control to conduct the same operations as the control menu buttons.<br />
79<br />
En
05 Use Other Equipment With Your Flat Panel TV<br />
5.3.4 Add an AV Amp or a BD Player<br />
To add an AV amp and/or a BD Player, refer to the appropriate cabling diagram below.<br />
AV Amp & BD Player<br />
T<br />
T<br />
T<br />
T<br />
W<br />
W<br />
W<br />
W<br />
Rear view<br />
Rear view<br />
HDMI compliant<br />
cable (HDMI cable<br />
having the HDMI<br />
mark)<br />
AV cable<br />
(commercially<br />
available)<br />
Optical digital cable<br />
(commercially<br />
available)<br />
HDMI compliant<br />
cable (HDMI cable<br />
having the HDMI<br />
mark)<br />
AV cable<br />
(commercially<br />
available)<br />
Optical digital<br />
cable<br />
(commercially<br />
available)<br />
AV amp<br />
BD player<br />
AV amp<br />
BD player<br />
BD Player only<br />
T<br />
W<br />
T<br />
W<br />
Rear view<br />
HDMI compliant cable<br />
(HDMI cable having the<br />
HDMI mark)<br />
BD player<br />
80<br />
En
Use Other Equipment With Your Flat Panel TV 05<br />
5.4 Specific HDMI Control Commands<br />
When using HDMI equipment with your flat panel TV, some options inclu<strong>de</strong> when to power the panel and ways to<br />
turn other <strong>de</strong>vices or features On and Off. This section provi<strong>de</strong>s steps for commonly <strong>de</strong>sirable s<strong>et</strong>ting changes.<br />
5.4.1 Play Source Sound Using an HDMI Command<br />
When sound is coming from a <strong>Pioneer</strong> AV System through the flat panel TV, placing the panel in Standby causes<br />
the sound to stop. To have the sound continue when the flat panel TV turns On, follow the steps below.<br />
1 ) Access the Option through the S<strong>et</strong>up.<br />
2 ) Select HDMI Control S<strong>et</strong>ting from the Option menu.<br />
3 ) Select Hold Sound Status from the submenu.<br />
4 ) Select On to allow sound from an AV System to play when the panel turns On.<br />
5 ) Press HOME MENU to exit the menu.<br />
English<br />
Note: To have the sound continue when the flat panel TV turns On, confirm that the Switch to TV Sound option<br />
appears on the HDMI Control menu before turning the panel Off (see page 77).<br />
5.4.2 Turn OFF the Power With an HDMI Command<br />
The “Power Off Control” function is valid for the <strong>de</strong>vices connected to any of the panel’s HDMI ports. To power off<br />
a connected <strong>de</strong>vice when the flat panel TV is turned Off, follow the steps below.<br />
1 ) Access the Option through the S<strong>et</strong>up.<br />
2 ) Select HDMI Control S<strong>et</strong>ting from the Option menu.<br />
3 ) Select Power Off Control from the submenu.<br />
4 ) Select On to allow the panel to power off the connected equipment.<br />
5 ) Press HOME MENU to exit the menu.<br />
5.4.3 Turn ON the Power With an HDMI Command<br />
The panel ships from the factory with the Power On command activated. If this feature is turned off in error, it can<br />
be reactivated. To power on the flat panel TV automatically when a connected <strong>Pioneer</strong> recor<strong>de</strong>r or player is turned<br />
On and images are sent to the panel, follow the steps below.<br />
1 ) Access the Option through the S<strong>et</strong>up.<br />
2 ) Select HDMI Control S<strong>et</strong>ting from the Option menu.<br />
3 ) Select Power-On Ready from the submenu.<br />
4 ) Select On to have another <strong>de</strong>vice power-on the panel.<br />
5 ) Press HOME MENU to exit the menu.<br />
81<br />
En
05 Use Other Equipment With Your Flat Panel TV<br />
5.4.4 Test the Power Control (On/Off)<br />
Your flat panel TV provi<strong>de</strong>s an HDMI control option to test equipment power when it is connected to the panel’s<br />
HDMI ports and it has been properly assigned to an Input.<br />
To confirm that the Power On/Off control function is working, follow the steps below.<br />
1 ) Access the Option through the S<strong>et</strong>up.<br />
2 ) Select HDMI Control S<strong>et</strong>ting from the Option menu.<br />
3 ) Select a test option (Power On Test or Power Off Test ) from the submenu.<br />
A list containing all HDMI connected equipment appears.<br />
4 ) Select a piece of equipment from the list.<br />
5 ) Repeat this process to test other equipment from the list.<br />
6 ) Press HOME MENU to exit the menu when all testing is compl<strong>et</strong>e.<br />
If the Power On/Off Test fails, check the connection points and the s<strong>et</strong>tings.<br />
5.5 Connect a Game Console or Camcor<strong>de</strong>r<br />
Your flat panel TV supplies direct connections for a game console, camcor<strong>de</strong>r, or other Audio/Visual (AV)<br />
equipment through INPUT 3. To watch an image coming from a game console or camcor<strong>de</strong>r, press INPUT 3 on<br />
the remote control or repeatedly press INPUT on the panel to select INPUT 3. For d<strong>et</strong>ails on game console<br />
s<strong>et</strong>tings, refer to “2.5.2 Connect Your Other <strong>Pioneer</strong> Equipment” and to “4.1.4 S<strong>et</strong> the Panel to Recognize a Game<br />
Console.”<br />
Use the connection type specified by the equipment. Connect equipment only to terminals that are actually to be<br />
used.<br />
82<br />
En
Use Other Equipment With Your Flat Panel TV 05<br />
5.6 Operate the Home Media Gallery<br />
With Home Media Gallery, you can enjoy digital content such as movies, music, and photo files on your high-end<br />
flat panel TV. Play content from files stored on one or more media servers connected by a home or local area<br />
n<strong>et</strong>work (LAN) or those stored on a USB flash drive. After connecting via a broadband router or an Ethern<strong>et</strong> hub<br />
to a media server with n<strong>et</strong>work software, navigate through the digital content visible on the Home Media Gallery.<br />
The flat panel TV supports Mass Storage Class and PTP <strong>de</strong>vices through USB interface and DLNA-compatible<br />
<strong>de</strong>vices through a n<strong>et</strong>work.<br />
English<br />
DLNA CERTIFIED Audio/Vi<strong>de</strong>o/Image Player<br />
This unit complies with the DLNA N<strong>et</strong>worked Device Interoperability Gui<strong>de</strong>lines - expan<strong>de</strong>d: October 2006 (v1.5).<br />
When a PC running DLNA server software or other DLNA-compatible <strong>de</strong>vice is connected to this player, some<br />
s<strong>et</strong>ting changes of software or other <strong>de</strong>vices may be required. Please refer to the operating instructions for the<br />
software or <strong>de</strong>vice for more information.<br />
Supported File Formats<br />
The following sections show supported file formats that can be played back or displayed on the flat panel TV. These<br />
formats are applicable to n<strong>et</strong>work sources. Most are also applicable to USB sources. However, media server<br />
content protected by digital rights management such as WMDRM10 (Windows Media Digital Rights<br />
Management 10), may not play on the panel.<br />
Supported Vi<strong>de</strong>o Formats<br />
• Windows Media Vi<strong>de</strong>o 9 (WMV9): MP@ML<br />
• Windows Media Vi<strong>de</strong>o 9 (WMV9) Advanced Profile (VC-1): AP@L1, MP@ML<br />
• MPEG-2 PS: MP@ML<br />
• MPEG-2 TS: MP@ML<br />
• MPEG-1<br />
• MPEG-4 Part2 (SP/ASP): SP@L3, ASP@L5<br />
• MPEG-4 Part10 (H.264/AVC): Main Profile 3.0<br />
Supported Audio Formats<br />
• Windows Media Audio 9 (WMA9): Sampling rates; 44.1 kHz or 48 kHz<br />
• MPEG-1 Audio Layer 3 (MP3): Sampling rates; 32 kHz, 44.1 kHz or 48 kHz<br />
• Linear PCM (WAV): Sampling rates; 44.1 kHz or 48 kHz<br />
• MPEG-4 AAC: Sampling rates; 16 kHz, 32 kHz, 44.1 kHz or 48 kHz<br />
• HE-AAC: Sampling rates; 16 kHz, 32 kHz, 44.1 kHz or 48 kHz<br />
Supported Image Formats<br />
• JPEG: Resolution; up to 3680 x 2760 pixels<br />
• PNG: Resolution; up to 3680 x 2760 pixels<br />
• GIF: Resolution; up to 3680 x 2760 pixels<br />
• TIFF: Resolution; up to 1600 x 1200 pixels<br />
• BMP: Resolution; up to 3072 x 2304 pixels<br />
Supported File Extensions<br />
This product supports the playback of files with the following extensions.<br />
• Vi<strong>de</strong>o: .wmv .asf .mpg .mpeg .mpe .m2p .m4v .mp4v, .mp4, .mov<br />
• Audio: .wma .mp3 .wav .m4a .aac<br />
• Image: .jpg .jpeg .png .gif .bmp .tif .tiff<br />
Note: Even the supported format files that are listed above may or may not play properly or compl<strong>et</strong>ely, <strong>de</strong>pending<br />
on the media server, USB <strong>de</strong>vice, bit rate stream and other content characteristics, as well as other factors.<br />
83<br />
En
05 Use Other Equipment With Your Flat Panel TV<br />
Even when files have a supported file extension, some files may not play or display properly, <strong>de</strong>pending on the<br />
content or media server type.<br />
Some formats may not be supported nor displayed on Home Media Gallery as formats that individual media<br />
servers support vary. Refer to the media server manufacturer’s or other relevant websites for supported formats.<br />
Although a particular format is supported, not all content functions may operate properly. If the content fails to<br />
appear properly, contact the content producer for assistance. In addition, some supported file formats may fail to<br />
play properly when imported from an unknown USB <strong>de</strong>vice.<br />
Note: You cannot use the Home Media Gallery until dimmed elements on the menu screen turn white.<br />
Some Home Media Gallery functions, such as trick play during Fast Forward and Rewind, Time Search and<br />
Search, may not work <strong>de</strong>pending on the media server’s capability and functionality.<br />
Home Media Gallery complies with the DLNA N<strong>et</strong>worked Device Interoperability Gui<strong>de</strong>lines - expan<strong>de</strong>d:<br />
October 2006 (v1.5). If your media server supports different DLNA version(s), some Home Media Gallery<br />
function(s) and content format(s) may not be supported.<br />
<strong>Pioneer</strong> is not responsible for any malfunction of the Home Media Gallery features due to communication<br />
error/malfunctions associated with your n<strong>et</strong>work connection and/or your PC, or other connected<br />
equipment. Contact your PC manufacturer or Intern<strong>et</strong> service provi<strong>de</strong>r.<br />
Content may not play or display properly, <strong>de</strong>pending on the conditions of use or media server in use.<br />
The Home Media Gallery functions as a WMDRM10-ND (Microsoft Windows Media DRM for n<strong>et</strong>worked<br />
<strong>de</strong>vices). Content can only be navigated from the media servers that support WMDRM10-ND. Content may<br />
not play, <strong>de</strong>pending on the DRM protection level.<br />
This system may not display content from incompatible memory cards.<br />
5.6.1 N<strong>et</strong>work Connections<br />
To connect to a n<strong>et</strong>work, s<strong>et</strong> up the Home Media Gallery through the Home Media Gallery menu. Press the HMG<br />
button on the remote control to cause the menu to appear. To use the Home Media Gallery, connect to a home<br />
n<strong>et</strong>work (LAN) via an Ethern<strong>et</strong> hub or cable directly to a media server.<br />
Usable Media Servers<br />
A media server contains digital content such as movies, music, and photo files. PCs that have pre-installed media<br />
server software and recor<strong>de</strong>rs with a media server function are consi<strong>de</strong>red the media server. There are some<br />
media servers that you can choose from; for example, Windows Media Connect, Windows Media Player that has<br />
a media sharing function, and DLNA compliant servers.<br />
• Windows Media Connect 2.0<br />
Windows Media Connect runs on a 32-bit PC with Windows XP Service Pack 2 (SP2) installed.<br />
When it is already installed, you can enjoy Home Media Gallery using your PC.<br />
• Windows Media Player 11 for Windows XP<br />
Windows Media Player 11 features Media Sharing that runs on a 32-bit PC with Windows XP Service Pack 2<br />
(SP2) installed.<br />
If Windows Media Connect 2.0 is not installed in your PC, you can download Windows Media Player 11 from<br />
Microsoft’s website.<br />
• Windows Media Player 11 for Windows Vista<br />
Windows Media Player 11 is featured in 32-bit Windows Vista PCs.<br />
When selecting the most suitable media server, please visit Microsoft’s website for system requirements, known<br />
issues, installation procedures, and other updated information.<br />
84<br />
En<br />
• DLNA CERTIFIED digital media servers<br />
The server is a DLNA-certified digital media server such as PC software, PCs and other <strong>de</strong>vices installed with<br />
DLNA-certified software. When a PC running DLNA server software or other DLNA-compatible <strong>de</strong>vice is<br />
connected to this player, some s<strong>et</strong>ting changes of the software or <strong>de</strong>vice may be required. Refer to the<br />
<strong>de</strong>vice(s) operating instructions for more information.
Use Other Equipment With Your Flat Panel TV 05<br />
Connect via an Ethern<strong>et</strong> Hub<br />
If already operating one or more media servers on a home or local area n<strong>et</strong>work (LAN), connect the flat panel TV<br />
to the Ethern<strong>et</strong> (LAN) hub using a standard (“straight-through”) Ethern<strong>et</strong> (LAN) cable. See the diagram below.<br />
Note: Although the Home Media Gallery supports 10BASE-T, it is b<strong>et</strong>ter to use 100BASE-TX for improved display<br />
quality and speed.<br />
English<br />
T<br />
W<br />
T<br />
W<br />
Rear view<br />
Media server 2<br />
Ethern<strong>et</strong> hub<br />
(Router with hub function)<br />
Straight-through<br />
cable<br />
Media server 1<br />
Connect directly to a Media Server<br />
To run a PC as a media server, connect the flat panel TV directly to the PC using a twisted (“cross-over”) Ethern<strong>et</strong><br />
(LAN) cable. See the diagram below.<br />
T<br />
W<br />
T<br />
W<br />
Rear view<br />
Cross-over cable<br />
Media server 1<br />
85<br />
En
05 Use Other Equipment With Your Flat Panel TV<br />
Confirm the IP Address<br />
After making the n<strong>et</strong>work connection, follow the instructions below to confirm the IP Address before accessing<br />
the n<strong>et</strong>work. (The s<strong>et</strong>up is effective for Auto only. To perform the procedure, DHCP on your server or router must<br />
be valid. See “5.9 HMG S<strong>et</strong>up”)<br />
1 ) Press HMG on the remote control.<br />
The Home Media Gallery menu appears on screen.<br />
2 ) Select HMG S<strong>et</strong>up.<br />
Use the arrow buttons to highlight an option.<br />
3 ) Press ENTER.<br />
4 ) Select N<strong>et</strong>work S<strong>et</strong>up.<br />
5 ) Select Auto DHCP.<br />
The screen turns from “Select” mo<strong>de</strong> to “Input” mo<strong>de</strong>.<br />
6 ) Select Yes.<br />
7 ) Press RETURN.<br />
The HMG S<strong>et</strong>up screen r<strong>et</strong>urns.<br />
The IP Address is assigned.<br />
The Home Media Gallery supports Auto IP and DHCP (Dynamic Host Configuration Protocol). If the system<br />
failed to assign the IP Address or if you want to obtain different addresses, select No then enter IP Address<br />
and Subn<strong>et</strong> mask. See N<strong>et</strong>work S<strong>et</strong>up or HMG S<strong>et</strong>up to enter an address manually.<br />
For information on DHCP, refer to n<strong>et</strong>work <strong>de</strong>vice’s operating instructions.<br />
You may need to contact your service provi<strong>de</strong>r or n<strong>et</strong>work administrator when manually entering an IP Address.<br />
Some media servers block or are programmed to block access to client servers. When connecting the flat panel<br />
TV, check the media server for client server access rights.<br />
5.6.2 Connect a USB Device<br />
You can also enjoy content stored on memory cards by connecting a USB <strong>de</strong>vice to the flat panel TV. The root<br />
directory or Device List screen appears as soon as a USB flash drive or a multi-card rea<strong>de</strong>r is connected to the<br />
USB port. Another option is to connect your digital camera directly to the flat panel TV using a commercially<br />
available USB connector cable.<br />
If for any reason, the Fol<strong>de</strong>r/Content List or Device List fails to appear, follow the steps below.<br />
1 ) Press HMG.<br />
The Home Media Gallery menu appears on screen.<br />
2 ) Select USB.<br />
Use the arrow buttons to highlight an option.<br />
3 ) Press ENTER to confirm the selection.<br />
4 ) Select the <strong>de</strong>sired <strong>de</strong>vice.<br />
The USB Device screen must be displayed.<br />
5 ) Press ENTER to navigate to a fol<strong>de</strong>r or play a file/content.<br />
To r<strong>et</strong>urn to the previous screen, press RETURN.<br />
6 ) Press EXIT or HMG to exit Home Media Gallery.<br />
Notes: The flat panel TV displays the USB Device screen or root directory immediately after inserting a USB<br />
<strong>de</strong>vice. In this case, start from Step 5.<br />
When a multi-card rea<strong>de</strong>r is inserted, the USB Device screen is displayed. In this case, start from Step 4.<br />
86<br />
En
Use Other Equipment With Your Flat Panel TV 05<br />
Flat Panel TV<br />
English<br />
USB flash drive<br />
Digital Camera with USB<br />
Mass Storage Class<br />
(PTP also supported)<br />
Flash media via USB adapter (Multi-card Rea<strong>de</strong>r )<br />
Note: Do not use any USB <strong>de</strong>vices other than those specified. Using other <strong>de</strong>vices can cause a malfunction.<br />
Readable Data Format<br />
This system reads FAT16, FAT32 or NTFS.<br />
Readable Data Files<br />
Movie, music, and photo files play with the exception of Digital Rights Management (WMDRM10) protected files.<br />
Your flat panel TV supports a single USB <strong>de</strong>vice at a time. Also, the panel does not support USB hubs.<br />
This system may not be able to display modified or edited content from a PC or other equipment.<br />
Your flat panel TV supports the USB Mass Storage Class and PTP <strong>de</strong>vices.<br />
Some digital cameras may require a s<strong>et</strong>up procedure for Mass Storage Class data transfer. The s<strong>et</strong>up is done on<br />
the camera. See the operating instructions supplied with the digital camera. Depending on the type of your<br />
memory card or camera, some images may fail to display.<br />
Remove a USB Device<br />
To remove a USB <strong>de</strong>vice, exit the Home Media Gallery first then disconnect the <strong>de</strong>vice.<br />
Be sure to exit the Home Media Gallery screen before removing the USB <strong>de</strong>vice. If you remove the USB <strong>de</strong>vice<br />
while the Home Media Gallery screen is displayed, data insi<strong>de</strong> the memory may be damaged.<br />
Do not insert or remove the USB <strong>de</strong>vice immediately after the system is switched On or Off. This action may cause<br />
data insi<strong>de</strong> the memory to be damaged.<br />
<strong>Pioneer</strong> is not liable for any loss or damage to the data insi<strong>de</strong> the USB flash drive.<br />
87<br />
En
05 Use Other Equipment With Your Flat Panel TV<br />
5.7 Run the Home Media Gallery<br />
1 ) Press HMG.<br />
The Home Media Gallery menu appears on screen.<br />
2 ) Select Media Navigator, USB, HMG Playlist or HMG S<strong>et</strong>up.<br />
Use the arrow buttons to highlight an option then press ENTER.<br />
To r<strong>et</strong>urn to the previous screen, press RETURN.<br />
3 ) Press EXIT or HMG to exit Home Media Gallery.<br />
Media Navigator<br />
USB<br />
HMG Playlist<br />
HMG S<strong>et</strong>up<br />
Use the Media Navigator<br />
By selecting Media Navigator, the previously selected server menu automatically appears on the screen. When<br />
only one server is found, the system automatically connects the server. You can also use the TOOLS Menu to<br />
switch to another server or manually select a server from the Server List. The screen automatically changes to<br />
the Server List if there are no previous servers.<br />
1 ) Press HMG.<br />
The Home Media Gallery menu appears on screen.<br />
2 ) Select Media Navigator.<br />
Use the arrow buttons to highlight an option then press ENTER.<br />
A server menu appears. The file/fol<strong>de</strong>r configuration may vary <strong>de</strong>pending on the server selected.<br />
3 ) Select a <strong>de</strong>sired server from the Server List.<br />
4 ) Select the <strong>de</strong>sired fol<strong>de</strong>r to navigate or file/content to play.<br />
Movie<br />
Music<br />
Photo<br />
User Files<br />
4<br />
(Sample screen)<br />
5 ) Press ENTER.<br />
The appropriate Player launches and begins playing the selected file.<br />
To r<strong>et</strong>urn to the previous screen, press RETURN.<br />
6 ) Press EXIT or HMG to exit Home Media Gallery.<br />
Note: The Media Navigator launch <strong>de</strong>pends on the option selected in Auto Connection un<strong>de</strong>r “5.9 HMG S<strong>et</strong>up.”<br />
Select a server from the Server list to open Media Navigator.<br />
88<br />
En
Use Other Equipment With Your Flat Panel TV 05<br />
Navigate through a USB Device’s Files and Fol<strong>de</strong>rs<br />
Like navigating through media servers, select the specific file from a <strong>de</strong>vice on the USB Device screen to start an<br />
appropriate player. For d<strong>et</strong>ails, follow the steps below.<br />
1 ) Press HMG.<br />
The Home Media Gallery menu appears on screen.<br />
2 ) Select USB.<br />
Use the arrow buttons to highlight an option then press ENTER.<br />
The USB Device screen appears. Select the <strong>de</strong>vice. When using a single directory <strong>de</strong>vice (USB flash drive),<br />
the USB Device screen does not appear.<br />
English<br />
USB A<br />
USB B<br />
USB C<br />
USB D<br />
USB E<br />
USB F<br />
USB G<br />
3 ) Select the <strong>de</strong>sired fol<strong>de</strong>r to navigate or file/content to play.<br />
4 ) Press ENTER.<br />
The appropriate Player launches and begins playing the selected file.<br />
To r<strong>et</strong>urn to the previous screen, press RETURN.<br />
5 ) Press EXIT or HMG to exit Home Media Gallery.<br />
15 (Sample screen)<br />
Note: The USB Device screen appears when using a multi-card rea<strong>de</strong>r or multiple flash drive <strong>de</strong>vices. In this case,<br />
select the <strong>de</strong>vice containing the <strong>de</strong>sired content.<br />
89<br />
En
05 Use Other Equipment With Your Flat Panel TV<br />
Screen Components<br />
Screen display options are:<br />
• List<br />
• Thumbnail<br />
• Thumbnail List<br />
Press TOOLS then select Change view from the TOOLS Menu to choose from the screen display options. The<br />
options are available for Movie, Music and Photo menus.<br />
List screen<br />
3<br />
(Sample screens)<br />
Fol<strong>de</strong>r 1<br />
1<br />
2<br />
Fol<strong>de</strong>r 2<br />
Fol<strong>de</strong>r 3<br />
Content 2<br />
Content 3<br />
Content 4<br />
Content 5<br />
40<br />
4<br />
1<br />
Thumbnail screen<br />
Thumbnail List screen<br />
Fol<strong>de</strong>r 2<br />
Fol<strong>de</strong>r 3 Content 1<br />
Content 2 Content 3<br />
40<br />
40<br />
2<br />
1<br />
3<br />
2 3<br />
1. Item being selected<br />
2. Number of total items<br />
3. Scroll bar (displayed when one or more pages follow)<br />
4. Icon or thumbnail of the selected item (if obtained)<br />
90<br />
En
Use Other Equipment With Your Flat Panel TV 05<br />
HMG Playlist<br />
Each category (Movie, Music, and Photo) has five different Playlists with up to 100 files each. The HMG Playlist can<br />
contain sound and image files selected in “Media Navigator”. To edit a Playlist, use the TOOLS Menu.<br />
1 ) Press HMG.<br />
The Home Media Gallery menu appears on screen.<br />
English<br />
2 ) Select HMG Playlist.<br />
Use the arrow buttons to highlight an option then press ENTER.<br />
3 ) Select Movie, Music or Photo from the HMG Playlist screen.<br />
Movie<br />
Music<br />
Photo<br />
3<br />
4 ) Select a <strong>de</strong>sired list from Playlist 1 through Playlist 5.<br />
5 ) Select the <strong>de</strong>sired content.<br />
This menu can appear as a List, Thumbnail or Thumbnail List screen. Press TOOLS then select Change<br />
view from the TOOLS Menu to cycle through the views.<br />
6 ) Press ENTER to play the content.<br />
The appropriate Player launches and begins playing the selected file.<br />
To r<strong>et</strong>urn to the previous screen, press RETURN.<br />
7 ) Press EXIT or HMG to exit Home Media Gallery.<br />
5.7.1 Show Your Movie Files on the Flat Panel TV<br />
When selecting movie content from the server menu on the Media Navigator screen or USB Device screen, the<br />
Movie Player automatically launches. Select a category, fol<strong>de</strong>r, or <strong>de</strong>vice to access the submenu containing the<br />
file or content.<br />
Selecting a movie file from the HMG Playlist causes the Movie Player screen to appear, just like selecting a file<br />
from a server.<br />
Screen Components<br />
The following information automatically appears on screen for a few seconds when Movie Player launches or<br />
playback status changes (controlled by the remote, for example). Pressing DISPLAY or selecting Information on<br />
the TOOLS Menu also causes the information to appear.<br />
1 2<br />
3<br />
Album Name MovieTITLE_0123456<br />
Playback 00:02:01/00:05:24<br />
4<br />
1<br />
5 6 7 8<br />
1<br />
9<br />
During A-B Repeat mo<strong>de</strong><br />
YYYY/MM/DD<br />
(Content information)<br />
1. Album name<br />
2. Content title<br />
3. Date<br />
(Player status)<br />
4. Playback status (status icon, status information,<br />
current time/total time)<br />
5. Progress bar<br />
6. Sound mo<strong>de</strong><br />
7. Play mo<strong>de</strong><br />
8. Random mo<strong>de</strong><br />
9. A-B Repeat mo<strong>de</strong><br />
91<br />
En
05 Use Other Equipment With Your Flat Panel TV<br />
Movie Player key gui<strong>de</strong><br />
Playback<br />
Stop<br />
PAUSE<br />
Mo<strong>de</strong> Key(s) used Function<br />
ENTER, (PLAY) Plays back the content.<br />
(STOP),<br />
RETURN<br />
ENTER,<br />
(PAUSE)<br />
Stops the Movie Player and r<strong>et</strong>urns to the previous screen<br />
(List/Thumbnail/Thumbnail List)<br />
Pauses the playback<br />
Fast Forward (FF), Fast forward while playback.<br />
Each press toggles the Fast Forward speed. To discontinue<br />
Fast Forward, press ENTER or PLAY. Normal playback mo<strong>de</strong><br />
r<strong>et</strong>urns.<br />
Fast Reverse (RWD), Fast reverse while playback.<br />
Each press toggles the Fast Reverse speed. To discontinue<br />
Fast Reverse, press ENTER or PLAY. Normal playback mo<strong>de</strong><br />
r<strong>et</strong>urns.<br />
Slow Forward + ,<br />
+ <br />
Slow forward when in PAUSE.<br />
Each press toggles the Slow Forward speed. To discontinue<br />
Slow Forward, press ENTER or PLAY. Normal playback<br />
mo<strong>de</strong> r<strong>et</strong>urns.<br />
Note: This function may not be supported, <strong>de</strong>pending on the<br />
content.<br />
Forward (15 sec.) Skips 15 seconds forward then plays back the vi<strong>de</strong>o or pauses<br />
while in PAUSE<br />
Reverse (15 sec.) Skips 15 seconds backward then plays back the vi<strong>de</strong>o or<br />
pauses while in PAUSE<br />
Time Search TOOLS See Use the TOOLS Menu<br />
Add to HMG Playlist TOOLS See Use the TOOLS Menu<br />
A-B Repeat Mo<strong>de</strong> TOOLS See Use the TOOLS Menu<br />
Random TOOLS See Use the TOOLS Menu<br />
Play Mo<strong>de</strong> TOOLS See Use the TOOLS Menu<br />
Audio TOOLS See Use the TOOLS Menu<br />
Picture TOOLS See Use the TOOLS Menu<br />
Sound TOOLS See Use the TOOLS Menu<br />
Information TOOLS See Use the TOOLS Menu<br />
Note: Some functions may not be supported <strong>de</strong>pending on the server type or software version.<br />
During playback, an error may arise in time-related information, <strong>de</strong>pending on the content or server<br />
software.<br />
Also, some functions may not be supported, <strong>de</strong>pending on the content.<br />
92<br />
En
Use Other Equipment With Your Flat Panel TV 05<br />
Content obtained from a digital vi<strong>de</strong>o camera that supports H.264/AVC format can be played through the USB<br />
port.<br />
To play content from this type of camera, follow the steps below.<br />
1 ) Insert the USB flash drive containing the content into a card rea<strong>de</strong>r connected to the flat panel TV.<br />
The USB <strong>de</strong>vice’s Fol<strong>de</strong>r/Contents List appears on screen.<br />
Refer to the operation manual that came with the individual <strong>de</strong>vice for connection and s<strong>et</strong>ting help.<br />
English<br />
2 ) Select a Fol<strong>de</strong>r/Contents List.<br />
Use the arrow buttons to highlight an option then press ENTER.<br />
3 ) Select the <strong>de</strong>sired content.<br />
Note: Some content may not be played back or may be a short <strong>de</strong>lay b<strong>et</strong>ween audio and vi<strong>de</strong>o, <strong>de</strong>pending on the<br />
file.<br />
Not all files (including edited files) may be supported with the Movie Player. Stored content may not appear in<br />
the “Shortcut” fol<strong>de</strong>r, <strong>de</strong>pending on the saved position in the memory <strong>de</strong>vice.<br />
Also, content may not play properly, <strong>de</strong>pending on the USB card rea<strong>de</strong>r used.<br />
5.7.2 Play Your Music Files on the Flat Panel TV<br />
When selecting music content from the server menu (on the Media Navigator screen or from the USB Device<br />
screen), the Music Player automatically launches. Select a category, fol<strong>de</strong>r, or <strong>de</strong>vice to access the submenu<br />
containing your file or content. Selecting a music file from HMG Playlist causes the Music Player screen to<br />
appear, just like selecting a file from a server.<br />
After playing music content through once, the music content loops as background music (BGM). To stop looping,<br />
stop the playback, exit the Home Media Gallery or start playing content other than photo content.<br />
Screen Components<br />
1<br />
Artist : XXXXX<br />
Album : XXXXX<br />
1. Artist/album information<br />
2. Music Player thumbnail icon/jack<strong>et</strong> image<br />
3. Player list<br />
XXXXXX.mp3<br />
Previous Song<br />
XXXXXX.mp3<br />
Next Song<br />
2<br />
3<br />
The following information and playback status appear on the Music Player screen.<br />
Playback 00:02:01/00:05:24<br />
4 5<br />
8<br />
During A-B Repeat mo<strong>de</strong><br />
YYYY/MM/DD<br />
6 7<br />
9<br />
4. Play mo<strong>de</strong><br />
5. Random mo<strong>de</strong><br />
6. Playback status (status icon, status information,<br />
current time/total time)<br />
7. Progress bar<br />
8. A-B Repeat mo<strong>de</strong><br />
9. Date<br />
93<br />
En
05 Use Other Equipment With Your Flat Panel TV<br />
Music Player key gui<strong>de</strong><br />
Mo<strong>de</strong> Key(s) used Function<br />
Playback<br />
ENTER, (PLAY) Plays back the selected content.<br />
Stop (STOP), Stops the playback<br />
PAUSE<br />
ENTER,<br />
Pauses the playback<br />
(PAUSE)<br />
Fast Forward (FF) See the Movie Player key gui<strong>de</strong>.<br />
<br />
Press and hold to start Fast Forward. When in Fast<br />
Forward, press to change the playback speed. To<br />
discontinue Fast Forward, press ENTER or PLAY. Normal<br />
playback mo<strong>de</strong> r<strong>et</strong>urns.<br />
Fast Reverse (RWD) See the Movie Player key gui<strong>de</strong>.<br />
<br />
Press and hold to start Fast Reverse. When in Fast<br />
Reverse, press to change the playback speed. To<br />
discontinue Fast Reverse, press ENTER or PLAY. Normal<br />
playback mo<strong>de</strong> r<strong>et</strong>urns.<br />
Next Selects the next content<br />
Previous Selects the previous content<br />
Time Search TOOLS See Use the TOOLS Menu<br />
Add to HMG Playlist TOOLS See Use the TOOLS Menu<br />
Random TOOLS See Use the TOOLS Menu<br />
A-B Repeat TOOLS See Use the TOOLS Menu<br />
Play Mo<strong>de</strong> TOOLS See Use the TOOLS Menu<br />
Sound TOOLS See Use the TOOLS Menu<br />
Note: Files may not play properly, <strong>de</strong>pending on the content.<br />
Some functions may not be supported, <strong>de</strong>pending on the server type or software version.<br />
Playback continues. Pressing RETURN to move from the Player screen to the previously selected screen<br />
has no effect.<br />
5.7.3 Show Your Photo File on the Flat Panel TV<br />
When selecting photo content from the Media Navigator’s server menu or from the USB Device screen, the Photo<br />
Player automatically launches. Press ENTER to show content in full screen. Select a category, fol<strong>de</strong>r or <strong>de</strong>vice to<br />
access the submenu containing your file or content.<br />
Selecting a photo file from the HMG Playlist causes the Photo Player screen to appear, just like selecting a file<br />
from the server.<br />
Screen Components<br />
The following information automatically appears on screen for a few seconds when Photo Player launches or<br />
playback status changes (controlled by the remote, for example). Pressing DISPLAY or selecting Information on<br />
the TOOLS Menu also causes the information to appear.<br />
94<br />
En<br />
1 2<br />
Album Name Photo TITLE_0123456<br />
Playback 45678/99999<br />
4<br />
5 6 7<br />
3<br />
YYYY/MM/DD<br />
(Content information)<br />
1. Album name<br />
2. Content title<br />
3. Date<br />
(Player status)<br />
4. Playback status<br />
(status icon, status information,<br />
current number/total number)<br />
5. Progress bar<br />
6. Play mo<strong>de</strong><br />
7. Random mo<strong>de</strong>
Use Other Equipment With Your Flat Panel TV 05<br />
Photo Player key gui<strong>de</strong><br />
Playback<br />
Stop<br />
PAUSE<br />
Mo<strong>de</strong> Key(s) used Function<br />
ENTER, (PLAY) Starts displaying a photo or playing a sli<strong>de</strong>show when in<br />
playback<br />
(STOP),<br />
RETURN<br />
ENTER while<br />
playback, <br />
(PAUSE)<br />
Stops the Player and r<strong>et</strong>urns to the previous screen (List/<br />
Thumbnail/Thumbnail List)<br />
Pauses the sli<strong>de</strong>show<br />
Move File Forward Displays the next image content<br />
Move File Backward Displays the previous image content<br />
Rotate (clockwise) (FF), TOOLS Rotates the image 90 o clockwise.<br />
Each press toggles the rotation angle by 90 o b<strong>et</strong>ween 90 o ,<br />
180 o , 270 o and 0 o .<br />
(See Use the TOOLS Menu)<br />
Rotate (counterclockwise)<br />
(RWD)<br />
Rotates the image 90 o counter-clockwise.<br />
Each press toggles the rotation angle by 90 o b<strong>et</strong>ween 270 o ,<br />
180 o , 90 o and 0 o .<br />
Change BGM , Switches BGM content while playing BGM<br />
Zoom TOOLS See Use the TOOLS Menu<br />
Add to HMG Playlist TOOLS See Use the TOOLS Menu<br />
Random TOOLS See Use the TOOLS Menu<br />
Play Mo<strong>de</strong> TOOLS See Use the TOOLS Menu<br />
Sli<strong>de</strong> Show TOOLS See Use the TOOLS Menu<br />
Music Player TOOLS See Use the TOOLS Menu<br />
Picture TOOLS See Use the TOOLS Menu<br />
Sound TOOLS See Use the TOOLS Menu<br />
Information TOOLS See Use the TOOLS Menu<br />
English<br />
Note: Some functions may not be supported, <strong>de</strong>pending on the server type or software version.<br />
Even files in the supported format may fail to play properly, <strong>de</strong>pending on the content.<br />
95<br />
En
05 Use Other Equipment With Your Flat Panel TV<br />
5.8 Use the TOOLS Menu<br />
Pressing TOOLS on the remote control causes the TOOLS Menu to appear. Select various play and display mo<strong>de</strong>s<br />
from this menu. The selectable menu items differ, <strong>de</strong>pending on the current menu (refer to “3.6.1 Use the TOOLS<br />
Menu”).<br />
Update Server List<br />
Use this function to update the currently selected Server List. This option is available on the Server List screen<br />
regardless if the server is connected to your flat panel TV.<br />
1 ) Press TOOLS while showing the Server List.<br />
The TOOLS Menu appears on screen.<br />
TELEVISION<br />
TOOLS<br />
Update Server List<br />
Music Player<br />
2 ) Select Update Server List from the TOOLS Menu.<br />
Use the arrow buttons to highlight an option then press ENTER.<br />
Information on the connected server is updated.<br />
Del<strong>et</strong>e Server<br />
Your flat panel TV allows disconnected servers to be removed from the Server List.<br />
To <strong>de</strong>l<strong>et</strong>e a server, follow the steps below. This option is available on the Server List screen (server not connected).<br />
1 ) Press TOOLS while the cursor is on the unconnected server on the Server List screen.<br />
The TOOLS Menu appears on screen.<br />
TELEVISION<br />
TOOLS<br />
Del<strong>et</strong>e Server<br />
Update Server List<br />
2 ) Select Del<strong>et</strong>e Server from the TOOLS Menu.<br />
A Del<strong>et</strong>e Server screen appears.<br />
3 ) Select Yes then press ENTER.<br />
The server disappears from the list.<br />
To cancel the server <strong>de</strong>l<strong>et</strong>ion, select No.<br />
USB Device<br />
The TOOLS menu provi<strong>de</strong>s a screen to see what USB <strong>de</strong>vice(s) are connected or supported. Follow the directions<br />
below to open the USB Device screen. This option is available on the Fol<strong>de</strong>r/Contents List (USB) screen.<br />
1 ) Press TOOLS.<br />
The TOOLS Menu appears on screen.<br />
TELEVISION<br />
TOOLS<br />
USB Device<br />
Picture<br />
96<br />
En<br />
2 ) Select USB Device from the TOOLS Menu.<br />
A USB Device screen appears, showing currently connected USB <strong>de</strong>vices.
Use Other Equipment With Your Flat Panel TV 05<br />
Favorites Entry<br />
Registering the Home Media Gallery in Favorites (TOOLS Menu) provi<strong>de</strong>s quick access to the Home Media Gallery<br />
top screen while watching TV or other programs. This option is available on the Home Media Gallery screen.<br />
1 ) Press TOOLS.<br />
The TOOLS Menu appears on screen.<br />
English<br />
TELEVISION<br />
TOOLS<br />
Favorite Entry : Off<br />
Del<strong>et</strong>e from HMG Playlist<br />
On<br />
2 ) Select Favorites Entry.<br />
3 ) S<strong>et</strong> the option to On then press ENTER.<br />
Registration compl<strong>et</strong>es.<br />
To remove the Home Media Gallery from Favorites, select Off.<br />
D<strong>et</strong>ailed Display<br />
Select this option to display the d<strong>et</strong>ailed information on the current content. This option is available on the Media<br />
Navigator, Playlist List (Movie/Music/Photo), and Fol<strong>de</strong>r/Contents List screens.<br />
1 ) Press TOOLS.<br />
The TOOLS Menu appears on screen.<br />
TELEVISION<br />
TOOLS<br />
D<strong>et</strong>ailed Display<br />
Del<strong>et</strong>e Server<br />
2 ) Select D<strong>et</strong>ailed Display from the TOOLS Menu.<br />
D<strong>et</strong>ailed information appears.<br />
Pressing RETURN causes the information to disappear and the previous screen to r<strong>et</strong>urn.<br />
Sort<br />
A sort option is available un<strong>de</strong>r Media Navigator and Fol<strong>de</strong>r/Contents List screens. This function is unavailable<br />
for fol<strong>de</strong>rs or content on a USB <strong>de</strong>vice. To sort the items contained in the Fol<strong>de</strong>r/Contents List, follow the steps<br />
below.<br />
1 ) Press HMG.<br />
The Home Media Gallery menu appears on screen.<br />
2 ) Select the <strong>de</strong>sired fol<strong>de</strong>r and/or content in the Media Navigator.<br />
Use the arrow buttons to highlight an option then press ENTER.<br />
3 ) Press TOOLS then select Sort from the TOOLS Menu.<br />
A Sort dialog screen appears.<br />
Sort<br />
Condition : Title<br />
Or<strong>de</strong>r : Bottom-Up<br />
Start<br />
4 ) Select the appropriate option on the Sort dialog screen.<br />
• Condition: Title, Track Number, Genre, Artist or Date.<br />
97<br />
En
05 Use Other Equipment With Your Flat Panel TV<br />
• Or<strong>de</strong>r: Bottom-Up or Top-Down<br />
5 ) Select Start on the Sort dialog screen.<br />
The sorting starts based on your selection and sort results are displayed.<br />
While sorting continues, content playback is available. To r<strong>et</strong>urn to the sort screen, press RETURN any time<br />
during playback.<br />
To cancel the sort mo<strong>de</strong>, press RETURN.<br />
Notes: The “Select a sorting or<strong>de</strong>r.” screen is available and may be left on the screen while navigating through the<br />
music categories.<br />
Sort may not be available, <strong>de</strong>pending on the server used.<br />
Available submenus for Condition vary, <strong>de</strong>pending on the server used.<br />
Search<br />
The flat panel TV’s built-in Search function provi<strong>de</strong>s a convenient way to find items held in a Fol<strong>de</strong>r/Contents List.<br />
However, the searching function is unavailable for fol<strong>de</strong>rs or content on a USB <strong>de</strong>vice.<br />
Simply enter a word and the results appear on screen. To begin a Search, follow the directions below. This option<br />
is available on the Media Navigator and Fol<strong>de</strong>r/Contents List screens.<br />
1 ) Press HMG.<br />
The Home Media Gallery menu appears on screen.<br />
2 ) Select the <strong>de</strong>sired fol<strong>de</strong>r and/or content in the Media Navigator.<br />
Use the arrow buttons to highlight an option then press ENTER.<br />
3 ) Press TOOLS.<br />
The TOOLS Menu appears on screen.<br />
4 ) Select Search from the TOOLS Menu.<br />
A Search dialog screen appears.<br />
Search<br />
Condition : Title<br />
Keyword : ----<br />
Start<br />
5 ) Select Title, Genre or Artist for Condition, or enter a Keyword.<br />
Pressing ENTER on the Keyword menu causes the software keyboard to appear on the screen.<br />
6 ) Enter the word on the software keyboard.<br />
Refer to “Software Keyboard” un<strong>de</strong>r “3.2.5 Create the List of Channels” for operation d<strong>et</strong>ails.<br />
7 ) Select OK on the software keyboard to bring up the Search dialog screen and hi<strong>de</strong> the keyboard.<br />
To cancel the key word entry, select Cancel.<br />
8 ) Select Start on the Search dialog screen.<br />
The searching starts based on the word entered with results are appearing on screen.<br />
While searching continues, content is playable. To r<strong>et</strong>urn to the search screen, press RETURN any time<br />
during playback.<br />
To cancel the search mo<strong>de</strong>, press RETURN.<br />
Notes: The Search function may not be available, <strong>de</strong>pending on the server.<br />
Available submenus for Condition vary, <strong>de</strong>pending on the server used.<br />
98<br />
En
Use Other Equipment With Your Flat Panel TV 05<br />
Sli<strong>de</strong> Show<br />
A sli<strong>de</strong>show is simply a series of still pictures, appearing one after the other, usually in a timed procession. Select<br />
the <strong>de</strong>sired photo file to display a still picture then press ENTER to start a sli<strong>de</strong>show. After a sli<strong>de</strong>show launches,<br />
pressing ENTER toggles b<strong>et</strong>ween PLAY and PAUSE. Or press PLAY to start the sli<strong>de</strong>show immediately. This option<br />
is available on the Media Navigator, Fol<strong>de</strong>r/Contents List, and Photo Player. You can s<strong>et</strong> the Photo Player to play<br />
a sli<strong>de</strong>show with background music (BGM) and various visual effects. To begin a sli<strong>de</strong>show, follow the directions<br />
below.<br />
1 ) Press HMG.<br />
The Home Media Gallery menu appears on screen.<br />
2 ) Select Media Navigator or USB from the menu.<br />
Use the arrow buttons to highlight an option then press ENTER.<br />
3 ) Select a fol<strong>de</strong>r containing photo content.<br />
Use the arrow buttons to highlight a fol<strong>de</strong>r then press ENTER.<br />
The Thumbnail screen appears (Thumbnail List or List screen appears, <strong>de</strong>pending on the s<strong>et</strong>ting).<br />
4 ) Select the <strong>de</strong>sired photo file.<br />
The selected photo content appears in full screen.<br />
5 ) Press TOOLS.<br />
The TOOLS Menu appears on screen.<br />
6 ) Select a sli<strong>de</strong>show option.<br />
7 ) Select an Effect: Off, Black Out or Panoramic.<br />
8 ) Select a time interval: 3Seconds, 5Seconds, 10Seconds, 15Seconds, 30Seconds or 60Seconds.<br />
English<br />
Sli<strong>de</strong> Show<br />
Effect : Black Out<br />
Interval : 5Seconds<br />
Random : Off<br />
Play Mo<strong>de</strong> : Repeat All<br />
BGM : Off<br />
Start<br />
9 ) Turn the Random option Off or On.<br />
For d<strong>et</strong>ails, refer to Random.<br />
10 ) Select the <strong>de</strong>sired option for Play Mo<strong>de</strong>.<br />
Select Single, Repeat, Repeat All or All. For d<strong>et</strong>ails, refer to “Play Mo<strong>de</strong>” (page 101).<br />
11 ) Select any <strong>de</strong>sired BGM.<br />
Select music content from Playlist 1 through 5 or the USB <strong>de</strong>vice.<br />
12 ) Select Start.<br />
The sli<strong>de</strong>show starts and photo images in the fol<strong>de</strong>r automatically appear one by one.<br />
To force the next image to appear, press .<br />
To force the previous image to r<strong>et</strong>urn, press .<br />
13 ) Press ENTER or (Pause) to stop the sli<strong>de</strong>show.<br />
The Photo Player pauses.<br />
14 ) Press ENTER again to resume the sli<strong>de</strong>show.<br />
To cancel the sli<strong>de</strong>show and stop the Photo Player, press RETURN or (Stop) during playback. The<br />
previous screen r<strong>et</strong>urns.<br />
Note: After s<strong>et</strong>ting the Interval time, it may take longer than the pres<strong>et</strong> time. As the Interval time refers to the time<br />
length up until the Home Media Gallery starts to obtain the next image. Key operations may not work while<br />
obtaining the next image.<br />
99<br />
En
05 Use Other Equipment With Your Flat Panel TV<br />
Add to HMG Playlist<br />
The Home Media Gallery function provi<strong>de</strong>s “HMG Playlist” - a self-contained play list that allows bookmarking<br />
favorite movie, music, and photo files from the n<strong>et</strong>work. You can store, edit, and sort up to 100 files in each Playlist<br />
List. This option is available on the Media Navigator, Fol<strong>de</strong>r/Contents List, Movie Player, Music Player, and Photo<br />
Player screens.<br />
1 ) While navigating or playing, select the file to be ad<strong>de</strong>d to a HMG Playlist.<br />
2 ) Press TOOLS.<br />
The TOOLS Menu appears on screen.<br />
3 ) Select Add to HMG Playlist from the TOOLS Menu.<br />
An Add to HMG Playlist dialog screen appears.<br />
4 ) Select a Playlist.<br />
Press / to select from Playlist 1 to Playlist 5.<br />
Add to HMG Playlist<br />
Add to : Playlist 1<br />
[Total] : 050/100<br />
OK<br />
5 ) Select OK.<br />
To select other Playlist(s), repeat Steps 2 to 5.<br />
The file is ad<strong>de</strong>d to the selected Playlist. The Total field changes as content is ad<strong>de</strong>d to the playlist.<br />
To cancel the operation, press RETURN.<br />
Select Server<br />
When one or more servers are connected within the n<strong>et</strong>work, you can switch b<strong>et</strong>ween servers. This option is<br />
available on the Media Navigator and Fol<strong>de</strong>r/Contents List screens.<br />
1 ) Press TOOLS.<br />
The TOOLS Menu appears on screen.<br />
2 ) Select Select Server from the TOOLS Menu.<br />
The Server List appears.<br />
Server 01<br />
Server 02<br />
Server 03<br />
Server 04<br />
4 (Sample screen)<br />
3 ) Select the <strong>de</strong>sired server.<br />
The screen changes to Media Navigator on the selected server.<br />
100<br />
En<br />
Notes: The Home Media Gallery can memorize previously connected servers. When the Media Navigator is<br />
launched, available servers are automatically located and connected.<br />
If a previously connected server cannot be found or if the server is in sleep mo<strong>de</strong>, the server name is<br />
dimmed.<br />
In some cases, media servers that support “Wake On LAN” can be booted up. Select the server then press<br />
ENTER to transmit a “Wake On LAN” command to the highlighted server.<br />
When having “Wake On LAN” turns the server’s power on, the server must be ready with the necessary<br />
s<strong>et</strong>tings already compl<strong>et</strong>ed.
Use Other Equipment With Your Flat Panel TV 05<br />
Play Mo<strong>de</strong><br />
Your flat panel TV provi<strong>de</strong>s four repeat mo<strong>de</strong>s when using the Movie Player, Music Player, or Photo Player.<br />
Choose a playback mo<strong>de</strong> (Repeat, Single, <strong>et</strong>c.) when playing multiple content files. To activate Play Mo<strong>de</strong>, follow<br />
the steps below.<br />
1 ) While playing content, press TOOLS.<br />
The TOOLS Menu appears on screen.<br />
English<br />
2 ) Select Play Mo<strong>de</strong> from TOOLS Menu.<br />
Select Single, Repeat, Repeat All or All.<br />
Single : Plays the selected content only once<br />
Repeat : Plays the selected content in a loop<br />
Repeat All : Loop-plays all contents in a fol<strong>de</strong>r in or<strong>de</strong>r (when the last content file ends, the first file begins<br />
to play with all subsequent files playing in or<strong>de</strong>r continually).<br />
All : Plays all selected fol<strong>de</strong>r content in or<strong>de</strong>r only once<br />
TELEVISION<br />
TOOLS<br />
Sound<br />
Random<br />
All Play Mo<strong>de</strong> : Single<br />
A-B Repeat<br />
Time Search<br />
Repeat<br />
Change Name<br />
Playlist (1 through 5) can be renamed in HMG Playlist. To name a Playlist, follow the directions below. This option<br />
is available on the Playlist List (Movie/Music/Photo) screen.<br />
1 ) Press TOOLS while five Playlists in the HMG Playlist are on screen.<br />
The TOOLS Menu appears on screen.<br />
2 ) Select Change Name from the TOOLS Menu.<br />
The software keyboard appears.<br />
Playlist Name<br />
P L A Y L I S T 1<br />
1 2 3 4 5 6 7 8 9 0<br />
A B C D E F G H I J Del<strong>et</strong>e<br />
K L M N O P Q R S T Space<br />
U V W X Y Z , . : ; Caps<br />
& ' ( ) + - * / _ @<br />
/<br />
$ % ! ? # = | ~ "<br />
^ ` < > [ ] { } OK Cancel<br />
3 ) Enter the new name.<br />
Refer to “Software Keyboard” un<strong>de</strong>r “3.2.5 Create the List of Channels” for operation d<strong>et</strong>ails.<br />
4 ) Select OK after the new name is entered on the software keyboard.<br />
The software keyboard disappears and the newly named Playlist appears.<br />
Selecting Cancel causes the entry to stop and cancels the name entry process.<br />
101<br />
En
05 Use Other Equipment With Your Flat Panel TV<br />
Change View<br />
Select this option to cycle b<strong>et</strong>ween the different views: List, Thumbnail, and Thumbnail List. This option is<br />
available on the Playlist List (Movie/Music/Photo), and Fol<strong>de</strong>r/Contents List screens.<br />
1 ) Press TOOLS.<br />
The TOOLS Menu appears on screen.<br />
2 ) Select Change View from the TOOLS Menu.<br />
Select the screen option from List, Thumbnail or Thumbnail List.<br />
TOOLS Menu<br />
TELEVISION<br />
TOOLS<br />
Thumbnail List<br />
Music Player<br />
Add to HMG Playlist<br />
Change View : List<br />
Sort<br />
Search<br />
Thumbnail<br />
List screen<br />
Fol<strong>de</strong>r 1<br />
Fol<strong>de</strong>r 2<br />
Fol<strong>de</strong>r 3<br />
Content 2<br />
Content 3<br />
Content 4<br />
Content 5<br />
40<br />
Thumbnail List screen<br />
Thumbnail screen<br />
40<br />
Fol<strong>de</strong>r 2<br />
Fol<strong>de</strong>r 3 Content 1<br />
Content 2 Content 3<br />
40<br />
(Sample screens)<br />
Time Search<br />
The Time Search function allows the content to start playing at the pres<strong>et</strong> time. This option is available on the<br />
Movie Player and Music Player screens.<br />
To allow Time Search, follow the steps below.<br />
1 ) While playing content, press TOOLS.<br />
The TOOLS Menu appears on screen.<br />
2 ) Select Time Search from the TOOLS Menu.<br />
A Time Search dialog screen appears.<br />
[Total] : 01:00:00<br />
Time Search<br />
Jump :<br />
00 : 00 : 00<br />
Start<br />
102<br />
En<br />
3 ) Enter the time (Hour, Minute and/or Second) to jump to.<br />
Enter Hour and Minute for movie content or Minute and Second for music content.<br />
Use /or buttons 0 to 9 (if a numeric key icon appears).<br />
Press / to select Hour and Minute (movie content) or Minute and Second (music content).<br />
4 ) Select Star then press ENTER to begin the time search.<br />
The movie (music) begins playing from the s<strong>et</strong> time. To cancel the Time Search, press RETURN.<br />
Note: The Time Search function may not be supported, <strong>de</strong>pending on the content, server software or software<br />
version.<br />
An error may arise in time-related information, <strong>de</strong>pending on the content or server software.
Use Other Equipment With Your Flat Panel TV 05<br />
Picture<br />
The Picture option is another way to adjust the image quality. This option is available on the Movie Player and<br />
Photo Player screens. To adjust the picture, follow the steps below.<br />
1 ) Press TOOLS.<br />
The TOOLS Menu appears on screen.<br />
English<br />
TELEVISION<br />
TOOLS<br />
Information<br />
Picture<br />
Sound<br />
Random<br />
2 ) Select Picture from the TOOLS Menu.<br />
A picture adjustment screen appears. For adjustment items, see “3.4 Adjust the Picture and Sound<br />
Quality.”<br />
3 ) Press RETURN to close the adjustment screen.<br />
Normal playback screen r<strong>et</strong>urns.<br />
Sound<br />
This Sound option is another way to adjust audio quality. This option is available on the Movie Player, Music Player<br />
and Photo Player screens. To adjust the sound, follow the steps below.<br />
1 ) Press TOOLS.<br />
The TOOLS Menu appears on screen.<br />
TELEVISION<br />
TOOLS<br />
Sound<br />
Random<br />
Play Mo<strong>de</strong><br />
2 ) Select Sound from the TOOLS Menu.<br />
A sound adjustment screen appears. For adjustment items, see “3.4 Adjust the Picture and Sound Quality.”<br />
3 ) Press RETURN to close the adjustment screen.<br />
Normal playback screen r<strong>et</strong>urns.<br />
Information<br />
The Information option displays the status information on the playing content. This option is available on the<br />
Movie Player and Photo Player screens. To show information during playback, follow the steps below.<br />
1 ) Press TOOLS.<br />
The TOOLS Menu appears on screen.<br />
TELEVISION<br />
TOOLS<br />
Information<br />
Zoom<br />
2 ) Select Information from the TOOLS Menu.<br />
An information (such as playback status) screen appears. Pressing DISPLAY also causes the information<br />
screen to appear.<br />
The screen automatically disappears after a short period of time.<br />
103<br />
En
05 Use Other Equipment With Your Flat Panel TV<br />
Audio<br />
Use this option to switch to another audio source if the currently played content has multiple audio sources<br />
(multi-language content, for example). This option is available on the Movie Player screen. To reveal multiple audio<br />
tracks, follow the steps below.<br />
1 ) Press TOOLS.<br />
The TOOLS Menu appears on screen.<br />
TELEVISION<br />
TOOLS<br />
A-B Repeat<br />
Time Search<br />
Audio : 1 L+R<br />
Information<br />
Add to HMG Playlist<br />
1 L<br />
2 ) Select Audio from the TOOLS Menu.<br />
Pressing / causes L, R or L+R to be selected. If the content has multiple audio sources, select L, R or<br />
L+R for each source.<br />
3 ) After entering the s<strong>et</strong>ting, press RETURN.<br />
Music Player<br />
The Music Player option allows changing BGM on any screen rather than using the music from the content. This<br />
option is only available when music is played on any screen other than Movie Player and Music Player. Music<br />
Player is available on the Media Navigator, Fol<strong>de</strong>r/Contents List, USB, HMG Playlist, Playlist List, and Photo Player<br />
screens. To activate Music Player, follow the steps below.<br />
1 ) Press TOOLS.<br />
The TOOLS Menu appears on screen.<br />
TELEVISION<br />
TOOLS<br />
Music Player<br />
Sli<strong>de</strong> Show<br />
2 ) Select Music Player from the TOOLS Menu.<br />
The Music Player screen appears.<br />
After entering the s<strong>et</strong>ting, press RETURN. The previous screen r<strong>et</strong>urns.<br />
Move<br />
To show files in your preferred or<strong>de</strong>r, use the Move option to change the listing or<strong>de</strong>r in the HMG Playlist. This<br />
option is available on the Contents List (Playlist) screen.<br />
1 ) Move the cursor to the content to be moved within the HMG Playlist.<br />
2 ) Press TOOLS.<br />
The TOOLS Menu appears on screen.<br />
TELEVISION<br />
TOOLS<br />
Move<br />
USB Device<br />
104<br />
En<br />
3 ) Select Move from the TOOLS Menu.<br />
4 ) Press / to move the content up or down.
Use Other Equipment With Your Flat Panel TV 05<br />
5 ) Press ENTER.<br />
Editing compl<strong>et</strong>es and Move finishes.<br />
Del<strong>et</strong>e from HMG Playlist<br />
Som<strong>et</strong>imes a file is no longer wanted. Your flat panel TV provi<strong>de</strong>s a m<strong>et</strong>hod to <strong>de</strong>l<strong>et</strong>e content from a HMG Playlist.<br />
This option is available on the Contents List (Playlist) screen. To <strong>de</strong>l<strong>et</strong>e content from a Playlist, follow the steps<br />
below.<br />
1 ) Move the cursor to the content to be <strong>de</strong>l<strong>et</strong>ed from the HMG Playlist.<br />
2 ) Press TOOLS.<br />
The TOOLS Menu appears on screen.<br />
English<br />
TELEVISION<br />
TOOLS<br />
Del<strong>et</strong>e from HMG Playlist<br />
Move<br />
3 ) Select Del<strong>et</strong>e from HMG Playlist on the TOOLS Menu.<br />
A Del<strong>et</strong>e from HMG Playlist dialog screen appears.<br />
4 ) Select Yes to remove the content item.<br />
The dialog screen disappears and the selected content is <strong>de</strong>l<strong>et</strong>ed from the HMG Playlist.<br />
To cancel, select No.<br />
A-B Repeat Mo<strong>de</strong><br />
Use this option to play the selected movie scenes or music programs repeatedly. This option is available only<br />
during normal playback on the Movie Player or Music Player.<br />
To s<strong>et</strong> Repeat, follow the steps below.<br />
1 ) While playing content, press TOOLS.<br />
The TOOLS Menu appears on screen.<br />
TELEVISION<br />
TOOLS<br />
A-B Repeat : A(Loop Start)<br />
Rotate<br />
2 ) Select A-B Repeat from the TOOLS Menu.<br />
3 ) Press ENTER to mark a starting point.<br />
4 ) Press ENTER again where the playback needs to stop.<br />
The Player status appears on the screen and the A-B Repeat mo<strong>de</strong> icon changes.<br />
The selected part of the content begins looping.<br />
To end the looping and r<strong>et</strong>urn to normal playback, press TOOLS then select Off while in the A-B Repeat mo<strong>de</strong>.<br />
Note: If the screen display fails to match the player status, a malfunction may have occurred. Stop playback then<br />
try the operation again.<br />
105<br />
En
05 Use Other Equipment With Your Flat Panel TV<br />
Random<br />
Use this option to shuffle the or<strong>de</strong>r in the content list, playing the content at random. This option is available on<br />
the Movie Player, Music Player and Photo Player screens. To shuffle the playlist, follow the steps below.<br />
1 ) While playing content, press TOOLS.<br />
The TOOLS Menu appears on screen.<br />
TELEVISION<br />
TOOLS<br />
Change Name<br />
Random : Off<br />
On<br />
2 ) Select Random from the TOOLS Menu.<br />
3 ) Select On.<br />
Random Repeat playback starts.<br />
To cancel the random mo<strong>de</strong>, press TOOLS and select Off.<br />
Note: Random Repeat is only available for content playing in Repeat Mo<strong>de</strong> (except when Single is selected).<br />
Rotate<br />
Use the Rotate option to turn an image 90º clockwise. This option is available on the Photo Player screen. To rotate<br />
an image, follow the steps below.<br />
1 ) While photo content appears, press TOOLS.<br />
The TOOLS Menu appears on screen.<br />
TELEVISION<br />
TOOLS<br />
Rotate : 90<br />
Time Search<br />
2 ) Select Rotate from the TOOLS Menu.<br />
Each press of the ENTER button causes the displayed image to rotate by one quarter clockwise. It toggles<br />
b<strong>et</strong>ween 90º, 180º, 270º and 0º.<br />
Note: The selected rotation angle is only effective for the visible image.<br />
Moving or changing the content causes the image to res<strong>et</strong> to the <strong>de</strong>fault view.<br />
106<br />
En
Use Other Equipment With Your Flat Panel TV 05<br />
Zoom<br />
Use the Zoom option to enlarge the photo content displayed. This option is available on the Photo Player screen.<br />
To enlarge content, follow the steps below.<br />
1 ) While photo content appears, press TOOLS.<br />
The TOOLS Menu appears on screen.<br />
English<br />
TELEVISION<br />
TOOLS<br />
Music Player<br />
Add to HMG Playlist<br />
Zoom : Off<br />
On<br />
2 ) Select Zoom from the TOOLS Menu.<br />
3 ) Press / to select On or Off.<br />
4 ) Press ENTER to confirm the selection.<br />
Selecting On causes the enlarged photo content to always appear.<br />
Displayed image differs <strong>de</strong>pending on the content. If the content’s aspect ratio is longer than 16:9, it<br />
appears fully str<strong>et</strong>ched horizontally to both si<strong>de</strong>s with images cropped at the top and bottom. If the<br />
content’s aspect ratio is wi<strong>de</strong>r than 16:9, it appears fully str<strong>et</strong>ched vertically to top and bottom with images<br />
cropped on the right and left si<strong>de</strong>s.<br />
A “zoom” icon appears on screen.<br />
5 ) While in Zoom mo<strong>de</strong>, use the arrow buttons to scroll the content.<br />
Press or if the content’s aspect ratio is longer than 16:9, or if the content’s aspect ratio is wi<strong>de</strong>r<br />
than 16:9.<br />
6 ) Press RETURN or ENTER to cancel the Zoom and r<strong>et</strong>urn to the normal screen.<br />
Note: The Zoom function is disabled when the content is a 16:9 picture.<br />
107<br />
En
05 Use Other Equipment With Your Flat Panel TV<br />
5.9 HMG S<strong>et</strong>up<br />
Use the HMG S<strong>et</strong>up option for N<strong>et</strong>work S<strong>et</strong>up, Auto Connection S<strong>et</strong>up and Default S<strong>et</strong>tings. For more information<br />
about each option, refer to the following sections.<br />
N<strong>et</strong>work S<strong>et</strong>up<br />
Auto Connection<br />
Default S<strong>et</strong>tings<br />
On<br />
N<strong>et</strong>work S<strong>et</strong>up<br />
Select wh<strong>et</strong>her to acquire the IP Address automatically or manually or, when acquiring manually, s<strong>et</strong> the IP<br />
Address and Subn<strong>et</strong> mask. To access the N<strong>et</strong>work S<strong>et</strong>up menu, follow the steps below.<br />
Automatic:<br />
To perform the procedure, DHCP on your server or router must be valid.<br />
1 ) Press HMG.<br />
The Home Media Gallery menu appears on screen.<br />
2 ) Select HMG S<strong>et</strong>up from the menu.<br />
Use the arrow buttons to highlight an option then press ENTER.<br />
3 ) Select N<strong>et</strong>work S<strong>et</strong>up.<br />
4 ) Select Auto DHCP.<br />
5 ) Select Yes.<br />
The flat panel TV seeks and acquires an IP Address if available.<br />
6 ) Press EXIT or HMG to exit Home Media Gallery.<br />
Manual:<br />
Before activating, check your media server for IP Address and Subn<strong>et</strong> mask information.<br />
1 ) Access the N<strong>et</strong>work S<strong>et</strong>up through the HMG S<strong>et</strong>up.<br />
2 ) Select Auto DHCP.<br />
3 ) Select No.<br />
4 ) Select the appropriate box.<br />
Use or to highlight an entry item (IP Address or Subn<strong>et</strong> mask) then press ENTER.<br />
No need to enter Default Gateway and DNS Server data.<br />
5 ) Enter the figures using buttons 0 to 9.<br />
Subn<strong>et</strong> mask (such as 255.255.255.0): Enter the same figures.<br />
IP Address (such as 192.168.201.***): Enter the same figures as used in the media server (PC, <strong>et</strong>c.). For<br />
***, enter 3-digit figures (0 – 254) that have not been used for other n<strong>et</strong>work connections.<br />
Use or to highlight other entry areas.<br />
6 ) Press ENTER on the appropriate box after the entry is compl<strong>et</strong>e.<br />
Repeat Steps 4 to 5 to compl<strong>et</strong>e N<strong>et</strong>work s<strong>et</strong>up.<br />
7 ) Press EXIT or HMG to exit Home Media Gallery.<br />
108<br />
En
Use Other Equipment With Your Flat Panel TV 05<br />
Auto Connection<br />
S<strong>et</strong> Auto Connection to automatically connect to the last accessed server.<br />
For selection, follow the steps below.<br />
1 ) Access the Auto Connection through the HMG S<strong>et</strong>up.<br />
2 ) Use or to change the s<strong>et</strong>ting.<br />
Selecting ON causes the display to access the last server. If the server is in Standby, a WOL (“Wake On<br />
LAN”) is sent to turn the last accessed server On.<br />
Selecting OFF causes a server list to appear on screen.<br />
“Wake on LAN (WOL)” turns the last accessed server’s power on if the server is WOL-compliant and is in<br />
Standby or sleep mo<strong>de</strong>, once the server is awake, the Media Navigator screen appears. While your flat<br />
panel TV attempts to wake the server, a dialog screen appears. If the server is not WOL-compliant or the<br />
WOL function fails, a notice appears on the Server List screen.<br />
English<br />
3 ) Press EXIT or HMG to exit Home Media Gallery.<br />
Res<strong>et</strong> to Default<br />
Occasionally it may be easier to r<strong>et</strong>urn your flat panel TV to the HMG <strong>de</strong>fault values rather than try to correct a<br />
large number of acci<strong>de</strong>ntal entries. To restore <strong>de</strong>fault s<strong>et</strong>tings within the Home Media Gallery, follow the steps<br />
below.<br />
1 ) Access Default S<strong>et</strong>tings through the HMG S<strong>et</strong>up.<br />
2 ) Select Yes.<br />
The <strong>de</strong>fault values r<strong>et</strong>urn and the Home Media Gallery screen appears.<br />
3 ) Press EXIT or HMG to exit Home Media Gallery.<br />
5.10 Other useful functions<br />
Screen Saver<br />
During navigation, the screen saver launches automatically if no activity is <strong>sens</strong>ed within five minutes. However,<br />
when a movie or sli<strong>de</strong>show is playing, the panel stops the screen saver from activating.<br />
Press any button to cancel the screen saver. Dismissing the screen saver does not interfere when connecting a<br />
USB <strong>de</strong>vice.<br />
Note: Pressing DISPLAY to show the Player status or key gui<strong>de</strong> before the screen saver activates may cause<br />
image r<strong>et</strong>ention.<br />
Important<br />
• Do not display the Player status and key gui<strong>de</strong> for an exten<strong>de</strong>d period of time while playing a movie<br />
or sli<strong>de</strong>show to avoid possible image r<strong>et</strong>ention.<br />
109<br />
En
05 Use Other Equipment With Your Flat Panel TV<br />
Dialog Screen Message<br />
No. Message Problem<br />
001 Content cannot be played. (001) No d<strong>et</strong>ails are available for the<br />
error, please check content<br />
100 A communication error<br />
occurred. (100)<br />
No further d<strong>et</strong>ails are available<br />
for the error<br />
101 No response from server. (101) Flat Panel TV timed out due to<br />
<strong>de</strong>layed server response<br />
102 Disconnected from the<br />
n<strong>et</strong>work. (102)<br />
103 Response from server<br />
indicating that it is impossible<br />
to reply. (103)<br />
Cables are disconnected<br />
Server response is not<br />
un<strong>de</strong>rstandable<br />
300 Content cannot be played. (300) No further d<strong>et</strong>ails are availabe<br />
for the error<br />
301 This format is not supported.<br />
(301)<br />
An unsupported file is selected<br />
500 Failed to authenticate. (500) Failed to obtain DRM<br />
authorization<br />
501 Failed to authenticate. (501) Failed to obtain DRM<br />
authorization<br />
502 Failed to authenticate.<br />
Check for failure of router, hub,<br />
other n<strong>et</strong>work <strong>de</strong>vices. (502)<br />
503 Failed to authenticate content.<br />
The copyright notice of this file<br />
might be invalid. (503)<br />
Failed to obtain DRM<br />
authorization<br />
Failed to obtain DRM<br />
authorization<br />
504 Failed to authenticate. (504) Failed to obtain WMDRM<br />
authorization<br />
505 Failed to authenticate.<br />
Check for failure of router, hub,<br />
other n<strong>et</strong>work <strong>de</strong>vices. (505)<br />
506 Failed to authenticate. The max<br />
count of access <strong>de</strong>vices<br />
<strong>de</strong>pends on server. (506)<br />
507 Failed to authenticate. The<br />
license of this file might be<br />
invalid. Receive the license from<br />
a server. (507)<br />
Failed to obtain WMDRM<br />
authorization<br />
Failed to obtain WMDRM<br />
authorization<br />
Failed to obtain WMDRM<br />
authorization<br />
508 Failed to authenticate. (508) Authorization error other than<br />
above<br />
Important<br />
• Displaying pictures in the Home Media Gallery for an exten<strong>de</strong>d period may cause an after-image.<br />
110<br />
En
Use Other Equipment With Your Flat Panel TV 05<br />
5.11 Add Other Audio Equipment<br />
The flat panel TV’s digital audio output terminal (optical) can output Dolby Digital signals. Using an optical digital<br />
cable, connect an AV receiver to the digital audio output terminal (optical) on the rear of the flat panel TV. This<br />
connection allows audio such as from digital TV broadcasts to play back in high quality.<br />
If your AV receiver does not have a digital audio input terminal (optical), connect the AUDIO OUT terminals (AUDIO)<br />
on the rear of the flat panel TV to the audio input terminals on the AV receiver. However, this m<strong>et</strong>hod may result in<br />
audio <strong>de</strong>lay b<strong>et</strong>ween the speakers and the sound from the AV receiver. To reduce the <strong>de</strong>lay, mute the speakers on<br />
the flat panel TV. Non<strong>et</strong>heless, you may still experience some <strong>de</strong>lay b<strong>et</strong>ween the sound and the picture.<br />
English<br />
T<br />
W<br />
T<br />
W<br />
Rear view<br />
This connection is<br />
not required<br />
when connecting<br />
an AV amp<br />
equipped with<br />
the surround<br />
function to a<br />
subwoofer.<br />
AV cable<br />
(commercially<br />
available)<br />
Optical digital<br />
cable<br />
(commercially<br />
available)<br />
Subwoofer<br />
AV receiver<br />
Audio signals synchronized with currently displayed images are output to the AUDIO OUT terminals. However,<br />
audio accompanying the images are output to the SUB WOOFER OUT terminal.<br />
When using the digital audio output terminal (optical), select s<strong>et</strong>tings according to your AV Receiver. For more<br />
information, see the operating instructions that came with the AV receiver.<br />
Note: When signals are input from the HDMI terminals, no signals are output from the DIGITAL OUT terminal if<br />
they are copy guar<strong>de</strong>d.<br />
To s<strong>et</strong> the DIGITAL OUT terminal (OPTICAL) for your AV Receiver, follow the steps below.<br />
1 ) Access the System S<strong>et</strong>up through the S<strong>et</strong>up.<br />
2 ) Select Digital Audio Output from the System S<strong>et</strong>up menu.<br />
3 ) Select an option from the submenu.<br />
Option<br />
Dolby Digital<br />
PCM<br />
Description<br />
outputs in Dolby Digital for the Dolby format and<br />
outputs in PCM for the PCM format (<strong>de</strong>fault)<br />
outputs in the PCM format regardless of signal type<br />
4 ) Press HOME MENU to exit the menu.<br />
111<br />
En
05 Use Other Equipment With Your Flat Panel TV<br />
5.12 Add a Computer (PC)<br />
Use the panel’s PC terminals to connect a personal computer. The PC input terminals are DDC2B-compatible;<br />
however, the Plug & Play function may not operate properly. When connected to a PC, the panel automatically<br />
i<strong>de</strong>ntifies the input signal type. If the panel fails to see the PC or the picture is unclear, activate the Auto S<strong>et</strong>up<br />
function.<br />
5.12.1 Automatic Image Position and Clock Adjustments<br />
When connected to a PC, the image position and clock frequency can be adjusted. The Auto S<strong>et</strong>up option<br />
automatically adjusts these options but the image position and clock can be adjusted manually too. This section<br />
covers the automatic s<strong>et</strong>up function and the following section covers how to manually adjust image position and<br />
clock.<br />
The AV source <strong>de</strong>vice must be connected to the flat panel TV and turned on for these options to work. To use Auto<br />
S<strong>et</strong>up to automatically adjust image position and clock, follow the steps below.<br />
1 ) Access the Option through the S<strong>et</strong>up.<br />
2 ) Select Auto S<strong>et</strong>up from the Option menu.<br />
The function begins as soon as the selection is ma<strong>de</strong>. However, <strong>de</strong>pending on the image, the position may<br />
not change after an adjustment.<br />
3 ) Press HOME MENU to exit the menu.<br />
Note: This function is unavailable when the PC is connected to the HDMI terminal.<br />
When Auto S<strong>et</strong>up finishes, the message, “Auto S<strong>et</strong>up Compl<strong>et</strong>ed” appears on screen. However, if the s<strong>et</strong>up fails<br />
to adjust the image, the message still appears if other factors affect the change. Auto S<strong>et</strong>up may fail with a PC<br />
image composed of similar patterns or a monochrome picture. If Auto S<strong>et</strong>up fails to correct the image position<br />
and clock, change the PC image and try again.<br />
5.12.2 Manual Image Position and Clock Adjustments<br />
Usually Auto S<strong>et</strong>up for a PC is the best practice for adjusting the image position and clock. However, to personally<br />
optimize the image position and clock, follow the steps below.<br />
1 ) Access the Option through the S<strong>et</strong>up.<br />
2 ) Select Manual S<strong>et</strong>up from the Option menu.<br />
3 ) Select an option to adjust.<br />
H/V Position Adjust<br />
Clock : +120<br />
Phase : +15<br />
Res<strong>et</strong><br />
4 ) Use the up/down arrow buttons (/) to adjust the option.<br />
Clock and Phase also accept the left/right arrows (/) for changes.<br />
5 ) Press HOME MENU to exit the menu.<br />
112<br />
En
Helpful Information 06<br />
6 Helpful Information<br />
This chapter inclu<strong>de</strong>s answers to some common questions and provi<strong>de</strong>s information about software/hardware<br />
used in your flat panel TV, cleaning m<strong>et</strong>hods, and troubleshooting/service information. If you need further<br />
assistance, please contact us and give us the chance to correct any issues you are experiencing. Thank you again<br />
for buying <strong>Pioneer</strong>!<br />
English<br />
6.1 Frequently Asked Questions (FAQs)<br />
This section answers some of the questions received by our Support staff members. If your question is not here<br />
or you would like more information please see the <strong>Pioneer</strong> website for more FAQs (www.pioneerelectronics.com)<br />
about your specific mo<strong>de</strong>l or our flat panel TVs in general.<br />
Why won’t the remote control buttons control my flat panel TV?<br />
If you select the mo<strong>de</strong> other than TV on the remote control, your flat panel TV cannot receive the commands. Press<br />
the SELECT button to toggle the mo<strong>de</strong>s until the TV indicator lights.<br />
Why do I have to move closer to the panel to use the remote control?<br />
Weak batteries in the remote control can cause communication to fail. Try moving closer to the panel and attempt<br />
to control the panel with the remote. If the panel responds then change the batteries. If moving closer has no<br />
effect on the panel, check the surroundings for objects that might be blocking the signal. Also consi<strong>de</strong>r if other<br />
equipment that use remote controls have been ad<strong>de</strong>d to the area around the panel. Objects and other IR signals<br />
can disrupt the remote.<br />
How can I protect the remote so it holds up longer?<br />
There are several ways to protect your remote control. Do not leave the remote sitting in direct sunlight as this<br />
can warp or <strong>de</strong>form the case. Avoid spilling liquids on the remote but if this happens, dry it immediately. If<br />
necessary, remove the batteries and allow the unit to dry compl<strong>et</strong>ely before attempting to use it again. Areas with<br />
high humidity can also cause damage.<br />
Another issue that can affect the remote control is a leaking battery. The chemicals from a leaky battery can<br />
discolor or damage the remote. If there is visible leakage in a battery, remove both batteries immediately and<br />
carefully wipe the battery compartment clean. Replace both batteries with fresh ones.<br />
Can the signal from my panel’s remote mess up other audio/vi<strong>de</strong>o equipment?<br />
The flat panel TV emits very weak infrared rays from its screen. If there is other equipment close by that also uses<br />
a remote control such as a DVR or stereo system, it may not receive commands from its remote control properly.<br />
Try moving the equipment farther away from the flat panel TV.<br />
Note: The strength of infrared rays emitted from the panel differs as the picture changes on the screen.<br />
Why does the picture seem to dim when I leave a picture on the screen?<br />
When still images (such as photos and computer images) stay on the screen for an exten<strong>de</strong>d period of time, the<br />
screen slightly dims. This function protects the panel from damage by automatically adjusting the screen<br />
brightness. The screen dims when a still image is d<strong>et</strong>ected for approximately three minutes.<br />
How do I find (or change) the Parental Control password if I forgot it?<br />
To clear a forgotten password, from an “Enter Password” window, press and hold the ENTER button on the remote<br />
control for three or more seconds. This action res<strong>et</strong>s the password to the <strong>de</strong>fault value of 1234. To s<strong>et</strong> a new<br />
password, refer to “3.5.1 Assign a Parental Control (Block) Password.”<br />
The picture and/or sound on a channel coming through the antenna doesn’t seem as clear as it should be,<br />
what can I do?<br />
Channels received through an antenna may have a weaker signal. To check signal strength, refer to “Check the<br />
Signal Strength” in Section 6.4.1 for more information.<br />
113<br />
En
06 Helpful Information<br />
Why is the picture cropped when I feed a PC signal through the PDP-6020FD/5020FD’s HDMI input?<br />
If you select Vi<strong>de</strong>o for Signal Type in the HDMI Input menu, the image is over-scanned (enlarged) but the panel<br />
automatically switches to PC when receiving computer signals. Refer to “5.2.1 Specify the HDMI Input Type.”<br />
Why won’t my <strong>Pioneer</strong> flat panel TV turn on?<br />
It may be that your remote has failing batteries or has been damaged. Check the power cord connection at the<br />
wall and on the back of the panel. Also try pressing a on you panel.<br />
Why does the blue or red power light on my flat panel TV blink?<br />
The panel’s internal protection circuit may have been activated for some reason. First turn the panel’s a off, wait<br />
one (1) or more minutes, then turn it back on. If the light still blinks, unplug the power cord from the outl<strong>et</strong>. Plug<br />
in the panel again after one to two minutes. If this fails to solve the problem, contact your <strong>de</strong>aler or <strong>Pioneer</strong><br />
Customer Support (see insi<strong>de</strong> back cover).<br />
What can I do to prevent image r<strong>et</strong>ention or burn-in?<br />
Burn-in or Image R<strong>et</strong>ention is a si<strong>de</strong> effect of plasma technology. After an image remains on the display for an<br />
exten<strong>de</strong>d time period, when the image changes or the unit is turned off, a faint afterimage or ghost of the original<br />
picture may remain. Continuing to play vi<strong>de</strong>o or leaving the unit turned off for a length of time can clear the<br />
afterimage. We recommend the following steps and s<strong>et</strong>tings to prevent image r<strong>et</strong>ention or burn-in.<br />
• S<strong>et</strong> Screen Protection to On.<br />
• Select PC for a signal type when using a PC through an HDMI input.<br />
How do I clean my flat panel TV?<br />
To clean the screen surface, gently wipe it with the supplied dry cloth. Rubbing hard on the screen can scratch<br />
the special film coating. Use a clean soft cloth (cotton or flannel, for example) for the TV cabin<strong>et</strong>. For d<strong>et</strong>ails on<br />
cleaning, refer to “6.3 Cleaning M<strong>et</strong>hods.”<br />
6.2 Check Your Software/Hardware Version<br />
You can check the version of all software and hardware used in your flat panel TV. To access the version<br />
information, follow the directions below.<br />
1 ) Access the System S<strong>et</strong>up through the S<strong>et</strong>up.<br />
2 ) Select Technical Info. from the System S<strong>et</strong>up menu.<br />
Software and hardware versions appear.<br />
3 ) Press HOME MENU to exit the menu after checking the versions.<br />
6.3 Cleaning M<strong>et</strong>hods<br />
Before cleaning your flat panel TV, unplug the power cord from the outl<strong>et</strong>.<br />
When cleaning the screen or the glossy front bezel, gently wipe with a clean, dry cloth such as the supplied<br />
cleaning cloth or a similar type of soft cloth (e.g., cotton, flannel, <strong>et</strong>c.). Avoid a w<strong>et</strong> or damp cloth as that can l<strong>et</strong><br />
moisture seep into the panel. A dusty or rough-textured cloth (or if you rub too hard), can scratch surfaces.<br />
Note: Do not use liquid cleaners or aerosol cleaners on the screen.<br />
The chassis or cabin<strong>et</strong> of the panel is mostly composed of plastic. Do not use chemicals such as benzene or paint<br />
thinner to clean the cabin<strong>et</strong>. These chemicals can mar the finish or cause other d<strong>et</strong>erioration. When cleaning the<br />
cabin<strong>et</strong>, use the same type of cloth and m<strong>et</strong>hod as <strong>de</strong>scribed for the front bezel.<br />
Note: Do not affix labels, tapes, <strong>et</strong>c. to any visible location on the flat panel TV. Adhesives can discolor or mar the<br />
panel surfaces.<br />
114<br />
En
Helpful Information 06<br />
6.4 Troubleshooting & Service Information<br />
General<br />
Issue<br />
Possible Solutions<br />
English<br />
No power<br />
Power sud<strong>de</strong>nly turns<br />
off<br />
Panel does not operate<br />
Remote control does<br />
not operate<br />
• Check the connection seating at the wall and panel.<br />
• See if the panel’s Power On button is turned ON.<br />
• Confirm that the remote is s<strong>et</strong> to TV.<br />
If the panel indicator lights red, press (a) on the remote control or STANDBY/ON on<br />
the flat panel TV.<br />
• Confirm that the Sleep Timer did not turn off your flat panel TV.<br />
• Check the power control s<strong>et</strong>ting.<br />
• See if the panel’s internal temperature has increased.<br />
Clean the vents or remove any blocking objects.<br />
• External influences such as voltage malfunction, static electricity, <strong>et</strong>c., may cause<br />
improper operation.<br />
Unplug the panel from the wall and leave it for two or more minutes. Reconnect and<br />
attempt to operate the panel once again.<br />
• Check if TV power is off. Press the button when the POWER ON and STANDBY<br />
indicators are off.<br />
• Confirm that the mo<strong>de</strong> is s<strong>et</strong> to TV.<br />
• Examine the remote control <strong>sens</strong>or on the panel for obstructions that could block the<br />
signal.<br />
• Check that the remote’s batteries are installed properly and hold a charge.<br />
Replace with new batteries to verify.<br />
• Consi<strong>de</strong>r changes in lighting such as stronger or new light sources that may affect the<br />
signal.<br />
Picture/Sound<br />
Issue<br />
No picture and sound<br />
No picture<br />
Screen appears dark<br />
Odd coloring and sha<strong>de</strong>s<br />
or misaligned images<br />
Picture is cut off or runs<br />
off screen<br />
Possible Solutions<br />
• Check the antenna connections.<br />
• Reseat the cable connections for other equipment.<br />
• Confirm that Parental Control is inactive.<br />
• Enter the password to temporarily remove Parental Control (block).<br />
• Confirm that the panel is s<strong>et</strong> to watch a TV channel instead of an input source.<br />
• Check the picture adjustment s<strong>et</strong>tings.<br />
Res<strong>et</strong> to <strong>de</strong>fault values if necessary.<br />
• Confirm that the connected equipment is installed and programmed properly.<br />
• If viewing an image from a PC, confirm that the signal is compatible.<br />
• Check for any obstacles in front of the Room Light Sensor.<br />
• Review the room lighting for recent changes or different natural lighting sources from<br />
windows or doorways.<br />
• Check the picture tone and adjust as necessary.<br />
• Check the screen size for the current channel/input source.<br />
• Confirm that the position of the picture is centered.<br />
115<br />
En
06 Helpful Information<br />
Picture/Sound<br />
Issue<br />
Picture but no sound<br />
Sound but no picture<br />
Sound is wrong (one si<strong>de</strong><br />
only or reversed b<strong>et</strong>ween<br />
left and right)<br />
Brightness and color<br />
tone on the si<strong>de</strong>s differ<br />
from the center<br />
After-image lag<br />
Possible Solutions<br />
• Confirm that the sound is not muted or that the volume is turned down.<br />
• When using a vi<strong>de</strong>o or PC input source, check that the audio terminals are connected.<br />
• Check if Picture Off is selected from the TOOLS Menu.<br />
With this option selected, the screen is <strong>de</strong>activated; only audio is output. To restore the<br />
screen display, press any button other than VOL +/– or MUTING.<br />
• Check if the speaker cable connections have been reversed b<strong>et</strong>ween the left and right.<br />
• Confirm that speaker cables are connected and seated properly.<br />
• Check the sound balance and adjust if necessary.<br />
• If images in 4:3 mo<strong>de</strong> or l<strong>et</strong>terbox images are displayed for long periods or for shorter<br />
periods over several days, an after-image may remain due to burning.<br />
Watch images in Full screen as much as possible to avoid this issue.<br />
• Change the Brightness Sync. s<strong>et</strong>ting to Auto.<br />
This function adjusts the brightness of the gray si<strong>de</strong> masks for the brightness of the main<br />
image.<br />
• Use the Screen Protection function (See “3.6.2 Extend Your Panel Life”)<br />
• If a bright or still image was on screen for a long period before switching to a darker<br />
image, the original image may appear as an after-image or ghost. Try playing another<br />
bright image, switching the picture quickly many times, or show a very active scene.<br />
• Use the Screen Protection function (See “3.6.2 Extend Your Panel Life”)<br />
• Display the Vi<strong>de</strong>o Pattern screen to help reduce after-image lag.<br />
HDMI Control<br />
Issue<br />
HDMI Controls do not<br />
function<br />
Error message: “The<br />
<strong>de</strong>vice cannot be<br />
operated. Please check<br />
connection”<br />
No picture and sound<br />
No picture<br />
No sound<br />
Possible Solutions<br />
• Check the connections b<strong>et</strong>ween the panel and the HDMI equipment.<br />
• Confirm that the s<strong>et</strong>tings for the panel are correct.<br />
• Confirm that the equipment is HDMI compliant.<br />
• Confirm that s<strong>et</strong>tings for the equipment are correct.<br />
For d<strong>et</strong>ails, refer to the operating instructions that came with the equipment.<br />
• Check the connections b<strong>et</strong>ween the panel and the HDMI equipment.<br />
• Confirm that s<strong>et</strong>tings for the equipment are correct.<br />
For d<strong>et</strong>ails, refer to the operating instructions that came with the equipment.<br />
• Check the connections b<strong>et</strong>ween the panel and the HDMI equipment.<br />
• Confirm that s<strong>et</strong>tings for the equipment are correct.<br />
For d<strong>et</strong>ails, refer to the operating instructions that came with the equipment.<br />
• Check the connections b<strong>et</strong>ween the panel and the HDMI equipment.<br />
• Confirm that s<strong>et</strong>tings for the equipment are correct.<br />
For d<strong>et</strong>ails, refer to the operating instructions that came with the equipment.<br />
• Check the connections b<strong>et</strong>ween the panel and the HDMI equipment.<br />
• Confirm that s<strong>et</strong>tings for the equipment are correct.<br />
For d<strong>et</strong>ails, refer to the operating instructions that came with the equipment.<br />
• Check that the AV system is connected to an HDMI terminal and any recor<strong>de</strong>r/player is<br />
connected to another HDMI terminal.<br />
116<br />
En
Helpful Information 06<br />
Home Media Gallery/NETWORK<br />
Issue<br />
No servers are found.<br />
No previously<br />
connected server(s)<br />
found (items in Select<br />
Servers are dimmed).<br />
“Failed to acquire a<br />
list.” appears on the<br />
Server List screen.<br />
Possible Solutions<br />
• Confirm that the PC is On and not in Standby or Sleep. (nothing is chosen in Select<br />
Servers). When the PC started from “Wake On LAN” (WOL), check if the PC complies<br />
with WOL or if the WOL s<strong>et</strong>up is programmed properly in <strong>de</strong>vice manager for BIOS or<br />
Windows.<br />
• Check the physical connections (hub, router, and cable quality). Please use 100BASE-<br />
TX for best quality playback and display speed.<br />
• Check the logical connections (IP Address s<strong>et</strong>up, DHCP, <strong>et</strong>c.). Confirm the IP Address<br />
is correct if acquired by Auto IP and Firewall s<strong>et</strong>up. Also check if the IP Address is<br />
properly acquired with DHCP on the N<strong>et</strong>work S<strong>et</strong>up screen that follows the HMG S<strong>et</strong>up<br />
menu.<br />
• Using two or more application servers on a single PC may cause unstable operation.<br />
For proper operation, it is strongly recommen<strong>de</strong>d that one application server is used on a<br />
single PC.<br />
• Check the PC if its media server is running. Restart if necessary. Check if one or more<br />
servers are On (this may cause a malfunction).<br />
• Check if the PC is operating properly. Reboot the PC after confirming specifications<br />
and s<strong>et</strong>up values.<br />
• Check the media server s<strong>et</strong>up. If a client is registered manually, the s<strong>et</strong>up procedure<br />
may have to be run again. An option “Not Allowed” may be selected for connections.<br />
• Check if UPnP (Universal Plug and Play) is enabled on your router. Refer to your<br />
router’s instruction manual for procedures.<br />
• Wait for a short period then select “Update Server List” from the TOOLS Menu.<br />
• Check for radio interference when connected using a wireless LAN. Radio interference<br />
may cause the connection to fail.<br />
• If the above does not solve the problem, try turning TV a off on the remote control unit<br />
then turn a on on the flat panel TV.<br />
English<br />
An available server is<br />
selected but cannot be<br />
navigated.<br />
A server is arbitrarily<br />
selected.<br />
File/fol<strong>de</strong>r<br />
configuration differs<br />
from one server to<br />
another (strange<br />
configuration).<br />
A communication error<br />
message appears.<br />
• Check if the server is correctly s<strong>et</strong> up for file sharing, if the targ<strong>et</strong> fol<strong>de</strong>r has been<br />
<strong>de</strong>l<strong>et</strong>ed, or if one or more fol<strong>de</strong>rs have been corrupted on the server.<br />
• Check if there are too many files in each fol<strong>de</strong>r.<br />
• This arbitrary selection happens when the server you used before had been s<strong>et</strong> to<br />
display the Media Navigator menu screen (if you res<strong>et</strong> it, other servers connected are<br />
also res<strong>et</strong>).<br />
•When ON is selected for Auto Connection on the HMG S<strong>et</strong>up menu, the server is<br />
automatically accessed if only one server is connected. Use the TOOLS Menu to select<br />
the proper server.<br />
• The Media Navigator displays the server contents as classified by the server.<br />
• If no information (such as ID3 tag) is contained in the file, files cannot be classified on<br />
the server.<br />
• Refer to the possible solutions provi<strong>de</strong>d previously for “No servers are found.”<br />
• If the above does not solve the problem, try turning TV a off on the remote control then<br />
turn on the flat panel TV’s a.<br />
117<br />
En
06 Helpful Information<br />
Home Media Gallery/PLAYBACK<br />
Issue<br />
Image or sound is<br />
interrupted or distorted<br />
(Block noise appears).<br />
Cannot play or display.<br />
Possible Solutions<br />
• Check the physical connections (hub, router, cable quality). Please use 100BASE-TX<br />
for best quality playback and display speed.<br />
• Check if the PC is operating properly. Reboot the PC after confirming specifications<br />
and s<strong>et</strong>up values.<br />
• Confirm that the file complies to the supported format, bit rate, and/or profile. Also<br />
check the file for damage.<br />
• When connected by a wireless LAN, verify that the bit rate is sufficient.<br />
• Some files that comply with the supported format may not play back or display.<br />
• Check if the DRM content was purchased for use with another PC. Your flat panel TV<br />
cannot play DRM content if it has been transferred from the PC on which it was<br />
purchased to another PC. You can only play DRM content purchased for the PC in use<br />
at the time of purchase. Please obtain a new license or use the PC for which the<br />
content was purchased.<br />
• Check if content on the same server allows multiple client <strong>de</strong>vices (players).<br />
• Check the physical connections (hub, router and cable quality). Please use 100BASE-<br />
TX for best quality playback and display speed.<br />
• Check if the PC is operating properly. Reboot the PC after confirming its specifications<br />
and s<strong>et</strong>up.<br />
• Check if the file complies to the supported format, bit rate and/or profile. Also check<br />
the file for damage.<br />
• Check if the leasing contract for the server has expired.<br />
• When connected by a wireless LAN, check if the bit rate is sufficient.<br />
• Some files that comply with the supported format may not be played back or displayed.<br />
• It takes time to capture and display a large-sized image. If this is the case, no operation<br />
may be performed.<br />
• Check if the DRM content was purchased for use with another PC. With the flat panel<br />
TV you cannot play DRM content if it has been transferred from the PC on which it was<br />
purchased to another PC. You can only play DRM content purchased for the PC in use<br />
at the time of purchase. Please obtain a new license or use the PC for which the<br />
content was purchased.<br />
• Check if content on the same server is played with multiple client <strong>de</strong>vices (players).<br />
Home Media Gallery/USB<br />
118<br />
En<br />
Issue<br />
USB <strong>de</strong>vices are not<br />
properly recognized.<br />
Possible Solutions<br />
• Check if the <strong>de</strong>vice is Mass Storage Class compliant.<br />
• Check if it is connected properly, nothing is damaged (power unit, mo<strong>de</strong> such as Mass<br />
Storage mo<strong>de</strong> and media format, <strong>et</strong>c.).<br />
• Check if it contains the supported files.<br />
• Check if the speed of the <strong>de</strong>vice is sufficient (poor <strong>de</strong>vice speed may result in<br />
interrupted or <strong>de</strong>layed display of images due to a bit-rate problem). When using a<br />
digital camera that is not Mass Storage Class compliant, insert the Flash Memory card<br />
into the multi-card rea<strong>de</strong>r.<br />
• Confirm that the <strong>de</strong>vice is correctly inserted or removed.<br />
• No USB hub is supported. When using a home n<strong>et</strong>work, connect directly to the<br />
<strong>de</strong>vice’s USB port.
Helpful Information 06<br />
Home Media Gallery/USB<br />
Issue<br />
Image or sound is<br />
interrupted or distorted<br />
(Block noise appears).<br />
Possible Solutions<br />
• Verify that the file complies with the supported format, bit rate and/or profile. Also<br />
check the file for damage.<br />
• Some files that comply with the supported format may not play back or display<br />
properly.<br />
• Check if the <strong>de</strong>vice is Mass Storage Class compliant.<br />
• Check if it is connected properly, nothing is damaged (power unit, mo<strong>de</strong> such as Mass<br />
Storage mo<strong>de</strong> and media format, <strong>et</strong>c.).<br />
• Check if it contains the supported files.<br />
• Check if the speed of the <strong>de</strong>vice is sufficient (poor <strong>de</strong>vice speed may result in<br />
interrupted or <strong>de</strong>layed display of images due to a bit-rate problem). When using a<br />
digital camera that is not Mass Storage Class compliant, insert the Flash Memory card<br />
into the multi-card rea<strong>de</strong>r.<br />
English<br />
An external <strong>de</strong>vice<br />
connected to the USB<br />
port does not operate.<br />
Photo data stored in a<br />
digital still camera<br />
cannot be read<br />
through USB interface.<br />
• Check if the <strong>de</strong>vice is connectable to the flat panel TV.<br />
• Re-insert the USB cable.<br />
• For connection, use a USB cable shorter than 5 m.<br />
• Check if the USB cable is properly connected.<br />
• First turn the power off and then on again to check if the external <strong>de</strong>vice works<br />
correctly.<br />
• Check if the external <strong>de</strong>vice works correctly after the USB <strong>de</strong>vice is relaunched.<br />
• Check if the digital still camera is in viewing mo<strong>de</strong>.<br />
• Refer to the instruction manual for the digital still camera.<br />
• Check if the <strong>de</strong>vice is connectable to the flat panel TV.<br />
• Check if the digital still camera is turned on.<br />
• Check if the digital still camera is in viewing mo<strong>de</strong>.<br />
Home Media Gallery/Sli<strong>de</strong> Show<br />
Issue<br />
Sli<strong>de</strong>show (photo<br />
content) doesn’t start.<br />
Next picture does not<br />
appear in the<br />
sli<strong>de</strong>show.<br />
Possible Solutions<br />
• Check if the player is in pause, rotation or zoom mo<strong>de</strong>. If it is, press PLAY or ENTER to<br />
start the sli<strong>de</strong>show.<br />
• The time nee<strong>de</strong>d to display a picture may be longer than the time s<strong>et</strong> to display in Sli<strong>de</strong><br />
Show s<strong>et</strong>tings. Reduce the picture size using a PC and try again.<br />
• Sli<strong>de</strong> Show only displays supported files. If there is only one supported file, that file<br />
remains on the screen. No other files appear.<br />
Other<br />
Issue<br />
Panel sounds/noises<br />
Brightness on si<strong>de</strong>s of<br />
screen are uneven<br />
Possible Solutions<br />
• Some sounds are appropriate for plasma technology.<br />
Examples: fan motor noise, electrical circuit humming, glass panel buzzing, <strong>et</strong>c.<br />
• Display content that compl<strong>et</strong>ely fills the screen until unevenness is minimized.<br />
• Change the AV mo<strong>de</strong> s<strong>et</strong>ting.<br />
119<br />
En
06 Helpful Information<br />
If the information above fails to solve the issue, please contact a <strong>Pioneer</strong>-authorized service representative. Do<br />
not attempt to service the panel yourself. Opening or removing covers exposes you to possible electrical shock<br />
and other dangers as well as possibly voiding your warranty. Request a qualified service professional to check you<br />
flat panel TV.<br />
Some situations that require a service professional are as follows:<br />
• panel dropped or damaged<br />
• power cord or plug damaged<br />
• liquid spilled or an object dropped into the panel<br />
• exposed to rain or water<br />
• noticeable abnormality in panel operation<br />
Occasionally a part within the flat panel TV may fail. Verify that your service professional uses only replacement<br />
parts specified by <strong>Pioneer</strong> or by those with the same characteristics and performance as the original parts. Use<br />
of unauthorized parts can result in fire, electric shock, or other danger. Upon compl<strong>et</strong>ion of any service or repair<br />
work, request that the service professional perform saf<strong>et</strong>y checks to ensure that the product is operating properly.<br />
If you need more assistance or have a Service/Parts-related question, please contact the <strong>Pioneer</strong> Service<br />
organization at (800) 421-1625.<br />
6.4.1 Check the Signal Strength<br />
When receiving a TV channel through a UHF/VHF antenna, check the current channel’s signal strength. You may<br />
use this function only when receiving digital broadcasting singnals over air. Follow the steps below to check a<br />
channel’s signal strength.<br />
1 ) Access the System S<strong>et</strong>up through the S<strong>et</strong>up.<br />
2 ) Select Digital Tuner S<strong>et</strong>up from the System S<strong>et</strong>up menu.<br />
3 ) Select Installation from the Digital Tuner S<strong>et</strong>up menu.<br />
4 ) Select Signal Check from the submenu.<br />
5 ) Select RF Channel.<br />
To add the channel(s), select Add.<br />
6 ) Select the channel to be checked.<br />
7 ) Adjust the direction of the antenna until the current signal strength reaches as close to the maximum signal<br />
strength as possible.<br />
RF Channel : 21<br />
Add<br />
Level : 60%<br />
Quality : 80%<br />
8 ) Press HOME MENU to exit the menu.<br />
120<br />
En
Cautions and Warnings 07<br />
7 Cautions and Warnings<br />
Your flat panel TV is <strong>de</strong>signed for a long and productive life. To keep your panel at peak performance, there are a<br />
few things that can help. This section provi<strong>de</strong>s general information and specific warnings to help you maintain<br />
the flat panel TV at top quality throughout its lif<strong>et</strong>ime.<br />
English<br />
Note: If you do not intend to use your flat panel TV for an exten<strong>de</strong>d period, occasionally power on and run the<br />
panel to maintain functionality.<br />
7.1 Installation D<strong>et</strong>ails<br />
It is best to use parts and accessories <strong>de</strong>signed by <strong>Pioneer</strong>. Use of accessories other than the <strong>Pioneer</strong> stand or<br />
installation brack<strong>et</strong> may result in instability and could cause injury. For custom installations, please speak with<br />
your <strong>de</strong>aler or expert installer before attempting to install your high-end flat panel TV. These professionals are<br />
familiar with proper installation techniques including ventilation.<br />
Using the unit without proper ventilation may cause the internal temperature to rise and could result in a possible<br />
malfunction. When the surrounding environmental or internal temperature exceeds a certain <strong>de</strong>gree, the display<br />
automatically powers off in or<strong>de</strong>r to cool the internal electronics and prevent a hazardous situation.<br />
A malfunction can be caused by a single issue such as ventilation or by a combination of factors. <strong>Pioneer</strong> is not<br />
responsible for acci<strong>de</strong>nts or damage caused by using parts and/or accessories manufactured by other<br />
companies, ina<strong>de</strong>quate installation sites, poor stabilization practices, erroneous installation m<strong>et</strong>hods,<br />
operational mistakes, site remo<strong>de</strong>ling, or natural disasters.<br />
For more installation information, refer to the following bull<strong>et</strong> points:<br />
• Confirm that panel vents are not partially obstructed or compl<strong>et</strong>ely blocked.<br />
• Use a vacuum cleaner s<strong>et</strong> to its lowest suction s<strong>et</strong>ting to clean dusty vents.<br />
• Distance the panel from the wall, other equipment, <strong>et</strong>c. (for minimum space requirements, refer to “2.1.1<br />
Check the Location for Suitability”).<br />
• Do not fit the unit insi<strong>de</strong> of narrow spaces where ventilation is poor.<br />
• Do not drape, seat, or enclose the panel in any material including blank<strong>et</strong>s, loose cloth, or carp<strong>et</strong>ing as this<br />
could block the panel vents.<br />
• Use a proper mount or stand rather than leaning the panel against a wall or other support.<br />
7.2 Physical Location & Temperature Consi<strong>de</strong>rations<br />
Con<strong>de</strong>nsation may form on the surface or insi<strong>de</strong> of the flat panel TV when the panel is moved from a cold place<br />
to a warm place or just after a heater or air conditioner is switched on. If con<strong>de</strong>nsation forms, do not turn on the<br />
flat panel TV until all moisture evaporates. Powering on the display when there is con<strong>de</strong>nsation may cause the<br />
panel to malfunction.<br />
7.3 Usage Gui<strong>de</strong>lines<br />
For maximum enjoyment of your <strong>Pioneer</strong> flat panel TV, read the following information carefully.<br />
Over the course of the flat panel TV’s lif<strong>et</strong>ime, as with all phosphor-based screens including standard tube-type<br />
TVs, the luminosity of the screen diminishes very slowly. Also, static pictures shown over an exten<strong>de</strong>d period can<br />
adversely affect the screen image. To enjoy bright and beautiful pictures for many years to come, please apply the<br />
following gui<strong>de</strong>lines.<br />
• S<strong>et</strong> the flat panel TV to Standby when it is not being used.<br />
• Avoid leaving a still image or frequently showing the same picture on the screen (e.g. closed-captioned<br />
images, games with static portions, <strong>et</strong>c.).<br />
• Hi<strong>de</strong> the On Screen Display (OSD) from a DVD player, VCR, or other <strong>de</strong>vice when not in use.<br />
• Do not leave a picture freeze-framed or paused for long periods.<br />
• Avoid showing a picture with very bright and very dark areas on the screen for exten<strong>de</strong>d lengths to time.<br />
• Activate the GAME mo<strong>de</strong> on the AV Selection submenu to play a game but try to limit using this mo<strong>de</strong> for<br />
more than two hours at a time.<br />
121<br />
En
07 Cautions and Warnings<br />
• View full-motion, high-action vi<strong>de</strong>o in WIDE or FULL screen after playing a game or showing a still/PC image.<br />
The recommen<strong>de</strong>d duration for showing the action vi<strong>de</strong>o is three times as long as the game or PC image<br />
was on the screen.<br />
• View full-motion vi<strong>de</strong>o in WIDE or FULL screen after playing content with si<strong>de</strong>, top, or bottom masking (black<br />
bars). Extensive viewing of masked content without this recovery process can cause uneven wear on the<br />
plasma cells.<br />
7.4 Signal Interference or Noise<br />
Signal interference, also referred to as vi<strong>de</strong>o noise or white noise, can be caused by many different situations.<br />
The most common are addressed in the following sections.<br />
Infrared rays<br />
The flat panel TV releases infrared rays because of its characteristics. Depending on how the flat panel TV is used,<br />
remote controls for nearby equipment may be adversely affected. Wireless headphones using infrared rays can<br />
experience noise interference. If this is the case, move equipment to a location where its remote control <strong>sens</strong>or<br />
is not affected.<br />
Radio Signals<br />
While this flat panel TV me<strong>et</strong>s the required specifications, it can affect the signals for surrounding equipment. If<br />
your radio, PC, VCR, or other electrical equipment is disrupted by the panel, move the equipment away from the<br />
panel.<br />
Flat Panel TV Motor<br />
The screen of the flat panel TV is composed of extremely fine pixels that emit light according to received vi<strong>de</strong>o<br />
signals. This principle may cause you to hear a slight buzz or electrical hum coming from the panel. This is a<br />
normal sound for the flat panel TV and does not indicate a failing unit.<br />
Flat Panel TV Fans<br />
You may hear the sound of a fan motor at times. The slight noise is caused by a cooling fan motor speeding up<br />
when the ambient temperature of the flat panel TV rises. This is a normal function of the panel and is not a<br />
malfunction.<br />
7.5 Phosphor Properties<br />
The following are typical effects and characteristics of a phosphor-based matrix display and as such are not<br />
covered by the Warranty:<br />
• Permanent residual images upon the phosphors of the panel<br />
• Existence of one or more inactive light cells in small quantity<br />
• Noises generated by fan motors, electrical circuits (hum), panel plates, <strong>et</strong>c.<br />
7.6 Image Information Including R<strong>et</strong>ention & After-Image Lag<br />
Menu Window Size (after a Vi<strong>de</strong>o Switch)<br />
Programs may be high <strong>de</strong>finition (HD) or standard <strong>de</strong>finition (SD). This flat panel TV automatically scales to the<br />
appropriate <strong>de</strong>finition type. If the vi<strong>de</strong>o program’s <strong>de</strong>finition type changes while a menu window is on screen (for<br />
example: HD to SD or SD to HD) the menu size may temporarily shrink or enlarge until the panel finishes<br />
adjusting the picture. Adjusting may happen, for example, when switching b<strong>et</strong>ween a TV program and playback<br />
from a DVR, or when a recor<strong>de</strong>d program switches b<strong>et</strong>ween different <strong>de</strong>finition types while the menu is showing.<br />
The menu r<strong>et</strong>urns to its normal size after a couple of seconds. This action is normal and does not indicate a<br />
problem with your flat panel TV.<br />
Pixel Information<br />
Plasma screens show pictures using pixels. <strong>Pioneer</strong> flat panel TVs contain a very large number of pixels. The size<br />
of the panel d<strong>et</strong>ermines the number of pixels. With the 20FD Series mo<strong>de</strong>ls, there are over 6.2 million pixels in the<br />
50”/60” panel. All <strong>Pioneer</strong> display panels are manufactured using a very high level of ultra-precision technology<br />
and un<strong>de</strong>rgo individual quality control.<br />
122<br />
En
Cautions and Warnings 07<br />
In rare cases, some pixels can be permanently switched off, or on, resulting in either a black or colored pixel<br />
permanently fixed on the screen. This effect is common to all plasma displays because it is a consequence of the<br />
technology.<br />
If the <strong>de</strong>fective pixels are visible at the standard viewing distance of b<strong>et</strong>ween 2.5 and 3.5 m<strong>et</strong>ers (8.2 fe<strong>et</strong> and 11.5<br />
fe<strong>et</strong>) while viewing a normal broadcast (i.e. not a test card, still image, or single color display) please immediately<br />
contact <strong>Pioneer</strong> Customer Support (USA) or Customer Satisfaction (CANADA). See insi<strong>de</strong> back cover for contact<br />
information. If, however, the faulty pixels can only be seen close up or during single color displays then this is<br />
consi<strong>de</strong>red normal for this technology.<br />
Image R<strong>et</strong>ention (a.k.a. Burn-In)<br />
Leaving a static picture on screen for several hours can cause a faint imprint of the image. This imprint is known as<br />
image r<strong>et</strong>ention or burn-in. The image may be temporary or permanent. Although caused by different things, image<br />
r<strong>et</strong>ention can occur on all display technologies including LDC, plasma, direct view CRT TVs, and projection TVs.<br />
On today’s plasma displays, permanent image r<strong>et</strong>ention is less of a worry. Most image r<strong>et</strong>ention can be improved<br />
simply by watching som<strong>et</strong>hing with a lot of action or rapid screen changes. To avoid image r<strong>et</strong>ention as much as<br />
possible, refer to the gui<strong>de</strong>lines below.<br />
• Change the picture periodically when showing static images, such as a fixed image from a PC or a TV game<br />
unit, for longer periods.<br />
• Avoid leaving fixed images such as time of day indicator or channel logos on screen whenever possible.<br />
• Display content in a wi<strong>de</strong> aspect ratio (no black or gray bars on any si<strong>de</strong> of the content). This flat panel TV is<br />
equipped with multiple wi<strong>de</strong>-screen viewing mo<strong>de</strong>s; use one of these mo<strong>de</strong>s to fill the entire screen with<br />
content. View in a wi<strong>de</strong> aspect ratio unless doing so would be a copyright infringement.<br />
• S<strong>et</strong> the Si<strong>de</strong> Mask d<strong>et</strong>ection function to Mo<strong>de</strong> 1 or Mo<strong>de</strong> 2. High Definition 16:9 aspect ratio images<br />
containing si<strong>de</strong> masks are d<strong>et</strong>ected automatically and si<strong>de</strong> masks are ad<strong>de</strong>d or the image appears in fullscreen.<br />
• Avoid showing dark images after still images for a period of time. In most cases, any image r<strong>et</strong>ention caused<br />
by this sequence can be corrected by displaying bright images for a similar period of time.<br />
After-Image Lag<br />
Displaying the same images such as still images for a long time may cause after-image lagging. After-Image Lag<br />
refers to a ghost of the still image remaining visible after the picture is no longer being shown. This may occur in<br />
the following cases.<br />
• After-image lagging due to remaining electric load<br />
If an image with very high peak luminance is displayed for more than a minute, after-image lagging may<br />
occur due to the remaining electric load. The ghost-image remaining on the screen disappears when<br />
moving images are shown. The luminance of the still image and the length of time it was displayed<br />
d<strong>et</strong>ermine how long it takes for the ghost image to fa<strong>de</strong> away.<br />
• After-image (lag image) due to burning<br />
Avoid displaying the same image on the flat panel TV continuously over a long period. If the same image is<br />
displayed continuously for several hours, or for shorter periods over several days, a permanent after-image<br />
may remain on the screen. This after-image is permanent because the fluorescent materials burned.<br />
Burned images may fa<strong>de</strong> eventually after playing other vi<strong>de</strong>o sequences but do not disappear compl<strong>et</strong>ely.<br />
When a program menu, or frozen image is displayed for up to 10 minutes, the flat panel TV automatically turns<br />
the image off to prevent the screen from being burned.<br />
Screen Protection<br />
Screen Protection simultaneously optimizes the related s<strong>et</strong>tings to alleviate image r<strong>et</strong>ention. For d<strong>et</strong>ails, see<br />
“3.6.2 Extend Your Panel Life.”<br />
Image Orbiter<br />
Another built-in feature to protect against burn-in is the Orbiter function. Orbiter automatically changes the<br />
position of the picture imperceptibly while the image is on screen. For more information about the feature, refer<br />
to “3.6.3 Turn On the Image Orbiter.”<br />
English<br />
123<br />
En
07 Cautions and Warnings<br />
7.7 Saf<strong>et</strong>y Precautions<br />
Your flat panel TV is engineered and manufactured with one of the highest priorities being saf<strong>et</strong>y. However,<br />
improper use can result in electric shock and/or fire. To avoid danger please follow the instructions below when<br />
installing, operating, and cleaning your flat panel TV.<br />
• Read & R<strong>et</strong>ain Instructions - Read all operating and user information provi<strong>de</strong>d with your flat panel TV.<br />
• Environment - Avoid installing the panel in a location with exposure to large quantities of dust, temperature<br />
extremes, high humidity, direct sunlight, or subject to excessive vibrations or impact shock. Also, never pour<br />
a liquid or insert an object in to the flat panel TV.<br />
• Cleaning - See the section above regarding the proper way to clean your flat panel TV.<br />
• Water & Moisture - Avoid operating or positioning your panel close to water or other sources of liquid. Such<br />
locations inclu<strong>de</strong> a bathroom, a kitchen or laundry sink, in a damp basement, by a swimming pool, <strong>et</strong>c.<br />
• Power - Turn OFF the panel before connecting any other equipment. Operate the panel only from a groun<strong>de</strong>d<br />
outl<strong>et</strong>.<br />
7.8 Legal Notices<br />
7.8.1 Saf<strong>et</strong>y<br />
WARNING<br />
This equipment is not waterproof. To prevent a fire or shock hazard, do not place any container filled<br />
with liquid near this equipment (such as a vase or flower pot) or expose it to dripping, splashing, rain<br />
or moisture.<br />
D3-4-2-1-3_B_En<br />
WARNING: This product equipped with a three-wire grounding (earthed) plug - a plug that has a<br />
third (grounding) pin. This plug only fits a grounding-type power outl<strong>et</strong>. If you are unable to insert<br />
the plug into an outl<strong>et</strong>, contact a licensed electrician to replace the outl<strong>et</strong> with a properly groun<strong>de</strong>d<br />
one. Do not <strong>de</strong>feat the saf<strong>et</strong>y purpose of the grounding plug.<br />
D3-4-2-1-6_A_En<br />
WARNING: To prevent a fire hazard, do not place any naked flame sources (such as a lighted<br />
candle) on the equipment.<br />
D3-4-2-1-7a_A_En<br />
VENTILATION CAUTION:<br />
When installing this unit, make sure to leave space around the unit for ventilation to improve heat<br />
radiation. For the minimum space required, see page 15.<br />
WARNING: Slots and openings in the cabin<strong>et</strong> are provi<strong>de</strong>d for ventilation to ensure reliable<br />
operation of the product, and to protect it from overheating. To prevent fire hazard, the openings<br />
should never be blocked or covered with items (such as newspapers, table-cloths, curtains) or by<br />
operating the equipment on thick carp<strong>et</strong> or a bed.<br />
124<br />
En
Cautions and Warnings 07<br />
CAUTION: The switch on this unit will not compl<strong>et</strong>ely shut off all power from the AC outl<strong>et</strong>. Since the power<br />
cord serves as the main disconnect <strong>de</strong>vice for the unit, you will need to unplug it from the AC outl<strong>et</strong> to shut<br />
down all power. Therefore, make sure the unit has been installed so that the power cord can be easily<br />
unplugged from the AC outl<strong>et</strong> in case of an acci<strong>de</strong>nt. To avoid fire hazard, the power cord should also be<br />
unplugged from the AC outl<strong>et</strong> when left unused for a long period of time (for example, when on vacation).<br />
D3-4-2-2-2a_A_En<br />
English<br />
Operating Environment<br />
Operating environment temperature and humidity:<br />
+0 ºC to +40 ºC (+32 ºF to +104 ºF); less than 85 %RH (cooling vents not blocked)<br />
Do not install this unit in a poorly ventilated area, or in locations exposed to high humidity or direct sunlight<br />
(or strong artificial light)<br />
D3-4-2-1-7c_A_En<br />
7.8.2 Radio Interference<br />
This digital television is capable of receiving analog basic, digital basic and digital premium cable television<br />
programming by direct connection to a cable system providing such programming. A security card provi<strong>de</strong>d<br />
by your cable operator is required to view encrypted digital programming. Certain advanced and interactive<br />
digital cable services such as vi<strong>de</strong>o-on-<strong>de</strong>mand, a cable operator’s enhanced program gui<strong>de</strong> and dataenhanced<br />
television services may require the use of a s<strong>et</strong>-top box. For more information call your local cable<br />
operator.<br />
Information to User<br />
Alteration or modifications carried out without appropriate authorization may invalidate the user’s right to<br />
operate the equipment.<br />
D8-10-2_En<br />
[For Canadian mo<strong>de</strong>l]<br />
This Class B digital apparatus complies with Canadian ICES-003.<br />
D8-10-1-3_En<br />
FEDERAL COMMUNICATIONS COMMISSION DECLARATION OF CONFORMITY<br />
This <strong>de</strong>vice complies with part 15 of the FCC Rules. Operation is subject to the following two conditions:<br />
(1) This <strong>de</strong>vice may not cause harmful interference, and (2) this <strong>de</strong>vice must accept any interference received,<br />
including interference that may cause un<strong>de</strong>sired operation.<br />
Product Name: Flat Panel TV<br />
Mo<strong>de</strong>l Number: PDP-6020FD/PDP-5020FD<br />
Product Category: Class B Personal Computers & Peripherals<br />
Responsible Party Name: PIONEER ELECTRONICS SERVICE, INC.<br />
Address: 1925 E. DOMINGUEZ ST., LONG BEACH, CA 90801-1760, U.S.A.<br />
Phone: 800-421-1625<br />
URL: http://www.pioneerelectronics.com<br />
NOTE: This equipment has been tested and found to comply with the limits for a Class B digital <strong>de</strong>vice,<br />
pursuant to Part 15 of the FCC Rules. These limits are <strong>de</strong>signed to provi<strong>de</strong> reasonable protection against<br />
harmful interference in a resi<strong>de</strong>ntial installation. This equipment generates, uses, and can radiate radio<br />
frequency energy and, if not installed and used in accordance with the instructions, may cause harmful<br />
interference to radio communications. However, there is no guarantee that interference will not occur in a<br />
particular installation. If this equipment does cause harmful interference to radio or television reception,<br />
which can be d<strong>et</strong>ermined by turning the equipment off and on, the user is encouraged to try to correct the<br />
interference by one or more of the following measures:<br />
– Reorient or relocate the receiving antenna.<br />
– Increase the separation b<strong>et</strong>ween the equipment and receiver.<br />
– Connect the equipment into an outl<strong>et</strong> on a circuit different from that to which the receiver is connected.<br />
– Consult the <strong>de</strong>aler or an experienced radio/TV technician for help. D8-10-1-2_En<br />
CAUTION: This product satisfies FCC regulations when shiel<strong>de</strong>d cables and connectors are used to connect<br />
the unit to other equipment. To prevent electromagn<strong>et</strong>ic interference with electric appliances such as radios<br />
and televisions, use shiel<strong>de</strong>d cables and connectors for connections.<br />
D8-10-3a_En<br />
125<br />
En
08 Appendix<br />
8 Appendix<br />
8.1 Ratings Charts (for Various Audience Classifications)<br />
The charts below list the various rating systems recognized by your flat panel TV.<br />
8.1.1 TV Ratings (age-based)<br />
Rating<br />
Description<br />
TV-Y<br />
TV-Y7<br />
TV-G<br />
TV-PG<br />
TV-14<br />
TV-MA<br />
All children<br />
Children seven and above<br />
General audiences<br />
Parental guidance suggested<br />
Parents strongly cautioned<br />
Mature audiences only<br />
8.1.2 U.S. TV Parental Gui<strong>de</strong>line Ratings (age/category-based)<br />
Rating<br />
Description<br />
FV<br />
V<br />
S<br />
L<br />
D<br />
Fantasy Violence<br />
Violence<br />
Sexual Situations<br />
Adult Language<br />
Sexual Dialog<br />
8.1.3 MPAA Movie Ratings (age-based)<br />
Rating<br />
Description<br />
N/A<br />
G<br />
PG<br />
PG-13<br />
R<br />
NC-17<br />
NR<br />
Not applicable for MPAA ratings<br />
General audiences. All ages admitted.<br />
Parental guidance suggested. Some material<br />
may not be suitable for children.<br />
Parents strongly cautioned. Some material may<br />
be inappropriate for children un<strong>de</strong>r 13.<br />
Restricted. Un<strong>de</strong>r 17 requires accompanying<br />
parent or adult guardian (age varies in some<br />
jurisdictions).<br />
No one 17 and un<strong>de</strong>r admitted.<br />
Not rated<br />
126<br />
En
Appendix<br />
08<br />
8.1.4 Canadian - English Ratings (age-based)<br />
E<br />
(exempt)<br />
Rating<br />
Description<br />
News, sports, documentaries, other information<br />
programming, talk shows, music vi<strong>de</strong>os, vari<strong>et</strong>y<br />
programming<br />
English<br />
C<br />
(children)<br />
C8+<br />
(children over 8)<br />
G<br />
(general)<br />
PG<br />
(parental guidance)<br />
14+<br />
(children over 14)<br />
18+<br />
(adults)<br />
For younger children un<strong>de</strong>r the age of eight years;<br />
pays close attention to themes that could<br />
threaten their <strong>sens</strong>e of security and well-being<br />
Contains no portrayal of violence as the preferred,<br />
acceptable, or only way to resolve conflict; nor<br />
encourages children to imitate dangerous acts<br />
they may see on the screen<br />
Acceptable for all age groups; contains very little<br />
violence, physical, verbal or emotional<br />
For general audience but may not be suitable for<br />
younger children (un<strong>de</strong>r the age of eight); could<br />
contain controversial themes or issues<br />
Contains themes where violence is one of the<br />
dominant elements of the storyline but it must be<br />
integral to the <strong>de</strong>velopment of plot or character;<br />
language usage could be profane; limited nudity<br />
present within the context of the theme<br />
Contains <strong>de</strong>pictions of violence related to the<br />
<strong>de</strong>velopment of plot, character or themes<br />
inten<strong>de</strong>d for adult viewing; could contain graphic<br />
language and portrayals of sex and nudity<br />
8.1.5 Canadian - French Ratings (age-based)<br />
Rating<br />
E<br />
G<br />
8ans+<br />
13ans+<br />
16ans+<br />
18ans+<br />
Description<br />
News, sports, documentaries, other information<br />
programming, talk shows, music vi<strong>de</strong>os, vari<strong>et</strong>y<br />
programming<br />
All ages and children, contains minimal direct<br />
violence, but may be integrated into the plot in a<br />
humorous or unrealistic manner<br />
General but inadvisable for young children; may<br />
be viewed by a wi<strong>de</strong> public audience but could<br />
contain scenes disturbing to children un<strong>de</strong>r eight<br />
who cannot distinguish b<strong>et</strong>ween imaginary and<br />
real situations; view with parent<br />
Contains scenes of frequent violent scenes and<br />
therefore recommen<strong>de</strong>d for viewing with parent<br />
Contains frequent violent scenes and intense<br />
violence<br />
Only for adult viewing; contains frequent violent<br />
scenes and extreme violence<br />
127<br />
En
08 Appendix<br />
8.2 Manufacturer Co<strong>de</strong>s to Program into the Remote Control<br />
8.2.1 Cable<br />
Brand/Co<strong>de</strong> Brand/Co<strong>de</strong> Brand/Co<strong>de</strong> Brand/Co<strong>de</strong> Brand/Co<strong>de</strong> Brand/Co<strong>de</strong><br />
A-Mark<br />
0008,0144<br />
ABC<br />
0237, 0003,<br />
0008<br />
Accuphase<br />
0003<br />
Acorn<br />
0237<br />
Action<br />
0237<br />
Active<br />
0237<br />
Americast<br />
0899<br />
Archer<br />
0237, 0260<br />
BCC<br />
0276<br />
Bell South<br />
0899<br />
British Telecom<br />
0003<br />
Century<br />
0008<br />
Clearmaster<br />
0883<br />
ClearMax<br />
0883<br />
Cool Box<br />
0883<br />
Coolmax<br />
0883<br />
Digeo<br />
1187<br />
Director<br />
0476<br />
Fosgate<br />
0276<br />
GE<br />
0144<br />
General<br />
Instrument<br />
0476, 0810,<br />
0276, 0003<br />
Gibralter<br />
0003<br />
GMI<br />
0883<br />
GoldStar<br />
0144<br />
Hitachi<br />
0003, 0008<br />
Insight<br />
0476, 0810<br />
Jerrold<br />
0476, 0810,<br />
0276, 0003<br />
Memorex<br />
0000<br />
Mitsubishi<br />
0003<br />
Motorola<br />
1376, 0476,<br />
0810, 0276,<br />
1187, 1106<br />
Multitech<br />
0883<br />
Nova Vision<br />
0008<br />
Novaplex<br />
0008<br />
Pace<br />
1877, 0877,<br />
0237, 0008<br />
Panasonic<br />
0000, 0008,<br />
0144, 0107<br />
Paragon<br />
0000, 0008, 0525<br />
Penney<br />
0000<br />
Philips<br />
1305, 0317<br />
<strong>Pioneer</strong><br />
1877, 0877,<br />
0144, 0533,<br />
0023, 0260,<br />
1021<br />
Pulsar<br />
0000<br />
Quasar<br />
0000<br />
RadioShack<br />
0883<br />
RCA<br />
1256<br />
Regal<br />
0276<br />
Runco<br />
0000<br />
Samsung<br />
0003, 0144,<br />
0023<br />
Scientific<br />
Atlanta<br />
1877, 0877,<br />
0477, 0237,<br />
0003, 0000,<br />
0008<br />
Sony<br />
1006<br />
Sprucer<br />
0144<br />
Starcom<br />
0003<br />
Supercable<br />
0276<br />
Supermax<br />
0883<br />
Thomson<br />
1256<br />
Torx<br />
0003<br />
Toshiba<br />
0000<br />
Tristar<br />
0883<br />
United Cable<br />
0276, 0003<br />
US Electronics<br />
0276, 0003,<br />
0008<br />
V2<br />
0883<br />
Vi<strong>de</strong>oway<br />
0000<br />
Viewmaster<br />
0883<br />
Vision<br />
0883<br />
Vortex View<br />
0883<br />
Zenith<br />
0000, 0525,<br />
0899<br />
8.2.2 Satellite<br />
Brand/Co<strong>de</strong> Brand/Co<strong>de</strong> Brand/Co<strong>de</strong> Brand/Co<strong>de</strong> Brand/Co<strong>de</strong> Brand/Co<strong>de</strong><br />
128<br />
En<br />
Bell ExpressVu<br />
0775, 1170<br />
Chaparral<br />
0216<br />
Coolsat<br />
1806, 2147<br />
Crossdigital<br />
1109<br />
DirecTV<br />
1377, 0392,0566,<br />
0639, 1639,<br />
1142, 0247,<br />
0749, 1749,<br />
0819, 1856,<br />
1076, 1108,<br />
0099, 1109,<br />
1392, 1414,<br />
1442, 1443,<br />
1444, 1538, 1609<br />
Dish N<strong>et</strong>work<br />
System<br />
1505, 0775,<br />
1170, 1775<br />
Dishpro<br />
1505, 0775,<br />
1775<br />
Echostar<br />
1505, 0775,<br />
1170, 1775<br />
Expressvu<br />
0775, 1775<br />
Fortec Star<br />
1550, 1821,<br />
1948<br />
Funai<br />
1377<br />
GE<br />
0392, 0566<br />
General<br />
Instrument<br />
0869<br />
GOI<br />
0775, 1775<br />
Hitachi<br />
0749, 0819,<br />
1250<br />
Houston<br />
0775<br />
HTS<br />
0775, 1775<br />
Hughes<br />
N<strong>et</strong>work<br />
Systems<br />
1142, 0749,<br />
1749, 1442,<br />
1443, 1444,<br />
1538<br />
Humax<br />
1790, 1781<br />
Innova<br />
0099<br />
Jerrold<br />
0869<br />
JVC<br />
0775, 1170,<br />
1775<br />
LG<br />
1226, 1414<br />
Magnavox<br />
0722<br />
McIntosh<br />
0869<br />
Mitsubishi<br />
0749<br />
Motorola<br />
0869, 0856<br />
N<strong>et</strong>sat<br />
0099<br />
Next Level<br />
0869<br />
Panasonic<br />
0247, 0701<br />
Pansat<br />
0647, 1807<br />
Philips<br />
1142, 0749,<br />
1749, 0775,<br />
0819, 1076,<br />
0722, 0099,<br />
1442<br />
<strong>Pioneer</strong><br />
1142, 0329,<br />
1442<br />
Primestar<br />
0869<br />
Proscan<br />
0392, 0566<br />
RadioShack<br />
0566, 0775,<br />
0869<br />
RCA<br />
0392, 0566,<br />
1142, 0775,<br />
0855, 0143,<br />
1392, 1442<br />
Samsung<br />
1377, 1142,<br />
1276, 1108,<br />
1109, 1442,<br />
1609<br />
Sanyo<br />
1219<br />
SKY<br />
0856, 0099<br />
Sony<br />
0639, 1639<br />
Star Choice<br />
0869<br />
Star Trak<br />
0869<br />
Thomson<br />
0392, 0566<br />
TiVo<br />
1142, 1442,<br />
1443, 1444,<br />
1538<br />
Toshiba<br />
0749, 1749,<br />
0790, 0819,<br />
1285<br />
UltimateTV<br />
1392<br />
Ultrasat<br />
1806<br />
Uni<strong>de</strong>n<br />
0722<br />
Voom<br />
0869<br />
Zenith<br />
0856, 1856,<br />
1810
Appendix<br />
08<br />
8.2.3 VCR (Brands A - F)<br />
Brand/Co<strong>de</strong> Brand/Co<strong>de</strong> Brand/Co<strong>de</strong> Brand/Co<strong>de</strong> Brand/Co<strong>de</strong> Brand/Co<strong>de</strong><br />
A-Mark<br />
0037, 0240,<br />
0000, 0278, 0046<br />
ABS<br />
1972<br />
Accurian<br />
0000<br />
Admiral<br />
0060, 0048,<br />
0039, 0047,<br />
0104, 0209,<br />
0479<br />
Adventura<br />
0037, 0240,<br />
0000<br />
Adyson<br />
0072<br />
Aiko<br />
0278<br />
Aiwa<br />
0037, 0000,<br />
0124, 0307,<br />
1137, 0468<br />
Akai<br />
0041, 0175<br />
Alba<br />
0209, 0072,<br />
0278<br />
Alienware<br />
1972<br />
Allegro<br />
0039, 1137<br />
America Action<br />
0278<br />
American High<br />
0035, 0081<br />
Amstrad<br />
0000<br />
Anam National<br />
0226<br />
Asha<br />
0240<br />
Astra<br />
0035, 0240<br />
Audio Dynamics<br />
0040<br />
Audio-Technica<br />
0058<br />
Audiovox<br />
0037, 0278,<br />
0038<br />
Avis<br />
0000, 0072<br />
Beaumark<br />
0240<br />
Bell & Howell<br />
0035, 0048,<br />
0039, 0000,<br />
0104, 0046,<br />
0479<br />
Bell ExpressVu<br />
1944<br />
Broksonic<br />
0184, 0121,<br />
0209, 0002,<br />
0479, 1815<br />
Calix<br />
0037<br />
Candle<br />
0037, 0038<br />
Canon<br />
0035<br />
Capehart<br />
0002<br />
Captive Works<br />
2167<br />
Carrera<br />
0240<br />
Carver<br />
0035, 0081<br />
CCE<br />
0072, 0278<br />
Cineral<br />
0278<br />
CineVision<br />
1137<br />
Citizen<br />
0035, 0037,<br />
0240, 0000,<br />
0209, 0278,<br />
0479<br />
Classic<br />
0037<br />
Colortyme<br />
0060, 0035,<br />
0045, 0278<br />
Colt<br />
0000, 0072<br />
Craig<br />
0037, 0047,<br />
0240, 0072<br />
Criterion<br />
0000, 0072<br />
Crosley<br />
0035, 0081,<br />
0000<br />
Crown<br />
0072, 0278<br />
Curtis Mathes<br />
0060, 0035,<br />
0162, 0240,<br />
0000, 0041,<br />
0278, 0432<br />
Cybernex<br />
0240<br />
CyberPower<br />
1972<br />
Daewoo<br />
0037, 0045,<br />
0278, 0046,<br />
1137<br />
Daytron<br />
0037, 0278<br />
DBX<br />
0040, 0050<br />
Dell<br />
1972<br />
Denon<br />
0081, 0042<br />
Derwent<br />
0041<br />
DirecTV<br />
0739, 0740<br />
Dish N<strong>et</strong>work<br />
System<br />
1944<br />
Dishpro<br />
1944<br />
Dual<br />
0000<br />
Dumont<br />
0040<br />
Durabrand<br />
0039, 0038<br />
Dynatech<br />
0240, 0000<br />
Echostar<br />
1944<br />
Electrohome<br />
0060, 0037,<br />
0240, 0000,<br />
0043, 0209<br />
Electrophonic<br />
0037<br />
Emerald<br />
0184, 0121<br />
Emerex<br />
0032<br />
Emerson<br />
0037, 0184,<br />
0240, 0000,<br />
0121, 0043,<br />
0209, 0002,<br />
0278, 0479,<br />
0593, 1593<br />
ESA<br />
1137<br />
Expressvu<br />
1944<br />
Fisher<br />
0039, 0047,<br />
0000, 0104,<br />
0046<br />
Fuji<br />
0035, 0033<br />
Fujitsu<br />
0000<br />
Funai<br />
0037, 0000,<br />
0072, 0278,<br />
0593, 1593<br />
English<br />
129<br />
En
08 Appendix<br />
8.2.4 VCR (Brands G - O)<br />
Brand/Co<strong>de</strong> Brand/Co<strong>de</strong> Brand/Co<strong>de</strong> Brand/Co<strong>de</strong> Brand/Co<strong>de</strong> Brand/Co<strong>de</strong><br />
Garrard<br />
0000<br />
Gateway<br />
1972<br />
GE<br />
0060, 0035,<br />
0048, 0240,<br />
0000<br />
Gemini<br />
0060<br />
Genexxa<br />
0037, 0000,<br />
0278<br />
Go Vi<strong>de</strong>o<br />
0240, 0432,<br />
0526, 0614,<br />
1137, 1873<br />
GOI<br />
1944<br />
GoldStar<br />
0035, 0037,<br />
0039, 0000,<br />
0278, 0038,<br />
1137<br />
Goodmans<br />
0037, 0081,<br />
0000, 0072,<br />
0278<br />
Gradiente<br />
0000<br />
Granada<br />
0081, 0042<br />
Grundig<br />
0081, 0226<br />
Harley Davidson<br />
0000<br />
Harman/Kardon<br />
0081, 0038<br />
Harvard<br />
0072<br />
Harwood<br />
0072<br />
Headquarter<br />
0046<br />
Hewl<strong>et</strong>t<br />
Packard<br />
1972<br />
HI-Q<br />
0035, 0047,<br />
0000<br />
Hitachi<br />
0035, 0037,<br />
0045, 0000,<br />
0042, 0041,<br />
0089<br />
Howard<br />
Computers<br />
1972<br />
HP<br />
1972<br />
HTS<br />
1944<br />
Hughes<br />
N<strong>et</strong>work<br />
Systems<br />
0042, 0739,<br />
0740<br />
Humax<br />
0739, 1797,<br />
1988<br />
Hush<br />
1972<br />
Hytek<br />
0047, 0000,<br />
0072<br />
iBUYPOWER<br />
1972<br />
Instant Replay<br />
0035, 0226<br />
ITT Nokia<br />
0240, 0041<br />
Janeil<br />
0240<br />
Jensen<br />
0067, 0041<br />
JVC<br />
0067, 0041,<br />
0058, 1162<br />
1944<br />
KEC<br />
0037, 0278<br />
Kenwood<br />
0067, 0041,<br />
0038, 0046<br />
KLH<br />
0072<br />
Kodak<br />
0035, 0037<br />
KTV<br />
0000<br />
LG<br />
0037, 0240,<br />
0038, 1037,<br />
1137, 2010<br />
Linksys<br />
1972<br />
Lloyd’s<br />
0240, 0000,<br />
0072, 0038,<br />
0040<br />
Loewe<br />
0081<br />
Logik<br />
0240, 0000,<br />
0072<br />
Lumatron<br />
0278<br />
Luxor<br />
0046<br />
LXI<br />
0037, 0000,<br />
0042, 0067<br />
M Electronic<br />
0240<br />
Magnasonic<br />
0037, 0240,<br />
0000, 0072,<br />
0278, 0593<br />
Magnavox<br />
0035, 0037,<br />
0048, 0039,<br />
0081, 0240,<br />
0000, 0226,<br />
0563, 0593,<br />
0618, 1593<br />
Magnin<br />
0240<br />
Marantz<br />
0035, 0081,<br />
0038<br />
Marta<br />
0037<br />
Matsui<br />
0037, 0209<br />
Matsushita<br />
0035, 0162,<br />
0081, 1162<br />
Media Center<br />
PC<br />
1972<br />
MEI<br />
0035<br />
Memorex<br />
0035, 0162,<br />
0037, 0048,<br />
0039, 0047,<br />
0240, 0000,<br />
0104, 0209,<br />
0072, 0278,<br />
0046, 0307,<br />
0479, 1037,<br />
1162<br />
M<strong>et</strong>z<br />
0037<br />
MGA<br />
0060, 0240,<br />
0043<br />
MGN<br />
Technology<br />
0240<br />
Microsoft<br />
1972<br />
Midland<br />
0240<br />
Mind<br />
1972<br />
Minolta<br />
0042<br />
Mitsubishi<br />
0060, 0048,<br />
0047, 0000,<br />
0042, 0067,<br />
0043, 0041,<br />
0173<br />
Motorola<br />
0035, 0048,<br />
1843<br />
Movie Walker<br />
0072<br />
MTC<br />
0240, 0000,<br />
0072<br />
MTX<br />
0000<br />
Multitech<br />
0039, 0000,<br />
0072<br />
NAD<br />
0240, 0104,<br />
0058<br />
NEC<br />
0104, 0067,<br />
0041, 0038,<br />
0040, 0050<br />
New Tech<br />
0072<br />
Nikko<br />
0037, 0278<br />
Nikkodo<br />
0037, 0278<br />
Nishi<br />
0240<br />
Niv<strong>eu</strong>s Media<br />
1972<br />
Noblex<br />
0240<br />
Northgate<br />
1972<br />
Olympus<br />
0035, 0162,<br />
0104, 0226<br />
Onkyo<br />
0222<br />
Optimus<br />
1062, 0035,<br />
0162, 0037,<br />
0048, 0047,<br />
0240, 0000,<br />
0104, 0058,<br />
0432, 0593,<br />
1162<br />
Orion<br />
0184, 0240,<br />
0000, 0104,<br />
0121, 0209,<br />
0002, 0278,<br />
0479<br />
130<br />
En
Appendix<br />
08<br />
8.2.5 VCR (Brands P - V)<br />
Brand/Co<strong>de</strong> Brand/Co<strong>de</strong> Brand/Co<strong>de</strong> Brand/Co<strong>de</strong> Brand/Co<strong>de</strong> Brand/Co<strong>de</strong><br />
Panama<br />
0035<br />
Panasonic<br />
1062, 0035,<br />
0162, 0000,<br />
0225, 0226,<br />
0614, 0616,<br />
1162<br />
Penney<br />
0035, 0162,<br />
0037, 0047,<br />
0081, 0240,<br />
0000, 0042,<br />
0067, 0038,<br />
0040<br />
Pentax<br />
0042<br />
Philco<br />
0035, 0081,<br />
0000, 0209,<br />
0479<br />
Philips<br />
0035, 0162,<br />
0048, 0081,<br />
0045, 0000,<br />
0209, 0616,<br />
0618, 0739,<br />
1081, 1181,<br />
1818<br />
Pilot<br />
0037<br />
<strong>Pioneer</strong><br />
0162, 0081,<br />
0042, 0067,<br />
0058, 0168,<br />
1337, 1803<br />
Polk Audio<br />
0081<br />
Portland<br />
0278<br />
Presidian<br />
1593<br />
Profitronic<br />
0240<br />
Proscan<br />
0060<br />
Protec<br />
0000, 0072<br />
Protech<br />
0072<br />
Pulsar<br />
0039, 0240,<br />
0278<br />
Pulser<br />
0240<br />
Quarter<br />
0046<br />
Quartz<br />
0035, 0047,<br />
0046<br />
Quasar<br />
0035, 0162,<br />
0002, 0226,<br />
1162<br />
RadioShack<br />
0035, 0162,<br />
0037, 0048,<br />
0047, 0240,<br />
0000, 0104,<br />
0046, 1037,<br />
1162<br />
Radix<br />
0037<br />
Ran<strong>de</strong>x<br />
0037<br />
RCA<br />
0060, 0035,<br />
0048, 0240,<br />
0045, 0000,<br />
0042, 0880,<br />
0058<br />
Realistic<br />
0035, 0162,<br />
0037, 0048,<br />
0047, 0240,<br />
0000, 0104,<br />
0121, 0278,<br />
0046, 1162<br />
ReplayTV<br />
0614, 0616<br />
Ricavision<br />
1972<br />
Rio<br />
1137<br />
Runco<br />
0039<br />
Samsung<br />
0060, 0240,<br />
0045, 0000,<br />
0038, 0432,<br />
0739<br />
Samtron<br />
0240<br />
Sanky<br />
0048, 0039<br />
Sansui<br />
0240, 0000,<br />
0067, 0209,<br />
0041, 0072,<br />
0002, 0479<br />
Sanyo<br />
0047, 0240,<br />
0000, 0104,<br />
0046, 0159,<br />
0479<br />
Scott<br />
0184, 0045,<br />
0121, 0043<br />
Sears<br />
0060, 0035,<br />
0162, 0037,<br />
0048, 0039,<br />
0047, 0033,<br />
0045, 0000,<br />
0042, 0104,<br />
0067, 0043,<br />
0209, 0041,<br />
0072, 0046,<br />
0058<br />
Sharp<br />
0048, 0047,<br />
0032, 0000,<br />
1875<br />
Shintom<br />
0039, 0240,<br />
0000, 0072<br />
Shogun<br />
0240<br />
Siemens<br />
0037, 0104<br />
Signature<br />
0060, 0035,<br />
0037, 0048,<br />
0000, 0046,<br />
0479<br />
Singer<br />
0037, 0240,<br />
0072<br />
Sonic Blue<br />
0614, 0616,<br />
1137<br />
Sonographe<br />
0046<br />
Sony<br />
0035, 0047,<br />
0032, 0033,<br />
0000, 0067,<br />
0046, 0226,<br />
0275, 0636,<br />
1032, 1702,<br />
1703, 1896,<br />
1972<br />
Soundmaster<br />
0000<br />
Stack 9<br />
1972<br />
Star Choice<br />
1843<br />
STS<br />
0042<br />
SV2000<br />
0000, 0072<br />
SVA<br />
0000<br />
Sylvania<br />
0035, 0081,<br />
0000, 0043,<br />
0593, 1593<br />
Symphonic<br />
0240, 0000,<br />
0002, 0593,<br />
1593<br />
Systemax<br />
1972<br />
Tagar Systems<br />
1972<br />
Tandy<br />
0000, 0104<br />
Tashiko<br />
0037<br />
Tatung<br />
0048, 0081,<br />
0000, 0067,<br />
0041<br />
Teac<br />
0000, 0067,<br />
0041<br />
Technics<br />
0035, 0162,<br />
0037, 0000<br />
Teknika<br />
0035, 0037,<br />
0000<br />
Telecor<strong>de</strong>r<br />
0240<br />
Telefunken<br />
0041<br />
Tevion<br />
0479<br />
Thomas<br />
0000, 0002<br />
Thomson<br />
0060, 0041<br />
Tisonic<br />
0278<br />
TiVo<br />
0618, 0636,<br />
0739, 0740,<br />
1337, 1944,<br />
1996<br />
TMK<br />
0240, 0000<br />
TNIX<br />
0037<br />
Tocom<br />
0240<br />
Toshiba<br />
0240, 0045,<br />
0000, 0043,<br />
0209, 0041,<br />
1008, 1972,<br />
1996, 1988<br />
Tosonic<br />
0278<br />
Totevision<br />
0037, 0240<br />
Touch<br />
1972<br />
Trix<br />
0037<br />
Ultra<br />
0045, 0278<br />
Unitech<br />
0240<br />
Vector<br />
0045<br />
Vector Research<br />
0184, 0038,<br />
0040<br />
Vextra<br />
0072<br />
Victor<br />
0067, 0041<br />
Vi<strong>de</strong>o Concepts<br />
0045, 0040<br />
Vi<strong>de</strong>omagic<br />
0037<br />
Vi<strong>de</strong>osonic<br />
0240, 0000,<br />
0072<br />
Viewsonic<br />
1972<br />
Villain<br />
0000<br />
Voodoo<br />
1972<br />
English<br />
8.2.6 VCR (Brands W - Z)<br />
Brand/Co<strong>de</strong> Brand/Co<strong>de</strong> Brand/Co<strong>de</strong> Brand/Co<strong>de</strong> Brand/Co<strong>de</strong> Brand/Co<strong>de</strong><br />
Wards<br />
0060, 0035,<br />
0037, 0048,<br />
0047, 0081,<br />
0033, 0240,<br />
0045, 0000,<br />
0042, 0043,<br />
0041, 0072,<br />
0038, 0046,<br />
0058, 0479<br />
Wharfedale<br />
0593<br />
White<br />
Westinghouse<br />
0000, 0209,<br />
0072, 0278,<br />
0479<br />
World<br />
0209, 0002,<br />
0479<br />
XR-1000<br />
0035, 0240,<br />
0000, 0072<br />
Yamaha<br />
0041, 0038<br />
Zenith<br />
0037, 0039,<br />
0033, 0000,<br />
0209, 0041,<br />
0278, 0479,<br />
1137, 1709<br />
ZT Group<br />
1972<br />
131<br />
En
08 Appendix<br />
8.2.7 PVR<br />
Brand/Co<strong>de</strong> Brand/Co<strong>de</strong> Brand/Co<strong>de</strong> Brand/Co<strong>de</strong> Brand/Co<strong>de</strong> Brand/Co<strong>de</strong><br />
ABS<br />
1972<br />
Alienware<br />
1972<br />
Bell ExpressVu<br />
1944<br />
Captive Works<br />
2167<br />
CyberPower<br />
1972<br />
Dell<br />
1972<br />
DirecTV<br />
0739, 0740<br />
Dish N<strong>et</strong>work<br />
System<br />
1944<br />
Dish Pro<br />
1944<br />
Echostar<br />
1944<br />
Expressvu<br />
1944<br />
Gateway<br />
1972<br />
Go Vi<strong>de</strong>o<br />
0614, 1873<br />
GOI<br />
1944<br />
Hewl<strong>et</strong>t Packard<br />
1972<br />
Howard<br />
Computers<br />
1972<br />
HP<br />
1972<br />
HTS<br />
1944<br />
Hughes<br />
N<strong>et</strong>work<br />
Systems<br />
0739, 0740<br />
Humax<br />
0739, 1797<br />
1988<br />
Hush<br />
1972<br />
iBUYPOWER<br />
1972<br />
JVC<br />
1944<br />
LG<br />
2010<br />
Linksys<br />
1972<br />
Media Center<br />
PC<br />
1972<br />
Microsoft<br />
1972<br />
Mind<br />
1972<br />
Motorola<br />
1843<br />
Niv<strong>eu</strong>s Media<br />
1972<br />
Northgate<br />
1972<br />
Panasonic<br />
0614, 0616<br />
Philips<br />
0618, 0739<br />
1818<br />
<strong>Pioneer</strong><br />
1337, 1803<br />
RCA<br />
0880<br />
ReplayTV<br />
0614, 0616<br />
Samsung<br />
0739<br />
Sharp<br />
1875<br />
Sonic Blue<br />
0614, 0616<br />
Sony<br />
0636, 1972<br />
Stack 9<br />
1972<br />
Star Choice<br />
1843<br />
Systemax<br />
1972<br />
Tagar Systems<br />
1972<br />
TiVo<br />
0618, 0636,<br />
0739, 1337<br />
0740<br />
Toshiba<br />
1008, 1972,<br />
1996, 1988<br />
Touch<br />
1972<br />
Viewsonic<br />
1972<br />
Voodoo<br />
1972<br />
Zenith<br />
1709<br />
ZT Group<br />
1972<br />
8.2.8 BD (HD-DVD)<br />
Brand/Co<strong>de</strong> Brand/Co<strong>de</strong> Brand/Co<strong>de</strong> Brand/Co<strong>de</strong> Brand/Co<strong>de</strong><br />
LG<br />
0741<br />
Onkyo<br />
1769<br />
Panasonic<br />
1641<br />
Philips<br />
2084<br />
<strong>Pioneer</strong><br />
2052, 0142<br />
RCA<br />
1769<br />
Samsung<br />
0199<br />
Sony<br />
1516<br />
Toshiba<br />
1769<br />
8.2.9 DVD-R<br />
Brand/Co<strong>de</strong> Brand/Co<strong>de</strong> Brand/Co<strong>de</strong> Brand/Co<strong>de</strong> Brand/Co<strong>de</strong> Brand/Co<strong>de</strong><br />
Accurian<br />
0675, 1416<br />
Apex Digital<br />
1056<br />
Aspire Digital<br />
1168<br />
Astar<br />
1489<br />
Broksonic<br />
1419<br />
Citizen<br />
2116<br />
Coby<br />
1086<br />
CyberHome<br />
1129, 1502<br />
Digital Max<br />
1738<br />
Electrohome<br />
2116<br />
Funai<br />
0675, 1334<br />
Gateway<br />
1073, 1158<br />
Go Vi<strong>de</strong>o<br />
0741, 1158,<br />
1304, 1730<br />
iLo<br />
1348<br />
JVC<br />
1275<br />
LG<br />
0741<br />
LiteOn<br />
1158, 1416,<br />
1440, 1738<br />
Magnavox<br />
0646, 0675,<br />
1506<br />
Panasonic<br />
0490<br />
Philips<br />
0646, 1340<br />
<strong>Pioneer</strong><br />
0631, 1460,<br />
1475,<br />
1476, 1512<br />
Polaroid<br />
1086, 2130<br />
Presidian<br />
1738<br />
RCA<br />
0522<br />
Samsung<br />
0490, 1470<br />
Sensory<br />
Science<br />
1158<br />
Sharp<br />
0675<br />
Sony<br />
1033, 1070,<br />
1431<br />
Sylvania<br />
0675<br />
Toshiba<br />
1510, 1588<br />
Zenith<br />
0741<br />
132<br />
En
Appendix<br />
08<br />
8.2.10 DVD (Brands A - N)<br />
Brand/Co<strong>de</strong> Brand/Co<strong>de</strong> Brand/Co<strong>de</strong> Brand/Co<strong>de</strong> Brand/Co<strong>de</strong> Brand/Co<strong>de</strong><br />
3D LAB<br />
0503, 0539<br />
Accurian<br />
0675, 1072,<br />
1416, 1737<br />
Acoustic<br />
Solutions<br />
0730<br />
Adcom<br />
1094<br />
Afreey<br />
0698<br />
Aiwa<br />
0641<br />
Akai<br />
0695, 0705,<br />
0770, 1089<br />
Alba<br />
0672, 0717<br />
Alco<br />
0790<br />
Allegro<br />
0869<br />
Amphion Media<br />
Works<br />
0872, 1245<br />
AMW<br />
0872, 1245<br />
Apex Digital<br />
0533, 0672,<br />
0717, 0755,<br />
0794, 0795,<br />
0796, 0797,<br />
1004, 1020,<br />
1056, 1061<br />
Arrgo<br />
1023<br />
Aspire Digital<br />
1168, 1407<br />
Astar<br />
1489, 1678,<br />
1679<br />
Audiovox<br />
0717, 0790,<br />
1041, 1072,<br />
1121, 1122<br />
Awa<br />
0730<br />
Axion<br />
1072<br />
B & K<br />
0655, 0662<br />
BBK<br />
1224<br />
Bel Canto<br />
Design<br />
1571<br />
Blaupunkt<br />
0717<br />
Blue Para<strong>de</strong><br />
0571<br />
Blue Sky<br />
0695, 0699<br />
Bose<br />
2023<br />
Brandt<br />
0651<br />
Broksonic<br />
0695, 1419<br />
California Audio<br />
Labs<br />
0490<br />
CAVS<br />
1057<br />
Celestial<br />
1020<br />
Centrex<br />
0672, 1004<br />
Cinea<br />
0831<br />
Cinego<br />
1399<br />
CineVision<br />
0876, 0833,<br />
0869<br />
Citizen<br />
1003, 0695,<br />
1277, 1587,<br />
2116<br />
Clairtone<br />
0571<br />
Coby<br />
0778, 0852,<br />
1077, 1086,<br />
1107, 1165,<br />
1177, 1351,<br />
1628<br />
Craig<br />
0831<br />
Creative<br />
0503, 0539<br />
Curtis Mathes<br />
1087<br />
CyberHome<br />
0816, 0874,<br />
1023, 1024,<br />
1117, 1129,<br />
1502, 1537<br />
Cytron<br />
0705<br />
D-Link<br />
1881<br />
Daewoo<br />
0784, 0705,<br />
0770, 0833,<br />
0869, 1169,<br />
1172, 1234,<br />
1242, 1441<br />
Dansai<br />
0770<br />
Daytek<br />
0872<br />
Decca<br />
0770<br />
Denon<br />
0490, 0634<br />
Denver<br />
0778<br />
Desay<br />
1407<br />
Diamond Vision<br />
1316<br />
DigitalMax<br />
1738<br />
Digitrex<br />
0672<br />
Disney<br />
0675, 1270<br />
DiViDo<br />
0705<br />
Dual<br />
0675, 1068,<br />
1085<br />
Durabrand<br />
1127, 2164<br />
DVD2000<br />
0521<br />
Electrohome<br />
1003, 2116<br />
Emerson<br />
0591, 0675,<br />
1268<br />
Enterprise<br />
0591<br />
Entivo<br />
0503, 0539<br />
Enzer<br />
0770<br />
ESA<br />
1268<br />
Firstline<br />
0651<br />
Fisher<br />
0670<br />
Funai<br />
0675, 1268,<br />
1334<br />
Gateway<br />
1073, 1077,<br />
1158<br />
GE<br />
0522, 0815,<br />
0717<br />
Go Vi<strong>de</strong>o<br />
0573, 0744,<br />
0717, 1730,<br />
1304, 1158,<br />
1144, 1099,<br />
1075, 1044,<br />
0869, 0833,<br />
0783, 0741,<br />
0715<br />
Go Vision<br />
1072<br />
GoldStar<br />
0741, 0869<br />
Goodmans<br />
0790<br />
GPX<br />
0699, 0769<br />
Gradiente<br />
0490, 0651<br />
Greenhill<br />
0717<br />
Grundig<br />
0539, 0705<br />
Harman/Kardon<br />
0582, 0702<br />
Helios<br />
2080<br />
Hello Kitty<br />
0831<br />
Hitachi<br />
0573, 0664,<br />
1247, 1664<br />
Hiteker<br />
0672<br />
Humax<br />
1588, 1500<br />
iLo<br />
1348, 1472<br />
Initial<br />
0717, 1472<br />
Insignia<br />
1268, 2095,<br />
2150<br />
Integra<br />
0571, 0627<br />
IRT<br />
0783<br />
Jaton<br />
1078<br />
JBL<br />
0702<br />
JMB<br />
0695<br />
JSI<br />
1423<br />
JVC<br />
0558, 0623,<br />
0867, 1275,<br />
1550, 1602<br />
jWin<br />
1049, 1051<br />
Kawasaki<br />
0790<br />
Kenwood<br />
0490, 0534,<br />
0682, 0737<br />
KLH<br />
0717, 0790,<br />
1020, 1149<br />
Kloss<br />
0533<br />
Konka<br />
0711, 0721<br />
Koss<br />
0651, 0769,<br />
0896, 1061,<br />
1423<br />
Lan<strong>de</strong>l<br />
0826<br />
Lasonic<br />
0627, 0798,<br />
1173<br />
Lecson<br />
1533<br />
Lenoxx<br />
1127<br />
LG<br />
0591, 0741,<br />
0869<br />
LiteOn<br />
1058, 1158,<br />
1416, 1440,<br />
1656, 1738<br />
Loewe<br />
0511, 0741<br />
Logix<br />
0783<br />
Magnasonic<br />
0651, 0675<br />
Magnavox<br />
0503, 0539,<br />
0646, 0675,<br />
1268, 1354,<br />
1472, 1506<br />
Malata<br />
0782, 1159<br />
Marantz<br />
0503, 0539,<br />
0675<br />
Mclntosh<br />
1533, 1273<br />
Medion<br />
0651<br />
McIntosh<br />
Memorex<br />
0695, 0831,<br />
1270<br />
Microsoft<br />
0522, 1708,<br />
2083<br />
Minato<br />
0752<br />
Mintek<br />
0839, 0717,<br />
1472<br />
Mitsubishi<br />
1521, 0521<br />
Momitsu<br />
1082<br />
Mustek<br />
0730<br />
Myryad<br />
0894<br />
NAD<br />
0692, 0741<br />
Naiko<br />
0770<br />
Nakamichi<br />
1222<br />
NEC<br />
0785, 0869<br />
Nesa<br />
0717<br />
Next Base<br />
0826<br />
NexxTech<br />
1402<br />
Nintaus<br />
1051<br />
Norcent<br />
1003, 0872,<br />
1107, 1265<br />
Nova<br />
1517<br />
English<br />
133<br />
En
08 Appendix<br />
8.2.11 DVD (Brands O - Z)<br />
Brand/Co<strong>de</strong> Brand/Co<strong>de</strong> Brand/Co<strong>de</strong> Brand/Co<strong>de</strong> Brand/Co<strong>de</strong> Brand/Co<strong>de</strong><br />
Onkyo<br />
0503, 0627,<br />
1769<br />
Oppo<br />
0575, 1224,<br />
2185<br />
Optimus<br />
0571<br />
OptoMedia<br />
Electronics<br />
0896<br />
Oritron<br />
0651<br />
Palsonic<br />
0672, 0852<br />
Panasonic<br />
0503, 0490,<br />
0571, 0703,<br />
1641, 1762<br />
Philco<br />
0675<br />
Philips<br />
0503, 0539,<br />
0646, 0675,<br />
1267, 1340,<br />
1354, 1846,<br />
2056, 2084<br />
Phonotrend<br />
0699<br />
PianoDisc<br />
1024<br />
<strong>Pioneer</strong><br />
0525, 0571,<br />
0142, 0631,<br />
1475, 1476,<br />
1571, 1460,<br />
1512, 1902,<br />
2052<br />
Polaroid<br />
1020, 1061,<br />
1086, 1245,<br />
1316, 1478,<br />
2130<br />
Polk Audio<br />
0539<br />
Portland<br />
0770<br />
Presidian<br />
0675, 1072,<br />
1738<br />
Primare<br />
1618<br />
Proceed<br />
0672<br />
Proscan<br />
0522<br />
Prosonic<br />
0699<br />
ProVision<br />
0778<br />
Qwestar<br />
0651<br />
Radion<strong>et</strong>te<br />
0741<br />
RadioShack<br />
0571<br />
RCA<br />
0522, 0571,<br />
0717, 0790,<br />
0822, 1022,<br />
1769<br />
Realistic<br />
0571<br />
Reoc<br />
0752<br />
Revoy<br />
0699<br />
Rio<br />
0869, 2002<br />
RJTech<br />
0118, 1360<br />
Rotel<br />
0623, 1178<br />
Rowa<br />
0823, 1004<br />
Saba<br />
0651<br />
Sampo<br />
0698, 0752,<br />
1501<br />
Samsung<br />
0298, 0490,<br />
0573, 0744,<br />
0199, 0820,<br />
1044, 1075,<br />
1470, 2069<br />
Sansui<br />
0695<br />
Sanyo<br />
0670, 0675,<br />
0695, 0873,<br />
1334<br />
Schnei<strong>de</strong>r<br />
0783<br />
Schwaiger<br />
0752<br />
Sensory<br />
Science<br />
1158<br />
Sharp<br />
0630, 0675,<br />
0752, 1256<br />
Sharper Image<br />
1117<br />
Sherwood<br />
0633, 0770,<br />
1043, 1077,<br />
1889<br />
Shinsonic<br />
0533, 0839<br />
Slim Art<br />
0784<br />
SM Electronic<br />
0730<br />
Sonic Blue<br />
0573, 0715,<br />
0783, 0869,<br />
1099, 2002<br />
Sony<br />
0533, 0772,<br />
0864, 1033,<br />
1070, 1431,<br />
1516, 1533,<br />
1548, 1633,<br />
1791, 1824,<br />
1892, 1903,<br />
1904, 1934,<br />
2020, 2043<br />
Sova<br />
1122<br />
Sungale<br />
1074<br />
SVA<br />
0717, 0860,<br />
1105<br />
Sylvania<br />
0675, 1268<br />
Symphonic<br />
0675, 0894,<br />
1268, 1334<br />
TAG McLaren<br />
0894<br />
Tatung<br />
0770<br />
Teac<br />
0571, 0717,<br />
0692, 0790<br />
Technics<br />
0490, 0703<br />
Technika<br />
0770<br />
Technosonic<br />
0730<br />
Techwood<br />
0692<br />
Terapin<br />
1031<br />
Tevion<br />
0651<br />
Th<strong>et</strong>a Digital<br />
0571<br />
Thomson<br />
0522, 0511<br />
TiVo<br />
1503, 1512,<br />
1588<br />
Toshiba<br />
0503, 0573,<br />
0539, 0695,<br />
1154, 1503,<br />
1510, 1588,<br />
1608, 1769<br />
Tre<strong>de</strong>x<br />
0800, 0803,<br />
0804<br />
Unimax<br />
0770<br />
United<br />
0730<br />
Universum<br />
0591<br />
Urban Concepts<br />
0503, 0539<br />
US Logic<br />
0839<br />
V<br />
1064, 1226<br />
Venturer<br />
0790<br />
Vizio<br />
1064, 1226<br />
Vocopro<br />
1027, 1360<br />
Wes<strong>de</strong>r<br />
0699<br />
Xbox<br />
0522, 1708,<br />
2083<br />
Yamaha<br />
0490, 0539,<br />
0545, 0497,<br />
0817<br />
Yamakawa<br />
0872<br />
Zenith<br />
0503, 0591,<br />
0741, 0869<br />
Z<strong>eu</strong>s<br />
0784<br />
Zoece<br />
1265<br />
8.2.12 LD<br />
Brand/Co<strong>de</strong> Brand/Co<strong>de</strong> Brand/Co<strong>de</strong> Brand/Co<strong>de</strong> Brand/Co<strong>de</strong> Brand/Co<strong>de</strong><br />
Carver<br />
0064, 0194,<br />
0323<br />
Denon<br />
0059, 0172,<br />
0241<br />
Disco Vision<br />
0023<br />
Harman/Kardon<br />
0194<br />
Hitachi<br />
0023, 0395<br />
Magnavox<br />
0064, 0194,<br />
0217, 0241<br />
Marantz<br />
0064, 0194<br />
Mitsubishi<br />
0059, 0241<br />
NAD<br />
0059<br />
NEC<br />
0286<br />
Optimus<br />
0059<br />
Panasonic<br />
0204<br />
Philips<br />
0064, 0194<br />
<strong>Pioneer</strong><br />
0059, 0023,<br />
0241, 0463,<br />
0572, 1274<br />
Polk Audio<br />
0194<br />
Quasar<br />
0204<br />
Renaissance<br />
0323<br />
Samsung<br />
0323<br />
Sega<br />
0023<br />
Sharp<br />
0001<br />
Sony<br />
0193, 0201,<br />
0270<br />
Technics<br />
0204<br />
Th<strong>et</strong>a Digital<br />
0194<br />
Toshiba<br />
0059<br />
Victor<br />
0245<br />
Wards<br />
0059<br />
Yamaha<br />
0217<br />
134<br />
En
Appendix<br />
08<br />
8.3 Specifications<br />
Flat Panel TV PDP-6020FD (60”) PDP-5020FD (50”)<br />
Number of pixels 1920 × 1080 pixels 1920 × 1080 pixels<br />
English<br />
Audio Amplifier 18 W + 18 W (1 kHz, 10 %, 6 Ω) 18 W + 18 W (1 kHz, 10 %, 6 Ω)<br />
Speaker<br />
Sound Effect<br />
Woofer: 4.8 cm x 13 cm cone type<br />
Twe<strong>et</strong>er: 2.5 cm semidome type<br />
SRS FOCUS/SRS/SRS TruBass/<br />
SRS Definition<br />
Woofer: 4.8 cm x 13 cm cone type<br />
Twe<strong>et</strong>er: 2.5 cm semidome type<br />
SRS FOCUS/SRS/SRS TruBass/<br />
SRS Definition<br />
On-Screen Languages English, French, Spanish English, French, Spanish<br />
Power Requirement<br />
Weight<br />
120 V AC, 60 Hz, 524 W (0.3 W<br />
Standby)<br />
Main unit: 50.8 kg (112.0 lbs)<br />
Stand: 5.3 kg (11.7 lbs)(including<br />
bolts)<br />
Speaker: 3.7 kg (8.2 lbs)<br />
(including cables, mounting<br />
fittings and screws)<br />
Total: 59.8 kg (131.8 lbs)<br />
120 V AC, 60 Hz, 436 W (0.2 W<br />
Standby)<br />
Main unit: 33.6 kg (74.1 lbs)<br />
Stand: 2.2 kg (4.9 lbs)(including<br />
bolts)<br />
Speaker: 3.2 kg (7.1 lbs)<br />
(including cables, mounting<br />
fittings and screws)<br />
Total: 39 kg (86 lbs)<br />
Digital<br />
Reception System<br />
Circuit Type<br />
ATSC Digital TV system<br />
8VSB/64QAM/256QAM<br />
Tuner VHF/UHF VHF Ch. 2 to 13 UHF Ch. 14 to 69<br />
Tuner CATV Ch. 2 to 135<br />
Audio format<br />
Dolby Digital<br />
Analog<br />
American TV standard NTSC system<br />
Circuit Type<br />
Vi<strong>de</strong>o signal d<strong>et</strong>ection PLL full synchronous d<strong>et</strong>ection, PLL digital<br />
Synthesizer system<br />
Tuner VHF/UHF VHF Ch. 2 to 13 UHF Ch. 14 to 69<br />
Tuner CATV Cable Ch. 1 to 135<br />
Audio<br />
multiplex<br />
BTSC system<br />
Terminals - Si<strong>de</strong><br />
INPUT 3<br />
INPUT 7<br />
PHONES<br />
USB<br />
VIDEO in, AUDIO in<br />
HDMI in*<br />
16 Ω to 32 Ω recommen<strong>de</strong>d<br />
USB in**<br />
135<br />
En
08 Appendix<br />
Terminals - Rear<br />
ANT<br />
INPUT 1<br />
INPUT 2<br />
INPUT 4<br />
PC INPUT<br />
INPUT 5<br />
INPUT 6<br />
AUDIO OUT<br />
DIGITAL OUT<br />
ETHERNET 1<br />
CONTROL OUT 1<br />
SPEAKERS<br />
SUB WOOFER OUT<br />
75 Ω UNBAL, F Type for DTV/VHF/UHF/CATV in<br />
S-VIDEO in, VIDEO in, AUDIO in<br />
COMPONENT VIDEO in, VIDEO in, AUDIO in<br />
HDMI in*, AUDIO in<br />
Analog RGB in, AUDIO in<br />
HDMI in*, AUDIO in<br />
HDMI in*<br />
AUDIO out (Fixed)<br />
Optical<br />
6 Ω to 16 Ω<br />
Variable<br />
* conforms to HDMI1.3 (Deep Color) and HDCP1.1<br />
** conforms to USB 1.1 and 2.0<br />
HDMI (High-Definition Multimedia Interface) is a digital interface that handles both vi<strong>de</strong>o and audio using a<br />
single cable.<br />
HDCP (High-bandwidth Digital Content Protection) is a technology used to protect copyrighted digital contents<br />
that use the Digital Visual Interface (DVI).<br />
.<br />
Note: Design and specifications are subject to change without notice<br />
Dimensions<br />
PDP-6020FD (60” panel)<br />
PDP-5020FD (50” panel)<br />
93 (3-21/32)<br />
1465 (57-11/16)<br />
93 (3-21/32)<br />
1233 (48-17/32)<br />
1030 (40-9/16)<br />
876 (34-1/2)<br />
867 (34-1/8)<br />
723 (28-15/32)<br />
429 (16-7/8)<br />
920 (36-7/32)<br />
80 (3-5/32)<br />
349 (13-3/4)<br />
550 (21-21/32)<br />
80 (3-5/32)<br />
136<br />
En
Appendix<br />
08<br />
License<br />
[MPEG4IP]<br />
This software is based in part on Mozilla Public License 1.1 see http://www.mozilla.org/MPL/ for information.<br />
[OpenSSL]<br />
English<br />
OpenSSL License<br />
Copyright © 1998-2007 The OpenSSL Project. All rights reserved.<br />
Redistribution and use in source and binary forms, with or without modification, are permitted provi<strong>de</strong>d that the<br />
following conditions are m<strong>et</strong>:<br />
1. Redistributions of source co<strong>de</strong> must r<strong>et</strong>ain the above copyright notice, this list of conditions and the following<br />
disclaimer.<br />
2. Redistributions in binary form must reproduce the above copyright notice, this list of conditions and the<br />
following disclaimer in the documentation and/or other materials provi<strong>de</strong>d with the distribution.<br />
3. All advertising materials mentioning features or use of this software must display the following<br />
acknowledgment: “This product inclu<strong>de</strong>s software <strong>de</strong>veloped by the OpenSSL Project for use in the OpenSSL<br />
Toolkit. (http://www.openssl.org/)”.<br />
4. The names “OpenSSL Toolkit” and “OpenSSL Project” must not be used to endorse or promote products<br />
<strong>de</strong>rived from this software without prior written permission. For written permission, please contact opensslcore@openssl.org.<br />
5. Products <strong>de</strong>rived from this software may not be called “OpenSSL” nor may “OpenSSL” appear in their names<br />
without prior written permission of the OpenSSL Project.<br />
6. Redistributions of any form whatsoever must r<strong>et</strong>ain the following acknowledgment: “This product inclu<strong>de</strong>s<br />
software <strong>de</strong>veloped by the OpenSSL Project for use in the OpenSSL Toolkit (http://www.openssl.org/)”.<br />
THIS SOFTWARE IS PROVIDED BY THE OpenSSL PROJECT “AS IS” AND ANY EXPRESSED OR IMPLIED<br />
WARRANTIES, INCLUDING, BUT NOT LIMITED TO, THE IMPLIED WARRANTIES OF MERCHANTABILITY AND<br />
FITNESS FOR A PARTICULAR PURPOSE ARE DISCLAIMED. IN NO EVENT SHALL THE OpenSSL PROJECT OR<br />
ITS CONTRIBUTORS BE LIABLE FOR ANY DIRECT, INDIRECT, INCIDENTAL, SPECIAL, EXEMPLARY, OR<br />
CONSEQUENTIAL DAMAGES (INCLUDING, BUT NOT LIMITED TO, PROCUREMENT OF SUBSTITUTE GOODS OR<br />
SERVICES; LOSS OF USE, DATA, OR PROFITS; OR BUSINESS INTERRUPTION) HOWEVER CAUSED AND ON<br />
ANY THEORY OF LIABILITY, WHETHER IN CONTRACT, STRICT LIABILITY, OR TORT (INCLUDING NEGLIGENCE OR<br />
OTHERWISE) ARISING IN ANY WAY OUT OF THE USE OF THIS SOFTWARE, EVEN IF ADVISED OF THE<br />
POSSIBILITY OF SUCH DAMAGE.<br />
This product inclu<strong>de</strong>s cryptographic software written by Eric Young (eay@cryptsoft.com). This product inclu<strong>de</strong>s<br />
software written by Tim Hudson (tjh@cryptsoft.com).<br />
Original SSLeay License<br />
Copyright © 1995-1998 Eric Young (eay@cryptsoft.com)<br />
All rights reserved.<br />
This package is an SSL implementation written by Eric Young (eay@cryptsoft.com). The implementation was<br />
written so as to conform with N<strong>et</strong>scapes SSL. This library is free for commercial and non-commercial use as long<br />
as the following conditions are aheared to. The following conditions apply to all co<strong>de</strong> found<br />
in this distribution, be it the RC4, RSA, lhash, DES, <strong>et</strong>c., co<strong>de</strong>; not just the SSL co<strong>de</strong>. The SSL documentation<br />
inclu<strong>de</strong>d with this distribution is covered by the same copyright terms except that the hol<strong>de</strong>r is Tim Hudson<br />
(tjh@cryptsoft.com).<br />
Copyright remains Eric Young’s, and as such any Copyright notices in the co<strong>de</strong> are not to be removed. If this<br />
package is used in a product, Eric Young should be given attribution as the author of the parts of the library used.<br />
This can be in the form of a textual message at program startup or in documentation (online or textual) provi<strong>de</strong>d<br />
with the package.<br />
Redistribution and use in source and binary forms, with or without modification, are permitted provi<strong>de</strong>d that the<br />
following conditions are m<strong>et</strong>:<br />
137<br />
En
08 Appendix<br />
1. Redistributions of source co<strong>de</strong> must r<strong>et</strong>ain the copyright notice, this list of conditions and the following<br />
disclaimer.<br />
2. Redistributions in binary form must reproduce the above copyright notice, this list of conditions and the<br />
following disclaimer in the documentation and/or other materials provi<strong>de</strong>d with the distribution.<br />
3. All advertising materials mentioning features or use of this software must display the following<br />
acknowledgement: “This product inclu<strong>de</strong>s cryptographic software written by Eric Young (eay@cryptsoft.com)”<br />
The word ‘cryptographic’ can be left out if the routines from the library being used are not cryptographic<br />
related:-).<br />
4. If you inclu<strong>de</strong> any Windows specific co<strong>de</strong> (or a <strong>de</strong>rivative thereof) from the apps directory (application co<strong>de</strong>)<br />
you must inclu<strong>de</strong> an acknowledgement: “This product inclu<strong>de</strong>s software written by Tim Hudson<br />
(tjh@cryptsoft.com)”<br />
THIS SOFTWARE IS PROVIDED BY ERIC YOUNG “AS IS” AND ANY EXPRESS OR IMPLIED WARRANTIES,<br />
INCLUDING, BUT NOT LIMITED TO, THE IMPLIED WARRANTIES OF MERCHANTABILITY AND FITNESS FOR A<br />
PARTICULAR PURPOSE ARE DISCLAIMED. IN NO EVENT SHALL THE AUTHOR OR CONTRIBUTORS BE LIABLE<br />
FOR ANY DIRECT, INDIRECT, INCIDENTAL, SPECIAL, EXEMPLARY, OR CONSEQUENTIAL DAMAGES<br />
(INCLUDING, BUT NOT LIMITED TO, PROCUREMENT OF SUBSTITUTE GOODS OR SERVICES; LOSS OF USE,<br />
DATA, OR PROFITS; OR BUSINESS INTERRUPTION) HOWEVER CAUSED AND ON ANY THEORY OF LIABILITY,<br />
WHETHER IN CONTRACT, STRICT LIABILITY, OR TORT (INCLUDING NEGLIGENCE OR OTHERWISE) ARISING IN<br />
ANY WAY OUT OF THE USE OF THIS SOFTWARE, EVEN IF ADVISED OF THE POSSIBILITY OF SUCH DAMAGE.<br />
The licence and distribution terms for any publically available version or <strong>de</strong>rivative of this co<strong>de</strong> cannot be<br />
changed. i.e. this co<strong>de</strong> cannot simply be copied and put un<strong>de</strong>r another distribution licence [including the GNU<br />
Public Licence.]<br />
[tiff]<br />
Copyright © 1988-1997 Sam Leffler<br />
Copyright © 1991-1997 Silicon Graphics, Inc.<br />
THE SOFTWARE IS PROVIDED “AS-IS” AND WITHOUT WARRANTY OF ANY KIND, EXPRESS, IMPLIED OR<br />
OTHERWISE, INCLUDING WITHOUT LIMITATION, ANY WARRANTY OF MERCHANTABILITY OR FITNESS FOR A<br />
PARTICULAR PURPOSE. IN NO EVENT SHALL SAM LEFFLER OR SILICON GRAPHICS BE LIABLE FOR ANY<br />
SPECIAL, INCIDENTAL, INDIRECT OR CONSEQUENTIAL DAMAGES OF ANY KIND, OR ANY DAMAGES<br />
WHATSOEVER RESULTING FROM LOSS OF USE, DATA OR PROFITS, WHETHER OR NOT ADVISED OF THE<br />
POSSIBILITY OF DAMAGE, AND ON ANY THEORY OF LIABILITY, ARISING OUT OF OR IN CONNECTION WITH THE<br />
USE OR PERFORMANCE OF THIS SOFTWARE.<br />
[Howl]<br />
Copyright © 2003, 2004 Porchdog Software All rights reserved.<br />
THIS SOFTWARE IS PROVIDED BY THE COPYRIGHT HOLDERS AND CONTRIBUTORS “AS IS” AND ANY<br />
EXPRESS OR IMPLIED WARRANTIES, INCLUDING, BUT NOT LIMITED TO, THE IMPLIED WARRANTIES OF<br />
MERCHANTABILITY AND FITNESS FOR A PARTICULAR PURPOSE ARE DISCLAIMED. IN NO EVENT SHALL THE<br />
COPYRIGHT OWNER OR CONTRIBUTORS BE LIABLE FOR ANY DIRECT, INDIRECT, INCIDENTAL, SPECIAL,<br />
EXEMPLARY, OR CONSEQUENTIAL DAMAGES (INCLUDING, BUT NOT LIMITED TO, PROCUREMENT OF<br />
SUBSTITUTE GOODS OR SERVICES; LOSS OF USE, DATA, OR PROFITS; OR BUSINESS INTERRUPTION)<br />
HOWEVER CAUSED AND ON ANY THEORY OF LIABILITY, WHETHER IN CONTRACT, STRICT LIABILITY, OR TORT<br />
(INCLUDING NEGLIGENCE OR OTHERWISE) ARISING IN ANY WAY OUT OF THE USE OF THIS SOFTWARE, EVEN<br />
IF ADVISED OF THE POSSIBILITY OF SUCH DAMAGE.<br />
This software is based in part on Apple Public Source License or the recent’s rights ther<strong>eu</strong>n<strong>de</strong>r see http://<br />
<strong>de</strong>veloper.apple.com/ for information.<br />
138<br />
En<br />
[libupnp]<br />
Copyright © 2000-2003 Intel Corporation<br />
All rights reserved.<br />
Redistribution and use in source and binary forms, with or without modification, are permitted provi<strong>de</strong>d that the<br />
following conditions are m<strong>et</strong>:
Appendix<br />
08<br />
* Redistributions of source co<strong>de</strong> must r<strong>et</strong>ain the above copyright notice, this list of conditions and the following<br />
disclaimer.<br />
* Redistributions in binary form must reproduce the above copyright notice, this list of conditions and the<br />
following disclaimer in the documentation and/or other materials provi<strong>de</strong>d with the distribution.<br />
* Neither name of Intel Corporation nor the names of its contributors may be used to endorse or promote<br />
products <strong>de</strong>rived from this software without specific prior written permission.<br />
THIS SOFTWARE IS PROVIDED BY THE COPYRIGHT HOLDERS AND CONTRIBUTORS “AS IS” AND ANY<br />
EXPRESS OR IMPLIED WARRANTIES, INCLUDING, BUT NOT LIMITED TO, THE IMPLIED WARRANTIES OF<br />
MERCHANTABILITY AND FITNESS FOR A PARTICULAR PURPOSE ARE DISCLAIMED. IN NO EVENT SHALL<br />
INTEL OR CONTRIBUTORS BE LIABLE FOR ANY DIRECT, INDIRECT, INCIDENTAL, SPECIAL, EXEMPLARY, OR<br />
CONSEQUENTIAL DAMAGES (INCLUDING, BUT NOT LIMITED TO, PROCUREMENT OF SUBSTITUTE GOODS OR<br />
SERVICES; LOSS OF USE, DATA, OR PROFITS; OR BUSINESS INTERRUPTION) HOWEVER CAUSED AND ON<br />
ANY THEORY OF LIABILITY, WHETHER IN CONTRACT, STRICT LIABILITY, OR TORT (INCLUDING NEGLIGENCE OR<br />
OTHERWISE) ARISING IN ANY WAY OUT OF THE USE OF THIS SOFTWARE, EVEN IF ADVISED OF THE<br />
POSSIBILITY OF SUCH DAMAGE.<br />
English<br />
[JPEG image compression]<br />
If only executable co<strong>de</strong> is distributed, then the accompanying documentation must state that “this software is<br />
based in part on the work of the In<strong>de</strong>pen<strong>de</strong>nt JPEG Group”.<br />
[libpng]<br />
COPYRIGHT NOTICE, DISCLAIMER, and LICENSE:<br />
If you modify libpng you may insert additional notices immediately following this sentence. libpng versions 1.2.6,<br />
August 15, 2004, through 1.2.25, February 18, 2008, are Copyright © 2004, 2006-2008 Glenn Ran<strong>de</strong>rs-Pehrson, and<br />
are distributed according to the same disclaimer and license as libpng-1.2.5 with the following individual ad<strong>de</strong>d<br />
to the list of Contributing Authors<br />
Cosmin Truta<br />
libpng versions 1.0.7, July 1, 2000, through 1.2.5 - October 3, 2002, are Copyright © 2000-2002 Glenn Ran<strong>de</strong>rs-<br />
Pehrson, and are distributed according to the same disclaimer and license as libpng-1.0.6 with the following<br />
individuals ad<strong>de</strong>d to the list of Contributing Authors<br />
Simon-Pierre Cadi<strong>eu</strong>x<br />
Eric S. Raymond<br />
Gilles Vollant<br />
and with the following additions to the disclaimer:<br />
There is no warranty against interference with your enjoyment of the library or against infringement. There is no<br />
warranty that our efforts or the library will fulfill any of your particular purposes or needs. This library is provi<strong>de</strong>d<br />
with all faults, and the entire risk of satisfactory quality, performance, accuracy, and effort is with the user.<br />
libpng versions 0.97, January 1998, through 1.0.6, March 20, 2000, are Copyright © 1998, 1999 Glenn Ran<strong>de</strong>rs-<br />
Pehrson, and are distributed according to the same disclaimer and license as libpng-0.96, with the following<br />
individuals ad<strong>de</strong>d to the list of Contributing Authors:<br />
Tom Lane<br />
Glenn Ran<strong>de</strong>rs-Pehrson<br />
Willem van Schaik<br />
libpng versions 0.89, June 1996, through 0.96, May 1997, are Copyright © 1996, 1997 Andreas Dilger Distributed<br />
according to the same disclaimer and license as libpng-0.88, with the following individuals ad<strong>de</strong>d to the list of<br />
Contributing Authors:<br />
John Bowler<br />
Kevin Bracey<br />
Sam Bushell<br />
Magnus Holmgren<br />
Greg Roelofs<br />
Tom Tanner<br />
139<br />
En
08 Appendix<br />
libpng versions 0.5, May 1995, through 0.88, January 1996, are Copyright © 1995, 1996 Guy Eric Schalnat, Group<br />
42, Inc.<br />
For the purposes of this copyright and license, “Contributing Authors” is <strong>de</strong>fined as the following s<strong>et</strong> of<br />
individuals:<br />
Andreas Dilger<br />
Dave Martindale<br />
Guy Eric Schalnat<br />
Paul Schmidt<br />
Tim Wegner<br />
The PNG Reference Library is supplied “AS IS”. The Contributing Authors and Group 42, Inc. disclaim all<br />
warranties, expressed or implied, including, without limitation, the warranties of merchantability and of fitness<br />
for any purpose. The Contributing Authors and Group 42, Inc. assume no liability for direct, indirect, inci<strong>de</strong>ntal,<br />
special, exemplary, or consequential damages, which may result from the use of the PNG Reference Library, even<br />
if advised of the possibility of such damage.<br />
Permission is hereby granted to use, copy, modify, and distribute this source co<strong>de</strong>, or portions hereof, for any<br />
purpose, without fee, subject to the following restrictions:<br />
1. The origin of this source co<strong>de</strong> must not be misrepresented.<br />
2. Altered versions must be plainly marked as such and must not be misrepresented as being the original source.<br />
3. This Copyright notice may not be removed or altered from any source or altered source distribution.<br />
The Contributing Authors and Group 42, Inc. specifically permit, without fee, and encourage the use of this source<br />
co<strong>de</strong> as a component to supporting the PNG file format in commercial products. If you use this source co<strong>de</strong> in a<br />
product, acknowledgment is not required but would be appreciated.<br />
A “png_g<strong>et</strong>_copyright” function is available, for convenient use in “about” boxes and the like:<br />
printf(“%s”,png_g<strong>et</strong>_copyright(NULL)); Also, the PNG logo (in PNG format, of course) is supplied in the files<br />
“pngbar.png” and “pngbar.jpg”(88x31) and “pngnow.png” (98x31).<br />
Libpng is OSI Certified Open Source Software. OSI Certified Open Source is a certification mark of the Open<br />
Source Initiative.<br />
Glenn Ran<strong>de</strong>rs-Pehrson<br />
glennrp at users.sourceforge.n<strong>et</strong><br />
February 18, 2008<br />
[zlib]<br />
This software is based in part on zlib see http://www.zlib.n<strong>et</strong> for information.<br />
[FreeType]<br />
The FreeType Project is Copyright © 1996-2000 by David Turner, Robert Wilhelm, and Werner Lemberg. All rights<br />
reserved except as specified below. THE FREETYPE PROJECT IS PROVIDED “AS IS” WITHOUT WARRANTY OF<br />
ANY KIND, EITHER EXPRESS OR IMPLIED, INCLUDING, BUT NOT LIMITED TO, WARRANTIES OF<br />
MERCHANTABILITY AND FITNESS FOR A PARTICULAR PURPOSE. IN NO EVENT WILL ANY OF THE AUTHORS<br />
OR COPYRIGHT HOLDERS BE LIABLE FOR ANY DAMAGES CAUSED BY THE USE OR THE INABILITY TO USE,<br />
OF THE FREETYPE PROJECT.<br />
[GIFLIB]<br />
The GIFLIB distribution is Copyright © 1997 Eric S. Raymond<br />
THE SOFTWARE IS PROVIDED “AS IS”, WITHOUT WARRANTY OF ANY KIND, EXPRESS OR IMPLIED,<br />
INCLUDING BUT NOT LIMITED TO THE WARRANTIES OF MERCHANTABILITY, FITNESS FOR A PARTICULAR<br />
PURPOSE AND NONINFRINGEMENT. IN NO EVENT SHALL THE AUTHORS OR COPYRIGHT HOLDERS BE<br />
LIABLE FOR ANY CLAIM, DAMAGES OR OTHER LIABILITY, WHETHER IN AN ACTION OF CONTRACT, TORT OR<br />
OTHERWISE, ARISING FROM, OUT OF OR IN CONNECTION WITH THE SOFTWARE OR THE USE OR OTHER<br />
DEALINGS IN THE SOFTWARE.<br />
140<br />
En
Appendix<br />
08<br />
[TinyLogin]<br />
This software is Copyright 1988 - 1994, Julianne Frances Haugh. All rights reserved.<br />
[portmap]<br />
Copyright © Sun Microsystems, Inc.<br />
Sun RPC is a product of Sun Microsystems, Inc. and is provi<strong>de</strong>d for unrestricted use provi<strong>de</strong>d that this legend is<br />
inclu<strong>de</strong>d on all tape media and as a part of the software program in whole or part. Users may copy or modify Sun<br />
RPC without charge, but are not authorized to license or distribute it to anyone else except as part of a product<br />
or program <strong>de</strong>veloped by the user or with the express written consent of Sun Microsystems, Inc.<br />
SUN RPC IS PROVIDED AS IS WITH NO WARRANTIES OF ANY KIND INCLUDING THE WARRANTIES OF<br />
DESIGN, MERCHANTIBILITY AND FITNESS FOR A PARTICULAR PURPOSE, OR ARISING FROM A COURSE OF<br />
DEALING, USAGE OR TRADE PRACTICE.<br />
Sun RPC is provi<strong>de</strong>d with no support and without any obligation on the part of Sun Microsystems, Inc. to assist<br />
in its use, correction, modification or enhancement.<br />
SUN MICROSYSTEMS, INC. SHALL HAVE NO LIABILITY WITH RESPECT TO THE INFRINGEMENT OF<br />
COPYRIGHTS, TRADE SECRETS OR ANY PATENTS BY SUN RPC OR ANY PART THEREOF.<br />
In no event will Sun Microsystems, Inc. be liable for any lost revenue or profits or other special, indirect and<br />
consequential damages, even if Sun has been advised of the possibility of such damages.<br />
Sun Microsystems, Inc.<br />
2550 Garcia Avenue<br />
Mountain View, California 94043<br />
English<br />
[libpcap]<br />
Copyright © 2000 Torsten Landschoff <br />
Sebastian Krahmer <br />
License: BSD<br />
Redistribution and use in source and binary forms, with or without modification, are permitted provi<strong>de</strong>d that the<br />
following conditions are m<strong>et</strong>:<br />
1. Redistributions of source co<strong>de</strong> must r<strong>et</strong>ain the above copyright notice, this list of conditions and the following<br />
disclaimer.<br />
2. Redistributions in binary form must reproduce the above copyright notice, this list of conditions and the<br />
following disclaimer in the documentation and/or other materials provi<strong>de</strong>d with the distribution.<br />
3. The names of the authors may not be used to endorse or promote products <strong>de</strong>rived from this software without<br />
specific prior written permission.<br />
THIS SOFTWARE IS PROVIDED “AS IS” AND WITHOUT ANY EXPRESS OR IMPLIED WARRANTIES, INCLUDING,<br />
WITHOUT LIMITATION, THE IMPLIED WARRANTIES OF MERCHANTABILITY AND FITNESS FOR A PARTICULAR<br />
PURPOSE.<br />
[libmpeg1]<br />
Copyright © 1992 The Regents of the University of California<br />
Copyright © 1994-1999 Gregory P. Ward <br />
All rights reserved.<br />
This software is supplied without even the faintest shred of assurance that it works in its entir<strong>et</strong>y.<br />
Permission to use, copy, modify, and distribute this software and its documentation for any purpose, without fee,<br />
and without written agreement is hereby granted, provi<strong>de</strong>d that the above copyright notice and the following two<br />
paragraphs appear in all copies of this software.<br />
IN NO EVENT SHALL THE AUTHOR BE LIABLE TO ANY PARTY FOR DIRECT, INDIRECT, SPECIAL, INCIDENTAL,<br />
OR CONSEQUENTIAL DAMAGES ARISING OUT OF THE USE OF THIS SOFTWARE AND ITS DOCUMENTATION,<br />
EVEN IF THE UNIVERSITY OF CALIFORNIA HAS BEEN ADVISED OF THE POSSIBILITY OF SUCH DAMAGE.<br />
THE AUTHOR SPECIFICALLY DISCLAIMS ANY WARRANTIES, INCLUDING, BUT NOT LIMITED TO, THE IMPLIED<br />
WARRANTIES OF ERCHANTABILITY AND FITNESS FOR A PARTICULAR PURPOSE. THE SOFTWARE PROVIDED<br />
141<br />
En
08 Appendix<br />
HEREUNDER IS ON AN “AS IS” BASIS, AND THE AUTHOR HAS NO BLIGATION TO PROVIDE MAINTENANCE,<br />
SUPPORT, UPDATES, ENHANCEMENTS, OR MODIFICATIONS.<br />
[GNU GENERAL PUBLIC LICENSE]<br />
Version 2, June 1991<br />
Copyright © 1989, 1991 Free Software Foundation, Inc., 51 Franklin Stre<strong>et</strong>, Fifth Floor, Boston, MA 02110-1301 USA<br />
Everyone is permitted to copy and distribute verbatim copies of this license document, but changing it is not<br />
allowed.<br />
Preamble<br />
The licenses for most software are <strong>de</strong>signed to take away your freedom to share and change it. By contrast, the<br />
GNU General Public License is inten<strong>de</strong>d to guarantee your freedom to share and change free software - to make<br />
sure the software is free for all its users. This General Public License applies to most of the Free Software<br />
Foundation’s software and to any other program whose authors commit to using it. (Some other Free Software<br />
Foundation software is covered by the GNU Lesser General Public License instead.) You can apply it to your<br />
programs, too.<br />
When we speak of free software, we are referring to freedom, not price. Our General Public Licenses are <strong>de</strong>signed<br />
to make sure that you have the freedom to distribute copies of free software (and charge for this service if you<br />
wish), that you receive source co<strong>de</strong> or can g<strong>et</strong> it if you want it, that you can change the software or use pieces of<br />
it in new free programs; and that you know you can do these things.<br />
To protect your rights, we need to make restrictions that forbid anyone to <strong>de</strong>ny you these rights or to ask you to<br />
surren<strong>de</strong>r the rights. These restrictions translate to certain responsibilities for you if you distribute copies of the<br />
software, or if you modify it.<br />
For example, if you distribute copies of such a program, wh<strong>et</strong>her gratis or for a fee, you must give the recipients<br />
all the rights that you have. You must make sure that they, too, receive or can g<strong>et</strong> the source co<strong>de</strong>. And you must<br />
show them these terms so they know their rights.<br />
We protect your rights with two steps: (1) copyright the software, and (2) offer you this license which gives you<br />
legal permission to copy, distribute and/or modify the software.<br />
Also, for each author’s protection and ours, we want to make certain that everyone un<strong>de</strong>rstands that there is no<br />
warranty for this free software. If the software is modified by someone else and passed on, we want its recipients<br />
to know that what they have is not the original, so that any problems introduced by others will not reflect on the<br />
original authors’ reputations.<br />
Finally, any free program is threatened constantly by software patents. We wish to avoid the danger that<br />
redistributors of a free program will individually obtain patent licenses, in effect making the program propri<strong>et</strong>ary.<br />
To prevent this, we have ma<strong>de</strong> it clear that any patent must be licensed for everyone’s free use or not licensed at<br />
all.<br />
The precise terms and conditions for copying, distribution and modification follow.<br />
142<br />
En<br />
GNU GENERAL PUBLIC LICENSE<br />
TERMS AND CONDITIONS FOR COPYING, DISTRIBUTION AND MODIFICATION<br />
0. This License applies to any program or other work which contains a notice placed by the copyright hol<strong>de</strong>r<br />
saying it may be distributed un<strong>de</strong>r the terms of this General Public License. The “Program”, below, refers to any<br />
such program or work, and a “work based on the Program” means either the Program or any <strong>de</strong>rivative work<br />
un<strong>de</strong>r copyright law: that is to say, a work containing the Program or a portion of it, either verbatim or with<br />
modifications and/or translated into another language. (Hereinafter, translation is inclu<strong>de</strong>d without limitation<br />
in the term “modification”.) Each licensee is addressed as “you”. Activities other than copying, distribution and<br />
modification are not covered by this License; they are outsi<strong>de</strong> its scope. The act of running the Program is not<br />
restricted, and the output from the Program is covered only if its contents constitute a work based on the<br />
Program (in<strong>de</strong>pen<strong>de</strong>nt of having been ma<strong>de</strong> by running the Program). Wh<strong>et</strong>her that is true <strong>de</strong>pends on what<br />
the Program does.<br />
1. You may copy and distribute verbatim copies of the Program’s source co<strong>de</strong> as you receive it, in any medium,<br />
provi<strong>de</strong>d that you conspicuously and appropriately publish on each copy an appropriate copyright notice and<br />
disclaimer of warranty; keep intact all the notices that refer to this License and to the absence of any warranty;<br />
and give any other recipients of the Program a copy of this License along with the Program. You may charge a
Appendix<br />
08<br />
fee for the physical act of transferring a copy, and you may at your option offer warranty protection in exchange<br />
for a fee.<br />
2. You may modify your copy or copies of the Program or any portion of it, thus forming a work based on the<br />
Program, and copy and distribute such modifications or work un<strong>de</strong>r the terms of Section 1 above, provi<strong>de</strong>d that<br />
you also me<strong>et</strong> all of these conditions:<br />
a) You must cause the modified files to carry prominent notices stating that you changed the files and the<br />
date of any change.<br />
b) You must cause any work that you distribute or publish, that in whole or in part contains or is <strong>de</strong>rived from<br />
the Program or any part thereof, to be licensed as a whole at no charge to all third parties un<strong>de</strong>r the terms<br />
of this License.<br />
c) If the modified program normally reads commands interactively when run, you must cause it, when started<br />
running for such interactive use in the most ordinary way, to print or display an announcement including<br />
an appropriate copyright notice and a notice that there is no warranty (or else, saying that you provi<strong>de</strong> a<br />
warranty) and that users may redistribute the program un<strong>de</strong>r these conditions, and telling the user how to<br />
view a copy of this License. (Exception: if the Program itself is interactive but does not normally print such<br />
an announcement, your work based on the Program is not required to print an announcement.) These<br />
requirements apply to the modified work as a whole. If i<strong>de</strong>ntifiable sections of that work are not <strong>de</strong>rived<br />
from the Program, and can be reasonably consi<strong>de</strong>red in<strong>de</strong>pen<strong>de</strong>nt and separate works in themselves, then<br />
this License, and its terms, do not apply to those sections when you distribute them as separate works. But<br />
when you distribute the same sections as part of a whole which is a work based on the Program, the<br />
distribution of the whole must be on the terms of this License, whose permissions for other licensees<br />
extend to the entire whole, and thus to each and every part regardless of who wrote it. Thus, it is not the<br />
intent of this section to claim rights or contest your rights to work written entirely by you; rather, the intent<br />
is to exercise the right to control the distribution of <strong>de</strong>rivative or collective works based on the Program. In<br />
addition, mere aggregation of another work not based on the Program with the Program (or with a work<br />
based on the Program) on a volume of a storage or distribution medium does not bring the other work<br />
un<strong>de</strong>r the scope of this License.<br />
3. You may copy and distribute the Program (or a work based on it, un<strong>de</strong>r Section 2) in object co<strong>de</strong> or executable<br />
form un<strong>de</strong>r the terms of Sections 1 and 2 above provi<strong>de</strong>d that you also do one of the following:<br />
a) Accompany it with the compl<strong>et</strong>e corresponding machine-readable source co<strong>de</strong>, which must be distributed<br />
un<strong>de</strong>r the terms of Sections 1 and 2 above on a medium customarily used for software interchange; or,<br />
b) Accompany it with a written offer, valid for at least three years, to give any third party, for a charge no more<br />
than your cost of physically performing source distribution, a compl<strong>et</strong>e machine-readable copy of the<br />
corresponding source co<strong>de</strong>, to be distributed un<strong>de</strong>r the terms of Sections 1 and 2 above on a medium<br />
customarily used for software interchange; or, it linking propri<strong>et</strong>ary applications with the library. If this is<br />
what you want to do, use the GNU Lesser General Public License instead of this License.<br />
c) Accompany it with the information you received as to the offer to distribute corresponding source co<strong>de</strong>.<br />
(This alternative is allowed only for noncommercial distribution and only if you received the program in<br />
object co<strong>de</strong> or executable form with such an offer, in accord with Subsection b above.) The source co<strong>de</strong> for<br />
a work means the preferred form of the work for making modifications to it. For an executable work,<br />
compl<strong>et</strong>e source co<strong>de</strong> means all the source co<strong>de</strong> for all modules it contains, plus any associated interface<br />
<strong>de</strong>finition files, plus the scripts used to control compilation and installation of the executable. However, as<br />
a special exception, the source co<strong>de</strong> distributed need not inclu<strong>de</strong> anything that is normally distributed (in<br />
either source or binary form) with the major components (compiler, kernel, and so on) of the operating<br />
system on which the executable runs, unless that component itself accompanies the executable. If<br />
distribution of executable or object co<strong>de</strong> is ma<strong>de</strong> by offering access to copy from a <strong>de</strong>signated place, then<br />
offering equivalent access to copy the source co<strong>de</strong> from the same place counts as distribution of the<br />
source co<strong>de</strong>, even though third parties are not compelled to copy the source along with the object co<strong>de</strong>.<br />
4. You may not copy, modify, sublicense, or distribute the Program except as expressly provi<strong>de</strong>d un<strong>de</strong>r this<br />
License. Any attempt otherwise to copy, modify, sublicense or distribute the Program is void, and will<br />
automatically terminate your rights un<strong>de</strong>r this License. However, parties who have received copies, or rights,<br />
from you un<strong>de</strong>r this License will not have their licenses terminated so long as such parties remain in full<br />
compliance.<br />
5. You are not required to accept this License, since you have not signed it. However, nothing else grants you<br />
permission to modify or distribute the Program or its <strong>de</strong>rivative works. These actions are prohibited by law if<br />
you do not accept this License. Therefore, by modifying or distributing the Program (or any work based on the<br />
English<br />
143<br />
En
08 Appendix<br />
Program), you indicate your acceptance of this License to do so, and all its terms and conditions for copying,<br />
distributing or modifying the Program or works based on it.<br />
6. Each time you redistribute the Program (or any work based on the Program), the recipient automatically<br />
receives a license from the original licensor to copy, distribute or modify the Program subject to these terms<br />
and conditions. You may not impose any further restrictions on the recipients’ exercise of the rights granted<br />
herein.<br />
You are not responsible for enforcing compliance by third parties to this License.<br />
7. If, as a consequence of a court judgment or allegation of patent infringement or for any other reason (not<br />
limited to patent issues), conditions are imposed on you (wh<strong>et</strong>her by court or<strong>de</strong>r, agreement or otherwise) that<br />
contradict the conditions of this License, they do not excuse you from the conditions of this License. If you<br />
cannot distribute so as to satisfy simultaneously your obligations un<strong>de</strong>r this License and any other pertinent<br />
obligations, then as a consequence you may not distribute the Program at all. For example, if a patent license<br />
would not permit royalty-free redistribution of the Program by all those who receive copies directly or indirectly<br />
through you, then the only way you could satisfy both it and this License would be to refrain entirely from<br />
distribution of the Program.<br />
If any portion of this section is held invalid or unenforceable un<strong>de</strong>r any particular circumstance, the balance<br />
of the section is inten<strong>de</strong>d to apply and the section as a whole is inten<strong>de</strong>d to apply in other circumstances.<br />
It is not the purpose of this section to induce you to infringe any patents or other property right claims or to<br />
contest validity of any such claims; this section has the sole purpose of protecting the integrity of the free<br />
software distribution system, which is implemented by public license practices. Many people have ma<strong>de</strong><br />
generous contributions to the wi<strong>de</strong> range of software distributed through that system in reliance on consistent<br />
application of that system; it is up to the author/donor to <strong>de</strong>ci<strong>de</strong> if he or she is willing to distribute software<br />
through any other system and a licensee cannot impose that choice. This section is inten<strong>de</strong>d to make<br />
thoroughly clear what is believed to be a consequence of the rest of this License.<br />
8. If the distribution and/or use of the Program is restricted in certain countries either by patents or by<br />
copyrighted interfaces, the original copyright hol<strong>de</strong>r who places the Program un<strong>de</strong>r this License may add an<br />
explicit geographical distribution limitation excluding those countries, so that distribution is permitted only in<br />
or among countries not thus exclu<strong>de</strong>d. In such case, this License incorporates the limitation as if written in the<br />
body of this License.<br />
9. The Free Software Foundation may publish revised and/or new versions of the General Public License from time<br />
to time. Such new versions will be similar in spirit to the present version, but may differ in d<strong>et</strong>ail to address new<br />
problems or concerns.<br />
Each version is given a distinguishing version number. If the Program specifies a version number of this<br />
License which applies to it and “any later version”, you have the option of following the terms and conditions<br />
either of that version or of any later version published by the Free Software Foundation. If the Program does not<br />
specify a version number of this License, you may choose any version ever published by the Free Software<br />
Foundation.<br />
10.If you wish to incorporate parts of the Program into other free programs whose distribution conditions are<br />
different, write to the author to ask for permission. For software which is copyrighted by the Free Software<br />
Foundation, write to the Free Software Foundation; we som<strong>et</strong>imes make exceptions for this. Our <strong>de</strong>cision will<br />
be gui<strong>de</strong>d by the two goals of preserving the free status of all <strong>de</strong>rivatives of our free software and of promoting<br />
the sharing and r<strong>eu</strong>se of software generally.<br />
144<br />
En<br />
NO WARRANTY<br />
11.BECAUSE THE PROGRAM IS LICENSED FREE OF CHARGE, THERE IS NO WARRANTY FOR THE PROGRAM,<br />
TO THE EXTENT PERMITTED BY APPLICABLE LAW. EXCEPT WHEN OTHERWISE STATED IN WRITING THE<br />
COPYRIGHT HOLDERS AND/OR OTHER PARTIES PROVIDE THE PROGRAM “AS IS” WITHOUT WARRANTY OF<br />
ANY KIND, EITHER EXPRESSED OR IMPLIED, INCLUDING, BUT NOT LIMITED TO, THE IMPLIED<br />
WARRANTIES OF MERCHANTABILITY AND FITNESS FOR A PARTICULAR PURPOSE. THE ENTIRE RISK AS<br />
TO THE QUALITY AND PERFORMANCE OF THE PROGRAM IS WITH YOU. SHOULD THE PROGRAM PROVE<br />
DEFECTIVE, YOU ASSUME THE COST OF ALL NECESSARY SERVICING, REPAIR OR CORRECTION.<br />
12.IN NO EVENT UNLESS REQUIRED BY APPLICABLE LAW OR AGREED TO IN WRITING WILL ANY COPYRIGHT<br />
HOLDER, OR ANY OTHER PARTY WHO MAY MODIFY AND/OR REDISTRIBUTE THE PROGRAM AS<br />
PERMITTED ABOVE, BE LIABLE TO YOU FOR DAMAGES, INCLUDING ANY GENERAL, SPECIAL, INCIDENTAL<br />
OR CONSEQUENTIAL DAMAGES ARISING OUT OF THE USE OR INABILITY TO USE THE PROGRAM<br />
(INCLUDING BUT NOT LIMITED TO LOSS OF DATA OR DATA BEING RENDERED INACCURATE OR LOSSES
Appendix<br />
08<br />
SUSTAINED BY YOU OR THIRD PARTIES OR A FAILURE OF THE PROGRAM TO OPERATE WITH ANY OTHER<br />
PROGRAMS), EVEN IF SUCH HOLDER OR OTHER PARTY HAS BEEN ADVISED OF THE POSSIBILITY OF SUCH<br />
DAMAGES.<br />
END OF TERMS AND CONDITIONS<br />
English<br />
How to Apply These Terms to Your New Programs<br />
If you <strong>de</strong>velop a new program, and you want it to be of the greatest possible use to the public, the best way to<br />
achieve this is to make it free software which everyone can redistribute and change un<strong>de</strong>r these terms.<br />
To do so, attach the following notices to the program. It is safest to attach them to the start of each source file to<br />
most effectively convey the exclusion of warranty; and each file should have at least the “copyright” line and a<br />
pointer to where the full notice is found.<br />
<br />
Copyright © <br />
This program is free software; you can redistribute it and/or modify it un<strong>de</strong>r the terms of the GNU General Public<br />
License as published by the Free Software Foundation; either version 2 of the License, or (at your option) any later<br />
version.<br />
This program is distributed in the hope that it will be useful, but WITHOUT ANY WARRANTY; without even the<br />
implied warranty of MERCHANTABILITY or FITNESS FOR A PARTICULAR PURPOSE. See the GNU General Public<br />
License for more d<strong>et</strong>ails.<br />
You should have received a copy of the GNU General Public License along with this program; if not, write to the<br />
Free Software Foundation, Inc., 51 Franklin Stre<strong>et</strong>, Fifth Floor, Boston, MA 02110-1301 USA.<br />
Also add information on how to contact you by electronic and paper mail.<br />
If the program is interactive, make it output a short notice like this when it starts in an interactive mo<strong>de</strong>:<br />
Gnomovision version 69, Copyright © year name of author<br />
Gnomovision comes with ABSOLUTELY NO WARRANTY; for d<strong>et</strong>ails type ‘show w’. This is free software, and<br />
you are welcome to redistribute it un<strong>de</strong>r certain conditions; type ‘show c’ for d<strong>et</strong>ails.<br />
The hypoth<strong>et</strong>ical commands ‘show w’ and ‘show c’ should show the appropriate parts of the General Public<br />
License. Of course, the commands you use may be called som<strong>et</strong>hing other than ‘show w’ and ‘show c’; they could<br />
even be mouse-clicks or menu items - whatever suits your program.<br />
You should also g<strong>et</strong> your employer (if you work as a programmer) or your school, if any, to sign a “copyright<br />
disclaimer” for the program, if necessary. Here is a sample; alter the names:<br />
Yoyodyne, Inc., hereby disclaims all copyright interest in the program ‘Gnomovision’ (which makes passes at<br />
compilers) written by James Hacker.<br />
, 1 April 1989<br />
Ty Coon, Presi<strong>de</strong>nt of Vice<br />
This General Public License does not permit incorporating your program into propri<strong>et</strong>ary programs. If your<br />
program is a subroutine library, you may consi<strong>de</strong>r it more useful to permit linking propri<strong>et</strong>ary applications with<br />
the library. If this is what you want to do, use the GNU Lesser General Public License instead of this License.<br />
[GNU LESSER GENERAL PUBLIC LICENSE]<br />
Version 2.1, February 1999<br />
Copyright © 1991, 1999 Free Software Foundation, Inc.<br />
51 Franklin Stre<strong>et</strong>, Fifth Floor, Boston, MA 02110-1301 USA<br />
Everyone is permitted to copy and distribute verbatim copies of this license document, but changing it is not<br />
allowed.<br />
[This is the first released version of the Lesser GPL. It also counts as the successor of the GNU Library Public<br />
License, version 2, hence the version number 2.1.]<br />
145<br />
En
08 Appendix<br />
146<br />
En<br />
Preamble<br />
The licenses for most software are <strong>de</strong>signed to take away your freedom to share and change it. By contrast, the<br />
GNU General Public Licenses are inten<strong>de</strong>d to guarantee your freedom to share and change free software - to<br />
make sure the software is free for all its users. This license, the Lesser General Public License, applies to some<br />
specially <strong>de</strong>signated software packages - typically libraries - of the Free Software Foundation and other authors<br />
who <strong>de</strong>ci<strong>de</strong> to use it. You can use it too, but we suggest you first think carefully about wh<strong>et</strong>her this license or the<br />
ordinary General Public License is the b<strong>et</strong>ter strategy to use in any particular case, based on the explanations<br />
below.<br />
When we speak of free software, we are referring to freedom of use, not price. Our General Public Licenses are<br />
<strong>de</strong>signed to make sure that you have the freedom to distribute copies of free software (and charge for this service<br />
if you wish); that you receive source co<strong>de</strong> or can g<strong>et</strong> it if you want it; that you can change the software and use<br />
pieces of it in new free programs; and that you are informed that you can do these things.<br />
To protect your rights, we need to make restrictions that forbid distributors to <strong>de</strong>ny you these rights or to ask you<br />
to surren<strong>de</strong>r these rights. These restrictions translate to certain responsibilities for you if you distribute copies of<br />
the library or if you modify it.<br />
For example, if you distribute copies of the library, wh<strong>et</strong>her gratis or for a fee, you must give the recipients all the<br />
rights that we gave you. You must make sure that they, too, receive or can g<strong>et</strong> the source co<strong>de</strong>. If you link other<br />
co<strong>de</strong> with the library, you must provi<strong>de</strong> compl<strong>et</strong>e object files to the recipients, so that they can relink them with<br />
the library after making changes to the library and recompiling it. And you must show them these terms so they<br />
know their rights. We protect your rights with a two-step m<strong>et</strong>hod: (1) we copyright the library, and (2) we offer you<br />
this license, which gives you legal permission to copy, distribute and/or modify the library.<br />
To protect each distributor, we want to make it very clear that there is no warranty for the free library. Also, if the<br />
library is modified by someone else and passed on, the recipients should know that what they have is not the<br />
original version, so that the original author’s reputation will not be affected by problems that might be introduced<br />
by others.<br />
Finally, software patents pose a constant threat to the existence of any free program. We wish to make sure that<br />
a company cannot effectively restrict the users of a free program by obtaining a restrictive license from a patent<br />
hol<strong>de</strong>r. Therefore, we insist that any patent license obtained for a version of the library must be consistent with<br />
the full freedom of use specified in this license.<br />
Most GNU software, including some libraries, is covered by the ordinary GNU General Public License. This<br />
license, the GNU Lesser General Public License, applies to certain <strong>de</strong>signated libraries, and is quite different from<br />
the ordinary General Public License. We use this license for certain libraries in or<strong>de</strong>r to permit linking those<br />
libraries into non-free programs.<br />
When a program is linked with a library, wh<strong>et</strong>her statically or using a shared library, the combination of the two<br />
is legally speaking a combined work, a <strong>de</strong>rivative of the original library. The ordinary General Public License<br />
therefore permits such linking only if the entire combination fits its criteria of freedom. The Lesser General Public<br />
License permits more lax criteria for linking other co<strong>de</strong> with the library.<br />
We call this license the “Lesser” General Public License because it does Less to protect the user’s freedom than<br />
the ordinary General Public License. It also provi<strong>de</strong>s other free software <strong>de</strong>velopers Less of an advantage over<br />
comp<strong>et</strong>ing non-free programs. These disadvantages are the reason we use the ordinary General Public License<br />
for many libraries. However, the Lesser license provi<strong>de</strong>s advantages in certain special circumstances.<br />
For example, on rare occasions, there may be a special need to encourage the wi<strong>de</strong>st possible use of a certain<br />
library, so that it becomes a <strong>de</strong>-facto standard. To achieve this, non-free programs must be allowed to use the<br />
library. A more frequent case is that a free library does the same job as wi<strong>de</strong>ly used non-free libraries. In this case,<br />
there is little to gain by limiting the free library to free software only, so we use the Lesser General Public License.<br />
In other cases, permission to use a particular library in non-free programs enables a greater number of people to<br />
use a large body of free software. For example, permission to use the GNU C Library in non-free programs enables<br />
many more people to use the whole GNU operating system, as well as its variant, the GNU Linux operating system.<br />
Although the Lesser General Public License is Less protective of the users’ freedom, it does ensure that the user<br />
of a program that is linked with the Library has the freedom and the wherewithal to run that program using a<br />
modified version of the Library.<br />
The precise terms and conditions for copying, distribution and modification follow. Pay close attention to the<br />
difference b<strong>et</strong>ween a “work based on the library” and a “work that uses the library”. The former contains co<strong>de</strong><br />
<strong>de</strong>rived from the library, whereas the latter must be combined with the library in or<strong>de</strong>r to run.
Appendix<br />
08<br />
GNU LESSER GENERAL PUBLIC LICENSE<br />
TERMS AND CONDITIONS FOR COPYING, DISTRIBUTION AND MODIFICATION<br />
0. This License Agreement applies to any software library or other program which contains a notice placed by the<br />
copyright hol<strong>de</strong>r or other authorized party saying it may be distributed un<strong>de</strong>r the terms of this Lesser General<br />
Public License (also called “this License”). Each licensee is addressed as “you”.<br />
A “library” means a collection of software functions and/or data prepared so as to be conveniently linked with<br />
application programs (which use some of those functions and data) to form executables.<br />
The “Library”, below, refers to any such software library or work which has been distributed un<strong>de</strong>r these terms.<br />
A “work based on the Library” means either the Library or any <strong>de</strong>rivative work un<strong>de</strong>r copyright law: that is to<br />
say, a work containing the Library or a portion of it, either verbatim or with modifications and/or translated<br />
straightforwardly into another language. (Hereinafter, translation is inclu<strong>de</strong>d without limitation in the term<br />
“modification”.)<br />
“Source co<strong>de</strong>” for a work means the preferred form of the work for making modifications to it. For a library,<br />
compl<strong>et</strong>e source co<strong>de</strong> means all the source co<strong>de</strong> for all modules it contains, plus any associated interface<br />
<strong>de</strong>finition files, plus the scripts used to control compilation and installation of the library.<br />
Activities other than copying, distribution and modification are not covered by this License; they are outsi<strong>de</strong> its<br />
scope. The act of running a program using the Library is not restricted, and output from such a program is<br />
covered only if its contents constitute a work based on the Library (in<strong>de</strong>pen<strong>de</strong>nt of the use of the Library in a<br />
tool for writing it). Wh<strong>et</strong>her that is true <strong>de</strong>pends on what the Library does and what the program that uses the<br />
Library does.<br />
1. You may copy and distribute verbatim copies of the Library’s compl<strong>et</strong>e source co<strong>de</strong> as you receive it, in any<br />
medium, provi<strong>de</strong>d that you conspicuously and appropriately publish on each copy an appropriate copyright<br />
notice and disclaimer of warranty; keep intact all the notices that refer to this License and to the absence of<br />
any warranty; and distribute a copy of this License along with the Library.<br />
You may charge a fee for the physical act of transferring a copy, and you may at your option offer warranty<br />
protection in exchange for a fee.<br />
2. You may modify your copy or copies of the Library or any portion of it, thus forming a work based on the Library,<br />
and copy and distribute such modifications or work un<strong>de</strong>r the terms of Section 1 above, provi<strong>de</strong>d that you also<br />
me<strong>et</strong> all of these conditions:<br />
a) The modified work must itself be a software library.<br />
b) You must cause the files modified to carry prominent notices stating that you changed the files and the<br />
date of any change.<br />
c) You must cause the whole of the work to be licensed at no charge to all third parties un<strong>de</strong>r the terms of this<br />
License.<br />
d) If a facility in the modified Library refers to a function or a table of data to be supplied by an application<br />
program that uses the facility, other than as an argument passed when the facility is invoked, then you<br />
must make a good faith effort to ensure that, in the event an application does not supply such function or<br />
table, the facility still operates, and performs whatever part of its purpose remains meaningful. (For<br />
example, a function in a library to compute square roots has a purpose that is entirely well-<strong>de</strong>fined<br />
in<strong>de</strong>pen<strong>de</strong>nt of the application. Therefore, Subsection 2d requires that any application-supplied function<br />
or table used by this function must be optional: if the application does not supply it, the square root<br />
function must still compute square roots.)<br />
These requirements apply to the modified work as a whole. If i<strong>de</strong>ntifiable sections of that work are not<br />
<strong>de</strong>rived from the Library, and can be reasonably consi<strong>de</strong>red in<strong>de</strong>pen<strong>de</strong>nt and separate works in<br />
themselves, then this License, and its terms, do not apply to those sections when you distribute them as<br />
separate works. But when you distribute the same sections as part of a whole which is a work based on the<br />
Library, the distribution of the whole must be on the terms of this License, whose permissions for other<br />
licensees extend to the entire whole, and thus to each and every part regardless of who wrote it.<br />
Thus, it is not the intent of this section to claim rights or contest your rights to work written entirely by you;<br />
rather, the intent is to exercise the right to control the distribution of <strong>de</strong>rivative or collective works based on<br />
the Library.<br />
In addition, mere aggregation of another work not based on the Library with the Library (or with a work<br />
based on the Library) on a volume of a storage or distribution medium does not bring the other work un<strong>de</strong>r<br />
the scope of this License.<br />
3. You may opt to apply the terms of the ordinary GNU General Public License instead of this License to a given<br />
copy of the Library. To do this, you must alter all the notices that refer to this License, so that they refer to the<br />
English<br />
147<br />
En
08 Appendix<br />
148<br />
En<br />
ordinary GNU General Public License, version 2, instead of to this License. (If a newer version than version 2 of<br />
the ordinary GNU General Public License has appeared, then you can specify that version instead if you wish.)<br />
Do not make any other change in these notices.<br />
Once this change is ma<strong>de</strong> in a given copy, it is irreversible for that copy, so the ordinary GNU General Public<br />
License applies to all subsequent copies and <strong>de</strong>rivative works ma<strong>de</strong> from that copy. This option is useful when<br />
you wish to copy part of the co<strong>de</strong> of the Library into a program that is not a library.<br />
4. You may copy and distribute the Library (or a portion or <strong>de</strong>rivative of it, un<strong>de</strong>r Section 2) in object co<strong>de</strong> or<br />
executable form un<strong>de</strong>r the terms of Sections 1 and 2 above provi<strong>de</strong>d that you accompany it with the compl<strong>et</strong>e<br />
corresponding machine-readable source co<strong>de</strong>, which must be distributed un<strong>de</strong>r the terms of Sections 1 and<br />
2 above on a medium customarily used for software interchange.<br />
If distribution of object co<strong>de</strong> is ma<strong>de</strong> by offering access to copy from a <strong>de</strong>signated place, then offering<br />
equivalent access to copy the source co<strong>de</strong> from the same place satisfies the requirement to distribute the<br />
source co<strong>de</strong>, even though third parties are not compelled to copy the source along with the object co<strong>de</strong>.<br />
5. A program that contains no <strong>de</strong>rivative of any portion of the Library, but is <strong>de</strong>signed to work with the Library by<br />
being compiled or linked with it, is called a “work that uses the Library”. Such a work, in isolation, is not a<br />
<strong>de</strong>rivative work of the Library, and therefore falls outsi<strong>de</strong> the scope of this License.<br />
However, linking a “work that uses the Library” with the Library creates an executable that is a <strong>de</strong>rivative of the<br />
Library (because it contains portions of the Library), rather than a “work that uses the library”. The executable<br />
is therefore covered by this License. Section 6 states terms for distribution of such executables.<br />
When a “work that uses the Library” uses material from a hea<strong>de</strong>r file that is part of the Library, the object co<strong>de</strong><br />
for the work may be a <strong>de</strong>rivative work of the Library even though the source co<strong>de</strong> is not. Wh<strong>et</strong>her this is true is<br />
especially significant if the work can be linked without the Library, or if the work is itself a library. The threshold<br />
for this to be true is not precisely <strong>de</strong>fined by law.<br />
If such an object file uses only numerical param<strong>et</strong>ers, data structure layouts and accessors, and small macros<br />
and small inline functions (ten lines or less in length), then the use of the object file is unrestricted, regardless<br />
of wh<strong>et</strong>her it is legally a <strong>de</strong>rivative work. (Executables containing this object co<strong>de</strong> plus portions of the Library<br />
will still fall un<strong>de</strong>r Section 6.)<br />
Otherwise, if the work is a <strong>de</strong>rivative of the Library, you may distribute the object co<strong>de</strong> for the work un<strong>de</strong>r the<br />
terms of Section 6. Any executables containing that work also fall un<strong>de</strong>r Section 6, wh<strong>et</strong>her or not they are<br />
linked directly with the Library itself.<br />
6. As an exception to the Sections above, you may also combine or link a “work that uses the Library” with the<br />
Library to produce a work containing portions of the Library, and distribute that work un<strong>de</strong>r terms of your<br />
choice, provi<strong>de</strong>d that the terms permit modification of the work for the customer’s own use and reverse<br />
engineering for <strong>de</strong>bugging such modifications.<br />
You must give prominent notice with each copy of the work that the Library is used in it and that the Library<br />
and its use are covered by this License. You must supply a copy of this License. If the work during execution<br />
displays copyright notices, you must inclu<strong>de</strong> the copyright notice for the Library among them, as well as a<br />
reference directing the user to the copy of this License. Also, you must do one of these things:<br />
a) Accompany the work with the compl<strong>et</strong>e corresponding machine-readable source co<strong>de</strong> for the Library<br />
including whatever changes were used in the work<br />
(which must be distributed un<strong>de</strong>r Sections 1 and 2 above); and, if the work is an executable linked with the<br />
Library, with the compl<strong>et</strong>e machine-readable “work that uses the Library”, as object co<strong>de</strong> and/or source<br />
co<strong>de</strong>, so that the user can modify the Library and then relink to produce a modified executable containing<br />
the modified Library. (It is un<strong>de</strong>rstood that the user who changes the contents of <strong>de</strong>finitions files in the<br />
Library will not necessarily be able to recompile the application to use the modified <strong>de</strong>finitions.)<br />
b) Use a suitable shared library mechanism for linking with the Library. A suitable mechanism is one that (1)<br />
uses at run time a copy of the library already present on the user’s computer system, rather than copying<br />
library functions into the executable, and (2) will operate properly with a modified version of the library, if<br />
the user installs one, as long as the modified version is interface-compatible with the version that the work<br />
was ma<strong>de</strong> with.<br />
c) Accompany the work with a written offer, valid for at least three years, to give the same user the materials<br />
specified in Subsection 6a, above, for a charge no more than the cost of performing this distribution.<br />
d) If distribution of the work is ma<strong>de</strong> by offering access to copy from a <strong>de</strong>signated place, offer equivalent<br />
access to copy the above specified materials from the same place.<br />
e) Verify that the user has already received a copy of these materials or that you have already sent this user a<br />
copy.
Appendix<br />
08<br />
For an executable, the required form of the “work that uses the Library” must inclu<strong>de</strong> any data and utility<br />
programs nee<strong>de</strong>d for reproducing the executable from it. However, as a special exception, the materials to<br />
be distributed need not inclu<strong>de</strong> anything that is normally distributed (in either source or binary form) with<br />
the major components (compiler, kernel, and so on) of the operating system on which the executable runs,<br />
unless that component itself accompanies the executable.<br />
It may happen that this requirement contradicts the license restrictions of other propri<strong>et</strong>ary libraries that<br />
do not normally accompany the operating system. Such a contradiction means you cannot use both them<br />
and the Library tog<strong>et</strong>her in an executable that you distribute.<br />
7. You may place library facilities that are a work based on the Library si<strong>de</strong>-by-si<strong>de</strong> in a single library tog<strong>et</strong>her with<br />
other library facilities not covered by this License, and distribute such a combined library, provi<strong>de</strong>d that the<br />
separate distribution of the work based on the Library and of the other library facilities is otherwise permitted,<br />
and provi<strong>de</strong>d that you do these two things:<br />
a) Accompany the combined library with a copy of the same work based on the Library, uncombined with any<br />
other library facilities. This must be distributed un<strong>de</strong>r the terms of the Sections above.<br />
b) Give prominent notice with the combined library of the fact that part of it is a work based on the Library,<br />
and explaining where to find the accompanying uncombined form of the same work.<br />
8. You may not copy, modify, sublicense, link with, or distribute the Library except as expressly provi<strong>de</strong>d un<strong>de</strong>r<br />
this License. Any attempt otherwise to copy, modify, sublicense, link with, or distribute the Library is void, and<br />
will automatically terminate your rights un<strong>de</strong>r this License. However, parties who have received copies, or<br />
rights, from you un<strong>de</strong>r this License will not have their licenses terminated so long as such parties remain in<br />
full compliance.<br />
9. You are not required to accept this License, since you have not signed it. However, nothing else grants you<br />
permission to modify or distribute the Library or its <strong>de</strong>rivative works. These actions are prohibited by law if you<br />
do not accept this License. Therefore, by modifying or distributing the Library (or any work based on the<br />
Library), you indicate your acceptance of this License to do so, and all its terms and conditions for copying,<br />
distributing or modifying the Library or works based on it.<br />
10.Each time you redistribute the Library (or any work based on the Library), the recipient automatically receives<br />
a license from the original licensor to copy, distribute, link with or modify the Library subject to these terms<br />
and conditions. You may not impose any further restrictions on the recipients’ exercise of the rights granted<br />
herein. You are not responsible for enforcing compliance by third parties with this License.<br />
11.If, as a consequence of a court judgment or allegation of patent infringement or for any other reason (not<br />
limited to patent issues), conditions are imposed on you (wh<strong>et</strong>her by court or<strong>de</strong>r, agreement or otherwise) that<br />
contradict the conditions of this License, they do not excuse you from the conditions of this License. If you<br />
cannot distribute so as to satisfy simultaneously your obligations un<strong>de</strong>r this License and any other pertinent<br />
obligations, then as a consequence you may not distribute the Library at all. For example, if a patent license<br />
would not permit royalty-free redistribution of the Library by all those who receive copies directly or indirectly<br />
through you, then the only way you could satisfy both it and this License would be to refrain entirely from<br />
distribution of the Library. If any portion of this section is held invalid or unenforceable un<strong>de</strong>r any particular<br />
circumstance, the balance of the section is inten<strong>de</strong>d to apply, and the section as a whole is inten<strong>de</strong>d to apply<br />
in other circumstances.<br />
It is not the purpose of this section to induce you to infringe any patents or other property right claims or to<br />
contest validity of any such claims; this section has the sole purpose of protecting the integrity of the free<br />
software distribution system which is implemented by public license practices. Many people have ma<strong>de</strong><br />
generous contributions to the wi<strong>de</strong> range of software distributed through that system in reliance on consistent<br />
application of that system; it is up to the author donor to <strong>de</strong>ci<strong>de</strong> if he or she is willing to distribute software<br />
through any other system and a licensee cannot impose that choice.<br />
This section is inten<strong>de</strong>d to make thoroughly clear what is believed to be a consequence of the rest of this<br />
License.<br />
12.If the distribution and/or use of the Library is restricted in certain countries either by patents or by copyrighted<br />
interfaces, the original copyright hol<strong>de</strong>r who places the Library un<strong>de</strong>r this License may add an explicit<br />
geographical distribution limitation excluding those countries, so that distribution is permitted only in or<br />
among countries not thus exclu<strong>de</strong>d. In such case, this License incorporates the limitation as if written in the<br />
body of this License.<br />
13.The Free Software Foundation may publish revised and/or new versions of the Lesser General Public License<br />
from time to time. Such new versions will be similar in spirit to the present version, but may differ in d<strong>et</strong>ail to<br />
address new problems or concerns.<br />
English<br />
149<br />
En
08 Appendix<br />
Each version is given a distinguishing version number. If the Library specifies a version number of this License<br />
which applies to it and “any later version”, you have the option of following the terms and conditions either of<br />
that version or of any later version published by the Free Software Foundation. If the Library does not specify a<br />
license version number, you may choose any version ever published by the Free Software Foundation.<br />
14.If you wish to incorporate parts of the Library into other free programs whose distribution conditions are<br />
incompatible with these, write to the author to ask for permission. For software which is copyrighted by the Free<br />
Software Foundation, write to the Free Software Foundation; we som<strong>et</strong>imes make exceptions for this. Our<br />
<strong>de</strong>cision will be gui<strong>de</strong>d by the two goals of preserving the free status of all <strong>de</strong>rivatives of our free software and<br />
of promoting the sharing and r<strong>eu</strong>se of software generally.<br />
NO WARRANTY<br />
15.BECAUSE THE LIBRARY IS LICENSED FREE OF CHARGE, THERE IS NO WARRANTY FOR THE LIBRARY, TO<br />
THE EXTENT PERMITTED BY APPLICABLE LAW. EXCEPT WHEN OTHERWISE STATED IN WRITING THE<br />
COPYRIGHT HOLDERS AND/OR OTHER PARTIES PROVIDE THE LIBRARY “AS IS” WITHOUT WARRANTY OF<br />
ANY KIND, EITHER EXPRESSED OR IMPLIED, INCLUDING, BUT NOT LIMITED TO, THE IMPLIED<br />
WARRANTIES OF MERCHANTABILITY AND FITNESS FOR A PARTICULAR PURPOSE. THE ENTIRE RISK AS<br />
TO THE QUALITY AND PERFORMANCE OF THE LIBRARY IS WITH YOU. SHOULD THE LIBRARY PROVE<br />
DEFECTIVE, YOU ASSUME THE COST OF ALL NECESSARY SERVICING, REPAIR OR CORRECTION.<br />
16.IN NO EVENT UNLESS REQUIRED BY APPLICABLE LAW OR AGREED TO IN WRITING WILL ANY COPYRIGHT<br />
HOLDER, OR ANY OTHER PARTY WHO MAY MODIFY AND/OR REDISTRIBUTE THE LIBRARY AS PERMITTED<br />
ABOVE, BE LIABLE TO YOU FOR DAMAGES, INCLUDING ANY GENERAL, SPECIAL, INCIDENTAL OR<br />
CONSEQUENTIAL DAMAGES ARISING OUT OF THE USE OR INABILITY TO USE THE LIBRARY (INCLUDING<br />
BUT NOT LIMITED TO LOSS OF DATA OR DATA BEING RENDERED INACCURATE OR LOSSES SUSTAINED BY<br />
YOU OR THIRD PARTIES OR A FAILURE OF THE LIBRARY TO OPERATE WITH ANY OTHER SOFTWARE), EVEN<br />
IF SUCH HOLDER OR OTHER PARTY HAS BEEN ADVISED OF THE POSSIBILITY OF SUCH DAMAGES.<br />
END OF TERMS AND CONDITIONS<br />
How to Apply These Terms to Your New Libraries<br />
If you <strong>de</strong>velop a new library, and you want it to be of the greatest possible use to the public, we recommend<br />
making it free software that everyone can redistribute and change. You can do so by permitting redistribution<br />
un<strong>de</strong>r these terms (or, alternatively, un<strong>de</strong>r the terms of the ordinary General Public License).<br />
To apply these terms, attach the following notices to the library. It is safest to attach them to the start of each<br />
source file to most effectively convey the exclusion of warranty; and each file should have at least the “copyright”<br />
line and a pointer to where the full notice is found.<br />
<br />
Copyright © <br />
This library is free software; you can redistribute it and/or modify it un<strong>de</strong>r the terms of the GNU Lesser General<br />
Public License as published by the Free Software Foundation; either version 2.1 of the License, or (at your option)<br />
any later version.<br />
This library is distributed in the hope that it will be useful, but WITHOUT ANY WARRANTY; without even the<br />
implied warranty of MERCHANTABILITY or FITNESS FOR A PARTICULAR PURPOSE. See the GNU Lesser General<br />
Public License for more d<strong>et</strong>ails.<br />
You should have received a copy of the GNU Lesser General Public License along with this library; if not, write to<br />
the Free Software Foundation, Inc., 51 Franklin Stre<strong>et</strong>, Fifth Floor, Boston, MA 02110-1301 USA<br />
Also add information on how to contact you by electronic and paper mail.<br />
You should also g<strong>et</strong> your employer (if you work as a programmer) or your school, if any, to sign a “copyright<br />
disclaimer” for the library, if necessary. Here is a sample; alter the names:<br />
Yoyodyne, Inc., hereby disclaims all copyright interest in the library ‘Frob’ (a library for tweaking knobs) written by<br />
James Random Hacker.<br />
, 1 April 1990<br />
Ty Coon, Presi<strong>de</strong>nt of Vice<br />
That’s all there is to it!<br />
150<br />
En
Appendix<br />
08<br />
[Linux Source Notice]<br />
The software programs used on this product inclu<strong>de</strong> the Linux operating system. The Linux contains software<br />
licensed for use based on the terms of a GNU General Public License. The machine readable copy of the<br />
corresponding source co<strong>de</strong> is available for the cost of distribution.<br />
For more information or to obtain a copy, contact your local <strong>Pioneer</strong> Customer Service center.<br />
D<strong>et</strong>ails of the GNU General Public License can be found at the GNU website (http://www.gnu.org).<br />
English<br />
151<br />
En
08 Appendix<br />
8.4 Glossary<br />
HDMI<br />
The High-Definition Multimedia Interface (HDMI) is a digital data transmission standard for consumer<br />
electronics/home appliances. HDMI connects digital audio/vi<strong>de</strong>o sources to a compatible digital audio and/or<br />
vi<strong>de</strong>o <strong>de</strong>vice, such as a flat panel TV. HDMI also allows digitally transmitted audio and control signals on a single<br />
cable for multi-channel digital audio sources.<br />
PCM<br />
The Pulse Co<strong>de</strong> Modulation (PCM) is a m<strong>et</strong>hod for converting analog audio signals to digital. PCM is used in<br />
music CDs.<br />
Dolby Digital<br />
Dolby Digital is an encoding technology for audio signal compressions. Dolby Digital supports high-quality, highcompression,<br />
multi-channel audio formats. The 5.1-channel surround format is utilized in digital broadcasts.<br />
High-Definition Broadcast<br />
HD is a digital television broadcasting system with greater resolution than traditional television systems. As<br />
compared with the existing terrestrial analog broadcasting system capable of producing an image composed of<br />
525 lines of resolution, the digital high-<strong>de</strong>finition broadcasting system features 750 or 1125 lines, thus providing<br />
higher <strong>de</strong>finition and quality image.<br />
Interlaced Scanning<br />
In NTSC television or vi<strong>de</strong>o image display, interlaced scanning first redraws every second line of the image field<br />
(262.5 lines) per each image refresh in 1/60 of a second, then the remaining lines with a second refresh in 1/60<br />
of a second for a compl<strong>et</strong>e frame of an image (525 lines). Effective scanning lines are expressed as “480i” and<br />
“1080i” (“i” stands for “interlaced”).<br />
Progressive Scanning<br />
The progressive scanning redraws an image frame (all of its lines) in or<strong>de</strong>r per each image refresh. Compared to<br />
interlaced scanning, progressive scanning produces less flicker, making it suitable for displaying text and still<br />
images. Effective scanning lines are expressed as “480p” and “720p” (“p” stands for “progressive”).<br />
152<br />
En<br />
(Home Media Gallery)<br />
Default Gateway<br />
Default gateway is a no<strong>de</strong> on a computer n<strong>et</strong>work that serves as an access point to another n<strong>et</strong>work. A <strong>de</strong>fault<br />
gateway (such as a computer and router) is used to forward all traffic that is not addressed to a station within the<br />
local subn<strong>et</strong>.<br />
DHCP (Dynamic Host Configuration Protocol) Server<br />
Provi<strong>de</strong>s a mechanism to allocate IP addresses to client hosts. In most cases, a broadband router serves as a<br />
DHCP server in a home n<strong>et</strong>work.<br />
DLNA (Digital Living N<strong>et</strong>work Alliance)<br />
The DLNA authorized logo makes it easy for consumers to recognize products that me<strong>et</strong> the new standard for<br />
home n<strong>et</strong>work PCs and other digital <strong>de</strong>vices, as s<strong>et</strong> down in the DLNA Gui<strong>de</strong>lines for interoperability. This allows<br />
music, vi<strong>de</strong>o, <strong>et</strong>c. to be enjoyed from various <strong>de</strong>vices over a home n<strong>et</strong>work. This unit is compatible with music,<br />
photo and vi<strong>de</strong>o content, and is based on the DLNA Home N<strong>et</strong>worked Device Interoperability Gui<strong>de</strong>lines -<br />
expan<strong>de</strong>d: October 2006 (v1.5). This unit can be used to playback music, photos and vi<strong>de</strong>o stored on a DLNAcompatible<br />
server connected through a LAN cable.<br />
Digital Living N<strong>et</strong>work Alliance (DLNA) is <strong>de</strong>dicated to the simplified sharing of digital content, such as digital<br />
music, photos and vi<strong>de</strong>o among n<strong>et</strong>worked consumer electronics (CE) and PCs. By establishing a platform of<br />
interoperability based on open industry standards, DLNA <strong>de</strong>livers technical <strong>de</strong>sign gui<strong>de</strong>lines that companies<br />
can use to <strong>de</strong>velop digital home products that share content through wired or wireless n<strong>et</strong>works in the home.<br />
DNS (Domain Name Service) Server<br />
DNS Server is a server that d<strong>et</strong>ermines the name of n<strong>et</strong>work-computer within the Intern<strong>et</strong>. The server functions<br />
to exchange IP address to the hostname, hostname to the IP address.<br />
Ethern<strong>et</strong><br />
A frame-based computer n<strong>et</strong>working technology for local area n<strong>et</strong>works (LANs). The flat panel TV supports<br />
100BASE-TX.
Appendix<br />
08<br />
IP (Intern<strong>et</strong> Protocol) Address<br />
A unique number that <strong>de</strong>vices use in or<strong>de</strong>r to i<strong>de</strong>ntify and communicate with each other on a n<strong>et</strong>work utilizing<br />
the Intern<strong>et</strong> Protocol standard, such as “192.168.1.xxx”. No duplicate numbers are allowed within the n<strong>et</strong>work.<br />
LAN Cable<br />
A cable that has an eight-pin modular plug on each end and is different from a telephone plug which has four<br />
pins. A straight cable is used when connecting the flat panel TV to a home n<strong>et</strong>work via a hub. A cross-over cable<br />
is used when connecting directly to a PC. Use category 5 (CAT-5) LAN cables.<br />
MAC (Media Access Control) Address<br />
An address attached to the port of any n<strong>et</strong>work <strong>de</strong>vice with an IP address. The MAC address is expressed as<br />
“00:e0:36:01:23:xx” and cannot be changed.<br />
Mass Storage Class Devices<br />
The standard provi<strong>de</strong>s an interface to a vari<strong>et</strong>y of storage <strong>de</strong>vices, such as USB flash drive and digital cameras.<br />
PTP (Picture Transfer Protocol)<br />
A protocol that allows the transfer of images and manipulation of digital cameras through USB connection. Most<br />
recent digital cameras and other <strong>de</strong>vices support PTP allowing the transfer of images through direct connections.<br />
Subn<strong>et</strong> Mask<br />
Used to d<strong>et</strong>ermine the n<strong>et</strong>work when IP addresses are broken into several parts. It is expressed as<br />
“255.255.255.0”. In most cases, the Subn<strong>et</strong> mask is automatically assigned by the DHCP server.<br />
UPnP (Universal Plug and Play)<br />
Architecture for pervasive peer-to-peer n<strong>et</strong>work connectivity of <strong>de</strong>vices of all form factors. It is <strong>de</strong>signed to bring<br />
easy-to-use, flexible, standard based connectivity to ad-hoc or unmanaged n<strong>et</strong>works wh<strong>et</strong>her in the home, in a<br />
small business, public spaces, or attached to the Intern<strong>et</strong>.<br />
USB (Universal Serial Bus)<br />
USB provi<strong>de</strong>s a serial bus standard for connecting <strong>de</strong>vices, usually to computers such as PCs. The flat panel TV<br />
supports the Mass Storage Class and PTP (Picture Transfer Protocol) <strong>de</strong>vices.<br />
Windows Media Connect<br />
Microsoft Windows Media Connect is a new technology to distribute music, photos and vi<strong>de</strong>o stored on a PC with<br />
Windows XP installed to a stereo system of TV. Using this technology you can playback files stored on the PC from<br />
various <strong>de</strong>vices wherever you like in your home.<br />
Windows Media DRM<br />
Windows Media DRM is copyright protection technology <strong>de</strong>veloped by Microsoft Corporation. It enables content<br />
provi<strong>de</strong>rs to distribute over the Intern<strong>et</strong> music, vi<strong>de</strong>o and other digital media content in a protected, encrypted file<br />
format.<br />
Windows Media Player<br />
A free digital media player application provi<strong>de</strong>d by Microsoft that is used for playing audio, vi<strong>de</strong>o and images on<br />
PCs.<br />
Windows Media Player 11<br />
The functionality of Windows Media Connect has been integrated into this version of Windows Media Player. After<br />
installing Windows Media Player 11 Windows Media Connect will not function. See Microsoft’s website for<br />
d<strong>et</strong>ails.<br />
English<br />
153<br />
En
08 Appendix<br />
154<br />
En<br />
8.5 In<strong>de</strong>x<br />
Numerics<br />
100BASE-TX ..........................................................................85, 152<br />
10BASE-T ......................................................................................85<br />
2-screen ......................................................................12, 13, 61, 62<br />
A<br />
Air/Cable .......................................................................................35<br />
Analog ...................................................................43, 64, 66, 74, 75<br />
Analog TV S<strong>et</strong>up ...............................................................36, 38, 43<br />
Auto Installation .....................................................................35, 38<br />
Auto Size ...........................................................................52, 56, 59<br />
AV Selection ...........................................................................54, 55<br />
AVC ..........................................................................................46, 67<br />
B<br />
Balance .............................................................................33, 46, 57<br />
Bass ..............................................................................................33<br />
Block ...............................................................................49, 51, 113<br />
Blue ...................................................................................33, 58, 65<br />
Brightness ........................................................................45, 55, 58<br />
Brightness Sync ...................................................................60, 116<br />
C<br />
Canadian English Ratings ...........................................................49<br />
Canadian French Ratings ............................................................49<br />
CBL ..........................................................................................12, 71<br />
Change Password ..................................................................33, 47<br />
Channel .............................................................................35, 38, 41<br />
Channel Mo<strong>de</strong> ........................................................................33, 39<br />
Clock .....................................................................................35, 112<br />
Closed Captions .....................................................................64, 65<br />
Color ............................................................................42, 45, 55, 58<br />
Contrast ......................................................................43, 54, 55, 58<br />
D<br />
Digital ................................................................................26, 32, 50<br />
Digital Tuner S<strong>et</strong>up ........................................................35, 38, 120<br />
Dolby Digital .......................................................................111, 135<br />
E<br />
Energy Save ......................................................................52, 53, 67<br />
F<br />
Favorites ..................................................................................33, 40<br />
Favorites Sort ..........................................................................33, 40<br />
Film Mo<strong>de</strong> .....................................................................................60<br />
Freeze ....................................................................................62, 121<br />
G<br />
GAME ....................................................................28, 54, 56, 60, 82<br />
Game Control Pref .................................................................56, 60<br />
Green .................................................................................58, 65, 73<br />
H<br />
H/V Position Adjust ......................................................................44<br />
HD Wi<strong>de</strong> Mo<strong>de</strong> .............................................................................59<br />
HDMI Control ...................................................................74, 76, 78<br />
HDMI Control S<strong>et</strong>ting ............................................................78, 81<br />
HDMI Input .....................................................................74, 75, 114<br />
HDMI terminal ..........................................................27, 74, 76, 116<br />
Home Media Gallery ....................................................................83<br />
HOME MENU .........................................................................12, 34<br />
I<br />
InfoBanner ....................................................................................63<br />
Input ........................................................................................12, 40<br />
Installation ......................................................................14, 35, 121<br />
L<br />
Label ..............................................................................................40<br />
Label Input ....................................................................................40<br />
Language ..............................................................34, 35, 65, 66, 76<br />
M<br />
Manual Adjust ........................................................................36, 43<br />
MOVIE ...............................................................................12, 44, 54<br />
MPAA ....................................................................................48, 126<br />
MTS .........................................................................................64, 66<br />
Multi-screen ......................................................................56, 61, 62<br />
MUTING ...................................................................................13, 41<br />
N<br />
No Operation off ...........................................................................68<br />
No Signal Off ................................................................................68<br />
O<br />
OPTIMUM .........................................................................12, 45, 54<br />
Orbiter ...................................................................................53, 123<br />
P<br />
Parental Control .......................................................47, 48, 50, 113<br />
PCM .......................................................................................74, 111<br />
PERFORMANCE .....................................................................12, 54<br />
Picture-in-picture .............................................................12, 13, 61<br />
Position .................................................................................44, 112<br />
Power ................................................................................31, 53, 67<br />
Power Control ...............................................................................82<br />
Power Management .....................................................................68<br />
PureCinema ..................................................................................59<br />
R<br />
RCV ................................................................................................12<br />
Red ..........................................................................................58, 65<br />
Remote Control ................................................................10, 12, 69<br />
Room Light Sensor ......................................................................42<br />
S<br />
SAP ..........................................................................................64, 66<br />
SAT ..........................................................................................12, 71<br />
Screen Protection ..................................................33, 52, 114, 123<br />
SCREEN SIZE .........................................................................13, 56<br />
Sharpness ...............................................................................55, 58<br />
SHIFT .................................................................................13, 61, 62<br />
Si<strong>de</strong> Mask .........................................................................52, 59, 60<br />
Si<strong>de</strong> Mask D<strong>et</strong>ection ............................................................59, 123<br />
Sleep Timer ...........................................................................41, 115<br />
Sound ..........................................................................42, 46, 54, 64<br />
Sound Effect .........................................................................67, 135<br />
SPORT .....................................................................................12, 54<br />
SRS ................................................................................67, 135, 155<br />
SRS Definition ............................................................................135<br />
SRS FOCUS ................................................................................135<br />
SRS TruBASS .............................................................................135<br />
STANDARD .............................................................................12, 55<br />
Standard .................................................................................12, 54<br />
SWAP ................................................................................13, 61, 62<br />
System S<strong>et</strong>up ................................................................................34<br />
T<br />
Text Optimization .........................................................................60<br />
Time Zone .....................................................................................35<br />
Tint ...........................................................................................55, 58<br />
Treble .............................................................................................46<br />
TV Parental Gui<strong>de</strong>lines ....................................................48, 49, 50<br />
TV/DTV ...............................................................................13, 26, 32<br />
U<br />
Unavailable Ratings .....................................................................49<br />
USER .......................................................................................12, 55<br />
V<br />
VOLUME ..................................................................................41, 67
Appendix 08<br />
8.6 Tra<strong>de</strong>marks, Licenses, & Patent Information<br />
Tra<strong>de</strong>marks<br />
English<br />
is a tra<strong>de</strong>mark of SRS Labs, Inc.<br />
WOW HD technology is incorporated un<strong>de</strong>r license from SRS Labs, Inc.<br />
Manufactured un<strong>de</strong>r license from Dolby Laboratories. Dolby and the double-D symbol are tra<strong>de</strong>marks of Dolby Laboratories.<br />
HDMI, the HDMI Logo and High-Definition Multimedia Interface are tra<strong>de</strong>marks or registered tra<strong>de</strong>marks of HDMI Licensing<br />
LLC.<br />
This product inclu<strong>de</strong>s FontAvenue ® fonts licensed by NEC Corporation. FontAvenue is a registered tra<strong>de</strong>mark of NEC<br />
Corporation.<br />
DDC is a registered tra<strong>de</strong>mark of Vi<strong>de</strong>o Electronics Standards Association.<br />
This software is based in part on the work of the in<strong>de</strong>pen<strong>de</strong>nt JPEG Group.<br />
The names of the companies or institutions are tra<strong>de</strong>marks or registered tra<strong>de</strong>marks of the respective companies or<br />
institutions.<br />
Windows Media and the Windows logo are tra<strong>de</strong>marks or registered tra<strong>de</strong>marks of Microsoft Corporation in the United States<br />
and/or other countries.<br />
DLNA and DLNA CERTIFIED are tra<strong>de</strong>marks and/or service marks of Digital Living N<strong>et</strong>work Alliance.<br />
License<br />
Content owners use Windows Media digital rights management technology (WMDRM) to protect their intellectual property,<br />
including copyrights. This <strong>de</strong>vice uses WMDRM software to access WMDRM-protected content. If the WMDRM software fails<br />
to protect the content, content owners may ask Microsoft to revoke the software’s ability to use WMDRM to play or copy<br />
protected content. Revocation does not affect unprotected content. When you download licenses for protected content, you<br />
agree that Microsoft may inclu<strong>de</strong> a revocation list with the licenses. Content owners may require you to upgra<strong>de</strong> WMDRM to<br />
access their content. If you <strong>de</strong>cline an upgra<strong>de</strong>, you will not be able to access content that requires the upgra<strong>de</strong>.<br />
This product is protected by certain intellectual property rights of Microsoft. Use or distribution of such technology outsi<strong>de</strong> of<br />
this product is prohibited without a license from Microsoft.<br />
The DLNA logo is permitted to the product that has obtained a DLNA (Digital Living N<strong>et</strong>work Alliance) certificate.<br />
Disclaimer Notice<br />
<strong>Pioneer</strong> provi<strong>de</strong>s information to help in s<strong>et</strong>ting up a n<strong>et</strong>work and connecting the flat panel TV to the n<strong>et</strong>work, but you are solely<br />
responsible for proper n<strong>et</strong>work s<strong>et</strong>up and the connection. <strong>Pioneer</strong> bears no responsibility whatsoever for any damage arising<br />
from the n<strong>et</strong>work s<strong>et</strong>up and the connection you ma<strong>de</strong>.<br />
When downloading software updates from the <strong>Pioneer</strong> website and performing updating procedures, make sure that your<br />
connections from the n<strong>et</strong>work to your USB flash drive, and from your USB flash drive to the flat panel TV are uninterrupted.<br />
<strong>Pioneer</strong> bears no responsibility for any failures or damage resulting from connection problems.<br />
Content may not work properly <strong>de</strong>pending on the USB <strong>de</strong>vice used. <strong>Pioneer</strong> assumes no responsibility whatsoever for any<br />
failures or damage resulting from the USB <strong>de</strong>vice used by the user.<br />
Published by <strong>Pioneer</strong> Corporation.<br />
Copyright © 2008 <strong>Pioneer</strong> Corporation.<br />
All rights reserved.<br />
155<br />
En
IMPORTANT<br />
Ce symbole <strong>de</strong> l’éclair, placé dans un triangle<br />
équilatéral, a pour but d’attirer l’attention <strong>de</strong><br />
l’utilisat<strong>eu</strong>r sur la présence, à l’intéri<strong>eu</strong>r du coffr<strong>et</strong><br />
<strong>de</strong> l’appareil, <strong>de</strong> “tensions danger<strong>eu</strong>ses” non<br />
isolées d’une grand<strong>eu</strong>r suffisante pour représenter<br />
un risque d’électrocution pour les êtres humains.<br />
ATTENTION<br />
DANGER D´ELECTROCUTION<br />
NE PAS OUVRIR<br />
ATTENTION:<br />
POUR ÉVITER TOUT RISQUE D’ÉLECTROCUTION, NE PAS<br />
ENLEVER LE COUVERCLE (NI LE PANNEAU ARRIÈRE).<br />
AUCUNE PIÈCE RÉPARABLE PAR L’UTILISATEUR NE SE<br />
TROUVE À L’INTÉRIEUR. CONFIER TOUT ENTRETIEN À<br />
UN PERSONNEL QUALIFIÉ UNIQUEMENT.<br />
Ce point d’exclamation, placé dans un triangle<br />
équilatéral, a pour but d’attirer l’attention <strong>de</strong><br />
l’utilisat<strong>eu</strong>r sur la présence, dans les documents<br />
qui accompagnent l’appareil, d’explications<br />
importantes du point <strong>de</strong> vue <strong>de</strong> l’exploitation ou <strong>de</strong><br />
l’entr<strong>et</strong>ien.<br />
D3-4-2-1-1_Fr-A<br />
P1-4-2-2_Fr<br />
REMARQUE IMPORTANTE –<br />
LE NUMÉRO DE SÉRIE DE CET APPAREIL SE TROUVE SUR LE PANNEAU ARRIÈRE. VEUILLEZ<br />
NOTER CE NUMÉRO SUR LA CARTE DE GARANTIE FOURNIE QUE VOUS PLACEREZ ENSUITE EN<br />
LIEU SÛR. CELA, POUR DES RAISONS DE SÉCURITÉ.<br />
D1-4-2-6-1_Fr
TABLE DES MATIÈRES<br />
Félicitations pour votre achat d’un télévis<strong>eu</strong>r à écran plat KURO <strong>de</strong> <strong>Pioneer</strong>.<br />
KURO représente le futur <strong>de</strong>s télévis<strong>eu</strong>rs à écran plat <strong>de</strong> <strong>Pioneer</strong>. Un mon<strong>de</strong> sans frontières où les <strong>sens</strong> évoluent, où l’on<br />
p<strong>eu</strong>t sentir les coul<strong>eu</strong>rs <strong>et</strong> goûter les sons. Une expérience qui changera non s<strong>eu</strong>lement votre façon <strong>de</strong> voir la télévision,<br />
mais également votre façon <strong>de</strong> voir le mon<strong>de</strong>.<br />
Nous sommes fiers d’intégrer c<strong>et</strong>te philosophie revendiquant une qualité d’exception, un <strong>de</strong>sign <strong>de</strong>rnier cri <strong>et</strong> une<br />
conception méthodique pour faire du KURO un télévis<strong>eu</strong>r véritablement unique <strong>et</strong> vous offrir le meill<strong>eu</strong>r divertissement<br />
possible.<br />
Prenez le temps <strong>de</strong> lire ce gui<strong>de</strong> d’utilisat<strong>eu</strong>r <strong>et</strong> mo<strong>de</strong> d’emploi pour découvrir les nombr<strong>eu</strong>ses fonctions <strong>et</strong> avantages qui<br />
font se démarquer le KURO. Nous espérons que vous apprécierez l’expérience <strong>de</strong> possé<strong>de</strong>r le KURO <strong>et</strong> nous vous<br />
invitons à entrer dans un nouveau mon<strong>de</strong> <strong>de</strong> perception sonore <strong>et</strong> visuelle <strong>jamais</strong> ressentie auparavant.<br />
TABLE DES MATIÈRES<br />
1 Présentation <strong>de</strong>s télévis<strong>eu</strong>rs à écran plat <strong>de</strong> la série 20FD ..................................................................6<br />
1.1 Liste <strong>de</strong> vérification <strong>de</strong> l’emballage du télévis<strong>eu</strong>r à écran plat..................................................................................... 6<br />
1.2 Options <strong>de</strong> comman<strong>de</strong> : Familiarisez-vous avec votre télévis<strong>eu</strong>r à écran plat............................................................ 8<br />
1.2.1 Touches <strong>de</strong> comman<strong>de</strong> <strong>et</strong> autres sur le télévis<strong>eu</strong>r à écran plat .......................................................................... 8<br />
1.2.2 Utilisation <strong>de</strong> la télécomman<strong>de</strong> ............................................................................................................................ 10<br />
1.2.3 Touches <strong>de</strong> la télécomman<strong>de</strong> ............................................................................................................................... 12<br />
2 Installation du télévis<strong>eu</strong>r à écran plat .................................................................................................14<br />
2.1 Choix <strong>de</strong> l’emplacement <strong>et</strong> métho<strong>de</strong> d’installation ..................................................................................................... 14<br />
2.1.1 Vérification <strong>de</strong>s conditions <strong>de</strong> l’emplacement .................................................................................................... 15<br />
2.1.2 Comment soulever <strong>et</strong>/ou déplacer le télévis<strong>eu</strong>r .................................................................................................. 15<br />
2.2 Installation du télévis<strong>eu</strong>r avec un support.................................................................................................................... 16<br />
2.2.1 Pose ou dépose du support fourni........................................................................................................................ 16<br />
2.2.2 Branchement <strong>de</strong>s câbles d’enceinte.................................................................................................................... 20<br />
2.3 Fixation au mur/plafond ................................................................................................................................................. 22<br />
2.4 Installation du télévis<strong>eu</strong>r à écran plat........................................................................................................................... 24<br />
2.5 Raccor<strong>de</strong>ment à la télévision hertzienne <strong>et</strong> à d’autres appareils (DVR, amplificat<strong>eu</strong>r, BDR, <strong>et</strong>c.)......................... 26<br />
2.5.1 Ajout <strong>de</strong> chaînes <strong>de</strong> télévision analogique (conventionnelle) <strong>et</strong> numérique .................................................... 26<br />
2.5.2 Branchement d’un autre appareil <strong>Pioneer</strong> .......................................................................................................... 26<br />
2.5.3 Connexion du cordon d’alimentation au télévis<strong>eu</strong>r ............................................................................................ 29<br />
2.6 Pour acheminer <strong>et</strong> attacher ensemble le cordon d’alimentation <strong>et</strong> les câbles ........................................................ 29<br />
3 Opérations <strong>de</strong> base pour regar<strong>de</strong>r la télévision..................................................................................31<br />
3.1 Mise sous/hors tension du télévis<strong>eu</strong>r à écran plat ...................................................................................................... 31<br />
3.2 Programmation du télévis<strong>eu</strong>r à écran plat pour regar<strong>de</strong>r la télévision ..................................................................... 32<br />
3.2.1 Choix <strong>de</strong> chaînes <strong>de</strong> télévision analogique ou numérique................................................................................. 32<br />
3.2.2 Exploration du menu principal (HOME MENU)................................................................................................... 32<br />
3.2.3 Attribution d’une langue........................................................................................................................................ 34<br />
3.2.4 Réglage <strong>de</strong> l’horloge .............................................................................................................................................. 35<br />
3.2.5 Création d’une liste <strong>de</strong> chaînes............................................................................................................................. 35<br />
3.2.6 Omission ou suppression <strong>de</strong> chaînes inutiles..................................................................................................... 38<br />
3.2.7 Liste <strong>de</strong>s chaînes.................................................................................................................................................... 39<br />
3.3 Démarrage rapi<strong>de</strong> pour regar<strong>de</strong>r la télévision ............................................................................................................. 41<br />
3.3.1 Changement <strong>de</strong> chaîne/chaîne secondaire......................................................................................................... 41<br />
3.3.2 Réglage du volume/son ......................................................................................................................................... 41<br />
3.3.3 Activation <strong>de</strong> la minuterie d’extinction................................................................................................................. 41<br />
3.4 Réglage <strong>de</strong> la qualité d’image <strong>et</strong> <strong>de</strong> son....................................................................................................................... 42<br />
3.4.1 Réglage <strong>de</strong> l’image selon l’éclairage <strong>de</strong> la pièce ................................................................................................ 42<br />
3.4.2 Réglage général <strong>de</strong> l’image (vidéo) pour une source AV.................................................................................... 43<br />
3.4.3 Comparaison d’images lors du réglage <strong>de</strong> l’image ............................................................................................ 44<br />
3.4.4 Affichage d’un écran <strong>de</strong> réglage <strong>de</strong> l’image graphique <strong>et</strong> du son..................................................................... 45<br />
3.4.5 Comman<strong>de</strong> Son...................................................................................................................................................... 46<br />
3.4.6 Réglage général du son (audio)............................................................................................................................ 46<br />
Français<br />
3<br />
Fr
TABLE DES MATIÈRES<br />
4<br />
Fr<br />
3.5 Blocage <strong>de</strong>s programmes, chaînes ou contenu ..........................................................................................................47<br />
3.5.1 Attribution d’un mot <strong>de</strong> passe <strong>de</strong> contrôle parental (Restriction) .....................................................................47<br />
3.5.2 Activation du Contrôle parental.............................................................................................................................48<br />
3.5.3 Attribution d’un système <strong>de</strong> classement pour créer <strong>de</strong>s restrictions................................................................48<br />
3.5.4 R<strong>et</strong>rait temporaire d’une restriction......................................................................................................................51<br />
3.6 Début intelligent pour les nouveaux propriétaires .......................................................................................................52<br />
3.6.1 Utilisation du menu TOOLS ...................................................................................................................................52<br />
3.6.2 Pour prolonger la durée <strong>de</strong> vie du télévis<strong>eu</strong>r .......................................................................................................52<br />
3.6.3 Activation <strong>de</strong> l’orbit<strong>eu</strong>r d’image ............................................................................................................................53<br />
3.6.4 Déclenchement périodique <strong>de</strong> la mire vidéo économis<strong>eu</strong>r d’écran ..................................................................53<br />
3.6.5 Activation <strong>de</strong> l’économie d’énergie pour diminuer la consommation électrique.............................................53<br />
4 Options <strong>de</strong> réglage supplémentaires <strong>de</strong> l’image <strong>et</strong> du son ............................................................... 54<br />
4.1 Choix d’une option AV (Vidéo, j<strong>eu</strong>, <strong>et</strong>c.) ........................................................................................................................54<br />
4.1.1 Source AV par le biais <strong>de</strong> la télécomman<strong>de</strong> ........................................................................................................54<br />
4.1.2 Choix d’une source AV par le biais du menu principal (HOME MENU)............................................................55<br />
4.1.3 Choix d’une source PC...........................................................................................................................................55<br />
4.1.4 Réglage du télévis<strong>eu</strong>r pour reconnaître une console <strong>de</strong> j<strong>eu</strong> ..............................................................................56<br />
4.2 Réglage d’éléments d’image spécifiques .....................................................................................................................56<br />
4.2.1 Choix d’un format d’écran (automatique ou manuel).........................................................................................56<br />
4.2.2 Correction <strong>de</strong> l’image pour une source AV ou PC...............................................................................................58<br />
4.3 Sélection <strong>de</strong> fonctions d’image avancées ....................................................................................................................59<br />
4.3.1 Réglage du cache d’écran (ban<strong>de</strong>s noires sur les côtés)...................................................................................59<br />
4.3.2 Sélection d’un niveau PureCinema pour une image <strong>de</strong> qualité supéri<strong>eu</strong>re .....................................................60<br />
4.4 Comment regar<strong>de</strong>r la télévision en multiécran............................................................................................................61<br />
4.4.1 Partage/Permutation/Changement d’écran.........................................................................................................61<br />
4.5 Gel <strong>de</strong> l’image..................................................................................................................................................................62<br />
4.6 Utilisation <strong>de</strong> la fonction Bannière ................................................................................................................................63<br />
4.7 Choix <strong>de</strong>s options sonores .............................................................................................................................................64<br />
4.7.1 Activation du sous-titrage codé (CC) ....................................................................................................................64<br />
4.7.2 Commutation <strong>de</strong>s langues au moyen <strong>de</strong> MTS .....................................................................................................66<br />
4.7.3 Sélection <strong>de</strong> SAP ....................................................................................................................................................66<br />
4.7.4 Application <strong>de</strong>s réglages d’eff<strong>et</strong> sonore ...............................................................................................................67<br />
4.7.5 Utilisation <strong>de</strong> AVC (Auto Volume Control)............................................................................................................67<br />
4.8 Gestion <strong>de</strong> l’alimentation................................................................................................................................................67<br />
5 Utilisation d’autres appareils avec le télévis<strong>eu</strong>r à écran plat............................................................ 69<br />
5.1 Programmation <strong>de</strong> la télécomman<strong>de</strong> pour comman<strong>de</strong>r d’autres appareils .............................................................69<br />
5.1.1 Attribution d’un co<strong>de</strong> fabricant à la télécomman<strong>de</strong> ...........................................................................................69<br />
5.1.2 Lancement d’une recherche bibliothèque pour le co<strong>de</strong> fabricant.....................................................................69<br />
5.1.3 Effacement <strong>de</strong> la télécomman<strong>de</strong> <strong>de</strong>s co<strong>de</strong>s fabricant ajoutés ..........................................................................70<br />
5.1.4 Comman<strong>de</strong> d’un ampli-tuner <strong>Pioneer</strong> ..................................................................................................................70<br />
5.1.5 Comman<strong>de</strong> d’un système par câble (CBL) ou satellite (SAT).............................................................................71<br />
5.1.6 Comman<strong>de</strong> d’un magnétoscope (VCR)................................................................................................................72<br />
5.1.7 Comman<strong>de</strong> d’un lect<strong>eu</strong>r <strong>de</strong> DVD/grav<strong>eu</strong>r <strong>de</strong> DVD/lect<strong>eu</strong>r BD...........................................................................73<br />
5.2 Utilisation <strong>de</strong>s entrées HDMI.........................................................................................................................................74<br />
5.2.1 Spécification du type d’entrée HDMI....................................................................................................................74<br />
5.2.2 Spécification du type <strong>de</strong> signal numérique HDMI...............................................................................................75<br />
5.2.3 Spécification du type <strong>de</strong> signal audio HDMI........................................................................................................75<br />
5.3 Comman<strong>de</strong> d’appareil avec la télécomman<strong>de</strong> du télévis<strong>eu</strong>r via HDMI .....................................................................76<br />
5.3.1 Comman<strong>de</strong> d’un système AV ................................................................................................................................78<br />
5.3.2 Comman<strong>de</strong> d’un enregistr<strong>eu</strong>r ...............................................................................................................................79<br />
5.3.3 Comman<strong>de</strong> d’un lect<strong>eu</strong>r ........................................................................................................................................79<br />
5.3.4 Ajout d’un amplificat<strong>eu</strong>r AV ou d’un lect<strong>eu</strong>r BD .................................................................................................80<br />
5.4 Options spécifiques <strong>de</strong> la Comman<strong>de</strong> HDMI ...............................................................................................................81<br />
5.4.1 Lecture <strong>de</strong> la source sonore au moyen <strong>de</strong> la Comman<strong>de</strong> HDMI .......................................................................81<br />
5.4.2 Mise hors tension avec la Comman<strong>de</strong> HDMI ......................................................................................................81<br />
5.4.3 Mise sous tension avec la Comman<strong>de</strong> HDMI......................................................................................................81<br />
5.4.4 Test <strong>de</strong> la comman<strong>de</strong> d’alimentation (Marche/Arrêt) .........................................................................................82
TABLE DES MATIÈRES<br />
5.5 Raccor<strong>de</strong>ment d’une console <strong>de</strong> j<strong>eu</strong> ou d’un caméscope.......................................................................................... 82<br />
5.6 Utilisation <strong>de</strong> Home Media Gallery................................................................................................................................ 83<br />
5.6.1 Connexions réseau................................................................................................................................................. 84<br />
5.6.2 Raccor<strong>de</strong>ment d’un périphérique USB................................................................................................................ 86<br />
5.7 Exécution <strong>de</strong> Home Media Gallery ................................................................................................................................ 88<br />
5.7.1 Affichage <strong>de</strong>s fichiers vidéo sur le télévis<strong>eu</strong>r à écran plat ................................................................................. 91<br />
5.7.2 Lecture <strong>de</strong>s fichiers musicaux sur le télévis<strong>eu</strong>r à écran plat ............................................................................. 93<br />
5.7.3 Affichage <strong>de</strong>s fichiers photo sur le télévis<strong>eu</strong>r à écran plat ................................................................................ 94<br />
5.8 Utilisation du menu TOOLS ........................................................................................................................................... 96<br />
5.9 Configuration HMG....................................................................................................................................................... 108<br />
5.10 Autres fonctions utiles ............................................................................................................................................... 109<br />
5.11 Ajout d’autres appareils audio................................................................................................................................... 111<br />
5.12 Ajout d’un ordinat<strong>eu</strong>r ................................................................................................................................................. 112<br />
5.12.1 Réglages automatiques <strong>de</strong> la position <strong>de</strong> l’image <strong>et</strong> <strong>de</strong> l’horloge................................................................. 112<br />
5.12.2 Réglages manuels <strong>de</strong> la position <strong>de</strong> l’image <strong>et</strong> <strong>de</strong> l’horloge.......................................................................... 112<br />
6 Informations utiles ..............................................................................................................................113<br />
6.1 Foire aux questions (FAQ)............................................................................................................................................ 113<br />
6.2 Vérification <strong>de</strong> la version du logiciel/matériel ............................................................................................................ 114<br />
6.3 Métho<strong>de</strong>s <strong>de</strong> n<strong>et</strong>toyage ................................................................................................................................................ 114<br />
6.4 Gui<strong>de</strong> <strong>de</strong> dépannage <strong>et</strong> informations sur l’entr<strong>et</strong>ien................................................................................................. 115<br />
6.4.1 Vérification <strong>de</strong> la puissance du signal................................................................................................................ 120<br />
7 Précautions <strong>et</strong> avertissements............................................................................................................121<br />
7.1 Remarques sur l’installation........................................................................................................................................ 121<br />
7.2 Considérations sur l’emplacement physique <strong>et</strong> la température .............................................................................. 121<br />
7.3 Consignes d’utilisation................................................................................................................................................. 121<br />
7.4 Interférence <strong>de</strong>s signaux ou bruits.............................................................................................................................. 122<br />
7.5 Propriétés <strong>de</strong>s phosphores .......................................................................................................................................... 122<br />
7.6 Informations sur l’image notamment la rémanence d’image.................................................................................. 122<br />
7.7 Précautions <strong>de</strong> sécurité ............................................................................................................................................... 124<br />
7.8 Avis légal........................................................................................................................................................................ 124<br />
7.8.1 Sécurité ................................................................................................................................................................. 124<br />
7.8.2 Brouillage radioélectrique ................................................................................................................................... 125<br />
8 Annexe ..................................................................................................................................................126<br />
8.1 Tableaux <strong>de</strong>s systèmes <strong>de</strong> classement (pour <strong>de</strong>s classements selon différents publics) ..................................... 126<br />
8.1.1 Classement <strong>de</strong>s émissions <strong>de</strong> télévision (par âge) ........................................................................................... 126<br />
8.1.2 Système <strong>de</strong> classement <strong>de</strong>s directives télévisées parentales américain (par âge/catégorie) ...................... 126<br />
8.1.3 Classement <strong>de</strong>s films par la MPAA (par âge).................................................................................................... 126<br />
8.1.4 Classement pour les Canadiens anglophones (par âge).................................................................................. 127<br />
8.1.5 Classement pour les Canadiens francophones (par âge) ................................................................................ 127<br />
8.2 Co<strong>de</strong>s <strong>de</strong> fabricant à programmer dans la télécomman<strong>de</strong> ...................................................................................... 128<br />
8.2.1 Câble...................................................................................................................................................................... 128<br />
8.2.2 Satellite.................................................................................................................................................................. 128<br />
8.2.3 Magnétoscope (Marques A à F).......................................................................................................................... 129<br />
8.2.4 Magnétoscope (Marques G à O)......................................................................................................................... 130<br />
8.2.5 Magnétoscope (Marques P à V).......................................................................................................................... 131<br />
8.2.6 Magnétoscope (Marques W à Z)......................................................................................................................... 131<br />
8.2.7 PVR ........................................................................................................................................................................ 132<br />
8.2.8 BD (HD-DVD)........................................................................................................................................................ 132<br />
8.2.9 DVD-R.................................................................................................................................................................... 132<br />
8.2.10 DVD (Marques A à N) ........................................................................................................................................ 133<br />
8.2.11 DVD (Marques O à Z) ......................................................................................................................................... 134<br />
8.2.12 LD......................................................................................................................................................................... 134<br />
8.3 Caractéristiques techniques........................................................................................................................................ 135<br />
8.4 Glossaire ........................................................................................................................................................................ 137<br />
8.5 In<strong>de</strong>x............................................................................................................................................................................... 139<br />
8.6 Informations sur les marques, licences <strong>et</strong> brev<strong>et</strong>s.................................................................................................... 140<br />
Français<br />
5<br />
Fr
01 Présentation <strong>de</strong>s télévis<strong>eu</strong>rs à écran plat <strong>de</strong> la série 20FD<br />
1 Présentation <strong>de</strong>s télévis<strong>eu</strong>rs à écran plat <strong>de</strong><br />
la série 20FD<br />
Les modèles <strong>de</strong> télévis<strong>eu</strong>r à écran plat <strong>Pioneer</strong> <strong>de</strong> la série 20FD comprennent le PDP-6020FD <strong>de</strong> 60 pouces <strong>et</strong><br />
PDP-5020FD <strong>de</strong> 50 pouces (tailles d’écran mesurées en diagonale). Vous trouverez ci-<strong>de</strong>ssous une liste <strong>de</strong> tous<br />
les accessoires accompagnant le télévis<strong>eu</strong>r. S’il manque un élément, v<strong>eu</strong>illez contacter immédiatement votre<br />
revend<strong>eu</strong>r ou notre centre <strong>de</strong> service. Les coordonnées <strong>de</strong>s centres <strong>de</strong> services sont répertoriées au dos <strong>de</strong> ce<br />
mo<strong>de</strong> d’emploi.<br />
1.1 Liste <strong>de</strong> vérification <strong>de</strong> l’emballage du télévis<strong>eu</strong>r à écran plat<br />
Outre le télévis<strong>eu</strong>r à écran plat, plusi<strong>eu</strong>rs accessoires sont inclus afin <strong>de</strong> faciliter <strong>et</strong> d’accélérer l’installation.<br />
V<strong>eu</strong>illez vérifier le contenu <strong>de</strong> l’emballage avant <strong>de</strong> le j<strong>et</strong>er ou <strong>de</strong> laisser votre installat<strong>eu</strong>r le m<strong>et</strong>tre au rebut.<br />
Les emballages du PDP-6020FD <strong>et</strong> du PDP-5020FD comprennent <strong>de</strong>s pièces légèrement différentes. I<strong>de</strong>ntifiez les<br />
accessoires sur la liste correspondante ci-<strong>de</strong>ssous.<br />
Un tournevis cruciforme est nécessaire pour installer l’enceinte <strong>et</strong> fixer le support.<br />
Inclus dans l’emballage <strong>de</strong>s d<strong>eu</strong>x modèles<br />
Télécomman<strong>de</strong> Piles pour la télécomman<strong>de</strong> (2) Chiffon <strong>de</strong> n<strong>et</strong>toyage<br />
Cordon d’alimentation<br />
(2 m/6,6 pieds)<br />
Serre-câbles (4) Mo<strong>de</strong> d’emploi<br />
Certificat <strong>de</strong> garantie<br />
Également inclus dans l’emballage du PDP-6020FD (télévis<strong>eu</strong>r <strong>de</strong> 60”)<br />
Kit du support<br />
Base Barres du support (2)<br />
Vis argent (4) (4×10 mm)<br />
Vis noires (4) (M6×20 mm)<br />
6<br />
Fr
Présentation <strong>de</strong>s télévis<strong>eu</strong>rs à écran plat <strong>de</strong> la série 20FD<br />
01<br />
Également inclus dans l’emballage du PDP-6020FD (télévis<strong>eu</strong>r <strong>de</strong> 60”)<br />
Ferrures métalliques <strong>de</strong> sécurité (2) Vis pour les ferrures métalliques(4)<br />
Accessoires pour enceintes<br />
Câbles d’enceinte (2)<br />
Enceinte<br />
Français<br />
Vis <strong>de</strong> montage <strong>de</strong>s enceintes (9) (M5×10 mm)<br />
Applique d’enceinte (Centrale) Appliques d’enceinte (gauche <strong>et</strong> droite)<br />
Également inclus dans l’emballage du PDP-5020FD (télévis<strong>eu</strong>r <strong>de</strong> 50”)<br />
Kit du support<br />
Ferrures métalliques <strong>de</strong> sécurité (2) Vis pour les ferrures métalliques(2)<br />
Accessoires pour enceintes<br />
Câbles d’enceinte (2) Appliques d’enceinte (latérales) (2) Enceinte<br />
Vis <strong>de</strong> montage <strong>de</strong>s enceintes (9)<br />
(M5×10 mm)<br />
Applique d’enceinte (Centrale)<br />
7<br />
Fr
01 Présentation <strong>de</strong>s télévis<strong>eu</strong>rs à écran plat <strong>de</strong> la série 20FD<br />
1.2 Options <strong>de</strong> comman<strong>de</strong> : Familiarisez-vous avec votre télévis<strong>eu</strong>r à écran plat<br />
Vous pouvez comman<strong>de</strong>r le télévis<strong>eu</strong>r à écran plat en utilisant les touches sur l’écran ou la télécomman<strong>de</strong>. Les<br />
sections suivantes indiquent l’emplacement/les opérations <strong>de</strong>s touches sur l’écran <strong>et</strong> sur la télécomman<strong>de</strong>.<br />
1.2.1 Touches <strong>de</strong> comman<strong>de</strong> <strong>et</strong> autres sur le télévis<strong>eu</strong>r à écran plat<br />
Ce télévis<strong>eu</strong>r à écran plat comporte <strong>de</strong>s touches, témoins <strong>et</strong> capt<strong>eu</strong>rs sur l’encadrement avant inféri<strong>eu</strong>r ainsi que<br />
d’autres touches, commutat<strong>eu</strong>rs <strong>et</strong> ports sur les côtés <strong>de</strong> l’écran. Reportez-vous aux schémas ci-<strong>de</strong>ssous pour<br />
connaître l<strong>eu</strong>r emplacement <strong>et</strong> l<strong>eu</strong>rs fonctions. Ou bien, pour les ports <strong>et</strong> les prises arrière, consultez le f<strong>eu</strong>ill<strong>et</strong><br />
d’emplacement <strong>de</strong>s prises situé près du compartiment <strong>de</strong>s prises <strong>de</strong> l’écran afin d’i<strong>de</strong>ntifier les différentes options.<br />
Modèles <strong>de</strong> la série 20FD : Face avant du télévis<strong>eu</strong>r<br />
(PDP-5020FD)<br />
1 2 3 4 5 6<br />
1 -Témoin d’alimentation (ON)<br />
2 -Témoin STANDBY<br />
3 -Témoin SLEEP<br />
Côté comman<strong>de</strong> du télévis<strong>eu</strong>r (côté gauche)<br />
4 -Capt<strong>eu</strong>r <strong>de</strong> luminosité ambiante<br />
5 -Capt<strong>eu</strong>r <strong>de</strong> télécomman<strong>de</strong><br />
6 -Encadrement (encore appelé cadre avant)<br />
7<br />
8<br />
12<br />
13<br />
14<br />
7 -Prise USB<br />
8 -Prise INPUT 7 (HDMI)<br />
9 -Prise PHONES<br />
10 -Prise INPUT 3 (Vidéo)<br />
11 -Prises INPUT 3 (Audio)<br />
12 -Touche STANDBY/ON<br />
13 -Touche INPUT<br />
14 -Touches VOLUME UP/DOWN<br />
15 -Touches CHANNEL UP/DOWN<br />
9<br />
10<br />
15<br />
11<br />
8<br />
Fr
Présentation <strong>de</strong>s télévis<strong>eu</strong>rs à écran plat <strong>de</strong> la série 20FD<br />
01<br />
1 -Prise ANT (Antenne)<br />
2 -Prise PC INPUT (Analogique RVB)<br />
3 -Prise AC IN<br />
(cadre supéri<strong>eu</strong>r)<br />
Dos du télévis<strong>eu</strong>r<br />
1 2 3<br />
Français<br />
4 11 12 13 14 15 16 17 18 19 20 21<br />
(cadre intermédiaire)<br />
5<br />
6 7 8<br />
4 -Port pour câble Ethern<strong>et</strong><br />
5 -Prise INPUT 4 (HDMI)<br />
6 -Prise INPUT 5 (HDMI)<br />
7 -Prise INPUT 6 (HDMI)<br />
8 -Prise RC-232C (réservée au réglage en usine)<br />
9 -Prises INPUT 4 (AUDIO)<br />
10 -Prises INPUT 5 (AUDIO)<br />
11 -Prise SUB WOOFER OUT<br />
12 -Prises AUDIO OUT (AUDIO)<br />
13 -Prise INPUT 1 (S-VIDÉO)<br />
9 10 22<br />
14 -Prise INPUT 1 (VIDÉO)<br />
15 -Prises INPUT 1 (AUDIO)<br />
16 -Prise INPUT 2 (VIDÉO)<br />
17 -Prises INPUT 2 (AUDIO)<br />
18 -Prises INPUT 2 (COMPONENT, Y, P B , P R )<br />
19 -Prise PC INPUT (AUDIO)<br />
20 -Prise CONTROL OUT<br />
21 -Prise DIGITAL OUT (OPTICAL)<br />
22 -Prises pour enceinte (SPEAKERS) (gauche/droite)<br />
(PDP-6020FD)<br />
(cadre inféri<strong>eu</strong>r)<br />
23 -Prise SPEAKERS (R) (Côté enceinte)<br />
24 -Prise SPEAKERS (L) (Côté enceinte)<br />
23 24 25<br />
25 -Touche POWER ON<br />
Les prises se trouvant sur les côtés <strong>et</strong> l’arrière sont les mêmes sur les d<strong>eu</strong>x modèles 20FD.<br />
9<br />
Fr
01 Présentation <strong>de</strong>s télévis<strong>eu</strong>rs à écran plat <strong>de</strong> la série 20FD<br />
1.2.2 Utilisation <strong>de</strong> la télécomman<strong>de</strong><br />
La télécomman<strong>de</strong> pour les télévis<strong>eu</strong>rs <strong>de</strong> la série 20FD est un outil puissant. C<strong>et</strong>te section présente<br />
succinctement votre télécomman<strong>de</strong>, tandis que les sections ultéri<strong>eu</strong>res exploreront davantage les opérations<br />
avancées.<br />
Insertion <strong>de</strong>s piles dans la télécomman<strong>de</strong><br />
Pour ouvrir, poussez <strong>et</strong> faites glisser le couvercle du logement <strong>de</strong>s piles dans le <strong>sens</strong> <strong>de</strong>s flèches.<br />
M<strong>et</strong>tez en place les d<strong>eu</strong>x piles AA fournies en introduisant d’abord le côté portant la borne négative (–).<br />
Les piles fournies avec c<strong>et</strong> appareil p<strong>eu</strong>vent avoir une durée <strong>de</strong> service plus courte que prévue du fait <strong>de</strong>s<br />
conditions <strong>de</strong> stockage. Si la télécomman<strong>de</strong> semble mal fonctionner ou est inefficace, remplacez les piles<br />
fournies par <strong>de</strong>s piles alcalines n<strong>eu</strong>ves.<br />
N’utilisez <strong>jamais</strong> ensemble une pile n<strong>eu</strong>ve <strong>et</strong> une pile usagée. Utiliser conjointement une pile n<strong>eu</strong>ve <strong>et</strong> une pile<br />
usagée p<strong>eu</strong>t se traduire par une réduction <strong>de</strong> la durée <strong>de</strong> vie <strong>de</strong> la pile n<strong>eu</strong>ve, ou une fuite <strong>de</strong> l’électrolyte <strong>de</strong> la<br />
pile usagée. Par aill<strong>eu</strong>rs, utiliser ensemble <strong>de</strong>s piles <strong>de</strong> type ou <strong>de</strong> marque différentes p<strong>eu</strong>t occasionner <strong>de</strong>s<br />
problèmes dans la mesure où l<strong>eu</strong>rs caractéristiques p<strong>eu</strong>vent varier légèrement d’un fabricant à un autre.<br />
Remarque: R<strong>et</strong>irez les piles si vous envisagez <strong>de</strong> ne pas utiliser la télécomman<strong>de</strong> du télévis<strong>eu</strong>r à écran plat<br />
pendant une pério<strong>de</strong> prolongée.<br />
Pour la mise au rebut <strong>de</strong>s piles usagées, v<strong>eu</strong>illez vous<br />
conformer aux règlements locaux ou aux instructions relatives<br />
à l’environnement applicables dans votre pays ou votre région.<br />
Problèmes <strong>de</strong> la télécomman<strong>de</strong><br />
Plusi<strong>eu</strong>rs problèmes p<strong>eu</strong>vent affecter le fonctionnement <strong>de</strong> votre télécomman<strong>de</strong>, mais le problème le plus<br />
courant est celui <strong>de</strong>s piles épuisées. Si vous laissez <strong>de</strong>s piles épuisées dans la télécomman<strong>de</strong>, la communication<br />
risque d’échouer ou la télécomman<strong>de</strong> <strong>de</strong> fonctionner sporadiquement. Dans un tel cas, rapprochez-vous <strong>de</strong><br />
l’écran <strong>et</strong> essayez <strong>de</strong> comman<strong>de</strong>r le télévis<strong>eu</strong>r avec la télécomman<strong>de</strong>. Si <strong>de</strong> c<strong>et</strong>te façon le télévis<strong>eu</strong>r répond,<br />
remplacez les piles. Si vous rapprocher <strong>de</strong> l’écran n’a aucun eff<strong>et</strong>, vérifiez qu’il n’y a pas d’obj<strong>et</strong>s bloquant le<br />
signal dans la pièce. Prenez aussi en considération les autres appareils commandés par télécomman<strong>de</strong> situés<br />
aux alentours <strong>de</strong> l’écran. Les obj<strong>et</strong>s ou d’autres signaux infrarouges p<strong>eu</strong>vent perturber la télécomman<strong>de</strong>. Pour<br />
<strong>de</strong>s conseils supplémentaires sur votre télécomman<strong>de</strong>, voir “6.1 Foire aux questions (FAQ)”.<br />
10<br />
Fr
Présentation <strong>de</strong>s télévis<strong>eu</strong>rs à écran plat <strong>de</strong> la série 20FD<br />
01<br />
Rayon d’action <strong>de</strong> la télécomman<strong>de</strong><br />
Pour comman<strong>de</strong>r un télévis<strong>eu</strong>r à écran plat, dirigez la télécomman<strong>de</strong> en direction du capt<strong>eu</strong>r sur le coin inféri<strong>eu</strong>r<br />
droit <strong>de</strong> l’écran. Pour une utilisation aisée, maintenez une distance entre la télécomman<strong>de</strong> <strong>et</strong> le capt<strong>eu</strong>r inféri<strong>eu</strong>re<br />
à 7 mètres (23 pieds) <strong>et</strong> à un angle <strong>de</strong> moins <strong>de</strong> 30 <strong>de</strong>grés.<br />
30º<br />
7 m<br />
(23 pieds)<br />
30º<br />
Capt<strong>eu</strong>r<br />
Français<br />
La télécomman<strong>de</strong> p<strong>eu</strong>t ne pas fonctionner correctement si le capt<strong>eu</strong>r est éclairé directement par le soleil ou un<br />
éclairage très violent. Si la pièce dans laquelle vous regar<strong>de</strong>z la télévision est naturellement lumin<strong>eu</strong>se, modifiez<br />
la position du télévis<strong>eu</strong>r ou placez la télécomman<strong>de</strong> plus près du capt<strong>eu</strong>r <strong>de</strong> l’écran.<br />
Remarque: Ne laissez pas la télécomman<strong>de</strong> en plein soleil ou sous un éclairage très violent sous peine <strong>de</strong><br />
déformer ou d’altérer son boîtier.<br />
11<br />
Fr
01 Présentation <strong>de</strong>s télévis<strong>eu</strong>rs à écran plat <strong>de</strong> la série 20FD<br />
1.2.3 Touches <strong>de</strong> la télécomman<strong>de</strong><br />
À l’exception <strong>de</strong> quelques options, les comman<strong>de</strong>s disponibles via les touches sur le télévis<strong>eu</strong>r à écran plat sont<br />
également disponibles sur la télécomman<strong>de</strong>. La télécomman<strong>de</strong> p<strong>eu</strong>t être programmée pour contrôler un autre<br />
appareil comme un lect<strong>eu</strong>r DVD, une chaîne stéréo intégrale, <strong>et</strong>c. Une section ultéri<strong>eu</strong>re intitulée “5 Utilisation<br />
d’autres appareils avec le télévis<strong>eu</strong>r à écran plat” explique comment utiliser la télécomman<strong>de</strong> pour contrôler<br />
d’autres appareils.<br />
C<strong>et</strong>te section i<strong>de</strong>ntifie <strong>et</strong> décrit les touches <strong>de</strong> la télécomman<strong>de</strong>.<br />
Télécomman<strong>de</strong> : Touches du côté gauche (<strong>de</strong> haut en bas, <strong>de</strong> gauche à droite)<br />
TV :<br />
Pour allumer ou m<strong>et</strong>tre le télévis<strong>eu</strong>r en veille<br />
INPUT :<br />
Pour sélectionner une source (INPUT 1 à INPUT 7)<br />
PC :<br />
Pour sélectionner la prise PC comme source d’entrée<br />
AV SELECTION :<br />
Pour sélectionner les réglages audio/vidéo<br />
Source AV : OPTIMUM, PERFORMANCES, DYNAMIQUE,<br />
CINÉMA, JEU, SPORT, Standard<br />
Source PC : STANDARD, UTILISATEUR<br />
SPLIT :<br />
Pour passer entre les vues une image, 2 images,<br />
image dans l’image<br />
FREEZE :<br />
Pour geler une image animée, puis appuyez une<br />
nouvelle fois pour annuler la fonction FREEZE<br />
Touches numériques 0 à 9 :<br />
Pour sélectionner une chaîne<br />
• (point) :<br />
Pour saisir un point afin <strong>de</strong> sélectionner une chaîne secondaire<br />
VOL +/– :<br />
Pour régler le volume<br />
EXIT :<br />
Pour quitter le menu <strong>et</strong> revenir à l’écran normal<br />
Touches fléchées :<br />
Pour naviguer dans les écrans du menu<br />
HOME MENU :<br />
Affiche le menu principal (HOME MENU)<br />
Touches <strong>de</strong> coul<strong>eu</strong>r (Rouge, Vert, Bl<strong>eu</strong>, Jaune) :<br />
Uniquement pour comman<strong>de</strong>r les fonctions <strong>de</strong> la comman<strong>de</strong><br />
HDMI sur un lect<strong>eu</strong>r BD<br />
HDMI CONTROL :<br />
Pour sélectionner les fonctions <strong>de</strong> la comman<strong>de</strong> HDMI<br />
SELECT :<br />
Pour sélectionner TV/RCV, CBL/SAT, VCR ou DVD/DVR<br />
1<br />
2<br />
3<br />
4<br />
5<br />
6<br />
7<br />
8<br />
9<br />
10<br />
11<br />
12<br />
13<br />
14<br />
15<br />
1<br />
3 4<br />
5 6<br />
8<br />
9<br />
10<br />
12<br />
14<br />
15<br />
2<br />
7<br />
13<br />
11<br />
12<br />
Fr
Présentation <strong>de</strong>s télévis<strong>eu</strong>rs à écran plat <strong>de</strong> la série 20FD<br />
01<br />
Télécomman<strong>de</strong> : Touches du côté droit (<strong>de</strong> haut en bas, <strong>de</strong> gauche à droite)<br />
16<br />
17 18<br />
19 20<br />
21<br />
22<br />
23 24<br />
26<br />
25<br />
27<br />
28<br />
29<br />
16 TV/DTV :<br />
Pour sélectionner les chaînes <strong>de</strong> télévision analogique ou<br />
numérique<br />
17 DISPLAY :<br />
Pour afficher les informations sur la chaîne<br />
18 SCREEN SIZE :<br />
Pour sélectionner le format d’image<br />
19 SWAP :<br />
Pour passer d’une image à l’autre pendant la<br />
visualisation 2 images ou image dans l’image<br />
20 SHIFT :<br />
Déplace la p<strong>et</strong>ite image sur un emplacement différent pendant<br />
la visualisation image dans l’image<br />
21 CH ENTER :<br />
Pour changer <strong>de</strong> chaîne<br />
22 CH RETURN :<br />
Pour revenir à la chaîne précé<strong>de</strong>nte<br />
23 MUTING :<br />
Pour couper le son pendant que la lecture vidéo continue<br />
24 CH +/– :<br />
Pour passer entre les chaînes<br />
25 TOOLS :<br />
Pour afficher le menu TOOLS (voir “3.6 Début intelligent pour<br />
les nouveaux propriétaires”)<br />
26 ENTER :<br />
Pour exécuter une comman<strong>de</strong><br />
27 RETURN :<br />
Pour revenir à l’écran du menu précé<strong>de</strong>nt<br />
28 Comman<strong>de</strong> du lect<strong>eu</strong>r/enregistr<strong>eu</strong>r :<br />
Utilisez ces touches pour comman<strong>de</strong>r les appareils raccordés<br />
29 HMG (Home Media Gallery) :<br />
Pour afficher le menu Home Media Gallery<br />
Utilisez c<strong>et</strong>te touche pour lancer l’enregistrement (pour les<br />
magnétoscopes/grav<strong>eu</strong>rs <strong>de</strong> DVD uniquement)<br />
Français<br />
13<br />
Fr
02 Installation du télévis<strong>eu</strong>r à écran plat<br />
2 Installation du télévis<strong>eu</strong>r à écran plat<br />
Vous disposez <strong>de</strong> plusi<strong>eu</strong>rs options d’installation pour le télévis<strong>eu</strong>r à écran plat. Ce chapitre vous explique<br />
comment choisir l’emplacement d’installation, vous donne les meill<strong>eu</strong>res métho<strong>de</strong>s d’installation <strong>et</strong> vous indique<br />
comment installer le télévis<strong>eu</strong>r.<br />
2.1 Choix <strong>de</strong> l’emplacement <strong>et</strong> métho<strong>de</strong> d’installation<br />
Ce télévis<strong>eu</strong>r à écran plat est très fin. Il nécessite une surface soli<strong>de</strong> <strong>et</strong> une structure <strong>de</strong> soutien (comme un socle<br />
ou une table) qui l’empêcheront d’être basculé ou renversé. Utilisez les accessoires <strong>de</strong> montage <strong>et</strong> les pièces<br />
inclus dans l’emballage. <strong>Pioneer</strong> recomman<strong>de</strong>, dans la mesure du possible, que l’installation soit réalisée par un<br />
technicien qualifié.<br />
Indépendamment <strong>de</strong> la métho<strong>de</strong> d’installation, attachez ou fixez le télévis<strong>eu</strong>r à écran plat en utilisant les trous <strong>de</strong><br />
fixation <strong>et</strong>/ou les boulons fournis.<br />
Vue <strong>de</strong> dos (PDP-6020FD)<br />
Vue <strong>de</strong> côté<br />
Surface <strong>de</strong> fixation<br />
Trou <strong>de</strong> fixation<br />
Trou <strong>de</strong> fixation<br />
Support <strong>de</strong> fixation<br />
(ou accessoire<br />
équivalent)<br />
Vis M8<br />
12 mm à 18 mm<br />
(0,5 pouces à 0,7<br />
pouces)<br />
Vue <strong>de</strong> dos (PDP-5020FD)<br />
W<br />
W<br />
Trou <strong>de</strong> fixation<br />
Trou <strong>de</strong> fixation<br />
W<br />
W<br />
T<br />
W<br />
T<br />
W<br />
Remarque: Certaines options d’installation nécessitent un type <strong>de</strong> boulon différent. Vérifiez auprès <strong>de</strong> votre<br />
installat<strong>eu</strong>r ou revend<strong>eu</strong>r en vue d’ach<strong>et</strong>er le ou les boulons adéquats.<br />
14<br />
Fr
Installation du télévis<strong>eu</strong>r à écran plat<br />
02<br />
2.1.1 Vérification <strong>de</strong>s conditions <strong>de</strong> l’emplacement<br />
Lors du choix <strong>de</strong> l’emplacement pour le télévis<strong>eu</strong>r, vous <strong>de</strong>vez prendre en considération plusi<strong>eu</strong>rs fact<strong>eu</strong>rs.<br />
L’emplacement d’installation doit être éloigné <strong>de</strong>s rayons directs du soleil <strong>et</strong> être suffisamment aéré autour du<br />
télévis<strong>eu</strong>r à écran plat pour perm<strong>et</strong>tre le refroidissement. Le schéma ci-<strong>de</strong>ssous donne un exemple d’un<br />
télévis<strong>eu</strong>r monté sur support avec une aération adéquate.<br />
Plus <strong>de</strong><br />
10 cm<br />
(3 15/16<br />
pouces)<br />
Plus <strong>de</strong> 50 cm<br />
(19 11/16 pouces)<br />
La distance <strong>de</strong>rrière <strong>et</strong> au-<strong>de</strong>ssus du<br />
télévis<strong>eu</strong>r varie en fonction <strong>de</strong> l’installation<br />
choisie. Prenez conseil auprès <strong>de</strong> votre<br />
revend<strong>eu</strong>r ou d’un installat<strong>eu</strong>r professionnel<br />
pour une aération adéquate.<br />
Français<br />
Consultez la liste <strong>de</strong> vérification ci-<strong>de</strong>ssous pour évaluer <strong>de</strong> possibles emplacements d’installation.<br />
Aération suffisante<br />
À l’abri <strong>de</strong>s vibrations excessives<br />
À l’écart d’un climatis<strong>eu</strong>r<br />
Sans humidité ni moit<strong>eu</strong>r<br />
Pas <strong>de</strong> risque d’éclaboussure d’eau<br />
Cordons <strong>et</strong> câbles placer <strong>de</strong> manière sécuritaire<br />
Pas <strong>de</strong> risque <strong>de</strong> surcharge électrique<br />
Éloigné d’un autre appareil à infrarouge<br />
À l’abri <strong>de</strong>s coups ou <strong>de</strong>s impacts<br />
À l’écart <strong>de</strong>s sources <strong>de</strong> chal<strong>eu</strong>r<br />
À l’abri <strong>de</strong> la lumière directe du soleil<br />
Distant <strong>de</strong> sources d’éclairage violent<br />
Pour <strong>de</strong>s précautions <strong>et</strong> <strong>de</strong>s informations sur la sécurité plus spécifiques, voir “7.2 Considérations sur<br />
l’emplacement physique <strong>et</strong> la température” <strong>et</strong> “7.7 Précautions <strong>de</strong> sécurité”.<br />
2.1.2 Comment soulever <strong>et</strong>/ou déplacer le télévis<strong>eu</strong>r<br />
Bien que ce télévis<strong>eu</strong>r à écran plat soit conçu pour durer, la technologie utilisée nécessite <strong>de</strong> le manipuler avec<br />
précaution. Utilisez les poignées placées à l’arrière du télévis<strong>eu</strong>r à écran plat pour le soulever. Pour éviter <strong>de</strong> le<br />
plier ou le tordre, d<strong>eu</strong>x personnes au moins sont nécessaires pour soulever <strong>et</strong> déplacer le télévis<strong>eu</strong>r. Ne déplacez<br />
pas le télévis<strong>eu</strong>r à écran plat en le tenant par une s<strong>eu</strong>le poignée ou en le tirant par ses poignées.<br />
Utilisez les poignées pour déplacer le<br />
télévis<strong>eu</strong>r. Ne déplacez pas le<br />
télévis<strong>eu</strong>r en le tenant par l’enceinte<br />
ou les appliques d’enceinte.<br />
Remarque: N’utilisez pas les poignées pour accrocher le télévis<strong>eu</strong>r à écran plat, ni comme suspensions pour<br />
l’empêcher <strong>de</strong> glisser ou basculer une fois installé en place.<br />
15<br />
Fr
02 Installation du télévis<strong>eu</strong>r à écran plat<br />
2.2 Installation du télévis<strong>eu</strong>r avec un support<br />
2.2.1 Pose ou dépose du support fourni<br />
Le PDP-5020FD est livré avec le support <strong>de</strong> table PIONEER (support) déjà fixé. Fixez le support fourni sur le<br />
télévis<strong>eu</strong>r pour le PDP-6020FD. Pour le PDP-5020FD, fixez les ferrures métalliques <strong>de</strong> sécurité après avoir redressé<br />
le télévis<strong>eu</strong>r.<br />
(PDP-5020FD)<br />
Vis <strong>de</strong> montage<br />
(M4 × 35 mm: noir)<br />
Fixation du support au télévis<strong>eu</strong>r<br />
Ferrures métalliques <strong>de</strong> sécurité<br />
Ne placez pas le télévis<strong>eu</strong>r à écran plat sur un wagon ou une<br />
pal<strong>et</strong>te plus p<strong>et</strong>it que son support sous peine <strong>de</strong> le plier.<br />
1 ) Détachez l’enceinte si elle a déjà été installée.<br />
Reportez-vous à “Pose/dépose <strong>de</strong> l’enceinte” à la page 18 pour assistance.<br />
2 ) Posez le télévis<strong>eu</strong>r à écran plat sur une surface élevée avec la base du support dépassant du bord.<br />
3 ) Placez toutes les pièces du support sur un chiffon doux pour éviter <strong>de</strong> les rayer.<br />
Si vous installez le PDP-6020FD, passez aux étapes 4 <strong>et</strong> 5. Si vous installez le PDP-5020FD, passez<br />
directement à l’étape 7.<br />
4 ) R<strong>et</strong>ournez la base <strong>de</strong> sorte que la partie inféri<strong>eu</strong>re soit tournée vers le haut.<br />
5 ) Insérez les soutiens du support (pieds) dans la base.<br />
Installez avec précaution les soutiens (gauche <strong>et</strong> droit) pour les placer dans la bonne position. Des soutiens<br />
désalignés p<strong>eu</strong>vent endommager la base <strong>et</strong>/ou les soutiens <strong>eu</strong>x-mêmes.<br />
6 ) Serrez les vis <strong>de</strong> la base pour verrouiller les soutiens en place.<br />
Vis<br />
(4 x 10 mm: argent)<br />
Vis<br />
(4 x 10 mm: argent)<br />
Arrière<br />
Avant<br />
Support<br />
compl<strong>et</strong><br />
F<strong>eu</strong>ille<br />
Base<br />
16<br />
Fr<br />
Remarque: Montez le support en plaçant un chiffon doux sous la base. Vous risqueriez autrement <strong>de</strong> rayer la<br />
surface avant <strong>de</strong> la base.
Installation du télévis<strong>eu</strong>r à écran plat<br />
02<br />
7 ) Après avoir monté le support, fixez les ferrures métalliques <strong>de</strong> sécurité à l’ai<strong>de</strong> <strong>de</strong>s vis <strong>de</strong> montage.<br />
(PDP-6020FD)<br />
Vis <strong>de</strong> montage<br />
(M4 × 35 mm: noir)<br />
8 ) Avec le télévis<strong>eu</strong>r à écran plat à l’envers, insérez les soutiens du support dans le bas du télévis<strong>eu</strong>r, puis<br />
serrez les vis.<br />
Alignez les supports <strong>de</strong> colonne <strong>et</strong> le bas<br />
du télévis<strong>eu</strong>r à écran plat.<br />
Ferrures métalliques<br />
<strong>de</strong> sécurité<br />
Boulons<br />
d’installation<br />
(M6 x 20 mm)<br />
Boulons<br />
d’installation<br />
(M6 x 20 mm)<br />
Français<br />
Insérez les soutiens du support dans le<br />
télévis<strong>eu</strong>r à écran plat <strong>de</strong> sorte que la flèche<br />
indiquant “FRONT/FACE AVANT” sur la partie<br />
inféri<strong>eu</strong>re du support<br />
soit tournée vers le bas.<br />
9 ) Avec l’ai<strong>de</strong> d’au moins une personne, redressez le télévis<strong>eu</strong>r, puis positionnez-le en place.<br />
17<br />
Fr
02 Installation du télévis<strong>eu</strong>r à écran plat<br />
Pose/dépose <strong>de</strong> l’enceinte<br />
L’enceinte du télévis<strong>eu</strong>r à écran plat restitue un son clair <strong>de</strong> qualité élevée. L’équilibre gauche/droit est contenu<br />
dans une s<strong>eu</strong>le unité par souci <strong>de</strong> facilité d’installation <strong>et</strong> <strong>de</strong> compacité. Même s’il est possible d’ajouter ou <strong>de</strong><br />
r<strong>et</strong>irer <strong>de</strong>s dispositifs du télévis<strong>eu</strong>r installé en place, fixez toujours l’enceinte en <strong>de</strong>rnier. Débranchez les câbles<br />
<strong>de</strong> l’enceinte <strong>et</strong> DÉPOSEZ L’ENCEINTE avant d’installer ou <strong>de</strong> déplacer le télévis<strong>eu</strong>r.<br />
Avant <strong>de</strong> fixer l’enceinte sur le télévis<strong>eu</strong>r installé en place, lisez les informations ci-<strong>de</strong>ssous.<br />
• Pour fixer les appliques d’enceinte, posez le télévis<strong>eu</strong>r à l’envers sur une surface stable.<br />
• N’utilisez que les vis fournies <strong>et</strong> serrez soli<strong>de</strong>ment avant <strong>de</strong> vous éloigner.<br />
• L’enceinte étant volumin<strong>eu</strong>se, elle doit être manipulée par d<strong>eu</strong>x personnes au moins.<br />
• Manipulez l’enceinte avec précaution pour ne pas rayer ou endommager le coffr<strong>et</strong> <strong>et</strong> la grille.<br />
• Si vous placez un monit<strong>eu</strong>r à tube cathodique à proximité <strong>de</strong> l’enceinte, l’image du télévis<strong>eu</strong>r à écran plat<br />
p<strong>eu</strong>t <strong>de</strong>venir floue. Maintenez une certaine distance entre l’enceinte <strong>et</strong> le monit<strong>eu</strong>r.<br />
• Si vous raccor<strong>de</strong>z c<strong>et</strong>te enceinte sur un autre télévis<strong>eu</strong>r ou dispositif,<br />
l’appareil risque d’être endommagé ou <strong>de</strong> prendre f<strong>eu</strong>.<br />
• Évitez <strong>de</strong> trop amplifier le volume sonore lorsque vous utilisez la<br />
fonction <strong>de</strong> comman<strong>de</strong> <strong>de</strong> la tonalité pour augmenter les sons aigus.<br />
Remarque: Utilisez la mousse d’emballage pour éviter <strong>de</strong> rayer ou d’endommager l’appareil pendant<br />
l’installation.<br />
Télévis<strong>eu</strong>r monté sur support<br />
Vous pouvez fixer les appliques d’enceinte au télévis<strong>eu</strong>r à écran plat alors qu’il est redressé. Il est toutefois plus<br />
facile <strong>de</strong> les installer lorsque le télévis<strong>eu</strong>r est posé à plat. Une fois les appliques en place, redressez le télévis<strong>eu</strong>r,<br />
puis positionnez-le sur son emplacement définitif avant <strong>de</strong> fixer l’enceinte.<br />
1 ) Fixez les appliques d’enceinte latérales (gauche <strong>et</strong> droite) au dos du télévis<strong>eu</strong>r en utilisant les vis fournies.<br />
(PDP-6020FD)<br />
(PDP-5020FD)<br />
Vis <strong>de</strong> montage d’enceinte<br />
(M5 x 10 mm)<br />
➀<br />
➁<br />
1 ) Serrez d’abord la vis du<br />
trou supéri<strong>eu</strong>r.<br />
2 ) Puis, serrez la vis du trou<br />
qui se trouve juste au<strong>de</strong>ssous<br />
du trou supéri<strong>eu</strong>r.<br />
➁<br />
➀<br />
Applique d’enceinte<br />
(latérale)<br />
Lorsque vous regar<strong>de</strong>z le dos du<br />
télévis<strong>eu</strong>r à écran plat, les côtés<br />
sont inversés. Serrez les vis dans<br />
l’ordre indiqué ci-<strong>de</strong>ssus.<br />
18<br />
Fr
Installation du télévis<strong>eu</strong>r à écran plat<br />
02<br />
2 ) Fixez l’applique d’enceinte centrale en utilisant les vis fournies.<br />
Lors <strong>de</strong> l’insertion <strong>de</strong>s vis, placez les vis 1 <strong>et</strong> 2 dans les trous sur l’applique centrale.<br />
(PDP-6020FD)<br />
(PDP-5020FD)<br />
Applique<br />
d’enceinte pour le<br />
centre<br />
➁<br />
➀<br />
➁<br />
➀<br />
Français<br />
Vis <strong>de</strong> montage<br />
d’enceinte (M5 x 10 mm)<br />
Serrez les vis dans l’ordre<br />
indiqué ci-<strong>de</strong>ssus.<br />
3 ) Positionnez l’enceinte au moyen <strong>de</strong>s appliques.<br />
Étant donné qu’il est très facile d’installer l’enceinte à l’envers, confirmez le bon alignement <strong>de</strong> l’enceinte<br />
avant <strong>de</strong> continuer.<br />
4 ) Insérez l’applique d’enceinte dans les fentes situées à l’arrière <strong>de</strong> l’enceinte.<br />
Si l’installation <strong>de</strong> l’enceinte pose <strong>de</strong>s difficultés, modifiez l’angle <strong>de</strong>s appliques.<br />
•Insérez l’enceinte en angle par le bas.<br />
•Redressez-la lorsqu’elle entre en<br />
contact avec l’applique d’enceinte.<br />
Remarque: procé<strong>de</strong>z dans l’ordre<br />
inverse pour déposer l’enceinte.<br />
Emballage <strong>de</strong><br />
protection<br />
Face avant <strong>de</strong><br />
l’enceinte<br />
Le côté portant le ruban <strong>de</strong> garniture<br />
doit être tourné vers le haut.<br />
Pour <strong>de</strong>s raisons<br />
graphiques, le support<br />
n’est pas représenté.<br />
Insérez les appliques d’enceinte dans les<br />
fentes situées à l’arrière <strong>de</strong> l’enceinte.<br />
5 ) Fixez l’enceinte sur l’applique centrale en utilisant les vis fournies.<br />
L’illustration <strong>de</strong> l’étape suivante représente l’ordre correct <strong>de</strong> serrage <strong>de</strong>s vis.<br />
19<br />
Fr
02 Installation du télévis<strong>eu</strong>r à écran plat<br />
6 ) Fixez l’enceinte sur les appliques latérales en utilisant les vis fournies.<br />
.<br />
➂<br />
➀<br />
Le trou <strong>de</strong> vis inféri<strong>eu</strong>r sur chaque<br />
applique d’enceinte n’est pas<br />
utilisé lorsque le télévis<strong>eu</strong>r reste<br />
sur le support.<br />
Vis <strong>de</strong> montage d’enceinte<br />
(M5 x 10 mm)<br />
➁<br />
Remarque: Si vous <strong>de</strong>vez repositionner l’enceinte (à l’horizontale ou à la verticale) après l’avoir installée,<br />
<strong>de</strong>sserrez d’abord les vis <strong>de</strong> montage d’enceinte. Ajustez la position, puis serrez à nouveau les vis.<br />
2.2.2 Branchement <strong>de</strong>s câbles d’enceinte<br />
1 ) Enfoncez le taqu<strong>et</strong>.<br />
2 ) Insérez le fil <strong>de</strong> la bonne coul<strong>eu</strong>r dans l’ouverture.<br />
3 ) Laissez une faible portion <strong>de</strong> la partie dénudée du câble apparente.<br />
4 ) Relâchez le taqu<strong>et</strong> pour bloquer le fil.<br />
Si la partie dénudée du câble est cachée lorsque vous relâchez le<br />
taqu<strong>et</strong>, répétez les opérations <strong>de</strong>s étapes 1 à 4 jusqu’à ce qu’une portion<br />
suffisante <strong>de</strong> câble soit visible.<br />
5 ) Répétez c<strong>et</strong>te procédure pour chaque câble en faisant correspondre la coul<strong>eu</strong>r<br />
du fil avec la borne adéquate.<br />
6 ) Branchez les câbles d’enceinte sur l’enceinte.<br />
7 ) Attachez ensemble les câbles d’enceinte, le cordon d’alimentation <strong>et</strong> les autres<br />
câbles dans le serre-câbles, puis faites-le passer dans l’orifice correspondant à<br />
l’arrière du télévis<strong>eu</strong>r à écran plat.<br />
Voir “2.6 Pour acheminer <strong>et</strong> attacher ensemble le cordon d’alimentation<br />
<strong>et</strong> les câbles”. Utilisez les serre-câbles au besoin (voir page 30).<br />
Taqu<strong>et</strong><br />
Gris<br />
Noir<br />
Gris<br />
Prise d’enceinte<br />
Rouge<br />
Noir<br />
Rouge<br />
(PDP-6020FD)<br />
20<br />
Fr<br />
Câble d’enceinte
Installation du télévis<strong>eu</strong>r à écran plat<br />
02<br />
PDP-6020FD avec l’enceinte installée<br />
Noir<br />
Gris<br />
Vis <strong>de</strong> montage<br />
d’enceinte<br />
(M5 x 10 mm)<br />
Noir<br />
Rouge<br />
Vis <strong>de</strong> montage<br />
d’enceinte (M5 x 10 mm)<br />
Vis <strong>de</strong> montage<br />
d’enceinte<br />
(M5 x 10 mm)<br />
Français<br />
Applique d’enceinte<br />
(droite)<br />
Câble d’enceinte<br />
Applique d’enceinte (centrale)<br />
Serre-câbles<br />
Enceinte<br />
Applique d’enceinte<br />
(gauche)<br />
(PDP-5020FD)<br />
• Avant <strong>de</strong> raccor<strong>de</strong>r l’enceinte au télévis<strong>eu</strong>r à écran plat,<br />
débranchez-le <strong>de</strong> la prise sect<strong>eu</strong>r. Si vous raccor<strong>de</strong>z le câble<br />
d’enceinte alors que le cordon d’alimentation est branché, le<br />
télévis<strong>eu</strong>r risque <strong>de</strong> mal fonctionner ou d’être endommagé dans le<br />
cas où les fils dénudés du câble entreraient en contact avec un<br />
autre appareil. Branchez le cordon d’alimentation au télévis<strong>eu</strong>r<br />
après avoir raccordé l’enceinte.<br />
• Ne laissez pas les fils <strong>de</strong>s câbles d’enceinte à nu <strong>et</strong> exposés aux<br />
prises. Des files à nu p<strong>eu</strong>vent entraîner <strong>de</strong>s courts-circuits <strong>et</strong><br />
causer un mauvais fonctionnenent ou endommager l’appareil.<br />
• Ne connectez aucun appareil aux prises d’enceinte en <strong>de</strong>hors <strong>de</strong>s<br />
enceintes spécifiées.<br />
21<br />
Fr
02 Installation du télévis<strong>eu</strong>r à écran plat<br />
2.3 Fixation au mur/plafond<br />
Posez le télévis<strong>eu</strong>r <strong>de</strong> 50” sur une surface élevée, puis déposez le support.<br />
Boulons d’installation (1)<br />
Boulons d’installation (2)<br />
(PDP-5020FD)<br />
Une option courante pour installer le télévis<strong>eu</strong>r à écran plat consiste à l’accrocher à un mur soli<strong>de</strong> ou un plafond<br />
renforcé. Avec c<strong>et</strong>te métho<strong>de</strong> d’installation, il est nécessaire <strong>de</strong> procé<strong>de</strong>r d’abord à certains préparatifs. Procé<strong>de</strong>z<br />
comme il est indiqué ci-<strong>de</strong>ssous pour préparer le télévis<strong>eu</strong>r avant l’installation.<br />
1 ) Fixez les appliques d’enceinte, mais pas l’enceinte.<br />
Voir “Pose/dépose <strong>de</strong> l’enceinte” pour les instructions.<br />
2 ) Branchez les câbles d’enceinte sur le télévis<strong>eu</strong>r s’ils ne sont pas déjà raccordés.<br />
Branchez les câbles UNIQUEMENT au télévis<strong>eu</strong>r, pas à l’enceinte.<br />
(PDP-5020FD)<br />
3 ) Branchez les câbles d’autres appareils au télévis<strong>eu</strong>r.<br />
Lorsque vous choisissez l’emplacement d’installation du télévis<strong>eu</strong>r à écran plat, prenez en compte les<br />
autres appareils dans la pièce. Les DVR, amplificat<strong>eu</strong>r, magnétoscope ou autres doivent communiquer<br />
avec le télévis<strong>eu</strong>r, directement ou par le biais d’un autre appareil. Lisez les instructions fournies avec<br />
l’autre appareil pour connaître l’emplacement <strong>de</strong>s ports <strong>et</strong> prises.<br />
Après avoir choisi les ports <strong>et</strong> prises nécessaires, notez les branchements sur le télévis<strong>eu</strong>r à écran plat<br />
pour faciliter l<strong>eu</strong>r i<strong>de</strong>ntification une fois le télévis<strong>eu</strong>r installé.<br />
4 ) Attachez ensemble provisoirement les câbles avec <strong>de</strong>s élastiques (non fournis).<br />
5 ) Branchez le cordon d’alimentation du télévis<strong>eu</strong>r à écran plat sur le télévis<strong>eu</strong>r, mais NE le branchez PAS à la<br />
prise <strong>de</strong> courant.<br />
6 ) Suivez les indications d’installation données pour le montage au mur/plafond choisi.<br />
22<br />
Fr<br />
Remarque: Pour fixer l’enceinte, reportez-vous au schéma <strong>de</strong> la section suivante pour connaître les trous <strong>de</strong> vis<br />
spécifiques à utiliser pour le montage au mur ou au plafond.
Installation du télévis<strong>eu</strong>r à écran plat<br />
02<br />
Une fois le télévis<strong>eu</strong>r à écran plat fixé au mur ou suspendu au plafond, suivez les étapes ci-<strong>de</strong>ssous pour fixer<br />
l’enceinte.<br />
1 ) Confirmez que les appliques d’enceinte sont prêtes à soutenir l’enceinte.<br />
Les appliques p<strong>eu</strong>vent se désaligner pendant l’installation du télévis<strong>eu</strong>r.<br />
2 ) Branchez les extrémités <strong>de</strong>s câbles d’enceinte sur l’enceinte.<br />
Si vous avez attaché ensemble les câbles avec <strong>de</strong>s élastiques pendant l’installation, r<strong>et</strong>irez ces <strong>de</strong>rniers<br />
avant <strong>de</strong> continuer.<br />
3 ) Alignez l’enceinte avec les appliques.<br />
Étant donné qu’il est très facile <strong>de</strong> monter l’enceinte à l’envers, confirmez le bon alignement <strong>de</strong> l’enceinte<br />
avant <strong>de</strong> continuer.<br />
4 ) Insérez les appliques d’enceinte dans les fentes situées à l’arrière <strong>de</strong> l’enceinte.<br />
Si l’installation <strong>de</strong> l’enceinte pose <strong>de</strong>s difficultés, modifiez l’angle <strong>de</strong>s appliques.<br />
Français<br />
•Insérez l’enceinte en angle par le bas.<br />
•Redressez-la lorsqu’elle entre en contact<br />
avec l’applique d’enceinte.<br />
Remarque: procé<strong>de</strong>z dans l’ordre inverse pour<br />
déposer l’enceinte.<br />
Vis <strong>de</strong><br />
montage<br />
d’enceinte<br />
(M5 x 10 mm)<br />
N’utilisez PAS ces trous lors<br />
du montage au mur ou au plafond<br />
➂<br />
➀<br />
Vis <strong>de</strong> montage<br />
d’enceinte (M5 x 10 mm)<br />
➁<br />
Vis <strong>de</strong><br />
montage d’enceinte<br />
(M5 x 10 mm)<br />
5 ) Serrez la vis centrale puis les vis latérales dans l’ordre indiqué ci-<strong>de</strong>ssus.<br />
Lors <strong>de</strong> l’installation du télévis<strong>eu</strong>r sur un mur ou un plafond, utilisez les trous <strong>de</strong> vis inféri<strong>eu</strong>rs sur chaque<br />
applique d’enceinte.<br />
Remarque: Si vous <strong>de</strong>vez repositionner l’enceinte (à l’horizontale) après l’avoir installée, <strong>de</strong>sserrez d’abord les vis<br />
<strong>de</strong> montage d’enceinte. Ajustez la position, puis serrez à nouveau les vis.<br />
23<br />
Fr
02 Installation du télévis<strong>eu</strong>r à écran plat<br />
2.4 Installation du télévis<strong>eu</strong>r à écran plat<br />
En raison du poids <strong>et</strong> <strong>de</strong> la fine épaiss<strong>eu</strong>r du télévis<strong>eu</strong>r à écran plat, d<strong>eu</strong>x personnes au moins sont nécessaires<br />
pour installer <strong>et</strong>/ou positionner le télévis<strong>eu</strong>r. Les sections suivantes donnent <strong>de</strong>s instructions sur les différentes<br />
options <strong>de</strong> montage <strong>et</strong> <strong>de</strong> fixation.<br />
Fixation du télévis<strong>eu</strong>r avec le support utilisé<br />
Lorsque vous utilisez un support, stabilisez le télévis<strong>eu</strong>r pour l’empêcher <strong>de</strong> basculer. Utilisez les ferrures<br />
métalliques <strong>et</strong> les vis fournies pour accrocher le télévis<strong>eu</strong>r à un mur ou à une autre structure <strong>de</strong> soutien soli<strong>de</strong>.<br />
Une autre option consiste à acquérir <strong>de</strong>s croch<strong>et</strong>s, <strong>de</strong>s cor<strong>de</strong>s <strong>et</strong> <strong>de</strong>s fixations auprès <strong>de</strong> votre installat<strong>eu</strong>r ou<br />
dans votre quincaillerie locale. La taille <strong>et</strong> résistance du matériel nécessaire dépen<strong>de</strong>nt <strong>de</strong> la composition <strong>et</strong> <strong>de</strong><br />
l’épaiss<strong>eu</strong>r <strong>de</strong> la surface <strong>de</strong> fixation.<br />
Croch<strong>et</strong>s recommandés: Diamètre nominal <strong>de</strong> 8 mm, longu<strong>eu</strong>r <strong>de</strong> 12 mm à 18 mm (0,5 pouce à 0,7 pouce)<br />
Pour accrocher le télévis<strong>eu</strong>r avec le support fourni utilisé, suivez les étapes ci-<strong>de</strong>ssous.<br />
1 ) Fixez les croch<strong>et</strong>s aux trous <strong>de</strong> fixation au dos du<br />
télévis<strong>eu</strong>r.<br />
2 ) Insérez les ferrures dans le mur ou la structure <strong>de</strong><br />
soutien.<br />
3 ) Faites passer les cor<strong>de</strong>s entre les croch<strong>et</strong>s <strong>et</strong> les<br />
ferrures.<br />
4 ) Serrez les cor<strong>de</strong>s jusqu’à ce que le télévis<strong>eu</strong>r soit<br />
accroché sans perdre l’équilibre.<br />
Ferrure<br />
1. Croch<strong>et</strong><br />
2. Cor<strong>de</strong><br />
M8<br />
12 mm à 18 mm<br />
(0,5 pouces à 0,7 pouces)<br />
Pour stabiliser le télévis<strong>eu</strong>r à écran plat sur une table ou une plateforme, utilisez les ferrures métalliques <strong>et</strong> les<br />
vis fournies, ainsi que <strong>de</strong>s vis à bois disponibles dans le commerce. Les vis à bois servent à accrocher les ferrures<br />
métalliques lors du montage sur une surface en bois. Elles doivent avoir un diamètre nominal <strong>de</strong> 4 mm (5/32<br />
pouces) <strong>et</strong> une longu<strong>eu</strong>r d’au moins 20 mm (13/16 pouces).<br />
Remarques: Évitez <strong>de</strong> déplacer la table après avoir fixé le télévis<strong>eu</strong>r.<br />
N’utilisez pas <strong>de</strong> fil nu pour le cordon. Si une partie du fil est introduite dans l’orifice <strong>de</strong> ventilation à<br />
l’arrière du panneau d’affichage, cela pourrait entraîner un incendie ou une électrocution.<br />
24<br />
Fr
Installation du télévis<strong>eu</strong>r à écran plat<br />
02<br />
Suivez les étapes ci-<strong>de</strong>ssous pour fixer en place le télévis<strong>eu</strong>r à écran plat.<br />
1 ) Notez l’emplacement <strong>de</strong>s ferrures métalliques <strong>et</strong> <strong>de</strong>s vis sur le bord arrière <strong>de</strong> la table au moyen du support<br />
du télévis<strong>eu</strong>r pour déterminer le positionnement.<br />
8 mm à 15 mm<br />
(3/8 pouce à 5/8 pouce)<br />
4 mm (5/32 pouces)<br />
(PDP-6020FD)<br />
(PDP-5020FD)<br />
20 mm<br />
(13/16 pouce)<br />
min.<br />
Vis à bois<br />
(disponible dans le<br />
commerce, 4 mm x<br />
20 mm (5/32 pouce x<br />
13/16 pouce) min.)<br />
Vis à bois<br />
(disponible dans<br />
le commerce,<br />
4 mm x 20 mm<br />
(5/32 pouce x 13/<br />
16 pouce) min.)<br />
Français<br />
2 ) Percez <strong>de</strong>s trous dans le bord <strong>de</strong> la table ou <strong>de</strong> la plateforme aux endroits marqués.<br />
3 ) Soulevez le télévis<strong>eu</strong>r en place à l’ai<strong>de</strong> d’au moins une d<strong>eu</strong>xième personne.<br />
4 ) Utilisez les vis à bois (non fournies) pour fixer les ferrures métalliques sur la table.<br />
25<br />
Fr
02 Installation du télévis<strong>eu</strong>r à écran plat<br />
2.5 Raccor<strong>de</strong>ment à la télévision hertzienne <strong>et</strong> à d’autres appareils (DVR,<br />
amplificat<strong>eu</strong>r, BDR, <strong>et</strong>c.)<br />
Le type d’appareil raccordé au télévis<strong>eu</strong>r à écran plat détermine les ports utilisés. Les sections suivantes<br />
expliquent comment raccor<strong>de</strong>r le télévis<strong>eu</strong>r à la télévision hertzienne <strong>et</strong> à un appareil <strong>de</strong> lecture comme un<br />
lect<strong>eu</strong>r DVD, une chaîne stéréo intégrale, un enregistr<strong>eu</strong>r vidéo, <strong>et</strong>c. Si votre appareil ne figure pas dans la liste,<br />
reportez-vous au mo<strong>de</strong> d’emploi accompagnant le ou les appareils pour le branchement.<br />
2.5.1 Ajout <strong>de</strong> chaînes <strong>de</strong> télévision analogique (conventionnelle) <strong>et</strong> numérique<br />
Qu’une station <strong>de</strong> télévision transm<strong>et</strong>te <strong>de</strong>s programmes analogiques ou numériques, le télévis<strong>eu</strong>r à écran plat<br />
les diffusera s’il est programmé pour recevoir le signal correspondant. Pour programmer le télévis<strong>eu</strong>r pour la<br />
télévision hertzienne, sélectionnez la prise ANT.<br />
La prise ANT accepte les signaux <strong>de</strong> télévision<br />
numérique <strong>et</strong> analogique. Raccor<strong>de</strong>z une antenne<br />
VHF/UHF <strong>et</strong>/ou la télévision par câble à la prise ANT<br />
au dos du télévis<strong>eu</strong>r, puis appuyez sur TV/DTV <strong>de</strong> la<br />
télécomman<strong>de</strong> pour passer <strong>de</strong>s programmes<br />
analogiques à numériques. Vous pouvez également<br />
utiliser une antenne externe lorsque vous regar<strong>de</strong>z<br />
<strong>de</strong>s chaînes analogiques pour obtenir une meill<strong>eu</strong>re<br />
image analogique.<br />
Si l’antenne extéri<strong>eu</strong>re est munie d’un câble coaxial<br />
<strong>de</strong> 75 ohms avec un connect<strong>eu</strong>r <strong>de</strong> type F, branchez<br />
ce connect<strong>eu</strong>r à la prise d’antenne se trouvant au dos<br />
du télévis<strong>eu</strong>r.<br />
Vue <strong>de</strong> dos<br />
2.5.2 Branchement d’un autre appareil <strong>Pioneer</strong><br />
C<strong>et</strong>te section donne <strong>de</strong>s informations sur le raccor<strong>de</strong>ment d’un autre appareil <strong>Pioneer</strong> à ce télévis<strong>eu</strong>r. Chaque schéma<br />
p<strong>eu</strong>t également être utilisé comme outil <strong>de</strong> référence pour <strong>de</strong>s appareils autres que <strong>Pioneer</strong>, mais l’emplacement <strong>de</strong>s<br />
ports p<strong>eu</strong>t être différent ou inaccessible.<br />
Raccor<strong>de</strong>r le câble ou le satellite au moyen d’un boîtier décod<strong>eu</strong>r (STB):<br />
T<br />
W<br />
Pour regar<strong>de</strong>r à la fois <strong>de</strong>s programmes<br />
analogiques <strong>et</strong> numériques par le biais<br />
d’une connexion par câble ou antenne<br />
terrestre, vous <strong>de</strong>vez d’abord raccor<strong>de</strong>r<br />
le câble d’antenne à un divis<strong>eu</strong>r.<br />
T<br />
W<br />
T<br />
W<br />
T<br />
W<br />
Antenne satellite<br />
Vue <strong>de</strong> dos<br />
SAT IN<br />
STB câble/STB satellite<br />
STB câble/STB satellite<br />
AUDIO<br />
OUT<br />
COMPONENT<br />
VIDEO OUTPUT<br />
AUDIO<br />
OUT<br />
COMPONENT<br />
VIDEO OUTPUT<br />
HDMI OUT<br />
Y<br />
IN<br />
HDMI OUT<br />
Y<br />
IN<br />
PB<br />
OUT<br />
PB<br />
OUT<br />
PR<br />
PR<br />
26<br />
Fr<br />
Lorsque vous utilisez un STB câble ou un STB satellite, branchez le câble STB fourni avec le boîtier décod<strong>eu</strong>r à la prise<br />
<strong>de</strong> courant d’antenne/télévision par câble. Si votre STB est pourvu d’une prise HDMI, utilisez une <strong>de</strong>s prises INPUT 4 à<br />
6 (prise HDMI) au dos du télévis<strong>eu</strong>r à écran plat ou INPUT 7 (prise HDMI) sur le côté du télévis<strong>eu</strong>r à écran plat au li<strong>eu</strong><br />
d’effectuer <strong>de</strong>s raccor<strong>de</strong>ments vidéo. Si vous branchez un câble d’antenne directement sur TV, vous <strong>de</strong>vez d’abord<br />
brancher le câble au divis<strong>eu</strong>r. Pour en savoir plus, reportez-vous au mo<strong>de</strong> d’emploi accompagnant le boîtier décod<strong>eu</strong>r.
Installation du télévis<strong>eu</strong>r à écran plat<br />
02<br />
Raccor<strong>de</strong>r un appareil HDMI (INPUT 4 à INPUT 6): Raccor<strong>de</strong>r un appareil HDMI (INPUT 7):<br />
T<br />
W<br />
T<br />
W<br />
Vue du côté gauche<br />
Vue <strong>de</strong> dos<br />
Câble compatible<br />
HDMI (Câble<br />
HDMI portant la<br />
marque HDMI)<br />
Appareil HDMI<br />
Câble audio<br />
(disponible dans<br />
le commerce)<br />
Effectuez c<strong>et</strong>te<br />
connexion si les<br />
signaux d’entrée<br />
audio sont<br />
analogiques.<br />
Câble compatible<br />
HDMI (Câble<br />
HDMI portant la<br />
marque HDMI)<br />
Français<br />
Les prises INPUT4 à INPUT 6 sont <strong>de</strong>s prises HDMI.<br />
Utilisez la prise INPUT 4 ou INPUT 5 (HDMI) lorsque les<br />
signaux d’entrée audio sont aussi analogiques. Pour en<br />
savoir plus, voir “5.2 Utilisation <strong>de</strong>s entrées HDMI”.<br />
Appareil HDMI<br />
Utilisez également INPUT 7 (prise HDMI) sur le côté du<br />
télévis<strong>eu</strong>r pour raccor<strong>de</strong>r un appareil HDMI. Pour en savoir<br />
plus, reportez-vous à “5.2 Utilisation <strong>de</strong>s entrées HDMI”.<br />
Raccor<strong>de</strong>r un lect<strong>eu</strong>r <strong>de</strong> DVD:<br />
Raccor<strong>de</strong>r un ampli-tuner AV:<br />
T<br />
T<br />
T<br />
T<br />
W<br />
W<br />
W<br />
W<br />
Vue <strong>de</strong> dos<br />
Vue <strong>de</strong> dos<br />
Câble audio-vidéo<br />
(disponible dans le<br />
commerce)<br />
Lect<strong>eu</strong>r <strong>de</strong> DVD<br />
Câble pour les<br />
composantes<br />
vidéo (disponible<br />
dans le<br />
commerce)<br />
Utilisez les prises INPUT 2 pour raccor<strong>de</strong>r un lect<strong>eu</strong>r <strong>de</strong><br />
DVD ou un autre appareil audiovisuel. Si votre lect<strong>eu</strong>r <strong>de</strong><br />
DVD est pourvu d’une prise HDMI, utilisez-la au li<strong>eu</strong><br />
d’effectuer <strong>de</strong>s raccor<strong>de</strong>ments vidéo. Pour en savoir plus,<br />
reportez-vous au mo<strong>de</strong> d’emploi accompagnant le<br />
lect<strong>eu</strong>r <strong>de</strong> DVD.<br />
C<strong>et</strong>te connexion n’est<br />
pas nécessaire si vous<br />
avez relié un<br />
amplificat<strong>eu</strong>r<br />
audiovisuel, possédant<br />
<strong>de</strong>s fonctions <strong>de</strong><br />
correction d’ambiance,<br />
à un caisson <strong>de</strong> graves.<br />
Câble audio-vidéo<br />
(disponible dans<br />
le commerce)<br />
Câble<br />
optique pour<br />
signaux<br />
numériques<br />
(disponible<br />
dans le<br />
commerce)<br />
Caisson <strong>de</strong> graves Ampli-tuner AV<br />
Au moyen d’un câble optique pour signaux numériques,<br />
raccor<strong>de</strong>z un ampli-tuner audiovisuel à la prise DIGITAL<br />
OUT (optique). Si l’ampli-tuner AV n’est pas pourvu d’une<br />
prise DIGITAL IN (optique), vous pouvez raccor<strong>de</strong>r la prise<br />
AUDIO OUT (AUDIO) du télévis<strong>eu</strong>r à la prise d’entrée<br />
audio <strong>de</strong> l’ampli-tuner AV. Pour en savoir plus, reportezvous<br />
au mo<strong>de</strong> d’emploi accompagnant l’ampli-tuner AV.<br />
27<br />
Fr
02 Installation du télévis<strong>eu</strong>r à écran plat<br />
Raccor<strong>de</strong>r un magnétoscope:<br />
T<br />
T<br />
W<br />
W<br />
Raccor<strong>de</strong>r une console <strong>de</strong> j<strong>eu</strong> ou un caméscope:<br />
Vue du côté gauche<br />
Vue <strong>de</strong> dos<br />
Câble audio-vidéo<br />
(disponible dans le<br />
commerce)<br />
Câble S-Vidéo<br />
(disponible dans<br />
le commerce)<br />
Câble audio-vidéo<br />
(disponible dans le<br />
commerce)<br />
Magnétoscope<br />
Utilisez les prises INPUT 1 pour raccor<strong>de</strong>r un<br />
magnétoscope ou un autre appareil. Pour en savoir plus,<br />
reportez-vous au mo<strong>de</strong> d’emploi accompagnant le<br />
magnétoscope.<br />
Raccor<strong>de</strong>r les câbles <strong>de</strong> comman<strong>de</strong>:<br />
Utilisez la prise INPUT 3 pour raccor<strong>de</strong>r une console <strong>de</strong><br />
j<strong>eu</strong>, un caméscope ou un autre appareil audiovisuel.<br />
Pour en savoir plus, reportez-vous au mo<strong>de</strong> d’emploi<br />
accompagnant la console <strong>de</strong> j<strong>eu</strong> ou le caméscope.<br />
Raccor<strong>de</strong>r un ordinat<strong>eu</strong>r:<br />
Caméscope/console <strong>de</strong> j<strong>eu</strong><br />
T<br />
T<br />
T<br />
T<br />
W<br />
W<br />
W<br />
W<br />
Vue <strong>de</strong> dos<br />
Vue <strong>de</strong> dos<br />
CONTROL<br />
IN<br />
OUT<br />
Câble RVB<br />
(disponible dans<br />
le commerce)<br />
Câble audio stéréo muni<br />
d’une mini-fiche<br />
(disponible dans le<br />
commerce)<br />
(Pour ém<strong>et</strong>tre le son <strong>de</strong><br />
l’ordinat<strong>eu</strong>r)<br />
Ordinat<strong>eu</strong>r personnel<br />
28<br />
Fr<br />
Raccor<strong>de</strong>z les câbles <strong>de</strong> comman<strong>de</strong> entre la prise<br />
CONTROL (OUT) du télévis<strong>eu</strong>r <strong>et</strong> les autres appareils<br />
<strong>Pioneer</strong> portant le logo SR. Utilisez un câble audio<br />
monaural muni d’une mini-fiche (non fourni).<br />
Utilisez la prise PC INPUT (RVB analogique) pour raccor<strong>de</strong>r<br />
un ordinat<strong>eu</strong>r. Pour ém<strong>et</strong>tre le son <strong>de</strong> l’ordinat<strong>eu</strong>r, utilisez<br />
PC INPUT (Audio) avec un câble audio stéréo muni d’une<br />
mini-fiche (non fourni). Pour en savoir plus, reportez-vous<br />
au mo<strong>de</strong> d’emploi accompagnant l’ordinat<strong>eu</strong>r.
T<br />
W<br />
T<br />
W<br />
T<br />
W<br />
T<br />
W<br />
Installation du télévis<strong>eu</strong>r à écran plat<br />
02<br />
2.5.3 Connexion du cordon d’alimentation au télévis<strong>eu</strong>r<br />
Raccor<strong>de</strong>z en <strong>de</strong>rnier le cordon d’alimentation. Veillez à brancher la fiche du cordon d’alimentation du télévis<strong>eu</strong>r<br />
à une prise sect<strong>eu</strong>r à trois broches convenablement reliée à la terre. Le cordon comprend un filtre antiparasite<br />
qui réduit les interférences électriques en provenance <strong>de</strong> la prise <strong>de</strong> courant.<br />
Le télévis<strong>eu</strong>r à écran plat est alimenté en électricité tant qu’il reste branché à la prise <strong>de</strong> courant. Débranchez le<br />
cordon d’alimentation <strong>de</strong> la prise <strong>de</strong> courant si vous envisagez <strong>de</strong> ne pas utiliser le télévis<strong>eu</strong>r à écran plat pendant<br />
une pério<strong>de</strong> prolongée. Vous prolongerez ainsi la durée <strong>de</strong> vie <strong>de</strong> l’écran plasma tout en économisant l’énergie.<br />
Branchez le cordon d’alimentation sur le télévis<strong>eu</strong>r, mais NE le branchez PAS encore à la prise <strong>de</strong> courant.<br />
Français<br />
2.6 Pour acheminer <strong>et</strong> attacher ensemble le cordon d’alimentation <strong>et</strong> les câbles<br />
Une fois le télévis<strong>eu</strong>r à écran plat installé <strong>et</strong> l’enceinte en place, installez les autres appareils sur l<strong>eu</strong>r<br />
emplacement définitif. Posez le cordon d’alimentation, les câbles du télévis<strong>eu</strong>r <strong>et</strong> les câbles <strong>de</strong> tout autre appareil<br />
d’après un schéma logique convenant au li<strong>eu</strong>. Prenez en compte les points suivants lors du cheminement <strong>de</strong>s<br />
câbles:<br />
• Accès à une prise <strong>de</strong> courant à 3 broches (reliée à la terre)<br />
• Espace pour le filtre antiparasite entre le télévis<strong>eu</strong>r <strong>et</strong> la prise <strong>de</strong> courant<br />
• Positionnement <strong>de</strong>s câbles sous un tapis ou en travers d’un chemin <strong>de</strong> passage déconseillé<br />
Généralement, les cordons/câbles sont détendus ou trop longs. Les élastiques sont une bonne solution provisoire<br />
pour attacher ensemble les câbles, mais ils ont tendance à se casser trop rapi<strong>de</strong>ment. Pour organiser<br />
soign<strong>eu</strong>sement les câbles, utilisez les serre-câbles fournis afin <strong>de</strong> les attacher ensemble. Le schéma ci-<strong>de</strong>ssous<br />
représente un câble d’enceinte attaché.<br />
PDP-6020FD<br />
PDP-5020FD<br />
Câble d’enceinte<br />
Câble d’enceinte<br />
Serre-câbles<br />
Attachez les câbles<br />
ensemble par p<strong>et</strong>it groupe<br />
dans la mesure du possible<br />
pour les séparer plus<br />
facilement par la suite,<br />
le cas échéant.<br />
Serre-câbles<br />
Un serre-câbles réutilisable est conçu pour bloquer les câbles attachés en place. Ce télévis<strong>eu</strong>r à écran plat<br />
comporte quatre trous en tout pour fixer les serre-câbles au dos du télévis<strong>eu</strong>r. Utilisez les serre-câbles selon vos<br />
besoins.<br />
PDP-6020FD<br />
PDP-5020FD<br />
29<br />
Fr
02 Installation du télévis<strong>eu</strong>r à écran plat<br />
Suivez les étapes ci-<strong>de</strong>ssous pour fixer un serre-câbles.<br />
1 ) Faites passer la ban<strong>de</strong> du serre-câbles dans le support <strong>et</strong> réunissez le ou les câbles dans le serre-câbles.<br />
2 ) Maintenez les leviers enfoncés, puis insérez le croch<strong>et</strong> dans le trou approprié au dos du télévis<strong>eu</strong>r à écran<br />
plat.<br />
3 ) Tirez sur la ban<strong>de</strong> du serre-câbles pour verrouiller.<br />
1<br />
2 Serre-câbles<br />
4 ) Vérifiez que le serre-câbles est fixé soli<strong>de</strong>ment sur le télévis<strong>eu</strong>r.<br />
Remarque: Évitez <strong>de</strong> pincer ou <strong>de</strong> créer <strong>de</strong>s points <strong>de</strong> pression lors <strong>de</strong> la mise en place <strong>de</strong>s câbles ou lorsque<br />
vous les attachez.<br />
Pour r<strong>et</strong>irer le serre-câbles, tirez <strong>et</strong> maintenez le taqu<strong>et</strong> dans c<strong>et</strong>te position.<br />
Pour r<strong>et</strong>irez le serre-câbles, maintenez les leviers enfoncés puis r<strong>et</strong>irez le serre-câbles du trou.<br />
Taqu<strong>et</strong><br />
Levier<br />
Levier<br />
Remarque: Un serre-câbles qui est en place <strong>de</strong>puis longtemps présente davantage <strong>de</strong> risques <strong>de</strong> détérioration.<br />
Un serre-câbles plus ancien p<strong>eu</strong>t être facilement endommagé lorsqu’il est r<strong>et</strong>iré <strong>et</strong> il se p<strong>eu</strong>t que vous<br />
ne puissiez pas le réutiliser.<br />
30<br />
Fr
Opérations <strong>de</strong> base pour regar<strong>de</strong>r la télévision 03<br />
3 Opérations <strong>de</strong> base pour regar<strong>de</strong>r la télévision<br />
Ce chapitre explore les opérations quotidiennes comme la mise sous tension du télévis<strong>eu</strong>r à écran plat,<br />
l’utilisation du menu principal (HOME) <strong>et</strong> le réglage <strong>de</strong> l’écran selon le li<strong>eu</strong>/la pièce <strong>de</strong> visionnement. La <strong>de</strong>rnière<br />
section <strong>de</strong> ce chapitre donne <strong>de</strong>s conseils <strong>et</strong> <strong>de</strong>s suggestions pour les utilisat<strong>eu</strong>rs qui ne sont pas familiarisés<br />
avec les fonctions <strong>de</strong>s télévis<strong>eu</strong>rs à écran plat.<br />
3.1 Mise sous/hors tension du télévis<strong>eu</strong>r à écran plat<br />
Ce télévis<strong>eu</strong>r à écran plat dispose <strong>de</strong> trois niveaux d’activités: sous tension, veille <strong>et</strong> hors tension. Le mo<strong>de</strong> veille<br />
économise l’énergie, tout en perm<strong>et</strong>tant d’allumer le télévis<strong>eu</strong>r avec la télécomman<strong>de</strong>.<br />
Les instructions suivantes s’appliquent à la télécomman<strong>de</strong>. Pour comman<strong>de</strong>r le télévis<strong>eu</strong>r à écran plat par<br />
l’intermédiaire <strong>de</strong>s touches sur l’écran, voir “1.2.1 Touches <strong>de</strong> comman<strong>de</strong> <strong>et</strong> autres sur le télévis<strong>eu</strong>r à écran plat”<br />
pour connaître l’emplacement <strong>de</strong>s touches.<br />
Mise sous tension du télévis<strong>eu</strong>r à écran plat<br />
Pour allumer le télévis<strong>eu</strong>r au moyen <strong>de</strong> la télécomman<strong>de</strong>, suivez les étapes ci-<strong>de</strong>ssous.<br />
1 ) Branchez la fiche du cordon d’alimentation du télévis<strong>eu</strong>r à écran plat dans une prise <strong>de</strong> courant<br />
correctement reliée à la terre.<br />
2 ) Appuyez sur une <strong>de</strong>s touches suivantes pour allumer le télévis<strong>eu</strong>r à écran plat.<br />
• Touche d’alimentation (a) au dos du télévis<strong>eu</strong>r dans le coin inféri<strong>eu</strong>r gauche (Voir page 9)<br />
• Touche STANDBY/ON sur le côté du télévis<strong>eu</strong>r (Voir page 8)<br />
• Touche TV (a) <strong>de</strong> la télécomman<strong>de</strong> située dans le coin supéri<strong>eu</strong>r gauche (Voir page 12)<br />
L’image apparaît sur l’écran du télévis<strong>eu</strong>r.<br />
Remarque: Utilisez la touche MUTING <strong>de</strong> la télécomman<strong>de</strong> pour réduire un grésillement excessif.<br />
3 ) Confirmez que le témoin d’alimentation Power (ON) s’allume en bl<strong>eu</strong>.<br />
Français<br />
Témoin SLEEP<br />
Témoin STANDBY<br />
Témoin d’alimentation (ON)<br />
Remarque: En mo<strong>de</strong> <strong>de</strong> veille, si vous appuyez sur la touche TV (a) <strong>de</strong> la télécomman<strong>de</strong>, le télévis<strong>eu</strong>r à écran plat<br />
s’allumera.<br />
Mise hors tension du télévis<strong>eu</strong>r à écran plat<br />
M<strong>et</strong>tre le télévis<strong>eu</strong>r à écran plat hors tension p<strong>eu</strong>t consister à passer en veille pour que <strong>de</strong>s fonctions comme la<br />
minuterie d’extinction reste opérationnelle ou bien à couper l’alimentation du télévis<strong>eu</strong>r. Sauf si vous avez<br />
l’intention <strong>de</strong> ne pas utiliser le télévis<strong>eu</strong>r à écran plat pendant une pério<strong>de</strong> prolongée, placez-le en veille.<br />
Remarque: Le télévis<strong>eu</strong>r à écran plat continue <strong>de</strong> consommer <strong>de</strong> l’électricité qu’il soit en veille ou éteint tant qu’il<br />
reste branché à une prise <strong>de</strong> courant.<br />
Procé<strong>de</strong>z comme il est indiqué ci-<strong>de</strong>ssous pour<br />
placer le télévis<strong>eu</strong>r en veille.<br />
1 ) Appuyez sur la touche TV ( a ) <strong>de</strong> la<br />
télécomman<strong>de</strong> ou sur la touche STANDBY/ON<br />
du télévis<strong>eu</strong>r.<br />
2 ) Confirmez que le témoin STANDBY s’allume en<br />
rouge.<br />
Le tableau <strong>de</strong> droite donne <strong>de</strong>s exemples <strong>de</strong> coul<strong>eu</strong>r<br />
<strong>de</strong>s témoins. Regar<strong>de</strong>z les témoins sur la face avant<br />
du télévis<strong>eu</strong>r pour connaître son statut<br />
d’alimentation.<br />
Témoin<br />
d’alimentation<br />
(ON)<br />
Témoin<br />
STANDBY<br />
Statut du télévis<strong>eu</strong>r à écran plat<br />
Le cordon d’alimentation du télévis<strong>eu</strong>r<br />
est débranché ou bien le cordon<br />
d’alimentation est branché, mais la<br />
touche d’alimentation principale du<br />
télévis<strong>eu</strong>r à écran plat (a) est éteinte<br />
Le télévis<strong>eu</strong>r est sous tension en<br />
attente d’activation<br />
Le télévis<strong>eu</strong>r est en mo<strong>de</strong> <strong>de</strong> veille<br />
31<br />
Fr
03 Opérations <strong>de</strong> base pour regar<strong>de</strong>r la télévision<br />
3.2 Programmation du télévis<strong>eu</strong>r à écran plat pour regar<strong>de</strong>r la télévision<br />
Pour regar<strong>de</strong>r la télévision <strong>et</strong> bénéficier <strong>de</strong> certaines fonctions intégrées, sélectionnez le type ou les types <strong>de</strong><br />
chaîne (analogique, numérique), choisissez une langue, réglez le fuseau horaire <strong>et</strong> programmez les chaînes. Les<br />
sections ci-<strong>de</strong>ssous expliquent également comment régler le type <strong>de</strong> chaîne <strong>et</strong> comment utiliser le menu<br />
principal (HOME) pour chaque option <strong>de</strong> programmation.<br />
3.2.1 Choix <strong>de</strong> chaînes <strong>de</strong> télévision analogique ou numérique<br />
Pour sélectionner un réglage <strong>de</strong> chaîne, notez la prise d’entrée d’antenne raccordée au dos du télévis<strong>eu</strong>r. Suivez<br />
les instructions ci-<strong>de</strong>ssous pour sélectionner <strong>de</strong>s chaînes <strong>de</strong> télévision analogique ou numérique.<br />
1) Confirmez que la télécomman<strong>de</strong> est bien placée<br />
sur TV. Situé en bas <strong>de</strong> la télécomman<strong>de</strong>.<br />
2) Appuyez sur TV/DTV <strong>de</strong> la télécomman<strong>de</strong>.<br />
Situé en haut <strong>de</strong> la télécomman<strong>de</strong>.<br />
3) Sélectionnez une option <strong>de</strong> chaîne: analogique ou<br />
numérique. Pendant l’opération, appuyez sur TV/<br />
DTV pour basculer entre les signaux <strong>de</strong> télévision.<br />
Remarque: Voir “2.5.1 Ajout <strong>de</strong> chaînes <strong>de</strong> télévision<br />
analogique (conventionnelle) <strong>et</strong> numérique”<br />
pour <strong>de</strong> plus amples informations sur les<br />
options <strong>de</strong> réglage <strong>de</strong>s chaînes.<br />
Remarque: Si vous regar<strong>de</strong>z la télévision <strong>et</strong> une image vidéo séparée (multiécran) <strong>et</strong> que vous appuyez sur la<br />
touche TV/DTV <strong>de</strong> la télécomman<strong>de</strong>, s<strong>eu</strong>l le signal <strong>de</strong> télévision apparaissant à gauche <strong>de</strong> l’écran<br />
changera.<br />
3.2.2 Exploration du menu principal (HOME MENU)<br />
Le menu principal (HOME) correspond à l’écran principal du télévis<strong>eu</strong>r à écran plat. La plupart <strong>de</strong>s comman<strong>de</strong>s<br />
<strong>et</strong> réglages p<strong>eu</strong>vent être programmés via ce menu. La section suivante donne un exemple type d’opération <strong>de</strong>s<br />
menus du télévis<strong>eu</strong>r. Pour les procédures réelles, voir les pages qui décrivent une fonction spécifique.<br />
32<br />
Fr<br />
1) Appuyez sur HOME MENU <strong>de</strong> la<br />
télécomman<strong>de</strong> pour accé<strong>de</strong>r au<br />
menu principal.<br />
2) M<strong>et</strong>tez en surbrillance une rubrique<br />
<strong>de</strong> menu avec les flèches haut/bas<br />
( / ).<br />
3) Parcourez les options <strong>de</strong> c<strong>et</strong>te<br />
rubrique <strong>de</strong> menu avec les flèches<br />
gauche/droite ( / ).<br />
4) M<strong>et</strong>tez en surbrillance l’option du<br />
menu sélectionné.<br />
Télécomman<strong>de</strong><br />
5) Appuyez sur ENTER pour vali<strong>de</strong>r le changement.<br />
6) Appuyez sur RETURN pour revenir au menu/page <strong>de</strong> sous-menu précé<strong>de</strong>nt si vous souhaitez modifier plus<br />
d’une option.<br />
7) Appuyez <strong>de</strong> nouveau sur HOME MENU pour quitter l’écran du menu.<br />
Écran du menu principal (HOME)<br />
Chaîne<br />
Favoris<br />
Entrée<br />
Home Media Gallery<br />
Cm<strong>de</strong> HDMI<br />
Configuration
Opérations <strong>de</strong> base pour regar<strong>de</strong>r la télévision 03<br />
Ce tableau présente les différentes rubriques du menu principal (HOME) pour les sources AV <strong>et</strong> PC.<br />
Source AV PG Option<br />
Chaîne 39 —<br />
Favoris 39 —<br />
Entrée 39 —<br />
Home Media Gallery 83 —<br />
Cm<strong>de</strong> HDMI 76 —<br />
Configuration Image 54 Pré réglages AV<br />
58 Contraste*<br />
58 Luminos.*<br />
58 Coul<strong>eu</strong>r*<br />
58 Teinte*<br />
58 N<strong>et</strong>t<strong>et</strong>é*<br />
60 PureCinema<br />
46 Comman<strong>de</strong> Son**<br />
45 Performances<br />
OPTIMUM**<br />
58 Réinitial.<br />
Son 46 Aigus<br />
46 Graves<br />
46 Balance<br />
67 Eff<strong>et</strong> sonore<br />
46 Réinitial.<br />
67 AVC<br />
Comman<strong>de</strong> alimentation 53 Économie d’énergie<br />
68 Arrêt sans signal<br />
68 Arrêt sans opération<br />
Minut. Extinction 41 —<br />
Options 44 Position<br />
56 Taille auto<br />
59 Cache latéral<br />
74 Entrée HDMI<br />
81 Rég. cm<strong>de</strong> HDMI<br />
53 Orbit<strong>eu</strong>r<br />
53 Mire vidéo<br />
56 Préf. Cm<strong>de</strong> J<strong>eu</strong><br />
42 Capt. lum. Salle<br />
52 Protection écran<br />
40 Étiqu<strong>et</strong>er Entrée<br />
Configuration Système 35 Autoinstallation<br />
36 Install. TV analogique<br />
38 Instal. Tuner<br />
Numérique<br />
47 Contrôle parental<br />
64 Sous-titres<br />
111 Sortie Audio Num.<br />
47 Modif. Mot <strong>de</strong> passe<br />
34 Langue<br />
114 Information Technique<br />
Configuration Favoris 39 Mo<strong>de</strong> Chaîne<br />
40 Trier Favoris<br />
* Disponible lorsqu’une option autre que OPTIMUM<br />
est sélectionnée dans le menu Pré réglages AV.<br />
** Disponible uniquement lorsque OPTIMUM est<br />
sélectionné dans le menu Pré réglages AV<br />
Source PC PG Option<br />
Chaîne 39 —<br />
Favoris 39 —<br />
Entrée 39 —<br />
Home Media Gallery 83 —<br />
Cm<strong>de</strong> HDMI 76 —<br />
Configuration Image 54 Pré réglages AV<br />
58 Contraste<br />
58 Luminos.<br />
58 Rouge<br />
58 Vert<br />
58 Bl<strong>eu</strong><br />
58 Réinitial.<br />
Son 46 Aigus<br />
46 Graves<br />
46 Balance<br />
67 Eff<strong>et</strong> sonore<br />
46 Réinitial.<br />
67 AVC<br />
Comman<strong>de</strong> alimentation 53 Économie d’énergie<br />
68 Gestion alimentation<br />
Minut. Extinction 41 —<br />
Options 112 Auto configuration<br />
112 Configuration manuelle<br />
74 Entrée HDMI<br />
81 Rég. cm<strong>de</strong> HDMI<br />
53 Orbit<strong>eu</strong>r<br />
40 Étiqu<strong>et</strong>er Entrée<br />
Configuration Favoris 39 Mo<strong>de</strong> Chaîne<br />
40 Trier Favoris<br />
Français<br />
33<br />
Fr
03 Opérations <strong>de</strong> base pour regar<strong>de</strong>r la télévision<br />
Éléments <strong>de</strong> l’écran du télévis<strong>eu</strong>r<br />
Le télévis<strong>eu</strong>r à écran plat comporte <strong>de</strong>s menus <strong>et</strong> <strong>de</strong>s symboles graphiques faciles à lire qui perm<strong>et</strong>tent un accès<br />
rapi<strong>de</strong> aux options désirées. Les menus présentés dans ce mo<strong>de</strong> d’emploi p<strong>eu</strong>vent légèrement différer <strong>de</strong>s<br />
menus réels mais les fonctionnalités <strong>de</strong>m<strong>eu</strong>rent i<strong>de</strong>ntiques.<br />
1<br />
2 3<br />
Sortie<br />
Son<br />
TELEVISION<br />
Aigus : 0<br />
Graves : 0<br />
4<br />
Réinitial.<br />
Balance : 0<br />
Eff<strong>et</strong> sonore :<br />
8<br />
AVC : Arrêt<br />
xxxxxxxxxxxxxxxxxxxx<br />
xxxxxxxxxxxxxxxxxxxxxx<br />
HOME MENU<br />
R<strong>et</strong>our<br />
5 6 7<br />
1 - Bouton Sortie: Fermez le menu pour regar<strong>de</strong>r à<br />
nouveau la télévision<br />
2 - Titre du menu: Affiche le titre du menu<br />
sélectionné<br />
3 - Bouton TOOLS: Affiche le menu TOOLS<br />
4 - Menu: Sélectionnez une option<br />
5 - Bouton HOME MENU: Fermez le menu pour<br />
regar<strong>de</strong>r à nouveau la télévision<br />
3.2.3 Attribution d’une langue<br />
La langue <strong>de</strong> menu par défaut est l’anglais. Procé<strong>de</strong>z comme il est indiqué ci-<strong>de</strong>ssous pour choisir une autre<br />
langue pour les menus <strong>et</strong> les informations à l’écran.<br />
1 ) Appuyez sur HOME MENU.<br />
2 ) Sélectionnez Configuration dans le menu principal.<br />
M<strong>et</strong>tez l’option en surbrillance avec les touches fléchées, puis appuyez sur ENTER.<br />
3 ) Sélectionnez Configuration Système dans le menu Configuration.<br />
4 ) Sélectionnez Langue dans le menu Configuration Système.<br />
5 ) Sélectionnez une langue dans le sous-menu.<br />
Menu : Français<br />
6 - Espace du gui<strong>de</strong> <strong>de</strong> fonctionnement: Affiche les<br />
consignes <strong>de</strong> fonctionnement pour la ou les<br />
options sélectionnées<br />
7 - Bouton R<strong>et</strong>our: Pour revenir à l’écran du menu<br />
précé<strong>de</strong>nt<br />
8 - Prévisualisation d’une image (en taille réduite)<br />
34<br />
Fr<br />
6 ) Appuyez <strong>de</strong> nouveau sur HOME MENU pour quitter le menu.
Opérations <strong>de</strong> base pour regar<strong>de</strong>r la télévision 03<br />
3.2.4 Réglage <strong>de</strong> l’horloge<br />
Réglez l’horloge du télévis<strong>eu</strong>r à écran plat pour profiter <strong>de</strong> nombr<strong>eu</strong>ses fonctions intégrées comme les fuseaux<br />
horaires <strong>et</strong> l’activation <strong>de</strong> l’h<strong>eu</strong>re d’été pour les programmes <strong>de</strong> télévision numérique.<br />
Remarque: Si le cordon d’alimentation du télévis<strong>eu</strong>r est débranché ou en cas <strong>de</strong> panne <strong>de</strong> courant, l’h<strong>eu</strong>re <strong>de</strong>vra<br />
être réinitialisée.<br />
Suivez les étapes ci-<strong>de</strong>ssous pour régler l’horloge.<br />
1 ) Accé<strong>de</strong>z à Configuration Système via Configuration.<br />
2 ) Sélectionnez Instal. Tuner Numérique dans le menu Configuration Système.<br />
3 ) Sélectionnez Horloge dans le menu Instal. Tuner Numérique.<br />
4 ) Sélectionnez Fuseau horaire dans les options.<br />
5 ) Sélectionnez le fuseau horaire correspondant à votre région.<br />
Français<br />
Fuseau horaire : Atlantique<br />
HA : Marche<br />
6 ) Sélectionnez l’option <strong>de</strong> menu HA pour activer/désactiver l’h<strong>eu</strong>re d’été.<br />
7 ) Sélectionnez l’option convenant à votre emplacement.<br />
8 ) Appuyez sur HOME MENU pour fermer <strong>et</strong> quitter le menu.<br />
3.2.5 Création d’une liste <strong>de</strong> chaînes<br />
C<strong>et</strong>te section décrit la manière <strong>de</strong> détecter les chaînes <strong>de</strong> télévision puis d’effectuer l<strong>eu</strong>r réglage. Vous disposez<br />
<strong>de</strong> d<strong>eu</strong>x métho<strong>de</strong>s pour ajouter <strong>de</strong>s chaînes au télévis<strong>eu</strong>r à écran plat: l’autoinstallation pour la sélection<br />
automatique <strong>de</strong>s chaînes ou la sélection manuelle <strong>de</strong>s chaînes. L’autoinstallation perm<strong>et</strong> d’ajouter toutes les<br />
chaînes disponibles via le fourniss<strong>eu</strong>r d’accès TV. Une fois toutes les chaînes ajoutées dans la liste, vous n’avez<br />
qu’à effacer celles inutiles. C<strong>et</strong>te section indique les étapes pour ajouter/r<strong>et</strong>irer <strong>de</strong>s chaînes.<br />
Autoinstallation<br />
L’autoinstallation recherche <strong>et</strong> ajoute les chaînes <strong>de</strong> télévision sur votre liste <strong>de</strong> chaînes visibles. Au moyen <strong>de</strong> la<br />
télécomman<strong>de</strong>, procé<strong>de</strong>z comme indiqué ci-<strong>de</strong>ssous pour automatiquement sélectionner toutes les chaînes<br />
disponibles.<br />
1 ) Accé<strong>de</strong>z à Configuration Système via Configuration.<br />
2 ) Sélectionnez Autoinstallation dans le menu Configuration Système.<br />
3 ) Sélectionnez Air/Câble, Langue ou Fuseau horaire dans le menu Autoinstallation.<br />
4 ) Sélectionnez une option.<br />
• Type <strong>de</strong> signal: Air ou Câble<br />
• Langue: English, Français ou Español<br />
• Fuseau horaire: Atlantique, Est, Centre, Roch<strong>eu</strong>ses, Pacifique, Alaska, or Hawaii<br />
35<br />
Fr
03 Opérations <strong>de</strong> base pour regar<strong>de</strong>r la télévision<br />
5 ) Sélectionnez Début.<br />
Le télévis<strong>eu</strong>r commence automatiquement à créer une liste <strong>de</strong> chaînes.<br />
Langue : Français<br />
Air/Câble : Câble<br />
Fuseau horaire : Atlantique<br />
Début<br />
Remarque: Pour quitter l’autoinstallation avant qu’elle ne soit terminée, appuyez sur RETURN pour rappeler<br />
l’écran d’autoinstallation, puis appuyez sur EXIT.<br />
Sélection manuelle <strong>de</strong>s chaînes<br />
Suivez les instructions ci-<strong>de</strong>ssous pour ajouter <strong>de</strong>s chaînes sans utiliser l’option d’autoinstallation. Par aill<strong>eu</strong>rs,<br />
si une chaîne est omise par err<strong>eu</strong>r, utilisez c<strong>et</strong>te métho<strong>de</strong> pour l’ajouter à la liste.<br />
1 ) Accé<strong>de</strong>z à Configuration Système via Configuration.<br />
2 ) Sélectionnez Install. TV analogique dans le menu Configuration Système.<br />
3 ) Sélectionnez Réglage manuel dans le menu Install. TV analogique.<br />
4 ) Sélectionnez Entrer programme.<br />
5 ) Sélectionnez le numéro <strong>de</strong> la chaîne à ajouter.<br />
Utilisez les touches fléchés (/) pour taper le numéro <strong>de</strong> chaîne.<br />
6 ) Sélectionnez Mémoriser dans le menu Réglage manuel.<br />
7 ) Sélectionnez Oui dans le sous-menu.<br />
Entrer programme : 1<br />
Mémoriser : Oui<br />
Syntonis<strong>eu</strong>r RB : Marche<br />
8 ) Appuyez sur HOME MENU pour quitter le menu une fois que vous avez ajouté toutes les chaînes voulues.<br />
Remarque: Les chaînes analogiques p<strong>eu</strong>vent être ajoutées manuellement, tandis que les chaînes numériques ne<br />
p<strong>eu</strong>vent être ajoutées qu’en utilisant le bouton Ajout <strong>de</strong> nouvelles chaînes dans le menu Instal. Tuner<br />
Numérique.<br />
Ajout <strong>de</strong> nouvelles chaînes<br />
Procé<strong>de</strong>z comme indiqué ci-<strong>de</strong>ssous pour ajouter <strong>de</strong> nouvelles chaînes.<br />
1 ) Accé<strong>de</strong>z à Configuration Système via Configuration.<br />
2 ) Sélectionnez Instal. Tuner Numérique dans le menu Configuration Système.<br />
36<br />
Fr
Opérations <strong>de</strong> base pour regar<strong>de</strong>r la télévision 03<br />
3 ) Sélectionnez Installation dans le menu Instal. Tuner Numérique.<br />
Installation<br />
Gestion <strong>de</strong>s chaînes<br />
Horloge<br />
4 ) Sélectionnez Ajoutez <strong>de</strong>s chaînes.<br />
La recherche <strong>de</strong> chaîne démarre automatiquement. Si une nouvelle chaîne est détectée, elle est<br />
automatiquement mémorisée dans le télévis<strong>eu</strong>r à écran plat.<br />
Pour annuler la recherche <strong>de</strong> chaînes avant qu’elle ne soit terminée, appuyez sur RETURN.<br />
Français<br />
Clavier virtuel<br />
Ce clavier à l’écran vous perm<strong>et</strong> d’étiqu<strong>et</strong>er (nommer) manuellement les chaînes <strong>de</strong> télévision ajoutées. Les<br />
étiqu<strong>et</strong>tes <strong>de</strong>s chaînes p<strong>eu</strong>vent comprendre jusqu’à huit caractères perm<strong>et</strong>tant d’i<strong>de</strong>ntifier une chaîne.<br />
Procé<strong>de</strong>z comme il est indiqué ci-<strong>de</strong>ssous pour utiliser le clavier virtuel afin d’étiqu<strong>et</strong>er les chaînes <strong>de</strong> télévision.<br />
1 ) Accé<strong>de</strong>z à Configuration Système via Configuration.<br />
2 ) Sélectionnez Install. TV analogique dans le menu Configuration Système.<br />
3 ) Sélectionnez Étiqu<strong>et</strong>te dans le menu Install. TV analogique.<br />
4 ) Sélectionnez Entrer programme dans le sous-menu.<br />
5 ) Sélectionnez un numéro <strong>de</strong> programme.<br />
• Câble: 1 à 135<br />
• Air: 2 à 69<br />
6 ) Sélectionnez Étiqu<strong>et</strong>te.<br />
L’écran du clavier virtuel apparaît.<br />
Étiqu<strong>et</strong>te<br />
I N P U<br />
1 2 3 4 5 6 7 8 9 0<br />
A B C D E F G H I J Del<strong>et</strong>e<br />
K L M N O P Q R S T Space<br />
U V W X Y Z , . : ; Caps<br />
& ' ( ) + - * / _ @ OK Cancel<br />
7 ) Sélectionnez le premier caractère.<br />
Le curs<strong>eu</strong>r se déplace sur l’espace du caractère suivant.<br />
8 ) Répétez l’étape précé<strong>de</strong>nte pour entrer jusqu’à huit caractères.<br />
• Pour changer <strong>de</strong> caractère, utilisez ou pour m<strong>et</strong>tre le caractère en surbrillance, puis appuyez sur<br />
ENTER. Le curs<strong>eu</strong>r se déplace sur le caractère précé<strong>de</strong>nt ou suivant.<br />
• Pour effacer le caractère saisi, m<strong>et</strong>tez-le en surbrillance, sélectionnez Del<strong>et</strong>e puis appuyez sur ENTER.<br />
• Pour introduire un espace après le caractère saisi, m<strong>et</strong>tez l’espace en surbrillance, sélectionnez Space puis<br />
appuyez sur ENTER.<br />
• Pour passer <strong>de</strong>s majuscules aux minuscules, m<strong>et</strong>tez le caractère en surbrillance, sélectionnez Caps, puis<br />
appuyez sur ENTER.<br />
9 ) Sélectionnez OK <strong>et</strong> appuyez sur ENTER.<br />
La saisie du nom est terminée.<br />
10 ) Appuyez sur HOME MENU pour quitter le menu.<br />
37<br />
Fr
03 Opérations <strong>de</strong> base pour regar<strong>de</strong>r la télévision<br />
3.2.6 Omission ou suppression <strong>de</strong> chaînes inutiles<br />
Le processus d’autoinstallation ajoute toutes les chaînes disponibles via votre fourniss<strong>eu</strong>r d’accès TV. Toutefois,<br />
certaines chaînes p<strong>eu</strong>vent être inutiles ou ne pas convenir à l’âge du public dans votre famille. C<strong>et</strong>te section<br />
explique comment contourner ou supprimer les chaînes inutiles en augmentant/diminuant d’une chaîne à la fois<br />
<strong>et</strong> indique les programmes visibles.<br />
Pour om<strong>et</strong>tre ou supprimer les chaînes inutiles, utilisez les touches CH+/CH– <strong>de</strong> la télécomman<strong>de</strong> afin <strong>de</strong><br />
réinitialiser le statut <strong>de</strong> ces chaînes. Suivez les étapes ci-<strong>de</strong>ssous pour changer un statut <strong>de</strong> chaîne.<br />
1 ) Accé<strong>de</strong>z à Configuration Système via Configuration.<br />
2 ) Sélectionnez Instal. Tuner Numérique ou Install. TV analogique dans le menu Configuration Système.<br />
• Chaînes <strong>de</strong> télévision numérique: Gestion <strong>de</strong>s chaînes > Options <strong>de</strong>s chaînes > (Suppression <strong>de</strong>s chaînes)<br />
> (Marche)<br />
3 ) Avancez jusqu’au numéro <strong>de</strong> chaîne inutile ou m<strong>et</strong>tez-le en surbrillance.<br />
4 ) Appuyez sur ENTER pour inverser le statut pour c<strong>et</strong>te chaîne.<br />
Si la case à côté <strong>de</strong> la chaîne est cochée, la coche disparaît.<br />
5 ) Appuyez sur RETURN.<br />
Un écran <strong>de</strong> confirmation apparaît.<br />
XXXX 00001.000<br />
XXXX 00002.000<br />
XXXX 00003.000<br />
XXXX 00004.000<br />
XXXX 00005.000<br />
XXXX 00006.000<br />
XXXX 00007.000<br />
XXXX 00008.000<br />
XXXX 00009.000<br />
6 ) Sélectionnez Oui, puis appuyez sur ENTER.<br />
Le réglage Suppression <strong>de</strong>s chaînes est terminé.<br />
7 ) Appuyez sur HOME MENU pour quitter le menu.<br />
Si vous sélectionnez l’option (Saut <strong>de</strong> Chaîne) à l’étape 3, le réglage est validé lorsque vous quittez le<br />
menu Options <strong>de</strong>s chaînes (aucun écran <strong>de</strong> confirmation n’apparaît). Om<strong>et</strong>tez les étapes 5 <strong>et</strong> 6.<br />
Les instructions pour rétablir une chaîne omise sont les mêmes que celles données ci-<strong>de</strong>ssus. À l’étape 4, une<br />
coche apparaît à côté <strong>de</strong> la chaîne ajoutée/rétablie.<br />
Suivez les étapes ci-<strong>de</strong>ssous pour om<strong>et</strong>tre une chaîne analogique.<br />
• Chaînes <strong>de</strong> télévision analogique: Réglage manuel > Mémoriser> Non<br />
Omission <strong>de</strong> stations <strong>de</strong> radio<br />
C<strong>et</strong>te fonction perm<strong>et</strong> d’om<strong>et</strong>tre <strong>de</strong>s stations <strong>de</strong> radio en une opération. Suivez les étapes ci-<strong>de</strong>ssous pour régler<br />
c<strong>et</strong>te option.<br />
1 ) Accé<strong>de</strong>z à Configuration Système via Configuration.<br />
2 ) Sélectionnez Instal. Tuner Numérique dans le menu Configuration Système.<br />
3 ) Sélectionnez Gestion <strong>de</strong>s chaînes dans le menu Instal. Tuner Numérique.<br />
4 ) Sélectionnez Saut Radio dans le menu Gestion <strong>de</strong>s chaînes.<br />
5 ) Sélectionnez Marche.<br />
6 ) Appuyez sur HOME MENU pour quitter le menu.<br />
38<br />
Fr
Opérations <strong>de</strong> base pour regar<strong>de</strong>r la télévision 03<br />
3.2.7 Liste <strong>de</strong>s chaînes<br />
Le télévis<strong>eu</strong>r à écran plat offre trois listes <strong>de</strong> chaînes qui perm<strong>et</strong>tent un accès rapi<strong>de</strong> à la chaîne désirée: Liste<br />
<strong>de</strong>s favoris, Liste <strong>de</strong>s chaînes <strong>et</strong> Liste <strong>de</strong>s entrées.<br />
Liste <strong>de</strong>s favoris: Affiche les numéros/noms <strong>de</strong> jusqu’à 20 <strong>de</strong> vos chaînes favorites (chaînes analogiques, entrée<br />
1 à 7, PC), 20 chaînes numériques <strong>et</strong> 1 Home Media Gallery.<br />
Mémorisez les chaînes que vous regar<strong>de</strong>z le plus fréquemment dans la liste <strong>de</strong>s favoris.<br />
Pour afficher la liste <strong>de</strong>s favoris, appuyez sur ENTER tout en regardant une chaîne <strong>de</strong> télévision. Pour accé<strong>de</strong>r à<br />
la liste <strong>de</strong>s favoris par une autre métho<strong>de</strong>, suivez les instructions ci-<strong>de</strong>ssous.<br />
1 ) Appuyez sur HOME MENU.<br />
2 ) Sélectionnez Favoris dans le menu principal.<br />
Si vous appuyez sur le bouton / pendant l’affichage <strong>de</strong> la liste <strong>de</strong>s chaînes ou la liste <strong>de</strong>s entrées, la<br />
liste <strong>de</strong>s favoris apparaît également.<br />
Français<br />
Liste <strong>de</strong>s chaînes: Affiche toutes les chaînes <strong>de</strong> télévision analogique/numérique dans chaque groupe <strong>de</strong> réseau<br />
<strong>de</strong> diffusion.<br />
Pour afficher la liste <strong>de</strong>s chaînes, suivez les instructions ci-<strong>de</strong>ssous.<br />
1 ) Appuyez sur HOME MENU.<br />
2 ) Sélectionnez Chaîne dans le menu principal.<br />
Si vous appuyez sur le bouton / pendant l’affichage <strong>de</strong> la liste <strong>de</strong>s favoris ou la liste <strong>de</strong>s entrées, la liste<br />
<strong>de</strong>s chaînes apparaît également.<br />
Liste <strong>de</strong>s entrées: Affiche les noms <strong>de</strong>s sources d’entrée externe <strong>de</strong> Entrée 1 à Entrée 7 <strong>et</strong> PC.<br />
Pour afficher la liste <strong>de</strong>s entrées, suivez les instructions ci-<strong>de</strong>ssous.<br />
1 ) Appuyez sur HOME MENU.<br />
2 ) Sélectionnez Entrée dans le menu principal.<br />
Si vous appuyez sur le bouton / pendant l’affichage <strong>de</strong> la liste <strong>de</strong>s favoris ou la liste <strong>de</strong>s chaînes, la liste<br />
<strong>de</strong>s entrées apparaît également.<br />
Remarque: Après avoir sélectionné la chaîne désirée, si vous appuyez sur ENTER, la liste <strong>de</strong>s chaînes se ferme<br />
<strong>et</strong> l’écran sélectionné apparaît. Si vous appuyez sur RETURN ou EXIT, la liste <strong>de</strong>s chaînes se ferme<br />
<strong>et</strong> l’écran avant la sélection réapparaît.<br />
Appuyez sur une touche fléchée pour passer d’une liste à l’autre pendant votre consultation.<br />
Favoris<br />
ENTRÉE6<br />
XXXXXX 00001.000<br />
XXXXXX 00004.000<br />
XXXXXX 00007.000<br />
XXXXXX 00009.000<br />
PC<br />
XXXXXX<br />
XXXXXX 00013.002<br />
XXXXXX 00015.000<br />
XXXXXX 00024.000<br />
1/2<br />
Réglage <strong>de</strong>s chaînes favorites<br />
Sélectionnez jusqu’à dix (10) chaînes par page <strong>de</strong> liste <strong>et</strong> jusqu’à cinq pages pour un total <strong>de</strong> 41 chaînes favorites.<br />
Suivez les étapes ci-<strong>de</strong>ssous pour ajouter <strong>de</strong>s chaînes à vos Favoris ou Tous.<br />
1 ) Accé<strong>de</strong>z à Configuration Favoris via Configuration.<br />
2 ) Sélectionnez Mo<strong>de</strong> Chaîne dans le menu Configuration Favoris.<br />
3 ) Sélectionnez Tous ou Favoris dans le menu Mo<strong>de</strong> Chaîne.<br />
• Pour attribuer toutes les chaînes, sélectionnez Tous. Pour attribuer les chaînes mémorisées, sélectionnez Favoris.<br />
39<br />
Fr
03 Opérations <strong>de</strong> base pour regar<strong>de</strong>r la télévision<br />
4 ) Sélectionnez la chaîne <strong>de</strong> télévision à mémoriser.<br />
Si l’écran ne tient pas dans la fenêtre, une barre <strong>de</strong> défilement apparaît.<br />
Si vous appuyez sur la touche ENTER pendant que vous regar<strong>de</strong>z une émission <strong>de</strong> télévision, la liste <strong>de</strong>s<br />
chaînes favorites apparaît également. Si la liste <strong>de</strong>s favoris est vi<strong>de</strong>, “Sans Liste Favoris.” s’affiche.<br />
5 ) Appuyez sur HOME MENU pour quitter le menu.<br />
Métho<strong>de</strong> alternative pour mémoriser les chaînes favorites<br />
Au moyen du menu TOOLS, vous pouvez mémoriser les chaînes, les sources d’entrée externe, y compris PC <strong>et</strong> le<br />
contenu <strong>de</strong> Home Media Gallery. Procé<strong>de</strong>z comme indiqué ci-<strong>de</strong>ssous pour mémoriser les chaînes.<br />
1 ) Appuyez sur TOOLS.<br />
Le menu TOOLS apparaît à l’écran.<br />
2 ) Sélectionnez Ent. Favoris.<br />
M<strong>et</strong>tez une option en surbrillance avec les touches fléchées.<br />
3 ) Sélectionnez Marche (/).<br />
La chaîne que vous regar<strong>de</strong>z est mémorisée dans la liste <strong>de</strong>s favoris.<br />
Sélectionnez Arrêt avec la touche fléchée pour annuler.<br />
Remarques:<br />
• Si vous appuyez à nouveau sur EXIT, RETURN ou TOOLS, le menu TOOLS disparaît.<br />
• Lorsque le nombre maximum <strong>de</strong> chaînes est mémorisé, un écran d’avertissement apparaît.<br />
• Pour arrêter la procédure avant qu’elle ne soit terminée, appuyez sur EXIT ou RETURN <strong>de</strong> la télécomman<strong>de</strong>.<br />
Tri <strong>de</strong>s chaînes favorites<br />
Procé<strong>de</strong>z comme indiqué ci-<strong>de</strong>ssous pour trier les chaînes mémorisées.<br />
1 ) Accé<strong>de</strong>z à Configuration Favoris via Configuration.<br />
2 ) Sélectionnez Trier Favoris dans le menu Configuration Favoris.<br />
3 ) Sélectionnez une chaîne à déplacer.<br />
4 ) Sélectionnez un nouvel emplacement puis appuyez sur ENTER.<br />
La chaîne sélectionnée est déplacée sur son nouvel emplacement. Pour trier d’autres chaînes, répétez les<br />
opérations <strong>de</strong>s étapes 3 <strong>et</strong> 4.<br />
5 ) Appuyez sur HOME MENU pour quitter le menu.<br />
Modification <strong>de</strong> la liste <strong>de</strong>s entrées<br />
Suivez les étapes ci-<strong>de</strong>ssous pour modifier le nom d’une entrée.<br />
1 ) Accé<strong>de</strong>z à Options via Configuration.<br />
2 ) Sélectionnez Étiqu<strong>et</strong>er Entrée dans le menu Options.<br />
3 ) Sélectionnez une entrée ou PC.<br />
Le clavier virtuel apparaît.<br />
4 ) Tapez le nouveau nom.<br />
Étiqu<strong>et</strong>te<br />
K I D S<br />
1 2 3 4 5 6 7 8 9 0<br />
A B C D E F G H I J Del<strong>et</strong>e<br />
K L M N O P Q R S T Space<br />
U V W X Y Z , . : ; Caps<br />
& ' ( ) + - * / _ @ OK Cancel<br />
40<br />
Fr<br />
5 ) Sélectionnez OK pour sauvegar<strong>de</strong>r le nom <strong>et</strong> quitter le menu.<br />
Pour annuler, appuyez sur HOME MENU.
Opérations <strong>de</strong> base pour regar<strong>de</strong>r la télévision 03<br />
3.3 Démarrage rapi<strong>de</strong> pour regar<strong>de</strong>r la télévision<br />
Le télévis<strong>eu</strong>r à écran plat offre <strong>de</strong> nombr<strong>eu</strong>ses fonctions <strong>et</strong> caractéristiques, que vous pourriez ne pas avoir le<br />
temps <strong>de</strong> toutes régler lors <strong>de</strong> l’installation du télévis<strong>eu</strong>r. Pour commencer à regar<strong>de</strong>r tout <strong>de</strong> suite la télévision,<br />
reportez-vous aux informations <strong>de</strong> base données dans c<strong>et</strong>te section. Toutefois, nous vous recommandons vivement<br />
<strong>de</strong> lire dès que possible le reste du manuel pour découvrir toutes les fonctionnalités du télévis<strong>eu</strong>r à écran plat.<br />
3.3.1 Changement <strong>de</strong> chaîne/chaîne secondaire<br />
Tout en dirigeant la télécomman<strong>de</strong> vers le capt<strong>eu</strong>r <strong>de</strong><br />
télécomman<strong>de</strong> du télévis<strong>eu</strong>r, appuyez sur la touche CH +<br />
pour passer <strong>de</strong> façon séquentielle à la chaîne disponible<br />
immédiatement supéri<strong>eu</strong>re. Le touche CH – perm<strong>et</strong> <strong>de</strong><br />
passer <strong>de</strong> façon séquentielle à la chaîne disponible<br />
immédiatement inféri<strong>eu</strong>re. Chaque pression sur la touche<br />
CH + or CH – change <strong>de</strong> façon séquentielle la chaîne<br />
affichée d’un canal à l’autre. Pour revenir à la chaîne<br />
précé<strong>de</strong>nte, appuyez sur CH RETURN. Appuyez une<br />
nouvelle fois sur la touche CH RETURN pour basculer<br />
entre les d<strong>eu</strong>x chaînes. Chaque pression sur la touche<br />
commute la chaîne entre ces d<strong>eu</strong>x canaux.<br />
Français<br />
Vous pouvez aussi utiliser les touches numériques (0 à 9) pour changer <strong>de</strong> chaîne. Il vous suffit d’appuyer sur les<br />
touches numériques dans l’ordre requis pour c<strong>et</strong>te chaîne. Par exemple, entrez la chaîne 231 en tapant 2 - 3 - 1<br />
ou la chaîne 4 en tapant le chiffre 4.<br />
Une nouveauté vient <strong>de</strong> faire son apparition dans la télévision: la chaîne secondaire. Une chaîne numérique p<strong>eu</strong>t<br />
être divisée en plusi<strong>eu</strong>rs signaux. Chaque signal, appelé chaîne secondaire, p<strong>eu</strong>t transm<strong>et</strong>tre un programme<br />
différent. Pour regar<strong>de</strong>r une chaîne secondaire, utilisez une combinaison <strong>de</strong>s touches numériques <strong>et</strong> la touche<br />
du point (.). Par exemple, si la chaîne 5 est numérique <strong>et</strong> comporte trois chaînes secondaires actives, tapez 5 . 2<br />
pour atteindre la d<strong>eu</strong>xième chaîne secondaire.<br />
Remarque: Pour sélectionner plus rapi<strong>de</strong>ment un programme, tapez la chaîne ou la chaîne secondaire, puis<br />
appuyez sur CH ENTER.<br />
3.3.2 Réglage du volume/son<br />
Tout en dirigeant la télécomman<strong>de</strong> vers le capt<strong>eu</strong>r <strong>de</strong> télécomman<strong>de</strong> du télévis<strong>eu</strong>r, maintenez enfoncée VOL+<br />
afin d’augmenter p<strong>et</strong>it à p<strong>et</strong>it le volume sonore. Si vous maintenez enfoncée VOL–, le volume diminuera à la<br />
même vitesse. Une s<strong>eu</strong>le pression sur VOL+ ou VOL– perm<strong>et</strong> <strong>de</strong> régler le volume d’incréments minimes.<br />
Pour couper le son, appuyez sur MUTING. Le symbole <strong>de</strong> sourdine (e ) apparaît sur l’écran. Pour r<strong>et</strong>ourner au<br />
niveau <strong>de</strong> volume précé<strong>de</strong>nt, appuyez <strong>de</strong> nouveau sur MUTING. Une pression sur la touche VOL+ augmente<br />
également le volume d’un incrément par rapport au niveau actuel <strong>et</strong> annule le mo<strong>de</strong> <strong>de</strong> sourdine.<br />
Si le niveau sonore par défaut du télévis<strong>eu</strong>r est trop fort ou trop faible, voir “3.4.6 Réglage général du son (audio)”.<br />
3.3.3 Activation <strong>de</strong> la minuterie d’extinction<br />
Pour économiser l’énergie <strong>et</strong> optimiser la durée <strong>de</strong> vie du télévis<strong>eu</strong>r à écran plat, utilisez la minuterie d’extinction pour<br />
les cas où le télévis<strong>eu</strong>r reste allumé par inadvertance. À l’expiration d’un certain temps, le télévis<strong>eu</strong>r est mis en veille<br />
par c<strong>et</strong>te minuterie. La minuterie d’extinction fournit <strong>de</strong>s pério<strong>de</strong>s <strong>de</strong> temps <strong>de</strong> 30, 60, 90 ou 120 minutes. Lorsqu’il ne<br />
reste plus que cinq minutes, un rappel apparaît à l’écran toutes les minutes jusqu’à expiration du temps.<br />
Suivez les étapes ci-<strong>de</strong>ssous pour régler la minuterie d’extinction.<br />
1 ) Accé<strong>de</strong>z à Minut. Extinction via Configuration.<br />
2 ) Sélectionnez la pério<strong>de</strong> <strong>de</strong> temps désirée.<br />
Sélectionnez entre 30 minutes <strong>et</strong> 2 h<strong>eu</strong>res (120 minutes).<br />
3 ) Appuyez <strong>de</strong> nouveau sur HOME MENU pour quitter le menu.<br />
41<br />
Fr
03 Opérations <strong>de</strong> base pour regar<strong>de</strong>r la télévision<br />
Le témoin SLEEP à l’avant du télévis<strong>eu</strong>r à écran plat s’allume en orange lorsque la minuterie d’extinction est<br />
réglée. Pour vérifier le temps restant, appuyez sur TOOLS puis sélectionnez Extinction. “Temps restant ---mn”<br />
apparaît en haut <strong>de</strong> l’écran du menu. Après avoir vérifié le temps restant, appuyez sur EXIT pour revenir au<br />
programme que vous regardiez sans perdre le réglage <strong>de</strong> la minuterie d’extinction.<br />
Remarque: Lorsque la minuterie d’extinction a été réglée, “Temps restant ---mn” apparaît en haut du menu.<br />
Toutefois, la minuterie <strong>de</strong> mire vidéo a priorité sur la minuterie d’extinction. Lorsque la minuterie <strong>de</strong><br />
mire vidéo est en service, la minuterie d’extinction est désactivée. La mire vidéo est expliquée en<br />
détail ultéri<strong>eu</strong>rement dans ce mo<strong>de</strong> d’emploi.<br />
3.4 Réglage <strong>de</strong> la qualité d’image <strong>et</strong> <strong>de</strong> son<br />
Le télévis<strong>eu</strong>r à écran plat offre <strong>de</strong> nombr<strong>eu</strong>ses options <strong>de</strong> réglage pour l’image <strong>et</strong> le son afin <strong>de</strong> satisfaire à vos<br />
besoins. C<strong>et</strong>te section indique <strong>de</strong>s réglages <strong>de</strong> base, mais voir “4 Options <strong>de</strong> réglage supplémentaires <strong>de</strong> l’image<br />
<strong>et</strong> du son” <strong>et</strong> “4.7 Choix <strong>de</strong>s options sonores” pour obtenir <strong>de</strong>s informations détaillées sur les modifications audio/<br />
vidéo.<br />
3.4.1 Réglage <strong>de</strong> l’image selon l’éclairage <strong>de</strong> la pièce<br />
Le télévis<strong>eu</strong>r à écran plat capte la quantité <strong>de</strong> lumière dans la pièce <strong>et</strong> règle automatiquement la luminosité <strong>de</strong><br />
l’écran pour obtenir une image optimale. Une pièce lumin<strong>eu</strong>se nécessite une coloration plus forte pour obtenir<br />
<strong>de</strong>s images n<strong>et</strong>tes. À l’inverse, dans une pièce sombre, la coloration <strong>de</strong>s images p<strong>eu</strong>t être plus subtile.<br />
Le télévis<strong>eu</strong>r est livré avec le capt<strong>eu</strong>r <strong>de</strong> luminosité ambiante désactivé. La section ci-<strong>de</strong>ssous donne <strong>de</strong>s<br />
instructions pour activer/désactiver le capt<strong>eu</strong>r <strong>de</strong> luminosité ambiante.<br />
Capt<strong>eu</strong>r <strong>de</strong> luminosité ambiante<br />
Suivez les étapes ci-<strong>de</strong>ssous pour désactiver/réactiver le capt<strong>eu</strong>r <strong>de</strong> luminosité ambiante.<br />
1 ) Accé<strong>de</strong>z à Options via Configuration.<br />
2 ) Sélectionnez Capt. lum. Salle dans le menu Options.<br />
3 ) Sélectionnez Marche (ou Arrêt ) dans le sous-menu.<br />
Préf. Cm<strong>de</strong> J<strong>eu</strong> : Arrêt<br />
Capt. lum. Salle : Arrêt<br />
Protection écran<br />
Étiqu<strong>et</strong>er Entrée<br />
4 ) Appuyez sur HOME MENU pour quitter le menu.<br />
42<br />
Fr
Opérations <strong>de</strong> base pour regar<strong>de</strong>r la télévision 03<br />
3.4.2 Réglage général <strong>de</strong> l’image (vidéo) pour une source AV<br />
Les instructions ci-<strong>de</strong>ssous concernent toutes les sources AV à l’exception d’OPTIMUM <strong>et</strong> DYNAMIQUE. Si<br />
l’option <strong>de</strong> visionnement est OPTIMUM, le télévis<strong>eu</strong>r à écran plat règle automatiquement l’image au meill<strong>eu</strong>r<br />
niveau possible. Si l’option <strong>de</strong> visionnement choisie est DYNAMIQUE, voir “4.1 Choix d’une option AV (Vidéo, j<strong>eu</strong>,<br />
<strong>et</strong>c.)”. Pour <strong>de</strong>s réglages standard d’image, suivez les étapes ci-<strong>de</strong>ssous.<br />
1 ) Accé<strong>de</strong>z à Image via Configuration.<br />
2 ) Sélectionnez une rubrique à régler.<br />
Le contraste est donné en exemple ci-<strong>de</strong>ssous.<br />
Image<br />
Pré réglages AV : PERFORMANCES<br />
Contraste : 40<br />
Luminos. : 0<br />
Coul<strong>eu</strong>r : 0<br />
Teinte : 0<br />
N<strong>et</strong>t<strong>et</strong>é : 0<br />
PureCinema<br />
Réinitial.<br />
Français<br />
3 ) Utilisez les touches fléchées (/) pour régler au niveau désiré.<br />
Contraste 32<br />
4 ) Appuyez sur HOME MENU pour quitter le menu.<br />
Réduction du bruit pour la télévision analogique<br />
Des signaux électroniques parasites p<strong>eu</strong>vent quelquefois provoquer <strong>de</strong>s imperfections sur l’image. Ces parasites<br />
sont appelés bruit vidéo. Le télévis<strong>eu</strong>r à écran plat p<strong>eu</strong>t diminuer le bruit vidéo affectant les chaînes <strong>de</strong> télévision<br />
analogique, en fonction du niveau du signal diffusé. Quelquefois, le signal diffusé comporte <strong>de</strong>s niveaux<br />
d’interférence supéri<strong>eu</strong>re, <strong>de</strong> sorte que le bruit vidéo est perceptible.<br />
C<strong>et</strong>te fonction n’est sélectionnable que pour les signaux provenant d’une antenne. Suivez les étapes ci-<strong>de</strong>ssous<br />
pour réduire le bruit affectant une chaîne <strong>de</strong> télévision analogique.<br />
1 ) Accé<strong>de</strong>z à Configuration Système via Configuration.<br />
2 ) Sélectionnez Install. TV analogique dans le menu Configuration Système.<br />
3 ) Sélectionnez Réglage manuel dans le sous-menu.<br />
S<strong>eu</strong>les les chaînes analogiques réglées en utilisant la fonction d’autoinstallation p<strong>eu</strong>vent être réglées<br />
manuellement.<br />
4 ) Sélectionnez Entrer programme.<br />
5 ) Sélectionnez le numéro <strong>de</strong> la chaîne à ajouter.<br />
Utilisez les touches fléchées (/) pour taper le numéro <strong>de</strong> chaîne.<br />
6 ) Sélectionnez Syntonis<strong>eu</strong>r RB.<br />
7 ) Sélectionnez Marche.<br />
Le réglage par défaut est Marche.<br />
8 ) Appuyez sur HOME MENU pour quitter le menu.<br />
43<br />
Fr
03 Opérations <strong>de</strong> base pour regar<strong>de</strong>r la télévision<br />
Position d’image<br />
Chaque source d’entrée mémorise les paramètres <strong>de</strong> réglage <strong>de</strong> l’image pour c<strong>et</strong>te vue. Le menu Position est<br />
disponible dans la plupart <strong>de</strong>s vues d’écran, sauf lorsque l’écran est réglé sur Pt par Pt. En outre, en fonction <strong>de</strong><br />
l’image vidéo affichée, la position <strong>de</strong> l’image p<strong>eu</strong>t ne pas changer même après le réglage.<br />
Procé<strong>de</strong>z comme indiqué ci-<strong>de</strong>ssous pour régler la position horizontale <strong>et</strong> verticale <strong>de</strong> l’image.<br />
1 ) Accé<strong>de</strong>z à Options via Configuration.<br />
2 ) Sélectionnez Position dans le menu Options.<br />
Position<br />
Taille auto : Arrêt<br />
Cache latéral<br />
Entrée HDMI<br />
Rég. cm<strong>de</strong> HDMI<br />
Orbit<strong>eu</strong>r : Arrêt<br />
Mire vidéo<br />
3 ) Sélectionnez Réglage <strong>de</strong> la position H/V dans le sous-menu.<br />
4 ) Réglez la position verticale <strong>et</strong>/ou horizontale au moyen <strong>de</strong>s touches fléchées.<br />
5 ) Appuyez sur HOME MENU pour quitter le menu.<br />
Rétablissement <strong>de</strong> l’image par défaut<br />
Après avoir procédé à plusi<strong>eu</strong>rs réglages, il p<strong>eu</strong>t s’avérer difficile <strong>de</strong> se débarrasser <strong>de</strong>s réglages incorrects. Pour<br />
rétablir les réglages vidéo par défaut d’usine, suivez les instructions ci-<strong>de</strong>ssous.<br />
1 ) M<strong>et</strong>tez en surbrillance Réinitial. dans le menu Image.<br />
2 ) Appuyez sur ENTER pour poursuivre la réinitialisation <strong>de</strong> l’image.<br />
Un écran <strong>de</strong> confirmation apparaît vous <strong>de</strong>mandant si les réglages doivent être ramenés à l<strong>eu</strong>rs val<strong>eu</strong>rs<br />
par défaut d’usine.<br />
3 ) M<strong>et</strong>tez Oui en surbrillance au moyen <strong>de</strong>s touches fléchées.<br />
4 ) Appuyez sur ENTER.<br />
Tous les réglages vidéo sont ramenés à l<strong>eu</strong>rs val<strong>eu</strong>rs initiales par défaut lorsque vous avez sélectionné une<br />
autre option que OPTIMUM ou PC.<br />
Si OPTIMUM est sélectionné, les réglages vidéo pour OPTIMUM, les menus <strong>de</strong> Pré réglage AV <strong>et</strong> les<br />
réglages <strong>de</strong> la Comman<strong>de</strong> Son sont ramenés à l<strong>eu</strong>rs val<strong>eu</strong>rs initiales par défaut.<br />
3.4.3 Comparaison d’images lors du réglage <strong>de</strong> l’image<br />
Lors du réglage <strong>de</strong> l’image, vous pouvez obtenir une amélioration générale en réglant chaque paramètre ou<br />
option en une s<strong>eu</strong>le opération. De nombr<strong>eu</strong>x p<strong>et</strong>its réglages perm<strong>et</strong>tent d’obtenir une image optimale convenant<br />
au li<strong>eu</strong> <strong>de</strong> visionnement. Étant donné que chaque option change, reportez-vous à l’image précé<strong>de</strong>mment réglée<br />
pour comparaison. C<strong>et</strong>te section comprend <strong>de</strong>s remarques sur le réglage <strong>et</strong> décrit les étapes pour régler l’image<br />
du télévis<strong>eu</strong>r à écran plat.<br />
Chaque paramètre/option doit être réglé séparément. Par exemple, si d<strong>eu</strong>x options dans Pré réglages AV,<br />
PERFORMANCES <strong>et</strong> CINÉMA doivent être réglées, modifiez/comparez une option, puis sauvegar<strong>de</strong>z le réglage<br />
<strong>de</strong> votre préférence avant <strong>de</strong> passer à l’autre option. Vous trouverez ci-<strong>de</strong>ssous d’autres instructions à suivre lors<br />
du réglage <strong>de</strong> l’image.<br />
44<br />
Fr<br />
• Les réglages sont disponibles lorsque l’écran Après est affiché. Si vous essayez <strong>de</strong> procé<strong>de</strong>r à <strong>de</strong>s réglages<br />
avec l’écran Avant affiché, un message d’avertissement apparaîtra.<br />
• Passez à un autre paramètre/option uniquement à partir <strong>de</strong> l’écran Après. Si vous affichez l’écran Avant<br />
lorsque vous sélectionnez une autre option, les données Avant seront perdues.
Opérations <strong>de</strong> base pour regar<strong>de</strong>r la télévision 03<br />
• Si vous quittez une option à partir <strong>de</strong> l’écran Avant, l’entrée précé<strong>de</strong>nte est gardée en mémoire <strong>et</strong> le bouton<br />
TOOLS est désactivé.<br />
• Si vous quittez une option à partir <strong>de</strong> l’écran Après, la nouvelle entrée est gardée en mémoire <strong>et</strong> le bouton<br />
est désactivé.<br />
• Si vous déplacez/modifiez le paramètre/option <strong>de</strong> Pré réglages AV, le réglage <strong>de</strong> l’option est gardé en<br />
mémoire (le bouton est toujours actif).<br />
Procé<strong>de</strong>z comme il est indiqué ci-<strong>de</strong>ssous pour régler les options <strong>de</strong> qualité d’image.<br />
1 ) Accé<strong>de</strong>z à Image via Configuration.<br />
2 ) Sélectionnez une option.<br />
3 ) Utilisez le bouton TOOLS pour basculer entre les images précé<strong>de</strong>nte <strong>et</strong> réglée.<br />
4 ) Répétez les étapes 2 <strong>et</strong> 3 pour poursuivre le réglage <strong>de</strong> l’option, selon vos besoins.<br />
5 ) Répétez les opérations <strong>de</strong>s étapes 2 à 4 pour régler d’autres options d’image.<br />
6 ) Appuyez sur HOME MENU pour quitter le menu.<br />
Français<br />
Remarque: Si aucune sélection n’est effectuée dans les 60 secon<strong>de</strong>s, le menu se ferme automatiquement <strong>et</strong> les<br />
réglages actuels sont gardés en mémoire.<br />
Pour quitter le menu sans sauvegar<strong>de</strong>r les changements, passez à l’écran Avant puis appuyez sur HOME MENU.<br />
3.4.4 Affichage d’un écran <strong>de</strong> réglage <strong>de</strong> l’image graphique <strong>et</strong> du son<br />
Si vous sélectionnez OPTIMUM dans le menu Pré réglage AV, le menu Image affichera <strong>de</strong>s sous-menus <strong>de</strong><br />
différentes sources AV. Sélectionnez Marche pour l’option Comman<strong>de</strong> Son afin <strong>de</strong> régler automatiquement la<br />
qualité sonore. En outre, Performances OPTIMUM fournit un monit<strong>eu</strong>r graphique à l’écran pour les réglages<br />
multiples d’image <strong>et</strong> <strong>de</strong> son.<br />
Performances OPTIMUM<br />
Les Performances OPTIMUM affichent les réglages en cours <strong>de</strong> l’image <strong>et</strong> du son au moyen <strong>de</strong> données<br />
graphiques lorsque OPTIMUM est sélectionné dans le menu Pré réglages AV. Les Performances OPTIMUM<br />
affichent les données suivantes sous forme <strong>de</strong> graphique à barre:<br />
• Analys<strong>eu</strong>r: Histogramme, RVB, Luminosité ambiante<br />
• Image: Contraste, Luminosité, Coul<strong>eu</strong>r, N<strong>et</strong>t<strong>et</strong>é, Température <strong>de</strong> coul<strong>eu</strong>r, Gamma<br />
• Son: Niveau<br />
Performances OPTIMUM<br />
[OPTIMUM] Marche<br />
OPTIMUM Mch/Arr<br />
[Analys.]<br />
Histogr.<br />
RVB<br />
L. Salle<br />
[Image]<br />
Contras.<br />
Luminos.<br />
Coul<strong>eu</strong>r<br />
N<strong>et</strong>t<strong>et</strong>é<br />
T. Coul.<br />
Gamma<br />
[Son]<br />
60 1k 12k(Hz)<br />
Pour afficher les performances OPTIMUM, procé<strong>de</strong>z comme décrit ci-<strong>de</strong>ssous.<br />
1 ) Accé<strong>de</strong>z à Image via Configuration.<br />
2 ) Sélectionnez Pré réglages AV dans le menu Image.<br />
3 ) Sélectionnez OPTIMUM dans le menu Pré réglages AV.<br />
4 ) Sélectionnez Performances OPTIMUM dans le menu Image.<br />
Les Performances OPTIMUM apparaissent. Pour annuler l’option Performances OPTIMUM, appuyez sur<br />
EXIT.<br />
Remarque: Lorsque OPTIMUM est sélectionné, maintenez enfoncée DISPLAY <strong>de</strong> la télécomman<strong>de</strong> pour afficher<br />
les Performances OPTIMUM.<br />
Performances OPTIMUM comparent la qualité d’image <strong>et</strong> <strong>de</strong> son entre “Arrêt” (non réglé) <strong>et</strong> “Marche”<br />
(réglé à l’ai<strong>de</strong> <strong>de</strong> la touche TOOLS).<br />
45<br />
Fr
03 Opérations <strong>de</strong> base pour regar<strong>de</strong>r la télévision<br />
3.4.5 Comman<strong>de</strong> Son<br />
Si vous réglez l’option Comman<strong>de</strong> Son sur Marche, la qualité sonore la plus élevée disponible sera définie pour<br />
l’image sélectionnée <strong>et</strong> l’environnement <strong>de</strong> visionnement. C<strong>et</strong>te option est également disponible lorsque<br />
OPTIMUM est sélectionné dans le menu Pré réglages AV. Pour activer la Comman<strong>de</strong> Son, procé<strong>de</strong>z comme décrit<br />
ci-<strong>de</strong>ssous.<br />
1 ) Accé<strong>de</strong>z à Image via Configuration.<br />
2 ) Sélectionnez Pré réglages AV dans le menu Image.<br />
3 ) Sélectionnez OPTIMUM dans le menu Pré réglages AV.<br />
4 ) Sélectionnez Comman<strong>de</strong> son dans le menu Image.<br />
5 ) Sélectionnez Marche.<br />
6 ) Appuyez sur HOME MENU pour quitter le menu.<br />
Remarque: Lorsque Comman<strong>de</strong> son dans le menu Image est sélectionné, la s<strong>eu</strong>le option du menu Son<br />
disponible est AVC (Comman<strong>de</strong> automatique du volume).<br />
3.4.6 Réglage général du son (audio)<br />
Nombr<strong>eu</strong>ses sont les personnes qui préfèrent <strong>de</strong>s graves plus <strong>de</strong>nses pour regar<strong>de</strong>r un film ou <strong>de</strong>s clips vidéo à<br />
partir d’une source AV ou sur le télévis<strong>eu</strong>r. D’autres préfèrent un son plus équilibré. Pour régler le son selon vos<br />
préférences, suivez les instructions ci-<strong>de</strong>ssous.<br />
1 ) Accé<strong>de</strong>z à Son via Configuration.<br />
2 ) Sélectionnez une option à régler.<br />
Aigus : 0<br />
Graves : 0<br />
Balance : 0<br />
Eff<strong>et</strong> sonore<br />
Réinitial.<br />
AVC : Arrêt<br />
3 ) Utilisez les touches fléchées gauche/droite ( / ) pour régler l’option.<br />
Options Bouton gauche Bouton droit<br />
Aigus affaiblit le ton renforce le ton<br />
Graves affaiblit le ton renforce le ton<br />
Balance<br />
règle la balance audio vers la<br />
gauche<br />
règle la balance audio vers la<br />
droite<br />
4 ) Appuyez sur HOME MENU pour quitter le menu.<br />
Rétablissement <strong>de</strong>s réglages sonores par défaut<br />
Pour rétablir les réglages audio par défaut d’usine, suivez les instructions ci-<strong>de</strong>ssous.<br />
1 ) M<strong>et</strong>tez en surbrillance Réinitial. dans le menu Son.<br />
2 ) Appuyez sur ENTER pour poursuivre la réinitialisation du son.<br />
Un écran <strong>de</strong> confirmation apparaît vous <strong>de</strong>mandant si les réglages doivent être ramenés à l<strong>eu</strong>rs val<strong>eu</strong>rs<br />
par défaut d’usine.<br />
3 ) M<strong>et</strong>tez Oui en surbrillance au moyen <strong>de</strong>s touches fléchées.<br />
4 ) Appuyez sur ENTER pour réinitialiser tous les réglages sonores aux val<strong>eu</strong>rs initiales par défaut.<br />
46<br />
Fr<br />
Remarque: Le réglage AVC (Comman<strong>de</strong> automatique du volume) ne p<strong>eu</strong>t pas être rétabli à sa val<strong>eu</strong>r d’usine par<br />
défaut.
Opérations <strong>de</strong> base pour regar<strong>de</strong>r la télévision 03<br />
3.5 Blocage <strong>de</strong>s programmes, chaînes ou contenu<br />
Le blocage <strong>de</strong>s programmes, chaînes ou contenu est facultatif, mais certaines images p<strong>eu</strong>vent ne pas convenir à<br />
tous les membres <strong>de</strong> la famille. Le télévis<strong>eu</strong>r à écran plat offre une fonction <strong>de</strong> blocage appelée Contrôle parental.<br />
Une fois le Contrôle parental activé, certains contenus n’apparaîtront pas à l’écran s’ils dépassent le niveau <strong>de</strong><br />
visionnement sélectionné. Le Contrôle parental utilise <strong>de</strong>s systèmes <strong>de</strong> classement reconnus mais vous perm<strong>et</strong><br />
également <strong>de</strong> choisir la restriction <strong>de</strong> votre guise. C<strong>et</strong>te section explique les différentes fonctions <strong>de</strong> blocage <strong>et</strong><br />
comment attribuer chaque type.<br />
Remarque: Lorsque vous regar<strong>de</strong>z une émission <strong>de</strong> télévision, <strong>de</strong>s messages d’urgence p<strong>eu</strong>vent défiler en haut<br />
<strong>de</strong> l’écran. La station <strong>de</strong> télévision diffuse <strong>de</strong>s messages d’urgence comme test ou alerte en cas<br />
d’urgence réelle. Le télévis<strong>eu</strong>r à écran plat est livré avec c<strong>et</strong>te fonction activée. Pour en savoir plus<br />
sur les messages d’urgence, voir “3.5.3 Attribution d’un système <strong>de</strong> classement pour créer <strong>de</strong>s<br />
restrictions”.<br />
Français<br />
3.5.1 Attribution d’un mot <strong>de</strong> passe <strong>de</strong> contrôle parental (Restriction)<br />
Le Contrôle parental perm<strong>et</strong> <strong>de</strong> bloquer <strong>de</strong>s émissions, <strong>de</strong>s enregistrements sur magnétoscope <strong>et</strong> <strong>de</strong>s contenus<br />
DVD inappropriés. Si quelqu’un essaie <strong>de</strong> regar<strong>de</strong>r un programme ou un contenu bloqué, le télévis<strong>eu</strong>r à écran<br />
plat affiche la fenêtre du mot <strong>de</strong> passe. Le Contrôle parental s’applique aussi bien aux contenus analogiques que<br />
numériques.<br />
Pour garantir que vos restrictions ne sont pas r<strong>et</strong>irées par err<strong>eu</strong>r, un mot <strong>de</strong> passe est nécessaire pour modifier<br />
l’accès aux émissions, chaînes ou contenus bloqués par le télévis<strong>eu</strong>r à écran plat. Le mot <strong>de</strong> passe par défaut<br />
pour le télévis<strong>eu</strong>r est 1234. Nous vous recommandons vivement d’utiliser le mot <strong>de</strong> passe à quatre chiffres <strong>de</strong><br />
votre préférence.<br />
Suivez les étapes ci-<strong>de</strong>ssous pour modifier le mot <strong>de</strong> passe.<br />
1 ) Accé<strong>de</strong>z à Configuration Système via Configuration.<br />
2 ) Sélectionnez Modif. Mot <strong>de</strong> passe dans le menu Configuration Système.<br />
Intro votre co<strong>de</strong> svp.<br />
3 ) Tapez le mot <strong>de</strong> passe actuel à quatre chiffres au moyen <strong>de</strong>s touches 0 à 9.<br />
Un message <strong>de</strong> confirmation apparaît à l’écran.<br />
4 ) Tapez votre nouveau mot <strong>de</strong> passe.<br />
5 ) Tapez une d<strong>eu</strong>xième fois votre nouveau mot <strong>de</strong> passe lorsque vous y êtes invité.<br />
6 ) Appuyez <strong>de</strong> nouveau sur HOME MENU pour quitter le menu.<br />
Notez par écrit votre nouveau mot<br />
<strong>de</strong> passe:<br />
Si vous oubliez votre mot <strong>de</strong> passe:<br />
Lorsque “V<strong>eu</strong>illez entrer le mot <strong>de</strong><br />
pass” apparaît à l’étape 4,<br />
maintenez enfoncée la touche<br />
ENTER pendant plus <strong>de</strong> trois<br />
secon<strong>de</strong>s.<br />
Le mot <strong>de</strong> passe par défaut 1234<br />
est rétabli.<br />
47<br />
Fr
03 Opérations <strong>de</strong> base pour regar<strong>de</strong>r la télévision<br />
3.5.2 Activation du Contrôle parental<br />
La fonction <strong>de</strong> Contrôle parental doit être activée pour que le télévis<strong>eu</strong>r bloque le contenu. Si c<strong>et</strong>te option est<br />
désactivée, les programmes bloqués apparaîtront à l’écran. Suivez les étapes ci-<strong>de</strong>ssous pour activer les<br />
restrictions du Contrôle parental.<br />
1 ) Accé<strong>de</strong>z à Configuration Système via Configuration.<br />
2 ) Sélectionnez Contrôle parental.<br />
La page <strong>de</strong> saisie du mot <strong>de</strong> passe s’affiche.<br />
3 ) Tapez votre mot <strong>de</strong> passe à quatre chiffres au moyen <strong>de</strong>s touches 0 à 9 .<br />
4 ) Sélectionnez Statut.<br />
Statut : Arrêt<br />
Classement MPAA<br />
Gui<strong>de</strong> parental télé<br />
Anglais canadien/classes<br />
Français canadien/classes<br />
Clas. Indisp. : Visionner<br />
Clas. Régional Numérique<br />
5 ) Sélectionnez Marche pour activer le Contrôle parental.<br />
6 ) Appuyez sur HOME MENU pour quitter le menu.<br />
Lorsqu’une émission est bloquée, un (B) apparaît en regard du numéro <strong>de</strong> la chaîne. Si une chaîne est bloquée,<br />
mais la fonction <strong>de</strong> Contrôle parental désactivé, le symbole est un (V) <strong>et</strong> la chaîne/émission est visible.<br />
Le symbole du verrou ici indique<br />
<strong>de</strong>s chaînes <strong>de</strong> télévision<br />
bloquées.<br />
B<br />
B<br />
B<br />
V<br />
VV<br />
B<br />
D<br />
3.5.3 Attribution d’un système <strong>de</strong> classement pour créer <strong>de</strong>s restrictions<br />
En plus <strong>de</strong> choisir <strong>de</strong> bloquer certaines chaînes, vous pouvez utiliser un <strong>de</strong>s systèmes <strong>de</strong> classement reconnus<br />
pour bloquer <strong>de</strong>s émissions <strong>et</strong>/ou <strong>de</strong>s contenus. Ce télévis<strong>eu</strong>r reconnaît les systèmes <strong>de</strong> classement suivants:<br />
• Classement <strong>de</strong>s émissions <strong>de</strong> télévision<br />
• Directives télévisées parentales y compris la programmation non classifiée<br />
• Motion Picture Association of America (MPAA pour les films)<br />
• Systèmes <strong>de</strong> classement anglais/français en vigu<strong>eu</strong>r au Canada<br />
Remarque: Le télévis<strong>eu</strong>r à écran plat est livré avec tous les classements débloqués.<br />
Pour bloquer les programmes <strong>de</strong> télévision ou d’autres contenus au moyen d’un système <strong>de</strong> classement, suivez<br />
les étapes ci-<strong>de</strong>ssous.<br />
1 ) Accé<strong>de</strong>z à Configuration Système via Configuration.<br />
2 ) Sélectionnez Contrôle parental dans le menu Configuration Système.<br />
3 ) Sélectionnez un <strong>de</strong>s systèmes <strong>de</strong> classement dans le sous-menu.<br />
48<br />
Fr
Opérations <strong>de</strong> base pour regar<strong>de</strong>r la télévision 03<br />
Menu Classement MPAA<br />
Menu Directives télévisées parentales<br />
N/A : Visionner<br />
G : Visionner<br />
PG : Visionner<br />
PG-13 : Visionner<br />
R : Visionner<br />
NC-17 : Visionner<br />
NR : Visionner<br />
Menu Classement pour les Canadiens anglophones<br />
E : Visionner<br />
C : Visionner<br />
C8+ : Visionner<br />
G : Bloquer<br />
PG : Bloquer<br />
14+ : Bloquer<br />
18+ : Bloquer<br />
VV D L S V<br />
TV-None<br />
TV-Y<br />
TV-Y7<br />
TV-G<br />
B<br />
B<br />
B<br />
V<br />
B<br />
TV-PG<br />
TV-14<br />
TV-MA<br />
V<br />
V<br />
V<br />
V<br />
V<br />
V<br />
V<br />
V<br />
V<br />
V<br />
V<br />
V<br />
V<br />
V<br />
Menu Classement pour les Canadiens francophones<br />
E : Visionner<br />
G : Visionner<br />
8 ans+ : Visionner<br />
13 ans+ : Visionner<br />
16 ans+ : Visionner<br />
18 ans+ : Visionner<br />
Français<br />
Menu Sans infos <strong>de</strong> classement<br />
Menu Classement numérique régional<br />
Statut : Arrêt<br />
Classement MPAA<br />
Gui<strong>de</strong> parental télé<br />
Anglais canadien/classes<br />
Français canadien/classes<br />
Clas. Indisp. : Visionner<br />
Clas. Régional Numérique<br />
Statut : Arrêt<br />
Classement MPAA<br />
Gui<strong>de</strong> parental télé<br />
Anglais canadien/classes<br />
Français canadien/classes<br />
Clas. Indisp. : Visionner<br />
Clas. Régional Numérique<br />
4 ) Utilisez les touches fléchées afin <strong>de</strong> m<strong>et</strong>tre en surbrillance un niveau <strong>de</strong> restriction pour ce système <strong>de</strong><br />
classement.<br />
5 ) Appuyez sur ENTER pour inverser le statut censuré pour l’option Directives télévisées parentales mise en<br />
surbrillance.<br />
Un symbole Bloquer (B) ou Visionner (V) apparaît dans la case <strong>de</strong> classement correspondant. Pour les<br />
autres options <strong>de</strong> classement, appuyez sur / pour basculer entre le blocage <strong>et</strong> le visionnement.<br />
6 ) Appuyez sur HOME MENU pour quitter le menu.<br />
Lorsqu’un classement est bloqué, tous les classements plus stricts sont également bloqués. Par exemple, si vous<br />
bloquez le classement TV-PG (Accord parental souhaitable), TV-14 (Accompagnement parental recommandé) <strong>et</strong><br />
TV-MA (Réservé à un public averti) seront automatiquement bloqués. Pareillement, si vous débloquez un<br />
classement, les classements moins stricts <strong>de</strong>viendront automatiquement disponibles.<br />
Classement <strong>de</strong>s émissions “Aucun”<br />
Le télévis<strong>eu</strong>r à écran plat fournit également un classement bloquant les émissions dont le classement est Aucun.<br />
Le système <strong>de</strong> classement <strong>de</strong>s directives télévisées parentales américain i<strong>de</strong>ntifie les émissions dont le<br />
classement est Aucun. Vous trouverez ci-<strong>de</strong>ssous <strong>de</strong>s exemples d’émissions dont le classement est Aucun:<br />
• Bull<strong>et</strong>ins d’urgence (tels que messages EAS, alertes météo <strong>et</strong> autres)<br />
• Émissions locales<br />
• Annonces <strong>de</strong> service public<br />
• Informations<br />
• Émissions politiques<br />
• Religion<br />
• Sports<br />
49<br />
Fr
03 Opérations <strong>de</strong> base pour regar<strong>de</strong>r la télévision<br />
Pour bloquer une émission dont le classement est Aucun, suivez les étapes ci-<strong>de</strong>ssous.<br />
1 ) Accé<strong>de</strong>z à Configuration Système via Configuration.<br />
2 ) Sélectionnez Contrôle parental dans le menu Configuration Système.<br />
3 ) Sélectionnez Gui<strong>de</strong> parental télé dans le menu Contrôle parental.<br />
4 ) Sélectionnez TV-None dans le sous-menu.<br />
5 ) Sélectionnez une option (Visionner ou Bloquer ).<br />
6 ) Appuyez sur HOME MENU pour quitter le menu.<br />
Pour en savoir plus sur les différents systèmes <strong>de</strong> classement, voir “8.1 Tableaux <strong>de</strong>s systèmes <strong>de</strong> classement<br />
(pour <strong>de</strong>s classements selon différents publics)”.<br />
Blocage <strong>de</strong>s émissions non classées<br />
Pour certaines émissions <strong>de</strong> télévision, aucune information <strong>de</strong> classement n’est disponible. Suivez les étapes ci<strong>de</strong>ssous<br />
pour bloquer ces émissions.<br />
1 ) Accé<strong>de</strong>z à Configuration Système via Configuration.<br />
2 ) Sélectionnez Contrôle parental dans le menu Configuration Système.<br />
3 ) Sélectionnez Clas. Indisp. dans le menu Contrôle parental.<br />
4 ) Sélectionnez une option (Visionner ou Bloquer ).<br />
5 ) Appuyez sur HOME MENU pour quitter le menu.<br />
Remarque: Le télévis<strong>eu</strong>r à écran plat est livré avec c<strong>et</strong>te option réglée sur Visionner.<br />
Nouveau système <strong>de</strong> classement pour les émissions numériques<br />
Certaines émissions numériques comportent maintenant <strong>de</strong> nouveaux classements qui ne sont pas compatibles<br />
avec les réglages originaux <strong>de</strong> contrôle parental du télévis<strong>eu</strong>r. Lorsque vous sélectionnez pour la première fois<br />
une <strong>de</strong> ces émissions, le menu Clas. Régional Numérique apparaît à l’écran. Modifiez les réglages du Contrôle<br />
parental pour accepter les nouveaux classements. Sinon, les classements que vous avez bloqués auparavant<br />
p<strong>eu</strong>vent être débloqués.<br />
Remarque: L’ajout du nouveau classement n’entraîne pas le blocage automatique <strong>de</strong>s émissions avec ce<br />
système <strong>de</strong> classement.<br />
Pour ajouter le nouveau système <strong>de</strong> classement au télévis<strong>eu</strong>r, suivez les instructions ci-<strong>de</strong>ssous.<br />
1 ) Accé<strong>de</strong>z à Configuration Système via Configuration.<br />
2 ) Sélectionnez Contrôle parental dans le menu Configuration Système.<br />
3 ) Sélectionnez Clas. Régional Numérique dans le sous-menu.<br />
Une liste <strong>de</strong>s classements disponibles apparaît.<br />
4 ) Sélectionnez parmi les classements disponibles.<br />
5 ) Sélectionnez un niveau dans les classements disponibles.<br />
6 ) Sélectionnez Visionner ou Bloquer.<br />
7 ) Appuyez sur HOME MENU pour quitter le menu.<br />
50<br />
Fr
Opérations <strong>de</strong> base pour regar<strong>de</strong>r la télévision 03<br />
Suppression d’un nouveau système <strong>de</strong> classement<br />
Si vous n’avez plus besoin d’un système <strong>de</strong> classement ajouté, supprimez-le du télévis<strong>eu</strong>r à écran plat. Il n’est<br />
pas nécessaire <strong>de</strong> r<strong>et</strong>irer les restrictions pour chaque chaîne ou émission. La suppression <strong>de</strong> la ligne <strong>de</strong><br />
classement r<strong>et</strong>ire toutes les restrictions attribuées pour ce système.<br />
1 ) Accé<strong>de</strong>z à Configuration Système via Configuration.<br />
2 ) Sélectionnez Contrôle parental dans le menu Configuration Système.<br />
3 ) Sélectionnez Clas. Régional Numérique dans le sous-menu.<br />
4 ) Sélectionnez Réinit. Tab. Clas. Région pour supprimer le nouveau système <strong>de</strong> classement du télévis<strong>eu</strong>r à<br />
écran plat.<br />
Le message “Réinitialiser les classements régionaux numériques?” apparaît.<br />
5 ) Sélectionnez OK.<br />
6 ) Appuyez sur HOME MENU pour quitter le menu.<br />
Français<br />
Pendant que le menu <strong>de</strong> contrôle parental est ouvert, l’affichage du statut reste inchangé même si le système<br />
reçoit <strong>de</strong>s émissions ayant un nouveau classement.<br />
3.5.4 R<strong>et</strong>rait temporaire d’une restriction<br />
L’écran <strong>de</strong> saisie du mot <strong>de</strong> passe apparaît à la détection <strong>de</strong>s signaux <strong>de</strong> classement bloqué (avec l’image <strong>et</strong> le<br />
son coupé). Si vous tapez votre mot <strong>de</strong> passe à quatre chiffres, vous pourrez voir l’émission jusqu’à ce que le<br />
télévis<strong>eu</strong>r à écran plat entre en veille ou s’éteigne. Suivez les étapes ci-<strong>de</strong>ssous pour r<strong>et</strong>irer temporairement une<br />
restriction.<br />
1 ) Sélectionnez la chaîne bloquée sur le télévis<strong>eu</strong>r à écran plat.<br />
2 ) Atten<strong>de</strong>z que le message <strong>de</strong> blocage apparaisse à l’écran.<br />
3 ) Entrez votre mot <strong>de</strong> passe à quatre chiffres.<br />
La fenêtre du mot <strong>de</strong> passe s’affiche. Si vous tapez un mot <strong>de</strong> passe <strong>de</strong> quatre chiffres ou n’effectuez<br />
aucune opération pendant 60 secon<strong>de</strong>s, la fenêtre disparaît. Pour rappeler la fenêtre après qu’elle a<br />
disparu, changez <strong>de</strong> chaîne ou <strong>de</strong> source d’entrée, puis revenez avant <strong>de</strong> répéter les étapes ci-<strong>de</strong>ssus.<br />
Intro votre co<strong>de</strong> svp.<br />
Pour ENTRÉE 2 (sauf les signaux 480i) <strong>et</strong> ENTRÉE 4 à ENTRÉE 7, l’écran <strong>de</strong> saisie du mot <strong>de</strong> passe apparaît<br />
lorsque Bloquer est sélectionné dans le menu Clas. Indisp.<br />
51<br />
Fr
03 Opérations <strong>de</strong> base pour regar<strong>de</strong>r la télévision<br />
3.6 Début intelligent pour les nouveaux propriétaires<br />
De nombr<strong>eu</strong>ses fonctions du télévis<strong>eu</strong>r à écran plat le ren<strong>de</strong>nt non s<strong>eu</strong>lement facile à utiliser, mais également<br />
respectu<strong>eu</strong>x <strong>de</strong> l’environnement. C<strong>et</strong>te section explique comment prolonger la durée <strong>de</strong> vie du télévis<strong>eu</strong>r tout en<br />
exploitant son potentiel éconénergétique. Nous vous conseillons d’appliquer toutes les fonctions ci-<strong>de</strong>ssous pour<br />
une utilisation ultra facile, une qualité optimale <strong>et</strong> une durée <strong>de</strong> vie prolongée.<br />
3.6.1 Utilisation du menu TOOLS<br />
Pour passer du menu actuel à une autre option, le menu TOOLS à l’écran offre <strong>de</strong>s raccourcis vers les sélections<br />
disponibles même pendant que vous regar<strong>de</strong>z une émission. Pour afficher le menu, appuyez sur TOOLS <strong>de</strong> la<br />
télécomman<strong>de</strong>. Les menus présentés dans c<strong>et</strong>te section diffèrent, selon le menu actuellement sélectionné.<br />
TELEVISION<br />
TOOLS<br />
Tous<br />
Son<br />
Aléatoire<br />
Mo<strong>de</strong> Lecture : Simple<br />
Répéter A-B<br />
Recherche H<strong>eu</strong>re<br />
Répéter<br />
Le menu TOOLS offre <strong>de</strong>s raccourcis vers les options <strong>de</strong> menu<br />
sélectionnables tout en regardant une émission.<br />
Basculez entre les options au moyen <strong>de</strong>s touches fléchées. Le réglage est terminé dès que l’option sélectionnée<br />
apparaît au centre <strong>de</strong> l’écran. Lors <strong>de</strong> l’affichage <strong>de</strong> d<strong>eu</strong>x écrans, le menu TOOLS apparaît sur l’écran principal.<br />
3.6.2 Pour prolonger la durée <strong>de</strong> vie du télévis<strong>eu</strong>r<br />
C<strong>et</strong>te fonction offre <strong>de</strong>s raccourcis vers <strong>de</strong>s options prolongeant la durée <strong>de</strong> service du télévis<strong>eu</strong>r. Le télévis<strong>eu</strong>r à<br />
écran plat comprend une option <strong>de</strong> protection d’écran. Si vous activez c<strong>et</strong>te option, le télévis<strong>eu</strong>r sélectionne<br />
automatiquement les différentes fonctions perm<strong>et</strong>tant <strong>de</strong> prolonger sa durée <strong>de</strong> vie tout en évitant les images<br />
rémanentes ou l’eff<strong>et</strong> <strong>de</strong> brûlure d’écran. Suivez les étapes ci-<strong>de</strong>ssous pour régler c<strong>et</strong>te option.<br />
1 ) Accé<strong>de</strong>z à Options via Configuration.<br />
2 ) Sélectionnez Protection écran dans le menu Options.<br />
Une page <strong>de</strong> confirmation s’affiche.<br />
3 ) Sélectionnez Oui dans le sous-menu.<br />
Les réglages suivants sont automatiquement entrés:<br />
•Taille auto: Zoom large<br />
•Cache latéral – Détection: Mo<strong>de</strong>1<br />
•Orbit<strong>eu</strong>r (Source AV): Mo<strong>de</strong>1<br />
•Orbit<strong>eu</strong>r (Source PC): Mo<strong>de</strong>1<br />
•Économie d’énergie: Mo<strong>de</strong>1<br />
•Pré réglages AV: OPTIMUM (avec DYNAMIQUE sélectionné pour Pré réglages AV)<br />
4 ) Appuyez sur HOME MENU pour quitter le menu.<br />
52<br />
Fr
Opérations <strong>de</strong> base pour regar<strong>de</strong>r la télévision 03<br />
3.6.3 Activation <strong>de</strong> l’orbit<strong>eu</strong>r d’image<br />
La fonction Orbit<strong>eu</strong>r intégrée protège l’écran contre les images rémanentes. L’orbit<strong>eu</strong>r change automatiquement<br />
la position <strong>de</strong> l’image <strong>de</strong> manière imperceptible pendant qu’elle est affichée à l’écran. Suivez les étapes ci<strong>de</strong>ssous<br />
pour activer l’orbit<strong>eu</strong>r. Pour annuler c<strong>et</strong>te fonction, sélectionnez Arrêt à l’étape 3.<br />
1 ) Accé<strong>de</strong>z à Options via Configuration.<br />
2 ) Sélectionnez Orbit<strong>eu</strong>r dans le menu Options.<br />
3 ) Sélectionnez Mo<strong>de</strong>1 ou Mo<strong>de</strong>2.<br />
• Mo<strong>de</strong>1 source AV: pour tout mo<strong>de</strong> d’écran, sauf Pt par Pt<br />
• Mo<strong>de</strong>2 source AV: pour tous les mo<strong>de</strong>s d’écran disponibles<br />
• Mo<strong>de</strong>1 source PC: pour activer l’orbit<strong>eu</strong>r<br />
• Mo<strong>de</strong>2 source PC: pour adoucir l’apparence du texte/caractère.<br />
4 ) Appuyez sur HOME MENU pour quitter le menu.<br />
Français<br />
Remarque: Les bords les plus éloignés d’une image p<strong>eu</strong>vent être masqués <strong>de</strong> temps à autre à mesure que la<br />
position <strong>de</strong> l’image change. En outre, lorsque la fonction Orbit<strong>eu</strong>r est réglée sur Mo<strong>de</strong>1 ou Mo<strong>de</strong>2,<br />
l’image p<strong>eu</strong>t sembler baisser légèrement sur l’écran.<br />
3.6.4 Déclenchement périodique <strong>de</strong> la mire vidéo économis<strong>eu</strong>r d’écran<br />
La fonction <strong>de</strong> mire vidéo affiche l’écran en blanc pour éviter les images rémanentes ou l’eff<strong>et</strong> <strong>de</strong> brûlure d’écran.<br />
Lorsque l’écran <strong>de</strong> mire vidéo est en service, s<strong>eu</strong>les la touche TV (a) sur la télécomman<strong>de</strong> <strong>et</strong> la touche<br />
STANDBY/ON sur le télévis<strong>eu</strong>r sont disponibles. Le télévis<strong>eu</strong>r entre automatiquement en veille une h<strong>eu</strong>re après<br />
avoir lancé l’écran <strong>de</strong> mire vidéo. Pour annuler l’écran <strong>de</strong> mire vidéo, appuyez sur TV (a) sur la télécomman<strong>de</strong><br />
ou sur STANBY/ON du télévis<strong>eu</strong>r.<br />
Suivez les étapes ci-<strong>de</strong>ssous pour activer l’écran <strong>de</strong> mire vidéo.<br />
1 ) Accé<strong>de</strong>z à Options via Configuration.<br />
2 ) Sélectionnez Mire vidéo dans le menu Options.<br />
Un écran <strong>de</strong> confirmation apparaît.<br />
3 ) Sélectionnez Début dans le sous-menu.<br />
L’écran <strong>de</strong> mire vidéo apparaît.<br />
4 ) N’utilisez pas le télévis<strong>eu</strong>r pendant au moins une h<strong>eu</strong>re.<br />
Remarque: La minuterie <strong>de</strong> la mire vidéo a priorité sur la minuterie d’extinction, sur les réglages Arrêt sans signal<br />
<strong>et</strong> Arrêt si pas d’opération (Gestion <strong>de</strong> l’alimentation).<br />
3.6.5 Activation <strong>de</strong> l’économie d’énergie pour diminuer la consommation électrique<br />
L’option Économie d’énergie réduit la luminosité <strong>de</strong>s images <strong>et</strong> par conséquent la consommation électrique. Le<br />
réglage recommandé, Économie d’énergie Mo<strong>de</strong> 1, prolonge la durée <strong>de</strong> vie du télévis<strong>eu</strong>r tout en limitant au<br />
minimum la consommation électrique.<br />
Suivez les étapes ci-<strong>de</strong>ssous pour activer l’option Économie d’énergie.<br />
1 ) Accé<strong>de</strong>z à Comman<strong>de</strong> alimentation via Configuration.<br />
2 ) Sélectionnez Économie d’énergie dans le menu.<br />
3 ) Sélectionnez une option dans le sous-menu Économie d’énergie.<br />
Arrêt<br />
Mo<strong>de</strong>1<br />
Mo<strong>de</strong>2<br />
Option<br />
Description<br />
Sans eff<strong>et</strong><br />
consomme moins d’énergie qu’en mo<strong>de</strong> Arrêt<br />
consomme moins d’énergie qu’en Mo<strong>de</strong>1<br />
4 ) Appuyez sur HOME MENU pour quitter le menu.<br />
53<br />
Fr
04 Options <strong>de</strong> réglage supplémentaires <strong>de</strong> l’image <strong>et</strong> du son<br />
4 Options <strong>de</strong> réglage supplémentaires <strong>de</strong><br />
l’image <strong>et</strong> du son<br />
Pour profiter <strong>de</strong> toutes les fonctionnalités offertes par votre télévis<strong>eu</strong>r à écran plat, parcourez ce chapitre à la<br />
découverte <strong>de</strong>s fonctions qui décupleront votre expérience <strong>de</strong> visionnement. La plupart <strong>de</strong>s sections traitent <strong>de</strong>s<br />
réglages d’image <strong>et</strong> <strong>de</strong> l’agencement <strong>de</strong>s écrans/rubriques <strong>de</strong> menu, tandis que les autres sections indiquent <strong>de</strong>s<br />
options sonores <strong>et</strong> <strong>de</strong> gestion <strong>de</strong> l’alimentation. Vous pouvez appliquer <strong>autant</strong> <strong>de</strong> changements que vous le désirez.<br />
4.1 Choix d’une option AV (Vidéo, j<strong>eu</strong>, <strong>et</strong>c.)<br />
Tout comme pour le capt<strong>eu</strong>r <strong>de</strong> luminosité ambiante, l’option AV ou Pré réglages AV dépend <strong>de</strong> la luminosité<br />
ambiante <strong>et</strong> <strong>de</strong> l’émission ou film à l’écran. Les images p<strong>eu</strong>vent provenir d’une source AV ou d’un ordinat<strong>eu</strong>r. Les<br />
d<strong>eu</strong>x sources sont présentées ci-<strong>de</strong>ssous.<br />
Choisissez parmi les sept préréglages AV pour obtenir une image optimale en provenance d’une source AV<br />
externe. Sélectionnez la source AV avec la télécomman<strong>de</strong> ou le menu principal (HOME). Pour une source PC,<br />
consultez plus avant la section “4.1.3 Choix d’une source PC” <strong>de</strong> ce mo<strong>de</strong> d’emploi.<br />
Si la source AV est une Comman<strong>de</strong> <strong>de</strong> j<strong>eu</strong>, sélectionnez JEU <strong>et</strong> voir “4.1.4 Réglage du télévis<strong>eu</strong>r pour reconnaître<br />
une console <strong>de</strong> j<strong>eu</strong>” pour <strong>de</strong> plus amples informations.<br />
4.1.1 Source AV par le biais <strong>de</strong> la télécomman<strong>de</strong><br />
Suivez les instructions ci-<strong>de</strong>ssous pour régler un préréglage AV pour une source AV externe au moyen <strong>de</strong> la<br />
télécomman<strong>de</strong>.<br />
1 ) Appuyez sur AV SELECTION <strong>de</strong> la télécomman<strong>de</strong>.<br />
L’option AV actuellement adoptée s’affiche.<br />
2 ) Appuyez une nouvelle fois sur AV SELECTION, avant que l’option affichée ne disparaisse.<br />
À chaque pression, l’option change dans l’ordre indiqué ci-<strong>de</strong>ssous:<br />
Pré réglage AV<br />
OPTIMUM<br />
Description<br />
règle automatiquement la qualité d’image pour le niveau<br />
<strong>de</strong> luminosité du li<strong>eu</strong> <strong>de</strong> visionnement (partagé par les<br />
sources d’entrée externe <strong>et</strong> d’entrée TV)<br />
PERFORMANCES pour obtenir une image très bien définie dans une pièce<br />
normalement éclairée (partagé par les sources d’entrée<br />
externe <strong>et</strong> d’entrée TV)<br />
DYNAMIQUE<br />
CINÉMA<br />
SPORT<br />
JEU<br />
Standard<br />
pour obtenir une image très n<strong>et</strong>te au contraste optimal,<br />
mais sans l’option <strong>de</strong> réglage manuel <strong>de</strong> qualité d’image<br />
disponible (partagé par les sources d’entrée externe <strong>et</strong><br />
d’entrée TV)<br />
pour <strong>de</strong>s films (partagé par les sources d’entrée externe <strong>et</strong><br />
d’entrée TV)<br />
pour <strong>de</strong>s émissions sportives (partagé par les sources<br />
d’entrée externe <strong>et</strong> d’entrée TV)<br />
réduit la luminosité <strong>de</strong> l’image pour un meill<strong>eu</strong>r<br />
visionnement (partagé par les sources d’entrée externe <strong>et</strong><br />
d’entrée TV)<br />
perm<strong>et</strong> <strong>de</strong>s réglages personnalisés selon vos préférences<br />
(le mo<strong>de</strong> est défini pour chaque source d’entrée)<br />
54<br />
Fr<br />
3 ) Atten<strong>de</strong>z que l’écran Pré réglages AV disparaisse.<br />
Une fois l’écran disparu, le télévis<strong>eu</strong>r se verrouille sur la <strong>de</strong>rnière option visionnée <strong>et</strong> le menu se ferme.
Options <strong>de</strong> réglage supplémentaires <strong>de</strong> l’image <strong>et</strong> du son<br />
04<br />
4.1.2 Choix d’une source AV par le biais du menu principal (HOME MENU)<br />
Il est aussi possible <strong>de</strong> choisir un préréglage AV au moyen du menu principal (HOME MENU). Suivez les<br />
instructions ci-<strong>de</strong>ssous pour établir un préréglage AV pour une source AV externe.<br />
Le préréglage AV, OPTIMUM, règle automatiquement la qualité d’image la plus élevée disponible pour la source<br />
sélectionnée <strong>et</strong> l’environnement <strong>de</strong> visionnement. Ce télévis<strong>eu</strong>r à écran plat utilise <strong>de</strong>s technologies <strong>de</strong><br />
reproduction sonore avancées, comme le SRS WOW HD TM . De la même manière, OPTIMUM règle<br />
automatiquement le son optimal pour la scène sélectionnée. Ce processus est progressif, <strong>de</strong> sorte que les<br />
changements apportés à la teinte <strong>et</strong> la luminosité p<strong>eu</strong>vent être visibles. Ceci est normal <strong>et</strong> ne constitue pas un<br />
dysfonctionnement.<br />
DYNAMIQUE bloque tous les réglages manuels d’options particulières. Le réglage DYNAMIQUE bloque le<br />
contraste, la luminosité, la coul<strong>eu</strong>r, la teinte, la n<strong>et</strong>t<strong>et</strong>é <strong>et</strong> la réinitialisation. Les options non disponibles sont<br />
estompées dans le menu.<br />
Français<br />
Procé<strong>de</strong>z comme indiqué ci-<strong>de</strong>ssous pour choisir une source AV par le biais du menu principal (HOME MENU).<br />
1 ) Accé<strong>de</strong>z à Image via Configuration.<br />
2 ) Sélectionnez Pré réglages AV dans le menu Image.<br />
3 ) Sélectionnez une option dans le sous-menu.<br />
Pré réglages AV<br />
OPTIMUM<br />
PERFORMANCES<br />
DYNAMIQUE<br />
CINÉMA<br />
SPORT<br />
JEU<br />
Standard<br />
Lorsque OPTIMUM est sélectionné,<br />
les images sont aussi reproduites<br />
sur la base <strong>de</strong>s informations<br />
recueillies par le capt<strong>eu</strong>r <strong>de</strong><br />
luminosité ambiante.<br />
Image<br />
Pré réglages AV : OPTIMUM<br />
PureCinema<br />
Comman<strong>de</strong> Son : Arrêt<br />
Performances OPTIMUM<br />
Réinitial.<br />
(Sous-menu lorsque OPTIMUM est sélectionné pour Pré réglages AV)<br />
4 ) Appuyez sur HOME MENU pour fermer <strong>et</strong> quitter le menu.<br />
4.1.3 Choix d’une source PC<br />
À partir d’un ordinat<strong>eu</strong>r, choisissez entre les d<strong>eu</strong>x préréglages AV pour une image optimale. Les options sont les<br />
suivantes:<br />
• STANDARD: pour obtenir une image très bien définie dans une pièce normalement éclairée<br />
• UTILISATEUR: perm<strong>et</strong> <strong>de</strong>s réglages personnalisés selon vos préférences pour chaque source d’entrée<br />
55<br />
Fr
04 Options <strong>de</strong> réglage supplémentaires <strong>de</strong> l’image <strong>et</strong> du son<br />
4.1.4 Réglage du télévis<strong>eu</strong>r pour reconnaître une console <strong>de</strong> j<strong>eu</strong><br />
Lorsque vous raccor<strong>de</strong>z une console <strong>de</strong> j<strong>eu</strong> au télévis<strong>eu</strong>r à écran plat, utilisez la fonction JEU pour donner la<br />
préférence à la qualité d’image ou à la facilité d’utilisation.<br />
Procé<strong>de</strong>z comme indiqué ci-<strong>de</strong>ssous pour que le télévis<strong>eu</strong>r mémorise vos préférences <strong>de</strong> j<strong>eu</strong>.<br />
1 ) Accé<strong>de</strong>z à Options via Configuration.<br />
2 ) Sélectionnez Préf. Cm<strong>de</strong> J<strong>eu</strong> dans le menu.<br />
3 ) Sélectionnez Marche (priorité à la facilité d’utilisation) ou Arrêt (priorité à la qualité d’image).<br />
4 ) Appuyez sur HOME MENU pour quitter le menu.<br />
Pour activer l’option Préf. Cm<strong>de</strong> J<strong>eu</strong>, réglez Pré réglages AV sur JEU <strong>et</strong> utilisez une entrée externe (sauf si la source<br />
vient d’un ordinat<strong>eu</strong>r). Lorsqu’un menu <strong>de</strong> source PC est à l’écran, l’option Préf. Cm<strong>de</strong> J<strong>eu</strong> est ignorée. En outre,<br />
l’option Préf. Cm<strong>de</strong> J<strong>eu</strong> pour la facilité d’utilisation est ignorée pendant le visionnement multiécran (voir “4.4<br />
Comment regar<strong>de</strong>r la télévision en multiécran”) ou le gel d’image (voir “4.5 Gel <strong>de</strong> l’image”).<br />
4.2 Réglage d’éléments d’image spécifiques<br />
La technologie plasma offre les meill<strong>eu</strong>res images disponibles actuellement. Toutefois, le li<strong>eu</strong>/environnement <strong>de</strong><br />
visionnement <strong>et</strong> les préférences personnelles ont une inci<strong>de</strong>nce sur l’apparence <strong>de</strong> l’image. C<strong>et</strong>te section donne<br />
<strong>de</strong>s métho<strong>de</strong>s <strong>de</strong> réglage <strong>de</strong> l’image <strong>et</strong> du son pour une expérience <strong>de</strong> visionnement optimale.<br />
4.2.1 Choix d’un format d’écran (automatique ou manuel)<br />
Sélection automatique du format d’écran<br />
Le télévis<strong>eu</strong>r à écran plat sélectionne automatiquement un format approprié pour <strong>de</strong>s signaux vidéo reçus d’un<br />
appareil HDMI raccordé. Suivez les étapes ci-<strong>de</strong>ssous pour perm<strong>et</strong>tre la sélection automatique du format<br />
d’écran.<br />
1 ) Accé<strong>de</strong>z à Options via Configuration.<br />
2 ) Sélectionnez Taille auto dans le menu Options.<br />
3 ) Sélectionnez Naturel ou Zoom large dans le sous-menu.<br />
Options<br />
Arrêt<br />
Naturel<br />
Zoom large<br />
Description<br />
m<strong>et</strong> hors service la fonction Taille auto<br />
ajuste l’image à la taille <strong>de</strong> l’écran<br />
agrandit <strong>et</strong> affiche s<strong>eu</strong>lement la partie dont le ratio<br />
d’aspect est 4:3 en écran plein <strong>et</strong> large<br />
4 ) Appuyez sur HOME MENU pour quitter le menu.<br />
Remarque: Si un signal vidéo ne contient aucune information <strong>de</strong> ratio d’aspect, la sélection automatique du<br />
format d’image ne fonctionne pas.<br />
56<br />
Fr
Options <strong>de</strong> réglage supplémentaires <strong>de</strong> l’image <strong>et</strong> du son<br />
04<br />
Sélection manuelle du format d’écran<br />
Sélectionnez manuellement le format d’écran approprié si l’image n’apparaît pas au bon format. Parcourez le menu<br />
pour trouver le format d’écran correct pour une émission donnée.<br />
Les formats disponibles dépen<strong>de</strong>nt <strong>de</strong> la nature <strong>de</strong>s signaux appliqués à l’entrée. Tout en regardant une émission <strong>de</strong><br />
télévision, appuyez sur SCREEN SIZE <strong>de</strong> la télécomman<strong>de</strong> pour faire passer l’image d’Auto, PLEIN, Pt par Pt, ZOOM,<br />
CINÉMA, 4:3, LARGE, LARGE1 à LARGE2. Vous pouvez changer librement le format d’écran pendant une émission<br />
ou une vidéo provenant d’autres sources d’entrée. Auto est disponible lors <strong>de</strong> la réception d’émissions HD.<br />
Le tableau suivant donne <strong>de</strong>s informations sur l’apparence <strong>de</strong> l’écran pour chaque option.<br />
Auto<br />
Option AV<br />
Description<br />
ajoute <strong>de</strong>s caches latéraux ou affiche l’image en plein<br />
écran quand <strong>de</strong>s images haute définition contenant <strong>de</strong>s<br />
caches latéraux sont détectées. Voir Détection <strong>de</strong> caches<br />
page 59.<br />
PLEIN rétrécit les images 16:9<br />
Pt par Pt<br />
ZOOM<br />
CINÉMA<br />
à un pixel du signal d’entrée correspond un pixel sur<br />
l’écran (disponible s<strong>eu</strong>lement pour <strong>de</strong>s signaux 1080i ou<br />
1080p)<br />
dans certains cas, une ban<strong>de</strong> p<strong>eu</strong>t être visible en haut <strong>et</strong><br />
en bas <strong>de</strong> l’image <strong>de</strong>s émissions au format L<strong>et</strong>terbox 16:9<br />
dans certains cas, une ban<strong>de</strong> p<strong>eu</strong>t être visible en haut <strong>et</strong><br />
en bas <strong>de</strong> l’image <strong>de</strong>s émissions au format L<strong>et</strong>terbox 14:9<br />
(disponible uniquement pour les signaux SD)<br />
4:3 un cache apparaît <strong>de</strong> chaque côté<br />
LARGE<br />
LARGE1<br />
LARGE2<br />
les images s’étirent progressivement <strong>de</strong> chaque côté<br />
(disponible uniquement pour les signaux SD)<br />
les images s’étirent progressivement <strong>de</strong> chaque côté<br />
(disponible uniquement pour les signaux HD)<br />
les images s’étirent <strong>de</strong> manière uniforme <strong>de</strong> chaque côté<br />
(disponible uniquement pour les signaux HD)<br />
Français<br />
Option PC<br />
Description<br />
4:3 l’image occupe la totalité <strong>de</strong> l’écran mais son ratio<br />
d’aspect n’est pas modifié<br />
PLEIN affiche <strong>de</strong>s images au format 16:9<br />
Avec LARGE1 ou LARGE2 sélectionné, une émission HDTV (Télévision haute définition) p<strong>eu</strong>t être affichée avec<br />
<strong>de</strong>s portions d’image ou <strong>de</strong> menu coupées. Si une image ou un menu s’affiche tronqué ou hors écran, placez<br />
l’option sur PLEIN.<br />
Évitez d’afficher <strong>de</strong>s signaux qui ne remplissent qu’une portion <strong>de</strong> l’écran. Les images n’occupant pas la totalité<br />
<strong>de</strong> l’écran p<strong>eu</strong>vent occasionner une rémanence d’image temporaire ou permanente selon la fréquence <strong>et</strong> la<br />
durée <strong>de</strong> l’affichage. Par exemple, une émission HD avec un cache latéral (images au format 4:3) entraîne une<br />
usure irrégulière <strong>de</strong>s cellules plasma. Si un cache latéral apparaît tout autour d’un programme, une fois une<br />
émission ou un film terminé, affichez un contenu vidéo plein écran. Ceci perm<strong>et</strong>tra au télévis<strong>eu</strong>r d’équilibrer<br />
l’usure <strong>de</strong>s cellules plasma <strong>et</strong> <strong>de</strong> protéger l’écran contre les images rémanentes. Pour en savoir plus sur les<br />
caches, voir “4.3.1 Réglage du cache d’écran (ban<strong>de</strong>s noires sur les côtés)”.<br />
Remarque: Toutes les émissions diffusées ne comportent pas d’options <strong>de</strong> format d’écran.<br />
57<br />
Fr
04 Options <strong>de</strong> réglage supplémentaires <strong>de</strong> l’image <strong>et</strong> du son<br />
4.2.2 Correction <strong>de</strong> l’image pour une source AV ou PC<br />
Même si les réglages d’image correspon<strong>de</strong>nt à vos préférences, la source est souvent à l’origine <strong>de</strong> modifications<br />
imprévues <strong>de</strong> l’image. Le télévis<strong>eu</strong>r à écran plat offre plusi<strong>eu</strong>rs options <strong>de</strong> réglage.<br />
Source AV<br />
Source PC<br />
Options Flèche gauche Flèche droite<br />
Contraste diminution du contraste augmentation du contraste<br />
Luminos. plus sombre plus claire<br />
Coul<strong>eu</strong>r intensité inféri<strong>eu</strong>re intensité supéri<strong>eu</strong>re<br />
Teinte teintes chair plus viol<strong>et</strong>tes teintes chair plus vertes<br />
N<strong>et</strong>t<strong>et</strong>é définition plus douce définition plus n<strong>et</strong>te<br />
Options Flèche gauche Flèche droite<br />
Contraste diminution du contraste augmentation du contraste<br />
Luminos. plus sombre plus claire<br />
Rouge coul<strong>eu</strong>r plus pâle coul<strong>eu</strong>r plus vive<br />
Vert coul<strong>eu</strong>r plus pâle coul<strong>eu</strong>r plus vive<br />
Bl<strong>eu</strong> coul<strong>eu</strong>r plus pâle coul<strong>eu</strong>r plus vive<br />
Pour corriger l’image pour une source AV ou PC, suivez les étapes ci-<strong>de</strong>ssous.<br />
1 ) Accé<strong>de</strong>z à Image via Configuration.<br />
2 ) Sélectionnez une option à régler.<br />
Source AV<br />
Source PC<br />
Image<br />
Pré réglages AV : PERFORMANCES<br />
Contraste : 40<br />
Luminos. : 0<br />
Coul<strong>eu</strong>r : 0<br />
Teinte : 0<br />
N<strong>et</strong>t<strong>et</strong>é : 0<br />
PureCinema<br />
Réinitial.<br />
Image<br />
Pré réglages AV : STANDARD<br />
Contraste : 40<br />
Luminos. : 0<br />
Rouge : 0<br />
Vert : 0<br />
Bl<strong>eu</strong> : 0<br />
Réinitial.<br />
3 ) Sélectionnez le niveau souhaité pour c<strong>et</strong>te option au moyen <strong>de</strong>s touches gauche/droite (/).<br />
Contraste 32<br />
4 ) Répétez le processus pour tout réglage supplémentaire.<br />
5 ) Appuyez sur HOME MENU pour quitter le menu une fois tous les réglages terminés.<br />
Remarque: La réinitialisation ramène tous les réglages à l<strong>eu</strong>rs val<strong>eu</strong>rs par défaut d’usine.<br />
58<br />
Fr
Options <strong>de</strong> réglage supplémentaires <strong>de</strong> l’image <strong>et</strong> du son<br />
04<br />
4.3 Sélection <strong>de</strong> fonctions d’image avancées<br />
Le télévis<strong>eu</strong>r à écran plat offre une pal<strong>et</strong>te <strong>de</strong> fonctions avancées perm<strong>et</strong>tant d’optimiser la qualité <strong>de</strong> l’image au<strong>de</strong>là<br />
<strong>de</strong>s réglages <strong>de</strong> base expliqués précé<strong>de</strong>mment dans ce mo<strong>de</strong> d’emploi. C<strong>et</strong>te section explore la val<strong>eu</strong>r<br />
apportée par la compatibilité Haute Définition (HD) PureCinema <strong>de</strong> <strong>Pioneer</strong>: <strong>de</strong>s noirs <strong>de</strong> qualité supéri<strong>eu</strong>re, une<br />
balance <strong>de</strong>s blancs améliorée <strong>et</strong> <strong>de</strong>s améliorations générales <strong>de</strong> la coul<strong>eu</strong>r.<br />
4.3.1 Réglage du cache d’écran (ban<strong>de</strong>s noires sur les côtés)<br />
Des caches d’écran couvrent les bords <strong>de</strong> chaque côté <strong>de</strong> l’image. Certains contenus ne remplissant pas tout<br />
l’écran, <strong>de</strong>s ban<strong>de</strong>s noires apparaissent <strong>de</strong> chaque côté <strong>de</strong> l’écran. C<strong>et</strong>te section explique comment régler le<br />
cache d’écran.<br />
Détection <strong>de</strong> caches<br />
Certaines émissions HD p<strong>eu</strong>vent être diffusées au format 4:3 avec <strong>de</strong>s caches <strong>de</strong> chaque côté. Les caches<br />
latéraux correspondant à <strong>de</strong>s ban<strong>de</strong>s noires apparaissant sur les côtés gauche <strong>et</strong> droit <strong>de</strong> l’image. Si le format<br />
d’écran du télévis<strong>eu</strong>r à écran plat est réglé sur Naturel au cours du processus <strong>de</strong> Taille auto, <strong>de</strong>s barres grises<br />
p<strong>eu</strong>vent remplacer les barres noires. Lorsque le télévis<strong>eu</strong>r est réglé sur Zoom large, les ban<strong>de</strong>s sont masquées.<br />
Ceci perm<strong>et</strong> <strong>de</strong> diminuer les problèmes d’image rémanente.<br />
Suivez les étapes ci-<strong>de</strong>ssous pour que le télévis<strong>eu</strong>r détecte les caches latéraux.<br />
1 ) Accé<strong>de</strong>z à Options via Configuration.<br />
2 ) Sélectionnez Cache latéral dans le menu Options.<br />
3 ) Sélectionnez Détection dans le sous-menu.<br />
4 ) Sélectionnez Mo<strong>de</strong>1 ou Mo<strong>de</strong>2 pour activer la détection du cache latéral.<br />
Mo<strong>de</strong>1 détecte uniquement les caches latéraux noirs tandis que Mo<strong>de</strong>2 détecte à la fois les caches<br />
latéraux noirs <strong>et</strong> illustrés. Sélectionnez Arrêt pour désactiver c<strong>et</strong>te fonction.<br />
5 ) Appuyez sur HOME MENU pour quitter le menu.<br />
6 ) Confirmez que le mot “AUTO” apparaît sur la bannière info.<br />
Français<br />
Les signaux vidéo p<strong>eu</strong>vent affecter la fonction <strong>de</strong> détection du cache <strong>de</strong> différente manière. Pour les émissions<br />
au format en haute définition, le télévis<strong>eu</strong>r détectera automatiquement les images contenant <strong>de</strong>s caches latéraux<br />
(si la détection du cache est activée) <strong>et</strong> les affichera en plein écran. Passez d’un format d’écran à l’autre afin <strong>de</strong><br />
sélectionner Auto pour les signaux vidéo sans informations <strong>de</strong> ratio d’aspect.<br />
Le contenu vidéo p<strong>eu</strong>t également affecter la fonction <strong>de</strong> détection du cache <strong>de</strong> différente manière. Si une err<strong>eu</strong>r<br />
<strong>de</strong> détection se produit lorsque vous essayez <strong>de</strong> regar<strong>de</strong>r un contenu HD, changez manuellement le format<br />
d’écran en fonction du réglage pour le contenu.<br />
Mo<strong>de</strong> HD Large<br />
Le Mo<strong>de</strong> HD Large perm<strong>et</strong> <strong>de</strong> sélectionner le mo<strong>de</strong> d’affichage (LARGE1 ou LARGE2) lors <strong>de</strong> la détection <strong>de</strong>s<br />
caches latéraux apparaissant sur une image 4:3. C<strong>et</strong>te option est disponible lorsque le menu Taille auto est réglé<br />
sur Zoom large <strong>et</strong> Détection du cache latéral sur Mo<strong>de</strong>1 ou Mo<strong>de</strong>2. Suivez les étapes ci-<strong>de</strong>ssous pour activer le<br />
Mo<strong>de</strong> HD Large.<br />
1 ) Accé<strong>de</strong>z à Options via Configuration.<br />
2 ) Sélectionnez Cache latéral dans le menu Options.<br />
3 ) Sélectionnez Mo<strong>de</strong> HD Large dans le sous-menu.<br />
4 ) Sélectionnez Mo<strong>de</strong>1 ou Mo<strong>de</strong>2 pour activer Mo<strong>de</strong> HD Large.<br />
• Mo<strong>de</strong>1: le mo<strong>de</strong> d’écran est réglé sur LARGE1 lors <strong>de</strong> la détection <strong>de</strong>s caches latéraux.<br />
• Mo<strong>de</strong>2: le mo<strong>de</strong> d’écran est réglé sur LARGE2 lors <strong>de</strong> la détection <strong>de</strong>s caches latéraux.<br />
5 ) Appuyez sur HOME MENU pour quitter le menu.<br />
59<br />
Fr
04 Options <strong>de</strong> réglage supplémentaires <strong>de</strong> l’image <strong>et</strong> du son<br />
Éclaircissement <strong>de</strong>s caches latéraux<br />
Si <strong>de</strong>s ban<strong>de</strong>s (caches latéraux) apparaissent <strong>de</strong> chaque côté <strong>de</strong> l’image lorsque le format d’écran se trouve sur<br />
4:3 <strong>et</strong> que la détection du cache latéral est réglée sur Mo<strong>de</strong>1 ou Mo<strong>de</strong>2, les ban<strong>de</strong>s passent automatiquement du<br />
noir au gris. Le gris est toutefois plutôt sombre. Suivez les étapes ci-<strong>de</strong>ssous pour changer la coul<strong>eu</strong>r <strong>de</strong>s ban<strong>de</strong>s<br />
à une teinte <strong>de</strong> gris plus claire.<br />
1 ) Accé<strong>de</strong>z à Options via Configuration.<br />
2 ) Sélectionnez Cache latéral dans le menu Options.<br />
3 ) Sélectionnez Sync. Luminosité dans le sous-menu.<br />
4 ) Sélectionnez le paramètre souhaité.<br />
Fixe<br />
Auto<br />
Paramètre<br />
Description<br />
la luminosité <strong>de</strong>s caches gris est la même<br />
la luminosité <strong>de</strong>s caches gris est réglée en fonction <strong>de</strong><br />
celle <strong>de</strong>s images à l’écran<br />
5 ) Appuyez sur HOME MENU pour quitter le menu.<br />
4.3.2 Sélection d’un niveau PureCinema pour une image <strong>de</strong> qualité supéri<strong>eu</strong>re<br />
La fonction PureCinema <strong>de</strong> <strong>Pioneer</strong> détecte automatiquement une source sous forme <strong>de</strong> film (codée à l’origine<br />
24 images/secon<strong>de</strong>), l’analyse <strong>et</strong> recrée chaque image fixe du film pour une qualité d’image haute définition. La<br />
fonction prend en charge les contenus film <strong>et</strong> texte.<br />
Suivez les étapes ci-<strong>de</strong>ssous pour régler le niveau PureCinema d’après votre contenu HD.<br />
1 ) Accé<strong>de</strong>z à Image via Configuration.<br />
2 ) Sélectionnez PureCinema dans le sous-menu.<br />
3 ) Sélectionnez Mo<strong>de</strong> film ou Optimis. Texte d’après le contenu.<br />
4 ) Sélectionnez le paramètre souhaité.<br />
Mo<strong>de</strong> Paramètre Description<br />
Mo<strong>de</strong> film Arrêt désactive PureCinema<br />
Optimis.<br />
Texte<br />
Standard (non disponible<br />
pour les signaux d’entrée<br />
480p, 720p @60 Hz ou<br />
1080p @60 Hz)<br />
Doux (non disponible pour<br />
les signaux d’entrée 1080p<br />
@60 Hz)<br />
Avancé (non disponible<br />
pour les signaux d’entrée<br />
1080p @60 Hz)<br />
Arrêt<br />
Marche<br />
détecte automatiquement les<br />
données d’image enregistrées<br />
tandis que sont affichées <strong>de</strong>s<br />
images <strong>de</strong> DVD ou haute définition<br />
(<strong>de</strong>s films par exemple) ca<strong>de</strong>ncées<br />
à 24 images par secon<strong>de</strong> pour une<br />
lecture régulière <strong>et</strong> vivante<br />
produit <strong>de</strong>s images animées plus<br />
régulières <strong>et</strong> plus vivantes<br />
convertit <strong>de</strong>s images <strong>de</strong> qualité<br />
cinéma à 72 Hz tandis que sont<br />
affichées <strong>de</strong>s images <strong>de</strong> DVD (<strong>de</strong>s<br />
films par exemple) ca<strong>de</strong>ncées à<br />
24 images par secon<strong>de</strong> pour une<br />
lecture régulière <strong>et</strong> vivante<br />
désactive l’optimisation <strong>de</strong> texte<br />
améliore la qualité d’affichage <strong>de</strong>s<br />
sous-titres<br />
5 ) Appuyez sur HOME MENU pour quitter le menu.<br />
60<br />
Fr<br />
Remarque: Si vous activez le réglage Préf. Cm<strong>de</strong> J<strong>eu</strong> dans le menu Options, le réglage PureCinema sera<br />
désactivé.
Options <strong>de</strong> réglage supplémentaires <strong>de</strong> l’image <strong>et</strong> du son<br />
04<br />
4.4 Comment regar<strong>de</strong>r la télévision en multiécran<br />
Le télévis<strong>eu</strong>r à écran plat p<strong>eu</strong>t afficher plusi<strong>eu</strong>rs écrans simultanément: d<strong>eu</strong>x images ou image dans l’image. Les<br />
images p<strong>eu</strong>vent être inversées (en mo<strong>de</strong> 2 images <strong>et</strong> Im. ds Im.) ou déplacées sur différentes zones <strong>de</strong> l’écran<br />
(Im. ds Im.).<br />
2 images Image dans l’image (Im. ds Im.)<br />
Français<br />
4.4.1 Partage/Permutation/Changement d’écran<br />
Pour partager l’écran <strong>et</strong> regar<strong>de</strong>r d<strong>eu</strong>x chaînes simultanément, appuyez sur la touche SPLIT <strong>de</strong> la télécomman<strong>de</strong>.<br />
Chaque pression sur la touche change les vues entre d<strong>eu</strong>x images, image dans l’image <strong>et</strong> une s<strong>eu</strong>le image.<br />
Pour permuter les images entre les côtés/zones <strong>de</strong> l’écran, appuyez sur la touche SWAP.<br />
Pour déplacer la p<strong>et</strong>ite image du mo<strong>de</strong> Image dans l’image (Im. ds Im.) dans le <strong>sens</strong> inverse <strong>de</strong>s aiguilles d’une<br />
montre, appuyez sur la touche SHIFT.<br />
61<br />
Fr
04 Options <strong>de</strong> réglage supplémentaires <strong>de</strong> l’image <strong>et</strong> du son<br />
.<br />
Appuyez sur SPLIT pour accé<strong>de</strong>r aux<br />
différentes vues multiécran.<br />
Appuyez sur SWAP pour permuter<br />
la position <strong>de</strong>s d<strong>eu</strong>x images.<br />
Appuyez sur SHIFT pour déplacer la<br />
p<strong>et</strong>ite image dans le <strong>sens</strong> inverse<br />
<strong>de</strong>s aiguilles d’une montre.<br />
La fonction multiécran n’est pas disponible lorsque vous regar<strong>de</strong>z une source provenant d’une s<strong>eu</strong>le entrée ou<br />
<strong>de</strong> d<strong>eu</strong>x sources d’entrée externes.<br />
Appuyez sur EXIT pour r<strong>et</strong>ourner à la vue une s<strong>eu</strong>le image.<br />
Vous pouvez aussi sélectionner le mo<strong>de</strong> multiécran <strong>de</strong> votre choix à partir du menu TOOLS. Suivez les étapes ci<strong>de</strong>ssous<br />
pour sélectionner un mo<strong>de</strong> multiécran.<br />
1 ) Appuyez sur TOOLS.<br />
L’écran <strong>de</strong> menu TOOLS apparaît.<br />
2 ) Sélectionnez Partage, Permutation ou Changement dans le menu.<br />
M<strong>et</strong>tez l’option <strong>de</strong> votre choix en surbrillance avec les touches fléchées (puis appuyez sur ENTER si vous<br />
sélectionnez Permutation).<br />
3 ) Sélectionnez un mo<strong>de</strong>.<br />
Sélectionnez Arrêt, 2 images ou Im. ds Im. pour le mo<strong>de</strong> Partage. Le mo<strong>de</strong> sélectionné s’affiche au centre<br />
du menu TOOLS.<br />
4.5 Gel <strong>de</strong> l’image<br />
Avertissement: Afficher <strong>de</strong>s images en mo<strong>de</strong><br />
multiécran pendant une pério<strong>de</strong> prolongée p<strong>eu</strong>t<br />
causer une rémanence d’image.<br />
Pendant les séquences d’action rapi<strong>de</strong> ou les images aux détails abondants, vous pouvez capturer l’image avec<br />
l’option FREEZE. Elle vous perm<strong>et</strong> <strong>de</strong> mi<strong>eu</strong>x comprendre l’action ou les détails <strong>de</strong> l’image. Procé<strong>de</strong>z comme<br />
indiqué ci-<strong>de</strong>ssous pour geler une image d’une émission <strong>de</strong> télévision ou d’un film.<br />
1 ) Appuyez sur FREEZE pour créer une image fixe (copie<br />
<strong>de</strong> l’image) <strong>de</strong> l’image actuellement affichée à l’écran.<br />
La copie apparaît à droite <strong>de</strong> la séquence vidéo<br />
encore en mouvement, divisant ainsi l’écran en d<strong>eu</strong>x.<br />
2 ) Appuyez une nouvelle fois sur FREEZE pour libérer<br />
l’image.<br />
L’image gelée disparaît, ce qui ramène l’écran à la<br />
vue une s<strong>eu</strong>le image avec la séquence vidéo toujours<br />
en cours.<br />
• Avec le partage d’écran, il n’est pas possible <strong>de</strong> geler<br />
une image.<br />
Un message d’avertissement apparaît si vous essayez d’utiliser c<strong>et</strong>te fonction alors qu’une image gelée est déjà<br />
à l’écran. Si une image reste gelée sur l’écran pendant plus <strong>de</strong> cinq minutes, le télévis<strong>eu</strong>r la libère<br />
automatiquement.<br />
62<br />
Fr<br />
Remarque: L’utilisation <strong>de</strong> la fonction FREEZE pendant une pério<strong>de</strong> prolongée p<strong>eu</strong>t causer une rémanence<br />
d’image.
Options <strong>de</strong> réglage supplémentaires <strong>de</strong> l’image <strong>et</strong> du son<br />
04<br />
4.6 Utilisation <strong>de</strong> la fonction Bannière<br />
Lorsque vous sélectionnez une chaîne <strong>de</strong><br />
télévision ou changez <strong>de</strong> signal d’entrée, toutes<br />
les informations disponibles s’affichent à<br />
l’écran si le signal comporte <strong>de</strong>s informations<br />
sur l’émission (voir InfoBanner ci-<strong>de</strong>ssous).<br />
Appuyez sur DISPLAY pour afficher la bannière<br />
d’info (supplémentaire). Appuyez à nouveau sur<br />
EXIT ou DISPLAY pour masquer la bannière.<br />
Français<br />
InfoBanner<br />
D00001.000 ABCDEFGH XXXXXXXXXXXXXXXXXXXXXXXXXXXXXX STÉRÉO 9:30AM<br />
1 2 3<br />
4 5 6<br />
InfoBanner (supplémentaire)<br />
D00001.000 ABCDE XXXXXXXXXXXXXXXXXXXXXXXXXXXXX STÉRÉO<br />
7:07PM-8:08PM<br />
PRT_10<br />
TV<br />
PG<br />
9:30AM<br />
V HD<br />
7 8 9 1011<br />
12<br />
1 -Signal diffusé (numérique/<br />
analogique)<br />
2 -Numéro <strong>de</strong> la chaîne<br />
3 -Nom <strong>de</strong> la station<br />
4 -Titre <strong>de</strong> l’émission<br />
5 -Informations sur le multiplexage<br />
<strong>de</strong>s sons<br />
6 -H<strong>eu</strong>re actuelle<br />
7 -Horaire <strong>de</strong> l’émission<br />
8 -Informations sur le contrôle<br />
parental<br />
9 -Icône du contrôle parental<br />
10 -Nom du contrôle parental<br />
11 -Informations sur le signal (HD/SD)<br />
12 -Icônes <strong>de</strong>s Favoris<br />
Une bannière séparée apparaît également en bas <strong>de</strong> l’écran indiquant le mo<strong>de</strong> Pré réglages AV (coin inféri<strong>eu</strong>r<br />
gauche) <strong>et</strong> le format d’écran (coin inféri<strong>eu</strong>r droit).<br />
Les informations ci-<strong>de</strong>ssus n’apparaissent que si elles appartiennent au signal diffusé. Pendant le mo<strong>de</strong><br />
multiécran, la bannière apparaît sur les écrans principal <strong>et</strong> secondaire.<br />
63<br />
Fr
04 Options <strong>de</strong> réglage supplémentaires <strong>de</strong> l’image <strong>et</strong> du son<br />
4.7 Choix <strong>de</strong>s options sonores<br />
Vous disposez <strong>de</strong> quatre options sonores pour le télévis<strong>eu</strong>r à écran plat: CC, MTS, SAP <strong>et</strong> Eff<strong>et</strong> sonore. C<strong>et</strong>te<br />
section définit chacune <strong>de</strong> ces options, puis explique comment/quand les utiliser.<br />
4.7.1 Activation du sous-titrage codé (CC)<br />
Ce télévis<strong>eu</strong>r à écran plat est pourvu d’un décod<strong>eu</strong>r <strong>de</strong> sous-titres codés (CC) interne. La fonction CC perm<strong>et</strong> <strong>de</strong><br />
représenter les dialogues, les commentaires <strong>et</strong> les eff<strong>et</strong>s sonores <strong>de</strong>s émissions <strong>de</strong> télévision <strong>et</strong> <strong>de</strong>s vidéos sous<br />
la forme <strong>de</strong> sous-titres à l’écran. Pour les chaînes numériques, certains paramètres p<strong>eu</strong>vent être modifiés (la<br />
police <strong>et</strong> la coul<strong>eu</strong>r du texte entre autres). Toutefois, toutes les émissions <strong>et</strong> toutes les vidéos n’offrent pas <strong>de</strong><br />
sous-titrage codé. Vérifiez si le symbole “ “ apparaît pour savoir si le sous-titrage codé est disponible pour une<br />
émission ou une chaîne donnée.<br />
Suivez les étapes ci-<strong>de</strong>ssous pour activer le sous-titrage codé si celui-ci est disponible.<br />
1 ) Accé<strong>de</strong>z à Configuration Système via Configuration.<br />
2 ) Sélectionnez Sous-titres dans le menu Configuration Système.<br />
3 ) Sélectionnez Statut dans le sous-menu.<br />
4 ) Sélectionnez une option.<br />
Paramètre<br />
Arrêt<br />
Marche<br />
Avec Sil.<br />
Description<br />
les sous-titres codés ne sont pas affichés (par défaut)<br />
les sous-titres codés sont affichés s’ils sont disponibles<br />
les sous-titres codés ne sont affichés que si le son est<br />
coupé<br />
5 ) Appuyez sur HOME MENU pour quitter le menu.<br />
Types <strong>de</strong> sous-titre codé<br />
La télévision hertzienne offre différents types <strong>de</strong> sous-titrage codé. Ce télévis<strong>eu</strong>r à écran plat prend en charge les<br />
types reconnus <strong>de</strong> sous-titres codés sur les programmes analogiques, ainsi que les signaux numériques qui<br />
comportent <strong>de</strong>s sous-titres codés analogiques.<br />
• CC 1, CC 2, CC 3 ou CC 4 proposent l’affichage <strong>de</strong> sous-titres codés tout en préservant l’image télévisée dans<br />
sa totalité.<br />
• Texte 1, Texte 2, Texte 3 ou Texte 4 incrustent d’autres informations sur l’image (par ex., la météo) qui sont<br />
indépendantes <strong>de</strong> l’émission en cours.<br />
Suivez les étapes ci-<strong>de</strong>ssous pour passer <strong>de</strong> l’option par défaut CC 1 à un autre type <strong>de</strong> sous-titrage codé.<br />
1 ) Accé<strong>de</strong>z à Configuration Système via Configuration.<br />
2 ) Sélectionnez Sous-titres dans le menu Configuration Système.<br />
3 ) Sélectionnez Rég. Analog. dans le sous-menu.<br />
4 ) Sélectionnez le sous-titrage codé désiré.<br />
Statut : Arrêt<br />
Rég. Analog. : CC 1<br />
Réglages numériques<br />
64<br />
Fr<br />
5 ) Appuyez sur HOME MENU pour quitter le menu.
Options <strong>de</strong> réglage supplémentaires <strong>de</strong> l’image <strong>et</strong> du son<br />
04<br />
Sous-titrage codé pour les émissions numériques<br />
Vous disposez <strong>de</strong> six options <strong>de</strong> sous-titres codés pour les émissions numériques, appelés niveaux <strong>de</strong> Service. Le<br />
service <strong>de</strong> sous-titrage primaire est habituellement offert au titre <strong>de</strong> Service 1 <strong>et</strong> le service <strong>de</strong> sous-titrage pour la<br />
langue secondaire est habituellement offert au titre <strong>de</strong> Service 2. Vous trouverez <strong>de</strong> plus amples informations sur<br />
ces offres un p<strong>eu</strong> plus loin dans ce chapitre.<br />
Suivez les étapes ci-<strong>de</strong>ssous pour passer du Service 1 par défaut à un autre type <strong>de</strong> sous-titrage codé numérique.<br />
1 ) Accé<strong>de</strong>z à Configuration Système via Configuration.<br />
2 ) Sélectionnez Sous-titres dans le menu Configuration Système.<br />
3 ) Sélectionnez Réglages numériques dans le sous-menu.<br />
4 ) Sélectionnez Service Num .<br />
5 ) Sélectionnez le niveau <strong>de</strong> service <strong>de</strong> sous-titre codé désiré (/).<br />
Français<br />
Réglages numériques<br />
Service Num. : Service 1<br />
Taille <strong>de</strong> police : Auto<br />
Police : Auto<br />
Coul. Police : Auto<br />
Opacité <strong>de</strong> police : Auto<br />
Coul<strong>eu</strong>r <strong>de</strong> fond : Auto<br />
Opacité du fond : Auto<br />
6 ) Appuyez sur HOME MENU pour quitter le menu.<br />
Suivez les étapes ci-<strong>de</strong>ssous pour modifier l’apparence du sous-titrage sur une émission numérique.<br />
1 ) Accé<strong>de</strong>z à Configuration Système via Configuration.<br />
2 ) Sélectionnez Sous-titres dans le menu Configuration Système.<br />
3 ) Sélectionnez Réglages numériques dans le sous-menu.<br />
4 ) Sélectionnez l’option à modifier.<br />
5 ) Sélectionnez le paramètre souhaité pour c<strong>et</strong>te option.<br />
Le paramètre par défaut pour chaque option est Auto.<br />
Options<br />
Taille <strong>de</strong> police<br />
Description<br />
Auto, Gran<strong>de</strong>, Standard, P<strong>et</strong>ite<br />
Police 1 Auto, Police 1, Police 2, Police 3, Police 4, Police 5,<br />
Police 6, Police 7<br />
Coul. Police<br />
Opacité <strong>de</strong> police<br />
Coul<strong>eu</strong>r <strong>de</strong> fond<br />
Opacité du fond<br />
Auto, Noire, Blanche, Rouge, Vert, Bl<strong>eu</strong>, Jaune,<br />
Magenta, Cyan<br />
Auto, Opaque, Transparente, Transluci<strong>de</strong>,<br />
Clignotante<br />
Auto, Noire, Blanche, Rouge, Vert, Bl<strong>eu</strong>, Jaune,<br />
Magenta, Cyan<br />
Auto, Opaque, Transparente, Transluci<strong>de</strong><br />
1 Police 1 (espacement constant <strong>et</strong> empattement)/ Police 2 (espacement proportionnel <strong>et</strong><br />
empattement)/ Police 3 (espacement constant sans empattement)/ Police 4 (espacement<br />
proportionnel sans empattement)/ Police 5 (police informelle)/ Police 6 (police cursive)/<br />
Police 7 (police <strong>de</strong> p<strong>et</strong>ites capitales)<br />
6 ) Appuyez sur HOME MENU pour quitter le menu.<br />
65<br />
Fr
04 Options <strong>de</strong> réglage supplémentaires <strong>de</strong> l’image <strong>et</strong> du son<br />
4.7.2 Commutation <strong>de</strong>s langues au moyen <strong>de</strong> MTS<br />
MTS (Multi-channel Television Sound) vous perm<strong>et</strong> <strong>de</strong> commuter la<br />
langue audible si elle est disponible pour c<strong>et</strong>te émission. Les langues<br />
disponibles dépen<strong>de</strong>nt <strong>de</strong> chaque émission.<br />
Suivez les étapes ci-<strong>de</strong>ssous lorsque vous regar<strong>de</strong>z une émission <strong>de</strong><br />
télévision analogique offrant plusi<strong>eu</strong>rs services <strong>de</strong> langue.<br />
1 ) Appuyez sur TOOLS <strong>de</strong> la télécomman<strong>de</strong>.<br />
2 ) Sélectionnez MTS dans le menu TOOLS.<br />
3 ) Sélectionnez English, Français ou Español.<br />
Si vous regar<strong>de</strong>z une émission <strong>de</strong> télévision numérique ne comportant pas d’informations <strong>de</strong> son ou <strong>de</strong> langue,<br />
“N/A” apparaîtra sur l’écran. Pour les langues autres que Anglais, Français ou Espagnol, “Autres” apparaît sur<br />
l’écran. Si la langue choisie est disponible lorsque vous changez <strong>de</strong> chaîne ou d’émission, vous entendrez c<strong>et</strong>te<br />
langue.<br />
4.7.3 Sélection <strong>de</strong> SAP<br />
Lorsque vous regar<strong>de</strong>z <strong>de</strong>s émissions <strong>de</strong> télévision sur les fréquences VHF/UHF ou <strong>de</strong>s chaînes <strong>de</strong> télévision<br />
analogique par câble, vous pouvez appuyer sur la touche TOOLS pour activer la stéréophonie <strong>et</strong>/ou le programme<br />
audio secondaire (SAP) si ces options sont disponibles.<br />
Suivez les étapes ci-<strong>de</strong>ssous pour sélectionner les options Stéréo/SAP.<br />
1 ) Appuyez sur TOOLS.<br />
2 ) Sélectionnez MTS dans le menu TOOLS.<br />
3 ) Sélectionnez STÉRÉO, SAP ou MONO.<br />
Le tableau ci-<strong>de</strong>ssous représente les options Stéréo/SAP.<br />
Mo<strong>de</strong> STÉRÉO Mo<strong>de</strong> SAP Mo<strong>de</strong> MONO<br />
STÉRÉO SAP MONO<br />
Mo<strong>de</strong> STÉRÉO Mo<strong>de</strong> SAP Mo<strong>de</strong> MONO<br />
STÉRÉO SAP MONO<br />
STÉRÉO 9:30AM STÉRÉO (SAP) 9:30AM MONO (SAP) 9:30AM MONO 9:30AM<br />
En mo<strong>de</strong> STÉRÉO En mo<strong>de</strong> STÉRÉO En mo<strong>de</strong> STÉRÉO En mo<strong>de</strong> STÉRÉO<br />
STÉRÉO 9:30AM SAP (STÉRÉO) 9:30AM SAP (PRINCIPAL) 9:30AM PRINCIPAL 9:30AM<br />
En mo<strong>de</strong> SAP En mo<strong>de</strong> SAP En mo<strong>de</strong> SAP En mo<strong>de</strong> SAP<br />
MONO 9:30AM MONO (SAP) 9:30AM MONO (SAP) 9:30AM MONO 9:30AM<br />
En mo<strong>de</strong> MONO En mo<strong>de</strong> MONO En mo<strong>de</strong> MONO En mo<strong>de</strong> MONO<br />
Signaux STÉRÉO STÉRÉO + SAP MONO + SAP Signaux MONO<br />
66<br />
Fr
Options <strong>de</strong> réglage supplémentaires <strong>de</strong> l’image <strong>et</strong> du son<br />
04<br />
Lorsque le son stéréo est difficile à entendre, choisissez manuellement MONO pour obtenir un son plus clair. Les<br />
sons du télévis<strong>eu</strong>r <strong>de</strong>m<strong>eu</strong>rent monophoniques même si l’émission reçue est en stéréophonie. Sélectionnez à<br />
nouveau STÉRÉO pour entendre <strong>de</strong>s émissions en stéréo si elles sont disponibles.<br />
La sélection <strong>de</strong> MTS ne change pas le type <strong>de</strong>s sons dans le cas où la source est ENTRÉE 1 à ENTRÉE 7, ou encore<br />
PC. En eff<strong>et</strong>, la nature du son est alors définie par la source vidéo.<br />
4.7.4 Application <strong>de</strong>s réglages d’eff<strong>et</strong> sonore<br />
Le télévis<strong>eu</strong>r à écran plat offre quatre types d’eff<strong>et</strong> sonore: SRS FOCUS, SRS, SRS TruBass <strong>et</strong> SRS Definition.<br />
• SRS FOCUS TM déplace la direction <strong>de</strong> la source sonore verticalement <strong>et</strong> rend le son <strong>et</strong> les voix plus<br />
clairement audibles<br />
• SRS ® produit sans effort un champ sonore tridimensionnel<br />
• SRS TruBass ® produit une tonalité <strong>de</strong> grave claire <strong>et</strong> riche<br />
• SRS Definition ® améliore la qualité <strong>de</strong>s fréquences moyennes <strong>et</strong> clarifie les voix <strong>et</strong> le son <strong>de</strong>s instruments<br />
Français<br />
Pour activer un ou plusi<strong>eu</strong>rs <strong>de</strong>s eff<strong>et</strong>s sonores, suivez les instructions ci-<strong>de</strong>ssous.<br />
1 ) Accé<strong>de</strong>z à Son via Configuration.<br />
2 ) Sélectionnez Eff<strong>et</strong> sonore dans le menu Son.<br />
3 ) Sélectionnez une option d’eff<strong>et</strong> sonore.<br />
(SRS FOCUS, SRS, SRS TruBass, SRS Definition)<br />
4 ) Sélectionnez Basse (modéré), Moyenne (standard), Haute (amélioré) ou Arrêt pour c<strong>et</strong>te option.<br />
5 ) Appuyez sur HOME MENU pour quitter le menu.<br />
Remarque: La modification d’un eff<strong>et</strong> sonore sur le son dépend du signal.<br />
(SRS WOW HD TM ) indique que SRS FOCUS, SRS, SRS TruBass <strong>et</strong> SRS Definition sont activés.<br />
4.7.5 Utilisation <strong>de</strong> AVC (Auto Volume Control)<br />
AVC (Auto Volume Control) réduit les changements brusques <strong>de</strong> volume <strong>et</strong> compense le niveau sonore <strong>de</strong> la<br />
source.<br />
Pour choisir c<strong>et</strong>te option, procé<strong>de</strong>z comme décrit ci-après.<br />
1 ) Accé<strong>de</strong>z à Son via Configuration.<br />
2 ) Sélectionnez AVC dans le menu Son.<br />
3 ) Sélectionnez Marche (ou Arrêt ).<br />
4 ) Appuyez sur HOME MENU pour quitter le menu.<br />
4.8 Gestion <strong>de</strong> l’alimentation<br />
Ce télévis<strong>eu</strong>r à écran plat est écoénergétique <strong>et</strong> comprend également <strong>de</strong>s fonctions pour économiser davantage<br />
la consommation électrique. Dans une section antéri<strong>eu</strong>re intitulée “3.6 Début intelligent pour les nouveaux<br />
propriétaires“, vous avez appris à activer la fonction d’économie d’énergie. C<strong>et</strong>te section indique <strong>de</strong>s fonctions<br />
encore plus avancées pour économiser l’énergie <strong>et</strong> prolonger la durée <strong>de</strong> vie du télévis<strong>eu</strong>r.<br />
Source AV/PC – Arrêt Image<br />
Pour économiser l’énergie <strong>et</strong> prolonger la durée <strong>de</strong> vie du télévis<strong>eu</strong>r à écran plat, éteignez l’écran du télévis<strong>eu</strong>r.<br />
Suivez les étapes ci-<strong>de</strong>ssous pour éteindre l’écran du télévis<strong>eu</strong>r.<br />
1 ) Appuyez sur TOOLS <strong>de</strong> la télécomman<strong>de</strong>.<br />
2 ) Sélectionnez Arrêt Image dans le menu TOOLS.<br />
3 ) Appuyez sur ENTER.<br />
L’écran du télévis<strong>eu</strong>r s’éteint.<br />
Pour rétablir l’image, appuyez sur toute touche autre que VOL +/– <strong>et</strong> MUTING.<br />
Remarque: Le réglage Arrêt Image n’est pas conservé en mémoire par le système.<br />
67<br />
Fr
04 Options <strong>de</strong> réglage supplémentaires <strong>de</strong> l’image <strong>et</strong> du son<br />
Source AV – Aucun signal<br />
Pour économiser l’énergie <strong>et</strong> prolonger la durée <strong>de</strong> vie du télévis<strong>eu</strong>r à écran plat, le télévis<strong>eu</strong>r p<strong>eu</strong>t se m<strong>et</strong>tre<br />
automatiquement en veille si aucun signal n’est reçu <strong>de</strong> la source AV pendant 15 minutes consécutives. Un<br />
message d’avertissement s’affiche sur le télévis<strong>eu</strong>r chaque minute au cours <strong>de</strong>s cinq minutes qui précè<strong>de</strong>nt sa<br />
mise en veille. Une fois la <strong>de</strong>rnière minute écoulée, le télévis<strong>eu</strong>r entre en veille.<br />
Suivez les étapes ci-<strong>de</strong>ssous pour que le télévis<strong>eu</strong>r entre en veille si aucun signal n’est reçu <strong>de</strong> la source AV.<br />
1 ) Accé<strong>de</strong>z à Comman<strong>de</strong> alimentation via Configuration.<br />
2 ) Sélectionnez Arrêt sans signal dans le menu Comman<strong>de</strong> alimentation.<br />
3 ) Sélectionnez Activer pour activer la fonction Arrêt si aucun signal AV.<br />
4 ) Appuyez sur HOME MENU pour quitter le menu.<br />
Remarque: Le télévis<strong>eu</strong>r à écran plat p<strong>eu</strong>t entrer en veille en cas <strong>de</strong> parasite (interférence du signal) à la fin d’une<br />
programmation (la chaîne passe hors antenne).<br />
Source AV – Pas d’opération<br />
Pour économiser l’énergie <strong>et</strong> prolonger la durée <strong>de</strong> vie du télévis<strong>eu</strong>r à écran plat, le télévis<strong>eu</strong>r p<strong>eu</strong>t se m<strong>et</strong>tre<br />
automatiquement en veille si aucune comman<strong>de</strong> n’est reçue <strong>de</strong> la source AV pendant trois h<strong>eu</strong>res consécutives.<br />
Un message d’avertissement s’affiche sur le télévis<strong>eu</strong>r chaque minute au cours <strong>de</strong>s cinq minutes qui précè<strong>de</strong>nt<br />
sa mise en veille. Une fois la <strong>de</strong>rnière minute écoulée, le télévis<strong>eu</strong>r entre en veille.<br />
Suivez les étapes ci-<strong>de</strong>ssous pour que le télévis<strong>eu</strong>r entre automatiquement en veille si aucune comman<strong>de</strong> n’est<br />
reçue <strong>de</strong> la source AV.<br />
1 ) Accé<strong>de</strong>z à Comman<strong>de</strong> alimentation via Configuration.<br />
2 ) Sélectionnez Arrêt sans opération dans le menu Comman<strong>de</strong> alimentation.<br />
3 ) Sélectionnez Activer dans le menu Arrêt sans opération.<br />
4 ) Appuyez sur HOME MENU pour quitter le menu.<br />
Source PC - Gestion <strong>de</strong> l’alimentation<br />
Lorsque les signaux sont reçus d’un ordinat<strong>eu</strong>r, le télévis<strong>eu</strong>r p<strong>eu</strong>t se m<strong>et</strong>tre automatiquement en veille si aucun<br />
signal n’est reçu. Suivez les étapes ci-<strong>de</strong>ssous pour activer c<strong>et</strong>te fonction.<br />
1 ) Accé<strong>de</strong>z à Comman<strong>de</strong> alimentation via Configuration.<br />
2 ) Sélectionnez Gestion alimentation dans le menu Comman<strong>de</strong> alimentation.<br />
3 ) Sélectionnez une option dans le sous-menu.<br />
Arrêt<br />
Marche<br />
Options<br />
Description<br />
Le système n’est pas placé en veille (par défaut)<br />
le télévis<strong>eu</strong>r entre en veille si aucun signal n’est<br />
reçu <strong>de</strong> l’ordinat<strong>eu</strong>r pendant huit minutes ; utiliser<br />
l’ordinat<strong>eu</strong>r n’a aucun eff<strong>et</strong> sur le télévis<strong>eu</strong>r<br />
Remarque: Appuyez sur TV a <strong>de</strong> la télécomman<strong>de</strong> ou sur STANDBY/ON du télévis<strong>eu</strong>r pour réactiver le<br />
télévis<strong>eu</strong>r à écran plat.<br />
4 ) Appuyez sur HOME MENU pour quitter le menu.<br />
Ces options <strong>de</strong> gestion <strong>de</strong> l’alimentation ne sont pas disponibles lorsqu’un ordinat<strong>eu</strong>r est raccordé au télévis<strong>eu</strong>r<br />
par le port/prise HDMI.<br />
68<br />
Fr
Utilisation d’autres appareils avec le télévis<strong>eu</strong>r à écran plat 05<br />
5 Utilisation d’autres appareils avec le<br />
télévis<strong>eu</strong>r à écran plat<br />
En complément <strong>de</strong>s sections antéri<strong>eu</strong>res qui ont déjà présenté d’autres appareils pour la lecture vidéo, c<strong>et</strong>te<br />
section donne <strong>de</strong>s informations sur la comman<strong>de</strong> <strong>et</strong> le fonctionnement d’appareils particuliers.<br />
5.1 Programmation <strong>de</strong> la télécomman<strong>de</strong> pour comman<strong>de</strong>r d’autres appareils<br />
Pour comman<strong>de</strong>r d’autres appareils ou dispositifs par le biais du télévis<strong>eu</strong>r à écran plat, il est nécessaire <strong>de</strong><br />
programmer la télécomman<strong>de</strong> du télévis<strong>eu</strong>r avec le co<strong>de</strong> fabricant <strong>de</strong> l’autre appareil. Un co<strong>de</strong> fabricant consiste<br />
en une série <strong>de</strong> numéros i<strong>de</strong>ntifiant le type d’appareil <strong>et</strong> la marque. Ces co<strong>de</strong>s sont disponibles dans la section<br />
intitulée “8.2 Co<strong>de</strong>s <strong>de</strong> fabricant à programmer dans la télécomman<strong>de</strong>” <strong>de</strong> l’Annexe 8.2 <strong>de</strong> ce mo<strong>de</strong> d’emploi.<br />
Français<br />
5.1.1 Attribution d’un co<strong>de</strong> fabricant à la télécomman<strong>de</strong><br />
Pour attribuer un co<strong>de</strong> fabricant préétabli à la télécomman<strong>de</strong> du télévis<strong>eu</strong>r,<br />
suivez les instructions ci-<strong>de</strong>ssous. (Pour connaître les co<strong>de</strong>s fabricant, voir<br />
“8.2 Co<strong>de</strong>s <strong>de</strong> fabricant à programmer dans la télécomman<strong>de</strong>”)<br />
1 ) Appuyez sur SELECT pour choisir l’appareil à programmer.<br />
2 ) Appuyez en même temps sur EDIT <strong>et</strong> 1.<br />
Le témoin du mo<strong>de</strong> sélectionné clignote lorsque la télécomman<strong>de</strong><br />
est prête à être programmée.<br />
3 ) Utilisez les touches numériques pour saisir le co<strong>de</strong> fabricant.<br />
Le co<strong>de</strong> est programmé dans la télécomman<strong>de</strong> lorsque le témoin<br />
s’éteint.<br />
5.1.2 Lancement d’une recherche bibliothèque pour le co<strong>de</strong> fabricant<br />
Si vous ne connaissez pas le co<strong>de</strong> d’un appareil particulier, essayez tous<br />
les co<strong>de</strong>s disponibles pour un appareil semblable, puis testez certaines<br />
fonctions pour ce co<strong>de</strong>.<br />
Pour trouver le co<strong>de</strong> perm<strong>et</strong>tant <strong>de</strong> comman<strong>de</strong>r correctement l’appareil,<br />
suivez les étapes ci-<strong>de</strong>ssous en utilisant différents co<strong>de</strong>s jusqu’à ce que<br />
vous trouviez la meill<strong>eu</strong>re association.<br />
1 ) Appuyez sur SELECT pour choisir l’appareil à programmer.<br />
2 ) Appuyez en même temps sur EDIT <strong>et</strong> 3.<br />
Le témoin du mo<strong>de</strong> sélectionné clignote lorsque la télécomman<strong>de</strong><br />
est prête à parcourir la bibliothèque <strong>de</strong>s co<strong>de</strong>s.<br />
3 ) Essayez le co<strong>de</strong> au moyen <strong>de</strong>s comman<strong>de</strong>s SOURCE POWER, PLAY,<br />
1 ou CH+.<br />
4 ) Passez au co<strong>de</strong> suivant avec les touches fléchées haut/bas ( / )<br />
si le co<strong>de</strong> saisi ne perm<strong>et</strong> pas <strong>de</strong> comman<strong>de</strong>r l’appareil.<br />
Vous pouvez aussi revenir au co<strong>de</strong> précé<strong>de</strong>nt <strong>et</strong> répétez l’étape 3.<br />
5 ) Appuyez sur ENTER pour verrouiller le co<strong>de</strong> perm<strong>et</strong>tant <strong>de</strong><br />
comman<strong>de</strong>r correctement l’appareil.<br />
Toutes les touches disponibles pour le mo<strong>de</strong> sélectionné sont<br />
ajoutées lorsque le témoin <strong>de</strong> mo<strong>de</strong> clignote pendant une secon<strong>de</strong>.<br />
La télécomman<strong>de</strong> reprend ensuite son fonctionnement normal.<br />
69<br />
Fr
05 Utilisation d’autres appareils avec le télévis<strong>eu</strong>r à écran plat<br />
5.1.3 Effacement <strong>de</strong> la télécomman<strong>de</strong> <strong>de</strong>s co<strong>de</strong>s fabricant ajoutés<br />
Suivez les étapes ci-<strong>de</strong>ssous pour ramener tous les co<strong>de</strong>s appris <strong>et</strong> préréglés aux réglages par défaut (PIONEER).<br />
1 ) Appuyez en même temps sur EDIT <strong>et</strong> TV .<br />
La sélection p<strong>eu</strong>t être effectuée dans n’importe quel mo<strong>de</strong>.<br />
2 ) Appuyez sur la touche Jaune.<br />
Vérifiez que le témoin <strong>de</strong> mo<strong>de</strong> sélectionné clignote.<br />
La télécomman<strong>de</strong> entre en mo<strong>de</strong> <strong>de</strong> réinitialisation aux réglages<br />
d’usine. La réinitialisation est terminée lorsque le témoin <strong>de</strong> mo<strong>de</strong><br />
clignote pendant une secon<strong>de</strong>. La télécomman<strong>de</strong> reprend ensuite son<br />
fonctionnement normal.<br />
Remarque: La télécomman<strong>de</strong> du télévis<strong>eu</strong>r p<strong>eu</strong>t ne pas comman<strong>de</strong>r ou<br />
comman<strong>de</strong>r partiellement certains appareils figurant dans les<br />
tableaux.<br />
Pour quitter la réinitialisation avant qu’elle ne soit terminée, appuyez <strong>de</strong> nouveau sur EDIT. La réinitialisation est<br />
annulée si aucune action n’est effectuée dans les 60 secon<strong>de</strong>s. Par aill<strong>eu</strong>rs, si vous changez <strong>de</strong> mo<strong>de</strong> pendant<br />
c<strong>et</strong>te procédure, la réinitialisation est annulée.<br />
5.1.4 Comman<strong>de</strong> d’un ampli-tuner <strong>Pioneer</strong><br />
La télécomman<strong>de</strong> du télévis<strong>eu</strong>r à écran plat comporte un carré <strong>de</strong> touches dédiées à la comman<strong>de</strong> d’un amplituner<br />
<strong>Pioneer</strong>. Les touches actives, <strong>de</strong> gauche à droite sont les suivantes:<br />
• RECEIVER STANDBY/ON<br />
(pour allumer ou éteindre l’ampli-tuner <strong>Pioneer</strong>)<br />
• RECEIVER INPUT<br />
(pour passer d’une entrée à l’autre/sélectionner une entrée)<br />
• RECEIVER VOL –<br />
(pour baisser le volume sonore)<br />
• RECEIVER VOL +<br />
(pour augmenter le volume sonore)<br />
70<br />
Fr
Utilisation d’autres appareils avec le télévis<strong>eu</strong>r à écran plat 05<br />
5.1.5 Comman<strong>de</strong> d’un système par câble (CBL) ou satellite (SAT)<br />
Avec Mo<strong>de</strong> placé sur CBL/SAT, un convertiss<strong>eu</strong>r <strong>de</strong> câble utilise les touches 1, 6, 7, 8, <strong>et</strong> 9 tandis que les tuners<br />
satellite utilisent les touches 1 à 8. Toutefois, le télévis<strong>eu</strong>r ne reconnaît qu’un s<strong>eu</strong>l système (câble ou satellite) à<br />
la fois.<br />
• 1 Touches numériques<br />
(appuyez sur ces touches pour saisir un numéro <strong>de</strong><br />
chaîne)<br />
• 2 SAT GUIDE<br />
(pour afficher l’écran <strong>de</strong> gui<strong>de</strong> <strong>de</strong> diffusion par<br />
satellite)<br />
• 3 ENTER<br />
(ENTER active la fonction sélectionnée)<br />
(les flèches perm<strong>et</strong>tent <strong>de</strong> sélectionner entre les<br />
écrans SAT GUIDE ou MENU)<br />
• 4 SAT MENU<br />
(pour afficher l’écran <strong>de</strong> menu <strong>de</strong> diffusion par<br />
satellite)<br />
• 5 SOURCE<br />
(pour allumer ou éteindre l’appareil)<br />
• 6 CH ENTER*<br />
(pour vali<strong>de</strong>r la saisie <strong>de</strong> la chaîne sélectionnée<br />
avec les touches <strong>de</strong> sélection directe)<br />
• 7 CH RETURN*<br />
(appuyez sur la ou les touches correspondant à la<br />
chaîne désirée)<br />
• 8 CH +/–<br />
(pour sélectionner la chaîne supéri<strong>eu</strong>re ou<br />
inféri<strong>eu</strong>re)<br />
• 9 RETURN<br />
(pour rétablir l’écran immédiatement antéri<strong>eu</strong>r)<br />
1<br />
2<br />
3<br />
6<br />
7<br />
8<br />
Français<br />
* Certains fabricants <strong>de</strong> convertiss<strong>eu</strong>r <strong>de</strong> câble ne<br />
prérèglent pas CH ENTER <strong>et</strong> CH RETURN.<br />
4<br />
9<br />
5<br />
71<br />
Fr
05 Utilisation d’autres appareils avec le télévis<strong>eu</strong>r à écran plat<br />
5.1.6 Comman<strong>de</strong> d’un magnétoscope (VCR)<br />
Avec Mo<strong>de</strong> placé sur VCR, vérifiez que l’entrée correcte est sélectionnée (ENTRÉE 1 à ENTRÉE 7) puis utilisez 1<br />
à 8 pour comman<strong>de</strong>r l’appareil.<br />
• 1 REWind<br />
(pour rembobiner la cass<strong>et</strong>te du magnétoscope <strong>et</strong><br />
perm<strong>et</strong>tre la recherche)<br />
• 2 PAUSE/STILL<br />
(pour suspendre la lecture <strong>et</strong> afficher <strong>de</strong>s images<br />
fixes)<br />
• 3 SOURCE<br />
(pour m<strong>et</strong>tre le magnétoscope sous ou hors<br />
tension)<br />
• 4 CH +/–<br />
(pour sélectionner la chaîne supéri<strong>eu</strong>re ou<br />
inféri<strong>eu</strong>re)<br />
• 5 PLAY<br />
(pour lancer la lecture)<br />
• 6 FF<br />
(pour avancer la cass<strong>et</strong>te du magnétoscope <strong>et</strong><br />
perm<strong>et</strong>tre la recherche)<br />
• 7 STOP<br />
(pour arrêter le défilement <strong>de</strong> la cass<strong>et</strong>te du<br />
magnétoscope)<br />
• 8 RECord<br />
(pour démarrer l’enregistrement)<br />
1<br />
2<br />
3<br />
4<br />
5<br />
6<br />
7<br />
8<br />
72<br />
Fr
Utilisation d’autres appareils avec le télévis<strong>eu</strong>r à écran plat 05<br />
5.1.7 Comman<strong>de</strong> d’un lect<strong>eu</strong>r <strong>de</strong> DVD/grav<strong>eu</strong>r <strong>de</strong> DVD/lect<strong>eu</strong>r BD<br />
Avec Mo<strong>de</strong> placé sur DVD/DVR, la télécomman<strong>de</strong> p<strong>eu</strong>t comman<strong>de</strong>r les lect<strong>eu</strong>rs <strong>de</strong> DVD, les grav<strong>eu</strong>rs <strong>de</strong> DVD ou<br />
les lect<strong>eu</strong>rs BD raccordés au télévis<strong>eu</strong>r à écran plat. Vérifiez que l’entrée correcte est sélectionnée pour l’appareil,<br />
puis utilisez les touches 1 à 14 pour le comman<strong>de</strong>r.<br />
Remarque: Les lect<strong>eu</strong>rs <strong>de</strong> DVD, les grav<strong>eu</strong>rs <strong>de</strong> DVD, les lect<strong>eu</strong>rs BD ou les lect<strong>eu</strong>rs HD-DVD d’autres fabricants<br />
p<strong>eu</strong>vent aussi être commandés en utilisant la télécomman<strong>de</strong> si la télécomman<strong>de</strong> a été préréglée<br />
pour ces appareils.<br />
• 1 DVD TOP MENU<br />
(pour afficher le menu supéri<strong>eu</strong>r d’un DVD)<br />
• 2 ENTER<br />
(ENTER active la fonction sélectionnée)<br />
(les flèches perm<strong>et</strong>tent <strong>de</strong> sélectionner entre les<br />
écrans SAT GUIDE ou MENU)<br />
• 3 DVD MENU<br />
(pour afficher le menu du DVD)<br />
• 4 Rouge/Vert/Bl<strong>eu</strong>/jaune (BD uniquement)<br />
(pour comman<strong>de</strong>r une application BD-J)<br />
• 5 REVERSE SCAN/CHAPTER SEARCH<br />
(appuyez une fois rapi<strong>de</strong>ment pour avancer au<br />
début du chapitre actuel; appuyez à nouveau pour<br />
revenir au début du chapitre précé<strong>de</strong>nt; appuyez<br />
continuellement pour aller en arrière)<br />
• 6 PAUSE/STILL<br />
(pour suspendre la lecture <strong>et</strong> afficher une image<br />
fixe)<br />
• 7 SOURCE<br />
(pour allumer ou éteindre l’appareil)<br />
• 8 CH +/– (grav<strong>eu</strong>r <strong>de</strong> DVD uniquement)<br />
(pour sélectionner la chaîne supéri<strong>eu</strong>re ou inféri<strong>eu</strong>re)<br />
• 9 TOOLS<br />
(pour attribuer un co<strong>de</strong> à un lect<strong>eu</strong>r BD <strong>Pioneer</strong>)<br />
• 10 RETURN<br />
(pour rétablir l’écran immédiatement antéri<strong>eu</strong>r)<br />
• 11 PLAY<br />
(pour lancer la lecture)<br />
• 12 FORWARD SCAN/CHAPTER SEARCH<br />
(appuyez une fois rapi<strong>de</strong>ment pour avancer au<br />
début du chapitre suivant; appuyez à nouveau pour<br />
avancer au début du chapitre suivant; appuyez<br />
continuellement pour effectuer une avance rapi<strong>de</strong>)<br />
• 13 STOP<br />
(pour interrompre la lecture DVD; sur certains<br />
lect<strong>eu</strong>rs/grav<strong>eu</strong>rs <strong>de</strong> DVD, le plateau <strong>de</strong> disque<br />
s’ouvre si vous appuyez d<strong>eu</strong>x fois sur c<strong>et</strong>te touche)<br />
• 14 RECord (Grav<strong>eu</strong>r <strong>de</strong> DVD uniquement)<br />
(pour démarrer l’enregistrement)<br />
1<br />
2<br />
3<br />
4<br />
5<br />
6<br />
7<br />
8<br />
9<br />
10<br />
11<br />
12<br />
13<br />
14<br />
Français<br />
13 & 14 STOP RECord (Grav<strong>eu</strong>r <strong>de</strong> DVD uniquement)<br />
(maintenez enfoncé puis appuyez sur pour<br />
arrêter l’enregistrement; s’applique uniquement aux<br />
grav<strong>eu</strong>rs <strong>de</strong> DVD <strong>Pioneer</strong>)<br />
73<br />
Fr
05 Utilisation d’autres appareils avec le télévis<strong>eu</strong>r à écran plat<br />
5.2 Utilisation <strong>de</strong>s entrées HDMI<br />
HDMI (High Definition Multimedia Interface) consiste en une métho<strong>de</strong> <strong>de</strong> communication couramment utilisée par<br />
les appareils numériques <strong>et</strong>/ou haute définition. Les prises INPUT 4, INPUT 5, INPUT 6 <strong>et</strong> INPUT 7 du télévis<strong>eu</strong>r à écran<br />
plat assurent les connexions HDMI pour les signaux d’entrée audio <strong>et</strong> vidéo numériques. Le télévis<strong>eu</strong>r à écran plat prend<br />
en charge les fonctions <strong>de</strong> Comman<strong>de</strong> HDMI afin <strong>de</strong> pouvoir comman<strong>de</strong>r l’appareil raccordé au télévis<strong>eu</strong>r. Pour utiliser<br />
la prise HDMI, précisez les types <strong>de</strong> signaux audio <strong>et</strong> vidéo en provenance <strong>de</strong> l’appareil raccordé. Pour connaître les types<br />
<strong>de</strong> signaux, voir le mo<strong>de</strong> d’emploi accompagnant l’appareil raccordé.<br />
L’un <strong>de</strong>s avantages d’utiliser le télévis<strong>eu</strong>r à écran plat pour comman<strong>de</strong>r un autre appareil est la compatibilité Deep Color.<br />
Deep Color est la profond<strong>eu</strong>r <strong>de</strong> coul<strong>eu</strong>r, qui décrit le nombre <strong>de</strong> bits utilisés pour représenter la coul<strong>eu</strong>r <strong>de</strong> chaque pixel<br />
dans une image matricielle. En plus <strong>de</strong>s signaux RVB/YCbCr16bits/20bits/24bits conventionnels, le télévis<strong>eu</strong>r à écran plat<br />
prend aussi en charge les signaux RVB/YCbCr30bits/36bits. Ceci perm<strong>et</strong> une reproduction chromatique plus fine <strong>et</strong><br />
précise lorsqu’un appareil qui prend en charge les signaux Deep Color (HDMI1.3 Deep Color) est raccordé au télévis<strong>eu</strong>r.<br />
La profond<strong>eu</strong>r <strong>de</strong> coul<strong>eu</strong>r apparaît sur la bannière info si une émission prend en charge Deep Color.<br />
Le télévis<strong>eu</strong>r à écran plat prend en charge les signaux vidéo suivants:<br />
Signaux vidéo pris en charge<br />
• 1920 x 1080p@60 Hz<br />
• 1920 x 1080p@24 Hz<br />
• 1920 x 1080i@59,94 Hz/60 Hz<br />
• 1280 x 720p@59,94 Hz/60 Hz<br />
• 720 x 480p@59,94 Hz/60 Hz<br />
• 720 (1440) x 480i@59,94 Hz/60 Hz<br />
Signaux PC pris en charge<br />
• 1280 x 1024 (SXGA) 60 Hz<br />
• 1360 x 768 (Wi<strong>de</strong>-XGA) 60 Hz<br />
• 1024 x 768 (XGA) 60 Hz<br />
• 800 x 600 (SVGA) 60 Hz<br />
• 640 x 480 (VGA) 60 Hz<br />
Remarque: L’image p<strong>eu</strong>t tar<strong>de</strong>r à s’afficher sur certains types d’appareil.<br />
Le télévis<strong>eu</strong>r à écran plat prend en charge les signaux audio suivants:<br />
• PCM linéaire (STÉRÉO 2 canaux)<br />
• Fréquence d’échantillonnage: 32 kHz, 44,1 kHz, 48 kHz<br />
Lors <strong>de</strong> la connexion d’un ordinat<strong>eu</strong>r à l’une <strong>de</strong>s prises HDMI du télévis<strong>eu</strong>r, utilisez un ordinat<strong>eu</strong>r ou une carte<br />
vidéo compatible HDMI. L’utilisation <strong>de</strong> la sortie DVI <strong>de</strong> l’ordinat<strong>eu</strong>r vers le télévis<strong>eu</strong>r à écran plat p<strong>eu</strong>t être à<br />
l’origine d’une absence ou d’une distorsion <strong>de</strong> l’image ou du son. Si la sortie DVI est votre unique option, v<strong>eu</strong>illez<br />
contactez le fabricant <strong>de</strong> l’ordinat<strong>eu</strong>r pour assistance.<br />
5.2.1 Spécification du type d’entrée HDMI<br />
Suivez les étapes ci-<strong>de</strong>ssous pour sélectionner un type <strong>de</strong> signal.<br />
1 ) Sélectionner l’entrée pour l’appareil raccordé.<br />
Appuyez sur la touche INPUT (<strong>de</strong> la télécomman<strong>de</strong> ou du télévis<strong>eu</strong>r) jusqu’à ce que l’entrée correcte<br />
s’affiche (ENTRÉE 4, ENTRÉE 5, ENTRÉE 6 ou ENTRÉE 7).<br />
Remarque: Pour ENTRÉE 4 <strong>et</strong> ENTRÉE 5, branchez <strong>de</strong>s câbles audio pour prendre en charge les signaux<br />
analogiques.<br />
2 ) Accé<strong>de</strong>z à Options via Configuration.<br />
3 ) Sélectionnez Entrée HDMI dans le menu Options.<br />
4 ) Sélectionnez Type <strong>de</strong> signal dans le sous-menu.<br />
5 ) Sélectionnez l’option adéquate.<br />
Vidéo<br />
PC<br />
Option<br />
Description<br />
utilisez c<strong>et</strong>te option sauf lorsqu’un ordinat<strong>eu</strong>r est raccordé<br />
(par défaut)<br />
lorsqu’un ordinat<strong>eu</strong>r est raccordé à la prise d’entrée HDMI<br />
74<br />
Fr<br />
6 ) Appuyez sur HOME MENU pour quitter le menu.
Utilisation d’autres appareils avec le télévis<strong>eu</strong>r à écran plat 05<br />
En mo<strong>de</strong> Vidéo, l’image est sur-balayée (agrandie), mais le télévis<strong>eu</strong>r passe automatiquement sur PC à la<br />
réception <strong>de</strong> signaux PC. En mo<strong>de</strong> PC, l’image s’affiche en plein écran pour une qualité optimale.<br />
Vidéo (sur-balayé)<br />
PC (sous-balayé)<br />
5.2.2 Spécification du type <strong>de</strong> signal numérique HDMI<br />
Pour connaître les types <strong>de</strong> signaux vidéo numériques nécessaires, consultez le mo<strong>de</strong> d’emploi accompagnant<br />
l’appareil raccordé.<br />
Français<br />
Suivez les étapes ci-<strong>de</strong>ssous pour attribuer un type <strong>de</strong> signal numérique.<br />
1 ) Accé<strong>de</strong>z à Options via Configuration.<br />
2 ) Sélectionnez Entrée HDMI dans le menu Options.<br />
3 ) Sélectionnez Vidéo dans le sous-menu.<br />
4 ) Sélectionnez le type <strong>de</strong> signaux vidéo numériques recommandé pour l’appareil raccordé.<br />
Type<br />
Auto<br />
Coul<strong>eu</strong>r-1<br />
Coul<strong>eu</strong>r-2<br />
Coul<strong>eu</strong>r-3<br />
Coul<strong>eu</strong>r-4<br />
Description<br />
le signal numérique reçu est automatiquement i<strong>de</strong>ntifié<br />
(par défaut)<br />
Signaux <strong>de</strong>s composantes vidéo numériques (4:2:2) verrouillés<br />
Signaux <strong>de</strong>s composantes vidéo numériques (4:4:4) verrouillés<br />
Signaux RVB numériques (16 à 235) verrouillés<br />
Signaux RVB numériques (0 à 255) verrouillés<br />
5 ) Appuyez sur HOME MENU pour quitter le menu.<br />
Si aucune image n’apparaît, choisissez un autre type <strong>de</strong> signal vidéo numérique. Le naturel <strong>de</strong>s coul<strong>eu</strong>rs <strong>de</strong>s<br />
paramètres autres que Auto doit être vérifié.<br />
5.2.3 Spécification du type <strong>de</strong> signal audio HDMI<br />
Pour connaître les types <strong>de</strong> signaux audio nécessaires, consultez le mo<strong>de</strong> d’emploi accompagnant l’appareil raccordé.<br />
Lorsque vous utilisez ENTRÉE 4 ou ENTRÉE 5 pour HDMI, sélectionnez la prise <strong>de</strong> la source d’entrée désirée.<br />
Suivez les étapes ci-<strong>de</strong>ssous pour spécifier le type <strong>de</strong> signal audio.<br />
1 ) Accé<strong>de</strong>z à Options via Configuration.<br />
2 ) Sélectionnez Entrée HDMI dans le menu Options.<br />
3 ) Sélectionnez Audio dans le sous-menu.<br />
4 ) Sélectionnez le type <strong>de</strong> signaux audio recommandé pour l’appareil raccordé.<br />
Type<br />
Auto<br />
Numérique<br />
Analogique<br />
Description<br />
le signal audio reçu est automatiquement i<strong>de</strong>ntifié (par défaut)<br />
les signaux audio numériques sont acceptés<br />
les signaux audio analogiques sont acceptés<br />
5 ) Appuyez sur HOME MENU pour quitter le menu.<br />
75<br />
Fr
05 Utilisation d’autres appareils avec le télévis<strong>eu</strong>r à écran plat<br />
Si aucun son n’est produit, spécifiez un autre type pour les signaux audio. Selon le type d’appareil, la sortie du<br />
son p<strong>eu</strong>t nécessiter <strong>de</strong>s câbles audio analogiques en plus <strong>de</strong>s raccor<strong>de</strong>ments HDMI.<br />
Remarque: Lorsque <strong>de</strong>s signaux sont entrés par les prises HDMI, aucun signal n’est sorti par la prise DIGITAL<br />
OUT s’il est protégé contre la copie.<br />
5.3 Comman<strong>de</strong> d’appareil avec la télécomman<strong>de</strong> du télévis<strong>eu</strong>r via HDMI<br />
La télécomman<strong>de</strong> du télévis<strong>eu</strong>r à écran plat p<strong>eu</strong>t comman<strong>de</strong>r un autre appareil comme un enregistr<strong>eu</strong>r, lect<strong>eu</strong>r<br />
ou système AV via les fonctions <strong>de</strong> Comman<strong>de</strong> HDMI. Les fonctions <strong>de</strong> comman<strong>de</strong> HDMI comprennent la lecture<br />
<strong>de</strong> données en utilisant un panneau <strong>de</strong> comman<strong>de</strong> affiché sur l’écran. Toutefois, la totalité <strong>de</strong>s opérations <strong>de</strong>s<br />
appareils n’est pas toujours disponible via la Comman<strong>de</strong> HDMI. Pour en savoir plus, voir les tableaux ci-<strong>de</strong>ssous.<br />
Fonction <strong>de</strong><br />
comman<strong>de</strong><br />
Lecture <strong>de</strong><br />
données<br />
Comman<strong>de</strong> sur<br />
écran<br />
Appareil<br />
commandé<br />
Enregistr<strong>eu</strong>r<br />
Lect<strong>eu</strong>r<br />
Enregistr<strong>eu</strong>r<br />
Lect<strong>eu</strong>r<br />
Sélection <strong>de</strong> Enregistr<strong>eu</strong>r<br />
langue d’affichage Lect<strong>eu</strong>r<br />
Comman<strong>de</strong> <strong>de</strong><br />
système AV<br />
Système AV<br />
Mise sous tension Enregistr<strong>eu</strong>r<br />
Lect<strong>eu</strong>r<br />
Mise hors tension Enregistr<strong>eu</strong>r<br />
Lect<strong>eu</strong>r<br />
Système AV<br />
Description <strong>de</strong> la fonction<br />
Si vous appuyez sur PLAY <strong>de</strong> l’appareil<br />
raccordé, la source est<br />
automatiquement sélectionnée <strong>et</strong> la<br />
lecture commence.<br />
L’enregistr<strong>eu</strong>r/lect<strong>eu</strong>r p<strong>eu</strong>t être<br />
commandé sur écran ou avec la<br />
télécomman<strong>de</strong> du télévis<strong>eu</strong>r (lecture,<br />
arrêt, avance/r<strong>et</strong>our rapi<strong>de</strong>s, <strong>et</strong>c.).<br />
L’information sur la langue<br />
d’affichage <strong>de</strong>s menus est transférée<br />
à l’enregistr<strong>eu</strong>r ou au lect<strong>eu</strong>r raccordé<br />
au télévis<strong>eu</strong>r à écran plat. Pour en<br />
savoir plus, voir le mo<strong>de</strong> d’emploi<br />
accompagnant l’enregistr<strong>eu</strong>r ou le<br />
lect<strong>eu</strong>r.<br />
L’ampli-tuner p<strong>eu</strong>t aussi être<br />
commandé avec la télécomman<strong>de</strong> du<br />
télévis<strong>eu</strong>r (volume, mo<strong>de</strong> surround <strong>et</strong><br />
sélection d’entrée <strong>de</strong> la prise HDMI).<br />
Le télévis<strong>eu</strong>r à écran plat p<strong>eu</strong>t être<br />
mis sous tension lorsque<br />
l’enregistr<strong>eu</strong>r ou le lect<strong>eu</strong>r raccordé<br />
est mis sous tension <strong>et</strong> que <strong>de</strong>s<br />
images sont envoyées au télévis<strong>eu</strong>r à<br />
écran plat.<br />
L’appareil raccordé p<strong>eu</strong>t être mis hors<br />
tension en même temps que le<br />
télévis<strong>eu</strong>r à écran plat.<br />
Remarques: La fonction Comman<strong>de</strong> HDMI (Cm<strong>de</strong> HDMI) mentionnée dans le mo<strong>de</strong> d’emploi <strong>et</strong> sur le produit est<br />
désignée par le nom <strong>de</strong> function KURO LINK sur le web <strong>et</strong> dans les catalogues.<br />
À l’exception <strong>de</strong>s fonctions <strong>de</strong> Mise hors tension <strong>et</strong> Sélection <strong>de</strong> la langue d’affichage, une s<strong>eu</strong>le<br />
prise HDMI p<strong>eu</strong>t être active à la fois.<br />
76<br />
Fr
Utilisation d’autres appareils avec le télévis<strong>eu</strong>r à écran plat 05<br />
La télécomman<strong>de</strong> du télévis<strong>eu</strong>r à écran plat p<strong>eu</strong>t comman<strong>de</strong>r un maximum <strong>de</strong> d<strong>eu</strong>x (2) enregistr<strong>eu</strong>rs, d<strong>eu</strong>x (2)<br />
lect<strong>eu</strong>rs <strong>et</strong> un (1) système AV à la fois.<br />
Pour sélectionner <strong>et</strong> utiliser les différentes fonctions <strong>de</strong> la comman<strong>de</strong> HDMI pour un enregistr<strong>eu</strong>r, un lect<strong>eu</strong>r ou<br />
un système AV <strong>Pioneer</strong>, utilisez le menu <strong>de</strong> la comman<strong>de</strong> HDMI sur le télévis<strong>eu</strong>r.<br />
Suivez les étapes ci-<strong>de</strong>ssous pour accé<strong>de</strong>r au menu.<br />
1 ) Appuyez sur HOME MENU.<br />
2 ) Sélectionnez Cm<strong>de</strong> HDMI dans le menu principal.<br />
M<strong>et</strong>tez l’option en surbrillance avec les touches fléchées, puis appuyez sur ENTER.<br />
Navigat<strong>eu</strong>r disque<br />
Pan. CMDE (SYS. AV)<br />
Pan. CMDE lecture<br />
Passer au son AV<br />
Français<br />
Remarque: Vous pouvez également appuyer sur HDMI CTRL <strong>de</strong> la télécomman<strong>de</strong> pour ouvrir le menu <strong>de</strong> la<br />
comman<strong>de</strong> HDMI.<br />
Option<br />
Navigat<strong>eu</strong>r disque<br />
Pan. CMDE (SYS. AV)<br />
Pan. CMDE lecture<br />
Passer au son AV/<br />
Passer au son TV<br />
Description<br />
affiche une liste <strong>de</strong> titres <strong>de</strong> l’enregistr<strong>eu</strong>r ou du<br />
lect<strong>eu</strong>r raccordé<br />
affiche le panneau <strong>de</strong> comman<strong>de</strong> pour le système<br />
AV raccordé<br />
affiche le panneau <strong>de</strong> comman<strong>de</strong> pour<br />
l’enregistr<strong>eu</strong>r ou le lect<strong>eu</strong>r raccordé<br />
commute entre le télévis<strong>eu</strong>r à écran plat <strong>et</strong> le<br />
système AV raccordé sur lequel le son est émis<br />
1<br />
Utilisez les touches suivantes pour comman<strong>de</strong>r les fonctions<br />
comme le navigat<strong>eu</strong>r <strong>de</strong> disque sur un enregistr<strong>eu</strong>r ou un lect<strong>eu</strong>r.<br />
2<br />
3<br />
4<br />
5<br />
6<br />
7<br />
• 1 VOL +/–<br />
(règle le volume pour un système AV)<br />
• 2 MUTING<br />
(pour couper le son pendant que la lecture vidéo continue)<br />
• 3 Touches fléchées<br />
(pour naviguer sur l’écran du menu)<br />
• 4 Touches <strong>de</strong> coul<strong>eu</strong>r (rouge, vert, bl<strong>eu</strong>, jaune)<br />
(pour comman<strong>de</strong>r un lect<strong>eu</strong>r BD)<br />
• 5 TOOLS<br />
(pour attribuer un co<strong>de</strong> à un lect<strong>eu</strong>r BD <strong>Pioneer</strong>)<br />
• 6 ENTER<br />
(pour activer la fonction sélectionnée)<br />
• 7 RETURN<br />
(pour revenir à l’écran <strong>de</strong> menu précé<strong>de</strong>nt)<br />
77<br />
Fr
05 Utilisation d’autres appareils avec le télévis<strong>eu</strong>r à écran plat<br />
Suivez les étapes ci-<strong>de</strong>ssous pour raccor<strong>de</strong>r un appareil pour la Comman<strong>de</strong> HDMI.<br />
1 ) Allumez le télévis<strong>eu</strong>r à écran plat <strong>et</strong> tous les autres appareils.<br />
2 ) Confirmez que le réglage d’entrée du télévis<strong>eu</strong>r pour les options <strong>de</strong> réglage Comman<strong>de</strong> HDMI est conforme<br />
aux instructions données dans le mo<strong>de</strong> d’emploi du ou <strong>de</strong>s appareils externes.<br />
3 ) Confirmez que l’appareil externe est programmé pour la Comman<strong>de</strong> HDMI.<br />
4 ) Vérifiez que la lecture audio <strong>et</strong> vidéo s’effectue correctement <strong>de</strong>puis l’appareil raccordé aux prises HDMI.<br />
5 ) Éteignez le télévis<strong>eu</strong>r à écran plat.<br />
6 ) Patientez quelques secon<strong>de</strong>s avant <strong>de</strong> le rallumer.<br />
7 ) Vérifiez que tous les appareils fonctionnent correctement.<br />
Suivez les étapes ci-<strong>de</strong>ssous pour sélectionner l’appareil qui sera commandé via la Comman<strong>de</strong> HDMI.<br />
1 ) Accé<strong>de</strong>z à Options via Configuration.<br />
2 ) Sélectionnez Rég. cm<strong>de</strong> HDMI dans le menu Options.<br />
3 ) Sélectionnez Réglage entrée dans le sous-menu.<br />
Réglage entrée : ENTRÉE4<br />
Cm<strong>de</strong> arrêt : Marche<br />
Prêt mse e. m. : Marche<br />
Gar<strong>de</strong>r état son : Arrêt<br />
Test marche<br />
Test arrêt<br />
4 ) Sélectionnez l’entrée désirée (ENTRÉE 4, ENTRÉE 5, ENTRÉE 6 ou ENTRÉE 7).<br />
5 ) Appuyez sur HOME MENU pour quitter le menu.<br />
Si vous comman<strong>de</strong>z un appareil compatible HDMI en utilisant un port HDMI autre que la prise sélectionnée dans<br />
Réglage entrée, un mauvais fonctionnement p<strong>eu</strong>t se produire. Lors du raccor<strong>de</strong>ment à une prise HDMI autre que<br />
celle sélectionnée dans Réglage entrée, les paramètres <strong>de</strong> l’appareil bloqueront les fonctions <strong>de</strong> Comman<strong>de</strong><br />
HDMI. Le menu <strong>de</strong> comman<strong>de</strong> HDMI n’est pas sélectionnable lorsque l’option Réglage entrée du menu Rég.<br />
cm<strong>de</strong> HDMI est placé sur Arrêt.<br />
Le menu <strong>de</strong> comman<strong>de</strong> change en fonction du type d’appareil compatible HDMI. Pour ajouter, modifier ou r<strong>et</strong>irer<br />
<strong>de</strong>s appareils <strong>de</strong> la Comman<strong>de</strong> HDMI, reportez-vous aux sections ci-<strong>de</strong>ssous pour les remarques d’installation <strong>et</strong><br />
les comman<strong>de</strong>s prises en charge.<br />
5.3.1 Comman<strong>de</strong> d’un système AV<br />
Pour ajouter un système AV, raccor<strong>de</strong>z l’appareil entre le télévis<strong>eu</strong>r <strong>et</strong> un enregistr<strong>eu</strong>r <strong>et</strong>/ou lect<strong>eu</strong>r. Pour<br />
fonctionner correctement, le système audio/vidéo doit prendre en charge la comman<strong>de</strong> HDMI entre le télévis<strong>eu</strong>r<br />
<strong>et</strong> tout autre appareil raccordé.<br />
Si le système AV ne prend pas en charge la Comman<strong>de</strong> HDMI, mais que l’autre appareil (lect<strong>eu</strong>r/enregistr<strong>eu</strong>r)<br />
accepte ce type <strong>de</strong> comman<strong>de</strong>, dans ce cas, raccor<strong>de</strong>z le système AV via la prise DIGITAL OUT du télévis<strong>eu</strong>r au<br />
moyen d’un câble numérique optique <strong>et</strong> via la prise AUDIO OUT au moyen d’un câble AV (en vente dans le<br />
commerce). L’autre appareil doit être raccordé au port HDMI au moyen d’un câble compatible HDMI. Les signaux<br />
entrés par les prises HDMI ne sont pas émis par la prise DIGITAL OUT.<br />
78<br />
Fr
Utilisation d’autres appareils avec le télévis<strong>eu</strong>r à écran plat 05<br />
Pendant la lecture, utilisez les touches fléchées haut/bas <strong>de</strong> la télécomman<strong>de</strong> (/ ) pour passer entre les<br />
options <strong>de</strong> son surround. Modifiez l’entrée avec les flèches gauche/droite (/). Pour reprendre la lecture,<br />
r<strong>et</strong>ournez au menu <strong>de</strong> comman<strong>de</strong> HDMI <strong>et</strong> sélectionnez <strong>de</strong> nouveau la fonction.<br />
Systèmes AV<br />
1 Change le mo<strong>de</strong> surround dans l’ordre<br />
2 Change la source d’entrée dans l’ordre<br />
inverse<br />
3 Change le mo<strong>de</strong> surround dans l’ordre inverse<br />
4 Ferme l’écran pour revenir au menu <strong>de</strong><br />
comman<strong>de</strong> HDMI<br />
5 Inscrit dans une liste l’appareil raccordé<br />
(numéro <strong>de</strong> modèle)<br />
6 Change la source d’entrée dans l’ordre<br />
7 Réservé/Annulé<br />
1<br />
2<br />
3<br />
Comman<strong>de</strong> HDMI<br />
****<br />
SURROUND+<br />
INPUT- INPUT+<br />
SURROUND-<br />
Sort.<br />
4<br />
5<br />
6<br />
7<br />
Français<br />
5.3.2 Comman<strong>de</strong> d’un enregistr<strong>eu</strong>r<br />
Appuyez sur ENTER pour lancer la lecture ou appuyez sur HDMI CONTROL pour revenir au menu. L’opération est<br />
la même pour les lect<strong>eu</strong>rs. Consultez le tableau ci-<strong>de</strong>ssous pour les comman<strong>de</strong>s disponibles.<br />
Enregistr<strong>eu</strong>rs<br />
1 Saute les publicités<br />
2 R<strong>et</strong>our rapi<strong>de</strong><br />
3 Arrête la lecture<br />
4 Ferme l’écran pour revenir au menu <strong>de</strong><br />
comman<strong>de</strong> HDMI<br />
5 Inscrit dans une liste l’appareil raccordé<br />
(numéro <strong>de</strong> modèle)<br />
6 Avance rapi<strong>de</strong><br />
7 Démarre la lecture<br />
1<br />
2<br />
3<br />
Comman<strong>de</strong> HDMI<br />
****<br />
Sort.<br />
4<br />
5<br />
6<br />
7<br />
Remarque: Vous pouvez utiliser les touches (Lecture), (Arrêt), (Pause), (Avance rapi<strong>de</strong>) <strong>et</strong> (R<strong>et</strong>our<br />
rapi<strong>de</strong>) <strong>de</strong> la télécomman<strong>de</strong> pour effectuer les mêmes opérations qu’avec les boutons du menu <strong>de</strong><br />
comman<strong>de</strong>.<br />
5.3.3 Comman<strong>de</strong> d’un lect<strong>eu</strong>r<br />
Appuyez sur ENTER pour lancer la lecture ou appuyez sur HDMI CONTROL pour revenir au menu. L’opération est<br />
la même pour les enregistr<strong>eu</strong>rs. Consultez le tableau ci-<strong>de</strong>ssous pour les comman<strong>de</strong>s disponibles.<br />
Lect<strong>eu</strong>rs<br />
1 Affiche le menu <strong>de</strong> disque DVD/Blu-ray du<br />
lect<strong>eu</strong>r<br />
2 R<strong>et</strong>our rapi<strong>de</strong><br />
3 Arrête la lecture<br />
4 Ferme l’écran pour revenir au menu <strong>de</strong><br />
comman<strong>de</strong> HDMI<br />
5 Inscrit dans une liste l’appareil raccordé<br />
(numéro <strong>de</strong> modèle)<br />
6 Avance rapi<strong>de</strong><br />
7 Démarre la lecture<br />
1<br />
2<br />
3<br />
Comman<strong>de</strong> HDMI<br />
****<br />
MENU<br />
Sort.<br />
4<br />
5<br />
6<br />
7<br />
Remarque: Vous pouvez utiliser les touches (Lecture), (Arrêt), (Pause), (Avance rapi<strong>de</strong>) <strong>et</strong> (R<strong>et</strong>our<br />
rapi<strong>de</strong>) <strong>de</strong> la télécomman<strong>de</strong> pour effectuer les mêmes opérations qu’avec les boutons du menu <strong>de</strong><br />
comman<strong>de</strong>.<br />
79<br />
Fr
05 Utilisation d’autres appareils avec le télévis<strong>eu</strong>r à écran plat<br />
5.3.4 Ajout d’un amplificat<strong>eu</strong>r AV ou d’un lect<strong>eu</strong>r BD<br />
Pour ajouter un amplificat<strong>eu</strong>r AV <strong>et</strong>/ou un lect<strong>eu</strong>r BD, reportez-vous au schéma <strong>de</strong> câblage ci-<strong>de</strong>ssous<br />
correspondant.<br />
Amplificat<strong>eu</strong>r AV <strong>et</strong> lect<strong>eu</strong>r BD<br />
T<br />
T<br />
T<br />
T<br />
W<br />
W<br />
W<br />
W<br />
Vue <strong>de</strong> dos<br />
Vue <strong>de</strong> dos<br />
Câble compatible<br />
HDMI (Câble<br />
HDMI portant la<br />
marque HDMI)<br />
Câble audio-vidéo<br />
(disponible dans<br />
le commerce)<br />
Câble numérique<br />
optique (disponible<br />
dans le commerce)<br />
Câble compatible<br />
HDMI (Câble<br />
HDMI portant la<br />
marque HDMI)<br />
Câble<br />
audio-vidéo<br />
(disponible dans<br />
le commerce)<br />
Câble<br />
numérique<br />
optique<br />
(disponible dans<br />
le commerce)<br />
Ampli AV<br />
Lect<strong>eu</strong>r BD<br />
Ampli AV<br />
Lect<strong>eu</strong>r BD<br />
Lect<strong>eu</strong>r BD uniquement<br />
T<br />
W<br />
T<br />
W<br />
Vue <strong>de</strong> dos<br />
Câble compatible HDMI<br />
(Câble HDMI portant la<br />
marque HDMI)<br />
Lect<strong>eu</strong>r BD<br />
80<br />
Fr
Utilisation d’autres appareils avec le télévis<strong>eu</strong>r à écran plat 05<br />
5.4 Options spécifiques <strong>de</strong> la Comman<strong>de</strong> HDMI<br />
Lorsque vous utilisez un appareil HDMI avec le télévis<strong>eu</strong>r à écran plat, certaines options perm<strong>et</strong>tent <strong>de</strong><br />
programmer la mise sous tension du télévis<strong>eu</strong>r <strong>et</strong> d’allumer ou d’éteindre d’autres appareils ou fonctions. C<strong>et</strong>te<br />
section indique les étapes nécessaires aux modifications <strong>de</strong>s réglages couramment utilisés.<br />
5.4.1 Lecture <strong>de</strong> la source sonore au moyen <strong>de</strong> la Comman<strong>de</strong> HDMI<br />
Lorsque le son est émis d’un système AV <strong>Pioneer</strong> via le télévis<strong>eu</strong>r à écran plat, si vous m<strong>et</strong>tez le télévis<strong>eu</strong>r en veille,<br />
le son sera coupé. Pour que le son continue d’être émis même lorsque le télévis<strong>eu</strong>r à écran plat entre en veille<br />
suivez les étapes ci-<strong>de</strong>ssous.<br />
1 ) Accé<strong>de</strong>z à Options via Configuration.<br />
2 ) Sélectionnez Rég. cm<strong>de</strong> HDMI dans le menu Options.<br />
3 ) Sélectionnez Gar<strong>de</strong>r état son dans le sous-menu.<br />
4 ) Sélectionnez Marche pour que le son d’un système AV soit lu pendant que le télévis<strong>eu</strong>r s’allume.<br />
5 ) Appuyez sur HOME MENU pour quitter le menu.<br />
Français<br />
Remarque: Pour que le son continue d’être émis lorsque le télévis<strong>eu</strong>r à écran plat s’allume, confirmez que<br />
l’option Passer au son TV apparaît dans le menu <strong>de</strong> Comman<strong>de</strong> HDMI avant d’éteindre le télévis<strong>eu</strong>r<br />
(voir page 77).<br />
5.4.2 Mise hors tension avec la Comman<strong>de</strong> HDMI<br />
La fonction “Cm<strong>de</strong> arrêt” est vali<strong>de</strong> pour les appareils raccordés à l’un <strong>de</strong>s ports HDMI du télévis<strong>eu</strong>r. Suivez les<br />
étapes ci-<strong>de</strong>ssous pour m<strong>et</strong>tre l’appareil raccordé hors tension en même temps que le télévis<strong>eu</strong>r à écran plat.<br />
1 ) Accé<strong>de</strong>z à Options via Configuration.<br />
2 ) Sélectionnez Rég. cm<strong>de</strong> HDMI dans le menu Options.<br />
3 ) Sélectionnez Cm<strong>de</strong> arrêt dans le sous-menu.<br />
4 ) Sélectionnez Marche pour perm<strong>et</strong>tre au télévis<strong>eu</strong>r <strong>de</strong> m<strong>et</strong>tre l’appareil raccordé hors tension.<br />
5 ) Appuyez sur HOME MENU pour quitter le menu.<br />
5.4.3 Mise sous tension avec la Comman<strong>de</strong> HDMI<br />
Le télévis<strong>eu</strong>r est livré avec la comman<strong>de</strong> <strong>de</strong> mise sous tension activée. Si c<strong>et</strong>te fonction est désactivée par err<strong>eu</strong>r,<br />
elle p<strong>eu</strong>t être réactivée. Pour m<strong>et</strong>tre automatiquement le télévis<strong>eu</strong>r à écran plat sous tension lorsqu’un<br />
enregistr<strong>eu</strong>r ou lect<strong>eu</strong>r <strong>Pioneer</strong> raccordé est mis sous tension <strong>et</strong> que <strong>de</strong>s images sont reçues par le télévis<strong>eu</strong>r,<br />
suivez les étapes ci-<strong>de</strong>ssous.<br />
1 ) Accé<strong>de</strong>z à Options via Configuration.<br />
2 ) Sélectionnez Rég. cm<strong>de</strong> HDMI dans le menu Options.<br />
3 ) Sélectionnez Prêt mse e. m. dans le sous-menu.<br />
4 ) Sélectionnez Marche pour qu’un autre appareil m<strong>et</strong>te le télévis<strong>eu</strong>r sous tension.<br />
5 ) Appuyez sur HOME MENU pour quitter le menu.<br />
81<br />
Fr
05 Utilisation d’autres appareils avec le télévis<strong>eu</strong>r à écran plat<br />
5.4.4 Test <strong>de</strong> la comman<strong>de</strong> d’alimentation (Marche/Arrêt)<br />
Le télévis<strong>eu</strong>r à écran plat offre une option <strong>de</strong> Comman<strong>de</strong> HDMI pour tester l’alimentation d’un appareil raccordé<br />
aux ports HDMI du télévis<strong>eu</strong>r <strong>et</strong> s’assurer que l’entrée attribuée est correcte.<br />
Pour confirmer que la fonction <strong>de</strong> comman<strong>de</strong> <strong>de</strong> mise sous/hors tension est opérante, suivez les étapes ci<strong>de</strong>ssous.<br />
1 ) Accé<strong>de</strong>z à Options via Configuration.<br />
2 ) Sélectionnez Rég. cm<strong>de</strong> HDMI dans le menu Options.<br />
3 ) Sélectionnez une option <strong>de</strong> test (Test marche ou Test arrêt ) dans le sous-menu.<br />
Une liste énumérant tous les appareils HDMI raccordés apparaît.<br />
4 ) Sélectionnez un appareil dans la liste.<br />
5 ) Répétez c<strong>et</strong>te opération pour tester d’autres appareils dans la liste.<br />
6 ) Appuyez sur HOME MENU pour quitter le menu une fois tous les tests terminés.<br />
Si le test <strong>de</strong> mise sous/hors tension échoue, vérifiez les points <strong>de</strong> raccor<strong>de</strong>ment <strong>et</strong> les réglages.<br />
5.5 Raccor<strong>de</strong>ment d’une console <strong>de</strong> j<strong>eu</strong> ou d’un caméscope<br />
Le télévis<strong>eu</strong>r à écran plat perm<strong>et</strong> un raccor<strong>de</strong>ment direct pour une console <strong>de</strong> j<strong>eu</strong>, un caméscope ou un autre<br />
appareil audiovisuel (AV) via ENTRÉE 3. Pour regar<strong>de</strong>r les images provenant d’une console <strong>de</strong> j<strong>eu</strong>x ou d’un<br />
caméscope, appuyez sur INPUT 3 <strong>de</strong> la télécomman<strong>de</strong> ou appuyez plusi<strong>eu</strong>rs fois sur INPUT du télévis<strong>eu</strong>r <strong>de</strong><br />
manière à sélectionner ENTRÉE 3. Pour en savoir plus sur les réglages <strong>de</strong> la console <strong>de</strong> j<strong>eu</strong>, voir “2.5.2<br />
Branchement d’un autre appareil <strong>Pioneer</strong>” <strong>et</strong> “4.1.4 Réglage du télévis<strong>eu</strong>r pour reconnaître une console <strong>de</strong> j<strong>eu</strong>”.<br />
Utilisez le type <strong>de</strong> raccor<strong>de</strong>ment spécifié par l’appareil. Ne raccor<strong>de</strong>z l’appareil qu’aux prises qui seront<br />
réellement utilisées.<br />
82<br />
Fr
Utilisation d’autres appareils avec le télévis<strong>eu</strong>r à écran plat 05<br />
5.6 Utilisation <strong>de</strong> Home Media Gallery<br />
Avec Home Media Gallery, vous pouvez visionner <strong>de</strong>s données numériques telles que <strong>de</strong>s fichiers vidéo,<br />
musicaux <strong>et</strong> photos sur ce télévis<strong>eu</strong>r à écran plat haut <strong>de</strong> gamme. Lisez les données <strong>de</strong>puis <strong>de</strong>s fichiers<br />
mémorisés sur un ou plusi<strong>eu</strong>rs serv<strong>eu</strong>rs multimédia connectés en réseau local (LAN) ou <strong>de</strong> c<strong>eu</strong>x stockés sur une<br />
mémoire flash USB. Après avoir effectué la connexion via un rout<strong>eu</strong>r haut débit ou un concentrat<strong>eu</strong>r Ethern<strong>et</strong> à<br />
un serv<strong>eu</strong>r multimédia avec un logiciel <strong>de</strong> réseau, accé<strong>de</strong>z aux données numériques visibles sur Home Media<br />
Gallery. Le télévis<strong>eu</strong>r à écran plat prend en charge les périphériques <strong>de</strong> classe <strong>de</strong> stockage <strong>de</strong> masse <strong>et</strong> PTP par<br />
le biais <strong>de</strong> l’interface USB <strong>et</strong> les appareils compatibles DLNA par le biais d’un réseau.<br />
Lect<strong>eu</strong>r Audio/Vidéo/Image DLNA CERTIFIED<br />
C<strong>et</strong> appareil est conforme aux directives d’interopérabilité d’appareils en réseau DLNA – élargies: octobre 2006<br />
(v1.5).<br />
Lorsqu’un ordinat<strong>eu</strong>r utilisant un logiciel serv<strong>eu</strong>r DLNA ou tout autre appareil compatible DLNA est raccordé à<br />
ce lect<strong>eu</strong>r, certains changements <strong>de</strong> configuration <strong>de</strong> logiciel ou d’autres appareils p<strong>eu</strong>vent s’avérer nécessaires.<br />
Pour <strong>de</strong> plus amples informations, v<strong>eu</strong>illez vous reporter au mo<strong>de</strong> d’emploi du logiciel ou <strong>de</strong> l’appareil en<br />
question.<br />
Français<br />
Formats <strong>de</strong> fichier pris en charge<br />
Les sections suivantes indiquent les formats <strong>de</strong> fichier pris en charge qui p<strong>eu</strong>vent être reproduits ou affichés sur<br />
le télévis<strong>eu</strong>r à écran plat. Ces formats sont applicables aux sources en réseau. La plupart sont aussi applicables<br />
aux sources USB. Cependant, il se p<strong>eu</strong>t que les données <strong>de</strong> serv<strong>eu</strong>r multimédia protégées par gestion <strong>de</strong>s droits<br />
numériques, comme WMDRM10 (Windows Media Digital Rights Management 10), ne puissent pas être<br />
reproduites sur le télévis<strong>eu</strong>r.<br />
Formats vidéo pris en charge<br />
• Windows Media Vi<strong>de</strong>o 9 (WMV9): MP@ML<br />
• Windows Media Vi<strong>de</strong>o 9 (WMV9) Advanced Profile (VC-1): AP@L1, MP@ML<br />
• MPEG-2 PS: MP@ML<br />
• MPEG-2 TS: MP@ML<br />
• MPEG-1<br />
• MPEG-4 Part2 (SP/ASP): SP@L3, ASP@L5<br />
• MPEG-4 Part10 (H.264/AVC): Main Profile 3.0<br />
Formats audio pris en charge<br />
• Windows Media Audio 9 (WMA9): fréquences d’échantillonnages; 44,1 kHz ou 48 kHz<br />
• MPEG-1 Audio Layer 3 (MP3): fréquences d’échantillonnage; 32 kHz, 44,1 kHz ou 48 kHz<br />
• PCM linéaire (WAV): fréquences d’échantillonnage; 44,1 kHz ou 48 kHz<br />
• MPEG-4 AAC: fréquences d’échantillonnage; 16 kHz, 32 kHz, 44,1 kHz ou 48 kHz<br />
• HE-AAC: fréquences d’échantillonnage; 16 kHz, 32 kHz, 44,1 kHz ou 48 kHz<br />
Formats d’image pris en charge<br />
• JPEG: résolution; jusqu’à 3680 x 2760 pixels<br />
• PNG: résolution; jusqu’à 3680 x 2760 pixels<br />
• GIF: résolution; jusqu’à 3680 x 2760 pixels<br />
• TIFF: résolution; jusqu’à 1600 x 1200 pixels<br />
• BMP: résolution; jusqu’à 3072 x 2304 pixels<br />
Extensions <strong>de</strong> fichier pris en charge<br />
C<strong>et</strong> appareil prend en charge la lecture <strong>de</strong>s fichiers avec les extensions suivantes:<br />
• Vidéo: .wmv .asf .mpg .mpeg .mpe .m2p .m4v .mp4v, .mp4, .mov<br />
• Audio: .wma .mp3 .wav .m4a .aac<br />
• Image: .jpg .jpeg .png .gif .bmp .tif .tiff<br />
Remarque: Même les fichiers <strong>de</strong>s formats compatibles <strong>de</strong> la liste ci-<strong>de</strong>ssous p<strong>eu</strong>vent ne pas être reproduits<br />
correctement ou complètement en fonction du serv<strong>eu</strong>r multimédia, du périphérique USB, du flux <strong>de</strong><br />
données binaires ou d’autre caractéristiques du contenu, <strong>de</strong> même qu’à cause d’autres fact<strong>eu</strong>rs.<br />
83<br />
Fr
05 Utilisation d’autres appareils avec le télévis<strong>eu</strong>r à écran plat<br />
Même si les fichiers comportent l’extension prise en charge, certains fichiers p<strong>eu</strong>vent ne pas être lus ou affichés<br />
correctement selon les données ou le serv<strong>eu</strong>r multimédia.<br />
Étant donné que les formats pris en charge par les divers serv<strong>eu</strong>rs multimédia varient, certains formats risquent <strong>de</strong> ne<br />
pas être pris en charge ni affichés sur Home Media Gallery. Pour les formats pris en charge, reportez-vous au site Web<br />
du fabricant du serv<strong>eu</strong>r multimédia ou <strong>de</strong>s sites Web correspondants.<br />
Même si un format particulier est pris en charge, toutes les fonctions p<strong>eu</strong>vent ne pas fonctionner correctement. Si les<br />
données n’apparaissent pas correctement, <strong>de</strong>man<strong>de</strong>z assistance auprès du créat<strong>eu</strong>r <strong>de</strong>s données. En outre, certains<br />
formats <strong>de</strong> fichier pris en charge p<strong>eu</strong>vent ne pas être lus correctement s’ils sont importés <strong>de</strong>puis un périphérique USB<br />
inconnu.<br />
Remarque: Vous ne pouvez pas utiliser Home Media Gallery tant que les rubriques en gris sur l’écran <strong>de</strong> menu<br />
ne passent pas au blanc.<br />
Suivant les capacités <strong>et</strong> caractéristiques du serv<strong>eu</strong>r multimédia, certaines fonctions <strong>de</strong> Home Media<br />
Gallery, comme la lecture en avance <strong>et</strong> en r<strong>et</strong>our rapi<strong>de</strong>s, la recherche par h<strong>eu</strong>re <strong>et</strong> la recherche,<br />
risquent <strong>de</strong> ne pas fonctionner.<br />
Home Media Gallery est conforme aux directives d’interopérabilité d’appareils en réseau DLNA – élargies:<br />
octobre 2006 (v1.5). Si votre serv<strong>eu</strong>r multimédia prend en charge différentes versions <strong>de</strong> DLNA, certaines<br />
fonctions <strong>et</strong> certains formats <strong>de</strong> données <strong>de</strong> Home Media Gallery risquent <strong>de</strong> ne pas être pris en charge.<br />
<strong>Pioneer</strong> ne saurait être tenu responsable <strong>de</strong> tout dysfonctionnement <strong>de</strong>s fonctions du Home Media Gallery<br />
suite à une err<strong>eu</strong>r <strong>de</strong> communication ou dysfonctionnements associés à votre connexion réseau <strong>et</strong>/ou<br />
votre ordinat<strong>eu</strong>r ou l’autre appareil raccordé. Adressez-vous au fabricant <strong>de</strong> l’ordinat<strong>eu</strong>r ou à votre<br />
fourniss<strong>eu</strong>r d’accès Intern<strong>et</strong>.<br />
Suivant les conditions d’utilisation ou le serv<strong>eu</strong>r multimédia utilisé, les données risquent <strong>de</strong> ne pas être<br />
reproduites ou affichées correctement.<br />
Home Media Gallery fonctionne comme un périphérique WMDRM10-ND (Microsoft Windows Media<br />
DRM pour appareils en réseau). S<strong>eu</strong>les les données <strong>de</strong> serv<strong>eu</strong>rs multimédia compatibles avec<br />
WMDRM10-ND sont accessibles. Les données p<strong>eu</strong>vent ne pas être lues selon le niveau <strong>de</strong> protection<br />
DRM.<br />
Ce système p<strong>eu</strong>t ne pas être en mesure d’afficher les données à partir <strong>de</strong> cartes mémoire incompatibles.<br />
5.6.1 Connexions réseau<br />
Pour vous connecter à un réseau, configurez Home Media Gallery via le menu Home Media Gallery. Appuyez sur<br />
la touche HMG <strong>de</strong> la télécomman<strong>de</strong> pour ouvrir le menu. Connectez-vous à un réseau local (LAN) via un<br />
concentrat<strong>eu</strong>r Ethern<strong>et</strong> ou un câble directement relié au serv<strong>eu</strong>r multimédia pour utiliser Home Media Gallery.<br />
84<br />
Fr<br />
Serv<strong>eu</strong>rs multimédia utilisables<br />
Un serv<strong>eu</strong>r multimédia contient <strong>de</strong>s données numériques telles que <strong>de</strong>s fichiers vidéo, musicaux <strong>et</strong> photos. Les<br />
ordinat<strong>eu</strong>rs qui possè<strong>de</strong>nt <strong>de</strong>s logiciels <strong>de</strong> serv<strong>eu</strong>r multimédia préinstallés <strong>et</strong> les enregistr<strong>eu</strong>rs avec une fonction <strong>de</strong><br />
serv<strong>eu</strong>r multimédia sont considérés comme serv<strong>eu</strong>r multimédia. Il existe divers serv<strong>eu</strong>rs multimédia sélectionnables:<br />
par exemple Windows Media Connect, Windows Media Player possédant une fonction <strong>de</strong> partage <strong>de</strong> média, <strong>et</strong> <strong>de</strong>s<br />
serv<strong>eu</strong>rs compatibles DLNA.<br />
• Windows Media Connect 2.0<br />
Windows Media Connect fonctionne sur un ordinat<strong>eu</strong>r 32 bits avec Windows XP Service Pack 2 (SP2) installé.<br />
Lorsqu’il est installé, vous pouvez profiter <strong>de</strong> Home Media Gallery avec votre ordinat<strong>eu</strong>r.<br />
• Windows Media Player 11 pour Windows XP<br />
Windows Media Player 11 comprend une fonction <strong>de</strong> partage <strong>de</strong> média qui fonctionne sur un ordinat<strong>eu</strong>r 32 bits<br />
avec Windows XP Service Pack 2 (SP2) installé.<br />
Si Windows Media Connect 2.0 n’est pas installé sur votre ordinat<strong>eu</strong>r, vous pouvez télécharger Windows Media<br />
Player 11 du site Web <strong>de</strong> Microsoft.<br />
• Windows Media Player 11 pour Windows Vista<br />
Windows Media Player 11 est compris dans les ordinat<strong>eu</strong>rs Windows Vista 32 bits.<br />
Lors <strong>de</strong> la sélection du serv<strong>eu</strong>r multimédia le mi<strong>eu</strong>x adapté, consultez le site Web <strong>de</strong> Microsoft pour les configurations<br />
système, les problèmes connus, les procédures d’installation <strong>et</strong> autres informations les plus récentes.<br />
• Serv<strong>eu</strong>rs multimédia numériques DLNA CERTIFIED<br />
Le serv<strong>eu</strong>r est un serv<strong>eu</strong>r multimédia numérique certifié DLNA comme un logiciel, un ordinat<strong>eu</strong>r ou tout<br />
autre appareil sur lequel est installé un logiciel certifié DLNA. Lorsqu’un ordinat<strong>eu</strong>r utilisant un logiciel<br />
serv<strong>eu</strong>r DLNA ou tout autre appareil compatible DLNA est raccordé à ce lect<strong>eu</strong>r, certains changements <strong>de</strong><br />
configuration <strong>de</strong> logiciel ou d’autres appareils p<strong>eu</strong>vent s’avérer nécessaires. Pour <strong>de</strong> plus amples<br />
informations, reportez-vous au mo<strong>de</strong> d’emploi <strong>de</strong> l’appareil en question.
Utilisation d’autres appareils avec le télévis<strong>eu</strong>r à écran plat 05<br />
Connexion via un concentrat<strong>eu</strong>r Ethern<strong>et</strong><br />
Si vous utilisez déjà un ou plusi<strong>eu</strong>rs serv<strong>eu</strong>rs multimédia sur un réseau local (LAN), connectez le télévis<strong>eu</strong>r à<br />
écran plat à un concentrat<strong>eu</strong>r (hub) Ethern<strong>et</strong> (LAN) en utilisant un câble Ethern<strong>et</strong> standard (LAN) “droit”. Voir le<br />
schéma ci-<strong>de</strong>ssous.<br />
Remarque: Bien que Home Media Gallery prenne en charge le format 10BASE-T, il est préférable d’utiliser le<br />
format 100BASE-TX pour améliorer la qualité d’affichage <strong>et</strong> la vitesse.<br />
T<br />
W<br />
T<br />
W<br />
Vue <strong>de</strong> dos<br />
Serv<strong>eu</strong>r multimédia 2<br />
Français<br />
Concentrat<strong>eu</strong>r Ethern<strong>et</strong><br />
(Rout<strong>eu</strong>r avec fonction <strong>de</strong><br />
concentrat<strong>eu</strong>r)<br />
Câble droit<br />
Serv<strong>eu</strong>r multimédia 1<br />
Connexion directe à un serv<strong>eu</strong>r multimédia<br />
Pour utiliser un ordinat<strong>eu</strong>r comme serv<strong>eu</strong>r multimédia, raccor<strong>de</strong>z le télévis<strong>eu</strong>r à écran plat directement à<br />
l’ordinat<strong>eu</strong>r en utilisant un câble Ethern<strong>et</strong> (LAN) torsadé (“câble invers<strong>eu</strong>r”). Voir le schéma ci-<strong>de</strong>ssous.<br />
T<br />
W<br />
T<br />
W<br />
Vue <strong>de</strong> dos<br />
Câble invers<strong>eu</strong>r<br />
Serv<strong>eu</strong>r multimédia 1<br />
85<br />
Fr
05 Utilisation d’autres appareils avec le télévis<strong>eu</strong>r à écran plat<br />
Vérification <strong>de</strong> l’adresse IP<br />
Après avoir réalisé la connexion au réseau, suivez les instructions ci-<strong>de</strong>ssous pour vérifier l’adresse IP avant<br />
d’accé<strong>de</strong>r au réseau. (Le réglage affecte uniquement Auto. Pour réaliser la procédure, DHCP doit être activé sur<br />
votre serv<strong>eu</strong>r ou rout<strong>eu</strong>r. Voir “5.9 Configuration HMG”)<br />
1 ) Appuyez sur HMG <strong>de</strong> la télécomman<strong>de</strong>.<br />
Le menu Home Media Gallery apparaît sur l’écran.<br />
2 ) Sélectionnez Configuration HMG.<br />
M<strong>et</strong>tez une option en surbrillance avec les touches fléchées.<br />
3 ) Appuyez sur ENTER.<br />
4 ) Sélectionnez Configuration Réseau.<br />
5 ) Sélectionnez Acq. IP Auto.<br />
L’écran passe du mo<strong>de</strong> “Sélection” au mo<strong>de</strong> “Saisie”.<br />
6 ) Sélectionnez Oui.<br />
7 ) Appuyez sur RETURN.<br />
L’écran Configuration HMG réapparaît.<br />
L’adresse IP est attribuée.<br />
Home Media Gallery prend en charge Auto IP <strong>et</strong> DHCP (Dynamic Host Configuration Protocol). Si le<br />
système ne parvient pas à attribuer l’adresse IP ou si vous souhaitez obtenir une adresse différente,<br />
sélectionnez Non, puis entrez manuellement l’Adresse IP <strong>et</strong> le Masque <strong>de</strong> sous-réseau. Voir Configuration<br />
réseau ou Configuration HMG pour la saisie manuelle d’une adresse.<br />
Pour en savoir plus sur le protocole DHCP, reportez-vous au mo<strong>de</strong> d’emploi du périphérique réseau.<br />
Vous pouvez avoir besoin <strong>de</strong> contacter votre prestataire <strong>de</strong> service ou l’administrat<strong>eu</strong>r du réseau pour entrer<br />
l’adresse IP manuellement.<br />
Certains serv<strong>eu</strong>rs multimédia bloquent ou sont programmés pour bloquer l’accès aux serv<strong>eu</strong>rs client. Lors <strong>de</strong> la<br />
connexion du télévis<strong>eu</strong>r à écran plat, vérifiez que le serv<strong>eu</strong>r multimédia pour le serv<strong>eu</strong>r client dispose <strong>de</strong>s droits<br />
d’accès.<br />
5.6.2 Raccor<strong>de</strong>ment d’un périphérique USB<br />
Vous pouvez aussi visionner les données d’une carte mémoire en raccordant un périphérique USB au télévis<strong>eu</strong>r<br />
à écran plat. Dès que vous raccor<strong>de</strong>z une mémoire flash USB ou un lect<strong>eu</strong>r multicartes au port USB, le répertoire<br />
racine ou l’écran <strong>de</strong> la liste <strong>de</strong>s périphériques apparaît. Vous pouvez aussi raccor<strong>de</strong>r votre appareil photo<br />
numérique directement au télévis<strong>eu</strong>r à écran plat en utilisant un câble <strong>de</strong> connexion USB en vente dans le<br />
commerce.<br />
Si pour une raison ou une autre, la liste <strong>de</strong>s contenus/dossiers ou la liste <strong>de</strong>s périphériques n’apparaît pas,<br />
procé<strong>de</strong>z comme indiqué ci-<strong>de</strong>ssous.<br />
1 ) Appuyez sur HMG.<br />
Le menu Home Media Gallery apparaît sur l’écran.<br />
2 ) Sélectionnez USB.<br />
M<strong>et</strong>tez une option en surbrillance avec les touches fléchées.<br />
3 ) Appuyez sur ENTER pour vali<strong>de</strong>r la sélection.<br />
4 ) Sélectionnez le périphérique désiré.<br />
L’écran <strong>de</strong>s périphériques USB doit être affiché.<br />
5 ) Appuyez sur ENTER pour naviguer vers un dossier ou lire un fichier ou <strong>de</strong>s données.<br />
Pour revenir à l’écran précé<strong>de</strong>nt, appuyez sur RETURN.<br />
6 ) Appuyez sur EXIT ou HMG pour quitter Home Media Gallery.<br />
86<br />
Fr<br />
Remarques: Le télévis<strong>eu</strong>r à écran plat affiche l’écran Liste Appareils USB ou le répertoire racine immédiatement<br />
après l’insertion d’un périphérique USB. Dans ce cas, démarrez à partir <strong>de</strong> l’étape 5.<br />
L’écran Liste Appareils USB apparaît lorsqu’un lect<strong>eu</strong>r multicartes est inséré. Dans ce cas, démarrez<br />
à partir <strong>de</strong> l’étape 4.
Utilisation d’autres appareils avec le télévis<strong>eu</strong>r à écran plat 05<br />
Télévis<strong>eu</strong>r à écran plat<br />
Mémoire flash USB<br />
Appareil photo numérique<br />
compatible avec périphérique<br />
<strong>de</strong> stockage <strong>de</strong> masse USB<br />
(PTP également pris en charge)<br />
Français<br />
Support Flash via adaptat<strong>eu</strong>r USB (Lect<strong>eu</strong>r multicartes)<br />
Remarque: N’utilisez pas <strong>de</strong> périphériques USB autres que c<strong>eu</strong>x indiqués. Vous risqueriez autrement <strong>de</strong><br />
provoquer un dysfonctionnement.<br />
Format <strong>de</strong> données lisible<br />
Ce système lit FAT16, FAT32 ou NTFS.<br />
Fichiers <strong>de</strong> données lisibles<br />
Les fichiers vidéo, musicaux <strong>et</strong> photos p<strong>eu</strong>vent aussi être reproduits; à l’exception <strong>de</strong>s fichiers protégés par la<br />
gestion <strong>de</strong>s droits numériques (WMDRM10).<br />
Le télévis<strong>eu</strong>r à écran plat n’accepte qu’un s<strong>eu</strong>l périphérique USB à la fois. Par aill<strong>eu</strong>rs, le télévis<strong>eu</strong>r n’est pas<br />
compatible avec les concentrat<strong>eu</strong>rs (hub) USB.<br />
Le système p<strong>eu</strong>t être incapable d’afficher <strong>de</strong>s données modifiées ou éditées à partir d’un ordinat<strong>eu</strong>r ou d’un autre<br />
appareil.<br />
Le télévis<strong>eu</strong>r à écran plat prend en charge la classe <strong>de</strong> stockage <strong>de</strong> masse USB <strong>et</strong> les périphériques PTP.<br />
Certains appareils photos numériques p<strong>eu</strong>vent nécessiter une procédure <strong>de</strong> réglage pour le transfert <strong>de</strong> données<br />
<strong>de</strong> classe <strong>de</strong> stockage <strong>de</strong> masse. Le réglage s’effectue sur l’appareil photo. Voir le mo<strong>de</strong> d’emploi fourni avec<br />
l’appareil photo numérique. Certaines images p<strong>eu</strong>vent ne pas s’afficher selon le type <strong>de</strong> carte mémoire.<br />
Déconnexion d’un périphérique USB<br />
Pour déconnecter un périphérique USB, quittez d’abord Home Media Gallery puis déconnectez le périphérique.<br />
Veillez à fermer l’écran Home Media Gallery avant <strong>de</strong> r<strong>et</strong>irer le périphérique USB. Si vous r<strong>et</strong>irez le périphérique<br />
USB pendant que l’écran Home Media Gallery est affiché, les données en mémoire risquent d’être<br />
endommagées.<br />
N’insérez ni ne r<strong>et</strong>irez le périphérique USB immédiatement après la mise sous ou hors tension du système. Ceci<br />
p<strong>eu</strong>t endommager les données en mémoire.<br />
<strong>Pioneer</strong> ne p<strong>eu</strong>t être tenu responsable pour toute perte ou dommage <strong>de</strong>s données présentes sur la mémoire flash<br />
USB.<br />
87<br />
Fr
05 Utilisation d’autres appareils avec le télévis<strong>eu</strong>r à écran plat<br />
5.7 Exécution <strong>de</strong> Home Media Gallery<br />
1 ) Appuyez sur HMG.<br />
Le menu Home Media Gallery apparaît sur l’écran.<br />
2 ) Sélectionnez Navigat<strong>eu</strong>r Médias, USB, Liste <strong>de</strong> Lecture HMG ou Configuration HMG.<br />
M<strong>et</strong>tez l’option en surbrillance avec les touches fléchées, puis appuyez sur ENTER.<br />
Pour revenir à l’écran précé<strong>de</strong>nt, appuyez sur RETURN.<br />
3 ) Appuyez sur EXIT ou HMG pour quitter Home Media Gallery.<br />
Navigat<strong>eu</strong>r Médias<br />
USB<br />
Liste <strong>de</strong> Lecture HMG<br />
Configuration HMG<br />
Utilisation du navigat<strong>eu</strong>r <strong>de</strong> médias<br />
Lorsque vous sélectionnez le navigat<strong>eu</strong>r <strong>de</strong> médias, le <strong>de</strong>rnier menu <strong>de</strong> serv<strong>eu</strong>r sélectionné apparaît<br />
automatiquement sur l’écran. Lorsqu’un s<strong>eu</strong>l serv<strong>eu</strong>r est détecté, le système se connecte automatiquement à ce<br />
serv<strong>eu</strong>r. Vous pouvez également utiliser le Menu TOOLS pour choisir un autre serv<strong>eu</strong>r ou sélectionner<br />
manuellement un serv<strong>eu</strong>r dans la Liste Serv<strong>eu</strong>rs. L’affichage passe automatiquement à la Liste Serv<strong>eu</strong>rs s’il n’y<br />
a pas <strong>de</strong> serv<strong>eu</strong>rs détectés précé<strong>de</strong>mment.<br />
1 ) Appuyez sur HMG.<br />
Le menu Home Media Gallery apparaît sur l’écran.<br />
2 ) Sélectionnez Navigat<strong>eu</strong>r Médias.<br />
M<strong>et</strong>tez l’option en surbrillance avec les touches fléchées, puis appuyez sur ENTER.<br />
Un menu <strong>de</strong> serv<strong>eu</strong>r apparaît. La configuration <strong>de</strong>s fichiers/dossiers p<strong>eu</strong>t varier suivant le serv<strong>eu</strong>r<br />
sélectionné.<br />
3 ) Sélectionnez le serv<strong>eu</strong>r désiré dans la Liste Serv<strong>eu</strong>rs.<br />
4 ) Sélectionnez le dossier souhaité pour naviguer ou le fichier/données à lire.<br />
Film<br />
Musique<br />
Photos<br />
Fichiers utilisat<strong>eu</strong>r<br />
88<br />
Fr<br />
4<br />
5 ) Appuyez sur ENTER.<br />
Le lect<strong>eu</strong>r correspondant s’allume <strong>et</strong> commence la lecture du fichier sélectionné.<br />
Pour revenir à l’écran précé<strong>de</strong>nt, appuyez sur RETURN.<br />
6 ) Appuyez sur EXIT ou HMG pour quitter Home Media Gallery.<br />
(Exemple d’écran)<br />
Remarque: Le lancement du navigat<strong>eu</strong>r <strong>de</strong> médias dépend <strong>de</strong> l’option sélectionnée dans Connex. Auto <strong>de</strong> “5.9<br />
Configuration HMG”. Sélectionnez un serv<strong>eu</strong>r dans la Liste Serv<strong>eu</strong>rs pour ouvrir le navigat<strong>eu</strong>r <strong>de</strong><br />
médias.
Utilisation d’autres appareils avec le télévis<strong>eu</strong>r à écran plat 05<br />
Navigation dans les fichiers <strong>et</strong> dossiers d’un périphérique USB<br />
De la même façon que pour la navigation dans les serv<strong>eu</strong>rs multimédia, sélectionnez le fichier souhaité d’un<br />
périphérique sur l’écran <strong>de</strong>s périphériques USB pour démarrer le lect<strong>eu</strong>r correspondant. Suivez les étapes ci<strong>de</strong>ssous<br />
pour en savoir plus.<br />
1 ) Appuyez sur HMG.<br />
Le menu Home Media Gallery apparaît sur l’écran.<br />
2 ) Sélectionnez USB.<br />
M<strong>et</strong>tez l’option en surbrillance avec les touches fléchées, puis appuyez sur ENTER.<br />
L’écran Liste Appareils USB apparaît. Sélectionnez le périphérique. C<strong>et</strong> écran n’apparaît pas lorsque vous<br />
utilisez un périphérique à un s<strong>eu</strong>l répertoire (mémoire flash USB).<br />
USB A<br />
USB B<br />
USB C<br />
USB D<br />
USB E<br />
USB F<br />
USB G<br />
15 (Exemple d’écran)<br />
Français<br />
3 ) Sélectionnez le dossier souhaité pour naviguer ou le fichier/données à lire.<br />
4 ) Appuyez sur ENTER.<br />
Le lect<strong>eu</strong>r correspondant s’allume <strong>et</strong> commence la lecture du fichier sélectionné.<br />
Pour revenir à l’écran précé<strong>de</strong>nt, appuyez sur RETURN.<br />
5 ) Appuyez sur EXIT ou HMG pour quitter Home Media Gallery.<br />
Remarque: L’écran Liste Appareils USB apparaît lorsque vous utilisez un lect<strong>eu</strong>r multicartes ou plusi<strong>eu</strong>rs<br />
mémoires flash. Le cas échéant, sélectionnez le périphérique contenant les données désirées.<br />
89<br />
Fr
05 Utilisation d’autres appareils avec le télévis<strong>eu</strong>r à écran plat<br />
Éléments d’écran<br />
Les options d’affichage <strong>de</strong> l’écran sont:<br />
• Liste<br />
• Miniature<br />
• Liste Vign<strong>et</strong>.<br />
Appuyez sur TOOLS puis sélectionnez Changer Affichage dans le menu TOOLS pour choisir une option dans<br />
l’écran affiché. Les options sont disponibles pour les menus Film, Musique <strong>et</strong> Photo.<br />
Écran <strong>de</strong> listes<br />
(Exemple d’écran)<br />
3<br />
1<br />
2<br />
Dossier 1<br />
Dossier 2<br />
Dossier 3<br />
Contenu 2<br />
Contenu 3<br />
Contenu 4<br />
Contenu 5<br />
40<br />
4<br />
1<br />
Écran <strong>de</strong> miniatures<br />
Écran <strong>de</strong> listes <strong>de</strong> vign<strong>et</strong>tes<br />
Dossier 2<br />
Dossier 3 Contenu 1<br />
Contenu 2 Contenu 3<br />
40<br />
40<br />
2<br />
1<br />
3<br />
2 3<br />
1. Élément actuellement sélectionné<br />
2. Nombre total d’éléments<br />
3. Barre <strong>de</strong> défilement (affichée lors <strong>de</strong> pages consécutives)<br />
4. Icône ou miniature <strong>de</strong> l’élément sélectionné (s’il est obtenu)<br />
90<br />
Fr
Utilisation d’autres appareils avec le télévis<strong>eu</strong>r à écran plat 05<br />
Liste <strong>de</strong> lecture HMG<br />
Chaque catégorie (film, musique <strong>et</strong> photo) comprend cinq listes <strong>de</strong> lecture différentes avec un maximum <strong>de</strong> 100<br />
fichiers chacune. La Liste <strong>de</strong> Lecture HMG p<strong>eu</strong>t contenir <strong>de</strong>s fichiers <strong>de</strong> son <strong>et</strong> d’image sélectionnés dans<br />
“Navigat<strong>eu</strong>r médias”. Pour éditer une liste <strong>de</strong> lecture, utilisez le Menu TOOLS.<br />
1 ) Appuyez sur HMG.<br />
Le menu Home Media Gallery apparaît sur l’écran.<br />
2 ) Sélectionnez Liste <strong>de</strong> Lecture HMG.<br />
M<strong>et</strong>tez l’option en surbrillance avec les touches fléchées, puis appuyez sur ENTER.<br />
3 ) Sélectionnez Film, Musique ou Photos dans l’écran Liste <strong>de</strong> Lecture HMG.<br />
Film<br />
Musique<br />
Photos<br />
Français<br />
3<br />
4 ) Sélectionnez la liste désirée dans Liste Lecture 1 à Liste Lecture 5.<br />
5 ) Sélectionnez les données désirées.<br />
Ce menu p<strong>eu</strong>t être affiché comme un écran Liste, Miniature ou Liste Vign<strong>et</strong>. Appuyez sur TOOLS puis<br />
sélectionnez Changer Affichage dans le menu TOOLS pour passer d’une vue à l’autre.<br />
6 ) Appuyez sur ENTER pour lire les données.<br />
Le lect<strong>eu</strong>r correspondant s’allume <strong>et</strong> commence la lecture du fichier sélectionné.<br />
Pour revenir à l’écran précé<strong>de</strong>nt, appuyez sur RETURN.<br />
7 ) Appuyez sur EXIT ou HMG pour quitter Home Media Gallery.<br />
5.7.1 Affichage <strong>de</strong>s fichiers vidéo sur le télévis<strong>eu</strong>r à écran plat<br />
Lorsque vous sélectionnez une séquence vidéo à partir du menu <strong>de</strong> serv<strong>eu</strong>r sur l’écran Navigat<strong>eu</strong>r Médias ou<br />
l’écran Liste Appareils USB, le lect<strong>eu</strong>r vidéo démarre automatiquement. Sélectionnez une catégorie, un dossier<br />
ou le périphérique pour accé<strong>de</strong>r au sous-menu contenant le fichier ou les données souhaités.<br />
Si vous sélectionnez un fichier vidéo à partir <strong>de</strong> Liste <strong>de</strong> Lecture HMG, l’écran du lect<strong>eu</strong>r vidéo apparaît <strong>de</strong> la<br />
même façon que si vous sélectionniez un fichier sur le serv<strong>eu</strong>r.<br />
Éléments d’écran<br />
Les informations suivantes apparaissent automatiquement sur l’écran pendant quelques secon<strong>de</strong>s au<br />
démarrage du lect<strong>eu</strong>r vidéo ou au changement du statut <strong>de</strong> lecture (avec la télécomman<strong>de</strong> par exemple). Si vous<br />
appuyez sur DISPLAY ou si vous sélectionnez <strong>de</strong>s informations sur le menu TOOLS, les informations<br />
apparaissent également.<br />
1 2<br />
3<br />
Nom <strong>de</strong> l’album FilmTITRE_0123456<br />
Lecture 00:02:01/00:05:24<br />
YYYY/MM/DD<br />
4<br />
5 6 7 8<br />
1<br />
9<br />
Pendant le mo<strong>de</strong> <strong>de</strong> répétition A-B<br />
1<br />
(Informations sur les données)<br />
1. Nom <strong>de</strong> l’album<br />
2. Titre <strong>de</strong>s données<br />
3. Date<br />
(Statut du lect<strong>eu</strong>r)<br />
4. Statut du lect<strong>eu</strong>r (icône du statut, informations sur<br />
le statut, durée actuelle/durée totale)<br />
5. Barre <strong>de</strong> progression<br />
6. Mo<strong>de</strong> sonore<br />
7. Mo<strong>de</strong> <strong>de</strong> lecture<br />
8. Mo<strong>de</strong> <strong>de</strong> lecture aléatoire<br />
9. Mo<strong>de</strong> <strong>de</strong> répétition A-B<br />
91<br />
Fr
05 Utilisation d’autres appareils avec le télévis<strong>eu</strong>r à écran plat<br />
Gui<strong>de</strong> <strong>de</strong>s touches du lect<strong>eu</strong>r vidéo<br />
Lecture<br />
Arrêt<br />
PAUSE<br />
Mo<strong>de</strong><br />
Touche(s)<br />
utilisée(s)<br />
ENTER, (PLAY) Lit le contenu.<br />
(STOP),<br />
RETURN<br />
ENTER,<br />
(PAUSE)<br />
Fonction<br />
Arrête le lect<strong>eu</strong>r vidéo <strong>et</strong> revient à l’écran précé<strong>de</strong>nt (Liste/<br />
Miniature/Liste Vign<strong>et</strong>.)<br />
M<strong>et</strong> la lecture en pause<br />
Avance rapi<strong>de</strong> (FF), Avance rapi<strong>de</strong> pendant la lecture.<br />
Chaque pression change la vitesse d’avance rapi<strong>de</strong>. Pour<br />
interrompre l’avance rapi<strong>de</strong>, appuyez sur ENTER ou PLAY.<br />
Le mo<strong>de</strong> <strong>de</strong> lecture normale est rétabli.<br />
R<strong>et</strong>our rapi<strong>de</strong> (RWD), R<strong>et</strong>our rapi<strong>de</strong> pendant la lecture.<br />
Chaque pression change la vitesse <strong>de</strong> r<strong>et</strong>our rapi<strong>de</strong>. Pour<br />
interrompre le r<strong>et</strong>our rapi<strong>de</strong>, appuyez sur ENTER ou PLAY.<br />
Le mo<strong>de</strong> <strong>de</strong> lecture normale est rétabli.<br />
Avance au ralenti + ,<br />
+ <br />
Avance au ralenti pendant la pause.<br />
Chaque pression change la vitesse du mo<strong>de</strong> ralenti. Pour<br />
interrompre l’avance au ralenti, appuyez sur ENTER ou<br />
PLAY. Le mo<strong>de</strong> <strong>de</strong> lecture normale est rétabli.<br />
Remarque: Suivant le contenu, c<strong>et</strong>te fonction p<strong>eu</strong>t ne pas<br />
être prise en charge.<br />
Avance (15 sec.) Saute 15 secon<strong>de</strong>s vers l’avant puis reprend la lecture ou reste<br />
en pause s’il l’était déjà<br />
R<strong>et</strong>our (15 sec.) Saute 15 secon<strong>de</strong>s vers l’arrière puis reprend la lecture ou<br />
reste en pause s’il l’était déjà<br />
Recherche h<strong>eu</strong>re TOOLS Voir Utilisation du menu TOOLS<br />
Ajout à la Liste <strong>de</strong><br />
Lecture HMG<br />
Mo<strong>de</strong> <strong>de</strong> répétition<br />
A-B<br />
TOOLS<br />
TOOLS<br />
Voir Utilisation du menu TOOLS<br />
Voir Utilisation du menu TOOLS<br />
Aléatoire TOOLS Voir Utilisation du menu TOOLS<br />
Mo<strong>de</strong> <strong>de</strong> lecture TOOLS Voir Utilisation du menu TOOLS<br />
Audio TOOLS Voir Utilisation du menu TOOLS<br />
Image TOOLS Voir Utilisation du menu TOOLS<br />
Son TOOLS Voir Utilisation du menu TOOLS<br />
Information TOOLS Voir Utilisation du menu TOOLS<br />
Remarque: Suivant le type <strong>de</strong> serv<strong>eu</strong>r ou la version logicielle utilisée, certaines fonctions p<strong>eu</strong>vent ne pas être<br />
prises en charge.<br />
Suivant le contenu ou le logiciel du serv<strong>eu</strong>r, une err<strong>eu</strong>r p<strong>eu</strong>t se produire au niveau <strong>de</strong>s informations<br />
relatives au temps pendant la lecture.<br />
Par aill<strong>eu</strong>rs, suivant le contenu, certaines fonctions p<strong>eu</strong>vent ne pas être prises en charge.<br />
92<br />
Fr
Utilisation d’autres appareils avec le télévis<strong>eu</strong>r à écran plat 05<br />
Les données obtenues à partir d’un caméscope numérique prenant en charge le format H.264/AVC p<strong>eu</strong>vent être lues<br />
par le port USB.<br />
Suivez les étapes ci-<strong>de</strong>ssous pour lire <strong>de</strong>s données <strong>de</strong>puis ce type <strong>de</strong> caméra.<br />
1 ) Insérez la mémoire flash USB contenant les données dans lect<strong>eu</strong>r <strong>de</strong> cartes raccordé au télévis<strong>eu</strong>r à écran plat.<br />
La liste <strong>de</strong>s dossiers/contenus du périphérique USB apparaît sur l’écran.<br />
Reportez-vous au mo<strong>de</strong> d’emploi fourni avec l’appareil pour une assistance sur la connexion <strong>et</strong> le réglage.<br />
2 ) Sélectionnez une liste <strong>de</strong> dossiers/contenus.<br />
M<strong>et</strong>tez l’option en surbrillance avec les touches fléchées, puis appuyez sur ENTER.<br />
3 ) Sélectionnez les données désirées.<br />
Remarque: Certaines données p<strong>eu</strong>vent ne pas être lues ou il p<strong>eu</strong>t se produire un court décalage entre le son <strong>et</strong><br />
l’image selon le fichier.<br />
Tous les fichiers (y compris les fichiers édités) ne sont pas pris en charge par le lect<strong>eu</strong>r vidéo. Les<br />
données stockées p<strong>eu</strong>vent ne pas apparaître dans le dossier “ Raccourci” selon l’emplacement <strong>de</strong><br />
sauvegar<strong>de</strong> sur le support mémoire.<br />
En outre, les données p<strong>eu</strong>vent ne pas être lues correctement selon le lect<strong>eu</strong>r <strong>de</strong> carte USB utilisé.<br />
Français<br />
5.7.2 Lecture <strong>de</strong>s fichiers musicaux sur le télévis<strong>eu</strong>r à écran plat<br />
Lorsque vous sélectionnez une séquence musicale à partir du menu <strong>de</strong> serv<strong>eu</strong>r (sur l’écran Navigat<strong>eu</strong>r Médias ou <strong>de</strong><br />
l’écran du périphérique USB), le lect<strong>eu</strong>r audio démarre automatiquement. Sélectionnez une catégorie, un dossier ou<br />
le périphérique pour accé<strong>de</strong>r au sous-menu contenant le fichier ou les données souhaités. Si vous sélectionnez un<br />
fichier audio à partir <strong>de</strong> Liste <strong>de</strong> Lecture HMG, l’écran du lect<strong>eu</strong>r audio apparaît <strong>de</strong> la même façon que si vous<br />
sélectionniez un fichier sur le serv<strong>eu</strong>r.<br />
Après avoir lu une séquence musicale une fois, celle-ci est lue en boucle comme musique <strong>de</strong> fond (BGM). Pour<br />
stopper la lecture en boucle, arrêtez la lecture, quittez le Home Media Gallery ou commencez la lecture d’un contenu<br />
autre qu’un contenu photo.<br />
Éléments d’écran<br />
XXXXXX.mp3<br />
Morceau Précé<br />
1<br />
Artistes : XXXXX<br />
Albums : XXXXX<br />
1. Informations sur l’artiste/album<br />
2. Icône <strong>de</strong> vign<strong>et</strong>te Lect<strong>eu</strong>r audio/image <strong>de</strong><br />
jaqu<strong>et</strong>te<br />
3. Liste du lect<strong>eu</strong>r<br />
2<br />
3<br />
Les informations suivantes <strong>et</strong> le statut <strong>de</strong> lecture apparaissent sur l’écran du lect<strong>eu</strong>r audio.<br />
Lecture 00:02:01/00:05:24<br />
4 5<br />
YYYY/MM/DD<br />
6 7<br />
9<br />
8<br />
Pendant le mo<strong>de</strong> <strong>de</strong> répétition A-B<br />
4. Mo<strong>de</strong> <strong>de</strong> lecture<br />
5. Mo<strong>de</strong> <strong>de</strong> lecture aléatoire<br />
6. Statut du lect<strong>eu</strong>r (icône du statut, informations<br />
sur le statut, durée actuelle/durée totale)<br />
7. Barre <strong>de</strong> progression<br />
8. Mo<strong>de</strong> <strong>de</strong> répétition A-B<br />
9. Date<br />
93<br />
Fr
05 Utilisation d’autres appareils avec le télévis<strong>eu</strong>r à écran plat<br />
Gui<strong>de</strong> <strong>de</strong>s touches du lect<strong>eu</strong>r audio<br />
Mo<strong>de</strong> Touche(s) utilisée(s) Fonction<br />
Lecture<br />
ENTER, (PLAY) Reproduit le fichier sélectionné.<br />
Arrêt (STOP), Arrête la lecture<br />
PAUSE<br />
ENTER,<br />
M<strong>et</strong> la lecture en pause<br />
(PAUSE)<br />
Avance rapi<strong>de</strong> (FF) Voir le gui<strong>de</strong> <strong>de</strong>s touches du lect<strong>eu</strong>r vidéo.<br />
<br />
Maintenez enfoncée pour lancer l’avance rapi<strong>de</strong>. En mo<strong>de</strong><br />
Avance rapi<strong>de</strong>, appuyez sur pour changer la vitesse <strong>de</strong><br />
lecture. Pour interrompre l’avance rapi<strong>de</strong>, appuyez sur ENTER<br />
ou PLAY. Le mo<strong>de</strong> <strong>de</strong> lecture normale est rétabli.<br />
R<strong>et</strong>our rapi<strong>de</strong> (RWD) Voir le gui<strong>de</strong> <strong>de</strong>s touches du lect<strong>eu</strong>r vidéo.<br />
<br />
Maintenez enfoncée pour lancer le r<strong>et</strong>our rapi<strong>de</strong>. En<br />
mo<strong>de</strong> R<strong>et</strong>our rapi<strong>de</strong>, appuyez sur pour changer la vitesse<br />
<strong>de</strong> lecture. Pour interrompre le r<strong>et</strong>our rapi<strong>de</strong>, appuyez sur<br />
ENTER ou PLAY. Le mo<strong>de</strong> <strong>de</strong> lecture normale est rétabli.<br />
Suivant Sélectionne le contenu suivant<br />
Précé<strong>de</strong>nt Sélectionne le contenu précé<strong>de</strong>nt<br />
Recherche h<strong>eu</strong>re TOOLS Voir Utilisation du menu TOOLS<br />
Ajout à la Liste <strong>de</strong> TOOLS<br />
Voir Utilisation du menu TOOLS<br />
Lecture HMG<br />
Aléatoire TOOLS Voir Utilisation du menu TOOLS<br />
Mo<strong>de</strong> <strong>de</strong> répétition A-B TOOLS Voir Utilisation du menu TOOLS<br />
Mo<strong>de</strong> <strong>de</strong> lecture TOOLS Voir Utilisation du menu TOOLS<br />
Son TOOLS Voir Utilisation du menu TOOLS<br />
Remarque: Suivant le contenu, certains fichiers p<strong>eu</strong>vent ne pas être reproduits correctement.<br />
Suivant le type <strong>de</strong> serv<strong>eu</strong>r ou la version logicielle utilisée, certaines fonctions p<strong>eu</strong>vent ne pas être<br />
prises en charge. La lecture se poursuit. Appuyer sur RETURN pour passer <strong>de</strong> l’écran du lect<strong>eu</strong>r à<br />
l’écran sélectionné précé<strong>de</strong>mment n’a aucun eff<strong>et</strong>.<br />
5.7.3 Affichage <strong>de</strong>s fichiers photo sur le télévis<strong>eu</strong>r à écran plat<br />
Lorsque vous sélectionnez une séquence photo à partir du menu <strong>de</strong> serv<strong>eu</strong>r <strong>de</strong> l’écran Navigat<strong>eu</strong>r Médias ou <strong>de</strong><br />
l’écran du périphérique USB, le lect<strong>eu</strong>r photo démarre automatiquement. Appuyez sur ENTER pour afficher les<br />
photos en plein écran. Sélectionnez une catégorie, un dossier ou le périphérique pour accé<strong>de</strong>r au sous-menu<br />
contenant le fichier ou les données souhaités.<br />
Si vous sélectionnez un fichier photo à partir <strong>de</strong> Liste <strong>de</strong> Lecture HMG, l’écran du lect<strong>eu</strong>r photo apparaît <strong>de</strong> la<br />
même façon que si vous sélectionniez un fichier sur le serv<strong>eu</strong>r.<br />
Éléments d’écran<br />
Les informations suivantes apparaissent automatiquement sur l’écran pendant quelques secon<strong>de</strong>s au<br />
démarrage du lect<strong>eu</strong>r vidéo ou au changement du statut <strong>de</strong> lecture (avec la télécomman<strong>de</strong> par exemple). Si vous<br />
appuyez sur DISPLAY ou si vous sélectionnez <strong>de</strong>s informations sur le menu TOOLS, les informations<br />
apparaissent également.<br />
94<br />
Fr<br />
1 2<br />
Nom <strong>de</strong> l’album Photos TITRE_0123456<br />
Lecture 45678/99999<br />
4<br />
5 6 7<br />
3<br />
YYYY/MM/DD<br />
(Informations sur les données)<br />
1. Nom <strong>de</strong> l’album<br />
2. Titre <strong>de</strong>s données<br />
3. Date<br />
(Statut du lect<strong>eu</strong>r)<br />
4. Statut du lect<strong>eu</strong>r<br />
(icône du statut, informations sur le statut,<br />
numéro actuel/numéro total)<br />
5. Barre <strong>de</strong> progression<br />
6. Mo<strong>de</strong> <strong>de</strong> lecture<br />
7. Mo<strong>de</strong> <strong>de</strong> lecture aléatoire
Utilisation d’autres appareils avec le télévis<strong>eu</strong>r à écran plat 05<br />
Gui<strong>de</strong> <strong>de</strong>s touches du lect<strong>eu</strong>r photo<br />
Lecture<br />
Arrêt<br />
PAUSE<br />
Mo<strong>de</strong> Touche(s) utilisée(s) Fonction<br />
Déplacement du<br />
fichier vers l’avant<br />
Déplacement d’un<br />
fichier vers l’arrière<br />
Rotation (<strong>sens</strong> <strong>de</strong>s<br />
aiguilles d’une<br />
montre)<br />
Rotation (<strong>sens</strong><br />
inverse <strong>de</strong>s aiguilles<br />
d’une montre)<br />
Changer la musique<br />
<strong>de</strong> fond<br />
ENTER, (PLAY) Affiche une photo ou démarre un diaporama pendant la<br />
lecture<br />
(STOP),<br />
RETURN<br />
ENTER pendant la<br />
lecture, <br />
(PAUSE)<br />
<br />
<br />
(FF), TOOLS<br />
(RWD)<br />
Arrête le lect<strong>eu</strong>r <strong>et</strong> r<strong>et</strong>ourne à l’écran précé<strong>de</strong>nt (Liste/<br />
Miniature/Liste Vign<strong>et</strong>.)<br />
Arrête momentanément le diaporama<br />
Affiche le fichier photo suivant<br />
Affiche le fichier photo précé<strong>de</strong>nt<br />
Fait pivoter l’image <strong>de</strong> 90 o dans le <strong>sens</strong> <strong>de</strong>s aiguilles d’une<br />
montre.<br />
Chaque fois que vous appuyez sur la touche l’angle <strong>de</strong><br />
rotation change <strong>de</strong> 90 o entre 90 o , 180 o , 270 o <strong>et</strong> 0 o .<br />
(Voir Utilisation du menu TOOLS)<br />
Fait pivoter l’image <strong>de</strong> 90 o dans le <strong>sens</strong> inverse <strong>de</strong>s aiguilles<br />
d’une montre.<br />
Chaque fois que vous appuyez sur la touche l’angle <strong>de</strong><br />
rotation change <strong>de</strong> 90 o entre 270 o , 180 o , 90 o <strong>et</strong> 0 o .<br />
, Change la musique <strong>de</strong> fond pendant qu’elle est lue<br />
Zoom TOOLS Voir Utilisation du menu TOOLS<br />
Ajout à la Liste <strong>de</strong><br />
Lecture HMG<br />
TOOLS<br />
Voir Utilisation du menu TOOLS<br />
Aléatoire TOOLS Voir Utilisation du menu TOOLS<br />
Mo<strong>de</strong> <strong>de</strong> lecture TOOLS Voir Utilisation du menu TOOLS<br />
Diaporama TOOLS Voir Utilisation du menu TOOLS<br />
Lect<strong>eu</strong>r audio TOOLS Voir Utilisation du menu TOOLS<br />
Image TOOLS Voir Utilisation du menu TOOLS<br />
Son TOOLS Voir Utilisation du menu TOOLS<br />
Information TOOLS Voir Utilisation du menu TOOLS<br />
Français<br />
Remarque: Suivant le type <strong>de</strong> serv<strong>eu</strong>r ou la version logicielle utilisée, certaines fonctions p<strong>eu</strong>vent ne pas être<br />
prises en charge.<br />
Suivant le contenu, même les fichiers au format pris en charge p<strong>eu</strong>vent ne pas être reproduits<br />
correctement.<br />
95<br />
Fr
05 Utilisation d’autres appareils avec le télévis<strong>eu</strong>r à écran plat<br />
5.8 Utilisation du menu TOOLS<br />
Appuyez sur la touche TOOLS <strong>de</strong> la télécomman<strong>de</strong> pour ouvrir le menu TOOLS. Divers mo<strong>de</strong>s <strong>de</strong> lecture <strong>et</strong><br />
d’affichage p<strong>eu</strong>vent être sélectionnés à partir <strong>de</strong> ce menu. Les rubriques <strong>de</strong> menu sélectionnables diffèrent en<br />
fonction du menu actuel (voir “3.6.1 Utilisation du menu TOOLS”).<br />
M. à J. Dernière Information<br />
Utilisez c<strong>et</strong>te fonction pour m<strong>et</strong>tre à jour la liste <strong>de</strong> serv<strong>eu</strong>rs actuellement sélectionnée. C<strong>et</strong>te option est<br />
disponible sur l’écran Liste Serv<strong>eu</strong>rs que le serv<strong>eu</strong>r soit raccordé ou non au télévis<strong>eu</strong>r à écran plat.<br />
1 ) Appuyez sur TOOLS tout en affichant la Liste Serv<strong>eu</strong>rs.<br />
Le menu TOOLS apparaît à l’écran.<br />
TELEVISION<br />
TOOLS<br />
M. à J. Dernière Information<br />
Lect<strong>eu</strong>r <strong>de</strong> Musique<br />
2 ) Sélectionnez M. à J. Dernière Information dans le menu TOOLS.<br />
M<strong>et</strong>tez l’option en surbrillance avec les touches fléchées, puis appuyez sur ENTER.<br />
Les informations sur le serv<strong>eu</strong>r connecté sont mises à jour.<br />
Supprimer Serv<strong>eu</strong>r<br />
Le télévis<strong>eu</strong>r à écran plat perm<strong>et</strong> <strong>de</strong> r<strong>et</strong>irer <strong>de</strong> la Liste Serv<strong>eu</strong>rs les serv<strong>eu</strong>rs déconnectés.<br />
Suivez les étapes ci-<strong>de</strong>ssous pour supprimer un serv<strong>eu</strong>r. C<strong>et</strong>te option est disponible sur l’écran Liste Serv<strong>eu</strong>rs<br />
(serv<strong>eu</strong>r non connecté).<br />
1 ) Appuyez sur TOOLS alors que le curs<strong>eu</strong>r est sur le serv<strong>eu</strong>r déconnecté sur l’écran Liste Serv<strong>eu</strong>rs.<br />
Le menu TOOLS apparaît à l’écran.<br />
TELEVISION<br />
TOOLS<br />
Supprimer Serv<strong>eu</strong>r<br />
M. à J. Dernière Information<br />
2 ) Sélectionnez Supprimer Serv<strong>eu</strong>r dans le menu TOOLS.<br />
Un écran Supprimer Serv<strong>eu</strong>r apparaît.<br />
3 ) Sélectionnez Oui <strong>et</strong> appuyez sur ENTER.<br />
Le serv<strong>eu</strong>r disparaît <strong>de</strong> la liste.<br />
Pour annuler la suppression du serv<strong>eu</strong>r, sélectionnez Non.<br />
Liste Appareils USB<br />
Le menu TOOLS fournit un écran perm<strong>et</strong>tant <strong>de</strong> voir quels périphériques USB sont raccordés ou pris en charge.<br />
Suivez les instructions ci-<strong>de</strong>ssous pour ouvrir l’écran Liste Appareils USB. C<strong>et</strong>te option est disponible sur l’écran<br />
Liste <strong>de</strong> dossiers/contenus (USB).<br />
1 ) Appuyez sur TOOLS.<br />
Le menu TOOLS apparaît à l’écran.<br />
TELEVISION<br />
TOOLS<br />
Liste Appareils USB<br />
Image<br />
96<br />
Fr
Utilisation d’autres appareils avec le télévis<strong>eu</strong>r à écran plat 05<br />
2 ) Sélectionnez Liste Appareils USB dans le menu TOOLS.<br />
Un écran Liste Appareils USB apparaît <strong>et</strong> indique les périphériques USB actuellement raccordés.<br />
Ent. Favoris<br />
L’inscription <strong>de</strong> Home Media Gallery dans les Favoris (menu TOOLS) perm<strong>et</strong> d’accé<strong>de</strong>r rapi<strong>de</strong>ment à l’écran<br />
supéri<strong>eu</strong>r Home Media Gallery tout en regardant la télévision ou d’autres émissions. C<strong>et</strong>te option est disponible<br />
sur l’écran Home Media Gallery.<br />
1 ) Appuyez sur TOOLS.<br />
Le menu TOOLS apparaît à l’écran.<br />
TELEVISION<br />
TOOLS<br />
Dans Favoris : Arrêt<br />
Sup. <strong>de</strong> Liste Lecture HMG<br />
Marche<br />
Français<br />
2 ) Sélectionnez Dans Favoris.<br />
3 ) Placez l’option sur Marche puis appuyez sur ENTER.<br />
L’inscription est terminée.<br />
Pour r<strong>et</strong>irer Home Media Gallery <strong>de</strong>s Favoris, sélectionnez Arrêt.<br />
Affichage Détaillé<br />
Sélectionnez c<strong>et</strong>te option pour afficher les informations détaillées sur le contenu actuel. C<strong>et</strong>te option est<br />
disponible sur les écrans Navigat<strong>eu</strong>r Médias, Liste <strong>de</strong> lecture (Film/Musique/Photos) <strong>et</strong> Liste <strong>de</strong> dossiers/<br />
contenus.<br />
1 ) Appuyez sur TOOLS.<br />
Le menu TOOLS apparaît à l’écran.<br />
TELEVISION<br />
TOOLS<br />
Affichage Détaillé<br />
Supprimer Serv<strong>eu</strong>r<br />
2 ) Sélectionnez Affichage Détaillé dans le menu TOOLS.<br />
Les informations détaillées apparaissent.<br />
Si vous appuyez sur RETURN, les informations disparaissent <strong>et</strong> l’écran précé<strong>de</strong>nt est rétabli.<br />
Arranger<br />
Une option <strong>de</strong> tri est disponible sur les écrans Navigat<strong>eu</strong>r Médias <strong>et</strong> Liste <strong>de</strong> dossiers/contenus. C<strong>et</strong>te fonction<br />
n’est pas disponible pour les dossiers ou contenus présents sur un périphérique USB. Suivez les étapes ci<strong>de</strong>ssous<br />
pour trier les rubriques figurant dans la liste <strong>de</strong>s dossiers/contenus.<br />
1 ) Appuyez sur HMG.<br />
Le menu Home Media Gallery apparaît sur l’écran.<br />
2 ) Sélectionnez le dossier souhaité <strong>et</strong>/ou le contenu dans le navigat<strong>eu</strong>r <strong>de</strong> médias.<br />
M<strong>et</strong>tez l’option en surbrillance avec les touches fléchées, puis appuyez sur ENTER.<br />
3 ) Appuyez sur TOOLS puis sélectionnez Arranger dans le menu TOOLS.<br />
Un écran <strong>de</strong> dialogue Arranger apparaît.<br />
Arranger<br />
Condition : Titre<br />
Ordre : De Bas En Haut<br />
Début<br />
97<br />
Fr
05 Utilisation d’autres appareils avec le télévis<strong>eu</strong>r à écran plat<br />
4 ) Sélectionnez l’option adéquate sur l’écran <strong>de</strong> dialogue Arranger.<br />
• Condition: Titre, Numéro <strong>de</strong> Piste, Genre, Artistes ou Date.<br />
• Ordre: De Bas En Haut ou De Haut En Bas<br />
5 ) SélectionnezDébut sur l’écran <strong>de</strong> dialogue Arranger.<br />
Le tri démarre d’après votre sélection <strong>et</strong> les résultats du tri sont affichés.<br />
La lecture du contenu est disponible pendant le tri. Pour revenir à l’écran Arranger, appuyez sur RETURN à<br />
tout moment pendant la lecture.<br />
Pour annuler le mo<strong>de</strong> <strong>de</strong> tri, appuyez sur RETURN.<br />
Remarques: L’écran “Sélectionnez un ordre <strong>de</strong> tri.” est disponible <strong>et</strong> p<strong>eu</strong>t rester sur l’écran pendant la navigation<br />
dans les catégories musicales.<br />
Suivant le serv<strong>eu</strong>r utilisé, le tri p<strong>eu</strong>t ne pas être disponible.<br />
Suivant le serv<strong>eu</strong>r utilisé, les sous-menus disponibles pour Condition varient.<br />
Rechercher<br />
La fonction Rechercher intégrée au télévis<strong>eu</strong>r à écran plat offre un moyen pratique <strong>de</strong> trouver <strong>de</strong>s éléments<br />
figurant sur la liste <strong>de</strong> dossiers/contenus. Toutefois, la fonction <strong>de</strong> recherche n’est pas disponible pour les<br />
dossiers ou contenus présents sur un périphérique USB.<br />
Il vous suffit <strong>de</strong> saisir un mot pour que le résultat apparaisse à l’écran. Pour lancer une recherche, suivez les<br />
instructions ci-<strong>de</strong>ssous. C<strong>et</strong>te option est disponible sur les écrans Navigat<strong>eu</strong>r Médias <strong>et</strong> Liste <strong>de</strong> dossiers/<br />
contenus.<br />
1 ) Appuyez sur HMG.<br />
Le menu Home Media Gallery apparaît sur l’écran.<br />
2 ) Sélectionnez le dossier souhaité <strong>et</strong>/ou le contenu dans le navigat<strong>eu</strong>r <strong>de</strong> médias.<br />
M<strong>et</strong>tez l’option en surbrillance avec les touches fléchées, puis appuyez sur ENTER.<br />
3 ) Appuyez sur TOOLS.<br />
Le menu TOOLS apparaît à l’écran.<br />
4 ) Sélectionnez Rechercher dans le menu TOOLS.<br />
Un écran <strong>de</strong> dialogue Rechercher apparaît.<br />
Rechercher<br />
Condition : Titre<br />
Mot clé : ----<br />
Début<br />
5 ) Sélectionnez Titre, Genre ou Artistes pour Condition, ou tapez un Mot clé.<br />
Appuyez sur ENTER dans le menu Mot clé pour afficher le clavier virtuel à l’écran.<br />
6 ) Tapez le mot sur le clavier virtuel.<br />
Voir “Clavier virtuel” <strong>de</strong> “3.2.5 Création d’une liste <strong>de</strong> chaînes” pour en savoir plus sur les opérations.<br />
7 ) Sélectionnez OK sur le clavier virtuel pour ouvrir l’écran <strong>de</strong> dialogue Rechercher <strong>et</strong> masquer le clavier.<br />
Pour annuler la saisie par mot clé, sélectionnez Cancel.<br />
8 ) Sélectionnez Début sur l’écran <strong>de</strong> dialogue Rechercher.<br />
La recherche démarre d’après le mot saisi <strong>et</strong> les résultats <strong>de</strong> la recherche apparaissent sur l’écran.<br />
La lecture du contenu est disponible pendant la recherche. Pour revenir à l’écran <strong>de</strong> recherche, appuyez<br />
sur RETURN à tout moment pendant la lecture.<br />
Pour annuler le mo<strong>de</strong> <strong>de</strong> recherche, appuyez sur RETURN.<br />
Remarques: La fonction Rechercher p<strong>eu</strong>t ne pas être disponible selon le serv<strong>eu</strong>r.<br />
Suivant le serv<strong>eu</strong>r utilisé, les sous-menus disponibles pour Condition varient.<br />
98<br />
Fr
Utilisation d’autres appareils avec le télévis<strong>eu</strong>r à écran plat 05<br />
Diaporama<br />
Un diaporama est tout simplement constitué d’une série d’images fixes, apparaissant les unes après les autres,<br />
en général selon une séquence minutée. Sélectionnez le fichier <strong>de</strong> photos <strong>de</strong> votre choix pour afficher une image<br />
fixe, puis appuyez sur ENTER pour lancer le diaporama. Après le démarrage d’un diaporama, appuyer sur ENTER<br />
perm<strong>et</strong> d’alterner entre LECTURE <strong>et</strong> PAUSE. Ou bien, appuyez sur PLAY pour démarrer immédiatement le<br />
diaporama. C<strong>et</strong>te option est disponible sur les écrans Navigat<strong>eu</strong>r Médias, Liste <strong>de</strong> dossiers/contenus <strong>et</strong> Lect<strong>eu</strong>r<br />
photo. Vous pouvez configurer le lect<strong>eu</strong>r photo pour qu’il lise un diaporama avec une musique <strong>de</strong> fond (BGM) <strong>et</strong><br />
différents eff<strong>et</strong>s visuels. Pour lancer un diaporama, suivez les instructions ci-<strong>de</strong>ssous.<br />
1 ) Appuyez sur HMG.<br />
Le menu Home Media Gallery apparaît sur l’écran.<br />
2 ) Sélectionnez Navigat<strong>eu</strong>r Médias ou USB dans le menu.<br />
M<strong>et</strong>tez l’option en surbrillance avec les touches fléchées, puis appuyez sur ENTER.<br />
3 ) Sélectionnez un dossier contenant <strong>de</strong>s photos.<br />
M<strong>et</strong>tez le dossier en surbrillance avec les touches fléchées, puis appuyez sur ENTER.<br />
L’écran Miniature est affiché (suivant le réglage, l’écran Liste Vign<strong>et</strong>. ou Liste est affiché).<br />
4 ) Sélectionnez le fichier <strong>de</strong> photos désiré.<br />
Les photos sélectionnées sont affichées en plein écran.<br />
5 ) Appuyez sur TOOLS.<br />
Le menu TOOLS apparaît à l’écran.<br />
6 ) Sélectionnez une option <strong>de</strong> diaporama.<br />
7 ) Sélectionnez un eff<strong>et</strong>: Arrêt, Évanouis. ou Panoramique.<br />
8 ) Sélectionnez un intervalle <strong>de</strong> temps: 3 Secon<strong>de</strong>s, 5 Secon<strong>de</strong>s, 10 Secon<strong>de</strong>s, 15 Secon<strong>de</strong>s, 30 Secon<strong>de</strong>s ou<br />
60 Secon<strong>de</strong>s.<br />
Français<br />
Diaporama<br />
Eff<strong>et</strong> : Évanouis.<br />
Intervalle : 5 Secon<strong>de</strong>s<br />
Aléatoire : Arrêt<br />
Mo<strong>de</strong> Lecture : Tout Répéter<br />
Musique Fond : Arrêt<br />
Début<br />
9 ) M<strong>et</strong>tez l’option Aléatoire sur Arrêt ou Marche.<br />
Pour en savoir plus, voir Aléatoire.<br />
10 ) Sélectionnez l’option désirée pour Mo<strong>de</strong> Lecture.<br />
Sélectionnez Simple, Répéter, Tout Répéter ou Tous. Pour en savoir plus, voir “Mo<strong>de</strong> <strong>de</strong> lecture” (page 101).<br />
11 ) Sélectionnez la Musique Fond désirée.<br />
Sélectionnez la musique dans la Liste Lecture 1 à Liste Lecture 5 ou sur le périphérique USB.<br />
12 ) Sélectionnez Début.<br />
Le diaporama démarre <strong>et</strong> les photos du dossier sont affichées automatiquement une par une.<br />
Pour afficher l’image suivante manuellement, appuyez sur .<br />
Pour afficher l’image précé<strong>de</strong>nte manuellement, appuyez sur .<br />
13 ) Appuyez sur ENTER ou (Pause) pour arrêter le diaporama.<br />
Le lect<strong>eu</strong>r photo est mis en pause.<br />
14 ) Appuyez <strong>de</strong> nouveau sur ENTER pour reprendre le diaporama.<br />
Pour annuler le diaporama <strong>et</strong> arrêter le lect<strong>eu</strong>r photo, appuyez sur RETURN ou (Arrêt) pendant la<br />
lecture. L’écran précé<strong>de</strong>nt réapparaît.<br />
Remarque: Après avoir réglé l’intervalle <strong>de</strong> temps, l’image p<strong>eu</strong>t apparaître plus lentement qu’avec le temps<br />
prédéfini, étant donné que l’intervalle <strong>de</strong> temps correspond à la durée jusqu’au démarrage du Home<br />
Media Gallery pour obtenir l’image suivante. Les comman<strong>de</strong>s par touche p<strong>eu</strong>vent ne pas fonctionner<br />
pendant l’obtention <strong>de</strong> l’image suivante.<br />
99<br />
Fr
05 Utilisation d’autres appareils avec le télévis<strong>eu</strong>r à écran plat<br />
Ajout à la Liste <strong>de</strong> Lecture HMG<br />
La fonction Home Media Gallery contient la “Liste <strong>de</strong> Lecture HMG” - une liste <strong>de</strong> lecture intégrée qui vous perm<strong>et</strong><br />
d’ajouter à la liste <strong>de</strong> lecture vos fichiers vidéo, audio <strong>et</strong> photo favoris à partir du réseau. Vous pouvez enregistrer,<br />
éditer <strong>et</strong> trier un maximum <strong>de</strong> 100 fichiers dans chaque liste <strong>de</strong> lecture. C<strong>et</strong>te option est disponible sur les écrans<br />
Navigat<strong>eu</strong>r Médias, Liste <strong>de</strong> dossiers/contenus, Lect<strong>eu</strong>r vidéo, Lect<strong>eu</strong>r audio <strong>et</strong> Lect<strong>eu</strong>r photo.<br />
1 ) Pendant la navigation ou la lecture, sélectionnez le fichier à ajouter à la Liste <strong>de</strong> Lecture HMG.<br />
2 ) Appuyez sur TOOLS.<br />
Le menu TOOLS apparaît à l’écran.<br />
3 ) Sélectionnez Ajouter à Liste Lecture HMG dans le menu TOOLS.<br />
Un écran <strong>de</strong> dialogue Ajouter à Liste Lecture HMG apparaît.<br />
4 ) Sélectionnez une liste <strong>de</strong> lecture.<br />
Appuyez sur / pour effectuer une sélection parmi les listes <strong>de</strong> lecture 1 à 5.<br />
Ajouter à Liste Lecture HMG<br />
Ajouter à : Liste Lecture 1<br />
[Total] : 050/100<br />
OK<br />
5 ) Sélectionnez OK.<br />
Pour sélectionner d’autres listes <strong>de</strong> lecture, répétez les opérations <strong>de</strong>s étapes 2 à 5.<br />
Le fichier est ajouté à la liste <strong>de</strong> lecture sélectionnée. Le champ Total change au fur <strong>et</strong> à mesure que <strong>de</strong>s<br />
fichiers sont ajoutés à la liste <strong>de</strong> lecture.<br />
Pour annuler l’opération, appuyez sur RETURN.<br />
Sélectionner Serv<strong>eu</strong>r<br />
Lorsqu’un ou plusi<strong>eu</strong>rs serv<strong>eu</strong>rs sont raccordés au sein du réseau, vous pouvez passer d’un serv<strong>eu</strong>r à l’autre.<br />
C<strong>et</strong>te option est disponible sur les écrans Navigat<strong>eu</strong>r Médias <strong>et</strong> Liste <strong>de</strong> dossiers/contenus.<br />
1 ) Appuyez sur TOOLS.<br />
Le menu TOOLS apparaît à l’écran.<br />
2 ) Sélectionnez Sélectionner Serv<strong>eu</strong>r dans le menu TOOL.<br />
La liste <strong>de</strong>s serv<strong>eu</strong>rs apparaît.<br />
Serv<strong>eu</strong>r 01<br />
Serv<strong>eu</strong>r 02<br />
Serv<strong>eu</strong>r 03<br />
Serv<strong>eu</strong>r 04<br />
4 (Exemple d’écran)<br />
3 ) Sélectionnez le serv<strong>eu</strong>r souhaité.<br />
L’écran passe au Navigat<strong>eu</strong>r Médias sur le serv<strong>eu</strong>r sélectionné.<br />
100<br />
Fr<br />
Remarques: Le Home Media Gallery p<strong>eu</strong>t mémoriser les serv<strong>eu</strong>rs précé<strong>de</strong>mment connectés. Au démarrage <strong>de</strong><br />
Navigat<strong>eu</strong>r Médias, les serv<strong>eu</strong>rs disponibles sont automatiquement recherchés <strong>et</strong> connectés.<br />
Si aucun serv<strong>eu</strong>r précé<strong>de</strong>mment connecté ne p<strong>eu</strong>t être détecté ou si un serv<strong>eu</strong>r est en mo<strong>de</strong> <strong>de</strong><br />
veille, le nom du serv<strong>eu</strong>r apparaît en gris.<br />
Dans certains cas, vous pouvez démarrer le serv<strong>eu</strong>r multimédia s’il est compatible avec “Wake On<br />
LAN”. Sélectionnez le serv<strong>eu</strong>r <strong>et</strong> appuyez sur ENTER pour transm<strong>et</strong>tre une comman<strong>de</strong> “Wake On<br />
LAN” au serv<strong>eu</strong>r mis en surbrillance.<br />
Lorsque “Wake On LAN” est programmé pour allumer le serv<strong>eu</strong>r, celui-ci doit être prêt <strong>et</strong> les réglages<br />
nécessaires déjà effectués.
Utilisation d’autres appareils avec le télévis<strong>eu</strong>r à écran plat 05<br />
Mo<strong>de</strong> <strong>de</strong> lecture<br />
Le télévis<strong>eu</strong>r à écran plat offre quatre mo<strong>de</strong>s <strong>de</strong> répétition avec Lect<strong>eu</strong>r vidéo, Lect<strong>eu</strong>r audio <strong>et</strong> Lect<strong>eu</strong>r photo.<br />
Choisissez un mo<strong>de</strong> <strong>de</strong> lecture (Répéter, Simple, <strong>et</strong>c.) lors <strong>de</strong> la lecture <strong>de</strong> fichiers aux contenus multiples. Suivez<br />
les étapes ci-<strong>de</strong>ssous pour activer le mo<strong>de</strong> <strong>de</strong> lecture.<br />
1 ) Pendant la lecture d’un contenu, appuyez sur TOOLS.<br />
Le menu TOOLS apparaît à l’écran.<br />
2 ) Sélectionnez Mo<strong>de</strong> Lecture dans le menu TOOLS.<br />
Sélectionnez Simple, Répéter, Tout Répéter ou Tous.<br />
Simple : Lit le contenu sélectionné une s<strong>eu</strong>le fois<br />
Répéter : Lit le contenu sélectionné en boucle<br />
Tout Répéter : Lit tout le contenu d’un dossier en boucle <strong>et</strong> en ordre (à la fin du <strong>de</strong>rnier fichier lu, le premier<br />
fichier est lu suivi <strong>de</strong> tous les autres fichiers en ordre en continu).<br />
Tous : Lit tout le contenu du dossier sélectionné en ordre une s<strong>eu</strong>le fois<br />
Français<br />
TELEVISION<br />
TOOLS<br />
Son<br />
Aléatoire<br />
Tous Mo<strong>de</strong> Lecture : Simple<br />
Répéter A-B<br />
Recherche H<strong>eu</strong>re<br />
Répéter<br />
Changer Nom<br />
La liste <strong>de</strong> lecture (1 à 5) p<strong>eu</strong>t être renommée en Liste Lecture HGM. Pour nommer une liste <strong>de</strong> lecture, suivez les<br />
instructions ci-<strong>de</strong>ssous. C<strong>et</strong>te option est disponible sur l’écran Liste <strong>de</strong> lecture (Film/Musique/Photos).<br />
1 ) Appuyez sur TOOLS alors que cinq listes <strong>de</strong> lecture sur la Liste Lecture HGM sont à l’écran.<br />
Le menu TOOLS apparaît à l’écran.<br />
2 ) Sélectionnez Changer Nom dans le menu TOOLS.<br />
Le clavier virtuel apparaît.<br />
Nom Liste <strong>de</strong> Lecture<br />
P L A Y L I S T 1<br />
1 2 3 4 5 6 7 8 9 0<br />
A B C D E F G H I J Del<strong>et</strong>e<br />
K L M N O P Q R S T Space<br />
U V W X Y Z , . : ; Caps<br />
& ' ( ) + - * / _ @<br />
/<br />
$ % ! ? # = | ~ "<br />
^ ` < > [ ] { } OK Cancel<br />
3 ) Tapez le nouveau nom.<br />
Voir “Clavier virtuel” <strong>de</strong> “3.2.5 Création d’une liste <strong>de</strong> chaînes” pour en savoir plus sur les opérations.<br />
4 ) Sélectionnez OK après avoir saisi le nouveau nom sur le clavier virtuel.<br />
Le clavier virtuel disparaît <strong>et</strong> la liste <strong>de</strong> lecture nouvellement nommée apparaît.<br />
Si vous sélectionnez Annuler, la saisie est interrompue <strong>et</strong> le processus <strong>de</strong> saisie du nom annulé.<br />
101<br />
Fr
05 Utilisation d’autres appareils avec le télévis<strong>eu</strong>r à écran plat<br />
Changer Affichage<br />
Sélectionnez c<strong>et</strong>te option pour passer entre les différentes vues: Liste, Miniature <strong>et</strong> Liste Vign<strong>et</strong>. C<strong>et</strong>te option est<br />
disponible sur les écrans Liste <strong>de</strong> lecture (Film/Musique/Photos) <strong>et</strong> Liste <strong>de</strong> dossiers/contenus.<br />
1 ) Appuyez sur TOOLS.<br />
Le menu TOOLS apparaît à l’écran.<br />
2 ) Sélectionnez Changer Affichage dans le menu TOOLS.<br />
Sélectionnez l’option d’écran parmi Liste, Miniature ou Liste Vign<strong>et</strong>.<br />
Menu TOOLS<br />
TELEVISION<br />
TOOLS<br />
Liste Vign<strong>et</strong>.<br />
Lect<strong>eu</strong>r <strong>de</strong> Musique<br />
Ajouter à Liste Lecture HMG<br />
Changer Affichage : Liste<br />
Arranger<br />
Rechercher<br />
Miniature<br />
Écran Liste<br />
Dossier 1<br />
Dossier 2<br />
Dossier 3<br />
Contenu 2<br />
Contenu 3<br />
Contenu 4<br />
Contenu 5<br />
40<br />
Écran Liste Vign<strong>et</strong>.<br />
Écran Miniature<br />
40<br />
Dossier 2<br />
40<br />
Dossier 3 Contenu 1<br />
Contenu 2 Contenu 3<br />
(Exemples d’écran)<br />
Recherche h<strong>eu</strong>re<br />
La fonction Recherche h<strong>eu</strong>re perm<strong>et</strong> <strong>de</strong> lire le contenu à partir <strong>de</strong> l’h<strong>eu</strong>re prédéfinie. C<strong>et</strong>te option est disponible<br />
sur les écrans Lect<strong>eu</strong>r vidéo <strong>et</strong> Lect<strong>eu</strong>r audio.<br />
Suivez les étapes ci-<strong>de</strong>ssous pour perm<strong>et</strong>tre la recherche h<strong>eu</strong>re.<br />
1 ) Pendant la lecture d’un contenu, appuyez sur TOOLS.<br />
2 ) Sélectionnez Recherche h<strong>eu</strong>re dans le menu TOOLS.<br />
Un écran <strong>de</strong> dialogue Recherche h<strong>eu</strong>re apparaît.<br />
[Total] : 01:00:00<br />
Recherche H<strong>eu</strong>re<br />
Saut :<br />
00 : 00 : 00<br />
Début<br />
3 ) Entrez l’h<strong>eu</strong>re (h<strong>eu</strong>re, minute <strong>et</strong>/ou secon<strong>de</strong>) à laquelle avancer.<br />
Entrez l’h<strong>eu</strong>re <strong>et</strong> les minutes pour un fichier vidéo ou les minutes <strong>et</strong> les secon<strong>de</strong>s pour un fichier audio.<br />
Utilisez /ou les touches 0 à 9 (si une icône <strong>de</strong> touche numérique apparaît).<br />
Appuyez sur / pour sélectionner les h<strong>eu</strong>res <strong>et</strong> les minutes (fichier vidéo) ou les minutes <strong>et</strong> les<br />
secon<strong>de</strong>s (fichier audio).<br />
4 ) Sélectionnez Début puis appuyez sur ENTER pour lancer la recherche <strong>de</strong> l’h<strong>eu</strong>re.<br />
Le fichier vidéo (audio) est lu à partir <strong>de</strong> l’h<strong>eu</strong>re définie. Pour annuler la Recherche h<strong>eu</strong>re, appuyez sur RETURN.<br />
102<br />
Fr<br />
Remarque: Suivant le contenu, le logiciel du serv<strong>eu</strong>r ou la version logicielle utilisée, la fonction Recherche h<strong>eu</strong>re<br />
p<strong>eu</strong>t ne pas être prise en charge.<br />
Suivant le contenu ou le logiciel du serv<strong>eu</strong>r, une err<strong>eu</strong>r p<strong>eu</strong>t se produire au niveau <strong>de</strong>s informations<br />
relatives au temps.
Utilisation d’autres appareils avec le télévis<strong>eu</strong>r à écran plat 05<br />
Image<br />
L’option Image offre un autre moyen <strong>de</strong> régler la qualité d’image. C<strong>et</strong>te option est disponible sur les écrans<br />
Lect<strong>eu</strong>r vidéo <strong>et</strong> Lect<strong>eu</strong>r photo. Suivez les étapes ci-<strong>de</strong>ssous pour régler l’image.<br />
1 ) Appuyez sur TOOLS.<br />
Le menu TOOLS apparaît à l’écran.<br />
TELEVISION<br />
TOOLS<br />
Information<br />
Image<br />
Son<br />
Aléatoire<br />
2 ) Sélectionnez Image dans le menu TOOLS.<br />
L’écran <strong>de</strong> réglage d’image apparaît. Pour les rubriques <strong>de</strong> réglage, voir “3.4 Réglage <strong>de</strong> la qualité d’image<br />
<strong>et</strong> <strong>de</strong> son”.<br />
3 ) Appuyez sur RETURN pour fermer l’écran <strong>de</strong> réglage.<br />
L’écran <strong>de</strong> lecture normale réapparaît.<br />
Français<br />
Son<br />
L’option Son offre un autre moyen <strong>de</strong> régler la qualité sonore. C<strong>et</strong>te option est disponible sur les écrans Lect<strong>eu</strong>r<br />
vidéo, Lect<strong>eu</strong>r audio <strong>et</strong> Lect<strong>eu</strong>r photo. Suivez les étapes ci-<strong>de</strong>ssous pour régler le son.<br />
1 ) Appuyez sur TOOLS.<br />
Le menu TOOLS apparaît à l’écran.<br />
TELEVISION<br />
TOOLS<br />
Son<br />
Aléatoire<br />
Mo<strong>de</strong> Lecture<br />
2 ) Sélectionnez Son dans le menu TOOLS.<br />
L’écran <strong>de</strong> réglage du son apparaît. Pour les rubriques <strong>de</strong> réglage, voir “3.4 Réglage <strong>de</strong> la qualité d’image <strong>et</strong><br />
<strong>de</strong> son”.<br />
3 ) Appuyez sur RETURN pour fermer l’écran <strong>de</strong> réglage.<br />
L’écran <strong>de</strong> lecture normale réapparaît.<br />
Information<br />
L’option Information affiche les informations du statut <strong>de</strong> lecture du contenu. C<strong>et</strong>te option est disponible sur les<br />
écrans Lect<strong>eu</strong>r vidéo <strong>et</strong> Lect<strong>eu</strong>r photo. Suivez les étapes ci-<strong>de</strong>ssous pour afficher les informations pendant la<br />
lecture.<br />
1 ) Appuyez sur TOOLS.<br />
Le menu TOOLS apparaît à l’écran.<br />
TELEVISION<br />
TOOLS<br />
Information<br />
Zoom<br />
103<br />
Fr
05 Utilisation d’autres appareils avec le télévis<strong>eu</strong>r à écran plat<br />
2 ) Sélectionnez Information dans le menu TOOLS.<br />
Un écran d’information (comme le statut <strong>de</strong> lecture) apparaît. Si vous appuyez sur DISPLAY, l’écran<br />
d’information apparaît également.<br />
L’écran disparaît automatiquement après un bref laps <strong>de</strong> temps.<br />
Audio<br />
Utilisez c<strong>et</strong>te option pour passer à une autre source audio si le contenu en cours <strong>de</strong> lecture comporte plusi<strong>eu</strong>rs<br />
sources audio (un contenu multilingue par exemple). C<strong>et</strong>te option est disponible sur l’écran Lect<strong>eu</strong>r vidéo. Suivez<br />
les étapes ci-<strong>de</strong>ssous pour dévoiler plusi<strong>eu</strong>rs plages audio.<br />
1 ) Appuyez sur TOOLS.<br />
Le menu TOOLS apparaît à l’écran.<br />
TELEVISION<br />
TOOLS<br />
Répéter A-B<br />
Recherche H<strong>eu</strong>re<br />
Audio : 1 L+R<br />
Information<br />
Ajouter à Liste Lecture HMG<br />
1 L<br />
2 ) Sélectionnez Audio dans le menu TOOLS.<br />
Si vous appuyez sur / L, R ou L+R sera sélectionné. Si le contenu comprend plusi<strong>eu</strong>rs sources audio,<br />
sélectionnez L, R ou L+R pour chaque source.<br />
3 ) Pour vali<strong>de</strong>r le réglage, appuyez sur RETURN.<br />
Lect<strong>eu</strong>r audio<br />
L’option Lect<strong>eu</strong>r audio vous perm<strong>et</strong> <strong>de</strong> modifier la musique <strong>de</strong> fond sur n’importe quel écran plutôt que d’utiliser<br />
la musique du contenu. C<strong>et</strong>te option n’est disponible que lorsque la musique est lue sur un écran autre que<br />
Lect<strong>eu</strong>r vidéo <strong>et</strong> Lect<strong>eu</strong>r audio. Le Lect<strong>eu</strong>r audio est disponible sur les écrans Navigat<strong>eu</strong>r Médias, Liste <strong>de</strong><br />
dossiers/contenus, USB, Liste Lecture HMG, Liste <strong>de</strong> lecture <strong>et</strong> Lect<strong>eu</strong>r photo. Suivez les étapes ci-<strong>de</strong>ssous pour<br />
activer le Lect<strong>eu</strong>r audio.<br />
1 ) Appuyez sur TOOLS.<br />
Le menu TOOLS apparaît à l’écran.<br />
TELEVISION<br />
TOOLS<br />
Lect<strong>eu</strong>r <strong>de</strong> Musique<br />
Diaporama<br />
2 ) Sélectionnez Lect<strong>eu</strong>r <strong>de</strong> Musique dans le menu TOOLS.<br />
L’écran Lect<strong>eu</strong>r <strong>de</strong> Musique apparaît.<br />
Après avoir validé le réglage, appuyez sur RETURN. L’écran précé<strong>de</strong>nt réapparaît.<br />
Déplacer<br />
Pour afficher les fichiers selon votre ordre <strong>de</strong> préférence, utilisez l’option Déplacer pour modifier l’ordre dans la<br />
Liste Lecture HMG. C<strong>et</strong>te option est disponible sur l’écran Liste <strong>de</strong> contenus (Liste <strong>de</strong> lecture).<br />
1 ) Déplacez le curs<strong>eu</strong>r sur le contenu à déplacer dans la Liste Lecture HMG.<br />
104<br />
Fr
Utilisation d’autres appareils avec le télévis<strong>eu</strong>r à écran plat 05<br />
2 ) Appuyez sur TOOLS.<br />
Le menu TOOLS apparaît à l’écran.<br />
TELEVISION<br />
TOOLS<br />
Déplacer<br />
Liste Appareils USB<br />
3 ) Sélectionnez Déplacer dans le menu TOOLS.<br />
4 ) Appuyez sur / pour déplacer le contenu en haut ou en bas.<br />
5 ) Appuyez sur ENTER.<br />
La modification est terminée <strong>et</strong> l’écran Déplacer se ferme.<br />
Français<br />
Sup. <strong>de</strong> Liste Lecture HMG<br />
Il p<strong>eu</strong>t arriver qu’un fichier <strong>de</strong>vienne inutile. Le télévis<strong>eu</strong>r à écran plat perm<strong>et</strong> <strong>de</strong> supprimer <strong>de</strong>s fichiers d’une liste<br />
<strong>de</strong> lecture HMG. C<strong>et</strong>te option est disponible sur l’écran Liste <strong>de</strong> contenus (Liste <strong>de</strong> lecture). Pour supprimer un<br />
fichier d’une liste <strong>de</strong> lecture, suivez les instructions ci-<strong>de</strong>ssous.<br />
1 ) Déplacez le curs<strong>eu</strong>r sur le contenu à supprimer dans la Liste Lecture HMG.<br />
2 ) Appuyez sur TOOLS.<br />
Le menu TOOLS apparaît à l’écran.<br />
TELEVISION<br />
TOOLS<br />
Sup. <strong>de</strong> Liste Lecture HMG<br />
Déplacer<br />
3 ) Sélectionnez Sup. <strong>de</strong> Liste Lecture HMG dans le menu TOOLS.<br />
Un écran <strong>de</strong> dialogue Sup. <strong>de</strong> Liste Lecture HMG apparaît.<br />
4 ) Sélectionnez Oui pour r<strong>et</strong>irer le fichier.<br />
L’écran <strong>de</strong> dialogue disparaît <strong>et</strong> le fichier sélectionné est supprimé <strong>de</strong> la Liste Lecture HGM.<br />
Pour annuler, sélectionnez Non.<br />
Mo<strong>de</strong> <strong>de</strong> répétition A-B<br />
Utilisez c<strong>et</strong>te option pour lire <strong>de</strong>s scènes <strong>de</strong> film ou <strong>de</strong>s programmes musicaux sélectionnés en boucle. C<strong>et</strong>te<br />
option est disponible uniquement pendant la lecture normale sur le Lect<strong>eu</strong>r vidéo ou Lect<strong>eu</strong>r audio.<br />
Suivez les étapes ci-<strong>de</strong>ssous pour régler la répétition.<br />
1 ) Pendant la lecture d’un contenu, appuyez sur TOOLS.<br />
Le menu TOOLS apparaît à l’écran.<br />
TELEVISION<br />
TOOLS<br />
Répéter A-B : A (Dé. Bou.)<br />
Rotation<br />
2 ) Sélectionnez Répéter A-B dans le menu TOOLS.<br />
105<br />
Fr
05 Utilisation d’autres appareils avec le télévis<strong>eu</strong>r à écran plat<br />
3 ) Appuyez sur ENTER pour indiquer un point <strong>de</strong> départ.<br />
4 ) Appuyez à nouveau sur ENTER au point où la lecture doit s’arrêter.<br />
L’état du lect<strong>eu</strong>r apparaît sur l’écran <strong>et</strong> l’icône du mo<strong>de</strong> <strong>de</strong> répétition A-B change.<br />
La partie sélectionnée du fichier est lue en boucle.<br />
Pour arrêter la lecture en boucle <strong>et</strong> r<strong>et</strong>ourner au mo<strong>de</strong> normal, appuyez sur TOOLS, puis sélectionnez Arrêt<br />
pendant le mo<strong>de</strong> Répéter A-B.<br />
Remarque: Si l’affichage à l’écran ne correspond pas à l’état du lect<strong>eu</strong>r, il se p<strong>eu</strong>t qu’un mauvais fonctionnement<br />
se soit produit. Arrêtez la lecture, puis recommencez l’opération.<br />
Aléatoire<br />
Utilisez c<strong>et</strong>te option pour mélanger l’ordre <strong>de</strong> la liste <strong>de</strong> fichiers, pour les lire au hasard. C<strong>et</strong>te option est<br />
disponible sur les écrans Lect<strong>eu</strong>r vidéo, Lect<strong>eu</strong>r audio <strong>et</strong> Lect<strong>eu</strong>r photo. Suivez les étapes ci-<strong>de</strong>ssous pour<br />
mélanger la liste <strong>de</strong> lecture.<br />
1 ) Pendant la lecture d’un contenu, appuyez sur TOOLS.<br />
Le menu TOOLS apparaît à l’écran.<br />
TELEVISION<br />
TOOLS<br />
Changer Nom<br />
Aléatoire : Arrêt<br />
Marche<br />
2 ) Sélectionnez Aléatoire dans le menu TOOLS.<br />
3 ) Sélectionnez Marche.<br />
La lecture répétée aléatoire démarre.<br />
Pour annuler le mo<strong>de</strong> aléatoire, appuyez sur TOOLS <strong>et</strong> sélectionnez Arrêt.<br />
Remarque: Le mo<strong>de</strong> <strong>de</strong> lecture répétée aléatoire est uniquement disponible pour le contenu lu en mo<strong>de</strong> <strong>de</strong><br />
lecture répétée (sauf lorsque Simple est sélectionné).<br />
Rotation<br />
Utilisez l’option Rotation pour faire pivoter une image <strong>de</strong> 90° vers la droite. C<strong>et</strong>te option est disponible sur l’écran<br />
Lect<strong>eu</strong>r photo. Suivez les étapes ci-<strong>de</strong>ssous pour faire pivoter une image.<br />
1 ) Pendant l’affichage d’un contenu photo, appuyez sur TOOLS.<br />
Le menu TOOLS apparaît à l’écran.<br />
TELEVISION<br />
TOOLS<br />
Rotation : 90<br />
Recherche H<strong>eu</strong>re<br />
2 ) Sélectionnez Rotation dans le menu TOOLS.<br />
À chaque pression sur la touche ENTER, l’image affichée pivote d’un quart <strong>de</strong> tour dans le <strong>sens</strong> <strong>de</strong>s<br />
aiguilles d’une montre. Elle bascule <strong>de</strong> 90º, 180º, 270º ou 0º.<br />
Remarque: L’angle <strong>de</strong> rotation sélectionné affecte uniquement l’image affichée.<br />
Si vous déplacez ou modifiez le contenu, l’image est ramenée à la vue par défaut.<br />
106<br />
Fr
Utilisation d’autres appareils avec le télévis<strong>eu</strong>r à écran plat 05<br />
Zoom<br />
Utilisez l’option Zoom pour agrandir la photo affichée. C<strong>et</strong>te option est disponible sur l’écran Lect<strong>eu</strong>r photo.<br />
Suivez les étapes ci-<strong>de</strong>ssous pour agrandir une photo.<br />
1 ) Pendant l’affichage d’un contenu photo, appuyez sur TOOLS.<br />
Le menu TOOLS apparaît à l’écran.<br />
TELEVISION<br />
TOOLS<br />
Lect<strong>eu</strong>r <strong>de</strong> Musique<br />
Ajouter à Liste Lecture HMG<br />
Zoom : Arrêt<br />
Marche<br />
2 ) Sélectionnez Zoom dans le menu TOOLS.<br />
3 ) Appuyez sur / pour sélectionner Marche ou Arrêt.<br />
4 ) Appuyez sur ENTER pour vali<strong>de</strong>r la sélection.<br />
Si vous sélectionnez Marche, la photo apparaîtra toujours agrandie.<br />
L’image affichée diffère selon la photo. Si le ratio d’aspect <strong>de</strong> la photo est plus long que 16:9, elle apparaît<br />
complètement étirée vers l’horizontale <strong>de</strong>s d<strong>eu</strong>x côtés avec les bords en haut <strong>et</strong> en bas coupés. Si le ratio<br />
d’aspect <strong>de</strong> la photo est plus large que 16:9, elle apparaît complètement étirée vers la verticale en haut <strong>et</strong><br />
en bas avec les bords droit <strong>et</strong> gauche coupés.<br />
Une icône “zoom” apparaît à l’écran.<br />
5 ) En mo<strong>de</strong> Zoom, faites défiler les photos avec les touches fléchées.<br />
Appuyez sur ou si le ratio d’aspect <strong>de</strong> la photo est plus long que 16:9, ou sur ou si le ratio<br />
d’aspect <strong>de</strong> la photo est plus large que 16:9.<br />
6 ) Appuyez sur RETURN ou ENTER pour annuler le zoom <strong>et</strong> revenir à l’écran normal.<br />
Français<br />
Remarque: La fonction Zoom est désactivée si la photo est au format 16:9.<br />
107<br />
Fr
05 Utilisation d’autres appareils avec le télévis<strong>eu</strong>r à écran plat<br />
5.9 Configuration HMG<br />
Utilisez l’option Configuration HMG pour la Configuration Réseau, Connex. Auto <strong>et</strong> Réglages Par Défaut. Pour en<br />
savoir plus sur chaque option, reportez-vous aux sections suivantes.<br />
Configuration Réseau<br />
Connex. Auto<br />
Réglages Par Défaut<br />
Marche<br />
Configuration Réseau<br />
Sélectionnez l’acquisition automatique ou manuelle <strong>de</strong> l’adresse IP, ou dans le cas <strong>de</strong> l’acquisition manuelle,<br />
renseignez l’adresse IP <strong>et</strong> le masque <strong>de</strong> sous-réseau. Suivez les étapes ci-<strong>de</strong>ssous pour accé<strong>de</strong>r au menu<br />
Configuration Réseau.<br />
Automatique:<br />
Pour réaliser la procédure, DHCP doit être activé sur votre serv<strong>eu</strong>r ou rout<strong>eu</strong>r.<br />
1 ) Appuyez sur HMG.<br />
Le menu Home Media Gallery apparaît sur l’écran.<br />
2 ) Sélectionnez Configuration HMG dans le menu.<br />
M<strong>et</strong>tez l’option en surbrillance avec les touches fléchées, puis appuyez sur ENTER.<br />
3 ) Sélectionnez Configuration Réseau.<br />
4 ) Sélectionnez Acq. IP Auto.<br />
5 ) Sélectionnez Oui.<br />
Le télévis<strong>eu</strong>r à écran plat cherche <strong>et</strong> obtient une adresse IP si elle est disponible.<br />
6 ) Appuyez sur EXIT ou HMG pour quitter Home Media Gallery.<br />
Manuel:<br />
Avant l’activation, vérifiez votre serv<strong>eu</strong>r multimédia pour connaître l’adresse IP <strong>et</strong> le masque <strong>de</strong> sous-réseau.<br />
1 ) Accé<strong>de</strong>z à Configuration réseau via Configuration HMG.<br />
2 ) Sélectionnez Acq. IP Auto.<br />
3 ) Sélectionnez Non.<br />
4 ) Sélectionnez la case adéquate.<br />
Utilisez ou pour m<strong>et</strong>tre en surbrillance l’option (Adresse IP ou Masque <strong>de</strong> sous-réseau), puis appuyez<br />
sur ENTER.<br />
Il n’est pas nécessaire d’entrer <strong>de</strong> val<strong>eu</strong>rs pour Passerelle par défaut <strong>et</strong> Serv<strong>eu</strong>r DNS.<br />
5 ) Entrez les paramètres souhaités en utilisant les touches 0 à 9.<br />
Masque <strong>de</strong> sous-réseau (tel que 255.255.255.0): Entrez les mêmes nombres.<br />
Adresse IP (telle que 192.168.201.***): Entrez les mêmes nombres utilisés dans le serv<strong>eu</strong>r multimédia<br />
(ordinat<strong>eu</strong>r, <strong>et</strong>c.). Pour ***, entrez 3 chiffres (0 - 254) qui n’ont pas été utilisés pour les autres connexions<br />
réseau.<br />
Utilisez ou pour m<strong>et</strong>tre en surbrillance d’autres zones <strong>de</strong> saisie.<br />
6 ) Appuyez sur ENTER sur la case adéquate une fois la saisie terminée.<br />
Répétez les étapes 4 à 5 pour terminer la configuration réseau.<br />
7 ) Appuyez sur EXIT ou HMG pour quitter Home Media Gallery.<br />
108<br />
Fr
Utilisation d’autres appareils avec le télévis<strong>eu</strong>r à écran plat 05<br />
Connex. Auto<br />
Configurez Connex. Auto pour vous connecter automatiquement au <strong>de</strong>rnier serv<strong>eu</strong>r connecté.<br />
Suivez les étapes ci-<strong>de</strong>ssous pour la sélection.<br />
1 ) Accé<strong>de</strong>z à Connex. Auto via Configuration HMG.<br />
2 ) Utilisez ou pour modifier le réglage.<br />
Si vous sélectionnez Marche, l’écran accè<strong>de</strong> au <strong>de</strong>rnier serv<strong>eu</strong>r. Si le serv<strong>eu</strong>r est en veille, un WOL (“Wake<br />
On LAN”) est envoyé pour allumer le <strong>de</strong>rnier serv<strong>eu</strong>r connecté.<br />
Si vous sélectionnez Arrêt, une liste <strong>de</strong> serv<strong>eu</strong>rs apparaît sur l’écran.<br />
“Wake on LAN (WOL)” fonctionne pour m<strong>et</strong>tre sous tension le <strong>de</strong>rnier serv<strong>eu</strong>r connecté si le serv<strong>eu</strong>r est<br />
compatible WOL <strong>et</strong> est en mo<strong>de</strong> d’attente ou <strong>de</strong> veille, puis l’écran Navigat<strong>eu</strong>r Médias apparaît. Pendant<br />
que le télévis<strong>eu</strong>r à écran plat essaie <strong>de</strong> “réveiller” le serv<strong>eu</strong>r, un écran <strong>de</strong> dialogue apparaît. Si le serv<strong>eu</strong>r<br />
n’est pas compatible WOL ou si la fonction WOL échoue, un avis apparaît sur l’écran Liste Serv<strong>eu</strong>rs.<br />
3 ) Appuyez sur EXIT ou HMG pour quitter Home Media Gallery.<br />
Français<br />
Réinitialisation aux val<strong>eu</strong>rs par défaut<br />
Il p<strong>eu</strong>t quelquefois s’avérer plus facile <strong>de</strong> ramener le télévis<strong>eu</strong>r à écran plat aux val<strong>eu</strong>rs HMG par défaut plutôt<br />
que d’essayer <strong>de</strong> rectifier un grand nombre <strong>de</strong> saisies acci<strong>de</strong>ntelles. Suivez les étapes ci-<strong>de</strong>ssous pour ramener<br />
les réglages à l<strong>eu</strong>rs val<strong>eu</strong>rs par défaut dans Home Media Gallery.<br />
1 ) Accé<strong>de</strong>z à Réglages Par Défaut via Configuration HMG.<br />
2 ) Sélectionnez Oui.<br />
Les val<strong>eu</strong>rs par défaut sont rétablies <strong>et</strong> l’écran Home Media Gallery apparaît.<br />
3 ) Appuyez sur EXIT ou HMG pour quitter Home Media Gallery.<br />
5.10 Autres fonctions utiles<br />
Économis<strong>eu</strong>r d’écran<br />
Pendant la navigation, l’économis<strong>eu</strong>r d’écran démarre automatiquement si aucune activité n’est détectée<br />
pendant environ cinq minutes. Toutefois, pendant la lecture d’un film ou d’un diaporama, le télévis<strong>eu</strong>r empêche<br />
l’économis<strong>eu</strong>r d’écran <strong>de</strong> s’activer.<br />
Appuyez sur n’importe quelle touche pour annuler l’économis<strong>eu</strong>r d’écran. Ignorer l’économis<strong>eu</strong>r d’écran n’a pas<br />
d’inci<strong>de</strong>nce sur le raccor<strong>de</strong>ment d’un périphérique USB.<br />
Remarque: Appuyer sur DISPLAY pour afficher l’état du lect<strong>eu</strong>r ou le gui<strong>de</strong> <strong>de</strong>s touches avant que l’économis<strong>eu</strong>r<br />
entre en service p<strong>eu</strong>t entraîner une rémanence d’image.<br />
Important<br />
• N’affichez pas l’état du lect<strong>eu</strong>r ou le gui<strong>de</strong> <strong>de</strong>s touches pendant une pério<strong>de</strong> prolongée lors <strong>de</strong> la<br />
lecture d’une séquence vidéo ou d’un diaporama afin d’éviter une rémanence d’image éventuelle.<br />
109<br />
Fr
05 Utilisation d’autres appareils avec le télévis<strong>eu</strong>r à écran plat<br />
Messages apparaissant sur l’écran<br />
N° Message Anomalie<br />
001 Le contenu ne p<strong>eu</strong>t pas être lu. (001) Aucun détail n’est disponible pour<br />
l’err<strong>eu</strong>r, vérifiez le contenu<br />
100 Err<strong>eu</strong>r <strong>de</strong> communication. (100) Aucun détail supplémentaire n’est<br />
disponible pour l’err<strong>eu</strong>r<br />
101 Aucune réponse du serv<strong>eu</strong>r. (101) Délai d’attente du télévis<strong>eu</strong>r à écran<br />
plat dépassé en raison d’une réponse<br />
tardive du serv<strong>eu</strong>r<br />
102 Ce périphérique a été déconnecté du<br />
réseau. (102)<br />
103 La réponse du serv<strong>eu</strong>r indique qu’il<br />
est dans l’impossibilité <strong>de</strong> répondre.<br />
(103)<br />
Les câbles sont déconnectés<br />
La réponse du serv<strong>eu</strong>r est<br />
incompréhensible<br />
300 Le contenu ne p<strong>eu</strong>t pas être lu. (300) Aucun détail supplémentaire n’est<br />
disponible pour l’err<strong>eu</strong>r<br />
301 Ce format n’est pas pris en charge.<br />
(301)<br />
Un fichier non pris en charge a été<br />
sélectionné<br />
500 Échec <strong>de</strong> l’authentification. (500) Échec <strong>de</strong> l’obtention <strong>de</strong><br />
l’autorisation DRM<br />
501 Échec <strong>de</strong> l’authentification. (501) Échec <strong>de</strong> l’obtention <strong>de</strong><br />
l’autorisation DRM<br />
502 Échec <strong>de</strong> l’authentification.<br />
Rechercher l’origine du problème dans<br />
les rout<strong>eu</strong>rs, concentrat<strong>eu</strong>rs <strong>et</strong> autres<br />
périphériques réseau. (502)<br />
503 Échec <strong>de</strong> l’authentification du contenu.<br />
L’avis <strong>de</strong> droits d’aut<strong>eu</strong>r <strong>de</strong> ce fichier est<br />
p<strong>eu</strong>t-être invali<strong>de</strong>. (503)<br />
Échec <strong>de</strong> l’obtention <strong>de</strong><br />
l’autorisation DRM<br />
Échec <strong>de</strong> l’obtention <strong>de</strong><br />
l’autorisation DRM<br />
504 Échec <strong>de</strong> l’authentification. (504) Échec <strong>de</strong> l’obtention <strong>de</strong><br />
l’autorisation WMDRM<br />
505 Échec <strong>de</strong> l’authentification.<br />
Rechercher l’origine du problème<br />
dans les rout<strong>eu</strong>rs, concentrat<strong>eu</strong>rs <strong>et</strong><br />
autres périphériques réseau. (505)<br />
506 Échec <strong>de</strong> l’authentification. Le nombre<br />
maximum <strong>de</strong> périphériques d’accès<br />
dépend du serv<strong>eu</strong>r. (506)<br />
507 Échec <strong>de</strong> l’authentification. La licence<br />
<strong>de</strong> ce fichier est p<strong>eu</strong>t-être invali<strong>de</strong>.<br />
Obtenez la licence d’un serv<strong>eu</strong>r. (507)<br />
Échec <strong>de</strong> l’obtention <strong>de</strong><br />
l’autorisation WMDRM<br />
Échec <strong>de</strong> l’obtention <strong>de</strong><br />
l’autorisation WMDRM<br />
Échec <strong>de</strong> l’obtention <strong>de</strong><br />
l’autorisation WMDRM<br />
508 Échec <strong>de</strong> l’authentification. (508) Err<strong>eu</strong>r d’autorisation autre que celle<br />
ci-<strong>de</strong>ssus<br />
110<br />
Fr<br />
Important<br />
• Afficher <strong>de</strong>s images dans Home Media Gallery pendant une pério<strong>de</strong> prolongée p<strong>eu</strong>t causer une<br />
rémanence d’image.
Utilisation d’autres appareils avec le télévis<strong>eu</strong>r à écran plat 05<br />
5.11 Ajout d’autres appareils audio<br />
La prise <strong>de</strong> sortie audio numérique du télévis<strong>eu</strong>r à écran plat (optique) p<strong>eu</strong>t ém<strong>et</strong>tre <strong>de</strong>s signaux Dolby Digital.<br />
Au moyen d’un câble numérique optique, raccor<strong>de</strong>z un ampli-tuner AV à la prise <strong>de</strong> sortie audio numérique<br />
(optique) située au dos du télévis<strong>eu</strong>r à écran plat. Ce raccor<strong>de</strong>ment perm<strong>et</strong> <strong>de</strong> restituer avec une gran<strong>de</strong> qualité<br />
les signaux audio d’émissions <strong>de</strong> télévision numérique.<br />
Si l’ampli-tuner AV ne possè<strong>de</strong> pas <strong>de</strong> prise d’entrée audio numérique (optique), raccor<strong>de</strong>z les prises AUDIO OUT<br />
(AUDIO) situées au dos du télévis<strong>eu</strong>r à écran plat aux prises d’entrée audio <strong>de</strong> l’ampli-tuner AV. Toutefois, c<strong>et</strong>te<br />
métho<strong>de</strong> p<strong>eu</strong>t être à l’origine d’un décalage entre le son <strong>de</strong>s enceintes <strong>et</strong> le son <strong>de</strong> l’ampli-tuner AV. Pour minimiser<br />
ce décalage, coupez le son <strong>de</strong>s enceintes du télévis<strong>eu</strong>r à écran plat. Il se p<strong>eu</strong>t toutefois que le décalage entre le son<br />
<strong>et</strong> l’image ne soit pas résolu.<br />
T<br />
W<br />
T<br />
W<br />
Français<br />
Vue <strong>de</strong> dos<br />
C<strong>et</strong>te connexion<br />
n’est pas<br />
nécessaire si vous<br />
avez relié un<br />
ampli AV,<br />
possédant <strong>de</strong>s<br />
fonctions<br />
surround à un<br />
caisson <strong>de</strong> graves.<br />
Câble AV<br />
(disponible<br />
dans le<br />
commerce)<br />
Câble numérique<br />
optique (disponible<br />
dans le commerce)<br />
Caisson <strong>de</strong> graves<br />
Ampli-tuner AV<br />
Les signaux audio synchronisés avec les images actuellement affichées sont toujours émis vers les prises AUDIO<br />
OUT. Cependant, le son qui accompagne les images est toujours émis vers la prise SUB WOOFER OUTPUT.<br />
Lors <strong>de</strong> l’utilisation <strong>de</strong> la prise <strong>de</strong> sortie audio numérique (optique), procé<strong>de</strong>z aux réglages en fonction <strong>de</strong> votre<br />
ampli-tuner AV. Pour <strong>de</strong> plus amples informations, reportez-vous au mo<strong>de</strong> d’emploi accompagnant l’ampli-tuner AV.<br />
Remarque: Lorsque <strong>de</strong>s signaux sont entrés par les prises HDMI, aucun signal n’est émis <strong>de</strong> la prise DIGITAL<br />
OUT s’il est protégé contre la copie.<br />
Pour régler la prise DIGITAL OUT (OPTICAL) pour votre ampli-tuner AV, suivez les étapes ci-<strong>de</strong>ssous.<br />
1 ) Accé<strong>de</strong>z à Configuration Système via Configuration.<br />
2 ) Sélectionnez Sortie Audio Num. dans le menu Configuration Système.<br />
3 ) Sélectionnez une option dans le sous-menu.<br />
Option<br />
Dolby Digital<br />
PCM<br />
Description<br />
la sortie est en Dolby Digital pour le format Dolby <strong>et</strong><br />
en PCM pour le format PCM (par défaut)<br />
la sortie est au format PCM quel que soit le type du<br />
signal<br />
4 ) Appuyez sur HOME MENU pour quitter le menu.<br />
111<br />
Fr
05 Utilisation d’autres appareils avec le télévis<strong>eu</strong>r à écran plat<br />
5.12 Ajout d’un ordinat<strong>eu</strong>r<br />
Utilisez les prises PC du télévis<strong>eu</strong>r pour raccor<strong>de</strong>r un ordinat<strong>eu</strong>r personnel. Les prises d’entrée PC sont<br />
compatibles DDC2B; il se p<strong>eu</strong>t, toutefois, que la fonction Plug & Play ne fonctionne pas correctement. Lorsqu’un<br />
ordinat<strong>eu</strong>r personnel est raccordé, le type <strong>de</strong> signal d’entrée est automatiquement i<strong>de</strong>ntifié par le télévis<strong>eu</strong>r. S’il<br />
est impossible <strong>de</strong> voir les images <strong>de</strong> l’ordinat<strong>eu</strong>r sur le télévis<strong>eu</strong>r ou si les images ne sont pas n<strong>et</strong>tes, activez la<br />
fonction Autoconfiguration.<br />
5.12.1 Réglages automatiques <strong>de</strong> la position <strong>de</strong> l’image <strong>et</strong> <strong>de</strong> l’horloge<br />
Lors <strong>de</strong> la connexion avec un ordinat<strong>eu</strong>r, la position <strong>de</strong> l’image <strong>et</strong> la fréquence d’horloge p<strong>eu</strong>vent être réglées.<br />
L’option Autoconfiguration règle automatiquement ces options, mais la position <strong>de</strong> l’image <strong>et</strong> l’horloge p<strong>eu</strong>vent<br />
également être réglées manuellement. C<strong>et</strong>te section explique la fonction <strong>de</strong> réglage automatique tandis que la<br />
section suivante explique comment régler manuellement la position d’image <strong>et</strong> l’horloge.<br />
L’appareil <strong>de</strong> la source AV doit être raccordé au télévis<strong>eu</strong>r à écran plat <strong>et</strong> mis sous tension pour que ces options<br />
fonctionnent. Suivez les étapes ci-<strong>de</strong>ssous pour utiliser Autoconfiguration afin <strong>de</strong> régler automatiquement la<br />
position d’image <strong>et</strong> l’horloge.<br />
1 ) Accé<strong>de</strong>z à Options via Configuration.<br />
2 ) Sélectionnez Auto configuration dans le menu Options.<br />
La fonction est lancée dès que la sélection est faite. Toutefois, selon l’image, la position p<strong>eu</strong>t ne pas<br />
changer même après le réglage.<br />
3 ) Appuyez sur HOME MENU pour quitter le menu.<br />
Remarque: C<strong>et</strong>te fonction n’est pas sélectionnable lorsque l’ordinat<strong>eu</strong>r est raccordé à la prise HDMI.<br />
Lorsque l’Autoconfiguration est terminée, le message “L’Autoconfiguration est terminé” apparaît sur l’écran.<br />
Toutefois, même dans les cas où le réglage ne perm<strong>et</strong> pas d’ajuster l’image, le message apparaît si d’autres<br />
fact<strong>eu</strong>rs affectent le changement. L’Autoconfiguration p<strong>eu</strong>t échouer si l’image <strong>de</strong> l’ordinat<strong>eu</strong>r comprend <strong>de</strong>s<br />
motifs répétés ou une image monochrome. En cas d’échec <strong>de</strong> l’Autoconfiguration pour corriger la position<br />
d’image <strong>et</strong> l’horloge, choisissez une autre image sur l’ordinat<strong>eu</strong>r personnel <strong>et</strong> recommencez l’opération.<br />
5.12.2 Réglages manuels <strong>de</strong> la position <strong>de</strong> l’image <strong>et</strong> <strong>de</strong> l’horloge<br />
L’Autoconfiguration est généralement la meill<strong>eu</strong>re métho<strong>de</strong> pour régler la position <strong>de</strong> l’image <strong>et</strong> l’horloge avec<br />
un raccor<strong>de</strong>ment à un ordinat<strong>eu</strong>r. Toutefois, suivez les étapes ci-<strong>de</strong>ssous pour optimiser les positions.<br />
1 ) Accé<strong>de</strong>z à Options via Configuration.<br />
2 ) Sélectionnez Configuration manuelle dans le menu Options.<br />
3 ) Sélectionnez une option à régler.<br />
Réglage <strong>de</strong> la position H/V<br />
Horloge : +120<br />
Phase : +15<br />
Réinitial.<br />
4 ) Utilisez les touches fléchées haut/bas ( / ) pour régler l’option.<br />
Vous pouvez également régler l’horloge <strong>et</strong> la phase avec les flèches gauche/droite (/).<br />
5 ) Appuyez sur HOME MENU pour quitter le menu.<br />
112<br />
Fr
Informations utiles 06<br />
6 Informations utiles<br />
Ce chapitre donne <strong>de</strong>s réponses à quelques questions courantes <strong>et</strong> fournit <strong>de</strong>s informations sur le logiciel/<br />
matériel utilisé dans le télévis<strong>eu</strong>r à écran plat, <strong>de</strong>s métho<strong>de</strong>s <strong>de</strong> n<strong>et</strong>toyage <strong>et</strong> <strong>de</strong>s informations sur le dépannage/<br />
entr<strong>et</strong>ien. Si vous avez besoin d’une ai<strong>de</strong> supplémentaire, v<strong>eu</strong>illez nous contacter pour que nous puissions<br />
remédier aux problèmes que vous rencontrez. Merci encore d’avoir porté votre choix sur la marque <strong>Pioneer</strong>!<br />
6.1 Foire aux questions (FAQ)<br />
C<strong>et</strong>te section répond à quelques-unes <strong>de</strong>s questions reçues par notre personnel du service d’assistance. Si votre<br />
question ne figure pas ici ou si vous souhaitez obtenir <strong>de</strong> plus amples informations, v<strong>eu</strong>illez consulter le site Web <strong>de</strong><br />
<strong>Pioneer</strong> pour une FAQ plus étendue (www.pioneerelectronics.com) répondant à <strong>de</strong>s questions sur votre modèle en<br />
particulier ou les télévis<strong>eu</strong>rs à écran plat en général.<br />
Pourquoi les touches <strong>de</strong> la télécomman<strong>de</strong> ne perm<strong>et</strong>tent pas <strong>de</strong> comman<strong>de</strong>r mon télévis<strong>eu</strong>r à écran plat?<br />
Si vous avez sélectionné un mo<strong>de</strong> autre que TV sur la télécomman<strong>de</strong>, le télévis<strong>eu</strong>r à écran plat ne p<strong>eu</strong>t pas recevoir d’ordres<br />
<strong>de</strong> c<strong>et</strong>te <strong>de</strong>rnière. Appuyez sur la touche SELECT pour basculer entre les mo<strong>de</strong>s jusqu’à ce que le témoin TV s’allume.<br />
Français<br />
Pourquoi suis-je obligé(e) <strong>de</strong> me rapprocher du télévis<strong>eu</strong>r pour utiliser la télécomman<strong>de</strong>?<br />
Si vous laissez <strong>de</strong>s piles épuisées dans la télécomman<strong>de</strong>, la communication risque d’échouer. Rapprochez-vous <strong>de</strong><br />
l’écran <strong>et</strong> essayez <strong>de</strong> comman<strong>de</strong>r le télévis<strong>eu</strong>r avec la télécomman<strong>de</strong>. Si <strong>de</strong> c<strong>et</strong>te façon le télévis<strong>eu</strong>r répond, remplacez<br />
les piles. Si vous rapprocher <strong>de</strong> l’écran n’a aucun eff<strong>et</strong>, vérifiez qu’il n’y a pas d’obj<strong>et</strong>s bloquant le signal dans la pièce.<br />
Prenez aussi en considération les autres appareils commandés par télécomman<strong>de</strong> qui ont pu être placés aux<br />
alentours du télévis<strong>eu</strong>r. Les obj<strong>et</strong>s ou d’autres signaux infrarouges p<strong>eu</strong>vent perturber la télécomman<strong>de</strong>.<br />
Comment puis-je protéger la télécomman<strong>de</strong> pour qu’elle dure plus longtemps?<br />
Vous disposez <strong>de</strong> plusi<strong>eu</strong>rs moyens pour protéger la télécomman<strong>de</strong>. Ne laissez pas la télécomman<strong>de</strong> en plein soleil<br />
sous peine <strong>de</strong> déformer ou d’altérer son boîtier. Évitez <strong>de</strong> renverser <strong>de</strong>s liqui<strong>de</strong>s sur la télécomman<strong>de</strong>. Mais le cas<br />
échéant, essuyez-la immédiatement. Au besoin, r<strong>et</strong>irez les piles <strong>et</strong> laissez la télécomman<strong>de</strong> séchée complètement<br />
avant <strong>de</strong> l’utiliser à nouveau. Les endroits à l’humidité élevée p<strong>eu</strong>vent aussi endommager la télécomman<strong>de</strong>.<br />
Un autre problème pouvant affecter la télécomman<strong>de</strong> est la fuite du liqui<strong>de</strong> <strong>de</strong>s piles. Les produits chimiques contenus<br />
dans le liqui<strong>de</strong> <strong>de</strong>s piles p<strong>eu</strong>vent endommager ou décolorer la télécomman<strong>de</strong>. En cas <strong>de</strong> fuite visible du liqui<strong>de</strong> <strong>de</strong>s<br />
piles, r<strong>et</strong>irez immédiatement les d<strong>eu</strong>x piles <strong>et</strong> essuyez soign<strong>eu</strong>sement le logement <strong>de</strong>s piles pour le n<strong>et</strong>toyer.<br />
Remplacez les d<strong>eu</strong>x piles par <strong>de</strong>s n<strong>eu</strong>ves.<br />
Le signal émis par la télécomman<strong>de</strong> <strong>de</strong> mon télévis<strong>eu</strong>r p<strong>eu</strong>t-il interférer avec d’autres appareils audio ou vidéo?<br />
Le télévis<strong>eu</strong>r à écran plat ém<strong>et</strong> un très faible rayonnement infrarouge. Si vous placez à proximité un autre appareil commandé<br />
par télécomman<strong>de</strong>, par exemple un DVR ou une chaîne stéréo, la réception <strong>de</strong>s signaux émis par sa télécomman<strong>de</strong> p<strong>eu</strong>t être<br />
perturbée. Essayez <strong>de</strong> placer c<strong>et</strong> appareil dans un endroit suffisamment éloigné du télévis<strong>eu</strong>r à écran plat.<br />
Remarque: La puissance du rayonnement infrarouge émis par le télévis<strong>eu</strong>r diffère selon l’image affichée à<br />
l’écran.<br />
Pourquoi la luminosité <strong>de</strong> l’image semble-t-elle réduite lorsque je laisse une image affichée sur l’écran?<br />
Lorsque vous affichez <strong>de</strong>s images fixes (photos ou images fournies par un ordinat<strong>eu</strong>r) pendant une longue pério<strong>de</strong>, la<br />
luminosité <strong>de</strong> l’écran est légèrement réduite. C<strong>et</strong>te fonction protège le télévis<strong>eu</strong>r en ajustant automatiquement la luminosité<br />
<strong>de</strong> l’écran. La baisse <strong>de</strong> luminosité survient après qu’une image fixe a été détectée pendant environ trois minutes.<br />
Comment r<strong>et</strong>rouver (ou modifier) le mot <strong>de</strong> passe du contrôle parental en cas d’oubli?<br />
Pour annuler un mot <strong>de</strong> passe oublié, maintenez enfoncée la touche ENTER <strong>de</strong> la télécomman<strong>de</strong> pendant au moins<br />
trois secon<strong>de</strong>s lorsque la fenêtre “Enter Password” est affichée. C<strong>et</strong>te action ramène le mot <strong>de</strong> passe à sa val<strong>eu</strong>r par<br />
défaut (1234). Voir “3.5.1 Attribution d’un mot <strong>de</strong> passe <strong>de</strong> contrôle parental (Restriction)” pour programmer un<br />
nouveau mot <strong>de</strong> passe.<br />
Que puis-je faire lorsque l’image <strong>et</strong>/ou le son sur une chaîne provenant <strong>de</strong> l’antenne n’apparaît pas aussi n<strong>et</strong>te<br />
qu’elle <strong>de</strong>vrait?<br />
Les chaînes reçues par l’intermédiaire d’une antenne comporte un signal plus faible. Pour <strong>de</strong> plus amples<br />
informations, voir “Vérification <strong>de</strong> la puissance du signal” à la Section 6.4.1 afin <strong>de</strong> vérifier la force du signal.<br />
113<br />
Fr
06 Informations utiles<br />
Pourquoi l’image est-elle coupée lorsque le signal PC est reçu par l’entrée HDMI du PDP-6020FD/5020FD?<br />
Si vous sélectionnez Vidéo pour le type <strong>de</strong> signal dans le menu Entrée HDMI, l’image est sur-balayée (agrandie), mais le<br />
télévis<strong>eu</strong>r passe automatiquement sur PC à la réception <strong>de</strong> signaux PC. Voir “5.2.1 Spécification du type d’entrée HDMI”.<br />
Pourquoi mon télévis<strong>eu</strong>r à écran plat refuse-t-il <strong>de</strong> se m<strong>et</strong>tre sous tension?<br />
Il se p<strong>eu</strong>t que les piles <strong>de</strong> la télécomman<strong>de</strong> soient épuisées ou que la télécomman<strong>de</strong> elle-même soit endommagée.<br />
Vérifiez le raccor<strong>de</strong>ment du cordon d’alimentation à la prise murale <strong>et</strong> au dos du télévis<strong>eu</strong>r. Essayez également<br />
d’appuyer sur a du télévis<strong>eu</strong>r.<br />
Pourquoi le témoin d’alimentation bl<strong>eu</strong> ou rouge <strong>de</strong> mon télévis<strong>eu</strong>r à écran plat clignote-t-il?<br />
Le circuit <strong>de</strong> protection interne du télévis<strong>eu</strong>r a p<strong>eu</strong>t-être été activé pour une raison quelconque. Éteignez le télévis<strong>eu</strong>r avec<br />
la touche a , patientez quelques minutes puis rallumez-le. Si le témoin clignote toujours, débranchez le cordon<br />
d’alimentation <strong>de</strong> la prise murale. Puis rebranchez-le au bout d’une ou d<strong>eu</strong>x minutes. Si le problème ne p<strong>eu</strong>t pas être résolu<br />
<strong>de</strong> c<strong>et</strong>te façon, contactez votre revend<strong>eu</strong>r ou le service d’assistance clientèle <strong>de</strong> <strong>Pioneer</strong> (voir la troisième <strong>de</strong> couverture).<br />
Que puis-je faire pour éviter la rémanence d’image ou l’eff<strong>et</strong> <strong>de</strong> brûlure d’écran?<br />
La rémanence d’image ou l’eff<strong>et</strong> <strong>de</strong> brûlure d’écran correspond à un eff<strong>et</strong> secondaire <strong>de</strong> la technologie plasma. Après<br />
qu’une image est affichée sur l’écran pendant une pério<strong>de</strong> prolongée, lorsque l’image change ou que le télévis<strong>eu</strong>r est<br />
éteint, une faible image rémanente ou un fantôme <strong>de</strong> l’image originale p<strong>eu</strong>t rester sur l’écran. Poursuivre la lecture<br />
vidéo ou laisser le télévis<strong>eu</strong>r éteint pendant quelques instants p<strong>eu</strong>t perm<strong>et</strong>tre <strong>de</strong> se débarrasser <strong>de</strong> c<strong>et</strong>te image. Nous<br />
vous recommandons les étapes <strong>et</strong> réglages suivants pour empêcher la rémanence d’image ou l’eff<strong>et</strong> <strong>de</strong> brûlure<br />
d’écran.<br />
• Réglez Protection écran sur Marche.<br />
• Sélectionnez PC comme type <strong>de</strong> signal lorsqu’un ordinat<strong>eu</strong>r est raccordé à la prise HDMI.<br />
Comment n<strong>et</strong>toyer mon télévis<strong>eu</strong>r à écran plat?<br />
Pour n<strong>et</strong>toyer la surface <strong>de</strong> l’écran, essuyez-la délicatement avec le chiffon sec fourni. Une forte friction sur l’écran p<strong>eu</strong>t<br />
rayer le film spécial qui recouvre la surface. Utilisez un chiffon propre <strong>et</strong> doux (en coton ou en flanelle, par exemple)<br />
pour le coffr<strong>et</strong> du télévis<strong>eu</strong>r. Pour en savoir plus sur le n<strong>et</strong>toyage, voir “6.3 Métho<strong>de</strong>s <strong>de</strong> n<strong>et</strong>toyage”.<br />
6.2 Vérification <strong>de</strong> la version du logiciel/matériel<br />
Vous pouvez vérifier la version <strong>de</strong> tous les logiciels <strong>et</strong> matériels utilisés sur votre télévis<strong>eu</strong>r à écran plat. Pour accé<strong>de</strong>r<br />
aux informations <strong>de</strong> version, suivez les instructions ci-<strong>de</strong>ssous.<br />
1 ) Accé<strong>de</strong>z à Configuration Système via Configuration.<br />
2 ) Sélectionnez Information Technique dans le menu Configuration Système.<br />
Les versions du logiciel <strong>et</strong> matériel apparaissent.<br />
3 ) Appuyez sur HOME MENU pour quitter le menu après avoir vérifié les versions.<br />
6.3 Métho<strong>de</strong>s <strong>de</strong> n<strong>et</strong>toyage<br />
Débranchez la fiche du cordon d’alimentation <strong>de</strong> la prise murale avant <strong>de</strong> n<strong>et</strong>toyer le télévis<strong>eu</strong>r à écran plat.<br />
Pour n<strong>et</strong>toyer la surface <strong>de</strong> l’écran ou la surface brillante <strong>de</strong> l’encadrement avant, essuyez-la délicatement avec un<br />
chiffon sec, le chiffon <strong>de</strong> n<strong>et</strong>toyage fourni ou un chiffon similaire (par exemple, en coton ou flanelle). Évitez d’utiliser<br />
un chiffon humi<strong>de</strong> ou mouillé car <strong>de</strong> l’humidité pourrait s’infiltrer dans le télévis<strong>eu</strong>r. Un chiffon poussiér<strong>eu</strong>x ou rêche<br />
(ou encore une friction trop forte) pourrait rayer la surface.<br />
Remarque: N’utilisez aucun liqui<strong>de</strong> <strong>de</strong> n<strong>et</strong>toyage ni aucun aérosol sur l’écran.<br />
Le châssis ou coffr<strong>et</strong> du télévis<strong>eu</strong>r est essentiellement composé <strong>de</strong> matières plastiques. N’utilisez aucun produit<br />
chimique tel que <strong>de</strong> l’essence ou du diluant pour le n<strong>et</strong>toyer. Ils p<strong>eu</strong>vent gâcher ou détériorer la finition. Pour n<strong>et</strong>toyer<br />
le coffr<strong>et</strong>, utilisez le même type <strong>de</strong> chiffon <strong>et</strong> la même métho<strong>de</strong> que pour l’encadrement avant.<br />
114<br />
Fr<br />
Remarque: Ne collez pas d’étiqu<strong>et</strong>tes, ruban adhésif, <strong>et</strong>c. sur un emplacement visible du télévis<strong>eu</strong>r à écran plat.<br />
Ils p<strong>eu</strong>vent décolorer ou détériorer les surfaces du télévis<strong>eu</strong>r.
Informations utiles 06<br />
6.4 Gui<strong>de</strong> <strong>de</strong> dépannage <strong>et</strong> informations sur l’entr<strong>et</strong>ien<br />
Généralités<br />
Problème<br />
Solutions possibles<br />
Absence<br />
d’alimentation<br />
L’alimentation se<br />
coupe brusquement<br />
• Vérifiez le raccor<strong>de</strong>ment à la prise murale <strong>et</strong> au télévis<strong>eu</strong>r.<br />
• Vérifiez si la touche d’alimentation du télévis<strong>eu</strong>r est allumée.<br />
• Confirmez que la télécomman<strong>de</strong> est bien placée sur TV.<br />
Appuyez sur (a) <strong>de</strong> la télécomman<strong>de</strong> ou sur STANDBY/ON du télévis<strong>eu</strong>r à écran plat<br />
si le témoin du télévis<strong>eu</strong>r est allumé en rouge.<br />
• Confirmez que la minuterie d’extinction n’a pas mis le télévis<strong>eu</strong>r hors tension.<br />
• Vérifiez le réglage <strong>de</strong> la comman<strong>de</strong> d’alimentation.<br />
• Vérifiez si la température interne du télévis<strong>eu</strong>r a augmenté.<br />
R<strong>et</strong>irez les obj<strong>et</strong>s qui obstruent les évents, ou n<strong>et</strong>toyez c<strong>eu</strong>x-ci.<br />
Français<br />
Le télévis<strong>eu</strong>r ne<br />
fonctionne pas<br />
La télécomman<strong>de</strong> ne<br />
fonctionne pas<br />
• Des phénomènes extéri<strong>eu</strong>rs tels que panne sect<strong>eu</strong>r, électricité statique, <strong>et</strong>c., p<strong>eu</strong>vent<br />
provoquer une anomalie <strong>de</strong> fonctionnement.<br />
Débranchez le télévis<strong>eu</strong>r <strong>de</strong> la prise murale pendant plusi<strong>eu</strong>rs minutes. Rebranchezle<br />
<strong>et</strong> essayez <strong>de</strong> le faire fonctionner à nouveau.<br />
• Vérifiez si l’alimentation du télévis<strong>eu</strong>r est coupée. Appuyez sur la touche lorsque les<br />
témoins POWER ON <strong>et</strong> STANDBY sont éteints.<br />
• Confirmez que le mo<strong>de</strong> est bien placé sur TV.<br />
• Vérifiez qu’aucun obj<strong>et</strong> n’empêche le capt<strong>eu</strong>r <strong>de</strong> la télécomman<strong>de</strong> sur le télévis<strong>eu</strong>r <strong>de</strong><br />
recevoir le signal <strong>de</strong> la télécomman<strong>de</strong>.<br />
• Vérifiez que les piles <strong>de</strong> la télécomman<strong>de</strong> sont correctement mises en place <strong>et</strong><br />
suffisamment chargées.<br />
Remplacez-les par <strong>de</strong>s piles n<strong>eu</strong>ves pour vérification.<br />
• Prenez en considération les modifications d’éclairage, une source <strong>de</strong> lumière plus vive<br />
ou nouvelle susceptible d’affecter le signal.<br />
Image/Son<br />
Problème<br />
Absence d’image <strong>et</strong> <strong>de</strong><br />
son<br />
Absence d’image<br />
L’écran est sombre<br />
Coloration <strong>et</strong> ombre<br />
inhabituelles ou images<br />
désalignées<br />
L’image est tronquée ou<br />
hors écran<br />
Solutions possibles<br />
• Vérifiez le raccor<strong>de</strong>ment <strong>de</strong> l’antenne.<br />
• Vérifiez le raccor<strong>de</strong>ment <strong>de</strong>s câbles <strong>de</strong> l’autre appareil.<br />
• Confirmez que la fonction Contrôle parental est désactivée.<br />
• Tapez le mot <strong>de</strong> passe qui perm<strong>et</strong> <strong>de</strong> désactiver temporairement le contrôle parental<br />
(restriction).<br />
• Confirmez que le télévis<strong>eu</strong>r est réglé pour regar<strong>de</strong>r une chaîne <strong>de</strong> télévision <strong>et</strong> non une<br />
source d’entrée.<br />
• Vérifiez le paramétrage <strong>de</strong>s réglages d’image.<br />
Ramenez les réglages à l<strong>eu</strong>rs val<strong>eu</strong>rs par défaut au besoin.<br />
• Confirmez que l’appareil raccordé est correctement installé <strong>et</strong> programmé.<br />
• Si vous visionnez <strong>de</strong>s images d’un ordinat<strong>eu</strong>r, confirmez la compatibilité du signal.<br />
• Contrôlez s’il n’y a pas d’obstacle <strong>de</strong>vant le capt<strong>eu</strong>r <strong>de</strong> luminosité ambiante.<br />
• Considérez les <strong>de</strong>rnières modifications apportées à l’éclairage ambiant ou les sources<br />
d’éclairage naturel <strong>de</strong>s fenêtres ou <strong>de</strong>s encadrures <strong>de</strong> portes.<br />
• Vérifiez la tonalité <strong>de</strong> l’image <strong>et</strong> ajustez au besoin.<br />
• Vérifiez que la taille d’écran correspond à la chaîne/source d’entrée actuelle.<br />
• Confirmez la position centrale <strong>de</strong> l’image.<br />
115<br />
Fr
06 Informations utiles<br />
Image/Son<br />
Problème<br />
Il y a une image mais pas<br />
<strong>de</strong> son<br />
Il y a du son mais pas<br />
d’image<br />
Le son est incorrect<br />
(émis d’un s<strong>eu</strong>l côté ou<br />
inversé entre gauche <strong>et</strong><br />
droite)<br />
La luminosité <strong>et</strong> le ton<br />
<strong>de</strong>s coul<strong>eu</strong>rs sont<br />
différents sur les côtés<br />
par rapport au centre<br />
Image rémanente<br />
Solutions possibles<br />
• Vérifiez que le son n’est pas coupé ou que le volume n’est pas baissé.<br />
• Si la source est une entrée vidéo ou PC, assurez-vous que les prises audio sont<br />
également raccordées.<br />
• Vérifiez si Arrêt Image est sélectionné dans le menu TOOLS.<br />
Lorsque vous vali<strong>de</strong>z c<strong>et</strong>te option, l’écran est éteint <strong>et</strong> s<strong>eu</strong>ls les sons sont émis. Pour<br />
rétablir l’affichage <strong>de</strong> l’écran, appuyez sur n’importe quelle touche sauf VOL +/– ou<br />
MUTING.<br />
• Vérifiez que les raccor<strong>de</strong>ments <strong>de</strong>s câbles d’enceinte ne sont pas intervertis entre la<br />
gauche <strong>et</strong> la droite.<br />
• Confirmez que les câbles d’enceinte sont correctement branchés <strong>et</strong> installés.<br />
• Vérifiez l’équilibre du son <strong>et</strong> ajustez au besoin.<br />
• Si <strong>de</strong>s images en mo<strong>de</strong> 4:3 ou <strong>de</strong>s images L<strong>et</strong>terbox sont affichées pendant <strong>de</strong> longues pério<strong>de</strong>s,<br />
ou pendant <strong>de</strong>s pério<strong>de</strong>s plus courtes sur plusi<strong>eu</strong>rs jours, une image rémanente p<strong>eu</strong>t apparaître<br />
du fait du phénomène <strong>de</strong> brûlure d’écran.<br />
Dans la mesure du possible, regar<strong>de</strong>z les images en plein écran afin d’éviter ce problème.<br />
• Placez le réglage Sync. luminosité sur Auto.<br />
C<strong>et</strong>te fonction ajuste la luminosité <strong>de</strong>s caches latéraux gris en fonction <strong>de</strong> celle <strong>de</strong> l’image<br />
principale.<br />
• Utilisez la fonction <strong>de</strong> protection d’écran (Voir “3.6.2 Pour prolonger la durée <strong>de</strong> vie du télévis<strong>eu</strong>r”)<br />
• Si une image lumin<strong>eu</strong>se ou fixe est restée affichée sur l’écran pendant une pério<strong>de</strong><br />
prolongée avant <strong>de</strong> passer à une image plus sombre, l’image d’origine p<strong>eu</strong>t apparaître sous<br />
la forme d’une image rémanente ou fantôme. Essayez <strong>de</strong> lire une autre image lumin<strong>eu</strong>se, <strong>de</strong><br />
changer d’image rapi<strong>de</strong>ment à plusi<strong>eu</strong>rs reprises ou d’afficher une scène d’actions.<br />
• Utilisez la fonction <strong>de</strong> protection d’écran (Voir “3.6.2 Pour prolonger la durée <strong>de</strong> vie du<br />
télévis<strong>eu</strong>r”)<br />
• Affichez l’écran <strong>de</strong> Mire vidéo <strong>de</strong> manière à réduire le risque d’image rémanente.<br />
116<br />
Fr<br />
Comman<strong>de</strong> HDMI<br />
Problème<br />
La comman<strong>de</strong> HDMI ne<br />
fonctionne pas<br />
Message d’err<strong>eu</strong>r:<br />
“Appareil inutilisable.<br />
Contrôlez la connexion”<br />
Absence d’image <strong>et</strong> <strong>de</strong><br />
son<br />
Absence d’image<br />
Pas <strong>de</strong> son<br />
Solutions possibles<br />
• Vérifiez les raccor<strong>de</strong>ments entre le télévis<strong>eu</strong>r <strong>et</strong> l’appareil HDMI.<br />
• Confirmez que les réglages du télévis<strong>eu</strong>r sont corrects.<br />
• Confirmez que l’appareil est compatible HDMI.<br />
• Confirmez que les réglages <strong>de</strong> l’appareil sont corrects.<br />
Pour en savoir plus, reportez-vous au mo<strong>de</strong> d’emploi accompagnant l’appareil.<br />
• Vérifiez les raccor<strong>de</strong>ments entre le télévis<strong>eu</strong>r <strong>et</strong> l’appareil HDMI.<br />
• Confirmez que les réglages <strong>de</strong> l’appareil sont corrects.<br />
Pour en savoir plus, reportez-vous au mo<strong>de</strong> d’emploi accompagnant l’appareil.<br />
• Vérifiez si le système AV est raccordé à une prise HDMI <strong>et</strong> si un enregistr<strong>eu</strong>r/lect<strong>eu</strong>r est<br />
raccordé à une autre prise HDMI.
Informations utiles 06<br />
Home Media Gallery/RÉSEAU<br />
Problème<br />
Solutions possibles<br />
Aucun serv<strong>eu</strong>r n’est<br />
détecté.<br />
Aucun serv<strong>eu</strong>r<br />
précé<strong>de</strong>mment<br />
connecté n’est détecté<br />
(les rubriques dans<br />
Sélectionner serv<strong>eu</strong>r<br />
apparaissent en gris).<br />
“Échec acquisition<br />
liste.” apparaît sur<br />
l’écran <strong>de</strong> liste <strong>de</strong><br />
serv<strong>eu</strong>rs.<br />
• Vérifiez que l’ordinat<strong>eu</strong>r est sous tension <strong>et</strong> non pas en mo<strong>de</strong> d’attente ou <strong>de</strong> veille (rien n’est<br />
choisi dans Sélectionner serv<strong>eu</strong>r). Si l’ordinat<strong>eu</strong>r a démarré avec la fonction “Wake On LAN”<br />
(WOL), vérifiez que l’ordinat<strong>eu</strong>r est compatible avec WOL ou que la configuration WOL a été<br />
correctement programmée dans le gestionnaire <strong>de</strong> périphérique <strong>de</strong> la BIOS ou <strong>de</strong> Windows.<br />
• Vérifiez les connexions physiques (concentrat<strong>eu</strong>r, rout<strong>eu</strong>r <strong>et</strong> qualité <strong>de</strong>s câbles). Il est fortement<br />
recommandé d’utiliser 100BASE-TX pour améliorer la qualité <strong>de</strong> lecture <strong>et</strong> la vitesse d’affichage.<br />
• Vérifiez les connexions logiques (adresse IP, DHCP, <strong>et</strong>c.). Vérifiez que l’adresse IP est correcte<br />
si elle a été acquise par affectation automatique IP <strong>et</strong> du réglage du pare-f<strong>eu</strong>. Vérifiez aussi que<br />
l’adresse IP a été acquise correctement avec DHCP sur l’écran Configuration Réseau dans le<br />
menu Configuration HMG.<br />
• L’utilisation <strong>de</strong> d<strong>eu</strong>x serv<strong>eu</strong>rs ou plus sur un s<strong>eu</strong>l ordinat<strong>eu</strong>r p<strong>eu</strong>t donner li<strong>eu</strong> à un<br />
fonctionnement instable.<br />
Pour un fonctionnement correct, il est vivement recommandé un s<strong>eu</strong>l serv<strong>eu</strong>r sur un s<strong>eu</strong>l<br />
ordinat<strong>eu</strong>r.<br />
• Vérifiez que le serv<strong>eu</strong>r multimédia <strong>de</strong> l’ordinat<strong>eu</strong>r est en service. Redémarrez si nécessaire.<br />
Vérifiez si un ou plusi<strong>eu</strong>rs serv<strong>eu</strong>rs sont sous tension (cela p<strong>eu</strong>t être la cause du mauvais<br />
fonctionnement).<br />
• Vérifiez si l’ordinat<strong>eu</strong>r fonctionne correctement. Redémarrez l’ordinat<strong>eu</strong>r après avoir vérifié les<br />
spécifications <strong>et</strong> les réglages.<br />
• Vérifiez les réglages du serv<strong>eu</strong>r multimédia. Si un client est enregistré manuellement, il p<strong>eu</strong>t<br />
s’avérer nécessaire <strong>de</strong> recommencer la procédure <strong>de</strong> configuration. Une option “Non autorisé”<br />
a pu être sélectionnée pour les connexions.<br />
• Contrôlez si UPnP (Universal Plug and Play) est activé sur votre rout<strong>eu</strong>r. Pour la marche à<br />
suivre, reportez-vous au mo<strong>de</strong> d’emploi <strong>de</strong> votre rout<strong>eu</strong>r.<br />
• Patientez un bref instant, puis sélectionnez “M. à J. Dernière Information” dans le Menu TOOLS.<br />
• Vérifiez qu’il n’y a pas <strong>de</strong> brouillage radio électrique lors <strong>de</strong> la connexion au moyen d’un LAN<br />
sans fil. Le brouillage radioélectrique p<strong>eu</strong>t empêcher la connexion.<br />
• Si les opérations ci-<strong>de</strong>ssus ne perm<strong>et</strong>tent pas <strong>de</strong> résoudre le problème, essayez d’éteindre le<br />
télévis<strong>eu</strong>r avec a <strong>de</strong> la télécomman<strong>de</strong>, puis <strong>de</strong> l’allumer avec TV a du télévis<strong>eu</strong>r à écran plat.<br />
Français<br />
Un serv<strong>eu</strong>r disponible est<br />
sélectionné mais il n’est<br />
pas possible d’y accé<strong>de</strong>r.<br />
Un serv<strong>eu</strong>r est<br />
sélectionné <strong>de</strong> façon<br />
arbitraire.<br />
La configuration <strong>de</strong>s<br />
fichiers/dossiers diffère<br />
d’un serv<strong>eu</strong>r à l’autre<br />
(configuration étrange).<br />
Un message d’err<strong>eu</strong>r<br />
<strong>de</strong> communication<br />
apparaît.<br />
• Vérifiez si le serv<strong>eu</strong>r est correctement réglé pour le partage <strong>de</strong>s fichiers, si le dossier<br />
cible a été effacé, ou si un ou plusi<strong>eu</strong>rs dossiers ont été altérés sur le serv<strong>eu</strong>r.<br />
• Vérifiez qu’il n’y a pas trop <strong>de</strong> fichiers dans chaque dossier.<br />
• C<strong>et</strong>te sélection arbitraire se produit si le serv<strong>eu</strong>r que vous utilisiez précé<strong>de</strong>mment a été réglé<br />
pour afficher l’écran du menu Navigat<strong>eu</strong>r Médias (si vous le réinitialisez, les autres serv<strong>eu</strong>rs<br />
connectés sont également réinitialisés).<br />
•Lorsque Connex. Auto est placé sur Marche dans le menu Configuration HMG <strong>et</strong> qu’un s<strong>eu</strong>l<br />
serv<strong>eu</strong>r est connecté, l’accès au serv<strong>eu</strong>r est automatique. Utilisez le Menu TOOLS pour<br />
sélectionner le serv<strong>eu</strong>r correct.<br />
• La Navigat<strong>eu</strong>r média affiche le contenu du serv<strong>eu</strong>r selon le classement propre du<br />
serv<strong>eu</strong>r.<br />
• Si aucune information (telle qu’une balise ID3) n’est contenue dans le fichier, le fichier<br />
ne p<strong>eu</strong>t pas être classé sur le serv<strong>eu</strong>r.<br />
• Reportez-vous aux solutions possibles données pour “Aucun serv<strong>eu</strong>r n’est détecté”.<br />
• Si les opérations ci-<strong>de</strong>ssus ne perm<strong>et</strong>tent pas <strong>de</strong> résoudre le problème, essayez<br />
d’éteindre le télévis<strong>eu</strong>r avec a <strong>de</strong> la télécomman<strong>de</strong>, puis <strong>de</strong> l’allumer avec TV a du<br />
télévis<strong>eu</strong>r à écran plat.<br />
117<br />
Fr
06 Informations utiles<br />
Home Media Gallery/LECTURE<br />
Problème<br />
Les images <strong>et</strong> le son<br />
sont saccadés ou<br />
déformés (un bruit <strong>de</strong><br />
bloc apparaît).<br />
Lecture ou affichage<br />
impossible.<br />
Solutions possibles<br />
• Vérifiez les connexions physiques (concentrat<strong>eu</strong>r, rout<strong>eu</strong>r <strong>et</strong> qualité <strong>de</strong>s câbles). Il est fortement<br />
recommandé d’utiliser 100BASE-TX pour améliorer la qualité <strong>de</strong> lecture <strong>et</strong> la vitesse d’affichage.<br />
• Vérifiez si l’ordinat<strong>eu</strong>r fonctionne correctement. Redémarrez l’ordinat<strong>eu</strong>r après avoir vérifié les<br />
spécifications <strong>et</strong> les réglages.<br />
• Vérifiez que le fichier est compatible avec le format, le débit binaire <strong>et</strong>/ou le profil. Vérifiez aussi<br />
si le fichier n’est pas endommagé.<br />
• Lors <strong>de</strong> la connexion à un réseau local (LAN) sans fil, vérifiez si le débit binaire est suffisant.<br />
• Certains fichiers compatibles avec les formats pris en charge p<strong>eu</strong>vent ne pas être reproduits ou<br />
affichés correctement.<br />
• Vérifiez si le contenu DRM a été acquis pour être utilisé sur un autre ordinat<strong>eu</strong>r. Le télévis<strong>eu</strong>r à<br />
écran plat ne p<strong>eu</strong>t pas lire <strong>de</strong> contenu DRM transféré <strong>de</strong>puis l’ordinat<strong>eu</strong>r sur lequel il a été<br />
acquis vers un autre ordinat<strong>eu</strong>r. Vous ne pouvez lire le contenu DRM acquis que pour<br />
l’ordinat<strong>eu</strong>r utilisé au moment <strong>de</strong> l’achat. V<strong>eu</strong>illez obtenir une nouvelle licence ou utiliser<br />
l’ordinat<strong>eu</strong>r pour lequel le contenu a été acquis.<br />
• Vérifiez si le contenu sur le même serv<strong>eu</strong>r autorise plusi<strong>eu</strong>rs périphériques clients (lect<strong>eu</strong>rs).<br />
• Vérifiez les connexions physiques (concentrat<strong>eu</strong>r, rout<strong>eu</strong>r <strong>et</strong> qualité <strong>de</strong>s câbles). Il est fortement<br />
recommandé d’utiliser 100BASE-TX pour améliorer la qualité <strong>de</strong> lecture <strong>et</strong> la vitesse d’affichage.<br />
• Vérifiez si l’ordinat<strong>eu</strong>r fonctionne correctement. Redémarrez l’ordinat<strong>eu</strong>r après avoir vérifié ses<br />
spécifications <strong>et</strong> ses réglages.<br />
• Vérifiez que le fichier est compatible avec le format, le débit binaire <strong>et</strong>/ou le profil. Vérifiez aussi<br />
si le fichier n’est pas endommagé.<br />
• Vérifiez si le contrat <strong>de</strong> location du serv<strong>eu</strong>r n’est pas expiré.<br />
• Lors <strong>de</strong> la connexion à un réseau local (LAN) sans fil, vérifiez si le débit binaire est suffisant.<br />
• Certains fichiers compatibles avec les formats pris en charge p<strong>eu</strong>vent ne pas être reproduits ou<br />
affichés.<br />
• Il faut un certain temps pour capturer <strong>et</strong> afficher une image <strong>de</strong> gran<strong>de</strong> taille. Le cas échéant, il<br />
se p<strong>eu</strong>t qu’aucune opération ne puisse être effectuée.<br />
• Vérifiez si le contenu DRM a été acquis pour être utilisé sur un autre ordinat<strong>eu</strong>r. Avec le<br />
télévis<strong>eu</strong>r à écran plat, vous ne pouvez pas lire <strong>de</strong> contenu DRM transféré <strong>de</strong>puis l’ordinat<strong>eu</strong>r<br />
sur lequel il a été acquis vers un autre ordinat<strong>eu</strong>r. Vous ne pouvez lire le contenu DRM acquis<br />
que pour l’ordinat<strong>eu</strong>r utilisé au moment <strong>de</strong> l’achat. V<strong>eu</strong>illez obtenir une nouvelle licence ou<br />
utiliser l’ordinat<strong>eu</strong>r pour lequel le contenu a été acquis.<br />
• Vérifiez si le contenu sur le même serv<strong>eu</strong>r est lu avec plusi<strong>eu</strong>rs périphériques clients (lect<strong>eu</strong>rs).<br />
Home Media Gallery/USB<br />
Problème<br />
Le périphérique USB<br />
n’est pas reconnu<br />
correctement.<br />
Solutions possibles<br />
• Vérifiez si le périphérique est conforme à la classe <strong>de</strong> stockage <strong>de</strong> masse.<br />
• Vérifiez qu’il est correctement raccordé <strong>et</strong> que rien n’est endommagé (alimentation,<br />
mo<strong>de</strong> comme le mo<strong>de</strong> <strong>de</strong> stockage <strong>de</strong> masse, le format média, <strong>et</strong>c.).<br />
• Vérifiez qu’il contient les fichiers pris en charge.<br />
• Vérifiez si la vitesse du périphérique est suffisante (une vitesse lente p<strong>eu</strong>t interrompre<br />
ou ralentir l’affichage <strong>de</strong>s images en raison d’une anomalie du débit binaire). Lors <strong>de</strong><br />
l’utilisation d’un appareil photo numérique qui n’est pas conforme à la Classe <strong>de</strong><br />
stockage <strong>de</strong> masse, insérez la carte mémoire flash dans un lect<strong>eu</strong>r multicartes.<br />
• Vérifiez que le périphérique est correctement inséré ou r<strong>et</strong>iré.<br />
• Les concentrat<strong>eu</strong>rs USB ne sont pas prise en charge. Lors d’une connexion à un<br />
réseau domestique, connectez directement au port USB du périphérique.<br />
118<br />
Fr
Informations utiles 06<br />
Home Media Gallery/USB<br />
Problème<br />
Solutions possibles<br />
Les images <strong>et</strong> le son<br />
sont saccadés ou<br />
déformés (un bruit <strong>de</strong><br />
bloc apparaît).<br />
• Vérifiez que le fichier est compatible avec le format, le débit binaire <strong>et</strong>/ou le profil. Vérifiez aussi<br />
si le fichier n’est pas endommagé.<br />
• Certains fichiers compatibles avec les formats pris en charge p<strong>eu</strong>vent ne pas être reproduits ou<br />
affichés correctement.<br />
• Vérifiez si le périphérique est conforme à la classe <strong>de</strong> stockage <strong>de</strong> masse.<br />
• Vérifiez qu’il est correctement raccordé <strong>et</strong> que rien n’est endommagé (alimentation, mo<strong>de</strong><br />
comme le mo<strong>de</strong> <strong>de</strong> stockage <strong>de</strong> masse, le format média, <strong>et</strong>c.).<br />
• Vérifiez qu’il contient les fichiers pris en charge.<br />
• Vérifiez si la vitesse du périphérique est suffisante (une vitesse lente p<strong>eu</strong>t interrompre ou ralentir<br />
l’affichage <strong>de</strong>s images en raison d’une anomalie du débit binaire). Lors <strong>de</strong> l’utilisation d’un<br />
appareil photo numérique qui n’est pas conforme à la Classe <strong>de</strong> stockage <strong>de</strong> masse, insérez la<br />
carte mémoire flash dans un lect<strong>eu</strong>r multicartes.<br />
Français<br />
Un appareil externe<br />
raccordé au port USB<br />
ne fonctionne pas.<br />
Les données photo<br />
présentes sur l’appareil<br />
photo numérique ne<br />
p<strong>eu</strong>vent pas être lues par<br />
l’interface USB.<br />
• Vérifiez si le périphérique p<strong>eu</strong>t être raccordé au télévis<strong>eu</strong>r à écran plat.<br />
• Réinsérez le câble USB.<br />
• Pour le raccor<strong>de</strong>ment, utilisez un câble USB <strong>de</strong> moins <strong>de</strong> 5 m.<br />
• Vérifiez si le câble USB est correctement raccordé.<br />
• M<strong>et</strong>tez d’abord l’appareil hors tension puis <strong>de</strong> nouveau sous tension pour vérifier si l’appareil<br />
externe fonctionne correctement.<br />
• Vérifiez si l’appareil externe fonctionne correctement après avoir redémarré le périphérique<br />
USB.<br />
• Vérifiez si l’appareil photo numérique est en mo<strong>de</strong> <strong>de</strong> visionnement.<br />
• Reportez-vous au mo<strong>de</strong> d’emploi <strong>de</strong> l’appareil photo numérique.<br />
• Vérifiez si le périphérique p<strong>eu</strong>t être raccordé au télévis<strong>eu</strong>r à écran plat.<br />
• Vérifiez si l’appareil photo numérique est sous tension.<br />
• Vérifiez si l’appareil photo numérique est en mo<strong>de</strong> <strong>de</strong> visionnement.<br />
Home Media Gallery/Diaporama<br />
Problème<br />
Le diaporama (contenu<br />
photo) ne démarre pas.<br />
L’image suivante<br />
n’apparaît pas dans le<br />
diaporama.<br />
Solutions possibles<br />
• Contrôlez si le lect<strong>eu</strong>r n’est pas en mo<strong>de</strong> pause, rotation ou zoom. Le cas échéant, appuyez sur<br />
PLAY ou ENTER pour démarrer le diaporama.<br />
• Le temps nécessaire pour afficher une image p<strong>eu</strong>t être plus long que celui spécifié dans les<br />
réglages du diaporama. Réduisez la taille <strong>de</strong> l’image avec un ordinat<strong>eu</strong>r <strong>et</strong> essayez <strong>de</strong> nouveau.<br />
• Le diaporama affiche s<strong>eu</strong>lement les fichiers pris en charge. S’il y a s<strong>eu</strong>lement un fichier pris en<br />
charge, ce fichier restera sur l’affichage. Les autres fichiers ne s’afficheront pas.<br />
Divers<br />
Problème<br />
Sons/bruits du<br />
télévis<strong>eu</strong>r<br />
La luminosité sur les<br />
côtés <strong>de</strong> l’écran est<br />
inégale<br />
Solutions possibles<br />
• Certains sons sont inhérents à la technologie plasma.<br />
Par exemple: bruit du mot<strong>eu</strong>r du ventilat<strong>eu</strong>r, ronflement du circuit électrique,<br />
bourdonnement du panneau <strong>de</strong> verre, <strong>et</strong>c.<br />
• Affichez une image qui remplit tout l’écran jusqu’à ce que la différence <strong>de</strong> luminosité<br />
soit atténuée.<br />
• Modifiez le réglage du mo<strong>de</strong> AV.<br />
119<br />
Fr
06 Informations utiles<br />
Si les informations ci-<strong>de</strong>ssus ne vous perm<strong>et</strong>tent pas <strong>de</strong> résoudre le problème, adressez-vous à un représentant<br />
du service agréé <strong>Pioneer</strong>. Ne tentez pas <strong>de</strong> réparer le télévis<strong>eu</strong>r par vous-même. Vous risqueriez <strong>de</strong> vous exposer<br />
à une électrocution <strong>et</strong> d’autres dangers si vous ouvrez ou déposez <strong>de</strong>s couvercles. Vous risqueriez également<br />
d’annuler la garantie. Confiez toute vérification du télévis<strong>eu</strong>r à écran plat à un technicien <strong>de</strong> service qualifié.<br />
Certaines situations exigeant l’intervention d’un technicien <strong>de</strong> service sont présentées ci-<strong>de</strong>ssous:<br />
• le télévis<strong>eu</strong>r est tombé ou a été endommagé;<br />
• le cordon ou la fiche d’alimentation est endommagé;<br />
• un liqui<strong>de</strong> a été renversé ou un obj<strong>et</strong> est tombé dans le télévis<strong>eu</strong>r;<br />
• le télévis<strong>eu</strong>r a été exposé à la pluie ou à l’eau;<br />
• le fonctionnement du télévis<strong>eu</strong>r est visiblement anormal.<br />
De temps à autre, une pièce du télévis<strong>eu</strong>r à écran plat p<strong>eu</strong>t être défaillante. Assurez-vous que le technicien <strong>de</strong><br />
service n’utilise que <strong>de</strong>s pièces <strong>de</strong> rechange spécifiées par <strong>Pioneer</strong> ou <strong>de</strong>s pièces ayant les mêmes<br />
caractéristiques ou performances que les pièces d’origine. L’utilisation <strong>de</strong> pièces non autorisées p<strong>eu</strong>t être à<br />
l’origine d’un incendie, d’une électrocution ou d’autres dangers. Après toute intervention d’entr<strong>et</strong>ien ou <strong>de</strong><br />
réparation, exigez du technicien <strong>de</strong> service qu’il effectue un contrôle <strong>de</strong> sécurité afin <strong>de</strong> s’assurer que l’appareil<br />
fonctionne correctement.<br />
Si vous avez besoin d’une assistance supplémentaire ou avez une question sur le service ou les pièces, adressezvous<br />
au centre <strong>de</strong> service <strong>Pioneer</strong> au (800) 421-1625.<br />
6.4.1 Vérification <strong>de</strong> la puissance du signal<br />
Lors <strong>de</strong> la réception d’une chaîne <strong>de</strong> télévision par le biais d’une antenne UHF/VHF, vérifiez la puissance du signal<br />
<strong>de</strong> la chaîne actuellement affichée. C<strong>et</strong>te fonction est disponible uniquement lors <strong>de</strong> la réception <strong>de</strong> signaux<br />
numériques par voie hertzienne. Suivez les étapes ci-<strong>de</strong>ssous pour vérifier la puissance du signal <strong>de</strong> la chaîne.<br />
1 ) Accé<strong>de</strong>z à Configuration Système via Configuration.<br />
2 ) Sélectionnez Instal. Tuner Numérique dans le menu Configuration Système.<br />
3 ) Sélectionnez Installation dans le menu Instal. Tuner Numérique.<br />
4 ) Sélectionnez Vérification du signal dans le sous-menu.<br />
5 ) Sélectionnez Canal RF.<br />
Pour ajouter d’autres chaînes, sélectionner Ajouter.<br />
6 ) Sélectionnez la chaîne à vérifier.<br />
7 ) Orientez l’antenne jusqu’à ce que la puissance du signal capté soit aussi élevée que possible.<br />
Canal RF : 21<br />
Ajouter<br />
Niveau : 60%<br />
Qualité : 80%<br />
8 ) Appuyez sur HOME MENU pour quitter le menu.<br />
120<br />
Fr
Précautions <strong>et</strong> avertissements 07<br />
7 Précautions <strong>et</strong> avertissements<br />
Le télévis<strong>eu</strong>r à écran plat est conçu pour fournir une longue durée <strong>de</strong> vie utile. Il existe quelques astuces<br />
perm<strong>et</strong>tant <strong>de</strong> maintenir la performance optimale du télévis<strong>eu</strong>r. C<strong>et</strong>te section donne <strong>de</strong>s informations générales<br />
<strong>et</strong> <strong>de</strong>s avertissements spécifiques pour vous ai<strong>de</strong>r à maintenir le télévis<strong>eu</strong>r à écran plat au meill<strong>eu</strong>r <strong>de</strong> sa qualité<br />
tout au long <strong>de</strong> sa durée <strong>de</strong> vie.<br />
Remarque: Si vous n’avez pas l’intention d’utiliser le télévis<strong>eu</strong>r à écran plat pendant une pério<strong>de</strong> prolongée,<br />
m<strong>et</strong>tez-le <strong>de</strong> temps en temps sous tension <strong>et</strong> faites le fonctionner pour maintenir ses opérations.<br />
7.1 Remarques sur l’installation<br />
Il est recommandé d’utiliser les pièces <strong>et</strong> les accessoires conçus par <strong>Pioneer</strong>. L’utilisation d’accessoires autres<br />
que le support ou l’applique <strong>de</strong> montage <strong>Pioneer</strong> p<strong>eu</strong>t se traduire par une instabilité pouvant être à l’origine <strong>de</strong><br />
blessures. Pour une installation personnalisée, consultez votre revend<strong>eu</strong>r ou install<strong>eu</strong>r avant d’essayer <strong>de</strong> m<strong>et</strong>tre<br />
en place ce télévis<strong>eu</strong>r à écran plat haut <strong>de</strong> gamme. Ces professionnels sont familiarisés avec les techniques<br />
d’installation correctes, y compris la ventilation.<br />
L’utilisation <strong>de</strong> l’appareil sans une ventilation convenable p<strong>eu</strong>t provoquer une élévation <strong>de</strong> la température interne<br />
qui p<strong>eu</strong>t se traduire par une anomalie <strong>de</strong> fonctionnement. Lorsque la température ambiante ou interne excè<strong>de</strong><br />
une certaine val<strong>eu</strong>r, le télévis<strong>eu</strong>r se m<strong>et</strong> automatiquement hors tension pour que les circuits électroniques<br />
internes puissent se refroidir <strong>et</strong> éviter une situation danger<strong>eu</strong>se.<br />
Un dysfonctionnement p<strong>eu</strong>t être le fruit d’un s<strong>eu</strong>l problème, comme la ventilation ou la combinaison <strong>de</strong> plusi<strong>eu</strong>rs<br />
fact<strong>eu</strong>rs. <strong>Pioneer</strong> ne sera en aucun cas responsable <strong>de</strong> tout acci<strong>de</strong>nt ou dommage dû à l’utilisation <strong>de</strong> pièces <strong>et</strong><br />
d’accessoires d’une autre marque, à un li<strong>eu</strong> d’installation inadéquat, à <strong>de</strong> mauvais moyens <strong>de</strong> stabilisation, à <strong>de</strong>s<br />
métho<strong>de</strong>s d’installation erronées, à <strong>de</strong>s err<strong>eu</strong>rs d’opération, à une transformation du li<strong>eu</strong> d’installation ou à une<br />
catastrophe naturelle.<br />
Pour <strong>de</strong> plus amples informations, reportez-vous aux points suivants:<br />
• Confirmez que les évents du télévis<strong>eu</strong>r ne sont pas partiellement obstrués ou complètement bloqués.<br />
• Utilisez un aspirat<strong>eu</strong>r réglé sur sa puissance minimum pour n<strong>et</strong>toyer la poussière <strong>de</strong>s évents.<br />
• Éloignez le télévis<strong>eu</strong>r <strong>de</strong>s autres appareils, d’un mur <strong>et</strong>c. (l’espace minimum requis est indiqué à la section<br />
“2.1.1 Vérification <strong>de</strong>s conditions <strong>de</strong> l’emplacement”).<br />
• Ne placez pas l’appareil dans un espace exigu où la ventilation est médiocre.<br />
• N’enveloppez, ni ne placez, ni n’entourez le télévis<strong>eu</strong>r dans un matériau comme une couverture, un chiffon<br />
ou un tapis sous peine <strong>de</strong> bloquer les évents du télévis<strong>eu</strong>r.<br />
• Ne posez pas le télévis<strong>eu</strong>r contre un mur ou tout autre support, mais utilisez un socle ou support adéquat.<br />
Français<br />
7.2 Considérations sur l’emplacement physique <strong>et</strong> la température<br />
De la con<strong>de</strong>nsation p<strong>eu</strong>t se former à la surface ou à l’intéri<strong>eu</strong>r du télévis<strong>eu</strong>r à écran plat si vous le transportez<br />
d’une pièce froi<strong>de</strong> à une pièce chau<strong>de</strong>, ou bien, lorsque vous allumez un radiat<strong>eu</strong>r ou un climatis<strong>eu</strong>r. En cas <strong>de</strong><br />
formation <strong>de</strong> con<strong>de</strong>nsation, n’allumez pas le télévis<strong>eu</strong>r à écran plat tant qu’elle ne s’est pas évaporée. Allumer le<br />
télévis<strong>eu</strong>r en présence <strong>de</strong> con<strong>de</strong>nsation p<strong>eu</strong>t provoquer un dysfonctionnement.<br />
7.3 Consignes d’utilisation<br />
V<strong>eu</strong>illez lire attentivement ces informations <strong>de</strong> manière à profiter au mi<strong>eu</strong>x du télévis<strong>eu</strong>r à écran plat <strong>Pioneer</strong>.<br />
Avec le temps, la luminosité du télévis<strong>eu</strong>r à écran plat diminuera légèrement, tout comme dans le cas <strong>de</strong>s télévis<strong>eu</strong>rs<br />
standard à tube cathodique à revêtement cathodoluminescent. Par aill<strong>eu</strong>rs, les images statiques affichées pendant<br />
une pério<strong>de</strong> prolongée p<strong>eu</strong>vent affecter négativement l’affichage à l’écran. Pour profiter longtemps <strong>de</strong> belles images<br />
lumin<strong>eu</strong>ses, v<strong>eu</strong>illez lire les consignes suivantes:<br />
• Placez le télévis<strong>eu</strong>r à écran plat en veille lorsque vous ne l’utilisez pas.<br />
• Évitez <strong>de</strong> laisser affichée une image fixe ou d’afficher fréquemment la même image sur l’écran (par exemple,<br />
images sous-titrées, j<strong>eu</strong>x avec <strong>de</strong>s séquences statiques, <strong>et</strong>c.).<br />
• Masquez l’affichage sur écran (OSD) d’un lect<strong>eu</strong>r <strong>de</strong> DVD, magnétoscope ou tout autre appareil lorsque vous ne<br />
l’utilisez pas.<br />
• Ne laissez pas affichée pendant longtemps une image fixe consécutive à une pause ou un arrêt sur image.<br />
• Évitez d’afficher pendant une pério<strong>de</strong> prolongée une image aux zones très claires ou très sombres sur l’écran.<br />
121<br />
Fr
07 Précautions <strong>et</strong> avertissements<br />
• Vous pouvez activer le mo<strong>de</strong> JEU du sous-menu Pré réglages AV pour jouer à un j<strong>eu</strong> vidéo, mais essayez <strong>de</strong> limiter<br />
l’usage <strong>de</strong> ce mo<strong>de</strong> à d<strong>eu</strong>x h<strong>eu</strong>res <strong>de</strong> suite.<br />
• Après avoir joué à un j<strong>eu</strong>, ou bien après l’affichage d’une image fixe ou d’une image provenant d’un ordinat<strong>eu</strong>r,<br />
regar<strong>de</strong>z une vidéo d’action aux images animées avec les réglages LARGE ou PLEIN. Il est recommandé <strong>de</strong><br />
regar<strong>de</strong>r c<strong>et</strong>te vidéo d’action trois fois la durée d’affichage <strong>de</strong> l’image PC ou du j<strong>eu</strong> à l’écran.<br />
• Regar<strong>de</strong>z une vidéo d’action aux images animées sur l’écran LARGE ou PLEIN après avoir joué à un j<strong>eu</strong><br />
comportant <strong>de</strong>s caches latéraux, supéri<strong>eu</strong>r <strong>et</strong> inféri<strong>eu</strong>r (<strong>de</strong>s ban<strong>de</strong>s noires). Regar<strong>de</strong>r pendant longtemps un<br />
contenu masqué sans effectuer ce processus <strong>de</strong> récupération p<strong>eu</strong>t entraîner une usure inégale <strong>de</strong>s cellules<br />
plasma.<br />
7.4 Interférence <strong>de</strong>s signaux ou bruits<br />
Les interférences <strong>de</strong> signaux, appelés également bruit vidéo ou bruit blanc, p<strong>eu</strong>vent être dus à plusi<strong>eu</strong>rs types <strong>de</strong><br />
situation. Les plus courantes sont présentées dans les sections suivantes.<br />
Rayonnement infrarouge<br />
En raison <strong>de</strong> ses caractéristiques, le télévis<strong>eu</strong>r à écran plat ém<strong>et</strong> un rayonnement infrarouge. Selon la manière dont le<br />
télévis<strong>eu</strong>r à écran plat est utilisé, le fonctionnement <strong>de</strong>s télécomman<strong>de</strong>s <strong>de</strong>s appareils à proximité p<strong>eu</strong>t être perturbé.<br />
Les casques d’écoute sans fil à infrarouge p<strong>eu</strong>vent subir <strong>de</strong>s interférences. Dans une telle situation, changez<br />
l’emplacement <strong>de</strong> l’appareil pour que son capt<strong>eu</strong>r <strong>de</strong> télécomman<strong>de</strong> soit en <strong>de</strong>hors <strong>de</strong> la zone <strong>de</strong> perturbation.<br />
Signaux radio<br />
Bien que ce télévis<strong>eu</strong>r à écran plat répon<strong>de</strong> aux caractéristiques exigées, il p<strong>eu</strong>t brouiller les signaux <strong>de</strong>s<br />
appareils à proximité. Si le fonctionnement <strong>de</strong> votre radio, ordinat<strong>eu</strong>r, magnétoscope ou tout autre appareil<br />
électrique est perturbé par le télévis<strong>eu</strong>r, éloignez ledit appareil du télévis<strong>eu</strong>r.<br />
Mot<strong>eu</strong>r du télévis<strong>eu</strong>r à écran plat<br />
L’écran du télévis<strong>eu</strong>r à écran plat est composé <strong>de</strong> pixels extrêmement fins qui ém<strong>et</strong>tent <strong>de</strong> la lumière en fonction<br />
<strong>de</strong>s signaux vidéo reçus. Ce principe p<strong>eu</strong>t faire qu’un léger bourdonnement ou un ronflement électrique en<br />
provenance du télévis<strong>eu</strong>r soit audible. Il s’agit d’un bruit normal propre aux télévis<strong>eu</strong>rs à écran plat qui n’est pas<br />
le signe d’un dysfonctionnement.<br />
Ventilat<strong>eu</strong>rs du télévis<strong>eu</strong>r à écran plat<br />
Le bruit du mot<strong>eu</strong>r du ventilat<strong>eu</strong>r p<strong>eu</strong>t être audible <strong>de</strong> temps à autre. Ce bruit légèrement perceptible est<br />
provoqué par l’accélération du mot<strong>eu</strong>r du ventilat<strong>eu</strong>r <strong>de</strong> refroidissement lors <strong>de</strong> l’augmentation <strong>de</strong> la température<br />
interne du télévis<strong>eu</strong>r à écran plat. Il s’agit d’une fonction normale du télévis<strong>eu</strong>r à écran plat qui n’est pas le signe<br />
d’un dysfonctionnement.<br />
7.5 Propriétés <strong>de</strong>s phosphores<br />
Les symptômes suivants sont <strong>de</strong>s eff<strong>et</strong>s typiques <strong>et</strong> caractéristiques <strong>de</strong>s écrans matriciels à revêtement<br />
cathodoluminescent, <strong>et</strong> comme tels, ils ne sont pas couverts par la garantie:<br />
• Rémanence d’image permanente sur les luminophores du télévis<strong>eu</strong>r<br />
• Existence d’un p<strong>et</strong>it nombre <strong>de</strong> cellules lumin<strong>eu</strong>ses inactives<br />
• Bruits produits par les mot<strong>eu</strong>rs <strong>de</strong> ventilat<strong>eu</strong>r, les circuits électriques (bourdonnement), les plaques du<br />
panneau, <strong>et</strong>c.<br />
7.6 Informations sur l’image notamment la rémanence d’image<br />
Taille <strong>de</strong> la fenêtre <strong>de</strong> menu (après un changement vidéo)<br />
Les émissions que vous regar<strong>de</strong>z p<strong>eu</strong>vent être en haute définition (HD) ou définition standard (SD). Ce télévis<strong>eu</strong>r<br />
à écran plat s’ajuste automatiquement au type <strong>de</strong> définition approprié. Si la résolution du programme vidéo<br />
change pendant l’affichage à l’écran d’une fenêtre du menu (par exemple, <strong>de</strong> HD à SD ou <strong>de</strong> SD à HD), la taille<br />
du menu p<strong>eu</strong>t rétrécir ou s’agrandir provisoirement pendant que le télévis<strong>eu</strong>r ajuste l’image. Cela p<strong>eu</strong>t se<br />
produire, par exemple, lorsque vous passez d’une émission télévisée à la lecture d’une vidéo d’un magnétoscope<br />
ou lorsque le programme enregistré passe d’un type <strong>de</strong> résolution à un autre pendant que le menu est affiché à<br />
l’écran. Le menu r<strong>et</strong>rouve ses dimensions normales au bout <strong>de</strong> quelques secon<strong>de</strong>s. Ce fonctionnement est<br />
normal <strong>et</strong> n’est pas le signe d’une anomalie du télévis<strong>eu</strong>r à écran plat.<br />
122<br />
Fr
Précautions <strong>et</strong> avertissements 07<br />
Informations sur les pixels<br />
Les écrans plasma affichent <strong>de</strong>s images au moyen <strong>de</strong> pixels. Les télévis<strong>eu</strong>rs à écran plat <strong>Pioneer</strong> contiennent un très<br />
grand nombre <strong>de</strong> pixels. La taille <strong>de</strong> l’écran détermine le nombre <strong>de</strong> pixels. Les modèles <strong>de</strong> la série 20FD comporte plus<br />
<strong>de</strong> 6,2 millions <strong>de</strong> pixels pour un écran <strong>de</strong> 50”/60”. Tous les écrans <strong>Pioneer</strong> sont fabriqués avec une technologie <strong>de</strong><br />
précision <strong>de</strong> très haut niveau <strong>et</strong> sont soumis individuellement à un contrôle <strong>de</strong> qualité très strict.<br />
Dans <strong>de</strong> rares cas, quelques pixels p<strong>eu</strong>vent être constamment éteints, ou allumés, donnant li<strong>eu</strong> à un pixel noir ou <strong>de</strong><br />
coul<strong>eu</strong>r constamment fixé sur l’écran. C<strong>et</strong> eff<strong>et</strong> est commun à tous les écrans plasma car il est inhérent à la<br />
technologie plasma.<br />
Si les pixels défectu<strong>eu</strong>x sont visibles à une distance normale comprise entre 2,5 <strong>et</strong> 3,5 mètres (8,2 <strong>et</strong> 11,5 pieds) en<br />
regardant une émission standard (c’est-à-dire pas une mire d’essai, ni une image fixe ni un affichage d’une s<strong>eu</strong>le<br />
coul<strong>eu</strong>r), adressez-vous immédiatement au service d’assistance clientèle (États-Unis) ou au service <strong>de</strong> satisfaction <strong>de</strong><br />
la clientèle (Canada) <strong>Pioneer</strong>. Voir la troisième <strong>de</strong> couverture pour les coordonnées. Si, toutefois, les pixels défectu<strong>eu</strong>x<br />
ne sont visibles que <strong>de</strong> près ou lors d’affichages d’une s<strong>eu</strong>le coul<strong>eu</strong>r, cela est normal pour c<strong>et</strong>te technologie.<br />
Rémanence d’image (ou eff<strong>et</strong> <strong>de</strong> brûlure d’écran)<br />
Si une image statique reste affichée à l’écran pendant plusi<strong>eu</strong>rs h<strong>eu</strong>res, une faible empreinte <strong>de</strong> l’image p<strong>eu</strong>t<br />
apparaître. C<strong>et</strong>te empreinte est connue sous le nom <strong>de</strong> rémanence d’image ou d’eff<strong>et</strong> <strong>de</strong> brûlure d’écran. L’image p<strong>eu</strong>t<br />
être temporaire ou permanente. Bien qu’elle ait <strong>de</strong>s causes différentes, la rémanence d’image p<strong>eu</strong>t se produire sur<br />
toutes les technologies d’affichage, y compris les écrans à cristaux liqui<strong>de</strong>s, plasma, les télévis<strong>eu</strong>rs à tube cathodique<br />
à mémoire <strong>et</strong> les télévis<strong>eu</strong>rs à rétro-projection.<br />
Sur les écrans plasma d’aujourd’hui, la rémanence d’une image permanente n’est h<strong>eu</strong>r<strong>eu</strong>sement plus qu’un<br />
souvenir. La plupart <strong>de</strong>s rémanences d’image p<strong>eu</strong>vent être corrigée facilement en regardant un programme<br />
comportant beaucoup d’actions ou <strong>de</strong>s changements d’écran rapi<strong>de</strong>s. Pour éviter <strong>autant</strong> que possible la<br />
rémanence d’image, reportez-vous aux consignes ci-<strong>de</strong>ssous.<br />
• Changez régulièrement d’images lors <strong>de</strong> l’affichage d’images statiques, comme <strong>de</strong>s images fixes d’un<br />
ordinat<strong>eu</strong>r ou d’une console <strong>de</strong> j<strong>eu</strong>, pendant une pério<strong>de</strong> prolongée.<br />
• Évitez <strong>autant</strong> que possible d’afficher à l’écran <strong>de</strong>s images fixes comme l’horloge ou les logos <strong>de</strong>s chaînes.<br />
• Affichez le contenu dans un ratio d’aspect large (sans ban<strong>de</strong>s noires ou grises sur les bords du contenu).<br />
Ce télévis<strong>eu</strong>r à écran plat est muni <strong>de</strong> multiples mo<strong>de</strong>s d’affichage d’écran large; utilisez un <strong>de</strong> ces mo<strong>de</strong>s<br />
pour remplir tout l’écran avec l’image. Regar<strong>de</strong>z la télévision au ratio d’aspect large à moins que ceci<br />
n’enfreigne un droit d’aut<strong>eu</strong>r.<br />
• Placez la fonction <strong>de</strong> détection du cache latéral sur Mo<strong>de</strong>1 ou Mo<strong>de</strong>2. Les images <strong>de</strong> format 16:9 en haute<br />
définition contenant <strong>de</strong>s caches latéraux sont détectées automatiquement <strong>et</strong> <strong>de</strong>s caches latéraux sont<br />
ajoutés ou l’image est affichée sur la totalité <strong>de</strong> l’écran.<br />
• Évitez d’afficher <strong>de</strong>s images sombres après avoir affiché une image fixe pendant une pério<strong>de</strong> prolongée.<br />
Dans la plupart <strong>de</strong>s cas, toute rémanence d’image due à c<strong>et</strong>te séquence p<strong>eu</strong>t être corrigée en affichant <strong>de</strong>s<br />
images lumin<strong>eu</strong>ses pendant une pério<strong>de</strong> <strong>de</strong> temps équivalente.<br />
Image rémanente<br />
L’affichage <strong>de</strong> la même image sous la forme d’une image fixe pendant une pério<strong>de</strong> prolongée p<strong>eu</strong>t provoquer une<br />
rémanence <strong>de</strong> c<strong>et</strong>te image. Les images rémanentes font référence au fantôme <strong>de</strong> l’image fixe restant visible<br />
après la disparition <strong>de</strong> l’image. Ceci p<strong>eu</strong>t se produire dans les circonstances suivantes.<br />
• Image rémanente due à la charge électrique<br />
Si une image présentant <strong>de</strong>s zones très lumin<strong>eu</strong>ses est affichée pendant plus d’une minute, une image<br />
rémanente produite par la charge électrique restante p<strong>eu</strong>t en résulter. C<strong>et</strong>te image fantôme disparaît dès<br />
qu’une image animée est affichée. Le temps requis pour la disparition <strong>de</strong> l’image fantôme dépend <strong>de</strong> la<br />
luminosité <strong>de</strong> l’image fixe <strong>et</strong> du temps d’affichage <strong>de</strong> c<strong>et</strong>te image.<br />
• Image rémanente due à l’eff<strong>et</strong> <strong>de</strong> brûlure d’écran<br />
Évitez d’afficher en continu sur le télévis<strong>eu</strong>r à écran plat la même image pendant une pério<strong>de</strong> prolongée. Si<br />
la même image est affichée pendant plusi<strong>eu</strong>rs h<strong>eu</strong>res ou plusi<strong>eu</strong>rs jours pendant <strong>de</strong>s pério<strong>de</strong>s plus<br />
courtes, une image rémanente p<strong>eu</strong>t rester à l’écran. C<strong>et</strong>te image rémanente est permanente car la couche<br />
fluorescente <strong>de</strong> l’écran est brûlée. Les images brûlées p<strong>eu</strong>vent finalement s’estomper après lecture <strong>de</strong><br />
plusi<strong>eu</strong>rs séquences vidéo, mais ne disparaissent <strong>jamais</strong> complètement.<br />
Lorsqu’un menu <strong>de</strong> programme ou une image gelée est affiché pendant 10 minutes, le télévis<strong>eu</strong>r à écran plat<br />
éteint automatiquement l’image pour éviter tout problème <strong>de</strong> brûlure d’écran.<br />
Français<br />
123<br />
Fr
07 Précautions <strong>et</strong> avertissements<br />
Protection d’écran<br />
La protection d’écran optimise simultanément les réglages correspondants afin <strong>de</strong> diminuer la rémanence<br />
d’image. Pour en savoir plus, voir “3.6.2 Pour prolonger la durée <strong>de</strong> vie du télévis<strong>eu</strong>r”.<br />
Orbit<strong>eu</strong>r d’image<br />
Une autre fonction intégrée perm<strong>et</strong>tant <strong>de</strong> protéger l’écran contre les brûlures est la fonction Orbit<strong>eu</strong>r. L’orbit<strong>eu</strong>r<br />
change automatiquement la position <strong>de</strong> l’image <strong>de</strong> manière imperceptible pendant qu’elle est affichée à l’écran.<br />
Pour en savoir plus sur c<strong>et</strong>te fonction, voir “3.6.3 Activation <strong>de</strong> l’orbit<strong>eu</strong>r d’image”.<br />
7.7 Précautions <strong>de</strong> sécurité<br />
Le télévis<strong>eu</strong>r à écran plat a été conçu <strong>et</strong> fabriqué en tenant le plus grand compte <strong>de</strong> la sécurité. Toutefois, une<br />
utilisation incorrecte p<strong>eu</strong>t être à l’origine d’une électrocution <strong>et</strong>/ou d’un incendie. Pour éviter une situation<br />
danger<strong>eu</strong>se, suivez les instructions ci-<strong>de</strong>ssous lors <strong>de</strong> l’installation, utilisation <strong>et</strong> n<strong>et</strong>toyage du télévis<strong>eu</strong>r à écran<br />
plat.<br />
• Lire <strong>et</strong> conserver le mo<strong>de</strong> d’emploi – Lisez toutes les instructions d’opération <strong>et</strong> les informations <strong>de</strong>stinées<br />
à l’utilisat<strong>eu</strong>r fournies avec le télévis<strong>eu</strong>r à écran plat.<br />
• Environnement - Évitez d’installer le télévis<strong>eu</strong>r dans un emplacement exposé à <strong>de</strong> gran<strong>de</strong>s quantités <strong>de</strong><br />
poussière, <strong>de</strong>s températures extrêmes, une humidité excessive, les rayons directs du soleil ou suj<strong>et</strong> à <strong>de</strong><br />
fortes vibrations ou <strong>de</strong>s chocs. Par aill<strong>eu</strong>rs, ne renversez <strong>jamais</strong> <strong>de</strong> liqui<strong>de</strong> ni n’insérez un obj<strong>et</strong> dans le<br />
télévis<strong>eu</strong>r à écran plat.<br />
• N<strong>et</strong>toyage - Voir la section ci-<strong>de</strong>ssus présentant la métho<strong>de</strong> appropriée pour n<strong>et</strong>toyer le télévis<strong>eu</strong>r à écran<br />
plat.<br />
• Eau <strong>et</strong> humidité - Évitez d’utiliser ou <strong>de</strong> placer le télévis<strong>eu</strong>r à proximité d’eau ou d’autres liqui<strong>de</strong>s. Par<br />
exemple, une salle <strong>de</strong> bain, une cuisine ou un évier, dans un sous-sol humi<strong>de</strong>, près d’une piscine.<br />
• Alimentation – Éteignez le télévis<strong>eu</strong>r avant d’y raccor<strong>de</strong>r un autre appareil. Raccor<strong>de</strong>z toujours le télévis<strong>eu</strong>r<br />
sur une prise murale reliée à la terre.<br />
7.8 Avis légal<br />
7.8.1 Sécurité<br />
AVERTISSEMENT<br />
C<strong>et</strong> appareil n’est pas étanche. Pour éviter les risques d’incendie <strong>et</strong> <strong>de</strong> décharge électrique, ne placez<br />
près <strong>de</strong> lui un récipient rempli d’eau, tel qu’un vase ou un pot <strong>de</strong> fl<strong>eu</strong>rs, <strong>et</strong> ne l’exposez pas à <strong>de</strong>s<br />
gouttes d’eau, <strong>de</strong>s éclaboussures, <strong>de</strong> la pluie ou <strong>de</strong> l’humidité.<br />
D3-4-2-1-3_A_Fr<br />
AVERTISSEMENT: C<strong>et</strong> appareil est muni d’une fiche <strong>de</strong> mise à la terre (masse) à trois fils. Comme<br />
la fiche présente une troisième broche (<strong>de</strong> terre), elle ne p<strong>eu</strong>t se brancher que sur une prise <strong>de</strong><br />
courant, prévue pour une mise à la terre. Si vous n’arrivez pas à insérer la fiche dans la prise <strong>de</strong><br />
courant, contactez un électricien qualifié pour faire remplacer la prise par une qui soit mise à la terre.<br />
N’annulez pas la fonction <strong>de</strong> sécurité que procure c<strong>et</strong>te fiche <strong>de</strong> mise à la terre.<br />
D3-4-2-1-6_A_Fr<br />
AVERTISSEMENT: Pour éviter les risques d’incendie, ne placez aucune flamme nue (telle qu’une<br />
bougie allumée) sur l’appareil.<br />
D3-4-2-1-7a_A_Fr<br />
PRÉCAUTION DE VENTILATION:<br />
Lors <strong>de</strong> l’installation <strong>de</strong> l’appareil, veillez à laisser un espace suffisant autour <strong>de</strong> ses parois <strong>de</strong> manière<br />
à améliorer la dissipation <strong>de</strong> chal<strong>eu</strong>r. L’espace minimum requis est indiqué à la page 15.<br />
AVERTISSEMENT: Les fentes <strong>et</strong> ouvertures du coffr<strong>et</strong> sont prévues pour la ventilation, pour<br />
assurer un fonctionnement stable <strong>de</strong> l’appareil <strong>et</strong> pour éviter sa surchauffe. Pour éviter les risques<br />
d’incendie, ne bouchez <strong>jamais</strong> les ouvertures <strong>et</strong> ne les recouvrez pas d’obj<strong>et</strong>s, tels que journaux,<br />
nappes ou ri<strong>de</strong>aux, <strong>et</strong> n’utilisez pas l’appareil posé sur un tapis épais ou un lit.<br />
124<br />
Fr
Précautions <strong>et</strong> avertissements 07<br />
ATTENTION: L’interrupt<strong>eu</strong>r <strong>de</strong> c<strong>et</strong> appareil ne coupe pas complètement celui-ci <strong>de</strong> sa prise sect<strong>eu</strong>r.<br />
Comme le cordon d’alimentation fait office <strong>de</strong> dispositif <strong>de</strong> déconnexion du sect<strong>eu</strong>r, il <strong>de</strong>vra être débranché<br />
au niveau <strong>de</strong> la prise sect<strong>eu</strong>r pour que l’appareil soit complètement hors tension. Par conséquent, veillez à<br />
installer l’appareil <strong>de</strong> telle manière que son cordon d’alimentation puisse être facilement débranché <strong>de</strong> la<br />
prise sect<strong>eu</strong>r en cas d’acci<strong>de</strong>nt. Pour éviter tout risque d’incendie, le cordon d’alimentation sera débranché<br />
au niveau <strong>de</strong> la prise sect<strong>eu</strong>r si vous prévoyez une pério<strong>de</strong> prolongée <strong>de</strong> non utilisation (par exemple avant<br />
un départ en vacances).<br />
D3-4-2-2-2a_A_Fr<br />
Mili<strong>eu</strong> <strong>de</strong> fonctionnement<br />
Température <strong>et</strong> humidité du mili<strong>eu</strong> <strong>de</strong> fonctionnement :<br />
De +0 ºC à +40 ºC (<strong>de</strong> +32 ºF à +104 ºF); Humidité relative inféri<strong>eu</strong>re à 85 % (orifices <strong>de</strong> ventilation non<br />
obstrués)<br />
N’installez pas l’appareil dans un endroit mal ventilé ou un li<strong>eu</strong> soumis à une forte humidité ou en plein soleil<br />
(ou à une forte lumière artificielle).<br />
D3-4-2-1-7c_A_Fr<br />
Français<br />
7.8.2 Brouillage radioélectrique<br />
Ce télévis<strong>eu</strong>r numérique est capable <strong>de</strong> recevoir les programmes <strong>de</strong> télévision analogiques <strong>de</strong> base,<br />
numériques <strong>de</strong> base <strong>et</strong> <strong>de</strong> télévision par câble à l’ai<strong>de</strong> d’une connexion directe à un système <strong>de</strong> télévision par<br />
câble offrant ces types <strong>de</strong> programme. Une carte <strong>de</strong> sécurité fournie par votre câblo-opérat<strong>eu</strong>r est requise<br />
pour voir les programmes numériques chiffrés. Certains services numériques évolués <strong>et</strong> interactifs par câble<br />
tels que la vidéo à la <strong>de</strong>man<strong>de</strong>, le gui<strong>de</strong> <strong>de</strong>s programmes du câblo-opérat<strong>eu</strong>r <strong>et</strong> certains services <strong>de</strong> télévision<br />
combinés avec <strong>de</strong>s données p<strong>eu</strong>vent nécessiter l’utilisation d’un boîtier adaptat<strong>eu</strong>r. Pour plus<br />
d’informations, v<strong>eu</strong>illez contacter votre câblo-opérat<strong>eu</strong>r.<br />
Informations <strong>de</strong>stinées à l’utilisat<strong>eu</strong>r<br />
Les altérations ou modifications réalisées sans autorisation écrite convenable p<strong>eu</strong>vent entraîner la<br />
déchéance <strong>de</strong> vos droits d’utilisat<strong>eu</strong>r.<br />
D8-10-2_Fr<br />
[Pour le modèle <strong>de</strong>stiné au Canada]<br />
C<strong>et</strong> appareil numérique <strong>de</strong> la classe B est conforme à la norme NMB-003 du Canada.<br />
D8-10-1-3_Fr<br />
DÉCLARATION DE CONFORMITÉ AUX RÈGLES DE LA FCC<br />
C<strong>et</strong> appareil est conforme à la 15e partie <strong>de</strong>s Règles <strong>de</strong> la FCC. Son fonctionnement est soumis aux 2<br />
conditions suivantes: (1) C<strong>et</strong> appareil ne doit pas produire <strong>de</strong>s brouillages séri<strong>eu</strong>x, <strong>et</strong> (2) il doit accepter les<br />
brouillages qu’il reçoit, y compris c<strong>eu</strong>x qui p<strong>eu</strong>vent provoquer un fonctionnement indésirable.<br />
Nom <strong>de</strong> l’appareil: Télévis<strong>eu</strong>r à Écran Plat<br />
Numéro <strong>de</strong> modèle: PDP-6020FD/PDP-5020FD<br />
Catégorie d’appareil: Ordinat<strong>eu</strong>rs personnels <strong>et</strong> phériphériques <strong>de</strong> la classe B<br />
Nom du tiers responsable: PIONEER ELECTRONICS SERVICE, INC.<br />
Adresse: 1925 E. DOMINGUEZ ST., LONG BEACH, CA 90801-1760, U.S.A.<br />
Téléphone: 800-421-1625<br />
URL: http://www.pioneerelectronics.com<br />
REMARQUE: C<strong>et</strong> appareil est conforme aux spécifications <strong>de</strong> la 15e partie <strong>de</strong>s Règles <strong>de</strong> la Commission<br />
Fédérale <strong>de</strong>s Communications (FCC). Ces limites ont été définies pour assurer une protection suffisante<br />
contre <strong>de</strong>s brouillages nuisibles dans une zone rési<strong>de</strong>ntielle. C<strong>et</strong> appareil génère, utilise <strong>et</strong> ém<strong>et</strong> <strong>de</strong>s signaux<br />
radioélectriques <strong>et</strong> s’il n’est pas installé <strong>et</strong> employé conformément aux prescriptions <strong>de</strong> son mo<strong>de</strong> d’emploi,<br />
il p<strong>eu</strong>t provoquer <strong>de</strong>s brouillages <strong>de</strong>s communications radio. Toutefois, il n’y a pas <strong>de</strong> garantie que les<br />
brouillages n’auront pas li<strong>eu</strong> dans une installation particulière. Si c<strong>et</strong> appareil provoque effectivement <strong>de</strong>s<br />
brouillages <strong>de</strong> la réception <strong>de</strong> la radio <strong>et</strong> <strong>de</strong> la télévision, ce qui p<strong>eu</strong>t être déterminé en arrêtant l’appareil puis<br />
en le rem<strong>et</strong>tant en marche, il est conseillé à l’utilisat<strong>eu</strong>r d’essayer d’y remédier, au moyen <strong>de</strong> l’une ou <strong>de</strong><br />
plusi<strong>eu</strong>rs <strong>de</strong>s mesures suivantes:<br />
– Réorienter ou déplacer l’antenne réceptrice.<br />
– Augmenter la distance entre l’appareil <strong>et</strong> le récept<strong>eu</strong>r.<br />
– Connecter l’appareil à une prise sect<strong>eu</strong>r d’un circuit différent <strong>de</strong> celui auquel est connecté le récept<strong>eu</strong>r.<br />
– Consulter le revend<strong>eu</strong>r ou un technicien compétent <strong>de</strong> radio ou <strong>de</strong> télévision. D8-10-1-2_Fr<br />
PRÉCAUTION: C<strong>et</strong> appareil est conforme aux spécifications <strong>de</strong> la FCC si <strong>de</strong>s câbles <strong>et</strong> <strong>de</strong>s connect<strong>eu</strong>rs<br />
blindés sont utilisés pour son raccor<strong>de</strong>ment à d’autres appareils. Pour limiter les risques <strong>de</strong> brouillage<br />
électromagnétique d’appareils électriques tels que récept<strong>eu</strong>rs <strong>de</strong> radio ou <strong>de</strong> télévision, effectuez les<br />
raccor<strong>de</strong>ments au moyen <strong>de</strong> câbles <strong>et</strong> <strong>de</strong> connect<strong>eu</strong>rs blindés.<br />
D8-10-3a_Fr<br />
125<br />
Fr
08 Annexe<br />
8 Annexe<br />
8.1 Tableaux <strong>de</strong>s systèmes <strong>de</strong> classement (pour <strong>de</strong>s classements selon différents publics)<br />
Les tableaux ci-<strong>de</strong>ssous présentent les différents systèmes <strong>de</strong> classement reconnus par le télévis<strong>eu</strong>r à écran plat.<br />
8.1.1 Classement <strong>de</strong>s émissions <strong>de</strong> télévision (par âge)<br />
Classement<br />
Description<br />
TV-Y<br />
TV-Y7<br />
TV-G<br />
TV-PG<br />
TV-14<br />
TV-MA<br />
Tous les enfants<br />
Enfants d’au moins sept ans<br />
Tout public<br />
Accord parental souhaitable<br />
Accompagnement parental recommandé<br />
Réservé à un public averti<br />
8.1.2 Système <strong>de</strong> classement <strong>de</strong>s directives télévisées parentales américain (par âge/catégorie)<br />
Classement<br />
Description<br />
VV<br />
V<br />
S<br />
L<br />
D<br />
Violence imaginaire<br />
Violence<br />
Scènes <strong>de</strong> sexe<br />
Langage adulte<br />
Dialogues à caractère sexuel<br />
8.1.3 Classement <strong>de</strong>s films par la MPAA (par âge)<br />
Classement<br />
Description<br />
N/A<br />
G<br />
PG<br />
PG-13<br />
R<br />
NC-17<br />
NR<br />
Pas applicable pour le classement MPAA<br />
Tout public. Tous les âges.<br />
Accord parental souhaitable. Certaines scènes p<strong>eu</strong>vent<br />
ne pas convenir aux enfants.<br />
Accompagnement parental recommandé. Certaines<br />
scènes p<strong>eu</strong>vent ne pas convenir aux enfants <strong>de</strong> moins<br />
<strong>de</strong> 13 ans.<br />
Public restreint. Un parent ou un tut<strong>eu</strong>r doit<br />
accompagner les moins <strong>de</strong> 17 ans (c<strong>et</strong> âge varie d’une<br />
juridiction à l’autre).<br />
Interdit au moins <strong>de</strong> 17 ans.<br />
Pas <strong>de</strong> classement<br />
126<br />
Fr
Annexe<br />
08<br />
8.1.4 Classement pour les Canadiens anglophones (par âge)<br />
E<br />
(exempt)<br />
Classement<br />
Description<br />
Informations, sports, documentaires <strong>et</strong> autres<br />
informations générales; émissions à thèmes, clips vidéo <strong>et</strong><br />
variétés.<br />
C<br />
(enfants)<br />
C8+<br />
(enfants <strong>de</strong> plus <strong>de</strong> 8<br />
ans)<br />
Pour les j<strong>eu</strong>nes enfants <strong>de</strong> moins <strong>de</strong> huit ans, une<br />
attention toute particulière est apportée aux scènes qui<br />
pourraient menacer l<strong>eu</strong>r <strong>sens</strong> <strong>de</strong> la sécurité ou du bienêtre<br />
La violence n’est <strong>jamais</strong> dépeinte comme un moyen<br />
préféré, acceptable ou unique <strong>de</strong> résoudre les conflits; les<br />
enfants ne sont pas encouragés à imiter les actions<br />
danger<strong>eu</strong>ses qui se déroulent sur l’écran<br />
Français<br />
G<br />
(tout public)<br />
PG<br />
(accord parental)<br />
14+<br />
(enfants <strong>de</strong> plus <strong>de</strong> 14<br />
ans)<br />
18+<br />
(adultes)<br />
Acceptable pour tous les groupes d’âge; très p<strong>eu</strong> <strong>de</strong><br />
violence, qu’elle soit physique, verbale ou émotionnelle<br />
L’émission convient à tous mais la question doit être<br />
tranchée par les parents car les très j<strong>eu</strong>nes enfants (moins<br />
<strong>de</strong> huit ans) p<strong>eu</strong>vent ne pas comprendre les thèmes <strong>et</strong> les<br />
questions abordées<br />
La violence p<strong>eu</strong>t être l’élément dominant du scénario mais<br />
elle est partie intégrante <strong>de</strong> l’histoire ou d’un personnage;<br />
le langage utilisé p<strong>eu</strong>t être cru <strong>et</strong> <strong>de</strong>s scènes <strong>de</strong> nu être<br />
visibles dans le contexte du thème<br />
P<strong>eu</strong>t contenir <strong>de</strong>s scènes <strong>de</strong> violence qui, tout en étant en<br />
relation avec le développement <strong>de</strong> l’intrigue, du<br />
personnage ou <strong>de</strong>s thèmes, s’adressent exclusivement<br />
aux adultes; p<strong>eu</strong>t contenir du langage graphique <strong>et</strong> <strong>de</strong>s<br />
scènes <strong>de</strong> sexe <strong>et</strong> <strong>de</strong> nudité<br />
8.1.5 Classement pour les Canadiens francophones (par âge)<br />
Classement<br />
E<br />
G<br />
8ans+<br />
13ans+<br />
16ans+<br />
18ans+<br />
Description<br />
Informations, sports, documentaires <strong>et</strong> autres informations<br />
générales; émissions à thèmes, clips vidéo <strong>et</strong> variétés<br />
Tous les âges <strong>et</strong> tous les enfants; p<strong>eu</strong> <strong>de</strong> violence qui fait<br />
toujours partie du scénario <strong>et</strong> est traitée <strong>de</strong> manière<br />
amusante ou irréaliste<br />
Tout public, mais déconseillé aux j<strong>eu</strong>nes enfants; p<strong>eu</strong>t être<br />
regardée par un large public mais p<strong>eu</strong>t contenir <strong>de</strong>s scènes<br />
qui ne seront pas comprises par les enfants <strong>de</strong> moins <strong>de</strong><br />
huit ans qui ont du mal à distinguer l’imaginaire du réel; à<br />
voir en présence d’un parent<br />
De fréquentes scènes <strong>de</strong> violence justifient la présence<br />
d’un parent<br />
De fréquentes scènes <strong>de</strong> violence, voire <strong>de</strong> violence intense<br />
Réservé aux adultes, <strong>de</strong> fréquentes scènes <strong>de</strong> violence,<br />
voire d’extrême violence<br />
127<br />
Fr
08 Annexe<br />
8.2 Co<strong>de</strong>s <strong>de</strong> fabricant à programmer dans la télécomman<strong>de</strong><br />
8.2.1 Câble<br />
Marque/Co<strong>de</strong> Marque/Co<strong>de</strong> Marque/Co<strong>de</strong> Marque/Co<strong>de</strong> Marque/Co<strong>de</strong> Marque/Co<strong>de</strong><br />
A-Mark<br />
0008,0144<br />
ABC<br />
0237, 0003,<br />
0008<br />
Accuphase<br />
0003<br />
Acorn<br />
0237<br />
Action<br />
0237<br />
Active<br />
0237<br />
Americast<br />
0899<br />
Archer<br />
0237, 0260<br />
BCC<br />
0276<br />
Bell South<br />
0899<br />
British Telecom<br />
0003<br />
Century<br />
0008<br />
Clearmaster<br />
0883<br />
ClearMax<br />
0883<br />
Cool Box<br />
0883<br />
Coolmax<br />
0883<br />
Digeo<br />
1187<br />
Director<br />
0476<br />
Fosgate<br />
0276<br />
GE<br />
0144<br />
General<br />
Instrument<br />
0476, 0810,<br />
0276, 0003<br />
Gibralter<br />
0003<br />
GMI<br />
0883<br />
GoldStar<br />
0144<br />
Hitachi<br />
0003, 0008<br />
Insight<br />
0476, 0810<br />
Jerrold<br />
0476, 0810,<br />
0276, 0003<br />
Memorex<br />
0000<br />
Mitsubishi<br />
0003<br />
Motorola<br />
1376, 0476,<br />
0810, 0276,<br />
1187, 1106<br />
Multitech<br />
0883<br />
Nova Vision<br />
0008<br />
Novaplex<br />
0008<br />
Pace<br />
1877, 0877,<br />
0237, 0008<br />
Panasonic<br />
0000, 0008,<br />
0144, 0107<br />
Paragon<br />
0000, 0008, 0525<br />
Penney<br />
0000<br />
Philips<br />
1305, 0317<br />
<strong>Pioneer</strong><br />
1877, 0877,<br />
0144, 0533,<br />
0023, 0260,<br />
1021<br />
Pulsar<br />
0000<br />
Quasar<br />
0000<br />
RadioShack<br />
0883<br />
RCA<br />
1256<br />
Regal<br />
0276<br />
Runco<br />
0000<br />
Samsung<br />
0003, 0144,<br />
0023<br />
Scientific<br />
Atlanta<br />
1877, 0877,<br />
0477, 0237,<br />
0003, 0000,<br />
0008<br />
Sony<br />
1006<br />
Sprucer<br />
0144<br />
Starcom<br />
0003<br />
Supercable<br />
0276<br />
Supermax<br />
0883<br />
Thomson<br />
1256<br />
Torx<br />
0003<br />
Toshiba<br />
0000<br />
Tristar<br />
0883<br />
United Cable<br />
0276, 0003<br />
US Electronics<br />
0276, 0003,<br />
0008<br />
V2<br />
0883<br />
Vi<strong>de</strong>oway<br />
0000<br />
Viewmaster<br />
0883<br />
Vision<br />
0883<br />
Vortex View<br />
0883<br />
Zenith<br />
0000, 0525,<br />
0899<br />
8.2.2 Satellite<br />
Marque/Co<strong>de</strong> Marque/Co<strong>de</strong> Marque/Co<strong>de</strong> Marque/Co<strong>de</strong> Marque/Co<strong>de</strong> Marque/Co<strong>de</strong><br />
128<br />
Fr<br />
Bell ExpressVu<br />
0775, 1170<br />
Chaparral<br />
0216<br />
Coolsat<br />
1806, 2147<br />
Crossdigital<br />
1109<br />
DirecTV<br />
1377, 0392,<br />
0566, 0639,<br />
1639, 1142,<br />
0247, 0749,<br />
1749, 0819,<br />
1856, 1076,<br />
1108, 0099,<br />
1109, 1392,<br />
1414, 1442,<br />
1443, 1444,<br />
1538, 1609<br />
Dish N<strong>et</strong>work<br />
System<br />
1505, 0775,<br />
1170, 1775<br />
Dishpro<br />
1505, 0775,<br />
1775<br />
Echostar<br />
1505, 0775,<br />
1170, 1775<br />
Expressvu<br />
0775, 1775<br />
Fortec Star<br />
1550, 1821,<br />
1948<br />
Funai<br />
1377<br />
GE<br />
0392, 0566<br />
General<br />
Instrument<br />
0869<br />
GOI<br />
0775, 1775<br />
Hitachi<br />
0749, 0819,<br />
1250<br />
Houston<br />
0775<br />
HTS<br />
0775, 1775<br />
Hughes<br />
N<strong>et</strong>work<br />
Systems<br />
1142, 0749,<br />
1749, 1442,<br />
1443, 1444,<br />
1538<br />
Humax<br />
1790, 1781<br />
Innova<br />
0099<br />
Jerrold<br />
0869<br />
JVC<br />
0775, 1170,<br />
1775<br />
LG<br />
1226, 1414<br />
Magnavox<br />
0722<br />
McIntosh<br />
0869<br />
Mitsubishi<br />
0749<br />
Motorola<br />
0869, 0856<br />
N<strong>et</strong>sat<br />
0099<br />
Next Level<br />
0869<br />
Panasonic<br />
0247, 0701<br />
Pansat<br />
0647, 1807<br />
Philips<br />
1142, 0749,<br />
1749, 0775,<br />
0819, 1076,<br />
0722, 0099,<br />
1442<br />
<strong>Pioneer</strong><br />
1142, 0329,<br />
1442<br />
Primestar<br />
0869<br />
Proscan<br />
0392, 0566<br />
RadioShack<br />
0566, 0775,<br />
0869<br />
RCA<br />
0392, 0566,<br />
1142, 0775,<br />
0855, 0143,<br />
1392, 1442<br />
Samsung<br />
1377, 1142,<br />
1276, 1108,<br />
1109, 1442,<br />
1609<br />
Sanyo<br />
1219<br />
SKY<br />
0856, 0099<br />
Sony<br />
0639, 1639<br />
Star Choice<br />
0869<br />
Star Trak<br />
0869<br />
Thomson<br />
0392, 0566<br />
TiVo<br />
1142, 1442,<br />
1443, 1444,<br />
1538<br />
Toshiba<br />
0749, 1749,<br />
0790, 0819,<br />
1285<br />
UltimateTV<br />
1392<br />
Ultrasat<br />
1806<br />
Uni<strong>de</strong>n<br />
0722<br />
Voom<br />
0869<br />
Zenith<br />
0856, 1856,<br />
1810
Annexe<br />
08<br />
8.2.3 Magnétoscope (Marques A à F)<br />
Marque/Co<strong>de</strong> Marque/Co<strong>de</strong> Marque/Co<strong>de</strong> Marque/Co<strong>de</strong> Marque/Co<strong>de</strong> Marque/Co<strong>de</strong><br />
A-Mark<br />
0037, 0240,<br />
0000, 0278, 0046<br />
ABS<br />
1972<br />
Accurian<br />
0000<br />
Admiral<br />
0060, 0048,<br />
0039, 0047,<br />
0104, 0209,<br />
0479<br />
Adventura<br />
0037, 0240,<br />
0000<br />
Adyson<br />
0072<br />
Aiko<br />
0278<br />
Aiwa<br />
0037, 0000,<br />
0124, 0307,<br />
1137, 0468<br />
Akai<br />
0041, 0175<br />
Alba<br />
0209, 0072,<br />
0278<br />
Alienware<br />
1972<br />
Allegro<br />
0039, 1137<br />
America Action<br />
0278<br />
American High<br />
0035, 0081<br />
Amstrad<br />
0000<br />
Anam National<br />
0226<br />
Asha<br />
0240<br />
Astra<br />
0035, 0240<br />
Audio Dynamics<br />
0040<br />
Audio-Technica<br />
0058<br />
Audiovox<br />
0037, 0278,<br />
0038<br />
Avis<br />
0000, 0072<br />
Beaumark<br />
0240<br />
Bell & Howell<br />
0035, 0048,<br />
0039, 0000,<br />
0104, 0046,<br />
0479<br />
Bell ExpressVu<br />
1944<br />
Broksonic<br />
0184, 0121,<br />
0209, 0002,<br />
0479, 1815<br />
Calix<br />
0037<br />
Candle<br />
0037, 0038<br />
Canon<br />
0035<br />
Capehart<br />
0002<br />
Captive Works<br />
2167<br />
Carrera<br />
0240<br />
Carver<br />
0035, 0081<br />
CCE<br />
0072, 0278<br />
Cineral<br />
0278<br />
CineVision<br />
1137<br />
Citizen<br />
0035, 0037,<br />
0240, 0000,<br />
0209, 0278,<br />
0479<br />
Classic<br />
0037<br />
Colortyme<br />
0060, 0035,<br />
0045, 0278<br />
Colt<br />
0000, 0072<br />
Craig<br />
0037, 0047,<br />
0240, 0072<br />
Criterion<br />
0000, 0072<br />
Crosley<br />
0035, 0081,<br />
0000<br />
Crown<br />
0072, 0278<br />
Curtis Mathes<br />
0060, 0035,<br />
0162, 0240,<br />
0000, 0041,<br />
0278, 0432<br />
Cybernex<br />
0240<br />
CyberPower<br />
1972<br />
Daewoo<br />
0037, 0045,<br />
0278, 0046,<br />
1137<br />
Daytron<br />
0037, 0278<br />
DBX<br />
0040, 0050<br />
Dell<br />
1972<br />
Denon<br />
0081, 0042<br />
Derwent<br />
0041<br />
DirecTV<br />
0739, 0740<br />
Dish N<strong>et</strong>work<br />
System<br />
1944<br />
Dishpro<br />
1944<br />
Dual<br />
0000<br />
Dumont<br />
0040<br />
Durabrand<br />
0039, 0038<br />
Dynatech<br />
0240, 0000<br />
Echostar<br />
1944<br />
Electrohome<br />
0060, 0037,<br />
0240, 0000,<br />
0043, 0209<br />
Electrophonic<br />
0037<br />
Emerald<br />
0184, 0121<br />
Emerex<br />
0032<br />
Emerson<br />
0037, 0184,<br />
0240, 0000,<br />
0121, 0043,<br />
0209, 0002,<br />
0278, 0479,<br />
0593, 1593<br />
ESA<br />
1137<br />
Expressvu<br />
1944<br />
Fisher<br />
0039, 0047,<br />
0000, 0104,<br />
0046<br />
Fuji<br />
0035, 0033<br />
Fujitsu<br />
0000<br />
Funai<br />
0037, 0000,<br />
0072, 0278,<br />
0593, 1593<br />
Français<br />
129<br />
Fr
08 Annexe<br />
8.2.4 Magnétoscope (Marques G à O)<br />
Marque/Co<strong>de</strong> Marque/Co<strong>de</strong> Marque/Co<strong>de</strong> Marque/Co<strong>de</strong> Marque/Co<strong>de</strong> Marque/Co<strong>de</strong><br />
Garrard<br />
0000<br />
Gateway<br />
1972<br />
GE<br />
0060, 0035,<br />
0048, 0240,<br />
0000<br />
Gemini<br />
0060<br />
Genexxa<br />
0037, 0000,<br />
0278<br />
Go Vi<strong>de</strong>o<br />
0240, 0432,<br />
0526, 0614,<br />
1137, 1873<br />
GOI<br />
1944<br />
GoldStar<br />
0035, 0037,<br />
0039, 0000,<br />
0278, 0038,<br />
1137<br />
Goodmans<br />
0037, 0081,<br />
0000, 0072,<br />
0278<br />
Gradiente<br />
0000<br />
Granada<br />
0081, 0042<br />
Grundig<br />
0081, 0226<br />
Harley Davidson<br />
0000<br />
Harman/Kardon<br />
0081, 0038<br />
Harvard<br />
0072<br />
Harwood<br />
0072<br />
Headquarter<br />
0046<br />
Hewl<strong>et</strong>t Packard<br />
1972<br />
HI-Q<br />
0035, 0047,<br />
0000<br />
Hitachi<br />
0035, 0037,<br />
0045, 0000,<br />
0042, 0041, 0089<br />
Howard<br />
Computers<br />
1972<br />
HP<br />
1972<br />
HTS<br />
1944<br />
Hughes<br />
N<strong>et</strong>work<br />
Systems<br />
0042, 0739,<br />
0740<br />
Humax<br />
0739, 1797,<br />
1988<br />
Hush<br />
1972<br />
Hytek<br />
0047, 0000,<br />
0072<br />
iBUYPOWER<br />
1972<br />
Instant Replay<br />
0035, 0226<br />
ITT Nokia<br />
0240, 0041<br />
Janeil<br />
0240<br />
Jensen<br />
0067, 0041<br />
JVC<br />
0067, 0041,<br />
0058, 1162<br />
1944<br />
KEC<br />
0037, 0278<br />
Kenwood<br />
0067, 0041,<br />
0038, 0046<br />
KLH<br />
0072<br />
Kodak<br />
0035, 0037<br />
KTV<br />
0000<br />
LG<br />
0037, 0240,<br />
0038, 1037,<br />
1137, 2010<br />
Linksys<br />
1972<br />
Lloyd’s<br />
0240, 0000,<br />
0072, 0038,<br />
0040<br />
Loewe<br />
0081<br />
Logik<br />
0240, 0000,<br />
0072<br />
Lumatron<br />
0278<br />
Luxor<br />
0046<br />
LXI<br />
0037, 0000,<br />
0042, 0067<br />
M Electronic<br />
0240<br />
Magnasonic<br />
0037, 0240,<br />
0000, 0072,<br />
0278, 0593<br />
Magnavox<br />
0035, 0037,<br />
0048, 0039,<br />
0081, 0240,<br />
0000, 0226,<br />
0563, 0593,<br />
0618, 1593<br />
Magnin<br />
0240<br />
Marantz<br />
0035, 0081,<br />
0038<br />
Marta<br />
0037<br />
Matsui<br />
0037, 0209<br />
Matsushita<br />
0035, 0162,<br />
0081, 1162<br />
Media Center<br />
PC<br />
1972<br />
MEI<br />
0035<br />
Memorex<br />
0035, 0162,<br />
0037, 0048,<br />
0039, 0047,<br />
0240, 0000,<br />
0104, 0209,<br />
0072, 0278,<br />
0046, 0307,<br />
0479, 1037,<br />
1162<br />
M<strong>et</strong>z<br />
0037<br />
MGA<br />
0060, 0240,<br />
0043<br />
MGN<br />
Technology<br />
0240<br />
Microsoft<br />
1972<br />
Midland<br />
0240<br />
Mind<br />
1972<br />
Minolta<br />
0042<br />
Mitsubishi<br />
0060, 0048,<br />
0047, 0000,<br />
0042, 0067,<br />
0043, 0041, 0173<br />
Motorola<br />
0035, 0048,<br />
1843<br />
Movie Walker<br />
0072<br />
MTC<br />
0240, 0000,<br />
0072<br />
MTX<br />
0000<br />
Multitech<br />
0039, 0000,<br />
0072<br />
NAD<br />
0240, 0104,<br />
0058<br />
NEC<br />
0104, 0067,<br />
0041, 0038,<br />
0040, 0050<br />
New Tech<br />
0072<br />
Nikko<br />
0037, 0278<br />
Nikkodo<br />
0037, 0278<br />
Nishi<br />
0240<br />
Niv<strong>eu</strong>s Media<br />
1972<br />
Noblex<br />
0240<br />
Northgate<br />
1972<br />
Olympus<br />
0035, 0162,<br />
0104, 0226<br />
Onkyo<br />
0222<br />
Optimus<br />
1062, 0035,<br />
0162, 0037,<br />
0048, 0047,<br />
0240, 0000,<br />
0104, 0058,<br />
0432, 0593, 1162<br />
Orion<br />
0184, 0240,<br />
0000, 0104,<br />
0121, 0209,<br />
0002, 0278, 0479<br />
130<br />
Fr
Annexe<br />
08<br />
8.2.5 Magnétoscope (Marques P à V)<br />
Marque/Co<strong>de</strong> Marque/Co<strong>de</strong> Marque/Co<strong>de</strong> Marque/Co<strong>de</strong> Marque/Co<strong>de</strong> Marque/Co<strong>de</strong><br />
Panama<br />
0035<br />
Panasonic<br />
1062, 0035,<br />
0162, 0000,<br />
0225, 0226,<br />
0614, 0616,<br />
1162<br />
Penney<br />
0035, 0162,<br />
0037, 0047,<br />
0081, 0240,<br />
0000, 0042,<br />
0067, 0038,<br />
0040<br />
Pentax<br />
0042<br />
Philco<br />
0035, 0081,<br />
0000, 0209,<br />
0479<br />
Philips<br />
0035, 0162,<br />
0048, 0081,<br />
0045, 0000,<br />
0209, 0616,<br />
0618, 0739,<br />
1081, 1181,<br />
1818<br />
Pilot<br />
0037<br />
<strong>Pioneer</strong><br />
0162, 0081,<br />
0042, 0067,<br />
0058, 0168,<br />
1337, 1803<br />
Polk Audio<br />
0081<br />
Portland<br />
0278<br />
Presidian<br />
1593<br />
Profitronic<br />
0240<br />
Proscan<br />
0060<br />
Protec<br />
0000, 0072<br />
Protech<br />
0072<br />
Pulsar<br />
0039, 0240,<br />
0278<br />
Pulser<br />
0240<br />
Quarter<br />
0046<br />
Quartz<br />
0035, 0047,<br />
0046<br />
Quasar<br />
0035, 0162,<br />
0002, 0226,<br />
1162<br />
RadioShack<br />
0035, 0162,<br />
0037, 0048,<br />
0047, 0240,<br />
0000, 0104,<br />
0046, 1037,<br />
1162<br />
Radix<br />
0037<br />
Ran<strong>de</strong>x<br />
0037<br />
RCA<br />
0060, 0035,<br />
0048, 0240,<br />
0045, 0000,<br />
0042, 0880, 0058<br />
Realistic<br />
0035, 0162,<br />
0037, 0048,<br />
0047, 0240,<br />
0000, 0104,<br />
0121, 0278,<br />
0046, 1162<br />
ReplayTV<br />
0614, 0616<br />
Ricavision<br />
1972<br />
Rio<br />
1137<br />
Runco<br />
0039<br />
Samsung<br />
0060, 0240,<br />
0045, 0000,<br />
0038, 0432,<br />
0739<br />
Samtron<br />
0240<br />
Sanky<br />
0048, 0039<br />
Sansui<br />
0240, 0000,<br />
0067, 0209,<br />
0041, 0072,<br />
0002, 0479<br />
Sanyo<br />
0047, 0240,<br />
0000, 0104,<br />
0046, 0159, 0479<br />
Scott<br />
0184, 0045,<br />
0121, 0043<br />
Sears<br />
0060, 0035,<br />
0162, 0037,<br />
0048, 0039,<br />
0047, 0033,<br />
0045, 0000,<br />
0042, 0104,<br />
0067, 0043,<br />
0209, 0041,<br />
0072, 0046, 0058<br />
Sharp<br />
0048, 0047,<br />
0032, 0000, 1875<br />
Shintom<br />
0039, 0240,<br />
0000, 0072<br />
Shogun<br />
0240<br />
Siemens<br />
0037, 0104<br />
Signature<br />
0060, 0035,<br />
0037, 0048,<br />
0000, 0046,<br />
0479<br />
Singer<br />
0037, 0240,<br />
0072<br />
Sonic Blue<br />
0614, 0616,<br />
1137<br />
Sonographe<br />
0046<br />
Sony<br />
0035, 0047,<br />
0032, 0033,<br />
0000, 0067,<br />
0046, 0226,<br />
0275, 0636,<br />
1032, 1702,<br />
1703, 1896,<br />
1972<br />
Soundmaster<br />
0000<br />
Stack 9<br />
1972<br />
Star Choice<br />
1843<br />
STS<br />
0042<br />
SV2000<br />
0000, 0072<br />
SVA<br />
0000<br />
Sylvania<br />
0035, 0081,<br />
0000, 0043,<br />
0593, 1593<br />
Symphonic<br />
0240, 0000,<br />
0002, 0593,<br />
1593<br />
Systemax<br />
1972<br />
Tagar Systems<br />
1972<br />
Tandy<br />
0000, 0104<br />
Tashiko<br />
0037<br />
Tatung<br />
0048, 0081,<br />
0000, 0067,<br />
0041<br />
Teac<br />
0000, 0067,<br />
0041<br />
Technics<br />
0035, 0162,<br />
0037, 0000<br />
Teknika<br />
0035, 0037,<br />
0000<br />
Telecor<strong>de</strong>r<br />
0240<br />
Telefunken<br />
0041<br />
Tevion<br />
0479<br />
Thomas<br />
0000, 0002<br />
Thomson<br />
0060, 0041<br />
Tisonic<br />
0278<br />
TiVo<br />
0618, 0636,<br />
0739, 0740,<br />
1337, 1944,<br />
1996<br />
TMK<br />
0240, 0000<br />
TNIX<br />
0037<br />
Tocom<br />
0240<br />
Toshiba<br />
0240, 0045,<br />
0000, 0043,<br />
0209, 0041,<br />
1008, 1972,<br />
1996, 1988<br />
Tosonic<br />
0278<br />
Totevision<br />
0037, 0240<br />
Touch<br />
1972<br />
Trix<br />
0037<br />
Ultra<br />
0045, 0278<br />
Unitech<br />
0240<br />
Vector<br />
0045<br />
Vector Research<br />
0184, 0038,<br />
0040<br />
Vextra<br />
0072<br />
Victor<br />
0067, 0041<br />
Vi<strong>de</strong>o Concepts<br />
0045, 0040<br />
Vi<strong>de</strong>omagic<br />
0037<br />
Vi<strong>de</strong>osonic<br />
0240, 0000,<br />
0072<br />
Viewsonic<br />
1972<br />
Villain<br />
0000<br />
Voodoo<br />
1972<br />
Français<br />
8.2.6 Magnétoscope (Marques W à Z)<br />
Marque/Co<strong>de</strong> Marque/Co<strong>de</strong> Marque/Co<strong>de</strong> Marque/Co<strong>de</strong> Marque/Co<strong>de</strong> Marque/Co<strong>de</strong><br />
Wards<br />
0060, 0035,<br />
0037, 0048,<br />
0047, 0081,<br />
0033, 0240,<br />
0045, 0000,<br />
0042, 0043,<br />
0041, 0072,<br />
0038, 0046,<br />
0058, 0479<br />
Wharfedale<br />
0593<br />
White<br />
Westinghouse<br />
0000, 0209,<br />
0072, 0278,<br />
0479<br />
World<br />
0209, 0002,<br />
0479<br />
XR-1000<br />
0035, 0240,<br />
0000, 0072<br />
Yamaha<br />
0041, 0038<br />
Zenith<br />
0037, 0039,<br />
0033, 0000,<br />
0209, 0041,<br />
0278, 0479,<br />
1137, 1709<br />
ZT Group<br />
1972<br />
131<br />
Fr
08 Annexe<br />
8.2.7 PVR<br />
Marque/Co<strong>de</strong> Marque/Co<strong>de</strong> Marque/Co<strong>de</strong> Marque/Co<strong>de</strong> Marque/Co<strong>de</strong> Marque/Co<strong>de</strong><br />
ABS<br />
1972<br />
Alienware<br />
1972<br />
Bell ExpressVu<br />
1944<br />
Captive Works<br />
2167<br />
CyberPower<br />
1972<br />
Dell<br />
1972<br />
DirecTV<br />
0739, 0740<br />
Dish N<strong>et</strong>work<br />
System<br />
1944<br />
Dish Pro<br />
1944<br />
Echostar<br />
1944<br />
Expressvu<br />
1944<br />
Gateway<br />
1972<br />
Go Vi<strong>de</strong>o<br />
0614, 1873<br />
GOI<br />
1944<br />
Hewl<strong>et</strong>t Packard<br />
1972<br />
Howard<br />
Computers<br />
1972<br />
HP<br />
1972<br />
HTS<br />
1944<br />
Hughes<br />
N<strong>et</strong>work<br />
Systems<br />
0739, 0740<br />
Humax<br />
0739, 1797<br />
1988<br />
Hush<br />
1972<br />
iBUYPOWER<br />
1972<br />
JVC<br />
1944<br />
LG<br />
2010<br />
Linksys<br />
1972<br />
Media Center<br />
PC<br />
1972<br />
Microsoft<br />
1972<br />
Mind<br />
1972<br />
Motorola<br />
1843<br />
Niv<strong>eu</strong>s Media<br />
1972<br />
Northgate<br />
1972<br />
Panasonic<br />
0614, 0616<br />
Philips<br />
0618, 0739<br />
1818<br />
<strong>Pioneer</strong><br />
1337, 1803<br />
RCA<br />
0880<br />
ReplayTV<br />
0614, 0616<br />
Samsung<br />
0739<br />
Sharp<br />
1875<br />
Sonic Blue<br />
0614, 0616<br />
Sony<br />
0636, 1972<br />
Stack 9<br />
1972<br />
Star Choice<br />
1843<br />
Systemax<br />
1972<br />
Tagar Systems<br />
1972<br />
TiVo<br />
0618, 0636,<br />
0739, 1337<br />
0740<br />
Toshiba<br />
1008, 1972,<br />
1996, 1988<br />
Touch<br />
1972<br />
Viewsonic<br />
1972<br />
Voodoo<br />
1972<br />
Zenith<br />
1709<br />
ZT Group<br />
1972<br />
8.2.8 BD (HD-DVD)<br />
Marque/Co<strong>de</strong> Marque/Co<strong>de</strong> Marque/Co<strong>de</strong> Marque/Co<strong>de</strong> Marque/Co<strong>de</strong><br />
LG<br />
0741<br />
Onkyo<br />
1769<br />
Panasonic<br />
1641<br />
Philips<br />
2084<br />
<strong>Pioneer</strong><br />
2052, 0142<br />
RCA<br />
1769<br />
Samsung<br />
0199<br />
Sony<br />
1516<br />
Toshiba<br />
1769<br />
8.2.9 DVD-R<br />
Marque/Co<strong>de</strong> Marque/Co<strong>de</strong> Marque/Co<strong>de</strong> Marque/Co<strong>de</strong> Marque/Co<strong>de</strong> Marque/Co<strong>de</strong><br />
Accurian<br />
0675, 1416<br />
Apex Digital<br />
1056<br />
Aspire Digital<br />
1168<br />
Astar<br />
1489<br />
Broksonic<br />
1419<br />
Citizen<br />
2116<br />
Coby<br />
1086<br />
CyberHome<br />
1129, 1502<br />
Digital Max<br />
1738<br />
Electrohome<br />
2116<br />
Funai<br />
0675, 1334<br />
Gateway<br />
1073, 1158<br />
Go Vi<strong>de</strong>o<br />
0741, 1158,<br />
1304, 1730<br />
iLo<br />
1348<br />
JVC<br />
1275<br />
LG<br />
0741<br />
LiteOn<br />
1158, 1416,<br />
1440, 1738<br />
Magnavox<br />
0646, 0675,<br />
1506<br />
Panasonic<br />
0490<br />
Philips<br />
0646, 1340<br />
<strong>Pioneer</strong><br />
0631, 1460,<br />
1475,<br />
1476, 1512<br />
Polaroid<br />
1086, 2130<br />
Presidian<br />
1738<br />
RCA<br />
0522<br />
Samsung<br />
0490, 1470<br />
Sensory<br />
Science<br />
1158<br />
Sharp<br />
0675<br />
Sony<br />
1033, 1070,<br />
1431<br />
Sylvania<br />
0675<br />
Toshiba<br />
1510, 1588<br />
Zenith<br />
0741<br />
132<br />
Fr
Annexe<br />
08<br />
8.2.10 DVD (Marques A à N)<br />
Marque/Co<strong>de</strong> Marque/Co<strong>de</strong> Marque/Co<strong>de</strong> Marque/Co<strong>de</strong> Marque/Co<strong>de</strong> Marque/Co<strong>de</strong><br />
3D LAB<br />
0503, 0539<br />
Accurian<br />
0675, 1072,<br />
1416, 1737<br />
Acoustic<br />
Solutions<br />
0730<br />
Adcom<br />
1094<br />
Afreey<br />
0698<br />
Aiwa<br />
0641<br />
Akai<br />
0695, 0705,<br />
0770, 1089<br />
Alba<br />
0672, 0717<br />
Alco<br />
0790<br />
Allegro<br />
0869<br />
Amphion Media<br />
Works<br />
0872, 1245<br />
AMW<br />
0872, 1245<br />
Apex Digital<br />
0533, 0672,<br />
0717, 0755,<br />
0794, 0795,<br />
0796, 0797,<br />
1004, 1020,<br />
1056, 1061<br />
Arrgo<br />
1023<br />
Aspire Digital<br />
1168, 1407<br />
Astar<br />
1489, 1678,<br />
1679<br />
Audiovox<br />
0717, 0790,<br />
1041, 1072,<br />
1121, 1122<br />
Awa<br />
0730<br />
Axion<br />
1072<br />
B & K<br />
0655, 0662<br />
BBK<br />
1224<br />
Bel Canto<br />
Design<br />
1571<br />
Blaupunkt<br />
0717<br />
Blue Para<strong>de</strong><br />
0571<br />
Blue Sky<br />
0695, 0699<br />
Bose<br />
2023<br />
Brandt<br />
0651<br />
Broksonic<br />
0695, 1419<br />
California Audio<br />
Labs<br />
0490<br />
CAVS<br />
1057<br />
Celestial<br />
1020<br />
Centrex<br />
0672, 1004<br />
Cinea<br />
0831<br />
Cinego<br />
1399<br />
CineVision<br />
0876, 0833,<br />
0869<br />
Citizen<br />
1003, 0695,<br />
1277, 1587,<br />
2116<br />
Clairtone<br />
0571<br />
Coby<br />
0778, 0852,<br />
1077, 1086,<br />
1107, 1165,<br />
1177, 1351,<br />
1628<br />
Craig<br />
0831<br />
Creative<br />
0503, 0539<br />
Curtis Mathes<br />
1087<br />
CyberHome<br />
0816, 0874,<br />
1023, 1024,<br />
1117, 1129,<br />
1502, 1537<br />
Cytron<br />
0705<br />
D-Link<br />
1881<br />
Daewoo<br />
0784, 0705,<br />
0770, 0833,<br />
0869, 1169,<br />
1172, 1234,<br />
1242, 1441<br />
Dansai<br />
0770<br />
Daytek<br />
0872<br />
Decca<br />
0770<br />
Denon<br />
0490, 0634<br />
Denver<br />
0778<br />
Desay<br />
1407<br />
Diamond Vision<br />
1316<br />
DigitalMax<br />
1738<br />
Digitrex<br />
0672<br />
Disney<br />
0675, 1270<br />
DiViDo<br />
0705<br />
Dual<br />
0675, 1068,<br />
1085<br />
Durabrand<br />
1127, 2164<br />
DVD2000<br />
0521<br />
Electrohome<br />
1003, 2116<br />
Emerson<br />
0591, 0675,<br />
1268<br />
Enterprise<br />
0591<br />
Entivo<br />
0503, 0539<br />
Enzer<br />
0770<br />
ESA<br />
1268<br />
Firstline<br />
0651<br />
Fisher<br />
0670<br />
Funai<br />
0675, 1268,<br />
1334<br />
Gateway<br />
1073, 1077,<br />
1158<br />
GE<br />
0522, 0815,<br />
0717<br />
Go Vi<strong>de</strong>o<br />
0573, 0744,<br />
0717, 1730,<br />
1304, 1158,<br />
1144, 1099,<br />
1075, 1044,<br />
0869, 0833,<br />
0783, 0741,<br />
0715<br />
Go Vision<br />
1072<br />
GoldStar<br />
0741, 0869<br />
Goodmans<br />
0790<br />
GPX<br />
0699, 0769<br />
Gradiente<br />
0490, 0651<br />
Greenhill<br />
0717<br />
Grundig<br />
0539, 0705<br />
Harman/Kardon<br />
0582, 0702<br />
Helios<br />
2080<br />
Hello Kitty<br />
0831<br />
Hitachi<br />
0573, 0664,<br />
1247, 1664<br />
Hiteker<br />
0672<br />
Humax<br />
1588, 1500<br />
iLo<br />
1348, 1472<br />
Initial<br />
0717, 1472<br />
Insignia<br />
1268, 2095,<br />
2150<br />
Integra<br />
0571, 0627<br />
IRT<br />
0783<br />
Jaton<br />
1078<br />
JBL<br />
0702<br />
JMB<br />
0695<br />
JSI<br />
1423<br />
JVC<br />
0558, 0623,<br />
0867, 1275,<br />
1550, 1602<br />
jWin<br />
1049, 1051<br />
Kawasaki<br />
0790<br />
Kenwood<br />
0490, 0534,<br />
0682, 0737<br />
KLH<br />
0717, 0790,<br />
1020, 1149<br />
Kloss<br />
0533<br />
Konka<br />
0711, 0721<br />
Koss<br />
0651, 0769,<br />
0896, 1061,<br />
1423<br />
Lan<strong>de</strong>l<br />
0826<br />
Lasonic<br />
0627, 0798, 1173<br />
Lecson<br />
1533<br />
Lenoxx<br />
1127<br />
LG<br />
0591, 0741, 0869<br />
LiteOn<br />
1058, 1158,<br />
1416, 1440,<br />
1656, 1738<br />
Loewe<br />
0511, 0741<br />
Logix<br />
0783<br />
Magnasonic<br />
0651, 0675<br />
Magnavox<br />
0503, 0539,<br />
0646, 0675,<br />
1268, 1354,<br />
1472, 1506<br />
Malata<br />
0782, 1159<br />
Marantz<br />
0503, 0539,<br />
0675<br />
Mclntosh<br />
1533, 1273<br />
Medion<br />
0651<br />
McIntosh<br />
Memorex<br />
0695, 0831,<br />
1270<br />
Microsoft<br />
0522, 1708,<br />
2083<br />
Minato<br />
0752<br />
Mintek<br />
0839, 0717,<br />
1472<br />
Mitsubishi<br />
1521, 0521<br />
Momitsu<br />
1082<br />
Mustek<br />
0730<br />
Myryad<br />
0894<br />
NAD<br />
0692, 0741<br />
Naiko<br />
0770<br />
Nakamichi<br />
1222<br />
NEC<br />
0785, 0869<br />
Nesa<br />
0717<br />
Next Base<br />
0826<br />
NexxTech<br />
1402<br />
Nintaus<br />
1051<br />
Norcent<br />
1003, 0872,<br />
1107, 1265<br />
Nova<br />
1517<br />
Français<br />
133<br />
Fr
08 Annexe<br />
8.2.11 DVD (Marques O à Z)<br />
Marque/Co<strong>de</strong> Marque/Co<strong>de</strong> Marque/Co<strong>de</strong> Marque/Co<strong>de</strong> Marque/Co<strong>de</strong> Marque/Co<strong>de</strong><br />
Onkyo<br />
0503, 0627,<br />
1769<br />
Oppo<br />
0575, 1224,<br />
2185<br />
Optimus<br />
0571<br />
OptoMedia<br />
Electronics<br />
0896<br />
Oritron<br />
0651<br />
Palsonic<br />
0672, 0852<br />
Panasonic<br />
0503, 0490,<br />
0571, 0703,<br />
1641, 1762<br />
Philco<br />
0675<br />
Philips<br />
0503, 0539,<br />
0646, 0675,<br />
1267, 1340,<br />
1354, 1846,<br />
2056, 2084<br />
Phonotrend<br />
0699<br />
PianoDisc<br />
1024<br />
<strong>Pioneer</strong><br />
0525, 0571,<br />
0142, 0631,<br />
1475, 1476,<br />
1571, 1460,<br />
1512, 1902,<br />
2052<br />
Polaroid<br />
1020, 1061,<br />
1086, 1245,<br />
1316, 1478,<br />
2130<br />
Polk Audio<br />
0539<br />
Portland<br />
0770<br />
Presidian<br />
0675, 1072,<br />
1738<br />
Primare<br />
1618<br />
Proceed<br />
0672<br />
Proscan<br />
0522<br />
Prosonic<br />
0699<br />
ProVision<br />
0778<br />
Qwestar<br />
0651<br />
Radion<strong>et</strong>te<br />
0741<br />
RadioShack<br />
0571<br />
RCA<br />
0522, 0571,<br />
0717, 0790,<br />
0822, 1022,<br />
1769<br />
Realistic<br />
0571<br />
Reoc<br />
0752<br />
Revoy<br />
0699<br />
Rio<br />
0869, 2002<br />
RJTech<br />
0118, 1360<br />
Rotel<br />
0623, 1178<br />
Rowa<br />
0823, 1004<br />
Saba<br />
0651<br />
Sampo<br />
0698, 0752,<br />
1501<br />
Samsung<br />
0298, 0490,<br />
0573, 0744,<br />
0199, 0820,<br />
1044, 1075,<br />
1470, 2069<br />
Sansui<br />
0695<br />
Sanyo<br />
0670, 0675,<br />
0695, 0873,<br />
1334<br />
Schnei<strong>de</strong>r<br />
0783<br />
Schwaiger<br />
0752<br />
Sensory<br />
Science<br />
1158<br />
Sharp<br />
0630, 0675,<br />
0752, 1256<br />
Sharper Image<br />
1117<br />
Sherwood<br />
0633, 0770,<br />
1043, 1077,<br />
1889<br />
Shinsonic<br />
0533, 0839<br />
Slim Art<br />
0784<br />
SM Electronic<br />
0730<br />
Sonic Blue<br />
0573, 0715,<br />
0783, 0869,<br />
1099, 2002<br />
Sony<br />
0533, 0772,<br />
0864, 1033,<br />
1070, 1431,<br />
1516, 1533,<br />
1548, 1633,<br />
1791, 1824,<br />
1892, 1903,<br />
1904, 1934,<br />
2020, 2043<br />
Sova<br />
1122<br />
Sungale<br />
1074<br />
SVA<br />
0717, 0860,<br />
1105<br />
Sylvania<br />
0675, 1268<br />
Symphonic<br />
0675, 0894,<br />
1268, 1334<br />
TAG McLaren<br />
0894<br />
Tatung<br />
0770<br />
Teac<br />
0571, 0717,<br />
0692, 0790<br />
Technics<br />
0490, 0703<br />
Technika<br />
0770<br />
Technosonic<br />
0730<br />
Techwood<br />
0692<br />
Terapin<br />
1031<br />
Tevion<br />
0651<br />
Th<strong>et</strong>a Digital<br />
0571<br />
Thomson<br />
0522, 0511<br />
TiVo<br />
1503, 1512,<br />
1588<br />
Toshiba<br />
0503, 0573,<br />
0539, 0695,<br />
1154, 1503,<br />
1510, 1588,<br />
1608, 1769<br />
Tre<strong>de</strong>x<br />
0800, 0803,<br />
0804<br />
Unimax<br />
0770<br />
United<br />
0730<br />
Universum<br />
0591<br />
Urban Concepts<br />
0503, 0539<br />
US Logic<br />
0839<br />
V<br />
1064, 1226<br />
Venturer<br />
0790<br />
Vizio<br />
1064, 1226<br />
Vocopro<br />
1027, 1360<br />
Wes<strong>de</strong>r<br />
0699<br />
Xbox<br />
0522, 1708,<br />
2083<br />
Yamaha<br />
0490, 0539,<br />
0545, 0497,<br />
0817<br />
Yamakawa<br />
0872<br />
Zenith<br />
0503, 0591,<br />
0741, 0869<br />
Z<strong>eu</strong>s<br />
0784<br />
Zoece<br />
1265<br />
8.2.12 LD<br />
Marque/Co<strong>de</strong> Marque/Co<strong>de</strong> Marque/Co<strong>de</strong> Marque/Co<strong>de</strong> Marque/Co<strong>de</strong> Marque/Co<strong>de</strong><br />
Carver<br />
0064, 0194,<br />
0323<br />
Denon<br />
0059, 0172,<br />
0241<br />
Disco Vision<br />
0023<br />
Harman/Kardon<br />
0194<br />
Hitachi<br />
0023, 0395<br />
Magnavox<br />
0064, 0194,<br />
0217, 0241<br />
Marantz<br />
0064, 0194<br />
Mitsubishi<br />
0059, 0241<br />
NAD<br />
0059<br />
NEC<br />
0286<br />
Optimus<br />
0059<br />
Panasonic<br />
0204<br />
Philips<br />
0064, 0194<br />
<strong>Pioneer</strong><br />
0059, 0023,<br />
0241, 0463,<br />
0572, 1274<br />
Polk Audio<br />
0194<br />
Quasar<br />
0204<br />
Renaissance<br />
0323<br />
Samsung<br />
0323<br />
Sega<br />
0023<br />
Sharp<br />
0001<br />
Sony<br />
0193, 0201,<br />
0270<br />
Technics<br />
0204<br />
Th<strong>et</strong>a Digital<br />
0194<br />
Toshiba<br />
0059<br />
Victor<br />
0245<br />
Wards<br />
0059<br />
Yamaha<br />
0217<br />
134<br />
Fr
Annexe<br />
08<br />
8.3 Caractéristiques techniques<br />
Télévis<strong>eu</strong>r à écran plat PDP-6020FD (60”) PDP-5020FD (50”)<br />
Nombre <strong>de</strong> pixels 1920 × 1080 pixels 1920 × 1080 pixels<br />
Amplificat<strong>eu</strong>r audio 18 W + 18 W (1 kHz, 10 %, 6 Ω ) 18 W + 18 W (1 kHz, 10 %, 6 Ω)<br />
Enceinte<br />
Graves: 4,8 cm x 13 cm type à cône<br />
Aigus: 2,5 cm type à <strong>de</strong>mi-dôme<br />
Graves: 4,8 cm x 13 cm type à cône<br />
Aigus: 2,5 cm type à <strong>de</strong>mi-dôme<br />
Eff<strong>et</strong> sonore<br />
SRS FOCUS/SRS/SRS TruBass/<br />
SRS Definition<br />
SRS FOCUS/SRS/SRS TruBass/<br />
SRS Definition<br />
Langues <strong>de</strong> l’affichage sur écran Anglais, Espagnol, Français Anglais, Espagnol, Français<br />
Français<br />
Alimentation<br />
Poids<br />
120 V CA, 60 Hz, 524 W (0,3 W en<br />
veille)<br />
Appareil: 50,8 kg (112,0 lbs)<br />
Support: 5,3 kg (11,7 lbs)(boulons<br />
compris)<br />
Enceinte: 3,7 kg (8,2 lbs) (y<br />
compris les câbles, les pièces <strong>de</strong><br />
fixation <strong>et</strong> les vis)<br />
Total: 59,8 kg (131,8 lbs)<br />
120 V CA, 60 Hz, 436 W (0,2 W en<br />
veille)<br />
Appareil: 33,6 kg (74,1 lbs)<br />
Support: 2,2 kg (4,9 lbs)(boulons<br />
compris)<br />
Enceinte: 3,2 kg (7,1 lbs) (y<br />
compris les câbles, les pièces <strong>de</strong><br />
fixation <strong>et</strong> les vis)<br />
Total: 39 kg (86 lbs)<br />
Standard <strong>de</strong> réception<br />
Numérique<br />
Système <strong>de</strong> télévision numérique ATSC<br />
Type <strong>de</strong> circuit<br />
8VSB/64QAM/256QAM<br />
Tuner VHF/UHF VHF chaînes 2 à 13, UHF chaînes 14 à 69<br />
Tuner télévision<br />
par câble (CATV)<br />
Format audio<br />
Chaînes 2 à 135<br />
Dolby Digital<br />
Analogique<br />
Système <strong>de</strong> télévision américain NTSC<br />
Type <strong>de</strong> circuit<br />
Détection synchrone du signal vidéo par circuit à verrouillage <strong>de</strong><br />
phase (PLL), tuner numérique à verrouillage <strong>de</strong> phase (PLL)<br />
Tuner VHF/UHF VHF chaînes 2 à 13, UHF chaînes 14 à 69<br />
Tuner <strong>de</strong> télévision<br />
par câble (CATV)<br />
Multiplexage<br />
audio<br />
Chaînes par câble 1 à 135<br />
Système BTSC<br />
Prises sur les côtés<br />
INPUT 3<br />
INPUT 7<br />
PHONES<br />
USB<br />
Entrées VIDEO, AUDIO<br />
Entrée HDMI*<br />
16 Ω à 32 Ω recommandées<br />
Entrée USB**<br />
135<br />
Fr
08 Annexe<br />
Prises au dos<br />
ANT<br />
INPUT 1<br />
INPUT 2<br />
INPUT 4<br />
PC INPUT<br />
INPUT 5<br />
INPUT 6<br />
AUDIO OUT<br />
DIGITAL OUT<br />
75 Ω asymétrique, type F pour entrée DTV/VHF/UHF/Télévision par câble<br />
Entrées S-VIDEO, VIDEO, AUDIO<br />
Entrées COMPONENT VIDEO, VIDEO, AUDIO<br />
Entrées HDMI*, AUDIO<br />
Entrées analogique RVB, AUDIO<br />
Entrées HDMI*, AUDIO<br />
Entrée HDMI*<br />
Sortie AUDIO (Fixe)<br />
Optique<br />
ETHERNET 1<br />
CONTROL OUT 1<br />
SPEAKERS<br />
SUB WOOFER OUT<br />
6 Ω à 16 Ω<br />
Variable<br />
* conforme à HDMI1.3 (Deep Color) <strong>et</strong> HDCP1.1<br />
** conforme à USB 1.1 <strong>et</strong> 2.0<br />
HDMI (High Definition Multimedia Interface) est une interface numérique qui gère la vidéo <strong>et</strong> le son sur un s<strong>eu</strong>l<br />
câble.<br />
HDCP (High-bandwith Digital Content Protection) est une technologie utilisée pour protéger les contenus<br />
numériques suj<strong>et</strong>s à copyright qui utilise l’interface visuelle numérique (DVI).<br />
.<br />
Remarque: Les caractéristiques <strong>et</strong> la conception sont suj<strong>et</strong>s à modification sans<br />
préavis.<br />
Dimensions<br />
93 (3-21/32)<br />
PDP-6020FD (écran <strong>de</strong> 60”) PDP-5020FD (écran <strong>de</strong> 50”)<br />
1465 (57-11/16)<br />
93 (3-21/32)<br />
1233 (48-17/32)<br />
1030 (40-9/16)<br />
876 (34-1/2)<br />
867 (34-1/8)<br />
723 (28-15/32)<br />
80 (3-5/32)<br />
80 (3-5/32)<br />
429 (16-7/8)<br />
920 (36-7/32)<br />
349 (13-3/4)<br />
550 (21-21/32)<br />
136<br />
Fr
Annexe<br />
08<br />
8.4 Glossaire<br />
HDMI<br />
HDMI (High-Definition Multimedia Interface) est un standard <strong>de</strong> transmission <strong>de</strong> données numériques <strong>de</strong>stiné aux<br />
appareils électroménagers/électroniques grand public. HDMI relie les sources audio/vidéo numériques à un appareil<br />
numérique audio <strong>et</strong>/ou vidéo compatible, comme un télévis<strong>eu</strong>r à écran plat. HDMI perm<strong>et</strong> également <strong>de</strong> transm<strong>et</strong>tre<br />
numériquement <strong>de</strong>s signaux audio <strong>et</strong> <strong>de</strong> comman<strong>de</strong> via un s<strong>eu</strong>l câble pour <strong>de</strong>s sources audio numériques multicanal.<br />
PCM<br />
PCM (Pulse Co<strong>de</strong> Modulation) est une métho<strong>de</strong> <strong>de</strong> conversion <strong>de</strong>s signaux audio analogiques en signaux numériques.<br />
PCM est utilisé sur les CD audio.<br />
Dolby Digital<br />
Dolby Digital est une technologie <strong>de</strong> codage perm<strong>et</strong>tant la compression <strong>de</strong>s signaux audio. Dolby Digital prend en<br />
charge les formats audio <strong>de</strong> gran<strong>de</strong> qualité, à compression élevée <strong>et</strong> multicanal. Le format surround 5.1 canaux est<br />
utilisé dans les émissions numériques.<br />
Émission haute définition<br />
La Haute Définition est un système <strong>de</strong> diffusion <strong>de</strong> télévision numérique à la résolution supéri<strong>eu</strong>re en comparaison<br />
<strong>de</strong>s systèmes <strong>de</strong> télévision conventionnelle. Par rapport au système existant d’émissions analogiques terrestres<br />
capable <strong>de</strong> produire une image composée <strong>de</strong> 525 lignes <strong>de</strong> résolution, le système d’émissions numérique haute<br />
définition comporte 750 ou 1125 lignes, ce qui perm<strong>et</strong> <strong>de</strong> fournir une résolution <strong>et</strong> une qualité d’image supéri<strong>eu</strong>res.<br />
Balayage entrelacé<br />
Avec la télévision NTSC ou l’affichage d’images vidéo, le balayage entrelacé balaie d’abord toutes les lignes paires d’un<br />
champ d’image (262,5 lignes) pour rafraîchir chaque image en 1/60e <strong>de</strong> secon<strong>de</strong>, puis les lignes impaires subissent<br />
un d<strong>eu</strong>xième rafraîchissement en 1/60e <strong>de</strong> secon<strong>de</strong> pour finalement obtenir une image complète (525 lignes). On fait<br />
référence aux lignes balayées efficacement par “480i” <strong>et</strong> “1080i” (le “i” signifie “interlaced”, entrelacé).<br />
Balayage progressif<br />
Le balayage progressif rafraîchit toutes les lignes d’une image en une s<strong>eu</strong>le passe. Par rapport au balayage entrelacé,<br />
le balayage progressif réduit le scintillement <strong>de</strong>s images, ce qui le rend idéal pour l’affichage <strong>de</strong> texte <strong>et</strong> d’images fixes.<br />
On fait référence aux lignes balayées efficacement par “480p” <strong>et</strong> “720p” (le “p” signifie “progressive”, progressif).<br />
Français<br />
(Home Media Gallery)<br />
Passerelle par défaut<br />
La passerelle par défaut est un nœud sur un réseau informatique qui sert <strong>de</strong> point d’accès à un autre réseau. Une<br />
passerelle par défaut (d’un serv<strong>eu</strong>r ou d’un rout<strong>eu</strong>r, par exemple) est utilisée pour faire suivre tout trafic qui n’est pas<br />
adressé à une station située à l’intéri<strong>eu</strong>r du sous-réseau local.<br />
Serv<strong>eu</strong>r DHCP (Dynamic Host Configuration Protocol)<br />
Mécanisme pour affecter les adresses IP aux clients-hôtes. Dans la plupart <strong>de</strong>s cas, un rout<strong>eu</strong>r à haut débit sert <strong>de</strong><br />
serv<strong>eu</strong>r DHCP dans un réseau local.<br />
DLNA (Digital Living N<strong>et</strong>work Alliance)<br />
Le logo autorisé DLNA perm<strong>et</strong> aux consommat<strong>eu</strong>rs <strong>de</strong> reconnaître facilement les produits compatibles avec le<br />
nouveau standard pour les réseaux informatiques locaux <strong>et</strong> les autres périphériques numériques, tel qu’il est défini par<br />
les directives d’interopérabilité DLNA. Il perm<strong>et</strong> <strong>de</strong> profiter <strong>de</strong>s données musicales, vidéo, <strong>et</strong>c. à partir <strong>de</strong> divers<br />
périphériques sur un réseau local. C<strong>et</strong> appareil est compatible avec les données musicales, photo <strong>et</strong> vidéo <strong>et</strong> est basé<br />
sur les directives d’interopérabilité d’appareils en réseau domestique DLNA – élargie: octobre 2006 (v1.5). C<strong>et</strong> appareil<br />
p<strong>eu</strong>t être utilisé pour reproduire <strong>de</strong>s données musicales, photo <strong>et</strong> vidéo se trouvant sur un serv<strong>eu</strong>r compatible DLNA<br />
connecté par un câble réseau.<br />
Digital Living N<strong>et</strong>work Alliance (DLNA) s’est spécialisé dans la simplification du partage <strong>de</strong>s données numériques,<br />
telles que la musique, les photos <strong>et</strong> les séquences vidéo numérique parmi <strong>de</strong>s produits électroniques <strong>de</strong> gran<strong>de</strong><br />
consommation <strong>et</strong> <strong>de</strong>s ordinat<strong>eu</strong>rs connectés en réseau. En établissant une plateforme d’interopérabilité basée sur<br />
une norme ouverte <strong>de</strong> l’industrie, DLNA offre <strong>de</strong>s directives <strong>de</strong> conception technique que les compagnies p<strong>eu</strong>vent<br />
utiliser pour m<strong>et</strong>tre au point <strong>de</strong>s produits numériques domestiques qui partagent <strong>de</strong>s données à travers un réseau<br />
local avec ou sans fil.<br />
137<br />
Fr
08 Annexe<br />
138<br />
Fr<br />
Serv<strong>eu</strong>r DNS (Domain Name Service)<br />
Un serv<strong>eu</strong>r DNS est un serv<strong>eu</strong>r qui détermine les adresses <strong>de</strong>s ordinat<strong>eu</strong>rs en réseau sur Intern<strong>et</strong>. Le serv<strong>eu</strong>r échange<br />
l’adresse IP <strong>et</strong> l’adresse Intern<strong>et</strong>, <strong>et</strong> l’adresse Intern<strong>et</strong> <strong>et</strong> l’adresse IP.<br />
Ethern<strong>et</strong><br />
Une technologie <strong>de</strong> réseau d’ordinat<strong>eu</strong>r pour réseau local (LAN). Le télévis<strong>eu</strong>r à écran plat prend en charge le format<br />
100BASE-TX.<br />
Adresse IP (protocole Intern<strong>et</strong>)<br />
Un numéro unique utilisé par chaque appareil pour être i<strong>de</strong>ntifié <strong>et</strong> communiquer avec les autres appareils sur un<br />
réseau utilisant le protocole standard Intern<strong>et</strong> tel que “192.168.1.xxx”. Aucun numéro en double n’est autorisé dans le<br />
même réseau.<br />
Câble réseau<br />
Un câble avec une fiche modulaire à huit broches à chaque extrémité, différente d’une fiche téléphonique qui ne<br />
possè<strong>de</strong> que quatre broches. Un câble droit est utilisé lors <strong>de</strong> la connexion du télévis<strong>eu</strong>r à écran plat à un réseau local<br />
via un concentrat<strong>eu</strong>r. Un câble croisé est utilisé lors <strong>de</strong> la connexion directe à un ordinat<strong>eu</strong>r. Utilisez <strong>de</strong>s câbles réseau<br />
<strong>de</strong> catégorie 5 (CAT-5).<br />
Adresse MAC (Media Access Control)<br />
Une adresse attachée au port <strong>de</strong> chaque appareil en réseau avec une adresse IP. L’adresse MAC est du type<br />
“00:e0:36:01:23:xx” <strong>et</strong> ne p<strong>eu</strong>t pas être changée.<br />
Appareils <strong>de</strong> la classe <strong>de</strong> stockage <strong>de</strong> masse<br />
Le standard fournit une interface à divers périphériques <strong>de</strong> stockage, tels que <strong>de</strong>s mémoires flash USB <strong>et</strong> <strong>de</strong>s appareils<br />
photo numériques.<br />
PTP (Picture Transfer Protocol)<br />
Un protocole perm<strong>et</strong>tant le transfert d’images <strong>et</strong> la manipulation d’appareils photo numériques par le biais d’une<br />
connexion USB. Les appareils photo numériques les plus récents <strong>et</strong> d’autres appareils prennent en charge le protocole<br />
PTP, ce qui perm<strong>et</strong> un transfert d’images par le biais d’une connexion directe.<br />
Masque <strong>de</strong> sous-réseau<br />
Utilisé pour déterminer le réseau lorsque l’adresse IP est segmentée en plusi<strong>eu</strong>rs parties. Elle est <strong>de</strong> la forme<br />
“255.255.255.0.”. Dans la plupart <strong>de</strong>s cas, le masque <strong>de</strong> sous-réseau est affecté automatiquement par le serv<strong>eu</strong>r DHCP.<br />
UPnP (Universal Plug and Play)<br />
Architecture pour la connectivité en réseau pair à pair d’appareils <strong>de</strong> tout fact<strong>eu</strong>r <strong>de</strong> forme. Elle est conçue pour<br />
apporter une connectivité facile à utiliser, flexible <strong>et</strong> normalisée pour <strong>de</strong>s réseaux ad hoc ou autonomes que ce soit à<br />
la maison, dans une p<strong>et</strong>ite entreprise, <strong>de</strong>s espaces publics, ou connectés à Intern<strong>et</strong>.<br />
USB (Universal Serial Bus)<br />
L’USB fournit un bus série standard pour la connexion d’appareil, comme <strong>de</strong>s ordinat<strong>eu</strong>rs. Le télévis<strong>eu</strong>r à écran plat<br />
prend en charge les périphériques <strong>de</strong> classe <strong>de</strong> stockage <strong>de</strong> masse <strong>et</strong> PTP (Picture Transfer Protocol).<br />
Windows Media Connect<br />
Microsoft Windows Media Connect est une nouvelle technologie pour distribuer <strong>de</strong>s données musicales, photo <strong>et</strong><br />
vidéo stockées sur un ordinat<strong>eu</strong>r avec Windows XP installé vers un système stéréo d’un télévis<strong>eu</strong>r. En utilisant c<strong>et</strong>te<br />
technologie vous pouvez reproduire <strong>de</strong>s fichiers qui se trouvent sur l’ordinat<strong>eu</strong>r à partir <strong>de</strong> divers appareils n’importe<br />
où dans votre maison.<br />
Windows Media DRM<br />
Windows Media DRM est une technologie <strong>de</strong> protection <strong>de</strong>s droits d’aut<strong>eu</strong>r mise au point par Microsoft Corporation.<br />
Elle perm<strong>et</strong> aux FAI <strong>de</strong> distribuer par Intern<strong>et</strong> <strong>de</strong>s données musicales, vidéo <strong>et</strong> d’autres supports numériques dans un<br />
format protégé <strong>et</strong> chiffré.<br />
Windows Media Player<br />
Application gratuite <strong>de</strong> lecture <strong>de</strong> médias numériques fournie par Microsoft <strong>et</strong> utilisée pour la lecture <strong>de</strong> fichiers audio,<br />
vidéo <strong>et</strong> image sur un ordinat<strong>eu</strong>r.<br />
Windows Media Player 11<br />
La fonction <strong>de</strong> Windows Media Connect a été intégrée à c<strong>et</strong>te version <strong>de</strong> Windows Media Player. Après l’installation <strong>de</strong><br />
Windows Media Player 11, Windows Media Connecte ne fonctionnera pas. Voir le site Web <strong>de</strong> Microsoft pour en savoir<br />
plus.
Annexe 08<br />
8.5 In<strong>de</strong>x<br />
Numériques<br />
100BASE-TX ..........................................................................85, 138<br />
10BASE-T ......................................................................................85<br />
2 images ......................................................................12, 13, 61, 62<br />
A<br />
Aigus .............................................................................................46<br />
Air/Câble .......................................................................................35<br />
Alimentation .....................................................................31, 53, 67<br />
Analogique ............................................................43, 64, 66, 74, 75<br />
Arrêt sans opération ....................................................................68<br />
Arrêt sans signal ..........................................................................68<br />
Autoinstallation ......................................................................35, 38<br />
AVC ..........................................................................................46, 67<br />
B<br />
Balance .............................................................................33, 46, 57<br />
Bl<strong>eu</strong> ...................................................................................33, 58, 65<br />
Bloquer ............................................................................49, 51, 113<br />
C<br />
Cache latéral .....................................................................52, 59, 60<br />
Capt<strong>eu</strong>r <strong>de</strong> luminosité ambiante ................................................42<br />
CBL ..........................................................................................12, 71<br />
Chaîne ...............................................................................35, 38, 41<br />
CINÉMA ...................................................................................44, 54<br />
Classement pour les Canadiens anglophones ..........................49<br />
Classement pour les Canadiens francophones .........................49<br />
Comman<strong>de</strong> alimentation .............................................................82<br />
Comman<strong>de</strong> HDMI ............................................................74, 76, 78<br />
Configuration système .................................................................34<br />
Contraste .....................................................................43, 54, 55, 58<br />
Contrôle parental ......................................................47, 48, 50, 113<br />
Coul<strong>eu</strong>r ........................................................................42, 45, 55, 58<br />
D<br />
Détection du cache latéral ..................................................59, 123<br />
Directives télévisées parentales ......................................48, 49, 50<br />
Dolby Digital .......................................................................111, 135<br />
E<br />
Économie d’énergie .........................................................52, 53, 67<br />
Eff<strong>et</strong> sonore ...........................................................................67, 135<br />
Entrée ......................................................................................12, 40<br />
Entrée HDMI ...................................................................74, 75, 114<br />
Étiqu<strong>et</strong>er Entrée ............................................................................40<br />
Étiqu<strong>et</strong>te ........................................................................................40<br />
F<br />
Favoris .....................................................................................33, 40<br />
Fuseau horaire ..............................................................................35<br />
G<br />
Geler ......................................................................................62, 121<br />
Gestion alimentation ....................................................................68<br />
Graves ............................................................................................33<br />
H<br />
Home Media Gallery .....................................................................83<br />
HOME MENU ..........................................................................12, 34<br />
Horloge ..................................................................................35, 112<br />
I<br />
Image dans l’image ..........................................................12, 13, 61<br />
InfoBanner ....................................................................................63<br />
Instal. Tuner Numérique ................................................35, 38, 120<br />
Install. TV analogique .......................................................36, 38, 43<br />
Installation ......................................................................14, 35, 121<br />
J<br />
JEU ........................................................................28, 54, 56, 60, 82<br />
L<br />
Langue ...................................................................34, 35, 65, 66, 76<br />
Luminosité ........................................................................45, 55, 58<br />
M<br />
Minuterie d’extinction ..........................................................41, 115<br />
Mo<strong>de</strong> Chaîne ...........................................................................33, 39<br />
Mo<strong>de</strong> film ..................................................................................... 60<br />
Mo<strong>de</strong> HD Large ........................................................................... 59<br />
Modif. Mot <strong>de</strong> passe .................................................................... 33<br />
Modifier Mot <strong>de</strong> passe ................................................................ 47<br />
MPAA ....................................................................................48, 126<br />
MTS ..........................................................................................64, 66<br />
multiécran .........................................................................56, 61, 62<br />
MUTING ...................................................................................13, 41<br />
N<br />
N<strong>et</strong>t<strong>et</strong>é .....................................................................................55, 58<br />
Numérique ........................................................................26, 32, 50<br />
O<br />
Optimisation <strong>de</strong> texte .................................................................. 60<br />
OPTIMUM ..........................................................................12, 45, 54<br />
Orbit<strong>eu</strong>r .................................................................................53, 124<br />
P<br />
PCM .......................................................................................74, 111<br />
PERFORMANCES ...................................................................12, 54<br />
Position .................................................................................44, 112<br />
Pré réglages AV ......................................................................54, 55<br />
Préf. Cm<strong>de</strong> J<strong>eu</strong> .......................................................................56, 60<br />
Prises HDMI ..............................................................27, 74, 76, 116<br />
Protection d’écran ......................................................................124<br />
Protection écran .............................................................33, 52, 114<br />
PureCinema ................................................................................. 59<br />
R<br />
RCV ............................................................................................... 12<br />
Réglage <strong>de</strong> Comman<strong>de</strong> HDMI ..............................................78, 81<br />
Réglage <strong>de</strong> la position H/V ......................................................... 44<br />
Réglage manuel .....................................................................36, 43<br />
Rouge ......................................................................................58, 65<br />
S<br />
Sans infos <strong>de</strong> classement ........................................................... 49<br />
SAP ..........................................................................................64, 66<br />
SAT ...........................................................................................12, 71<br />
SCREEN SIZE ..........................................................................13, 56<br />
SHIFT .................................................................................13, 61, 62<br />
Son ...............................................................................42, 46, 54, 64<br />
Sous-titres ...............................................................................64, 65<br />
SPORT .......................................................................................... 54<br />
SRS ................................................................................67, 135, 140<br />
SRS Definition ............................................................................135<br />
SRS FOCUS ................................................................................135<br />
SRS TruBASS ..............................................................................135<br />
STANDARD .............................................................................12, 55<br />
Standard ..................................................................................12, 54<br />
SWAP ................................................................................13, 61, 62<br />
Sync. Luminosité ..................................................................60, 116<br />
T<br />
Taille auto ..........................................................................52, 56, 59<br />
Teinte .......................................................................................55, 58<br />
Télécomman<strong>de</strong> .................................................................10, 12, 69<br />
Trier Favoris .............................................................................33, 40<br />
TV/DTV ...............................................................................13, 26, 32<br />
U<br />
UTILISATEUR ..........................................................................12, 55<br />
V<br />
Vert .....................................................................................58, 65, 73<br />
VOLUME ..................................................................................41, 67<br />
Français<br />
139<br />
Fr
08 Annexe<br />
8.6 Informations sur les marques, licences <strong>et</strong> brev<strong>et</strong>s<br />
Marques <strong>de</strong> commerce<br />
est une marque <strong>de</strong> SRS Labs, Inc.<br />
WOW HD technologie est incorporé sous licence <strong>de</strong> SRS Labs, Inc.<br />
Fabriqué sous licence <strong>de</strong> Dolby Laboratories. Le terme Dolby <strong>et</strong> le sigle double D sont <strong>de</strong>s marques commerciales <strong>de</strong> Dolby<br />
Laboratories.<br />
HDMI, le logo HDMI <strong>et</strong> High-Definition Multimedia Interface sont <strong>de</strong>s marques commerciales ou <strong>de</strong>s marques déposées <strong>de</strong><br />
HDMI Licensing LLC.<br />
Ce produit utilise les polices FontAvenue ® sous licence <strong>de</strong> NEC Corporation. FontAvenue est une marque déposée <strong>de</strong> NEC<br />
Corporation.<br />
DDC est une marque déposée <strong>de</strong> Vi<strong>de</strong>o Electronics Standards Association.<br />
Ce logiciel est basé en partie sur le travail du groupe indépendant JPEG.<br />
Les noms <strong>de</strong> sociétés ou d’organismes sont <strong>de</strong>s marques <strong>de</strong> commerce qui p<strong>eu</strong>vent avoir fait lobj<strong>et</strong> d’un dépôt par l<strong>eu</strong>r<br />
propriétaire.<br />
Windows Media <strong>et</strong> le logo Windows sont <strong>de</strong>s marques <strong>de</strong> commerciales ou <strong>de</strong>s marques déposées <strong>de</strong> Microsoft Corporation<br />
aux États-Unis <strong>et</strong>/ou dans d’autres pays.<br />
DLNA <strong>et</strong> DLNA CERTIFIED sont <strong>de</strong>s marques <strong>de</strong> commerce <strong>et</strong>/ou marques <strong>de</strong> service <strong>de</strong> Digital Living N<strong>et</strong>work Alliance.<br />
Licence<br />
Les propriétaires <strong>de</strong>s données utilisent la technologie <strong>de</strong> gestion <strong>de</strong>s droits numériques Windows Media (WMDRM) pour<br />
protéger l<strong>eu</strong>r propriété intellectuelle, y compris les droits d’aut<strong>eu</strong>rs. C<strong>et</strong> appareil utilise le logiciel WMDRM pour accé<strong>de</strong>r aux<br />
données protégées par WMDRM. Si le logiciel WMDRM échoue à protéger les données, les propriétaires <strong>de</strong>s données p<strong>eu</strong>vent<br />
<strong>de</strong>man<strong>de</strong>r à Microsoft d’annuler la capacité du logiciel d’utiliser WMDRM pour reproduire ou copier les données protégées.<br />
Une telle annulation n’a pas d’eff<strong>et</strong> sur les données non protégées. Lorsque vous téléchargez <strong>de</strong>s licences pour <strong>de</strong>s données<br />
protégées, vous acceptez que Microsoft puisse inclure une liste d’annulation avec la licence. Les propriétaires <strong>de</strong>s données<br />
p<strong>eu</strong>vent exiger que vous m<strong>et</strong>tiez à jour WMDRM pour accé<strong>de</strong>r à l<strong>eu</strong>rs données. Si vous refusez d’effectuer la mise à jour, vous<br />
ne pourrez pas accé<strong>de</strong>r aux données qui nécessitent une mise à jour.<br />
C<strong>et</strong> appareil est protégé par certains droits <strong>de</strong> propriété intellectuelle <strong>de</strong> Microsoft. L’utilisation ou la distribution <strong>de</strong> c<strong>et</strong>te<br />
technologie en <strong>de</strong>hors <strong>de</strong> c<strong>et</strong> appareil est interdite sans licence <strong>de</strong> Microsoft.<br />
Le logo DLNA p<strong>eu</strong>t être utilisé par les appareils ayant obtenu un certificat <strong>de</strong> DLNA (Digital Living N<strong>et</strong>work Alliance).<br />
Avis <strong>de</strong> non-responsabilité<br />
<strong>Pioneer</strong> fournit <strong>de</strong>s informations pour faciliter la configuration d’un réseau <strong>et</strong> la connexion du télévis<strong>eu</strong>r à écran plat au<br />
réseau, mais vous êtes entièrement responsable <strong>de</strong> la bonne exécution <strong>de</strong> c<strong>et</strong>te configuration <strong>et</strong> <strong>de</strong> c<strong>et</strong>te connexion. <strong>Pioneer</strong><br />
n’assume aucune responsabilité pour tout dommage résultant <strong>de</strong> la configuration <strong>et</strong> <strong>de</strong> la connexion que vous avez<br />
effectuées.<br />
Lorsque vous téléchargez <strong>de</strong>s mises à jour <strong>de</strong> logiciel du site Web <strong>de</strong> <strong>Pioneer</strong> <strong>et</strong> lorsque vous effectuez <strong>de</strong>s mises à jour, veillez<br />
à ce que les connexions du réseau à votre mémoire flash USB, <strong>et</strong> <strong>de</strong> votre mémoire flash USB au télévis<strong>eu</strong>r à écran plat ne<br />
soient pas interrompues.<br />
<strong>Pioneer</strong> n’assume aucune responsabilité pour toute défaillance ou tout dommage résultant <strong>de</strong> problèmes <strong>de</strong> connexion.<br />
Suivant le périphérique USB utilisé, les données risquent <strong>de</strong> ne pas fonctionner correctement. <strong>Pioneer</strong> n’assume aucune<br />
responsabilité pour toute défaillance ou tout dommage résultant <strong>de</strong> l’emploi d’un périphérique USB par l’utilisat<strong>eu</strong>r.<br />
140<br />
Fr<br />
Publication <strong>de</strong> <strong>Pioneer</strong> Corporation.<br />
© 2008 <strong>Pioneer</strong> Corporation.<br />
Tous droits <strong>de</strong> reproduction <strong>et</strong> <strong>de</strong> traduction réservés.
IMPORTANTE<br />
La luz intermitente con el símbolo <strong>de</strong> punta <strong>de</strong> flecha<br />
<strong>de</strong>ntro un triángulo equilátero. Está convenido para<br />
avisar el usuario <strong>de</strong> la presencia <strong>de</strong> “voltaje peligrosa”<br />
no aislada <strong>de</strong>ntro el producto que podría constituir un<br />
peligro <strong>de</strong> choque eléctrico para las personas.<br />
CAUTION<br />
RISK OF ELECTRIC SHOCK<br />
DO NOT OPEN<br />
ATENCIÓN:<br />
PARA PREVENIR EL PELIGRO DE CHOQUE<br />
ELÉCTRICO NO REMOVER LA TAPA NI LAS<br />
PARTES DENTRO NO UTILIZADAS, LLAMAR UNA<br />
PERSONA CUALIFICADA<br />
El punto exclamativo <strong>de</strong>ntro un triángulo equilátero<br />
convenido para avisar el usuário <strong>de</strong> la presencia <strong>de</strong><br />
importantes instrucciones sobre el funcionamiento<br />
y la manutención en la libr<strong>et</strong>a que acompaña el<br />
aparato.<br />
D3-4-2-1-1_Sp-A<br />
AVISO IMORTANTE –<br />
EL NÚMERO DE SERIE PARA ESTE EQUIPO SE ENCUENTRA EN EL PANEL TRASERO.<br />
SÍRVASE ESCRIBIR ESTE NÚMERO DE SERIE EN SU TARJETA DE GARANTÍA ADJUNTA<br />
Y GUÁRDELA EN UN LUGAR SEGURO. ESTO ES PARA SU SEGURIDAD. D1-4-2-6-1_Sp
CONTENIDO<br />
Congratulaciones por su compra <strong>de</strong> un televisor <strong>de</strong> pantalla plana KURO <strong>de</strong> <strong>Pioneer</strong>.<br />
KURO es el futuro <strong>de</strong> los monitores pantalla plana <strong>de</strong> <strong>Pioneer</strong>. Es un mundo sin fronteras. Un lugar don<strong>de</strong> se <strong>de</strong>sarrollan<br />
los sentidos, se sienten los colores y se saborean los sonidos. Una experiencia que cambia no sólo la manera que mira<br />
la televisión, pero la manera que mira el mundo.<br />
Estamos orgullosos <strong>de</strong> incorporar esta filosofía <strong>de</strong> calidad excepcional, diseño <strong>de</strong> punta y ingeniería m<strong>et</strong>iculosa para<br />
hacer <strong>de</strong>l KURO algo indisputablemente singular, y ofrecerle una <strong>de</strong> las mejores experiencias <strong>de</strong> entr<strong>et</strong>enimiento<br />
posibles.<br />
Tome algún tiempo para leer esta guía <strong>de</strong>l usuario y el manual <strong>de</strong> instrucciones para apren<strong>de</strong>r acerca <strong>de</strong> las muchas<br />
funciones y beneficios <strong>de</strong>stinados al KURO. Esperamos que disfrute <strong>de</strong> la experiencia <strong>de</strong> poseer el KURO y le invitamos<br />
a entrar en el nuevo mundo <strong>de</strong> ver y oír como nunca antes.<br />
CONTENIDO<br />
1 Introducción a los Televisores <strong>de</strong> Pantalla Plana <strong>de</strong> la Serie 20FD ......................................................6<br />
1.1 Lista <strong>de</strong> comprobación <strong>de</strong> embarque <strong>de</strong>l televisor <strong>de</strong> pantalla plana ......................................................................... 6<br />
1.2 Opciones <strong>de</strong> control: Conocimiento <strong>de</strong> su televisor <strong>de</strong> pantalla plana........................................................................ 8<br />
1.2.1 Botones <strong>de</strong> control y otros en el televisor <strong>de</strong> pantalla plana................................................................................ 8<br />
1.2.2 Operación con el mando a distancia.................................................................................................................... 10<br />
1.2.3 Botones <strong>de</strong>l mando a distancia ............................................................................................................................ 12<br />
2 Instalación <strong>de</strong> su televisor <strong>de</strong> pantalla plana......................................................................................14<br />
2.1 Selección <strong>de</strong> la ubicación y <strong>de</strong>l método <strong>de</strong> montaje ................................................................................................... 14<br />
2.1.1 Comprobación <strong>de</strong> la apropiabilidad <strong>de</strong> la ubicación .......................................................................................... 15<br />
2.1.2 Cómo levantar y/o <strong>de</strong>splazar su pantalla ............................................................................................................. 15<br />
2.2 Instalación <strong>de</strong> la pantalla con un soporte .................................................................................................................... 16<br />
2.2.1 Utilice o extraiga el soporte incluido .................................................................................................................... 16<br />
2.2.2 Conecte los cables <strong>de</strong> altavoz. .............................................................................................................................. 20<br />
2.3 Montaje en pared/techo ................................................................................................................................................. 22<br />
2.4 Monte el televisor <strong>de</strong> pantalla plana ............................................................................................................................. 24<br />
2.5 Conexión a un sistema <strong>de</strong> emisión <strong>de</strong> TV y a otros dispositivos (DVR, Receptor, BDR, <strong>et</strong>c.).................................. 26<br />
2.5.1 Adición <strong>de</strong> canales <strong>de</strong> TV analógicos (convencionales) y digitales................................................................... 26<br />
2.5.2 Conexión <strong>de</strong> otro equipo <strong>Pioneer</strong>.......................................................................................................................... 26<br />
2.5.3 Conexión <strong>de</strong>l cable <strong>de</strong> alimentación a la pantalla............................................................................................... 29<br />
2.6 Tendido y atado <strong>de</strong>l cable <strong>de</strong> alimentación y cables ................................................................................................... 29<br />
3 Operaciones básicas para contemplación <strong>de</strong> televisión .....................................................................31<br />
3.1 Encendido y apagado <strong>de</strong>l televisor <strong>de</strong> pantalla plana ................................................................................................. 31<br />
3.2 Programación <strong>de</strong>l televisor <strong>de</strong> pantalla plana para contemplación <strong>de</strong> televisión .................................................... 32<br />
3.2.1 Selección <strong>de</strong> canales <strong>de</strong> TV analógicos o digitales............................................................................................. 32<br />
3.2.2 Exploración <strong>de</strong>l Home Menu................................................................................................................................. 32<br />
3.2.3 Asignación <strong>de</strong> un idioma....................................................................................................................................... 34<br />
3.2.4 Ajuste <strong>de</strong>l reloj........................................................................................................................................................ 35<br />
3.2.5 Creación <strong>de</strong> una lista <strong>de</strong> canales.......................................................................................................................... 35<br />
3.2.6 Omisión o eliminación <strong>de</strong> canales in<strong>de</strong>seables .................................................................................................. 38<br />
3.2.7 Lista <strong>de</strong> canales...................................................................................................................................................... 39<br />
3.3 Inicio rápido para ver televisión..................................................................................................................................... 41<br />
3.3.1 Cambio <strong>de</strong> canal/subcanal.................................................................................................................................... 41<br />
3.3.2 Ajuste <strong>de</strong>l volumen y <strong>de</strong>l sonido ........................................................................................................................... 41<br />
3.3.3 Activación <strong>de</strong>l temporizador <strong>de</strong> apagado............................................................................................................. 41<br />
3.4 Ajuste <strong>de</strong> la calidad <strong>de</strong> la imagen y <strong>de</strong>l sonido............................................................................................................ 42<br />
3.4.1 Ajuste <strong>de</strong> la imagen para la iluminación <strong>de</strong> su sala ........................................................................................... 42<br />
3.4.2 Ajuste <strong>de</strong> imagen general (ví<strong>de</strong>o) para una fuente <strong>de</strong> AV .................................................................................. 43<br />
3.4.3 Comparación <strong>de</strong> las imágenes al ajustar una imagen ....................................................................................... 44<br />
3.4.4 Visualización <strong>de</strong> una pantalla <strong>de</strong> ajuste <strong>de</strong> imagen gráfica/sonido .................................................................. 45<br />
3.4.5 Control <strong>de</strong>l sonido .................................................................................................................................................. 46<br />
3.4.6 Ajuste <strong>de</strong>l sonido general (audio) ......................................................................................................................... 46<br />
Español<br />
3<br />
Sp
CONTENIDO<br />
4<br />
Sp<br />
3.5 Bloqueo <strong>de</strong> programas, canales o contenidos.............................................................................................................47<br />
3.5.1 Asignación <strong>de</strong> una contraseña para el control familiar (bloqueo).....................................................................47<br />
3.5.2 Activación <strong>de</strong>l Control familiar ..............................................................................................................................48<br />
3.5.3 Asignación <strong>de</strong> un sistema <strong>de</strong> clasificación para crear bloqueos ......................................................................48<br />
3.5.4 Eliminación temporal <strong>de</strong> un bloqueo....................................................................................................................51<br />
3.6 Iniciación inteligente para nuevos usuarios.................................................................................................................52<br />
3.6.1 Utilización <strong>de</strong>l menú TOOLS..................................................................................................................................52<br />
3.6.2 Extensión <strong>de</strong> la vida útil <strong>de</strong> la pantalla..................................................................................................................52<br />
3.6.3 Activación <strong>de</strong> Orbiter..............................................................................................................................................53<br />
3.6.4 Disparo periódico <strong>de</strong>l patrón <strong>de</strong> ví<strong>de</strong>o <strong>de</strong> protección <strong>de</strong> pantalla......................................................................53<br />
3.6.5 Activación <strong>de</strong>l ahorro <strong>de</strong> energía para reducir el uso <strong>de</strong> energía ......................................................................53<br />
4 Opciones adicionales <strong>de</strong> ajuste <strong>de</strong> la imagen y <strong>de</strong>l sonido................................................................ 54<br />
4.1 Selección <strong>de</strong> una opción <strong>de</strong> AV (Ví<strong>de</strong>o, Juego, <strong>et</strong>c.)....................................................................................................54<br />
4.1.1 Fuente <strong>de</strong> AV a través <strong>de</strong>l mando a distancia......................................................................................................54<br />
4.1.2 Selección <strong>de</strong> una fuente <strong>de</strong> AV a través <strong>de</strong> Home Menu....................................................................................55<br />
4.1.3 Selección <strong>de</strong> una fuente <strong>de</strong> PC .............................................................................................................................55<br />
4.1.4 Configuración <strong>de</strong> la pantalla para reconocer una consola <strong>de</strong> juego.................................................................56<br />
4.2 Ajuste <strong>de</strong> los elementos <strong>de</strong> imagen específicos ..........................................................................................................56<br />
4.2.1 Selección <strong>de</strong> un tamaño <strong>de</strong> pantalla (automática o manual) ............................................................................56<br />
4.2.2 Corrección <strong>de</strong> la imagen para una fuente <strong>de</strong> AV o PC........................................................................................58<br />
4.3 Asignación <strong>de</strong> funciones <strong>de</strong> imagen avanzadas ..........................................................................................................59<br />
4.3.1 Ajuste <strong>de</strong> las máscaras laterales (barras negras en ambos lados) ...................................................................59<br />
4.3.2 Seleccione un nivel PureCinema para imágenes <strong>de</strong> alta calidad......................................................................60<br />
4.4 Visualización en multipantalla .......................................................................................................................................61<br />
4.4.1 Dividir/Alternar/Desplazar la pantalla...................................................................................................................61<br />
4.5 Congelamiento <strong>de</strong> imagen .............................................................................................................................................62<br />
4.6 Utilización <strong>de</strong> la función <strong>de</strong> rótulo.................................................................................................................................63<br />
4.7 Selecciones alternativas <strong>de</strong>l sonido ..............................................................................................................................64<br />
4.7.1 Subtitulación activa (CC) .......................................................................................................................................64<br />
4.7.2 Cambio <strong>de</strong> idiomas con MTS.................................................................................................................................66<br />
4.7.3 Selección <strong>de</strong> SAP ...................................................................................................................................................66<br />
4.7.4 Aplicación <strong>de</strong> las configuraciones <strong>de</strong>l efecto <strong>de</strong> sonido.....................................................................................67<br />
4.7.5 Utilización <strong>de</strong>l control automático <strong>de</strong>l volumen (AVC)........................................................................................67<br />
4.8 Gestión <strong>de</strong> energía ..........................................................................................................................................................67<br />
5 Utilización <strong>de</strong> otros equipos con su televisor <strong>de</strong> pantalla plana ....................................................... 69<br />
5.1 Programación <strong>de</strong>l mando a distancia para operar otros equipos ..............................................................................69<br />
5.1.1 Asignación <strong>de</strong> un código <strong>de</strong> fabricante al mando a distancia ...........................................................................69<br />
5.1.2 Búsqueda <strong>de</strong> un código <strong>de</strong> fabricante..................................................................................................................69<br />
5.1.3 Eliminación <strong>de</strong> códigos <strong>de</strong> fabricante añadidos <strong>de</strong>l mando a distancia...........................................................70<br />
5.1.4 Control <strong>de</strong> un receptor <strong>Pioneer</strong> .............................................................................................................................70<br />
5.1.5 Control <strong>de</strong> un sistema <strong>de</strong> cable (CBL) o satélite (SAT) .......................................................................................71<br />
5.1.6 Control <strong>de</strong> una vi<strong>de</strong>ograbadora (VCR) ..................................................................................................................72<br />
5.1.7 Control <strong>de</strong> un reproductor DVD/Grabadora DVR/Reproductor BD....................................................................73<br />
5.2 Utilización <strong>de</strong> las entradas HDMI ..................................................................................................................................74<br />
5.2.1 Especificación <strong>de</strong>l tipo <strong>de</strong> entrada HDMI.............................................................................................................74<br />
5.2.2 Especificación <strong>de</strong> un tipo <strong>de</strong> señal HDMI digital.................................................................................................75<br />
5.2.3 Especificación <strong>de</strong> un tipo <strong>de</strong> señal HDMI <strong>de</strong> audio ............................................................................................75<br />
5.3 Control <strong>de</strong> equipos con el mando a distancia <strong>de</strong> la pantalla a través <strong>de</strong> HDMI .......................................................76<br />
5.3.1 Control <strong>de</strong> un sistema <strong>de</strong> AV .................................................................................................................................78<br />
5.3.2 Control <strong>de</strong> una grabadora......................................................................................................................................79<br />
5.3.3 Control <strong>de</strong> un reproductor .....................................................................................................................................79<br />
5.3.4 Adición <strong>de</strong> un amplificador <strong>de</strong> AV o <strong>de</strong> un reproductor BD ...............................................................................80<br />
5.4 Comandos específicos <strong>de</strong>l Control HDMI.....................................................................................................................81<br />
5.4.1 Sonido <strong>de</strong> la fuente <strong>de</strong> reproducción con un comando HDMI...........................................................................81<br />
5.4.2 Apagado con un comando HDMI .........................................................................................................................81<br />
5.4.3 Encendido con un comando HDMI ......................................................................................................................81<br />
5.4.4 Prueba <strong>de</strong>l control <strong>de</strong> la alimentación (Encendido/Apagado) ...........................................................................82
CONTENIDO<br />
5.5 Conexión <strong>de</strong> una consola <strong>de</strong> vi<strong>de</strong>ojuegos o una vi<strong>de</strong>ocámara................................................................................... 82<br />
5.6 Operación <strong>de</strong> Home Media Gallery ............................................................................................................................... 83<br />
5.6.1 Conexiones en red.................................................................................................................................................. 84<br />
5.6.2 Conexión a un dispositivo USB............................................................................................................................. 86<br />
5.7 Ejecución <strong>de</strong> Home Media Gallery ................................................................................................................................ 88<br />
5.7.1 Visualización <strong>de</strong> sus archivos <strong>de</strong> película en el televisor <strong>de</strong> pantalla plana..................................................... 91<br />
5.7.2 Reproducción <strong>de</strong> archivos <strong>de</strong> música en el televisor <strong>de</strong> pantalla plana ........................................................... 93<br />
5.7.3 Visualización <strong>de</strong> sus archivos <strong>de</strong> foto en el televisor <strong>de</strong> pantalla plana............................................................ 94<br />
5.8 Utilización <strong>de</strong>l menú TOOLS .......................................................................................................................................... 96<br />
5.9 Configuración HMG...................................................................................................................................................... 108<br />
5.10 Otras funciones útiles ................................................................................................................................................ 109<br />
5.11 Adición <strong>de</strong> otros equipos <strong>de</strong> audio............................................................................................................................ 111<br />
5.12 Adición <strong>de</strong> un PC ........................................................................................................................................................ 112<br />
5.12.1 Ajuste automático <strong>de</strong> la posición <strong>de</strong> la imagen y <strong>de</strong>l reloj ............................................................................. 112<br />
5.12.2 Ajuste manual <strong>de</strong> la posición <strong>de</strong> la imagen y <strong>de</strong>l reloj ................................................................................... 112<br />
6 Información útil ...................................................................................................................................113<br />
6.1 Preguntas frecuentes (FAQ) ........................................................................................................................................ 113<br />
6.2 Comprobación <strong>de</strong> la versión <strong>de</strong> su software/hardware............................................................................................. 114<br />
6.3 Métodos <strong>de</strong> limpieza..................................................................................................................................................... 114<br />
6.4 Solución <strong>de</strong> problemas e información <strong>de</strong> servicio..................................................................................................... 115<br />
6.4.1 Comprobación <strong>de</strong> la intensidad <strong>de</strong> la señal....................................................................................................... 120<br />
7 Precauciones y advertencias ...............................................................................................................121<br />
7.1 D<strong>et</strong>alles <strong>de</strong> la instalación ............................................................................................................................................. 121<br />
7.2 Consi<strong>de</strong>raciones sobre la ubicación física y temperatura ........................................................................................ 121<br />
7.3 Consejos para la utilización ......................................................................................................................................... 121<br />
7.4 Interferencia o ruido <strong>de</strong> señal...................................................................................................................................... 122<br />
7.5 Propieda<strong>de</strong>s <strong>de</strong>l fósforo................................................................................................................................................ 122<br />
7.6 Información <strong>de</strong> imagen incluyendo imagen remanente o imagen r<strong>et</strong>enida........................................................... 122<br />
7.7 Precauciones <strong>de</strong> seguridad ......................................................................................................................................... 124<br />
7.8 Avisos Legales............................................................................................................................................................... 124<br />
7.8.1 Seguridad.............................................................................................................................................................. 124<br />
7.8.2 Interferencia <strong>de</strong> radio........................................................................................................................................... 125<br />
8 Apéndice ...............................................................................................................................................126<br />
8.1 Cuadros <strong>de</strong> clasificación (para diversas clasificaciones <strong>de</strong> audiencia) .................................................................. 126<br />
8.1.1 Clasificaciones <strong>de</strong> TV (basadas en edad)........................................................................................................... 126<br />
8.1.2 Clasificaciones <strong>de</strong> control paterno <strong>de</strong> TV <strong>de</strong> EE.UU. (basadas en edad/categoría)....................................... 126<br />
8.1.3 Clasificaciones <strong>de</strong> cine MPAA (basadas en edad)............................................................................................ 126<br />
8.1.4 Clasificaciones canadienses en inglés (basadas en edad) .............................................................................. 127<br />
8.1.5 Clasificaciones canadienses en francés (basadas en edad)............................................................................ 127<br />
8.2 Códigos <strong>de</strong> fabricantes para programar el mando a distancia ................................................................................ 128<br />
8.2.1 Cable...................................................................................................................................................................... 128<br />
8.2.2 Satélite................................................................................................................................................................... 128<br />
8.2.3 Vi<strong>de</strong>ograbadora (Marcas A - F) ........................................................................................................................... 129<br />
8.2.4 Vi<strong>de</strong>ograbadora (Marcas G - O)........................................................................................................................... 130<br />
8.2.5 Vi<strong>de</strong>ograbadora (Marcas P - V) ........................................................................................................................... 131<br />
8.2.6 Vi<strong>de</strong>ograbadora (Marcas W - Z) .......................................................................................................................... 132<br />
8.2.7 PVR ........................................................................................................................................................................ 132<br />
8.2.8 BD (HD-DVD)........................................................................................................................................................ 132<br />
8.2.9 DVD-R.................................................................................................................................................................... 132<br />
8.2.10 DVD (Marcas A - N)............................................................................................................................................ 133<br />
8.2.11 DVD (Marcas O - Z) ............................................................................................................................................ 134<br />
8.2.12 LD......................................................................................................................................................................... 134<br />
8.3 Especificaciones ........................................................................................................................................................... 135<br />
8.4 Glosario.......................................................................................................................................................................... 137<br />
8.5 Índice ............................................................................................................................................................................. 139<br />
8.6 Información <strong>de</strong> marcas registradas, licencias y patentes ........................................................................................ 140<br />
Español<br />
5<br />
Sp
01 Introducción a los Televisores <strong>de</strong> Pantalla Plana <strong>de</strong> la Serie 20FD<br />
1 Introducción a los Televisores <strong>de</strong> Pantalla<br />
Plana <strong>de</strong> la Serie 20FD<br />
Los Televisores <strong>de</strong> Pantalla Plana <strong>de</strong> la Serie 20FD <strong>de</strong> <strong>Pioneer</strong> incluyen el mo<strong>de</strong>lo PDP-6020FD <strong>de</strong> 60 pulgadas y<br />
el mo<strong>de</strong>lo PDP-5020FD <strong>de</strong> 50 pulgadas (tamaños <strong>de</strong> pantalla medidos diagonalmente). A continuación se provee<br />
una lista <strong>de</strong> todos los accesorios suministrado con su televisor. Si falta algo, póngase en contacto con su<br />
reven<strong>de</strong>dor o con nuestro centro <strong>de</strong> servicio inmediatamente. La información <strong>de</strong> contacto <strong>de</strong> servicio se<br />
encuentra en la parte posterior <strong>de</strong> este manual.<br />
1.1 Lista <strong>de</strong> comprobación <strong>de</strong> embarque <strong>de</strong>l televisor <strong>de</strong> pantalla plana<br />
A<strong>de</strong>más <strong>de</strong>l televisor <strong>de</strong> pantalla plana, se suministran varios accesorios para la instalación rápida y fácil <strong>de</strong>l<br />
televisor. Compruebe el contenido antes <strong>de</strong> <strong>de</strong>sechar o permitir que el instalador <strong>de</strong>seche cualquier material <strong>de</strong><br />
empaque.<br />
Os embarques <strong>de</strong>l PDP-6020FD y <strong>de</strong>l PDP-5020FD tienen piezas ligeramente diferentes. Compruebe los<br />
accesorios en la lista apropiada a continuación.<br />
Se requiere un <strong>de</strong>stonillador Philips para montar los altavoces y fijar el soporte.<br />
Se suministra con ambos mo<strong>de</strong>los<br />
Mando a distancia Pilas para el mando a distancia (2) Paño <strong>de</strong> limpieza<br />
Cable <strong>de</strong> alimentación (2 m/6,6 pies) Abraza<strong>de</strong>ras <strong>de</strong> cables (4) Manual <strong>de</strong> instrucciones<br />
Tarj<strong>et</strong>a <strong>de</strong> garantía<br />
También se suministra con el PDP-6020FD (pantalla <strong>de</strong> 60”)<br />
Kit <strong>de</strong> soporte<br />
Cubierta <strong>de</strong> la base Tubos <strong>de</strong>l soporte (2)<br />
Tornillos plateados (4) (4×10 mm) Tornillos negros (4) (M6×20 mm)<br />
6<br />
Sp
Introducción a los Televisores <strong>de</strong> Pantalla Plana <strong>de</strong> la Serie 20FD<br />
01<br />
También se suministra con el PDP-6020FD (pantalla <strong>de</strong> 60”)<br />
Accesorio m<strong>et</strong>álico <strong>de</strong> prevención contra caída (2) Tornillos para los accesorios m<strong>et</strong>álicos (4)<br />
(M4×35 mm)<br />
Accesorios <strong>de</strong> altavoz<br />
Cables <strong>de</strong> altavoz (2)<br />
Altavoz<br />
Tornillos <strong>de</strong> montaje <strong>de</strong> altavoz (9) (M5×10 mm)<br />
Ménsula <strong>de</strong> altavoz (Centro) Ménsulas <strong>de</strong> altavoz (Izquierda y Derecha)<br />
Español<br />
Kit <strong>de</strong> soporte<br />
Accesorio m<strong>et</strong>álico <strong>de</strong><br />
prevención contra caída (2)<br />
También se suministra con el PDP-5020FD (pantalla <strong>de</strong> 50”)<br />
Tornillos para los accesorios<br />
m<strong>et</strong>álicos (2) (M4×35 mm)<br />
Accesorios <strong>de</strong> altavoz<br />
Cables <strong>de</strong> altavoz (2) Ménsulas <strong>de</strong> altavoz (Lado) (2) Altavoz<br />
Tornillos <strong>de</strong> montaje <strong>de</strong> altavoz (9)<br />
(M5×10 mm)<br />
Ménsula <strong>de</strong> altavoz (Centro)<br />
7<br />
Sp
01 Introducción a los Televisores <strong>de</strong> Pantalla Plana <strong>de</strong> la Serie 20FD<br />
1.2 Opciones <strong>de</strong> control: Conocimiento <strong>de</strong> su televisor <strong>de</strong> pantalla plana<br />
Pue<strong>de</strong> operar su televisor <strong>de</strong> pantalla plana con los botones <strong>de</strong> la pantalla o con el mando a distancia. En las<br />
siguientes secciones se <strong>de</strong>scriben las ubicaciones y operaciones <strong>de</strong> los botones para la pantalla y mando a distancia.<br />
1.2.1 Botones <strong>de</strong> control y otros en el televisor <strong>de</strong> pantalla plana<br />
Su televisor <strong>de</strong> pantalla plana tiene botones, indicadores y <strong>sens</strong>ores en el bisel <strong>de</strong>lantero inferior, así como otros<br />
botones, conmutadores y puertos en los lados <strong>de</strong> la pantalla. Refiérase a los dibujos a continuación para las<br />
ubicaciones y funciones específicas. O, para los puertos y terminales traseros solamente, refiérase a la hoja <strong>de</strong><br />
posición <strong>de</strong> los terminales que se encuentra cerca <strong>de</strong>l compartimiento <strong>de</strong> los terminales <strong>de</strong> la pantalla para<br />
i<strong>de</strong>ntificar las diversas opciones.<br />
Mo<strong>de</strong>los <strong>de</strong> la serie 20FD: Cara <strong>de</strong> la pantalla<br />
(PDP-5020FD)<br />
1 2 3 4 5 6<br />
1 -Indicador <strong>de</strong> alimentación (ON)<br />
2 -Indicador STANDBY<br />
3 -Indicador SLEEP<br />
Lado <strong>de</strong> la pantalla (lado izquierdo)<br />
7<br />
8<br />
12<br />
13<br />
14<br />
4 -Sensor <strong>de</strong> luz ambiental<br />
5 -Sensor <strong>de</strong>l mando a distancia<br />
6 -Bisel (algunos lo llaman “panel <strong>de</strong>lantero”)<br />
7 -Terminal USB<br />
8 -Terminal INPUT 7 (HDMI)<br />
9 -Terminal PHONES<br />
10 -Terminal INPUT 3 (Ví<strong>de</strong>o)<br />
11 -Terminales INPUT 3 (Audio)<br />
12 -Botón STANDBY/ON<br />
13 -Botón INPUT<br />
14 -Botones VOLUME Más/Menos<br />
15 -Botones CHANNEL Más/Menos<br />
9<br />
15<br />
10<br />
11<br />
8<br />
Sp
Introducción a los Televisores <strong>de</strong> Pantalla Plana <strong>de</strong> la Serie 20FD<br />
01<br />
1 -Terminal ANT<br />
2 -Terminal <strong>de</strong> entrada <strong>de</strong> PC (RGB analógico)<br />
3 -Terminal <strong>de</strong> entrada <strong>de</strong> CA<br />
(banco superior)<br />
Parte trasera <strong>de</strong> la pantalla<br />
1 2 3<br />
4 11 12 13 14 15 16 17 18 19 20 21<br />
(banco medio)<br />
Español<br />
5<br />
6 7 8<br />
4 -Puerto <strong>de</strong> cable Ethern<strong>et</strong><br />
5 -Terminal INPUT 4 (HDMI)<br />
6 -Terminal INPUT 5 (HDMI)<br />
7 -Terminal INPUT 6 (HDMI)<br />
8 -Terminal RC-232C (para uso <strong>de</strong> fábrica)<br />
9 -Terminales INPUT 4 (Audio)<br />
10 -Terminales INPUT 5 (Audio)<br />
11 -Terminal SUBWOOFER OUT<br />
12 -Terminales AUDIO OUT (Audio)<br />
13 -Terminal INPUT 1 (S-Ví<strong>de</strong>o)<br />
9 10 22<br />
14 -Terminal INPUT 1 (Ví<strong>de</strong>o)<br />
15 -Terminales INPUT 1 (Audio)<br />
16 -Terminal INPUT 2 (Ví<strong>de</strong>o)<br />
17 -Terminales INPUT 2 (Audio)<br />
18 -Terminales INPUT 2 (Componente, Y, P B , P R )<br />
19 -Terminal PC INPUT (Audio)<br />
20 -Terminal CONTROL OUT<br />
21 -Terminal DIGITAL OUT (Optical)<br />
22 -Terminal SPEAKERS (<strong>de</strong>recho/izquierdo)<br />
(PDP-6020FD)<br />
(banco inferior)<br />
23 -Terminal <strong>de</strong> altavoz (R) (lado <strong>de</strong>l altavoz)<br />
24 -Terminal <strong>de</strong> altavoz (L) (lado <strong>de</strong>l altavoz)<br />
23 24 25<br />
25 -Botón <strong>de</strong> encendido<br />
Los terminales en los paneles lateral y trasero son comunes a ambos mo<strong>de</strong>los 20FD.<br />
9<br />
Sp
01 Introducción a los Televisores <strong>de</strong> Pantalla Plana <strong>de</strong> la Serie 20FD<br />
1.2.2 Operación con el mando a distancia<br />
El mando a distancia para las pantallas <strong>de</strong> la serie 20FD es una herramienta muy útil. En esta sección se provee<br />
una breve introducción a su mando a distancia mientras en las secciones subsiguientes se exploran operaciones<br />
más avanzadas.<br />
Coloque las pilas en el mando a distancia<br />
Para abrir, presione y <strong>de</strong>slice la tapa <strong>de</strong>l compartimiento <strong>de</strong> las pilas en la dirección <strong>de</strong> las flechas.<br />
Coloque las dos pilas <strong>de</strong> tamaño AA suministradas con sus extremos <strong>de</strong> polaridad negativa (–) primero.<br />
Las pilas suministradas con este producto pue<strong>de</strong>n durar menos <strong>de</strong> lo esperado <strong>de</strong>bido a las condiciones <strong>de</strong><br />
almacenamiento. Si el mando a distancia parece estar fallando o débil, reemplace las pilas por pilas alcalinas<br />
nuevas.<br />
No mezcle nunca pilas usadas con nuevas. Mezclar pilas usadas con nuevas pue<strong>de</strong> reducir la duración <strong>de</strong> las<br />
pilas nuevas o causar fugas <strong>de</strong>l electrólito en las pilas viejas. Mezclar pilas <strong>de</strong> tipos o marcas diferentes también<br />
pue<strong>de</strong> causar problemas, ya que las pilas tienen características ligeramente diferentes.<br />
Nota: Saque las pilas si no va a utilizar el mando a distancia <strong>de</strong>l televisor <strong>de</strong> pantalla plana durante un largo<br />
período <strong>de</strong> tiempo.<br />
Cuando tire las pilas usadas, asegúrese <strong>de</strong> cumplir con los<br />
reglamentos gubernamentales y con las instrucciones <strong>de</strong><br />
protección <strong>de</strong>l medio ambiente aplicables a su país o área.<br />
Problemas <strong>de</strong>l mando a distancia<br />
Hay varios problemas que pue<strong>de</strong>n ocurrir con su mando a distancia, pero el problema más común es la <strong>de</strong>bilidad<br />
<strong>de</strong> las pilas. Pilas débiles en el mando a distancia pue<strong>de</strong>n causar un fallo <strong>de</strong> comunicación o solamente el<br />
funcionamiento esporádico. En este caso, aproxímese a la pantalla e intente operarla con el mando a distancia.<br />
Si la pantalla respon<strong>de</strong>, reemplace las pilas. Si aproximarse <strong>de</strong> la pantalla no tiene efecto, compruebe los<br />
alre<strong>de</strong>dores para ver si no hay obj<strong>et</strong>os que estén bloqueando la señal. Consi<strong>de</strong>re también otros equipos con<br />
mando a distancia que estén en el área alre<strong>de</strong>dor <strong>de</strong> la pantalla. Obj<strong>et</strong>os y otras señales IR pue<strong>de</strong>n perjudicar el<br />
funcionamiento <strong>de</strong>l mando a distancia. Para más información sobre el mando a distancia, consulte “6.1<br />
Preguntas frecuentes (FAQ)”.<br />
10<br />
Sp
Introducción a los Televisores <strong>de</strong> Pantalla Plana <strong>de</strong> la Serie 20FD<br />
01<br />
Alcance <strong>de</strong> funcionamiento <strong>de</strong>l mando a distancia<br />
Para controlar el televisor <strong>de</strong> pantalla plana, apunte el mando a distancia hacia el <strong>sens</strong>or en la esquina inferior<br />
<strong>de</strong>recha <strong>de</strong> la pantalla. Para uma operación fácil, mantenga la distancia entre el mando a distancia y el <strong>sens</strong>or<br />
<strong>de</strong>ntro <strong>de</strong> 7 m<strong>et</strong>ros (23 pies) en un ángulo inferior a 30 grados.<br />
30º<br />
7 m<br />
(23 pies)<br />
30º<br />
Sensor<br />
Pue<strong>de</strong> que el mando a distancia no funcione correctamente si el <strong>sens</strong>or está bajo la luz directa <strong>de</strong>l sol o bajo una<br />
iluminación muy brillante. Si su sala <strong>de</strong> contemplación es naturalmente clara, cambie la posición <strong>de</strong> la pantalla<br />
o utilice el mando a distancia físicamente más cerca <strong>de</strong>l <strong>sens</strong>or <strong>de</strong> la pantalla.<br />
Español<br />
Nota: Si se <strong>de</strong>ja el mando a distancia bajo la luz directa <strong>de</strong>l sol o bajo una luz muy fuerte, su caja podría alabearse<br />
o <strong>de</strong>formarse.<br />
11<br />
Sp
01 Introducción a los Televisores <strong>de</strong> Pantalla Plana <strong>de</strong> la Serie 20FD<br />
1.2.3 Botones <strong>de</strong>l mando a distancia<br />
Exc<strong>et</strong>o algunas opciones, los comandos disponibles con los botones <strong>de</strong>l televisor <strong>de</strong> pantalla plana también se<br />
encuentran en el mando a distancia. A<strong>de</strong>más, se pue<strong>de</strong> programar el mando a distancia para controlar otros<br />
equipos tales como un reproductor DVD, sistema <strong>de</strong> sonido envolvente, <strong>et</strong>c. En la sección “5 Utilización <strong>de</strong> otros<br />
equipos con su televisor <strong>de</strong> pantalla plana” se explica cómo utilizar el mando a distancia para controlar otros<br />
equipos.<br />
En esta sección se i<strong>de</strong>ntifican y se <strong>de</strong>scriben los botones <strong>de</strong>l mando a distancia.<br />
Mando a distancia: Botones <strong>de</strong>l lado izquierdo (<strong>de</strong> arriba a abajo, <strong>de</strong> la izquierda a la <strong>de</strong>recha)<br />
TV :<br />
Para encen<strong>de</strong>r o colocar la pantalla en el modo <strong>de</strong> espera<br />
INPUT:<br />
Para seleccionar una fuente (INPUT 1 a INPUT 7)<br />
PC:<br />
Para seleccionar el terminal PC como una fuente <strong>de</strong> entrada<br />
AV SELECTION:<br />
Para seleccionar las configuraciones <strong>de</strong> audio y ví<strong>de</strong>o<br />
Fuente <strong>de</strong> AV: ÓPTIMO, RENDIMIENTO, DINÁMICO,<br />
PELÍCULA, JUEGO, DEPORTE, Estándar<br />
Fuente <strong>de</strong> PC: ESTÁNDAR, USUARIO<br />
SPLIT:<br />
Para cambiar la visualización a través <strong>de</strong> pantalla única,<br />
2-pantallas, imagen-en-imagen<br />
FREEZE:<br />
Para congelar un fotograma <strong>de</strong> una imagen en movimiento y<br />
para cancelar la función al pulsarlo nuevamente<br />
Botones numéricos <strong>de</strong> 0 a 9:<br />
Para seleccionar un canal<br />
•(punto):<br />
Para introducir un punto para seleccionar un subcanal<br />
VOL +/–:<br />
Para ajustar el volumen<br />
EXIT:<br />
Para salir <strong>de</strong>l menú y volver a la pantalla normal<br />
Botones <strong>de</strong> flecha:<br />
Para navegar por las pantallas <strong>de</strong> menú<br />
HOME MENU:<br />
Para visualizar el HOME MENU<br />
Botones <strong>de</strong> color (Rojo, Ver<strong>de</strong>, Azul, Amarillo):<br />
Para controlar un reproductor BD, solamente para las<br />
funciones <strong>de</strong>l Control HDMI<br />
HDMI CONTROL:<br />
Para seleccionar las funciones <strong>de</strong>l Control HDMI<br />
SELECT:<br />
Para seleccionar TV/RCV, CBL/SAT, VCR o DVD/DVR<br />
1<br />
2<br />
3<br />
4<br />
5<br />
6<br />
7<br />
8<br />
9<br />
10<br />
11<br />
12<br />
13<br />
14<br />
15<br />
1<br />
3 4<br />
5 6<br />
8<br />
9<br />
10<br />
12<br />
14<br />
15<br />
2<br />
7<br />
13<br />
11<br />
12<br />
Sp
Introducción a los Televisores <strong>de</strong> Pantalla Plana <strong>de</strong> la Serie 20FD<br />
01<br />
Mando a distancia: Botones <strong>de</strong>l lado <strong>de</strong>recho (<strong>de</strong> arriba a abajo, <strong>de</strong> la izquierda a la <strong>de</strong>recha)<br />
16<br />
17 18<br />
19 20<br />
21<br />
22<br />
23 24<br />
26<br />
25<br />
27<br />
28<br />
29<br />
16 TV/DTV:<br />
Para seleccionar canales <strong>de</strong> TV analógicos o digitales<br />
17 DISPLAY:<br />
Para visualizar la información <strong>de</strong> un canal<br />
18 SCREEN SIZE:<br />
Para seleccionar el tamaño <strong>de</strong> la pantalla<br />
19 SWAP:<br />
Para alternar entre dos pantallas cuando<br />
esté viendo 2-pantallas o imagen-en-imagen<br />
20 SHIFT:<br />
Para <strong>de</strong>splazar la ubicación <strong>de</strong> la pantalla pequeña cuando<br />
esté viendo imagen-en-imagen<br />
21 CH ENTER:<br />
Para cambiar el canal<br />
22 CH RETURN:<br />
Para volver al canal anterior<br />
23 MUTING:<br />
Para apagar el sonido mientras se continua la reproducción <strong>de</strong>l<br />
ví<strong>de</strong>o<br />
24 CH +/–:<br />
Para cambiar a través <strong>de</strong> los canales<br />
25 TOOLS:<br />
Para visualizar el menú TOOLS - Consulte “3.6 Iniciación<br />
inteligente para nuevos usuarios”<br />
26 ENTER:<br />
Para ejecutar un comando<br />
27 RETURN:<br />
Para volver a la pantalla <strong>de</strong>l menú anterior<br />
28 Control <strong>de</strong> reproductor/grabadora:<br />
Utilice estos botones para controlar los equipos conectados<br />
29 HMG (Home Media Gallery):<br />
Para visualizar el menú Home Media Gallery<br />
Utilice este botón para iniciar una grabación (solamente para<br />
grabadora VCR/DVD)<br />
Español<br />
13<br />
Sp
02 Instalación <strong>de</strong> su televisor <strong>de</strong> pantalla plana<br />
2 Instalación <strong>de</strong> su televisor <strong>de</strong> pantalla plana<br />
Hay varias opciones <strong>de</strong> instalación <strong>de</strong> su televisor <strong>de</strong> pantalla plana. En este capítulo se <strong>de</strong>scribe cómo elegir una<br />
ubicación <strong>de</strong> instalación, los mejores métodos <strong>de</strong> montaje, y cómo instalar su pantalla.<br />
2.1 Selección <strong>de</strong> la ubicación y <strong>de</strong>l método <strong>de</strong> montaje<br />
Su televisor <strong>de</strong> pantalla plana es muy <strong>de</strong>lgado. La pantalla requiere una superficie sólida y algún tipo <strong>de</strong><br />
estructura <strong>de</strong> apoyo (un soporte, mesa, <strong>et</strong>c.) para protegerla contra caídas o acci<strong>de</strong>ntes similares. Utilice los<br />
accesorios y las piezas <strong>de</strong> instalación que se suministran. <strong>Pioneer</strong> recomienda la instalación por un instalador<br />
calificado siempre que sea posible.<br />
In<strong>de</strong>pendientemente <strong>de</strong>l método <strong>de</strong> montaje, suj<strong>et</strong>e o fije su televisor <strong>de</strong> pantalla plana utilizando una<br />
combinación <strong>de</strong> los agujeros <strong>de</strong> montaje y/o los pernos suministrados.<br />
Vista trasera (PDP-6020FD)<br />
Agujero <strong>de</strong><br />
montaje<br />
Agujero <strong>de</strong><br />
montaje<br />
Vista lateral<br />
Superficie <strong>de</strong> montaje<br />
Ménsula <strong>de</strong><br />
montaje<br />
(o componente<br />
equivalente)<br />
Tornillo M8<br />
12 mm a 18 mm<br />
(0,5 a 0,7 pulgada)<br />
Vista trasera (PDP-5020FD)<br />
W<br />
W<br />
Agujero <strong>de</strong><br />
montaje<br />
W<br />
W<br />
Agujero <strong>de</strong><br />
montaje<br />
T<br />
T<br />
W<br />
W<br />
Nota: Algunas opciones <strong>de</strong> instalación requieren un tipo diferente <strong>de</strong> perno. Compruebe con su instalador o<br />
reven<strong>de</strong>dor para comprar los pernos apropiados.<br />
14<br />
Sp
Instalación <strong>de</strong> su televisor <strong>de</strong> pantalla plana<br />
02<br />
2.1.1 Comprobación <strong>de</strong> la apropiabilidad <strong>de</strong> la ubicación<br />
Al elegir la ubicación para la pantalla, hay diversos factores que <strong>de</strong>be tomar en consi<strong>de</strong>ración. El lugar <strong>de</strong><br />
instalación <strong>de</strong>be estar alejado <strong>de</strong> la luz directa <strong>de</strong>l sol y tener ventilación suficiente alre<strong>de</strong>dor <strong>de</strong>l televisor <strong>de</strong><br />
pantalla plana para permitir su enfriamiento a<strong>de</strong>cuado. El diagrama a continuación es un ejemplo <strong>de</strong> una<br />
pantalla montada en un soporte con la ventilación apropiada.<br />
Más <strong>de</strong><br />
10 cm<br />
(3 15/16<br />
pulgadas)<br />
Más <strong>de</strong> 50 cm<br />
(19 11/16 pulgadas)<br />
La distancia d<strong>et</strong>rás y arriba <strong>de</strong> la pantalla<br />
cambia <strong>de</strong>pendiendo <strong>de</strong>l método <strong>de</strong> montaje<br />
que elija. Consulte su reven<strong>de</strong>dor o instalador<br />
profesional para la ventilación apropiada.<br />
Español<br />
Utilice la lista <strong>de</strong> comprobación a continuación para los lugares <strong>de</strong> instalación posibles.<br />
Ventilación suficiente<br />
Seguro <strong>de</strong> vibraciones excesivas<br />
Alejado <strong>de</strong> acondicionadores <strong>de</strong> aire<br />
Libre <strong>de</strong> humedad<br />
Sin peligro <strong>de</strong> salpicadura <strong>de</strong> agua<br />
Tendido seguro <strong>de</strong> los cables<br />
Sin peligro <strong>de</strong> sobrecargas <strong>de</strong> energía<br />
Separado <strong>de</strong> otros equipos IR<br />
Protegido contra impactos y golpes<br />
Distante <strong>de</strong> fuentes <strong>de</strong> calor<br />
Fuera <strong>de</strong>l alcance <strong>de</strong> los rayos solares<br />
Alejado <strong>de</strong> fuentes <strong>de</strong> luz fuertes<br />
Para las precauciones específicas e información <strong>de</strong> seguridad, consulte “7.2 Consi<strong>de</strong>raciones sobre la ubicación<br />
física y temperatura” y “7.7 Precauciones <strong>de</strong> seguridad”.<br />
2.1.2 Cómo levantar y/o <strong>de</strong>splazar su pantalla<br />
El televisor <strong>de</strong> pantalla plana está construido para ser resistente, pero <strong>de</strong>bido a su tecnología, se <strong>de</strong>be manipular<br />
la pantalla con cuidado. Utilice los asi<strong>de</strong>ros instalados en la parte trasera <strong>de</strong>l televisor <strong>de</strong> pantalla plana para<br />
levantarlo. Para evitar la flexión o torsión <strong>de</strong> la pantalla, son necesarias por lo menos dos personas para levantar<br />
y <strong>de</strong>splazar la pantalla. No <strong>de</strong>splace el televisor <strong>de</strong> pantalla plana agarrando solamente un único asi<strong>de</strong>ro o<br />
arrastrando el televisor por sus asi<strong>de</strong>ros.<br />
Utilice los asi<strong>de</strong>ros para <strong>de</strong>splazar la<br />
pantalla. No <strong>de</strong>splace la pantalla por<br />
el altavoz o ménsula <strong>de</strong>l altavoz.<br />
Nota: No utilice los asi<strong>de</strong>ros para suspen<strong>de</strong>r el televisor <strong>de</strong> pantalla plana o como anclajes para prevenir que la<br />
pantalla <strong>de</strong>slice o caiga <strong>de</strong>spués que esté montada.<br />
15<br />
Sp
02 Instalación <strong>de</strong> su televisor <strong>de</strong> pantalla plana<br />
2.2 Instalación <strong>de</strong> la pantalla con un soporte<br />
2.2.1 Utilice o extraiga el soporte incluido<br />
El PDP-5020FD viene con un soporte <strong>de</strong> mesa <strong>Pioneer</strong> (soporte) instalado. Instale el soporte suministrado en la<br />
pantalla para el PDP-6020FD. Para el PDP-5020FD, instale los accesorios m<strong>et</strong>álicos <strong>de</strong> prevención <strong>de</strong> caída<br />
<strong>de</strong>spués <strong>de</strong> colocar la pantalla <strong>de</strong> pie.<br />
(PDP-5020FD)<br />
Tornillos <strong>de</strong> instalación<br />
(M4 x 35 mm: negro)<br />
Accesorio m<strong>et</strong>álico <strong>de</strong> prevención contra caída<br />
Para instalar el soporte en la pantalla<br />
No manipule el televisor <strong>de</strong> pantalla plana en una plataforma o<br />
pal<strong>et</strong>a que sea menor que su soporte. El soporta se curvará.<br />
1 ) Extraiga el altavoz si ya ha sido instalado.<br />
Refiérase a “Colocación y extracción <strong>de</strong>l altavoz” en la página 18 para ayuda.<br />
2 ) Acueste el televisor <strong>de</strong> pantalla plana en una superficie elevada con la base <strong>de</strong>l soporte suspendida sobre<br />
el bor<strong>de</strong>.<br />
3 ) Coloque todas las partes <strong>de</strong>l soporte sobre un paño blando para evitar arañazos.<br />
Si está montando el PDP-6020FD, continúe con los pasos 4 y 5. Si está montando el PDP-5020FD, salte al paso 7.<br />
4 ) Vuelva la cubierta <strong>de</strong> la base <strong>de</strong> modo que su parte inferior que<strong>de</strong> hacia arriba.<br />
5 ) Inserte las piernas <strong>de</strong>l soporte en la cubierta <strong>de</strong> la base.<br />
Instale las piernas (izquierda y <strong>de</strong>recha) cuidadosamente, <strong>de</strong> forma que que<strong>de</strong>n en las posiciones correctas.<br />
Piernas <strong>de</strong>salineadas pue<strong>de</strong>n sufrir daños y/o dañar la base.<br />
6 ) Apri<strong>et</strong>e los tornillos <strong>de</strong> la base para fijar las piernas en sus lugares.<br />
Tornillos<br />
(4 x 10 mm: plateado)<br />
Tornillos<br />
(4 x 10 mm: plateado)<br />
Parte<br />
trasera<br />
Parte frontal<br />
Soporte<br />
compl<strong>et</strong>ado<br />
Hoja<br />
Cubierta <strong>de</strong><br />
la base<br />
16<br />
Sp<br />
Nota: Monte el soporte con una hoja blanda por <strong>de</strong>bajo <strong>de</strong> la cubierta <strong>de</strong> base. Si no se pone una hoja antes <strong>de</strong>l<br />
montaje, pue<strong>de</strong> que se arañe la superficie frontal <strong>de</strong> la cubierta <strong>de</strong> la base.
Instalación <strong>de</strong> su televisor <strong>de</strong> pantalla plana<br />
02<br />
7 ) Después <strong>de</strong> montar el soporte, instale los accesorios m<strong>et</strong>álicos <strong>de</strong> prevención contra caída utilizando los<br />
tornillos <strong>de</strong> instalación.<br />
(PDP-6020FD)<br />
Tornillos <strong>de</strong> instalación<br />
(M4 x 35 mm: negro)<br />
Accesorio m<strong>et</strong>álico <strong>de</strong><br />
prevención contra caída<br />
8 ) Con el televisor <strong>de</strong> pantalla plana todavía vuelto hacia abajo, inserte las piernas <strong>de</strong>l soporte en la parte<br />
inferior <strong>de</strong> la pantalla y, a continuación, apri<strong>et</strong>e los tornillos.<br />
Alinee los soportes <strong>de</strong> columna con la parte<br />
inferior <strong>de</strong>l televisor <strong>de</strong> pantalla plana.<br />
Pernos <strong>de</strong><br />
instalación<br />
(M6 x 20 mm)<br />
Pernos <strong>de</strong><br />
instalación<br />
(M6 x 20 mm)<br />
Español<br />
Inserte las piernas <strong>de</strong>l soporte en el televisor<br />
<strong>de</strong> pantalla plana <strong>de</strong> forma que la flecha<br />
marcada con “FRONT/FACE AVANT” en la<br />
parte inferior <strong>de</strong>l soporte<br />
que<strong>de</strong> hacia abajo.<br />
9 ) Con el auxilio <strong>de</strong> por lo menos una otra persona, levante la pantalla verticalmente y, a continuación,<br />
<strong>de</strong>splácela a su lugar <strong>de</strong> instalación.<br />
17<br />
Sp
02 Instalación <strong>de</strong> su televisor <strong>de</strong> pantalla plana<br />
Colocación y extracción <strong>de</strong>l altavoz<br />
El altavoz <strong>de</strong>l televisor <strong>de</strong> pantalla plana suministra un sonido claro <strong>de</strong> alta calidad. El balance izquierdo/<strong>de</strong>recho<br />
está encerrado en una unidad simple para facilidad <strong>de</strong> instalación y compacticidad. Mientras se pue<strong>de</strong> añadir y<br />
extraer otros dispositivos <strong>de</strong> la pantalla montada, instale el altavoz físicamente por último. Desenchufe los cables<br />
<strong>de</strong>l altavoz y EXTRAIGA EL ALTAVOZ antes <strong>de</strong> montar o <strong>de</strong>splazar la pantalla.<br />
Antes <strong>de</strong> colocar el altavoz en la pantalla montada, repase la información a continuación.<br />
• Acueste la pantalla boca abajo en una superficie estable cuando instale las ménsulas <strong>de</strong>l altavoz.<br />
• Sólo utilice los tornillos suministrados y apriételos firmemente antes <strong>de</strong> pasar a<strong>de</strong>lante.<br />
• El altavoz es ancho y se requiere más <strong>de</strong> una persona para manipularlo.<br />
• Manipule el altavoz con cuidado para proteger la caja y la reja contra arañazos y otros daños.<br />
• Colocar un monitor CRT cerca <strong>de</strong>l altavoz pue<strong>de</strong> enturbiar la imagen en el televisor <strong>de</strong> pantalla plana.<br />
Mantenga una cierta distancia entre el altavoz y el monitor.<br />
• Conectar este altavoz a otra pantalla o dispositivo pue<strong>de</strong><br />
dañar los productos o causar un incendio.<br />
• Cuando utilice el control <strong>de</strong> tono para aumentar los agudos,<br />
evite aumentar el volumen <strong>de</strong>masiadamente.<br />
Nota: Utilice los materiales <strong>de</strong> empaque <strong>de</strong> espuma para proteger el equipo contra arañazos u otros daños<br />
durante el montaje.<br />
Pantalla montada en el soporte<br />
Mientras sea posible instalar las ménsulas <strong>de</strong> altavoz en el televisor <strong>de</strong> pantalla plana mientras el mismo está en<br />
pie, es más fácil montar las ménsulas con la pantalla acostada. Después <strong>de</strong> instalar las ménsulas, vuelva a poner<br />
la pantalla <strong>de</strong> pie y, a continuación, <strong>de</strong>splácela a la posición final antes <strong>de</strong> montar el altavoz.<br />
1 ) Instale las ménsulas <strong>de</strong> los altavoces laterales (izquierdo y <strong>de</strong>recho) en la parte trasera <strong>de</strong> la pantalla<br />
utilizando los tornillos suministrados.<br />
(PDP-6020FD)<br />
(PDP-5020FD)<br />
Tornillo <strong>de</strong> montaje <strong>de</strong><br />
altavoz (M5 x 10 mm)<br />
➁<br />
➀<br />
1 ) Apri<strong>et</strong>e el tornillo en el<br />
agujero <strong>de</strong> tornillo superior<br />
primero.<br />
2 ) Luego, apri<strong>et</strong>e el tornillo en el<br />
agujero <strong>de</strong> tornillo<br />
exactamente <strong>de</strong>bajo <strong>de</strong>l<br />
agujero superior.<br />
➁<br />
➀<br />
Ménsula <strong>de</strong> altavoz (lateral)<br />
Mirando hacia la parte trasera<br />
<strong>de</strong>l televisor <strong>de</strong> pantalla plana,<br />
los lados están invertidos.<br />
Apri<strong>et</strong>e los tornillos en el or<strong>de</strong>n<br />
que se muestra arriba.<br />
18<br />
Sp
Instalación <strong>de</strong> su televisor <strong>de</strong> pantalla plana<br />
02<br />
2 ) Instale la ménsula <strong>de</strong>l altavoz central utilizando los tornillos suministrados.<br />
Cuando ajuste los tornillos, coloque los tornillos 1 y 2 a través <strong>de</strong> los agujeros en ménsula central.<br />
(PDP-6020FD)<br />
(PDP-5020FD)<br />
Ménsula <strong>de</strong>l<br />
altavoz central<br />
➁<br />
➀<br />
➁<br />
➀<br />
Tornillo <strong>de</strong> montaje <strong>de</strong><br />
altavoz (M5 x 10 mm)<br />
Apri<strong>et</strong>e los tornillos en el or<strong>de</strong>n<br />
que se muestra arriba.<br />
3 ) Posicione el altavoz por las ménsulas.<br />
Es muy fácil confundirse y montar el altavoz boca abajo y, por lo tanto, asegúrese <strong>de</strong> que el altavoz esté<br />
alineado a<strong>de</strong>cuadamente antes <strong>de</strong> continuar.<br />
Español<br />
4 ) Inserte la ménsula <strong>de</strong> altavoz en las ranuras en la parte trasera <strong>de</strong>l altavoz.<br />
Si no se pue<strong>de</strong> montar el altavoz fácilmente, ajuste el ángulo <strong>de</strong> las ménsulas.<br />
•Inserte el altavoz <strong>de</strong>s<strong>de</strong> la parte<br />
inferior en un ángulo.<br />
•En<strong>de</strong>récelo cuando toque la ménsula<br />
<strong>de</strong>l altavoz.<br />
Nota: Invierta el procedimiento para<br />
extraer el altavoz.<br />
Hoja<br />
protectora<br />
Lado frontal <strong>de</strong>l<br />
altavoz<br />
El lado con la regl<strong>et</strong>a <strong>de</strong><br />
relleno está hacia arriba.<br />
Para propósitos<br />
ilustrativos, no se<br />
muestra el soporte.<br />
Inserte las ménsulas <strong>de</strong> altavoz en las<br />
ranuras en la parte trasera <strong>de</strong>l altavoz.<br />
5 ) Instale el altavoz en la ménsula central utilizando los tornillos suministrados.<br />
En el dibujo <strong>de</strong>l paso siguiente se muestra el or<strong>de</strong>n correcto <strong>de</strong> apri<strong>et</strong>e <strong>de</strong> los tornillos.<br />
19<br />
Sp
02 Instalación <strong>de</strong> su televisor <strong>de</strong> pantalla plana<br />
6 ) Instale el altavoz en las ménsulas laterales utilizando los tornillos suministrados.<br />
.<br />
➂<br />
➀<br />
No se utiliza el agujero <strong>de</strong> tornillo<br />
inferior en cada ménsula <strong>de</strong><br />
altavoz cuando la pantalla<br />
permanece en el soporte.<br />
Tornillo <strong>de</strong> montaje <strong>de</strong><br />
altavoz (M5 x 10 mm)<br />
➁<br />
Nota: Si se requiere reposicionar el altavoz (horizontal o verticalmente) una vez que esté instalado, afloje los<br />
tornillos <strong>de</strong> montaje <strong>de</strong> altavoz primero. Ajuste la posición y, a continuación, vuelva a apr<strong>et</strong>ar los tornillos.<br />
2.2.2 Conecte los cables <strong>de</strong> altavoz.<br />
1 ) Presione la orej<strong>et</strong>a.<br />
2 ) Inserte el hilo <strong>de</strong> color apropiado en la abertura.<br />
3 ) Deje expuesta una pequeña sección <strong>de</strong>l hilo <strong>de</strong>snudo <strong>de</strong>l cable.<br />
4 ) Suelte la orej<strong>et</strong>a para suj<strong>et</strong>ar el hilo.<br />
Si el hilo <strong>de</strong>snudo queda oculta al soltar la orej<strong>et</strong>a, repita los pasos <strong>de</strong><br />
1 a 4 hasta que la sección apropiada <strong>de</strong>l hilo que<strong>de</strong> visible.<br />
5 ) Repita este proceso para cada cable, igualando el color <strong>de</strong>l hilo con el<br />
terminal apropiado.<br />
6 ) Conecte los cables <strong>de</strong> altavoz al altavoz.<br />
7 ) Ate los cables <strong>de</strong> altavoz, cabo <strong>de</strong> alimentación y otros cables en la<br />
abraza<strong>de</strong>ra <strong>de</strong> cable y, a continuación, inserte la abraza<strong>de</strong>ra en un<br />
agujero apropiado en la parte trasera <strong>de</strong>l televisor <strong>de</strong> pantalla plana.<br />
Consulte “2.6 Tendido y atado <strong>de</strong>l cable <strong>de</strong> alimentación y cables”.<br />
Utilice las abraza<strong>de</strong>ras como sea necesario (consulte la página 30).<br />
Orej<strong>et</strong>a<br />
Gris<br />
Negro<br />
Gris<br />
Terminal <strong>de</strong> altavoz<br />
Rojo<br />
Negro<br />
Rojo<br />
(PDP-6020FD)<br />
Cable <strong>de</strong> altavoz<br />
20<br />
Sp
Instalación <strong>de</strong> su televisor <strong>de</strong> pantalla plana<br />
02<br />
PDP-6020FD con altavoz instalado<br />
Negro<br />
Gris<br />
Negro<br />
Rojo<br />
Tornillo <strong>de</strong> montaje <strong>de</strong><br />
altavoz (M5 x 10 mm)<br />
Tornillo <strong>de</strong><br />
montaje <strong>de</strong><br />
altavoz<br />
(M5 x 10 mm)<br />
Tornillo <strong>de</strong><br />
montaje<br />
<strong>de</strong> altavoz<br />
(M5 x 10 mm)<br />
Ménsula <strong>de</strong> altavoz<br />
(<strong>de</strong>recha)<br />
Cable <strong>de</strong> altavoz<br />
Ménsula <strong>de</strong> altavoz (central)<br />
Altavoz<br />
Abraza<strong>de</strong>ra <strong>de</strong> cable<br />
Ménsula <strong>de</strong> altavoz<br />
(izquierda)<br />
Español<br />
(PDP-5020FD)<br />
• Antes <strong>de</strong> conectar el altavoz al televisor <strong>de</strong> pantalla plana, <strong>de</strong>senchufe la<br />
pantalla <strong>de</strong> la toma <strong>de</strong> corriente. Conectar el cable <strong>de</strong> altavoz con el cable<br />
<strong>de</strong> alimentación enchufado pue<strong>de</strong> causar un fallo <strong>de</strong> funcionamiento o<br />
dañar la pantalla si un hilo <strong>de</strong>snudo <strong>de</strong>l cable toca otro equipo. Enchufe<br />
el cable <strong>de</strong> alimentación <strong>de</strong>spués <strong>de</strong> conectar el altavoz.<br />
• No <strong>de</strong>je los hilos <strong>de</strong> los altavoces <strong>de</strong>snudos y expuestos en los<br />
terminales. Los hilos expuestos pue<strong>de</strong>n causar un cortocircuito, que por<br />
su vez pue<strong>de</strong> causar un fallo <strong>de</strong> funcionamiento o daños <strong>de</strong>l sistema.<br />
• No conecte ningún dispositivo a los terminales <strong>de</strong> altavoces que no sea<br />
un altavoz especificado.<br />
21<br />
Sp
02 Instalación <strong>de</strong> su televisor <strong>de</strong> pantalla plana<br />
2.3 Montaje en pared/techo<br />
Acueste la pantalla <strong>de</strong> 50” en una superficie elevada y, a continuación, extraiga el soporte.<br />
Pernos <strong>de</strong> instalación (1)<br />
Pernos <strong>de</strong> instalación (2)<br />
(PDP-5020FD)<br />
Una opción <strong>de</strong> montaje común <strong>de</strong> un televisor <strong>de</strong> pantalla plana es suspen<strong>de</strong>r la pantalla en una pared robusta<br />
o <strong>de</strong>s<strong>de</strong> un techo reforzado. Cuando monte <strong>de</strong> esta forma, es necesario hacer ciertas preparaciones primero.<br />
Siga los pasos a continuación para preparar la pantalla para el montaje.<br />
1 ) Instale las ménsulas <strong>de</strong> altavoz, pero no el altavoz.<br />
Consulte “Colocación y extracción <strong>de</strong>l altavoz” para las instrucciones.<br />
2 ) Conecte los cables <strong>de</strong> altavoz al panel si no están instalados todavía.<br />
Conecte los cables SOLAMENTE al panel, y no al altavoz.<br />
(PDP-5020FD)<br />
3 ) Conecte los cables para cualesquierra otros dispositivos al panel.<br />
Cuando <strong>de</strong>cida una ubicación para su televisor <strong>de</strong> pantalla plana, consi<strong>de</strong>re los otros equipos en la sala.<br />
Equipos como una grabadora DVR, Receptor, vi<strong>de</strong>ograbadora, <strong>et</strong>c., requieren alguna forma para<br />
comunicarse con la pantalla, sea directamente o mediante otro dispositivo. Repase las instrucciones que<br />
vienen con los otros equipos para los puertos y terminales disponibles.<br />
Después <strong>de</strong> <strong>de</strong>cidir cuáles puertos y terminales son necesarios, marque las conexiones en el televisor <strong>de</strong><br />
pantalla plana para una i<strong>de</strong>ntificación más fácil una vez que la pantalla esté montada.<br />
4 ) Ate temporalmente los cables sueltos con bandas <strong>de</strong> caucho (no suministradas).<br />
5 ) Enchufe el cable <strong>de</strong> alimentación <strong>de</strong>l televisor <strong>de</strong> pantalla plana a la pantalla, pero NO enchúfele a la toma<br />
<strong>de</strong> corriente.<br />
6 ) Siga las instrucciones <strong>de</strong> instalación que se proveen para el montaje en pared/techo.<br />
22<br />
Sp<br />
Nota: Cuando instale el altavoz, refiérase al diagrama en la siguiente sección con respecto a los agujeros <strong>de</strong><br />
tornillo específicos que se utilizan para el montaje en pared o techo.
Instalación <strong>de</strong> su televisor <strong>de</strong> pantalla plana<br />
02<br />
Una vez que el televisor <strong>de</strong> pantalla plana esté montado en la pared o suspendido <strong>de</strong>l techo, siga los pasos a<br />
continuación para instalar el altavoz.<br />
1 ) Asegúrese <strong>de</strong> que las ménsulas <strong>de</strong> altavoz estén listas para soportar el altavoz.<br />
Es posible que las ménsulas que<strong>de</strong>n <strong>de</strong>salineadas <strong>de</strong>bido a sacudidas mientras instale la pantalla.<br />
2 ) Conecte los extremos sueltos <strong>de</strong> los cables <strong>de</strong> altavoz al altavoz.<br />
Si los cables han sido atados con bandas <strong>de</strong> caucho durante la instalación, extraiga las bandas antes <strong>de</strong><br />
continuar.<br />
3 ) Alinee el altavoz con las ménsulas.<br />
Es muy fácil confundirse y montar el altavoz boca abajo y, por lo tanto, asegúrese <strong>de</strong> que el altavoz esté<br />
alineado a<strong>de</strong>cuadamente antes <strong>de</strong> continuar.<br />
4 ) Inserte las ménsulas <strong>de</strong> altavoz en las ranuras en la parte trasera <strong>de</strong>l altavoz.<br />
Si no se pue<strong>de</strong> montar el altavoz fácilmente, ajuste el ángulo <strong>de</strong> las ménsulas.<br />
Español<br />
•Inserte el altavoz <strong>de</strong>s<strong>de</strong> la parte inferior en un<br />
ángulo.<br />
•En<strong>de</strong>récelo cuando toque la ménsula <strong>de</strong> altavoz.<br />
Nota: Invierta el procedimiento para extraer el<br />
altavoz.<br />
NO utilice estos agujeros cuando<br />
monte en una pared o techo.<br />
Tornillo <strong>de</strong><br />
montaje<br />
<strong>de</strong> altavoz<br />
(M5 x 10 mm)<br />
➂<br />
➀<br />
Tornillo <strong>de</strong><br />
montaje <strong>de</strong><br />
altavoz (M5 x 10 mm)<br />
➁<br />
Tornillo <strong>de</strong><br />
montaje <strong>de</strong><br />
altavoz (M5 x 10 mm)<br />
5 ) Apri<strong>et</strong>e el agujero central y, a continuación, los tornillos laterales en el or<strong>de</strong>n que se muestra arriba.<br />
Cuando instale la pantalla en una pared o techo, utilice los agujeros <strong>de</strong> tornillo inferiores en cada ménsula<br />
<strong>de</strong> altavoz.<br />
Nota: Si se requiere reposicionar el altavoz (horizontalmente) una vez que esté instalado, afloje los tornillos <strong>de</strong><br />
montaje <strong>de</strong> altavoz primero. Ajuste la posición y, a continuación, vuelva a apr<strong>et</strong>ar los tornillos.<br />
23<br />
Sp
02 Instalación <strong>de</strong> su televisor <strong>de</strong> pantalla plana<br />
2.4 Monte el televisor <strong>de</strong> pantalla plana<br />
Como su televisor <strong>de</strong> pantalla plana es <strong>de</strong>lgado pero pesado, por lo menos dos personas <strong>de</strong>ben montar y/o<br />
posicionar la pantalla. En las siguientes secciones se proveen las instrucciones para las diferentes opciones <strong>de</strong><br />
montaje y anclaje.<br />
Anclaje <strong>de</strong> la pantalla con un soporte<br />
Cuando utilice un soporte, estabilice la pantalla para prevenir que caiga. Utilice los accesorios m<strong>et</strong>álicos y<br />
tornillos suministrados par anclar la pantalla en una pared u otra estructura <strong>de</strong> apoyo sólida.<br />
Otra opción es comprar ganchos, cables y accesorios a través <strong>de</strong> su instalador o <strong>de</strong> una tienda <strong>de</strong> ferr<strong>et</strong>ería local.<br />
El tamaño y resistencia <strong>de</strong> las piezas <strong>de</strong>pen<strong>de</strong>n <strong>de</strong> la composición y espesor <strong>de</strong> la superficie <strong>de</strong> anclaje.<br />
Gancho recomendado: Diám<strong>et</strong>ro nominal <strong>de</strong> 8 mm (3/8 pulgada), largo <strong>de</strong> 12 mm a 18 mm<br />
(0,5 a 0,7 pulgada)<br />
Para anclar la pantalla utilizando el soporte suministrado, siga los pasos a continuación.<br />
1 ) Instale los ganchos en los agujeros <strong>de</strong> montaje en<br />
la parte trasera <strong>de</strong> la pantalla.<br />
2 ) Introduzca los accesorios en la pared o estructura<br />
<strong>de</strong> apoyo.<br />
3 ) Pase los cables entre los ganchos y accesorios.<br />
4 ) Apri<strong>et</strong>e los cables hasta que la pantalla que<br />
anclada, sin ningún <strong>de</strong>sequilibrio.<br />
1. Gancho<br />
2. Cable<br />
Accesorio<br />
M8<br />
12 mm a 18 mm<br />
(0,5 a 0,7 pulgada)<br />
Para estabilizar el televisor <strong>de</strong> pantalla plana en una mesa o plataforma, utilice los accesorios m<strong>et</strong>álicos y<br />
tornillos suministrados, así como tornillos para ma<strong>de</strong>ra disponibles comercialmente. Los tornillos para ma<strong>de</strong>ra<br />
se utilizan para anclar los accesorios m<strong>et</strong>álicos cuando se monta la pantalla en una superficie <strong>de</strong> ma<strong>de</strong>ra. Los<br />
tornillos <strong>de</strong>ben tener un diám<strong>et</strong>ro nominal <strong>de</strong> 4 mm (5/32 pulgada) y por lo menos 20 mm (13/16 pulgada) <strong>de</strong><br />
largo.<br />
Nota: Evite <strong>de</strong>splazar la mesa una vez que la pantalla esté instalada.<br />
24<br />
Sp
Instalación <strong>de</strong> su televisor <strong>de</strong> pantalla plana<br />
02<br />
Siga los pasos a continuación para suj<strong>et</strong>ar el televisor <strong>de</strong> pantalla plana.<br />
1 ) Marque las ubicaciones para los accesorios m<strong>et</strong>álicos y tornillos en el bor<strong>de</strong> posterior <strong>de</strong> la mesa utilizando<br />
el soporte <strong>de</strong> la pantalla para d<strong>et</strong>erminar la colocación.<br />
8 mm a 15 mm<br />
(3/8 pulgada a 5/8<br />
pulgada)<br />
4 mm<br />
(5/32 pulgada)<br />
(PDP-6020FD)<br />
(PDP-5020FD)<br />
20 mm<br />
(13/16 pulgada)<br />
mín.<br />
Tornillo para ma<strong>de</strong>ra<br />
(disponible<br />
comercialmente,<br />
4 mm x 20 mm<br />
(5/32 pulgada x<br />
13/16 pulgada) mín.)<br />
Tornillo para ma<strong>de</strong>ra<br />
(disponible<br />
comercialmente,<br />
4 mm x 20 mm<br />
(5/32 pulgada x<br />
13/16 pulgada) mín.)<br />
Español<br />
2 ) Taladre agujeros en el bor<strong>de</strong> <strong>de</strong> la mesa o plataforma en las ubicaciones marcadas.<br />
3 ) Levante la pantalla en el lugar <strong>de</strong> instalación con el auxilio <strong>de</strong> por lo menos una otra persona.<br />
4 ) Utilice tornillos para ma<strong>de</strong>ra (no suministrados) para fijar los accesorios m<strong>et</strong>álicos a la mesa.<br />
25<br />
Sp
02 Instalación <strong>de</strong> su televisor <strong>de</strong> pantalla plana<br />
2.5 Conexión a un sistema <strong>de</strong> emisión <strong>de</strong> TV y a otros dispositivos (DVR, Receptor, BDR, <strong>et</strong>c.)<br />
El tipo <strong>de</strong> equipo que se conectará a su televisor <strong>de</strong> pantalla plana d<strong>et</strong>ermina los puertos <strong>de</strong> la pantalla que se<br />
utilizarán. En las siguientes secciones se explica cómo conectar un sistema <strong>de</strong> emisión <strong>de</strong> TV y equipos <strong>de</strong><br />
reproducción tales como un reproductor DVD, sistema <strong>de</strong> sonido envolvente, vi<strong>de</strong>ograbadora, <strong>et</strong>c., a la pantalla.<br />
Si su equipo no está enumerado, consulte el manual <strong>de</strong> instrucciones que viene con su equipo para las<br />
instrucciones <strong>de</strong> conexión.<br />
2.5.1 Adición <strong>de</strong> canales <strong>de</strong> TV analógicos (convencionales) y digitales<br />
Dependiendo si una emisora <strong>de</strong> TV emite señales analógicas o digitales, su televisor <strong>de</strong> pantalla plana muestra<br />
los programas con tal que esté programado para aceptar las señales en cuestión. Para programar su pantalla<br />
para recibir emisiones <strong>de</strong> TV, seleccione el terminal ANT.<br />
T<br />
T<br />
El terminal ANT acepta tanto emisiones analógicas<br />
W<br />
W<br />
como digitales. Conecte una antena VHF/UHF y/o TV<br />
por cable al terminal ANT en la parte trasera <strong>de</strong> la<br />
pantalla y, a continuación, pulse TV/DTV en el mando<br />
a distancia para alternar entre emisión analógica y<br />
Vista trasera<br />
digital. Cuando contemple canales <strong>de</strong> TV analógicos,<br />
también pue<strong>de</strong> utilizar una antena exterior para una<br />
imagen analógica más clara.<br />
Si su antena exterior emplea un cable coaxial <strong>de</strong><br />
75 ohmios con un conector tipo-F, enchúfela al<br />
terminal <strong>de</strong> antena en la parte trasera <strong>de</strong> la pantalla.<br />
Para contemplar tanto emisiones<br />
analógicas como digitales a través <strong>de</strong><br />
su antena terrestre o conexión por<br />
cable, <strong>de</strong>be conectar un cable <strong>de</strong><br />
antena a un divisor <strong>de</strong> antena primero.<br />
2.5.2 Conexión <strong>de</strong> otro equipo <strong>Pioneer</strong><br />
En esta sección se provee la información <strong>de</strong>l cableado para otro equipo <strong>Pioneer</strong> en combinación con la pantalla.<br />
También se pue<strong>de</strong> utilizar cada diagrama como una referencia para dispositivos que no sean <strong>de</strong> <strong>Pioneer</strong>, per las<br />
ubicaciones <strong>de</strong> los puertos pue<strong>de</strong>n diferir o no ser disponibles.<br />
Conexión por cable o satélite con un <strong>de</strong>scodificador STB (S<strong>et</strong> Top Box):<br />
T<br />
W<br />
T<br />
W<br />
Antena <strong>de</strong> satélite<br />
Vista trasera<br />
SAT IN<br />
STB por cable/STB por satélite<br />
STB por cable/STB por satélite<br />
AUDIO<br />
OUT<br />
COMPONENT<br />
VIDEO OUTPUT<br />
AUDIO<br />
OUT<br />
COMPONENT<br />
VIDEO OUTPUT<br />
HDMI OUT<br />
Y<br />
IN<br />
HDMI OUT<br />
Y<br />
IN<br />
PB<br />
OUT<br />
PB<br />
OUT<br />
PR<br />
PR<br />
26<br />
Sp<br />
Cuando utilice un STB por cable o STB por satélite, enchúfelo a la toma <strong>de</strong> antena/TV por cable en la pared con el<br />
cable STB suministrado con su STB. Si su STB tiene un terminal HDMI, utilice cualquiera <strong>de</strong> INPUT 4 a INPUT 6<br />
(terminal HDMI) en la parte trasera o INPUT 7 (terminal HDMI) en el lado <strong>de</strong>l televisor <strong>de</strong> pantalla plana en vez <strong>de</strong><br />
hacer las conexiones <strong>de</strong> ví<strong>de</strong>o. Si conecta un cable <strong>de</strong> antena directamente al televisor, <strong>de</strong>be conectar el cable a<br />
un divisor <strong>de</strong> antena primero. Para los d<strong>et</strong>alles, consulte el manual <strong>de</strong> instrucciones que viene con el STB.
Instalación <strong>de</strong> su televisor <strong>de</strong> pantalla plana<br />
02<br />
Conexión <strong>de</strong> equipo HDMI (INPUT 4 a INPUT 6): Conexión <strong>de</strong> equipo HDMI (INPUT 7):<br />
Vista lateral izquierda<br />
T<br />
W<br />
T<br />
W<br />
Vista trasera<br />
Cable compatible<br />
con HDMI (cable<br />
HDMI con la<br />
marca HDMI)<br />
Equipo HDMI<br />
Cable <strong>de</strong> audio<br />
(disponible<br />
comercialmente)<br />
Haga esta<br />
conexión para<br />
introducir señales<br />
<strong>de</strong> audio<br />
analógicas.<br />
Los terminales INPUT 4 a INPUT 6 son terminales HDMI.<br />
Utilice el terminal INPUT 4 ó INPUT 5 (HDMI) cuando<br />
también <strong>de</strong>see introducir señales <strong>de</strong> audio analógicas. Para<br />
los d<strong>et</strong>alles, consulte “5.2 Utilización <strong>de</strong> las entradas HDMI”.<br />
Cable compatible<br />
con HDMI (cable<br />
HDMI con la<br />
marca HDMI)<br />
Equipo HDMI<br />
Utilice también INPUT 7 (terminal HDMI) en el lado <strong>de</strong>l<br />
panel cuando conecte un equipo HDMI. Para los d<strong>et</strong>alles,<br />
consulte “5.2 Utilización <strong>de</strong> las entradas HDMI”.<br />
Español<br />
Conexión <strong>de</strong> un reproductor DVD:<br />
Conexión <strong>de</strong> un receptor <strong>de</strong> AV:<br />
T<br />
W<br />
T<br />
W<br />
T<br />
W<br />
T<br />
W<br />
Vista trasera<br />
Vista trasera<br />
Cable <strong>de</strong> AV<br />
(disponible<br />
comercialmente)<br />
Reproductor DVD<br />
Cable <strong>de</strong> ví<strong>de</strong>o<br />
componente<br />
(disponible<br />
comercialmente)<br />
Utilice el terminal INPUT 2 para conectar un<br />
reproductor DVD u otro equipo audiovisual. Si su<br />
reproductor DVD tiene un terminal HDMI, utilice esta<br />
conexión en vez <strong>de</strong> hacer las conexiones <strong>de</strong> ví<strong>de</strong>o. Para<br />
los d<strong>et</strong>alles, consulte el manual <strong>de</strong> instrucciones que<br />
viene con el reproductor DVD.<br />
No se requiere esta<br />
conexión cuando<br />
se conecta un<br />
amplificador <strong>de</strong> AV<br />
equipado con la<br />
función surround a<br />
un subwoofer.<br />
Cable <strong>de</strong> AV<br />
(disponible<br />
comercialmente)<br />
Cable digital<br />
óptico<br />
(disponible<br />
comercialmente)<br />
Subwoofer Receptor <strong>de</strong> AV<br />
Utilice un cable digital óptico para conectar un receptor <strong>de</strong> AV<br />
al terminal DIGITAL OUT (OPTICAL). Si su receptor <strong>de</strong> AV no<br />
tiene un terminal DIGITAL IN (OPTICAL), pue<strong>de</strong> conectar el<br />
terminal AUDIO OUT (audio) <strong>de</strong> la pantalla al terminal <strong>de</strong><br />
entrada <strong>de</strong> audio <strong>de</strong>l receptor <strong>de</strong> AV. Para los d<strong>et</strong>alles, consulte<br />
el manual <strong>de</strong> instrucciones que viene con el receptor <strong>de</strong> AV.<br />
27<br />
Sp
02 Instalación <strong>de</strong> su televisor <strong>de</strong> pantalla plana<br />
Conexión <strong>de</strong> una vi<strong>de</strong>ograbadora:<br />
Conexión <strong>de</strong> una consola <strong>de</strong> vi<strong>de</strong>ojuegos o una vi<strong>de</strong>ocámara:<br />
T<br />
W<br />
T<br />
W<br />
Vista lateral izquierda<br />
Vista trasera<br />
Cable <strong>de</strong> AV<br />
(disponible<br />
comercialmente)<br />
Cable S-Ví<strong>de</strong>o<br />
(disponible<br />
comercialmente)<br />
Cable <strong>de</strong> AV<br />
(disponible<br />
comercialmente)<br />
Vi<strong>de</strong>ograbadora<br />
Utilice los terminales INPUT 1 para conectar una<br />
vi<strong>de</strong>ograbadora u otro equipo. Para los d<strong>et</strong>alles, consulte<br />
el manual <strong>de</strong> instrucciones que viene con la<br />
vi<strong>de</strong>ograbadora.<br />
Conexión <strong>de</strong> los cables <strong>de</strong> control:<br />
Vi<strong>de</strong>ocámara/Consola<br />
<strong>de</strong> vi<strong>de</strong>ojuegos<br />
Utilice los terminales INPUT 3 para conectar una consola<br />
<strong>de</strong> vi<strong>de</strong>ojuegos, vi<strong>de</strong>ocámara u otro equipo audiovisual.<br />
Para los d<strong>et</strong>alles, consulte el manual <strong>de</strong> instrucciones<br />
que viene con la consola <strong>de</strong> vi<strong>de</strong>ojuegos o vi<strong>de</strong>ocámara.<br />
Conexión <strong>de</strong> un PC:<br />
T<br />
W<br />
T<br />
W<br />
T<br />
W<br />
T<br />
W<br />
Vista trasera<br />
Vista trasera<br />
CONTROL<br />
IN<br />
OUT<br />
Cable RGB<br />
(disponible<br />
comercialmente)<br />
Cable <strong>de</strong> sonido estéreo<br />
con clavija <strong>de</strong><br />
miniconector<br />
(disponible<br />
comercialmente)<br />
(Cuando el audio <strong>de</strong> PC<br />
está conectado)<br />
PC<br />
28<br />
Sp<br />
Conecte los cables <strong>de</strong> control entre el terminal<br />
CONTROL (OUT) <strong>de</strong> la pantalla y otros equipos<br />
<strong>Pioneer</strong> que lleven el logotipo SR. Utilice un cable<br />
<strong>de</strong> sonido monofónico con una clavija <strong>de</strong><br />
miniconector (no suministrado).<br />
Utilice el terminal PC INPUT (RGB analógico) cuando conecte<br />
un PC. Si también conecta el audio <strong>de</strong> PC, utilice el terminal PC<br />
INPUT (Audio) con un cable <strong>de</strong> sonido estéreo con una clavija <strong>de</strong><br />
miniconector (no suministrado). Para los d<strong>et</strong>alles, consulte el<br />
manual <strong>de</strong> instrucciones que viene con el PC.
T<br />
W<br />
T<br />
W<br />
T<br />
W<br />
T<br />
W<br />
Instalación <strong>de</strong> su televisor <strong>de</strong> pantalla plana<br />
02<br />
2.5.3 Conexión <strong>de</strong>l cable <strong>de</strong> alimentación a la pantalla<br />
La conexión final es <strong>de</strong>l cable <strong>de</strong> alimentación. Conecte siempre el cable <strong>de</strong> alimentación <strong>de</strong> la pantalla a una<br />
toma <strong>de</strong> corriente para tres patillas y asegúrese <strong>de</strong> que el cable esté puesto a tierra correctamente. El cable<br />
incluye un filtro <strong>de</strong> ruido que reduce la interferencia eléctrica <strong>de</strong> la toma <strong>de</strong> corriente.<br />
Mientras el televisor <strong>de</strong> pantalla plana está enchufado a una toma <strong>de</strong> corriente, una pequeña cantidad <strong>de</strong><br />
corriente fluye a través <strong>de</strong> la pantalla. Cuando no va a utilizar el televisor <strong>de</strong> pantalla plana durante un largo<br />
período <strong>de</strong> tiempo, <strong>de</strong>senchúfelo <strong>de</strong> la toma <strong>de</strong> corriente. Desenchufar el televisor <strong>de</strong> pantalla plana extien<strong>de</strong> la<br />
vida <strong>de</strong> la pantalla <strong>de</strong> plasma, así como ahorra energía.<br />
Enchufe el cable a la pantalla, pero NO lo enchufe a una toma <strong>de</strong> corriente todavía.<br />
2.6 Tendido y atado <strong>de</strong>l cable <strong>de</strong> alimentación y cables<br />
Una vez que el televisor <strong>de</strong> pantalla plana esté montado y el altavoz esté instsalado, coloque los equipos<br />
adicionales en sus posiciones finales. Tienda el cable <strong>de</strong> alimentación, cables <strong>de</strong> la pantalla y cables <strong>de</strong> los otros<br />
dispositivos en un patrón lógico que funcione para el lugar. Consi<strong>de</strong>re los siguientes puntos cuando encamine<br />
los cables:<br />
• Acceso a una toma <strong>de</strong> corriente para tres patillas (puesta a tierra)<br />
• Espacio para el filtro <strong>de</strong> ruido entre la pantalla y la toma <strong>de</strong> corriente<br />
• Colocación <strong>de</strong> los cables por <strong>de</strong>bajo <strong>de</strong> alfombras o por los caminos <strong>de</strong> personas.<br />
Español<br />
Usualmente los cables tienen alguna flojedad o están muy largos. Mientras las bandas <strong>de</strong> caucho son una buena<br />
solución temporal para atar los cables, las bandas tien<strong>de</strong>n a romperse rápidamente. Para mantener los cables<br />
organizados y or<strong>de</strong>nados, utilice las abraza<strong>de</strong>ras <strong>de</strong> cable suministradas para atar los cables. En el diagrama a<br />
continuación se muestra un cable <strong>de</strong> altavoz atado.<br />
PDP-6020FD<br />
Cable <strong>de</strong> altavoz<br />
Abraza<strong>de</strong>ra <strong>de</strong> cable<br />
Ate los cables en grupos<br />
pequeños cuando sea<br />
posible para una<br />
separación posterior más<br />
fácil,<br />
cuando sea necesario.<br />
PDP-5020FD<br />
Cable <strong>de</strong> altavoz<br />
Abraza<strong>de</strong>ra <strong>de</strong> cable<br />
Se emplea una abraza<strong>de</strong>ra <strong>de</strong> cable r<strong>eu</strong>tilizable para fijar los cables atados en su lugar. Su televisor <strong>de</strong> pantalla<br />
plana tiene un total <strong>de</strong> cuatro agujeros para fijar las abraza<strong>de</strong>ras <strong>de</strong> cable a la parte trasera <strong>de</strong> la pantalla. Utilice<br />
las abraza<strong>de</strong>ras <strong>de</strong> cable como sea necesario.<br />
PDP-6020FD<br />
PDP-5020FD<br />
29<br />
Sp
02 Instalación <strong>de</strong> su televisor <strong>de</strong> pantalla plana<br />
Siga los pasos a continuación para fijar una abraza<strong>de</strong>ra <strong>de</strong> cable.<br />
1 ) Pase la banda <strong>de</strong> la abraza<strong>de</strong>ra a través <strong>de</strong>l suj<strong>et</strong>ador y ate los cables en la abraza<strong>de</strong>ra <strong>de</strong> cable.<br />
2 ) Presione y sostenga las palancas y, a continuación, inserte el gancho en un agujero apropiado en la parte<br />
trasera <strong>de</strong>l televisor <strong>de</strong> pantalla plana.<br />
3 ) Tire <strong>de</strong> la banda <strong>de</strong> la abraza<strong>de</strong>ra para bloquear.<br />
2<br />
1<br />
Abraza<strong>de</strong>ra<br />
<strong>de</strong> cable<br />
4 ) Asegúrese <strong>de</strong> que la abraza<strong>de</strong>ra <strong>de</strong> cable esté firmemente asentada en el panel.<br />
Nota: Evite oprimir o crear presión en los puntos cuando encamine o ate los cables.<br />
Para extraer la banda <strong>de</strong> la abraza<strong>de</strong>ra, tire y sostenga el pestillo para soltar la banda.<br />
Para extraer la abraza<strong>de</strong>ra <strong>de</strong> cable, presione y sostenga las palancas y, a continuación, tírela <strong>de</strong>l agujero.<br />
Pestillo<br />
Palanca<br />
Palanca<br />
Nota: Cuanto más tiempo una abraza<strong>de</strong>ra que<strong>de</strong> en posición, mayor será la posibilidad <strong>de</strong> d<strong>et</strong>erioro. Una<br />
abraza<strong>de</strong>ra antigua se daña con más facilidad durante su extracción y pue<strong>de</strong> quedarse inutilizable.<br />
30<br />
Sp
Operaciones básicas para contemplación <strong>de</strong> televisión 03<br />
3 Operaciones básicas para contemplación <strong>de</strong><br />
televisión<br />
En este capítula se explora las operaciones diarias tales como encen<strong>de</strong>r su televisor <strong>de</strong> pantalla plana, utilizar el<br />
Home Menu, y ajustar la pantalla para el área/sala <strong>de</strong> contemplación. En la sección final <strong>de</strong> este capítulo se<br />
proveen sugerencias y notas para los usuarios nuevos en los recursos <strong>de</strong> televisores <strong>de</strong> pantalla plana.<br />
3.1 Encendido y apagado <strong>de</strong>l televisor <strong>de</strong> pantalla plana<br />
Su televisor <strong>de</strong> pantalla plana tiene tres niveles <strong>de</strong> actividad: Encendido, Espera y Apagado. El modo <strong>de</strong> espera<br />
ahorra energía, pero permite que se encienda la pantalla con el mando a distancia.<br />
Las siguientes instrucciones emplean el mando a distancia. Para operar el televisor <strong>de</strong> pantalla plana a través <strong>de</strong><br />
los botones <strong>de</strong>l panel lateral, consulte “1.2.1 Botones <strong>de</strong> control y otros en el televisor <strong>de</strong> pantalla plana” para la<br />
ubicación <strong>de</strong> los botones.<br />
Encendido <strong>de</strong>l televisor <strong>de</strong> pantalla plana<br />
Para encen<strong>de</strong>r la pantalla con el mando a distancia, siga los pasos a continuación.<br />
1 ) Enchufe el cable <strong>de</strong> alimentación <strong>de</strong>l televisor <strong>de</strong> pantalla plana a una toma <strong>de</strong> corriente puesta a tierra<br />
apropiadamente.<br />
2 ) Pulse cualquiera <strong>de</strong> los botones para encen<strong>de</strong>r el televisor <strong>de</strong> pantalla plana.<br />
• Botón <strong>de</strong> alimentación (a) en la parte trasera <strong>de</strong> la pantalla en la sección inferior izquierda (consulte la<br />
página 9)<br />
• Botón STANDBY/ON en el lado <strong>de</strong> la pantalla (consulte la página 8)<br />
• Botón TV (a) <strong>de</strong>l mando a distancia ubicado en la esquina superior izquierda (consulte la página 12)<br />
Aparece la imagen en la pantalla.<br />
Nota: Utilice el botón MUTING <strong>de</strong>l mando a distancia para reducir cualquier ruido estático excesivo.<br />
3 ) Compruebe que el indicador <strong>de</strong> alimentación (ON) se encienda en azul.<br />
Español<br />
Indicador SLEEP<br />
Indicador STANDBY<br />
Indicador <strong>de</strong> alimentación (ON)<br />
Nota: En el modo <strong>de</strong> espera, pulsar el botón TV (a) <strong>de</strong>l mando a distancia encien<strong>de</strong> el televisor <strong>de</strong> pantalla plana.<br />
Apagado <strong>de</strong>l televisor <strong>de</strong> pantalla plana<br />
Apagar el televisor <strong>de</strong> pantalla plana pue<strong>de</strong> significar entrar en el modo <strong>de</strong> espera y, en este caso, funciones como el<br />
temporizador <strong>de</strong> apagado todavía tienen efecto, o también pue<strong>de</strong> significar cortar la energía a la pantalla. A menos<br />
que no vaya a utilizar el televisor <strong>de</strong> pantalla plana durante un largo período <strong>de</strong> tiempo, déjelo en el modo <strong>de</strong> espera.<br />
Nota: Cuando el televisor <strong>de</strong> pantalla plana está en el modo <strong>de</strong> espera o apagado, una pequeña cantidad <strong>de</strong><br />
corriente fluye a través <strong>de</strong>l mismo siempre y cuando esté enchufado a una toma <strong>de</strong> corriente.<br />
Siga los pasos a continuación para colocar la<br />
pantalla en el modo <strong>de</strong> espera.<br />
1 ) Pulse el botón TV ( a ) <strong>de</strong>l mando a distancia o<br />
el botón STANDBY/ON <strong>de</strong> la pantalla.<br />
2 ) Compruebe que el indicador <strong>de</strong>l modo <strong>de</strong><br />
espera se encienda en rojo.<br />
En la tabla a la <strong>de</strong>recha se proveen ejemplos <strong>de</strong><br />
cómo los indicadores se encien<strong>de</strong>n. Observe los<br />
indicadores en la frente <strong>de</strong> la pantalla para<br />
comprobar el estado <strong>de</strong> alimentación.<br />
Indicador <strong>de</strong><br />
alimentación<br />
(ON)<br />
Indicador<br />
STANDBY<br />
Estado <strong>de</strong>l televisor <strong>de</strong> pantalla plana<br />
El cable <strong>de</strong> alimentación <strong>de</strong> la pantalla<br />
está <strong>de</strong>sconectado o el cable <strong>de</strong><br />
alimentación está conectado, pero el<br />
botón <strong>de</strong> alimentación <strong>de</strong>l televisor <strong>de</strong><br />
pantalla plana (a) está <strong>de</strong>sactivado.<br />
La alimentación está conectada,<br />
pero esperando por activación<br />
La pantalla está en el modo <strong>de</strong><br />
espera<br />
31<br />
Sp
03 Operaciones básicas para contemplación <strong>de</strong> televisión<br />
3.2 Programación <strong>de</strong>l televisor <strong>de</strong> pantalla plana para contemplación <strong>de</strong> televisión<br />
Para ver televisión y tomar ventaja <strong>de</strong> algunos recursos incorporados, seleccione el tipo o tipos <strong>de</strong> canales<br />
(analógico, digital), seleccione un idioma, configure su zona <strong>de</strong> horario, y programe los canales. En las secciones<br />
a continuación se incluyen cómo configurar el tipo <strong>de</strong> canales y cómo utilizar el Home Menu para cada opción<br />
<strong>de</strong> programación.<br />
3.2.1 Selección <strong>de</strong> canales <strong>de</strong> TV analógicos o digitales<br />
Para seleccionar una configuración <strong>de</strong> canal, compruebe el terminal <strong>de</strong> entrada <strong>de</strong> antena que está conectado<br />
en la parte trasera <strong>de</strong> la pantalla. Siga las instrucciones a continuación para seleccionar los canales <strong>de</strong> TV<br />
analógicos o digitales.<br />
1) Compruebe que el mando a distancia está ajustado<br />
en TV.<br />
Ubicado en la parte inferior <strong>de</strong>l mando a distancia.<br />
2) Pulse TV/DTV en el mando a distancia.<br />
Ubicado en la parte superior <strong>de</strong>l mando a<br />
distancia.<br />
3) Seleccione la opción <strong>de</strong> canal, analógico o digital.<br />
Durante la operación, pulse TV/DTV para alternar<br />
entre las señales <strong>de</strong> TV.<br />
Nota: Consulte “2.5.1 Adición <strong>de</strong> canales <strong>de</strong> TV<br />
analógicos (convencionales) y digitales” para<br />
más información acerca <strong>de</strong> las opciones <strong>de</strong><br />
configuración <strong>de</strong> canales.<br />
Nota: Cuando esté viendo televisión e una imagen <strong>de</strong> ví<strong>de</strong>o separada (multipantalla), pulsar el botón TV/DTV <strong>de</strong>l<br />
mando a distancia cambia solamente la señal <strong>de</strong> TV que aparece en el lado izquierdo <strong>de</strong> la pantalla.<br />
3.2.2 Exploración <strong>de</strong>l Home Menu<br />
El Home Menu es el menú principal para el televisor <strong>de</strong> pantalla plana. La mayoría <strong>de</strong> los comandos y<br />
configuraciones se programan a través <strong>de</strong> este menú. En la siguiente sección se <strong>de</strong>scribe un método típico para<br />
trabajar con los menús <strong>de</strong> la pantalla. Para los procedimientos reales, consulte la(s) página(s) apropiada(s) que<br />
<strong>de</strong>scriben las funciones individuales.<br />
32<br />
Sp<br />
1) Pulse HOME MENU en el mando a<br />
distancia para acce<strong>de</strong>r al menú<br />
principal.<br />
2) Utilice las flechas arriba/abajo ( /<br />
) para resaltar un ítem <strong>de</strong>l menú.<br />
3) Utilice las flechas izquierda/<strong>de</strong>recha<br />
( / ) para <strong>de</strong>splazar a través <strong>de</strong><br />
las opciones para tal ítem <strong>de</strong>l menú.<br />
Mando a distancia<br />
Pantalla <strong>de</strong>l Home Menu<br />
Canal<br />
Favoritos<br />
Entrada<br />
Home Media Gallery<br />
Control HDMI<br />
Configuración<br />
4) Resalte la opción <strong>de</strong> menú <strong>de</strong>seada.<br />
5) Pulse ENTER para aplicar el cambio.<br />
6) Pulse RETURN para volver a la página anterior <strong>de</strong>l menú/submenú cuando cambie más <strong>de</strong> una única<br />
opción.<br />
7) Pulse HOME MENU nuevamente para salir <strong>de</strong> la pantalla <strong>de</strong>l menú.
Operaciones básicas para contemplación <strong>de</strong> televisión 03<br />
En este cuadro se provee un <strong>de</strong>sglose <strong>de</strong>l Home Menu para las fuentes <strong>de</strong> AV y PC.<br />
Fuente <strong>de</strong><br />
AV<br />
Pág Opción<br />
Canal 39 —<br />
Favoritos 39 —<br />
Entrada 39 —<br />
Home Media Gallery 83 —<br />
Control HDMI 76 —<br />
Configuración Imagen 54 Selección AV<br />
58 Contraste*<br />
58 Brillo*<br />
58 Color*<br />
58 Matiz*<br />
58 Niti<strong>de</strong>z*<br />
60 PureCinema<br />
46 Cont. sonido**<br />
45 Rendimiento ÓPTIMO**<br />
58 Reponer<br />
Sonido 46 Agudos<br />
46 Graves<br />
46 Balance<br />
67 Efecto sonido<br />
46 Reponer<br />
67 AVC<br />
Control <strong>de</strong> la 53 Ahorro <strong>de</strong> energía<br />
alimentación<br />
68 Apagado: sin señal<br />
68 Apagado: sin op.<br />
Temporizador <strong>de</strong> 41 —<br />
apagado<br />
Opción 44 Posición<br />
56 Tmño. Auto.<br />
59 Máscara lateral<br />
74 Entrada HDMI<br />
81 Conf.Control HDMI<br />
53 Orbiter<br />
53 Patrón <strong>de</strong> ví<strong>de</strong>o<br />
56 Pref. cont. juego<br />
42 Sensor luz amb.<br />
52 Protec. pantalla<br />
40 Etiqu<strong>et</strong>ar entrada<br />
Configuración 35 Instalación auto.<br />
<strong>de</strong>l sistema<br />
36 Config. TV analógica<br />
38 Config. sint. Digital<br />
47 Control Familiar<br />
64 Sub-Títulos<br />
111 Salida <strong>de</strong> audio digital<br />
47 Cambiar contraseña<br />
34 Idioma<br />
114 Información técnica<br />
Configuración <strong>de</strong> 39 Modo canal<br />
favoritos<br />
40 Organizar favoritos<br />
* Disponible cuando se selecciona cualquier<br />
opción diferente <strong>de</strong> ÓPTIMO <strong>de</strong>s<strong>de</strong> el menú<br />
Selección AV.<br />
**Disponible solamente cuando ÓPTIMO está<br />
seleccionado en el menú Selección AV<br />
Fuente <strong>de</strong><br />
PC<br />
Pág Opción<br />
Canal 39 —<br />
Favoritos 39 —<br />
Entrada 39 —<br />
Home Media Gallery 83 —<br />
Control HDMI 76 —<br />
Configuración Imagen 54 Selección AV<br />
58 Contraste<br />
58 Brillo<br />
58 Rojo<br />
58 Ver<strong>de</strong><br />
58 Azul<br />
58 Reponer<br />
Sonido 46 Agudos<br />
46 Graves<br />
46 Balance<br />
67 Efecto sonido<br />
46 Reponer<br />
67 AVC<br />
Control <strong>de</strong> la 53 Ahorro <strong>de</strong> energía<br />
alimentación<br />
68 Gestión <strong>de</strong> energía<br />
Temporizador <strong>de</strong> 41 —<br />
apagado<br />
Opción 112 Autoconfiguración<br />
112 Configuración manual<br />
74 Entrada HDMI<br />
81 Conf.Control HDMI<br />
53 Orbiter<br />
40 Etiqu<strong>et</strong>ar entrada<br />
Configuración <strong>de</strong> 39 Modo canal<br />
favoritos<br />
40 Organizar favoritos<br />
Español<br />
33<br />
Sp
03 Operaciones básicas para contemplación <strong>de</strong> televisión<br />
Componentes <strong>de</strong> la pantalla <strong>de</strong> TV<br />
Su televisor <strong>de</strong> pantalla plana tiene menú fáciles <strong>de</strong> leer, así como símbolos gráficos que proveen un acceso<br />
rápido a las opciones <strong>de</strong>seadas. Los menús que aparecen en este manual pue<strong>de</strong>n diferir ligeramente <strong>de</strong> los<br />
menús reales, pero sus funciones son iguales.<br />
1<br />
2 3<br />
Salir<br />
Sonido<br />
TELEVISION<br />
Agudos : 0<br />
Graves : 0<br />
4<br />
Reponer<br />
Balance : 0<br />
Efecto sonido :<br />
8<br />
AVC : Apagado<br />
xxxxxxxxxxxxxxxxxxxx<br />
xxxxxxxxxxxxxxxxxxxxxx<br />
HOME MENU<br />
Volver<br />
1 - Botón Salir: Cierra el menú y vuelve a la<br />
contemplación <strong>de</strong> TV.<br />
2 - Título <strong>de</strong>l menú: Visualiza el título <strong>de</strong>l menú<br />
seleccionado.<br />
3 - Botón TOOLS: Visualiza el menú TOOLS.<br />
4 - Menú: Selecciona una opción.<br />
5 - Botón HOME MENU: Cierra el menú y vuelve a<br />
la contemplación <strong>de</strong> TV.<br />
3.2.3 Asignación <strong>de</strong> un idioma<br />
El idioma <strong>de</strong> menú pred<strong>et</strong>erminado es el inglés. Para asignar un idioma diferentes para los menús e información<br />
en la pantalla, siga los pasos a continuación.<br />
1 ) Pulse HOME MENU.<br />
2 ) Seleccione Configuración <strong>de</strong>l menú principal.<br />
Utilice los botones <strong>de</strong> flecha para resaltar una opción y, a continuación, pulse ENTER.<br />
3 ) Seleccione Configuración <strong>de</strong>l sistema <strong>de</strong>l menú Configuración.<br />
4 ) Seleccione Idioma <strong>de</strong>l menú Configuración <strong>de</strong>l sistema.<br />
5 ) Seleccione un idioma <strong>de</strong>l submenú.<br />
5 6 7<br />
Menú : Español<br />
6 - Área <strong>de</strong> la guía <strong>de</strong> operación: Visualiza la guía <strong>de</strong><br />
operación para la(s) opción(es) seleccionada(s).<br />
7 - Botón Volver: Vuelve a la pantalla <strong>de</strong>l menú<br />
anterior.<br />
8 - Vista previa <strong>de</strong> imagen (en tamaño reducido)<br />
34<br />
Sp<br />
6 ) Pulse HOME MENU nuevamente para salir <strong>de</strong>l menú.
Operaciones básicas para contemplación <strong>de</strong> televisión 03<br />
3.2.4 Ajuste <strong>de</strong>l reloj<br />
Ajuste el reloj <strong>de</strong>l televisor <strong>de</strong> pantalla plana para tomar ventaja <strong>de</strong> los diversos recursos incorporados tales como<br />
la zona <strong>de</strong> horario y la activación <strong>de</strong>l horario <strong>de</strong> verano para la emisión <strong>de</strong> TV digital.<br />
Nota: Si se <strong>de</strong>senchufa el cable <strong>de</strong> alimentación <strong>de</strong> la pantalla o si hay un corte <strong>de</strong> energía, se <strong>de</strong>be reajustar la<br />
hora.<br />
Siga los pasos a continuación para ajustar el reloj.<br />
1 ) Acceda a Configuración <strong>de</strong>l sistema a través <strong>de</strong> Configuración.<br />
2 ) Seleccione Config. sint. Digital <strong>de</strong>l menú Configuración <strong>de</strong>l sistema.<br />
3 ) Seleccione Reloj <strong>de</strong>l menú Config. sint. Digital.<br />
4 ) Seleccione Zona <strong>de</strong> Horario <strong>de</strong> las opciones.<br />
5 ) Seleccione la zona <strong>de</strong> horario para su área.<br />
Zona <strong>de</strong> Horario : Atlántico<br />
D.S.T. : Encendido<br />
Español<br />
6 ) Seleccione la opción <strong>de</strong> menú D.S.T. para activar/<strong>de</strong>sactivar el horario <strong>de</strong> verano.<br />
7 ) Seleccione la opción apropiada para su localización.<br />
8 ) Pulse HOME MENU para cerrar el menú y salir.<br />
3.2.5 Creación <strong>de</strong> una lista <strong>de</strong> canales<br />
En esta sección se <strong>de</strong>scribe cómo buscar y configurar los canales <strong>de</strong> TV. Hay dos maneras <strong>de</strong> añadir canales a<br />
su televisor <strong>de</strong> pantalla plana: Instalación automática para la selección automática <strong>de</strong> los canales o Asignación<br />
manual <strong>de</strong> los canales. La instalación automática añadía todos los disponibles <strong>de</strong> su proveedor <strong>de</strong> TV<br />
seleccionado. Una vez que todos los canales tengan sido añadidos a la lista, simplemente borre los canales que<br />
no <strong>de</strong>see. En esta sección se proveen los pasos para añadir/eliminar canales.<br />
Instalación automática<br />
La instalación automática busca y añadía los canales <strong>de</strong> TV a su lista <strong>de</strong> canales que pue<strong>de</strong>n contemplarse.<br />
Utilizando el mando a distancia, siga los pasos a continuación para seleccionar automáticamente todos los<br />
canales disponibles.<br />
1 ) Acceda a Configuración <strong>de</strong>l sistema a través <strong>de</strong> Configuración.<br />
2 ) Seleccione Instaslación auto. <strong>de</strong>l menú Configuración <strong>de</strong>l sistema.<br />
3 ) Seleccione Aire/Cable, Idioma o Zona <strong>de</strong> horario <strong>de</strong>l menú Instalación auto.<br />
4 ) Seleccione una opción.<br />
• Tipo señal: Aire o Cable<br />
• Idioma: English, Français o Español<br />
• Zona <strong>de</strong> horario: Atlántico, Este, Centro, Montaña, Pacífico, Alaska o Hawaii<br />
35<br />
Sp
03 Operaciones básicas para contemplación <strong>de</strong> televisión<br />
5 ) Seleccione Iniciar.<br />
La pantalla comienza a crear su lista <strong>de</strong> canales automáticamente.<br />
Idioma : Español<br />
Aire/Cable : Cable<br />
Zona <strong>de</strong> Horario : Atlántico<br />
Iniciar<br />
Nota: Para salir <strong>de</strong> la instalación automática antes que se concluya, pulse RETURN para volver a la pantalla<br />
Instalación auto. y, a continuación, pulse EXIT.<br />
Selección manual <strong>de</strong> canales<br />
Para añadir canales sin utilizar la opción Instalación auto., siga las instrucciones a continuación. Si se ha omitido<br />
un canal por error, también pue<strong>de</strong> utilizar este método para añadir el canal a su lista.<br />
1 ) Acceda a Configuración <strong>de</strong>l sistema a través <strong>de</strong> Configuración.<br />
2 ) Seleccione Config. TV analógica <strong>de</strong>l menú Configuración <strong>de</strong>l sistema.<br />
3 ) Seleccione Ajuste manual <strong>de</strong>l menú Config. TV analógica.<br />
4 ) Seleccione Introducción progr.<br />
5 ) Seleccione el número <strong>de</strong>l canal que <strong>de</strong>see añadir.<br />
Utilice los botones <strong>de</strong> flecha ( / ) para introducir un número <strong>de</strong> canal.<br />
6 ) Seleccione Memorizar <strong>de</strong>l menú Ajuste manual.<br />
7 ) Seleccione Sí <strong>de</strong>l submenú.<br />
Introducción progr. : 1<br />
Memorizar : Sí<br />
Sinton. RN : Encendido<br />
8 ) Pulse HOME MENU para salir <strong>de</strong>l menú <strong>de</strong>spués que todos los canales <strong>de</strong>seados tengan sido añadidos.<br />
Nota: Los canales analógicos pue<strong>de</strong>n añadirse manualmente, pero los canales sólo pue<strong>de</strong>n añadirse utilizando<br />
el botón Añadir nuevos canales en el menú Config. sint. Digital.<br />
Adición <strong>de</strong> nuevos canales<br />
Para añadir nuevos canales, siga los pasos a continuación.<br />
1 ) Acceda a Configuración <strong>de</strong>l sistema a través <strong>de</strong> Configuración.<br />
2 ) Seleccione Config. sint. Digital <strong>de</strong>l menú Configuración <strong>de</strong>l sistema.<br />
36<br />
Sp
Operaciones básicas para contemplación <strong>de</strong> televisión 03<br />
3 ) Seleccione Instalación <strong>de</strong>l menú Config. sint. Digital.<br />
Instalación<br />
Administración <strong>de</strong> Canales<br />
Reloj<br />
4 ) Seleccione Añadir nuevos canales.<br />
La búsqueda <strong>de</strong> canales comienza automáticamente. Si se encuentra un canal nuevo, se lo almacena<br />
automáticamente en el televisor <strong>de</strong> pantalla plana.<br />
Para cancelar la búsqueda <strong>de</strong> canales antes que se finalice, pulse RETURN.<br />
Teclado <strong>de</strong> software<br />
Este teclado en la pantalla le permite <strong>et</strong>iqu<strong>et</strong>ar manualmente los canales <strong>de</strong> TV añadidos. Las <strong>et</strong>iqu<strong>et</strong>as <strong>de</strong> canal<br />
pue<strong>de</strong>n contener hasta ocho caracteres para facilitar la i<strong>de</strong>ntificación <strong>de</strong> los canales.<br />
Para utilizar el teclado <strong>de</strong> software para <strong>et</strong>iqu<strong>et</strong>ar canales <strong>de</strong> TV, siga los pasos a continuación.<br />
1 ) Acceda a Configuración <strong>de</strong>l sistema a través <strong>de</strong> Configuración.<br />
Español<br />
2 ) Seleccione Config. TV analógica <strong>de</strong>l menú Configuración <strong>de</strong>l sistema.<br />
3 ) Seleccione Etiqu<strong>et</strong>a <strong>de</strong>l menú Config. TV analógica.<br />
4 ) Seleccione Introducción progr. <strong>de</strong>l submenú.<br />
5 ) Seleccione un número <strong>de</strong> programa.<br />
• Cable: 1 a 135<br />
• Aire: 2 a 69<br />
6 ) Seleccione Etiqu<strong>et</strong>a.<br />
La pantalla <strong>de</strong>l teclado <strong>de</strong> software aparece.<br />
Etiqu<strong>et</strong>a<br />
I N P U<br />
1 2 3 4 5 6 7 8 9 0<br />
A B C D E F G H I J Del<strong>et</strong>e<br />
K L M N O P Q R S T Space<br />
U V W X Y Z , . : ; Caps<br />
& ' ( ) + - * / _ @ OK Cancel<br />
7 ) Seleccione el primer carácter.<br />
El cursor se <strong>de</strong>splaza al espacio <strong>de</strong>l próximo carácter.<br />
8 ) Repita el paso prece<strong>de</strong>nte para introducir hasta ocho caracteres.<br />
• Para cambiar un carácter, utilice o para resaltar el carácter y, a continuación, pulse ENTER. El cursor<br />
se <strong>de</strong>splaza al carácter anterior o siguiente.<br />
• Para borrar el carácter introducido, resalte el carácter, seleccione Del<strong>et</strong>e y, a continuación, pulse ENTER.<br />
• Para poner un espacio <strong>de</strong>spués <strong>de</strong>l carácter introducido, resalte el espacio, seleccione Space y, a<br />
continuación, pulse ENTER.<br />
• Para alternar entre l<strong>et</strong>ras mayúsculas y l<strong>et</strong>ras minúsculas, resalte el carácter, seleccione Caps y, a<br />
continuación, pulse ENTER.<br />
9 ) Seleccione OK y, a continuación, pulse ENTER.<br />
La entrada está compl<strong>et</strong>ada.<br />
10 ) Pulse HOME MENU para salir <strong>de</strong>l menú.<br />
37<br />
Sp
03 Operaciones básicas para contemplación <strong>de</strong> televisión<br />
3.2.6 Omisión o eliminación <strong>de</strong> canales in<strong>de</strong>seables<br />
La instalación automática añadía todos los disponibles <strong>de</strong> su proveedor <strong>de</strong> TV. Sin embargo, pue<strong>de</strong> que haya<br />
algunos canales que no <strong>de</strong>see o que no sean apropiados para los niños en su casa. En esta sección se explica<br />
cómo omitir o eliminar los canales in<strong>de</strong>seables cuando se <strong>de</strong>splaza hacia arriba/hacia abajo un canal a la vez, y<br />
qué programas están disponibles para contemplación.<br />
Para omitir o borrar canales in<strong>de</strong>seables, utilice los botones CH+/CH– <strong>de</strong>l mando a distancia para reponer el<br />
estado para tales canales. Siga los pasos a continuación para cambiar el estado <strong>de</strong> un canal.<br />
1 ) Acceda a Configuración <strong>de</strong>l sistema a través <strong>de</strong> Configuración.<br />
2 ) Seleccione Config. sint. Digital o Config. TV analógica <strong>de</strong>l menú Configuración <strong>de</strong>l sistema.<br />
• Canales <strong>de</strong> TV digitales: Administración <strong>de</strong> Canales > Opciones <strong>de</strong> canal > (Eliminación <strong>de</strong> canales) ><br />
(Encendido)<br />
XXXX 00001.000<br />
XXXX 00002.000<br />
XXXX 00003.000<br />
XXXX 00004.000<br />
XXXX 00005.000<br />
XXXX 00006.000<br />
XXXX 00007.000<br />
XXXX 00008.000<br />
XXXX 00009.000<br />
3 ) Desplace o resalte el número <strong>de</strong> un canal in<strong>de</strong>seable.<br />
4 ) Pulse ENTER para invertir el estado para tal canal.<br />
Cuando hay una marca <strong>de</strong> verificación próxima al canal, la marca <strong>de</strong>saparece.<br />
5 ) Pulse RETURN.<br />
Aparecerá una pantalla <strong>de</strong> confirmación.<br />
6 ) Seleccione Sí y, a continuación, ENTER.<br />
Se concluye la configuración <strong>de</strong> eliminación <strong>de</strong> canal.<br />
7 ) Pulse HOME MENU para salir <strong>de</strong>l menú.<br />
Si selecciona la opción (Omisión <strong>de</strong> canales) en el paso 3, la configuración se concluye cuando se sale<br />
el menú Opciones <strong>de</strong> canal (no aparece ninguna pantalla <strong>de</strong> confirmación). Salte los pasos 5 y 6.<br />
Las instrucciones para restaurar un canal omitido son las mismas que las <strong>de</strong> arriba. En el paso 4, una marca <strong>de</strong><br />
verificación aparece próxima al canal añadido/restaurado.<br />
Para saltar un canal analógico, siga los pasos a continuación.<br />
• Canales <strong>de</strong> TV analógicos: Ajuste manual > Memorizar > No<br />
Salto <strong>de</strong> radio<br />
Esta función permite el salto <strong>de</strong> canales <strong>de</strong> raio a la vez. Para ajustar esta opción, siga el procedimiento a<br />
continuación.<br />
1 ) Acceda a Configuración <strong>de</strong>l sistema a través <strong>de</strong> Configuración.<br />
2 ) Seleccione Config. sint. Digital <strong>de</strong>l menú Configuración <strong>de</strong>l sistema.<br />
3 ) Seleccione Administración <strong>de</strong> Canales <strong>de</strong>l menú Config. sint. Digital.<br />
4 ) Seleccione Omisión <strong>de</strong> radio <strong>de</strong>l menú Administración <strong>de</strong> Canales.<br />
5 ) Seleccione Encendido.<br />
6 ) Pulse HOME MENU para salir <strong>de</strong>l menú.<br />
38<br />
Sp
Operaciones básicas para contemplación <strong>de</strong> televisión 03<br />
3.2.7 Lista <strong>de</strong> canales<br />
Su televisor <strong>de</strong> pantalla plana ofrece tres listas <strong>de</strong> canales para un acceso rápido al canal <strong>de</strong>seado: Lista <strong>de</strong><br />
favoritos, LIsta <strong>de</strong> canales y Lista <strong>de</strong> entradas.<br />
Lista <strong>de</strong> favoritos: Visualice los números/nombres <strong>de</strong> sus canales favoritos para hasta 20 canales (canales<br />
analógicos, Entrada 1 a 7, PC), 20 canales digitales, y 1 Home Media Gallery.<br />
Almacene los canales que ve con más frecuencia en la Lista <strong>de</strong> favoritos.<br />
Para visualizar la Lista <strong>de</strong> favoritos, pulse ENTER mientras visualiza un canal <strong>de</strong> TV. Para otro método <strong>de</strong> acceso<br />
a la Lista <strong>de</strong> favoritos, siga las instrucciones a continuación.<br />
1 ) Pulse HOME MENU.<br />
2 ) Seleccione Favoritos <strong>de</strong>l menú principal.<br />
Pulsar el botón / mientras visualiza la Lista <strong>de</strong> canales o Lista <strong>de</strong> entradas también hace que aparezca<br />
la Lista <strong>de</strong> favoritos.<br />
Lista <strong>de</strong> canales: Visualiza todos los canales <strong>de</strong> TV analógicos/digitales en cada grupo <strong>de</strong> red <strong>de</strong> emisión.<br />
Para visualizar la Lista <strong>de</strong> canales, siga las instrucciones a continuación.<br />
1 ) Pulse HOME MENU.<br />
2 ) Seleccione Canal <strong>de</strong>l menú principal.<br />
Pulsar el botón / mientras visualiza la Lista <strong>de</strong> favoritos o Lista <strong>de</strong> entradas también hace que aparezca<br />
la Lista <strong>de</strong> canales.<br />
Español<br />
Lista <strong>de</strong> entradas: VIsualiza los nombres <strong>de</strong> las fuentes <strong>de</strong> entrada externas <strong>de</strong> ENTRADA 1 a ENTRADA 7 y PC.<br />
Para visualizar la Lista <strong>de</strong> entradas, siga las instrucciones a continuación.<br />
1 ) Pulse HOME MENU.<br />
2 ) Seleccione Entrada <strong>de</strong>l menú principal.<br />
Pulsar el botón / mientras visualiza la Lista <strong>de</strong> favoritos o Lista <strong>de</strong> canales también hace que aparezca<br />
la Lista <strong>de</strong> entradas.<br />
Nota: Después <strong>de</strong> seleccionar el canal seleccionado, pulsar ENTER cierra la Lista <strong>de</strong> canales y visualiza la<br />
pantalla seleccionada. Pulsar RETURN o EXIT cierra la Lista <strong>de</strong> canales y vuelve a visualizar la pantalla<br />
anterior a la selección.<br />
Pulse un botón <strong>de</strong> flecha para cambiar a través <strong>de</strong> las listas cuando visualice cualquiera <strong>de</strong> las listas.<br />
Favoritos<br />
ENTRADA6<br />
XXXXXX 00001.000<br />
XXXXXX 00004.000<br />
XXXXXX 00007.000<br />
XXXXXX 00009.000<br />
PC<br />
XXXXXX<br />
XXXXXX 00013.002<br />
XXXXXX 00015.000<br />
XXXXXX 00024.000<br />
1/2<br />
Configuración <strong>de</strong> los canales favoritos<br />
Seleccione hasta diez (10) canales por página <strong>de</strong> lista, hasta cinco páginas para un total <strong>de</strong> 41 canales favoritos.<br />
Para asignar canales a su Favoritos o Todo, siga los pasos a continuación.<br />
1 ) Acceda a Configuración <strong>de</strong> favoritos a través <strong>de</strong> Configuración.<br />
2 ) Seleccione Modo canal <strong>de</strong>l menú Configuración <strong>de</strong> favoritos.<br />
3 ) Seleccione Todo o Favoritos <strong>de</strong>l menú Modo canal.<br />
• Para asignar todos los canales, seleccione Todo. Para asignar los canales registrados, seleccione Favoritos.<br />
39<br />
Sp
03 Operaciones básicas para contemplación <strong>de</strong> televisión<br />
4 ) Seleccione un canal <strong>de</strong> TV para almacenar.<br />
Si la pantalla no cabe en la ventana, aparece una barra <strong>de</strong> <strong>de</strong>splazamiento.<br />
Pulsar ENTER mientras visualiza un programa <strong>de</strong> TV también hace que aparezca la lista <strong>de</strong> canales<br />
favoritos. Si la Lista <strong>de</strong> favoritos está vacía, se visualiza el mensaje “Sin lista favorito”.<br />
5 ) Pulse HOME MENU para salir <strong>de</strong>l menú.<br />
Método alternativo para almacenar sus canales favoritos<br />
Utilice el menú TOOLS para almacenar canales <strong>de</strong> TV, fuentes <strong>de</strong> entrada externas incluyendo PC, y contenidos<br />
<strong>de</strong> Home Media Gallery. Para almacenar canales, siga los pasos a continuación.<br />
1 ) Pulse TOOLS.<br />
El menú TOOLS aparece en la pantalla.<br />
2 ) Seleccione Entrada fav.<br />
Utilice los botones <strong>de</strong> flecha para resaltar una opción.<br />
3 ) Seleccione Encendido (/).<br />
El canal que está viendo se almacena en la lista <strong>de</strong> favoritos.<br />
Para cancelar, utilice el botón <strong>de</strong> flecha para seleccionar Apagado.<br />
Notas:<br />
• Pulsear EXIT, RETURN o TOOLS <strong>de</strong> nuevo hace que <strong>de</strong>saparezca el menú TOOLS.<br />
• Una vez que el número máximo <strong>de</strong> canales sea almacenado, aparece una pantalla <strong>de</strong> advertencia.<br />
• Para salir <strong>de</strong>l procedimiento antes que se finalice, pulse EXIT o RETURN en el mando a distancia.<br />
Organización <strong>de</strong> los canales favoritos<br />
Para organizar los canales, siga los pasos a continuación.<br />
1 ) Acceda a Configuración <strong>de</strong> favoritos a través <strong>de</strong> Configuración.<br />
2 ) Seleccione Organizar favoritos <strong>de</strong>l menú Configuración <strong>de</strong> favoritos.<br />
3 ) Seleccione el canal que <strong>de</strong>see <strong>de</strong>splazar.<br />
4 ) Seleccione una nueva ubicación y, a continuación, pulse ENTER.<br />
El canal seleccionado se <strong>de</strong>splaza a la nueva ubicación. Para organizar otro(s) canale(s), repita los pasos 3<br />
y 4.<br />
5 ) Pulse HOME MENU para salir <strong>de</strong>l menú.<br />
Edición <strong>de</strong> lista <strong>de</strong> entradas<br />
Para cambiar el nombre <strong>de</strong> una entrada, siga los pasos a continuación.<br />
1 ) Acceda a Opción a través <strong>de</strong> Configuración.<br />
2 ) Seleccione Etiqu<strong>et</strong>ar entrada <strong>de</strong>l menú Opción.<br />
3 ) Seleccione una entrada o PC.<br />
El teclado <strong>de</strong> software aparece.<br />
4 ) Introduzca el nuevo nombre.<br />
Etiqu<strong>et</strong>a<br />
K I D S<br />
1 2 3 4 5 6 7 8 9 0<br />
A B C D E F G H I J Del<strong>et</strong>e<br />
K L M N O P Q R S T Space<br />
U V W X Y Z , . : ; Caps<br />
& ' ( ) + - * / _ @ OK Cancel<br />
40<br />
Sp<br />
5 ) Seleccione OK para almacenar el nombre y salir <strong>de</strong>l menú.<br />
Para cancelar, pulse HOME MENU.
Operaciones básicas para contemplación <strong>de</strong> televisión 03<br />
3.3 Inicio rápido para ver televisión<br />
Su televisor <strong>de</strong> pantalla plana tiene muchas funciones y recursos, y configurar algunos <strong>de</strong> ellos pue<strong>de</strong> tomarle<br />
cierto tiempo al instalar la pantalla por primera vez. Para comenzar a ver televisión rápidamente, consulte la<br />
información básica <strong>de</strong>ntro <strong>de</strong> esta sección. Sin embargo, cuando tenga tiempo, recomendamos fuertemente que<br />
lea el resto <strong>de</strong>l manual y aprenda todo lo que pueda hacer con el televisor <strong>de</strong> pantalla plana.<br />
3.3.1 Cambio <strong>de</strong> canal/subcanal<br />
Con el mando a distancia apuntado al <strong>sens</strong>or remoto <strong>de</strong> la<br />
pantalla, pulse el botón CH + para cambiar<br />
secuencialmente al próximo canal más alto disponible. El<br />
botón CH – cambia secuencialmente, en el or<strong>de</strong>n<br />
<strong>de</strong>scen<strong>de</strong>nte, al próximo canal más bajo disponible. Cada<br />
vez que pulsa CH + o CH –, el canal cambia<br />
secuencialmente <strong>de</strong> emisora a emisora. Para volver al<br />
canal anterior, pulse CH RETURN. Para alternar dos<br />
canales, pulse CH RETURN <strong>de</strong> nuevo. Cada vez que pulsa<br />
el botón, el canal cambia entre las dos emisoras.<br />
Español<br />
Otra opción para cambiar el canal es utilizar los botones numéricos (0 a 9). Simplemente pulse los botones<br />
numéricos en el or<strong>de</strong>n necesario para tal canal. Por ejemplo, introduza el canal 231 como 2 - 3 - 1 o el canal 4<br />
como el número simple, 4.<br />
Una reciente adición a la contemplación <strong>de</strong> TV es el subcanal. Un canal digital pue<strong>de</strong> dividirse en señales<br />
múltiples. Cada señal, <strong>de</strong>nominada un subcanal, pue<strong>de</strong> transmitir un programa diferente. Para ver un subcanal,<br />
utilice una combinación <strong>de</strong> botones numéricos y el botón <strong>de</strong> punto (.). Por ejemplo, si el canal 5 es digital y tiene<br />
tres subcanales activos, introduzca 5 . 2 para acce<strong>de</strong>r al segundo subcanal.<br />
Nota: Para sintonizar un programa más rápidamente, introduzca el canal o subcanal y, a continuación, pulse<br />
CH ENTER.<br />
3.3.2 Ajuste <strong>de</strong>l volumen y <strong>de</strong>l sonido<br />
Con el mando a distancia apuntado al <strong>sens</strong>or remoto <strong>de</strong> la pantalla, mantenga pulsado VOL+ para aumentar el<br />
volumen <strong>de</strong>l sonido gradualmente. Manter pulsado VOL– disminuye el volume <strong>de</strong> la misma forma. Una simple<br />
pulsación <strong>de</strong> VOL+ o VOL– ajusta el volumen en incrementos menores.<br />
Para silenciar el sonido compl<strong>et</strong>amente, pulse MUTING. El símbolo <strong>de</strong> silenciamiento ( e ) aparece en la<br />
pantalla. Para restaurar el volumen al nivel anterior, pulse MUTING nuevamente. Pulsar VOL+ una vez también<br />
aumenta el volumen un paso más alto que el nivel actual y cancela el modo <strong>de</strong> silenciamiento.<br />
Si el nivel <strong>de</strong> sonido pred<strong>et</strong>erminado <strong>de</strong> la pantalla está muy alto o muy bajo, consulte “3.4.6 Ajuste <strong>de</strong>l sonido<br />
general (audio)”.<br />
3.3.3 Activación <strong>de</strong>l temporizador <strong>de</strong> apagado<br />
Para ahorrar energía y maximizar la vida útil <strong>de</strong> su televisor <strong>de</strong> pantalla plana, intente utilizar el temporizador <strong>de</strong><br />
apagado cuando exista la posibilidad <strong>de</strong> <strong>de</strong>jar la pantalla encendida involuntariamente. El temporizador <strong>de</strong><br />
apagado coloca la pantalla en el modo <strong>de</strong> espera cuando transcurre el tiempo seleccionado. El temporizador <strong>de</strong><br />
apagado provee períodos <strong>de</strong> tiempo <strong>de</strong> 30, 60, 90 ó 120 minutos. Cuando el conteo regresivo <strong>de</strong>l temporizador<br />
alcanza cinco minutos, aparece un recordatorio en la pantalla cada minuto hasta la expiración <strong>de</strong>l tiempo.<br />
Para ajustar el temporizador <strong>de</strong> apagado, siga los pasos a continuación.<br />
1 ) Acceda a Temporizador <strong>de</strong> apagado a través <strong>de</strong> Configuración.<br />
2 ) Seleccione el período <strong>de</strong> tiempo <strong>de</strong>seado.<br />
Seleccione entre 30 minutos y 2 horas (120 minutos).<br />
3 ) Pulse HOME MENU nuevamente para salir <strong>de</strong>l menú.<br />
41<br />
Sp
03 Operaciones básicas para contemplación <strong>de</strong> televisión<br />
Cuando se configura el temporizador <strong>de</strong> apagado, el indicador SLEEP se encien<strong>de</strong> en naranja en la parte frontal<br />
<strong>de</strong>l televisor <strong>de</strong> pantalla plana. Para comprobar el tiempo restante, pulse TOOLS y, a continuación, seleccione<br />
Dormir. “Quedan ---min” aparece en la parte superior <strong>de</strong> la pantalla <strong>de</strong> menú. Después <strong>de</strong> comprobar el tiempo,<br />
pulse EXIT para volver a su programa sin per<strong>de</strong>r la configuración <strong>de</strong>l temporizador <strong>de</strong> apagado.<br />
Nota: Cuando el temporizador <strong>de</strong> apagado ha sido ajustado, “Quedan ---min” aparece en la parte superior <strong>de</strong>l<br />
menú. Sin embargo, el temporizador <strong>de</strong>l patrón <strong>de</strong> ví<strong>de</strong>o tiene prioridad sobre el temporizador <strong>de</strong> apagado.<br />
Cuando el temporizador <strong>de</strong> patrón <strong>de</strong> ví<strong>de</strong>o está activado, el temporizador <strong>de</strong> apagado queda <strong>de</strong>sactivado.<br />
El patrón <strong>de</strong> ví<strong>de</strong>o se explica en d<strong>et</strong>alles más a<strong>de</strong>lante en este manual.<br />
3.4 Ajuste <strong>de</strong> la calidad <strong>de</strong> la imagen y <strong>de</strong>l sonido<br />
Su televisor <strong>de</strong> pantalla plana tiene muchas opciones <strong>de</strong> ajuste para la imagen y para el sonido para satisfacer<br />
totalmente sus preferencias. En esta sección se <strong>de</strong>scriben los ajustes básicos. Para las modificaciones<br />
d<strong>et</strong>alladas <strong>de</strong> ví<strong>de</strong>o y audio, consulte “4 Opciones adicionales <strong>de</strong> ajuste <strong>de</strong> la imagen y <strong>de</strong>l sonido” y “4.7<br />
Selecciones alternativas <strong>de</strong>l sonido”.<br />
3.4.1 Ajuste <strong>de</strong> la imagen para la iluminación <strong>de</strong> su sala<br />
El televisor <strong>de</strong> pantalla plana d<strong>et</strong>ecta la cantidad <strong>de</strong> luz en su sala y ajusta automáticamente el brillo <strong>de</strong> la pantalla<br />
para la mejor imagen. Salas brillantes requieren una coloración más fuerte <strong>de</strong> forma que las imágenes aparezcan<br />
más nítidas, mientras salas con poca iluminación permiten una coloración más sutil para la imagen.<br />
La pantalla sale <strong>de</strong> la fábrica con el <strong>sens</strong>or <strong>de</strong> luz ambiental <strong>de</strong>sactivado. En las secciones siguientes se proveen<br />
las instrucciones para activar/<strong>de</strong>sactivar el <strong>sens</strong>or <strong>de</strong> luz ambiental.<br />
Sensor <strong>de</strong> luz ambiental<br />
Para <strong>de</strong>sactivar/reactivar el <strong>sens</strong>or <strong>de</strong> luz ambiental, siga los pasos a continuación.<br />
1 ) Acceda a Opción a través <strong>de</strong> Configuración.<br />
2 ) Seleccione Sensor luz amb. <strong>de</strong>l menú Opción.<br />
3 ) Seleccione Encendido (o Apagado) <strong>de</strong>l submenú.<br />
Pref. cont. juego : Apagado<br />
Sensor luz amb. : Apagado<br />
Protec. pantalla<br />
Etiqu<strong>et</strong>ar entrada<br />
4 ) Pulse HOME MENU para salir <strong>de</strong>l menú.<br />
42<br />
Sp
Operaciones básicas para contemplación <strong>de</strong> televisión 03<br />
3.4.2 Ajuste <strong>de</strong> imagen general (ví<strong>de</strong>o) para una fuente <strong>de</strong> AV<br />
Las instrucciones a continuación se aplican a todas las fuentes <strong>de</strong> AV con excepción <strong>de</strong> ÓPTIMO y DINÁMICO.<br />
Si la opción <strong>de</strong> contemplación es ÓPTIMO, su televisor <strong>de</strong> pantalla plana ajusta automáticamente la imagen al<br />
mejor nivel posible. Si la opción <strong>de</strong> contemplación preferida es DINÁMICO, consulte “4.1 Selección <strong>de</strong> una opción<br />
<strong>de</strong> AV (Ví<strong>de</strong>o, Juego, <strong>et</strong>c.)”. Para los ajustes <strong>de</strong> imagen estándares, siga los pasos a continuación.<br />
1 ) Acceda a Imagen a través <strong>de</strong> Configuración.<br />
2 ) Seleccione un ítem que <strong>de</strong>see ajustar.<br />
Se utiliza el contraste en el ejemplo a continuación.<br />
Imagen<br />
Selección AV : RENDIMIENTO<br />
Contraste : 40<br />
Brillo : 0<br />
Color : 0<br />
Matiz : 0<br />
Niti<strong>de</strong>z : 0<br />
PureCinema<br />
Reponer<br />
Español<br />
3 ) Utilice los botones <strong>de</strong> flecha (/) para ajustar al nivel <strong>de</strong>seado.<br />
Contraste 32<br />
4 ) Pulse HOME MENU para salir <strong>de</strong>l menú.<br />
Reducción <strong>de</strong>l ruido <strong>de</strong> TV analógica<br />
Algunas veces la estática <strong>de</strong> la señal electrónica pue<strong>de</strong> causar imperfecciones en la imagen. Esta estática se<br />
<strong>de</strong>nomina “Ruido <strong>de</strong> ví<strong>de</strong>o”. Su televisor <strong>de</strong> pantalla plana pue<strong>de</strong> reducir el ruido <strong>de</strong> ví<strong>de</strong>o <strong>de</strong> un canal <strong>de</strong> TV<br />
analógico, <strong>de</strong>pendiendo <strong>de</strong>l nivel <strong>de</strong> la señal <strong>de</strong> emisión. Algunas veces la señal <strong>de</strong> emisión tiene niveles <strong>de</strong><br />
interferencia más altos y, por lo tanto, se pue<strong>de</strong> notar algún ruido <strong>de</strong> ví<strong>de</strong>o.<br />
Sólo se pue<strong>de</strong> seleccionar esta función para las señales <strong>de</strong> una antena. Siga los pasos a continuación para<br />
reducir el ruido en un canal <strong>de</strong> TV analógico.<br />
1 ) Acceda a Configuración <strong>de</strong>l sistema a través <strong>de</strong> Configuración.<br />
2 ) Seleccione Config. TV analógica <strong>de</strong>l menú Configuración <strong>de</strong>l sistema.<br />
3 ) Seleccione Ajuste manual <strong>de</strong>l submenú.<br />
Sólo se pue<strong>de</strong>n ajustar manualmente los canales que tengan sido configurados con la instalación<br />
automática.<br />
4 ) Seleccione Introducción progr.<br />
5 ) Seleccione el número <strong>de</strong>l canal que <strong>de</strong>see añadir.<br />
Utilice los botones <strong>de</strong> flecha (/) para introducir un número <strong>de</strong> canal.<br />
6 ) Seleccione Sinton. RN.<br />
7 ) Seleccione Encendido.<br />
La configuración pred<strong>et</strong>erminada es Encendido.<br />
8 ) Pulse HOME MENU para salir <strong>de</strong>l menú.<br />
43<br />
Sp
03 Operaciones básicas para contemplación <strong>de</strong> televisión<br />
Posición <strong>de</strong> la imagen<br />
Cada fuente <strong>de</strong> entrada almacena las configuraciones <strong>de</strong> ajuste <strong>de</strong> la imagen para tal contemplación. Mientras<br />
la reposición está disponible en la mayoría <strong>de</strong> las visualizaciones, cuando la pantalla está configurada para Punto<br />
a punto, el menú Posición no está disponible. Dependiendo también <strong>de</strong>l ví<strong>de</strong>o que se visualice, pue<strong>de</strong> que la<br />
posición <strong>de</strong> la imagen no cambie <strong>de</strong>spués <strong>de</strong>l ajuste.<br />
Para ajustar la posición horizontal y vertical <strong>de</strong> la imagen, siga los pasos a continuación.<br />
1 ) Acceda a Opción a través <strong>de</strong> Configuración.<br />
2 ) Seleccione Posición <strong>de</strong>l menú Opción.<br />
Posición<br />
Tmño. Auto. : Desactivar<br />
Máscara lateral<br />
Entrada HDMI<br />
Conf.Control HDMI<br />
Orbiter : Desactivar<br />
Patrón <strong>de</strong> ví<strong>de</strong>o<br />
3 ) Seleccione Ajuste <strong>de</strong> la posición H/V <strong>de</strong>l submenú.<br />
4 ) Ajuste la posición vertical y/o horizontal utilizando los botones <strong>de</strong> flecha.<br />
5 ) Pulse HOME MENU para salir <strong>de</strong>l menú.<br />
44<br />
Sp<br />
Restauración <strong>de</strong> la imagen pred<strong>et</strong>erminada<br />
Después <strong>de</strong> hacer diversos ajustes, pue<strong>de</strong> que sea dificil corregir las configuraciones ina<strong>de</strong>cuadas. Para<br />
restaurar las configuraciones <strong>de</strong> ví<strong>de</strong>o pred<strong>et</strong>erminadas <strong>de</strong> fábrica, siga las instrucciones a continuación.<br />
1 ) Resalte Reponer <strong>de</strong>l menú Imagen.<br />
2 ) Pulse ENTER para continuar con la reposición <strong>de</strong> la imagen.<br />
Una pantalla <strong>de</strong> confirmación aparece le preguntando si <strong>de</strong>sea reponer las configuraciones a las<br />
selecciones pred<strong>et</strong>erminadas <strong>de</strong> fábrica.<br />
3 ) Utilice los botones <strong>de</strong> flecha para resaltar Sí.<br />
4 ) Pulse ENTER.<br />
Todas las configuraciones <strong>de</strong> ví<strong>de</strong>o vuelven a las selecciones pred<strong>et</strong>erminadas <strong>de</strong> fábrica cuando se<br />
selecciona una opción que no sea ÓPTIMO o PC.<br />
Cuando se selecciona ÓPTIMO, las configuraciones <strong>de</strong> ví<strong>de</strong>o para ÓPTIMO, menús Selección AV, y<br />
configuraciones <strong>de</strong>l control <strong>de</strong> sonido vuelven a sus selecciones pred<strong>et</strong>erminadas <strong>de</strong> fábrica.<br />
3.4.3 Comparación <strong>de</strong> las imágenes al ajustar una imagen<br />
Cuando ajuste una imagen, busque una mejora general ajustando cada parám<strong>et</strong>ro u opción a la vez. Muchos<br />
ajustes pequeños producen una imagem mejor para su área <strong>de</strong> visualización. Mientras cada opción cambia,<br />
refiérase a la imagen configurada anteriormente para comparación. En esta sección se incluyen notas <strong>de</strong> ajuste<br />
y pasos para ajustar la imagen <strong>de</strong>l televisor <strong>de</strong> pantalla plana.<br />
Se <strong>de</strong>be ajustar cada parám<strong>et</strong>ro y opción separadamente. Por ejemplo, si dos opciones en Selección AV,<br />
RENDIMIENTO y PELÍCULA requieren ajuste, cambie y compare una opción y, a continuación, almacene la<br />
configuración preferida antes <strong>de</strong> pasar a la otra opción. A continuación se proveen otros consejos para seguir<br />
cuando se ajusta la imagen.<br />
• Los ajustes están disponibles mientras se está en la pantalla Después. Intentar hacer ajustes mientras se<br />
están en la pantalla Antes hace que aparezca un mensaje <strong>de</strong> advertencia.<br />
• Cambie a otro parám<strong>et</strong>ro/opción solamente <strong>de</strong> la pantalla Después. Si se cambia a otra opción <strong>de</strong>s<strong>de</strong> la<br />
pantalla Antes, se per<strong>de</strong>rán los dados <strong>de</strong> la pantalla Antes.<br />
• Salir <strong>de</strong> una opción <strong>de</strong>s<strong>de</strong> la pantalla Antes almacena la entrada anterior en la memoria y <strong>de</strong>sactiva el botón<br />
TOOLS.
Operaciones básicas para contemplación <strong>de</strong> televisión 03<br />
• Salir <strong>de</strong> una opción <strong>de</strong>s<strong>de</strong> la pantalla Después almacena la nueva entrada en la memoria y <strong>de</strong>sactiva el<br />
botón.<br />
• Desplazar/cambiar el parám<strong>et</strong>ro/opción <strong>de</strong> Selección AV almacena la configuración <strong>de</strong> la opción en la<br />
memoria (el botón continúa activado).<br />
Siga los pasos a continuación para ajustar las opciones para la calidad <strong>de</strong> imagen preferida.<br />
1 ) Acceda a Imagen a través <strong>de</strong> Configuración.<br />
2 ) Seleccione una opción.<br />
3 ) Utilice el botón TOOLS para alternar entre la imagen anterior y la imagen ajustada.<br />
4 ) Repita los pasos 2 y 3 para continuar el ajuste <strong>de</strong> la opción como sea necesario.<br />
5 ) Repita los pasos <strong>de</strong> 2 a 4 para ajustar otras opciones <strong>de</strong> imagen.<br />
6 ) Pulse HOME MENU para salir <strong>de</strong>l menú.<br />
Nota: Si no se selecciona nada <strong>de</strong>ntro <strong>de</strong> 60 segundos, el menú se cierra automáticamente y las configuraciones<br />
actuales se almacenan en la memoria.<br />
Para salir <strong>de</strong>l menú sin almacenar los cambios, cambie a la pantalla Antes y, a continuación, pulse<br />
HOME MENU.<br />
Español<br />
3.4.4 Visualización <strong>de</strong> una pantalla <strong>de</strong> ajuste <strong>de</strong> imagen gráfica/sonido<br />
Seleccionar ÓPTIMO <strong>de</strong>l menú Selección AV hace que el menú Imagen visualice diferentes submenús <strong>de</strong> fuentes<br />
<strong>de</strong> AV. Seleccione Encendido para la opción Cont. sonido para ajustar la calidad <strong>de</strong>l sonido auto, y el rendimiento<br />
ÓPTIMO provee un monitor gráfico en la pantalla para ajustes <strong>de</strong> múltiples imágenes y sonido.<br />
Rendimiento ÓPTIMO<br />
El Rendimiento ÓPTIMO visualiza ajustes <strong>de</strong> imagen y sonio en tiempo real utilizando datos gráficos cuando se<br />
selecciona ÓPTIMO <strong>de</strong>l menú Selección AV. El Rendimiento ÓPTIMO provee los siguientes datos gráficos en<br />
barras:<br />
• Analizador: Histograma, RGB<br />
• Imagen: Contraste, Brillo, Color, Niti<strong>de</strong>z, Temp.color, Gamma<br />
• Sonido: Nivel<br />
Rendimiento ÓPTIMO<br />
Activar [ÓPTIMO]<br />
Act/Desact ÓPTIMO<br />
[Analiz.]<br />
Histograma<br />
RGB<br />
[Imagen]<br />
Contraste<br />
Brillo<br />
Color<br />
Niti<strong>de</strong>z<br />
Temp.color<br />
Gamma<br />
[Sonido]<br />
60 1k 12k(Hz)<br />
Para visualizar el Rendimiento ÓPTIMO, siga el procedimiento a continuación.<br />
1 ) Acceda a Imagen a través <strong>de</strong> Configuración.<br />
2 ) Seleccione Selección AV <strong>de</strong>l menú Imagen.<br />
3 ) Seleccione ÓPTIMO <strong>de</strong>l menú Selección AV.<br />
4 ) Seleccione Rendimiento ÓPTIMO <strong>de</strong>l menú Imagen.<br />
El Rendimiento ÓPTIMO aparece. Para cancelar la opción Rendimiento ÓPTIMO, pulse EXIT.<br />
Nota: Cuando ÓPTIMO esté seleccionado, mantenga pulsado DISPLAY en el mando a distancia para visualizar<br />
el Rendimiento ÓPTIMO.<br />
El Rendimiento ÓPTIMO compara la calidad <strong>de</strong> la imagen y <strong>de</strong>l sonido entre “Apagado” (sin ajuste) y<br />
“Encendido” (ajustado con el botón TOOLS).<br />
45<br />
Sp
03 Operaciones básicas para contemplación <strong>de</strong> televisión<br />
3.4.5 Control <strong>de</strong>l sonido<br />
Configurar la opción Cont. sonido a Encendido ajusta automáticamente a la calida <strong>de</strong> sonido más alta posible<br />
para la imagen seleccionada y entorno <strong>de</strong> contemplación. Esta opción también está disponible cuando ÓPTIMO<br />
está seleccionado en el menú Selección AV. Para activar la opción Cont. sonido, siga el procedimiento a<br />
continuación.<br />
1 ) Acceda a Imagen a través <strong>de</strong> Configuración.<br />
2 ) Seleccione Selección AV <strong>de</strong>l menú Imagen.<br />
3 ) Seleccione ÓPTIMO <strong>de</strong>l menú Selección AV.<br />
4 ) Seleccione Cont. sonido <strong>de</strong>l menú Imagen.<br />
5 ) Seleccione Encendido.<br />
6 ) Pulse HOME MENU para salir <strong>de</strong>l menú.<br />
Nota: Cuando la opción Cont. sonido <strong>de</strong>l menú Imagen está seleccionada, la única opción disponible <strong>de</strong>l menú<br />
Sonido es AVC (Auto Volume Control - Control Automático <strong>de</strong>l Volumen).<br />
3.4.6 Ajuste <strong>de</strong>l sonido general (audio)<br />
Muchas personas prefieren un sonido más pesado para ver películas o ví<strong>de</strong>os <strong>de</strong> música <strong>de</strong> una fuente e AV o<br />
en la televisión. Otros prefieren un sonido más balanceado. Para ajustar el sonido según sus preferencias, siga<br />
las instrucciones a continuación.<br />
1 ) Acceda a Sonido a través <strong>de</strong> Configuración.<br />
2 ) Seleccione una opción para ajuste.<br />
Agudos : 0<br />
Graves : 0<br />
Balance : 0<br />
Efecto sonido<br />
Reponer<br />
AVC : Apagado<br />
3 ) Utilice los botones <strong>de</strong> flecha izquierda/<strong>de</strong>recha ( / ) para ajustar la opción.<br />
Opción Botón <strong>de</strong> flecha izquierda Botón <strong>de</strong> flecha <strong>de</strong>recha<br />
Agudos atenúa el tono refuerza el tono<br />
Graves atenúa el tono refuerza el tono<br />
Balance <strong>de</strong>splaza el balance <strong>de</strong> audio<br />
hacia la izquierda<br />
<strong>de</strong>splaza el balance <strong>de</strong> audio<br />
hacia la <strong>de</strong>recha<br />
4 ) Pulse HOME MENU para salir <strong>de</strong>l menú.<br />
46<br />
Sp<br />
Restauración <strong>de</strong> las configuraciones <strong>de</strong> sonido pred<strong>et</strong>erminadas<br />
Para restaurar las configuraciones <strong>de</strong> sonido pred<strong>et</strong>erminadas <strong>de</strong> fábrica, siga las instrucciones a continuación.<br />
1 ) Resalte Reponer <strong>de</strong>l menú Sonido.<br />
2 ) Pulse ENTER para continuar con la reposición <strong>de</strong>l sonido.<br />
Una pantalla <strong>de</strong> confirmación aparece le preguntando si <strong>de</strong>sea reponer las configuraciones a las<br />
selecciones pred<strong>et</strong>erminadas <strong>de</strong> fábrica.<br />
3 ) Utilice los botones <strong>de</strong> flecha para resaltar Sí.<br />
4 ) Pulse ENTER para restaurar todas las configuraciones <strong>de</strong> sonido a las selecciones pred<strong>et</strong>erminadas <strong>de</strong><br />
fábrica.<br />
Nota: No se pue<strong>de</strong> restaurar la configuración AVC (Control automático <strong>de</strong>l volumen) a la selección<br />
pred<strong>et</strong>erminada <strong>de</strong> fábrica.
Operaciones básicas para contemplación <strong>de</strong> televisión 03<br />
3.5 Bloqueo <strong>de</strong> programas, canales o contenidos<br />
Mientras el bloqueo <strong>de</strong> programas, canales o contenidos es opcional, pue<strong>de</strong> que algunas imágenes sean<br />
inapropiadas a todos los miembros <strong>de</strong> la familia. Su televisor <strong>de</strong> pantalla plana soporta una función <strong>de</strong> bloqueo<br />
conocida como Control familiar. Con el Control familiar activado, ciertos materiales no aparecen en la pantalla si<br />
están fuera <strong>de</strong>l nivel <strong>de</strong> contemplación seleccionado. El Control familiar utiliza sistemas <strong>de</strong> clasificación<br />
reconocidos, pero también permite el bloqueo a juicio <strong>de</strong>l usuario. En esta sección se explica las diferentes<br />
funciones <strong>de</strong> bloqueo y cómo asignar cada tipo <strong>de</strong> bloqueo.<br />
Nota: Cuando vea un programa <strong>de</strong> TV, pue<strong>de</strong> que aparezca un mensaje <strong>de</strong> alerta <strong>de</strong> emergencia que se <strong>de</strong>splaza<br />
en la parte superior <strong>de</strong> la pantalla. La emisora <strong>de</strong> televisión está emitiendo el mensaje <strong>de</strong> emergencia como<br />
una prueba o un alerta en una emergencia real. El televisor <strong>de</strong> pantalla plana sale <strong>de</strong> la fábrica con esta<br />
función activada. Para la información acerca <strong>de</strong> los mensajes <strong>de</strong> emergencia, consulte “3.5.3 Asignación<br />
<strong>de</strong> un sistema <strong>de</strong> clasificación para crear bloqueos”.<br />
3.5.1 Asignación <strong>de</strong> una contraseña para el control familiar (bloqueo)<br />
Con el Control familiar, es posible bloquear los programas <strong>de</strong> TV, grabaciones <strong>de</strong> ví<strong>de</strong>o y contenidos <strong>de</strong> DVD<br />
inapropiados. Cuando alguien intenta ver un programa o contenido bloqueado, el televisor <strong>de</strong> pantalla plana<br />
visualiza la ventana <strong>de</strong> contraseña. El Control familiar se aplica tanto a los materiales analógicos como digitales.<br />
Para asegurar que sus bloqueos no se eliminen acci<strong>de</strong>ntalmente, el televisor <strong>de</strong> pantalla plana requiere una<br />
contraseña para cambiar el acceso a los programas, canales o contenidos bloqueados. La contraseña<br />
pred<strong>et</strong>erminada es 1234. Recomendamos fuertemente el cambio <strong>de</strong> la contraseña a un código <strong>de</strong> cuatro dígitos<br />
que le signifique algo.<br />
Siga los pasos a continuación para cambiar la contraseña.<br />
1 ) Acceda a Configuración <strong>de</strong>l sistema a través <strong>de</strong> Configuración.<br />
Español<br />
2 ) Seleccione Cambiar contraseña <strong>de</strong>l menú Configuración <strong>de</strong>l sistema.<br />
Introduzca contraseña.<br />
3 ) Introduzca la contraseña actual <strong>de</strong> cuatro dígitos utilizando los botones 0 a 9.<br />
Un mensaje <strong>de</strong> confirmación aparece en la pantalla.<br />
4 ) Introduzca su nueva contraseña.<br />
5 ) Introduzca su nueva contraseña una segunda vez cuando le sea solicitado.<br />
6 ) Pulse HOME MENU nuevamente para salir <strong>de</strong>l menú.<br />
Escriba su nueva contraseña:<br />
Si se olvida <strong>de</strong> su contraseña:<br />
Cuando aparezca “Introduza una<br />
contraseña” en el paso 4, pulse el<br />
botón ENTER durante tres<br />
segundos o más.<br />
La contraseña vuelve a la<br />
contraseña pred<strong>et</strong>erminada,<br />
1234.<br />
47<br />
Sp
03 Operaciones básicas para contemplación <strong>de</strong> televisión<br />
3.5.2 Activación <strong>de</strong>l Control familiar<br />
La función Control familiar <strong>de</strong>be estar activada para que se bloqueen los contenidos in<strong>de</strong>seables. Si esta opción<br />
está <strong>de</strong>sactivada, los programas bloqueados aparecerán en la pantalla. Para activar el bloqueo <strong>de</strong>l Control<br />
familiar, siga los pasos a continuación.<br />
1 ) Acceda a Configuración <strong>de</strong>l sistema a través <strong>de</strong> Configuración.<br />
2 ) Seleccione Control Familiar.<br />
La pantalla <strong>de</strong> introducción <strong>de</strong> contraseña aparece.<br />
3 ) Introduzca su contraseña <strong>de</strong> cuatro dígitos utilizando los botones 0 a 9.<br />
4 ) Seleccione Status.<br />
5 ) Seleccione Encendido para activar el Control familiar.<br />
6 ) Pulse HOME MENU para salir <strong>de</strong>l menú.<br />
Status : Apagado<br />
Clasificaciones MPAA<br />
Guía Familiar <strong>de</strong> TV<br />
Clasif. Inglés Canadiense<br />
Clasif. Francés Canadiense<br />
Sin Clasificaciones : Ver<br />
Clas. regional digital<br />
Cuando un programa está bloqueado, aparece (B) próximo al número <strong>de</strong>l canal. Si un canal está bloqueado pero<br />
el Control familiar está <strong>de</strong>sactivado, el símbolo que aparece es (V) y se pue<strong>de</strong> ver el canal/programa.<br />
El símbolo <strong>de</strong> bloqueo aquí marca<br />
las clasificaciones <strong>de</strong> TV<br />
bloqueadas.<br />
B<br />
B<br />
B<br />
V<br />
FV<br />
B<br />
D<br />
3.5.3 Asignación <strong>de</strong> un sistema <strong>de</strong> clasificación para crear bloqueos<br />
A<strong>de</strong>más <strong>de</strong> seleccionar el bloqueo <strong>de</strong> ciertos canales, también pue<strong>de</strong> utilizar uno <strong>de</strong> los sistemas <strong>de</strong> clasificación<br />
reconocidos para bloquear programas y/o contenidos. Su pantalla reconoce los siguientes sistemas <strong>de</strong><br />
clasificación:<br />
• Clasificación <strong>de</strong> TV<br />
• Guías familiares <strong>de</strong> TV incluyendo programación no clasificada<br />
• Asociación <strong>de</strong> la Industria Cinematrográfica <strong>de</strong> Estados Unidos (MPAA (Motion Picture Association of<br />
America) para películas)<br />
• Sistemas <strong>de</strong> clasificación canadienses en inglés/francés<br />
Nota: Su televisor <strong>de</strong> pantalla plana sale <strong>de</strong> la fábrica con todas las clasificaciones <strong>de</strong>sbloqueadas.<br />
Para bloquear el contenido <strong>de</strong> TV u otros contenidos con un sistema <strong>de</strong> clasificación, siga los pasos a<br />
continuación.<br />
1 ) Acceda a Configuración <strong>de</strong>l sistema a través <strong>de</strong> Configuración.<br />
2 ) Seleccione Control Familiar <strong>de</strong>l menú Configuración <strong>de</strong>l sistema.<br />
3 ) Seleccione uno <strong>de</strong> los sistemas <strong>de</strong> clasificación <strong>de</strong>l submenú.<br />
48<br />
Sp
Operaciones básicas para contemplación <strong>de</strong> televisión 03<br />
Menú Clasificiones MPAA<br />
Menú Guía Familiar <strong>de</strong> TV<br />
N/A : Ver<br />
G : Ver<br />
PG : Ver<br />
PG-13 : Ver<br />
R : Ver<br />
NC-17 : Ver<br />
NR : Ver<br />
TV-None<br />
TV-Y<br />
TV-Y7<br />
TV-G<br />
TV-PG<br />
TV-14<br />
TV-MA<br />
B<br />
B<br />
B<br />
V<br />
V<br />
V<br />
V<br />
FV D L S V<br />
B<br />
V<br />
V<br />
V<br />
V<br />
V<br />
V<br />
V<br />
V<br />
V<br />
V<br />
V<br />
Menú Clasif. Inglés Canadiense<br />
Menú Clasif. Francés Canadiense<br />
E : Ver<br />
C : Ver<br />
C8+ : Ver<br />
G : Bloquear<br />
PG : Bloquear<br />
14+ : Bloquear<br />
18+ : Bloquear<br />
E : Ver<br />
G : Ver<br />
8 ans+ : Ver<br />
13 ans+ : Ver<br />
16 ans+ : Ver<br />
18 ans+ : Ver<br />
Español<br />
Menú Sin clasificaciones<br />
Menú Clas. regional digital<br />
Status : Apagado<br />
Clasificaciones MPAA<br />
Guía Familiar <strong>de</strong> TV<br />
Clasif. Inglés Canadiense<br />
Clasif. Francés Canadiense<br />
Sin Clasificaciones : Ver<br />
Clas. regional digital<br />
Status : Apagado<br />
Clasificaciones MPAA<br />
Guía Familiar <strong>de</strong> TV<br />
Clasif. Inglés Canadiense<br />
Clasif. Francés Canadiense<br />
Sin Clasificaciones : Ver<br />
Clas. regional digital<br />
4 ) Utilice los botones <strong>de</strong> flecha para resaltar un nivel <strong>de</strong> bloqueo para el sistema <strong>de</strong> clasificación<br />
correspondiente.<br />
5 ) Pulse ENTER para invertir el estado <strong>de</strong> bloqueo para la opción <strong>de</strong> control paterno <strong>de</strong> TV resaltada.<br />
Un símbolo <strong>de</strong> bloqueo (B) o <strong>de</strong> visualización (V) aparece en las casillas <strong>de</strong> clasificación apropiadas. Para<br />
otras opciones <strong>de</strong> clasificación, pulse / para alternar entre bloqueo y visualización.<br />
6 ) Pulse HOME MENU para salir <strong>de</strong>l menú.<br />
Cuando una clasificación está bloqueada, todas las clasificaciones más severas también se bloquean. Por<br />
ejemplo, bloquear la clasificación <strong>de</strong> TV <strong>de</strong> nivel TV-PG (Orientación familiar sugerida), bloquea automáticamente<br />
el nivel TV-14 (Fuerte atención a los padres) y el nivel TV-MA (Auciencias maduras solamente). Por otro lado,<br />
<strong>de</strong>sbloquear una clasificación hace que las clasificaciones menos severas que<strong>de</strong>n disponibles<br />
automáticamente.<br />
Programas con la clasificación “No”<br />
El televisor <strong>de</strong> pantalla plana también provee una configuración <strong>de</strong> clasificación que bloquea los programas con<br />
una clasificación No. El sistema <strong>de</strong> clasificación <strong>de</strong> guía familiar <strong>de</strong> TV <strong>de</strong> Estados Unidos i<strong>de</strong>ntifica programas<br />
con el nivel <strong>de</strong> clasificación No. A continuación se proveen ejemplos <strong>de</strong> programas con una clasificación <strong>de</strong> No:<br />
• Comunicados <strong>de</strong> emergencia (como mensajes EAS, advertencia <strong>de</strong> tiempo y otros)<br />
• Programas originados localmente<br />
• Anuncios <strong>de</strong> servicios públicos<br />
• Noticias<br />
• Política<br />
• Religión<br />
• Deportes<br />
49<br />
Sp
03 Operaciones básicas para contemplación <strong>de</strong> televisión<br />
Para bloquear un programa con una clasificación No, siga los pasos a continuación.<br />
1 ) Acceda a Configuración <strong>de</strong>l sistema a través <strong>de</strong> Configuración.<br />
2 ) Seleccione Control Familiar <strong>de</strong>l menú Configuración <strong>de</strong>l sistema.<br />
3 ) Seleccione Guía Familiar <strong>de</strong> TV <strong>de</strong>l menú Control Familiar.<br />
4 ) Seleccione TV-None <strong>de</strong>l submenú.<br />
5 ) Seleccione una opción (Ver o Bloquear ).<br />
6 ) Pulse HOME MENU para salir <strong>de</strong>l menú.<br />
Consulte “8.1 Cuadros <strong>de</strong> clasificación (para diversas clasificaciones <strong>de</strong> audiencia)” para la información<br />
d<strong>et</strong>allada acerca <strong>de</strong> los diferentes sistemas <strong>de</strong> clasificación.<br />
Bloqueo <strong>de</strong> programas sin clasificación<br />
Con algunos programas <strong>de</strong> TV, la información <strong>de</strong> clasificación no está disponible. Para bloquear estos<br />
programas, siga los pasos a continuación.<br />
1 ) Acceda a Configuración <strong>de</strong>l sistema a través <strong>de</strong> Configuración.<br />
2 ) Seleccione Control Familiar <strong>de</strong>l menú Configuración <strong>de</strong>l sistema.<br />
3 ) Seleccione Sin Clasificaciones <strong>de</strong>l menú Control Familiar.<br />
4 ) Seleccione una opción (Ver o Bloquear ).<br />
5 ) Pulse HOME MENU para salir <strong>de</strong>l menú.<br />
Nota: Su televisor <strong>de</strong> pantalla plana sale <strong>de</strong> la fábrica con esta opción configurada para Ver.<br />
Nuevos sistemas <strong>de</strong> clasificación para emisiones digitales<br />
Algunas emisiones digitales contienen nuevas clasificaciones que no son compatibles con las clasificaciones <strong>de</strong><br />
control familiar originales <strong>de</strong> la pantalla. Cuando sintonice una <strong>de</strong> esas emisiones por primera vez, el menú Clas.<br />
Regional digital aparece en la pantalla. Cambie las configuraciones <strong>de</strong>l Control familiar para manipular las<br />
nuevas clasificaciones. De lo contrario, pue<strong>de</strong> que se <strong>de</strong>sbloqueen las clasificaciones que tuviese bloqueado<br />
anteriormente.<br />
Nota: Añadir la nueva clasificación no bloquea los programas con tal sistema <strong>de</strong> clasificación automáticamente.<br />
Para añadir el nuevo sistema <strong>de</strong> clasificación a su pantalla, siga las instrucciones a continuación.<br />
1 ) Acceda a Configuración <strong>de</strong>l sistema a través <strong>de</strong> Configuración.<br />
2 ) Seleccione Control Familiar <strong>de</strong>l menú Configuración <strong>de</strong>l sistema.<br />
3 ) Seleccione Clas. regional digital <strong>de</strong>l submenú.<br />
Se visualiza una lista <strong>de</strong> las clasificaciones disponibles.<br />
4 ) Seleccione entre las clasificaciones disponibles.<br />
5 ) Seleccione un nivel <strong>de</strong> las clasificaciones disponibles.<br />
6 ) Seleccione Ver o Bloquear.<br />
7 ) Pulse HOME MENU para salir <strong>de</strong>l menú.<br />
50<br />
Sp
Operaciones básicas para contemplación <strong>de</strong> televisión 03<br />
Eliminación <strong>de</strong> un nuevo sistema <strong>de</strong> clasificación<br />
Si no necesita más <strong>de</strong> un sistema <strong>de</strong> clasificación añadido, elimine el sistema <strong>de</strong> clasificación <strong>de</strong> su televisor <strong>de</strong><br />
pantalla plana. No es necesario eliminar los bloqueos <strong>de</strong> canales o programas individuales. Eliminar un sistema<br />
<strong>de</strong> clasificación elimina cualesquiera/todos los bloqueos iniciados con tal sistema.<br />
1 ) Acceda a Configuración <strong>de</strong>l sistema a través <strong>de</strong> Configuración.<br />
2 ) Seleccione Control Familiar <strong>de</strong>l menú Configuración <strong>de</strong>l sistema.<br />
3 ) Seleccione Clas. regional digital <strong>de</strong>l submenú.<br />
4 ) Seleccione Reposición RRT para eliminar el nuevo sistema <strong>de</strong> clasificación <strong>de</strong>l televisor <strong>de</strong> pantalla plana.<br />
Se visualiza el mensaje “¿Reajuste las clasificaciones regionales digitales?”.<br />
5 ) Seleccione OK.<br />
6 ) Pulse HOME MENU para salir <strong>de</strong>l menú.<br />
Mientras el menú Control Familiar está abierto, la visualización <strong>de</strong> estado permanece incambiable aunque el<br />
sistema tenga recibido emisiones con nuevas clasificaciones.<br />
3.5.4 Eliminación temporal <strong>de</strong> un bloqueo<br />
La pantalla <strong>de</strong> introducción <strong>de</strong> contraseña aparece cuando se d<strong>et</strong>ectan señales <strong>de</strong> classificación bloqueadas<br />
(con la imagen y sonido <strong>de</strong>sactivados). Introducir su contraseña <strong>de</strong> cuatro dígitos le permite ver el programa<br />
hasta que su televisor <strong>de</strong> pantalla plana entre en el modo <strong>de</strong> espera o sea apagado. Para eliminar un bloqueo<br />
temporalmente, siga los pasos a continuación.<br />
1 ) Sintonice el televisor <strong>de</strong> pantalla plana al canal bloqueado.<br />
2 ) Espere que se visualice el mensaje <strong>de</strong> bloqueo en la pantalla.<br />
3 ) Introduzca su contraseña <strong>de</strong> cuatro dígitos.<br />
La ventana <strong>de</strong> contraseña aparece. Cuando se introduce una contraseña <strong>de</strong> cuatro dígitos, o no se realiza<br />
una operación <strong>de</strong>ntro <strong>de</strong> 60 segundos, la ventana <strong>de</strong>saparece. Para llamar la ventana <strong>de</strong>spués que<br />
<strong>de</strong>saparezca, cambie el canal o fuente <strong>de</strong> entrada y, a continuación, vuelva antes <strong>de</strong> rep<strong>et</strong>ir los pasos<br />
prece<strong>de</strong>ntes.<br />
Español<br />
Introduzca contraseña.<br />
Para ENTRADA 2 (excepto señales <strong>de</strong> 480i) y ENTRADA 4 a ENTRADA 7, la pantalla <strong>de</strong> introducción <strong>de</strong><br />
contraseña aparece cuando se ha seleccionado Bloquear <strong>de</strong>l menú Sin clasificaciones.<br />
51<br />
Sp
03 Operaciones básicas para contemplación <strong>de</strong> televisión<br />
3.6 Iniciación inteligente para nuevos usuarios<br />
Muchas <strong>de</strong> las funciones <strong>de</strong>l televisor <strong>de</strong> pantalla plana son fáciles <strong>de</strong> utilizar, así como son más amigables al<br />
medio ambiente. En esta sección se explica cómo exten<strong>de</strong>r la vida útil <strong>de</strong> su pantalla mientras se ahorre energía.<br />
Sugerimos la aplicación <strong>de</strong> todas las funciones a continuación para la utilización más simple, mejor calidad y<br />
vida <strong>de</strong> servicio más larga.<br />
3.6.1 Utilización <strong>de</strong>l menú TOOLS<br />
Para cambiar el menú actual a otra opción, el menú TOOLS en la pantalla provee accesos directos a las<br />
selecciones disponibles aún cuando esté viendo un programa. Para visualizar el menú, pulse TOOLS en el mando<br />
a distancia. Los menús que se muestran en esta sección difieren <strong>de</strong>pendiendo <strong>de</strong>l menú.<br />
TELEVISION<br />
TOOLS<br />
Sonido<br />
Aleatorio<br />
Todo Modo Repr. : Simple<br />
Rep<strong>et</strong>ir A-B<br />
Búsqueda <strong>de</strong> tiempo<br />
Rep<strong>et</strong>ir<br />
El menú TOOLS provee accesos directos a las opciones <strong>de</strong> menú que<br />
pue<strong>de</strong>n seleccionar mientras se ve un programa.<br />
Utilice los botones <strong>de</strong> flecha para alternar entre las opciones. La configuración está concluida tan pronto la<br />
opción seleccionada aparezca en el centro <strong>de</strong> la pantalla. Cuando esté visualizando dos pantallas, el menú<br />
TOOLS aparece en la pantalla principal.<br />
3.6.2 Extensión <strong>de</strong> la vida útil <strong>de</strong> la pantalla<br />
Este menú provee accesos directos a funciones que extien<strong>de</strong>n la vida <strong>de</strong> servicio <strong>de</strong> su pantalla. Su televisor <strong>de</strong><br />
pantalla plana incluye una opción <strong>de</strong> protección <strong>de</strong> la pantalla. Activar esta opción hace que la pantalla<br />
seleccione automáticamente las varias funciones que pue<strong>de</strong>n alargar la vida <strong>de</strong> servicio <strong>de</strong> su pantalla y atenuar<br />
los fenómenos <strong>de</strong> imagen remanente y quemado <strong>de</strong> la pantalla. Para configurar esta opción, siga las<br />
instrucciones a continuación.<br />
1 ) Acceda a Opción a través <strong>de</strong> Configuración.<br />
2 ) Seleccione Protec. pantalla <strong>de</strong>l menú Opción.<br />
Aparecerá una pantalla <strong>de</strong> confirmación.<br />
3 ) Seleccione Sí <strong>de</strong>l submenú.<br />
Las siguientes configuraciones se introducen automáticamente:<br />
•Tmño. Auto.: Zoom ancho<br />
•Máscara lateral - D<strong>et</strong>ección: Modo 1<br />
•Orbiter (Fuente <strong>de</strong> AV): Modo 1<br />
•Orbiter (Fuente <strong>de</strong> PC): Modo 1<br />
•Ahorro <strong>de</strong> energía: Modo 1<br />
•Selección AV: ÓPTIMO (Cuando DINÁMICO está seleccionado para Selección AV)<br />
4 ) Pulse HOME MENU para salir <strong>de</strong>l menú.<br />
52<br />
Sp
Operaciones básicas para contemplación <strong>de</strong> televisión 03<br />
3.6.3 Activación <strong>de</strong> Orbiter<br />
Orbiter es una función incorporada para proteger el quemado <strong>de</strong> la pantalla. La función Orbiter cambia<br />
automáticamente la posición <strong>de</strong> la imagen mientras <strong>de</strong> forma imperceptible la imagen está en la pantalla. Para<br />
activar la función Orbiter, siga los pasos a continuación. Para cancelar esta función, seleccione Apagado en el<br />
paso 3.<br />
1 ) Acceda a Opción a través <strong>de</strong> Configuración.<br />
2 ) Seleccione Orbiter <strong>de</strong>l menú Opción.<br />
3 ) Seleccione Modo 1 ó Modo 2.<br />
• Modo 1 <strong>de</strong> fuente <strong>de</strong> AV: para cualquier modo <strong>de</strong> pantalla con excepción <strong>de</strong> Punto a punto<br />
• Modo 2 <strong>de</strong> fuente <strong>de</strong> AV: para todos los modos <strong>de</strong> pantalla disponibles<br />
• Modo 1 <strong>de</strong> fuente <strong>de</strong> PC: para activar la función Orbiter<br />
• Modo 2 <strong>de</strong> fuente <strong>de</strong> PC: para suavizar la apariencia <strong>de</strong>l texto/caracteres<br />
4 ) Pulse HOME MENU para salir <strong>de</strong>l menú.<br />
Nota: Los bor<strong>de</strong>s más alejados <strong>de</strong> una imagen pue<strong>de</strong>n ocultarse cuando se <strong>de</strong>splaza la posición <strong>de</strong> la imagen.<br />
A<strong>de</strong>más, cuando la función Orbiter está configurada para el Modo 1 ó Modo 2, pue<strong>de</strong> que la imagen<br />
parezca bajar ligeramente en la pantalla.<br />
3.6.4 Disparo periódico <strong>de</strong>l patrón <strong>de</strong> ví<strong>de</strong>o <strong>de</strong> protección <strong>de</strong> pantalla<br />
La función <strong>de</strong> patrón <strong>de</strong> ví<strong>de</strong>o hace que la pantalla aparezca blanca, que ayuda a atenuar los fenómenos <strong>de</strong><br />
imagen remanente y <strong>de</strong> quemado <strong>de</strong> pantalla. Mientras la pantalla <strong>de</strong> patrón <strong>de</strong> ví<strong>de</strong>o está activada, solamente<br />
el botón TV (a) <strong>de</strong>l mando a distancia y el botón STANDBY/ON <strong>de</strong> la pantalla están disponibles. La pantalla<br />
cambia automáticamente al modo <strong>de</strong> espera una hora <strong>de</strong>spués <strong>de</strong> la activación <strong>de</strong> la pantalla <strong>de</strong> patrón <strong>de</strong> ví<strong>de</strong>o.<br />
Para cancelar la pantalla <strong>de</strong> patrón <strong>de</strong> ví<strong>de</strong>o, pulse TV (a) <strong>de</strong>l mando a distancia o pulse STANDBY/ON <strong>de</strong> la<br />
pantalla.<br />
Para activar la función <strong>de</strong> patrón <strong>de</strong> ví<strong>de</strong>o, siga los pasos a continuación.<br />
1 ) Acceda a Opción a través <strong>de</strong> Configuración.<br />
2 ) Seleccione Patrón <strong>de</strong> ví<strong>de</strong>o <strong>de</strong>l menú Opción.<br />
Aparecerá una pantalla <strong>de</strong> confirmación.<br />
3 ) Seleccione Iniciar <strong>de</strong>l submenú.<br />
La pantalla <strong>de</strong> patrón <strong>de</strong> ví<strong>de</strong>o aparece.<br />
4 ) Deje la pantalla sin tocar durante por lo menos una hora.<br />
Español<br />
Nota: El temporizador <strong>de</strong> patrón <strong>de</strong> ví<strong>de</strong>o tiene prioridad sobre las configuraciones Temporizador <strong>de</strong> apagado,<br />
Apagado: sin señal y Apagado: sin operación (Gestión <strong>de</strong> energía).<br />
3.6.5 Activación <strong>de</strong>l ahorro <strong>de</strong> energía para reducir el uso <strong>de</strong> energía<br />
La opción Ahorro <strong>de</strong> energía reduce el brillo <strong>de</strong> la imagen y disminuye el consumo <strong>de</strong> energía. La configuración<br />
recomendada, Modo 1 <strong>de</strong> Ahorro <strong>de</strong> energía, extien<strong>de</strong> la vida <strong>de</strong> servicio <strong>de</strong> su pantalla mientras mantiene el uso<br />
<strong>de</strong> energía al mínimo.<br />
siga las instrucciones a continuación para activar la opción Ahorro <strong>de</strong> energía.<br />
1 ) Acceda a Control <strong>de</strong> la alimentación a través <strong>de</strong> Configuración.<br />
2 ) Seleccione Ahorro <strong>de</strong> energía <strong>de</strong>l menú.<br />
3 ) Seleccione una opción <strong>de</strong>l submenú Ahorro <strong>de</strong> energía.<br />
Opción<br />
4 ) Pulse HOME MENU para salir <strong>de</strong>l menú.<br />
Descripción<br />
Apagado<br />
Sin efecto<br />
Modo 1<br />
consume menos energía que Apagado<br />
Modo 2 consume menos energía que el Modo 1<br />
53<br />
Sp
04 Opciones adicionales <strong>de</strong> ajuste <strong>de</strong> la imagen y <strong>de</strong>l sonido<br />
4 Opciones adicionales <strong>de</strong> ajuste <strong>de</strong> la imagen<br />
y <strong>de</strong>l sonido<br />
Para tomar ventaja <strong>de</strong> todo lo que ofrece su televisor <strong>de</strong> pantalla plana, explore este capítulo para los recursos y<br />
funciones que hacen su experiencia <strong>de</strong> contemplación más intensa. La mayoría <strong>de</strong> las secciones tratan <strong>de</strong>l ajuste<br />
y disposición <strong>de</strong> los ítems <strong>de</strong> pantalla/menú relacionados con la imagen mientras las otras secciones proveen<br />
las opciones <strong>de</strong> ajuste <strong>de</strong>l sonido y gestión <strong>de</strong> energía. Aplique todos los cambios que <strong>de</strong>see.<br />
4.1 Selección <strong>de</strong> una opción <strong>de</strong> AV (Ví<strong>de</strong>o, Juego, <strong>et</strong>c.)<br />
Así como con el <strong>sens</strong>or <strong>de</strong> luz ambiental, cada opción y selección <strong>de</strong> AV <strong>de</strong>pen<strong>de</strong> <strong>de</strong>l brillo <strong>de</strong>l ambiente y <strong>de</strong>l<br />
programa o película en la pantalla. Las imágenes pue<strong>de</strong>n ser <strong>de</strong> una fuente <strong>de</strong> AV o <strong>de</strong> PC. Ambas las fuentes se<br />
discutirán a continuación.<br />
Seleccione entre las si<strong>et</strong>e selecciones <strong>de</strong> AV para obter la mejor imagen <strong>de</strong> una fuente <strong>de</strong> AV externa. Utilice el<br />
mando a distancia o el Home Menu para seleccionar la fuente <strong>de</strong> AV. Para un PC, proceda a “4.1.3 Selección <strong>de</strong><br />
una fuente <strong>de</strong> PC”.<br />
Si la fuente <strong>de</strong> AV es un control <strong>de</strong> juego, seleccione JUEGO y consulte “4.1.4 Configuración <strong>de</strong> la pantalla para<br />
reconocer una consola <strong>de</strong> juego” para más información.<br />
4.1.1 Fuente <strong>de</strong> AV a través <strong>de</strong>l mando a distancia<br />
siga las instrucciones a continuación para configurar una selección <strong>de</strong> AV para una fuente <strong>de</strong> AV externa con el<br />
mando a distancia.<br />
1 ) Pulse AV SELECTION en el mando a distancia.<br />
La selección <strong>de</strong> AV actual aparece.<br />
2 ) Pulse AV SELECTION <strong>de</strong> nuevo antes que el modo visualizado <strong>de</strong>saparezca.<br />
Cada vez que pulsa, las opciones cambian en el or<strong>de</strong>n que se muestra a continuación.<br />
Selección AV<br />
ÓPTIMO<br />
RENDIMIENTO<br />
DINÁMICO<br />
PELÍCULA<br />
DEPORTE<br />
JUEGO<br />
Estándar<br />
Descripción<br />
ajusta automáticamente la calidad <strong>de</strong> la imagen<br />
para el nivel <strong>de</strong>l brillo <strong>de</strong>l área <strong>de</strong> contemplación<br />
(compartido con las fuentes <strong>de</strong> entrada externa y<br />
entrada <strong>de</strong> TV)<br />
para una imagen altamente <strong>de</strong>finida en una sala <strong>de</strong><br />
brillo normal (compartido por fuentes <strong>de</strong> entrada<br />
externa y entrada <strong>de</strong> TV)<br />
para una imagen muy nítida con contraste<br />
máximo, pero sin disponibilidad <strong>de</strong> ajuste manual<br />
<strong>de</strong> la calidad <strong>de</strong> imagen (compartido por fuentes <strong>de</strong><br />
entrada externa y entrada <strong>de</strong> TV)<br />
para películas (compartido por fuentes <strong>de</strong> entrada<br />
externa y entrada <strong>de</strong> TV)<br />
para programas <strong>de</strong>portivos (compartido por<br />
fuentes <strong>de</strong> entrada externa y entrada <strong>de</strong> TV)<br />
reduce el brillo <strong>de</strong> la imagen para una<br />
contemplación más fácil (compartido por fuentes<br />
<strong>de</strong> entrada externa y entrada <strong>de</strong> TV)<br />
permite personalizar las configuraciones como se<br />
<strong>de</strong>see (ajuste el modo para cada fuente <strong>de</strong> entrada)<br />
54<br />
Sp<br />
3 ) Permita que la pantalla Sección AV <strong>de</strong>saparezca.<br />
Cuando <strong>de</strong>saparezca la pantalla, la pantalla se bloquea en la última opción vista y el menú se cierra.
Opciones adicionales <strong>de</strong> ajuste <strong>de</strong> la imagen y <strong>de</strong>l sonido<br />
04<br />
4.1.2 Selección <strong>de</strong> una fuente <strong>de</strong> AV a través <strong>de</strong> Home Menu<br />
El otro método para seleccionar una selección <strong>de</strong> AV utiliza el Home Menu. Siga las instrucciones a continuación<br />
para configurar una selección <strong>de</strong> AV para una fuente <strong>de</strong> AV.<br />
La Selección AV, ÓPTIMO, ajusta automáticamente a la calidad <strong>de</strong> imagen más alta posible para la fuente<br />
seleccionada y entorno <strong>de</strong> contemplación. Su televisor <strong>de</strong> pantalla plana emplea tecnologías avanzadas <strong>de</strong><br />
reproducción <strong>de</strong>l sonido, tales como SRS WOW HD TM , y la configuración ÓPTIMO también ajusta<br />
automáticamente al sonido óptimo para la escena seleccionada. Este proceso es gradual y, por lo tanto, los<br />
cambios <strong>de</strong> matiz y brillo pue<strong>de</strong>n ser visibles. Eso es normal y no indica un fallo <strong>de</strong> funcionamiento.<br />
La configuración DINÁMICO bloquea los ajustes manuales para opciones específicas. La configuración<br />
DINÁMICO bloquea el Contraste, Brillo, Color, Matiz, Niti<strong>de</strong>z y Reponer. Las opciones no disponbles aparecen<br />
oscurecidas en el menú.<br />
Para seleccionar una fuente <strong>de</strong> AV a través <strong>de</strong>l Home Menu, siga los pasos a continuación.<br />
1 ) Acceda a Imagen a través <strong>de</strong> Configuración.<br />
2 ) Seleccione Selección AV <strong>de</strong>l menú Imagen.<br />
3 ) Seleccione una opción <strong>de</strong>l submenú.<br />
Selección AV<br />
Español<br />
ÓPTIMO<br />
RENDIMIENTO<br />
DINÁMICO<br />
PELÍCULA<br />
DEPORTE<br />
JUEGO<br />
Estándar<br />
Cuando se selecciona ÓPTIMO,<br />
las imágenes se reproducen según<br />
la información colectada por el<br />
<strong>sens</strong>or <strong>de</strong> luz ambiental.<br />
Imagen<br />
Selección AV : ÓPTIMO<br />
PureCinema<br />
Cont. sonido : Apagado<br />
Rendimiento ÓPTIMO<br />
Reponer<br />
(Submenú cuando se selecciona ÓPTIMO para Selección AV)<br />
4 ) Pulse HOME MENU para cerrar el menú y salir.<br />
4.1.3 Selección <strong>de</strong> una fuente <strong>de</strong> PC<br />
De un PC, seleccione entre las dos selecciones <strong>de</strong> AV para la mejor imagen. Las opciones son las siguientes:<br />
• ESTÁNDAR: para una imagen altamente <strong>de</strong>finida en una sala con brillo normal<br />
• USUARIO: permite personalizar las configuraciones como se <strong>de</strong>see para cada fuente <strong>de</strong> entrada<br />
55<br />
Sp
04 Opciones adicionales <strong>de</strong> ajuste <strong>de</strong> la imagen y <strong>de</strong>l sonido<br />
4.1.4 Configuración <strong>de</strong> la pantalla para reconocer una consola <strong>de</strong> juego<br />
Al añadir una consola <strong>de</strong> juego a su televisor <strong>de</strong> pantalla plana, utilice la función Juego para establecer una<br />
preferencia para la calidad <strong>de</strong> la imagen o para la operabilidad.<br />
Para que la pantalla almacene su preferencia <strong>de</strong> Juego, siga los pasos a continuación.<br />
1 ) Acceda a Opción a través <strong>de</strong> Configuración.<br />
2 ) Seleccione Pref. cont. juego <strong>de</strong>l menú.<br />
3 ) Seleccione Encendido (operabilidad preferida) o Apagado (calidad <strong>de</strong> imagen preferida).<br />
4 ) Pulse HOME MENU para salir <strong>de</strong>l menú.<br />
Para activar la opción Pref. cont. juego, aajuste la Selección AV a JUEGO y utilice una entrada externa (a menos<br />
que la fuente venga <strong>de</strong> un PC). Cuando un menú <strong>de</strong> fuente <strong>de</strong> PC está en la pantalla, se ignora la opción Pref.<br />
cont. juego. De la misma forma, se ignora la opción Pref. cont. juego para la operatibilidad (encendido) durante<br />
la visualización en multipantalla (consulte “4.4 Visualización en multipantalla”) o congelamiento <strong>de</strong> imagen<br />
(consulte “4.5 Congelamiento <strong>de</strong> imagen”).<br />
4.2 Ajuste <strong>de</strong> los elementos <strong>de</strong> imagen específicos<br />
La tecnología <strong>de</strong> plasma proporciona una <strong>de</strong> las mejores imágenes disponibles hoy en día. Sin embargo, el área/<br />
entorno <strong>de</strong> contemplación y preferencias personales afectan cómo la imagem aparece. En esta sección se proveen<br />
los métodos para ajustar la imagen y el sonido para una mejor experiencia <strong>de</strong> contemplación.<br />
4.2.1 Selección <strong>de</strong> un tamaño <strong>de</strong> pantalla (automática o manual)<br />
Selección automática <strong>de</strong>l tamaño <strong>de</strong> la pantalla<br />
El televisor <strong>de</strong> pantalla plana pue<strong>de</strong> seleccionar automáticamente un tamaño <strong>de</strong> pantalla apropiado para la señal<br />
<strong>de</strong> ví<strong>de</strong>o <strong>de</strong> entrada <strong>de</strong>s<strong>de</strong> un dispositivo HDMI conectado. Para permitir la selección automática <strong>de</strong>l tamaño <strong>de</strong><br />
pantalla, siga los pasos a continuación.<br />
1 ) Acceda a Opción a través <strong>de</strong> Configuración.<br />
2 ) Seleccione Tmño. Auto. <strong>de</strong>l menú Opción.<br />
3 ) Seleccione Natural o Zoom ancho <strong>de</strong>l submenú.<br />
Opción<br />
Apagado<br />
Natural<br />
Zoom ancho<br />
Descripción<br />
<strong>de</strong>sactiva la función <strong>de</strong> tamaño automático<br />
ajusta la imagen al tamaño <strong>de</strong> la pantalla<br />
amplía y visualiza solamente la porción <strong>de</strong> relación<br />
<strong>de</strong> aspecto 4:3 en una pantalla compl<strong>et</strong>a y ancha<br />
4 ) Pulse HOME MENU para salir <strong>de</strong>l menú.<br />
Nota: Cuando una señal <strong>de</strong> ví<strong>de</strong>o no contiene la información <strong>de</strong> relación <strong>de</strong> aspecto, la función <strong>de</strong> selección<br />
automática <strong>de</strong>l tamaño <strong>de</strong> pantalla no está disponible.<br />
56<br />
Sp
Opciones adicionales <strong>de</strong> ajuste <strong>de</strong> la imagen y <strong>de</strong>l sonido<br />
04<br />
Selección manual <strong>de</strong>l tamaño <strong>de</strong> la pantalla<br />
Seleccione manualmente un tamaño <strong>de</strong> pantalla apropiado si una imagen no aparece en el formato correcto.<br />
Explore el menú para el tamaño <strong>de</strong> pantalla correcto para un programa específico.<br />
Los tamaños <strong>de</strong> pantalla disponibles difieren <strong>de</strong>pendiendo <strong>de</strong> los tipos <strong>de</strong> señales <strong>de</strong> ví<strong>de</strong>o. Mientras ve un<br />
programa <strong>de</strong> TV, pulse SCREEN SIZE en el mando a distancia para cambiar la imagen a través <strong>de</strong> Auto,<br />
COMPLETA, Punto a punto, ZOOM, CINE, 4:3, PANORÁMICA, PANORÁMICA 1 y PANORÁMICA 2. Cambie<br />
libremente el tamaño <strong>de</strong> la pantalla durante las emisiones o ví<strong>de</strong>o <strong>de</strong> otras fuentes <strong>de</strong> entrada. La opción Auto<br />
está disponible cuando se recibe una emisión HD.<br />
El cuadro a continuación provee información sobre cómo la pantalla aparece para cada opción.<br />
Auto<br />
Opción <strong>de</strong> AV<br />
Descripción<br />
añada máscaras laterales o visualiza la imagen en<br />
pantalla compl<strong>et</strong>a cuando se d<strong>et</strong>ectan imágenes<br />
HD con máscaras laterales. Consulte D<strong>et</strong>ección <strong>de</strong><br />
máscaras en la página 59.<br />
COMPLETA comprime las imágenes 16:9<br />
Punto a punto<br />
ZOOM<br />
CINE<br />
iguala la señal <strong>de</strong> entrada al mismo número <strong>de</strong><br />
píxeles <strong>de</strong> la pantalla (disponible solamente para<br />
señales <strong>de</strong> 1080i ó 1080p)<br />
pue<strong>de</strong> que aparezcan barras en las partes superior<br />
e inferior en algunos programas tipo buzón 16:9<br />
pue<strong>de</strong> que aparezcan barras en las partes superior<br />
e inferior en algunos programas tipo buzón 14:9<br />
(disponible solamente para señales SD)<br />
4:3 aparecen barras laterales en cada lado<br />
PANORÁMICA<br />
PANORÁMICA 1<br />
PANORÁMICA 2<br />
las imágenes se alargan progresivamente hacia<br />
cada lado (disponible solamente para señales SD)<br />
las imágenes se alargan progresivamente hacia<br />
cada lado (disponible solamente para señales HD)<br />
las imágenes se alargan uniformemente hacia<br />
cada lado (disponible solamente para señales HD)<br />
Español<br />
Opción <strong>de</strong> PC<br />
Descripción<br />
4:3 rellena la pantalla sin cambiar la relación <strong>de</strong><br />
aspecto <strong>de</strong> las señales <strong>de</strong> entrada<br />
COMPLETA visualiza una pantalla compl<strong>et</strong>a 16:9<br />
Con la opción PANORÁMICA 1 ó PANORÁMICA 2 seleccionada, una emisión <strong>de</strong> alta <strong>de</strong>finición (HD) pue<strong>de</strong> cortar<br />
parte <strong>de</strong> una imagen o menú. Si una imagen o menú aparece cortado o sale <strong>de</strong> la pantalla, cambie la opción a<br />
COMPLETA.<br />
Evite visualizar señales que rellenan solamente parte <strong>de</strong> la pantalla. Las imágenes que no rellenan totalmente la<br />
pantalla pue<strong>de</strong>n causar una r<strong>et</strong>ención <strong>de</strong> imagen temporal o permanente <strong>de</strong>pendiendo <strong>de</strong> su frecuencia y<br />
duración. Por ejemplo, una emisión HD con máscaras laterales (contenido 4:3) causa el <strong>de</strong>sgaste irregular <strong>de</strong> las<br />
celdas <strong>de</strong> plasma. Si máscaras laterales aparecen alre<strong>de</strong>dor <strong>de</strong> una emisión, una vez que se finalice el programa<br />
o película, cambie a un ví<strong>de</strong>o <strong>de</strong> movimiento <strong>de</strong> pantalla compl<strong>et</strong>a. Esta acción ayuda a compensar el <strong>de</strong>gaste<br />
<strong>de</strong> las celdas <strong>de</strong> plasma y protege la pantalla contra el fenómeno <strong>de</strong> imagen remanente. Para más información<br />
acerca <strong>de</strong> máscaras, consulte “4.3.1 Ajuste <strong>de</strong> las máscaras laterales (barras negras en ambos lados)”.<br />
Nota: No todos los programas contienen tamaños <strong>de</strong> pantalla alternativos.<br />
57<br />
Sp
04 Opciones adicionales <strong>de</strong> ajuste <strong>de</strong> la imagen y <strong>de</strong>l sonido<br />
4.2.2 Corrección <strong>de</strong> la imagen para una fuente <strong>de</strong> AV o PC<br />
Mientras los ajustes <strong>de</strong> la imagen son para sus preferencias personales, las fuentees pue<strong>de</strong>n causar cambios <strong>de</strong><br />
la imagen imprevistos con frecuencia. Su televisor <strong>de</strong> pantalla plana ofrece diversas opciones <strong>de</strong> ajuste.<br />
Fuente <strong>de</strong> AV<br />
Fuente <strong>de</strong> PC<br />
Opción Flecha izquierda Flecha <strong>de</strong>recha<br />
Contraste menos contraste más contraste<br />
Brillo más oscuro más brillante<br />
Color menos intensidad más intensidad<br />
Matiz tonos <strong>de</strong> la piel purpúreos tonos <strong>de</strong> la piel verdosos<br />
Niti<strong>de</strong>z menor <strong>de</strong>finición mayor <strong>de</strong>finición<br />
Opción Flecha izquierda Flecha <strong>de</strong>recha<br />
Contraste menos contraste más contraste<br />
Brillo más oscuro más brillante<br />
Rojo color más débil color más fuerte<br />
Ver<strong>de</strong> color más débil color más fuerte<br />
Azul color más débil color más fuerte<br />
Para corregir la imagen para una fuente <strong>de</strong> AV o PC, siga los pasos a continuación.<br />
1 ) Acceda a Imagen a través <strong>de</strong> Configuración.<br />
2 ) Seleccione una opción para ajustar.<br />
Fuente <strong>de</strong> AV<br />
Fuente <strong>de</strong> PC<br />
Imagen<br />
Selección AV : RENDIMIENTO<br />
Contraste : 40<br />
Brillo : 0<br />
Color : 0<br />
Matiz : 0<br />
Niti<strong>de</strong>z : 0<br />
PureCinema<br />
Reponer<br />
Imagen<br />
Selección AV : ESTÁNDAR<br />
Contraste : 40<br />
Brillo : 0<br />
Rojo : 0<br />
Ver<strong>de</strong> : 0<br />
Azul : 0<br />
Reponer<br />
3 ) Seleccione el nivel <strong>de</strong>seado para tal opción utilizando las flechas izquierda y <strong>de</strong>recha ( / ).<br />
Contraste 32<br />
4 ) Repita el proceso para cualquier ajuste adicional.<br />
5 ) Pulse HOME MENU para salir <strong>de</strong>l menú <strong>de</strong>spués <strong>de</strong> concluir todos los ajustes.<br />
Nota: La reposición regresa todas las configuraciones a las selecciones pred<strong>et</strong>erminadas <strong>de</strong> fábrica.<br />
58<br />
Sp
Opciones adicionales <strong>de</strong> ajuste <strong>de</strong> la imagen y <strong>de</strong>l sonido<br />
04<br />
4.3 Asignación <strong>de</strong> funciones <strong>de</strong> imagen avanzadas<br />
Su televisor <strong>de</strong> pantalla plana provee diversas funciones avanzadas para optimizar la calidad <strong>de</strong> la imagen que<br />
van más allá <strong>de</strong> los ajustes básicos explicados previamente en este manual. En esta sección se explora el valor<br />
ofrecido a través <strong>de</strong>l soporte <strong>de</strong> alta <strong>de</strong>finición (HD) <strong>de</strong> PureCinema <strong>de</strong> <strong>Pioneer</strong>, los colores negros <strong>de</strong> calidad<br />
superior, el balance <strong>de</strong>l blanco mejorado, y las mejoras <strong>de</strong> los colores en general.<br />
4.3.1 Ajuste <strong>de</strong> las máscaras laterales (barras negras en ambos lados)<br />
Las máscaras laterales rellenan las áreas en ambos lados <strong>de</strong> una imagen. Algunos contenidos no rellenan toda<br />
la pantalla y, por lo tanto, aparecen barras en ambos lados <strong>de</strong> la imagen. En esta sección se explica cómo ajustar<br />
las máscaras laterales.<br />
D<strong>et</strong>ección <strong>de</strong> máscaras<br />
Pue<strong>de</strong> que algunas emisiones HD visualicen el contenido 4:3 con máscaras laterales. Las máscaras laterales son<br />
barras negras que aparecen en los lados izquierdo y <strong>de</strong>recho <strong>de</strong> la imagen. Si se ajusta el tamaño <strong>de</strong> la pantalla<br />
<strong>de</strong>l televisor <strong>de</strong> pantalla plana a Natural durante el proceso <strong>de</strong> selección automática <strong>de</strong>l tamaño, barras grises<br />
reemplazan las barras negras. Cuando se ajusta la pantalla a Zoom ancho, las barras se ocultan. Esas respuestas<br />
reducen las preocupaciones <strong>de</strong> imagen remanente.<br />
Para permitir que la pantalla d<strong>et</strong>ecte máscaras laterales, siga los pasos a continuación.<br />
1 ) Acceda a Opción a través <strong>de</strong> Configuración.<br />
Español<br />
2 ) Seleccione Máscara lateral <strong>de</strong>l menú Opción.<br />
3 ) Seleccione D<strong>et</strong>ección <strong>de</strong>l submenú.<br />
4 ) Seleccione Modo 1 ó Mo<strong>de</strong> 2 para activar la d<strong>et</strong>ección <strong>de</strong> máscaras laterales.<br />
El Modo 1 d<strong>et</strong>ecta solamente las máscaras laterales negras y el Modo 2 d<strong>et</strong>ecta tanto las máscaras<br />
laterales negras como las máscaras laterales ilustradas. Seleccione Apagado para <strong>de</strong>sactivar esta función.<br />
5 ) Pulse HOME MENU para salir <strong>de</strong>l menú.<br />
6 ) Compruebe que se visualice la palabra “AUTO” en el rótulo <strong>de</strong> información.<br />
Las señales <strong>de</strong> ví<strong>de</strong>o pue<strong>de</strong>n afectar la función <strong>de</strong> d<strong>et</strong>ección <strong>de</strong> máscaras laterales. Para las emisiones <strong>de</strong> alta<br />
<strong>de</strong>finición, si la d<strong>et</strong>ección <strong>de</strong> máscaras laterales está activada, la pantalla d<strong>et</strong>ecta automáticamente las<br />
imágenes que contienen máscaras laterales y muestra la imagen en pantalla compl<strong>et</strong>a. Alterne el tamaño <strong>de</strong> la<br />
pantalla para seleccionar Auto para las señales <strong>de</strong> ví<strong>de</strong>o sin información <strong>de</strong> relación <strong>de</strong> aspecto.<br />
Los contenidos <strong>de</strong> ví<strong>de</strong>o también pue<strong>de</strong>n afectar la función <strong>de</strong> d<strong>et</strong>ección <strong>de</strong> máscaras laterales. Si ocurre un<br />
error <strong>de</strong> d<strong>et</strong>ección al intentar ver un contenido HD, cambie manualmente el tamaño <strong>de</strong> la pantalla a la<br />
configuración apropiada para tal contenido.<br />
Modo HD ancho<br />
El modo HD ancho permite seleccionar el modo <strong>de</strong> visualización (PANORÁMICA 1 ó PANORÁMICA 2) cuando<br />
se d<strong>et</strong>ectan máscaras laterales que aparecen en una imagen 4:3. Esta opción está disponible cuando el menú<br />
Tmño. Auto. está configurado para Zoom ancho y la d<strong>et</strong>ección <strong>de</strong> máscaras laterales para Modo 1 ó Modo 2. Para<br />
permitir el modo HD ancho, siga los pasos a continuación.<br />
1 ) Acceda a Opción a través <strong>de</strong> Configuración.<br />
2 ) Seleccione Máscara lateral <strong>de</strong>l menú Opción.<br />
3 ) Seleccione Modo HD ancho <strong>de</strong>l submenú.<br />
4 ) Seleccione Modo 1 ó Mo<strong>de</strong> 2 para activar el modo HD ancho.<br />
• Modo 1: el modo <strong>de</strong> la pantalla cambia a PANORÁMICA 1 cuando se d<strong>et</strong>ecan máscaras laterales.<br />
• Modo 2: el modo <strong>de</strong> la pantalla cambia a PANORÁMICA 2 cuando se d<strong>et</strong>ecan máscaras laterales.<br />
5 ) Pulse HOME MENU para salir <strong>de</strong>l menú.<br />
59<br />
Sp
04 Opciones adicionales <strong>de</strong> ajuste <strong>de</strong> la imagen y <strong>de</strong>l sonido<br />
Aclaramiento <strong>de</strong> las máscaras laterales<br />
Si el contenido aparece con barras (máscaras laterales) en cada lado <strong>de</strong> una imagen cuando el tamaño <strong>de</strong><br />
pantalla es 4:3 y la d<strong>et</strong>ección <strong>de</strong> máscaras laterales está configurada para el Modo 1 ó Modo 2, las barras camian<br />
automáticamente <strong>de</strong> negro a gris. Sin embargo, el gris es relativamente oscuro. Para cambiar las barras a un<br />
tono <strong>de</strong> gris más claro, siga los pasos a continuación.<br />
1 ) Acceda a Opción a través <strong>de</strong> Configuración.<br />
2 ) Seleccione Máscara lateral <strong>de</strong>l menú Opción.<br />
3 ) Seleccione Brillo sinc. <strong>de</strong>l submenú.<br />
4 ) Seleccione el parám<strong>et</strong>ro <strong>de</strong>seado.<br />
Fija<br />
Auto<br />
Parám<strong>et</strong>ro<br />
Descripción<br />
ajusta el mismo brillo para las máscaras laterales<br />
grises<br />
ajusta el brillo <strong>de</strong> las máscaras laterales <strong>de</strong> acurdo<br />
al brillo <strong>de</strong> las imágenes <strong>de</strong> la pantalla<br />
5 ) Pulse HOME MENU para salir <strong>de</strong>l menú.<br />
4.3.2 Seleccione un nivel PureCinema para imágenes <strong>de</strong> alta calidad<br />
La función PureCinema <strong>de</strong> <strong>Pioneer</strong> d<strong>et</strong>ecta y analiza automáticamente una fuente basada en película (codificada<br />
originalmente en 24 fotogramas/segundo) y, a continuación, recrea cada fotograma fijo para ofrecer una calidad<br />
<strong>de</strong> imagen HD. La función soporta tanto películas como texto.<br />
Para ajustar el nivel PureCinema para su material HD, siga los pasos a continuación.<br />
1 ) Acceda a Imagen a través <strong>de</strong> Configuración.<br />
2 ) Seleccione PureCinema <strong>de</strong>l submenú.<br />
3 ) Seleccione Modo película o Optimización <strong>de</strong>pendiendo <strong>de</strong>l material.<br />
4 ) Seleccione el parám<strong>et</strong>ro <strong>de</strong>seado.<br />
Modo Parám<strong>et</strong>ro Descripción<br />
Apagado<br />
<strong>de</strong>sactiva PureCinema<br />
Modo<br />
película<br />
Estándar (no disponible para<br />
señales <strong>de</strong> entrada <strong>de</strong> 480p,<br />
720p @60 Hz ó 1080p @60 Hz)<br />
Suave (no disponibles para<br />
señales <strong>de</strong> entrada <strong>de</strong> 1080p<br />
@60 Hz)<br />
Avanzar (no disponibles para<br />
señales <strong>de</strong> entrada <strong>de</strong> 1080p<br />
@60 Hz)<br />
d<strong>et</strong>ecta automáticamente los<br />
datos <strong>de</strong> imagen grabados al<br />
visualizar imágenes <strong>de</strong> DVD y<br />
<strong>de</strong> alta <strong>de</strong>finición (películas, por<br />
ejemplo) con 24 fotogramas por<br />
segundo para una<br />
reproducción fluida y vívida<br />
produce imágenes en<br />
movimiento más fluidas y vívidas<br />
convierte imágenes <strong>de</strong> calidad<br />
<strong>de</strong> cine a 72 Hz al visualizar<br />
imágenes <strong>de</strong> DVD (películas,<br />
por ejemplo) con 24 fotogramas<br />
por segundo para una<br />
reproducción fluida y vívida<br />
Optimización Apagado <strong>de</strong>sactiva la optimización <strong>de</strong><br />
texto<br />
Encendido<br />
mejora la calidad <strong>de</strong><br />
visualización <strong>de</strong> subtítulos<br />
5 ) Pulse HOME MENU para salir <strong>de</strong>l menú.<br />
Nota: Activar la configuración Pref. cont. juego en el menú Opción <strong>de</strong>sactiva la configuración PureCinema.<br />
60<br />
Sp
Opciones adicionales <strong>de</strong> ajuste <strong>de</strong> la imagen y <strong>de</strong>l sonido<br />
04<br />
4.4 Visualización en multipantalla<br />
El televisor <strong>de</strong> pantalla plana pue<strong>de</strong> visualizar pantallas múltiples al mismo tiempo: dos pantallas o imagen-enimagen.<br />
Es posible invertir las imágenes (en 2 pantallas e I-en-I) o <strong>de</strong>splazarlas a varias ubicaciones en la pantalla<br />
(I-en-I)<br />
2-pantallas<br />
Imagen-en-Imagen (I-en-I)<br />
4.4.1 Dividir/Alternar/Desplazar la pantalla<br />
Para dividir la pantalla <strong>de</strong> forma que aparezcan dos canales, pulse el botón SPLIT en el mando a distancia. Cada<br />
vez que pulsa el botón, la pantalla cambia a través <strong>de</strong> las visualizaciones en dos pantallas, imagen-en-imagen, y<br />
pantalla simple.<br />
Para cambiar las imágenes entre los lados/ubicaciones <strong>de</strong> la pantalla, pulse el botón SWAP.<br />
Español<br />
Para <strong>de</strong>splazar la imagen pequeña <strong>de</strong> Imagen-en-Imagen (I-en-I) en el sentido antihorario, pulse el botón SHIFT.<br />
61<br />
Sp
04 Opciones adicionales <strong>de</strong> ajuste <strong>de</strong> la imagen y <strong>de</strong>l sonido<br />
.<br />
Pulse SPLIT para cambiar a través <strong>de</strong><br />
las diferentes visualizaciones <strong>de</strong><br />
multipantalla.<br />
Pulse SWAP para cambiar la<br />
posición <strong>de</strong> las dos pantallas.<br />
Pulse SHIFT para <strong>de</strong>splazar la<br />
posición <strong>de</strong> la pantalla pequeña en<br />
el sentido antihorario.<br />
La función <strong>de</strong> multipantalla no está disponible cuando se utiliza una fuente <strong>de</strong> una única entrada o <strong>de</strong> dos fuentes<br />
<strong>de</strong> entrada externa.<br />
Advertencia: La visualización <strong>de</strong> imágenes en el modo <strong>de</strong> multipantalla<br />
durante un largo período <strong>de</strong> tiempo pue<strong>de</strong> causar una imagen r<strong>et</strong>enida.<br />
Para volver a una imagen simple, pulse EXIT.<br />
Otra opción es seleccionar un modo multipantalla <strong>de</strong>l menú TOOLS. Para seleccionar un modo multipantalla,<br />
siga los pasos a continuación.<br />
1 ) Pulse TOOLS.<br />
El menú TOOLS aparece en la pantalla.<br />
2 ) Seleccione Dividir, Alternar o Desplazar <strong>de</strong>l menú.<br />
Utilice los botones <strong>de</strong> flecha para resaltar una opción (y, a continuación, pulse ENTER, si ha seleccionado<br />
Alternar).<br />
3 ) Seleccione un modo.<br />
Seleccione Apagado, 2-pantallas o I-en-I para el modo Dividir. El modo seleccionado se visualiza en el<br />
centro <strong>de</strong>l menú TOOLS.<br />
4.5 Congelamiento <strong>de</strong> imagen<br />
Durante las secuencias <strong>de</strong> acción rápida o imágenes d<strong>et</strong>alladas, intente capturar la imagen con la opción<br />
FREEZE. La opción FREEZE le permite enten<strong>de</strong>r mejor los d<strong>et</strong>alles <strong>de</strong> un acción o imagen. Para congelar una<br />
imagen <strong>de</strong> una emisión <strong>de</strong> TV o película, siga los pasos a continuación.<br />
1 ) Pulse FREEZE para crear una imagen fija (copia) <strong>de</strong><br />
la imagen que se está visualizando actualmente.<br />
La copia aparece a la <strong>de</strong>recha <strong>de</strong> la secuendia <strong>de</strong>l<br />
ví<strong>de</strong>o en movimiento-fijo, dividindo la pantalla.<br />
2 ) Pulse FREEZE <strong>de</strong> nuevo para liberar la imagen.<br />
La imagen congelada <strong>de</strong>saparece, reaparecendo la<br />
imagen en una pantalla simple con la secuencia<br />
<strong>de</strong> ví<strong>de</strong>o en progreso.<br />
• Con la pantalla dividida, no se pue<strong>de</strong> congelar una<br />
imagen.<br />
Aparece un mensaje <strong>de</strong> advertencia si se intenta utilizar esta función cuando ya existe una imagen<br />
congelada en la pantalla. Si se <strong>de</strong>ja una imagen congelada en la pantalla, el televisor libera<br />
automáticamente la imagen <strong>de</strong>spués <strong>de</strong> cinco minutos.<br />
62<br />
Sp<br />
Nota: Utilizar la función FREEZE durante un largo período <strong>de</strong> tiempo causa una imagen remanente.
Opciones adicionales <strong>de</strong> ajuste <strong>de</strong> la imagen y <strong>de</strong>l sonido<br />
04<br />
4.6 Utilización <strong>de</strong> la función <strong>de</strong> rótulo<br />
Cuando sintonice una canal <strong>de</strong> TV o una señal<br />
<strong>de</strong> entrada cambia, cualquier información<br />
disponible aparece en la pantalla si la señal<br />
transmite información acerca <strong>de</strong>l programa<br />
(Consulte Rótulo <strong>de</strong> información a<br />
continuación).<br />
Pulsar DISPLAY hace que aparezca el rótulo <strong>de</strong><br />
información (adicional). Pulse EXIT o DISPLAY<br />
nuevamente para ocultar el rótulo.<br />
Rótulo <strong>de</strong> información<br />
Español<br />
D00001.000 ABCDEFGH XXXXXXXXXXXXXXXXXXXXXXXXXXXXXX ESTÉREO 9:30AM<br />
1 2 3<br />
4 5 6<br />
Rótulo <strong>de</strong> información (adicional)<br />
D00001.000 ABCDE XXXXXXXXXXXXXXXXXXXXXXXXXXXXX ESTÉREO<br />
7:07PM-8:08PM<br />
TV<br />
PRT_10 PG<br />
9:30AM<br />
V HD<br />
7 8 9 1011<br />
12<br />
1 -Señal <strong>de</strong> emisión (Digital/<br />
Analógica)<br />
2 -Número <strong>de</strong> canal<br />
3 -Nombre <strong>de</strong> emisora<br />
4 -Título <strong>de</strong>l programa<br />
5 -Información <strong>de</strong> múltiplex <strong>de</strong><br />
sonido<br />
6 -Hora actual<br />
7 -Horario <strong>de</strong> los programas<br />
8 -Información <strong>de</strong> control familiar<br />
9 -Icono familiar<br />
10 -Nombre familiar<br />
11 -Información <strong>de</strong> señal (HD/SD)<br />
12 -Icono Favoritos<br />
También aparece un rótulo separado en la parte inferior <strong>de</strong> la pantalla que muestra el modo Selección AV<br />
(izquierda inferior) y el tamaño <strong>de</strong> pantalla (<strong>de</strong>recha inferior).<br />
La información prece<strong>de</strong>nte sólo aparece si está incluida en la señal <strong>de</strong> emisión. Durante el modo multipantalla,<br />
el rótulo aparece tanto en la pantalla principal como en la pantalla secundaria.<br />
63<br />
Sp
04 Opciones adicionales <strong>de</strong> ajuste <strong>de</strong> la imagen y <strong>de</strong>l sonido<br />
4.7 Selecciones alternativas <strong>de</strong>l sonido<br />
Hay cuatro selecciones alternativas <strong>de</strong>l sonido para su televisor <strong>de</strong> pantalla plana: CC, MTS, SAP y Efecto <strong>de</strong><br />
sonido. En esta sección se <strong>de</strong>fine cada una <strong>de</strong> estas selecciones alternativas, así como se explica cómo/cuándo<br />
utilizarlas.<br />
4.7.1 Subtitulación activa (CC)<br />
Su televisor <strong>de</strong> pantalla plana está equipado con un <strong>de</strong>scodificador <strong>de</strong> subtitulación interna (CC). La subtituación<br />
CC permite la visualización <strong>de</strong> conversaciones, narraciones y efectos <strong>de</strong> sonido en programas <strong>de</strong> TV y ví<strong>de</strong>o como<br />
subtítulos en la pantalla. Para los canales digitales, se pue<strong>de</strong> cambiar algunos parám<strong>et</strong>ros tales como el tipo y el<br />
color <strong>de</strong> l<strong>et</strong>ra. Sin embargo, no todos los programas y ví<strong>de</strong>os ofrecen la subtitulación. Verifique si aparece el<br />
símbolo “ ” para ver si el canal o programa ofrece la subtitulación.<br />
Para activar la subtitulación cuando esté disponible, siga los pasos a continuación.<br />
1 ) Acceda a Configuración <strong>de</strong>l sistema a través <strong>de</strong> Configuración.<br />
2 ) Seleccione Sub-Títulos <strong>de</strong>l menú Configuración <strong>de</strong>l sistema.<br />
3 ) Seleccione Status <strong>de</strong>l submenú.<br />
4 ) Seleccione una opción.<br />
Parám<strong>et</strong>ro<br />
Apagado<br />
Encendido<br />
Activo si mudo<br />
Descripción<br />
no muestra la subtitulación (selección<br />
pred<strong>et</strong>erminada)<br />
se muestra la subtitulación cuando disponible<br />
muestra la subtitulación sólo mientras el sonido<br />
está silenciado<br />
5 ) Pulse HOME MENU para salir <strong>de</strong>l menú.<br />
Tipos <strong>de</strong> subtitulación<br />
La emisión <strong>de</strong> TV ofrece diferentes tipos <strong>de</strong> subtitulación. Su televisor <strong>de</strong> pantalla plana soporta los tipos<br />
reconocidos <strong>de</strong> programación analógica, así como las señales digitales que transmiten la subtitulación<br />
analógica.<br />
• CC 1, CC 2, CC 3 ó CC 4: provee subtítulos con una visualización compl<strong>et</strong>a <strong>de</strong> la imagen<br />
• Texto 1, Texto 2, Texto 3 ó Texto 4: superpone otra información (tiempo, por ejemplo) que es in<strong>de</strong>pendiente<br />
<strong>de</strong>l programa <strong>de</strong> TV en progreso<br />
Para cambiar el tipo <strong>de</strong> subtitulación <strong>de</strong> la selección pre<strong>de</strong>finida CC 1, siga los pasos a continuación.<br />
1 ) Acceda a Configuración <strong>de</strong>l sistema a través <strong>de</strong> Configuración.<br />
2 ) Seleccione Sub-Títulos <strong>de</strong>l menú Configuración <strong>de</strong>l sistema.<br />
3 ) Seleccione Ajuste analóg <strong>de</strong>l submenú.<br />
4 ) Seleccione la subtitulación <strong>de</strong>seada.<br />
Status : Apagado<br />
Ajuste analóg : CC 1<br />
Ajustes Digitales<br />
64<br />
Sp<br />
5 ) Pulse HOME MENU para salir <strong>de</strong>l menú.
Opciones adicionales <strong>de</strong> ajuste <strong>de</strong> la imagen y <strong>de</strong>l sonido<br />
04<br />
Subtitulación para programas digitales<br />
Hay seis opciones diferentes <strong>de</strong> subtitulación para la programación digital, <strong>de</strong>nominadas niveles <strong>de</strong> Servicio. El<br />
servicio <strong>de</strong> subtitulación primaria se ofrece para el Servicio 1, mientras el servicio <strong>de</strong> idioma secundario se ofrece<br />
para el Servicio 2. Podrá encontrar más información acerca <strong>de</strong> esos servicios más a<strong>de</strong>lante en este capítulo.<br />
Para cambiar la subtitulación digital <strong>de</strong> la selección pre<strong>de</strong>finida Servicio 1, siga los pasos a continuación.<br />
1 ) Acceda a Configuración <strong>de</strong>l sistema a través <strong>de</strong> Configuración.<br />
2 ) Seleccione Sub-Títulos <strong>de</strong>l menú Configuración <strong>de</strong>l sistema.<br />
3 ) Seleccione Ajustes Digitales <strong>de</strong>l submenú.<br />
4 ) Seleccione Servicio Digital.<br />
5 ) Seleccione el nivel <strong>de</strong> servico <strong>de</strong> la subtitulación <strong>de</strong>seada (/).<br />
Ajustes Digitales<br />
Servicio Digital : Servicio 1<br />
Tamaño <strong>de</strong> L<strong>et</strong>ra : Auto<br />
L<strong>et</strong>ra Tipo : Auto<br />
Color <strong>de</strong> L<strong>et</strong>ra : Auto<br />
Opacidad <strong>de</strong> l<strong>et</strong>ra : Auto<br />
Color <strong>de</strong> Fondo : Auto<br />
Opacidad <strong>de</strong> fondo : Auto<br />
Español<br />
6 ) Pulse HOME MENU para salir <strong>de</strong>l menú.<br />
Para cambia la apariencia <strong>de</strong> la subtitulación en un programa digital, siga los pasos a continuación.<br />
1 ) Acceda a Configuración <strong>de</strong>l sistema a través <strong>de</strong> Configuración.<br />
2 ) Seleccione Sub-Títulos <strong>de</strong>l menú Configuración <strong>de</strong>l sistema.<br />
3 ) Seleccione Ajustes Digitales <strong>de</strong>l submenú.<br />
4 ) Seleccione una opción para cambiar.<br />
5 ) Seleccione el parám<strong>et</strong>ro <strong>de</strong>seado para tal opción.<br />
El parám<strong>et</strong>ro pre<strong>de</strong>finido para cada opción es Auto.<br />
Opción<br />
Tamaño <strong>de</strong> L<strong>et</strong>ra<br />
L<strong>et</strong>ra Tipo 1<br />
Color <strong>de</strong> L<strong>et</strong>ra<br />
Opacidad <strong>de</strong> l<strong>et</strong>ra<br />
Color <strong>de</strong> Fondo<br />
Opacidad <strong>de</strong> fondo<br />
Descripción<br />
Auto, Gran<strong>de</strong>, Estándar, Pequeño<br />
Auto, L<strong>et</strong>ra Tipo 1, L<strong>et</strong>ra TIpo 2, L<strong>et</strong>ra Tipo 3, L<strong>et</strong>ra<br />
Tipo 4, L<strong>et</strong>ra Tipo 5, L<strong>et</strong>ra Tipo 6, L<strong>et</strong>ra Tipo 7<br />
Auto, Negro, Blanco, Rojo, Ver<strong>de</strong>, Azul, Amarillo,<br />
Rosa Fuerte, Azul Cielo<br />
Auto, Sólido, Transparente, Translúcido,<br />
Intermitente<br />
Auto, Negro, Blanco, Rojo, Ver<strong>de</strong>, Azul, Amarillo,<br />
Rosa Fuerte, Azul Cielo<br />
Auto, Sólido, Transparente, Translúcido<br />
1 L<strong>et</strong>ra Tipo 1 (espacio fijo con serif)/ L<strong>et</strong>ra Tipo 2 (espacio proporcional con serif)/<br />
L<strong>et</strong>ra Tipo 3 (espacio fijo sin serif)/ L<strong>et</strong>ra Tipo 4 (espacio proporcional sin serif)/<br />
L<strong>et</strong>ra Tipo 5 (l<strong>et</strong>ra casual)/ L<strong>et</strong>ra Tipo 6 (l<strong>et</strong>ra cursiva)/ L<strong>et</strong>ra Tipo 7 (l<strong>et</strong>ra mayúscula pequeña)<br />
6 ) Pulse HOME MENU para salir <strong>de</strong>l menú.<br />
65<br />
Sp
04 Opciones adicionales <strong>de</strong> ajuste <strong>de</strong> la imagen y <strong>de</strong>l sonido<br />
4.7.2 Cambio <strong>de</strong> idiomas con MTS<br />
La función <strong>de</strong> sonido <strong>de</strong> televisión multicanal (MTS) permite cambiar el<br />
idioma audible si está disponible para tal programa. Los idiomas<br />
disponibles difieren <strong>de</strong>pendiendo <strong>de</strong> la emisión actual.<br />
Cuando vea un programa <strong>de</strong> TV digital que provea servicios <strong>de</strong> múltiples<br />
idiomas, siga los pasos a continuación.<br />
1 ) Pulse TOOLS en el mando a distancia.<br />
2 ) Seleccione MTS <strong>de</strong>l menú TOOLS.<br />
3 ) Seleccione English, Français o Español.<br />
Un programa <strong>de</strong> TV digital sin información <strong>de</strong> sonido o idioma muestra “N/A” en la pantalla. Para los idiomas<br />
que no sean el inglés, francés o español, la palabra “Otros” aparece en su lugar. Si el idioma seleccionado está<br />
disponible cuando se cambia el canal o programa, se escucha tal idioma.<br />
4.7.3 Selección <strong>de</strong> SAP<br />
Cuando vea programas <strong>de</strong> TV en las frecuencias VHF/UHF o <strong>de</strong> canales <strong>de</strong> TV por cable analógico, el botón<br />
TOOLS pue<strong>de</strong> activar los programas <strong>de</strong> sonido estéreo y/o audio secundario (SAP) si está disponible.<br />
Para seleccionar las opciones Estéreo/SAP, siga los pasos a continuación.<br />
1 ) Pulse TOOLS.<br />
2 ) Seleccione MTS <strong>de</strong>l menú TOOLS.<br />
3 ) Seleccione ESTÉREO, SAP o MONO.<br />
El cuadro a continuación muestra un <strong>de</strong>sglose <strong>de</strong> las opciones Estéreo/SAP.<br />
Modo ESTÉREO Modo SAP Modo MONO<br />
ESTÉREO SAP MONO<br />
Modo ESTÉREO Modo SAP Modo MONO<br />
ESTÉREO SAP MONO<br />
ESTÉREO 9:30AM ESTÉREO (SAP) 9:30AM MONO (SAP) 9:30AM MONO 9:30AM<br />
En el modo ESTÉREO En el modo ESTÉREO En el modo ESTÉREO En el modo ESTÉREO<br />
ESTÉREO 9:30AM SAP (ESTÉREO) 9:30AM SAP (PRINCIPAL) 9:30AM PRINCIPAL 9:30AM<br />
En el modo SAP En el modo SAP En el modo SAP En el modo SAP<br />
MONO 9:30AM MONO (SAP) 9:30AM MONO (SAP) 9:30AM MONO 9:30AM<br />
En el modo MONO En el modo MONO En el modo MONO En el modo MONO<br />
Señales ESTÉREO ESTÉREO + SAP MONO + SAP Señales MONO<br />
66<br />
Sp
Opciones adicionales <strong>de</strong> ajuste <strong>de</strong> la imagen y <strong>de</strong>l sonido<br />
04<br />
Cuando el sonido estéreo está dificil <strong>de</strong> escuchar, cambie manualmente a MONO para un sonido más claro. El<br />
sonido <strong>de</strong> la pantalla permanece en mono aunque el sistema reciba una emisión estéreo. Vuelva a seleccionar<br />
ESTÉREO para escuchar las emisiones en estéreo cuando esté disponible.<br />
Seleccionar MTS mientras la fuente <strong>de</strong> entrada es ENTRADA 1 a ENTRADA 7 ó PC no cambia el tipo <strong>de</strong> sonido.<br />
En este caso, la fuente <strong>de</strong> ví<strong>de</strong>o d<strong>et</strong>ermina el sonido.<br />
4.7.4 Aplicación <strong>de</strong> las configuraciones <strong>de</strong>l efecto <strong>de</strong> sonido<br />
Su televisor <strong>de</strong> pantalla plana ofrece cuatro efectos <strong>de</strong> sonido: SRS FOCUS, SRS, SRS TruBass y SRS Definition.<br />
• SRS FOCUS TM <strong>de</strong>splaza la dirección <strong>de</strong> la fuente <strong>de</strong>l sonido verticalmente y <strong>de</strong>ja el sonido y la voz claramente<br />
audibles.<br />
• SRS ® produce sin esfuerzo un campo <strong>de</strong> sonido tridimensional.<br />
• SRS TruBass ® produce un sonido <strong>de</strong> graves rico y claro.<br />
• SRS Definition ® mejora la calidad <strong>de</strong>l rango medio y clarifica los sonidos <strong>de</strong> las voces y <strong>de</strong> los instrumentos.<br />
Para activar uno o más <strong>de</strong> los efectos <strong>de</strong> sonido, siga las instrucciones a continuación.<br />
1 ) Acceda a Sonido a través <strong>de</strong> Configuración.<br />
2 ) Seleccione Efecto Sonido <strong>de</strong>l menú Sonido.<br />
3 ) Seleccione una opción <strong>de</strong> efecto <strong>de</strong> sonido.<br />
(SRS FOCUS, SRS, SRS TruBass, SRS Definition)<br />
4 ) Seleccione Bajo (mo<strong>de</strong>rado), Medio (estándar), Alto (mejorado) o Apagado para tal opción.<br />
5 ) Pulse HOME MENU para salir <strong>de</strong>l menú.<br />
Español<br />
Nota: La forma cómo un efecto <strong>de</strong> sonido cambia el audio <strong>de</strong>pen<strong>de</strong> <strong>de</strong> la señal.<br />
(SRS WOW HD TM ) indica que SRS FOCUS, SRS, SRS TruBass y SRS Definition están activados.<br />
4.7.5 Utilización <strong>de</strong>l control automático <strong>de</strong>l volumen (AVC)<br />
El controle automático <strong>de</strong>l volumen (AVC) reduce el cambio repentino <strong>de</strong>l volumen y compensa el nivel <strong>de</strong>l sonido<br />
<strong>de</strong> la fuente.<br />
Para seleccionar esta opción, siga el procedimiento a continuación.<br />
1 ) Acceda a Sonido a través <strong>de</strong> Configuración.<br />
2 ) Seleccione AVC <strong>de</strong>l menú Sonido.<br />
3 ) Seleccione Encendido (o Apagado).<br />
4 ) Pulse HOME MENU para salir <strong>de</strong>l menú.<br />
4.8 Gestión <strong>de</strong> energía<br />
Su televisor <strong>de</strong> pantalla plana es eficaz en energía, pero incluye funciones para ahorrar energía adicionalmente.<br />
En la sección anterior “3.6 Iniciación inteligente para nuevos usuarios”, se ha explicado cómo activar la función<br />
<strong>de</strong> ahorro <strong>de</strong> energía. En esta sección se provee funciones más avanzadas para ahorrar energía y exten<strong>de</strong>r la vida<br />
<strong>de</strong> servicio <strong>de</strong> la pantalla.<br />
Fuente <strong>de</strong> AV/PC - Desactivar imagen<br />
Para ahorrar energía y exten<strong>de</strong>r la vida <strong>de</strong> servicio <strong>de</strong> su televisor <strong>de</strong> pantalla plana, apague la pantalla. Para<br />
<strong>de</strong>sactivar la pantalla, siga los pasos a continuación.<br />
1 ) Pulse TOOLS en el mando a distancia.<br />
2 ) Seleccione Desactivar imagen <strong>de</strong>l menú TOOLS.<br />
3 ) Pulse ENTER.<br />
La pantalla se apaga.<br />
Para restaurar la visualización <strong>de</strong> la pantalla, pulse cualquier botón que no sea VOL +/– y MUTING.<br />
Nota: El sistema no memoriza la configuración Desactivar imagen.<br />
67<br />
Sp
04 Opciones adicionales <strong>de</strong> ajuste <strong>de</strong> la imagen y <strong>de</strong>l sonido<br />
Fuente <strong>de</strong> AV - Sin señal<br />
Para ahorrar energía y exten<strong>de</strong>r la vida <strong>de</strong> servicio <strong>de</strong> su televisor <strong>de</strong> pantalla plana, se pue<strong>de</strong> configurar para que<br />
la pantalla entre automáticamente en el modo <strong>de</strong> espera si no hay una señal <strong>de</strong> fuente <strong>de</strong> AV <strong>de</strong>ntro <strong>de</strong> 15<br />
minutos. Cinco minutos antes y a cada minuto <strong>de</strong>spués <strong>de</strong> ahí, se visualiza un mensaje <strong>de</strong> advertencia en la<br />
pantalla. Una vez que transcurra el último minuto, la pantalla cambia al modo <strong>de</strong> espera.<br />
Para que la pantalla cambie al modo <strong>de</strong> espera cuando no hay una señal <strong>de</strong> la fuente <strong>de</strong> AV, siga los pasos a<br />
continuación.<br />
1 ) Acceda a Control <strong>de</strong> la alimentación a través <strong>de</strong> Configuración.<br />
2 ) Seleccione Apagado: sin señal <strong>de</strong>l menú Control <strong>de</strong> la alimentación.<br />
3 ) Seleccione Activar para activar la función <strong>de</strong> apagado cuando no hay señal <strong>de</strong> AV.<br />
4 ) Pulse HOME MENU para salir <strong>de</strong>l menú.<br />
Nota: El televisor <strong>de</strong> pantalla plana pue<strong>de</strong> cambiar al modo <strong>de</strong> espera cuando hay ruido (interferencia <strong>de</strong> señal)<br />
al final <strong>de</strong>l programa <strong>de</strong> emisión (cuando el canal sale <strong>de</strong>l aire).<br />
Fuente <strong>de</strong> AV - Sin operación<br />
Para ahorrar energía y exten<strong>de</strong>r la vida <strong>de</strong> servicio <strong>de</strong> su televisor <strong>de</strong> pantalla plana, se pue<strong>de</strong> configurar para que<br />
la pantalla entre automáticamente en el modo <strong>de</strong> espera si no hay comandos <strong>de</strong> la fuente <strong>de</strong> AV <strong>de</strong>ntro <strong>de</strong> tres<br />
horas. Cinco minutos antes y a cada minuto <strong>de</strong>spués <strong>de</strong> ahí, se visualiza un mensaje <strong>de</strong> advertencia en la<br />
pantalla. Una vez que transcurra el último minuto, la pantalla cambia al modo <strong>de</strong> espera.<br />
Para que la pantalla entre en el modo <strong>de</strong> espera automáticamente cuando no ha comandos <strong>de</strong> la fuente <strong>de</strong> AV,<br />
siga los pasos a continuación.<br />
1 ) Acceda a Control <strong>de</strong> la alimentación a través <strong>de</strong> Configuración.<br />
2 ) Seleccione Apagado: sin op. <strong>de</strong>l menú Control <strong>de</strong> la alimentación.<br />
3 ) Seleccione Activar <strong>de</strong>l menú Apagado: sin op.<br />
4 ) Pulse HOME MENU para salir <strong>de</strong>l menú.<br />
Fuente <strong>de</strong> PC - Gestión <strong>de</strong> energía<br />
Cuando se está viendo la imagen <strong>de</strong> un PC, la pantalla pue<strong>de</strong> entrar en el modo <strong>de</strong> espera automáticamente si<br />
no hay señales. Siga los pasos a continuación para activar esta función.<br />
1 ) Acceda a Control <strong>de</strong> la alimentación a través <strong>de</strong> Configuración.<br />
2 ) Seleccione Gestión <strong>de</strong> energía <strong>de</strong>l menú Control <strong>de</strong> la alimentación.<br />
3 ) Seleccione una opción <strong>de</strong>l submenú.<br />
Opción<br />
Apagado<br />
Encendido<br />
Descripción<br />
sin gestión <strong>de</strong> energía (selección pred<strong>et</strong>erminada)<br />
la pantalla entra en el modo <strong>de</strong> espera cuando no<br />
se reciben ninguna señal <strong>de</strong>l PC durante ocho<br />
minutos; utilizar el PC no tiene efecto en la<br />
pantalla<br />
Nota: Pulsar TV a en el mando a distancia o STANDBY/ON en la pantalla reactiva el televisor <strong>de</strong> pantalla plana.<br />
4 ) Pulse HOME MENU para salir <strong>de</strong>l menú.<br />
Estas opciones <strong>de</strong> gestión <strong>de</strong> energía no están disponibles cuando un PC está conectado a la pantalla a través<br />
<strong>de</strong>l puerto/terminal HDMI.<br />
68<br />
Sp
Utilización <strong>de</strong> otros equipos con su televisor <strong>de</strong> pantalla plana 05<br />
5 Utilización <strong>de</strong> otros equipos con su televisor<br />
<strong>de</strong> pantalla plana<br />
Mientras en las secciones prece<strong>de</strong>ntes se han mencionado otros equipos para reproducir ví<strong>de</strong>o, en esta sección<br />
se provee la información <strong>de</strong> control y operación <strong>de</strong> tipos específicos <strong>de</strong> equipos.<br />
5.1 Programación <strong>de</strong>l mando a distancia para operar otros equipos<br />
Para operar equipos o dispositivos a través <strong>de</strong> su televisor <strong>de</strong> pantalla plana, programe el mando a distancia <strong>de</strong><br />
la pantalla con el código <strong>de</strong> fabricante <strong>de</strong>l otro equipo. Un código <strong>de</strong> fabricante es una serie <strong>de</strong> números que<br />
i<strong>de</strong>ntifican el tipo <strong>de</strong> dispositivo y la marca. Esos códigos están disponibles en la sección “8.2 Códigos <strong>de</strong><br />
fabricantes para programar el mando a distancia” en el Apéndice 8.2 <strong>de</strong> este manual.<br />
5.1.1 Asignación <strong>de</strong> un código <strong>de</strong> fabricante al mando a distancia<br />
Para asignar un código <strong>de</strong> fabricante pred<strong>et</strong>erminado al mando a<br />
distancia <strong>de</strong> la pantalla, siga las instrucciones a continuación. (Para los<br />
códigos <strong>de</strong> los fabricante, consulte “8.2 Códigos <strong>de</strong> fabricantes para<br />
programar el mando a distancia”.)<br />
Español<br />
1 ) Pulse SELECT para seleccionar el dispositivo que <strong>de</strong>see programar.<br />
2 ) Pulse EDIT y 1 al mismo tiempo.<br />
El indicador <strong>de</strong>l modo seleccionado parpa<strong>de</strong>ará cuando el mando a<br />
distancia que<strong>de</strong> listo para ser programado.<br />
3 ) Utilice los botones numéricos para introducir un código <strong>de</strong><br />
fabricante.<br />
Cuando el indicador se apague, el código ha sido programado en el<br />
mando a distancia.<br />
5.1.2 Búsqueda <strong>de</strong> un código <strong>de</strong> fabricante<br />
Si el código para un dispositivo particular es <strong>de</strong>sconocido, cambie a<br />
través <strong>de</strong> los códigos disponibles para un dispositivo similar y pruebe<br />
algunas funciones con tal código.<br />
Para encontrar el código que funcione correctamente, siga los pasos a<br />
continuación utilizando diferentes códigos para encontrar el que se<br />
funcione mejor.<br />
1 ) Pulse SELECT para seleccionar el dispositivo que <strong>de</strong>see programar.<br />
2 ) Pulse EDIT y 3 al mismo tiempo.<br />
El indicador <strong>de</strong>l modo seleccionado parpa<strong>de</strong>ará cuando el mando a<br />
distancia que<strong>de</strong> listo para buscar los códigos.<br />
3 ) Pruebe el código utilizando el comando SOURCE POWER , PLAY, 1<br />
ó CH+.<br />
4 ) Utilice los botones <strong>de</strong> flecha arriba/abajo ( / ) para avanzar al<br />
próximo código si el código actual no funciona con el dispositivo.<br />
Otra opción es volver al código anterior y rep<strong>et</strong>ir el paso 3.<br />
5 ) Pulse ENTER para bloquear el código que funcione correctamente con<br />
el dispositivo.<br />
Todos los botones disponibles para el modo seleccionado son añadidos cuando el indicador <strong>de</strong> modo<br />
parpa<strong>de</strong>a durante un segundo. Luego, el mando a distancia vuelve a su funcionamiento normal.<br />
69<br />
Sp
05 Utilización <strong>de</strong> otros equipos con su televisor <strong>de</strong> pantalla plana<br />
5.1.3 Eliminación <strong>de</strong> códigos <strong>de</strong> fabricante añadidos <strong>de</strong>l mando a distancia<br />
Para restaurar todos los códigos aprendidos y memorizados a sus selecciones pred<strong>et</strong>erminadas (PIONEER), siga<br />
los pasos a continuación.<br />
1 ) Pulse EDIT y TV al mismo tiempo.<br />
Se pue<strong>de</strong> seleccionar en cualquier modo.<br />
2 ) Pulse el botón Amarillo.<br />
Compruebe que el indicador <strong>de</strong>l modo seleccionado parpa<strong>de</strong>e.<br />
El mando a distancia entra en el modo <strong>de</strong> reposición <strong>de</strong> códigos <strong>de</strong><br />
fabricantes. La reposición se finaliza cuando el indicador <strong>de</strong> modo<br />
parpa<strong>de</strong>a durante un segundo. Luego, el mando a distancia vuelve a<br />
su funcionamiento normal.<br />
Nota: Pue<strong>de</strong> que el mando a distancia <strong>de</strong> la pantalla no controle o no tenga<br />
total control sobre algunos equipos listados en las tablas.<br />
Para salir antes que se finalice la reposición, pulse el botón EDIT nuevamente. La reposición se cancela si no se<br />
realiza ninguna operación <strong>de</strong>ntro <strong>de</strong> 60 segundos. Cambiar el modo durante este procedimiento también cancela<br />
la reposición.<br />
5.1.4 Control <strong>de</strong> un receptor <strong>Pioneer</strong><br />
El mando a distancia <strong>de</strong>l televisor <strong>de</strong> pantalla plana tiene un banco <strong>de</strong> botones específicamente para controlar<br />
un receptor <strong>Pioneer</strong>. Los botones activos, <strong>de</strong> la izquierda a la <strong>de</strong>recha, son los siguientes:<br />
• RECEIVER STANDBY/ON<br />
(encien<strong>de</strong>/apaga el receptor <strong>Pioneer</strong>)<br />
• RECEIVER INPUT<br />
(cambia a través/selecciona una entrada)<br />
• RECEIVER VOL –<br />
(reduce el volumen)<br />
• RECEIVER VOL +<br />
(aumenta el volumen)<br />
70<br />
Sp
Utilización <strong>de</strong> otros equipos con su televisor <strong>de</strong> pantalla plana 05<br />
5.1.5 Control <strong>de</strong> un sistema <strong>de</strong> cable (CBL) o satélite (SAT)<br />
Cuando el modo está configurado para CBL/SAT, un convertidor <strong>de</strong> cable utiliza los botones 1, 6, 7, 8 y 9, mientras<br />
los sintonizadores <strong>de</strong> satélite utilizan los botones 1 a 8. Sin embargo, la pantalla sólo reconoce un único sistema<br />
(cable o satélite) a la vez.<br />
• 1 Botones numéricos<br />
(utilice para introducir un número <strong>de</strong> canal)<br />
• 2 SAT GUIDE<br />
(visualiza la pantalla <strong>de</strong> guía <strong>de</strong> emisión por<br />
satélite)<br />
• 3 ENTER<br />
(utilice ENTER para aplicar la función<br />
seleccionada)<br />
(utilice las flechas para seleccionar las pantallas<br />
SAT GUIDE o SAT MENU)<br />
• 4 SAT MENU<br />
(visualiza la pantalla <strong>de</strong> menú <strong>de</strong> emisión por<br />
satélite)<br />
• 5 SOURCE<br />
(encien<strong>de</strong> y apaga el equipo)<br />
• 6 CH ENTER *<br />
(introduce el canal seleccionado con los botones<br />
<strong>de</strong> selección directa <strong>de</strong> canal)<br />
• 7 CH RETURN *<br />
(pulse los botones que correspon<strong>de</strong>n a un canal)<br />
• 8 CH +/–<br />
(selecciona un canal más alto o más bajo)<br />
• 9 RETURN<br />
(restaura la pantalla inmediatamente anterior)<br />
1<br />
2<br />
6<br />
7<br />
8<br />
Español<br />
* Algunos fabricantes <strong>de</strong> convertidores <strong>de</strong> cables no<br />
preajustan CH ENTER y CH RETURN.<br />
3<br />
4<br />
9<br />
5<br />
71<br />
Sp
05 Utilización <strong>de</strong> otros equipos con su televisor <strong>de</strong> pantalla plana<br />
5.1.6 Control <strong>de</strong> una vi<strong>de</strong>ograbadora (VCR)<br />
Cuando el modo está configurado para VCR, compruebe que la entrada correcta esté seleccionada (ENTRADA 1<br />
a ENTRADA 7) y, a continuación, utilice 1 a 8 para controlar el dispositivo.<br />
• 1 RETROCESO<br />
(r<strong>et</strong>roce<strong>de</strong> la cass<strong>et</strong>e la cinta y permite la<br />
búsqueda)<br />
• 2 PAUSA/IMAGEN FIJA<br />
(establece una pausa en la reproducción y visualiza<br />
imágenes fijas)<br />
• 3 SOURCE<br />
(encien<strong>de</strong> y apaga la vi<strong>de</strong>ograbadora)<br />
• 4 CH +/–<br />
(selecciona un canal más alto o más bajo)<br />
• 5 REPRODUCCIÓN<br />
(selecciona la reproducción)<br />
• 6 AVANCE RÁPIDO<br />
(avanza la cinta y permite la búsqueda)<br />
• 7 DETENCIÓN<br />
(d<strong>et</strong>iene el transporte <strong>de</strong> la cinta)<br />
• 8 GRABACIÓN<br />
(inicia la grabación)<br />
1<br />
2<br />
3<br />
4<br />
5<br />
6<br />
7<br />
8<br />
72<br />
Sp
Utilización <strong>de</strong> otros equipos con su televisor <strong>de</strong> pantalla plana 05<br />
5.1.7 Control <strong>de</strong> un reproductor DVD/Grabadora DVR/Reproductor BD<br />
Cuando el modo está configurado para DVD/DVR, el mando a distancia pue<strong>de</strong> operar reproductores DVD,<br />
grabadoras DVD o reproductor BD conectados al televisor <strong>de</strong> pantalla plana. Compruebe que la entrada<br />
apropiada esté seleccionada para el dispositivo y, a continuación, utilice 1 a 14 para controlarlo.<br />
Nota: Los equipos <strong>de</strong> otros fabricantes (reproductores DVD, grabadoras DVD, reproductores BD y reproductos<br />
HD-DVD) también pue<strong>de</strong>n operarse con el mando a distancia si el mando a distancia está preajustado para<br />
tales equipos.<br />
• 1 DVD TOP MENU<br />
(visualiza el menú inicial <strong>de</strong>l DVD)<br />
• 2 ENTER<br />
(utilice ENTER para aplicar la función<br />
seleccionada)<br />
(utilice las flechas para seleccionar las pantallas<br />
SAT GUIDE o SAT MENU)<br />
• 3 DVD MENU<br />
(visualiza el menú DVD)<br />
• 4 Rojo/Ver<strong>de</strong>/Azul/Amarillo (BD solamente)<br />
(controla la aplicación BD-J)<br />
• 5 EXPLORACIÓN REGRESIVA/BÚSQUEDA DE<br />
CAPÍTULO<br />
(pulse una vez rápidamente para ir al comienzo <strong>de</strong>l<br />
capítulo actual, pulse nuevamente para volver al<br />
comienzo <strong>de</strong>l capítulo anterior, continúe pulsando<br />
para volver más)<br />
• 6 PAUSA/IMAGEN FIJA<br />
(establece una pausa en la reproducción y visualiza<br />
imágenes fijas)<br />
• 7 SOURCE<br />
(encien<strong>de</strong> o apaga el equipo)<br />
• 8 CH +/– (Grabadora DVD solamente)<br />
(selecciona un canal más alto o más bajo)<br />
• 9 TOOLS<br />
(asigna el código para un reproductor BD <strong>Pioneer</strong>)<br />
• 10 RETURN<br />
(restaura la pantalla inmediatamente anterior)<br />
• 11 REPRODUCCIÓN<br />
(selecciona la reproducción)<br />
• 12 EXPLORACIÓN PROGRESIVA/BÚSQUEDA DE<br />
CAPÍTULO<br />
(pulse una vez rápidamente para ir al comienzo <strong>de</strong>l<br />
próximo capítulo, pulse nuevamente para avanzar<br />
al comienzo <strong>de</strong>l próximo capítulo, continúe<br />
pulsando para avanzar rápidamente)<br />
• 13 DETENCIÓN<br />
(d<strong>et</strong>iene la reproducción <strong>de</strong> DVD; algunos<br />
reproductores/grabadoras DVD abren la ban<strong>de</strong>ja<br />
<strong>de</strong> disco si se pulsa este botón dos veces)<br />
• 14 GRABACIÓN (Grabadora DVD solamente)<br />
(inicia la grabación)<br />
1<br />
2<br />
3<br />
4<br />
5<br />
6<br />
7<br />
8<br />
9<br />
10<br />
11<br />
12<br />
13<br />
14<br />
Español<br />
13 Y 14 DETENCIÓN DE GRABACIÓN (Grabadora<br />
DVD solamente)<br />
(mantenga pulsado y, a continuación, pulse <br />
para d<strong>et</strong>ener la grabación - aplicable a grabadoras<br />
DVD <strong>Pioneer</strong> solamente)<br />
73<br />
Sp
05 Utilización <strong>de</strong> otros equipos con su televisor <strong>de</strong> pantalla plana<br />
5.2 Utilización <strong>de</strong> las entradas HDMI<br />
HDMI (High Definition Multimedia Interface) es un método <strong>de</strong> comunicación comúmente utilizado por equipos<br />
digitales y/o <strong>de</strong> alta <strong>de</strong>finición. La ENTRADA 4, ENTRADA 5, ENTRADA 6 y ENTRADA 7 <strong>de</strong> su televisor <strong>de</strong> pantalla<br />
plana son terminales HDMI para señales <strong>de</strong> entrada <strong>de</strong> ví<strong>de</strong>o y audio digitales. El televisor <strong>de</strong> pantalla plana<br />
soporta las funciones <strong>de</strong> Control HDMI y, por lo tanto, al conectar un equipo a la pantalla, la misma pue<strong>de</strong><br />
controlar tal equipo. Para utilizar un terminal HDMI, especifique los tipos <strong>de</strong> señales <strong>de</strong> audio y ví<strong>de</strong>o que se van<br />
recibir <strong>de</strong>s<strong>de</strong> el equipo conectado. Para los tipos <strong>de</strong> señales, consulte el manual <strong>de</strong> instrucciones que viene con<br />
el respectivo equipo.<br />
Uno <strong>de</strong> los beneficios <strong>de</strong> utilizar su televisor <strong>de</strong> pantalla plana para controlar otros equipos es el soporte <strong>de</strong> Deep<br />
Color. Deep Color es la profundidad <strong>de</strong> color que <strong>de</strong>scribe el número <strong>de</strong> bitios utilizados para representar el color <strong>de</strong><br />
un único píxel en una imagen en mapa <strong>de</strong> bitios. A<strong>de</strong>más <strong>de</strong> las señales RGB/YCbCr16bit/20bit/24bit<br />
convencionales, el televisor <strong>de</strong> pantalla plana también soporta las señales RGB/YCbCr30bit/36bit. Esto permite una<br />
reproducción <strong>de</strong> color más refinada cuando se conecta un dispositivo que soporta señales <strong>de</strong> Deep Color (HDMI1.3<br />
Deep Color) a la pantalla. La profundidad <strong>de</strong> color aparece en el rótulo <strong>de</strong> información si un programa soporta el<br />
Deep Color.<br />
El televisor <strong>de</strong> pantalla plana soporta las siguientes señales <strong>de</strong> ví<strong>de</strong>o:<br />
Señales <strong>de</strong> ví<strong>de</strong>o soportadas<br />
• 1920 x 1080p@60 Hz<br />
• 1920 x 1080p@24 Hz<br />
• 1920 x 1080i@59,94 Hz/60 Hz<br />
• 1280 x 720p@59,94 Hz/60 Hz<br />
• 720 x 480p@59,94 Hz/60 Hz<br />
• 720 (1440) x 480i@59,94 Hz/60 Hz<br />
Señales <strong>de</strong> PC soportadas<br />
• 1280 x 1024 (SXGA) 60 Hz<br />
• 1360 x 768 (XGA ancho) 60 Hz<br />
• 1024 x 768 (XGA) 60 Hz<br />
• 800 x 600 (SVGA) 60 Hz<br />
• 640 x 480 (VGA) 60 Hz<br />
Nota: Pue<strong>de</strong> que tome algún tiempo para que la imagen aparezca en el otro equipo, <strong>de</strong>pendiendo <strong>de</strong>l tipo <strong>de</strong><br />
dispositivo.<br />
El televisor <strong>de</strong> pantalla plana soporta las siguientes señales <strong>de</strong> audio:<br />
• Linear PCM (STEREO 2ch)<br />
• Frecuencia <strong>de</strong> muestreo: 32 kHz, 44,1 kHz, 48 kHz<br />
Cuando conecte un PC a una <strong>de</strong> las entradas HDMI <strong>de</strong> la pantalla, utilice un PC o una tarj<strong>et</strong>a <strong>de</strong> ví<strong>de</strong>o compatible<br />
con HDMI. Utilizar la salida DVI <strong>de</strong> un PC para hacer la conexión al televisor <strong>de</strong> pantalla plana pue<strong>de</strong> causar la<br />
pérdida o distorsión <strong>de</strong>l sonido o imagen. Si una salida DVI es su única opción, póngase en contacto con el<br />
fabricante <strong>de</strong>l PC para asistencia.<br />
5.2.1 Especificación <strong>de</strong>l tipo <strong>de</strong> entrada HDMI<br />
Para seleccionar un tipo <strong>de</strong> señal, siga los pasos a continuación.<br />
1 ) Seleccione la entrada para el equipo conectado.<br />
Pulse el botón INPUT (mando a distancia o pantalla) hasta que la entrada correcta aparezca (ENTRADA 4,<br />
ENTRADA 5, ENTRADA 6 ó ENTRADA 7).<br />
Nota: Para la ENTRADA 4 y ENTRADA 5, utilice cables <strong>de</strong> audio para soportar las señales analógicas.<br />
2 ) Acceda a Opción a través <strong>de</strong> Configuración.<br />
3 ) Seleccione Entrada HDMI <strong>de</strong>l menú Opción.<br />
4 ) Seleccione Tipo señal <strong>de</strong>l submenú.<br />
5 ) Seleccione la opción apropiada.<br />
Ví<strong>de</strong>o<br />
PC<br />
Opción<br />
Descripción<br />
Utilice cuando no hay un PC conectado (selección<br />
pred<strong>et</strong>erminada).<br />
Utilice solamente cuando hay un PC conectado al<br />
terminal <strong>de</strong> entrada HDMI.<br />
74<br />
Sp
Utilización <strong>de</strong> otros equipos con su televisor <strong>de</strong> pantalla plana 05<br />
6 ) Pulse HOME MENU para salir <strong>de</strong>l menú.<br />
En el modo Ví<strong>de</strong>o, se redimensiona la imagen para ampliarla, pero la pantalla cambia automáticamente al PC<br />
cuando se reciben las señales <strong>de</strong>l PC. En el modo PC, la imagen se visualiza en tamaño compl<strong>et</strong>o para una<br />
óptima calidad <strong>de</strong> la imagen.<br />
Ví<strong>de</strong>o (redimensionamiento<br />
para ampliar la imagen)<br />
PC (redimensionamiento<br />
para reducir la imagen)<br />
5.2.2 Especificación <strong>de</strong> un tipo <strong>de</strong> señal HDMI digital<br />
Para el tipo <strong>de</strong> señal <strong>de</strong> ví<strong>de</strong>o digital que se requiere, consulte el manual <strong>de</strong> instrucciones que viene con el otro<br />
equipo.<br />
Para asignar el tipo <strong>de</strong> señal digital, siga los pasos a continuación.<br />
1 ) Acceda a Opción a través <strong>de</strong> Configuración.<br />
2 ) Seleccione Entrada HDMI <strong>de</strong>l menú Opción.<br />
3 ) Seleccione Ví<strong>de</strong>o <strong>de</strong>l submenú.<br />
4 ) Seleccione el tipo <strong>de</strong> señal <strong>de</strong> ví<strong>de</strong>o digital recomendado para el dispositivo conectado.<br />
Español<br />
Tipo<br />
Descripción<br />
Auto<br />
i<strong>de</strong>ntifica automáticamente las señales <strong>de</strong> entrada<br />
digitales (selección pred<strong>et</strong>erminada)<br />
Color-1 Señales digitales <strong>de</strong> ví<strong>de</strong>o componente (4:2:2)<br />
bloqueadas<br />
Color-2 Señales digitales <strong>de</strong> ví<strong>de</strong>o componente (4:4:4)<br />
bloqueadas<br />
Color-3<br />
Señales RGB digitales (16 a 235) bloqueadas<br />
Color-4<br />
Señales RGB digitales (0 a 255) bloqueadas<br />
5 ) Pulse HOME MENU para salir <strong>de</strong>l menú.<br />
Si no aparece ninguna imagen, especifique otro tipo <strong>de</strong> señal <strong>de</strong> ví<strong>de</strong>o digital. Se <strong>de</strong>be comprobar si se producen<br />
colores naturales con los parám<strong>et</strong>ros <strong>de</strong> tipo que no sean Auto.<br />
5.2.3 Especificación <strong>de</strong> un tipo <strong>de</strong> señal HDMI <strong>de</strong> audio<br />
Para el tipo <strong>de</strong> señal <strong>de</strong> audio que se requiere, consulte el manual <strong>de</strong> instrucciones que viene con el otro equipo.<br />
Cuando utilice la ENTRADA 4 ó ENTRADA 5 para HDMI, seleccione el terminal para la fuente <strong>de</strong> entrada <strong>de</strong>seada.<br />
Para especificar el tipo <strong>de</strong> audio, siga los pasos a continuación.<br />
1 ) Acceda a Opción a través <strong>de</strong> Configuración.<br />
2 ) Seleccione Entrada HDMI <strong>de</strong>l menú Opción.<br />
3 ) Seleccione Audio <strong>de</strong>l submenú.<br />
4 ) Seleccione el tipo <strong>de</strong> señal <strong>de</strong> audio recomendado para el dispositivo conectado.<br />
Tipo<br />
Auto<br />
Digital<br />
Analógico<br />
Descripción<br />
i<strong>de</strong>ntifica automáticamente las señales <strong>de</strong> entrada<br />
<strong>de</strong> audio (selección pred<strong>et</strong>erminada)<br />
acepta las señales <strong>de</strong> audio digitales<br />
acepta las señales <strong>de</strong> audio analógicas<br />
75<br />
Sp
05 Utilización <strong>de</strong> otros equipos con su televisor <strong>de</strong> pantalla plana<br />
5 ) Pulse HOME MENU para salir <strong>de</strong>l menú.<br />
Si no se genera ningún sonido, especifique otro tipo <strong>de</strong> señales <strong>de</strong> audio. Dependiendo <strong>de</strong>l tipo <strong>de</strong> equipo, pue<strong>de</strong><br />
que la salida <strong>de</strong> sonido requiera cables <strong>de</strong> áudio analógico a<strong>de</strong>más <strong>de</strong> la(s) conexión(es) HDMI.<br />
Nota: Cuando se emiten señales <strong>de</strong> los terminales HDMI, no se emite ninguna señal <strong>de</strong>s<strong>de</strong> el terminal DIGITAL<br />
OUT, si el contenido está protegido contra copia.<br />
5.3 Control <strong>de</strong> equipos con el mando a distancia <strong>de</strong> la pantalla a través <strong>de</strong> HDMI<br />
El mando a distancia <strong>de</strong> su televisor <strong>de</strong> pantalla plana pue<strong>de</strong> controlar otros equipos como una grabadora,<br />
reproductor o sistema <strong>de</strong> AV a través <strong>de</strong> las funciones <strong>de</strong> Control HDMI. Las funciones <strong>de</strong> Control HDMI incluyen<br />
la reproducción <strong>de</strong> contenidos utilizando un panel <strong>de</strong> control en la pantalla. Sin embargo, no todas las operaciones<br />
pue<strong>de</strong>n estar disponibles a través <strong>de</strong>l Control HDMI. Para los d<strong>et</strong>ales, consulte los cuadros a continuación.<br />
Función <strong>de</strong><br />
control<br />
Reproducción <strong>de</strong><br />
contenido<br />
Control en la<br />
pantalla<br />
Configuración <strong>de</strong>l<br />
idioma <strong>de</strong><br />
visualización<br />
Control <strong>de</strong><br />
sistema <strong>de</strong> AV<br />
Encendido<br />
Apagado<br />
Equipo<br />
controlado<br />
Grabadora<br />
Reproductor<br />
Grabadora<br />
Reproductor<br />
Grabadora<br />
Reproductor<br />
Sistema <strong>de</strong> AV<br />
Grabadora<br />
Reproductor<br />
Grabadora<br />
Reproductor<br />
Sistema <strong>de</strong> AV<br />
Descripción <strong>de</strong> la función<br />
Pulsar PLAY en un dispositivo<br />
conectado selecciona<br />
automáticamente la fuente e inicia la<br />
reproducción.<br />
Se pue<strong>de</strong> controlar la operación <strong>de</strong> la<br />
grabadora/reproductor con el panel<br />
<strong>de</strong> control en la pantalla o con el<br />
mando a distancia <strong>de</strong> la pantalla<br />
(reproducción, d<strong>et</strong>ención, avance<br />
rápido/r<strong>et</strong>roceso, <strong>et</strong>c.).<br />
La información <strong>de</strong>l idioma <strong>de</strong> menú<br />
<strong>de</strong> visualización se transfiere a la<br />
grabadora o reproductor conectado al<br />
televisor <strong>de</strong> pantalla plana. Para los<br />
d<strong>et</strong>alles, consulte el manual <strong>de</strong><br />
instrucciones que viene con la<br />
grabadora o reproductor.<br />
También se pue<strong>de</strong> controlar la<br />
operación <strong>de</strong> un receptor/<br />
amplificador con el mando a distancia<br />
<strong>de</strong> la pantalla (volumen, modo <strong>de</strong><br />
surround y selección <strong>de</strong> entrada <strong>de</strong>l<br />
terminal HDMI).<br />
Se pue<strong>de</strong> encen<strong>de</strong>r el televisor <strong>de</strong><br />
pantalla plana cuando se encien<strong>de</strong> la<br />
grabadora o reproductor conectado y<br />
se envían imágenes al televisor <strong>de</strong><br />
pantalla plana.<br />
Se pue<strong>de</strong> apagar los dispositivos<br />
conectados cuando se apaga el<br />
televisor <strong>de</strong> pantalla plana.<br />
Notas: El nombre <strong>de</strong> la función KURO LINK usado en la web y en los catálogos recibe el nombre <strong>de</strong> Control HDMI<br />
en el manual <strong>de</strong> instrucciones y en el producto.<br />
Excepto para el apagado y configuración <strong>de</strong>l idioma <strong>de</strong> visualización, solamente un único terminal HDMI<br />
pue<strong>de</strong> estar activo a la vez.<br />
76<br />
Sp
Utilización <strong>de</strong> otros equipos con su televisor <strong>de</strong> pantalla plana 05<br />
El mando a distancia <strong>de</strong>l televisor <strong>de</strong> pantalla plana pue<strong>de</strong> controlar un máximo <strong>de</strong> dos (2) grabadoras, dos (2)<br />
reproductores, y un (1) sistema <strong>de</strong> AV a la vez.<br />
Para seleccionar y utilizar las diversas funciones <strong>de</strong> Control HDMI para un sistema <strong>de</strong> AV, grabadora o<br />
reproductor <strong>Pioneer</strong> conectado, utilice el menú Control HDMI <strong>de</strong> la pantalla.<br />
Para acce<strong>de</strong>r al menú, siga los pasos a continuación.<br />
1 ) Pulse HOME MENU.<br />
2 ) Seleccione Control HDMI <strong>de</strong>l menú principal.<br />
Utilice los botones <strong>de</strong> flecha para resaltar una opción y, a continuación, pulse ENTER.<br />
Navegador disco<br />
Panel cont.(SIS-AV)<br />
Panel cont. repr.<br />
Cambiar a sonido AV<br />
Español<br />
Nota: Pulsar HDMI CTRL en el mando a distancia también abre el menú Control HDMI.<br />
Opción<br />
Navegador disco<br />
Panel cont.(SIS-AV)<br />
Panel cont. repr.<br />
Cambiar a sonido AV/<br />
Cambiar a sonido TV<br />
Descripción<br />
Visualiza una lista <strong>de</strong> títulos <strong>de</strong> la grabadora o<br />
reproductor conectado.<br />
Visualiza el panel <strong>de</strong> control para el sistema <strong>de</strong> AV<br />
conectado.<br />
Visualiza el panel <strong>de</strong> control para la grabadora o<br />
reproductor conectado.<br />
Cambia entre el televisor <strong>de</strong> pantalla plana y el<br />
sistema <strong>de</strong> AV conectado para la salida <strong>de</strong> sonido.<br />
1<br />
Utilice los siguientes botones para controlar las funciones como el<br />
navegador <strong>de</strong> disco en una grabadora o reproductor.<br />
2<br />
3<br />
4<br />
5<br />
6<br />
7<br />
• 1 VOL +/–<br />
(ajusta el volumen para un sistema <strong>de</strong> AV)<br />
• 2 MUTING<br />
(apaga el sonido mientras se continúa la reproducción <strong>de</strong>l ví<strong>de</strong>o)<br />
• 3 Botones <strong>de</strong> flecha<br />
(navega por las pantallas <strong>de</strong> menú)<br />
• 4 Botones <strong>de</strong> color (Rojo, Ver<strong>de</strong>, Azul, Amarillo)<br />
(controla un reproductor BD)<br />
• 5 TOOLS<br />
(asigna el código para un reproductor BD <strong>Pioneer</strong>)<br />
• 6 ENTER<br />
(aplica la función seleccionada)<br />
• 7 RETURN<br />
(vuelve a la pantalla <strong>de</strong>l menú anterior)<br />
77<br />
Sp
05 Utilización <strong>de</strong> otros equipos con su televisor <strong>de</strong> pantalla plana<br />
Para conectar un dispositivo para Control HDMI, siga los pasos a continuación.<br />
1 ) Encienda el televisor <strong>de</strong> pantalla plana y todos los otros equipos.<br />
2 ) Compruebe que la configuración <strong>de</strong> entrada <strong>de</strong> la pantalla para las opciones <strong>de</strong> Conf.Control HDMI<br />
cumplan con las instrucciones <strong>de</strong> funcionamiento para los otros dispositivos.<br />
3 ) Compruebe que los otros equipos estén ajustados para Control HDMI.<br />
4 ) Compruebe que el audio y ví<strong>de</strong>o estén siendo reproducidos a<strong>de</strong>cuadamente <strong>de</strong> los equipos conectados a<br />
los terminales HDMI.<br />
5 ) Apague el televisor <strong>de</strong> pantalla plana.<br />
6 ) Espere algunos segundos antes <strong>de</strong> encen<strong>de</strong>rlo nuevamente.<br />
7 ) Compruebe que todos los equipos estén funcionando correctamente.<br />
Para seleccionar el dispositivo a controlar vía Control HDMI, siga los pasos a continuación.<br />
1 ) Acceda a Opción a través <strong>de</strong> Configuración.<br />
2 ) Seleccione Conf.Control HDMI <strong>de</strong>l menú Opción.<br />
3 ) Seleccione Config. Entrada <strong>de</strong>l submenú.<br />
Config. Entrada : ENTRADA4<br />
Control apagado : Encendido<br />
Listo encendido : Encendido<br />
R<strong>et</strong>enerConf.Audio : Apagado<br />
Prueba encen<strong>de</strong>r<br />
Prueba apagado<br />
4 ) Seleccione la entrada <strong>de</strong>sea (ENTRADA4, ENTRADA5, ENTRADA6 ó ENTRADA7).<br />
5 ) Pulse HOME MENU para salir <strong>de</strong>l menú.<br />
Si se opera un dispositivo HDMI utilizando un puerto que no sea el terminal seleccionado en Config. Entrada,<br />
ocurrirá un error <strong>de</strong> funcionamiento. Cuando conecte a un terminal HDMI diferente <strong>de</strong>l seleccionado en Config.<br />
Entrada, las configuraciones <strong>de</strong>l equipo <strong>de</strong>ben bloquear las funciones <strong>de</strong> Control HDMI. No se pue<strong>de</strong> seleccionar<br />
el menú Control HDMI cuando se selecciona Apagado para la opción Config. Entrada en el menú Conf.Control<br />
HDMI.<br />
El menú <strong>de</strong> control cambia para ajustarse al tipo <strong>de</strong> equipo compatible con HDMI. Al añadir, cambiar o eliminar<br />
un equipo <strong>de</strong>l Control HDMI, consulte las secciones a continuación para las notas <strong>de</strong> instalación y comandos<br />
soportados.<br />
5.3.1 Control <strong>de</strong> un sistema <strong>de</strong> AV<br />
Al añadir un sistema <strong>de</strong> AV, conecte la unidad entre la pantalla y cualesquiera grabadoras y/o reproductores. Para<br />
funcionar correctamente, un sistema <strong>de</strong> Audio/Ví<strong>de</strong>o <strong>de</strong>be soportar las funciones <strong>de</strong> Control HDMI entre la<br />
pantalla y cualquier otro equipo conectado.<br />
Si el sistema <strong>de</strong> AV no soporta el Control HDMI pero el otro equipo (reproductor/grabadora) acepta este tipo <strong>de</strong><br />
control, conecte el sistema <strong>de</strong> AV a través <strong>de</strong> la toma DIGITAL OUT <strong>de</strong> la pantalla utilizando un cable digital óptico<br />
y la toma AUDIO OUT utilizando un cable <strong>de</strong> AV (disponible comercialmente). Se conecta el otro equipo al puerto<br />
HDMI utilizando un cable HDMI. Las señales introducidas por el equipo HDMI no salen por la toma DIGITAL OUT.<br />
78<br />
Sp
Utilización <strong>de</strong> otros equipos con su televisor <strong>de</strong> pantalla plana 05<br />
Durante la reproducción, utilice las flechas arriba/abajo (/) <strong>de</strong>l mando a distancia para cambiar a través <strong>de</strong><br />
las opciones <strong>de</strong>l sonido surround. Utilice las flechas izquierda/<strong>de</strong>recha (/) para cambiar la entrada. Para<br />
continuar la reproducción, vuelva al menú Control HDMI y, a continuación, seleccione <strong>de</strong> nuevo la función.<br />
Sistemas <strong>de</strong> AV<br />
1 Cambia el modo <strong>de</strong> surround en secuencia<br />
2 Cambia la fuente <strong>de</strong> entrada en el or<strong>de</strong>n<br />
inverso<br />
3 Cambia el modo <strong>de</strong> surround en el or<strong>de</strong>n<br />
inverso<br />
4 Cierra la pantalla para volver al menú Control<br />
HDMI<br />
5 Enumera los equipos conectados<br />
(número <strong>de</strong> mo<strong>de</strong>lo)<br />
6 Cambia la fuente <strong>de</strong> entrada en secuencia<br />
7 Reservado/Nulo<br />
1<br />
2<br />
3<br />
Control HDMI<br />
****<br />
SURROUND+<br />
INPUT- INPUT+<br />
SURROUND-<br />
Salir<br />
4<br />
5<br />
6<br />
7<br />
5.3.2 Control <strong>de</strong> una grabadora<br />
Pulse ENTER para iniciar la reproducción o pulse HDMI CONTROL para volver al menú. Este proceso también<br />
se aplica a los reproductores. Consulte el cuadro a continuación para los comandos disponibles.<br />
Español<br />
Grabadoras<br />
1 Salta los comerciales<br />
2 Avance rápido<br />
3 D<strong>et</strong>iene la reproducción<br />
4 Cierra la pantalla para volver al menú Control<br />
HDMI<br />
5 Enumera los equipos conectados<br />
(número <strong>de</strong> mo<strong>de</strong>lo)<br />
6 R<strong>et</strong>roceso rápido<br />
7 Inicia la reproducción<br />
1<br />
2<br />
3<br />
4<br />
Control HDMI<br />
Salir<br />
****<br />
5<br />
6<br />
7<br />
Nota: También pue<strong>de</strong> utilizar (Reproducción), (D<strong>et</strong>ención), (Pausa), (Avance rápido) y (R<strong>et</strong>roceso<br />
rápido) en el mando a distancia para realizar las mismas operaciones que los botones <strong>de</strong>l menú <strong>de</strong> control.<br />
5.3.3 Control <strong>de</strong> un reproductor<br />
Pulse ENTER para iniciar la reproducción o pulse HDMI CONTROL para volver al menú. Este proceso también<br />
se aplica a las grabadoras. Consulte el cuadro a continuación para los comandos disponibles.<br />
Reproductores<br />
1 Visualiza el menú <strong>de</strong> disco DVD/Blu-ray en el<br />
reproductor<br />
2 Avance rápido<br />
3 D<strong>et</strong>iene la reproducción<br />
4 Cierra la pantalla para volver al menú Control<br />
HDMI<br />
5 Enumera los equipos conectados<br />
(número <strong>de</strong> mo<strong>de</strong>lo)<br />
6 R<strong>et</strong>roceso rápido<br />
7 Inicia la reproducción<br />
1<br />
2<br />
3<br />
4<br />
Control HDMI<br />
****<br />
MENU<br />
Salir<br />
5<br />
6<br />
7<br />
Nota: También pue<strong>de</strong> utilizar (Reproducción), (D<strong>et</strong>ención), (Pausa), (Avance rápido) y (R<strong>et</strong>roceso<br />
rápido) en el mando a distancia para realizar las mismas operaciones que los botones <strong>de</strong>l menú <strong>de</strong> control.<br />
79<br />
Sp
05 Utilización <strong>de</strong> otros equipos con su televisor <strong>de</strong> pantalla plana<br />
5.3.4 Adición <strong>de</strong> un amplificador <strong>de</strong> AV o <strong>de</strong> un reproductor BD<br />
Para añadir un amplificador <strong>de</strong> AV y/o un reproductor BD, consulte el diagrama <strong>de</strong> cableado apropiado a<br />
continuación.<br />
Amplificador <strong>de</strong> AV y reproductor BD<br />
T<br />
T<br />
T<br />
T<br />
W<br />
W<br />
W<br />
W<br />
Vista trasera<br />
Vista trasera<br />
Cable compatible<br />
con HDMI (cable<br />
HDMI con la<br />
marca HDMI)<br />
Cable <strong>de</strong> AV<br />
(disponible<br />
comercialmente)<br />
Cable digital óptico<br />
(disponible<br />
comercialmente)<br />
Cable compatible<br />
con HDMI (cable<br />
HDMI con la<br />
marca HDMI)<br />
Cable <strong>de</strong> AV<br />
(disponible<br />
comercialmente)<br />
Cable digital<br />
óptico<br />
(disponible<br />
comercialmente)<br />
Amplificador<br />
<strong>de</strong> AV<br />
Reproductor<br />
BD<br />
Amplificador<br />
<strong>de</strong> AV<br />
Reproductor<br />
BD<br />
Reproductor BD solamente<br />
T<br />
W<br />
T<br />
W<br />
Vista trasera<br />
Cable compatible con<br />
HDMI (cable HDMI con<br />
la marca HDMI)<br />
Reproductor BD<br />
80<br />
Sp
Utilización <strong>de</strong> otros equipos con su televisor <strong>de</strong> pantalla plana 05<br />
5.4 Comandos específicos <strong>de</strong>l Control HDMI<br />
Cuando utilice un equipo HDMI con su televisor <strong>de</strong> pantalla plana, algunas opciones incluyen el momento <strong>de</strong><br />
encen<strong>de</strong>r la pantalla y los métodos <strong>de</strong> encen<strong>de</strong>r y apagar los otros dispositivos o funciones. En esta sección se<br />
proveen los pasos para cambiar las configuraciones más comunes.<br />
5.4.1 Sonido <strong>de</strong> la fuente <strong>de</strong> reproducción con un comando HDMI<br />
Cuando se produce el sonido por un sistema <strong>de</strong> AV <strong>Pioneer</strong> a través <strong>de</strong>l televisor <strong>de</strong> pantalla plana, colocar la<br />
pantalla en el modo <strong>de</strong> espera interrumpe el sonido. Para restaurar el sonido cuando se encienda el televisor <strong>de</strong><br />
pantalla plana, siga los pasos a continuación.<br />
1 ) Acceda a Opción a través <strong>de</strong> Configuración.<br />
2 ) Seleccione Conf.Control HDMI <strong>de</strong>l menú Opción.<br />
3 ) Seleccione R<strong>et</strong>enerConf.Audio <strong>de</strong>l submenú.<br />
4 ) Seleccione Encendido para general el sonido <strong>de</strong>l sistema <strong>de</strong> AV cuando se encienda la pantalla.<br />
5 ) Pulse HOME MENU para salir <strong>de</strong>l menú.<br />
Nota: Para que el sonido continúe cuando se encien<strong>de</strong> el televisor <strong>de</strong> pantalla plana, compruebe que la opción<br />
Cambiar a sonido TV aparece en el menú Control HDMI antes <strong>de</strong> apagar la pantalla (consulte la página 77).<br />
Español<br />
5.4.2 Apagado con un comando HDMI<br />
La función “Control apagado” está disponible para los dispositivos conectados a qualquier uno <strong>de</strong> los puertos<br />
HDMI <strong>de</strong> la pantalla. Para apagar un dispositivo conectado cuando se apaga el televisor <strong>de</strong> pantalla plana, siga<br />
los pasos a continuación.<br />
1 ) Acceda a Opción a través <strong>de</strong> Configuración.<br />
2 ) Seleccione Conf.Control HDMI <strong>de</strong>l menú Opción.<br />
3 ) Seleccione Control apagado <strong>de</strong>l submenú.<br />
4 ) Seleccione Encendido para permitir que la pantalla apague el equipo conectado.<br />
5 ) Pulse HOME MENU para salir <strong>de</strong>l menú.<br />
5.4.3 Encendido con un comando HDMI<br />
La pantalla sale <strong>de</strong> la fábrica con el comando <strong>de</strong> encendido activado. Si se <strong>de</strong>sactiva esta función<br />
acci<strong>de</strong>ntalmente, se pue<strong>de</strong> reactivarla. Para encen<strong>de</strong>r el televisor <strong>de</strong> pantalla plana automáticamente cuando se<br />
encien<strong>de</strong> una grabadora o reproductor <strong>Pioneer</strong> conectado y se envién las imágenes a la pantalla, siga los pasos<br />
a continuación.<br />
1 ) Acceda a Opción a través <strong>de</strong> Configuración.<br />
2 ) Seleccione Conf.Control HDMI <strong>de</strong>l menú Opción.<br />
3 ) Seleccione Listo encendido <strong>de</strong>l submenú.<br />
4 ) Seleccione Encendido para que otro dispositivo encienda la pantalla.<br />
5 ) Pulse HOME MENU para salir <strong>de</strong>l menú.<br />
81<br />
Sp
05 Utilización <strong>de</strong> otros equipos con su televisor <strong>de</strong> pantalla plana<br />
5.4.4 Prueba <strong>de</strong>l control <strong>de</strong> la alimentación (Encendido/Apagado)<br />
Su televisor <strong>de</strong> pantalla plana provee una opción <strong>de</strong> Control HDMI para probar la alimentación <strong>de</strong> un equipo<br />
conectado a un puerto HDMI <strong>de</strong> la pantalla y asignado apropiadamente a una entrada.<br />
Para comprobar el funcionamiento correcto <strong>de</strong> la función <strong>de</strong> encendido/apagado, siga los pasos a continuación.<br />
1 ) Acceda a Opción a través <strong>de</strong> Configuración.<br />
2 ) Seleccione Conf.Control HDMI <strong>de</strong>l menú Opción.<br />
3 ) Seleccione una opción <strong>de</strong> prueba (Prueba encen<strong>de</strong>r o Prueba apagado) <strong>de</strong>l submenú.<br />
Se visualiza una lista con todos los equipos HDMI conectados.<br />
4 ) Seleccion uno <strong>de</strong> los equipos <strong>de</strong> la lista.<br />
5 ) Repita este proceso para probar los oros equipos <strong>de</strong> la lista.<br />
6 ) Pulse HOME MENU para salir <strong>de</strong>l menú cuando se finalicen todas las pruebas.<br />
Si la prueba <strong>de</strong> encendido/apagado falla, compruebe las conexiones y configuraciones.<br />
5.5 Conexión <strong>de</strong> una consola <strong>de</strong> vi<strong>de</strong>ojuegos o una vi<strong>de</strong>ocámara<br />
Su televisor <strong>de</strong> pantalla plana ofrece conexiones directas para una consola <strong>de</strong> vi<strong>de</strong>ojuegos, vi<strong>de</strong>ocámara, u otro<br />
equipo audiovisual (AV) a través <strong>de</strong> la ENTRADA 3. Para ver la imagen <strong>de</strong> una consola <strong>de</strong> vi<strong>de</strong>ojuegos o<br />
vi<strong>de</strong>ocámara, pulse INPUT 3 en el mando a distancia o pulse INPUT rep<strong>et</strong>idamente para seleccionar ENTRADA<br />
3. Para los d<strong>et</strong>alles acerca <strong>de</strong> las configuraciones para consola <strong>de</strong> vi<strong>de</strong>ojuegos, consulte “2.5.2 Conexión <strong>de</strong> otro<br />
equipo <strong>Pioneer</strong>” y “4.1.4 Configuración <strong>de</strong> la pantalla para reconocer una consola <strong>de</strong> juego”.<br />
Utilice el tipo <strong>de</strong> conexión especificado por el equipo. Conecte un equipo solamente a los terminales que<br />
realmente se utilizarán.<br />
82<br />
Sp
Utilización <strong>de</strong> otros equipos con su televisor <strong>de</strong> pantalla plana 05<br />
5.6 Operación <strong>de</strong> Home Media Gallery<br />
Con Home Media Gallery, pue<strong>de</strong> disfrutar <strong>de</strong> contenidos digitales tales como archivos <strong>de</strong> película, música y foto<br />
en televisor <strong>de</strong> pantalla plana <strong>de</strong> alta fi<strong>de</strong>lidad. Reproduzca los contenidos <strong>de</strong> archivos almacenados en uno o<br />
más servidores <strong>de</strong> medios conectados por una red doméstica o red <strong>de</strong> área local (LAN), o <strong>de</strong> archivos<br />
almacenados en un dispositivo <strong>de</strong> memoria flash USB. Después <strong>de</strong> conectar vía un ruteador <strong>de</strong> banda ancha o<br />
vía un concentador Ethern<strong>et</strong> a un servidor <strong>de</strong> medios con software <strong>de</strong> red, navegue por los contenidos digitales<br />
visibles en Home Media Gallery. El televisor <strong>de</strong> pantalla plana soporta dispositivos <strong>de</strong> clase <strong>de</strong> almacenamiento<br />
masivo y dispositivos PTP a través <strong>de</strong> interfaz USB, así como dispositivos compatibles con DLNA a través <strong>de</strong> una<br />
red.<br />
Reproductor <strong>de</strong> audio/ví<strong>de</strong>o/imagen DLNA CERTIFIED<br />
Este producto es compatible con las guías DLNA N<strong>et</strong>worked Device Interoperability Gui<strong>de</strong>lines - expandidas:<br />
Octubre <strong>de</strong> 2006 (v1.5).<br />
Cuando se conecta un PC que esté ejecutando un software <strong>de</strong> servidor DLNA u otro dispositivo compatible con<br />
DLNA a este reproductor, pue<strong>de</strong> que se requieran algunos cambios en las configuraciones <strong>de</strong>l software o<br />
dispositivo. Consulte el manual <strong>de</strong> instrucciones para el sotware o dispositivo para más información.<br />
Formatos <strong>de</strong> archivos soportados<br />
En las siguientes secciones se muestran los formatos <strong>de</strong> archivos soportados que pue<strong>de</strong>n reproducirse o<br />
visualizarse en el televisor <strong>de</strong> pantalla plana. Esos formatos se aplican a las fuentes <strong>de</strong> red. La mayoría también<br />
es aplicable a las fuentes <strong>de</strong> USB. Sin embargo, pue<strong>de</strong> que no sea posible reproducir los contenidos <strong>de</strong> un<br />
servidor <strong>de</strong> medios que estén protegidos por la gestión <strong>de</strong> <strong>de</strong>rechos digitales, tales como WMDRM10 (Windows<br />
Media Digital Rights Management 10).<br />
Español<br />
Formatos <strong>de</strong> ví<strong>de</strong>o soportados<br />
• Windows Media Vi<strong>de</strong>o 9 (WMV9): MP@HL<br />
• Windows Media Vi<strong>de</strong>o 9 (WMV9) Advanced Profile (VC-1): AP@L2, MP@ML<br />
• MPEG-2 PS: MP@ML<br />
• MPEG-2 TS: MP@ML/MP@HL<br />
• MPEG-1<br />
• MPEG-4 Part2 (SP/ASP): SP@L3, ASP@L5<br />
• MPEG-4 Part10 (H.264/AVC): Main Profile 3.0, High Profile 4.1<br />
Formatos <strong>de</strong> audio soportados<br />
• Windows Media Audio 9 (WMA9): Tasas <strong>de</strong> muestreo; 44,1 kHz ó 48 kHz<br />
• MPEG-1 Audio Layer 3 (MP3): Tasas <strong>de</strong> muestreo; 32 kHz, 44,1 kHz ó 48 kHz<br />
• Linear PCM (WAV): Tasas <strong>de</strong> muestreo; 44,1 kHz ó 48 kHz<br />
• MPEG-4 AAC: Tasas <strong>de</strong> muestreo; 16 kHz, 32 kHz, 44,1 kHz ó 48 kHz<br />
• HE-AAC: Tasas <strong>de</strong> muestreo; 16 kHz, 32 kHz, 44,1 kHz ó 48 kHz<br />
Formatos <strong>de</strong> imagen soportados<br />
• JPEG: Resolución; hasta 3680 x 2760 píxeles<br />
• PNG: Resolución; hasta 3680 x 2760 píxeles<br />
• GIF: Resolución; hasta 3680 x 2760 píxeles<br />
• TIFF: Resolución; hasta 1600 x 1200 píxeles<br />
• BMP: Resolución; hasta 3680 x 2760 píxeles<br />
Extensiones <strong>de</strong> archivo soportadas<br />
• Ví<strong>de</strong>o: .wmv .asf .mpg .mpeg .mpe .m2p .m4v .mp4v, .mp4, .mov<br />
• Audio: .wma .mp3 .wav .m4a .aac<br />
• Imagen: .jpg .jpeg .png .gif .bmp .tif .tiff<br />
83<br />
Sp
05 Utilización <strong>de</strong> otros equipos con su televisor <strong>de</strong> pantalla plana<br />
Aunque los archivos tengan una extensión soportada, pue<strong>de</strong> que algunos archivos no se reproduzcan o no se<br />
visualicen a<strong>de</strong>cuadamente, <strong>de</strong>pendiendo <strong>de</strong>l contenido o tipo <strong>de</strong> servidor <strong>de</strong> medios.<br />
Pue<strong>de</strong> que algunos formatos no sean soportados ni visualizados en Home Media Gallery, ya que los formatos que<br />
los servidores individuales soportan varían. Consulte sitios Web <strong>de</strong>l fabricante <strong>de</strong>l servidor <strong>de</strong> medios u otros<br />
sitios Web relevantes para los formatos soportados.<br />
Mientras un formato particular sea soportado, no todas las funciones <strong>de</strong>l contenido pue<strong>de</strong>n ejecutarse<br />
a<strong>de</strong>cuadamente. Si no se visualiza un contenido a<strong>de</strong>cuadamente, póngase en contacto con el productor <strong>de</strong>l<br />
contenido para asistencia. A<strong>de</strong>más, pue<strong>de</strong> que algunos formatos <strong>de</strong> archivo soportados no se reproduzcan<br />
correctamente cuando se importa los archivos <strong>de</strong> un dispositivo USB <strong>de</strong>sconocido.<br />
Nota: No es posible utilizar Home Media Gallery hasta que los elementos oscurecidos en la pantalla <strong>de</strong>l menú se<br />
pongan blancos.<br />
Pue<strong>de</strong> que algunas funciones <strong>de</strong> Home Media Gallery, tales como la reproducción variable durante el<br />
avance rápido y r<strong>et</strong>roceso, búsqueda <strong>de</strong> tiempo y búsqueda, no funcionen <strong>de</strong>pendiendo <strong>de</strong> la capacidad y<br />
funcionalidad <strong>de</strong>l servidor <strong>de</strong> medios.<br />
Home Media Gallery es compatible con las guías DLNA N<strong>et</strong>worked Device Interoperability Gui<strong>de</strong>lines -<br />
expandidas: Octubre <strong>de</strong> 2006 (v1.5). Si su servidor <strong>de</strong> medios soporta diferentes versiones <strong>de</strong> DLNA, pue<strong>de</strong><br />
que algunas funciones <strong>de</strong> Home Media Gallery y algunos formatos <strong>de</strong> contenido no sean soportados.<br />
<strong>Pioneer</strong> no se hace responsable por cualquier fallo <strong>de</strong> funcionamiento <strong>de</strong> las funciones <strong>de</strong> Home Media<br />
Gallery <strong>de</strong>bido a errores <strong>de</strong> comunicación o fallos <strong>de</strong> funcionamiento asociados con su conexión <strong>de</strong> red y/<br />
o su PC, u otros equipos conectados. Póngase en contacto con el fabricante <strong>de</strong> su PC o con el proveedor<br />
<strong>de</strong> servicio <strong>de</strong> Intern<strong>et</strong>.<br />
Pue<strong>de</strong> que el contenido no se reproduzca o no se visualice correctamente, <strong>de</strong>pendiendo <strong>de</strong> las condiciones<br />
<strong>de</strong> uso o servidor <strong>de</strong> medios en uso.<br />
Las funciones <strong>de</strong> Home Media Gallery como WMDRM10-ND (Microsoft Windows Media DRM para<br />
dispositivos conectados en red). Sólo se pue<strong>de</strong> navegar por el contenido <strong>de</strong>s<strong>de</strong> servidores <strong>de</strong> medios que<br />
soportan WMDRM10-ND. Pue<strong>de</strong> que el contenido no se reproduzca, <strong>de</strong>pendiendo <strong>de</strong>l nivel <strong>de</strong> protección<br />
DRM.<br />
Pue<strong>de</strong> que este sistema no visualice el contenido <strong>de</strong> tarj<strong>et</strong>as <strong>de</strong> memoria incompatibles.<br />
5.6.1 Conexiones en red<br />
Para conectar a una red, configure Home Media Gallery a través <strong>de</strong>l menú Home Media Gallery. Pulse el botón<br />
HMG en el mando a distancia para visualizar el menú. Para utilizar Home Media Gallery, conecte a una red<br />
doméstica (LAN) vía un concentrador o cable Ethern<strong>et</strong> directamente a un servidor <strong>de</strong> medios.<br />
84<br />
Sp<br />
Servidores <strong>de</strong> medios utilizables<br />
Un servidor <strong>de</strong> medios contiene contenidos digitales como archivos <strong>de</strong> película, música y foto. PCs con software<br />
<strong>de</strong> servidor <strong>de</strong> medios preinstalado y grabadoras con una función <strong>de</strong> servidor <strong>de</strong> medios se consi<strong>de</strong>ran servidores<br />
<strong>de</strong> medios. Hay algunos servidores <strong>de</strong> medios que pue<strong>de</strong> seleccionar como, por ejemplo, Windows Media Connect,<br />
Windows Media Player con una función <strong>de</strong> compartición <strong>de</strong> medios, y servidores compatibles con DLNA.<br />
• Windows Media Connect 2.0<br />
Windows Media Connect funciona en un PC <strong>de</strong> 32 bitios con Windows XP Service Pack 2 (SP2) instalado.<br />
Cuando ya está instalado, pue<strong>de</strong> disfrutar <strong>de</strong> Home Media Gallery utilizando su PC.<br />
• Windows Media Player 11 for Windows XP<br />
Windows Media Player 11 provee la función <strong>de</strong> compartición <strong>de</strong> medios y funciona en un PC <strong>de</strong> 32 bitios<br />
con Windows XP Service Pack 2 (SP2) instalado.<br />
Si Windows Media Connect 2.0 no está instalado en su PC, pue<strong>de</strong> <strong>de</strong>scargar Windows Media Player 11 <strong>de</strong>l<br />
sitio Web <strong>de</strong> Microsoft.<br />
• Windows Media Player 11 for Windows Vista<br />
Windows Media Player 11 se encuentra incorporado en los PCs <strong>de</strong> 32 bitios con Windows Vista.<br />
Cuando seleccione el servidor <strong>de</strong> medios más a<strong>de</strong>cuado, visite el sitio Web <strong>de</strong> Microsoft para los requisitos <strong>de</strong>l<br />
sistema, cuestiones conocidas, procedimientos <strong>de</strong> instalación, y otras informaciones actualizadas.<br />
• Servidores <strong>de</strong> medios digitales DLNA CERTIFIED<br />
El servidor es un servidor <strong>de</strong> medios digitales con certificado DLNA tal como software <strong>de</strong> PC, PCs y otros<br />
dispositivos instalados con software con certificado DLNA. Cuando se conecta un PC que esté ejecutando<br />
un software <strong>de</strong> servidor DLNA u otro dispositivo compatible con DLNA a este reproductor, pue<strong>de</strong> que se<br />
requieran algunos cambios en las configuraciones <strong>de</strong>l software o dispositivo. Consulte los manuales <strong>de</strong><br />
instrucciones <strong>de</strong> los dispositivos para más información.
Utilización <strong>de</strong> otros equipos con su televisor <strong>de</strong> pantalla plana 05<br />
Conexión vía un concentrador Ethern<strong>et</strong><br />
Si ya está utilizando uno o más servidores <strong>de</strong> medios en una red doméstica o red <strong>de</strong> área local (LAN), conecte el<br />
televisor <strong>de</strong> pantalla plana a un concentrador Ethern<strong>et</strong> (LAN) con un cable Ethern<strong>et</strong> (LAN) estándar (“directo”).<br />
Vea el diagrama a continuación.<br />
Nota: Mientras el Home Media Gallery soporta 10BASE-T, es mejor utilizar 100BASE-TX para aumentar la calidad<br />
y velocidad <strong>de</strong> visualización.<br />
T<br />
W<br />
T<br />
W<br />
Vista trasera<br />
Servidor <strong>de</strong><br />
medios 2<br />
Cable directo<br />
Concentrador Ethern<strong>et</strong><br />
(Ruteador con función <strong>de</strong><br />
concentrador)<br />
Español<br />
Servidor <strong>de</strong> medios 1<br />
Conexión directa a un servidor <strong>de</strong> medios<br />
Para utilizar un PC como un servidor <strong>de</strong> medios, conecte el televisor <strong>de</strong> pantalla plana directamente al PC con<br />
un cable Ethern<strong>et</strong> (LAN) trenzado (“cruzado”). Vea el diagrama a continuación.<br />
T<br />
W<br />
T<br />
W<br />
Vista trasera<br />
Cable cruzado<br />
Servidor <strong>de</strong> medios 1<br />
85<br />
Sp
05 Utilización <strong>de</strong> otros equipos con su televisor <strong>de</strong> pantalla plana<br />
Confirmación <strong>de</strong> la dirección IP<br />
Después <strong>de</strong> hacer la conexión a la red, siga las instrucciones a continuación para confirmar la dirección IP antes<br />
<strong>de</strong> acce<strong>de</strong>r a la red. (La configuración sólo es efectiva para Auto. Para realizar el procedimiento, DHCP en su<br />
servidor o ruteador <strong>de</strong>be estar activo. Consulte “5.9 Configuración HMG”.)<br />
1 ) Pulse HMG en el mando a distancia.<br />
El menú Home Media Gallery aparece en la pantalla.<br />
2 ) Seleccione Configuración HMG.<br />
Utilice los botones <strong>de</strong> flecha para resaltar una opción.<br />
3 ) Pulse ENTER.<br />
4 ) Seleccione Configuración <strong>de</strong> red.<br />
5 ) Seleccione Obt. auto. IP.<br />
La pantalla cambia <strong>de</strong>l modo “Selección” al modo “Entrada”.<br />
6 ) Seleccione Sí.<br />
7 ) Pulse RETURN.<br />
La pantalla Configuración <strong>de</strong> HMG reaparece.<br />
Se asigna la dirección IP.<br />
Home Media Gallery soporta obtención automática <strong>de</strong> IP y DHCP (Dynamic Host Configuration Protocol).<br />
Si el sistema no pudo asignar la dirección IP o si <strong>de</strong>sea obtener diferentes direcciones, seleccione No y, a<br />
continuación, introduzca la dirección IP y la máscara <strong>de</strong> subred. Consulte Configuración <strong>de</strong> red y<br />
Configuración HMG para introducir una dirección manualmente.<br />
Para la información acerca <strong>de</strong> DHCP, consulte el manual <strong>de</strong> instrucciones <strong>de</strong>l dispositivo <strong>de</strong> red.<br />
Pue<strong>de</strong> que necesite ponerse en contacto con el proveedor <strong>de</strong> servicio o administrador <strong>de</strong> la red para introducir<br />
la dirección IP manualmente.<br />
Algunos servidores <strong>de</strong> medios bloquean o están programados para bloquear el acceso a servidores <strong>de</strong> clientes.<br />
Cuando conecte el televisor <strong>de</strong> pantalla plana, compruebe si el servidor <strong>de</strong> medios tiene <strong>de</strong>rechos <strong>de</strong> acceso a<br />
servidores <strong>de</strong> clientes.<br />
5.6.2 Conexión a un dispositivo USB<br />
También pue<strong>de</strong> disfrutar <strong>de</strong>l contenido almacenado en tarj<strong>et</strong>as <strong>de</strong> memoria conectando un dispositivo USB al<br />
televisor <strong>de</strong> pantalla plana. El directorio raíz o pantalla Lista <strong>de</strong> dispositivos aparece tan pronto se conecte una<br />
unidad flash USB o un lector <strong>de</strong> múltiples tarj<strong>et</strong>as al puerto USB. Otra opción es conectar su cámara digital<br />
directamente al televisor <strong>de</strong> pantalla plana utilizando un cable con conector USB disponible comercialmente.<br />
Si por cualquier razón, la Lista <strong>de</strong> carp<strong>et</strong>as/contenidos o Lista <strong>de</strong> dispositivos no aparece, siga los pasos a<br />
continuación.<br />
1 ) Pulse HMG.<br />
El menú Home Media Gallery aparece en la pantalla.<br />
2 ) Seleccione USB.<br />
Utilice los botones <strong>de</strong> flecha para resaltar una opción.<br />
3 ) Pulse ENTER para confirmar la selección.<br />
4 ) Seleccione el dispositivo <strong>de</strong>seado.<br />
La pantalla <strong>de</strong>l dispositivo USB <strong>de</strong>be aparecer.<br />
5 ) Pulse ENTER para navegar a una carp<strong>et</strong>a o reproducir un archivo/contenido.<br />
Para volver a la pantalla anterior, pulse RETURN.<br />
6 ) Pulse EXIT o HMG para salir <strong>de</strong> Home Media Gallery.<br />
86<br />
Sp<br />
Nota: El televisor <strong>de</strong> pantalla plana visualiza la pantalla Dispositivo USB o el directorio raíz inmediatamente<br />
<strong>de</strong>spués <strong>de</strong> la inserción <strong>de</strong> un dispositivo USB. En este caso, comience <strong>de</strong>s<strong>de</strong> el paso 5.<br />
Cuando se inserta un lector <strong>de</strong> múltiples tarj<strong>et</strong>as, se visualiza la pantalla Dispositivo USB. En este caso,<br />
comience <strong>de</strong>s<strong>de</strong> el paso 4.
Utilización <strong>de</strong> otros equipos con su televisor <strong>de</strong> pantalla plana 05<br />
Televisor <strong>de</strong> pantalla plana<br />
Dispositivo flash<br />
USB<br />
Cámara digital con clase<br />
<strong>de</strong> <strong>de</strong> almacenamiento<br />
masivo USB<br />
(También se soporta PTP)<br />
Español<br />
Medio flash vía adaptador USB (Lector <strong>de</strong> múltiples tarj<strong>et</strong>as)<br />
Nota: No utilice ningún dispositivo USB que no sea especificado. Utilizar dispositivos no especificados pue<strong>de</strong><br />
causar un fallo <strong>de</strong> funcionamiento.<br />
Formatos <strong>de</strong> datos que pue<strong>de</strong>n leerse<br />
Este sistema pue<strong>de</strong> leer FAT16, FAT32 o NTFS.<br />
Archivos <strong>de</strong> datos que pue<strong>de</strong>n leerse<br />
Archivos <strong>de</strong> película, música y foto con la excepción <strong>de</strong> archivos protegidos por gestión <strong>de</strong> <strong>de</strong>rechos digitales<br />
(WMDRM10).<br />
Su televisor <strong>de</strong> pantalla plana soporta sólo un dispositivo USB a la vez. Tampoco soporta concentradores USB.<br />
Pue<strong>de</strong> que este sistema no sea capaz <strong>de</strong> visualizar contenidos modificados o editados utilizando un PC u otro<br />
equipo.<br />
Su televisor <strong>de</strong> pantalla plana soporta dispositivos <strong>de</strong> clase <strong>de</strong> almacenamiento masivo USB y dispositivos PTP.<br />
Algunas cámaras digitales pue<strong>de</strong>n requerir un procedimiento <strong>de</strong> configuración la transferencia <strong>de</strong> datos <strong>de</strong> clase<br />
<strong>de</strong> almacenamiento masivo. La configuración se lleva a cabo en la cámara. Consulte el manual <strong>de</strong> instrucciones<br />
suministrado con la cámara digital. Dependiendo <strong>de</strong>l tipo <strong>de</strong> su tarj<strong>et</strong>a <strong>de</strong> memoria o cámara, pue<strong>de</strong> que algunas<br />
imágenes no se visualicen.<br />
Extracción <strong>de</strong> un dispositivo USB<br />
Para extraer un dispositivo USB, primero salga <strong>de</strong> Home Media Gallery y, a continuación, <strong>de</strong>sconecte el<br />
dispositivo.<br />
Asegúrese <strong>de</strong> salir <strong>de</strong> la pantalla Home Media Gallery antes <strong>de</strong> extraer el dispositivo USB. Si extrae el dispositivo<br />
USB mientras se visualiza la pantalla Home Media Gallery, los datos <strong>de</strong>ntro <strong>de</strong> la memoria pue<strong>de</strong>n dañarse.<br />
No inserte ni extraiga el dispositivo USB inmediatamente <strong>de</strong>spués <strong>de</strong> encen<strong>de</strong>r o apagar el sistema. Esto causará<br />
daños a los datos en la memoria.<br />
<strong>Pioneer</strong> no se hace responsable por cualesquiera pérdidas o daños a los datos <strong>de</strong>ntro <strong>de</strong>l dispositivo flash USB.<br />
87<br />
Sp
05 Utilización <strong>de</strong> otros equipos con su televisor <strong>de</strong> pantalla plana<br />
5.7 Ejecución <strong>de</strong> Home Media Gallery<br />
1 ) Pulse HMG.<br />
El menú Home Media Gallery aparece en la pantalla.<br />
2 ) Seleccione Media Navigator, USB, Lista reproducción HMG o Configuración HMG.<br />
Utilice los botones <strong>de</strong> flecha para resaltar una opción y, a continuación, pulse ENTER.<br />
Para volver a la pantalla anterior, pulse RETURN.<br />
3 ) Pulse EXIT o HMG para salir <strong>de</strong> Home Media Gallery.<br />
Media Navigator<br />
USB<br />
Lista reproducción HMG<br />
Configuración HMG<br />
Utilización <strong>de</strong>l Media Navigator<br />
Al seleccionar el Media Navigator, se visualiza automáticamente el menú <strong>de</strong>l servidor seleccionado<br />
anteriormente. Cuando se encuentra solamente un servidor, el sistema conecta tal servidor automáticamente.<br />
También pue<strong>de</strong> utilizar el menú TOOLS para cambiar a otro servidor o seleccionar un servidor manualmente <strong>de</strong><br />
la Lista <strong>de</strong> servidores. La pantalla cambia automáticamente a la lista <strong>de</strong> servidores si no hay servidores<br />
anteriores.<br />
1 ) Pulse HMG.<br />
El menú Home Media Gallery aparece en la pantalla.<br />
2 ) Seleccione Media Navigator.<br />
Utilice los botones <strong>de</strong> flecha para resaltar una opción y, a continuación, pulse ENTER.<br />
Se visualiza el menú <strong>de</strong> un servidor. La configuración <strong>de</strong> archivo/carp<strong>et</strong>a pue<strong>de</strong> variar <strong>de</strong>pendiendo <strong>de</strong>l<br />
servidor seleccionado.<br />
3 ) Seleccione un servidor <strong>de</strong>seado <strong>de</strong> la Lista <strong>de</strong> servidores.<br />
4 ) Seleccione la carp<strong>et</strong>a que <strong>de</strong>see navegar o el archivo/contenido que <strong>de</strong>see reproducir.<br />
Cine<br />
Música<br />
Foto<br />
Archivos <strong>de</strong>l usuario<br />
4<br />
(Pantalla <strong>de</strong> muestreo)<br />
5 ) Pulse ENTER.<br />
El reproductor apropiado se inicia y comienza a reproducir el archivo seleccionado.<br />
Para volver a la pantalla anterior, pulse RETURN.<br />
6 ) Pulse EXIT o HMG para salir <strong>de</strong> Home Media Gallery.<br />
Nota: El lanzamiento <strong>de</strong>l Media Navigator <strong>de</strong>pen<strong>de</strong> <strong>de</strong> la opción seleccionada en Conexión automática“5.9<br />
Configuración HMG”. Seleccione un servidor <strong>de</strong> la Lista <strong>de</strong> servidores para abrir el Media Navigator.<br />
88<br />
Sp
Utilización <strong>de</strong> otros equipos con su televisor <strong>de</strong> pantalla plana 05<br />
Navegación por los archivos y carp<strong>et</strong>as <strong>de</strong> un dispositivo USB<br />
Así como en la navegación por los servidores <strong>de</strong> medios, seleccione el archivo específico <strong>de</strong> un dispositivo en la<br />
pantalla Dispositivo USB para iniciar un reproductor apropiado. Para los d<strong>et</strong>ales, consulte los pasos a<br />
continuación.<br />
1 ) Pulse HMG.<br />
El menú Home Media Gallery aparece en la pantalla.<br />
2 ) Seleccione USB.<br />
Utilice los botones <strong>de</strong> flecha para resaltar una opción y, a continuación, pulse ENTER.<br />
Se visualiza la pantalla Dispositivo USB. Seleccione el dispositivo. Cuando utilice un dispositivo con un<br />
único directorio (unidad flash USB), la pantalla Dispositivo USB no aparece.<br />
USB A<br />
USB B<br />
USB C<br />
USB D<br />
USB E<br />
USB F<br />
USB G<br />
15 (Pantalla <strong>de</strong> muestreo)<br />
Español<br />
3 ) Seleccione la carp<strong>et</strong>a que <strong>de</strong>see navegar o el archivo/contenido que <strong>de</strong>see reproducir.<br />
4 ) Pulse ENTER.<br />
El reproductor apropiado se inicia y comienza a reproducir el archivo seleccionado.<br />
Para volver a la pantalla anterior, pulse RETURN.<br />
5 ) Pulse EXIT o HMG para salir <strong>de</strong> Home Media Gallery.<br />
Nota: La pantalla Dispositivo USB aparece cuando se utiliza un lector <strong>de</strong> mútiples tarj<strong>et</strong>as o múltiples<br />
dispositivos flash. En este caso, seleccione el dispositivo que contiene el contenido <strong>de</strong>seado.<br />
89<br />
Sp
05 Utilización <strong>de</strong> otros equipos con su televisor <strong>de</strong> pantalla plana<br />
Componentes <strong>de</strong> la pantalla<br />
Las opciones <strong>de</strong> visualización son:<br />
• Lista<br />
• Miniaturas<br />
• Lista <strong>de</strong> miniaturas<br />
Pulse TOOLS y, a continuación, seleccione Cambiar visualización <strong>de</strong>l menú TOOLS para seleccionar entre las<br />
opciones <strong>de</strong> visualización. Hay opciones para los menús Película, Música y Foto.<br />
Pantalla <strong>de</strong> lista<br />
3<br />
(Pantalla <strong>de</strong> muestreo)<br />
Carp<strong>et</strong>a 1<br />
1<br />
2<br />
Carp<strong>et</strong>a 2<br />
Carp<strong>et</strong>a 3<br />
Contenido 2<br />
Contenido 3<br />
Contenido 4<br />
Contenido 5<br />
40<br />
4<br />
1<br />
Pantalla <strong>de</strong> miniaturas<br />
Pantalla Lista <strong>de</strong> miniaturas<br />
Carp<strong>et</strong>a 2<br />
Carp<strong>et</strong>a 3 Contenido 1<br />
Contenido 2 Contenido 3<br />
40<br />
40<br />
2<br />
1<br />
3<br />
2 3<br />
1. Ítem seleccionado<br />
2 . Número total <strong>de</strong> ítems<br />
3 . Barra <strong>de</strong> <strong>de</strong>splazamiento (se visualiza cuando hay una o más páginas subsiguientes)<br />
4 . Icono o miniatura <strong>de</strong>l ítem seleccionado (si se obtiene)<br />
90<br />
Sp
Utilización <strong>de</strong> otros equipos con su televisor <strong>de</strong> pantalla plana 05<br />
Lista <strong>de</strong> reproducción HMG<br />
Cada categoría (Película, Música y Foto) tiene cinco Listas <strong>de</strong> reproducción diferentes con hasta 100 archivos cada.<br />
La Lista <strong>de</strong> reproducción HMG pue<strong>de</strong> contener archivos <strong>de</strong> sonido y imagen seleccionados en el “Media Navigator”.<br />
Para editar una Lista <strong>de</strong> reproducción, utilice el menú TOOLS.<br />
1 ) Pulse HMG.<br />
El menú Home Media Gallery aparece en la pantalla.<br />
2 ) Seleccione Lista <strong>de</strong> reproducción HMG.<br />
Utilice los botones <strong>de</strong> flecha para resaltar una opción y, a continuación, pulse ENTER.<br />
3 ) Seleccione Película, Música o Foto <strong>de</strong> la pantalla Lista <strong>de</strong> reproducción HMG.<br />
Cine<br />
Música<br />
Foto<br />
3<br />
4 ) Seleccione una lista <strong>de</strong>seada <strong>de</strong> Lista <strong>de</strong> reproducción 1 a Lista <strong>de</strong> reproducción 5.<br />
5 ) Seleccione el contenido <strong>de</strong>seado.<br />
Este menú pue<strong>de</strong> aparecer como una Lista, Miniatura o Lista <strong>de</strong> miniaturas. Pulse TOOLS y, a<br />
continuación, seleccione Cambiar visualización <strong>de</strong>l menú TOOLS para cambiar a través <strong>de</strong> las opciones <strong>de</strong><br />
visualización.<br />
6 ) Pulse ENTER para reproducir el contenido.<br />
El reproductor apropiado se inicia y comienza a reproducir el archivo seleccionado.<br />
Para volver a la pantalla anterior, pulse RETURN.<br />
7 ) Pulse EXIT o HMG para salir <strong>de</strong> Home Media Gallery.<br />
Español<br />
5.7.1 Visualización <strong>de</strong> sus archivos <strong>de</strong> película en el televisor <strong>de</strong> pantalla plana<br />
Cuando seleccione el contenido <strong>de</strong> película <strong>de</strong>l menú <strong>de</strong>l servidor en la pantalla Media Navigator o la pantalla<br />
Dispositivo USB, el Reproductor <strong>de</strong> película se inicia automáticamente. Seleccione una categoría, carp<strong>et</strong>a o<br />
dispositivo para acce<strong>de</strong>r al submenú que contiene el archivo o contenido.<br />
Seleccionar un archivo <strong>de</strong> película <strong>de</strong> la Lista <strong>de</strong> reproducción HMG visualiza la pantalla Reproductor <strong>de</strong> película,<br />
exactamente como al seleccionar un archivo <strong>de</strong> un servidor.<br />
Componentes <strong>de</strong> la pantalla<br />
La siguiente información aparece automáticamente en la pantalla durante algunos segundos cuando el<br />
Reproductor <strong>de</strong> película se inicia o el estado <strong>de</strong> reproducción cambia (controlado por el mando a distancia, por<br />
ejemplo). Pulsar DISPLAY o seleccionar Información en el menú TOOLS también visualiza la información.<br />
1 2<br />
3<br />
Nombre <strong>de</strong>l álbum CineTÍTULO_0123456<br />
Reproducc. 00:02:01/00:05:24<br />
1<br />
YYYY/MM/DD<br />
4<br />
5 6 7 8<br />
1<br />
9<br />
Durante modo <strong>de</strong> rep<strong>et</strong>ición A-B<br />
(Información <strong>de</strong>l contenido)<br />
1. Nombre <strong>de</strong>l álbum<br />
2. Título <strong>de</strong>l contenido<br />
3. Fecha<br />
(Estado <strong>de</strong>l reproductor)<br />
4. Estado <strong>de</strong> reproducción (icono <strong>de</strong> estado,<br />
información <strong>de</strong>l estado, hora actual/tiempo total)<br />
5. Barra <strong>de</strong> progreso<br />
6. Modo <strong>de</strong> sonido<br />
7. Modo <strong>de</strong> reproducción<br />
8. Modo aleatorio<br />
9. Modo <strong>de</strong> rep<strong>et</strong>ición A-B<br />
91<br />
Sp
05 Utilización <strong>de</strong> otros equipos con su televisor <strong>de</strong> pantalla plana<br />
Guía <strong>de</strong> botones <strong>de</strong>l Reproductor <strong>de</strong> película<br />
Modo<br />
Reproducción<br />
D<strong>et</strong>ención<br />
PAUSE<br />
Botones que se<br />
utilizan<br />
ENTER, (PLAY) Reproduce el contenido.<br />
(STOP),<br />
RETURN<br />
ENTER,<br />
(PAUSE)<br />
Función<br />
D<strong>et</strong>iene el Reproductor <strong>de</strong> película y vuelve a la pantalla<br />
anterior (Lista/Miniatura/Lista <strong>de</strong> miniaturas)<br />
Establece una pausa <strong>de</strong> la reproducción.<br />
Avance rápido (FF), Avance rápido durante la reproducción.<br />
Cada pulsación alterna la velocidad <strong>de</strong> Avance rápido. Para<br />
interrumpir el Avance rápido, pulse ENTER o PLAY. Se<br />
vuelve al modo <strong>de</strong> reproducción normal.<br />
R<strong>et</strong>roceso rápido (RWD), R<strong>et</strong>roceso rápido durante la reproducción.<br />
Cada pulsación alterna la velocidad <strong>de</strong> R<strong>et</strong>roceso rápido.<br />
Para interrumpir el R<strong>et</strong>roceso rápido, pulse ENTER o PLAY.<br />
Se vuelve al modo <strong>de</strong> reproducción normal.<br />
Avance lento + ,<br />
+ <br />
Avance lento cuando se está en pausa.<br />
Cada pulsación alterna la velocidad <strong>de</strong> avance lento. Para<br />
interrumpir el Avance lento, pulse ENTER o PLAY. Se vuelve<br />
al modo <strong>de</strong> reproducción normal.<br />
Nota: Pue<strong>de</strong> que esta función no sea soportada,<br />
<strong>de</strong>pendiendo <strong>de</strong>l contenido.<br />
Avance (15 seg.) Salta 15 segundos a<strong>de</strong>lante y, a continuación, reproduce el<br />
ví<strong>de</strong>o o establece una pausa cuando se está en pausa<br />
R<strong>et</strong>roceso (15 seg.) Salta 15 segundos atrás y, a continuación, reproduce el<br />
ví<strong>de</strong>o o establece una pausa cuando se está en pausa<br />
Búsqueda <strong>de</strong> tiempo TOOLS<br />
Añadir a la lista repr.<br />
HMG<br />
Modo <strong>de</strong> rep<strong>et</strong>ición<br />
A-B<br />
TOOLS<br />
TOOLS<br />
Consulte Utilización <strong>de</strong>l menú TOOLS<br />
Consulte Utilización <strong>de</strong>l menú TOOLS<br />
Consulte Utilización <strong>de</strong>l menú TOOLS<br />
Aleatorio TOOLS Consulte Utilización <strong>de</strong>l menú TOOLS<br />
Modo <strong>de</strong><br />
reproducción<br />
TOOLS<br />
Consulte Utilización <strong>de</strong>l menú TOOLS<br />
Audio TOOLS Consulte Utilización <strong>de</strong>l menú TOOLS<br />
Imagen TOOLS Consulte Utilización <strong>de</strong>l menú TOOLS<br />
Sonido TOOLS Consulte Utilización <strong>de</strong>l menú TOOLS<br />
Información TOOLS Consulte Utilización <strong>de</strong>l menú TOOLS<br />
Nota: Pue<strong>de</strong> que algunas funciones no sean soportadas, <strong>de</strong>pendiendo <strong>de</strong>l tipo <strong>de</strong> servidor o versión <strong>de</strong>l software.<br />
Durante la reproducción, pue<strong>de</strong> ocurrir un error en la información relacionada con el tiempo, <strong>de</strong>pendiendo<br />
<strong>de</strong>l contenido o software <strong>de</strong>l servidor.<br />
Pue<strong>de</strong> también que no se soporten algunas funciones, <strong>de</strong>pendiendo <strong>de</strong>l contenido.<br />
92<br />
Sp
Utilización <strong>de</strong> otros equipos con su televisor <strong>de</strong> pantalla plana 05<br />
Se pue<strong>de</strong> reproducir el contenido obtenido <strong>de</strong> una vi<strong>de</strong>ocámara digital que soporte el formato H.264/AVC a través<br />
<strong>de</strong>l puerto USB.<br />
Para reproducir el contenido <strong>de</strong> este tipo <strong>de</strong> cámara, siga los pasos a continuación.<br />
1 ) Inserte el dispositivo flash USB que contiene el contenido en un lector <strong>de</strong> tarj<strong>et</strong>as conectado al televisor <strong>de</strong><br />
pantalla plana.<br />
Se visualiza la lista <strong>de</strong> carp<strong>et</strong>as/contenidos <strong>de</strong>l dispositivo USB.<br />
Consulte el manual <strong>de</strong> instrucciones que viene con el dispositivo utilizado para la información acerca <strong>de</strong> la<br />
conexión y configuración.<br />
2 ) Seleccione una lista <strong>de</strong> carp<strong>et</strong>as/contenidos.<br />
Utilice los botones <strong>de</strong> flecha para resaltar una opción y, a continuación, pulse ENTER.<br />
3 ) Seleccione el contenido <strong>de</strong>seado.<br />
Nota: Pue<strong>de</strong> que algunos contenidos no se reproduzcan o que ocurra un breve r<strong>et</strong>ardo entre el audio y ví<strong>de</strong>o,<br />
<strong>de</strong>pendiendo <strong>de</strong>l archivo.<br />
No todos los archivos (incluyendo archivos editados) se soportan por el Reproductor <strong>de</strong> película. Pue<strong>de</strong> que<br />
no aparezca el contenido almacenado en la carp<strong>et</strong>a “Acceso directo”, <strong>de</strong>pendiendo <strong>de</strong> la posición <strong>de</strong><br />
almacenamiento en el dispositivo <strong>de</strong> memoria.<br />
Pue<strong>de</strong> también que no se reproduzca el contenido correctamente, <strong>de</strong>pendiendo <strong>de</strong>l lector <strong>de</strong> tarj<strong>et</strong>as USB<br />
que se utilice.<br />
5.7.2 Reproducción <strong>de</strong> archivos <strong>de</strong> música en el televisor <strong>de</strong> pantalla plana<br />
Cuando seleccione el contenido <strong>de</strong> música <strong>de</strong>l menú <strong>de</strong>l servidor (en la pantalla Media Navigator o <strong>de</strong> un<br />
Dispositivo USB), el Reproductor <strong>de</strong> música se inicia automáticamente. Seleccione una categoría, carp<strong>et</strong>a o<br />
dispositivo para acce<strong>de</strong>r al submenú que contiene el archivo o contenido. Seleccionar un archivo <strong>de</strong> música <strong>de</strong><br />
la Lista <strong>de</strong> reproducción HMG visualiza la pantalla Reproductor <strong>de</strong> música, exactamente como al seleccionar un<br />
archivo <strong>de</strong> un servidor.<br />
Después <strong>de</strong> reproducir el contenido <strong>de</strong> música una vez, el contenido <strong>de</strong> música entra en un bucle como música<br />
<strong>de</strong> fondo (BGM). Para d<strong>et</strong>ener el bucle, d<strong>et</strong>enga la reproducción, salga <strong>de</strong> Home Media Gallery o inicie la<br />
reproducción <strong>de</strong> un contenido que no sea <strong>de</strong> foto.<br />
Componentes <strong>de</strong> la pantalla<br />
1<br />
Español<br />
Artista : XXXXX<br />
Álbum : XXXXX<br />
1. Información <strong>de</strong> artista/álbum<br />
2. Icono miniatura <strong>de</strong>l Reproductor <strong>de</strong> música/<br />
imagen <strong>de</strong> la cubierta<br />
3. Lista <strong>de</strong>l reproductor<br />
XXXXXX.mp3<br />
Canción anterior<br />
MúsicaABCD.mp3<br />
XXXXXX.mp3<br />
Canción siguiente<br />
2<br />
3<br />
La siguiente información y estado <strong>de</strong> reproducción aparecen en la pantalla <strong>de</strong>l Reproductor <strong>de</strong> música.<br />
Reproducc. 00:02:01/00:05:24<br />
4 5<br />
YYYY/MM/DD<br />
6 7<br />
9<br />
8<br />
Durante modo <strong>de</strong> rep<strong>et</strong>ición A-B<br />
4. Modo <strong>de</strong> reproducción<br />
5. Modo aleatorio<br />
6. Estado <strong>de</strong> reproducción (icono <strong>de</strong> estado,<br />
información <strong>de</strong>l estado, hora actual/tiempo total)<br />
7. Barra <strong>de</strong> progreso<br />
8. Modo <strong>de</strong> rep<strong>et</strong>ición A-B<br />
9. Fecha<br />
93<br />
Sp
05 Utilización <strong>de</strong> otros equipos con su televisor <strong>de</strong> pantalla plana<br />
Guía <strong>de</strong> botones <strong>de</strong>l Reproductor <strong>de</strong> música<br />
Modo<br />
Botones que se<br />
utilizan<br />
Función<br />
Reproducción ENTER, (PLAY) Reproduce el contenido seleccionado.<br />
D<strong>et</strong>ención (STOP), D<strong>et</strong>iene la reproducción.<br />
PAUSE<br />
ENTER,<br />
Establece una pausa <strong>de</strong> la reproducción.<br />
(PAUSE)<br />
Avance rápido (FF) Vea la guía <strong>de</strong> botones <strong>de</strong>l Reproductor <strong>de</strong> película.<br />
<br />
Mantenga pulsado para iniciar el Avance rápido.<br />
Durante el Avance rápido, pulse para cambiar la<br />
velocidad <strong>de</strong> reproducción. Para interrumpir el Avance<br />
rápido, pulse ENTER o PLAY. Se vuelve al modo <strong>de</strong><br />
reproducción normal.<br />
R<strong>et</strong>roceso rápido (RWD) Vea la guía <strong>de</strong> botones <strong>de</strong>l Reproductor <strong>de</strong> película.<br />
<br />
Mantenga pulsado para iniciar el R<strong>et</strong>roceso rápido.<br />
Durante el R<strong>et</strong>roceso rápido, pulse para cambiar la<br />
velocidad <strong>de</strong> reproducción. Para interrumpir el R<strong>et</strong>roceso<br />
rápido, pulse ENTER o PLAY. Se vuelve al modo <strong>de</strong><br />
reproducción normal.<br />
Siguiente Selecciona el contenido siguiente<br />
Anterior Selecciona el contenido anterior<br />
Búsqueda <strong>de</strong> tiempo TOOLS<br />
Consulte Utilización <strong>de</strong>l menú TOOLS<br />
Añadir a la lista repr. TOOLS<br />
Consulte Utilización <strong>de</strong>l menú TOOLS<br />
HMG<br />
Aleatorio TOOLS Consulte Utilización <strong>de</strong>l menú TOOLS<br />
Rep<strong>et</strong>ición A-B TOOLS Consulte Utilización <strong>de</strong>l menú TOOLS<br />
Modo <strong>de</strong> reproducción TOOLS Consulte Utilización <strong>de</strong>l menú TOOLS<br />
Sonido TOOLS Consulte Utilización <strong>de</strong>l menú TOOLS<br />
Nota: Pue<strong>de</strong> que los archivos no se reproduzcan a<strong>de</strong>cuadam<strong>et</strong>e, <strong>de</strong>pendiendo <strong>de</strong>l contenido.<br />
Pue<strong>de</strong> que algunas funciones no sean soportadas, <strong>de</strong>pendiendo <strong>de</strong>l tipo <strong>de</strong> servidor o versión <strong>de</strong>l software.<br />
La reproducción continúa. Pusar RETURN para <strong>de</strong>splazar <strong>de</strong> la pantalla <strong>de</strong>l reproductor a la pantalla<br />
seleccionada anteriormente no tiene efecto.<br />
5.7.3 Visualización <strong>de</strong> sus archivos <strong>de</strong> foto en el televisor <strong>de</strong> pantalla plana<br />
Cuando seleccione un contenido <strong>de</strong> foto <strong>de</strong>l menú <strong>de</strong>l servidor <strong>de</strong>l Media Navigator o <strong>de</strong> la pantalla Dispositivo<br />
USB, el Reproductor <strong>de</strong> foto se inicia automáticamente. Pulse ENTER para visualizar el contenido en la pantalla<br />
compl<strong>et</strong>a. Seleccione una categoría, carp<strong>et</strong>a o dispositivo para acce<strong>de</strong>r al submenú que contiene el archivo o<br />
contenido.<br />
Seleccionar un archivo <strong>de</strong> foto <strong>de</strong> la Lista <strong>de</strong> reproducción HMG visualiza la pantalla Reproductor <strong>de</strong> foto,<br />
exactamente como al seleccionar un archivo <strong>de</strong> un servidor.<br />
Componentes <strong>de</strong> la pantalla<br />
La siguiente información aparece automáticamente en la pantalla durante algunos segundos cuando el<br />
Reproductor <strong>de</strong> película se inicia o el estado <strong>de</strong> reproducción cambia (controlado por el mando a distancia, por<br />
ejemplo). Pulsar DISPLAY o seleccionar Información en el menú TOOLS también visualiza la información.<br />
94<br />
Sp<br />
1 2<br />
Nombre <strong>de</strong>l álbum Foto TÍTULO_0123456<br />
Reproducc. 45678/99999<br />
4<br />
5 6 7<br />
3<br />
YYYY/MM/DD<br />
(Información <strong>de</strong>l contenido)<br />
1. Nombre <strong>de</strong>l álbum<br />
2. Título <strong>de</strong>l contenido<br />
3. Fecha<br />
(Estado <strong>de</strong>l reproductor)<br />
4. Estado <strong>de</strong> reproducción<br />
(icono <strong>de</strong> estado, información <strong>de</strong> estado,<br />
número actual/número total)<br />
5. Barra <strong>de</strong> progreso<br />
6. Modo <strong>de</strong> reproducción<br />
7. Modo aleatorio
Utilización <strong>de</strong> otros equipos con su televisor <strong>de</strong> pantalla plana 05<br />
Guía <strong>de</strong> botones <strong>de</strong>l Reproductor <strong>de</strong> foto<br />
Modo<br />
Reproducción<br />
D<strong>et</strong>ención<br />
PAUSE<br />
Desplazar archivo<br />
a<strong>de</strong>lante<br />
Desplazar archivo<br />
atrás<br />
Girar (sentido<br />
horario)<br />
Girar (sentido<br />
antihorario)<br />
Botones que se<br />
utilizan<br />
Función<br />
ENTER, (PLAY) Inicia la visualización <strong>de</strong> una foto o reproducción <strong>de</strong> una<br />
presentación <strong>de</strong> diapositivas<br />
(STOP),<br />
RETURN<br />
ENTER durante la<br />
reproducción,<br />
(PAUSE)<br />
<br />
<br />
(FF), TOOLS<br />
(RWD)<br />
D<strong>et</strong>iene el Reproductor y vuelve a la pantalla anterior (Lista/<br />
Miniatura/Lista <strong>de</strong> miniaturas)<br />
Establece una pausa <strong>de</strong> la presentación <strong>de</strong> diapositivas.<br />
Visualiza el contenido <strong>de</strong> imagen siguiente.<br />
Visualiza el contenido <strong>de</strong> imagen anterior.<br />
Gira la imagen 90 o en el sentido horario.<br />
Cada pulsación cambia el ángulo <strong>de</strong> rotación 90 o entre 90 o ,<br />
180 o , 270 o y 0 o .<br />
(Consulte Utilización <strong>de</strong>l menú TOOLS)<br />
Gira la imagen 90 o en el sentido antihorario.<br />
Cada pulsación cambia el ángulo <strong>de</strong> rotación 90 o entre<br />
270 o , 180 o , 90 o y 0 o .<br />
Cambiar BGM , Cambia el contenido <strong>de</strong>l BMG durante la reproducción <strong>de</strong><br />
BGM.<br />
Zoom TOOLS Consulte Utilización <strong>de</strong>l menú TOOLS<br />
Añadir a la lista repr.<br />
HMG<br />
TOOLS<br />
Consulte Utilización <strong>de</strong>l menú TOOLS<br />
Aleatorio TOOLS Consulte Utilización <strong>de</strong>l menú TOOLS<br />
Modo <strong>de</strong><br />
reproducción<br />
TOOLS<br />
Present. diapositivas TOOLS<br />
Reproductor <strong>de</strong><br />
música<br />
TOOLS<br />
Consulte Utilización <strong>de</strong>l menú TOOLS<br />
Consulte Utilización <strong>de</strong>l menú TOOLS<br />
Consulte Utilización <strong>de</strong>l menú TOOLS<br />
Imagen TOOLS Consulte Utilización <strong>de</strong>l menú TOOLS<br />
Sonido TOOLS Consulte Utilización <strong>de</strong>l menú TOOLS<br />
Información TOOLS Consulte Utilización <strong>de</strong>l menú TOOLS<br />
Español<br />
Nota: Pue<strong>de</strong> que algunas funciones no sean soportadas, <strong>de</strong>pendiendo <strong>de</strong>l tipo <strong>de</strong> servidor o versión <strong>de</strong>l software.<br />
Aún archivos en el formato soportado pue<strong>de</strong>n no reproducirse a<strong>de</strong>cuadamente, <strong>de</strong>pendiendo <strong>de</strong>l<br />
contenido.<br />
95<br />
Sp
05 Utilización <strong>de</strong> otros equipos con su televisor <strong>de</strong> pantalla plana<br />
5.8 Utilización <strong>de</strong>l menú TOOLS<br />
Pulsar TOOLS en el mando a distancia visualiza el menú TOOLS. Seleccione diversos modos <strong>de</strong> reproducción y<br />
visualización <strong>de</strong> este menú. Los ítems que pue<strong>de</strong>n seleccionarse <strong>de</strong>l menú difieren, <strong>de</strong>pendiendo <strong>de</strong>l menú<br />
actual (consulte “3.6.1 Utilización <strong>de</strong>l menú TOOLS”).<br />
Actualizar última información<br />
Utilice esta función para actualizar la Lista <strong>de</strong> servidores seleccionada actualmente. Esta opción está disponible<br />
en la pantalla Lista <strong>de</strong> servidores, in<strong>de</strong>pendientemente si el servidor está o no conectado al televisor <strong>de</strong> pantalla<br />
plana.<br />
1 ) Pulse TOOLS mientras se visualice la Lista <strong>de</strong> servidores.<br />
El menú TOOLS aparece en la pantalla.<br />
TELEVISION<br />
TOOLS<br />
Actualizar última información<br />
Reproducción <strong>de</strong> música<br />
2 ) Seleccione Actualizar última información <strong>de</strong>l menú TOOLS.<br />
Utilice los botones <strong>de</strong> flecha para resaltar una opción y, a continuación, pulse ENTER.<br />
Se actualiza la información <strong>de</strong>l servidor conectado.<br />
Eliminar servidor<br />
Su televisor <strong>de</strong> pantalla plana permite eliminar servidores <strong>de</strong>sconectados <strong>de</strong> la Lista <strong>de</strong> servidores.<br />
Para eliminar un servidor, siga los pasos a continuación. Esta opción está disponible en la pantalla Lista <strong>de</strong><br />
servidores (servidor no conectado).<br />
1 ) Pulse TOOLS mientras el cursor está sobre un servidor <strong>de</strong>sconectado en la pantalla Lista <strong>de</strong> servidores.<br />
El menú TOOLS aparece en la pantalla.<br />
TELEVISION<br />
TOOLS<br />
Eliminar servidor<br />
Actualizar última información<br />
2 ) Seleccione Eliminar servidor <strong>de</strong>l menú TOOLS.<br />
Se visualiza la pantalla Eliminar servidor.<br />
3 ) Seleccione Sí y, a continuación, ENTER.<br />
El servidor <strong>de</strong>saparece <strong>de</strong> la lista.<br />
Para cancelar la eliminación <strong>de</strong> servidor, seleccione No.<br />
Lista <strong>de</strong> dispositivos USB<br />
El menú TOOLS provee una pantalla para ver qué dispositivos USB están conectados o son soportados. Siga las<br />
instrucciones a continuación para visualizar la pantalla Dispositivo USB. Esta opción está disponible en la<br />
pantalla Lista <strong>de</strong> carp<strong>et</strong>as/contenidos (USB).<br />
1 ) Pulse TOOLS.<br />
El menú TOOLS aparece en la pantalla.<br />
TELEVISION<br />
TOOLS<br />
Lista <strong>de</strong> dispositivos USB<br />
Imagen<br />
96<br />
Sp<br />
2 ) Seleccione Lista <strong>de</strong> dispositivos USB <strong>de</strong>l menú TOOLS.<br />
Se visualiza la pantalla Lista <strong>de</strong> dispositivos USB, mostrando los dispositivos USB conectados<br />
actualmente.
Utilización <strong>de</strong> otros equipos con su televisor <strong>de</strong> pantalla plana 05<br />
Entrada fav.<br />
Registrar el Home Media Gallery en Favoritos (menú TOOLS) provee un acceso rápido a la pantalla inicial <strong>de</strong><br />
Home Media Gallery mientras se ve TV u otros programas. Esta opción está disponible en la pantalla <strong>de</strong> Home<br />
Media Gallery.<br />
1 ) Pulse TOOLS.<br />
El menú TOOLS aparece en la pantalla.<br />
TELEVISION<br />
TOOLS<br />
Entrada fav. : Apagado<br />
Eliminar <strong>de</strong> lista repr. HMG<br />
Encendido<br />
2 ) Seleccione Entrada fav .<br />
3 ) Seleccione Encendido y, a continuación, ENTER.<br />
Se concluye el registro.<br />
Para eliminar el Home Media Gallery <strong>de</strong> Favoritos, seleccione Apagado.<br />
Visualización d<strong>et</strong>allada<br />
Seleccione esta opción para visualizar la información d<strong>et</strong>allada en el contenido actual. Esta opción está<br />
disponible en las pantallas Media Navigator, Lista <strong>de</strong> reproducción (Película/Música/Foto) y Lista <strong>de</strong> carp<strong>et</strong>as/<br />
contenidos.<br />
1 ) Pulse TOOLS.<br />
El menú TOOLS aparece en la pantalla.<br />
Español<br />
TELEVISION<br />
TOOLS<br />
Visualización d<strong>et</strong>allada<br />
Eliminar servidor<br />
2 ) Seleccione Visualización d<strong>et</strong>allada <strong>de</strong>l menú TOOLS.<br />
Se visualiza la información d<strong>et</strong>allada.<br />
Pulsar RETURN hace que <strong>de</strong>saparezca la información y que reaparezca la pantalla anterior.<br />
Organizar<br />
Una opción <strong>de</strong> or<strong>de</strong>nación está disponible en las pantallas Media Navigator y Lista <strong>de</strong> carp<strong>et</strong>as/contenidos. Esta<br />
función no está disponible para carp<strong>et</strong>as o contenidos en un dispositivo USB. Para organizar u or<strong>de</strong>nar los ítems<br />
contenidos en la Lista <strong>de</strong> carp<strong>et</strong>as/contenidos, siga los pasos a continuación.<br />
1 ) Pulse HMG.<br />
El menú Home Media Gallery aparece en la pantalla.<br />
2 ) Seleccione la carp<strong>et</strong>a y/o contenido que <strong>de</strong>see en el Media Navigator.<br />
Utilice los botones <strong>de</strong> flecha para resaltar una opción y, a continuación, pulse ENTER.<br />
3 ) Pulse TOOLS y, a continuación, Organizar <strong>de</strong>l menú TOOLS.<br />
Se visualiza el cuadro <strong>de</strong> diálogo Organizar.<br />
Organizar<br />
Condición : Título<br />
Or<strong>de</strong>n : De abajo<br />
Iniciar<br />
4 ) Seleccione la opción apropiada el cuadro <strong>de</strong> diálogo Organizar.<br />
• Condición: Título, Número <strong>de</strong> pista, Género, Artista o Fecha.<br />
97<br />
Sp
05 Utilización <strong>de</strong> otros equipos con su televisor <strong>de</strong> pantalla plana<br />
• Or<strong>de</strong>n: De abajo o De arriba<br />
5 ) Seleccione Iniciar en el cuadro <strong>de</strong> diálogo Organizar.<br />
La or<strong>de</strong>nación comienza basada en su selección y, cuando se finalice, se visualizan los resultados.<br />
Mientras la organización continúa, la reproducción <strong>de</strong>l contenido está disponible. Para volver a la pantalla<br />
<strong>de</strong> or<strong>de</strong>nación, pulse RETURN a cualquier momento durante la reproducción.<br />
Para cancelar el modo <strong>de</strong> or<strong>de</strong>nación, pulse RETURN.<br />
Notas: La pantalla “Seleccione un or<strong>de</strong>n <strong>de</strong> or<strong>de</strong>nación.” está disponible y pue<strong>de</strong> quedar visualizada mientras se<br />
navega por las categorías <strong>de</strong> música.<br />
Pue<strong>de</strong> que la or<strong>de</strong>nación no esté disponible, <strong>de</strong>pendiendo <strong>de</strong>l servidor que se utilice.<br />
Los submenús disponibles <strong>de</strong> Condición varían, <strong>de</strong>pendiendo <strong>de</strong>l servidor que se utilice.<br />
Búsqueda<br />
La función Búsqueda incorporada <strong>de</strong>l televisor <strong>de</strong> pantalla plana provee un medio conveniente para encontrar<br />
ítems en una Lista <strong>de</strong> carp<strong>et</strong>as/contenidos. Sin embargo, la función <strong>de</strong> búsqueda no está disponible para<br />
carp<strong>et</strong>as o contenidos en un dispositivo USB.<br />
Simplemente introduzca una plabra y los resultados aparecerán en la pantalla. Para iniciar una búsqueda, siga<br />
las instrucciones a continuación. Esta opción está disponible en las pantallas Media Navigator y Lista <strong>de</strong><br />
carp<strong>et</strong>as/contenidos.<br />
1 ) Pulse HMG.<br />
El menú Home Media Gallery aparece en la pantalla.<br />
2 ) Seleccione la carp<strong>et</strong>a y/o contenido que <strong>de</strong>see en el Media Navigator.<br />
Utilice los botones <strong>de</strong> flecha para resaltar una opción y, a continuación, pulse ENTER.<br />
3 ) Pulse TOOLS.<br />
El menú TOOLS aparece en la pantalla.<br />
4 ) Seleccione Búsqueda <strong>de</strong>l menú TOOLS.<br />
Se visualiza el cuadro <strong>de</strong> diálogo Búsqueda.<br />
Búsqueda<br />
Condición : Título<br />
Palabra clave : ----<br />
Iniciar<br />
5 ) Seleccione Título, Género o Artista para Condición, o introduzca una Palabra clave.<br />
Pulsar ENTER en el menú Palabra clave hace que el teclado <strong>de</strong> software aparezca en la pantalla.<br />
6 ) Introduzca la palabra en el teclado <strong>de</strong> software.<br />
Consulte “Teclado <strong>de</strong> software” en “3.2.5 Creación <strong>de</strong> una lista <strong>de</strong> canales” para los d<strong>et</strong>alles.<br />
7 ) Seleccione OK en el teclado <strong>de</strong> software para visualizar el cuadro <strong>de</strong> diálogo Búsqueda y ocultar el teclado.<br />
Para cancelar la entrada <strong>de</strong> palabra clave, seleccione Cancel.<br />
8 ) Seleccione Iniciar en el cuadro <strong>de</strong> diálogo Búsqueda.<br />
La búsqueda comienza basada en la palabra introducida y, a continuación, los resultados aparecen en la<br />
palabra.<br />
Mientras la búsqueda continúa, se reproduce el contenido. Para volver a la pantalla <strong>de</strong> búsqueda, pulse<br />
RETURN a cualquier momento durante la reproducción.<br />
Para cancelar el modo <strong>de</strong> búsqueda, pulse RETURN.<br />
Notas: Pue<strong>de</strong> que la búsqueda no esté disponible, <strong>de</strong>pendiendo <strong>de</strong>l servidor.<br />
Los submenús disponibles <strong>de</strong> Condición varían, <strong>de</strong>pendiendo <strong>de</strong>l servidor que se utilice.<br />
98<br />
Sp
Utilización <strong>de</strong> otros equipos con su televisor <strong>de</strong> pantalla plana 05<br />
Presentación <strong>de</strong> diapositivas<br />
Una presentación <strong>de</strong> diapositivas es una serie <strong>de</strong> imágenes fijas, que aparecen una tras otra, usualmente en un<br />
intervalo <strong>de</strong> tiempo pred<strong>et</strong>erminado. Seleccione el archivo <strong>de</strong> foto que <strong>de</strong>see visualizar y, a continuación, pulse<br />
ENTER para iniciar la presentación <strong>de</strong> diapositivas. Una vez que una presentación <strong>de</strong> diapositivas comience,<br />
pulsar ENTER alterna entre REPRODUCCIÓN y PAUSA. O pulse PLAY para iniciar la presentación <strong>de</strong> diapositivas<br />
inmediatamente. Esta opción está disponible en las pantallas Media Navigator, Lista <strong>de</strong> carp<strong>et</strong>as/contenidos y<br />
Reproductor <strong>de</strong> foto. Pue<strong>de</strong> configurar el Reproductor <strong>de</strong> foto para reproducir una presentación <strong>de</strong> diapositivas<br />
con música <strong>de</strong> fondo (BGM) y diversos efectos visuales. Para iniciar una presentación <strong>de</strong> diapositivas, siga las<br />
instrucciones a continuación.<br />
1 ) Pulse HMG.<br />
El menú Home Media Gallery aparece en la pantalla.<br />
2 ) Seleccione Media Navigator o USB <strong>de</strong>l menú.<br />
Utilice los botones <strong>de</strong> flecha para resaltar una opción y, a continuación, pulse ENTER.<br />
3 ) Seleccione la carp<strong>et</strong>a que contiene el contenido <strong>de</strong> fotos.<br />
Utilice los botones <strong>de</strong> flecha para resaltar una carp<strong>et</strong>a y, a continuación, pulse ENTER.<br />
La pantalla Miniaturas aparece (La pantalla Lista <strong>de</strong> miniaturas o Lista aparece, <strong>de</strong>pendiendo <strong>de</strong> la<br />
configuración).<br />
4 ) Seleccione el archivo <strong>de</strong> foto <strong>de</strong>seado.<br />
El contenido <strong>de</strong> foto seleccionado aparece en pantalla compl<strong>et</strong>a.<br />
5 ) Pulse TOOLS.<br />
El menú TOOLS aparece en la pantalla.<br />
6 ) Seleccione una opción <strong>de</strong> presentación <strong>de</strong> diapositivas.<br />
7 ) Seleccione un efecto: Apagado, Supresión im. o Panorámico.<br />
8 ) Seleccione un intervalo <strong>de</strong> tiempo: 3Segundos, 5Segundos, 10Segundos, 15Segundos, 30Segundos ó<br />
60Segundos.<br />
Español<br />
Present. diapositivas<br />
Efecto : Supresión im.<br />
Intervalo : 5Segundos<br />
Aleatorio : Apagado<br />
Modo Repr. : Rep<strong>et</strong>ir todo<br />
BGM : Apagado<br />
Iniciar<br />
9 ) Seleccione Apagado o Encendido para Aleatorio.<br />
Para los d<strong>et</strong>alles, consulte Aleatorio.<br />
10 ) Seleccione la opción <strong>de</strong>seada para Modo Repr .<br />
Seleccione Simple, Rep<strong>et</strong>ir, Rep<strong>et</strong>ir todo o Todo. Para los d<strong>et</strong>alles, consulte “Modo Repr.” (página 101).<br />
11 ) Seleccione cualquier BGM que <strong>de</strong>see.<br />
Seleccione el contenido <strong>de</strong> música <strong>de</strong> Lista <strong>de</strong> reproducción 1 a Lista <strong>de</strong> reproducción 5 ó el dispositivo<br />
USB.<br />
12 ) Seleccione Iniciar.<br />
La presentación <strong>de</strong> diapositivas comienza y las imágenes <strong>de</strong> foto en la carp<strong>et</strong>a aparecen<br />
automáticamente una a una.<br />
Para visualizar la imagen siguiente forzosamente, pulse .<br />
Para visualizar la imagen anterior forzosamente, pulse .<br />
13 ) Pulse ENTER o (Pausa) para d<strong>et</strong>ener la presentación <strong>de</strong> diapositvas.<br />
El Reproductor <strong>de</strong> foto entra en pausa.<br />
14 ) Pulse ENTER <strong>de</strong> nuevo para continuar la presentación <strong>de</strong> diapositivas.<br />
Para cancelar la presentación <strong>de</strong> diapositivas y d<strong>et</strong>ener el Reproductor <strong>de</strong> foto, pulse RETURN o<br />
(D<strong>et</strong>ener) durante la reproducción. La pantalla anterior reaparece.<br />
Nota: Después <strong>de</strong> configurar el intervalo <strong>de</strong> tiempo, pue<strong>de</strong> que tome más tiempo que el tiempo pred<strong>et</strong>erminado.<br />
El intervalo <strong>de</strong> tiempo refiérese a la duración <strong>de</strong> tiempo hasta que el Home Media Gallery comienza a<br />
obtener la imagen siguiente. Pue<strong>de</strong> que las operaciones <strong>de</strong> botones no funcionen mientras se obtiene la<br />
imagen siguiente.<br />
99<br />
Sp
05 Utilización <strong>de</strong> otros equipos con su televisor <strong>de</strong> pantalla plana<br />
Añadir a la lista repr. HMG<br />
La función Home Media Gallery provee una “Lista <strong>de</strong> reproducción HMG” - una lista <strong>de</strong> reproducción integrada<br />
que permite la marcación <strong>de</strong> archivos favoritos <strong>de</strong> película, música y foto <strong>de</strong> una red. Pue<strong>de</strong> almacenar, editar y<br />
or<strong>de</strong>nar hasta 100 archivos en cada lista <strong>de</strong> reproducción. Esta opción está disponible en las pantallas Media<br />
Navigator, Lista <strong>de</strong> carp<strong>et</strong>as/contenidos, Reproductor <strong>de</strong> película, Reproductor <strong>de</strong> música y Reproductor <strong>de</strong> foto.<br />
1 ) Durante la navegación o reproducción, seleccione el archivo que <strong>de</strong>see añadir a una lista <strong>de</strong> reproducción<br />
HMG.<br />
2 ) Pulse TOOLS.<br />
El menú TOOLS aparece en la pantalla.<br />
3 ) Seleccione Añadir a la lista repr. HMG <strong>de</strong>l menú TOOLS.<br />
Se visualiza el cuadro <strong>de</strong> diálogo Añadir a la lista repr. HMG.<br />
4 ) Seleccione una lista <strong>de</strong> reproducción.<br />
Pulse / para seleccionar <strong>de</strong> Lista <strong>de</strong> reproducción 1 a Lista <strong>de</strong> reproducción 5.<br />
Añadir a la lista repr. HMG<br />
Añadir a : Lista <strong>de</strong> reproducción 1<br />
[Total] : 050/100<br />
Aceptar<br />
5 ) Seleccione Aceptar.<br />
Para seleccionar otra lista <strong>de</strong> reproducción, repita los pasos <strong>de</strong> 2 a 5.<br />
Se añadía el archivo a la lista <strong>de</strong> reproducción seleccionada. El campo Total cambia cuando se añadía un<br />
contenido a la lista <strong>de</strong> reproducción.<br />
Para cancelar la operación, pulse RETURN.<br />
Seleccionar servidor<br />
Cuando uno o más servidores están conectados <strong>de</strong>ntro <strong>de</strong> la red, pue<strong>de</strong> cambiar entre los servidores. Esta opción<br />
está disponible en las pantallas Media Navigator y Lista <strong>de</strong> carp<strong>et</strong>as/contenidos.<br />
1 ) Pulse TOOLS.<br />
El menú TOOLS aparece en la pantalla.<br />
2 ) Seleccione Seleccionar servidor <strong>de</strong>l menú TOOLS.<br />
Se visualiza la lista <strong>de</strong> servidores.<br />
Servidor 01<br />
Servidor 02<br />
Servidor 03<br />
Servidor 04<br />
4 (Pantalla <strong>de</strong> muestreo)<br />
3 ) Seleccione el servidor <strong>de</strong>seado.<br />
La pantalla cambia al Media Navigator en el servidor seleccionado.<br />
100<br />
Sp<br />
Notas: Home Media Gallery pue<strong>de</strong> memorizar los servidores conectados anteriormente. Cuando el Media<br />
Navigator se inicia, los servidores disponibles se localizan y se conectan automáticamente.<br />
Si no se pue<strong>de</strong> encontrar un servidor conectado anteriormente o si el servidor está en el modo <strong>de</strong><br />
suspensión, el nombre <strong>de</strong>l servidor está oscurecido (en gris).<br />
En algunos casos, se pue<strong>de</strong> reiniciar los servidores <strong>de</strong> medios que soportan “Wake On LAN”. Seleccione<br />
el servidor y, a continuación, pulse ENTER para transmitir un comando “Wake On LAN” al servidor<br />
resaltado.<br />
Para que “Wake On LAN” encienda el servidor, el servidor <strong>de</strong>be estar listo con las configuraciones<br />
necesarias ya concluidas.
Utilización <strong>de</strong> otros equipos con su televisor <strong>de</strong> pantalla plana 05<br />
Modo Repr.<br />
Su televisor <strong>de</strong> pantalla plana provee cuatro modos <strong>de</strong> rep<strong>et</strong>ición cuando se utiliza el Reproductor <strong>de</strong> película,<br />
Reproductor <strong>de</strong> música o Reproductor <strong>de</strong> foto. Seleccione un modo <strong>de</strong> reproducción, (Rep<strong>et</strong>ir, Simple, <strong>et</strong>c.)<br />
cuando reproduzca diversos archivos. Para activar el modo <strong>de</strong> reproducción, siga los pasos a continuación.<br />
1 ) Durante la reproducción <strong>de</strong>l contenido, pulse TOOLS.<br />
El menú TOOLS aparece en la pantalla.<br />
2 ) Seleccione Modo Repr. <strong>de</strong>l menú TOOLS.<br />
Seleccione Simple, Rep<strong>et</strong>ir, Rep<strong>et</strong>ir todo o Todo.<br />
Simple: Reproduce el contenido seleccionado una vez solamente.<br />
Rep<strong>et</strong>ir: Reproduce el contenido seleccionado en un bucle.<br />
Rep<strong>et</strong>ir todo: Reproduce en bucle todo el contenido en una carp<strong>et</strong>a en or<strong>de</strong>n (cuando se concluye el último<br />
archivo, el primer archivo comienza a reproducirse, y todos los archivos subsiguientes se reproducen en<br />
or<strong>de</strong>n continuamente).<br />
Todo: Reproduce todo el contenido <strong>de</strong> la carp<strong>et</strong>a seleccionada en or<strong>de</strong>n una vez solamente.<br />
TELEVISION<br />
TOOLS<br />
Sonido<br />
Aleatorio<br />
Todo Modo Repr. : Simple<br />
Rep<strong>et</strong>ir A-B<br />
Búsqueda <strong>de</strong> tiempo<br />
Rep<strong>et</strong>ir<br />
Español<br />
Cambiar nombre<br />
Se pue<strong>de</strong> cambiar el nombre <strong>de</strong> la lista <strong>de</strong> reproducción (1 a 5) en la lista <strong>de</strong> reproducción HMG. Para cambiar<br />
el nombre <strong>de</strong> una lista <strong>de</strong> reproducción, siga las instrucciones a continuación. Esta opción está disponible en la<br />
pantalla Lista <strong>de</strong> reproducción (Película/Música/Foto).<br />
1 ) Pulse TOOLS mientras las cinco listas <strong>de</strong> reproducción en la lista <strong>de</strong> reproducción HMG están en la<br />
pantalla.<br />
El menú TOOLS aparece en la pantalla.<br />
2 ) Seleccione Cambiar nombre <strong>de</strong>l menú TOOLS.<br />
El teclado <strong>de</strong> software aparece.<br />
Nombre lista repr.<br />
P L A Y L I S T 1<br />
1 2 3 4 5 6 7 8 9 0<br />
A B C D E F G H I J Del<strong>et</strong>e<br />
K L M N O P Q R S T Space<br />
U V W X Y Z , . : ; Caps<br />
& ' ( ) + - * / _ @<br />
/<br />
$ % ! ? # = | ~ "<br />
^ ` < > [ ] { } OK Cancel<br />
3 ) Introduzca el nuevo nombre.<br />
Consulte “Teclado <strong>de</strong> software” en “3.2.5 Creación <strong>de</strong> una lista <strong>de</strong> canales” para los d<strong>et</strong>alles.<br />
4 ) Seleccione OK <strong>de</strong>spués <strong>de</strong> introducir el nuevo nombre con el teclado <strong>de</strong> software.<br />
El teclado <strong>de</strong> software <strong>de</strong>saparece y la lista <strong>de</strong> reproducción aparece con el nuevo nombre.<br />
Seleccionar Cancel interrumpe la entrada y cancela el proceso <strong>de</strong> cambio <strong>de</strong>l nombre.<br />
101<br />
Sp
05 Utilización <strong>de</strong> otros equipos con su televisor <strong>de</strong> pantalla plana<br />
Cambiar visualización<br />
Seleccione esta opción para cambiar entre las diferentes visualizaciones: Lista, Miniatura y Lista <strong>de</strong> miniaturas.<br />
Esta opción está disponible en las pantallas Lista <strong>de</strong> reproducción (Película/Música/Foto) y Lista <strong>de</strong> carp<strong>et</strong>as/<br />
contenidos.<br />
1 ) Pulse TOOLS.<br />
El menú TOOLS aparece en la pantalla.<br />
2 ) Seleccione Cambiar visualización <strong>de</strong>l menú TOOLS.<br />
Seleccione la opción entre Lista, Miniatura o Lista miniat.<br />
Menú TOOLS<br />
TELEVISION<br />
TOOLS<br />
Lista miniat.<br />
Reproducción <strong>de</strong> música<br />
Añadir a la lista repr. HMG<br />
Cambiar visualización : Lista<br />
Organizar<br />
Búsqueda<br />
Miniatura<br />
Pantalla Lista<br />
Carp<strong>et</strong>a 1<br />
Carp<strong>et</strong>a 2<br />
Carp<strong>et</strong>a 3<br />
Contenido 2<br />
Contenido 3<br />
Contenido 4<br />
Contenido 5<br />
40<br />
Pantalla Lista miniat.<br />
Pantalla Miniatura<br />
40<br />
Carp<strong>et</strong>a 2<br />
Carp<strong>et</strong>a 3 Contenido 1<br />
Contenido 2 Contenido 3<br />
(Pantallas <strong>de</strong> muestreo)<br />
40<br />
Búsqueda <strong>de</strong> tiempo<br />
La función Búsqueda <strong>de</strong> tiempo permite que se inicie la reproducción <strong>de</strong> un contenido a un tiempo<br />
pred<strong>et</strong>erminado. Esta opción está disponible en las pantallas Reproductor <strong>de</strong> película y Reproductor <strong>de</strong> música.<br />
Para permitir la búsqueda <strong>de</strong> tiempo, siga los pasos a continuación.<br />
1 ) Durante la reproducción <strong>de</strong>l contenido, pulse TOOLS.<br />
2 ) Seleccione Búsqueda <strong>de</strong> tiempo <strong>de</strong>l menú TOOLS.<br />
Se visualiza el cuadro <strong>de</strong> diálogo Búsqueda <strong>de</strong> tiempo.<br />
Búsqueda <strong>de</strong> tiempo<br />
[Total] : 01:00:00<br />
Saltar :<br />
00 : 00 : 00<br />
Iniciar<br />
102<br />
Sp<br />
3 ) Introduzca el tiempo (Horas, minutos y/o segundos) al cual <strong>de</strong>sea saltar.<br />
Introduzca Horas y Minutos para contenido <strong>de</strong> película o Minutos y Segundos para contenido <strong>de</strong> música.<br />
Utilice / o los botones 0 a 9 (si se visualiza un icono <strong>de</strong> botón numérico).<br />
Pulse / para seleccionar Horas y Minutos (contenido <strong>de</strong> película) o Minutos y Segundos (contenido <strong>de</strong><br />
música).<br />
4 ) Seleccione Iniciar y, a continuación, pulse ENTER para iniciar la búsqueda <strong>de</strong> tiempo.<br />
La reproducción <strong>de</strong> la película (música) comienza <strong>de</strong>s<strong>de</strong> el tiempo pred<strong>et</strong>erminado. Para cancelar la<br />
búsqueda <strong>de</strong> tiempo, pulse RETURN.<br />
Nota: Pue<strong>de</strong> que la función Búsqueda <strong>de</strong> tiempo no sea soportada, <strong>de</strong>pendiendo <strong>de</strong>l contenido, <strong>de</strong>l software <strong>de</strong>l<br />
servidor o <strong>de</strong> la versión <strong>de</strong>l software.<br />
Pue<strong>de</strong> que ocurra un error en la información relacionada con el tiempo, <strong>de</strong>pendiendo <strong>de</strong>l contenido o <strong>de</strong>l<br />
software <strong>de</strong>l servidor.
Utilización <strong>de</strong> otros equipos con su televisor <strong>de</strong> pantalla plana 05<br />
Imagen<br />
La opción Imagen es otro recurso para ajustar la calidad <strong>de</strong> la imagen. Esta opción está disponible en las<br />
pantallas Reproductor <strong>de</strong> película y Reproductor <strong>de</strong> foto. Para ajustar la imagen, siga los pasos a continuación.<br />
1 ) Pulse TOOLS.<br />
El menú TOOLS aparece en la pantalla.<br />
TELEVISION<br />
TOOLS<br />
Información<br />
Imagen<br />
Sonido<br />
Aleatorio<br />
2 ) Seleccione Imagen <strong>de</strong>l menú TOOLS.<br />
Se visualiza una pantalla <strong>de</strong> ajuste <strong>de</strong> la imagen. Para los ítems <strong>de</strong> ajuste, consulte “3.4 Ajuste <strong>de</strong> la<br />
calidad <strong>de</strong> la imagen y <strong>de</strong>l sonido”.<br />
3 ) Pulse RETURN para cerrar la pantalla <strong>de</strong> ajuste.<br />
Se vuelve a la pantalla <strong>de</strong> reproducción normal.<br />
Sonido<br />
La opción Sonido es otro recurso para ajustar la calidad <strong>de</strong>l audio. Esta opción está disponible en las pantallas<br />
Reproductor <strong>de</strong> película, Reproductor <strong>de</strong> música y Reproductor <strong>de</strong> foto. Para ajustar el sonido, siga los pasos a<br />
continuación.<br />
1 ) Pulse TOOLS.<br />
El menú TOOLS aparece en la pantalla.<br />
Español<br />
TELEVISION<br />
TOOLS<br />
Sonido<br />
Aleatorio<br />
Modo Repr.<br />
2 ) Seleccione Sonido <strong>de</strong>l menú TOOLS.<br />
Se visualiza una pantalla <strong>de</strong> ajuste <strong>de</strong>l sonido. Para los ítems <strong>de</strong> ajuste, consulte “3.4 Ajuste <strong>de</strong> la calidad<br />
<strong>de</strong> la imagen y <strong>de</strong>l sonido”.<br />
3 ) Pulse RETURN para cerrar la pantalla <strong>de</strong> ajuste.<br />
Se vuelve a la pantalla <strong>de</strong> reproducción normal.<br />
Información<br />
La opción Información visualiza la información <strong>de</strong>l estado <strong>de</strong>l contenido <strong>de</strong> reproducción. Esta opción está<br />
disponible en las pantallas Reproductor <strong>de</strong> película y Reproductor <strong>de</strong> foto. Para visualizar la información durante<br />
la reproducción, siga los pasos a continuación.<br />
1 ) Pulse TOOLS.<br />
El menú TOOLS aparece en la pantalla.<br />
TELEVISION<br />
TOOLS<br />
Información<br />
Zoom<br />
103<br />
Sp
05 Utilización <strong>de</strong> otros equipos con su televisor <strong>de</strong> pantalla plana<br />
2 ) Seleccione Información <strong>de</strong>l menú TOOLS.<br />
Se visualiza una pantalla <strong>de</strong> información (tal como el estado <strong>de</strong> la reproducción). Pulsar DISPLAY también<br />
visualiza la pantalla <strong>de</strong> información.<br />
La pantalla <strong>de</strong>saparece automáticamente tras un corto período <strong>de</strong> tiempo.<br />
Audio<br />
Utilice esta opción para cambiar a otra fuente <strong>de</strong> audio si el contenido que está siendo reproducido actualmente<br />
tiene múltiples fuentes <strong>de</strong> audio (contenido <strong>de</strong> múltiples idiomas, por ejemplo). Esta opción está disponible en<br />
la pantalla Reproductor <strong>de</strong> película. Para mostrar las pistas <strong>de</strong> audio múltiples, siga los pasos a continuación.<br />
1 ) Pulse TOOLS.<br />
El menú TOOLS aparece en la pantalla.<br />
TELEVISION<br />
TOOLS<br />
Rep<strong>et</strong>ir A-B<br />
Búsqueda <strong>de</strong> tiempo<br />
Audio : 1 L+R<br />
Información<br />
Añadir a la lista repr. HMG<br />
1 L<br />
2 ) Seleccione Audio <strong>de</strong>l menú TOOLS.<br />
Pulsar / permite la selección <strong>de</strong> L, R ou L+R. Si el contenido tiene múltiples fuentes <strong>de</strong> audio,<br />
seleccioen L, R o L+R para cada fuente.<br />
3 ) Después <strong>de</strong> hacer la configuración, pulse RETURN.<br />
Reproductor <strong>de</strong> música<br />
La opción Reproductor <strong>de</strong> música permite cambiar el BGM en cualquier pantalla, en vez <strong>de</strong> utilizar la música <strong>de</strong>l<br />
contenido. Esta opción sólo está disponible cuando se reproduce música en cualquier pantalla que no sea<br />
Reproductor <strong>de</strong> película y Reproductor <strong>de</strong> música. El Reproductor <strong>de</strong> música está disponible en las pantallas<br />
Media Navigator, Lista <strong>de</strong> carp<strong>et</strong>as/contenidos, USB, Lista <strong>de</strong> reproducción HMG, Lista <strong>de</strong> reproducción y<br />
Reproductor <strong>de</strong> foto. Para activar el Reproductor <strong>de</strong> música, siga los pasos a continuación.<br />
1 ) Pulse TOOLS.<br />
El menú TOOLS aparece en la pantalla.<br />
TELEVISION<br />
TOOLS<br />
Reproducción <strong>de</strong> música<br />
Present. diapositivas<br />
2 ) Seleccione Reproducción <strong>de</strong> música <strong>de</strong>l menú TOOLS.<br />
Se visualiza la pantalla Reproductor <strong>de</strong> música.<br />
Después <strong>de</strong> hacer la configuración, pulse RETURN. Se activa la opción Reproducción <strong>de</strong> música y se<br />
vuelve a la pantalla anterior.<br />
Escoger<br />
Para visualizar archivos en el or<strong>de</strong>n preferido, utilice la opción Escoger para cambiar el or<strong>de</strong>n en la Lista <strong>de</strong><br />
reproducción HMG. Esta opción está disponible en la pantalla Lista contenidos (Lista <strong>de</strong> reproducción).<br />
1 ) Desplace el cursor al contenido que <strong>de</strong>see mover <strong>de</strong>ntro <strong>de</strong> la Lista <strong>de</strong> reproducción HMG.<br />
104<br />
Sp
Utilización <strong>de</strong> otros equipos con su televisor <strong>de</strong> pantalla plana 05<br />
2 ) Pulse TOOLS.<br />
El menú TOOLS aparece en la pantalla.<br />
TELEVISION<br />
TOOLS<br />
Escoger<br />
Lista <strong>de</strong> dispositivos USB<br />
3 ) Seleccione Escoger <strong>de</strong>l menú TOOLS.<br />
4 ) Pulse / para <strong>de</strong>splazar el contenido hacia arriba o hacia abajo.<br />
5 ) Pulse ENTER.<br />
Se cambia el or<strong>de</strong>n y se concluye la edición.<br />
Eliminar <strong>de</strong> lista repr. HMG<br />
A veces no se <strong>de</strong>sea más un archivo. Su televisor <strong>de</strong> pantalla plana provee un método para eliminar el contenido<br />
<strong>de</strong> una Lista <strong>de</strong> reproducción HMG. Esta opción está disponible en la pantalla Lista contenidos (Lista <strong>de</strong><br />
reproducción). Para eliminar el contenido <strong>de</strong> una lista <strong>de</strong> reproducción, siga los pasos a continuación.<br />
1 ) Desplace el cursor al contenido que <strong>de</strong>see eliminar <strong>de</strong> la Lista <strong>de</strong> reproducción HMG.<br />
2 ) Pulse TOOLS.<br />
El menú TOOLS aparece en la pantalla.<br />
Español<br />
TELEVISION<br />
TOOLS<br />
Eliminar <strong>de</strong> lista repr. HMG<br />
Escoger<br />
3 ) Seleccione Eliminar <strong>de</strong> lista repr. HMG <strong>de</strong>l menú TOOLS.<br />
Se visualiza el cuadro <strong>de</strong> diálogo Eliminar <strong>de</strong> lista repr. HMG.<br />
4 ) Seleccione Sí para eliminar el contenido.<br />
El cuadro <strong>de</strong> diálogo <strong>de</strong>saparece y se elimina el contenido seleccionado <strong>de</strong> la Lista <strong>de</strong> reproducción HMG.<br />
Para cancelar, seleccione No.<br />
Modo <strong>de</strong> rep<strong>et</strong>ición A-B<br />
Utilice esta opción para reproducir las escenas <strong>de</strong> película seleccionadas o programas <strong>de</strong> música rep<strong>et</strong>idamente.<br />
Esta opción sólo está disponible durante la reproducción normal en el Reproductor <strong>de</strong> película o Reproductor <strong>de</strong><br />
música.<br />
Para configurar la rep<strong>et</strong>ición, siga el procedimiento a continuación.<br />
1 ) Durante la reproducción <strong>de</strong>l contenido, pulse TOOLS.<br />
El menú TOOLS aparece en la pantalla.<br />
TELEVISION<br />
TOOLS<br />
Rep<strong>et</strong>ir A-B : A (Ini.bucle)<br />
Girar<br />
2 ) Seleccione Rep<strong>et</strong>ir A-B <strong>de</strong>l menú TOOLS.<br />
105<br />
Sp
05 Utilización <strong>de</strong> otros equipos con su televisor <strong>de</strong> pantalla plana<br />
3 ) Pulse ENTER para marcar un ponto inicial.<br />
4 ) Pulse ENTER nuevamente don<strong>de</strong> <strong>de</strong>see d<strong>et</strong>ener la reproducción.<br />
El estado <strong>de</strong>l reproductor aparece en la pantalla y el icono <strong>de</strong> modo <strong>de</strong> rep<strong>et</strong>ición A-B cambia.<br />
La parte seleccionada <strong>de</strong>l contenido comienza a reproducirse en bucle.<br />
Para finalizar el bucle y volver a la reproducción normal, pulse TOOLS y, a continuación, seleccione Apagado en<br />
el modo Rep<strong>et</strong>ir A-B.<br />
Nota: Si la visualización no coinci<strong>de</strong> con el estado <strong>de</strong>l reproductor, pue<strong>de</strong> que tenga ocurrido un fallo <strong>de</strong><br />
funcionamiento. D<strong>et</strong>enga la reproducción y, a continuación, vuelva a intentarlo.<br />
Aleatorio<br />
Utilice esta opción para barajar el or<strong>de</strong>n en la lista <strong>de</strong> contenidos, para reproducir los contenidos aleatoriamiente.<br />
Esta opción está disponible en las pantallas Reproductor <strong>de</strong> película, Reproductor <strong>de</strong> música y Reproductor <strong>de</strong><br />
foto. Para barajar la lista <strong>de</strong> reproducción, siga los pasos a continuación.<br />
1 ) Durante la reproducción <strong>de</strong>l contenido, pulse TOOLS.<br />
El menú TOOLS aparece en la pantalla.<br />
TELEVISION<br />
TOOLS<br />
Cambiar nombre<br />
Aleatorio : Apagado<br />
Encendido<br />
2 ) Seleccione Aleatorio <strong>de</strong>l menú TOOLS.<br />
3 ) Seleccione Encendido.<br />
La reproducción rep<strong>et</strong>ida aleatoria comienza.<br />
Para cancelar el modo aleatorio, pulse TOOLS y, a continuación, seleccione Apagado.<br />
Nota: La rep<strong>et</strong>ición aleatoria sólo está disponible para los contenidos que se están reproduciendo en el modo <strong>de</strong><br />
rep<strong>et</strong>ición (excepto cuando Simple está seleccionado).<br />
Girar<br />
Utilice la opción Girar para girar una imagen 90º en el sentido horario. Esta opción está disponible en la pantalla<br />
Reproductor <strong>de</strong> foto. Para girar una imagen, siga los pasos a continuación.<br />
1 ) Mientras se visualice el contenido <strong>de</strong> foto, pulse TOOLS.<br />
El menú TOOLS aparece en la pantalla.<br />
TELEVISION<br />
TOOLS<br />
Girar : 90<br />
Búsqueda <strong>de</strong> tiempo<br />
2 ) Seleccione Girar <strong>de</strong>l menú TOOLS.<br />
Cada vez que pulsa el botón ENTER se gira la imagen visualizada en un cuarto <strong>de</strong> vuelta. Se alterna entre<br />
90º, 180º, 270º y 0º.<br />
Nota: El ángulo <strong>de</strong> rotación seleccionado sólo es efectivo para la imagen visible.<br />
Desplazar o cambiar el contenido hace que la imagen vuelva a la visualización original.<br />
106<br />
Sp
Utilización <strong>de</strong> otros equipos con su televisor <strong>de</strong> pantalla plana 05<br />
Zoom<br />
Utilice la opción Zoom para ampliar el contenido <strong>de</strong> foto visualizado. Esta opción está disponible en la pantalla<br />
Reproductor <strong>de</strong> foto. Para ampliar el contenido, siga los pasos a continuación.<br />
1 ) Mientras se visualice el contenido <strong>de</strong> foto, pulse TOOLS.<br />
El menú TOOLS aparece en la pantalla.<br />
TELEVISION<br />
TOOLS<br />
Reproducción <strong>de</strong> música<br />
Añadir a la lista repr. HMG<br />
Zoom : Apagado<br />
Encendido<br />
2 ) Seleccione Zoom <strong>de</strong>l menú TOOLS.<br />
3 ) Pulse / para seleccionar Encendido o Apagado.<br />
4 ) Pulse ENTER para confirmar la selección.<br />
Seleccionar Encendido hace que siempre aparezca el contenido <strong>de</strong> foto ampliado.<br />
La imagen visualizada difiere <strong>de</strong>pendiendo <strong>de</strong>l contenido. Si la relación <strong>de</strong> aspecto <strong>de</strong>l contenido es más<br />
larga que 16:9, el contenido aparece compl<strong>et</strong>amente alargado horizontalmente en ambos lados, con la<br />
imagen cortada en las partes superior e inferior. Si la relación <strong>de</strong> aspecto <strong>de</strong>l contenido es más ancha que<br />
16:9, el contenido aparece compl<strong>et</strong>amente alargado verticalmente en las partes superior e inferior, con la<br />
imagen cortada en los lados <strong>de</strong>recho e izquierdo.<br />
Se visualiza un icono “zoom”.<br />
5 ) En el modo Zoom, utilice los botones <strong>de</strong> flecha para <strong>de</strong>splazar el contenido.<br />
Pulse o si la relación <strong>de</strong> aspecto <strong>de</strong>l contenido es más larga que 16:9, o si la relación <strong>de</strong><br />
aspecto <strong>de</strong>l contenido es más ancha que 16:9.<br />
6 ) Pulse RETURN o ENTER para cancelar el Zoom y volver a la pantalla normal.<br />
Español<br />
Nota: La función Zoom se <strong>de</strong>sactiva cuando el contenido es una imagen <strong>de</strong> 16:9.<br />
107<br />
Sp
05 Utilización <strong>de</strong> otros equipos con su televisor <strong>de</strong> pantalla plana<br />
5.9 Configuración HMG<br />
Utilice la opción Configuración HMG para Configuración <strong>de</strong> red, Conexión automática y Configuraciones<br />
iniciales. Para más información acerca <strong>de</strong> cada opción, consulte las secciones siguientes.<br />
Configuración <strong>de</strong> red<br />
Conexión automática<br />
Configuraciones iniciales<br />
Encendido<br />
Configuración <strong>de</strong> red<br />
Seleccione si se obtiene la dirección IP automática o manualmente o, cuando se obtiene manualmente,<br />
configure la dirección IP y máscara <strong>de</strong> subred. Para acce<strong>de</strong>r al menú Configuración <strong>de</strong> red, siga los pasos a<br />
continuación.<br />
Automático:<br />
Para realizar el procedimiento, DHCP en su servidor o ruteador <strong>de</strong>be estar activo.<br />
1 ) Pulse HMG.<br />
El menú Home Media Gallery aparece en la pantalla.<br />
2 ) Seleccione Configuración HMG <strong>de</strong>l menú.<br />
Utilice los botones <strong>de</strong> flecha para resaltar una opción y, a continuación, pulse ENTER.<br />
3 ) Seleccione Configuración <strong>de</strong> red.<br />
4 ) Seleccione Obt. auto. IP.<br />
5 ) Seleccione Sí.<br />
El televisor <strong>de</strong> pantalla plana busca y obtiene una dirección IP, si disponible.<br />
6 ) Pulse EXIT o HMG para salir <strong>de</strong> Home Media Gallery.<br />
Manual:<br />
Antes <strong>de</strong> acativar, compruebe su servidor <strong>de</strong> medios para la información <strong>de</strong> dirección IP y máscara <strong>de</strong> subred.<br />
1 ) Acceda a Configuración <strong>de</strong> red a través <strong>de</strong> Configuración HMG.<br />
2 ) Seleccione Obt. auto. IP.<br />
3 ) Seleccione No.<br />
4 ) Seleccione la casilla apropiada.<br />
Utilice o para resaltar un ítem (Dirección IP o Másc. subred) y, a continuación, pulse ENTER.<br />
No se requiere introducir los datos para Gateway pred. y Servidor DNS.<br />
5 ) Introduzca los números con los botones 0 a 9.<br />
Másc. subred (tal como 255.255.255.0): Introduzca los mismos números.<br />
Dirección IP (talcomo 192.168.201.***): Introduzca los mismos números utilizados en el servidor <strong>de</strong><br />
medios (PC, <strong>et</strong>c.). Para ***, introduzca un número <strong>de</strong> 3 dígitos (0 – 254) que no tenga sido utilizado para<br />
otras conexiones <strong>de</strong> la red.<br />
Utilice o para resaltar otras áreas <strong>de</strong> entrada.<br />
6 ) Pulse ENTER en la casilla apropiada <strong>de</strong>spués <strong>de</strong> concluir la entrada.<br />
Repita los pasos 4 y 5 para compl<strong>et</strong>ar la configuración <strong>de</strong> red.<br />
7 ) Pulse EXIT o HMG para salir <strong>de</strong> Home Media Gallery.<br />
108<br />
Sp
Utilización <strong>de</strong> otros equipos con su televisor <strong>de</strong> pantalla plana 05<br />
Conexión automática<br />
Seleccione Conexión automática para conectar automáticamente al último servidor accedido.<br />
Para la selección, consulte los pasos a continuación.<br />
1 ) Acceda a Conexión automática a través <strong>de</strong> Configuración HMG.<br />
2 ) Utilice o para cambiar la configuración.<br />
Seleccionar Encendido visualiza el último servidor accedido. Si el servidor está en el modo <strong>de</strong> espera, se<br />
envía un comando WOL (“Wake On LAN”) para encen<strong>de</strong>r el último servidor accedido.<br />
Seleccionar Apagado visualiza una lista <strong>de</strong> servidores.<br />
El comando “Wake on LAN (WOL)” encien<strong>de</strong> el último servidor accedido si el servidor es compatible con el<br />
comando WOL y está en el modo <strong>de</strong> espera o suspensión, y una vez que se reinicie el servidor, se visualiza<br />
el Media Navigator. Mientras el televisor <strong>de</strong> pantalla plana intenga reiniciar el servidor, se visualiza un<br />
cuadro <strong>de</strong> diálogo. Si el servidor no es compatible con WOL o la función WOL falla, se visualiza un mensaje<br />
en la pantalla Lista <strong>de</strong> servidores.<br />
3 ) Pulse EXIT o HMG para salir <strong>de</strong> Home Media Gallery.<br />
Configuraciones iniciales<br />
Ocasionalmente, pue<strong>de</strong> que sea más fácil reponer el televisor <strong>de</strong> pantalla plana a sus selecciones<br />
pred<strong>et</strong>erminadas <strong>de</strong> HMG, mejor que intentar corregir un gran número <strong>de</strong> entradas acci<strong>de</strong>ntales. Para reponer<br />
las selecciones iniciales <strong>de</strong>ntro <strong>de</strong> Home Media Gallery, siga los pasos a continuación.<br />
1 ) Acceda a Configuraciones iniciales a través <strong>de</strong> Configuración HMG.<br />
Español<br />
2 ) Seleccione Sí.<br />
Se reponen las selecciones pred<strong>et</strong>erminadas y se visualiza la pantalla <strong>de</strong> Home Media Gallery.<br />
3 ) Pulse EXIT o HMG para salir <strong>de</strong> Home Media Gallery.<br />
5.10 Otras funciones útiles<br />
Protector <strong>de</strong> pantalla<br />
Durante la navegación, el protector <strong>de</strong> pantalla se inicia automáticamente si no se d<strong>et</strong>ecta ninguna actividad<br />
<strong>de</strong>ntro <strong>de</strong> cinco minutos. Sin embargo, durante la reproducción <strong>de</strong> una película o <strong>de</strong> una presentación <strong>de</strong><br />
diapositivas, la pantalla impi<strong>de</strong> la activación <strong>de</strong>l protector <strong>de</strong> pantalla.<br />
Pulse cualquier botón para cancelar el protector <strong>de</strong> pantalla. Descartar el protector <strong>de</strong> pantalla no interfiere<br />
cuando se conecta un dispositivo USB.<br />
Nota: Pulsar DISPLAY para visualizar el estado <strong>de</strong>l reproductor o guía <strong>de</strong> botones antes que el protector <strong>de</strong><br />
pantalla se active pue<strong>de</strong> causar una imagen remanente.<br />
Importante<br />
• No visualice el estado <strong>de</strong>l reproductor y la guía <strong>de</strong> botones durante un largo período <strong>de</strong> tiempo<br />
mientras reproduce una película o presentación <strong>de</strong> diapositivas para evitar una posible r<strong>et</strong>ención <strong>de</strong> la<br />
imagen.<br />
109<br />
Sp
05 Utilización <strong>de</strong> otros equipos con su televisor <strong>de</strong> pantalla plana<br />
Mensaje en el cuadro <strong>de</strong> diálogo<br />
Nº Mensaje Problema<br />
001 No se pue<strong>de</strong> reproducir el<br />
contenido. (001)<br />
100 Ha ocurrido un error <strong>de</strong><br />
comunicación. (100)<br />
101 No hay respuesta <strong>de</strong>l servidor.<br />
(101)<br />
102 Se ha <strong>de</strong>sconectado <strong>de</strong> la red.<br />
(102)<br />
103 Respuesta <strong>de</strong>l servidor que indica<br />
la imposibilidad <strong>de</strong> contestar. (103)<br />
300 No se pue<strong>de</strong> reproducir el<br />
contenido. (300)<br />
No hay d<strong>et</strong>alles disponibles para el<br />
error, compruebe el contenido<br />
No hay más d<strong>et</strong>alles disponibles<br />
para el error<br />
Expiración <strong>de</strong>l tiempo <strong>de</strong>l televisor<br />
<strong>de</strong> pantalla plana <strong>de</strong>bido a un<br />
r<strong>et</strong>ardo <strong>de</strong> respuesta <strong>de</strong>l servidor<br />
Los cables están <strong>de</strong>sconectados<br />
La respuesta <strong>de</strong>l servidor no es<br />
compreensible<br />
No hay más d<strong>et</strong>alles disponibles<br />
para el error<br />
301 No se soporta este formato. (301) Se ha seleccionado un archivo no<br />
soportado<br />
500 Error <strong>de</strong> autenticación. (500) Error al obtener autorización DRM<br />
501 Error <strong>de</strong> autenticación. (501) Error al obtener autorización DRM<br />
502 Error <strong>de</strong> autenticación.<br />
Verifique si el ruteador,<br />
concentrador u otro dispositivo <strong>de</strong><br />
red no está <strong>de</strong>fectuoso. (502)<br />
503 Error <strong>de</strong>l contenido <strong>de</strong><br />
autenticación. El aviso <strong>de</strong><br />
<strong>de</strong>rechos <strong>de</strong> autor <strong>de</strong> este archivo<br />
pue<strong>de</strong> estar inválido. (503)<br />
Error al obtener autorización DRM<br />
Error al obtener autorización DRM<br />
504 Error <strong>de</strong> autenticación. (504) Error al obtener autorización<br />
WMDRM<br />
505 Error <strong>de</strong> autenticación.<br />
Verifique si el ruteador,<br />
concentrador u otro dispositivo <strong>de</strong><br />
red no está <strong>de</strong>fectuoso. (505)<br />
506 Error <strong>de</strong> autenticación. El conteo<br />
máximo <strong>de</strong> dispositivos <strong>de</strong> acceso<br />
<strong>de</strong>pen<strong>de</strong> <strong>de</strong>l servidor. (506)<br />
507 Error <strong>de</strong> autenticación. La licencia<br />
<strong>de</strong> este archivo pue<strong>de</strong> estar<br />
inválida. Reciba la licencia <strong>de</strong> un<br />
servidor. (507)<br />
Error al obtener autorización<br />
WMDRM<br />
Error al obtener WMDRM<br />
Error al obtener autorización<br />
WMDRM<br />
508 Error <strong>de</strong> autenticación. (508) Error <strong>de</strong> autorización diferente <strong>de</strong><br />
los <strong>de</strong> arriba<br />
Importante<br />
• La visualización <strong>de</strong> imágenes en Home Media Gallery durante un largo período <strong>de</strong> tiempo pue<strong>de</strong> causar<br />
una imagen remanente.<br />
110<br />
Sp
Utilización <strong>de</strong> otros equipos con su televisor <strong>de</strong> pantalla plana 05<br />
5.11 Adición <strong>de</strong> otros equipos <strong>de</strong> audio<br />
El terminal <strong>de</strong> salida <strong>de</strong> audio digital (óptico) <strong>de</strong>l televisor <strong>de</strong> pantalla plana pue<strong>de</strong> generar señales Dolby Digital.<br />
Utilizando un cable digital óptico, conecte un receptor <strong>de</strong> AV al terminal <strong>de</strong> salida <strong>de</strong> audio digital (óptico) en la<br />
parte trasera <strong>de</strong>l televisor <strong>de</strong> pantalla plana. Esta conexión permite que el audio <strong>de</strong> una emisión <strong>de</strong> TV digital se<br />
reproduzca en alta calidad.<br />
Si su receptor <strong>de</strong> AV no tiene un terminal <strong>de</strong> entrada <strong>de</strong> audio digital (óptico), conecte los terminales AUDIO OUT<br />
(AUDIO) en la parte trasera <strong>de</strong>l televisor <strong>de</strong> pantalla plana a los terminales <strong>de</strong> entrada <strong>de</strong> audio <strong>de</strong>l receptor <strong>de</strong> AV.<br />
Sin embargo, este método pue<strong>de</strong> resultar en el r<strong>et</strong>ardo <strong>de</strong> audio entre los altavoces y el sonido <strong>de</strong>l receptor <strong>de</strong> AV.<br />
Para reducir el r<strong>et</strong>ardo, silencie los altavoces en el televisor <strong>de</strong> pantalla plana. Aún así, pue<strong>de</strong> percibir algún r<strong>et</strong>ardo<br />
entre el sonido y la imagen.<br />
T<br />
W<br />
T<br />
W<br />
Vista trasera<br />
No se requiere<br />
esta conexión<br />
cuando se<br />
conecta un<br />
amplificador <strong>de</strong><br />
AV equipado con<br />
la función<br />
surround a un<br />
subwoofer.<br />
Cable <strong>de</strong> AV<br />
(disponible<br />
comercialmente)<br />
Cable digital óptico<br />
(disponible<br />
comercialmente)<br />
Español<br />
Subwoofer<br />
Receptor <strong>de</strong> AV<br />
Las señales <strong>de</strong> audio sincronizadas con las imágenes actualmente visualizadas se generan a los terminales<br />
AUDIO OUT. Sin embargo, el audio que acompaña las imágenes se genera al terminal SUB WOOFER OUT.<br />
Cuando utilice el terminal <strong>de</strong> salida <strong>de</strong> audio digital (óptico), seleccione las configuraciones <strong>de</strong> acuerdo a su<br />
Receptor <strong>de</strong> AV. Para más información, consulte el manual <strong>de</strong> instrucciones que viene con el receptor <strong>de</strong> AV.<br />
Nota: Cuando se introducen las señales <strong>de</strong> los terminales HDMI, no se emite ninguna señal <strong>de</strong>s<strong>de</strong> el terminal<br />
DIGITAL OUT, si el contenido está protegido contra copia.<br />
Para configurar el terminal DIGITAL OUT (OPTICAL) para su receptor <strong>de</strong> AV, siga los pasos a continuación.<br />
1 ) Acceda a Configuración <strong>de</strong>l sistema a través <strong>de</strong> Configuración.<br />
2 ) Seleccione Salida <strong>de</strong> audio digital <strong>de</strong>l menú Configuración <strong>de</strong>l sistema.<br />
3 ) Seleccione una opción <strong>de</strong>l submenú.<br />
Opción<br />
Dolby Digital<br />
PCM<br />
Descripción<br />
Genera la señal Dolby Digital para el formato Dolby<br />
y genera la señal PCM para el formato PCM<br />
(selección pred<strong>et</strong>erminada).<br />
Genera en el formato PCM in<strong>de</strong>pendientemente <strong>de</strong>l<br />
tipo <strong>de</strong> señal.<br />
4 ) Pulse HOME MENU para salir <strong>de</strong>l menú.<br />
111<br />
Sp
05 Utilización <strong>de</strong> otros equipos con su televisor <strong>de</strong> pantalla plana<br />
5.12 Adición <strong>de</strong> un PC<br />
Utilice los terminales PC <strong>de</strong> la pantalla para conectar un PC. Los terminales <strong>de</strong> entrada PC son compatibles con<br />
DDC2B; sin embargo, pue<strong>de</strong> que la función Plug & Play no funcione a<strong>de</strong>cuadamente. Cuando está conectada a<br />
un PC, la pantalla i<strong>de</strong>ntifica automática el tipo <strong>de</strong> señal <strong>de</strong> entrada. Si la pantalla no pue<strong>de</strong> ver el PC o si la imagen<br />
no está clara, active la función Configuración automática.<br />
5.12.1 Ajuste automático <strong>de</strong> la posición <strong>de</strong> la imagen y <strong>de</strong>l reloj<br />
Cuando se está conectado a un PC, se pue<strong>de</strong> ajustar la posición <strong>de</strong> la imagen y la frecuencia <strong>de</strong>l reloj. La opción<br />
Configuración automática ajusta automáticamente estas opciones, pero también se pue<strong>de</strong> ajustar la posición la<br />
imagen y el reloj manualmente. En esta sección se <strong>de</strong>scribe la función <strong>de</strong> configuración automática y en las<br />
siguientes secciones se <strong>de</strong>scribe cómo ajustar la posición <strong>de</strong> la imagen y el reloj manualmene.<br />
El dispositivo <strong>de</strong> fuente <strong>de</strong> AV <strong>de</strong>be estar conectado al televisor <strong>de</strong> pantalla plana y encendido para que estas<br />
opciones funcionen. Para utilizar la Configuración automática para ajustar la posición <strong>de</strong> la imagen y el reloj<br />
automáticamente, siga los pasos a continuación.<br />
1 ) Acceda a Opción a través <strong>de</strong> Configuración.<br />
2 ) Seleccione Autoconfiguración <strong>de</strong>l menú Opción.<br />
La función comienza así que se hace la selección. Sin embargo, <strong>de</strong>pendiendo <strong>de</strong> la imagen, pue<strong>de</strong> que la<br />
posición <strong>de</strong> la imagen no cambie <strong>de</strong>spués <strong>de</strong>l ajuste.<br />
3 ) Pulse HOME MENU para salir <strong>de</strong>l menú.<br />
Nota: Esta función no está disponible cuando un PC está conectado al terminal HDMI.<br />
Cuando se finalice la Configuración automática, se visualiza el mensaje “Instalación auto. concluida.”. Sin<br />
embargo, si la configuración no ajusta la imagen, el mensaje también aparece si otros factores afectan el<br />
cambio. La configuración automática pue<strong>de</strong> fallar con una imagen <strong>de</strong> PC compuesta por patrones similares o en<br />
una imagen monocromática. Si la Configuración automática no ajusta la posición <strong>de</strong> la imagen y reloj, cambie<br />
la imagen <strong>de</strong> PC y vuelva a intentarlo.<br />
5.12.2 Ajuste manual <strong>de</strong> la posición <strong>de</strong> la imagen y <strong>de</strong>l reloj<br />
Usualmente, la Configuración automática para un PC es la mejor manera <strong>de</strong> ajustar la posición <strong>de</strong> la imagen y<br />
el reloj. Sin embargo, para optimizar las posiciones personalmente, siga los pasos a continuación.<br />
1 ) Acceda a Opción a través <strong>de</strong> Configuración.<br />
2 ) Seleccione Configuración manual <strong>de</strong>l menú Opción.<br />
3 ) Seleccione una opción para ajustar.<br />
Ajuste <strong>de</strong> la posición H/V<br />
Reloj : +120<br />
Fase : +15<br />
Reponer<br />
4 ) Utilice los botones <strong>de</strong> flecha arriba/abajo (/) para ajustar la opción.<br />
El reloj y la fase también aceptan las flechas izquierda/<strong>de</strong>recha (/) para cambios.<br />
5 ) Pulse HOME MENU para salir <strong>de</strong>l menú.<br />
112<br />
Sp
Información útil 06<br />
6 Información útil<br />
En este capítulo se incluyen las respuestas a algunas cuestiones comunes y se provee la información sobre el<br />
software/hardware que se utilize en su televisor <strong>de</strong> pantalla plana, métodos <strong>de</strong> limpieza, y d<strong>et</strong>ección <strong>de</strong><br />
problemas/información <strong>de</strong> servicio. Si necesita más asistencia, póngase en contacto con nosostros y nos dé la<br />
oportunidad para corregir cualesquiera problemas que esté experimentando. ¡Gracias nuevamente por adquirir<br />
<strong>Pioneer</strong>!<br />
6.1 Preguntas frecuentes (FAQ)<br />
En esta sección se proveen las respuestas a algunas <strong>de</strong> las preguntas recibidas por nuestros funcionarios <strong>de</strong><br />
soporte. Si su pregunta no está aquí o le gustaría más información, visite el sitio Web <strong>de</strong> <strong>Pioneer</strong> para más FAQs<br />
(www.pioneerelectronics.com) acerca <strong>de</strong> su mo<strong>de</strong>lo específico o nuestros televisores <strong>de</strong> pantalla plana en general.<br />
¿Por qué los botones <strong>de</strong>l mando a distancia no controlan mi televisor <strong>de</strong> pantalla plana?<br />
Si ha seleccionado un modo que no sea TV en el mando a distancia, su televisor <strong>de</strong> pantalla plana no pue<strong>de</strong><br />
recibir los comandos. Pulse el botón SELECT para cambiar el modo hasta que el indicador TV se encienda.<br />
¿Por qué tengo que aproximarme a la pantalla para utilizar el mando a distancia?<br />
Pilas débiles en el mando a distancia pue<strong>de</strong>n causar un error <strong>de</strong> comunicación. Intente aproximarse a la pantalla<br />
e intente operarla con el mando a distancia. Si la pantalla respon<strong>de</strong>, reemplace las pilas. Si aproximarse a la<br />
pantalla no tiene efecto, compruebe los alre<strong>de</strong>dores para ver si no hay obj<strong>et</strong>os que estén bloqueando la señal.<br />
Consi<strong>de</strong>re también si otros equipos que utilizan mandos a distancia han sido añadidos al área alre<strong>de</strong>dor <strong>de</strong> la<br />
pantalla. Obj<strong>et</strong>os y otras señales IR pue<strong>de</strong>n perjudicar el funcionamiento <strong>de</strong>l mando a distancia.<br />
Español<br />
¿Cómo pue<strong>de</strong> proteger el mando a distancia para que funcione más tiempo?<br />
Hay diversas maneras <strong>de</strong> proteger su mando a distancia. No <strong>de</strong>je el mando a distancia expuesto a la luz directa<br />
<strong>de</strong>l sol, ya que esto pue<strong>de</strong> alabear o <strong>de</strong>formar la caja. Evite <strong>de</strong>rramar líquidos en el mando a distancia, pero si<br />
esto ocurre, séquelo inmediatamente. Si fuese necesario, saque las pilas y permita que la unidad se seque<br />
compl<strong>et</strong>amente antes <strong>de</strong> tentar utilizarla nuevamente. Áreas con alta humedad también pue<strong>de</strong>n causar daños.<br />
Otra cuestión que pue<strong>de</strong> afectar el mando a distancia es la fuga <strong>de</strong>l líquido <strong>de</strong> las pilas. El fluido químico <strong>de</strong> la<br />
fuga <strong>de</strong> una pila pue<strong>de</strong> <strong>de</strong>scolorar o dañar el mando a distancia. Si hay fuga visible <strong>de</strong> una pila, saque ambas las<br />
pilas inmediatamente y limpie cuidadosamente el compartimiento <strong>de</strong> las pilas. Reemplace las pilas por nuevas.<br />
¿Pue<strong>de</strong> la señal <strong>de</strong>l mando a distancia <strong>de</strong> la pantalla mezclarse con la señal <strong>de</strong> otros equipos <strong>de</strong> audio/<br />
ví<strong>de</strong>o?<br />
El televisor <strong>de</strong> pantalla plana emite rayos infrarrojos muy débiles <strong>de</strong>s<strong>de</strong> su pantalla. Si hay otros equipos cercanos<br />
que también utilizan un mando a distancia, tales como una grabadora DVR o sistema estéreo, pue<strong>de</strong> que tal<br />
equipo no reciba los comandos <strong>de</strong> su mando a distancia a<strong>de</strong>cuadamente. Intente alejar el equipo <strong>de</strong>l televisor<br />
<strong>de</strong> pantalla plana.<br />
Nota: La intensidad <strong>de</strong> los rayos infrarrojos emitidos <strong>de</strong> la pantalla difiere con el cambio <strong>de</strong> la imagen en la<br />
pantalla.<br />
¿Por qué la imagen parece atenuarse cuando <strong>de</strong>jo una imagen en la pantalla?<br />
Cuando imágenes fijas (como fotos e imágenes <strong>de</strong> or<strong>de</strong>nadores) permanecen en la pantalla durante un período<br />
<strong>de</strong> tiempo prolongado, la pantalla se oscurece ligeramente. Esta función protege la pantalla contra daños,<br />
ajustando automáticamente el brillo <strong>de</strong> la pantalla. La pantalla se oscurece cuando se d<strong>et</strong>ecta una imagen fija<br />
durante aproximadamente tres minutos.<br />
¿Cómo encuentreo (o cambio) la contraseña <strong>de</strong>l Control familiar si la he olvidado?<br />
Para borrar una contraseña olvidada, <strong>de</strong> una ventana “Introduzca la contraseña”, mantenga pulsado el botón<br />
ENTER en el mando a distancia durante tres segundos o más. Esta acción reposiciona la contraseña al valor<br />
pred<strong>et</strong>erminado <strong>de</strong> 1234. Para configurar una nueva contraseña, consulte “3.5.1 Asignación <strong>de</strong> una contraseña<br />
para el control familiar (bloqueo)”.<br />
La imagen y/o sonido en un canal a través <strong>de</strong> una antena parece no estar claro como <strong>de</strong>bería. ¿Qué <strong>de</strong>bo<br />
hacer?<br />
Pue<strong>de</strong> que los canales recibidos a través <strong>de</strong> una antena tengan una señal débil. Para comprobar la intensidad <strong>de</strong><br />
la señal, consulte “Comprobación <strong>de</strong> la intensidad <strong>de</strong> la señal” en la sección 6.4.1 para más información.<br />
113<br />
Sp
06 Información útil<br />
¿Por qué se corta la imagen cuando alimento una señal <strong>de</strong> PC a través <strong>de</strong> la entrada HDMI <strong>de</strong>l PDP-6020FD/<br />
5020FD?<br />
Si se selecciona Ví<strong>de</strong>o para Tipo <strong>de</strong> senal en el menú Entrada HDMI, se redimensiona la imagen para ampliarla,<br />
pero la pantalla cambia automáticamente a PC cuando recibe las señales <strong>de</strong> PC. Consulte “5.2.1 Especificación<br />
<strong>de</strong>l tipo <strong>de</strong> entrada HDMI”.<br />
¿Por qué mi televisor <strong>de</strong> pantalla plana <strong>Pioneer</strong> no se encien<strong>de</strong>?<br />
Pue<strong>de</strong> que su mando a distancia esté con las pilas agotadas o esté dañado. Compruebe la conexión <strong>de</strong>l cable <strong>de</strong><br />
alimentación en la toma <strong>de</strong> corriente y en la parte trasera <strong>de</strong> la pantalla. Intente también pulsar a en la pantalla.<br />
¿Por qué la luz <strong>de</strong> alimentación azul o roja está parpa<strong>de</strong>ando en el televisor <strong>de</strong> pantalla plana?<br />
Pue<strong>de</strong> que el circuito <strong>de</strong> protección interno <strong>de</strong> la pantalla tenga sido activado por alguna razón. Apague a la<br />
pantalla, espere un (1) minuto o más y, a continuación, enciéndala nuevamente. Si la luz todavía está<br />
parpa<strong>de</strong>ando, <strong>de</strong>senchufe el cable <strong>de</strong> alimentación <strong>de</strong> la toma <strong>de</strong> corriente. Enchufe el cable nuevamente<br />
<strong>de</strong>spués <strong>de</strong> uno o dos minutos. Si esto no soluciona el problema, póngase en contacto con su reven<strong>de</strong>dor o la<br />
División <strong>de</strong> Asistencia al Cliente (vea la contracubierta hacia <strong>de</strong>ntro).<br />
¿Qué pue<strong>de</strong> hacer para prevenir la r<strong>et</strong>ención <strong>de</strong> imagen o quemado <strong>de</strong> la pantalla?<br />
La r<strong>et</strong>ención <strong>de</strong> imagen o quemado <strong>de</strong> la pantalla es un efecto colateral <strong>de</strong> la tecnológia <strong>de</strong> plasma. Después que<br />
una imagen tenga permanecido en la pantalla durante un largo período <strong>de</strong> tiempo, cuando la imagen cambia o<br />
se apaga la unidad, pue<strong>de</strong> que permanezca una imagen remanente o imagen fantasma <strong>de</strong> la imagen original.<br />
Continuar a reproducir ví<strong>de</strong>o o <strong>de</strong>jar la unidad apagada durante un cierto tiempo pue<strong>de</strong> eliminar la imagen<br />
remanente. Recomendamos los siguientes pasos y configuraciones para prevenir la r<strong>et</strong>ención <strong>de</strong> imagen o<br />
quemado <strong>de</strong> la pantalla.<br />
• Seleccione Encendido para Protección <strong>de</strong> pantalla.<br />
• Seleccione PC para el tipo <strong>de</strong> señal cuando utilice un PC a través <strong>de</strong> una entrada HDMI.<br />
¿Cómo limpio mi televisor <strong>de</strong> pantalla plana?<br />
Para limpiar la superficie <strong>de</strong> la pantalla, límpiela suavemente con el paño <strong>de</strong> limpieza seco suministrado. Frotar<br />
la pantalla con mucha fuerza pue<strong>de</strong> arañar el <strong>de</strong> revestimiento especial <strong>de</strong> la superficie. Utilice un paño blando<br />
y limpio (algodón o franela, por ejemplo) para la caja <strong>de</strong>l televisor. Para los d<strong>et</strong>alles acerca <strong>de</strong> la limpieza, consulte<br />
“6.3 Métodos <strong>de</strong> limpieza”.<br />
6.2 Comprobación <strong>de</strong> la versión <strong>de</strong> su software/hardware<br />
Pue<strong>de</strong> comprobar la versión <strong>de</strong>l software y hardware en uso en su televisor <strong>de</strong> pantalla plana. Para acce<strong>de</strong>r a la<br />
información <strong>de</strong> la versión, siga las instrucciones a continuación.<br />
1 ) Acceda a Configuración <strong>de</strong>l sistema a través <strong>de</strong> Configuración.<br />
2 ) Seleccione Información técnica <strong>de</strong>l menú Configuración <strong>de</strong>l sistema.<br />
Se visualizan las versiones <strong>de</strong>l software y hardware.<br />
3 ) Pulse HOME MENU para salir <strong>de</strong>l menú <strong>de</strong>spués <strong>de</strong> comprobar las versiones.<br />
6.3 Métodos <strong>de</strong> limpieza<br />
Antes <strong>de</strong> limpiar su televisor <strong>de</strong> pantalla plana, <strong>de</strong>senchufe el cable <strong>de</strong> alimentación <strong>de</strong> la toma <strong>de</strong> corriente.<br />
Cuando limpie la pantalla o el bisel <strong>de</strong>lantero lustroso, limpie gentilmente con un paño limpie y seco, tal como el<br />
paño <strong>de</strong> limpieza suministrado o un paño blando <strong>de</strong> tipo similar (algodón o franela, por ejemplo). Evite utilizar un<br />
paño mojado hume<strong>de</strong>cido, ya que la humedad pue<strong>de</strong> pen<strong>et</strong>rar en la pantalla. Un paño polvoriento o áspero (o si<br />
frota con mucha fuerza) pue<strong>de</strong> arrañar las superficies.<br />
Nota: No utilice productos <strong>de</strong> limpieza líquidos ni en aerosol en la pantalla.<br />
114<br />
Sp<br />
El bastidor o caja <strong>de</strong> la pantalla está compuesto principalmente por plástico. No utilice substancias químicas<br />
como benzina o diluyentes para limpiar la caja. Estas substancias químicas pue<strong>de</strong>n dañar el acabado o causar<br />
otros d<strong>et</strong>erioros. Cuando limpie la caja, utilice el mismo tipo <strong>de</strong> paño y método como se ha <strong>de</strong>scrito para el bisel<br />
<strong>de</strong>lantero.<br />
Nota: No fije <strong>et</strong>iqu<strong>et</strong>as, cintas, <strong>et</strong>c. a cualquier ubicación visible en el televisor <strong>de</strong> pantalla plana. Adhesivos<br />
pue<strong>de</strong>n <strong>de</strong>scolorar o dañar las superficies <strong>de</strong> la pantalla.
Información útil 06<br />
6.4 Solución <strong>de</strong> problemas e información <strong>de</strong> servicio<br />
General<br />
Cuestión<br />
La pantalla no se<br />
encien<strong>de</strong><br />
La pantalla se apaga<br />
repentinamente<br />
La pantalla no<br />
funciona<br />
El mando a distancia<br />
no funciona<br />
Solución posible<br />
• Compruebe la conexión en la toma <strong>de</strong> corriente y en la pantalla.<br />
• Compruebe si el botón <strong>de</strong> alimentación <strong>de</strong> la pantalla está activado.<br />
• Compruebe que el mando a distancia está ajustado en TV.<br />
Si el indicador <strong>de</strong> la pantalla está encendido en rojo, pulse (a) en el mando a<br />
distancia o STANDBY/ON en el televisor <strong>de</strong> pantalla plana.<br />
• Compruebe que el temporizador <strong>de</strong> apagado no ha apagado el televisor <strong>de</strong> pantalla plana.<br />
• Compruebe el ajuste <strong>de</strong>l control <strong>de</strong> la alimentación.<br />
• Compruebe si la temperatura interna <strong>de</strong> la pantalla ha aumentado.<br />
Limpie las aberturas <strong>de</strong> ventilación y r<strong>et</strong>ire cualquier obj<strong>et</strong>o que bloque la ventilación.<br />
• Existen influencias externas como, por ejemplo, fallo <strong>de</strong> voltaje, la electricidad<br />
estática, <strong>et</strong>c., que pue<strong>de</strong>n causar un funcionamiento incorrecto.<br />
Desenchufe la pantalla <strong>de</strong> la toma <strong>de</strong> corriente y déjela apagada durante dos minutos<br />
o más. Vuelva a conectar e intente operar la pantalla nuevamente.<br />
• Verifique si la energía <strong>de</strong>l televisor está <strong>de</strong>sactivada. Pulse el botón cuando los<br />
indicadores POWER ON y STANDBY estén apagados.<br />
• Compruebe que el modo esté ajustado en TV.<br />
• Verifique el <strong>sens</strong>or <strong>de</strong> mando a distancia en la pantalla para ver si no hay<br />
obstrucciones que podrían bloquear la señal.<br />
• Compruebe que las pilas <strong>de</strong>l mando a distancia estén instaladas a<strong>de</strong>cuadamente y<br />
que tengan carga suficiente.<br />
Reemplace por pilas nuevas para verificar.<br />
• Consi<strong>de</strong>re los cambios en la iluminación, ya que fuentes <strong>de</strong> luz más fuertes o nuevas<br />
pue<strong>de</strong>n afectar la señal.<br />
Español<br />
Imagen/Sonido<br />
Cuestión<br />
Solución posible<br />
No hay imagen ni sonido • Compruebe las conexiones <strong>de</strong> la antena.<br />
• Compruebe las conexiones <strong>de</strong> los cables con otros equipos.<br />
• Compruebe que el Control familiar esté inactivo.<br />
• Introduzca la contraseña para cancelar el Control familiar (bloqueo) temporalmente.<br />
• Compruebe que la pantalla esté ajusdada para ver un canal <strong>de</strong> TV, en vez <strong>de</strong> una fuente<br />
<strong>de</strong> entrada.<br />
No hay imagen • Compruebe las configuraciones <strong>de</strong> ajuste <strong>de</strong> la imagen.<br />
Restaure las selecciones pred<strong>et</strong>erminadas, si necesario.<br />
• Compruebe que el equipo conectado esté instalado y programado correctamente.<br />
• Si esté viendo la imagen <strong>de</strong> un PC, compruebe que la señal sea compatible.<br />
La pantalla aparece • Verifique si hay obstáculos en la frente <strong>de</strong>l <strong>sens</strong>or <strong>de</strong> luz ambiental.<br />
oscura<br />
Coloración irregular y<br />
sombras, imágenes<br />
<strong>de</strong>salineadas<br />
La imagen está cortada o<br />
sale por la pantalla<br />
Hay imagen pero no hay<br />
sonido<br />
• Compruebe la iluminación <strong>de</strong> la sala para recientes cambios recientes o diferentes<br />
fuentes <strong>de</strong> iluminación natural <strong>de</strong> ventanas o entradas.<br />
• Compruebe el tono <strong>de</strong> la imagen y ajuste como sea necesario.<br />
• Compruebe el tamaño <strong>de</strong> la pantalla para el canal/fuente <strong>de</strong> entrada actual.<br />
• Compruebe que la posición <strong>de</strong> la imagen esté centrada.<br />
• Compruebe que el sonido no esté silenciado o que el volumen no esté en el nivel mínimo.<br />
• Cuando utilice un ví<strong>de</strong>o o PC como la fuente <strong>de</strong> entrada, compruebe si el terminal <strong>de</strong><br />
audio está conectado.<br />
115<br />
Sp
06 Información útil<br />
Imagen/Sonido<br />
Cuestión<br />
Hay sonido pero no hay<br />
imagen<br />
El sonido está incorrecto<br />
(sólo un lado o invertido<br />
entre izquierda y<br />
<strong>de</strong>recha)<br />
El brillo y el tono <strong>de</strong> color<br />
en los lados difieren <strong>de</strong>l<br />
centro<br />
Imagen remanente<br />
Solución posible<br />
•Compruebe si Desactivar imagen no está seleccionado en el menú TOOLS.<br />
Con esta opción seleccionada, la pantalla se <strong>de</strong>sactiva; sólo se general el audio. Para<br />
restaurar la visualización <strong>de</strong> la pantalla, pulse cualquier botón que no sea VOL +/– o<br />
MUTING.<br />
• Compruebe si las conexiones <strong>de</strong> los cables <strong>de</strong> altavoz no están invertidas entre izquierda<br />
y <strong>de</strong>recha.<br />
• Compruebe que los cables <strong>de</strong> altavoz estén conectados correctamente.<br />
• Compruebe el balance <strong>de</strong>l sonido y ajústelo si necesario.<br />
• Si se visualizan imágenes en el modo 4:3 o imágenes tipo buzón durante largos períodos<br />
<strong>de</strong> tiempo, o por períodos más cortos durante varios días, una imagen remanente pue<strong>de</strong><br />
permanecer en la pantalla <strong>de</strong>bido al efecto <strong>de</strong> quemado.<br />
Vea las imágenes en pantalla compl<strong>et</strong>a tanto cuanto posible para evitar este fenómeno.<br />
• Cambie la configuración Brillo sinc. a Auto.<br />
Esta función ajusta el brillo <strong>de</strong> las máscaras laterales grises para el brillo <strong>de</strong> la imagen<br />
principal.<br />
• Utilice la función Protección <strong>de</strong> pantalla (Consulte “3.6.2 Extensión <strong>de</strong> la vida útil <strong>de</strong> la<br />
pantalla”).<br />
• Si una imagen brillante o fija ha quedado en la pantalla durante un largo período <strong>de</strong><br />
tiempo antes <strong>de</strong> cambiar a una imagen más oscura, pue<strong>de</strong> que la imagen original<br />
aparezca como una imagen remanente o imagen fantasma. Intente reproducir otra<br />
imagen brillante, cambiar la imagen rápidamente varias veces, o visualizar una escena<br />
muy activa.<br />
• Utilice la función Protección <strong>de</strong> pantalla (Consulte “3.6.2 Extensión <strong>de</strong> la vida útil <strong>de</strong> la<br />
pantalla”).<br />
• Visualice la pantalla Patrón <strong>de</strong> ví<strong>de</strong>o para ayudar a reducir la imagen remanente.<br />
Control HDMI<br />
Cuestión<br />
El Control HDMI no<br />
funciona<br />
Mensaje <strong>de</strong> error: “El<br />
dispositivo no pue<strong>de</strong><br />
operarse. Compruebe la<br />
conexión”<br />
Solución posible<br />
• Compruebe las conexiones entre la pantalla y el equipo HDMI.<br />
• Compruebe que las configuraciones para la pantalla estén correctas.<br />
• Compruebe que el equipo sea compatible con HDMI.<br />
• Compruebe que las configuraciones para el equipo estén correctas.<br />
Para los d<strong>et</strong>alles, consulte el manual <strong>de</strong> instrucciones que viene con el equipo.<br />
• Compruebe las conexiones entre la pantalla y el equipo HDMI.<br />
• Compruebe que las configuraciones para el equipo estén correctas.<br />
Para los d<strong>et</strong>alles, consulte el manual <strong>de</strong> instrucciones que viene con el equipo.<br />
No hay imagen ni sonido • Compruebe las conexiones entre la pantalla y el equipo HDMI.<br />
• Compruebe que las configuraciones para el equipo estén correctas.<br />
Para los d<strong>et</strong>alles, consulte el manual <strong>de</strong> instrucciones que viene con el equipo.<br />
No hay imagen • Compruebe las conexiones entre la pantalla y el equipo HDMI.<br />
• Compruebe que las configuraciones para el equipo estén correctas.<br />
Para los d<strong>et</strong>alles, consulte el manual <strong>de</strong> instrucciones que viene con el equipo.<br />
No hay sonido<br />
• Compruebe las conexiones entre la pantalla y el equipo HDMI.<br />
• Compruebe que las configuraciones para el equipo estén correctas.<br />
Para los d<strong>et</strong>alles, consulte el manual <strong>de</strong> instrucciones que viene con el equipo.<br />
• Compruebe que el sistema <strong>de</strong> AV esté conectado a un terminal HDMI y que cualquier<br />
grabadora/reproductor esté conectado a otro terminal HDMI.<br />
116<br />
Sp
Información útil 06<br />
Home Media Gallery/Red<br />
Cuestión<br />
No se ha encontrado<br />
ningún servidor.<br />
No se ha encontrado<br />
ningún servidor<br />
conectado<br />
anteriormente (ítems<br />
en Seleccionar servidor<br />
están oscurecidos).<br />
Se visualiza el mensaje<br />
“Error al adquirir lista.”<br />
en la pantalla Lista <strong>de</strong><br />
servidores.<br />
Un servidor disponible<br />
está seleccionado,<br />
pero no se pue<strong>de</strong><br />
navegar.<br />
Se selecciona un<br />
servidor<br />
arbitrariamente.<br />
La configuración <strong>de</strong><br />
archivos/carp<strong>et</strong>as difiere<br />
<strong>de</strong> un servidor para otro<br />
(configuración extraña).<br />
Se visualiza un<br />
mensaje <strong>de</strong> error <strong>de</strong><br />
comunicación.<br />
Solución posible<br />
• Compruebe que el PC esté encendido y no en el modo <strong>de</strong> espera o suspensión. (No hay<br />
ninguna selección en Seleccionar servidor). Cuando se reinicia el PC por “Wake On LAN”<br />
(WOL), compruebe si el PC cumple con WOL o si la configuración WOL está<br />
programada a<strong>de</strong>cuadamente en el administrador <strong>de</strong> dispositivos para BIOS o Windows.<br />
• Compruebe las conexiones físicas (concentrador, ruteador y calidad <strong>de</strong>l cable). Utilice<br />
100BASE-TX para una reproducción <strong>de</strong> mejor calidad y velocidad <strong>de</strong> visualización más alta.<br />
• Compruebe las conexiones lógicas (Dirección IP, DHCP, <strong>et</strong>c.). Compruebe que la<br />
Dirección IP esté correcta si ha sido obtenida por la configuración Auto IP y Firewall.<br />
Compruebe también si la Dirección IP ha sido obtenida correctamente con DHCP en<br />
la pantalla Configuración <strong>de</strong> red que sigue el menú Configuración HMG.<br />
• Utilizar dos o más servidores <strong>de</strong> aplicación en un único PC pue<strong>de</strong> causar un<br />
funcionamient inestable.<br />
Para el funcionamiento correcto, se recomienda fuertemente que se utilice un servidor<br />
<strong>de</strong> aplicación en un único PC.<br />
• Compruebe que el servidor <strong>de</strong> medios esté funcionando en el PC. Reinicie si fuese<br />
necesario. Verifique si hay uno o más servidores están encendidos (esto pue<strong>de</strong> causar<br />
un fallo <strong>de</strong> funcionamiento).<br />
• Compruebe que el PC esté funcionando correctamente. Reinicie el PC <strong>de</strong>spués <strong>de</strong><br />
comprobar las especificaciones y valores <strong>de</strong> configuración.<br />
• Compruebe la configuración <strong>de</strong>l servidor <strong>de</strong> medios. Si un cliente se registra manualmente,<br />
pue<strong>de</strong> que sea necesario realizar el procedimiento <strong>de</strong> configuración nuevamente. Pue<strong>de</strong><br />
que una opción “No permitido” esté seleccionada para las conexiones.<br />
• Compruebe que UPnP (Universal Plug and Play) esté activado en su ruteador.<br />
Consulte el manual <strong>de</strong> instrucciones <strong>de</strong> su ruteador para los procedimientos.<br />
• Espere un breve momento y, a continuación, seleccionar “Actualizar última<br />
información” <strong>de</strong>l menú TOOLS.<br />
• Verifique si hay interferencia <strong>de</strong> radio cuando conecte con una red LAN inalámbrica.<br />
Una interferencia <strong>de</strong> radio pue<strong>de</strong> causar un error <strong>de</strong> conexión.<br />
• Si el procedimiento prece<strong>de</strong>nte no soluciona el problema, intente <strong>de</strong>sactivar TV a en<br />
el mando a distancia y, a continuación, activar TV a en el televisor <strong>de</strong> pantalla plana.<br />
• Compruebe si el servidor está configurado correctamente para compartición <strong>de</strong><br />
archivos, si la carp<strong>et</strong>a obj<strong>et</strong>ivo ha sido borrada, o si no hay una o más carp<strong>et</strong>as<br />
dañadas en el servidor.<br />
• Verifique si no hay archivos excesivos en cada carp<strong>et</strong>a.<br />
• Esta selección arbitraria ocurre cuando el servidor utilizado anteriomente ha sido<br />
configurado para visualizar la pantalla <strong>de</strong>l menú Media Navigator (si lo restaura, los<br />
otros servidores conectados también se restauran).<br />
• Cuando Encendido está seleccionado para Conexión automática en el menú<br />
Configuración HMG, se acce<strong>de</strong> al servidor automáticamente si solamente un servidor<br />
está conectado. Utilice el menú TOOLS para seleccionar el servidor apropiado.<br />
• El Media Navigator visualiza el contenido <strong>de</strong>l servidor como se ha clasificado por el<br />
servidor.<br />
• Si no hay información (tal como <strong>et</strong>iqu<strong>et</strong>a ID3) en el archivo, los archivos no pue<strong>de</strong>n<br />
clasificarse en el servidor.<br />
• Consulte las soluciones posibles que se proveen anteriormente para “No se ha<br />
encontrado ningún servidor”.<br />
• Si el procedimiento prece<strong>de</strong>nte no soluciona el problema, intente <strong>de</strong>sactivar TV a en<br />
el mando a distancia y, a continuación, activar TV a en el televisor <strong>de</strong> pantalla plana.<br />
Español<br />
117<br />
Sp
06 Información útil<br />
Home Media Gallery/Reproducción<br />
Cuestión<br />
La imagen o sonido se<br />
interrumpe o se<br />
distorsiona (aparece<br />
ruido <strong>de</strong> bloqueo).<br />
No se pue<strong>de</strong><br />
reproducir o visualizar.<br />
Solución posible<br />
• Compruebe las conexiones físicas (concentrador, ruteador y calidad <strong>de</strong>l cable). Utilice<br />
100BASE-TX para una reproducción <strong>de</strong> mejor calidad y velocidad <strong>de</strong> visualización más alta.<br />
• Compruebe que el PC esté funcionando correctamente. Reinicie el PC <strong>de</strong>spués <strong>de</strong><br />
comprobar las especificaciones y valores <strong>de</strong> configuración.<br />
• Compruebe que el archivo es compatible con el formato, tasa <strong>de</strong> bitios, y/o perfil que<br />
se soportan. Verifique también si el archivo no está dañado.<br />
• Cuando conectado por una red LAN inalámbrica, compruebe que la tasa <strong>de</strong> bitios sea<br />
suficiente.<br />
• Pue<strong>de</strong> que algunos archivos compatibles con el formato soportado no se reproduzcan<br />
o no se visualicen.<br />
• Compruebe que el contenido DRM ha sido comprado para uso con otro PC. Su<br />
televisor <strong>de</strong> pantalla plana no pue<strong>de</strong> reproducir contenidos DRM comprados para un<br />
PC, pero que tengan sido transferidos a otro PC. Sólo se pue<strong>de</strong> reproducir un<br />
contenido DRM comprado para el PC en uso en el momento <strong>de</strong> la compra. Obtenga<br />
una nueva licencia o utilice el PC para el cual se ha comprado el contenido.<br />
• Compruebe si el contenido en el mismo servidor permite múltiples dispositivos <strong>de</strong><br />
clientes (reproductores).<br />
• Compruebe las conexiones físicas (concentrador, ruteador y calidad <strong>de</strong>l cable). Utilice<br />
100BASE-TX para una reproducción <strong>de</strong> mejor calidad y velocidad <strong>de</strong> visualización más alta.<br />
• Compruebe que el PC esté funcionando correctamente. Reinicie el PC <strong>de</strong>spués <strong>de</strong><br />
comprobar las especificaciones y configuraciones.<br />
• Compruebe que el archivo sea compatible con el formato, tasa <strong>de</strong> bitios y/o perfil que<br />
se soportan. Verifique también si el archivo no está dañado.<br />
• Verifique si el contrato <strong>de</strong> licencia para el servidor no ha expirado.<br />
• Cuando conectado por una red LAN inalámbrica, compruebe que la tasa <strong>de</strong> bitios sea<br />
suficiente.<br />
• Pue<strong>de</strong> que algunos archivos compatibles con el formato soportado no se reproduzcan<br />
o no se visualicen.<br />
• Toma tiempo para capturar y visualizar una imagen <strong>de</strong> tamaño gran<strong>de</strong>. En este caso,<br />
no se pue<strong>de</strong> realizar ninguna operación.<br />
• Compruebe que el contenido DRM ha sido comprado para uso con otro PC. Su televisor<br />
<strong>de</strong> pantalla plana no pue<strong>de</strong> reproducir contenidos DRM comprados para un PC, pero<br />
que tengan sido transferidos a otro PC. Sólo se pue<strong>de</strong> reproducir un contenido DRM<br />
comprado para el PC en uso en el momento <strong>de</strong> la compra. Obtenga una nueva licencia<br />
o utilice el PC para el cual se ha comprado el contenido.<br />
• Compruebe si el contenido en el mismo servidor permite múltiples dispositivos <strong>de</strong><br />
clientes (reproductores).<br />
118<br />
Sp<br />
Home Media Gallery/USB<br />
Cuestión<br />
Los dispositivos USB<br />
no se reconocen<br />
a<strong>de</strong>cuadamente.<br />
Solución posible<br />
• Compruebe que el dispositivo se compatible con dispositivo <strong>de</strong> clase <strong>de</strong><br />
almacenamiento masivo.<br />
• Compruebe que el dispositivo esté conectado correctamente, y que no haya daños<br />
(unidad <strong>de</strong> energía, modo, tal como modo <strong>de</strong> almacenamiento masivo y formato <strong>de</strong><br />
medio, <strong>et</strong>c.).<br />
• Verifique si el dispositivo contiene los archivos soportados.<br />
• Compruebe que la velocidad <strong>de</strong>l dispositivo sea suficiente (una velocidad <strong>de</strong>ficiente<br />
pue<strong>de</strong> resultar en interrupciones y r<strong>et</strong>ardo <strong>de</strong> la visualización <strong>de</strong> imágenes <strong>de</strong>bido a un<br />
problema <strong>de</strong> tasa <strong>de</strong> bitios). Cuando utilice una cámara digital que no sea compatible<br />
con clase <strong>de</strong> almacenamiento masivo, inserte la tarj<strong>et</strong>a <strong>de</strong> memoria flash en el lector<br />
<strong>de</strong> múltiples tarj<strong>et</strong>as.<br />
• Asegúrese <strong>de</strong> insertar o extaer el dispositivo correctamente.<br />
• No se soporta concentrador USB. Cuando utilice una red doméstica, conecte<br />
directamente al puerto USB <strong>de</strong>l dispositivo.
Información útil 06<br />
Home Media Gallery/USB<br />
Cuestión<br />
La imagen o sonido se<br />
interrumpe o se<br />
distorsiona (aparece<br />
ruido <strong>de</strong> bloqueo).<br />
Un dispositivo externo<br />
conectado al puerto<br />
USB no funciona.<br />
Los datos <strong>de</strong> foto<br />
almacenados en una<br />
cámara digital no<br />
pue<strong>de</strong>n leerse a través<br />
<strong>de</strong> la interfaz USB.<br />
Solución posible<br />
• Compruebe que el archivo sea compatible con el formato, tasa <strong>de</strong> bitios y/o perfil que<br />
se soportan. Verifique también si el archivo no está dañado.<br />
• Pue<strong>de</strong> que algunos archivos compatibles con el formato soportado no se reproduzcan<br />
o no se visualicen correctamente.<br />
• Compruebe que el dispositivo se compatible con dispositivo <strong>de</strong> clase <strong>de</strong><br />
almacenamiento masivo.<br />
• Compruebe que el dispositivo esté conectado correctamente, y que no haya daños<br />
(unidad <strong>de</strong> energía, modo, tal como modo <strong>de</strong> almacenamiento masivo y formato <strong>de</strong><br />
medio, <strong>et</strong>c.).<br />
• Verifique si el dispositivo contiene los archivos soportados.<br />
• Compruebe que la velocidad <strong>de</strong>l dispositivo sea suficiente (una velocidad <strong>de</strong>ficiente<br />
pue<strong>de</strong> resultar en interrupciones y r<strong>et</strong>ardo <strong>de</strong> la visualización <strong>de</strong> imágenes <strong>de</strong>bido a un<br />
problema <strong>de</strong> tasa <strong>de</strong> bitios). Cuando utilice una cámara digital que no sea compatible<br />
con clase <strong>de</strong> almacenamiento masivo, inserte la tarj<strong>et</strong>a <strong>de</strong> memoria flash en el lector<br />
<strong>de</strong> múltiples tarj<strong>et</strong>as.<br />
• Compruebe si se pue<strong>de</strong> conectar el dispositivo al televisor <strong>de</strong> pantalla plana.<br />
• Vuelva a insertar el cable USB.<br />
• Para la conexión, utilice un cable USB más corto que 5 m.<br />
• Compruebe que el cable USB esté conectado correctamente.<br />
• Primero apague la alimentación y, a continuación, enciéndala nuevamente para<br />
verificar si el dispositivo externo funciona correctamente.<br />
• Compruebe que el dispositivo externo funcione correctamente <strong>de</strong>spués <strong>de</strong> reiniciar el<br />
dispositivo USB.<br />
• Compruebe que la cámara digital esté en el modo <strong>de</strong> visualización.<br />
• Consulte el manual <strong>de</strong> instrucciones <strong>de</strong> la cámara digital.<br />
• Compruebe si se pue<strong>de</strong> conectar el dispositivo al televisor <strong>de</strong> pantalla plana.<br />
• Compruebe que la cámara digital esté encendida.<br />
• Compruebe que la cámara digital esté en el modo <strong>de</strong> visualización.<br />
Español<br />
Home Media Gallery/Presentación <strong>de</strong> diapositivas<br />
Cuestión<br />
La presentación <strong>de</strong><br />
diapositivas (contenido<br />
<strong>de</strong> fotos) no comienza.<br />
La imagen siguiente no<br />
aparece en la<br />
presentación <strong>de</strong><br />
diapositivas.<br />
Solución posible<br />
• Verifique si el reproductor está en el modo <strong>de</strong> pausa, rotación o zoom. Si está, pulse<br />
PLAY o ENTER para iniciar la presentación <strong>de</strong> diapositivas.<br />
• El tiempo necesario para visualizar una imagen pue<strong>de</strong> ser más largo que el tiempo<br />
pred<strong>et</strong>erminado para visualizar las imágenes en las configuración Pesentación <strong>de</strong><br />
diapositivas. Reduzca el tamaño <strong>de</strong> imagen utilizando un PC y vuelva a intentarlo.<br />
• La presentación <strong>de</strong> diapositivas sólo visualiza archivos soportados. Si hay solamente un<br />
archivo soportado, tal archivo permanece en la pantalla. Ningún otro archivo aparece.<br />
Otros<br />
Cuestión<br />
Sonidos/ruidos <strong>de</strong>l<br />
panel<br />
El brillo en los lados <strong>de</strong> la<br />
pantalla están irregulares<br />
Solución posible<br />
• Algunos sonidos son apropiados para la tecnología <strong>de</strong> plasma.<br />
Ejemplos: Ruido <strong>de</strong>l motor <strong>de</strong>l ventilador, zumbido <strong>de</strong>l circuito eléctrico, zumbido <strong>de</strong>l<br />
panel <strong>de</strong> vidrio, <strong>et</strong>c.<br />
• Se minimiza el contenido que rellena compl<strong>et</strong>amente la pantalla hasta la irregularidad.<br />
• Cambie la configuración <strong>de</strong>l modo AV.<br />
Si la información prece<strong>de</strong>nte no soluciona el problema, póngase en contacto con el representante <strong>de</strong> servicio <strong>de</strong><br />
<strong>Pioneer</strong> autorizado. No intente realizar el servicio usted mismo. Abrir o quitar las cubiertas le expone a posibles<br />
119<br />
Sp
06 Información útil<br />
<strong>de</strong>scargas eléctricas y otros peligros, así como posiblemente anula su garantía. Solicite la inspección <strong>de</strong> su<br />
televisor <strong>de</strong> pantalla plana a un profesional <strong>de</strong> servicio calificado.<br />
A continuación se listan algunas situaciones que requieren un profesional <strong>de</strong> servicio:<br />
• caída o daño <strong>de</strong> la pantalla<br />
• daño <strong>de</strong>l cable <strong>de</strong> alimentación o enchufe<br />
• <strong>de</strong>rrame <strong>de</strong> líquido o <strong>de</strong> un obj<strong>et</strong>o en la pantalla<br />
• exposición a la lluvia o agua<br />
• anormalidad <strong>de</strong> funcionamiento <strong>de</strong> la pantalla<br />
Ocasionalmente, pue<strong>de</strong> que falle una pieza <strong>de</strong>ntro <strong>de</strong>l televisor <strong>de</strong> pantalla plana. Asegúrese <strong>de</strong> que el<br />
profesional <strong>de</strong> servicio utilice solamente piezas <strong>de</strong> reemplazo especificadas por <strong>Pioneer</strong> o piezas con las mismas<br />
características y rendimiento <strong>de</strong> las piezas originales. La utilización <strong>de</strong> piezas no autorizadas pue<strong>de</strong> causar un<br />
incendio, <strong>de</strong>scarga eléctrica u otros peligros. Al concluir cualquier servicio ou reparación, solicite verificaciones<br />
<strong>de</strong> seguridad al profesional <strong>de</strong> servicio para asegurar que el producto esté funcionando correctamente.<br />
Si necesita más asistencia o tiene duas relacionadas con el servicio/piezas, póngase en contacto con la División<br />
<strong>de</strong> Servicio <strong>Pioneer</strong> en (800) 421-1625.<br />
6.4.1 Comprobación <strong>de</strong> la intensidad <strong>de</strong> la señal<br />
Al recibir un canal <strong>de</strong> TV a través <strong>de</strong> una antena UHF/VHF, compruebe la intensidad <strong>de</strong> la señal <strong>de</strong>l canal actual.<br />
Sólo pue<strong>de</strong> utilizar esta función cuando se reciben señales <strong>de</strong> transmisión digital sobre el aire. Siga los pasos a<br />
continuación para verificar la intensidad <strong>de</strong> la señal <strong>de</strong> un canal.<br />
1 ) Acceda a Configuración <strong>de</strong>l sistema a través <strong>de</strong> Configuración.<br />
2 ) Seleccione Config. sint. Digital <strong>de</strong>l menú Configuración <strong>de</strong>l sistema.<br />
3 ) Seleccione Instalación <strong>de</strong>l menú Config. sint. Digital.<br />
4 ) Seleccione Comprobación <strong>de</strong> la señal <strong>de</strong>l submenú.<br />
5 ) Seleccione Canal <strong>de</strong> RF.<br />
Para añadir canales, seleccione Añadir.<br />
6 ) Seleccione el canal que <strong>de</strong>see comprobar.<br />
7 ) Ajuste la dirección <strong>de</strong> la antena hasta que la intensidad actual <strong>de</strong> la señal alcance la intensidad máxima <strong>de</strong><br />
la señal tan cerca como sea posible.<br />
Canal <strong>de</strong> RF : 21<br />
Añadir<br />
Nivel : 60%<br />
Calidad : 80%<br />
8 ) Pulse HOME MENU para salir <strong>de</strong>l menú.<br />
120<br />
Sp
Precauciones y advertencias 07<br />
7 Precauciones y advertencias<br />
Su televisor <strong>de</strong> pantalla plana ha sido diseñada para una vida <strong>de</strong> servicio larga y productiva. Para mantener su<br />
pantalla con su rendimiento máximo, hay algunas cosas que pue<strong>de</strong>n ayudar. En esta sección se proveen<br />
informaciones generales y advertencias específicas para ayudar a mantener el televisor <strong>de</strong> pantalla plana con su<br />
calidad superior a lo largo <strong>de</strong> su vida útil.<br />
Nota: Si no intenta utilizar su televisor <strong>de</strong> pantalla plana durante un largo período <strong>de</strong> tiempo, enciéndalo y realice<br />
algunas funciones ocasionalmente para mantener su funcionalidad.<br />
7.1 D<strong>et</strong>alles <strong>de</strong> la instalación<br />
Es mejor utilizar piezas y accesorios diseñados por <strong>Pioneer</strong>. La utilización <strong>de</strong> accesorios que no sean el soporte<br />
o la ménsula <strong>de</strong> instalación <strong>de</strong> <strong>Pioneer</strong> pue<strong>de</strong> ser la causa <strong>de</strong> que se produzcan inestabilidad y lesiones. Para<br />
instalaciones personalizadas, hable con su reven<strong>de</strong>dor o instalador especializado antes <strong>de</strong> intentar instalar su<br />
televisor <strong>de</strong> pantalla plana <strong>de</strong> alta fi<strong>de</strong>lidad. Esos profesionales son familiares con las técnicas <strong>de</strong> instalación<br />
apropiadas, incluyendo la ventilación.<br />
La utilización <strong>de</strong> la unidad sin la ventilación apropiada pue<strong>de</strong> ser la causa <strong>de</strong> que la temperatura interna aumente<br />
y <strong>de</strong> que se produzca un fallo en el funcionamiento. Cuando la temperatura ambiental o interna supere cierto<br />
valor, la pantalla se apagará automáticamente para que se enfríen los componentes electrónicos internos y se<br />
impidan situaciones peligrosas.<br />
Un fallo <strong>de</strong> funcionamiento también pue<strong>de</strong> ocurrir por una simple cuestión tal como ventlación o por una<br />
combinación <strong>de</strong> factores. <strong>Pioneer</strong> no se hace responsable por acci<strong>de</strong>ntes y daños causados por la utilización <strong>de</strong><br />
piezas y/o accesorios fabricados por otras compañías, sitios <strong>de</strong> instalación ina<strong>de</strong>cuados, estabilización<br />
<strong>de</strong>ficiente, instalación incorrecta, errores operacionales, modificación <strong>de</strong>l sitio o <strong>de</strong>sastres naturales.<br />
Para más información acerca <strong>de</strong> la instalación, consulte los siguientes puntos:<br />
• Compruebe que las ventilaciones <strong>de</strong> la pantalla no estén parcialmente obstruidas o compl<strong>et</strong>amente<br />
bloqueadas.<br />
• Utilice una aspiradora ajustada a su potencia mínima para limpiar las ventilaciones polvorientas.<br />
• Distancia <strong>de</strong>l pantalla <strong>de</strong>s<strong>de</strong> la pared, otros equipos, <strong>et</strong>c. (para los requisitos <strong>de</strong> espacio mínimo, consulte<br />
“2.1.1 Comprobación <strong>de</strong> la apropiabilidad <strong>de</strong> la ubicación”).<br />
• No instale la unidad en espacios angostos don<strong>de</strong> la ventilación no sea apropiada.<br />
• No cubra, coloque o encierre la pantalla en materiales como mantas, telas o carp<strong>et</strong>as, ya que esto podría<br />
bloquear las ventilaciones <strong>de</strong> la pantalla.<br />
• Utilice un accesorio <strong>de</strong> montaje o soporte apropiado, en vez <strong>de</strong> apoyar la pantalla contra una pared u otro<br />
apoyo.<br />
7.2 Consi<strong>de</strong>raciones sobre la ubicación física y temperatura<br />
Pue<strong>de</strong> que se forme con<strong>de</strong>nsación en la superficie o interior <strong>de</strong>l televisor <strong>de</strong> pantalla plana cuando se traslada la<br />
pantalla <strong>de</strong> un lugar frío a un lugar caliente, o inmediatamente <strong>de</strong>spués <strong>de</strong> encen<strong>de</strong>r un calentador o<br />
acondicionador <strong>de</strong> aire. Si se forma con<strong>de</strong>nsación, no encienda el televisor <strong>de</strong> pantalla plana hasta que la<br />
humedad se evapore. Encen<strong>de</strong>r la pantalla cuando hay con<strong>de</strong>nsación pue<strong>de</strong> causar un fallo <strong>de</strong> funcionamiento.<br />
7.3 Consejos para la utilización<br />
Para el disfrute máximo <strong>de</strong> su televisor <strong>de</strong> pantalla plana, lea atentamente la siguiente información.<br />
A lo largo <strong>de</strong> la vida útil <strong>de</strong>l televisor <strong>de</strong> pantalla plana, así como con todas las pantallas basadas en fósforo,<br />
incluyendo televisores <strong>de</strong> tubo estándar, la luminosidad <strong>de</strong> la pantalla disminuye muy lentamente. De la misma<br />
forma, la visualización <strong>de</strong> imágenes estática durante largos períodos <strong>de</strong> tiempo pue<strong>de</strong> afectar la pantalla<br />
adversamente. Para disfrutar <strong>de</strong> imágenes claras y belas por muchos años, siga los siguientes consejos.<br />
• Coloque el televisor <strong>de</strong> pantalla plana en el modo <strong>de</strong> espera cuando no lo utilice.<br />
• Evite <strong>de</strong>jar una imagen fija o visualizar con frecuencia la misma imagen (por ejemplo, imágenes en<br />
subtitulación, juegos con porciones estáticas, <strong>et</strong>c.).<br />
• Oculte la indicación en pantalla (OSD) <strong>de</strong> un reproductor DVD, vi<strong>de</strong>ograbadora u otro dispositivo cuando<br />
no la esté utilizando.<br />
• No <strong>de</strong>je una imagen congelada o en pausa por mucho tiempo.<br />
• Evite visualizar una imagen con áreas muy brillantes o muy oscureas en la pantalla durante largos períodos<br />
<strong>de</strong> tiempo.<br />
Español<br />
121<br />
Sp
07 Precauciones y advertencias<br />
• Active el modo JUEGO en el submenú Selección AV para reproducir un juego, pero intente limitar la<br />
utilización <strong>de</strong> este modo a dos horas cada vez.<br />
• Visualice ví<strong>de</strong>o <strong>de</strong> movimiento compl<strong>et</strong>o o <strong>de</strong> muchas acciones en la pantalla PANORÁMICA o COMPLETA<br />
<strong>de</strong>spués <strong>de</strong> reproducir un juego o visualizar una imagen fija/imagen <strong>de</strong> PC. La duración recomendada para<br />
visualizar el ví<strong>de</strong>o <strong>de</strong> acción es tres veces el tiempo en que la imagen <strong>de</strong> juego o <strong>de</strong> PC estuvo visualizada.<br />
• Visualice ví<strong>de</strong>o <strong>de</strong> movimiento compl<strong>et</strong>o en pantalla PANORÁMICA o COMPLETA <strong>de</strong>spués <strong>de</strong> reproducir un<br />
contenido con máscaras laterales, o superior e inferior (barras negras). La visualiza extensiva <strong>de</strong> contenido<br />
con máscaras sin este proceso <strong>de</strong> recuperación pue<strong>de</strong> causar el <strong>de</strong>sgaste irreglar <strong>de</strong> las celdas <strong>de</strong> plasma.<br />
122<br />
Sp<br />
7.4 Interferencia o ruido <strong>de</strong> señal<br />
La interferencia <strong>de</strong> señal, también conocida como ruido <strong>de</strong> ví<strong>de</strong>o o ruido blanco, pue<strong>de</strong> ocurrir <strong>de</strong>bido a muchas<br />
circunstancias diferentes. Las más comunes se <strong>de</strong>scriben en las secciones siguientes.<br />
Rayos infrarrojos<br />
El televisor <strong>de</strong> pantalla plana radia rayos infrarrojos <strong>de</strong>bido a sus características. Dependiendo <strong>de</strong> cómo se utiliza<br />
el televisor <strong>de</strong> pantalla plana, los mandos a distancia <strong>de</strong> los equipos cercanos pue<strong>de</strong>n afectarse adversamente.<br />
Auriculares inalámbricos que utilizan rayos infrarrojos pue<strong>de</strong>n captar interferencia <strong>de</strong> ruido. En este caso, ponga<br />
el equipo en un lugar don<strong>de</strong> su <strong>sens</strong>or <strong>de</strong> mando a distancia no sea afectado.<br />
Señales <strong>de</strong> radio<br />
Aunque este televisor <strong>de</strong> pantalla plana satisfaga las especificaciones requeridas, pue<strong>de</strong> que afecte las señales<br />
<strong>de</strong> los equipos cercanos. Si su radio, PC, vi<strong>de</strong>ograbadora u otro equipo eléctrico sufre interferencias por la<br />
pantalla, aleje el equipo <strong>de</strong> la pantalla.<br />
Motor <strong>de</strong>l televisor <strong>de</strong> pantalla plana<br />
La pantalla <strong>de</strong>l televisor <strong>de</strong> pantalla plana se compone <strong>de</strong> píxeles extremamente finos y estos píxeles emiten luz<br />
<strong>de</strong> acuerdo con las señales <strong>de</strong> ví<strong>de</strong>o recibidas. Este principio pue<strong>de</strong> hacerle oír un pequeño sonido <strong>de</strong> zumbido<br />
o zumbido <strong>de</strong>l circuito eléctrico <strong>de</strong> la pantalla. Esto es un sonido normal para el televisor <strong>de</strong> pantalla plana y no<br />
indica un fallo <strong>de</strong> funcionamiento.<br />
Ventiladores <strong>de</strong>l televisor <strong>de</strong> pantalla plana<br />
Pue<strong>de</strong> que algunas veces oiga el sonido <strong>de</strong>l motor <strong>de</strong> un ventilador. El ligero sonido se produce por el aumento<br />
<strong>de</strong> velocidad <strong>de</strong>l motor <strong>de</strong>l ventilador <strong>de</strong> enfriamiento cuando sube la temperatura ambiente <strong>de</strong>l televisor <strong>de</strong><br />
pantalla plana. Ésta es una función normal <strong>de</strong> la pantalla y no indica un fallo <strong>de</strong> funcionamiento.<br />
7.5 Propieda<strong>de</strong>s <strong>de</strong>l fósforo<br />
A continuación se <strong>de</strong>scriben las características y efectos típicos <strong>de</strong> una pantalla <strong>de</strong> matriz basada en fósforo y,<br />
por lo tanto, no están cubiertos por la garantía:<br />
• Imágenes residuales permanentes en el fósforo <strong>de</strong> la pantalla<br />
• Existencia <strong>de</strong> una o más celdas <strong>de</strong> luz inactivas en pequeña cantidad<br />
• Ruidos generados por motores <strong>de</strong> ventiladores, circuitos eléctricos (zumbido), placas <strong>de</strong> la pantalla, <strong>et</strong>c.<br />
7.6 Información <strong>de</strong> imagen incluyendo imagen remanente o imagen r<strong>et</strong>enida<br />
Tamaño <strong>de</strong> la ventana <strong>de</strong> menú (<strong>de</strong>spués <strong>de</strong> cambio <strong>de</strong> ví<strong>de</strong>o)<br />
Los programas pue<strong>de</strong>n ser <strong>de</strong> alta <strong>de</strong>finición (HD) o <strong>de</strong>finición estándar (SD). Este televisor <strong>de</strong> pantalla plana se<br />
redimensiona automática al tipo <strong>de</strong> <strong>de</strong>finición apropiado. Si el tipo <strong>de</strong> la <strong>de</strong>finición <strong>de</strong>l programa <strong>de</strong> ví<strong>de</strong>o cambia<br />
mientras que una ventana <strong>de</strong> menú está en la pantalla (por ejemplo: HD a SD o SD a HD), pue<strong>de</strong> que el tamaño<br />
<strong>de</strong>l menú se reduzca o se amplíe temporalmente hasta que la pantalla finalice el ajuste <strong>de</strong> la imagen. El ajuste<br />
pue<strong>de</strong> ocurrir, por ejemplo, cuando se cambia entre un programa <strong>de</strong> TV y una reproducción <strong>de</strong> un DVR, o cuando<br />
se cambia un programa grabado entre diferentes tipos <strong>de</strong> <strong>de</strong>finición mientras se visualice un menú. El menú<br />
vuelve a su tamaño normal <strong>de</strong>spués <strong>de</strong> algunos segundos. Esta acción es normal, y no indica un problema con<br />
su televisor <strong>de</strong> pantalla plana.<br />
Información <strong>de</strong> píxeles<br />
Las pantallas <strong>de</strong> plasma visualizan las imágenes utilizando píxeles. Los televisores <strong>de</strong> pantalla plana <strong>de</strong> <strong>Pioneer</strong><br />
contienen un número muy gran<strong>de</strong> <strong>de</strong> píxeles. El tamaño <strong>de</strong> la pantalla d<strong>et</strong>ermina el número <strong>de</strong> píxeles. Con los<br />
mo<strong>de</strong>los <strong>de</strong> la serie 20FD, hay más <strong>de</strong> 6,2 millones <strong>de</strong> píxeles en la pantalla <strong>de</strong> 50”/60”. Todos las pantallas <strong>de</strong><br />
visualización <strong>de</strong> <strong>Pioneer</strong> se fabrican utilizando un nivel muy alto <strong>de</strong> tecnología <strong>de</strong> ultra-precisión y pasan por un<br />
control <strong>de</strong> calidad individual.
Precauciones y advertencias 07<br />
En casos raros, pue<strong>de</strong> que algunos píxeles que<strong>de</strong>n permanentemente apagados, o encendidos, resultando en un<br />
píxel negro o <strong>de</strong> color permanentemente fijo en la pantalla. Este efecto es común en todas las pantallas <strong>de</strong><br />
plasma, porque es una consecuencia <strong>de</strong> la tecnología.<br />
Si los píxeles <strong>de</strong>fectuosos están visibles en una distancia <strong>de</strong> visualización normal entre 2,5 y 3,5 m<strong>et</strong>ros (8,2 pies<br />
y 11,5 pies) mientras se ve una transmisión normal (o sea, no en una tarj<strong>et</strong>a <strong>de</strong> prueba, imagen fija o visualización<br />
en color simple), póngase en contacto con la División <strong>de</strong> Asistencia al Cliente (EE.UU.) o con el Departamento<br />
<strong>de</strong> Satisfacción <strong>de</strong>l Cliente (CANADÁ) <strong>de</strong> <strong>Pioneer</strong>. Consulte la contracubierta hacia <strong>de</strong>ntro para la información<br />
<strong>de</strong> contacto. Si, entr<strong>et</strong>anto, sólo se pue<strong>de</strong> ver los píxeles <strong>de</strong>fectuosos muy cerca o durante visualizaciones en<br />
color simples, esto se consi<strong>de</strong>ra normal para esta tecnología.<br />
R<strong>et</strong>ensión <strong>de</strong> la imagen (quemado <strong>de</strong> pantalla)<br />
Dejar una imagen estática en la pantalla durante varias horas pue<strong>de</strong> causar una débil huella <strong>de</strong> la imagen. Esta huella<br />
se conoce como r<strong>et</strong>ención <strong>de</strong> la imagen o quemado <strong>de</strong> la pantalla. La imagen pue<strong>de</strong> ser temporal o permanente.<br />
Causada por varios factores, la r<strong>et</strong>ención <strong>de</strong> imagen pue<strong>de</strong> ocurrir en todas las tecnologías <strong>de</strong> visualización,<br />
incluyendo los sistemas LCD, plasma, CRT <strong>de</strong> visualización directa y televisores <strong>de</strong> proyección.<br />
En las pantallas <strong>de</strong> plasma <strong>de</strong> hoy en día, la r<strong>et</strong>ención <strong>de</strong> imagen permanente ya no es una preocupación. La<br />
mayoría <strong>de</strong> la r<strong>et</strong>ención <strong>de</strong> imagen pue<strong>de</strong> majorarse simplemente por la visualización con muchas acciones o<br />
cambios rápidos <strong>de</strong> escenas. Para evitar la r<strong>et</strong>ención <strong>de</strong> imagen lo más posible, consulte los consejos a<br />
continuación.<br />
• Cambie la imagen periódicamente cuando visualice imágenes estáticas, tales como una imagen fija <strong>de</strong> un<br />
PC o <strong>de</strong> una consola <strong>de</strong> vi<strong>de</strong>ojuegos, durante largos períodos <strong>de</strong> tiempo.<br />
• Siempre que posible, evite <strong>de</strong>jar imágenes fijas tales como el indicador <strong>de</strong> la hora actual o logotipos <strong>de</strong><br />
canal en la pantalla.<br />
• Visualice los contenidos en una relación <strong>de</strong> aspecto ancha (sin barras negras o grises en los lados <strong>de</strong>l<br />
contenido). Este televisor <strong>de</strong> pantalla plana está equipado con múltiples modos <strong>de</strong> visualización <strong>de</strong> pantalla<br />
ancha; utilice uno <strong>de</strong> estos modos para llenar toda la pantalla con el contenido. Contemple en una relación<br />
<strong>de</strong> aspecto ancha, a menos que hacer esto sea una violación <strong>de</strong> <strong>de</strong>rechos <strong>de</strong> auto.<br />
• Configure la función <strong>de</strong> d<strong>et</strong>ección <strong>de</strong> máscaras laterales al Modo 1 ó Modo 2. La imágenes <strong>de</strong> relación <strong>de</strong><br />
aspecto 16:9 <strong>de</strong> alta <strong>de</strong>finición que contienen máscaras laterales se d<strong>et</strong>ectan automáticamente y se<br />
visualizan con máscaras laterales o en pantalla compl<strong>et</strong>a.<br />
• Evite visualizar imágenes oscuras <strong>de</strong>spués <strong>de</strong> imágenes fijas durante un largo período <strong>de</strong> tiempo. En la<br />
mayoría <strong>de</strong> los casos, se pue<strong>de</strong> corregir la r<strong>et</strong>ención <strong>de</strong> imagen causada por esta secuencia visualizando<br />
imágenes brillantes durante un período <strong>de</strong> tiempo equivalente.<br />
Imagen remanente<br />
La visualización <strong>de</strong> las mismas imágenes, imágenes fijas por ejemplo, durante un largo período <strong>de</strong> tiempo pue<strong>de</strong><br />
causar el efecto <strong>de</strong> imagen remanente. Imagen remanente refiérese a una imagen fantasma <strong>de</strong> la imagen fija<br />
que permanece visible <strong>de</strong>spués que <strong>de</strong>saparezca la imagen original. Esto pue<strong>de</strong> ocurrir en los casos siguientes.<br />
• Imagen remanente <strong>de</strong>bida a carga eléctrica remanente<br />
Si se visualiza una imagen con una luminancia <strong>de</strong> pico muy alto por más <strong>de</strong> un minuto, pue<strong>de</strong> que se<br />
produzca una imagen remanente <strong>de</strong>bido a la carga eléctrica remanente. La imagen fantasma que<br />
permanece en la pantalla <strong>de</strong>saparece cuando se visualizan imágenes en movimiento. La luminancia <strong>de</strong> la<br />
imagen fija y la duración <strong>de</strong> tiempo que tal imagen ha sido visualizada d<strong>et</strong>erminan la cantidad <strong>de</strong> tiempo<br />
que toma para que la imagen fantasma <strong>de</strong>saparezca.<br />
• Imagen remanente (imagen r<strong>et</strong>enida) <strong>de</strong>bido al quemado<br />
Evite visualizar continuamente la misma imagen en el televisor <strong>de</strong> pantalla plana durante largos periodos<br />
<strong>de</strong> tiempo. Si se visualiza la misma imagen continuamente durante varias horas, o por periodos <strong>de</strong> tiempo<br />
más cortos durante varios días, en la pantalla quedará una imagen remanente permanente. Esta imagen<br />
remanente es permanente <strong>de</strong>bido a los materiales fluorescentes quemados. Las imágenes quemadas<br />
pue<strong>de</strong>n atenuarse eventualmente <strong>de</strong>spués <strong>de</strong> reproducir otras secuencias <strong>de</strong> ví<strong>de</strong>o, pero no <strong>de</strong>saparecen<br />
compl<strong>et</strong>amente.<br />
Cuando se visualiza un menú <strong>de</strong> programa o una imagen congelada durante hasta 10 minutos, el televisor <strong>de</strong><br />
pantalla plana apaga la imagen automáticamente para evitar daños <strong>de</strong>bidos al quemado <strong>de</strong> la pantalla.<br />
Protección <strong>de</strong> pantalla<br />
La protección <strong>de</strong> pantalla optimiza simultaneamente las configuraciones relacionadas para aliviar la r<strong>et</strong>ención<br />
<strong>de</strong> imagen. Para los d<strong>et</strong>alles, consulte “3.6.2 Extensión <strong>de</strong> la vida útil <strong>de</strong> la pantalla”.<br />
Español<br />
123<br />
Sp
07 Precauciones y advertencias<br />
Orbiter <strong>de</strong> imagen<br />
Otra función incorporada para proteger el quemado <strong>de</strong> la pantalla es la función Orbiter. La función Orbiter<br />
cambia automáticamente la posición <strong>de</strong> la imagen mientras <strong>de</strong> forma imperceptible la imagen está en la<br />
pantalla. Para más información acerca <strong>de</strong> la función, consulte “3.6.3 Activación <strong>de</strong> Orbiter”.<br />
7.7 Precauciones <strong>de</strong> seguridad<br />
Su televisor <strong>de</strong> pantalla plana se ha proyectado y fabricado llevando en cuenta la seguridad como una <strong>de</strong> las<br />
priorida<strong>de</strong>s más altas. Sin embargo, si no se utiliza <strong>de</strong> la forma correcta pue<strong>de</strong> producir <strong>de</strong>scargas eléctricas y/o un<br />
incendio. Para evitar peligros, siga las instrucciones a continuación cuando instale, opere y limpie su televisor <strong>de</strong><br />
pantalla plana.<br />
• Lea y guar<strong>de</strong> las instrucciones - Lea todas las instrucciones e información <strong>de</strong>l usuario que se proveen con<br />
su televisor <strong>de</strong> pantalla plana.<br />
• Entorno - Evite instalar la pantalla en un lugar expuesto a gran<strong>de</strong>s cantida<strong>de</strong>s <strong>de</strong> polvo, temperaturas<br />
extremas, alta humedad, luz directa <strong>de</strong>l sol, o un lugar subjecto a vibraciones o impactos. Igualmente,<br />
nunca <strong>de</strong>rrame líquidos ni inserte obj<strong>et</strong>os en el televisor <strong>de</strong> pantalla plana.<br />
• Limpieza - Consulte la sección prece<strong>de</strong>nte con respecto a la forma a<strong>de</strong>cuada <strong>de</strong> limpiar su televisor <strong>de</strong><br />
pantalla plana.<br />
• Agua y humedad - Evite operar o posicionar su pantalla muy cerca <strong>de</strong> agua u otras fuentes <strong>de</strong> líquido. Tales<br />
lugares incluyen un cuarto <strong>de</strong> baño, cocina o frega<strong>de</strong>ro, sótano húmedo, piscina, <strong>et</strong>c.<br />
• Alimentación - Apague la pantalla antes <strong>de</strong> conectar cualquier otro equipo. Opere la pantalla solamente a<br />
través <strong>de</strong> una toma <strong>de</strong> corriente puesta a tierra.<br />
7.8 Avisos Legales<br />
7.8.1 Seguridad<br />
ADVERTENCIA<br />
Este aparato no es impermeable. Para evitar el riesgo <strong>de</strong> incendio y <strong>de</strong> <strong>de</strong>scargas eléctricas, no ponga<br />
ningún recipiente lleno <strong>de</strong> líquido (como pueda ser un vaso o un florero) cerca <strong>de</strong>l aparato ni lo<br />
exponga a goteo, salpicaduras, lluvia o humedad.<br />
D3-4-2-1-3_A_Sp<br />
ADVERTENCIA: Este producto está provisto <strong>de</strong> una clavija <strong>de</strong> tres conductores con toma <strong>de</strong> tierra<br />
(puesta a tierra) cuya tercera patilla es la <strong>de</strong> toma <strong>de</strong> tierra. Esta clavija sólo se adapta en una toma<br />
<strong>de</strong> corriente <strong>de</strong>l tipo <strong>de</strong> toma <strong>de</strong> tierra. Si no pue<strong>de</strong> insertar la clavija en la toma <strong>de</strong> corriente, llame a<br />
un electricista profesional para que le reemplace la toma <strong>de</strong> corriente por otra con toma <strong>de</strong> tierra que<br />
sea a<strong>de</strong>cuada. No elimine el dispositivo <strong>de</strong> seguridad <strong>de</strong> la clavija con toma <strong>de</strong> tierra. D3-4-2-1-6_A_Sp<br />
ADVERTENCIA: Para evitar el peligro <strong>de</strong> incendio, no ponga nada con fuego encendido (como<br />
pueda ser una vela) encima <strong>de</strong>l aparato.<br />
D3-4-2-1-7a_A_Sp<br />
PRECAUCIÓN DE VENTILACIÓN:<br />
Cuando instale este aparato, asegúrese <strong>de</strong> <strong>de</strong>jar espacio en torno al mismo para la ventilación con el<br />
fin <strong>de</strong> mejorar la disipación <strong>de</strong> calor. Para el espacio mínimo requerido, consulte la página 15.<br />
ADVERTENCIA: Las ranuras y aberturas <strong>de</strong> la caja <strong>de</strong>l aparato sirven para su ventilación para<br />
po<strong>de</strong>r asegurar un funcionamiento fiable <strong>de</strong>l aparato y para protegerlo contra sobrecalentamiento.<br />
Para evitar el peligro <strong>de</strong> incendio, las aberturas nunca <strong>de</strong>berán taparse ni cubrirse con nada (como por<br />
ejemplo, periódicos, manteles, cortinas) ni ponerse en funcionamiento el aparato sobre una alfombra<br />
gruesas o una cama.<br />
124<br />
Sp
Precauciones y advertencias 07<br />
PRECAUCIÓN: El interruptor a <strong>de</strong> este aparato no corta por compl<strong>et</strong>o toda la alimentación <strong>de</strong> la toma <strong>de</strong><br />
corriente <strong>de</strong> CA. Puesto que el cable <strong>de</strong> alimentación hace las funciones <strong>de</strong> dispositivo <strong>de</strong> <strong>de</strong>sconexión <strong>de</strong> la<br />
corriente para el aparato, para <strong>de</strong>sconectar toda la alimentación <strong>de</strong>l aparato <strong>de</strong>berá <strong>de</strong>senchufar el cable <strong>de</strong><br />
la toma <strong>de</strong> corriente <strong>de</strong> CA. Por lo tanto, asegúrese <strong>de</strong> instalar el aparato <strong>de</strong> modo que el cable <strong>de</strong><br />
alimentación pueda <strong>de</strong>senchufarse con facilidad <strong>de</strong> la toma <strong>de</strong> corriente <strong>de</strong> CA en caso <strong>de</strong> un acci<strong>de</strong>nte.<br />
Para evitar correr el peligro <strong>de</strong> incendio, el cable <strong>de</strong> alimentación también <strong>de</strong>berá <strong>de</strong>senchufarse <strong>de</strong> la toma<br />
<strong>de</strong> corriente <strong>de</strong> CA cuando no se tenga la intención <strong>de</strong> utilizarlo durante mucho tiempo seguido (por ejemplo,<br />
antes <strong>de</strong> irse <strong>de</strong> vacaciones).<br />
D3-4-2-2-2a_A_Sp<br />
Entorno <strong>de</strong> funcionamiento<br />
Temperatura y humedad <strong>de</strong>l entorno <strong>de</strong> funcionamiento<br />
+0 °C a +40 °C (+32 °F a +104 °F); menos <strong>de</strong>l 85 % <strong>de</strong> humedad relativa (rejillas <strong>de</strong> refrigeración no obstruidas)<br />
No instale este aparato en un lugar mal ventilado, ni en lugares expuestos a alta humedad o a la luz directa <strong>de</strong>l<br />
sol (o <strong>de</strong> otra luz artificial potente).<br />
D3-4-2-1-7c_A_Sp<br />
7.8.2 Interferencia <strong>de</strong> radio<br />
Este televisor digital pue<strong>de</strong> recibir programación <strong>de</strong> televisión por cable básica analógica, básica digital y<br />
‘premium’ digital mediante conexión directa a un sistema <strong>de</strong> cable que provea dicha programación. Para ver<br />
programación digital codificada se requiere una tarj<strong>et</strong>a <strong>de</strong> seguridad suministrada por su proveedor <strong>de</strong><br />
cable. Ciertos servicios avanzados e interactivos <strong>de</strong> cable digital como vi<strong>de</strong>o en <strong>de</strong>manda, guía <strong>de</strong><br />
programación mejorada <strong>de</strong>l proveedor <strong>de</strong> cable y servicios <strong>de</strong> televisión con datos mejorados podrían<br />
requerir la utilización <strong>de</strong> un <strong>de</strong>scodificador (STB). Para mayor información, comuníquese con su proveedor<br />
<strong>de</strong> cable local.<br />
Español<br />
Información al usuario<br />
Cambios o modificaciones realizados sin la autorización apropiada pue<strong>de</strong>n invalidar el <strong>de</strong>recho <strong>de</strong>l usuario<br />
<strong>de</strong> operar el equipo.<br />
D8-10-2_Sp<br />
[Para el mo<strong>de</strong>lo canadiense]<br />
Este aparato digital <strong>de</strong> clase B cumple con la norma ICES-003 <strong>de</strong>l Canadá.<br />
D8-10-1-3_Sp<br />
COMISIÓN FEDERAL DE COMUNICACIONES DECLARACIÓN DE CONFORMIDAD<br />
Este dispositivo cumple con la parte 15 <strong>de</strong> los reglamentos <strong>de</strong> la FCC. El funcionamiento está suj<strong>et</strong>o a las dos<br />
condiciones siguientes: (1) Este dispositivo no pue<strong>de</strong> causar interferencia perjudicial, y (2) este dispositivo<br />
<strong>de</strong>be aceptar cualquier interferencia recibida, incluyendo una interferencia que pue<strong>de</strong> causar un<br />
funcionamiento no <strong>de</strong>seado.<br />
Nombre <strong>de</strong>l producto: Televisor <strong>de</strong> Pantalla Plana<br />
Número <strong>de</strong>l mo<strong>de</strong>lo: PDP-6020FD/PDP-5020FD<br />
Categoría <strong>de</strong>l producto: Computadoras personales y periféricos <strong>de</strong> clase B<br />
Nombre <strong>de</strong>l responsable: PIONEER ELECTRONICS SERVICE, INC.<br />
Dirección: 1925 E. DOMINGUEZ ST., LONG BEACH, CA 90801-1760, U.S.A.<br />
Teléfono: 800-421-1625<br />
URL: http://www.pioneerelectronics.com<br />
NOTA: Este equipo ha sido probado y se ha comprobado que cumple con los límites para un dispositivo<br />
digital <strong>de</strong> clase B, <strong>de</strong> acuerdo con la Parte 15 <strong>de</strong> las Reglas <strong>de</strong> FCC. Esos límites están concebidos para<br />
proveer una protección razonable contra interferencias prejudiciales en una instalación resi<strong>de</strong>ncial. Este<br />
equipo genera, utiliza, y pue<strong>de</strong> radiar energía <strong>de</strong> frecuencia <strong>de</strong> radio y, si no se instala y se utiliza <strong>de</strong> acuerdo<br />
con las instrucciones, pue<strong>de</strong> causar interferencias prejudiciales a las comunicaciones <strong>de</strong> radio. Sin<br />
embargo, no hay ninguna garantía <strong>de</strong> que no ocurrirá interferencia en una instalación particular. Si este<br />
equipo causa interferencia perjudicial a la recepción <strong>de</strong> radio o televisión, que se pue<strong>de</strong> d<strong>et</strong>erminar mediante<br />
el encendido y apagado <strong>de</strong>l equipo, se recomienda al usuario que intente corregir la interferencia a través <strong>de</strong><br />
una o más <strong>de</strong> las medidas siguientes:<br />
– Reoriente o r<strong>eu</strong>bique la antena <strong>de</strong> recepción.<br />
– Aumente la separación entre el equipo y el receptor.<br />
– Conecte el equipo a una toma <strong>de</strong> corriente en un circuito diferente <strong>de</strong>l cual el receptor está conectado.<br />
– Consulte su reven<strong>de</strong>dor o un técnico experimentado <strong>de</strong> radio/TV para ayuda. D8-10-1-2_Sp<br />
PRECAUCIÓN: Este producto satisface los reglamentos <strong>de</strong> la FCC cuando se utilizan cables o conectores blindados<br />
para conectar el producto a otro equipo. Para impedir las interferencias electromagnéticas con aparatos eléctricos<br />
tales como radios y televisores, utilice conectores y cables blindados para hacer las conexiones.<br />
D8-10-3a_Sp<br />
125<br />
Sp
08 Apéndice<br />
8 Apéndice<br />
8.1 Cuadros <strong>de</strong> clasificación (para diversas clasificaciones <strong>de</strong> audiencia)<br />
Los cuadros a continuación listan varios sistemas <strong>de</strong> clasificación reconocidos por su televisor <strong>de</strong> pantalla plana.<br />
8.1.1 Clasificaciones <strong>de</strong> TV (basadas en edad)<br />
Clasificación<br />
Descripción<br />
TV-Y<br />
TV-Y7<br />
TV-G<br />
TV-PG<br />
TV-14<br />
TV-MA<br />
Todos los niños<br />
Niños <strong>de</strong> si<strong>et</strong>e y mayores<br />
Audiencias generales<br />
Orientación familiar sugerida<br />
Fuerte atención a los padres<br />
Audiencias maduras solamente<br />
8.1.2 Clasificaciones <strong>de</strong> control paterno <strong>de</strong> TV <strong>de</strong> EE.UU. (basadas en edad/categoría)<br />
Clasificación<br />
Descripción<br />
FV<br />
V<br />
S<br />
L<br />
D<br />
Violencia <strong>de</strong> fantasía<br />
Violencia<br />
Situaciones sexuales<br />
Lenguaje adulto<br />
Diálogo sexual<br />
8.1.3 Clasificaciones <strong>de</strong> cine MPAA (basadas en edad)<br />
Clasificación<br />
Descripción<br />
N/A<br />
G<br />
PG<br />
PG-13<br />
R<br />
NC-17<br />
NR<br />
No aplicable a las clasificaciones MPAA<br />
Audiencias generales. Todas las eda<strong>de</strong>s<br />
admitidas.<br />
Orientación familiar sugerida. Pue<strong>de</strong> que algún<br />
material no sea a<strong>de</strong>cuado para los niños.<br />
Fuerte atención a los padres. Pue<strong>de</strong> que algún<br />
material sea ina<strong>de</strong>cuado a niños menores <strong>de</strong> 13<br />
años <strong>de</strong> edad.<br />
Restricto. Bajo 17 se requiere compañía <strong>de</strong> uno<br />
<strong>de</strong> los padres o tutor adulto (la edad varía en<br />
algunas jurisdicciones).<br />
Nadie <strong>de</strong> 17 y menor admitido.<br />
No clasificado<br />
126<br />
Sp
Apéndice<br />
08<br />
8.1.4 Clasificaciones canadienses en inglés (basadas en edad)<br />
E<br />
(exento)<br />
C<br />
(niños)<br />
Clasificación<br />
C8+<br />
(niños arriba <strong>de</strong> 8 años<br />
<strong>de</strong> edad)<br />
G<br />
(general)<br />
PG<br />
(orientación familiar)<br />
14+<br />
(niños arriba <strong>de</strong> 14<br />
años <strong>de</strong> edad)<br />
18+<br />
(adultos)<br />
Descripción<br />
Noticias, <strong>de</strong>portes, documentarios y otros<br />
programas <strong>de</strong> información; espectáculos <strong>de</strong><br />
conversación, ví<strong>de</strong>os <strong>de</strong> música, programas <strong>de</strong><br />
variedad<br />
Para niños menores <strong>de</strong> ocho años <strong>de</strong> eda<strong>de</strong>;<br />
tiene especial atención a temas que podrían<br />
amenazar su sentido <strong>de</strong> seguridad y bien-estar<br />
Contiene violencia como la única manera o<br />
preferida, aceptable <strong>de</strong> resolver un conflicto; ni<br />
encoraja los niños a imitar acciones peligrosas<br />
que pue<strong>de</strong>n ver en la pantalla<br />
Aceptable para todas eda<strong>de</strong>s; contiene muy poca<br />
violencia, física, verbal o emocional<br />
Para la audiencia general, pero pue<strong>de</strong> que no sea<br />
a<strong>de</strong>cuado para niños muy pequeños (menores <strong>de</strong><br />
ocho años <strong>de</strong> edad), podría contener temas o<br />
cuestiones controversiales<br />
Contiene temas don<strong>de</strong> la violencia es uno <strong>de</strong> los<br />
elementos dominantes <strong>de</strong> la historia, pero <strong>de</strong>be<br />
ser integral al <strong>de</strong>sarrollo <strong>de</strong> la trama o carácter; el<br />
lenguaje usado podría ser profano; presencia <strong>de</strong><br />
<strong>de</strong>snuez limitada <strong>de</strong>ntro <strong>de</strong>l contexto <strong>de</strong>l tema<br />
Contiene violencia relacionada con el <strong>de</strong>sarrollo<br />
<strong>de</strong> la trama, carácter o temas <strong>de</strong>stinados a<br />
visualización <strong>de</strong> adultos; podría contener lenguaje<br />
gráfico y representaciones <strong>de</strong> sexo y <strong>de</strong>snu<strong>de</strong>z<br />
Español<br />
8.1.5 Clasificaciones canadienses en francés (basadas en edad)<br />
E<br />
G<br />
8ans+<br />
13ans+<br />
16ans+<br />
18ans+<br />
Clasificación<br />
Descripción<br />
Noticias, <strong>de</strong>portes, documentarios y otros<br />
programas <strong>de</strong> información; espectáculos <strong>de</strong><br />
conversación, ví<strong>de</strong>os <strong>de</strong> música, programas <strong>de</strong><br />
variedad<br />
Todas las eda<strong>de</strong>s y niños, contiene violencia<br />
directa mínima, pero pue<strong>de</strong> integrarse a la trama<br />
<strong>de</strong> una manera humorosa y no realista<br />
General pero no aconsejables para niños<br />
pequeños; pue<strong>de</strong> visualizarse por una amplia<br />
audiencia pública, pero podría contener escenas<br />
que molestan los niños menores <strong>de</strong> ocho años <strong>de</strong><br />
edad que no pue<strong>de</strong>n distinguir entre situaciones<br />
imaginarias y reales; visualización con los padres<br />
Contiene escenas frecuentes <strong>de</strong> violencia y, por lo<br />
tanto, se recomienda su visualización con los padres<br />
Contiene escenas frecuentes <strong>de</strong> violencia y<br />
violencia intensa<br />
Solamente para visualización <strong>de</strong> adultos; contiene<br />
escenas violentas frecuentes y violencia intensa<br />
127<br />
Sp
08 Apéndice<br />
8.2 Códigos <strong>de</strong> fabricantes para programar el mando a distancia<br />
8.2.1 Cable<br />
Marca/<br />
Código<br />
Marca/<br />
Código<br />
Marca/<br />
Código<br />
Marca/<br />
Código<br />
Marca/<br />
Código<br />
Marca/<br />
Código<br />
A-Mark<br />
0008,0144<br />
ABC<br />
0237, 0003,<br />
0008<br />
Accuphase<br />
0003<br />
Acorn<br />
0237<br />
Action<br />
0237<br />
Active<br />
0237<br />
Americast<br />
0899<br />
Archer<br />
0237, 0260<br />
BCC<br />
0276<br />
Bell South<br />
0899<br />
British Telecom<br />
0003<br />
Century<br />
0008<br />
Clearmaster<br />
0883<br />
ClearMax<br />
0883<br />
Cool Box<br />
0883<br />
Coolmax<br />
0883<br />
Digeo<br />
1187<br />
Director<br />
0476<br />
Fosgate<br />
0276<br />
GE<br />
0144<br />
General<br />
Instrument<br />
0476, 0810,<br />
0276, 0003<br />
Gibralter<br />
0003<br />
GMI<br />
0883<br />
GoldStar<br />
0144<br />
Hitachi<br />
0003, 0008<br />
Insight<br />
0476, 0810<br />
Jerrold<br />
0476, 0810,<br />
0276, 0003<br />
Memorex<br />
0000<br />
Mitsubishi<br />
0003<br />
Motorola<br />
1376, 0476,<br />
0810, 0276,<br />
1187, 1106<br />
Multitech<br />
0883<br />
Nova Vision<br />
0008<br />
Novaplex<br />
0008<br />
Pace<br />
1877, 0877,<br />
0237, 0008<br />
Panasonic<br />
0000, 0008,<br />
0144, 0107<br />
Paragon<br />
0000, 0008, 0525<br />
Penney<br />
0000<br />
Philips<br />
1305, 0317<br />
<strong>Pioneer</strong><br />
1877, 0877,<br />
0144, 0533,<br />
0023, 0260,<br />
1021<br />
Pulsar<br />
0000<br />
Quasar<br />
0000<br />
RadioShack<br />
0883<br />
RCA<br />
1256<br />
Regal<br />
0276<br />
Runco<br />
0000<br />
Samsung<br />
0003, 0144,<br />
0023<br />
Scientific<br />
Atlanta<br />
1877, 0877,<br />
0477, 0237,<br />
0003, 0000,<br />
0008<br />
Sony<br />
1006<br />
Sprucer<br />
0144<br />
Starcom<br />
0003<br />
Supercable<br />
0276<br />
Supermax<br />
0883<br />
Thomson<br />
1256<br />
Torx<br />
0003<br />
Toshiba<br />
0000<br />
Tristar<br />
0883<br />
United Cable<br />
0276, 0003<br />
US Electronics<br />
0276, 0003,<br />
0008<br />
V2<br />
0883<br />
Vi<strong>de</strong>oway<br />
0000<br />
Viewmaster<br />
0883<br />
Vision<br />
0883<br />
Vortex View<br />
0883<br />
Zenith<br />
0000, 0525,<br />
0899<br />
8.2.2 Satélite<br />
Marca/<br />
Código<br />
Marca/<br />
Código<br />
Marca/<br />
Código<br />
Marca/<br />
Código<br />
Marca/<br />
Código<br />
Marca/<br />
Código<br />
128<br />
Bell ExpressVu<br />
0775, 1170<br />
Chaparral<br />
0216<br />
Coolsat<br />
1806, 2147<br />
Crossdigital<br />
1109<br />
DirecTV<br />
1377, 0392,0566,<br />
0639, 1639,<br />
1142, 0247,<br />
0749, 1749,<br />
0819, 1856,<br />
1076, 1108,<br />
0099, 1109,<br />
1392, 1414,<br />
1442, 1443,<br />
1444, 1538, 1609<br />
Dish N<strong>et</strong>work<br />
System<br />
1505, 0775,<br />
1170, 1775<br />
Dishpro<br />
1505, 0775,<br />
1775<br />
Echostar<br />
1505, 0775,<br />
1170, 1775<br />
Expressvu<br />
0775, 1775<br />
Fortec Star<br />
1550, 1821,<br />
1948<br />
Funai<br />
1377<br />
GE<br />
0392, 0566<br />
General<br />
Instrument<br />
0869<br />
GOI<br />
0775, 1775<br />
Hitachi<br />
0749, 0819,<br />
1250<br />
Houston<br />
0775<br />
HTS<br />
0775, 1775<br />
Hughes<br />
N<strong>et</strong>work<br />
Systems<br />
1142, 0749,<br />
1749, 1442,<br />
1443, 1444,<br />
1538<br />
Humax<br />
1790, 1781<br />
Innova<br />
0099<br />
Jerrold<br />
0869<br />
JVC<br />
0775, 1170,<br />
1775<br />
LG<br />
1226, 1414<br />
Magnavox<br />
0722<br />
McIntosh<br />
0869<br />
Mitsubishi<br />
0749<br />
Motorola<br />
0869, 0856<br />
N<strong>et</strong>sat<br />
0099<br />
Next Level<br />
0869<br />
Panasonic<br />
0247, 0701<br />
Pansat<br />
0647, 1807<br />
Philips<br />
1142, 0749,<br />
1749, 0775,<br />
0819, 1076,<br />
0722, 0099,<br />
1442<br />
<strong>Pioneer</strong><br />
1142, 0329,<br />
1442<br />
Primestar<br />
0869<br />
Proscan<br />
0392, 0566<br />
RadioShack<br />
0566, 0775,<br />
0869<br />
RCA<br />
0392, 0566,<br />
1142, 0775,<br />
0855, 0143,<br />
1392, 1442<br />
Samsung<br />
1377, 1142,<br />
1276, 1108,<br />
1109, 1442,<br />
1609<br />
Sanyo<br />
1219<br />
SKY<br />
0856, 0099<br />
Sony<br />
0639, 1639<br />
Star Choice<br />
0869<br />
Star Trak<br />
0869<br />
Thomson<br />
0392, 0566<br />
TiVo<br />
1142, 1442,<br />
1443, 1444,<br />
1538<br />
Toshiba<br />
0749, 1749,<br />
0790, 0819,<br />
1285<br />
UltimateTV<br />
1392<br />
Ultrasat<br />
1806<br />
Uni<strong>de</strong>n<br />
0722<br />
Voom<br />
0869<br />
Zenith<br />
0856, 1856,<br />
1810<br />
Sp
Apéndice<br />
08<br />
8.2.3 Vi<strong>de</strong>ograbadora (Marcas A - F)<br />
Marca/<br />
Código<br />
Marca/<br />
Código<br />
Marca/<br />
Código<br />
Marca/<br />
Código<br />
Marca/<br />
Código<br />
Marca/<br />
Código<br />
A-Mark<br />
0037, 0240,<br />
0000, 0278, 0046<br />
ABS<br />
1972<br />
Accurian<br />
0000<br />
Admiral<br />
0060, 0048,<br />
0039, 0047,<br />
0104, 0209,<br />
0479<br />
Adventura<br />
0037, 0240,<br />
0000<br />
Adyson<br />
0072<br />
Aiko<br />
0278<br />
Aiwa<br />
0037, 0000,<br />
0124, 0307,<br />
1137, 0468<br />
Akai<br />
0041, 0175<br />
Alba<br />
0209, 0072,<br />
0278<br />
Alienware<br />
1972<br />
Allegro<br />
0039, 1137<br />
America Action<br />
0278<br />
American High<br />
0035, 0081<br />
Amstrad<br />
0000<br />
Anam National<br />
0226<br />
Asha<br />
0240<br />
Astra<br />
0035, 0240<br />
Audio Dynamics<br />
0040<br />
Audio-Technica<br />
0058<br />
Audiovox<br />
0037, 0278,<br />
0038<br />
Avis<br />
0000, 0072<br />
Beaumark<br />
0240<br />
Bell & Howell<br />
0035, 0048,<br />
0039, 0000,<br />
0104, 0046,<br />
0479<br />
Bell ExpressVu<br />
1944<br />
Broksonic<br />
0184, 0121,<br />
0209, 0002,<br />
0479, 1815<br />
Calix<br />
0037<br />
Candle<br />
0037, 0038<br />
Canon<br />
0035<br />
Capehart<br />
0002<br />
Captive Works<br />
2167<br />
Carrera<br />
0240<br />
Carver<br />
0035, 0081<br />
CCE<br />
0072, 0278<br />
Cineral<br />
0278<br />
CineVision<br />
1137<br />
Citizen<br />
0035, 0037,<br />
0240, 0000,<br />
0209, 0278,<br />
0479<br />
Classic<br />
0037<br />
Colortyme<br />
0060, 0035,<br />
0045, 0278<br />
Colt<br />
0000, 0072<br />
Craig<br />
0037, 0047,<br />
0240, 0072<br />
Criterion<br />
0000, 0072<br />
Crosley<br />
0035, 0081,<br />
0000<br />
Crown<br />
0072, 0278<br />
Curtis Mathes<br />
0060, 0035,<br />
0162, 0240,<br />
0000, 0041,<br />
0278, 0432<br />
Cybernex<br />
0240<br />
CyberPower<br />
1972<br />
Daewoo<br />
0037, 0045,<br />
0278, 0046,<br />
1137<br />
Daytron<br />
0037, 0278<br />
DBX<br />
0040, 0050<br />
Dell<br />
1972<br />
Denon<br />
0081, 0042<br />
Derwent<br />
0041<br />
DirecTV<br />
0739, 0740<br />
Dish N<strong>et</strong>work<br />
System<br />
1944<br />
Dishpro<br />
1944<br />
Dual<br />
0000<br />
Dumont<br />
0040<br />
Durabrand<br />
0039, 0038<br />
Dynatech<br />
0240, 0000<br />
Echostar<br />
1944<br />
Electrohome<br />
0060, 0037,<br />
0240, 0000,<br />
0043, 0209<br />
Electrophonic<br />
0037<br />
Emerald<br />
0184, 0121<br />
Emerex<br />
0032<br />
Emerson<br />
0037, 0184,<br />
0240, 0000,<br />
0121, 0043,<br />
0209, 0002,<br />
0278, 0479,<br />
0593, 1593<br />
ESA<br />
1137<br />
Expressvu<br />
1944<br />
Fisher<br />
0039, 0047,<br />
0000, 0104,<br />
0046<br />
Fuji<br />
0035, 0033<br />
Fujitsu<br />
0000<br />
Funai<br />
0037, 0000,<br />
0072, 0278,<br />
0593, 1593<br />
Español<br />
129<br />
Sp
08 Apéndice<br />
8.2.4 Vi<strong>de</strong>ograbadora (Marcas G - O)<br />
Marca/<br />
Código<br />
Marca/<br />
Código<br />
Marca/<br />
Código<br />
Marca/<br />
Código<br />
Marca/<br />
Código<br />
Marca/<br />
Código<br />
Garrard<br />
0000<br />
Gateway<br />
1972<br />
GE<br />
0060, 0035,<br />
0048, 0240,<br />
0000<br />
Gemini<br />
0060<br />
Genexxa<br />
0037, 0000,<br />
0278<br />
Go Vi<strong>de</strong>o<br />
0240, 0432,<br />
0526, 0614,<br />
1137, 1873<br />
GOI<br />
1944<br />
GoldStar<br />
0035, 0037,<br />
0039, 0000,<br />
0278, 0038,<br />
1137<br />
Goodmans<br />
0037, 0081,<br />
0000, 0072,<br />
0278<br />
Gradiente<br />
0000<br />
Granada<br />
0081, 0042<br />
Grundig<br />
0081, 0226<br />
Harley Davidson<br />
0000<br />
Harman/Kardon<br />
0081, 0038<br />
Harvard<br />
0072<br />
Harwood<br />
0072<br />
Headquarter<br />
0046<br />
Hewl<strong>et</strong>t<br />
Packard<br />
1972<br />
HI-Q<br />
0035, 0047,<br />
0000<br />
Hitachi<br />
0035, 0037,<br />
0045, 0000,<br />
0042, 0041, 0089<br />
Howard<br />
Computers<br />
1972<br />
HP<br />
1972<br />
HTS<br />
1944<br />
Hughes<br />
N<strong>et</strong>work<br />
Systems<br />
0042, 0739,<br />
0740<br />
Humax<br />
0739, 1797,<br />
1988<br />
Hush<br />
1972<br />
Hytek<br />
0047, 0000,<br />
0072<br />
iBUYPOWER<br />
1972<br />
Instant Replay<br />
0035, 0226<br />
ITT Nokia<br />
0240, 0041<br />
Janeil<br />
0240<br />
Jensen<br />
0067, 0041<br />
JVC<br />
0067, 0041,<br />
0058, 1162<br />
1944<br />
KEC<br />
0037, 0278<br />
Kenwood<br />
0067, 0041,<br />
0038, 0046<br />
KLH<br />
0072<br />
Kodak<br />
0035, 0037<br />
KTV<br />
0000<br />
LG<br />
0037, 0240,<br />
0038, 1037,<br />
1137, 2010<br />
Linksys<br />
1972<br />
Lloyd’s<br />
0240, 0000,<br />
0072, 0038,<br />
0040<br />
Loewe<br />
0081<br />
Logik<br />
0240, 0000,<br />
0072<br />
Lumatron<br />
0278<br />
Luxor<br />
0046<br />
LXI<br />
0037, 0000,<br />
0042, 0067<br />
M Electronic<br />
0240<br />
Magnasonic<br />
0037, 0240,<br />
0000, 0072,<br />
0278, 0593<br />
Magnavox<br />
0035, 0037,<br />
0048, 0039,<br />
0081, 0240,<br />
0000, 0226,<br />
0563, 0593,<br />
0618, 1593<br />
Magnin<br />
0240<br />
Marantz<br />
0035, 0081,<br />
0038<br />
Marta<br />
0037<br />
Matsui<br />
0037, 0209<br />
Matsushita<br />
0035, 0162,<br />
0081, 1162<br />
Media Center<br />
PC<br />
1972<br />
MEI<br />
0035<br />
Memorex<br />
0035, 0162,<br />
0037, 0048,<br />
0039, 0047,<br />
0240, 0000,<br />
0104, 0209,<br />
0072, 0278,<br />
0046, 0307,<br />
0479, 1037,<br />
1162<br />
M<strong>et</strong>z<br />
0037<br />
MGA<br />
0060, 0240,<br />
0043<br />
MGN<br />
Technology<br />
0240<br />
Microsoft<br />
1972<br />
Midland<br />
0240<br />
Mind<br />
1972<br />
Minolta<br />
0042<br />
Mitsubishi<br />
0060, 0048,<br />
0047, 0000,<br />
0042, 0067,<br />
0043, 0041, 0173<br />
Motorola<br />
0035, 0048,<br />
1843<br />
Movie Walker<br />
0072<br />
MTC<br />
0240, 0000,<br />
0072<br />
MTX<br />
0000<br />
Multitech<br />
0039, 0000,<br />
0072<br />
NAD<br />
0240, 0104,<br />
0058<br />
NEC<br />
0104, 0067,<br />
0041, 0038,<br />
0040, 0050<br />
New Tech<br />
0072<br />
Nikko<br />
0037, 0278<br />
Nikkodo<br />
0037, 0278<br />
Nishi<br />
0240<br />
Niv<strong>eu</strong>s Media<br />
1972<br />
Noblex<br />
0240<br />
Northgate<br />
1972<br />
Olympus<br />
0035, 0162,<br />
0104, 0226<br />
Onkyo<br />
0222<br />
Optimus<br />
1062, 0035,<br />
0162, 0037,<br />
0048, 0047,<br />
0240, 0000,<br />
0104, 0058,<br />
0432, 0593,<br />
1162<br />
Orion<br />
0184, 0240,<br />
0000, 0104,<br />
0121, 0209,<br />
0002, 0278,<br />
0479<br />
130<br />
Sp
Apéndice<br />
08<br />
8.2.5 Vi<strong>de</strong>ograbadora (Marcas P - V)<br />
Marca/<br />
Código<br />
Marca/<br />
Código<br />
Marca/<br />
Código<br />
Marca/<br />
Código<br />
Marca/<br />
Código<br />
Marca/<br />
Código<br />
Panama<br />
0035<br />
Panasonic<br />
1062, 0035,<br />
0162, 0000,<br />
0225, 0226,<br />
0614, 0616,<br />
1162<br />
Penney<br />
0035, 0162,<br />
0037, 0047,<br />
0081, 0240,<br />
0000, 0042,<br />
0067, 0038,<br />
0040<br />
Pentax<br />
0042<br />
Philco<br />
0035, 0081,<br />
0000, 0209,<br />
0479<br />
Philips<br />
0035, 0162,<br />
0048, 0081,<br />
0045, 0000,<br />
0209, 0616,<br />
0618, 0739,<br />
1081, 1181,<br />
1818<br />
Pilot<br />
0037<br />
<strong>Pioneer</strong><br />
0162, 0081,<br />
0042, 0067,<br />
0058, 0168,<br />
1337, 1803<br />
Polk Audio<br />
0081<br />
Portland<br />
0278<br />
Presidian<br />
1593<br />
Profitronic<br />
0240<br />
Proscan<br />
0060<br />
Protec<br />
0000, 0072<br />
Protech<br />
0072<br />
Pulsar<br />
0039, 0240,<br />
0278<br />
Pulser<br />
0240<br />
Quarter<br />
0046<br />
Quartz<br />
0035, 0047,<br />
0046<br />
Quasar<br />
0035, 0162,<br />
0002, 0226,<br />
1162<br />
RadioShack<br />
0035, 0162,<br />
0037, 0048,<br />
0047, 0240,<br />
0000, 0104,<br />
0046, 1037,<br />
1162<br />
Radix<br />
0037<br />
Ran<strong>de</strong>x<br />
0037<br />
RCA<br />
0060, 0035,<br />
0048, 0240,<br />
0045, 0000,<br />
0042, 0880,<br />
0058<br />
Realistic<br />
0035, 0162,<br />
0037, 0048,<br />
0047, 0240,<br />
0000, 0104,<br />
0121, 0278,<br />
0046, 1162<br />
ReplayTV<br />
0614, 0616<br />
Ricavision<br />
1972<br />
Rio<br />
1137<br />
Runco<br />
0039<br />
Samsung<br />
0060, 0240,<br />
0045, 0000,<br />
0038, 0432,<br />
0739<br />
Samtron<br />
0240<br />
Sanky<br />
0048, 0039<br />
Sansui<br />
0240, 0000,<br />
0067, 0209,<br />
0041, 0072,<br />
0002, 0479<br />
Sanyo<br />
0047, 0240,<br />
0000, 0104,<br />
0046, 0159,<br />
0479<br />
Scott<br />
0184, 0045,<br />
0121, 0043<br />
Sears<br />
0060, 0035,<br />
0162, 0037,<br />
0048, 0039,<br />
0047, 0033,<br />
0045, 0000,<br />
0042, 0104,<br />
0067, 0043,<br />
0209, 0041,<br />
0072, 0046,<br />
0058<br />
Sharp<br />
0048, 0047,<br />
0032, 0000,<br />
1875<br />
Shintom<br />
0039, 0240,<br />
0000, 0072<br />
Shogun<br />
0240<br />
Siemens<br />
0037, 0104<br />
Signature<br />
0060, 0035,<br />
0037, 0048,<br />
0000, 0046,<br />
0479<br />
Singer<br />
0037, 0240,<br />
0072<br />
Sonic Blue<br />
0614, 0616,<br />
1137<br />
Sonographe<br />
0046<br />
Sony<br />
0035, 0047,<br />
0032, 0033,<br />
0000, 0067,<br />
0046, 0226,<br />
0275, 0636,<br />
1032, 1702,<br />
1703, 1896,<br />
1972<br />
Soundmaster<br />
0000<br />
Stack 9<br />
1972<br />
Star Choice<br />
1843<br />
STS<br />
0042<br />
SV2000<br />
0000, 0072<br />
SVA<br />
0000<br />
Sylvania<br />
0035, 0081,<br />
0000, 0043,<br />
0593, 1593<br />
Symphonic<br />
0240, 0000,<br />
0002, 0593,<br />
1593<br />
Systemax<br />
1972<br />
Tagar Systems<br />
1972<br />
Tandy<br />
0000, 0104<br />
Tashiko<br />
0037<br />
Tatung<br />
0048, 0081,<br />
0000, 0067,<br />
0041<br />
Teac<br />
0000, 0067,<br />
0041<br />
Technics<br />
0035, 0162,<br />
0037, 0000<br />
Teknika<br />
0035, 0037,<br />
0000<br />
Telecor<strong>de</strong>r<br />
0240<br />
Telefunken<br />
0041<br />
Tevion<br />
0479<br />
Thomas<br />
0000, 0002<br />
Thomson<br />
0060, 0041<br />
Tisonic<br />
0278<br />
TiVo<br />
0618, 0636,<br />
0739, 0740,<br />
1337, 1944,<br />
1996<br />
TMK<br />
0240, 0000<br />
TNIX<br />
0037<br />
Tocom<br />
0240<br />
Toshiba<br />
0240, 0045,<br />
0000, 0043,<br />
0209, 0041,<br />
1008, 1972,<br />
1996, 1988<br />
Tosonic<br />
0278<br />
Totevision<br />
0037, 0240<br />
Touch<br />
1972<br />
Trix<br />
0037<br />
Ultra<br />
0045, 0278<br />
Unitech<br />
0240<br />
Vector<br />
0045<br />
Vector Research<br />
0184, 0038,<br />
0040<br />
Vextra<br />
0072<br />
Victor<br />
0067, 0041<br />
Vi<strong>de</strong>o Concepts<br />
0045, 0040<br />
Vi<strong>de</strong>omagic<br />
0037<br />
Vi<strong>de</strong>osonic<br />
0240, 0000,<br />
0072<br />
Viewsonic<br />
1972<br />
Villain<br />
0000<br />
Voodoo<br />
1972<br />
Español<br />
131<br />
Sp
08 Apéndice<br />
8.2.6 Vi<strong>de</strong>ograbadora (Marcas W - Z)<br />
Marca/<br />
Código<br />
Marca/<br />
Código<br />
Marca/<br />
Código<br />
Marca/<br />
Código<br />
Marca/<br />
Código<br />
Marca/<br />
Código<br />
Wards<br />
0060, 0035,<br />
0037, 0048,<br />
0047, 0081,<br />
0033, 0240,<br />
0045, 0000,<br />
0042, 0043,<br />
0041, 0072,<br />
0038, 0046,<br />
0058, 0479<br />
Wharfedale<br />
0593<br />
White<br />
Westinghouse<br />
0000, 0209,<br />
0072, 0278,<br />
0479<br />
World<br />
0209, 0002,<br />
0479<br />
XR-1000<br />
0035, 0240,<br />
0000, 0072<br />
Yamaha<br />
0041, 0038<br />
Zenith<br />
0037, 0039,<br />
0033, 0000,<br />
0209, 0041,<br />
0278, 0479,<br />
1137, 1709<br />
ZT Group<br />
1972<br />
8.2.7 PVR<br />
Marca/<br />
Código<br />
Marca/<br />
Código<br />
Marca/<br />
Código<br />
Marca/<br />
Código<br />
Marca/<br />
Código<br />
Marca/<br />
Código<br />
ABS<br />
1972<br />
Alienware<br />
1972<br />
Bell ExpressVu<br />
1944<br />
Captive Works<br />
2167<br />
CyberPower<br />
1972<br />
Dell<br />
1972<br />
DirecTV<br />
0739, 0740<br />
Dish N<strong>et</strong>work<br />
System<br />
1944<br />
Dish Pro<br />
1944<br />
Echostar<br />
1944<br />
Expressvu<br />
1944<br />
Gateway<br />
1972<br />
Go Vi<strong>de</strong>o<br />
0614, 1873<br />
GOI<br />
1944<br />
Hewl<strong>et</strong>t Packard<br />
1972<br />
Howard<br />
Computers<br />
1972<br />
HP<br />
1972<br />
HTS<br />
1944<br />
Hughes<br />
N<strong>et</strong>work<br />
Systems<br />
0739, 0740<br />
Humax<br />
0739, 1797<br />
1988<br />
Hush<br />
1972<br />
iBUYPOWER<br />
1972<br />
JVC<br />
1944<br />
LG<br />
2010<br />
Linksys<br />
1972<br />
Media Center<br />
PC<br />
1972<br />
Microsoft<br />
1972<br />
Mind<br />
1972<br />
Motorola<br />
1843<br />
Niv<strong>eu</strong>s Media<br />
1972<br />
Northgate<br />
1972<br />
Panasonic<br />
0614, 0616<br />
Philips<br />
0618, 0739<br />
1818<br />
<strong>Pioneer</strong><br />
1337, 1803<br />
RCA<br />
0880<br />
ReplayTV<br />
0614, 0616<br />
Samsung<br />
0739<br />
Sharp<br />
1875<br />
Sonic Blue<br />
0614, 0616<br />
Sony<br />
0636, 1972<br />
Stack 9<br />
1972<br />
Star Choice<br />
1843<br />
Systemax<br />
1972<br />
Tagar Systems<br />
1972<br />
TiVo<br />
0618, 0636,<br />
0739, 1337<br />
0740<br />
Toshiba<br />
1008, 1972,<br />
1996, 1988<br />
Touch<br />
1972<br />
Viewsonic<br />
1972<br />
Voodoo<br />
1972<br />
Zenith<br />
1709<br />
ZT Group<br />
1972<br />
8.2.8 BD (HD-DVD)<br />
Marca/<br />
Código<br />
Marca/<br />
Código<br />
Marca/<br />
Código<br />
Marca/<br />
Código<br />
Marca/<br />
Código<br />
LG<br />
0741<br />
Onkyo<br />
1769<br />
Panasonic<br />
1641<br />
Philips<br />
2084<br />
<strong>Pioneer</strong><br />
2052, 0142<br />
RCA<br />
1769<br />
Samsung<br />
0199<br />
Sony<br />
1516<br />
Toshiba<br />
1769<br />
8.2.9 DVD-R<br />
Marca/<br />
Código<br />
Marca/<br />
Código<br />
Marca/<br />
Código<br />
Marca/<br />
Código<br />
Marca/<br />
Código<br />
Marca/<br />
Código<br />
132<br />
Sp<br />
Accurian<br />
0675, 1416<br />
Apex Digital<br />
1056<br />
Aspire Digital<br />
1168<br />
Astar<br />
1489<br />
Broksonic<br />
1419<br />
Citizen<br />
2116<br />
Coby<br />
1086<br />
CyberHome<br />
1129, 1502<br />
Digital Max<br />
1738<br />
Electrohome<br />
2116<br />
Funai<br />
0675, 1334<br />
Gateway<br />
1073, 1158<br />
Go Vi<strong>de</strong>o<br />
0741, 1158,<br />
1304, 1730<br />
iLo<br />
1348<br />
JVC<br />
1275<br />
LG<br />
0741<br />
LiteOn<br />
1158, 1416,<br />
1440, 1738<br />
Magnavox<br />
0646, 0675,<br />
1506<br />
Panasonic<br />
0490<br />
Philips<br />
0646, 1340<br />
<strong>Pioneer</strong><br />
0631, 1460,<br />
1475,<br />
1476, 1512<br />
Polaroid<br />
1086, 2130<br />
Presidian<br />
1738<br />
RCA<br />
0522<br />
Samsung<br />
0490, 1470<br />
Sensory<br />
Science<br />
1158<br />
Sharp<br />
0675<br />
Sony<br />
1033, 1070,<br />
1431<br />
Sylvania<br />
0675<br />
Toshiba<br />
1510, 1588<br />
Zenith<br />
0741
Apéndice<br />
08<br />
8.2.10 DVD (Marcas A - N)<br />
Marca/<br />
Código<br />
Marca/<br />
Código<br />
Marca/<br />
Código<br />
Marca/<br />
Código<br />
Marca/<br />
Código<br />
Marca/<br />
Código<br />
3D LAB<br />
0503, 0539<br />
Accurian<br />
0675, 1072,<br />
1416, 1737<br />
Acoustic<br />
Solutions<br />
0730<br />
Adcom<br />
1094<br />
Afreey<br />
0698<br />
Aiwa<br />
0641<br />
Akai<br />
0695, 0705,<br />
0770, 1089<br />
Alba<br />
0672, 0717<br />
Alco<br />
0790<br />
Allegro<br />
0869<br />
Amphion Media<br />
Works<br />
0872, 1245<br />
AMW<br />
0872, 1245<br />
Apex Digital<br />
0533, 0672,<br />
0717, 0755,<br />
0794, 0795,<br />
0796, 0797,<br />
1004, 1020,<br />
1056, 1061<br />
Arrgo<br />
1023<br />
Aspire Digital<br />
1168, 1407<br />
Astar<br />
1489, 1678,<br />
1679<br />
Audiovox<br />
0717, 0790,<br />
1041, 1072,<br />
1121, 1122<br />
Awa<br />
0730<br />
Axion<br />
1072<br />
B & K<br />
0655, 0662<br />
BBK<br />
1224<br />
Bel Canto<br />
Design<br />
1571<br />
Blaupunkt<br />
0717<br />
Blue Para<strong>de</strong><br />
0571<br />
Blue Sky<br />
0695, 0699<br />
Bose<br />
2023<br />
Brandt<br />
0651<br />
Broksonic<br />
0695, 1419<br />
California Audio<br />
Labs<br />
0490<br />
CAVS<br />
1057<br />
Celestial<br />
1020<br />
Centrex<br />
0672, 1004<br />
Cinea<br />
0831<br />
Cinego<br />
1399<br />
CineVision<br />
0876, 0833,<br />
0869<br />
Citizen<br />
1003, 0695,<br />
1277, 1587,<br />
2116<br />
Clairtone<br />
0571<br />
Coby<br />
0778, 0852,<br />
1077, 1086,<br />
1107, 1165,<br />
1177, 1351,<br />
1628<br />
Craig<br />
0831<br />
Creative<br />
0503, 0539<br />
Curtis Mathes<br />
1087<br />
CyberHome<br />
0816, 0874,<br />
1023, 1024,<br />
1117, 1129,<br />
1502, 1537<br />
Cytron<br />
0705<br />
D-Link<br />
1881<br />
Daewoo<br />
0784, 0705,<br />
0770, 0833,<br />
0869, 1169,<br />
1172, 1234,<br />
1242, 1441<br />
Dansai<br />
0770<br />
Daytek<br />
0872<br />
Decca<br />
0770<br />
Denon<br />
0490, 0634<br />
Denver<br />
0778<br />
Desay<br />
1407<br />
Diamond Vision<br />
1316<br />
DigitalMax<br />
1738<br />
Digitrex<br />
0672<br />
Disney<br />
0675, 1270<br />
DiViDo<br />
0705<br />
Dual<br />
0675, 1068,<br />
1085<br />
Durabrand<br />
1127, 2164<br />
DVD2000<br />
0521<br />
Electrohome<br />
1003, 2116<br />
Emerson<br />
0591, 0675,<br />
1268<br />
Enterprise<br />
0591<br />
Entivo<br />
0503, 0539<br />
Enzer<br />
0770<br />
ESA<br />
1268<br />
Firstline<br />
0651<br />
Fisher<br />
0670<br />
Funai<br />
0675, 1268,<br />
1334<br />
Gateway<br />
1073, 1077,<br />
1158<br />
GE<br />
0522, 0815,<br />
0717<br />
Go Vi<strong>de</strong>o<br />
0573, 0744,<br />
0717, 1730,<br />
1304, 1158,<br />
1144, 1099,<br />
1075, 1044,<br />
0869, 0833,<br />
0783, 0741,<br />
0715<br />
Go Vision<br />
1072<br />
GoldStar<br />
0741, 0869<br />
Goodmans<br />
0790<br />
GPX<br />
0699, 0769<br />
Gradiente<br />
0490, 0651<br />
Greenhill<br />
0717<br />
Grundig<br />
0539, 0705<br />
Harman/Kardon<br />
0582, 0702<br />
Helios<br />
2080<br />
Hello Kitty<br />
0831<br />
Hitachi<br />
0573, 0664,<br />
1247, 1664<br />
Hiteker<br />
0672<br />
Humax<br />
1588, 1500<br />
iLo<br />
1348, 1472<br />
Initial<br />
0717, 1472<br />
Insignia<br />
1268, 2095,<br />
2150<br />
Integra<br />
0571, 0627<br />
IRT<br />
0783<br />
Jaton<br />
1078<br />
JBL<br />
0702<br />
JMB<br />
0695<br />
JSI<br />
1423<br />
JVC<br />
0558, 0623,<br />
0867, 1275,<br />
1550, 1602<br />
jWin<br />
1049, 1051<br />
Kawasaki<br />
0790<br />
Kenwood<br />
0490, 0534,<br />
0682, 0737<br />
KLH<br />
0717, 0790,<br />
1020, 1149<br />
Kloss<br />
0533<br />
Konka<br />
0711, 0721<br />
Koss<br />
0651, 0769,<br />
0896, 1061,<br />
1423<br />
Lan<strong>de</strong>l<br />
0826<br />
Lasonic<br />
0627, 0798,<br />
1173<br />
Lecson<br />
1533<br />
Lenoxx<br />
1127<br />
LG<br />
0591, 0741,<br />
0869<br />
LiteOn<br />
1058, 1158,<br />
1416, 1440,<br />
1656, 1738<br />
Loewe<br />
0511, 0741<br />
Logix<br />
0783<br />
Magnasonic<br />
0651, 0675<br />
Magnavox<br />
0503, 0539,<br />
0646, 0675,<br />
1268, 1354,<br />
1472, 1506<br />
Malata<br />
0782, 1159<br />
Marantz<br />
0503, 0539,<br />
0675<br />
Mclntosh<br />
1533, 1273<br />
Medion<br />
0651<br />
McIntosh<br />
Memorex<br />
0695, 0831,<br />
1270<br />
Microsoft<br />
0522, 1708,<br />
2083<br />
Minato<br />
0752<br />
Mintek<br />
0839, 0717,<br />
1472<br />
Mitsubishi<br />
1521, 0521<br />
Momitsu<br />
1082<br />
Mustek<br />
0730<br />
Myryad<br />
0894<br />
NAD<br />
0692, 0741<br />
Naiko<br />
0770<br />
Nakamichi<br />
1222<br />
NEC<br />
0785, 0869<br />
Nesa<br />
0717<br />
Next Base<br />
0826<br />
NexxTech<br />
1402<br />
Nintaus<br />
1051<br />
Norcent<br />
1003, 0872,<br />
1107, 1265<br />
Nova<br />
1517<br />
Español<br />
133<br />
Sp
08 Apéndice<br />
8.2.11 DVD (Marcas O - Z)<br />
Marca/<br />
Código<br />
Marca/<br />
Código<br />
Marca/<br />
Código<br />
Marca/<br />
Código<br />
Marca/<br />
Código<br />
Marca/<br />
Código<br />
Onkyo<br />
0503, 0627,<br />
1769<br />
Oppo<br />
0575, 1224,<br />
2185<br />
Optimus<br />
0571<br />
OptoMedia<br />
Electronics<br />
0896<br />
Oritron<br />
0651<br />
Palsonic<br />
0672, 0852<br />
Panasonic<br />
0503, 0490,<br />
0571, 0703,<br />
1641, 1762<br />
Philco<br />
0675<br />
Philips<br />
0503, 0539,<br />
0646, 0675,<br />
1267, 1340,<br />
1354, 1846,<br />
2056, 2084<br />
Phonotrend<br />
0699<br />
PianoDisc<br />
1024<br />
<strong>Pioneer</strong><br />
0525, 0571,<br />
0142, 0631,<br />
1475, 1476,<br />
1571, 1460,<br />
1512, 1902,<br />
2052<br />
Polaroid<br />
1020, 1061,<br />
1086, 1245,<br />
1316, 1478,<br />
2130<br />
Polk Audio<br />
0539<br />
Portland<br />
0770<br />
Presidian<br />
0675, 1072,<br />
1738<br />
Primare<br />
1618<br />
Proceed<br />
0672<br />
Proscan<br />
0522<br />
Prosonic<br />
0699<br />
ProVision<br />
0778<br />
Qwestar<br />
0651<br />
Radion<strong>et</strong>te<br />
0741<br />
RadioShack<br />
0571<br />
RCA<br />
0522, 0571,<br />
0717, 0790,<br />
0822, 1022,<br />
1769<br />
Realistic<br />
0571<br />
Reoc<br />
0752<br />
Revoy<br />
0699<br />
Rio<br />
0869, 2002<br />
RJTech<br />
0118, 1360<br />
Rotel<br />
0623, 1178<br />
Rowa<br />
0823, 1004<br />
Saba<br />
0651<br />
Sampo<br />
0698, 0752,<br />
1501<br />
Samsung<br />
0298, 0490,<br />
0573, 0744,<br />
0199, 0820,<br />
1044, 1075,<br />
1470, 2069<br />
Sansui<br />
0695<br />
Sanyo<br />
0670, 0675,<br />
0695, 0873,<br />
1334<br />
Schnei<strong>de</strong>r<br />
0783<br />
Schwaiger<br />
0752<br />
Sensory<br />
Science<br />
1158<br />
Sharp<br />
0630, 0675,<br />
0752, 1256<br />
Sharper Image<br />
1117<br />
Sherwood<br />
0633, 0770,<br />
1043, 1077,<br />
1889<br />
Shinsonic<br />
0533, 0839<br />
Slim Art<br />
0784<br />
SM Electronic<br />
0730<br />
Sonic Blue<br />
0573, 0715,<br />
0783, 0869,<br />
1099, 2002<br />
Sony<br />
0533, 0772,<br />
0864, 1033,<br />
1070, 1431,<br />
1516, 1533,<br />
1548, 1633,<br />
1791, 1824,<br />
1892, 1903,<br />
1904, 1934,<br />
2020, 2043<br />
Sova<br />
1122<br />
Sungale<br />
1074<br />
SVA<br />
0717, 0860,<br />
1105<br />
Sylvania<br />
0675, 1268<br />
Symphonic<br />
0675, 0894,<br />
1268, 1334<br />
TAG McLaren<br />
0894<br />
Tatung<br />
0770<br />
Teac<br />
0571, 0717,<br />
0692, 0790<br />
Technics<br />
0490, 0703<br />
Technika<br />
0770<br />
Technosonic<br />
0730<br />
Techwood<br />
0692<br />
Terapin<br />
1031<br />
Tevion<br />
0651<br />
Th<strong>et</strong>a Digital<br />
0571<br />
Thomson<br />
0522, 0511<br />
TiVo<br />
1503, 1512,<br />
1588<br />
Toshiba<br />
0503, 0573,<br />
0539, 0695,<br />
1154, 1503,<br />
1510, 1588,<br />
1608, 1769<br />
Tre<strong>de</strong>x<br />
0800, 0803,<br />
0804<br />
Unimax<br />
0770<br />
United<br />
0730<br />
Universum<br />
0591<br />
Urban Concepts<br />
0503, 0539<br />
US Logic<br />
0839<br />
V<br />
1064, 1226<br />
Venturer<br />
0790<br />
Vizio<br />
1064, 1226<br />
Vocopro<br />
1027, 1360<br />
Wes<strong>de</strong>r<br />
0699<br />
Xbox<br />
0522, 1708,<br />
2083<br />
Yamaha<br />
0490, 0539,<br />
0545, 0497,<br />
0817<br />
Yamakawa<br />
0872<br />
Zenith<br />
0503, 0591,<br />
0741, 0869<br />
Z<strong>eu</strong>s<br />
0784<br />
Zoece<br />
1265<br />
8.2.12 LD<br />
Marca/<br />
Código<br />
Marca/<br />
Código<br />
Marca/<br />
Código<br />
Marca/<br />
Código<br />
Marca/<br />
Código<br />
Marca/<br />
Código<br />
Carver<br />
0064, 0194,<br />
0323<br />
Denon<br />
0059, 0172,<br />
0241<br />
Disco Vision<br />
0023<br />
Harman/Kardon<br />
0194<br />
Hitachi<br />
0023, 0395<br />
Magnavox<br />
0064, 0194,<br />
0217, 0241<br />
Marantz<br />
0064, 0194<br />
Mitsubishi<br />
0059, 0241<br />
NAD<br />
0059<br />
NEC<br />
0286<br />
Optimus<br />
0059<br />
Panasonic<br />
0204<br />
Philips<br />
0064, 0194<br />
<strong>Pioneer</strong><br />
0059, 0023,<br />
0241, 0463,<br />
0572, 1274<br />
Polk Audio<br />
0194<br />
Quasar<br />
0204<br />
Renaissance<br />
0323<br />
Samsung<br />
0323<br />
Sega<br />
0023<br />
Sharp<br />
0001<br />
Sony<br />
0193, 0201,<br />
0270<br />
Technics<br />
0204<br />
Th<strong>et</strong>a Digital<br />
0194<br />
Toshiba<br />
0059<br />
Victor<br />
0245<br />
Wards<br />
0059<br />
Yamaha<br />
0217<br />
134<br />
Sp
Apéndice<br />
08<br />
8.3 Especificaciones<br />
Televisor <strong>de</strong> pantalla plana PDP-6020FD (60”) PDP-5020FD (50”)<br />
Número <strong>de</strong> píxeles 1920 × 1080 píxeles 1920 × 1080 píxeles<br />
Amplificador <strong>de</strong> audio 18 W + 18 W (1 kHz, 10%, 6 Ω) 18 W + 18 W (1 kHz, 10%, 6 Ω)<br />
Altavoz<br />
Efecto sonido<br />
Woofer: Twe<strong>et</strong>er tipo cónico <strong>de</strong><br />
4,8 cm x 13 cm: Tipo semicúpula<br />
<strong>de</strong> 2,5 cm<br />
SRS FOCUS/SRS/SRS TruBass/<br />
SRS Definition<br />
Woofer: Twe<strong>et</strong>er tipo cónico <strong>de</strong><br />
4,8 cm x 13 cm: Tipo semicúpula<br />
<strong>de</strong> 2,5 cm<br />
SRS FOCUS/SRS/SRS TruBass/<br />
SRS Definition<br />
Idiomas en la pantalla Inglés, Francés, Español Inglés, Francés, Español<br />
Requisitos <strong>de</strong> energía<br />
Peso<br />
120 V CA, 60 Hz, 524 W (0,3 W<br />
Modo <strong>de</strong> espera)<br />
Unidad principal: 50,8 kg (112,0 lbs)<br />
Soporte: 5,3 kg (11,7 lbs)<br />
(incluyendo pernos)<br />
Altavoz: 3,7 kg (8,2 lbs)<br />
(incluyendo cables, accesorios <strong>de</strong><br />
montaje y tornillos)<br />
Total: 59,8 kg (131,8 lbs)<br />
120 V CA, 60 Hz, 436 W (0,2 W<br />
Modo <strong>de</strong> espera)<br />
Unidad principal: 33,6 kg (74,1 lbs)<br />
Soporte: 2,2 kg (4,9 lbs)<br />
(incluyendo pernos)<br />
Altavoz: 3,2 kg (7,1 lbs)<br />
(incluyendo cables, accesorios <strong>de</strong><br />
montaje y tornillos)<br />
Total: 39 kg (86 lbs)<br />
Español<br />
Digital<br />
Analógico<br />
Sistema <strong>de</strong> recepción<br />
Tipo <strong>de</strong> circuito<br />
Sintonizador<br />
VHF/UHF<br />
Sintonizador<br />
CATV<br />
Formato <strong>de</strong><br />
audio<br />
Tipo <strong>de</strong> circuito<br />
Sintonizador<br />
VHF/UHF<br />
Sintonizador<br />
CATV<br />
Múltiplex <strong>de</strong><br />
audio<br />
Terminales - Lado<br />
INPUT 3<br />
INPUT 7<br />
PHONES<br />
USB<br />
Sistema <strong>de</strong> TV digital ATSC<br />
8VSB/64QAM/256QAM<br />
Canales VHF 2 a 13, canales UHF 14 a 69<br />
Canales 2 a 135<br />
Dolby Digital<br />
Sistema NTSC patrón <strong>de</strong> TV Americano<br />
D<strong>et</strong>ección <strong>de</strong> señal <strong>de</strong> ví<strong>de</strong>o, d<strong>et</strong>ección síncrona compl<strong>et</strong>a PLL,<br />
sistema <strong>de</strong> sint<strong>et</strong>izador digital PLL<br />
Canales VHF 2 a 13, canales UHF 14 a 69<br />
Cable 1 a 135<br />
Sistema BTSC<br />
Entrada VIDEO, entrada AUDIO<br />
Entrada HDMI*<br />
16 Ω a 32 Ω recomendable<br />
Entrada USB**<br />
135<br />
Sp
08 Apéndice<br />
Terminales - Parte trasera<br />
ANT<br />
INPUT 1<br />
INPUT 2<br />
INPUT 4<br />
PC INPUT<br />
INPUT 5<br />
INPUT 6<br />
AUDIO OUT<br />
DIGITAL OUT<br />
ETHERNET 1<br />
CONTROL OUT 1<br />
SPEAKERS<br />
SUB WOOFER OUT<br />
75 Ω UNBAL, tipo F para entrada DTV/VHF/UHF/CATV<br />
Entrada S-VIDEO, entrada VIDEO, entrada AUDIO<br />
Entrada COMPONENT VIDEO, entrada VIDEO, entrada AUDIO<br />
Entrada, HDMI*, entrada AUDIO<br />
Entrada RGB analógica, entrada AUDIO<br />
Entrada, HDMI*, entrada AUDIO<br />
Entrada HDMI*<br />
Salida AUDIO (Fija)<br />
Óptica<br />
6 Ω a 16 Ω<br />
Variable<br />
* compatible con HDMI1.3 (Deep Color) y HDCP1.1<br />
** compatible con USB 1.1 y 2.0<br />
HDMI (High Definition Multimedia Interface) es una interfaz digital que manipula tanto ví<strong>de</strong>o como audio<br />
utilizando un único cable.<br />
HDCP (High-bandwidth Digital Content Protection) es una tecnología utilizada para proteger los contenidos<br />
digitales protegidos por <strong>de</strong>rechos <strong>de</strong> autor que utilizan la interfaz Digital Visual Interface (DVI).<br />
.<br />
Nota: El diseño y las especificaciones están suj<strong>et</strong>os a cambios sin previo aviso.<br />
Dimensiones<br />
PDP-6020FD (pantalla <strong>de</strong> 60”) PDP-5020FD (pantalla <strong>de</strong> 50”)<br />
93 (3-21/32)<br />
1465 (57-11/16)<br />
93 (3-21/32)<br />
1233 (48-17/32)<br />
1030 (40-9/16)<br />
876 (34-1/2)<br />
867 (34-1/8)<br />
723 (28-15/32)<br />
429 (16-7/8)<br />
920 (36-7/32)<br />
80 (3-5/32)<br />
349 (13-3/4)<br />
550 (21-21/32)<br />
80 (3-5/32)<br />
136<br />
Sp
Apéndice<br />
08<br />
8.4 Glosario<br />
HDMI<br />
High-Definition Multimedia Interface (HDMI) - La interfaz multimedia <strong>de</strong> alta <strong>de</strong>finición es una norma <strong>de</strong><br />
transmisión <strong>de</strong> datos digitales para aparatos electrodomésticos para consumidores. La HDMI conecta fuentes<br />
<strong>de</strong> audio/ví<strong>de</strong>o digitales a un dispositivo <strong>de</strong> audio y/o ví<strong>de</strong>o digital compatible, tal como un televisor <strong>de</strong> pantalla<br />
plana. La HDMI también permite el audio transmitido digitalmente y señales <strong>de</strong> control en un único cable para<br />
fuentes <strong>de</strong> audio digitales <strong>de</strong> múltiples canales.<br />
PCM<br />
Pulse Co<strong>de</strong> Modulation (PCM) - La modulación por impulsos codificados es un método para convertir señales <strong>de</strong><br />
audio analógicas en digitales. Se utiliza la PCM en CDs <strong>de</strong> música.<br />
Dolby Digital<br />
Dolby Digital es una tecnología <strong>de</strong> codificación para compresiones <strong>de</strong> señales <strong>de</strong> audio. Dolby Digital soporta<br />
formatos <strong>de</strong> audio multicanal, <strong>de</strong> alta compresión, <strong>de</strong> alta calidad. Se utiliza el formato surround <strong>de</strong> 5.1 canales<br />
en emisiones digitales.<br />
Emisión <strong>de</strong> alta <strong>de</strong>finición (HD)<br />
HD es un sistema <strong>de</strong> emisión <strong>de</strong> televisión digital con mayor resolución que los sistemas <strong>de</strong> televisión<br />
tradicionales. En comparación con el sistema <strong>de</strong> emisión analógica terrestre existente que es capaz <strong>de</strong> producir<br />
una imagen compuesta por 525 líneas <strong>de</strong> resolución, el sistema <strong>de</strong> emisión <strong>de</strong> alta <strong>de</strong>finición digital provee 750<br />
ó 1125 líneas, produciendo una imagen <strong>de</strong> <strong>de</strong>finición y calidad más alta.<br />
Exploración entrelazada<br />
En la televisión NTSC o visualización <strong>de</strong> imagen <strong>de</strong> ví<strong>de</strong>o, la exploración entrelazada rediseña cada segunda línea<br />
<strong>de</strong>l campo <strong>de</strong> imagen (262,5 líneas) por cada actualización <strong>de</strong> imagen en 1/60 <strong>de</strong> segundo y, a continuación, las<br />
líneas restantes con una segunda actualización en 1/60 <strong>de</strong> segundo para un cuadro compl<strong>et</strong>o <strong>de</strong> una imagen<br />
(525 líneas). Las líneas <strong>de</strong> exploración efectivas son expresas como “480i” y “1080i” (“i” representa “interlaced”<br />
(entrelazado)).<br />
Exploración progresiva<br />
La exploración progresiva rediseña un cuadro <strong>de</strong> imagen (todas sus líneas) en or<strong>de</strong>n por cada actualización <strong>de</strong><br />
imagen. En comparación con la exploración entrelazada, la exploración progresiva produce menos parpa<strong>de</strong>o,<br />
haciéndola a<strong>de</strong>cuada para visualizar imágenes <strong>de</strong> texto y fijas. Las líneas <strong>de</strong> exploración efectivas son expresas<br />
como “480p” y “720p” (“p” representa “progressive” (progresivo)).<br />
Español<br />
(Home Media Gallery)<br />
Gateway pred<strong>et</strong>erminado<br />
El gateway pred<strong>et</strong>erminado es un nudo en una red <strong>de</strong> computadoras que se emplea como un punto <strong>de</strong> acceso a<br />
otra red. Un gateway pred<strong>et</strong>erminado (tal como una computadora y ruteador) se utiliza para dirigir todo el tráfico<br />
que no se direcciona a una estación <strong>de</strong>ntro <strong>de</strong> la subred local.<br />
Servidor DHCP (Dynamic Host Configuration Protocol)<br />
Provee un mecanismo para asignar direcciones IP a clientes. En la mayoría <strong>de</strong> los casos, un ruteador <strong>de</strong> banda<br />
ancha se emplea como un servidor DHCP en una red doméstica.<br />
DLNA (Digital Living N<strong>et</strong>work Alliance)<br />
El logotipo DLNA autorizado permite que los consumidores reconozcan fácilmente los productos que satisfacen<br />
la nueva norma para PCs <strong>de</strong> re<strong>de</strong>s domésticas y otros dispositivos digitales, como estipulado en la Guías DLNA<br />
para interoperabilidad. Esto permite que se disfrute <strong>de</strong> la música, ví<strong>de</strong>o, <strong>et</strong>c, <strong>de</strong> diversos dispositivos en una red<br />
doméstica. Este producto es compatible con contenidos <strong>de</strong> música, foto y ví<strong>de</strong>o, y está basado en las guías DLNA<br />
Home N<strong>et</strong>worked Device Interoperability - expandidas: Octubre <strong>de</strong> 2006 (V1.5). Este producto pue<strong>de</strong> utilizarse<br />
para reproducir música, foto y ví<strong>de</strong>o alma<strong>de</strong>nado en un servidor compatible con DLNA conectado a través <strong>de</strong> un<br />
cable LAN.<br />
La Alianza <strong>de</strong> Re<strong>de</strong>s Digitales Vivas (DLNA) se <strong>de</strong>dica a la compartición simplificada <strong>de</strong> contenidos digitales,<br />
tales como música, foto y ví<strong>de</strong>o digital entre PCs y aparatos electrónicos <strong>de</strong> consumidores (CE) en red. Mediante<br />
e l establecimiento <strong>de</strong> una plataforma <strong>de</strong> interoperabilidad basada en normas industriales abiertas, la DLNA<br />
proporciona guías <strong>de</strong> diseño técnico que las compañías pue<strong>de</strong>n utilizar para <strong>de</strong>sarrollar productos domésticos<br />
que comparten contenidos a través <strong>de</strong> re<strong>de</strong>s domésticas alámbricas e inalámbricas.<br />
137<br />
Sp
08 Apéndice<br />
138<br />
Sp<br />
Servidor DNS (Domain Name Service)<br />
El servidor DNS es un servidor que d<strong>et</strong>ermina el nombre <strong>de</strong> una computadora <strong>de</strong> red <strong>de</strong>ntro <strong>de</strong> la Intern<strong>et</strong>. El<br />
servidor funcionar para intercambiar la dirección IP al nombre <strong>de</strong>l host, y nombre <strong>de</strong>l host a la dirección IP.<br />
Ethern<strong>et</strong><br />
Una tecnología <strong>de</strong> re<strong>de</strong>s <strong>de</strong> computadoras basada en tramas <strong>de</strong> datos para re<strong>de</strong>s <strong>de</strong> área local (LANs). El<br />
televisor <strong>de</strong> pantalla plana soporta 100BASE-TX.<br />
Dirección IP (Protocolo <strong>de</strong> Intern<strong>et</strong>)<br />
Un número singular que los dispositivos utilizan para i<strong>de</strong>ntificar y comunicarse con cada otro en una red<br />
utilizando la norma <strong>de</strong> protocolo <strong>de</strong> Intern<strong>et</strong>, tal como “192.168.1.xxx”. No se permiten números duplicados<br />
<strong>de</strong>ntro <strong>de</strong> la red.<br />
Cable LAN<br />
Un cable que tiene un enchufe modular <strong>de</strong> ocho clavijas en cada extremo y es diferente <strong>de</strong>l enchufe <strong>de</strong> teléfone,<br />
que tiene cuatro clavijas. Se utiliza un cable directo cuando se conecta el televisor <strong>de</strong> pantalla plana a una red<br />
doméstica vía un concentrador. Se utiliza un cable cruzado cuando se conecta directamente a un PC. Utilie<br />
cables LAN <strong>de</strong> categoría 5 (CAT-5).<br />
Dirección MAC (Media Access Control)<br />
Una dirección adjunta a un puerto <strong>de</strong> cualquier dispositivo <strong>de</strong> red con una dirección IP. La dirección MAC se<br />
expresa como “00:e0:36:01:23:xx” y no pue<strong>de</strong> cambiarse.<br />
Dispositivos <strong>de</strong> clase <strong>de</strong> almacenamiento masivo<br />
La norma provee una interfaz a una variedad <strong>de</strong> dispositivos <strong>de</strong> almacenamiento, tales como dispositivos flash<br />
USB y cámaras digitales.<br />
PTP (Picture Transfer Protocol)<br />
Un protocolo que permite la transferencia <strong>de</strong> imágenes y manipulación <strong>de</strong> cámaras digitales a través <strong>de</strong> una<br />
conexión USB. La mayoría <strong>de</strong> las cámaras digitales recientes y otros dispositivos soportan el protocolo PTP,<br />
permitiendo la transferencia <strong>de</strong> imágenes a través <strong>de</strong> conexiones directas.<br />
Máscara <strong>de</strong> subred<br />
Se utiliza para d<strong>et</strong>erminar la red cuando las direcciones IP están divididas en varias partes. Se expresa como<br />
“255.255.255.0”. En la mayoría <strong>de</strong> los casos, la máscara <strong>de</strong> subred se asigna automáticamente por el servidor<br />
DHCP.<br />
UPnP (Universal Plug and Play)<br />
Arquitectura para la conectividad <strong>de</strong> re<strong>de</strong>s <strong>de</strong> dispositivos <strong>de</strong> punto a punto pen<strong>et</strong>rante <strong>de</strong> factores <strong>de</strong> todas<br />
formas. Está diseñada para proporcionar una conectividad, fácil <strong>de</strong> utilizar y flexible, a re<strong>de</strong>s ad-hoc o no<br />
administradas sea en la casa, en un negocio pequeño, espacios públicos, o lugares adjuntos a la Intern<strong>et</strong>.<br />
USB (Universal Serial Bus)<br />
USB provee un estándar <strong>de</strong> bus serial para conectar dispositivos, usualmente a computadoras tales como PCs.<br />
El televisor <strong>de</strong> pantalla plana soporta dispositivos <strong>de</strong> clase <strong>de</strong> almacenamiento masivo y dispositivos PTP (Picture<br />
Transfer Protocol).<br />
Windows Media Connect<br />
Microsoft Windows Media Connect es una nueva tecnología para distribuir música, fotos y ví<strong>de</strong>o almacenados<br />
en un PC con Windows XP instalado en un sitema estéreo <strong>de</strong> TV. Con esta tecnología, se pue<strong>de</strong> reproducir<br />
archivos almacenados en un PC <strong>de</strong> diversos dispositivos siempre que se <strong>de</strong>see.<br />
Windows Media DRM<br />
Windows Media DRM es una tecnología <strong>de</strong> protección <strong>de</strong> <strong>de</strong>rechos <strong>de</strong> autor <strong>de</strong>sarrollada por Microsoft<br />
Corporation. Esta tecnología permite que los proveedores <strong>de</strong> contenidos distribuyan música, ví<strong>de</strong>o y otros<br />
contenidos <strong>de</strong> medios digitales en la Intern<strong>et</strong> en un formato <strong>de</strong> archivo codificado y protegido.<br />
Windows Media Player<br />
Una aplicación <strong>de</strong> reproducción <strong>de</strong> medios digitales gratuita suministrada por Microsoft que se utiliza para<br />
reproducir audio, ví<strong>de</strong>o e imágenes en PCs.<br />
Windows Media Player 11<br />
La funcionalidad <strong>de</strong> Windows Media Connect ha sido integrada en esta versión <strong>de</strong> Windows Media Player.<br />
Después <strong>de</strong> instalar Windows Media Player 11, Windows Media Connect no funcionará. Consulte el sitio Web <strong>de</strong><br />
Microsoft para los d<strong>et</strong>alles.
Apéndice 08<br />
8.5 Índice<br />
Números<br />
100BASE-TX ..........................................................................85, 138<br />
10BASE-T ......................................................................................85<br />
2-pantallas ...................................................................12, 13, 61, 62<br />
A<br />
Agudos ..........................................................................................46<br />
Ahorro <strong>de</strong> energía ............................................................52, 53, 67<br />
Aire/Cable .....................................................................................35<br />
Ajuste <strong>de</strong> la posición H/V ............................................................44<br />
Ajuste manual ........................................................................36, 43<br />
Analógico ..............................................................43, 64, 66, 74, 75<br />
Apagado: sin op. ...........................................................................68<br />
Apagado: sin señal .......................................................................68<br />
AVC ..........................................................................................46, 67<br />
Azul ....................................................................................33, 58, 65<br />
B<br />
Balance .............................................................................33, 46, 57<br />
Bloquear ..........................................................................49, 51, 113<br />
Brillo ..................................................................................45, 55, 58<br />
Brillo sinc. .............................................................................60, 116<br />
C<br />
Cambiar contraseña ..............................................................33, 47<br />
Canal .................................................................................35, 38, 41<br />
CBL ..........................................................................................12, 71<br />
Clasificaciones canadienses en francés ....................................49<br />
Clasificaciones canadienses en inglés ......................................49<br />
Clasificaciones no disponibles ...................................................49<br />
Color ............................................................................42, 45, 55, 58<br />
Conf.Control HDMI .................................................................78, 81<br />
Config. sint. Digital. ........................................................35, 38, 120<br />
Config. TV analógica ........................................................36, 38, 43<br />
Configuración <strong>de</strong>l sistema ..........................................................34<br />
Congelar ........................................................................................62<br />
Contraste .....................................................................43, 54, 55, 58<br />
Control <strong>de</strong> la alimentación ..........................................................82<br />
Control familiar .........................................................47, 48, 50, 113<br />
Control HDMI ....................................................................74, 76, 78<br />
D<br />
DEPORTE ................................................................................12, 54<br />
D<strong>et</strong>ección <strong>de</strong> máscaras laterales .......................................59, 123<br />
Digital ................................................................................26, 32, 50<br />
Dolby Digital .......................................................................111, 135<br />
E<br />
Efecto sonido ........................................................................67, 135<br />
Encendido .....................................................................................31<br />
Energía ....................................................................................53, 67<br />
Entrada ..........................................................................................40<br />
Entrada HDMI .................................................................74, 75, 114<br />
ESTÁNDAR .............................................................................12, 55<br />
Estándar ..................................................................................12, 54<br />
Etiqu<strong>et</strong>a .........................................................................................40<br />
Etiqu<strong>et</strong>ar entrada ..........................................................................40<br />
F<br />
Favoritos ..................................................................................33, 40<br />
G<br />
Gestión <strong>de</strong> energía .......................................................................68<br />
Graves ............................................................................................33<br />
Guías familiares <strong>de</strong> TV .....................................................48, 49, 50<br />
H<br />
Home Media Gallery .....................................................................83<br />
HOME MENU ..........................................................................12, 34<br />
I<br />
Idioma ...................................................................34, 35, 65, 66, 76<br />
Imagen congelada .....................................................................121<br />
Imagen-en-imagen ...........................................................12, 13, 61<br />
INPUT ............................................................................................12<br />
Instalación .......................................................................14, 35, 121<br />
Instalación automática ............................................................... 35<br />
J<br />
JUEGO ...................................................................28, 54, 56, 60, 82<br />
M<br />
Mando a distancia ............................................................10, 12, 69<br />
Máscara lateral .................................................................52, 59, 60<br />
Matiz ........................................................................................55, 58<br />
Modo canal .............................................................................33, 39<br />
Modo HD ancho .......................................................................... 59<br />
Modo película .............................................................................. 60<br />
MPAA ....................................................................................48, 126<br />
MTS ..........................................................................................64, 66<br />
multipantalla .....................................................................56, 61, 62<br />
MUTING ...................................................................................13, 41<br />
N<br />
Niti<strong>de</strong>z ......................................................................................55, 58<br />
O<br />
Optimización ................................................................................ 60<br />
ÓPTIMO .............................................................................12, 45, 54<br />
Orbiter ...................................................................................53, 124<br />
Organizar favoritos .................................................................33, 40<br />
P<br />
PCM .......................................................................................74, 111<br />
PELÍCULA ..........................................................................12, 44, 54<br />
Posición .................................................................................44, 112<br />
Pref. cont. juego .....................................................................56, 60<br />
Protec. pantalla ........................................................................... 33<br />
Protección <strong>de</strong> pantalla .................................................52, 114, 123<br />
PureCinema ................................................................................. 59<br />
R<br />
RCV ............................................................................................... 12<br />
Reloj .......................................................................................35, 112<br />
RENDIMIENTO ........................................................................12, 54<br />
Rojo ..........................................................................................58, 65<br />
Rótulo <strong>de</strong> información ................................................................ 63<br />
S<br />
SAP ..........................................................................................64, 66<br />
SAT ...........................................................................................12, 71<br />
SCREEN SIZE ..........................................................................13, 56<br />
Selección AV ...........................................................................54, 55<br />
Sensor luz amb. ........................................................................... 42<br />
SHIFT .................................................................................13, 61, 62<br />
Sonido .........................................................................42, 46, 54, 64<br />
SRS ................................................................................67, 135, 140<br />
SRS Definition ............................................................................135<br />
SRS FOCUS ................................................................................135<br />
SRS TruBASS ..............................................................................135<br />
Sub-Títulos ..............................................................................64, 65<br />
SWAP ................................................................................13, 61, 62<br />
T<br />
Tamaño automático .................................................................... 59<br />
Temporizador <strong>de</strong> apagado ...................................................41, 115<br />
Terminal HDMI .........................................................27, 74, 76, 116<br />
Tmño. Auto. .............................................................................52, 56<br />
TV/DTV ...............................................................................13, 26, 32<br />
U<br />
USUARIO ................................................................................12, 55<br />
V<br />
Ver<strong>de</strong> ..................................................................................58, 65, 73<br />
VOLUMEN ...............................................................................41, 67<br />
Z<br />
Zona <strong>de</strong> horario ........................................................................... 35<br />
Español<br />
139<br />
Sp
08 Apéndice<br />
8.6 Información <strong>de</strong> marcas registradas, licencias y patentes<br />
Marcas registradas<br />
es una marca registrada <strong>de</strong> SRS Labs, Inc.<br />
WOW HD tecnología esta incorporada bajo licencia <strong>de</strong> SRS Labs, Inc.<br />
Fabricado bajo licencia <strong>de</strong> Dolby Laboratories. “Dolby” y el símbolo <strong>de</strong> la doble D son marcas comerciales <strong>de</strong> Dolby<br />
Laboratories.<br />
HDMI, el logotipo HDMI y High-Definition Multimedia Interface son marcas comerciales o marcas registradas <strong>de</strong> HDMI<br />
Licensing LLC.<br />
Este producto incluye fuentes FontAvenue ® bajo licencia <strong>de</strong> NEC Corporation. FontAvenue es una marca registrada <strong>de</strong> NEC<br />
Corporation.<br />
DDC es una marca registrada <strong>de</strong> Vi<strong>de</strong>o Electronics Standards Association.<br />
Este software está basado en parte en el trabajo <strong>de</strong>l grupo JPEG in<strong>de</strong>pendiente.<br />
Los nombres <strong>de</strong> las compañías o instituciones son los nombres comerciales o marcas registradas <strong>de</strong> las respectivas<br />
compañías o instituciones.<br />
Windows Media y el logotipo Windows son marcas comerciales o marcas registradas <strong>de</strong> Microsoft Corporation en los Estados<br />
Unidos y/u otros países.<br />
DLNA y DLNA CERTIFIED son marcas <strong>de</strong> fábrica y/o marcas <strong>de</strong> servicio <strong>de</strong> Digital Living N<strong>et</strong>work Alliance.<br />
Licencia<br />
Los propi<strong>et</strong>arios <strong>de</strong> contenidos utilizan la administración <strong>de</strong> <strong>de</strong>rechos digitales <strong>de</strong> Windows Media (WMDRM) para proteger<br />
su propiedad intelectual, incluyendo <strong>de</strong>rechos <strong>de</strong> autor. Este dispositivo utiliza software WMDRM para acce<strong>de</strong>r a contenidos<br />
protegidos por WMDRM. Si el software WMDRM no protege el contenido, el propi<strong>et</strong>ario <strong>de</strong>l contenido pue<strong>de</strong> pedir a Microsoft<br />
que revoque la habilidad <strong>de</strong>l software para utilizar WMDRM para reproducir o copiar contenidos protegidos. La revocación no<br />
afecta los contenidos no protegidos. Al <strong>de</strong>scargar licencias para contenidos protegidos, usted acepta que Microsoft pueda<br />
incluir una lista <strong>de</strong> revocaciones con las licencias. Los propi<strong>et</strong>arios <strong>de</strong> contenidos pue<strong>de</strong>n solicitarle la actualización <strong>de</strong><br />
WMDRM para acce<strong>de</strong>r a sus contenidos. Si rechaza una actualización no podrá acce<strong>de</strong>r al contenido que requiera la<br />
actualización.<br />
Este producto está protegido por ciertos <strong>de</strong>rechos <strong>de</strong> propiedad intelectual <strong>de</strong> Microsoft. La utilización o distribución <strong>de</strong> tal<br />
tecnología fuera <strong>de</strong> este producto está prohibida sin una licencia <strong>de</strong> Microsoft.<br />
El logo DLNA está permitido a los productos que tengan obtenido una certificación DLNA (Digital Living N<strong>et</strong>work Alliance).<br />
Aviso <strong>de</strong> exención <strong>de</strong> responsabilidad<br />
<strong>Pioneer</strong> ofrece información para ayudar la configuración <strong>de</strong> una red y la conexión <strong>de</strong>l televisor <strong>de</strong> pantalla plana a una red,<br />
pero el usuario es el responsable en la configuración y conexión apropiada <strong>de</strong> la red. <strong>Pioneer</strong> no se hace responsable por<br />
daños resultantes <strong>de</strong> la configuración <strong>de</strong> red y conexiones hechas.<br />
Al <strong>de</strong>scargar actualizaciones <strong>de</strong> software <strong>de</strong>l sitio web <strong>de</strong> <strong>Pioneer</strong> y realizar los procedimientos <strong>de</strong> actualización, asegúrese<br />
<strong>de</strong> que no se interrumpan sus conexiones <strong>de</strong> la red a su dispositivo flash USB, y <strong>de</strong> su dispositivo flash USB al televisor <strong>de</strong><br />
pantalla plana.<br />
<strong>Pioneer</strong> no se hace responsable por fallos o daños resultantes <strong>de</strong> problemas con conexión.<br />
Pue<strong>de</strong> que ciertos contenidos no funcionen correctamente <strong>de</strong>pendiendo <strong>de</strong>l dispositivo USB que se utilice. <strong>Pioneer</strong> no<br />
assume ninguna responsabilidad por fallos o daños resultantes <strong>de</strong>l dispositivo USB utilizado por el usuario.<br />
140<br />
Sp<br />
Publicado por <strong>Pioneer</strong> Corporation.<br />
Copyright © 2008 <strong>Pioneer</strong> Corporation.<br />
Todos los <strong>de</strong>rechos reservados.
Should this product require service in the U.S.A. and you wish to locate the nearest <strong>Pioneer</strong> Authorized In<strong>de</strong>pen<strong>de</strong>nt Service Company, or if you wish to<br />
purchase replacement parts, operating instructions, service manuals, or accessories, please call the number shown below.<br />
8 0 0 – 4 2 1 – 1 6 2 5<br />
Please do not ship your product to <strong>Pioneer</strong> without first calling the Customer Support Division at the above listed number for assistance.<br />
<strong>Pioneer</strong> Electronics (USA) Inc.<br />
Customer Support Division<br />
P.O. BOX 1760, Long Beach,<br />
CA 90801-1760, U.S.A.<br />
For warranty information please see the Limited Warranty she<strong>et</strong> inclu<strong>de</strong>d with your product.<br />
Should this product require service in Canada, please contact a <strong>Pioneer</strong> Canadian Authorized Dealer to locate the nearest <strong>Pioneer</strong> Authorized Service<br />
Company in Canada.<br />
Alternatively, please contact the Customer Satisfaction Department at the following address:<br />
<strong>Pioneer</strong> Electronics of Canada, Inc.<br />
Customer Satisfaction Department<br />
300 Allstate Parkway, Markham, Ontario L3R 0P2<br />
1-877-283-5901<br />
905-479-4411<br />
For warranty information please see the Limited Warranty she<strong>et</strong> inclu<strong>de</strong>d with your product.<br />
Si ce produit doit être réparé au Canada, v<strong>eu</strong>illez vous adresser à un distribut<strong>eu</strong>r autorisé <strong>Pioneer</strong> du Canada pour obtenir le nom du Centre <strong>de</strong> Service<br />
Autorisé <strong>Pioneer</strong> le plus près <strong>de</strong> chez-vous. Vous pouvez aussi contacter le Service à la clientèle <strong>de</strong> <strong>Pioneer</strong>:<br />
<strong>Pioneer</strong> Électroniques du Canada, Inc.<br />
Service Clientèle<br />
300, Allstate Parkway, Markham, Ontario L3R 0P2<br />
1-877-283-5901<br />
905-479-4411<br />
Pour obtenir <strong>de</strong>s renseignements sur la garantie, v<strong>eu</strong>illez vous reporter au f<strong>eu</strong>ill<strong>et</strong> sur la garantie restreinte qui accompagne le produit.<br />
S018_B_EF
Register Your Product on<br />
http://www.pioneerelectronics.com (US)<br />
http://www.pioneerelectronics.ca (Canada)<br />
Enregistrez votre appareil sur:<br />
http://www.pioneerelectronics.com (États-Unis)<br />
http://www.pioneerelectronics.ca (Canada)<br />
PIONEER CORPORATION<br />
4-1, Meguro 1-Chome, Meguro-ku, Tokyo 153-8654, Japan<br />
PIONEER ELECTRONICS (USA) INC.<br />
P.O. BOX 1540, Long Beach, California 90801-1540, U.S.A. TEL: (800) 421-1404<br />
PIONEER ELECTRONICS OF CANADA, INC.<br />
300 Allstate Parkway, Markham, Ontario L3R 0P2, Canada TEL: 1-877-283-5901, 905-479-4411<br />
PIONEER EUROPE NV<br />
Haven 1087, Ke<strong>et</strong>berglaan 1, B-9120 Melsele, Belgium TEL: 03/570.05.11<br />
PIONEER ELECTRONICS ASIACENTRE PTE. LTD.<br />
253 Alexandra Road, #04-01, Singapore 159936 TEL: 65-6472-7555<br />
PIONEER ELECTRONICS AUSTRALIA PTY. LTD.<br />
178-184 Boundary Road, Braesi<strong>de</strong>, Victoria 3195, Australia, TEL: (03) 9586-6300<br />
PIONEER ELECTRONICS DE MEXICO S.A. DE C.V.<br />
Blvd.Manuel Avila Camacho 138 10 piso Col.Lomas <strong>de</strong> Chapultepec, Mexico, D.F. 11000 TEL: 55-9178-4270<br />
K002_B_En<br />
Published by <strong>Pioneer</strong> Corporation.<br />
Copyright © 2008 <strong>Pioneer</strong> Corporation.<br />
All rights reserved.<br />
Publication <strong>de</strong> <strong>Pioneer</strong> Corporation.<br />
© 2008 <strong>Pioneer</strong> Corporation.<br />
Tous droits <strong>de</strong> reproduction <strong>et</strong> <strong>de</strong> traduction réservés.<br />
<br />
Printed in China<br />
Imprimé en Chine