
You also want an ePaper? Increase the reach of your titles
YUMPU automatically turns print PDFs into web optimized ePapers that Google loves.
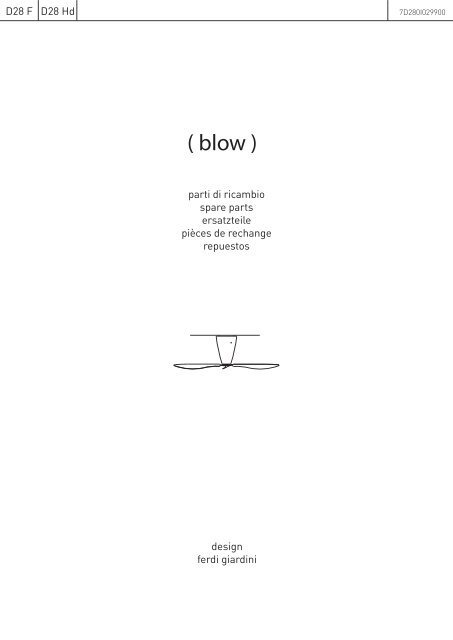
D28 F D28 Hd 7D280I029900<br />
( <strong>blow</strong> )<br />
parti di ricambio<br />
spare parts<br />
ersatzteile<br />
pièces de rechange<br />
repuestos<br />
design<br />
ferdi giardini
Vecchia versione<br />
Old version<br />
Alte version<br />
Ancienne version<br />
Versión anterior<br />
Hd<br />
Fluo<br />
Circuiti separati (2 schede)<br />
Separate circuits (2 boards)<br />
Getrennter Schaltkreis (2 karten)<br />
Circuits séparés (2 cartes)<br />
Circuitos separados (2 placas)<br />
www.luceplan.com<br />
Circuito con asola<br />
Circuit with buttonhole<br />
Schaltkreis mit Öse<br />
Circuits avec fente<br />
Circuito con ojal<br />
Nuova versione<br />
New version<br />
Neue version<br />
Nouvelle version<br />
Nueva anterior<br />
Circuito unico<br />
Single circuit<br />
Einzelner Schaltkreis<br />
Circuit unique<br />
Circuito único<br />
Circuito con foro<br />
Circuit with hole<br />
Schaltkreis mit Loch<br />
Circuits avec trou<br />
Circuito con foro<br />
02
Elenco ricambi<br />
Spares list<br />
Ersatzteilenliste<br />
Liste des pièces de rechange<br />
Listado de repuestos<br />
www.luceplan.com<br />
1<br />
6<br />
10<br />
8<br />
9<br />
4<br />
5<br />
3<br />
2<br />
2<br />
5<br />
D28 F / D28 Hd<br />
2<br />
7<br />
5<br />
5<br />
03
flange fissaggio pale, superiore e inferiore con viti<br />
flanges for blade clamping, upper and under side with screws<br />
flasche für blattmontage, obere und untere seite mit schrauben<br />
bride pour montage des pales, supérieure et inférieure avec vis<br />
bridas superior e inferior de fijaciónde las palas con tornillos<br />
paralume opalino con viti<br />
frosted glass shade with screws<br />
opalschirm mit schrauben<br />
abat-jour opale avec vis<br />
pantalla opalino con tornillos<br />
9D2812600101<br />
8 D28/16<br />
sacchetto 10 fusibili 0,8 A<br />
0.8 A 10 fuse bag<br />
beutel mit 10 sicherungen 0,8 A<br />
poche avec 10 fusibles 0,8 A<br />
blister de 10 fusibles de 0,8 A<br />
9D2816000000<br />
new<br />
9 D28/18<br />
gruppo circuito (solo per versione D28 F)<br />
circuit group (only for D28 F model)<br />
scaltungsguppe (nur für ausführung D28 F)<br />
groupe du circuit (seulement pour version D28 F)<br />
grupo circuito (sólo para versión D28 F)<br />
9D2818601900<br />
new<br />
10 D99/01<br />
9D9901260000<br />
old<br />
reattore 26W 230V<br />
ballast 26W 230V<br />
vorschaltgerät 26W 230V<br />
reacteur-ballast 26W 230V<br />
reactor 26W 230V<br />
Vers.<br />
Vers.<br />
Vers.<br />
Vers.<br />
Vers.<br />
old<br />
+<br />
new<br />
old<br />
+<br />
new<br />
old<br />
+<br />
new<br />
old<br />
+<br />
new<br />
old<br />
+<br />
new<br />
old<br />
+<br />
new<br />
new<br />
+<br />
new<br />
04
Solo vecchia versione<br />
Only old version<br />
Nur die alte version<br />
Seule l’ancienne version<br />
Sólo la versión anterior<br />
Rif.<br />
Ref.<br />
Kenn.<br />
Réf.<br />
Ref.<br />
Cod.Comm.le<br />
Comm. Code<br />
Handelskode<br />
Code comm.<br />
Cód. Com.<br />
D28/15<br />
D28/17<br />
D28/18<br />
www.luceplan.com<br />
Descrizione<br />
Description<br />
Beschreibung<br />
Description<br />
Descripción<br />
circuito ricevente (solo per versione D28 Hd)<br />
receiving circuit (only for D28 Hd model)<br />
Empfänger Schaltung (nur für ausführung D28 Hd)<br />
circuit récepteur (seulement pour version D28 Hd)<br />
circuito receptor (sólo para versión D28 Hd)<br />
circuito dimmer (solo per versione D28 Hd)<br />
dimmer circuit (only for D28 Hd model)<br />
dimmer-Karte (nur für ausführung D28 Hd)<br />
circuit gradateur (seulement pour version D28 Hd)<br />
circuito dimmer (sólo para versión D28 Hd)<br />
circuito ricevente (solo per versione D28 F)<br />
circuit receiving (only for D28 F model)<br />
Empfänger Schaltung (nur für ausführung D28 F)<br />
circuit récepteur (seulement pour version D28 F)<br />
circuito receptor (sólo para versión D28 F)<br />
Cod. Ricambi<br />
Spares code<br />
Ersatzteilenkode<br />
Cod. pieces de rechange<br />
Cód. Repuestos<br />
9D2815601400<br />
9D2817702100<br />
9D2818601300<br />
Colore<br />
Colour<br />
Farbe<br />
Couleur<br />
Color<br />
Vers.<br />
Vers.<br />
Vers.<br />
Vers.<br />
Vers.<br />
old<br />
old<br />
old<br />
05
1-6 – Sostituzione pala singola<br />
1-6 - Single blade replacement<br />
1-6 - Einzelblattaustausch<br />
1-6 – Remplacement des pale simple<br />
1-6 - Sustitución de la pala simple<br />
!<br />
ATTENZIONE<br />
Prima di procedere alla sostituzione leggere attentamente le AVVERTENZE contenute alla<br />
fine del presente libretto di istruzioni.<br />
!<br />
WARNING<br />
Before replacing, read carefully the WARNINGS contained at the end of this instruction<br />
handbook.<br />
!<br />
ACHTUNG<br />
Vor dem Auswechseln sorgfaltig die ANWEISUNGEN am Ende des vorliegenden<br />
Handbuches lesen.<br />
!<br />
ATTENTION<br />
Avant de procéder au remplacement, lire attentivement les AVERTISSEMENTS contenus à<br />
la fin de ce manuel d’instructions.<br />
!<br />
ATENCIÓN<br />
Antes de proceder a la sustitución leer atentamente las ADVERTENCIAS contenidas en el<br />
final del presente manual de instrucciones.<br />
1.1 - Svitare le viti (a) che fissano la flangia di fissaggio pale (b) al paralume (c) e<br />
rimuovere la flangia stessa insieme alle pale.<br />
Unscrew the screws (a) that fix the flange for blade clamping (b) to the<br />
shade (c) and remove the flange itself together with the blades.<br />
Schrauben (a) losmachen, die den Flansch für Blattmontage (b) an dem Schirm<br />
(c) befestigen und den Flansch zusammen mit den Blättern entefernen.<br />
Dévisser les vis (a) qui fixent la bride de fixation des pales (b) a l’abat-jour (c)<br />
et extraire la bride conjointement avec les pales.<br />
Desenroscar los tornillos (a) que fijan la brida de fijación de las palas (b) a la<br />
pantalla (c) y retirar esta brida junto con las palas.<br />
1.2 - Svitare le viti (d) e rimuovere la piastra pale superiore (e).<br />
Unscrew the screws (d) and remove the upper plate (e) for blade clamping.<br />
Schrauben (d) losmachen und die obere Blattplatte (e) entfernen.<br />
Dévisser les vis (d) et extraire la plaque supérieure des pales (e).<br />
Desenroscar los tornillos (d) y retirar la placa superior (e) de las palas.<br />
www.luceplan.com<br />
d<br />
e<br />
c<br />
b<br />
a<br />
1.3 - Rimuovere la pala da sostituire.<br />
Remove the blade to be replaced.<br />
Das auszutauschende Blatt entfernen.<br />
Enlever la pale qui doit être replacée.<br />
Retirar la pala a sustituir.<br />
1.4 - Inserire la nuova pala.<br />
Insert the new blade.<br />
Das neuen Blatt einsetzen.<br />
Insérer la nouvel pale.<br />
Colocar la pala nueva.<br />
1.5 - Ricollocare la piastra pale superiore (e) e riavvitare le viti (d).<br />
Place the upper plate (e) for blade clamping again and tighten the<br />
screws (d) again.<br />
Die obere Platte (e) für Blattmontage wieder positionieren und die<br />
Schrauben (d) wieder festziehen.<br />
Positionner de nouveau la pale supérieure (e) et revisser les vis (d).<br />
Colocar nuevamente la placa superior (e) de las palas y enroscar los<br />
tornillos (d).<br />
d<br />
e<br />
06
1.6 - Riavvitare le viti (a) e fissare la flangia di fissaggio pale (b) al paralume (c).<br />
Tighten the screws (a) again and fix the flange for blade (b) clamping to the shade (c).<br />
Schrauben (a) wieder festziehen und den Flansch für Blattmontage (b) an<br />
dem Schirm (c) befestigen.<br />
Revisser les vis (a) et fixer la bride de fixation des pales (b) à l’abat-jour (c).<br />
Enroscar los tornillos (a) y fijar la brida de fijación de las palas (b) a la<br />
pantalla (c).<br />
www.luceplan.com<br />
c<br />
b<br />
a<br />
07
2 – Sostituzione flange fissaggio pale<br />
2 – Replacement of flanges for blade clamping<br />
2 – Austausch der Flansche für Blattmontage<br />
2 – Remplacement des brides pour fixations des pales<br />
2 - Sustitución de las bridas de fijación de las palas<br />
!<br />
ATTENZIONE<br />
Prima di procedere alla sostituzione leggere attentamente le AVVERTENZE contenute alla<br />
fine del presente libretto di istruzioni.<br />
!<br />
WARNING<br />
Before replacing, read carefully the WARNINGS contained at the end of this instruction<br />
handbook.<br />
!<br />
ACHTUNG<br />
Vor dem Auswechseln sorgfaltig die ANWEISUNGEN am Ende des vorliegenden<br />
Handbuches lesen.<br />
!<br />
ATTENTION<br />
Avant de procéder au remplacement, lire attentivement les AVERTISSEMENTS contenus à<br />
la fin de ce manuel d’instructions.<br />
!<br />
ATENCIÓN<br />
Antes de proceder a la sustitución leer atentamente las ADVERTENCIAS contenidas en el<br />
final del presente manual de instrucciones.<br />
2.1 - Svitare le viti (a) che fissano la flangia di fissaggio pale (b) al paralume (c) e<br />
rimuovere la flangia stessa insieme alle pale.<br />
Unscrew the screws (a) that fix the flange for blade clamping (b) to the<br />
shade (c) and remove the flange itself together with the blades.<br />
Schrauben (a) losmachen, die den Flansch für Blattmontage (b) an dem<br />
Schirm (c) befestigen und den Flansch zusammen mit den Blättern entfernen.<br />
Dévisser les vis (a) qui fixent la bride de fixation des pales (b) a l’abat-jour (c)<br />
et extraire la bride conjointement avec les pales.<br />
Desenroscar los tornillos (a) que fijan la brida de fijación de las palas (b) a la<br />
pantalla (c) y retirar esta brida junto con las palas.<br />
2.2 - Svitare le viti (d) e rimuovere la piastra pale superiore (e).<br />
Unscrew the screws (d) and remove the upper plate (e) for blade clamping.<br />
Schrauben (d) losmachen und die obere Blattplatte (e) entfernen.<br />
Dévisser les vis (d) et extraire la plaque supérieure des pales (e).<br />
Desenroscar los tornillos (d) y retirar la placa superior (e) de las palas.<br />
www.luceplan.com<br />
d<br />
c<br />
e<br />
b<br />
a<br />
2.3 - Rimuovere le pale dalla piastra fissaggio pale inferiore (f).<br />
Remove the blades from the under plate (f) for blade clamping.<br />
Die Blätter aus der unteren Platte (f) für Blattmontage entfernen.<br />
Enlever les pales de la plaque de fixation pour la pale inférieure (f).<br />
Retirar las palas de la placa de fijación palas inferior (f).<br />
2.4 - Riposizionare le pale sulla nuova piastra fissaggio pale inferiore (f).<br />
Place again the blades on the new under plate (f) for blade clamping.<br />
Die Blätter auf die neue untere Montageplatte (f) wieder positionieren.<br />
Positionner de nouveau les pales sur la nouvel plaque de fixation pour<br />
la pale inférieure (f).<br />
Ubicar nuevamente las palas en la nueva placa de fijación palas inferior (f).<br />
f<br />
Nota: Il profilo ad incastro della pala deve essere accoppiato alla<br />
flangia come mostrato nell’immagine, affinché l’inserto filettato (g)<br />
della piastra di fissaggio inferiore e il foro della pala con la sede per il<br />
suo alloggiamento corrispondano.<br />
Note: The clamping profile of the blade must be coupled to the flange<br />
as shown in the picture, so that the threaded insert (g) of the under<br />
clamping plate and the hole of the blade together with the seat for its<br />
housing may correspond.<br />
Bemerkung: das Einspannungsprofil des Blattes muss dem Flansch<br />
gekuppelt werden, wie in dem Bild dargestellt, damit die Gewindeeinlage<br />
(g) der unteren Montagenplatte dem Blattloch mit dem Sitz für<br />
Plattengehäuse entspricht.<br />
Remarque: Le profil à emboîtement de la pale doit être accouplé à la<br />
bride, comme représenté dans l’image, afin que la douille filetée (g) de<br />
la plaque de fixation inférieure et le trou de la pale avec son logement<br />
correspondent.<br />
Nota: El perfil de unión de la pala debe acoplarse a la brida tal como<br />
se muestra en la imagen, para que la unión roscada (g) de la placa de<br />
fijación inferior y el orificio de la pala con su alojamiento se correspondan<br />
entre sí.<br />
08
2.5 - Ricollocare la piastra pale superiore (e) e riavvitare le viti (d).<br />
Place the upper plate (e) for blade clamping again and tighten the<br />
screws (d) again.<br />
Die obere Platte (e) für Blattmontage wieder positionieren und die<br />
Schrauben (d) wieder festziehen.<br />
Positionner de nouveau la pale supérieure (e) et revisser les vis (d).<br />
Colocar nuevamente la placa superior (e) de las palas y enroscar los<br />
tornillos (d).<br />
2.6 - Riavvitare le viti (a) e fissare la flangia di fissaggio pale (b) al paralume (c).<br />
Tighten the screws (a) again and fix the flange for blade (b) clamping to<br />
the shade (c).<br />
Die Schrauben (a) wieder festziehen und den Flansch für Blattmontage (b)<br />
an dem Schirm befestigen.<br />
Revisser les vis (a) et fixer la bride de fixation des pales (b) a l’abat-jour (c).<br />
Enroscar los tornillos (a) y fijar la brida de fijación de las palas (b) a la<br />
pantalla (c).<br />
www.luceplan.com<br />
d<br />
e<br />
c<br />
b<br />
a<br />
09
3 – Sostituzione paralume opalino<br />
3 – Frosted glass shade replacement<br />
3 – Austausch von Opalschirm<br />
3 – Remplacement l’abat-jour de verre opale<br />
3 - Sustitución de la pantalla opalino<br />
!<br />
ATTENZIONE<br />
Prima di procedere alla sostituzione leggere attentamente le AVVERTENZE contenute alla<br />
fine del presente libretto di istruzioni.<br />
!<br />
WARNING<br />
Before replacing, read carefully the WARNINGS contained at the end of this instruction<br />
handbook.<br />
!<br />
ACHTUNG<br />
Vor dem Auswechseln sorgfaltig die ANWEISUNGEN am Ende des vorliegenden<br />
Handbuches lesen.<br />
!<br />
ATTENTION<br />
Avant de procéder au remplacement, lire attentivement les AVERTISSEMENTS contenus à<br />
la fin de ce manuel d’instructions.<br />
!<br />
ATENCIÓN<br />
Antes de proceder a la sustitución leer atentamente las ADVERTENCIAS contenidas en el<br />
final del presente manual de instrucciones.<br />
3.1 - Svitare le viti (a) che fissano la flangia di fissaggio pale (b) al paralume (c) e<br />
rimuovere la flangia stessa insieme alle pale.<br />
Unscrew the screws (a) that fix the flange for blade clamping (b) to the<br />
shade (c) and remove the flange itself together with the blades.<br />
Schrauben (a) losmachen, die den Flansch für Blattmontage (b) an dem<br />
Schirm (c) befestigen und den Flansch zusammen mit den Blättern entfernen.<br />
Dévisser les vis (a) qui fixent la bride de fixation des pales (b) a l’abat-jour (c)<br />
et extraire la bride conjointement avec les pales.<br />
Desenroscar los tornillos (a) que fijan la brida de fijación de las palas (b) a la<br />
pantalla (c) y retirar esta brida junto con las palas.<br />
3.2 - Svitare le viti (d) poste sul paralume (c) e rimuoverlo.<br />
Unscrew the screws (d) positioned on the shade (c) and remove it.<br />
Die Schrauben (d) auf dem Schirm (c) losmachen und ihn entfernen.<br />
Dévisser les vis (d) positionnées sur l’abat-jour (c) et l’enlever.<br />
Desenroscar los tornillos (d) ubicados en la pantalla (c) y retirarla.<br />
www.luceplan.com<br />
c<br />
b<br />
d<br />
a<br />
c<br />
3.3 - Posizionare il nuovo paralume (c) e riavvitare le viti (d).<br />
Place the new shade (c) and tighten the screws (d) again.<br />
Den neuen Schirm (c) positionieren und die Schrauben (d) wieder festziehen.<br />
Positionner le nouveau l’abat-jour (c) et revisser les vis (d).<br />
Colocar la pantalla nueva (c) y enroscar los tornillos (d).<br />
c<br />
b<br />
d<br />
3.4 - Riavvitare le viti (a) e fissare la flangia di fissaggio pale (b) al nuovo paralume (c).<br />
Tighten the screws (a) again and fix the flange for blade (b) fixing to the new<br />
shade (c).<br />
Die Schrauben (a) wieder festziehen und die Befestigungsflansch für<br />
Blättermontage (b) an dem neuen Schirm (c) befestigen.<br />
Revisser les vis (a) et fixer la bride de fixation des pales (b) au nouveau<br />
abat-jour (c).<br />
Enroscar los tornillos (a) y fijar la brida de fijación de las palas (b) a la<br />
pantalla nueva (c).<br />
a<br />
c<br />
10
4 - Sostituzione gruppo flangia supporto muro<br />
4 – Replacement of flange group for wall support<br />
4 – Austausch der Flanschgruppe für Wandstütze<br />
4 – Remplacement le groupe – bride pour support à paroi<br />
4 – Sustitución del grupo brida de soporte a pared<br />
!<br />
ATTENZIONE<br />
Prima di procedere alla sostituzione leggere attentamente le AVVERTENZE contenute alla<br />
fine del presente libretto di istruzioni.<br />
!<br />
WARNING<br />
Before replacing, read carefully the WARNINGS contained at the end of this instruction<br />
handbook.<br />
!<br />
ACHTUNG<br />
Vor dem Auswechseln sorgfaltig die ANWEISUNGEN am Ende des vorliegenden<br />
Handbuches lesen.<br />
!<br />
ATTENTION<br />
Avant de procéder au remplacement, lire attentivement les AVERTISSEMENTS contenus à<br />
la fin de ce manuel d’instructions.<br />
!<br />
ATENCIÓN<br />
Antes de proceder a la sustitución leer atentamente las ADVERTENCIAS contenidas en el<br />
final del presente manual de instrucciones.<br />
4.1 - Allentare il grano (a) ed aprire il gruppo flangia supporto muro (b).<br />
Unfasten the dowel (a) and open the flange group for wall support (b).<br />
Den Stift (a) lockern und die Flanschgruppe für Wandstütze (b) öffnen.<br />
Desserrer le goujon (a) et ouvrir le groupe de bride pour support à paroi (b).<br />
Aflojar el perno (a) y abrir el grupo brida de soporte a pared (b).<br />
b<br />
4.2 - Scollegare il morsetto maschio (c) dal morsetto femmina (d).<br />
Disconnect the male terminal (c) from the female one (d).<br />
Die Gewindeklemme (c) von der Schraubenklemme (d) abklemmen.<br />
Déconnecter la borne mâle (c) de la borne (d).<br />
Desconectar el borne macho (c) del borne hembra (d).<br />
www.luceplan.com<br />
d<br />
c<br />
a<br />
4.3 - Sganciare il gruppo flangia supporto muro (b) dal supporto ventilatore (e) e<br />
sostituirlo con il nuovo.<br />
Uncouple the flange group for wall support (b) from the fan support (e) and<br />
replace it with the new one.<br />
Die Flanschgruppe für Wandstütze (b) von dem Lüfterhalter (e) auskuppeln<br />
und sie mit einer neuen austauschen.<br />
Décrocher le groupe de bride pour support à paroi (b) du support du<br />
ventilateur (e) et le remplacer avec le nouveau.<br />
Desenganchar el grupo brida de soporte a pared (b) del soporte del<br />
ventilador (e) y sustituirlo con el soporte nuevo.<br />
4.4 - Collegare il morsetto maschio (c) al morsetto femmina (d).<br />
Connect the male terminal (c) to the female one (d).<br />
Die Gewindeklemme (c) der Schraubenklemme (d) verbinden.<br />
Connecter la borne mâle (c) à la borne (d).<br />
Conectar el borne macho (c) con el borne hembra (d).<br />
b<br />
b<br />
d c<br />
d<br />
4.5 - Chiudere il nuovo gruppo flangia supporto muro (b) e serrare il grano (a).<br />
Close the new flange group for wall support (b) and fasten the dowel (a).<br />
Die neue Flanschgruppe für Wandstütze (b) wieder schließen und den<br />
Stift (a) spannen.<br />
Fermer le nouveau groupe de bride pour support à paroi (b) et serrer le<br />
goujon (a).<br />
Cerrar el grupo brida de soporte nuevo a pared (b) y apretar el perno (a).<br />
a<br />
e<br />
11
7 – Sostituzione gruppo circuito<br />
7 – Replacement of circuit group<br />
7 – Austausch der Schaltungsgruppe<br />
7 – Remplacement du groupe du circuit<br />
7 - Sustitución del grupo circuito<br />
!<br />
ATTENZIONE<br />
Prima di procedere alla sostituzione leggere attentamente le AVVERTENZE contenute alla<br />
fine del presente libretto di istruzioni.<br />
!<br />
WARNING<br />
Before replacing, read carefully the WARNINGS contained at the end of this instruction<br />
handbook.<br />
!<br />
ACHTUNG<br />
Vor dem Auswechseln sorgfaltig die ANWEISUNGEN am Ende des vorliegenden<br />
Handbuches lesen.<br />
!<br />
ATTENTION<br />
Avant de procéder au remplacement, lire attentivement les AVERTISSEMENTS contenus à<br />
la fin de ce manuel d’instructions.<br />
!<br />
ATENCIÓN<br />
Antes de proceder a la sustitución leer atentamente las ADVERTENCIAS contenidas en el<br />
final del presente manual de instrucciones.<br />
7.1 - Allentare il grano (a) ed aprire il gruppo flangia supporto muro (b).<br />
Unfasten the dowel (a) and open the flange group for wall support (b).<br />
Den Stift (a) lockern und die Flanschgruppe für Wandstütze (b) öffnen.<br />
Desserrer le goujon (a) et ouvrir le groupe de bride pour support à paroi (b).<br />
Aflojar el perno (a) y abrir el grupo brida de soporte a pared (b).<br />
b<br />
7.2 - Scollegare il morsetto maschio (c) dal morsetto femmina (d).<br />
Disconnect the male terminal (c) from the female one (d).<br />
Die Gewindeklemme (c) von der Schraubenklemme (d) abklemmen.<br />
Déconnecter la borne mâle (c) de la borne (d).<br />
Desconectar el borne macho (c) del borne hembra (d).<br />
www.luceplan.com<br />
d<br />
c<br />
a<br />
7.3 - Sganciare il gruppo flangia supporto muro (b) dal supporto ventilatore (e).<br />
Uncouple the flange group for wall support (b) from the fan support (e).<br />
Die Flanschgruppe für Wandstütze (b) von dem Lüfterhalter (e) auskuppeln.<br />
Décrocher le groupe de bride pour support à paroi (b) du support du ventilateur (e).<br />
Desenganchar el grupo brida de soporte a pared (b) del soporte del ventilador (e).<br />
b<br />
7.4 - Svitare le viti (f) e rimuovere il separatore circuito (g).<br />
Unscrew the screws (f) and remove the circuit isolator (g).<br />
Die Schrauben (f) losmachen und den Schaltungstrenner (g) entfernen.<br />
Dévisser les vis (f) et enlever le séparateur du circuit (g).<br />
Desenroscar los tornillos (f) y retirar el separador del circuito (g).<br />
g<br />
7.5 - Sfilare il passacavo (h) insieme ai cavi stessi dal separatore circuito (g).<br />
Extract the cable guide (h) together with the cables themselves from<br />
the circuit isolator (g).<br />
Die Kabelführung (h) zusammen mit den Kabeln aus dem<br />
Schaltungstrenner (g) ausziehen.<br />
Extraire le guide-câble (h) avec les câbles mêmes du séparateur du circuit (g).<br />
Extraer del separador del circuito (g) el pasacable (h) junto con sus cables.<br />
d<br />
h<br />
f<br />
e<br />
g<br />
12
7.6 - Scollegare i cavi elettrici dal morsetto del circuito (i) allentando le viti.<br />
Disconnect the electrical cables from the circuit clamp (i) by<br />
unfastening the screws.<br />
Die elektrischen Kabeln aus dem Schaltungsklemme (i) abschalten,<br />
beim Lockern der Schrauben.<br />
Déconnecter les câbles électriques de la borne du circuit (i) en<br />
dévissant les vis.<br />
Desconectar los cables eléctricos del borne del circuito (i) aflojando los<br />
tornillos.<br />
7.7 - Svitare le viti (m) ed estrarre il circuito (n) dal supporto ventilatore (o).<br />
Unscrew the screws (m) and extract the circuit (n) from the fan support (o).<br />
Die Schrauben (m) losmachen und die Schaltung (n) aus dem Lüfterhalter (o)<br />
ausziehen.<br />
Dévisser les vis (m) et extraire le circuit (n) du support du ventilateur (o).<br />
Desenroscar los tornillos (m) y extraer el circuito (n) del soporte del ventilador (o).<br />
7.8 - Posizionare il nuovo circuito (n) nella sua sede, passando i cavi elettrici<br />
del supporto ventilatore (o) attraverso il circuito stesso.<br />
Position the new circuit (n) in its seat, by passing the electrical cables in<br />
the fan support (o) through the circuit itself.<br />
Die neue Schaltung (n) in ihre Sitze wieder positionieren, beim Führen<br />
der elektrischen Kabeln des Lüfterhalters (o) durch die Schaltung.<br />
Positionner le nouveau circuit (n) dans son logement, en faisant passer<br />
les câbles électriques du support du ventilateur (o) par le circuit même.<br />
Ubicar el circuito nuevo (n) en su alojamiento, pasando los cables<br />
eléctricos del soporte del ventilador (o) a través del circuito mismo.<br />
o<br />
www.luceplan.com<br />
o<br />
n<br />
n<br />
m<br />
i<br />
7.9 - Riavvitare le nuove viti (m) ed fissare il nuovo circuito (n) al supporto<br />
ventilatore (o).<br />
Screw the screws (m) again and extract the new circuit (n) from the fan<br />
support (o).<br />
Die neuen Schrauben wieder festziehen (m) und die neue Schaltung (n)<br />
an dem Lüfterhalter (o) befestigen.<br />
Revisser les vis (m) et fixer le nouveau circuit (n) au support du<br />
ventilateur (o).<br />
Enroscar los tornillos nuevos (m) y fijar el circuito nuevo (n) al soporte<br />
del ventilador (o).<br />
o<br />
n<br />
Nota: fissare il cavo di terra (p) con la vite (m).<br />
Note: Fix the grounding cable (p) with the screw (m).<br />
Bemerkung: Das Erdungskabel (p) mit der Schraube (m) befestigen.<br />
Remarque: Fixer le câble de terre (p) avec la vis (m).<br />
Nota: fijar el cable a tierra (p) con el tornillo (m).<br />
7.10 - Collegare al morsetto del circuito i cavi elettrici motore (tenuti assieme<br />
dalla calza bianca): il bianco (bi1) nella posizione 4, il blu (bl) nella<br />
posizione 3, il marrone (ma) nella posizione 2 ed il rosso (ro) nella<br />
posizione 1; successivamente collegare i cavi liberi bianco (bi2) nella<br />
posizione adiacente alla 1 e il nero (ne) nell'ultima posizione.<br />
Connect the engine electrical cables (kept together by the white braid)<br />
to the circuit clamp: white (bi1) in position 4, blue (bl) in position 3,<br />
brown (ma) in position 2 and red (ro) in position 1; successively connect<br />
the free cables (bi2), white in the position next to 1 and black (ne) in the<br />
last position.<br />
Die elektrischen Kabel des Motors der Schaltungsklemme verbinden<br />
(sie sind von der weißen Beflechtung zusammengehalten): weiß (bi1) in<br />
Stelle 4, blau (bl) in Stelle 3, braun (ma) in Stelle 2 und rot (ro) in Stelle<br />
1; dann die freien Kabel (bi2) verbinden: weiß (bi2) in eine Lage zu 1<br />
Stelle angrenzende und schwarz (ne) in die letzte Stelle verbinden.<br />
Connecter à la borne du circuit les câbles électriques (tenus ensemble<br />
par la gaine blanche) blanc (bi1) dans la position 4, le bleu (bl) dans la<br />
position 3, le marron (ma) dans la position 2 et e rouge (ro) dans la<br />
position 1; ensuite connecter les câbles libres: blanc (bi2) dans la<br />
position voisine au câble 1 et noir (ne) dans la dernière position.<br />
Conectar los cables eléctricos del motor al borne del circuito (que se<br />
mantienen unidos por la malla blanca): el blanco (bi1) en la posición 4,<br />
el azul (bl) en la posición 3, el marrón (ma) en la posición 2 y el rojo (ro)<br />
en la posición 1; luego conectar los cables libres blanco (bi2) en la<br />
posición adyacente a la 1 y el negro (ne) en la última posición.<br />
m<br />
bi2<br />
bl ma ro<br />
bi1<br />
p<br />
ne<br />
13
Nota: tutte le posizioni da 1 a 4 sono indicate sul circuito, le due<br />
restanti sono entrambe indicate con il simbolo della lampadina.<br />
Note: all positions from 1 to 4 are indicated on the circuit, the<br />
remaining two positions are both indicated with the lamp symbol.<br />
Bemerkung: Alle Stellen von 1 bis 4 sind auf der Schaltung angegeben, die<br />
restlichen zwei Stellen sind beide mit dem Glühbirnensymbol dargestellt.<br />
Remarque: Tous le positions de 1 a 4 sont indiqués sur le circuit, le deux<br />
qui restent, sont tous le deux indiquées avec le symbole de l’ampoule.<br />
Nota: todas las posiciones de 1 a 4 se indican en el circuito, las dos<br />
posiciones restantes se indican con el símbolo de la bombilla.<br />
7.11 - Inserire il nuovo passacavo (h) ed i cavi stessi nell’apposita sede sul<br />
separatore circuito (g).<br />
Insert the new cable guide (h) and the same cables in the suitable seat<br />
on the circuit isolator (g).<br />
Die neue Kabelführung (h) und die Kabeln in den entsprechenden Sitz<br />
auf dem Schaltungstrenner (g) einsetzen.<br />
Insérer le nouveau passe-câble (h) et les câbles mêmes dans le prévu<br />
logement sur le séparateur du circuit (g).<br />
Colocar el pasacable nuevo (h) y sus cables en el alojamiento<br />
correspondiente en el separador del circuito (g).<br />
7.12 - Riavvitare le viti (f) e fissare il separatore circuito (g) al supporto<br />
ventilatore (o).<br />
Screw again the screws (f) and fix the circuit isolator (g) to the fan<br />
support (o).<br />
Die Schrauben (f) wieder festziehen und den Schaltungstrenner (g) an<br />
dem Lüfterhalter (o) befestigen.<br />
Revisser les vis (f) et fixer le séparateur du circuit (g) au support du<br />
ventilateur (o).<br />
Enroscar los tornillos (f) y fijar el separador del circuito (g) al soporte<br />
del ventilador (o).<br />
o<br />
www.luceplan.com<br />
g<br />
h<br />
g<br />
f<br />
7.13 - Agganciare il gruppo flangia supporto muro (b) al supporto ventilatore (e).<br />
Uncouple the flange group for wall support (b) from the fan support (e).<br />
Die Flanschgruppe für Wandstütze (b) dem Lüfterhalter kuppeln (e).<br />
Accrocher le groupe de bride pour support à paroi (b) au support du ventilateur (e).<br />
Enganchar el grupo brida de soporte a pared (b) al soporte del ventilador (e).<br />
b<br />
7.14 - Collegare il morsetto maschio (c) al morsetto femmina (d).<br />
Connect the male terminal (c) to the female one (d).<br />
Die Gewindeklemme (c) der Schraubenklemme (d) verbinden.<br />
Connecter la borne mâle (c) à la borne (d).<br />
Conectar el borne macho (c) con el borne hembra (d).<br />
d<br />
c<br />
7.15 - Chiudere il gruppo flangia supporto muro (b) e serrare il grano (a).<br />
Close the new flange group for wall support (b) and fasten the dowel (a).<br />
Die Flanschgruppe für Wandstütze (b) schließen und das Stift (a)<br />
festziehen.<br />
Fermer le groupe de bride pour support à paroi (b) et serrer le goujon (a).<br />
Cerrar el grupo brida de soporte a pared (b) y apretar el perno (a).<br />
b<br />
a<br />
e<br />
14
!<br />
ATTENZIONE<br />
L’ intervento sul prodotto deve essere eseguito esclusivamente da personale qualificato e<br />
autorizzato da Luceplan Spa.<br />
Prima di procedere a qualsiasi operazione accertarsi che la lampada sia scollegata dalla rete elettrica.<br />
Non utilizzare il presente articolo se danneggiato.<br />
Verificare la compatibilità dell’apparecchio con il presente ricambio, accertarsi che le istruzioni scaricate<br />
siano relative alla tipologia e revisione di prodotto su cui si sta intervenendo.<br />
Seguire scrupolosamente le istruzioni specifiche utilizzando esclusivamente ricambi originali.<br />
Se dopo aver letto le istruzioni rimangono dei dubbi non intervenire sull’apparecchio e<br />
contattare il costruttore.<br />
Dopo l’intervento e prima di riutilizzare l’apparecchio effettuare le verifiche di sicurezza necessarie.<br />
Luceplan Spa declina ogni responsabilità per qualsiasi danno provocato da un intervento<br />
non corretto o dall’uso improprio del presente articolo.<br />
Per la rottamazione dei componenti sostituiti seguire le direttive locali in materia di smaltimento.<br />
!<br />
WARNING<br />
The intervention on the product shall be performed only by qualified personnel, authorized by<br />
Luceplan Spa.<br />
Before performing any operation, make sure that the lamp is not connected to the power supply network.<br />
Do not use this item, if damaged.<br />
Check the compatibility of the equipment with this spare, make sure that downloaded instructions<br />
refer to the correct type and revision of the product under repair.<br />
Follow carefully the specific instructions, using only original spares.<br />
In case of doubts after having read the instructions, do not intervene on the equipment and contact<br />
the manufacturer.<br />
After intervention and before reusing the equipment, perform the necessary safety checks.<br />
Luceplan Spa declines any responsibility for any damage caused by incorrect intervention or<br />
improper use of this item.<br />
When disposing of the replaced components, follow the local applicable regulations.<br />
!<br />
ACHTUNG<br />
Der Eingriff auf das Produkt darf ausschließlich von qualifiziertem und von Luceplan Spa<br />
genehmigtem Personal durchgeführt werden.<br />
Bevor man jeglichen Vorgang unternimmt sich vergewissern, dass der Lampenanschluss vom<br />
Stromnetz getrennt ist.<br />
Die Kompatibilität des Gerätes mit vorliegendem Wechselteil überprüfen und sicherstellen,<br />
dass die herunter geladenen Anleitungen dem Produkttyp und –Revision entsprechen, auf dem man eingreift.<br />
Den Anleitungen genau folgen und ausschließlich Originalwechselteile verwenden.<br />
Falls nach dem lesen der Anleitungen noch Zweifel bestehen sollten, nicht auf das Gerät<br />
eingreifen und zum Hersteller Kontakt aufnehmen.<br />
Nach dem Eingriff und vor der Verwendung des Gerätes die notwendigen Sicherheitsüberprüfungen<br />
durchführen.<br />
Luceplan Spa lehnt jede Verantwortung für jegliche Schaden welche durch falschen Eingriff oder<br />
missbräuchliche Verwendung dieses Produktes verursacht wurden.<br />
Zur Verschrottung der ausgewechselten Teilen sich an den örtlichen Regelungen bzgl. Entsorgung halten.<br />
www.luceplan.com<br />
!<br />
ATTENTION<br />
Seul le personnel qualifié et autorisé par Luceplan Spa peut intervenir sur le produit.<br />
Avant de procéder à n’importe quelle opération, s’assurer que la lampe est débranchée du<br />
réseau électrique.<br />
Ne pas utiliser cet article s’il est endommagé.<br />
Vérifier la compatibilité de l’appareil avec cette pièce de rechange, et s’assurer que les instructions<br />
téléchargées correspondent avec le type et la version du produit faisant l’objet de l’intervention.<br />
Suivre scrupuleusement les instructions spécifiques en utilisant exclusivement des pièces de<br />
rechange originales.<br />
En cas de doutes après la lecture des instructions, ne pas intervenir sur l’appareil et contacter le fabricant.<br />
Après l’intervention, effectuer les contrôles de sécurité nécessaires avant de réutiliser l’appareil.<br />
Luceplan Spa décline toute responsabilité pour tout dommage provoqué par une intervention<br />
incorrecte ou une utilisation impropre de cet article.<br />
Pour la destruction des composants remplacés, suivre les directives locales en matière<br />
d'élimination de déchets.<br />
!<br />
ATENCIÓN<br />
Sólo el personal cualificado y autorizado por Luceplan Spa podrá intervenir sobre el producto.<br />
Antes de proceder a cualquier operación, asegurarse de que la lámpara esté desconectada de la red eléctrica.<br />
No utilizar este artículo si se encuentra dañado.<br />
Verificar la compatibilidad del aparato con este repuesto, y asegurarse de que las instrucciones<br />
descargadas correspondan con el tipo y versión del producto en que se está interviniendo.<br />
Seguir rigurosamente las instrucciones específicas, utilizando exclusivamente repuestos originales.<br />
En caso de subsistir alguna duda después de haber leído las instrucciones, no intervenir sobre<br />
el aparato y contactar con el fabricante.<br />
Una vez realizada la intervención, efectuar los controles de seguridad necesarios antes de volver<br />
a utilizar el aparato.<br />
Luceplan Spa declina toda responsabilidad ante cualquier daño provocado por una intervención<br />
incorrecta o por un uso inadecuado de este artículo.<br />
Para la destrucción de los componentes reemplazados, seguir las directivas locales en materia<br />
de eliminación de desechos.<br />
15