Datalogic Heron D110 Quick Reference Guide - The Barcode ...
Datalogic Heron D110 Quick Reference Guide - The Barcode ...
Datalogic Heron D110 Quick Reference Guide - The Barcode ...

You also want an ePaper? Increase the reach of your titles
YUMPU automatically turns print PDFs into web optimized ePapers that Google loves.
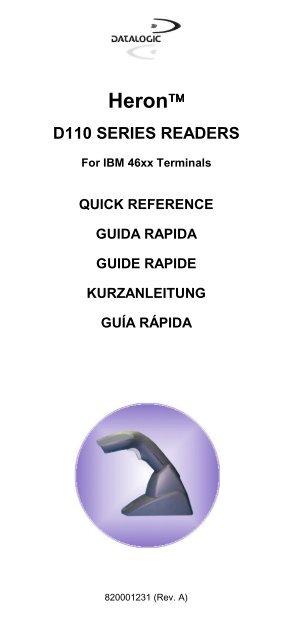
<strong>Heron</strong><br />
<strong>D110</strong> SERIES READERS<br />
For IBM 46xx Terminals<br />
QUICK REFERENCE<br />
GUIDA RAPIDA<br />
GUIDE RAPIDE<br />
KURZANLEITUNG<br />
GUÍA RÁPIDA<br />
820001231 (Rev. A)
USING HERON SERIES READERS<br />
UK<br />
<strong>Heron</strong> guns automatically scan barcodes at a distance.<br />
Simply aim and pull the trigger. Code scanning is performed<br />
along the center of the light bar emitted from the reading<br />
window. This bar must cover the entire code.<br />
Successful scanning is obtained by tilting the scanner with<br />
respect to the barcode to avoid direct reflections which impair<br />
the reading performance, see the figure above.<br />
Successful reading is signaled by an audible tone plus a goodread<br />
green spot.<br />
By correctly inserting the reader into its stand, it is immediately<br />
ready to read automatically any code present in its reading area<br />
without pressing the trigger. Furthermore, a green aiming light<br />
is continuously emitted to facilitate the positioning of the<br />
barcode to be read, see the figure above. To guarantee single<br />
code reading, same code consecutive reading requires the<br />
code to be removed from the reading area (no decoding) before<br />
the reader will accept the same code.<br />
I<br />
Con le pistole <strong>Heron</strong> la lettura dei codici a barre avviene a<br />
distanza: è sufficiente mirare sul codice e premere il grilletto.<br />
La finestra anteriore proietta una banda luminosa che deve<br />
essere centrata sul codice e attraversarlo interamente. Le<br />
condizioni ottimali per la lettura si ottengono quando la pistola<br />
viene usata con un'inclinazione rispetto al piano su cui si trova<br />
il codice, così da evitare il rischio di riflessione diretta, che<br />
potrebbe compromettere il risultato della lettura (vedi figura).<br />
La buona lettura è segnalata da un beep sonoro e da uno spot<br />
verde che illumina il codice.<br />
Inserendo correttamente la pistola nello stand, questa sarà<br />
immediatamente pronta per leggere automaticamente i codici<br />
presenti nella sua area di lettura senza premere il grilletto.<br />
Inoltre, un puntatore di luce verde verrà attivato per facilitare il<br />
posizionamento del codice da leggere, (vedi figura).<br />
La singola lettura di un codice viene garantita dal fatto che una<br />
lettura consecutiva dello stesso codice richiede la sua<br />
rimozione dell’area di lettura (nessuna decodifica) prima di<br />
essere nuovamente accettato dal lettore.
F<br />
Avec les pistolets <strong>Heron</strong>, la lecture des codes s'effectue<br />
automatiquement et à distance. Il suffit de viser le code et<br />
d’appuyer sur la gâchette. Le faisceau sortant de la fenêtre de<br />
lecture de l'appareil lit le code. Ce faisceau doit être centré sur<br />
le code à barres à lire et doit le traverser de part en part.<br />
Pour des prestations optimales inclinez la douchette par<br />
rapport au code à lire, afin d'éviter des réflexions directes qui<br />
pourraient compromettre la performance de lecture (voir figure<br />
ci-dessus).<br />
La lecture correcte est signalée par un beep sonore ainsi que<br />
par un spot vert qui illumine le code lu.<br />
Après une introduction correcte du pistolet dans le support, le<br />
pistolet est prêt à lire automatiquement les codes qui se<br />
trouvent dans la zone de lecture sans appuyer sur la gâchette.<br />
Le pistolet déclenche également un pointeur lumineux vert qui<br />
facilite le positionnement du code à lire (voir figure).<br />
Une seule lecture du même code est garantie puisque pour lire<br />
deux fois le même code, il faut déplacer le code hors de la<br />
zone de lecture (aucune lecture) avant qu’il soit lu par le lecteur<br />
une deuxième fois.<br />
D<br />
Die <strong>Heron</strong> Lesepistolen lesen Strichcodes automatisch und<br />
berührungslos. Es genügt auf den Code zu zielen und die<br />
Taste zu drücken. Der Code wird mittels eines Lichtbandes<br />
gelesen, das das Gerät durch das Lesefenster verlässt. Dieses<br />
Lichtband muß den gesamten Code möglichst in der Mitte<br />
durchqueren.<br />
Eine optimale Lesung ist gewährleistet, wenn der Benutzer die<br />
Pistole bzgl. der Oberfläche, auf der sich der Code befindet,<br />
etwas neigt, um eine direkte Reflexion zu vermeiden, wie im<br />
Bild oben gezeigt wird.<br />
Das erfolgreiche Lesen wird durch einen "Beeper" und einen<br />
grünen Lichtpunkt angezeigt.<br />
Wenn die Pistole im Halter korrekt positioniert wird, ist Sie<br />
sofort bereit Codes automatisch (ohne Tastendruck) zu lesen.<br />
Außerdem, verlässt die Pistole einen grünen Lichtpunkt, der<br />
eine einfache Positionierung des Codes ermöglicht (siehe Bild).<br />
Um eine einzige Lesung des Codes zu garantieren, erfordert<br />
die Doppellesung den Code vom Lesefenster (kein<br />
Dekodierung) zu entfernen. Dann positionieren Sie denselben<br />
Code für eine neue Lesung zurück.
E<br />
Los lectores <strong>Heron</strong> capturan automáticamente códigos de<br />
barras a distancia: sólo hay que encuadrar el código y apretar<br />
el gatillo. La lectura se realiza sobre el rayo de luz emitida por<br />
la ventana de lectura que debe atravesar el código de parte a<br />
parte.<br />
Las condiciones óptimas para la lectura se obtienen inclinando<br />
el escáner respecto al código de barras para evitar reflexiones<br />
directas de luz que podrían perjudicar el rendimiento de lectura<br />
(ver figura arriba). El lector señala una lectura correcta a través<br />
de un pitido y de un punto verde.<br />
Insertándolo correctamente en su mostrador, el lector estará<br />
listo de forma inmediata para leer automáticamente cualquier<br />
código en su área de lectura sin apretar el gatillo. Además, el<br />
lector emite siempre una luz verde que facilita el encuadre del<br />
código (ver figura arriba). Para evitar que el mismo código sea<br />
leído varias veces, para efectuar lecturas consecutivas del<br />
mismo código es necesario quitar el código del área de lectura<br />
(no decodificación) y volverlo a presentar al lector para que<br />
éste lo pueda aceptar otra vez.
CONNECTIONS<br />
RS232<br />
With the RS232 cable, this accessory device is intended to be<br />
supplied by a UL Listed or CSA Certified Direct Plug-in Power<br />
Unit marked "Class 2", rated 5 V, minimum 180 mA.<br />
IBM port 9B / IBM port 5B<br />
With the IBM terminal 5B and 9B port cables, this accessory<br />
device is intended to be connected to a UL Listed or CSA<br />
Certified Computer which supplies power directly to the reader.<br />
DISCONNECTING THE CABLE
STAND INSTALLATION<br />
A<br />
B<br />
C<br />
UK<br />
<strong>The</strong> stand can be mounted by using self-tapping screws,<br />
double sided adhesive strips or rubber feet:<br />
A) mount the stand directly to the surface using the<br />
self-tapping screws;<br />
B) carefully clean the bottom surface of the stand and the<br />
table surface. Remove the protective plastic from one side<br />
of the adhesive strips and stick them on the stand bottom.<br />
<strong>The</strong>n, remove the plastic from the other side of the strips<br />
and affix the stand to the table;<br />
C) carefully clean the bottom surface of the stand, remove the<br />
protective film from the rubber feet and stick them in the<br />
corresponding housing on the bottom surface. It is also<br />
possible to fix an optional metal plate.<br />
I<br />
Lo stand può essere montato utilizzando le viti autofilettanti, le<br />
strisce adesive oppure i piedini di gomma:<br />
A) montare lo stand direttamente sulla superficie utilizzando le<br />
viti autofilettanti;<br />
B) pulire accuratamente la superficie inferiore della base dello<br />
stand e la superficie d’appoggio. Togliere la plastica<br />
protettiva da un lato di ogni striscia e attaccare entrambe le<br />
strisce alla base dello stand. Rimuovere la plastica<br />
protettiva dall’altro lato delle strisce adesive e attaccare lo<br />
stand alla superficie d’appoggio;<br />
C) pulire accuratamente la superficie inferiore della base dello<br />
stand, quindi togliere la pellicola protettiva dai piedini e<br />
attaccarli all’interno delle apposite sedi nella base di<br />
plastica. Inoltre, è possibile fissare un base metallica<br />
opzionale.
F<br />
Pour le montage du support il est possible également d’utiliser<br />
des vis filetées, des bandes adhésives ou des petits patins en<br />
caoutchouc:<br />
A) utiliser des vis filetées pour le montage sur la surface<br />
d’appui;<br />
B) nettoyer soigneusement la surface inférieure du support et<br />
la surface d’appui. Retirer le plastique protecteur de l’une<br />
des faces des bandes et la coller sur la surface inférieure<br />
du support. Retirer le plastique protecteur sur l’autre face<br />
adhésive et coller le support sur la surface d’appui ;<br />
C) nettoyer soigneusement la surface inférieure du support.<br />
Retirer la pellicule protectrice des patins et coller les patins<br />
dans les logements correspondants situés sur la surface<br />
inférieure du support. Il est possible aussi de fixer une<br />
plaque métallique en option.<br />
D<br />
Der Halter kann mittels der selbstschneidenden Schrauben, der<br />
Klebstreifen oder mittels der Gummifüßchen befestigt werden:<br />
A) für eine permanente Installation verwenden Sie die zwei<br />
selbstschneidenden Schrauben.<br />
B) die untere Seite des Halters und die Ablagefläche sorgfältig<br />
reinigen. Die Schutzschicht von einer Seite jedes<br />
Klebstreifens entfernen und beide Klebstreifen auf den<br />
Halters kleben. Die Schutzschicht von der anderen Seite<br />
der Klebstreifen entfernen und den Halter auf der<br />
Ablagefläche befestigen.<br />
C) die untere Seite des Halters und die Ablagefläche sorgfältig<br />
reinigen um die Füßchen auf die Sitzen des Halters zu<br />
kleben. Man kann auch eine optionale Metallunterlage<br />
befestigen.<br />
E<br />
El soporte puede ser montado a través de tornillos autobloqueantes<br />
(A), tiras adhesivas de doble cara (B) o pies de<br />
goma (C):<br />
A) Montar el soporte directamente sobre la superficie<br />
utilizando los tornillos auto-bloqueantes;<br />
B) Limpiar con cuidado la superficie inferior del soporte y la<br />
superficie de la mesa. Quitar el plástico de protección de<br />
una de las caras de las tiras adhesivas y pegarla a la<br />
superficie inferior del soporte. Luego quitar el plástico de la<br />
otra cara de la tira adhesiva y posicionar el soporte en la<br />
posición deseada sobre la mesa;<br />
C) Limpiar con cuidado la superficie inferior del soporte, quitar<br />
el plástico de protección de los pies de goma e insertarlos<br />
en las posiciones correspondientes en la superficie inferior<br />
del soporte. Es posible también fijar una placa de metal<br />
opcional.
INSERTION INTO STAND<br />
UK<br />
I<br />
F<br />
D<br />
E<br />
Pair the reader to the stand paying attention to<br />
insert the handle into the stand clip (see figure<br />
above). Correct insertion will be signaled by a<br />
beep; the reader will then be ready to read<br />
barcodes.<br />
Posizionare la pistola nello stand assicurandosi<br />
che il manico sia inserito nel fermo dello stand<br />
stesso (vedi figura sopra). Un beep sonoro<br />
segnalerà il corretto inserimento ed il lettore sarà<br />
pronto per leggere i codici a barre.<br />
Placer le pistolet dans le support en faisant<br />
attention d’introduire la poignée dans le crochet du<br />
support (voir figure ci-dessus). Un beep sonore<br />
indiquera un positionnement correct. Le pistolet<br />
est ainsi prêt à lire les codes.<br />
Positionieren Sie die Pistole im Halter und stecken<br />
Sie den Griff in die Öffnung des Halters (siehe Bild<br />
oben). Das korrekte Positionieren wird durch einen<br />
Piepton angezeigt. Dann ist die Pistole bereit<br />
Codes zu lesen.<br />
Poner el lector en su soporte insertando la<br />
empuñadura en el clip del soporte (ver figura<br />
arriba). El soporte emitirá un pitido al insertar el<br />
lector de forma correcta. El lector estará entonces<br />
listo para leer códigos de barras.
1 DEFAULT<br />
UK<br />
I<br />
F<br />
D<br />
E<br />
Read the RESTORE DEFAULT code.<br />
Leggere il codice che ripristina i default.<br />
Lire le code de configuration par défaut.<br />
Lesen Sie den Restore Default Code, um die<br />
Werkseinstellung wieder herzustellen.<br />
Leer el código de restaurar los parámetros de<br />
fábrica.<br />
RESTORE DEFAULT<br />
<br />
<br />
<br />
RS232 DEFAULT SETTINGS<br />
9600 baud, no parity, 8 data bits, 1 stop bit, no handshaking,<br />
delay disabled, rx timeout 5 sec., ack/nack disabled, fifo<br />
enabled, serial trigger lock disabled;<br />
DATA FORMAT: code identifier disabled, no field adjustment,<br />
code length not transmitted, no header, terminator = CR-LF,<br />
character replacement disabled<br />
IBM DEFAULT SETTINGS<br />
DATA FORMAT: IBM Standard, code identifier disabled, no<br />
header, no terminator<br />
POWER SAVE<br />
scan rate max, standby disabled, sleep disabled<br />
READING PARAMETERS<br />
hardware trigger, trigger active level, no trigger timeout,<br />
Flash On = 1 sec, Flash Off = .6 sec, one read per cycle,<br />
safety time .5 sec, beeper intensity high, tone 2, beeper type<br />
monotone, beeper length short, good read spot duration<br />
medium, stand recognition beep enabled; automatic<br />
operation aiming light enabled
DECODING PARAMETERS<br />
ink spread enabled, overflow control enabled, interdigit<br />
control enabled, Puzzle Solver disabled, decoding safety<br />
= one read<br />
CODE SELECTION<br />
enabled codes<br />
• EAN 8/EAN 13 / UPC A/UPC E without ADD ON<br />
check digit transmitted, no conversions<br />
• Interleaved 2/5<br />
check digit control and transmission, variable length<br />
code; 4-99 characters<br />
• Standard Code 39<br />
no check digit control, variable length code; 1-99<br />
characters<br />
• Code 128<br />
variable length code; 1-99 characters<br />
disabled codes<br />
EAN 128, ISBT128, Code 93, Codabar, pharmaceutical<br />
codes, Standard and EAN, MSI, Plessey, Telepen, Delta<br />
IBM, Code 11, Code 16K, Code 49, RSS Codes<br />
*ADVANCED FORMATTING PARAMETERS<br />
concatenation disabled, no advanced formats defined<br />
* <strong>The</strong> advanced formatting parameters may not be<br />
compatible with the IBM 46xx cash register parameters.
2 READER CONFIGURATION<br />
UK<br />
I<br />
F<br />
D<br />
E<br />
Read the interface selection code for your application.<br />
Leggere il codice per la selezione dell’interfaccia<br />
relativo al modo di comunicazione desiderato.<br />
Lire le code “Interface” correspondant à votre<br />
modèle.<br />
Lesen Sie den Schnittstellen-Code, der Ihrem<br />
gewünschten Kommunikationsmodus entspricht.<br />
Leer uno de los siguientes códigos para la selección<br />
del interfaz relativo a su aplicación.<br />
RS232<br />
<br />
<br />
<br />
IBM Terminals 46xx<br />
PORT 9B<br />
4501 Protocol<br />
<br />
<br />
<br />
(typical)<br />
1520 Protocol<br />
<br />
<br />
<br />
PORT 5B<br />
1520 Protocol<br />
<br />
<br />
<br />
(typical)<br />
4501 Protocol
IBM DATA FORMATTING<br />
UK<br />
To select the data formatting for these IBM<br />
Terminals, read one of the code selections below.<br />
(default = IBM Standard).<br />
I Per i terminali IBM, leggere il codice<br />
corrispondente alla formattazione dei dati<br />
desiderata (default = IBM Standard).<br />
F<br />
Pour sélectionner le format des données pour des<br />
terminaux IBM, lire l’un des codes suivants (par<br />
défaut = IBM Standard).<br />
D Um die Datenformat für IBM Terminals<br />
einzustellen, lesen Sie einen der folgenden<br />
Strichcodes. (Werkseinstellung = IBM Standard).<br />
E<br />
Para configurar el formato de datos para los<br />
terminales IBM, leer uno de los siguientes códigos.<br />
(default = IBM Standard).<br />
Conversion to Code 39<br />
<br />
<br />
<br />
IBM Standard<br />
<br />
<br />
<br />
Mixed IBM Standard + Code 39
IBM DATA FORMATTING (Transmission Format)<br />
<strong>The</strong> IBM 46xx Series cash register recognizes the following<br />
codes:<br />
EAN 8 / EAN13 / UPC A / UPC E with and without Add On<br />
Interleaved 2/5<br />
Code 39<br />
Codabar<br />
Code 128<br />
Code 93<br />
Normal 2/5<br />
<strong>The</strong> transmission format of codes belonging to this set is<br />
specified by the protocol. As the reader allows a wider set of<br />
codes to be selected, the following formats are defined to offer<br />
the user all the reading possibilities of the <strong>Datalogic</strong> product.<br />
Conversion to Code 39 Format<br />
Data from any code selected may be transmitted. Each code is<br />
transmitted to the Host as Code 39. Any character not included<br />
in the standard Code 39 set will be replaced with a “Space” (20<br />
Hex).<br />
IBM Standard Format (default)<br />
Only codes belonging to the above mentioned set may be<br />
transmitted. Each code transmitted to the Host is recognized by<br />
the identifier requested by the protocol. If the selected code<br />
does not belong to this set, it wiII not be transmitted.<br />
MIXED IBM Standard + Code 39 Format<br />
Data from any code selected may be transmitted. For codes<br />
belonging to the above mentioned set, the “IBM Standard<br />
Format” is applied. <strong>The</strong> “Code 39’ Format applies to codes not<br />
belonging to this set.
OPERATING TEST<br />
UK Read the TEST codes below.<br />
I<br />
F<br />
D<br />
E<br />
Leggere i codici di test.<br />
Lire les codes tests.<br />
Lesen Sie die Test-Coden.<br />
Leer los siguientes códigos TEST.<br />
EAN-8<br />
1234 5670<br />
EAN-13<br />
1 234567 000992<br />
Code 39 (Normal)<br />
1 7 1 6 2<br />
Code 128<br />
t e s t<br />
Interleaved 2 of 5<br />
0123456784
UK<br />
YOUR READER IS NOW READY TO READ<br />
BARCODES.<br />
To change the defaults see the HHD II Software<br />
Configuration Manual, part number 90ACC1877.<br />
I<br />
IL LETTORE È PRONTO A LEGGERE I CODICI.<br />
Per cambiare i parametri di default, fare riferimento<br />
al manuale “HHD II Software Configuration Manual",<br />
n. d'ordine 90ACC1877.<br />
F<br />
VOTRE LECTEUR EST DÉSORMAIS PRÊT A<br />
L’EMPLOI POUR LA LECTURE DE CODES.<br />
Pour changer les paramètres voir le manuel "HHD II<br />
Software Configuration Manual" numéro d'ordre<br />
90ACC1877.<br />
D<br />
DAS LESEGERÄT IST JETZT BEREIT CODES ZU<br />
LESEN.<br />
Um die Werkseinstellungsparameter zu ändern,<br />
schlagen Sie im Handbuch "HHD II Software<br />
Configuration Manual" nach, Bestellnummer<br />
90ACC1877.<br />
E<br />
EL LECTOR ESTÁ LISTO PARA LA LECTURA DE<br />
LOS CÓDIGOS DE BARRAS.<br />
Para cambiar los parámetros de fábrica ver el<br />
manual “HHD II Software Configuration Manual”, n.<br />
de orden 90ACC1877.
TECHNICAL FEATURES<br />
<strong>Heron</strong> <strong>D110</strong><br />
Electrical Features<br />
Power Supply<br />
RS232 interface<br />
IBM 46xx<br />
Consumption:<br />
Maximum<br />
Operating<br />
Sleep mode<br />
Max. Scan Rate<br />
Reading Indicators<br />
5 Vdc ± 5%<br />
12 Vdc directly taken from cash<br />
register<br />
RS232<br />
IBM 46xx<br />
180 mA @ 5 Vdc<br />
150 mA @ 5 Vdc<br />
500 µA @ 5 Vdc<br />
90 mA @ 12 Vdc<br />
90 mA @ 12 Vdc<br />
20 mA @ 12 Vdc<br />
256 scans/sec<br />
LED, Good Read Spot, Beeper<br />
Optical Features<br />
Sensor<br />
CCD solid state (2048 pixels)<br />
Illuminator<br />
LED array<br />
Wavelength<br />
630 ~ 670 nm<br />
Max. LED Output Power<br />
0.31 mW<br />
LED Safety Class Class 1 EN 60825-1<br />
Reading Field<br />
see reading diagrams<br />
Max. Resolution<br />
0.10 mm (4 mils)<br />
PCS<br />
min. 15% (<strong>Datalogic</strong> Test Chart)<br />
Environmental Features<br />
Working Temperature 0 °C to + 55 °C<br />
Storage Temperature -20 °C to + 70 °C<br />
Humidity<br />
Drop Resistance<br />
(on concrete)<br />
ESD Protection<br />
Protection Class<br />
Mechanical Features<br />
90% non condensing<br />
IEC 68-2-32 Test ED<br />
1.8 m<br />
16 KV<br />
IP30<br />
Weight (without cable)<br />
Cable Length<br />
about 165 g. (5.8 oz.)<br />
2 m (6 ft. 6 in.)
READING DIAGRAM<br />
15<br />
<strong>D110</strong> - Reading Zones (10° skew angle)<br />
10<br />
5<br />
0.13 mm<br />
(5 mils)<br />
CODE 39<br />
0.13 mm<br />
(5 mils)<br />
CODE 39<br />
0.50 mm<br />
(20 mils)<br />
0<br />
-5<br />
EAN13 M=1<br />
0.33 mm<br />
(13 mils)<br />
-10<br />
-15<br />
0 5 10 15 20 25 30 35<br />
(cm)<br />
FCC COMPLIANCE<br />
This device complies with PART 15 of the FCC<br />
Rules. Operation is subject to the following two<br />
conditions: (1) This device may not cause harmful<br />
interference, and (2) this device must accept any<br />
interference received, including interference which<br />
may cause undesired operation.<br />
This equipment has been tested and found to comply with the<br />
limits for a Class A digital device, pursuant to part 15 of the<br />
FCC Rules. <strong>The</strong>se limits are designed to provide reasonable<br />
protection against harmful interference when the equipment is<br />
operated in a commercial environment. This equipment<br />
generates, uses, and can radiate radio frequency energy and, if<br />
not installed and used in accordance with the instruction<br />
manual, may cause harmful interference to radio<br />
communications. Operation of this equipment in a residential<br />
area is likely to cause harmful interference in which case the<br />
user will be required to correct the interference at his own<br />
expense.
LED CLASS<br />
R<br />
C<br />
US<br />
SEE PACKAGE FOR<br />
PATENT LISTING<br />
UK<br />
Class 1 LED product<br />
I Apparecchio LED classe 1<br />
F Appareil à LED de classe 1<br />
D LED Klasse 1<br />
E LED Clase 1<br />
This product conforms to EN60825-1:2001.<br />
PATENTS<br />
This product is licensed by one or more of the following U.S.<br />
patents:<br />
4,894,523; 5,021,642; and 6,158,661<br />
This product is covered by one or more of the following patents:<br />
U.S. patents 5,992,740; 6,305,606 B1; 6,631,846 B2;<br />
6,517,003 B2; and 6,712,271 B2<br />
European patents 851,378 B1; 895,175 B1; 962,880 B1;<br />
997,760 B1; and 1,128,315 B1<br />
Additional patents pending.
WARRANTY<br />
UK<br />
I<br />
F<br />
<strong>Datalogic</strong> warranties this product against defects in<br />
workmanship and materials, for a period of 5 years<br />
from the date of shipment, provided that the product<br />
is operated under normal and proper conditions.<br />
<strong>Datalogic</strong> has the faculty to repair or replace the<br />
product, these provisions do not prolong the original<br />
warranty term.<br />
<strong>The</strong> warranty does not apply to any product that has<br />
been subject to misuse, accidental damage,<br />
unauthorized repair or tampering.<br />
<strong>Datalogic</strong> garantisce questo prodotto contro difetti di<br />
fabbricazione e di materiali per 5 anni dalla data di<br />
consegna, a condizione che il prodotto sia utilizzato<br />
come previsto.<br />
<strong>Datalogic</strong> si riserva la facoltà di riparare o sostituire il<br />
prodotto. Quanto sopra non prolunga la garanzia<br />
originale.<br />
La garanzia non si applica a prodotti utilizzati in modo<br />
non corretto, danneggiati accidentalmente, sottoposti<br />
a riparazioni non autorizzate o manomessi.<br />
<strong>Datalogic</strong> garantit ce produit de tout défaut de<br />
fabrication ou des matériaux pendant 5 ans à compter<br />
de la date de livraison, à condition que le produit soit<br />
utilisé correctement.<br />
<strong>Datalogic</strong> a la faculté de réparer ou de remplacer ce<br />
produit. Ces mesures ne prolongeront pas l’échéance<br />
de la garantie.<br />
La garantie ne s’applique pas aux produits qui ont été<br />
utilisés de façon incorrecte, accidentellement<br />
endommagés, soumis à des réparations non<br />
autorisées ou bien altérés.<br />
D <strong>Datalogic</strong> gibt für dieses Produkt eine Garantie von 5<br />
Jahren auf Herstellungs- und Materialfehler ab<br />
Versandsdatum, falls das Produkt unter normalen und<br />
angemessenen Bedingungen verwendet wurde.<br />
<strong>Datalogic</strong> behält sich vor, das Produkt entweder zu<br />
reparieren oder zu ersetzen, was aber den originalen<br />
Garantietermin nicht verlängert.<br />
Die Garantie erlischt bei unsachgemäßer Verwendung<br />
und unberechtigter Veränderungen am Produkt.<br />
E<br />
<strong>Datalogic</strong> garantiza este producto contra todos los<br />
defectos de fabricación y materiales por un periodo<br />
de 5 años desde la fecha de envío, a condición de<br />
que el producto sea utilizado en condiciones<br />
normales y correctas.<br />
<strong>Datalogic</strong> tiene el derecho de reparar o reemplazar el<br />
producto sin que esto suponga una prolongación de<br />
la garantía original.<br />
La garantía no será valida si el producto ha sufrido<br />
abusos, daños accidentales, reparaciones no<br />
autorizadas o ha sido falsificado.
SERVICES AND SUPPORT<br />
UK<br />
I<br />
F<br />
<strong>Datalogic</strong> provides several services as well as<br />
technical support through its website. Log on to<br />
www.datalogic.com/services and click on the links<br />
indicated for further information including:<br />
<strong>Datalogic</strong> fornisce servizi e supporto tecnico tramite<br />
il suo sito web. Connettersi al sito<br />
www.datalogic.com/services e cliccare sui link<br />
indicati per avere ulteriori informazioni, come<br />
elencato di seguito:<br />
<strong>Datalogic</strong> fournit différents services et une aide<br />
technique en ligne. Connectez-vous sur<br />
www.datalogic.com/services et cliquez sur le lien<br />
indiqué pour obtenir des informations<br />
complémentaires sur:<br />
D <strong>Datalogic</strong> bietet unterschiedliche Service-<br />
Leistungen, wie auch technische Unterstützung über<br />
Internetseiten. Gehen Sie auf die Seite<br />
www.datalogic.com/services und klicken Sie auf<br />
die Links die Sie über folgende Punkte informieren:<br />
E<br />
<strong>Datalogic</strong> proporciona servicios y soporte técnico a<br />
través su página web. Hay que conectarse a<br />
www.datalogic.com/services y hacer clic en los<br />
enlaces indicados a continuación para recibir más<br />
información:<br />
• <strong>Datalogic</strong> Services - Warranty Extensions and<br />
Maintenance Agreements<br />
• Downloads - Software Downloads, Manuals and<br />
Catalogues<br />
• Contact Us - Listing of <strong>Datalogic</strong> Subsidiaries and<br />
Quality Partners<br />
• Authorised Repair Centres<br />
• Products >Hand-Held Readers >Software Tools - DL<br />
Sm@rtSet<br />
DL Sm@rtSet is a Windows-based utility program<br />
which allows device configuration using a PC. It provides<br />
RS232 interface configuration as well as configuration<br />
barcode printing.
DATALOGIC S.p.A.,<br />
Via Candini, 2<br />
40012 - Lippo di Calderara<br />
Bologna - Italy<br />
dichiara che<br />
declares that the<br />
déclare que le<br />
bescheinigt, daß das Gerät<br />
declare que el<br />
<strong>Heron</strong> D1XX<br />
e tutti i suoi modelli<br />
and all its models<br />
et tous ses modèles<br />
und seine modelle<br />
y todos sus modelos<br />
sono conformi alle Direttive del Consiglio Europeo sottoelencate:<br />
are in conformity with the requirements of the European Council Directives listed below:<br />
sont conformes aux spécifications des Directives de l'Union Européenne ci-dessous:<br />
den nachstehenden angeführten Direktiven des Europäischen Rats:<br />
cumple con los requisitos de las Directivas del Consejo Europeo, según la lista<br />
siguiente:<br />
89/336/EEC EMC Directive e 92/31/EEC, 93/68/EEC emendamenti successivi<br />
and<br />
further amendments<br />
et<br />
ses successifs amendements<br />
und<br />
späteren Abänderungen<br />
y<br />
succesivas enmiendas<br />
Basate sulle legislazioni degli Stati membri in relazione alla compatibilità<br />
elettromagnetica ed alla sicurezza dei prodotti.<br />
On the approximation of the laws of Member States relating to electromagnetic<br />
compatibility and product safety.<br />
Basée sur la législation des Etates membres relative à la compatibilité<br />
électromagnétique et à la sécurité des produits.<br />
Über die Annäherung der Gesetze der Mitgliedsstaaten in bezug auf<br />
elektromagnetische Verträglichkeit und Produktsicherheit entsprechen.<br />
Basado en la aproximación de las leyes de los Países Miembros respecto a la<br />
compatibilidad electromagnética y las Medidas de seguridad relativas al producto.<br />
Questa dichiarazione è basata sulla conformità dei prodotti alle norme seguenti:<br />
This declaration is based upon compliance of the products to the following standards:<br />
Cette déclaration repose sur la conformité des produits aux normes suivantes:<br />
Diese Erklärung basiert darauf, daß das Produkt den folgenden Normen entspricht:<br />
Esta declaración se basa en el cumplimiento de los productos con la siguientes normas:<br />
EN 55022, August 1994:<br />
LIMITS AND METHODS OF MEASUREMENTS OF<br />
RADIO DISTURBANCE OF INFORMATION<br />
TECHNOLOGY EQUIPMENT (ITE)<br />
EN 50024, September 1998: INFORMATION TECHNOLOGY EQUIPMENT.<br />
IMMUNITY CHARACTERISTICS. LIMITS AND<br />
METHODS OF MEASUREMENTS<br />
Lippo di Calderara, 06/02/2004<br />
Ruggero Cacioppo<br />
Quality Assurance Laboratory Manager